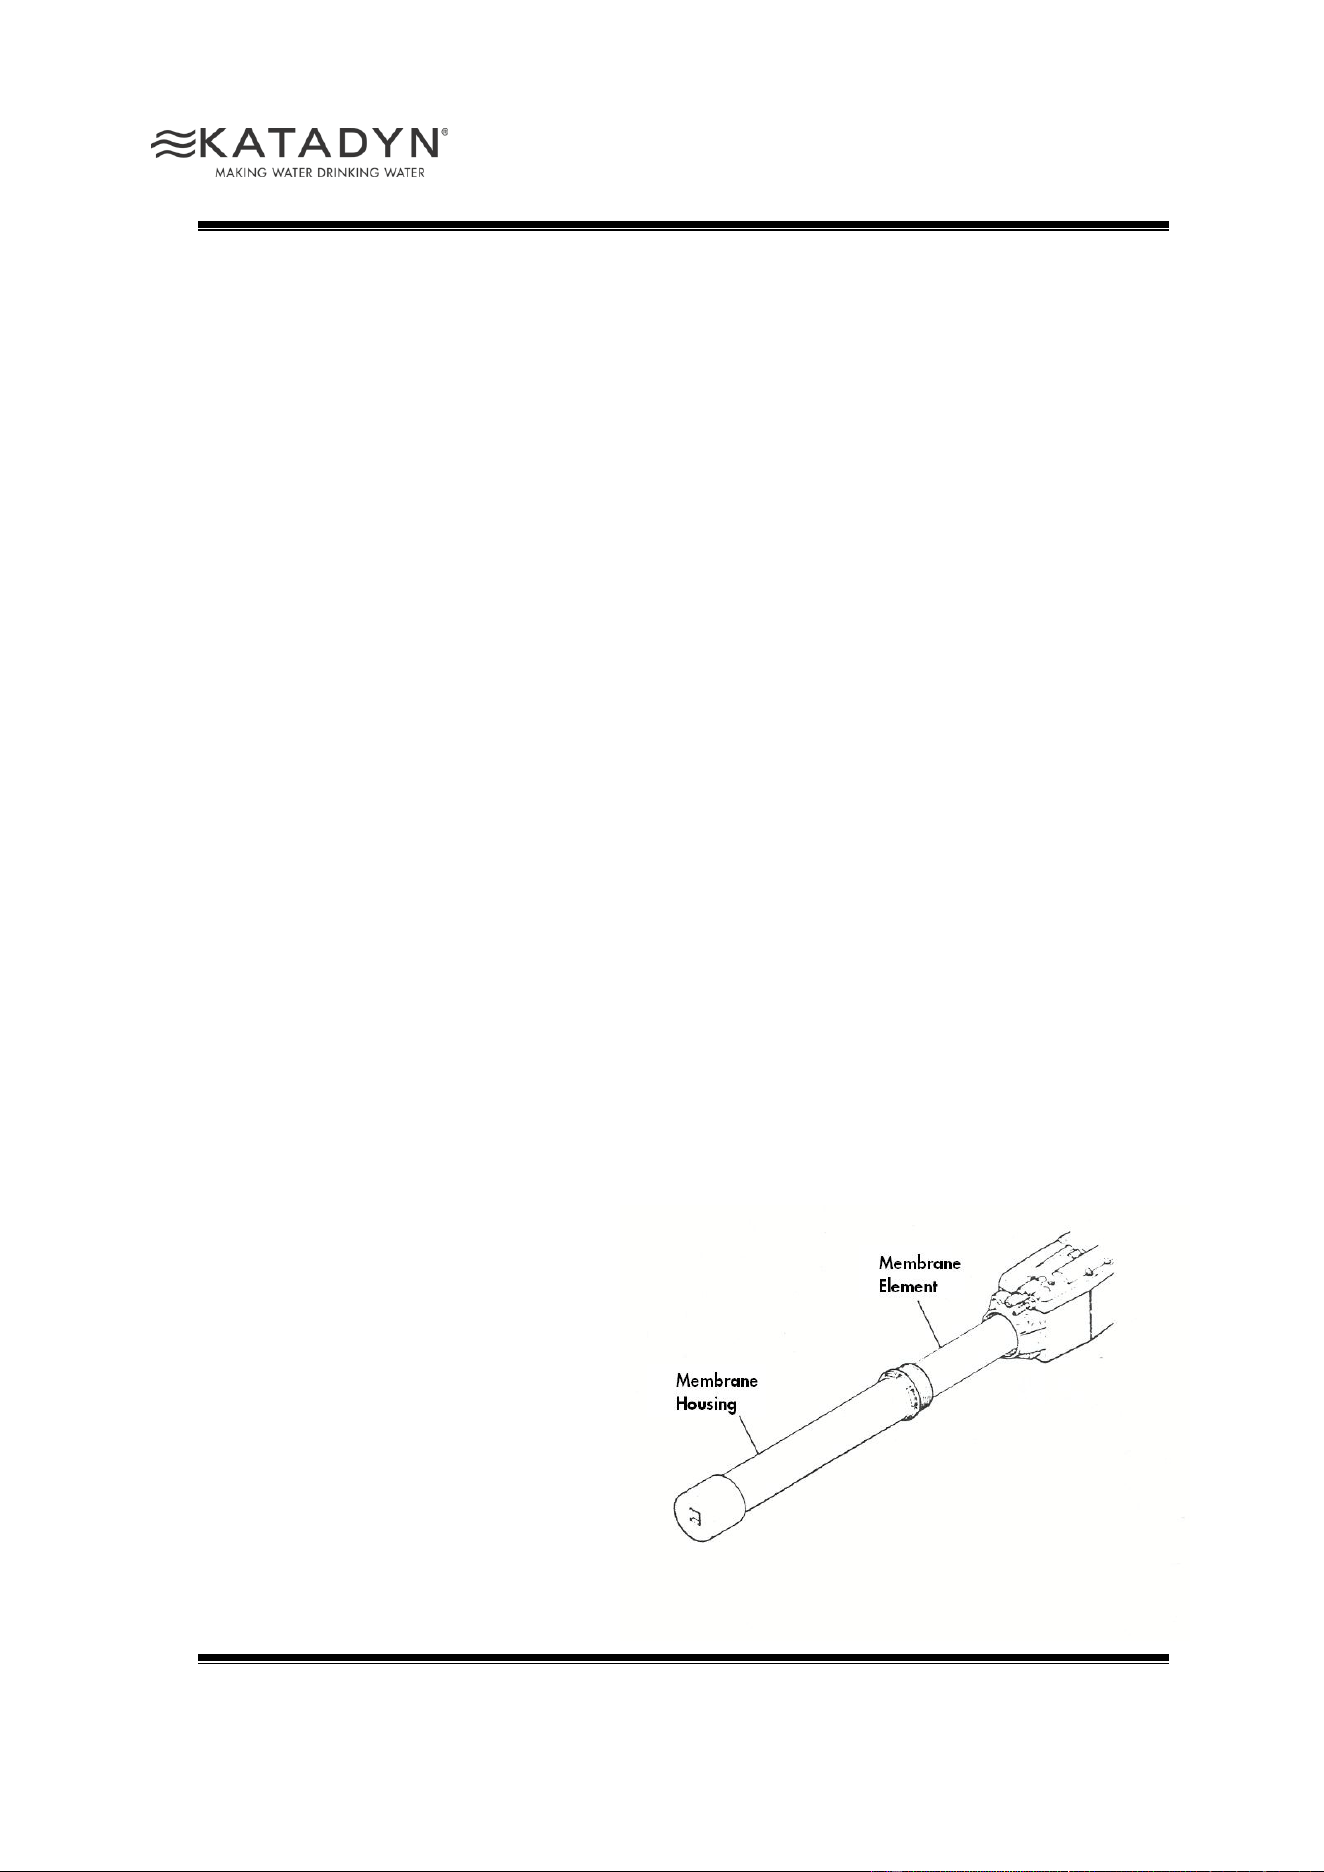
INSTALLATION INSTRUCTIONS
MEMBRANE ELEMENT KIT
Print No.: 8012794/2 Katadyn North A merica Inc. Katadyn Products Inc.
4830 Azelia Avenue North Pfäffikerstrasse 37
Minneapolis, MN 554429 U.S.A. 8310 Kemptthal Switzerland
Tel +1 800 755 6701 Fax +1 763 746 3540 Tel +41 44 839 21 11 Fax +41 44 830 21 99
[email protected] www.katadyn.us [email protected] www.katadyn.ch
Purpose of the kit
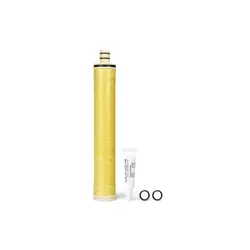
The Membrane Replacement Kit contains parts required to replace one membrane element on a
PowerSurvivor-80E or the membrane for the Survivor 35 or the PowerSurvivor 40E. It also includes
seals and O-rings which may need to be replaced at the same time.
Contents of the kit
Membrane Element (1)
Quad Seal (1)
Sleeve O-rings (2)
Spacer O-rings (2)
Silicone Lubricant
Tools and Supplies required
11/16-in.open-end wrench
Flat-blade screwdriver
Channel Lock Pliers (optional)
Installation Instructions
Model Survivor 35
1. Grasp the membrane housing with both hands and turn counterclockwise until it can be removed.
2. Remove the membrane element with a pulling-and-twisting motion. The reject tube will come out
with the membrane.
3. Lubricate all O-rings and seals on the new membrane element and reject tube with a light coating
of silicone lubricant.
4. Insert the membrane element into the pump body.
NOTE: The brine seal should be on the same end of the membrane as the spacer O-rings. No brine
seal should be on the opposite end of the membrane.
5. Insert the reject tube through the
membrane element.
6. Slide the membrane housing over the
membrane. Screw the housing all the
way into the pump collar by hand, but
do not overtighten.
Model PowerSurvivor 40E
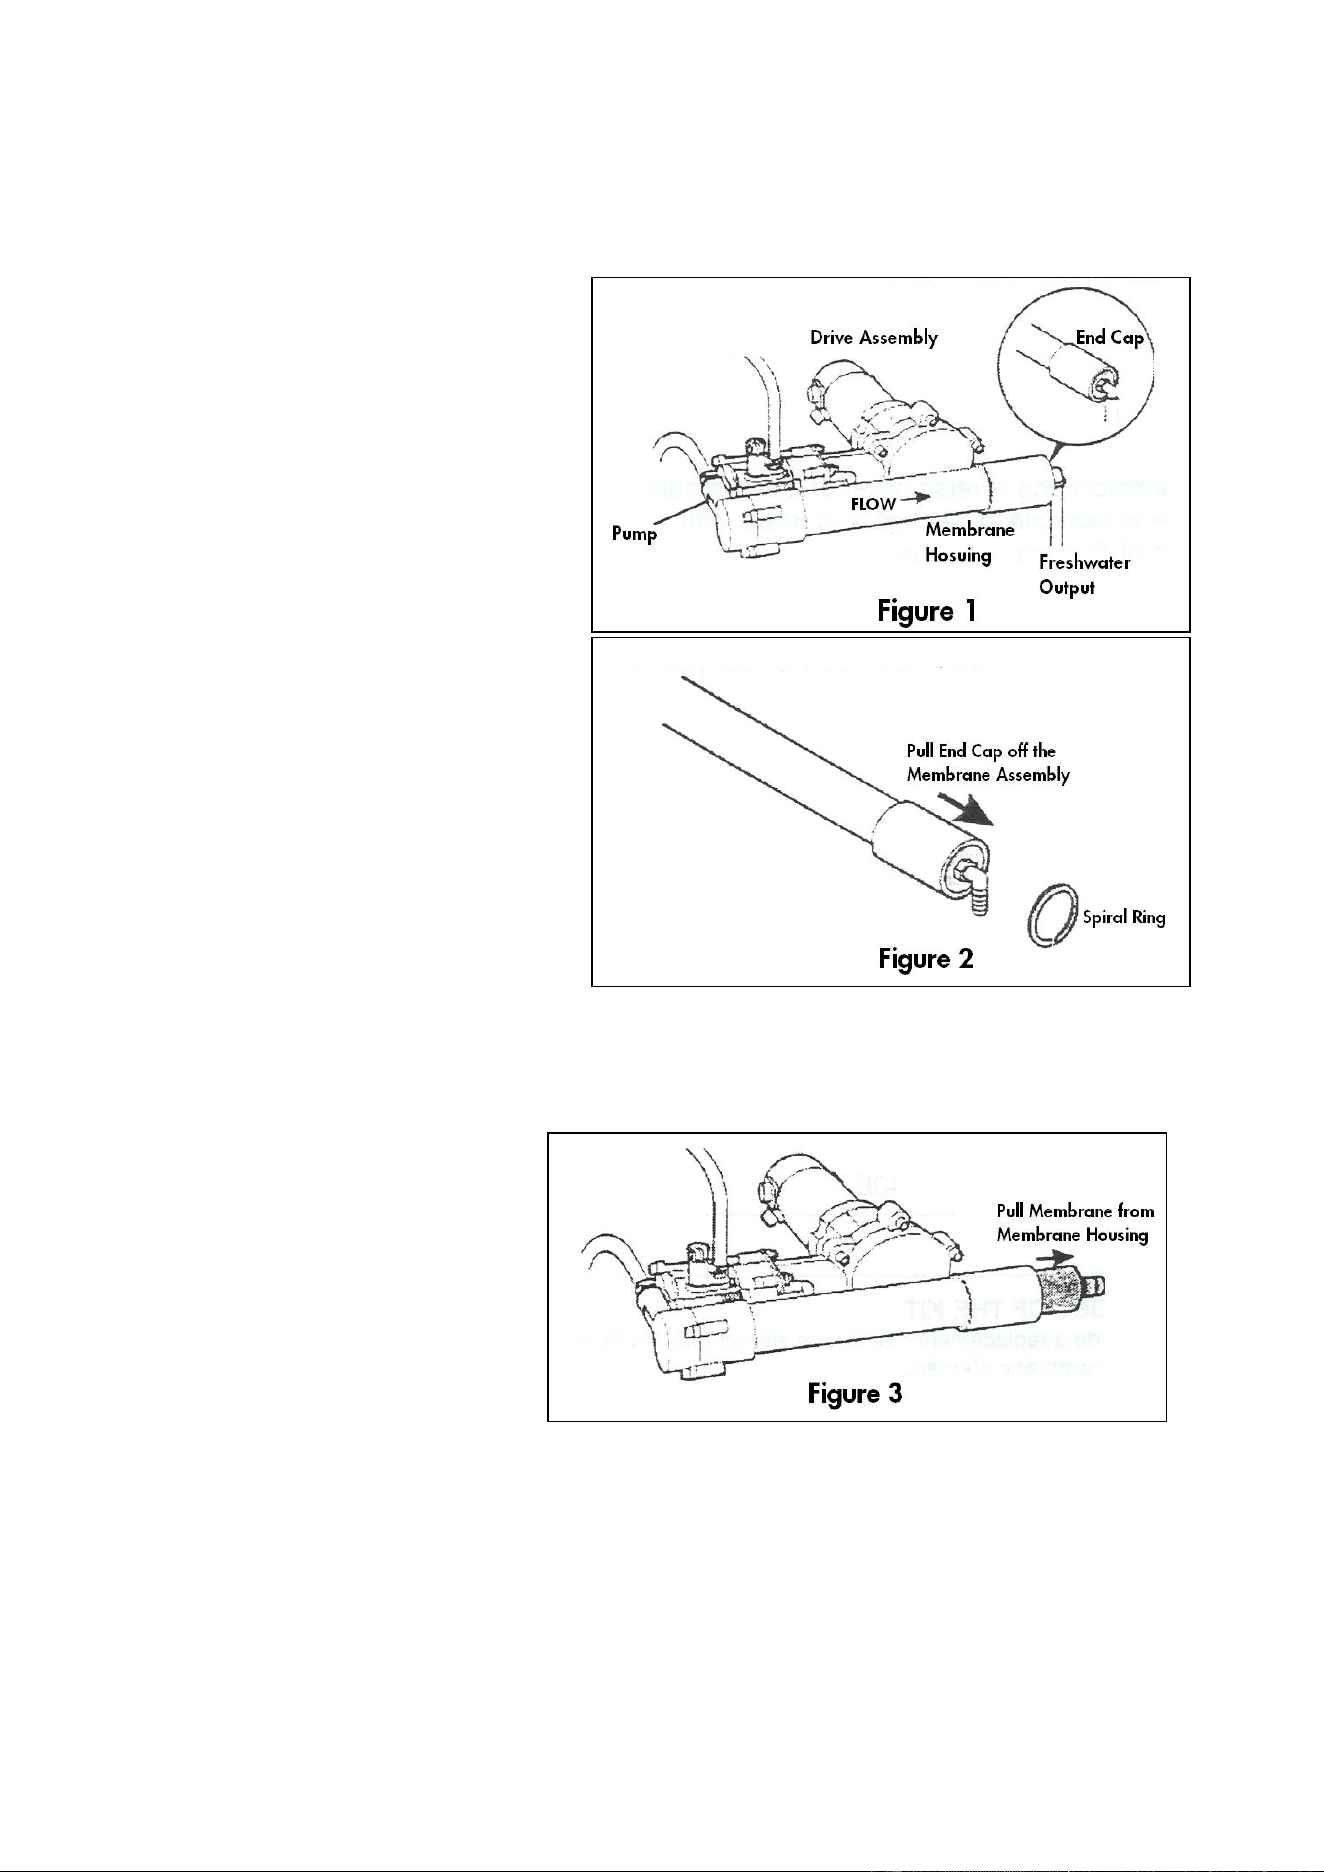
1. If the End Cap has Fresh Water
Product Hose attached, remove the
Hose (see Figure 1).
2. Use the flat-head screwdriver to lift
the end of the Spiral Ring on the
End Cap. Pull the Spiral Ring off
(see Figure 2).
3. Remove the End Cap by pulling
gently on the Hose Barb and End
Cap taking care not to destroy the
Hose Barb.
NOTE: End Caps may not come off easily. Grasp the Hose Barb gently and pull the End Cap off. It may
be necessary to wrap a piece of cloth around the Hose Barb (to protect it), then grasp the base of the
barb with the channel lock pliers and leverage the End Cap up and away.
4. With the End Cap removed,
gently pull the Membrane
Element out the open end of
the Membrane Assembly (see
Figure 3).
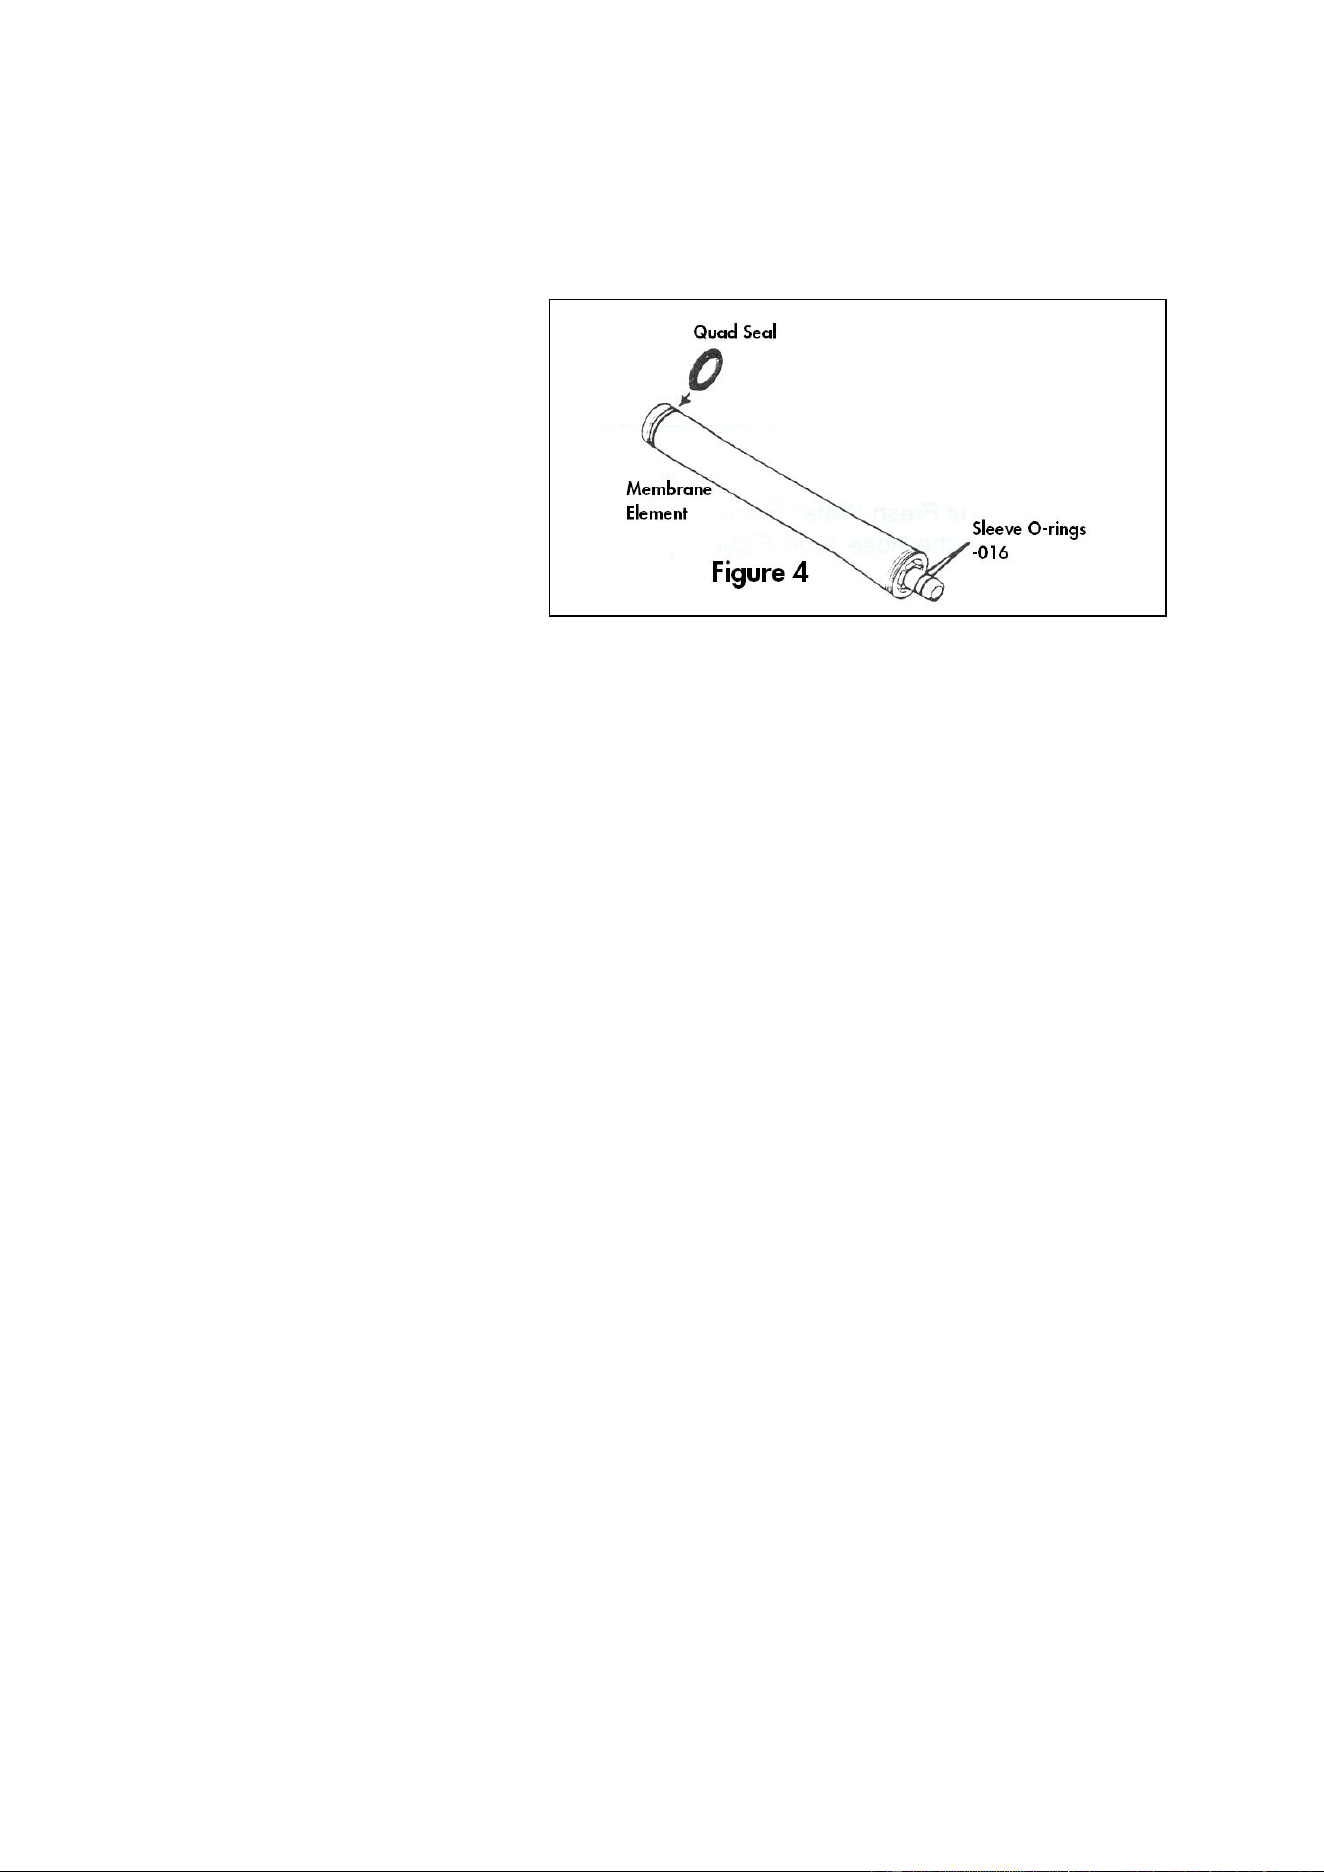
5. NOTE: Normally the quad seal is installed on the male end of the membrane element. Remove this
quad seal from the male end.
6. Install the Quad Seal on the
end of the Membrane
Element farthest from the
Fresh Water Product output
(the end where the seawater
enters the Membrane) (see
Figure 4).
NOTE: Only one end of the
Membrane Element gets a new
Quad Seal.
7. Install two new O-rings -016 on the male end of the Membrane (see Figure 4).
8. Reassemble in the reverse order of disassembly. Be sure to lubricate all O-rings and Seals with a
thin film of Silicone Lubricant.
CAUTION: Do not use petroleum-based lubricants on the O-ring.
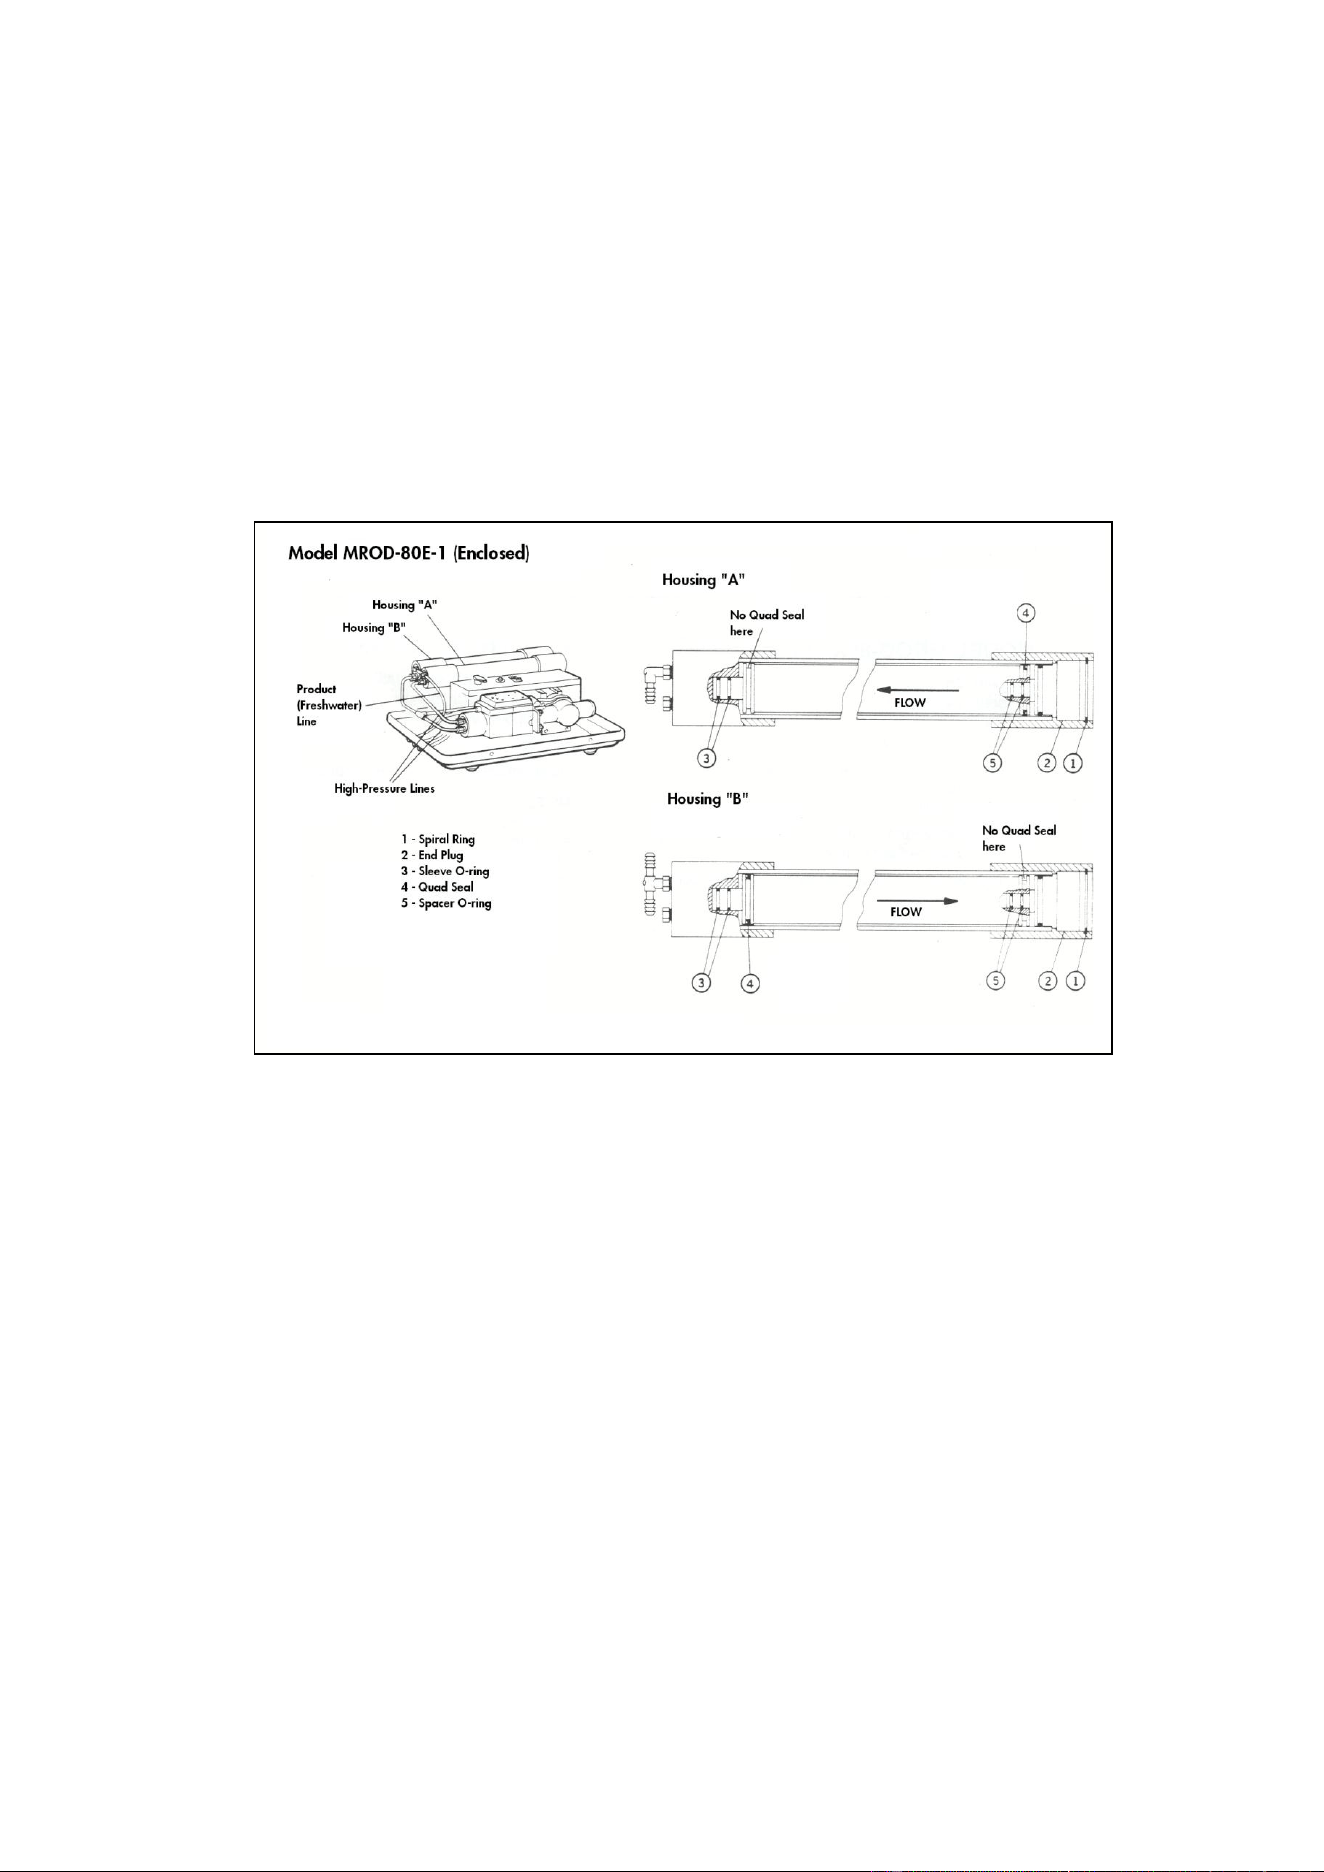
Model PowerSurvivor 80E (Enclosed)
NOTE: The membrane elements can be removed from the modules without taking the modules out of
the frame. However, if seals in both ends of the module are to be replaced, it will be easier to remove
the entire module.
1. With an 11/16-in. wrench, disconnect the high pressure lines from both membrane housings.
Remove the product (freshwater) tubing from the fittings on the housing ends.
2. To remove the end cap and product hose connection, use a screwdriver to remove the spiral ring
(#1) from the groove in the end cap.
3. Remove the end plug (#2) by pulling carefully on the fittings.
4. If the membrane element stays in the housing, grasp its product tube (3/4 in. diameter white tube
with two O-rings) and pull the element out.
5. Install new Quad seals (#4) as shown, on the indicated end of each membrane element. The
elements are shipped with new sleeve O-rings (#5) already installed.
6. Reassemble the modules in the reverse order of disassembly.
NOTE: Lubricate all O-rings and seals with a thin film of silicone lubricant when the components are
reassembled. DO NOT use any petroleum-based grease or oil (including petroleum jelly). As they will
degrade the membrane.
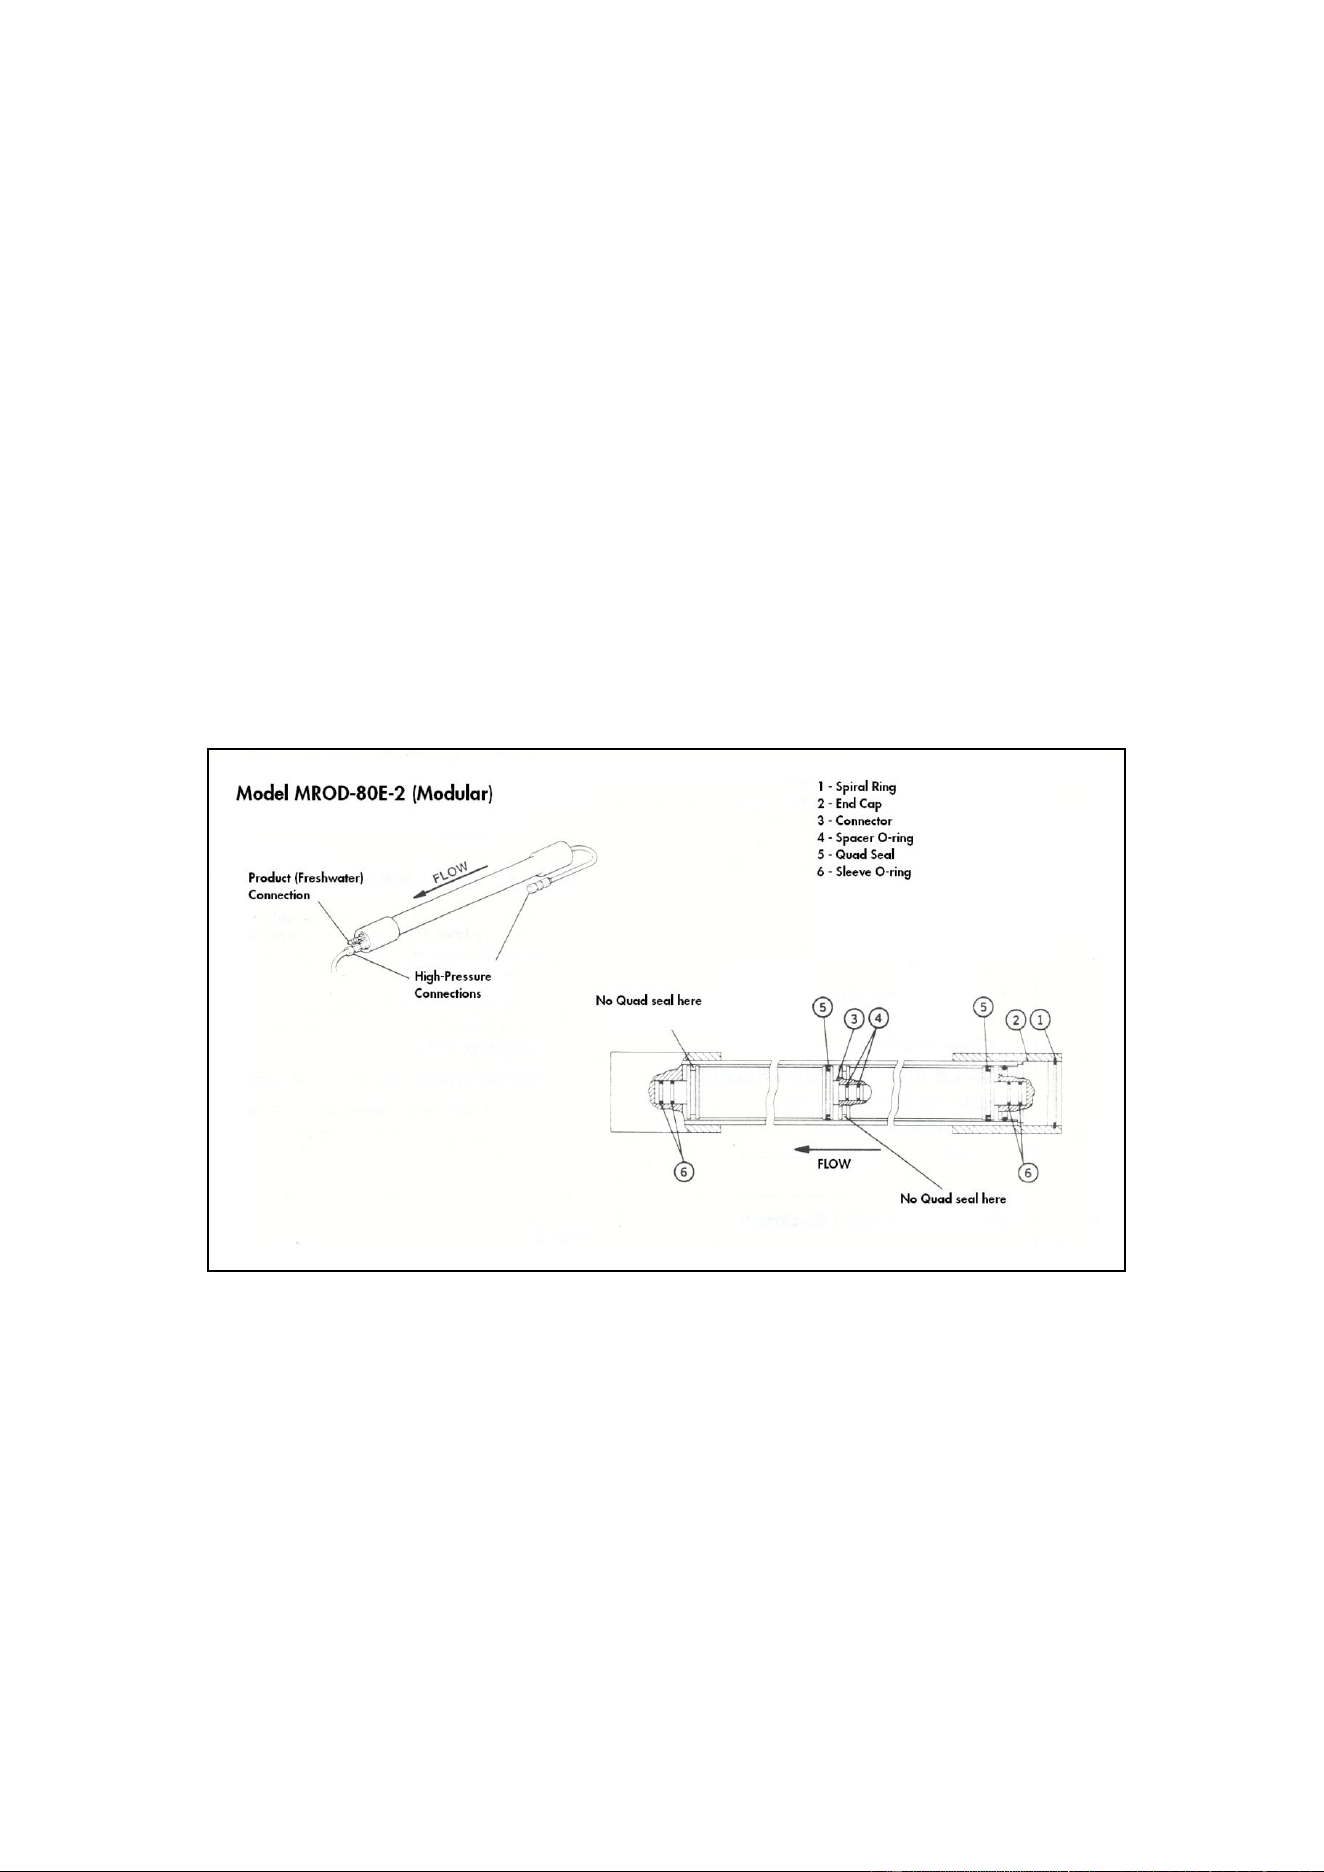
Model PowerSurvivor 80E (Modular)
7. With an 11/16 in. wrench, disconnect the high pressure lines from the ends of the membrane
housing. Also remove the product (freshwater) tubing from the fittings on the housing end.
8. Use a screwdriver to remove the spiral ring (#1) from the groove in each end cap. Remove both
end caps (#2) by pulling on the hose connectors.
9. If the membrane elements stay in the housing, they can be pushed out from either end.
10. The two elements are joined by a connector (#3), which can be removed for replacing its O-rings
(#4).
11. Install new Quad seals (#5) as shown, on the indicated end of each membrane element. The
elements are shipped with new sleeve O-rings (#6) already installed.
12. Reassemble in reverse order of disassembly.
NOTE: Lubricate all O-rings and seals with a thin film of silicone lubricant when the components are
reassembled. DO NOT use any petroleum-based grease or oil (including petroleum jelly). As they will
degrade the membrane.