无 线 尿 液 报 警 器
感谢您购买我们的产品
使用前请务必仔细阅读此说明书并妥善保管,以备将来参考。
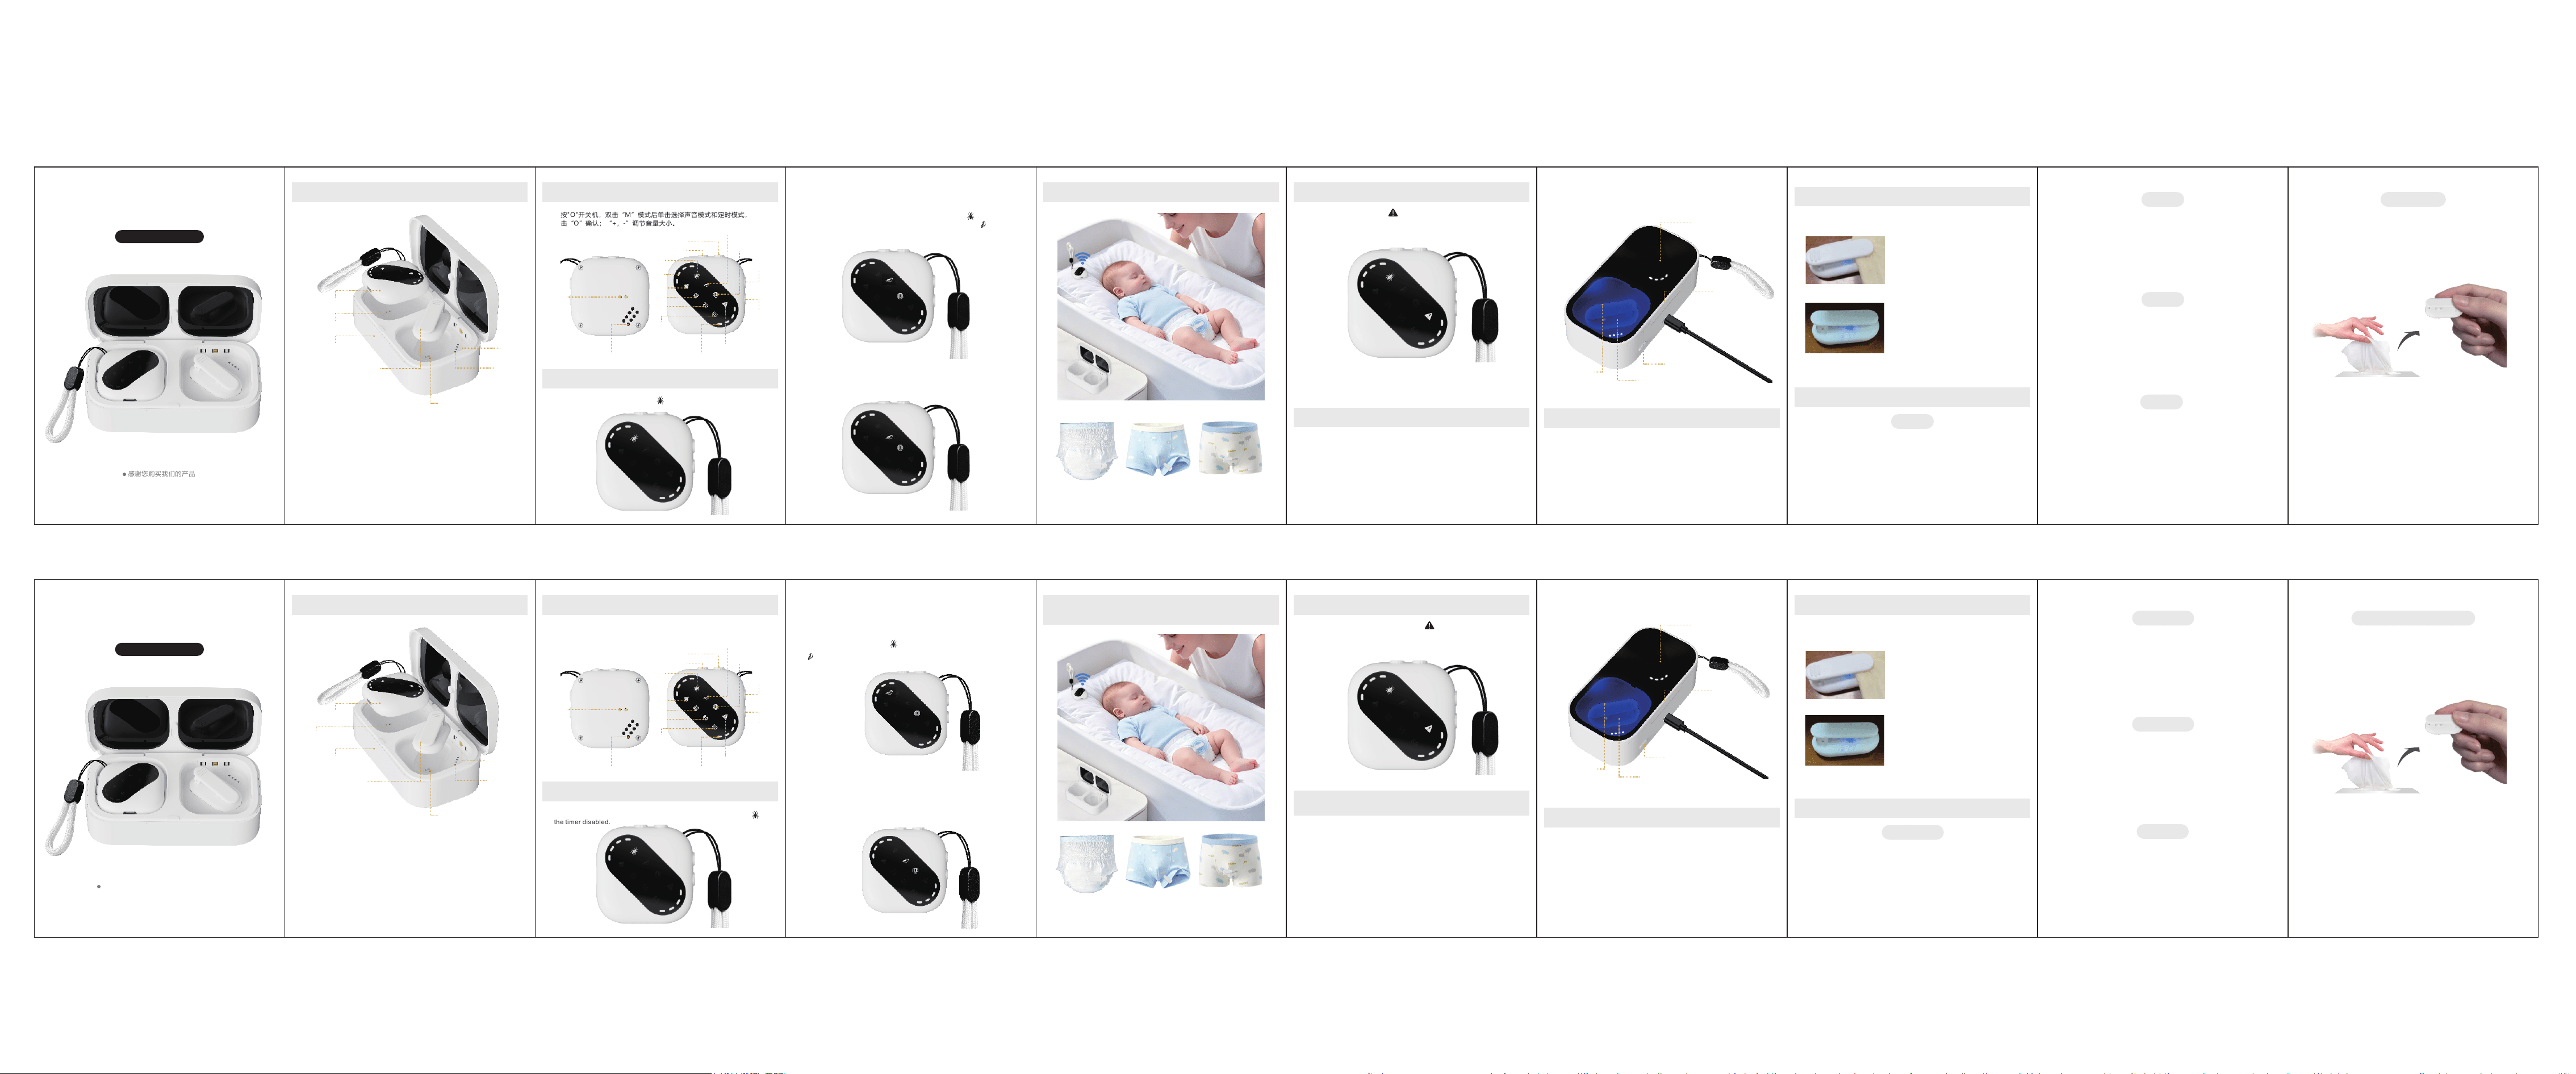
产品组成
尿液报警器由三个部分构成:
发射器(尿液检测):检测尿液通过无线方式发送报警信息给接收器
接收器:接收器用于接收发射器报警信息,通过震动或者声音方式通知
用户。
充电盒(收纳盒):用于发射器,接收器的充电,发射器消毒,不充电
盖上盖子后方便收纳,携带。
接收器操作方法
长按"O"开关机,双击“M”模式后单击选择声音模式和定时模式,选定后
单击“O”确认;“+,-”调节音量大小。
接收器4种声音和震动模式设置
双击“M”模式键解锁使指示灯闪烁,再单击"M"模式键指示灯会依次闪
烁亮起,并发出提示音,当你听到你想要的声音时,单击确认键"O"即可。
例如:鸟叫声模式设置:双击"M"模式键使蟋蟀灯闪烁 (或是上次
设置的模式灯闪烁),然后单击“M”模式键使鸟叫灯闪烁 并发出鸟
叫
声,单击确认键“O”即可。依次类推可以设置其他模式音。
定时模式设置和取消 :
双击"M"模式键解锁使指示灯闪烁,然后单击"M"模式键,使“30”或
“60”分钟指示灯闪烁亮起,然后"O"单击确认键即可; 当30和60指示
灯同时闪烁,单击"O"确认键表示90分钟定时.如果取消定时重新开机即
可。
尿液检测模块夹子端佩戴方法
产品充电+收纳+UVC消毒三位一体
一仓解决快速充电/探头收纳/日常消毒三大护理难题。双仓独立分区,充
电。消毒同步进行,互不干扰。左仓为接收器主机补电,右仓密闭UVC消
毒仓,放入传感器探头即可充电,一键启动紫外杀菌,分解探头残留尿液
细菌,减少私处红屁屁诱因,仓体放漏光,消毒过程中打开仓盖消毒灯自
动熄灭,避免光线伤害眼部,独立UVC开关,更贴心。
注意事项
1. 夹子端可以冲洗,之后必须擦干,特别是感应点不能有水分。
2. 接收器不能冲洗,浸水。
3. 感应器发射信号时,指示灯快闪。
4. 感应器电量低时,会有低电量提醒,指示灯慢闪。
产品介绍
通常在孩子入睡大约1至2小时,家长想完全弄醒孩子是不容易的,
而尿湿报警器会帮助家长叫醒孩子。
通过白天让孩子小睡一会,确保孩子在晚上睡觉不会筋疲力尽,
这样将会有助于报警器将孩子叫醒。
每天晚上要提醒你的孩子,当听到报警声音时,须停止排尿并上
厕所。
在晚上上床睡觉前,没必要限制液体的摄入量。
重要
在最初的几周里,当报警器响起时孩子自己可能不会被报警器叫
醒,所以孩子需要家长的帮助:叫醒孩子并上厕所。
孩子参与的过程是孩子取得成功不可缺少的。不要为孩子拔下报
警器,让孩子自己察觉报警器响起并自己取下或断开报警器为更好,
家长需要帮助孩子上卫生间排完尿。在最初的一到两周里,孩子可能
会在床上完全尿湿但家长仍需要继续强调上厕所的重要性并且鼓励他
们。问问孩子第二天是否记得报警器响起和他们做了些什么。
重要
家长的参与对于这个计划的成功也是必不可少的,在最初的几周
内,孩子需要家长的帮助和鼓励。这个计划可能是缓慢和沮丧的,但
家长坚持每天晚上使用报警器,每次训练过程报警器都能正常响起,
家长要帮助叫醒孩子。
你需要继续使用报警器3至4周,亦确保孩子在最后一次报警后不
会复发。复发是指孩子在一个月或更多月之后又连续尿湿。如果这种
情况发生,请立刻开始再次使用报警器,这样复发的间隔将会变得越
来越长。
重要
在报警器发生响声后,要给孩子重新连接报警器,同时要给孩子
换上一条新的内裤。
在孩子的房间使用一个通宵灯,这样有助孩子在报警器响起时更
容易醒来,并且能够找到去卫生间的路。
每次你的孩子度过一个干燥的夜晚或察觉到报警声,一定要表扬
他们。同样重要的是不要因为孩子没有察觉到报警音而责骂他们,因
为改变孩子的行为要花费一些时间。此外,使用进度图是很有帮助的,
以便孩子能参与到计划的进展中。
计划
产 品 使 用 说 明
发射器(检测尿液)
接收器
接收器充电探针
收纳盒(充电盒)
发射器充电探针
消毒灯
音量“+”
音量“-”
蟋蟀声
音量
指示灯
虫鸣声
蛙叫声
定时
30分钟
定时
60分钟
电量指示灯
报警提示灯
震动
鸟叫声
开关机/
确认OK键
模式M键
充电点
喇叭
报警提示
当系统出现报警时候,出现 小图标,报警器按用户设定的报警模式
震动或者声音,用户按任意键报警取消,报警图标消失,报警器恢复正
常。
在每次有尿湿部分后,记住要清理传感器夹子。如果有需要的话,
可一 并擦干净报警器。不要把报警器本体浸在水里,因为这样会损坏
内部零件,传感器夹子可在水里冲洗。
一定要经常检查电池,以确保报警器仍在工作。这可以通过在夹
子中间插入一块湿布来检查。
本公司报警器是为单个用户设计的,如果你想另一个孩子使用报
警器,请联系购买另外一个报警器。
保养/清洁
警告:使用中报警后,请将发射端夹子打开并用干爽的纸巾擦
干净,方可使用。
发射夹子
电量显示
接收器报警模式和定时模式设置
开机默认模式:开机后默认蟋蟀声 和无定时模式
( 使用情况下 )
( 使用情况下 )
3
0
60
接收器主机
充电/电量指示灯
Type-C充电口
UVC深度消毒开关
传感器探头电量指示灯
传感器探头
充电指示灯
1. 尿不湿佩戴方法。 2. 内裤材质吸水性能
弱的佩戴方法
3. 内裤材质吸水性能
良好的佩戴方法
产品参数
充电仓尺寸:124*64*35.3mm
接收器尺寸:48.3*48.3*16.7mm
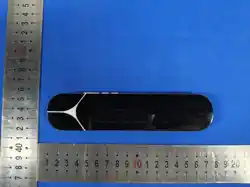
发射端尺寸:42.7*24.1*15.35mm
输入:5V/200mAh
充电时长:1到2小时
待机时长:30天
正常使用:10天以上
Wireless Urine Alarm
Product Composition
The urine alarm consists of three components:
Transmitter (Urine Detection):Detects urine and sends alarm
signals wirelessly to the receiver.
Receiver: Receives alarm signals transmitted by the transmitter
and alerts users via vibration or sound.
Receiver Operation
Press and hold "O" to turn on/off.Double-click "M" to access mode selection,
single-click to toggle between Sound Mode and Timing Mode.Single-click "O"
to confirm selection."+" / "-": Adjust volume.
4 Sound Tones & Vibration Mode Settings of the Receiver
Double-click the "M" Mode key to unlock; the indicator light will flash.
Then single-click the "M" Mode key. The indicator lights will flash
sequentially with prompt tones. When you hear your desired sound,
single-click the "O" Confirm key to save the setting.Example: Setting
Bird Chirp ModeDouble-click the "M" Mode key to trigger the flashing
of the cricket tone indicator (or the indicator light of the last selected
mode). Single-click the "M" Mode key until the bird chirp indicator flashes
and the bird chirp plays. Single-click the "O" Confirm key to confirm.
Follow the same procedure to set other alert tones.
Timer Mode Setting and Cancellation :
Double-click the "M" Mode key to unlock and make the indicator light flash.
Next, single-click the "M" Mode key to activate flashing for the 30-minute
or 60-minute indicator light, then single-click the "O" Confirm key to confirm.
When both the 30-minute and 60-minute indicators flash simultaneously,
single-click the "O" Confirm key to set a 90-minute timer. To cancel the timer,
power the device off and restart it.
Wearing Method for the Clip End of Urine
Detection Module
3-in-1 Function: Charging, Storage and UVC
Disinfection
One compartment solves three major nursing challenges: fast charging,
probe storage and daily disinfection. Equipped with two separate
independent compartments to support simultaneous charging and
disinfection without mutual interference.The left compartment charges
the receiver main unit. The right compartment is a sealed UVC
disinfection chamber. Place the sensor probe inside for charging.
One-touch activation of ultraviolet sterilization breaks down urine residue
and bacteria on the probe, reducing causes of private-area red rashes.
The chamber features light leakage prevention. The disinfection light
automatically turns off if the lid is opened during operation to avoid eye
damage from ultraviolet rays. An independent UVC switch delivers more
thoughtful operation.
Precautions
1. The clip-end can be rinsed, but must be dried thoroughly afterwards.
In particular, no moisture shall remain on the sensing points.
2. The receiver must not be rinsed or immersed in water.
3. The indicator light flashes rapidly when the sensor transmits signals.
4. A low-battery alert will be triggered and the indicator light flashes slowly
when the sensor has low power.
Product Introduction
It is often difficult for parents to fully wake a child roughly 1 to 2 hours
after they fall asleep. The bedwetting alarm will assist parents in waking
the child.
Let your child take a short nap during the daytime to prevent them from
being overly exhausted at night.This will help the alarm wake your child
successfully.
Remind your child every night: when hearing the alarm tone, stop
urinating immediately and go to the toilet.
There is no need to restrict fluid intake before bedtime.
Important
User M a n u al
Transmitter
(Urine Detection)
Receiver
Receiver
Charging
Probe
Charging &
Storage Case
Transmitter Charging Probe
Disinfection
Light
Volume +
Volume −
Cricket
Chirp
Volume
Indicator
Light
Insect
Chirp
60-Min
Timer
Power Indicator
Alarm Indicator
Vibration
Bird Chirp
Power/OK Key
Mode M Key
Charging
Contact
Speaker
Alarm Alert
When the system triggers an alarm, the icon will appear. The alarm
device alerts you via vibration or sound according to your preset alarm
mode. Press any key to stop the alarm; the alarm icon disappears and
the device returns to normal status.
Transmitter
Clip Battery
Indicator
Receiver Alarm Mode & Timer Mode Settings
Default mode on startup: The default alert tone is Cricket Chirp with
the timer disabled.
( In Use )
30
60
Receiver Main
UnitCharging / Battery
Indicator
Type-C
Charging Port
UVC Disinfection
Switch
Sensor Probe Battery Indicator Light
Sensor Probe
Charging
Indicator Light
1. Diaper Wearing
Guide
2. Wearing Guide:
Underwear with Low
Water Absorption
3. Wearing Guide:
Underwear with Good
Water Absorption
Specifications
Charging Case Dimensions: 124 × 64 × 35.3 mm
Receiver Dimensions: 48.3 × 48.3 × 16.7 mm
Transmitter Dimensions: 42.7 × 24.1 × 15.35 mm
Input: 5V/200mA
Charging Time: 1 to 2 hours
Standby Time: 30 days
Normal Usage: More than 10 days
Thank you for purchasing our product!
Please read this manual carefully before use and keep it
properly for future reference.
Charging Case (Storage Case): Supports charging for the transmitter
and receiver, as well as disinfection of the transmitter. When closed
without charging, it enables convenient storage and portability.
30-Min
Timer
Frog
Croak
( In Use )
During the first few weeks, your child may not wake up by themselves
when the alarm goes off, so assistance from parents is needed: wake
the child and take them to the toilet.
The child’s active participation is essential to achieve success. Do not
disconnect the alarm for the child. It is better to let the child notice the
alarm and remove or turn off the device on their own. Parents should
assist the child to finish urinating in the restroom. Within the first one
to two weeks, the child may still wet the bed completely. Even so,
parents need to keep emphasizing the importance of going to the toilet
and offer encouragement. Ask the child the next day whether they
remember the alarm sounding and what they did.
Parental involvement is also essential to the success of this program.
During the first few weeks, children require support and encouragement
from their parents. Progress under this program may be slow and
frustrating. Parents should keep using the alarm every night. Ensure
the alarm triggers properly during each training session, and assist in
waking the child.
Continue using the alarm for 3 to 4 weeks to prevent relapse after the
last alarm alert. A relapse means the child wets the bed consecutively
again one month or more later. If this occurs, restart using the alarm
immediately. The intervals between relapses will gradually become
longer.
Important
Important
Program
After the alarm sounds, reconnect the alarm for your child and have
them change into a new pair of underwear. Keep a night light on in the
child’s bedroom. This helps the child wake up more easily when the
alarm triggers and find their way to the toilet.Be sure to praise your
child whenever they achieve a dry night or notice the alarm sounding.
Equally important: do not scold your child if they fail to detect the alarm,
as behavioural changes take time. In addition, using a progress chart
is helpful to engage the child in tracking training progress.
Maintenance & Cleaning
WARNING: After the alarm is triggered during use, open
the transmitter clip and wipe it thoroughly with a dry
tissue before reuse.
After each wetting incident, remember to clean the sensor clip. Wipe
the alarm unit if necessary. Do not immerse the main alarm device in
water, as this will damage internal components. The sensor clip can
be rinsed under running water.
Always check the battery regularly to ensure the alarm functions
properly. You may test it by placing a damp cloth between the clip jaws.
This alarm is designed for single-user use. If you wish another child to
use the device, please purchase a separate alarm.

FCC Caution.
This device complies with part 15 of the FCC Rules. Operation is subject to the following two
conditions:
(1) This device may not cause harmful interference, and
(2) this device must accept any interference received, including interference that may cause
undesired operation.
Any Changes or modifications not expressly approved by the party responsible for compliance
could void the user's authority to operate the equipment.
Note: This equipment has been tested and found to comply with the limits for a Class B digital
device, pursuant to part 15 of the FCC Rules. These limits are designed to provide reasonable
protection against harmful interference in a residential installation. This equipment generates
uses and can radiate radio frequency energy and, if not installed and used in accordance with the
instructions, may cause harmful interference to radio communications. However, there is no
guarantee that interference will not occur in a particular installation. If this equipment does
cause harmful interference to radio or television reception, which can be determined by turning
the equipment off and on, the user is encouraged to try to correct the interference by one or
more of the following measures:
-Reorient or relocate the receiving antenna.
-Increase the separation between the equipment and receiver.
-Connect the equipment into an outlet on a circuit different from that to which the receiver is
connected.
-Consult the dealer or an experienced radio/TV technician for help.
* RF warning for Portable device:
The device has been evaluated to meet general RF exposure requirement. The device can be used
in portable exposure condition without restriction.