N
EED HELP FAST
?
READ YOUR
Q
UICK GUIDE AND/OR OWNER'S MANUAL FIRST FOR QUICK TIPS THAT MAK
E
USING YOUR MAGNAVOX PRODUCT MORE ENJOYABLE
.
IF YOU HAVE READ YOUR INSTRUCTIONS AND STILL NEED ASSISTANCE
,
Y
OU
MAY ACCE
SS
OU
R
O
NLINE HELP A
T
WWW.MAGNAVOX.COM
/
SUPPOR
T
O
R CALL 1-
800
-
605
-
86
1
0
WHILE WITH YOUR PRODUCT
.
INSTRUCCIONES EN ESPAÑOL INCLUIDAS.
©
2012 Funai Electric Co.
,
Ltd
.
O
wn
e
r's M
a
n
ual
Z
V427M
G
9
D
V
D
Recorder
/ VCR
r
LINE-IN RECORDING
(
NO TUNER
)
Recording Playback Editing
Introduction
Connections Basic Setup Function Setup VCR Functions
Others Español
E9P8CUDZV427MG9BOMv1.indd1E9P8CUDZV427MG9BOMv1.indd1 2012/03/0113:05:412012/03/0113:05:41
2
EN
EN
SAFETY INFORMATION
F
CC
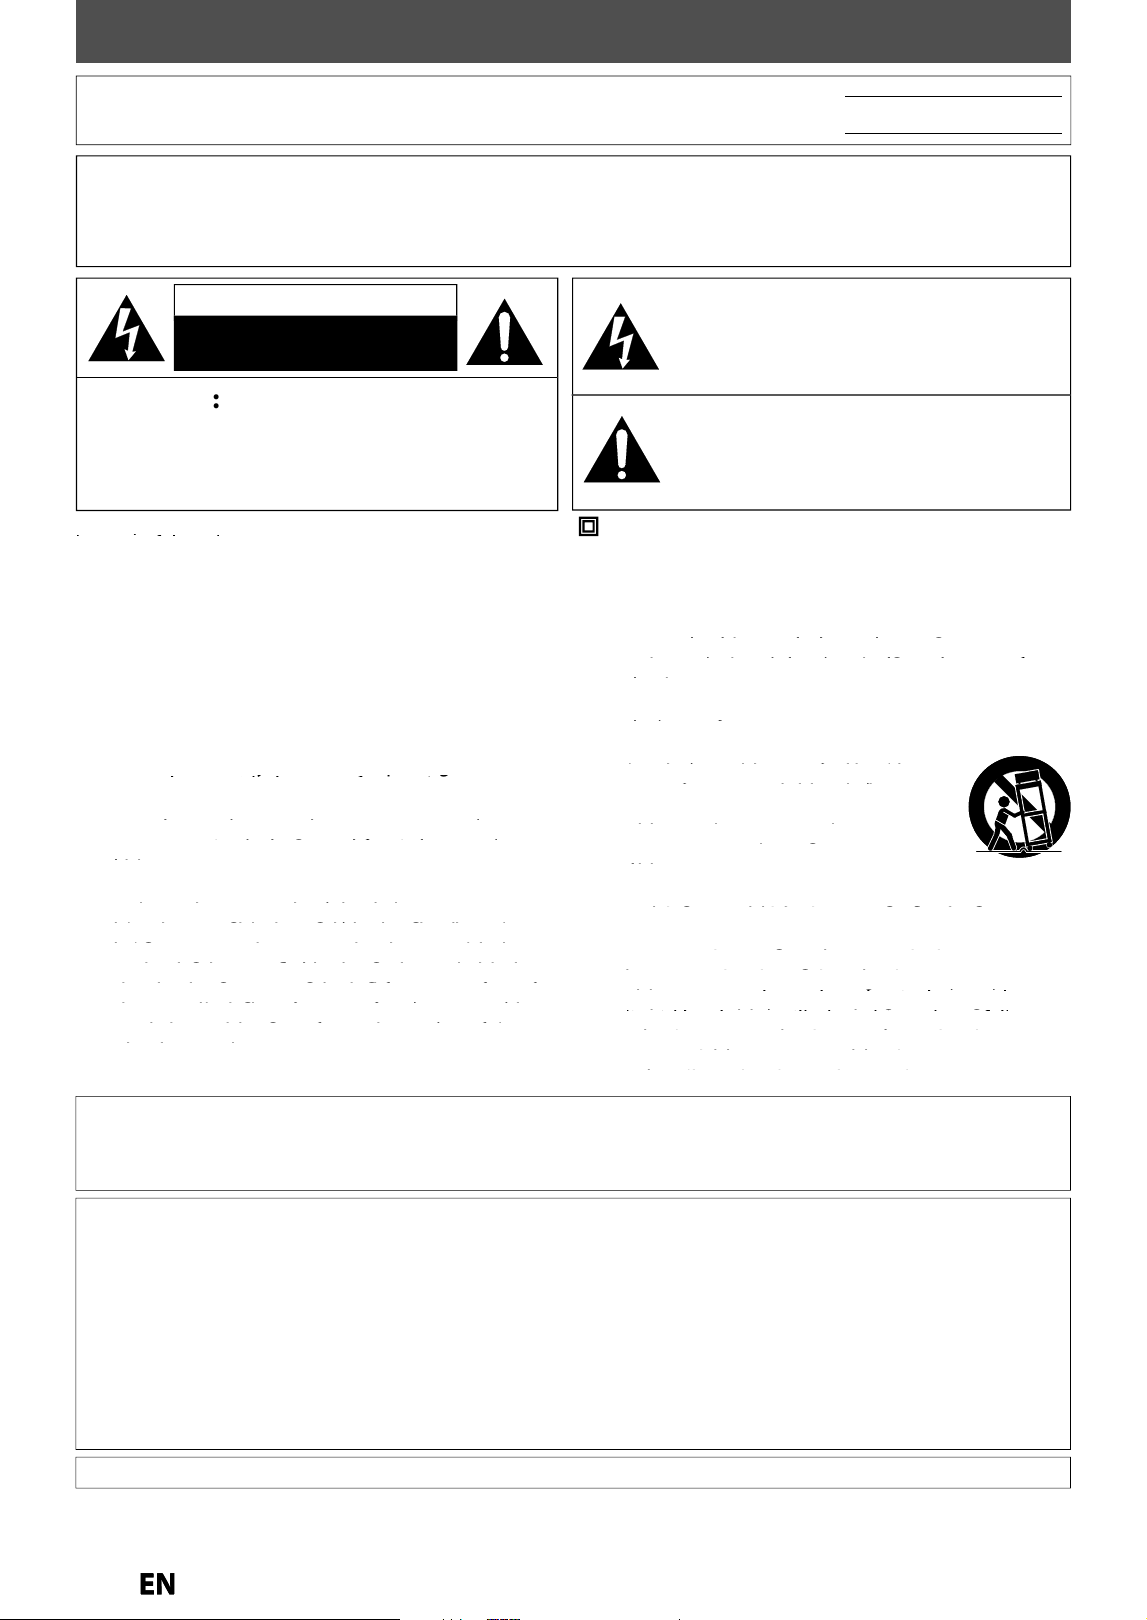
WARNIN
G
T
his equipment ma
y
generate or use radio
f
requenc
y
energ
y
. Changes or modi
f
ications to this equipment ma
y
cause harmful interference unless the modifications are expressl
y
approved in the manual. The user could lose the
authorit
y
to operate this equipment if an unauthorized change or modification is made
.
R
ADI
O
-TV INTERFEREN
CE
T
his equipment has been tested and
f
ound to compl
y
with the limits
f
or a Class B digital device, pursuant to Part
15 of the FCC Rules. These limits are desi
g
ned to provide reasonable protection a
g
ainst harmful interference in a
residential installation. This equipment generates, uses, and can radiate radio frequenc
y
energ
y
and, if not installed
and used in accordance with the instructions, ma
y
cause harm
f
ul inter
f
erence to radio communications. However,
there is no
g
uarantee that interference will not occur in a particular installation. If this equipment does cause harmful
interference to radio or television reception, which can be determined b
y
turning the equipment off and on, the user
is encouraged to tr
y
to correct the inter
f
erence b
y
one or more o
f
the
f
ollowing measures
:
1
)
Reorient or relocate the receivin
g
antenna
.
2
)
Increase the separation between the equipment and receiver
.
3
)
Connect the e
q
ui
p
ment into an outlet on a circuit di
ff
erent
f
rom that to which the receiver is connected
.
4
)
Consult the dealer or an experienced radio/TV technician for help
.
Disconnect the mains plug to shut o
ff
when
f
ind trouble or not in use. The mains plug shall remain readil
y
operable
.
T
he model and serial numbers o
f
this unit may be
f
ound on the cabinet
.
Y
ou
s
h
ou
l
d
r
eco
r
d
a
n
d
r
eta
in
t
h
ose
n
u
m
be
r
s
fo
r
futu
r
e
r
efe
r
e
n
ce.
Se
ri
al
N
o.:
M
o
d
e
l
No.:
WARNIN
G
:
T
O
REDUCE THE RISK
O
F FIRE
O
R ELECTRIC SH
O
CK
,
D
O
N
O
T EXP
O
SE THIS
APPARAT
US
T
O
RAIN
O
R M
O
I
S
T
U
RE
.
APPARATUS SHALL N
O
T BE EXP
O
SED T
O
DRIPPING
O
R SPLASHING AND N
O
O
BJECTS
FILLED WITH LI
Q
UIDS, SUCH AS VASES, SHALL BE PLACED
O
N THE APPARATUS
.
C
A
U
TI
ON
:
T
O REDUCE THE RISK OF ELECTRIC SHOCK
,
DO NO
T
REMOVE COVER
(
OR BACK
)
. NO USER SERVICEABLE
PARTS INSIDE. REFER SERVICING TO
Q
UALIFIED
S
ERVI
C
E PER
SO
NNEL
.
C
AUTI
O
N
RISK OF ELECTRIC SHOCK
DO NOT OPEN
T
h
e exc
l
amation point wit
h
in an equi
l
atera
l
triang
l
e is
intended to alert the user to the presence o
f
important
operating an
d
maintenance (servicing) instructions in
t
h
e
l
iterature accompanying t
h
e app
l
iance
.
The lightning
f
lash with arrowhead symbol, within an
equi
l
atera
l
triang
l
e, is inten
d
e
d
to a
l
ert t
h
e user to t
h
e
presence o
f
uninsulated “dangerous voltage” within the
product’s enclosure that may be o
f
su
ff
icient magnitude
to constitute a risk o
f
electric shock to persons
.
IMP
O
RTANT SAFETY INSTR
UC
TI
O
N
S
1
.
R
ead
t
h
ese
in
st
r
uct
i
o
n
s.
2.
Keep t
h
ese instructions
.
3.
Heed all warnin
g
s
.
4
.
F
o
ll
o
w
a
ll in
st
r
uct
i
o
n
s.
5
. Do not use t
h
is apparatus near water
.
6
. C
l
ean on
l
y wit
h
d
ry c
l
ot
h.
7
.
Do not block an
y
ventilation o
p
enin
g
s. Install in
accordance with the manufacturer’s instructions.
ypgyp
8.
Do not insta
ll
near an
y
h
eat sources suc
h
as radiators, heat registers, stoves, or other
y
y
apparatus (including amplifiers) that produce
g
g
heat.
pp
9
. Do not de
f
eat the sa
f
et
y
p
ur
p
ose o
f
the
polarized or grounding-type plug. A polarized
yp p
yp p
pl
u
g
h
as two
bl
a
d
es wit
h
one wi
d
er t
h
an t
h
e
pggyppgp
g g yp p g p
other. A grounding type plug has two blades
pg
g
and a third grounding prong. The wide blade or
ggyppg
ggyppg
the third prong are provided for your safety. If
ggpg
ggpg
the provided plug does not fit into your outlet,
pg p y y
pg p y y
consult an electrician for replacement of the
ppg y
pg y
o
b
so
l
ete out
l
et
.
1
0.
Protect the power cord from being walked on
or pinched particularly at plugs, convenience
pg
p
receptacles, and the point where they exit from
pp ypg
pypg
the apparatus.
p
11.
Only use attachments/accessories specified by
the manufacturer.
y
y
12
.
Use only with the cart, stand, tripod,
bracket, or table specified by the
yp
y
manu
f
acturer
,
or so
ld
wit
h
t
h
e
py
py
apparatus. When a cart is used, use
caution w
h
en movin
g
t
h
e cart
/
pp
apparatus combination to avoid injury
g
from tip-over.
pp
1
3.
Unplug this apparatus during lightning storms
or when unused for long periods of time.
p g pp g g g
gpp gg
14.
Re
f
er all servicin
g
to
q
uali
f
ied service
personnel. Servicing is required when the
gq
gq
apparatus has been damaged in any way, such
pgq
gq
as power-supply cord or plug is damaged,
pp g y y
gyy
liquid has been spilled or objects have fallen
pppypgg
pppypgg
into the apparatus, the apparatus has been
qpj
pj
exposed to rain or moisture, does not operate
pp pp
pp pp
norma
lly
, or
h
as
b
een
d
roppe
d.
p
T
he s
y
mbol for CLASS ll (Double Insulation
)
The important note and rating are located on the rear or
b
ottom o
f
t
h
e ca
b
inet
.
p
p
E9P8CUDZV427MG9BOMv1.indd2E9P8CUDZV427MG9BOMv1.indd2 2012/03/0113:05:432012/03/0113:05:43
3
EN
EN
Recording Playback Editing
Introduction
Connections Basic Setup Function Setup VCR Functions
Others Español
SAFETY INFORMATION
C
A
U
TI
O
N
:
Danger o
f
explosion i
f
batter
y
is incorrectl
y
replaced. Replace onl
y
with the same or equivalent t
y
pe.
W
ARNIN
G
: Batteries (Batter
y
pack or batter
y
installed) shall not be exposed to excessive heat such as sunshine,
f
ire or the like.
L
A
S
ER
S
AFET
Y
T
his apparatus is classi
f
ied as a CLASS 1 LASER PRODUCT.
T
his apparatus emplo
y
s a laser. Onl
y
a qualified service person should remove the cover or attempt
t
o service this apparatus, due to possible e
y
e injur
y.
C
A
U
TI
O
N
:
Use of controls or ad
j
ustments or performance of procedures other than those specified
h
erein ma
y
resu
l
t in
h
azar
d
ous ra
d
iation exposure
.
I
MP
O
RTANT
CO
PYRIGHT INF
O
RMATI
ON
Unauthorized copying, broadcasting, public per
f
ormance and lending o
f
discs are prohibited. This item incorporates
copy protection technology that is protected by U.S. patents and other intellectual property rights o
f
Rovi Corporation.
Reverse engineering an
d
d
isassem
bl
y are pro
h
i
b
ite
d.
Do not place the unit on the furniture that is capable of being tilted b
y
a child and an adult leaning, pulling, standing
or climbing on it. A
f
alling unit can cause serious injur
y
or even death
.
Never use a gas
d
uster on t
h
is unit.
T
he gas trapped inside o
f
this unit may cause ignition and explosion
.
To
Av
o
i
d
the H
a
z
a
r
ds
o
f Electric
a
l Sh
o
ck
a
n
d
Fir
e
•
Do not
h
an
dl
e t
h
e power cor
d
wit
h
wet
h
an
d
s
.
•
Do not pull on the power cord when disconnecting it from an AC outlet. Grasp it b
y
the plug
.
•
Do not put
y
our
f
ingers or objects into the unit
.
Location an
d
Han
dl
ing
•
Do not install the unit in direct sunlight, near strong magnetic fields, or in a place sub
j
ect to dust or strong vibration.
•
A
void a place with drastic temperature chan
g
es
.
•
I
nstall the unit in a horizontal and stable position. Do not place anything directly on top or bottom o
f
the unit.
Depending on your external devices, noise or disturbance o
f
the picture and/or sound may be generated i
f
the unit is
p
l
ace
d
too c
l
ose to t
h
em. In t
h
is case, p
l
ease ensure enoug
h
space
b
etween t
h
e externa
l
d
evices an
d
t
h
e unit
.
•
Depending on the environment, the temperature of this unit ma
y
increase slightl
y
. This is not a malfunction
.
•
Be sure to remove the disc and unplug the AC power cord
f
rom the outlet be
f
ore carrying the unit.
D
ew Condensation Warnin
g
•
Dew condensation ma
y
f
orm inside the unit in the
f
ollowing conditions. I
f
so, do not use this unit at least
f
or a
f
ew
h
ours unti
l
its insi
d
e gets
d
ry
.
- The unit is moved from a cold
p
lace to a warm
p
lace.
- Under conditions of high humidit
y
.
- After heatin
g
a cold room.
N
ote a
b
out Recyc
l
ing
•
T
his unit’s packaging materials are rec
y
clable and can be reused. Please dispose o
f
an
y
materials in
accor
d
ance wit
h
your
l
oca
l
recyc
l
ing regu
l
ations
.
•
Batteries should never be thrown awa
y
or incinerated but disposed of in accordance with
y
our local
re
g
ulations concernin
g
chemical wastes
.
•
F
or product rec
y
cling information, please visit -
www.magnavox.com
g
.
N
otice
f
or Progressive Scan Outpu
t
•
C
onsumers should note that not all high definition television sets are full
y
compatible with this product and ma
y
cause artifacts to be displa
y
ed in the picture. In case of picture problems with 525(480) progressive scan output,
it is recommended that the user switch the connection to the ‘standard definition’ out
p
ut. If there are
q
uestions
regarding
y
our TV set compatibilit
y
with this 525p(480p) DVD pla
y
er, please contact our customer service center
.
E9P8CUDZV427MG9BOMv1.indd3E9P8CUDZV427MG9BOMv1.indd3 2012/03/0113:05:442012/03/0113:05:44
4
EN
EN
SAFETY INFORMATION
Cl
eanin
g
t
h
e
d
isc
l
ens
g
•
I
f
this unit still does not per
f
orm properl
y
a
lthough
y
ou re
f
er to the relevant sections and to
“
TROUBLESHOOTING” in t
h
is owner's manua
l,
t
h
e
l
aser
o
ptical pickup unit ma
y
be dirt
y
. Consult
y
our dealer
o
r an Authorized Service Center for inspection and
c
leaning o
f
the laser optical pickup unit
.
D
isc
h
an
dl
in
g
g
•
Handle the discs so that fin
g
erprints and dust do not
ad
h
e
r
e
to
t
h
e
su
rf
aces
o
f
t
h
e
d
i
scs.
•
Alwa
y
s store the disc in its protective case when it is
not
used.
A
uto
h
ea
d
c
l
eanin
g
g
•
A
utomaticall
y
cleans video heads as
y
ou insert or
r
emove a cassette, so
y
ou can see a clear picture
.
•
P
la
y
back picture ma
y
become blurred or interrupted
w
hile the TV pro
g
ram reception is clear. Dirt accumulated
o
n the video heads after a lon
g
period of use, or the
u
sa
g
e of rental or worn tapes can cause this problem. If
a
streak
y
or snow
y
picture appears during pla
y
back, the
v
ideo heads in
y
our unit ma
y
need to be cleaned.
1
. Please visit
y
our local Audio/Video store and purchase a
good qualit
y
VHS video head cleaner
.
2
. If a video head cleaner does not solve the
p
roblem,
p
lease
consult
y
our dealer or an Authorized Service Center
.
Note
•
Remember to read the instructions alon
g
with the
v
i
deo
h
ead
c
l
ea
n
e
r
befo
r
e
use.
•
Clean video heads onl
y
when problems occur
.
I
R si
g
na
l
c
h
ec
k
g
I
f the remote control does not work properl
y
,
y
ou can test
i
f the remote control sends out the infrared si
g
nal with a
d
i
g
ital camera (includin
g
built-in camera of cellular phone).
I
t will hel
p
to define the cause of malfunction.
W
it
h
a
d
igita
l
camera (inc
l
u
d
ing
b
ui
l
t-in
c
amera o
f
cellular phone)
:
D
irect a
d
igita
l
camera to remote contro
l
, press
a
nd hold a button on remote control. I
f
in
f
rared
l
ig
h
t appears t
h
roug
h
d
igita
l
camera, t
h
e
r
emote contro
l
is wor
k
ing
.
Su
ppl
ie
d
Accessorie
s
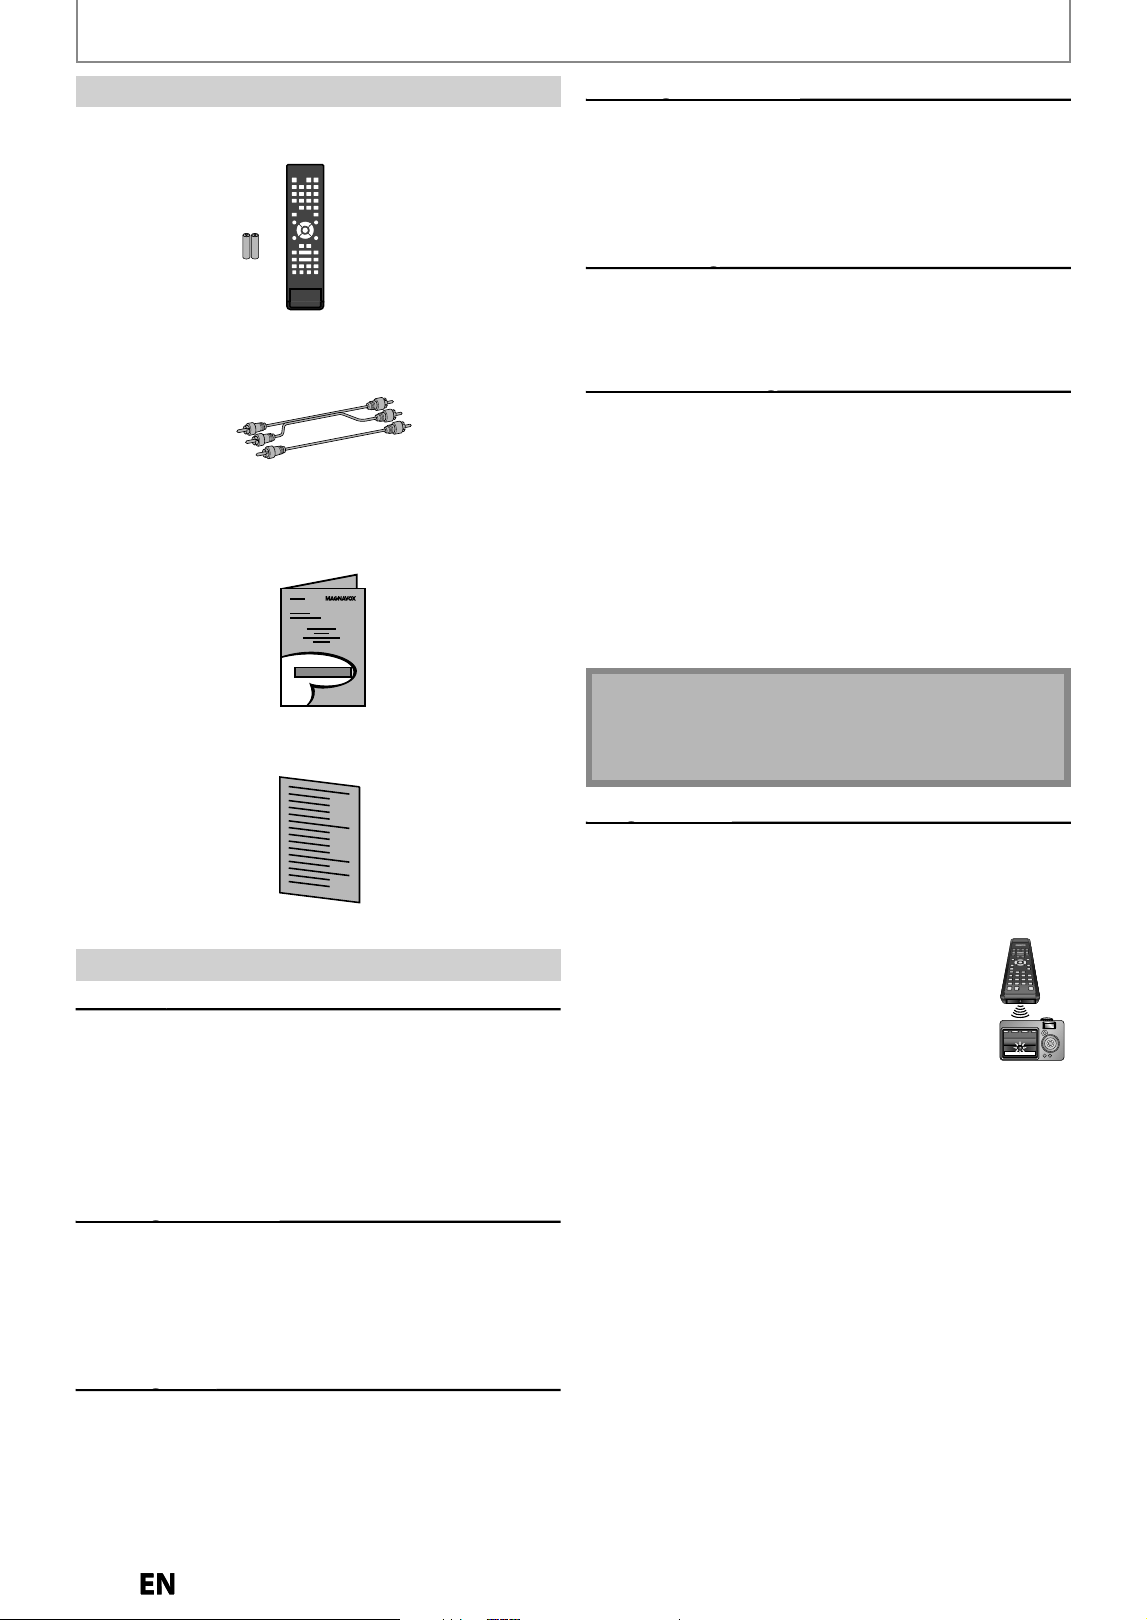
remote contro
l
(NB887UD) wit
h
b
atteries (AA
,
1.5V x 2
)
Servicin
g
g
• Please re
f
er to relevant topics on “TROUBLESHOOTING”
on pages 86-89 be
f
ore returning the product.
• I
f
this unit becomes inoperative, do not try to correct
the problem by yoursel
f
. There are no user-serviceable
parts insi
d
e. Turn t
h
e unit to t
h
e stan
db
y mo
d
e, unp
l
ug
t
h
e power p
l
ug an
d
p
l
ease ca
ll
our
h
e
l
p
l
ine mentione
d
on the
f
ront page to locate an Authorized Service
C
enter
.
Cleanin
g
the cabinet
g
• Wi
p
e the front
p
anel and other exterior surfaces of the
u
ni
t
wi
t
h
a
so
f
t
c
l
ot
h
.
• Never use a solvent
,
thinner
,
benzene or alcohol to
clean the unit. Do not spra
y
insecticide liquid near
the unit. Such chemicals ma
y
discolor the surface or
dama
g
e the unit
.
C
l
eanin
g
d
isc
s
g
•
Wh
en a
d
isc
b
ecomes
d
irt
y
, c
l
ean it wit
h
a c
l
eaning c
l
ot
h
.
W
ipe the disc from the center to out. Do not wipe in a
c
ir
cu
l
a
r m
ot
i
o
n
.
• Do not use solvents such as benzine, thinner, commerciall
y
avai
l
a
bl
e c
l
eaners,
d
eter
g
ent, a
b
rasive c
l
eanin
g
a
g
ents or
antistatic spra
y
intended for analog records
.
RCA audio
/
video cables
owner's manua
l
quic
k
gui
de
Ma
i
ntenance
E9P8CUDZV427MG9BOMv1.indd4E9P8CUDZV427MG9BOMv1.indd4 2012/03/0113:05:452012/03/0113:05:45
5
EN
EN
Recording Playback Editing
Introduction
Connections Basic Setup Function Setup VCR Functions
Others Español
SAFETY INFORMATION
T
r
ad
em
a
rk Inf
o
rm
a
ti
on
© 2012 Funai E
l
ectric Co., Lt
d
.
All rights reserved. No part of this manual ma
y
be reproduced, copied, transmitted, disseminated, transcribed,
downloaded or stored in an
y
storage medium, in an
y
form or for an
y
purpose without the express prior written
c
onsent of Funai. Furthermore, an
y
unauthorized commercial distribution of this manual or an
y
revision hereto is
s
trictl
y
prohibited
.
In
f
ormation in this document is sub
j
ect to change without notice. Funai reserves the right to change the content
h
erein without the obligation to noti
fy
an
y
person or organization o
f
such changes
.
M
AGNAVOX is a registered trademark o
f
Philips Electronics North America Corporation and is used by Funai Electric Co.,
Ltd. and Funai Corporation, Inc. under license
f
rom Philips Electronics North America.
Kodak and KODAK Picture CD Com
p
atible are
t
r
ade
m
a
rk
s
of
K
oda
k
used
u
n
de
r li
ce
n
se.
M
anufactured under license from Dolb
y
Laboratories.
D
olb
y
and the double-D s
y
mbol are trademarks o
f
Dolb
y
L
abo
r
ato
ri
es.
Dolb
y
Digital Stereo Creato
r
“Dolb
y
® Digital Stereo Creator enables consumers to
create stereo DVD-Videos with stunning Dolb
y
Digital
s
ound tracks at home. The technolog
y
, when utilized
i
nstead of PCM recordin
g
, also saves recordable disc
s
pace, allowin
g
for hi
g
her video resolution or extended
recordin
g
time on each DVD. DVDs mastered usin
g
Dolb
y
Digital Stereo Creator will pla
y
back on all DVD
-
Video pla
y
ers.
”
N
o
te
:
This is true when the players are compatible with
actua
l r
eco
r
dab
l
e
DVD
d
i
scs.
T
he terms HDMI and HDMI Hi
g
h-Definition Multimedia
I
nterface, and the HDMI Lo
g
o are trademarks or
re
g
istered trademarks of HDMI Licensin
g
LLC in the
U
ni
ted
States
a
n
d
ot
h
e
r
cou
n
t
ri
es.
E9P8CUDZV427MG9BOMv1.indd5E9P8CUDZV427MG9BOMv1.indd5 2012/03/0113:05:462012/03/0113:05:46

6
EN
EN
CONTENTS
Introduction
SAFETY INF
O
RMATI
ON
.
.
.
.
.
.
.
.
.
.
.
.
.
.
.
.
.
.
.
.
.
.
.
.
.
.
.
2
F
EAT
U
RE
S
.
.
.
.
.
.
.
.
.
.
.
.
.
.
.
.
.
.
.
.
.
.
.
.
.
.
.
.
.
.
.
.
.
.
.
.
.
.
.
8
S
y
mbols Used in this Owner’s Manua
l
.
.
.
.
.
.
.
.
.
.
.
.
.
.
.
9
FU
N
C
TI
O
NAL
O
VERVIE
W
.
.
.
.
.
.
.
.
.
.
.
.
.
.
.
.
.
.
.
.
.
.
.
.
10
F
r
o
n
t
P
a
n
el
.
.
.
.
.
.
.
.
.
.
.
.
.
.
.
.
.
.
.
.
.
.
.
.
.
.
.
.
.
.
.
.
.
.
.
.
.
.
.
10
R
ea
r P
a
n
el
.
.
.
.
.
.
.
.
.
.
.
.
.
.
.
.
.
.
.
.
.
.
.
.
.
.
.
.
.
.
.
.
.
.
.
.
.
.
.
.
11
R
e
m
ote
Co
n
t
r
ol
.
.
.
.
.
.
.
.
.
.
.
.
.
.
.
.
.
.
.
.
.
.
.
.
.
.
.
.
.
.
.
.
.
.
.
12
F
ront Panel Displa
y
.
.
.
.
.
.
.
.
.
.
.
.
.
.
.
.
.
.
.
.
.
.
.
.
.
.
.
.
.
.
.
.
14
Connections
C
O
NNECTI
ON
.
.
.
.
.
.
.
.
.
.
.
.
.
.
.
.
.
.
.
.
.
.
.
.
.
.
.
.
.
.
.
.
.
.
.
15
Connecting to an Externa
l
Tune
r
.
.
.
.
.
.
.
.
.
.
.
.
.
.
.
.
.
.
15
T
V Connection
O
vervie
w
.
.
.
.
.
.
.
.
.
.
.
.
.
.
.
.
.
.
.
.
.
.
.
.
.
.
15
Connecting to a TV wit
h
an HDMI™
Compati
bl
e Por
t
.
.
.
.
.
.
.
.
.
.
.
.
.
.
.
.
.
.
.
.
.
.
.
.
.
.
.
.
.
.
.
.
.
.
16
Connecting to a TV wit
h
Component Vi
d
eo Input jac
ks
.
.
.
.
.
.
.
.
.
.
.
.
.
.
.
.
.
.
.
.
.
17
Connecting to a TV wit
h
an S-Vi
d
eo Input Jac
k
.
.
.
.
.
17
Connecting to a TV wit
h
Au
d
io / Vi
d
eo Input Jac
ks
.
18
Connecting to a TV wit
h
out
Au
d
io / Vi
d
eo Input Jac
ks
.
.
.
.
.
.
.
.
.
.
.
.
.
.
.
.
.
.
.
.
.
.
.
.
.
18
Digita
l
Au
d
io Connectio
n
.
.
.
.
.
.
.
.
.
.
.
.
.
.
.
.
.
.
.
.
.
.
.
.
.
.
19
Basic Setup
B
EF
O
RE Y
OU
STAR
T
.
.
.
.
.
.
.
.
.
.
.
.
.
.
.
.
.
.
.
.
.
.
.
.
.
.
.
.
.
20
Finding the Viewing Channel on Your TV
.
.
.
.
.
.
.
.
.
.
V
20
Guide to On-Screen Displa
y
/ Menu
.
.
.
.
.
.
.
.
.
.
.
.
.
.
.
.
21
M
a
in M
e
n
u
.
.
.
.
.
.
.
.
.
.
.
.
.
.
.
.
.
.
.
.
.
.
.
.
.
.
.
.
.
.
.
.
.
.
.
.
.
.
.
.
23
Switc
h
in
g
DVD / VCR Mo
d
e
.
.
.
.
.
.
.
.
.
.
.
.
.
.
.
.
.
.
.
.
.
.
.
.
24
H
ow to Insert a Disc / Cassette Ta
pe
.
.
.
.
.
.
.
.
.
.
.
.
.
.
.
24
I
NITIAL
S
ETTIN
G
.
.
.
.
.
.
.
.
.
.
.
.
.
.
.
.
.
.
.
.
.
.
.
.
.
.
.
.
.
.
.
.
25
SETTING THE CLOCK
. . . . . . . . . . . . . . . . . . . . . . . . . . . .
K
26
Recording
INF
O
RMATI
O
N
O
N DVD RE
CO
RDIN
G
.
.
.
.
.
.
.
.
.
.
.
.
.
27
B
EF
O
RE RE
CO
RDIN
G
.
.
.
.
.
.
.
.
.
.
.
.
.
.
.
.
.
.
.
.
.
.
.
.
.
.
.
.
2
8
M
ake Recordin
g
Compatibl
e
.
.
.
.
.
.
.
.
.
.
.
.
.
.
.
.
.
.
.
.
.
.
2
8
Settin
g
for Auto Chapte
r
.
.
.
.
.
.
.
.
.
.
.
.
.
.
.
.
.
.
.
.
.
.
.
.
.
.
2
8
B
ASI
C
RE
CO
RDING
&
O
NE-T
OUC
H TIMER RE
CO
RDIN
G
.
.
.
.
.
.
.
.
.
.
.
.
.
.
.
.
.
2
9
T
IMER RE
CO
RDIN
G
.
.
.
.
.
.
.
.
.
.
.
.
.
.
.
.
.
.
.
.
.
.
.
.
.
.
.
.
.
.
31
Hints for Timer Recordin
g
.
.
.
.
.
.
.
.
.
.
.
.
.
.
.
.
.
.
.
.
.
.
.
.
.
34
S
ATELLITE LIN
K
.
.
.
.
.
.
.
.
.
.
.
.
.
.
.
.
.
.
.
.
.
.
.
.
.
.
.
.
.
.
.
.
.
35
O
VERWRITING
U
NNE
C
ESSARY TITL
E
.
.
.
.
.
.
.
.
.
.
.
.
.
37
O
verwritin
g
from the Be
g
innin
g
of the Titl
e
.
.
.
.
.
.
.
.
37
O
verwritin
g
in the Middle of the Titl
e
.
.
.
.
.
.
.
.
.
.
.
.
.
.
37
Hints for Overwritin
g
.
.
.
.
.
.
.
.
.
.
.
.
.
.
.
.
.
.
.
.
.
.
.
.
.
.
.
.
.
.
38
SETTINGS F
O
R AN EXTERNAL DEVI
CE
.
.
.
.
.
.
.
.
.
.
.
.
39
Co
nn
ect
i
o
n
to
a
n Ex
te
rn
a
l D
e
vi
ce
.
.
.
.
.
.
.
.
.
.
.
.
.
.
.
.
.
.
39
Settin
g
for the Video Inpu
t
.
.
.
.
.
.
.
.
.
.
.
.
.
.
.
.
.
.
.
.
.
.
.
.
39
Recordin
g
from an External Devic
e
.
.
.
.
.
.
.
.
.
.
.
.
.
.
.
.
4
0
B
I-DIRE
C
TI
O
NAL D
U
BBIN
G
.
.
.
.
.
.
.
.
.
.
.
.
.
.
.
.
.
.
.
.
.
.
41
SETTING A DIS
C
T
O
PR
O
TE
C
T
.
.
.
.
.
.
.
.
.
.
.
.
.
.
.
.
.
.
.
.
4
3
P
LAYING THE DIS
C
S
O
N
O
THER DVD PLAYER
S
.
.
.
.
44
Finalizin
g
a Disc
.
.
.
.
.
.
.
.
.
.
.
.
.
.
.
.
.
.
.
.
.
.
.
.
.
.
.
.
.
.
.
.
.
.
.
44
A
uto Finalizin
g
.
.
.
.
.
.
.
.
.
.
.
.
.
.
.
.
.
.
.
.
.
.
.
.
.
.
.
.
.
.
.
.
.
.
.
.
4
5
E9P8CUDZV427MG9BOMv1.indd6E9P8CUDZV427MG9BOMv1.indd6 2012/03/0113:05:472012/03/0113:05:47

7
EN
EN
Recording Playback Editing
Introduction
Connections Basic Setup Function Setup VCR Functions
Others Español
CONTENTS
Playback
INFORMATION ON PLAYBACK
. . . . . . . . . . . . . . . . . . .
K
46
BASIC PLAYBACK
. . . . . . . . . . . . . . . . . . . . . . . . . . . . . . .
K
48
Direct Playback
.
.
.
.
.
.
.
.
.
.
.
.
.
.
.
.
.
.
.
.
.
.
.
.
.
.
.
.
.
.
.
.
.
.
.
k
48
Pla
y
back from the Title List
.
.
.
.
.
.
.
.
.
.
.
.
.
.
.
.
.
.
.
.
.
.
.
.
49
Pla
y
ing Back an Audio CD and a CD-RW / -R
with MP3
/
JPEG File
s
.
.
.
.
.
.
.
.
.
.
.
.
.
.
.
.
.
.
.
.
.
.
.
.
.
.
.
.
.
.
50
Usin
g
the Title / Disc Men
u
.
.
.
.
.
.
.
.
.
.
.
.
.
.
.
.
.
.
.
.
.
.
.
.
5
1
Pause
.
.
.
.
.
.
.
.
.
.
.
.
.
.
.
.
.
.
.
.
.
.
.
.
.
.
.
.
.
.
.
.
.
.
.
.
.
.
.
.
.
.
.
.
.
5
1
SPECIAL PLAYBACK
. . . . . . . . . . . . . . . . . . . . . . . . . . . . .
K
5
2
Resume Playback
.
.
.
.
.
.
.
.
.
.
.
.
.
.
.
.
.
.
.
.
.
.
.
.
.
.
.
.
.
.
.
.
.
k
5
2
Fast Forward / Fast Reverse Playback
.
.
.
.
.
.
.
.
.
.
.
.
.
.
k
5
2
S
k
ipping TV Commercia
l
s During P
l
a
yb
ac
k
.
.
.
.
.
.
.
.
.
5
2
Rapid Pla
y
bac
k
.
.
.
.
.
.
.
.
.
.
.
.
.
.
.
.
.
.
.
.
.
.
.
.
.
.
.
.
.
.
.
.
.
.
.
.
5
2
Step b
y
Step Pla
y
bac
k
.
.
.
.
.
.
.
.
.
.
.
.
.
.
.
.
.
.
.
.
.
.
.
.
.
.
.
.
.
53
Slow Forward / Slow Reverse Pla
y
bac
k
.
.
.
.
.
.
.
.
.
.
.
.
.
53
Z
oom
.
.
.
.
.
.
.
.
.
.
.
.
.
.
.
.
.
.
.
.
.
.
.
.
.
.
.
.
.
.
.
.
.
.
.
.
.
.
.
.
.
.
.
.
.
53
M
arker Settin
g
.
.
.
.
.
.
.
.
.
.
.
.
.
.
.
.
.
.
.
.
.
.
.
.
.
.
.
.
.
.
.
.
.
.
.
.
5
4
Repeat Playback
.
.
.
.
.
.
.
.
.
.
.
.
.
.
.
.
.
.
.
.
.
.
.
.
.
.
.
.
.
.
.
.
.
.
k
5
4
Random Playback
.
.
.
.
.
.
.
.
.
.
.
.
.
.
.
.
.
.
.
.
.
.
.
.
.
.
.
.
.
.
.
.
.
k
55
S
li
de
S
h
ow
.
.
.
.
.
.
.
.
.
.
.
.
.
.
.
.
.
.
.
.
.
.
.
.
.
.
.
.
.
.
.
.
.
.
.
.
.
.
.
.
55
Program Pla
y
bac
k
.
.
.
.
.
.
.
.
.
.
.
.
.
.
.
.
.
.
.
.
.
.
.
.
.
.
.
.
.
.
.
.
.
55
SEAR
CH
.
.
.
.
.
.
.
.
.
.
.
.
.
.
.
.
.
.
.
.
.
.
.
.
.
.
.
.
.
.
.
.
.
.
.
.
.
.
.
.
56
T
itle / Cha
p
ter Searc
h
.
.
.
.
.
.
.
.
.
.
.
.
.
.
.
.
.
.
.
.
.
.
.
.
.
.
.
.
.
56
T
r
ac
k
Sea
r
ch
.
.
.
.
.
.
.
.
.
.
.
.
.
.
.
.
.
.
.
.
.
.
.
.
.
.
.
.
.
.
.
.
.
.
.
.
.
.
56
T
im
e
Sea
r
ch
.
.
.
.
.
.
.
.
.
.
.
.
.
.
.
.
.
.
.
.
.
.
.
.
.
.
.
.
.
.
.
.
.
.
.
.
.
.
.
5
7
SELE
C
TING THE F
O
RMAT
O
F A
U
DI
O
AND VIDE
O
.
.
58
Switchin
g
Subtitle
s
.
.
.
.
.
.
.
.
.
.
.
.
.
.
.
.
.
.
.
.
.
.
.
.
.
.
.
.
.
.
.
.
58
Switching Audio Soundtrack
.
.
.
.
.
.
.
.
.
.
.
.
.
.
.
.
.
.
.
.
.
.
k
58
Switchin
g
Camera An
g
le
s
.
.
.
.
.
.
.
.
.
.
.
.
.
.
.
.
.
.
.
.
.
.
.
.
.
5
9
Reducin
g
Block Noise
.
.
.
.
.
.
.
.
.
.
.
.
.
.
.
.
.
.
.
.
.
.
.
.
.
.
.
.
.
5
9
Editing
INF
O
RMATI
O
N
O
N DIS
C
EDITIN
G
.
.
.
.
.
.
.
.
.
.
.
.
.
.
.
.
.
60
Gu
i
de
to
a
Ti
t
l
e
Li
st
.
.
.
.
.
.
.
.
.
.
.
.
.
.
.
.
.
.
.
.
.
.
.
.
.
.
.
.
.
.
.
.
60
E
ditin
g
Disc
s
.
.
.
.
.
.
.
.
.
.
.
.
.
.
.
.
.
.
.
.
.
.
.
.
.
.
.
.
.
.
.
.
.
.
.
.
.
.
60
EDITING DIS
CS
.
.
.
.
.
.
.
.
.
.
.
.
.
.
.
.
.
.
.
.
.
.
.
.
.
.
.
.
.
.
.
.
.
.
61
Deletin
g
a Title
.
.
.
.
.
.
.
.
.
.
.
.
.
.
.
.
.
.
.
.
.
.
.
.
.
.
.
.
.
.
.
.
.
.
.
.
61
Puttin
g
Names on Title
s
.
.
.
.
.
.
.
.
.
.
.
.
.
.
.
.
.
.
.
.
.
.
.
.
.
.
.
62
S
ettin
g
Chapter Mark
s
.
.
.
.
.
.
.
.
.
.
.
.
.
.
.
.
.
.
.
.
.
.
.
.
.
.
.
.
.
63
C
learin
g
Chapter Mark
s
.
.
.
.
.
.
.
.
.
.
.
.
.
.
.
.
.
.
.
.
.
.
.
.
.
.
.
64
H
i
d
in
g
C
h
apter
s
.
.
.
.
.
.
.
.
.
.
.
.
.
.
.
.
.
.
.
.
.
.
.
.
.
.
.
.
.
.
.
.
.
.
.
66
S
ettin
g
Pictures for Thumbnail
s
.
.
.
.
.
.
.
.
.
.
.
.
.
.
.
.
.
.
.
.
67
Dividin
g
a Title
.
.
.
.
.
.
.
.
.
.
.
.
.
.
.
.
.
.
.
.
.
.
.
.
.
.
.
.
.
.
.
.
.
.
.
.
68
P
uttin
g
Name on
D
isc
.
.
.
.
.
.
.
.
.
.
.
.
.
.
.
.
.
.
.
.
.
.
.
.
.
.
.
.
.
69
E
rasin
g
D
is
c
.
.
.
.
.
.
.
.
.
.
.
.
.
.
.
.
.
.
.
.
.
.
.
.
.
.
.
.
.
.
.
.
.
.
.
.
.
.
.
7
0
M
akin
g
Edits Compatibl
e
.
.
.
.
.
.
.
.
.
.
.
.
.
.
.
.
.
.
.
.
.
.
.
.
.
.
71
Function Setup
LIST
O
F SETTING
S
.
.
.
.
.
.
.
.
.
.
.
.
.
.
.
.
.
.
.
.
.
.
.
.
.
.
.
.
.
.
.
7
2
S
ETUP
S
.
.
.
.
.
.
.
.
.
.
.
.
.
.
.
.
.
.
.
.
.
.
.
.
.
.
.
.
.
.
.
.
.
.
.
.
.
.
.
.
.
74
P
l
ay
b
ac
k
.
.
.
.
.
.
.
.
.
.
.
.
.
.
.
.
.
.
.
.
.
.
.
.
.
.
.
.
.
.
.
.
.
.
.
.
.
.
.
.
.
.
74
Disp
l
a
y
.
.
.
.
.
.
.
.
.
.
.
.
.
.
.
.
.
.
.
.
.
.
.
.
.
.
.
.
.
.
.
.
.
.
.
.
.
.
.
.
.
.
.
77
Vi
d
e
o
.
.
.
.
.
.
.
.
.
.
.
.
.
.
.
.
.
.
.
.
.
.
.
.
.
.
.
.
.
.
.
.
.
.
.
.
.
.
.
.
.
.
.
.
.
80
HD
M
I
.
.
.
.
.
.
.
.
.
.
.
.
.
.
.
.
.
.
.
.
.
.
.
.
.
.
.
.
.
.
.
.
.
.
.
.
.
.
.
.
.
.
.
.
.
81
Reset A
ll
.
.
.
.
.
.
.
.
.
.
.
.
.
.
.
.
.
.
.
.
.
.
.
.
.
.
.
.
.
.
.
.
.
.
.
.
.
.
.
.
.
.
82
VCR Functions
V
C
R F
U
N
C
TI
O
N
S
.
.
.
.
.
.
.
.
.
.
.
.
.
.
.
.
.
.
.
.
.
.
.
.
.
.
.
.
.
.
.
.
83
I
nf
o
rm
at
i
o
n
o
n V
C
R F
u
n
ct
i
o
n
s
.
.
.
.
.
.
.
.
.
.
.
.
.
.
.
.
.
.
.
.
.
83
P
l
a
yb
ac
k
.
.
.
.
.
.
.
.
.
.
.
.
.
.
.
.
.
.
.
.
.
.
.
.
.
.
.
.
.
.
.
.
.
.
.
.
.
.
.
.
.
.
83
Recor
d
in
g
.
.
.
.
.
.
.
.
.
.
.
.
.
.
.
.
.
.
.
.
.
.
.
.
.
.
.
.
.
.
.
.
.
.
.
.
.
.
.
.
.
83
O
ne-touch Timer Recordin
g
(OTR
)
.
.
.
.
.
.
.
.
.
.
.
.
.
.
.
.
.
84
I
n
de
x
Sea
r
ch
.
.
.
.
.
.
.
.
.
.
.
.
.
.
.
.
.
.
.
.
.
.
.
.
.
.
.
.
.
.
.
.
.
.
.
.
.
.
84
T
im
e
Sea
r
ch
.
.
.
.
.
.
.
.
.
.
.
.
.
.
.
.
.
.
.
.
.
.
.
.
.
.
.
.
.
.
.
.
.
.
.
.
.
.
.
85
O
t
h
er Operation
s
.
.
.
.
.
.
.
.
.
.
.
.
.
.
.
.
.
.
.
.
.
.
.
.
.
.
.
.
.
.
.
.
.
85
Others
TR
OU
BLESH
OO
TIN
G
.
.
.
.
.
.
.
.
.
.
.
.
.
.
.
.
.
.
.
.
.
.
.
.
.
.
.
.
86
LANG
U
AGE
CO
D
E
.
.
.
.
.
.
.
.
.
.
.
.
.
.
.
.
.
.
.
.
.
.
.
.
.
.
.
.
.
.
.
9
0
GL
O
SSAR
Y
.
.
.
.
.
.
.
.
.
.
.
.
.
.
.
.
.
.
.
.
.
.
.
.
.
.
.
.
.
.
.
.
.
.
.
.
.
91
SPE
C
IFI
C
ATI
O
N
S
.
.
.
.
.
.
.
.
.
.
.
.
.
.
.
.
.
.
.
.
.
.
.
.
.
.
.
.
.
.
.
.
92
Español
ESPA
ÑOL
.
.
.
.
.
.
.
.
.
.
.
.
.
.
.
.
.
.
.
.
.
.
.
.
.
.
.
.
.
.
.
.
.
.
.
.
.
.
.
93
LIMITE
D
WA
RR
ANT
Y
.
.
.
.
.
.
.
.
.
.
.
.
.
.
.
.
.
.
.
.
Ba
c
k
c
o
ve
r
E9P8CUDZV427MG9BOMv1.indd7E9P8CUDZV427MG9BOMv1.indd7 2012/03/0113:05:472012/03/0113:05:47

8
EN
EN
FEATURES
T
his unit not onl
y
pla
y
s back DVD, CD and VCR but also o
ff
ers
f
eatures
f
or
y
ou to record on DVD and edit them a
f
ter
that. The
f
ollowin
g
f
eatures are o
ff
ered with this unit
.
Th
is unit is com
p
ati
bl
e wit
h
DVD+RW/DVD-RW, w
h
ic
h
are rewrita
bl
e repeate
dl
y an
d
DVD+R/DVD-R, w
h
ic
h
are
available for recording once. Even if
y
ou choose DVD
-
RW/DVD-R, these discs will automaticall
y
be recorded in
the DVD+VR mode. Also, this unit allows
y
ou to record
to the cassette tape. You can choose either one for
y
our
co
nv
e
ni
e
n
ce.
DVD VCR
U
p to 12 pro
g
ram recordin
g:
Y
ou can pro
g
ram t
h
e unit to recor
d
up to 12 pro
g
rams
within a one-month period. Dail
y
or weekl
y
program
recordin
g
s are also available
.
One-touch timer recordin
g
(OTR)
:
Y
ou can easil
y
set a recording time as
y
ou prefer. Ever
y
t
im
e
[
REC
]
is pressed durin
g
recordin
g
, the recordin
g
time will be increased b
y
30 minutes up to 6 hours for
DVD, and 8 hours for VCR. The recording automaticall
y
stops when the recording time
y
ou set is reached or the
d
i
sc
i
s
f
u
ll
.
D
u
bb
ing mo
d
e
:
Y
ou can copy a
D
V
D
to a cassette tape or copy a cassette
tape to a DVD. This
f
unction will be possible only i
f
the
DVD or a cassette tape is not cop
y
protecte
d.
Y
ou cannot recor
d
on a cassette tape w
h
en its erase-pro
-
tection ta
b
is remove
d.
L
eft channel stereo recordin
g:
T
his unit can record the sound o
f
the le
f
t channel monau
-
ral input as le
f
t and right channels automatically
.
DVD
Automatic chapter mark settin
g:
C
hapter marks will be put on recordings as
y
ou set before
attemptin
g
to record
.
Automatic tit
l
e
l
ist ma
k
ing
:
Th
e unit ma
k
es a tit
l
e
l
ist wit
h
t
h
e in
d
ex automatica
ll
y
.
Recor
d
in
g
DVD
D
eletin
g
titles
:
You can delete titles which
y
ou do not need an
y
more
.
P
utting names on tit
l
es
:
You can put your
f
avorite names on titles
.
Settin
g
/ c
l
earin
g
c
h
apter mar
k
s:
You can set / c
l
ear c
h
a
p
ter mar
k
s on tit
l
es
.
Hidin
g
chapters
:
T
o keep others from pla
y
ing back some chapters without
permission,
y
ou can hide chapters
.
Setting pictures
f
or thumbnails
:
You can change pictures
f
or thumbnails
.
D
ividing titles (DVD+RW/DVD-RW onl
y
)
:
Y
ou
ca
n
d
ivi
de
a
t
i
t
l
e
in
to
2
o
r m
o
r
e.
P
uttin
g
name on disc
:
You can put
y
our favorite disc name
.
E
d
itin
g
DVD
Th
eater surroun
d
soun
d
in
y
our
h
ome
:
W
hen connectin
g
the unit to an amplifier or a decoder
which is compatible with Dolb
y
Digital,
y
ou can experi
-
e
n
ce
t
h
e
t
h
eate
r
su
rr
ou
n
d
sou
n
d
f
r
o
m
d
i
scs
wi
t
h
su
r-
roun
d
soun
d
s
y
stem
.
Quick search for what
y
ou want to watch
:
Y
ou can easil
y
find the part
y
ou want to watch using the
search function. Search for a desired point on a disc b
y
title, cha
p
ter or time
.
P
laying back MP3 / JPEG / KODAK Picture CD
f
iles:
Y
ou can enjoy MP3 / JPEG / KODAK Picture CD
f
iles which
are recor
d
e
d
on CD-RW/-R
.
P
l
ay
b
ac
k
DVD
Available
f
or playing back discs on a regular DVD
p
l
ayer
:
R
ecor
d
e
d
d
iscs can
b
e p
l
aye
d
b
ac
k
on regu
l
ar DVD
p
l
ayers, inc
l
u
d
ing computer DVD
d
rives compati
bl
e
wit
h
DVD-vi
d
eo p
l
ay
b
ac
k
. A
l
t
h
oug
h
DVD+R are p
l
aya
bl
e
on other units without
f
inalization in most cases, it
is recommended to
f
inalize in order to stabilize the
per
f
ormance. For DVD-RW/-R, you need to
f
inalize the
recor
d
e
d
d
iscs to p
l
ay
b
ac
k
on ot
h
er DVD p
l
ayers
.
Compatibilit
y
DVD VCR
P
rogressive scan s
y
ste
m
Unlike conventional interlace scannin
g
, the pro
g
ressive
scan s
y
stem provides less flickering and images in higher
resolution than that of traditional television si
g
nals
.
HDMI (High-De
f
inition Multimedia Inter
f
ace
)
You can enjoy c
l
earer au
d
io/vi
d
eo output w
h
en connecting
t
h
is unit to a
d
isp
l
ay
d
evice wit
h
an HDMI-compati
bl
e port.
O
ther
s
VCR
Quick search for what you want to watch
:
You can easil
y
find the part
y
ou want to watch using the
index search
/
time search
f
unctions. An index mark will be
assigned at the beginning o
f
each recording you make.
For time search
f
unction,
y
ou can go to a speci
f
ic point on
a cassette tape b
y
entering the exact amount o
f
time
y
ou
wis
h
to s
k
ip
.
E9P8CUDZV427MG9BOMv1.indd8E9P8CUDZV427MG9BOMv1.indd8 2012/03/0113:05:472012/03/0113:05:47
9
EN
EN
Recording Playback Editing
Introduction
Connections Basic Setup Function Setup VCR Functions
Others Español
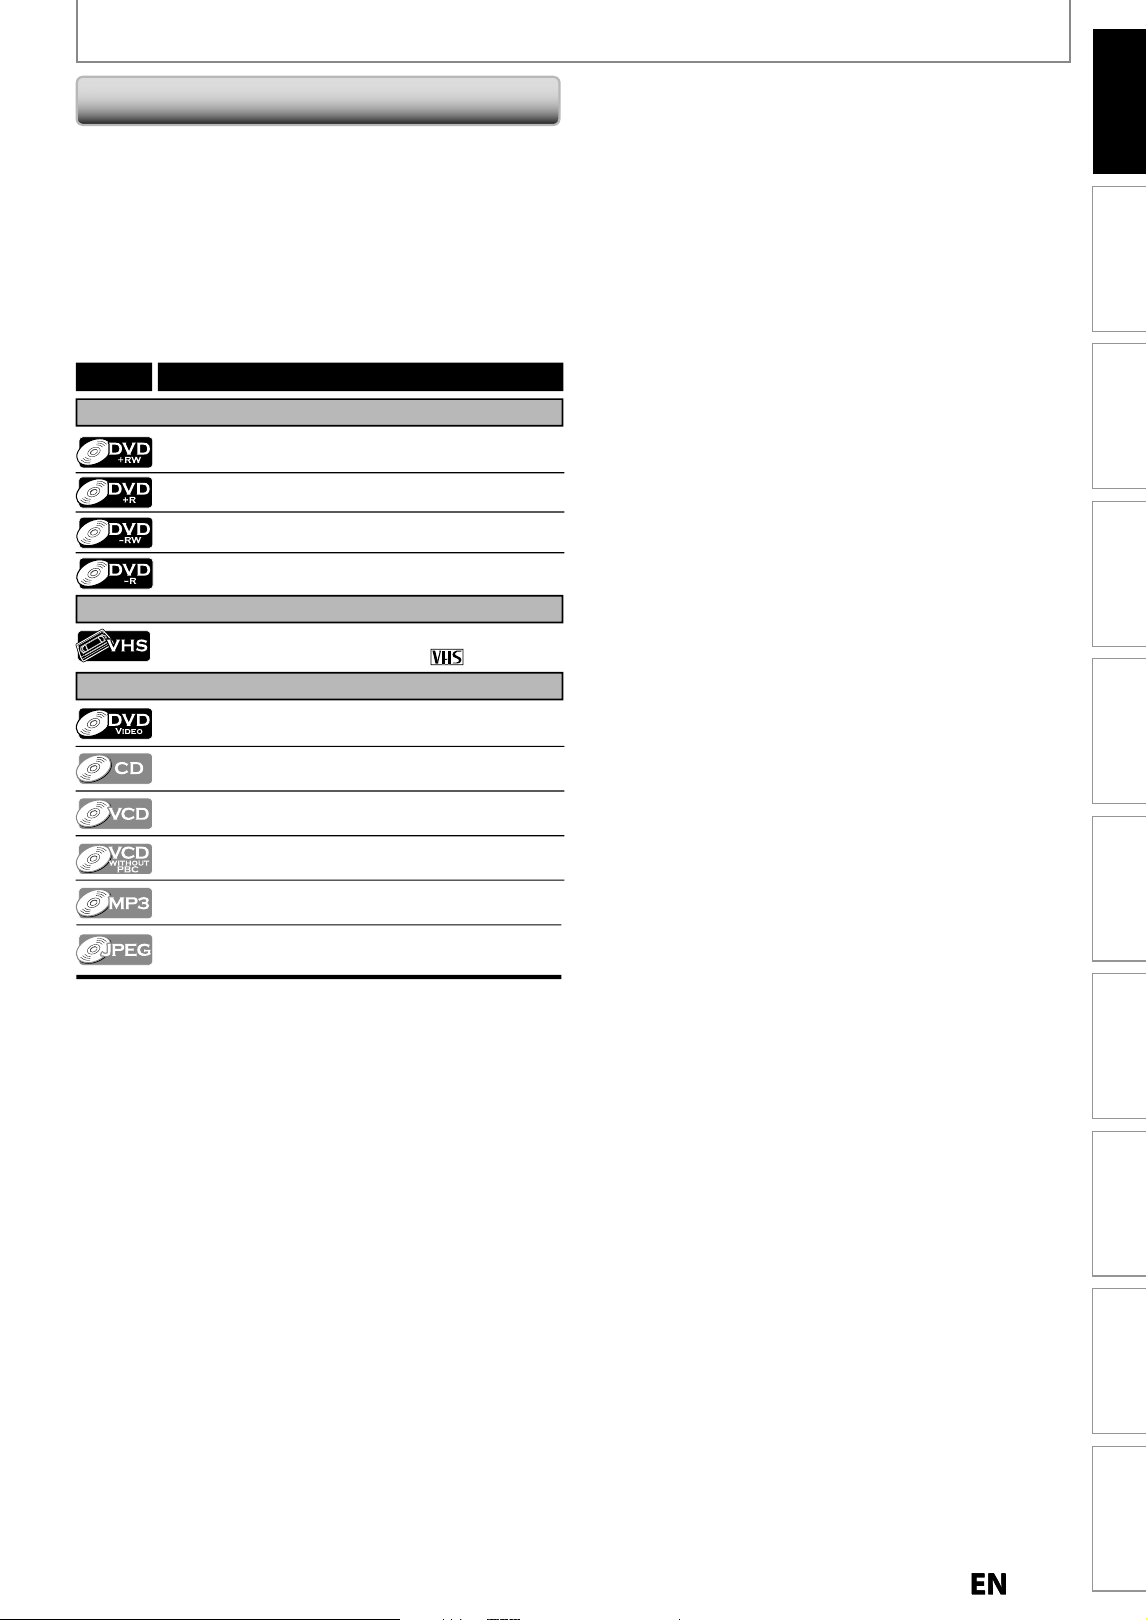
Symbols Used in this Owner’s Manua
l
T
o speci
f
y
f
or what disc type each
f
unction is, we put
t
he following s
y
mbols at the beginning of each item to
o
p
era
t
e
.
* DVD-RW/-R recor
d
e
d
in VR mo
d
e or non compati
bl
e
recording format are not pla
y
able
.
* DVD-RW r
eco
r
ded
in
t
h
e
m
ode
ot
h
e
r
t
h
a
n +VR i
s
n
ot
recordable on this unit unless
y
ou erase all contents in
the disc (refer to pa
g
e 70)
.
* DVD-R r
eco
r
ded
in
t
h
e
m
ode
ot
h
e
r
t
h
a
n +VR i
s
n
ot
r
eco
r
dab
l
e
o
n
t
hi
s
u
ni
t.
Symbol
For Recording, Playing Back, and Editing
For Recording and Playing Back
Description
Description refers to DVD+RW
Description refers to DVD+R
Description refers to DVD-RW
Description refers to DVD-R
For Playback only
Description refers to audio CD
Description refers to video CD with PBC function
Description refers to video CD without PBC
function
Description refers to CD-RW/-R with MP3 les
Description refers to DVD-video
Description refers to VHS tapes
Use only cassettes marked VHS ( )
If you do not nd any of the symbols listed above under the
function heading, the operation is applicable to all media.
Description refers to CD-RW/-R with JPEG les
(KODAK Picture CD les included)
FEATURES
E9P8CUDZV427MG9BOMv1.indd9E9P8CUDZV427MG9BOMv1.indd9 2012/03/0113:05:482012/03/0113:05:48
1
0
EN
EN
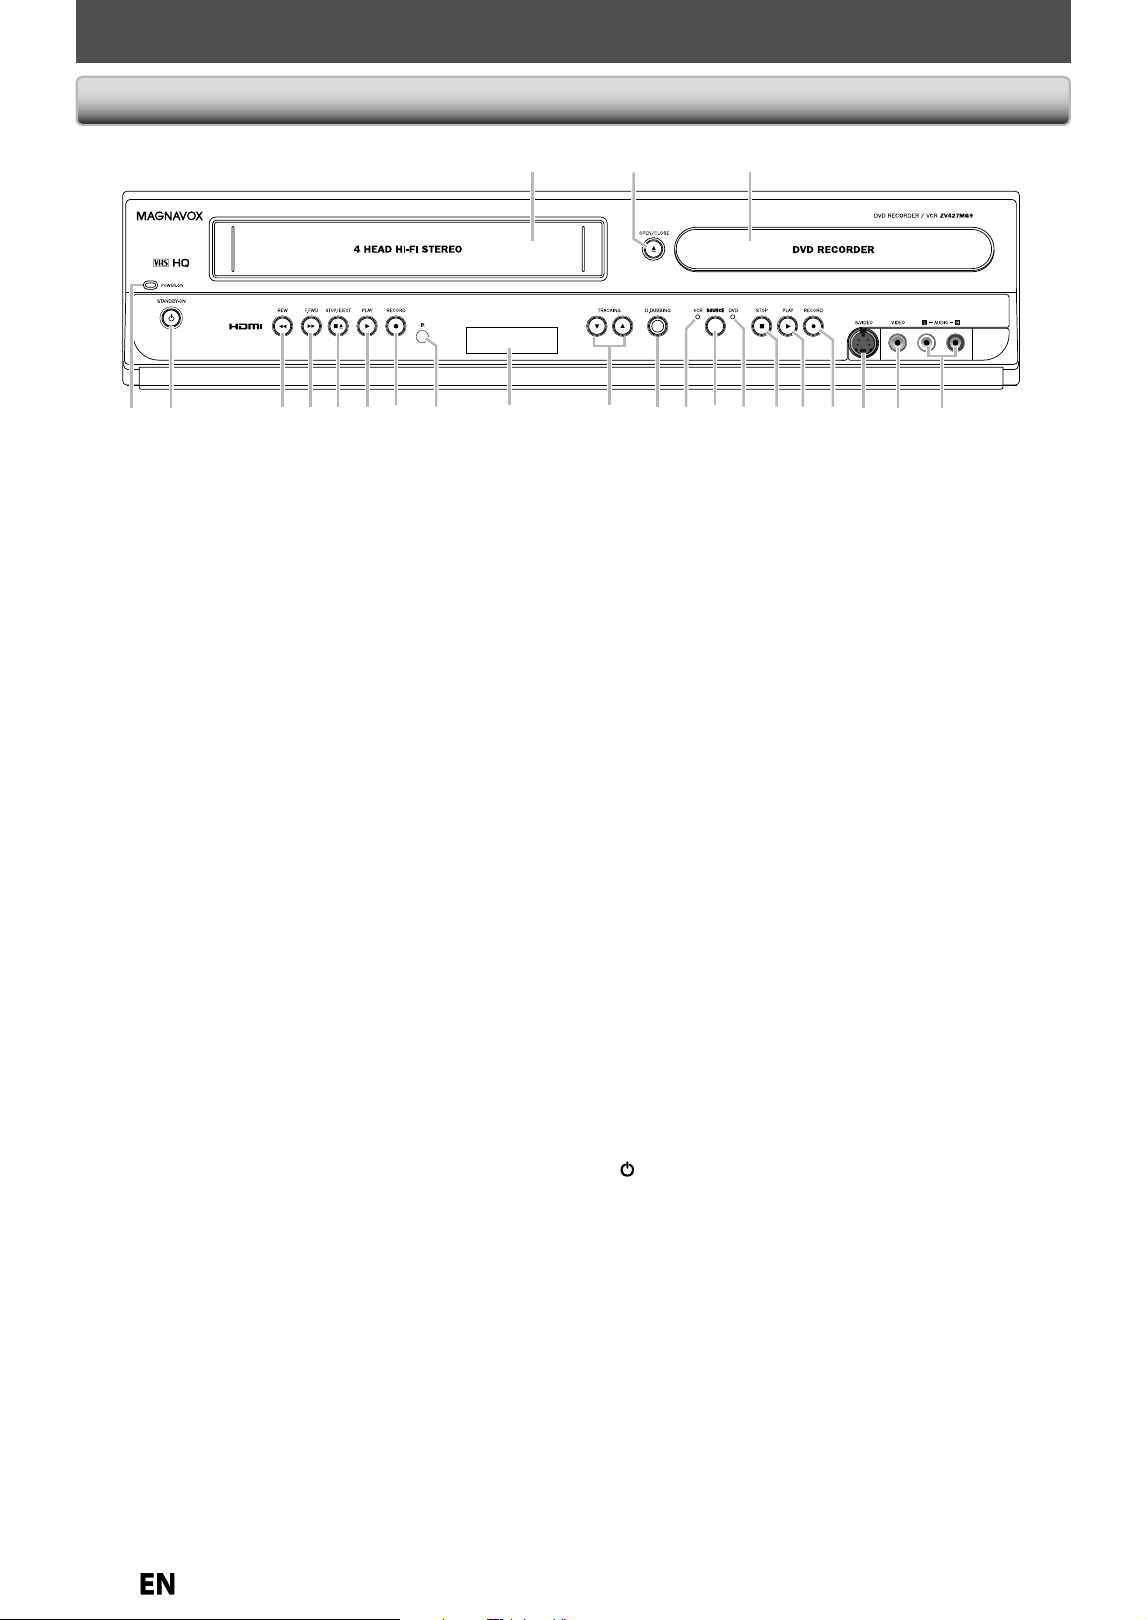
FUNCTIONAL OVERVIEW
12* 3
6 5 422 21 13 11 1012 9 8* 720 19 18 17 1516 1423
Fr
o
nt P
a
ne
l
(
*
)
Th
e unit can a
l
so
b
e turne
d
on
by
pressing t
h
ese
b
uttons or inserting a cassette tape
.
1. Cassette com
p
artment (VCR
)
Insert a cassette ta
p
e here
.
2
.
A
OPEN/CLOSE button
(
DVD
)*
Press to open or close the disc tra
y.
3. Disc tra
y
(DVD
)
Place a disc when it is o
p
en
.
4. AUDIO input
j
acks (L2) (DVD/VCR
)
Use
to
co
nn
ect
e
x
te
rn
a
l
de
vi
ce
wi
t
h
a
n R
C
A
aud
i
o
cab
l
e.
5. VIDEO input
j
ack (L2) (DVD/VCR
)
Use
to
co
nn
ect
e
x
te
rn
a
l
de
vi
ce
wi
t
h
a
n R
C
A vi
deo
cab
l
e.
6. S-VIDEO input
j
ack (L2) (DVD/VCR)
Use to connect the S-video out
p
ut of external device
wi
t
h
a
n
S
-vi
deo
cab
l
e.
7
.
I
RECORD button
(
DVD
)
• Press once to start a recordin
g.
• Press repeatedl
y
to start the one-touch timer
recordin
g.
8.
B
PLAY button
(
DVD
)*
Press to start or resume pla
y
back
.
9
.
C
STOP button
(
DVD
)
• Press to stop pla
y
back or recording
.
• Press to stop the proceedin
g
timer recordin
g
in DVD
.
1
0.
DVD in
d
ic
a
t
or
Li
g
hts up when the DVD output mode is selected
.
11. SOURCE button
(
DVD/VCR
)
Press to select the component
y
ou wish to operate
.
12
.
V
C
R in
d
ic
a
t
or
Li
g
hts up when the VCR output mode is selected
.
13. D.DUBBING button
(
DVD/VCR
)
Press to start VCR to DVD (DVD to VCR) du
p
lication
which
y
ou set in the main menu
.
14
.
TRA
C
KING
L
/
K
buttons
(
VCR
)
• Press to adjust the tracking during pla
y
back or in
slow motion of the cassette ta
p
e
.
• While pla
y
back is in still mode,
y
ou can adjust the
picture blurred verticall
y.
15. Disp
l
ay (DVD/VCR
)
Re
f
er to “Front Panel Display” on page 14
.
16. In
f
rared sensor window (DVD/VCR
)
Receive signals
f
rom your remote control so that you
can control the unit
f
rom a distance.
17
.
I
RECORD
b
utton (VCR
)
Press once to start a recor
d
ing. Press repeate
dl
y to
start t
h
e one-touc
h
timer recor
d
ing
.
1
8
.
B
PLAY
b
utton (VCR
)
Press to start p
l
ay
b
ac
k.
1
9
.
C
A
S
TOP/EJECT
b
utton (VCR
)
•
Press to remove the cassette tape
f
rom the cassette
compar
t
men
t
.
•
Press to stop cassette tape p
l
ay
b
ac
k
or recor
d
ing
.
•
Press to stop t
h
e procee
d
ing timer recor
d
ing in VCR
.
20
.
D
F.FWD
b
utton (VCR
)
Press to rapi
dl
y a
d
vance t
h
e cassette tape, or view t
h
e
picture rapidly in
f
orward during playback (
f
orward
searc
h
)
.
2
1.
E
REW
b
utton (VCR
)
Press to rewin
d
t
h
e cassette tape, or to view t
h
e
picture rapi
dl
y in reverse
d
uring p
l
ay
b
ac
k
(rewin
d
searc
h
)
.
22
.
y
y
STANDBY-ON
b
utton (DVD/VCR
)
Press to turn on t
h
e unit, or to turn t
h
e unit to t
h
e
stan
db
y mo
d
e. (To comp
l
ete
l
y s
h
ut
d
own t
h
e unit,
you must unp
l
ug t
h
e AC power cor
d
.
)
23. POWER-ON in
d
icator (DVD/VCR
)
Re
d
LED
l
ig
h
ts up w
h
en power is on
.
E9P8CUDZV427MG9BOMv1.indd10E9P8CUDZV427MG9BOMv1.indd10 2012/03/0113:05:482012/03/0113:05:48
11
EN
EN
Recording Playback Editing
Introduction
Connections Basic Setup Function Setup VCR Functions
Others Español
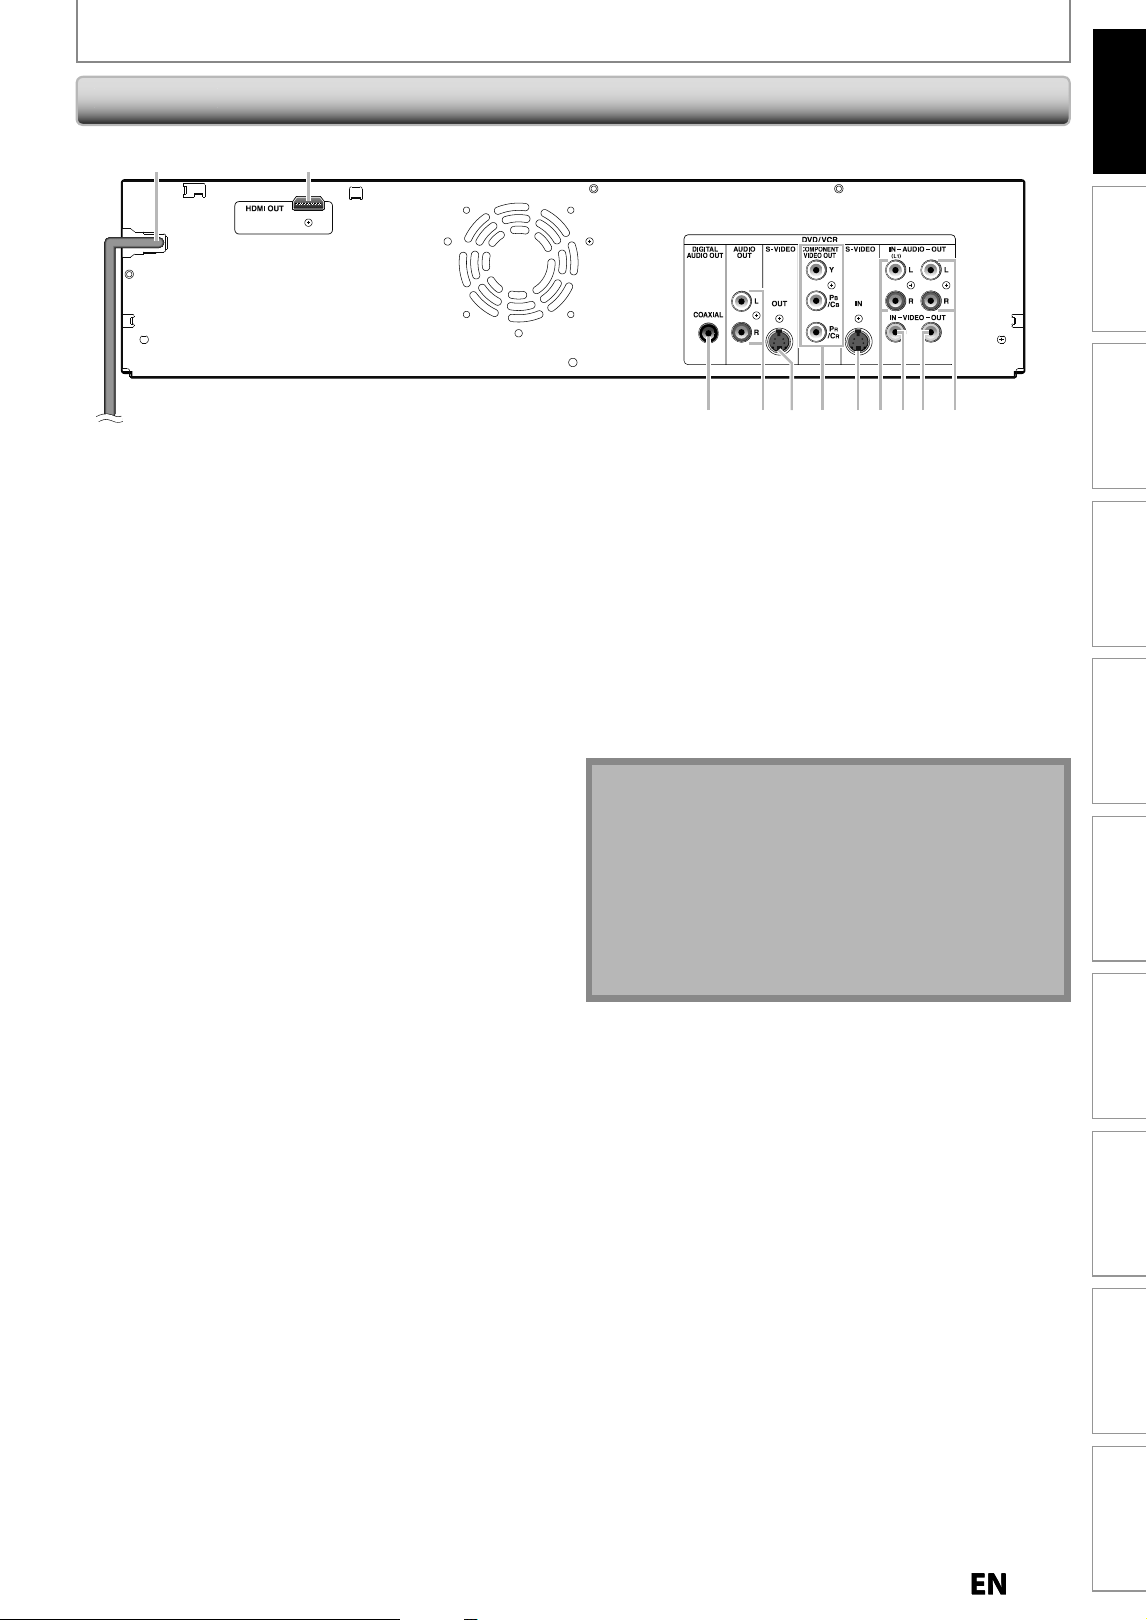
1 2
37910 8 6 453
R
e
a
r P
a
ne
l
FUNCTIONAL OVERVIEW
Note
•
Do not touch the inner pins o
f
the jacks on the rear
pane
l
. E
l
ectrostatic
d
isc
h
arge ma
y
cause permanent
d
amage to t
h
e unit
.
•
T
h
is unit
d
oes not
h
ave t
h
e RF mo
d
u
l
ator.
C
aution on usin
g
S-video, component, or HDMI
co
nnecti
o
n f
o
r V
C
R
:
•
On
ly
t
h
e p
l
a
yb
ac
k
vi
d
eo/au
d
io are avai
l
a
bl
e wit
h
these
co
nn
ect
i
o
n
s.
1
.
A
C
P
o
wer
Co
r
d
•
Connect to a standard AC outlet to suppl
y
power to this
u
ni
t.
•
Unplug this cord from the AC outlet to completel
y
shut
do
wn
t
h
e
u
ni
t.
2. HDMI OUT
j
ac
k
Use an HDMI cable to connect to a displa
y
with an
H
DMI com
p
atible
p
ort
.
3. AUDIO OUT
j
ack
s
Use to connect a TV monitor
,
AV receiver or other
de
vi
ce
wi
t
h
a
n R
C
A
aud
i
o
cab
l
e.
4. VIDEO OUT
j
ac
k
Use to connect a TV monitor
,
AV receiver or other
de
vi
ce
wi
t
h
a
n R
C
A vi
deo
cab
l
e.
5. VIDEO IN
j
ack (L1
)
Use
to
co
nn
ect
e
x
te
rn
a
l
de
vi
ce
wi
t
h
a
n R
C
A vi
deo
cab
l
e.
6. AUDIO IN
j
acks (L1
)
Use
to
co
nn
ect
e
x
te
rn
a
l
de
vi
ce
wi
t
h
a
n R
C
A
aud
i
o
cab
l
e.
7. S-VIDEO IN
j
ack (L1
)
Use to connect the S-video out
p
ut of external device
wi
t
h
a
n
S
-vi
deo
cab
l
e.
8. COMPONENT VIDEO OUT
j
ack
s
Use to connect a TV monitor with com
p
onent video
in
p
uts with a com
p
onent video cable
.
9. S-VIDEO OUT
j
ac
k
Use to connect the S-video in
p
ut of a TV monitor, A
V
r
ece
iv
e
r
o
r
ot
h
e
r
de
vi
ce
wi
t
h
a
n
S
-vi
deo
cab
l
e.
10. COAXIAL DIGITAL AUDIO OUT
j
ac
k
Use to connect an AV receiver, Dolb
y
Digital decoder
o
r other device with a digital audio coaxial input
j
ac
k
w
ith a di
g
ital audio coaxial cable
.
E9P8CUDZV427MG9BOMv1.indd11E9P8CUDZV427MG9BOMv1.indd11 2012/03/0113:05:492012/03/0113:05:49
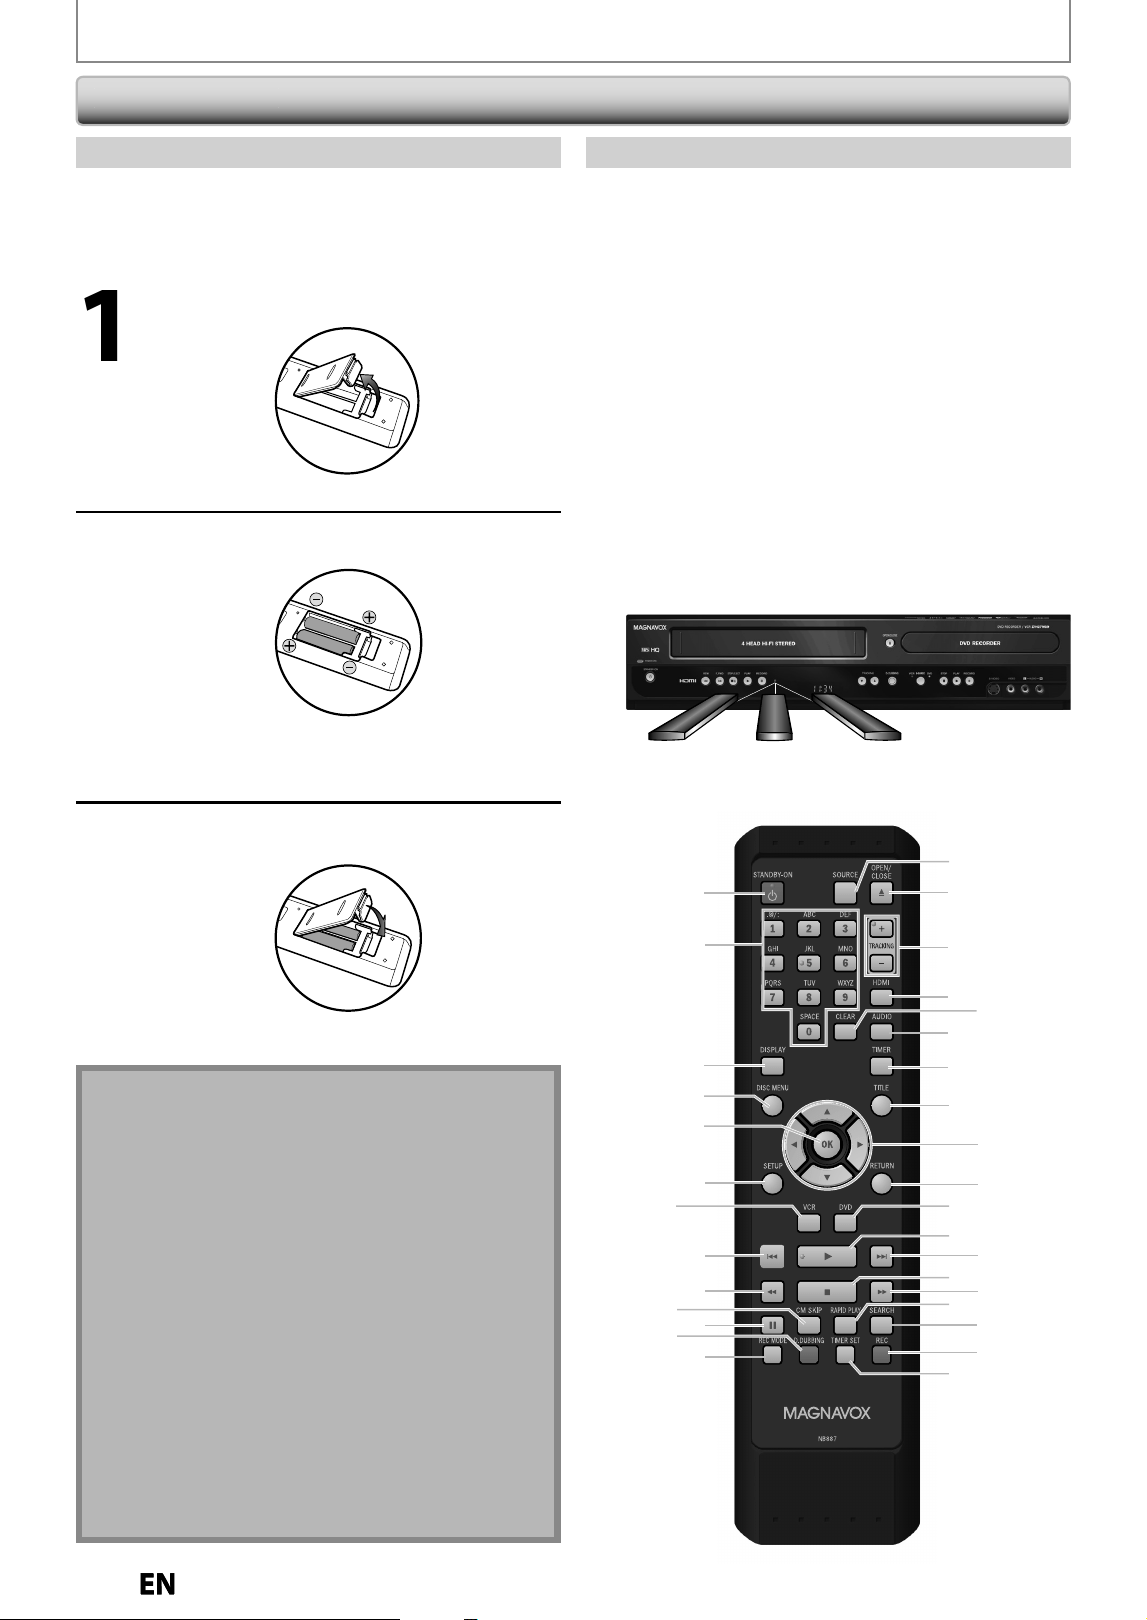
12
EN
EN
FUNCTIONAL OVERVIEW
Using a Remote Contro
l
15
19
20
21
24
27
31
1
2
4
6
8
10
9
13
3
25
17
16
12
11
14
29
7
22
23
26
28
30
32
18
5
K
eep in mind the
f
ollowin
g
when usin
g
the remote
co
n
t
r
ol:
• Ma
k
e sure t
h
at t
h
ere are no o
b
stac
l
es
b
etween t
h
e remote
control and the in
f
rared sensor window on the unit
.
•
Remote operation may become unreliable i
f
strong
sunlight or
f
luorescent light is shining on the in
f
rared
sensor window o
f
the unit
.
•
Remote control
f
or di
ff
erent devices can inter
f
ere with
each other. Avoid using remote control
f
or other device
located
close
to
the
u
ni
t.
•
Replace the batteries when
y
ou notice a
f
all o
ff
in the
operating range o
f
the remote control
.
•
The maximum operable ranges
f
rom the unit are as
fo
ll
o
w
s.
-
Line o
f
sigh
t
: approx. 23
f
eet (7m
)
-
Either side o
f
the center
:
approx. 16
f
eet (5m) within 30
°
-
A
bo
ve
:
approx. 16
f
eet (5m) within 15
°
-
Be
l
ow
:
approx. 10
f
eet (3m) within 30
°
Insta
ll
t
h
e
b
atteries (AA 1.5V × 2) matc
h
ing t
h
e po
l
arit
y
indicated inside batter
y
compartment of the remote
contro
l.
N
ot
e
I
n
co
rr
ect
use
o
f
batte
ri
es
ca
n r
esu
l
t
in h
a
z
a
r
ds
suc
h
as
leaka
g
e and burstin
g
. Please observe the followin
g:
•
Lit
h
ium or ni-ca
d
an
d
ni-m
h
rec
h
ar
g
ea
bl
e
b
atteries
a
r
e
n
ot
r
eco
mm
e
n
ded
to
use
f
o
r r
e
m
ote
co
n
t
r
o
l
.
•
Do not mix di
ff
erent types o
f
batteries such as
a
lk
a
l
ine an
d
stan
d
ar
d
(car
b
on-zinc)
.
•
Do not mix new and old batteries to
g
ether
.
•
Do not use di
ff
erent kinds o
f
batteries to
g
ether.
Although the
y
ma
y
look similar, different batteries
ma
y
have different voltages
.
•
Make sure that the + and - ends o
f
each battery
matc
h
t
h
e in
d
ications in t
h
e
b
attery compartment
.
•
Remove batteries from batter
y
compartment that is
not
g
oin
g
to be used for a month or more
.
•
W
hen disposing o
f
used batteries, please compl
y
with
g
overnmental re
g
ulations or environmental public
instruction’s ru
l
es t
h
at app
ly
in
y
our countr
y
or area
.
•
Do not rec
h
arge, s
h
ort-circuit,
h
eat,
b
urn or
d
isassem
bl
e
b
atteries
.
16 feet (5m)
30˚
16 feet (5m)
30˚
23 feet (7m)
Rem
o
te
Co
ntr
ol
Insta
ll
ing t
h
e Batteries in t
h
e Remote Contro
l
1
O
p
en the cover
.
2
In
s
ert
ba
tterie
s.
M
ake
su
r
e
to
m
atch
+
a
n
d
-
o
n
the
batte
ri
es
to
t
h
e mar
k
s in
d
icate
d
in t
h
e
b
atter
y
compartment
.
3
C
l
os
e the c
o
ver
.
E9P8CUDZV427MG9BOMv1.indd12E9P8CUDZV427MG9BOMv1.indd12 2012/03/0113:05:492012/03/0113:05:49
1
3
EN
EN
Recording Playback Editing
Introduction
Connections Basic Setup Function Setup VCR Functions
Others Español
FUNCTIONAL OVERVIEW
1
.
STANDBY-
O
N
yy
b
utton
(
DVD/VCR
)
• Press to turn on the unit
,
or to turn the unit to the
stan
dby
mo
d
e. (To comp
l
ete
ly
s
h
ut
d
own t
h
e unit,
y
ou must unplug the AC power cord.)
2. Num
b
er/C
h
aracter
b
uttons
(
DVD/VCR
)
• Press to select a title/chapter/track/file on displa
y
.
• Press to enter values for the settin
g
s in the main menu
.
•Pr
ess
to
e
n
te
r
t
i
t
l
e
n
a
m
es.
• Press to start the index
/
time search in VCR mode.
3. DISPLAY button
(
DVD/VCR
)
• Press to displa
y
the displa
y
menu on or off.
4. DISC MENU button
(
DVD
)
• Press to displa
y
the disc menu
.
5. OK button
(
DVD/VCR
)
• Pr
ess
to
co
nfirm
o
r
se
l
ect
m
e
n
u
i
te
m
s.
6. SETUP button
(
DVD/VCR
)
• Press to displa
y
the main menu
.
• During DVD pla
y
back, press and hold for more than
3 seconds to switch the pro
g
ressive scannin
g
mode
to
t
h
e
in
te
rl
ace
m
ode.
7
.
V
C
R
bu
tt
on
• Press to select the VCR out
p
ut mode
.
8.
PREV
H
button
(
DVD
)
• During pla
y
back, press to return to the beginning o
f
the current cha
p
ter, track or file
.
• When pla
y
back is in pause, press repeatedl
y
to
reverse the pla
y
back step b
y
step
.
9
.
REW
E
button
(
DVD/VCR
)
DVD m
od
e
:
• During pla
y
back, press to fast reverse pla
y
back
.
• When pla
y
back is paused, press to slow reverse pla
y
back
.
V
C
R m
od
e
:
• During pla
y
back, press to rewind the cassette tape
or to view the picture rapidl
y
in reverse
.
10. CM SKIP button
(
DVD
)
• During pla
y
back, press to skip 30 seconds
.
11
.
PA
U
SE
F
button
(
DVD/VCR
)
• Press to pause pla
y
back or recording
.
12. D.DUBBING button
(
DVD/VCR
)
• Press to start VCR to DVD (DVD to VCR) du
p
lication
which
y
ou set in the main menu
.
13. REC MODE button
(
DVD/VCR
)
• Press repeatedl
y
to switch the recording mode
.
14. SOURCE button
(
DVD/VCR
)
• Press to select the a
pp
ro
p
riate in
p
ut
.
15. OPEN
/
CLOSE
A
button
(
DVD/VCR
)
DVD m
od
e
:
• Press to open or close the disc tra
y
.
V
C
R m
od
e
:
• Press to remove the cassette ta
p
e from the cassette
com
p
artment
.
1
6.
TRA
C
KING
/
buttons
(
VCR
)
• Press to adjust the tracking during pla
y
back or in
slow motion of the cassette ta
p
e
.
• While pla
y
back is in still mode,
y
ou can adjust the
picture blurred verticall
y
.
17. HDMI button
(
DVD
)
• Press to set the HDMI connector’s video si
g
nal out
-
p
ut mode.
18. CLEAR button
(
DVD/VCR
)
DVD m
od
e
:
• Press to clear the
p
assword once entered or to can-
cel the pro
g
rammin
g
for CD or to clear the selected
marker number
,
etc
.
V
C
R m
od
e
:
• Press to reset the ta
p
e counter
.
19. AUDIO
b
utton (DVD/VCR)
DVD mo
d
e:
• Press to displa
y
the audio menu during pla
y
back
.
V
C
R m
od
e
:
• During pla
y
back of a Hi-Fi videotape, press to
c
h
an
g
e t
h
e au
d
io out settin
g
.
20. TIMER button
(
DVD/VCR
)
• Press to displa
y
the timer programming list
.
21. TITLE button
(
DVD
)
• Press to displa
y
the title list
.
22
.
Cu
r
so
r
K
/
L
/
{
/
{
B
buttons
(
DVD/VCR
)
• Press to select items or settin
g
s.
23. RETURN button
(
DVD/VCR
)
• Press to return to the previousl
y
displa
y
ed menu screen
.
24
.
DVD
bu
tt
o
n
• Press to select the DVD out
p
ut mode.
2
5.
PLAY
B
button
(
DVD/VCR
)
• Press to start pla
y
back or resume pla
y
back.
2
6.
NEXT
G
button
(
DVD
)
• During pla
y
back, press to skip to the next chapter,
t
r
ac
k
o
r fil
e.
• When pla
y
back is in pause, press repeatedl
y
to for-
w
ard the pla
y
back step b
y
step.
27
.
ST
O
P
C
button
(
DVD/VCR
)
• Press to stop pla
y
back or recording
.
DVD m
od
e
:
• Pr
ess
to
e
xi
t
fr
o
m
t
h
e
t
i
t
l
e
li
st.
28.
FFW
D
button
(
DVD/VCR
)
DVD m
od
e
:
• During pla
y
back, press to fast forward pla
y
back
.
• When pla
y
back is paused, press to slow forward pla
y
back.
V
C
R m
od
e
:
• During pla
y
back, press to rapidl
y
advance the
cassette tape or view the picture rapidl
y
in forward.
• When pla
y
back is paused, press to view the cassette
ta
p
e in slow motion
.
29. RAPID PLAY button
(
DVD
)
• During pla
y
back, press to pla
y
back in a slightl
y
faster/slower mode with keeping the audio qualit
y.
30. SEARCH button
(
VCR
)
• Press to call u
p
the index or time search menu
.
31. TIMER SET button
(
DVD/VCR
)
• Press to set the unit in the timer standb
y
mode. In
the timer standb
y
mode, press to cancel the mode
a
n
d
to
tu
rn
t
h
e
u
ni
t
o
n
.
32. REC button
(
DVD/VCR
)
• Press once to start a recordin
g
.
• Press repeatedl
y
to start the one-touch timer recording.
Note
•
If
y
ou turn this unit to the standb
y
mode,
[
OPEN/CLOSE
A
]
o
n
t
h
e
r
e
m
ote
co
n
t
r
o
l i
s
n
ot
a
v
a
il
ab
l
e.
B
e
su
r
e
to
use
[
A
O
PEN
/
CL
O
SE
]
o
r
[
C
A
ST
O
P
/
EJECT
]
o
n
t
h
e
u
ni
t.
E9P8CUDZV427MG9BOMv1.indd13E9P8CUDZV427MG9BOMv1.indd13 2012/03/0113:05:512012/03/0113:05:51
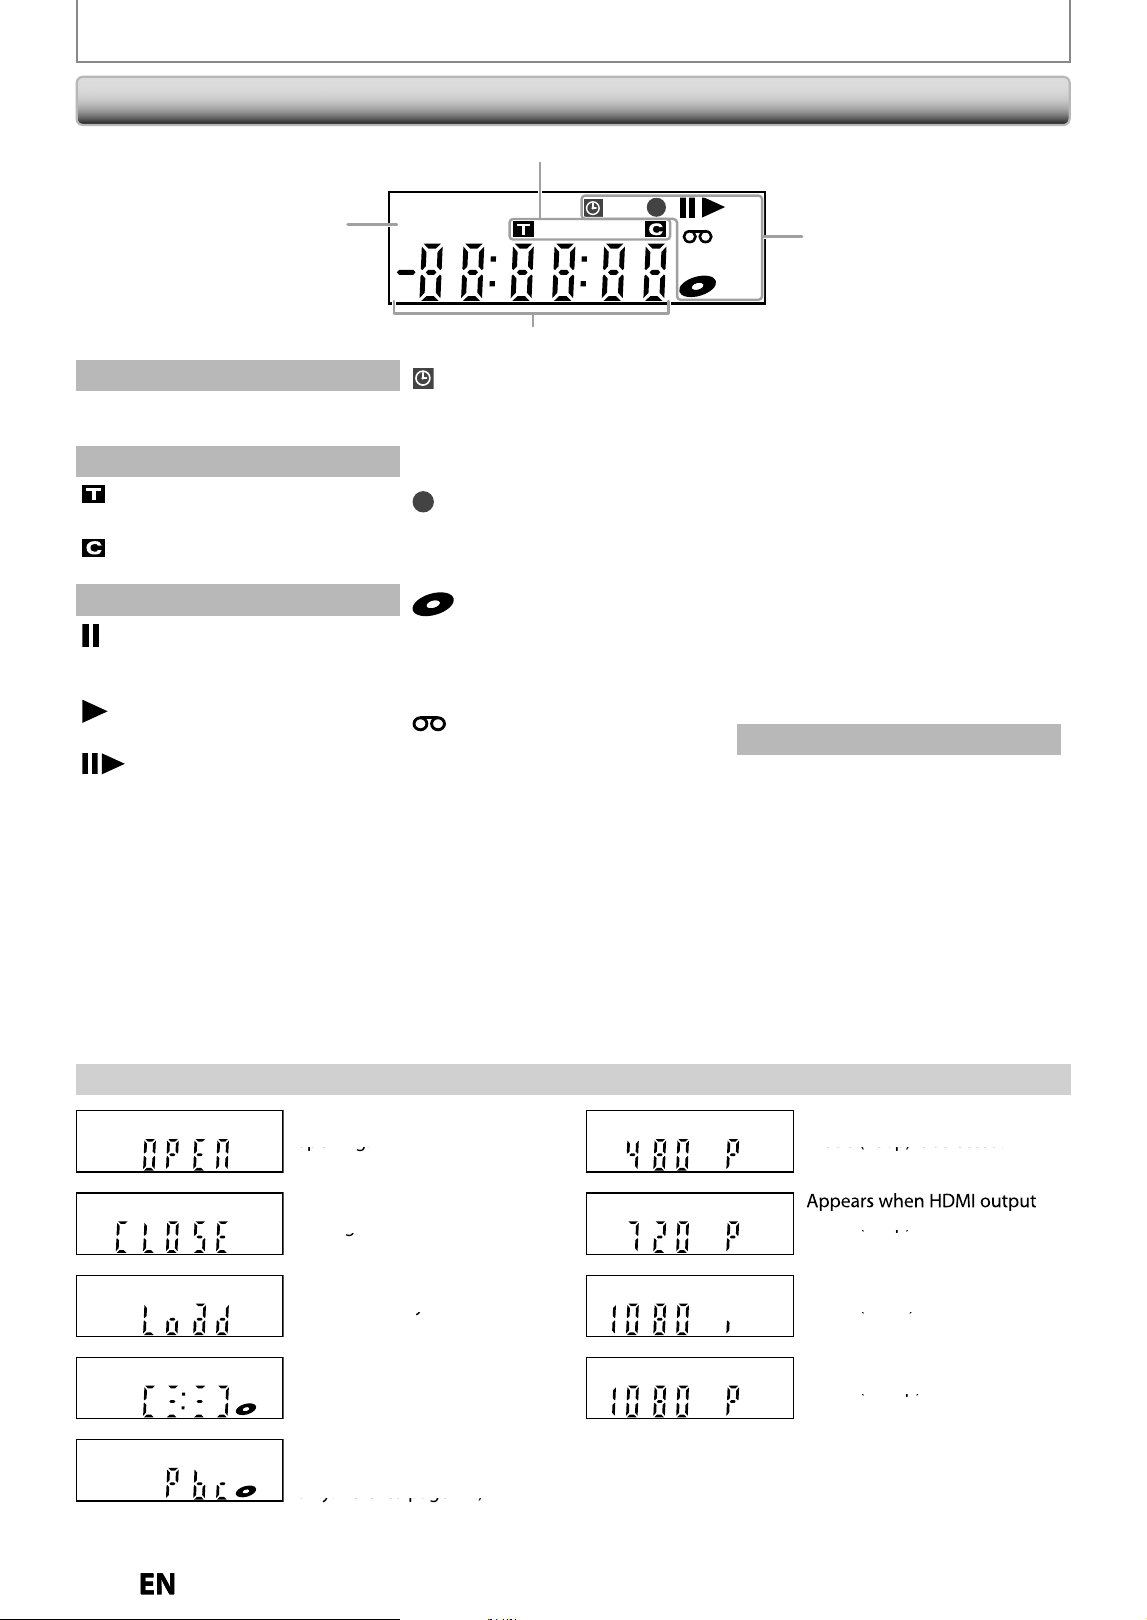
14
EN
EN
DVD
App
ears when the PBC function
i
s activated. (Video CD pla
y
back
only.
Refer
to
page
47.)
only. Refer to page 47.)
Displa
y
Message
FUNCTIONAL OVERVIEW
Front Pane
l
Disp
l
a
y
PM
BS CS DR CD
VCR
HDDDB
DVD
1
4
2
3
1
.
PM
: A
pp
ears in the afternoon
with the clock displa
y.
2. Title / track /
f
ile and chapter mark
: Appears w
h
en in
d
icating a
title / track /
f
ile number
.
: Appears w
h
en in
d
icating a
c
h
apter num
b
er
.
3
. Current status o
f
the uni
t
: Appears w
h
en p
l
ay
b
ac
k
is in
pause, or in step
b
y step
p
l
ay
b
ac
k.
: Appears w
h
en p
l
aying
b
ac
k
a
d
isc, or a cassette tape
.
: Appears durin
g
slow forward
/
reverse pla
y
back
.
: A
pp
ears when the timer
p
ro
g
rammin
g
or OTR has
b
een set or is proceedin
g.
:
F
lashes
w
he
n
all
t
im
e
r
r
ecordin
g
s have been
f
inished.
: Appears
d
uring recor
d
ing
process.
: F
l
as
h
es w
h
en a recor
d
ing is in
pa
u
se.
: Appears w
h
en t
h
is unit is in
D
VD output mo
d
e an
d
a
d
isc
i
s in t
h
e unit
.
: Appears durin
g
duplication
p
rocess
.
: A
pp
ears when this unit is in
V
CR out
p
ut mode and a
c
assette ta
p
e is in the unit
.
: Appears
d
uring
d
up
l
ication
process.
VCR
: Appears w
h
en t
h
is unit is in
V
CR output mo
d
e
.
: A
pp
ears when the timer
recordin
g
is proceedin
g
in VCR
.
: A
pp
ears w
h
en VCR is in t
h
e
timer recor
d
ing stan
dby
mo
d
e
.
: F
l
as
h
es w
h
en a program cannot
b
e per
f
ormed
f
or some reasons.
DVD
: A
pp
ears when this unit is in
D
VD out
p
ut mode
.
: Appears when the timer
recor
d
ing is procee
d
ing in
D
V
D.
: Appears w
h
en DVD is in t
h
e
t
imer recor
d
ing stan
db
y
mo
d
e
.
: Flashes when a pro
g
ram
c
annot be
p
erformed for
so
m
e
r
easo
n
s.
DB
: Appears durin
g
VCR to DVD
d
u
p
lication
p
rocess
.
: Appears
d
urin
g
DVD to VCR
d
uplication process
.
4
. Displays the
f
ollowin
g
•
E
l
apse
d
p
l
ay
b
ac
k
time
•
Current title / cha
p
ter / track /
fil
e
n
u
m
ber
•
Recordin
g
time / remainin
g
time
•
Clock
•
Se
l
ecte
d
externa
l
input position
•
Remainin
g
time for one-touch
t
imer recordin
g
•
Se
l
ecte
d
HDMI output mo
d
e
•
V
C
R tape counter
A
pp
ears when HDMI out
p
ut
mode
(480p)
is
selected.
mode (480p) is selected.
A
pp
ears when HDMI out
p
ut
mode
(1080i)
is
selected.
mode (1080i) is selected.
DVD
DVD
mode
(720p)
is
selected.
mode (720p) is selected.
DVD
Appears w
h
en HDMI output
ode ( 080p) s se ected.
m
ode
(
1
080p)
i
s
selected.
DVD
A
ppears w
h
en
d
ata is
b
eing
eco ded o a d sc.
reco
r
ded
o
n
a
d
i
sc.
App
ears when a disc is loaded
on
the
disc
tray.
on the disc tray.
DVD
A
ppears when the disc tra
y
is
opening.
opening.
DVD
A
ppears w
h
en t
h
e
d
isc tray is
cos g.
clos
in
g.
DVD
DVD
E9P8CUDZV427MG9BOMv1.indd14E9P8CUDZV427MG9BOMv1.indd14 2012/03/0113:05:512012/03/0113:05:51
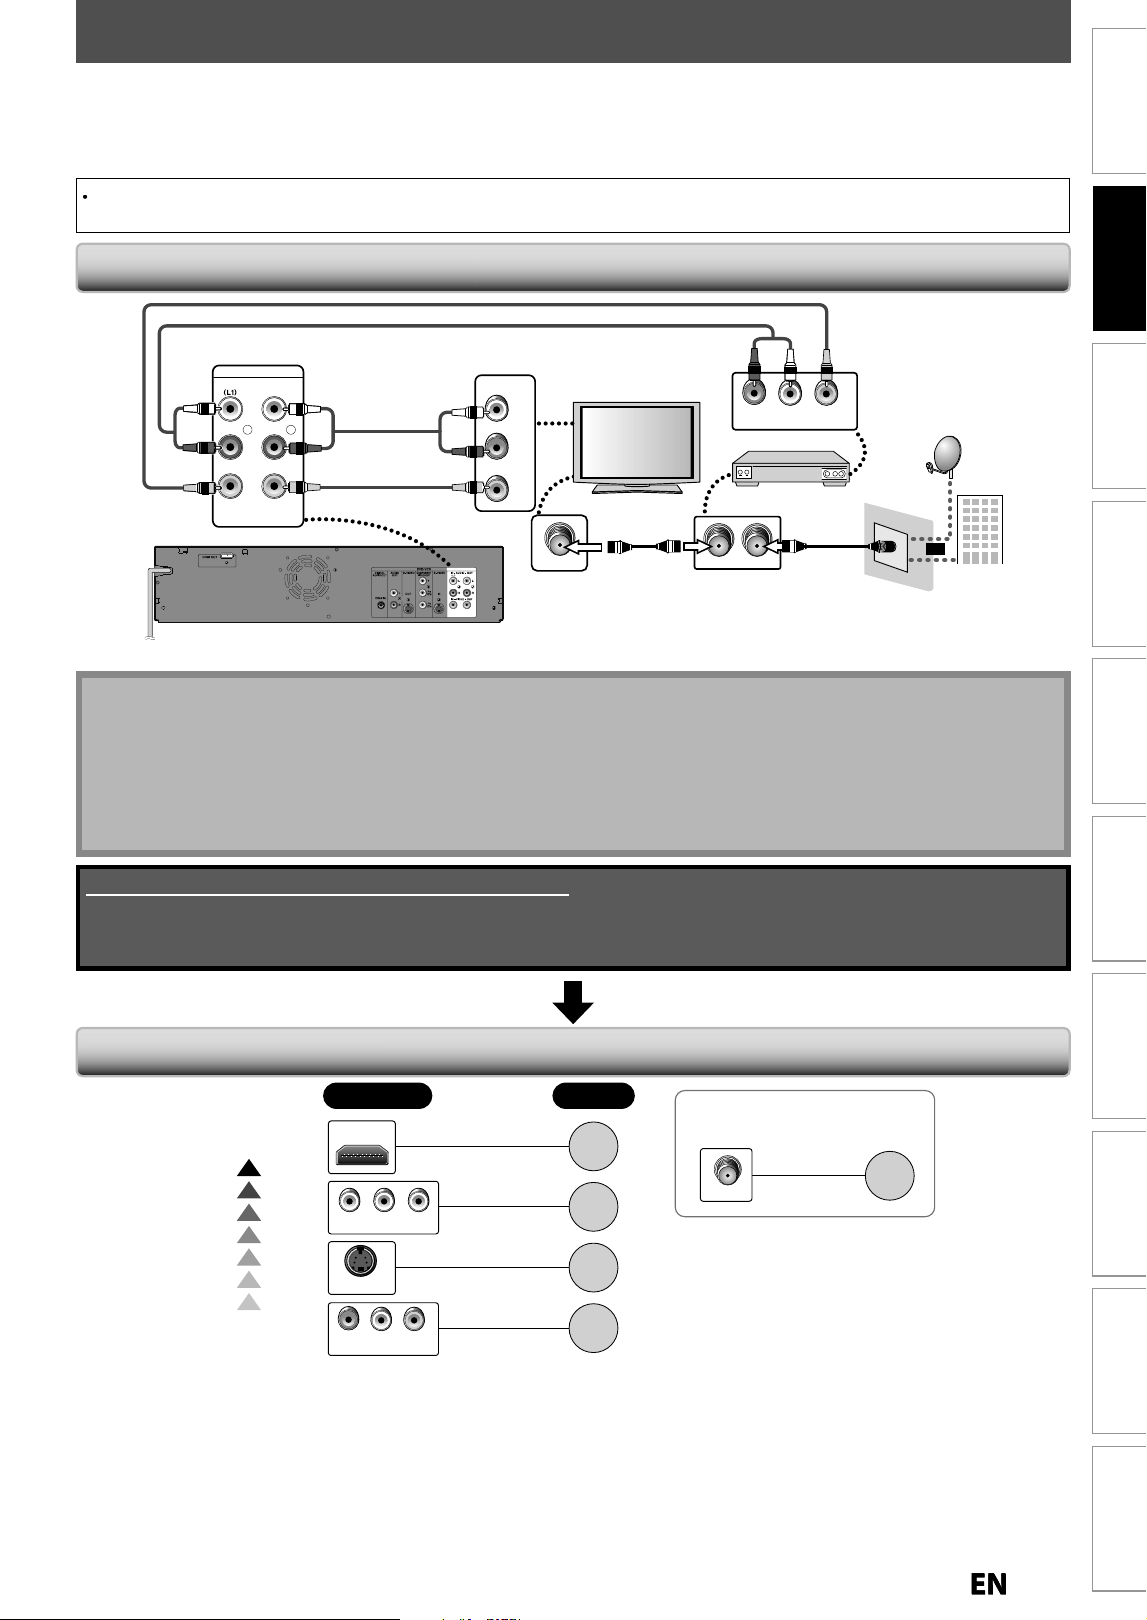
1
5
EN
EN
Recording Playback Editing
Introduction
Connections
Basic Setup Function Setup VCR Functions
Others Español
CONNECTION
Connecting to an Externa
l
Tune
r
Re
ad
thi
s
f
ir
s
t
:
1
)
Disconnect the AC power cords o
f
the devices
f
rom the AC outlet.
2)
M
ake
the
co
nn
ect
i
o
n
as
i
llust
r
ated
belo
w
.
3)
A
f
ter making all the connections, connect the AC power cords o
f
the devices
.
•
Connect this unit directl
y
to the TV. I
f
the RCA audio/video cables are connected to a VCR, pictures ma
y
be distorted
d
ue to t
h
e cop
y
protection s
y
stem
.
N
ot
e
•
Required cables and connectin
g
methods differ dependin
g
on the external tuner.
F
or more information, please contact
y
our external tuner provider
.
Wit
h
t
h
is setup
:
•
You can recor
d
any unscram
bl
e
d
c
h
anne
l
b
y se
l
ecting t
h
e c
h
anne
l
on t
h
e externa
l
tuner. Be sure t
h
at t
h
e externa
l
tuner is turne
d
on
.
•
You cannot record one channel while watchin
g
another channel
.
Supplied cables used in this connection are as follows:
• RCA audio cable (L/R) x 1
• RCA video cable x 1
Please purchase the rest of the necessary cables at your local store.
TV
C
on
ne
ct
io
n
Ov
er
vi
ew
If Your TV has
Refer to
Standard
Quality
Higher
Quality
If your device has
only an ANT. IN jack
page
18
COMPONENT VIDEO IN
AUDIO IN
LR
VIDEO IN
page
17
page
17
page
18
S-VIDEO IN
ANT. IN
page
16
HDMI IN
VIDEO IN
AUDIO IN
L
R
L
R
IN --- AUDIO --- OUT
IN --- VIDEO --- OU T
ANT. INANT.OUT
LR
VIDEO OUTAUDIO OUT
rear of this unit
external tuner
RCA audio cable
RCA video cable
satellite
dish
ANT. IN
cable TV
company
RF coaxial
cable
RF coaxial
cable
or
RCA video cable
RCA audio cable
E9P8CUDZV427MG9BOMv1.indd15E9P8CUDZV427MG9BOMv1.indd15 2012/03/0113:05:552012/03/0113:05:55
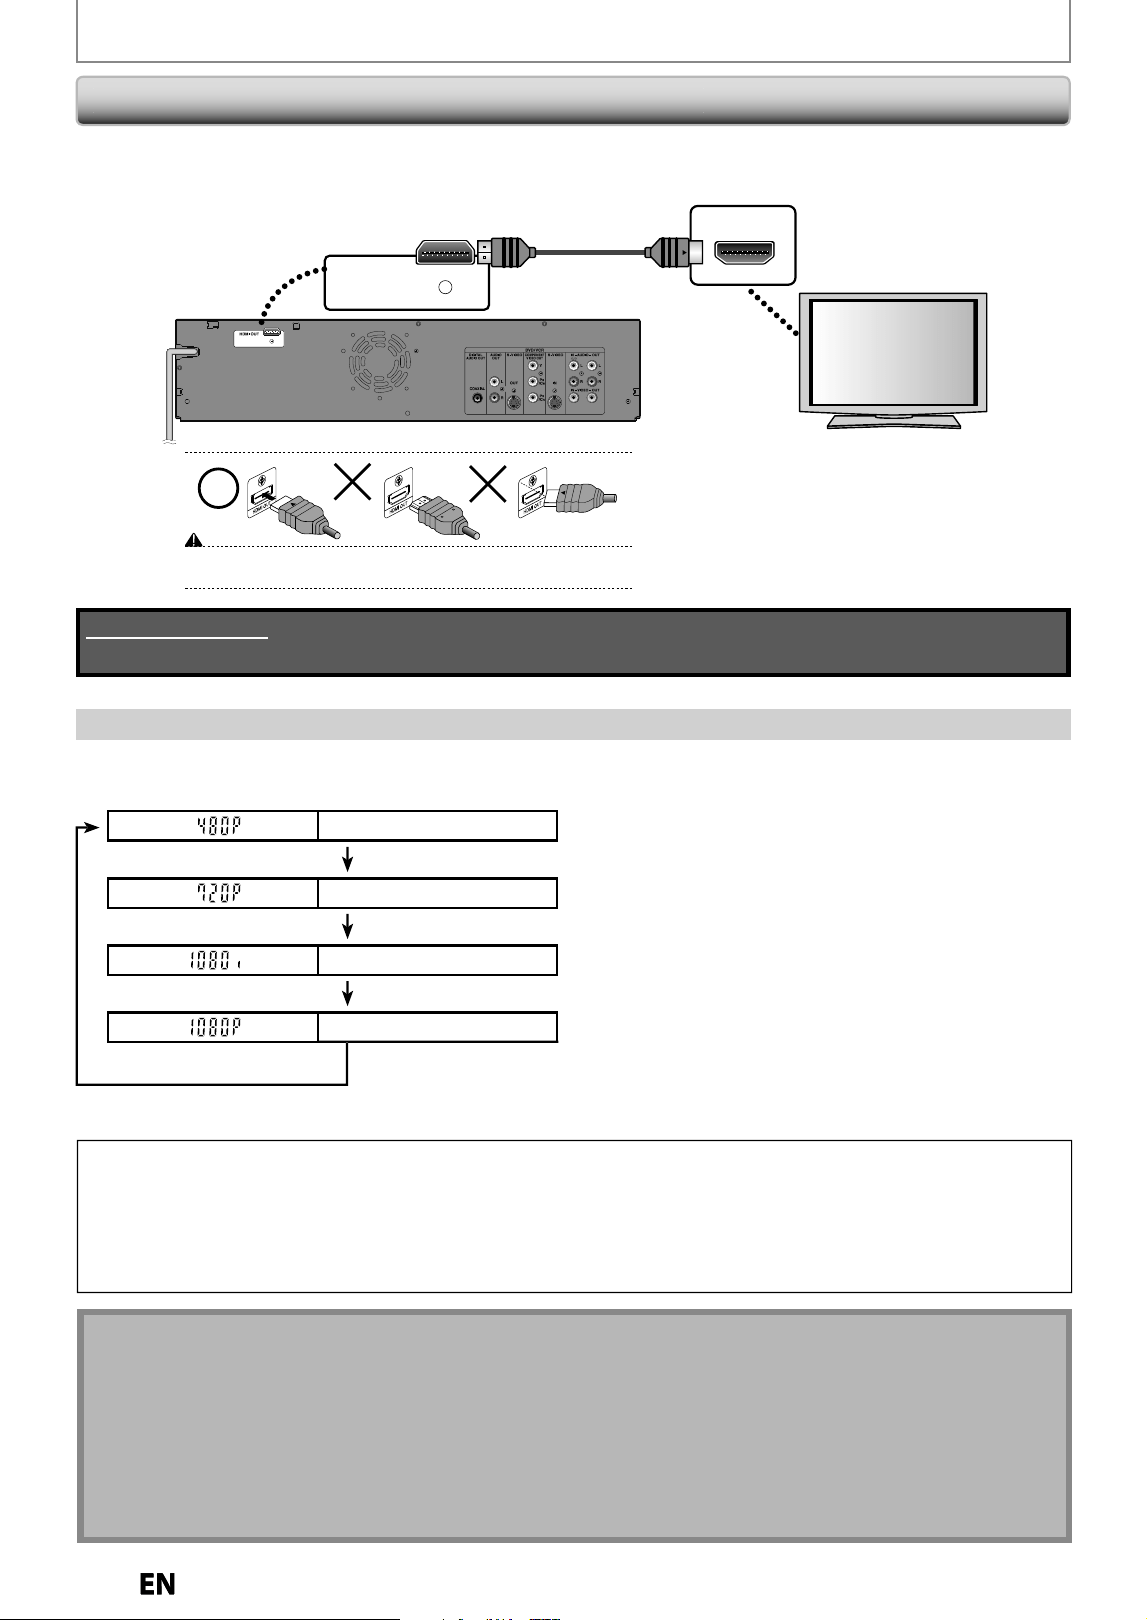
1
6
EN
EN
•
HDMI outputs the video / audio si
g
nals without convertin
g
to analo
g
si
g
nals.
•
No au
d
io connection is re
q
uire
d.
CONNECTION
rear of this unit
HDMI OUT
HDMI IN
Do not tilt the connector when inserting it into the HDMI jack, and make sure the
shapes of the jack and the connector are matched.
HDMI cable
HDMI Mode and Actual Output Si
g
nal
s
P
ress
[
HDMI
]
to select the HDMI output mode. The output mode changes as
f
ollows ever
y
time
[
HDMI
]
is presse
d.
Front Pane
l
Disp
l
ay Vi
d
eo Output Signa
l
480 Progress
i
v
e
Press
[
HDMI
]
720 Pro
g
ressiv
e
Press
[
HDMI
]
1
080
interl
a
ce
d
Press
[
HDMI
]
1080 Pro
g
ressiv
e
Press
[
HDMI
]
• T
h
e HDMI mo
d
e t
h
at is not supporte
d
b
y
d
isp
l
ay
d
evice wi
ll
b
e s
k
ippe
d.
Cop
y
right protection s
y
ste
m
To play back the digital video images o
f
a DVD via an HDMI connection, it is necessary that both the player and the
displa
y
device (or an AV ampli
f
ier) support a cop
y
right protection s
y
stem called HDCP (high-bandwidth digital
content protection s
y
stem). HDCP is cop
y
protection tec
h
no
l
og
y
t
h
at comprises
d
ata encr
y
ption an
d
aut
h
entication
o
f
the connected AV device. This unit supports HDCP. Please read the operating instructions o
f
your display device
(or AV ampli
f
ier)
f
or more in
f
ormation
.
Note
f
o
r HDMI C
o
nn
e
c
t
i
on
•
B
e
cause HDMI is an evolving technolog
y
, it is possible that some devices with an HDMI input ma
y
not operate
properl
y
with this unit
.
•
When using an HDCP-incompatible displa
y
device, the image will not be viewed properl
y.
•
Amon
g
the devices that support HDMI, some devices can control other devices via the HDMI connector; however,
this unit cannot be controlled b
y
another device via the HDMI connector
.
•
When this unit’s HDMI connector is connected to a DVI-D com
p
atible monitor (HDCP com
p
atible) with an HDMI-DVI
converter cable, the si
g
nals are output in di
g
ital RGB
.
•
When the power failure occurs, or when
y
ou unplug the unit, some problems in the HDMI setting might occur.
Please check and set the HDMI settin
g
a
g
ain
.
Cables not included.
Please purchase the necessary cables at your local store.
Connectin
g
to a TV wit
h
an HDMI™ Compati
bl
e Por
t
E9P8CUDZV427MG9BOMv1.indd16E9P8CUDZV427MG9BOMv1.indd16 2012/03/0113:05:562012/03/0113:05:56
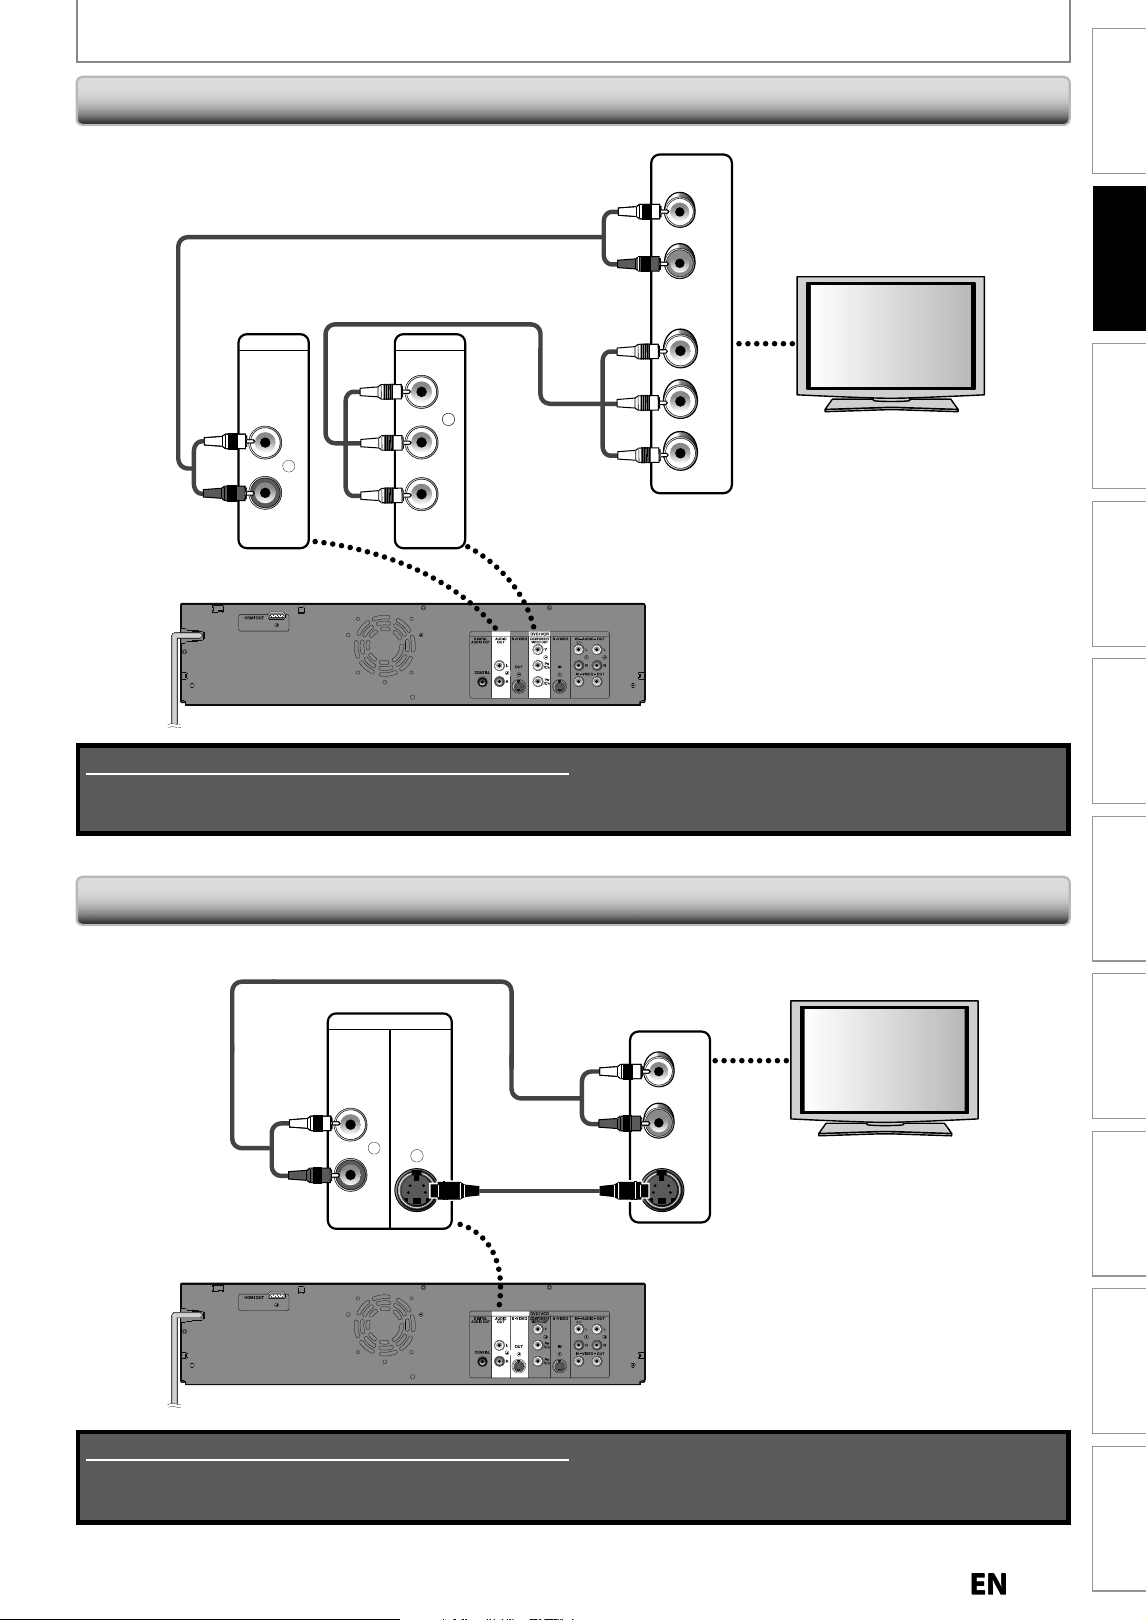
17
EN
EN
Recording Playback Editing
Introduction
Connections
Basic Setup Function Setup VCR Functions
Others Español
CONNECTION
Connecting to a TV with Component Video Input jacks
Connecting to a TV wit
h
an S-Vi
d
eo Input Jac
k
rear of this unit
S-VIDEO
OUT
AUDIO
OUT
L
R
RCA audio cable
AUDIO IN
L
R
S-VIDEO IN
S-video cable
L
R
RCA audio cable
DVD / VCR
Y
P
B
/CB
PR
/CR
COMPONENT
VIDEO OUT
AUDIO
OUT
(Green)
(Blue)
(Red)
RCA component video cable
(Green)
(Blue)
(Red)
Y
P
B
/CB
PR
/CR
COMPONENT
VIDEO IN
AUDIO IN
L
R
rear of this unit
Supplied cables used in this connection are as follows:
• RCA audio cable (L/R) x 1
Please purchase the rest of the necessary cables at your local store.
Supplied cables used in this connection are as follows:
• RCA audio cable (L/R) x 1
Please purchase the rest of the necessary cables at your local store.
E9P8CUDZV427MG9BOMv1.indd17E9P8CUDZV427MG9BOMv1.indd17 2012/03/0113:05:572012/03/0113:05:57
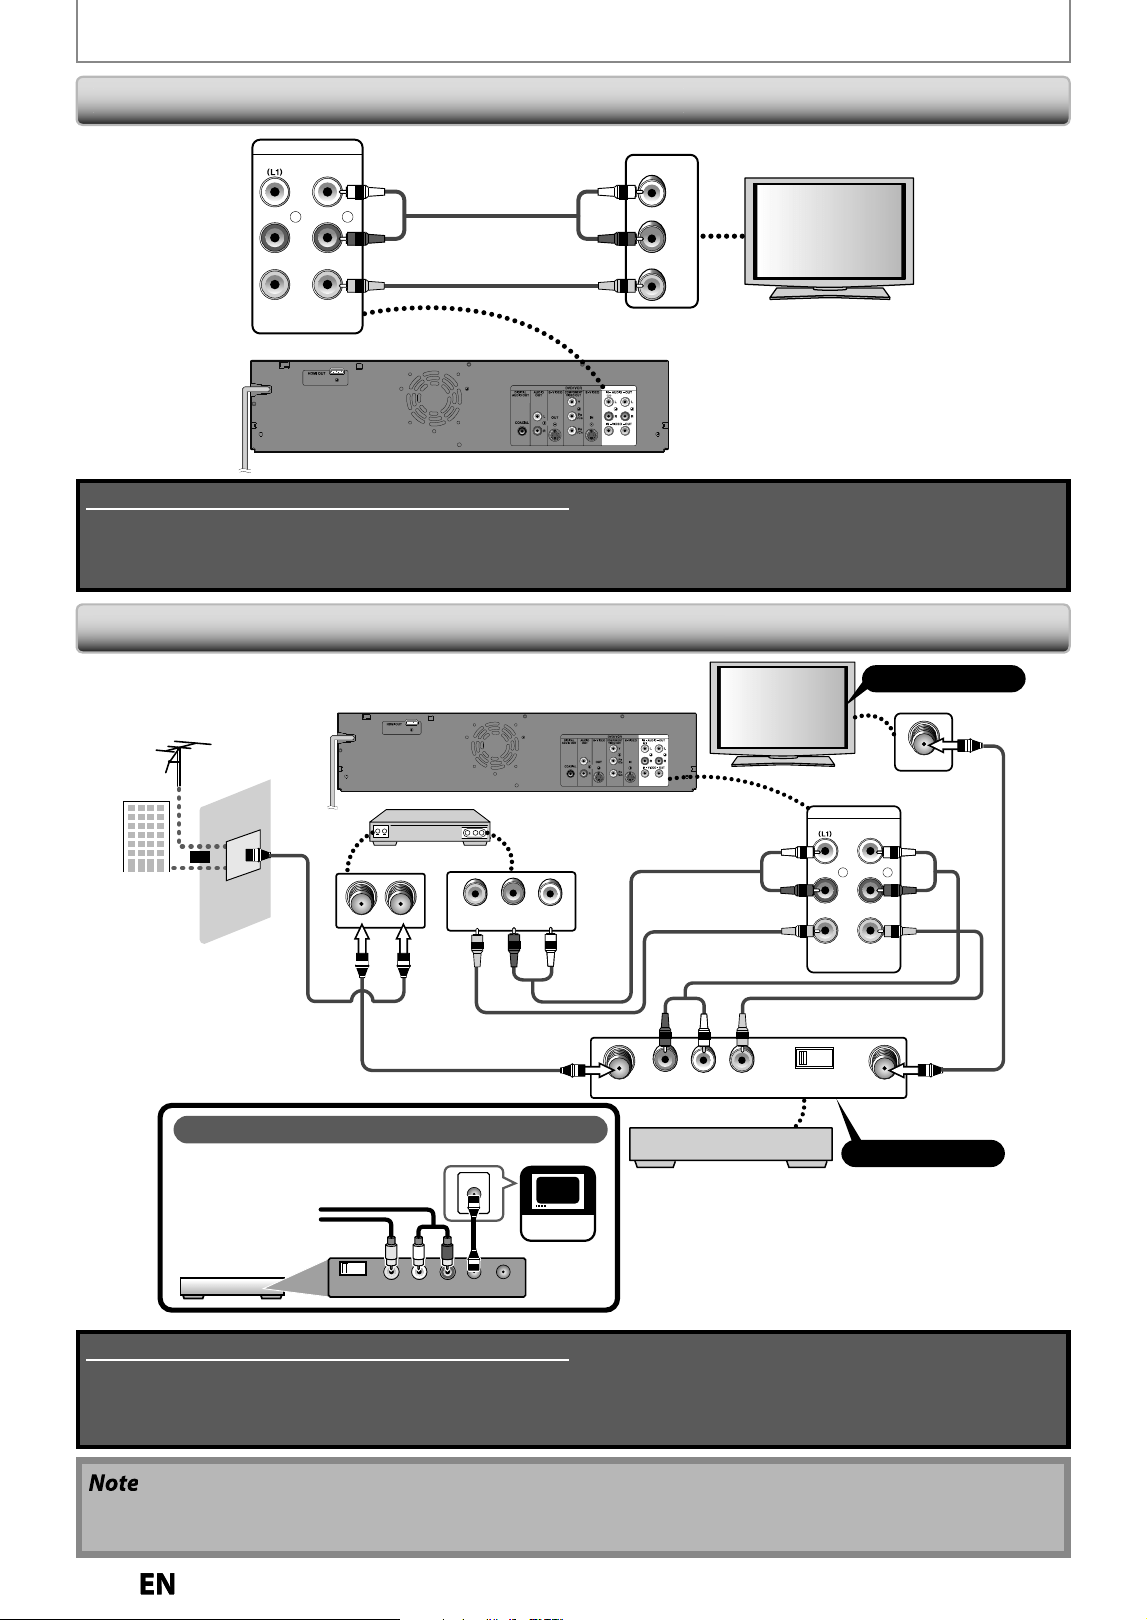
1
8
EN
EN
CONNECTION
Supplied cables used in this connection are as follows:
• RCA audio cable (L/R) x 1
• RCA video cable x 1
Please purchase the rest of the necessary cables at your local store.
L
R
I N --- AU DI O --- OU T
IN --- VIDEO --- OU T
If your TV only has an Antenna input
(no A/ V inputs), you will need a
RF modulator
(NOT INCLUDED)
to connect this player.
RF modulator
AUDIO IN
RL
VIDEO IN
CHANNEL
43
TO T V
TV
ANT. IN
ANT. IN
No Antenna (RF) Output!
ANT. IN
rear of this unit
RCA audio cable
RCA audio cable
RCA video cable
RCA video cable
AUDIO IN TO TVANT. IN
LR
CHANNEL
43
VIDEO IN
RF modulator
VHF / UHF
antenna
cable TV
company
or
Set channel 3 or 4
Set channel 3 or 4
RF coaxial cable
RF coaxial cable
RF coaxial cable
ANT. INANT.OUT
VIDEO OUT
external tuner
LR
AUDIO OUT
• RF mo
d
u
l
ator is not supp
l
ie
d
wit
h
t
h
is unit. You nee
d
to purc
h
ase it at
y
our
l
oca
l
store
.
• The quality o
f
picture may become poor i
f
this unit is connected to an RF modulator
.
Supplied cables used in this connection are as follows:
• RCA audio cable (L/R) x 1
• RCA video cable x 1
Please purchase the rest of the necessary cables at your local store.
rear of this unit
RCA audio cable
RCA video cable
L
R
I N --- AU D IO --- OU T
IN --- VIDEO --- OU T
AUDIO IN
L
R
VIDEO IN
Connectin
g
to a TV wit
h
out Au
d
io / Vi
d
eo Input Jac
k
s
Connectin
g
to a TV wit
h
Au
d
io / Vi
d
eo Input Jac
k
s
E9P8CUDZV427MG9BOMv1.indd18E9P8CUDZV427MG9BOMv1.indd18 2012/03/0113:05:582012/03/0113:05:58
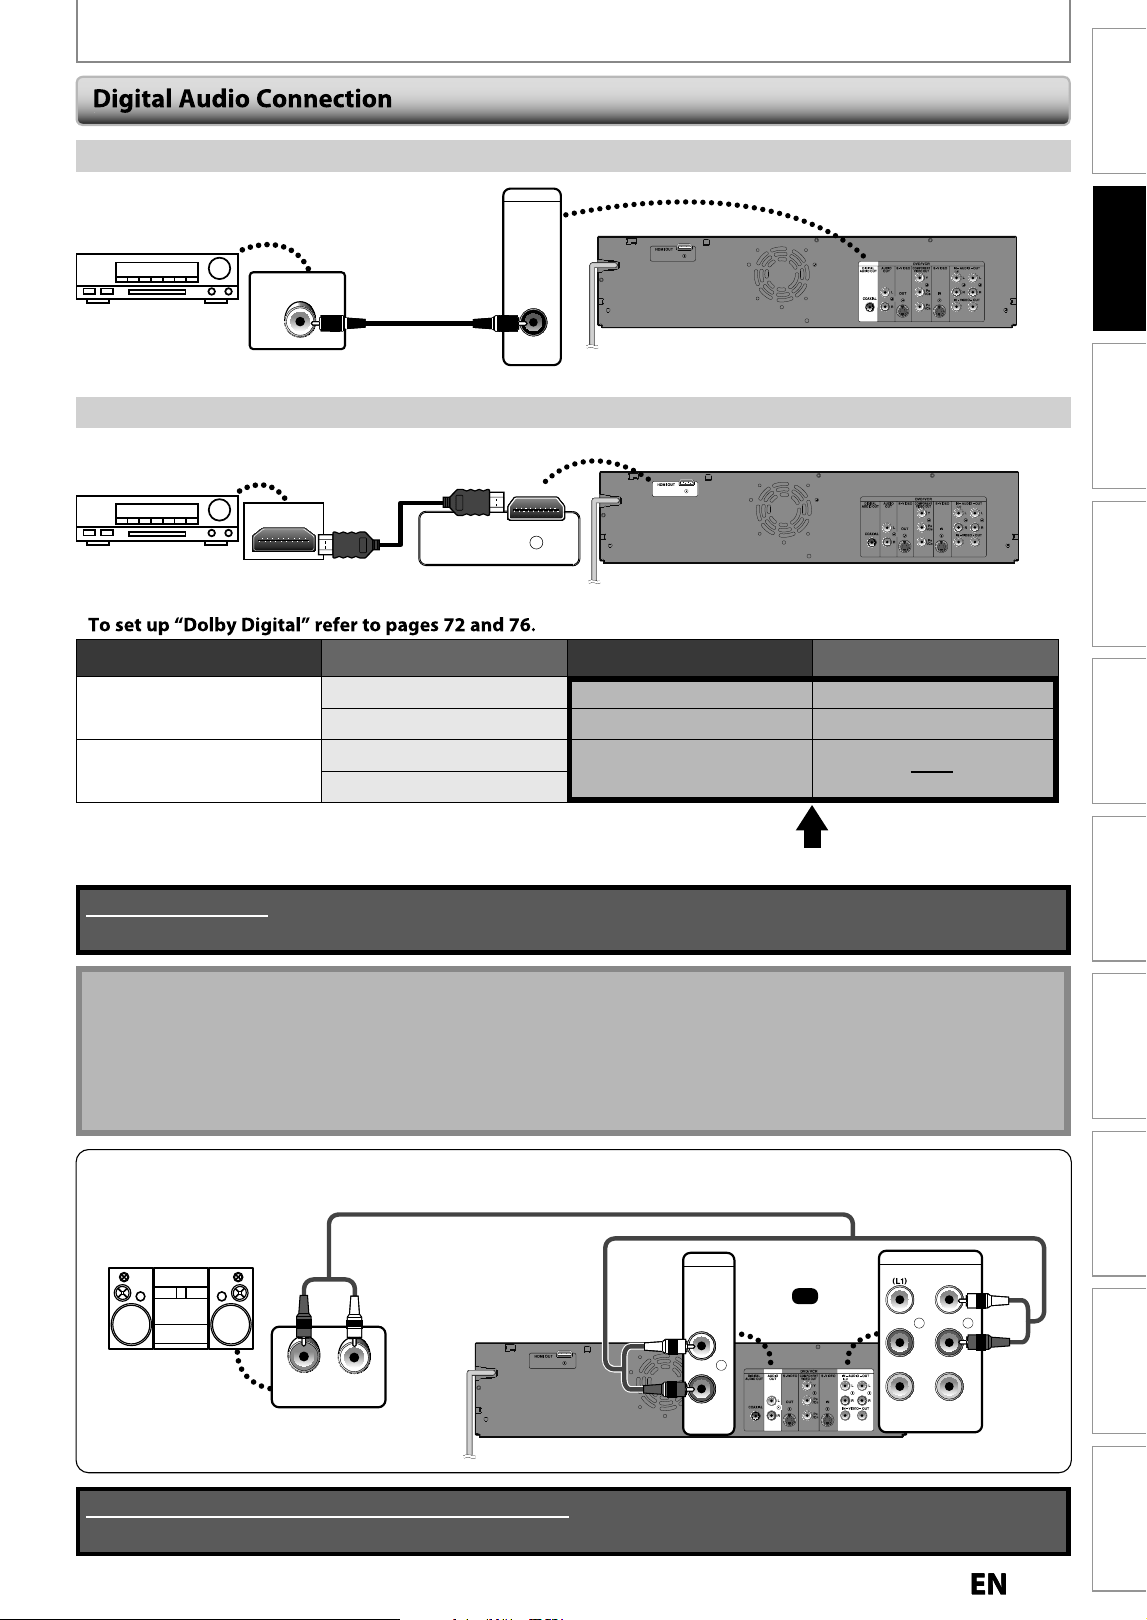
1
9
EN
EN
Recording Playback Editing
Introduction
Connections
Basic Setup Function Setup VCR Functions
Others Español
Coa
xi
al
Cabl
e
Co
nnecti
on
Note
•
The audio source on a disc in a Dolb
y
Digital multi channel surround
f
ormat cannot be recorded as digital sound
by
an MD or DAT
d
ec
k.
•
By connecting t
h
is unit to a Do
lb
y Digita
l
d
eco
d
er, you can enjoy
h
ig
h
-qua
l
ity Do
lb
y Digita
l
mu
l
ti c
h
anne
l
surroun
d
soun
d
as movie t
h
eaters
.
•
Pla
y
ing back a DVD using incorrect settings ma
y
generate noise distortion and ma
y
also damage the speakers
.
Supplied cables used in this connection are as follows:
• RCA audio cable (L/R) x 1
HDMI Au
d
io Connectio
n
T
o set up “HDMI Audio” refer to pa
g
es 73 and 81
.
CONNECTION
DIGITAL
AUDIO OUT
COAXIAL
COAXIAL
rear of this unit
Dolby Digital decoder
digital audio
coaxial cable
digital audio
coaxial input jack
HDMI OUT
rear of this unit
AV receiver / amplier with an HDMI input jack
HDMI IN
HDMI
cable
Dolby Digital
PCM
Stream
PCM
Stream
2channel PCM
Dolby Digital
2channel PCM
Dolby Digital
LPCM
2channel PCM
Audio format (disc) HDMI Digital Output
Dolby Digital Setting of this unit
Actual Output
L
R
IN --- AUDI O --- OU T
IN --- VIDEO --- OU T
LR
AUDIO
OUT
L
R
stereo system
analog audio
input jacks
or
AUDIO OUT
RCA audio cable
rear of this unit
AUDIO IN
2 Channel Analog Audio Connection
Cables not included.
Please purchase the necessary cables at your local store.
E9P8CUDZV427MG9BOMv1.indd19E9P8CUDZV427MG9BOMv1.indd19 2012/03/0113:06:002012/03/0113:06:00
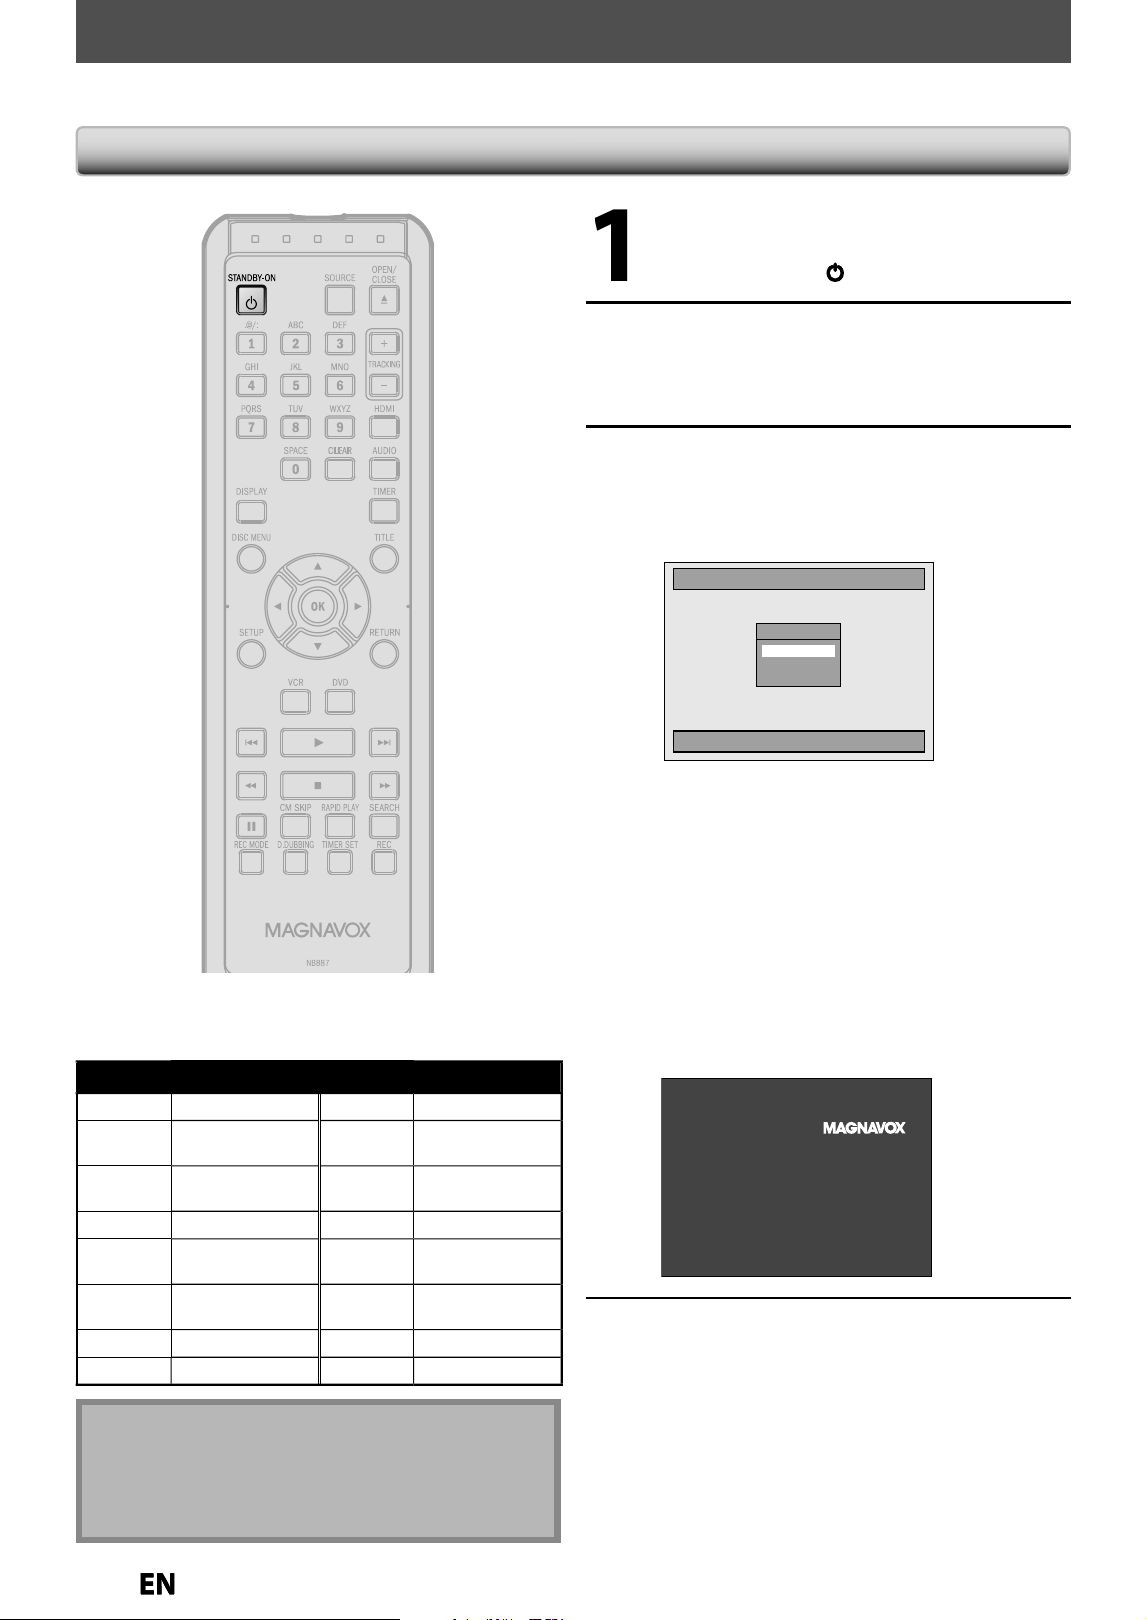
20
EN
EN
BEFORE YOU START
Af
ter
y
ou have completed all the connections,
y
ou must
f
ind the viewing channel (external input channel) on
y
our TV
.
1
After
y
ou have made all the
necessar
y
connections, press
[
STANDBY-ON
yy
]
to turn on the unit
.
2
T
urn on your
TV
.
• If connected to
y
our VCR make sure it is
switched off or in standb
y
mode before
proceedin
g.
3
Press “2” on t
h
e TV’s remote contro
l
,
t
h
en press c
h
anne
l
d
own
b
utton
repeate
dl
y unti
l
you see “Initia
l
Setup
”
menu
.
Initial Setup
Select the language for Setup display.
OSD Language
English
Français
Español
This is the correct viewin
g
channel (external
in
p
ut channel) for the recorder
.
• For some TVs, t
h
ere ma
y
b
e a
b
utton on t
h
e
T
V’
s
r
e
m
ote
co
n
t
r
o
l
t
h
at
accesses
t
h
e
e
x
te
rn
a
l
input channel. It ma
y
be labeled
“
S
OU
R
C
E
”
,
“AV”
,
or
“SELE
C
T
”
.
In such case,
p
ress it
repeatedl
y
. Refer to
y
our TV’s user manual for
deta
il
s.
• I
f
more than 10 minutes have passed since you
h
ave turne
d
on t
h
e unit, you may see t
h
e
M
AGNAVOX screen saver instead o
f
“Initial
S
etup
”
menu
.
MAGNAV
O
X
sc
r
ee
n
sa
v
e
r
:
4
Proceed to ste
p
2 in “INITIAL
SETTING” on pa
g
e 25
.
Fin
d
ing t
h
e Viewing C
h
anne
l
on Your T
V
Note
•
Video in
p
ut selection varies for different brand’s
m
ode
l
s
o
f TV
s.
•
Consult your TV manu
f
acturer i
f
none o
f
the above is
successfu
l
.
Input Mode Names for Common TV Brands (Example)
A
d
mira
l
AUX
P
anasonic TV
/
VIDE
O
Cu
r
t
i
s
M
at
hi
s
LINE1
,
LINE2
,
00
,
90
,
91
,
92
,
93
RC
A INPUT
,
TV/VCR
,
00
,
90
,
91
,
92
,
9
3
GE
INPUT, TV
/
VCR,
00
,
90
,
9
1,
92
,
93
S
amsun
g
TV
/
VIDE
O
Hitac
hi
IN
P
UT, AU
X
S
anyo VIDE
O
J
V
C
VIDEO
,
VIDEO 1
,
VIDEO 2
,
VIDEO
3
S
har
p
00
K
e
nw
ood
AUX
S
on
y
VIDE
O
1
,
VIDE
O
2
,
VIDE
O3
LXI-
S
erie
s
00
T
os
h
i
b
a TV
/
GAM
E
M
a
g
navo
x
A
U
X
C
HANNE
L
Ze
ni
t
h
00
E9P8CUDZV427MG9BOMv1.indd20E9P8CUDZV427MG9BOMv1.indd20 2012/03/0113:06:012012/03/0113:06:01
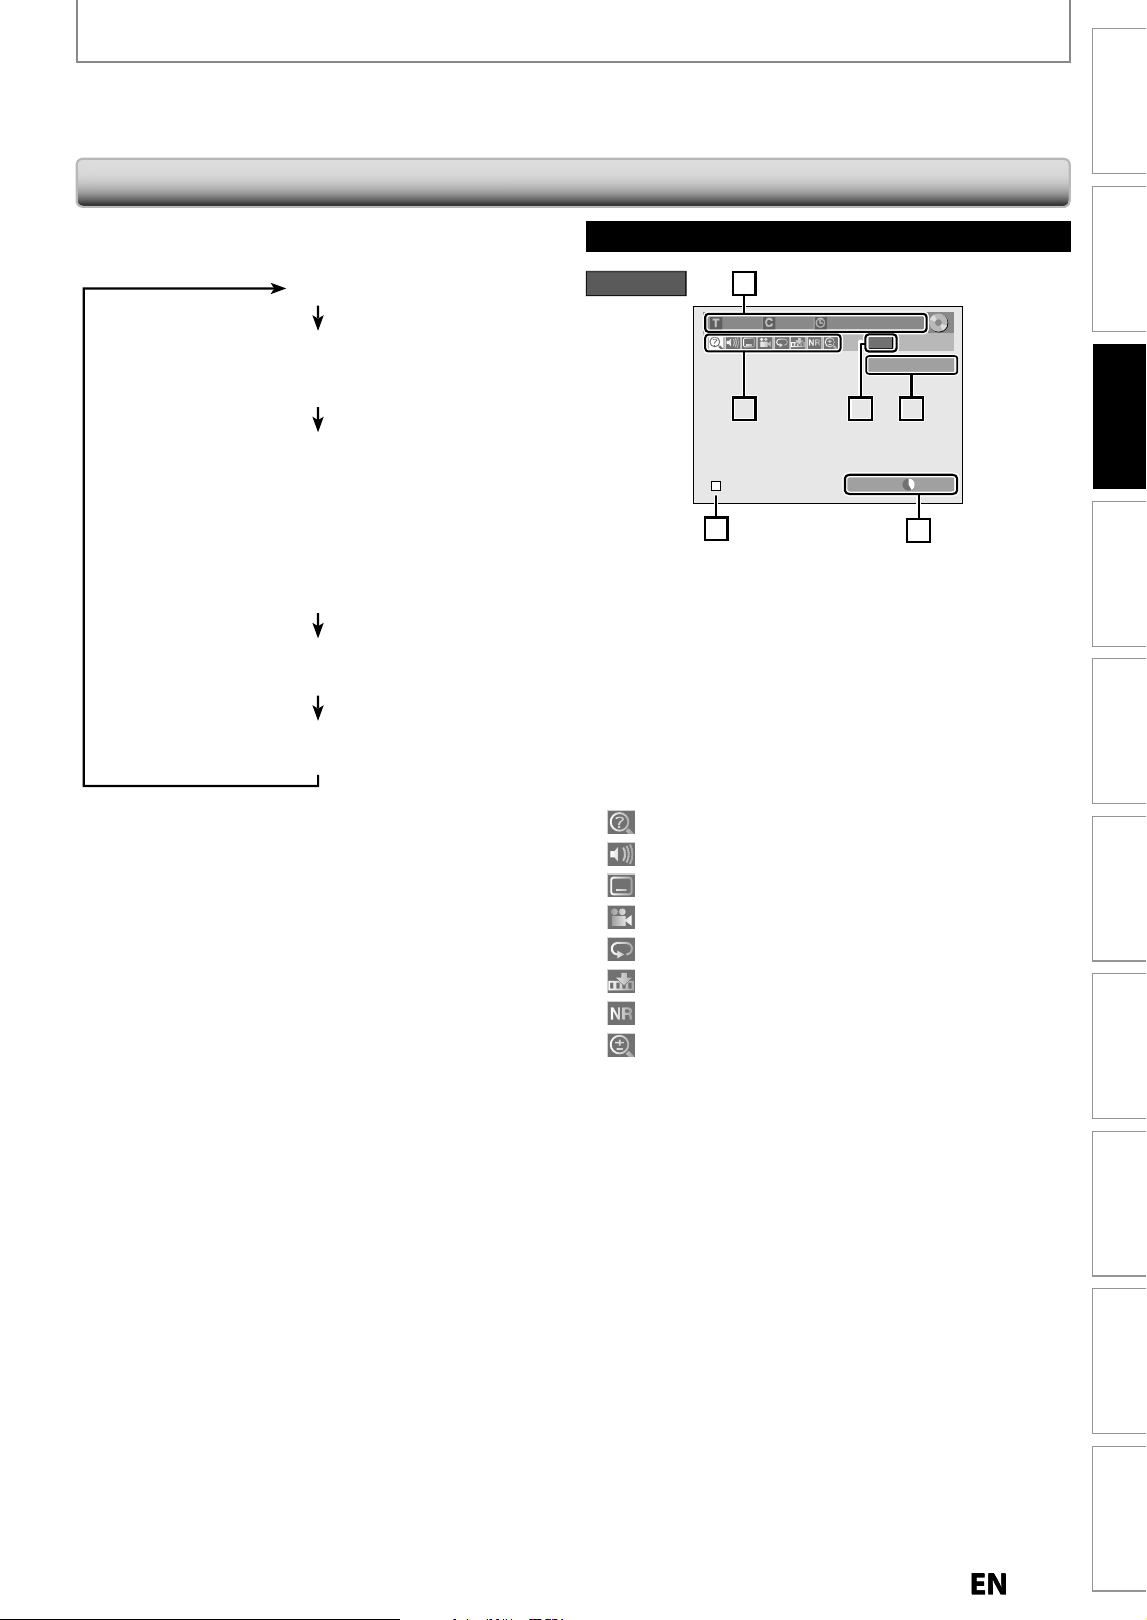
21
EN
EN
Recording Playback Editing
Introduction
Connections
Basic Setup
Function Setup VCR Functions
Others Español
L1 (Rear)
1/ 5 1/ 5
-RW
0:01:00 / 1:23:45
SP(2Hr) 1h53m
6
5
5
1
1
512
2
2
4
3
*
This is an example screen onl
y
for explanation.
Displa
y
ed items var
y
depending on the disc
y
ou
in
se
r
ted.
1.
Indicates a disc t
y
pe
.
2
.
Indicates the selected external in
p
ut channel.
3.
Indicates a recordin
g
mode and possible recordin
g
t
im
e
l
e
f
t.
4.
In
d
icates an operation status
.
5
.
E
ac
h
icon means
:
: Search
: Audio
: Subtitle
: Angle
: Repeat
: Marker
: Noise Reduction
: Zoom
6.
Indicates the current title number/total number o
f
titles, the current chapter number/total number o
f
chapters, and time lapse o
f
the current title playback
/
total duration o
f
the title
.
T
his unit uses the
f
ollowing on-screen displa
y
s and menus to guide
y
ou to the eas
y
operations
.
T
he on-screen displa
y
s give
y
ou the in
f
ormation on the loaded disc or the disc/
f
ile in pla
y
back, or the HDMI status, etc
.
T
he menus allow
y
ou to change the various kinds of settings for pla
y
ing back, recording, or editing to suit
y
our preference.
Gui
d
e to On-Screen Disp
l
a
y
/ Men
u
Disc Information / Menu
The on-screen display changes in the
f
ollowing order
as you press
[
DISPLAY
].
O
FF
Disc In
f
ormation/Men
u
(on
l
y in DVD mo
d
e
)
or
VCR In
f
ormatio
n
(on
l
y in VCR mo
d
e)
Title N
a
me Inf
o
rm
a
ti
o
n (on
ly
in DVD mo
d
e)
(on
l
y w
h
en DVD+RW/DVD+R/DVD-RW/DVD-R
is in p
l
ay
b
ac
k)
or
File N
a
me Inf
o
rm
a
ti
o
n
(
onl
y
in CD mode
)
(
only when a CD with MP3 / JPEG / KODAK picture CD
f
iles
is in p
l
ay
b
ac
k)
M
P3 Ta
g
Informatio
n
(
onl
y
when an MP3
f
ile is in pla
y
back
)
HDMI In
fo
rm
a
ti
on
(
only
f
or the images output through the HDMI output
)
DVD mode
BEFORE YOU START
E9P8CUDZV427MG9BOMv1.indd21E9P8CUDZV427MG9BOMv1.indd21 2012/03/0113:06:062012/03/0113:06:06
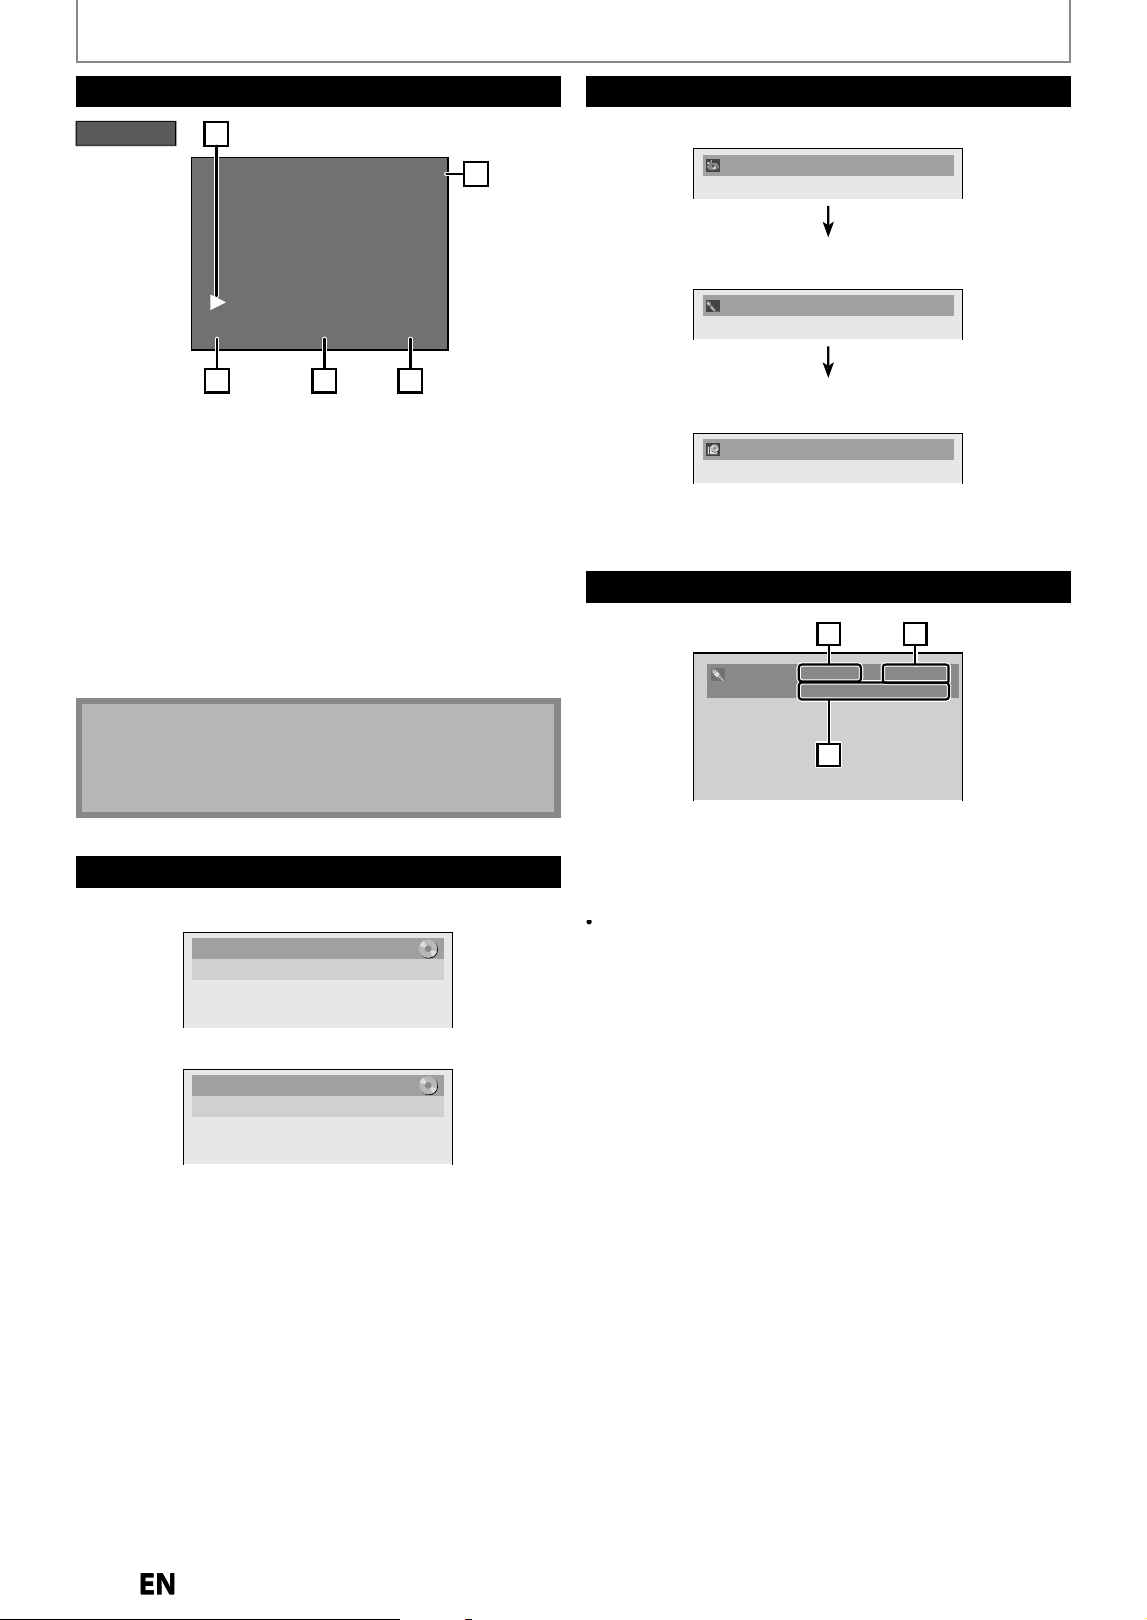
22
EN
EN
BEFORE YOU START
T
i
t
l
e
N
a
m
e
Inf
o
rm
at
i
on
Title Name
My Title
File Name In
f
ormation
File Name
My File
Title/File Name Information
0:00:00 HIFISP
12:00AM
4 53
1
2
*
T
his is an example screen onl
y
for explanation.
Disp
l
a
y
e
d
items var
y
d
epen
d
ing on t
h
e cassette tape
y
ou inserte
d.
*
During stop mode or pause, VCR in
f
ormation is not
avai
l
a
bl
e wit
h
HDMI connection
.
1
.
In
d
i
cates
cu
rr
e
n
t
vi
deo
status.
2.
In
d
icates t
h
e current time
.
3.
Indicates a recording or pla
y
ing back mode.
4.
In
d
icates a ta
p
e counter
.
5.
Audio status o
f
the current cassette tape
.
VCR mode
VCR Information
• First, trac
k
name wi
ll
b
e
d
isp
l
a
y
e
d.
Track Name
• I
f
y
ou press
[
DISPLAY
]
one more time
,
artist name wi
ll
be displa
y
ed
.
Artist Name
• If
y
ou press
[
DISPLAY
]
one more time
,
a
lb
um name
will be displa
y
ed
.
Album Name
• I
f
there is no artist, track or album name, “Not Available”
wi
ll
b
e
d
isp
l
aye
d.
MP3 Tag Information
Video Info. : 480p / YCbCr
Audio Info. : Bitstream
21
3
3
3
1
.
Indicates the resolution of the HDMI output ima
g
e.
2.
Indicates the HDMI video
f
ormat
.
3.
Indicates the HDMI audio
f
ormat.
•
“- - -” will be displa
y
ed, when it does not have an
y
inf
o
rm
at
i
o
n
.
HDMI Information
Note
•
VCR in
f
ormation does not appear on the screen when
t
h
e unit is connecte
d
b
y an HDMI, component or
S-vi
d
eo ca
bl
e, except
d
uring t
h
e p
l
ay
b
ac
k
.
E9P8CUDZV427MG9BOMv1.indd22E9P8CUDZV427MG9BOMv1.indd22 2012/03/0113:06:072012/03/0113:06:07
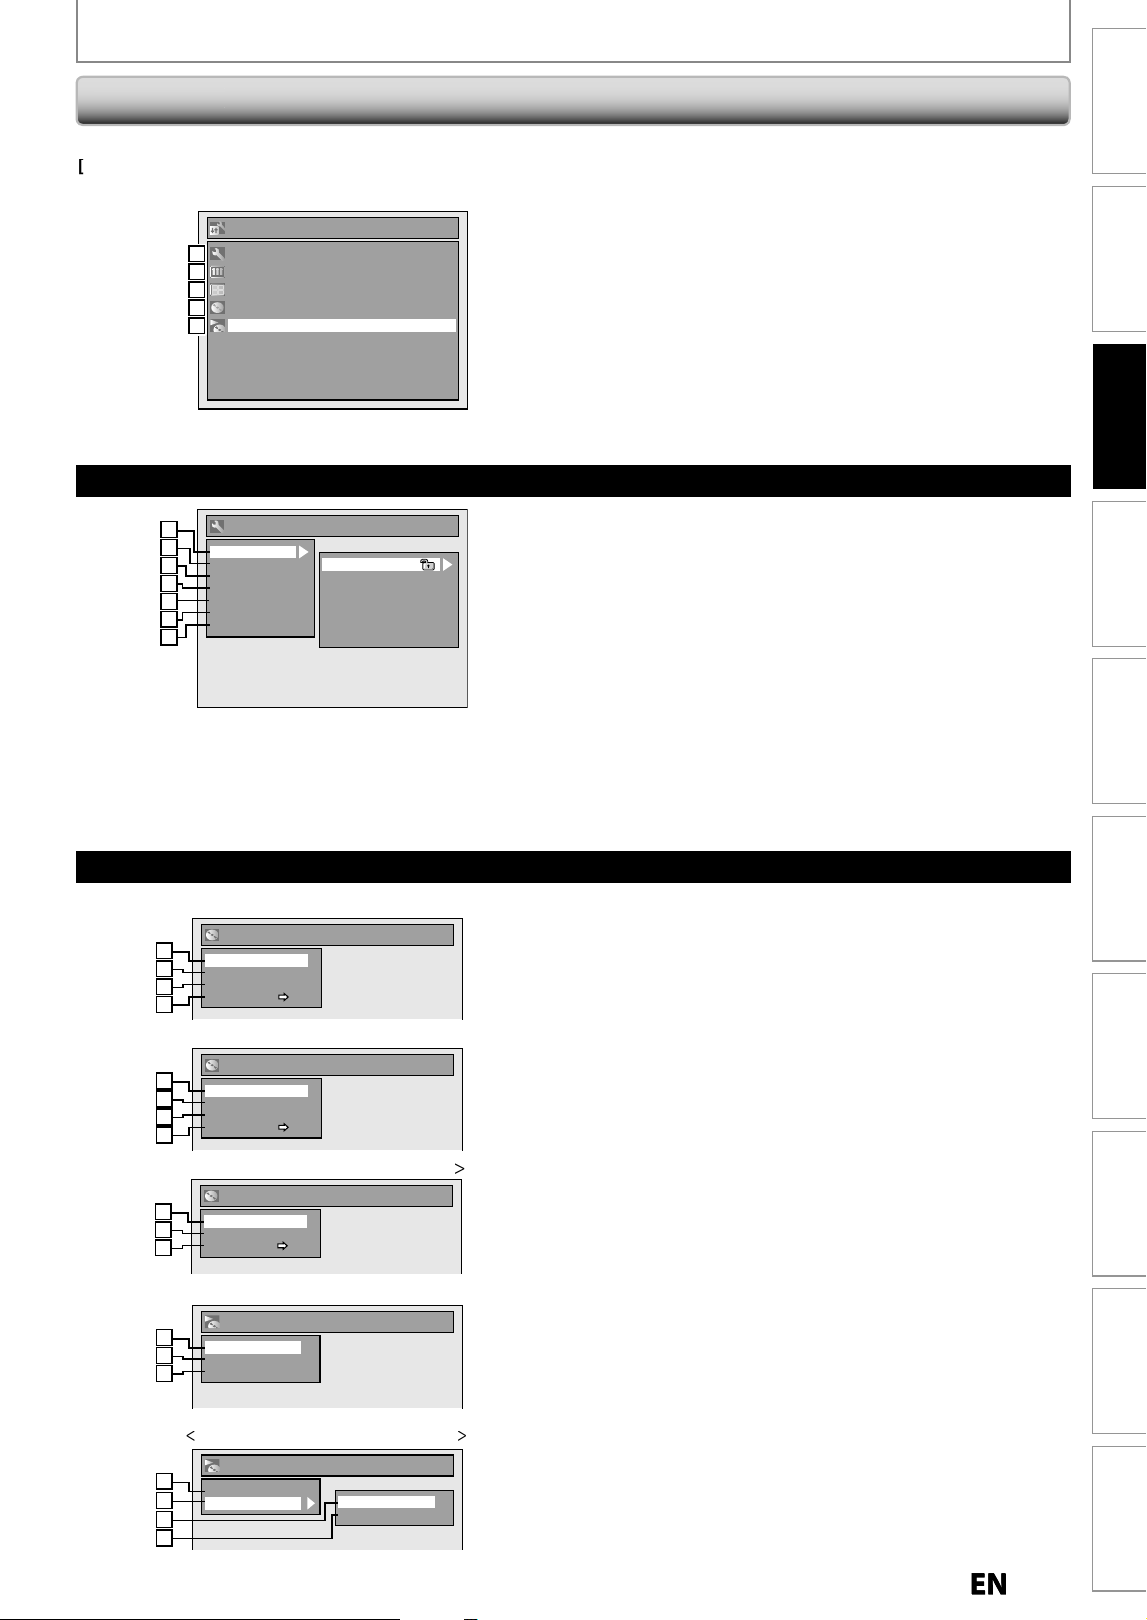
23
EN
EN
Recording Playback Editing
Introduction
Connections
Basic Setup
Function Setup VCR Functions
Others Español
1
. E
d
it Disc Name
:
A
ll
ows you to rename t
h
e
d
isc
.
2. Erase D
i
sc:
(
DVD+RW
/
D
V
D
-
RW
on
l
y
)
Allows
y
ou to erase all contents in the disc and
f
ormat
it.
3.
Ma
k
e E
d
its Compati
bl
e: (DVD+RW on
ly)
A
ll
ows you to memorize t
h
e e
d
iting status on t
h
e
disc i
f
you have added or deleted chapters, or made
chapters hidden on this unit, and to e
ff
ect it when
p
l
aying
b
ac
k
on t
h
e ot
h
er unit
.
Fina
l
ize:
(
DVD+R/DVD-RW/-
R
on
ly
)
Allows you to
f
inalize a disc containing recorded titles
.
4. D
i
sc Protect
:
Allows you to protect a disc
f
rom accidental editing or
recor
d
ing
.
5. Ran
d
om P
l
ay
:
Allows you to activate the random playback
f
eature.
6
. Program P
l
ay: (au
d
io CD/vi
d
eo CD on
ly)
Allows you to activate the program playback
f
eature
.
7
. PBC (Vi
d
eo CD on
l
y)
:
Allows you to select images or in
f
ormation on the
menu screen
b
y activating PBC (p
l
ay
b
ac
k
contro
l
)
f
unction.
8. Mus
i
c :
Allows
y
ou to make setting
f
or MP3 pla
y
back
.
9.
P
ho
t
o
:
Allows
y
ou to make setting
f
or JPEG pla
y
back
.
1
0.
S
l
i
d
e S
ho
w
:
(JPEG / KODAK Picture CD
f
iles onl
y
)
Allows you to select the display time o
f
the slide show
mo
d
e
.
Disc Edit
Edit Disc Name
Erase Disc
Make Edits Compatible
Disc Protect OFF ON
1
1
2
2
3
3
4
4
1
2
3
4
<Disc E
d
it menu (DVD+RW)
>
Disc Edit
Edit Disc Name
Finalize
Disc Protect OFF ON
1
1
2
2
3
3
1
3
4
<Di
sc
E
d
i
t
m
e
n
u
(
DVD+R
/
D
V
D
-
R
)
>
BEFORE YOU START
Mai
n Men
u
P
r
ess
[
SETUP
]
to displa
y
the main menu. Then
use
[
K
/
L
]
to
select
a
m
e
n
u
a
n
d
press
[
OK
]
to
d
isp
l
a
y
t
h
e
menu. These menus
p
rovide entries to all main functions
of
t
h
e
u
ni
t.
Disc Edit / DISC Playback Mode
Disc Edit
Edit Disc Name
Erase Disc
Finalize
Disc Protect OFF ON
1
1
2
2
3
3
4
4
1
2
3
4
<Disc Edit menu
(
DVD-RW
)>
1
. General Settin
g:
To
g
o to
g
enera
l
settin
g
menu.
2. Timer Pro
g
rammin
g:
To pro
g
ram a timer recor
d
in
g
.
3.
Tit
l
e Li
s
t
:
To call u
p
the title list
.
4
.
Di
s
c E
d
it
:
To set up the DVD settin
g
.
5. DISC Pla
y
back Mode:
To set up the disc pla
y
back setting
.
• “DISC Pla
y
back Mode” is available onl
y
when an audio
CD
,
a vi
d
eo CD
,
a CD-RW/-R wit
h
MP3 / JPEG / KODA
K
p
icture CD files is inserted into the unit
.
Setup
Timer Programming
Title List
Disc Edit
DISC Playback Mode
General Setting
1
1
2
2
3
3
4
4
5
5
1
2
3
4
5
General Setting Menu
General Setting
Playback
Display
Video
Recording
Clock
HDMI
Reset All
Parental Lock
Disc Audio
Disc Menu Language
Audio Language
Subtitle Language
Angle Icon
Still Mode
1
1
2
2
3
3
4
4
5
5
2
2
3
3
1
2
3
4
5
6
7
1
. P
l
a
yb
ac
k:
To set up the unit to pla
y
back discs as
y
ou pre
f
er.
2. Disp
l
a
y:
To set up the OSD screen as
y
ou pre
f
er
.
3.
Vi
d
e
o:
To set up t
h
e vi
d
eo setting
.
4. Recor
d
in
g:
To set up the unit to record to discs as
y
ou pre
f
er
.
5.
Clo
c
k:
To set up the clock o
f
the unit as you need
.
6.
H
D
MI
:
To set up t
h
e HDMI connection setting.
7
. Reset A
ll
:
To reset the setting to the
f
actory de
f
ault
.
<
DISC Pla
y
back Mode menu (audio CD/VCD)
>
<
DISC Pla
y
back Mode menu (MP3/JPEG
)
>
DISC Playback Mode
Random Play
Program Play
PBC (Video CD only)
1
1
2
2
3
3
4
4
5
6
7
DISC Playback Mode
Music
Photo
Random Play
Slide Show
1
1
2
2
8
5
1
1
9
2
2
10
E9P8CUDZV427MG9BOMv1.indd23E9P8CUDZV427MG9BOMv1.indd23 2012/03/0113:06:082012/03/0113:06:08
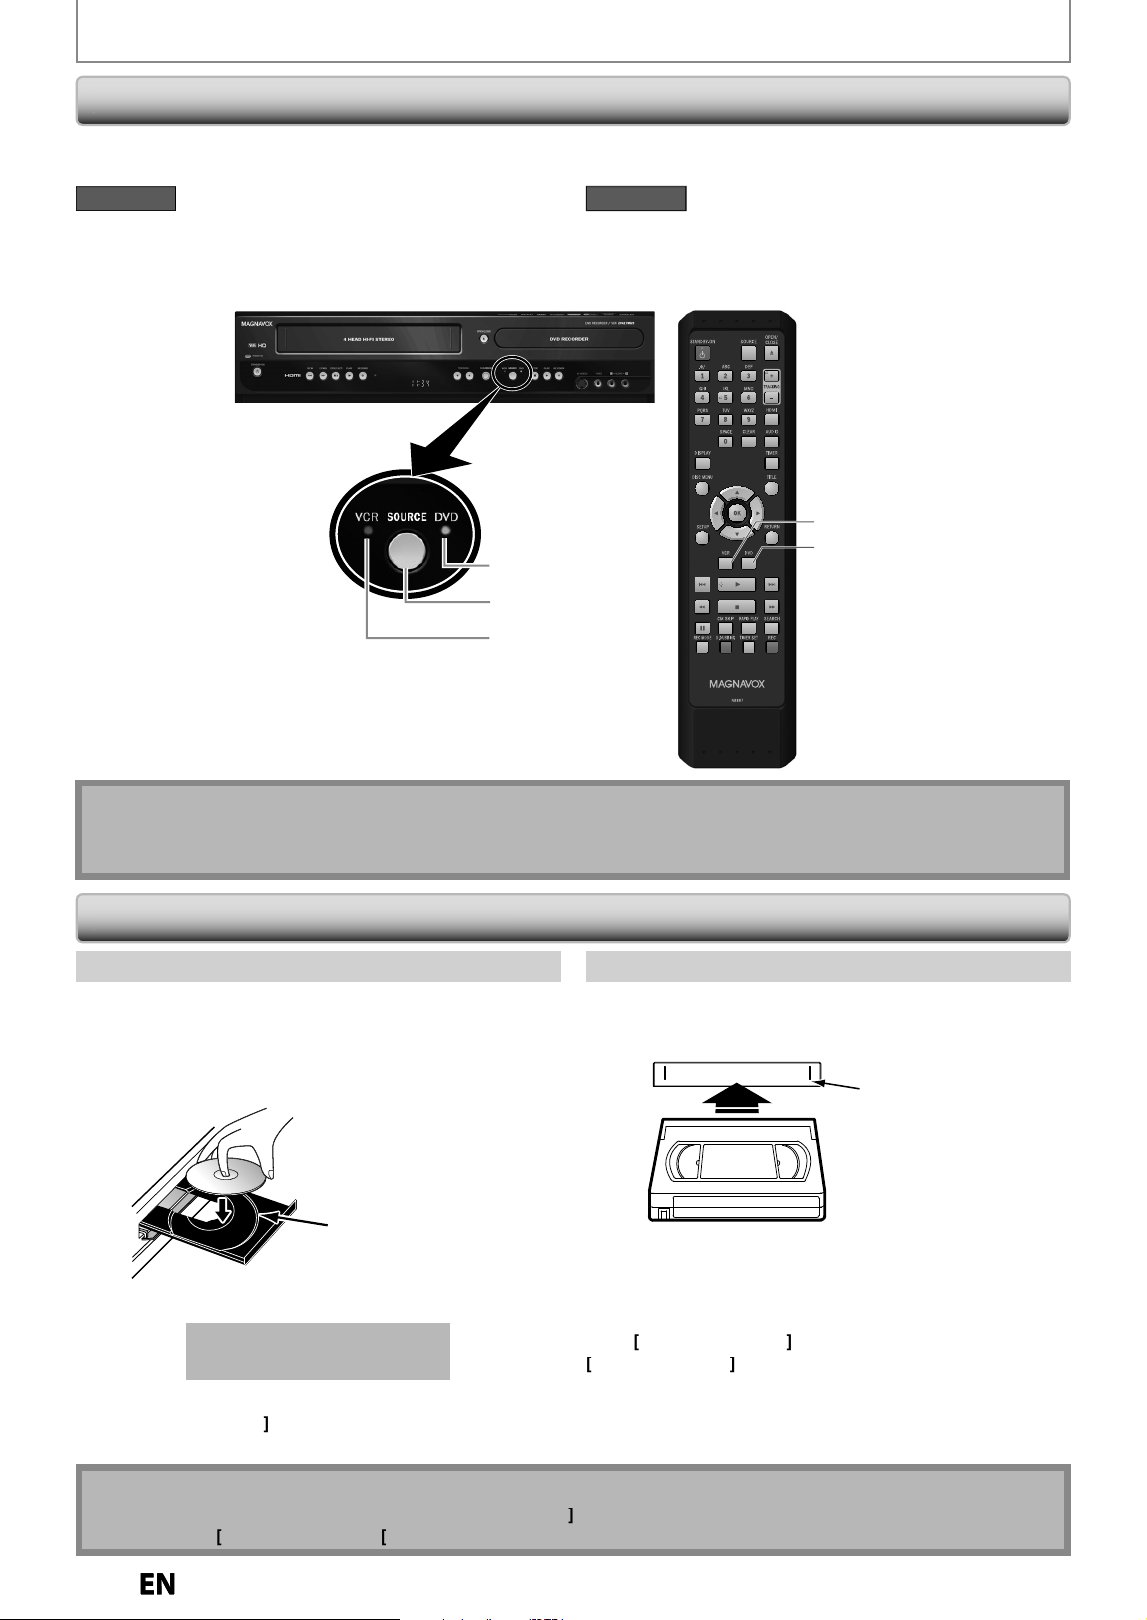
24
EN
EN
Because this product is a combination of a VCR and a DVD recorder,
y
ou must select first which component
y
ou wish
to o
p
erate
.
DVD indicator
VCR indicator
SOURCE button
VCR button
DVD button
DVD mode
P
r
ess
[
S
O
URCE
]
on the
f
ront panel, or press
[
DVD
]
o
n
the
remote contro
l.
(Verif
y
that the DVD indicator is lit.)
VCR mode
P
r
ess
[
S
O
URCE
]
on the
f
ront panel, or press
[
VCR
]
o
n
the
remote contro
l.
(
Verif
y
that the VCR indicator is lit.
)
Note
• You cannot switc
h
to anot
h
er mo
d
e w
h
i
l
e in t
h
e timer-stan
db
y mo
d
e.
• Pla
y
back will stop when
y
ou change the output mode
.
1
)
Press [DVD].
2
)
Press [OPEN/CLOSE
A
] to open t
h
e
d
isc tra
y.
3) Place the disc on the disc tra
y
with its label side
facin
g
up
.
Align the disc to
the disc tray guide.
4
)
Press [OPEN/CLOSE
A
] to close the disc tra
y.
It may ta
k
e a w
h
i
l
e to
l
oa
d
th
e
d
isc
.
To eject t
h
e
d
isc
:
Pr
ess
[
OPEN/CLOSE
A
]
to open the disc tra
y
, then remove
the disc before turning the unit to the standb
y
mode
.
1
)
Press [VCR]
.
2
) Insert a cassette ta
p
e as i
ll
ustrate
d
b
e
l
ow
.
4 HEAD HI-FI STEREO
Cassette compartment
• Insert from the fla
p
side first with the window side
facin
g
up
.
T
o eject t
h
e cassette tape
:
P
r
ess
[
C
A
STOP
/
EJEC
T
]
on the front
p
anel or
p
ress
[
OPEN
/
CLOSE
A
]
o
n
t
h
e
r
e
m
ote
co
n
t
r
o
l
.
H
o
w t
o
In
s
ert
a
Di
s
c How to Insert a Cassette Ta
pe
How to Insert a Disc / Cassette Ta
p
e
Switc
h
in
g
DVD / VCR Mo
de
BEFORE YOU START
Note
•
I
f
y
ou turn this unit to the standb
y
mode,
[O
PEN
/
CL
O
SE
A
]
on t
h
e remote contro
l
is not avai
l
a
bl
e.
B
e sure to use
[
A
O
PEN
/
CL
O
SE
]
or
[
C
A
ST
O
P
/
EJECT
]
on t
h
e unit.
E9P8CUDZV427MG9BOMv1.indd24E9P8CUDZV427MG9BOMv1.indd24 2012/03/0113:06:102012/03/0113:06:10
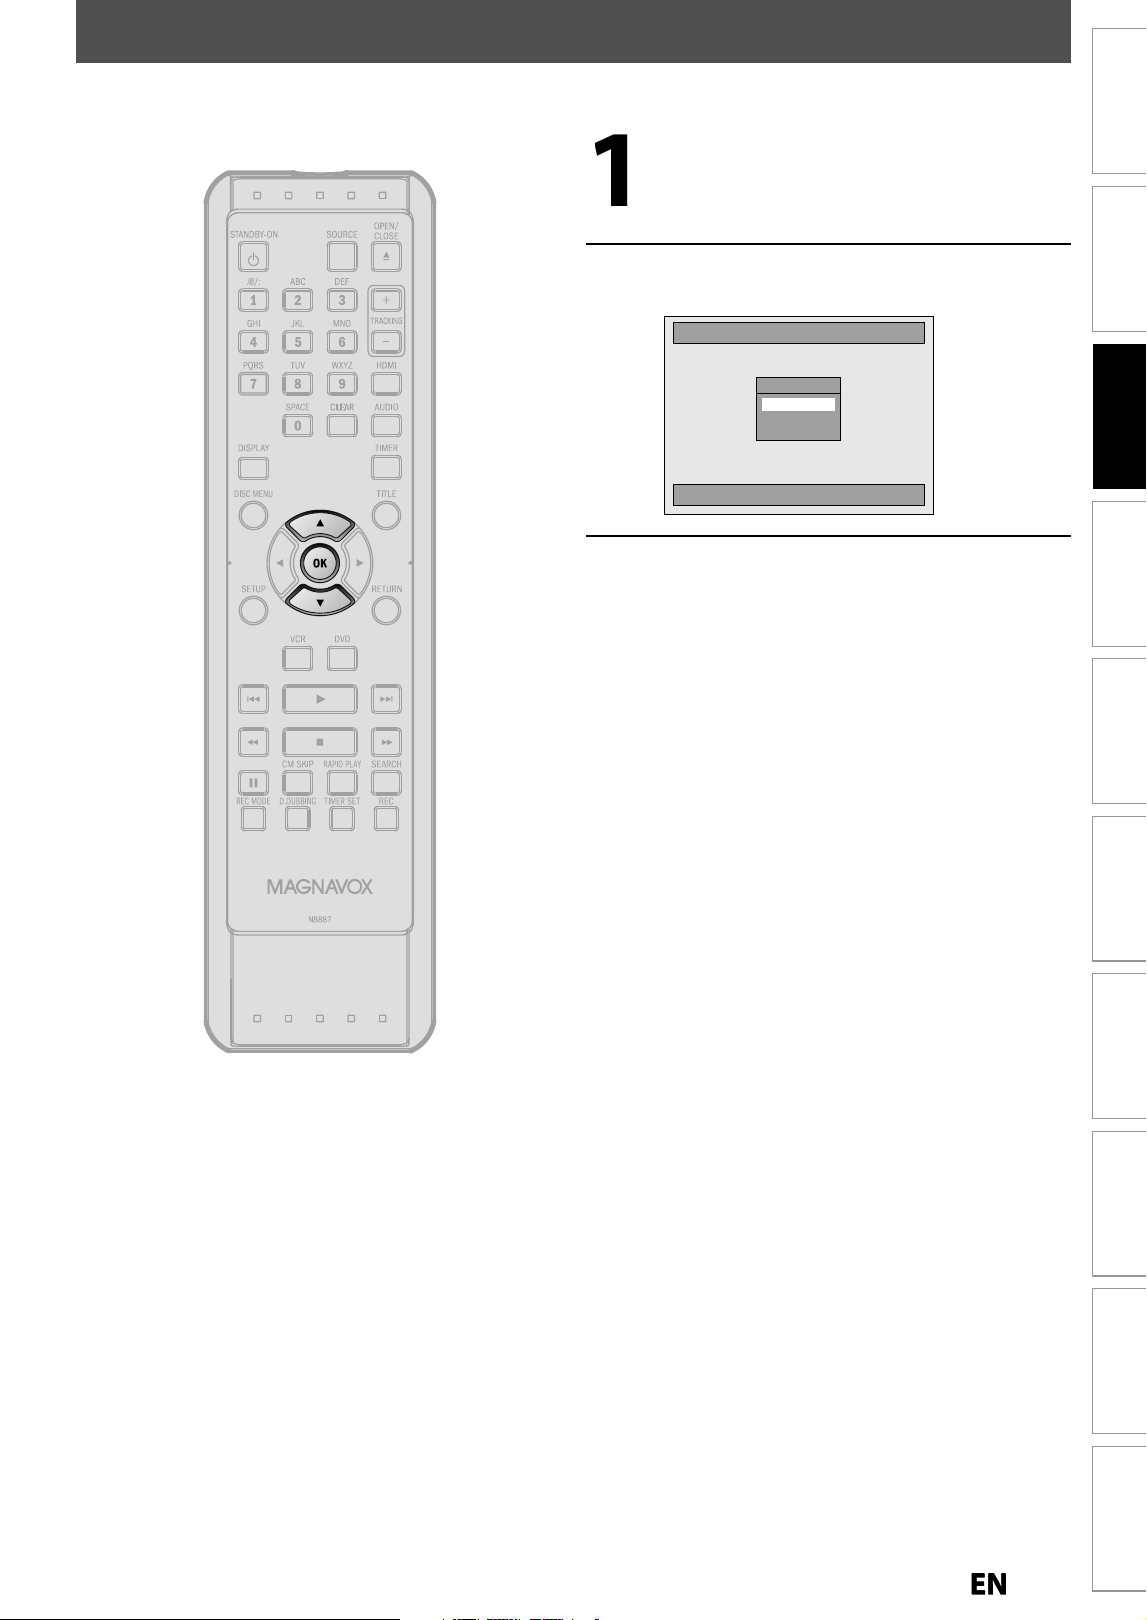
25
EN
EN
Recording Playback Editing
Introduction
Connections
Basic Setup
Function Setup VCR Functions
Others Español
INITIAL SETTING
You need to follow these steps when
y
ou turn on this unit for the first time
.
1
Follow the procedure in “Finding the
Viewing Channel on Your TV” on
page 20 to
d
isp
l
a
y
“Initia
l
Setup”
m
enu
.
2
Use
[
K
/
L
] to select
y
our desired
lan
g
ua
g
e, then press [OK]
.
Initial Setup
Select the language for Setup display.
OSD Language
English
Français
Español
3
Proceed to ste
p
3 in
“SETTING THE CLOCK” on pa
g
e 26
.
E9P8CUDZV427MG9BOMv1.indd25E9P8CUDZV427MG9BOMv1.indd25 2012/03/0113:06:122012/03/0113:06:12
26
EN
EN
1
Press
[
SETUP
]
an
d
use
[
K
/
L
]
to
se
l
ect “Genera
l
Settin
g
”, t
h
en press
[O
K
].
“Genera
l
Settin
g
” menu wi
ll
appear
.
2
Use
[
K
/
L
] to se
l
ect “C
l
oc
k
”, t
h
en
press
[O
K
].
“C
l
oc
k
Setting” menu wi
ll
appear
.
N
ot
e
•
Your setting will be canceled if
y
ou press
[
SETUP
]
before pressin
g
[
OK
]
at ste
p
3
.
•
Your clock settin
g
will be lost if either there is a power failure or this unit has been unplu
gg
ed for more than 30
seconds when
y
ou set the clock manuall
y.
•
For setting t
h
e
d
ay, year,
h
our, an
d
minute, [t
h
e Num
b
er
b
uttons
]
can a
l
so
b
e use
d
.
•
You can set the built-in calendar from the
y
ear 2011 up to 2058
.
SETTING THE CLOCK
Set the clock be
f
ore
y
ou tr
y
the timer programming. Follow these steps below
.
3
Use
[
{
/
{
B
] to se
l
ect an item to set
,
an
d
use
[
K
/
L
] to se
l
ect t
h
e contents
to suit
y
our pre
f
erence, then press
[OK] when you
f
inish setting all the
con
t
en
t
s
.
Clock Setting
JAN / 05 / 2012 ( THU
)
12 : 00 AM
Your settin
g
will be activated
.
T
h
e c
l
oc
k
start counting w
h
en
y
ou press
[O
K
]
.
4
Press
[
SETUP
]
to exit.
E9P8CUDZV427MG9BOMv1.indd26E9P8CUDZV427MG9BOMv1.indd26 2012/03/0113:06:122012/03/0113:06:12
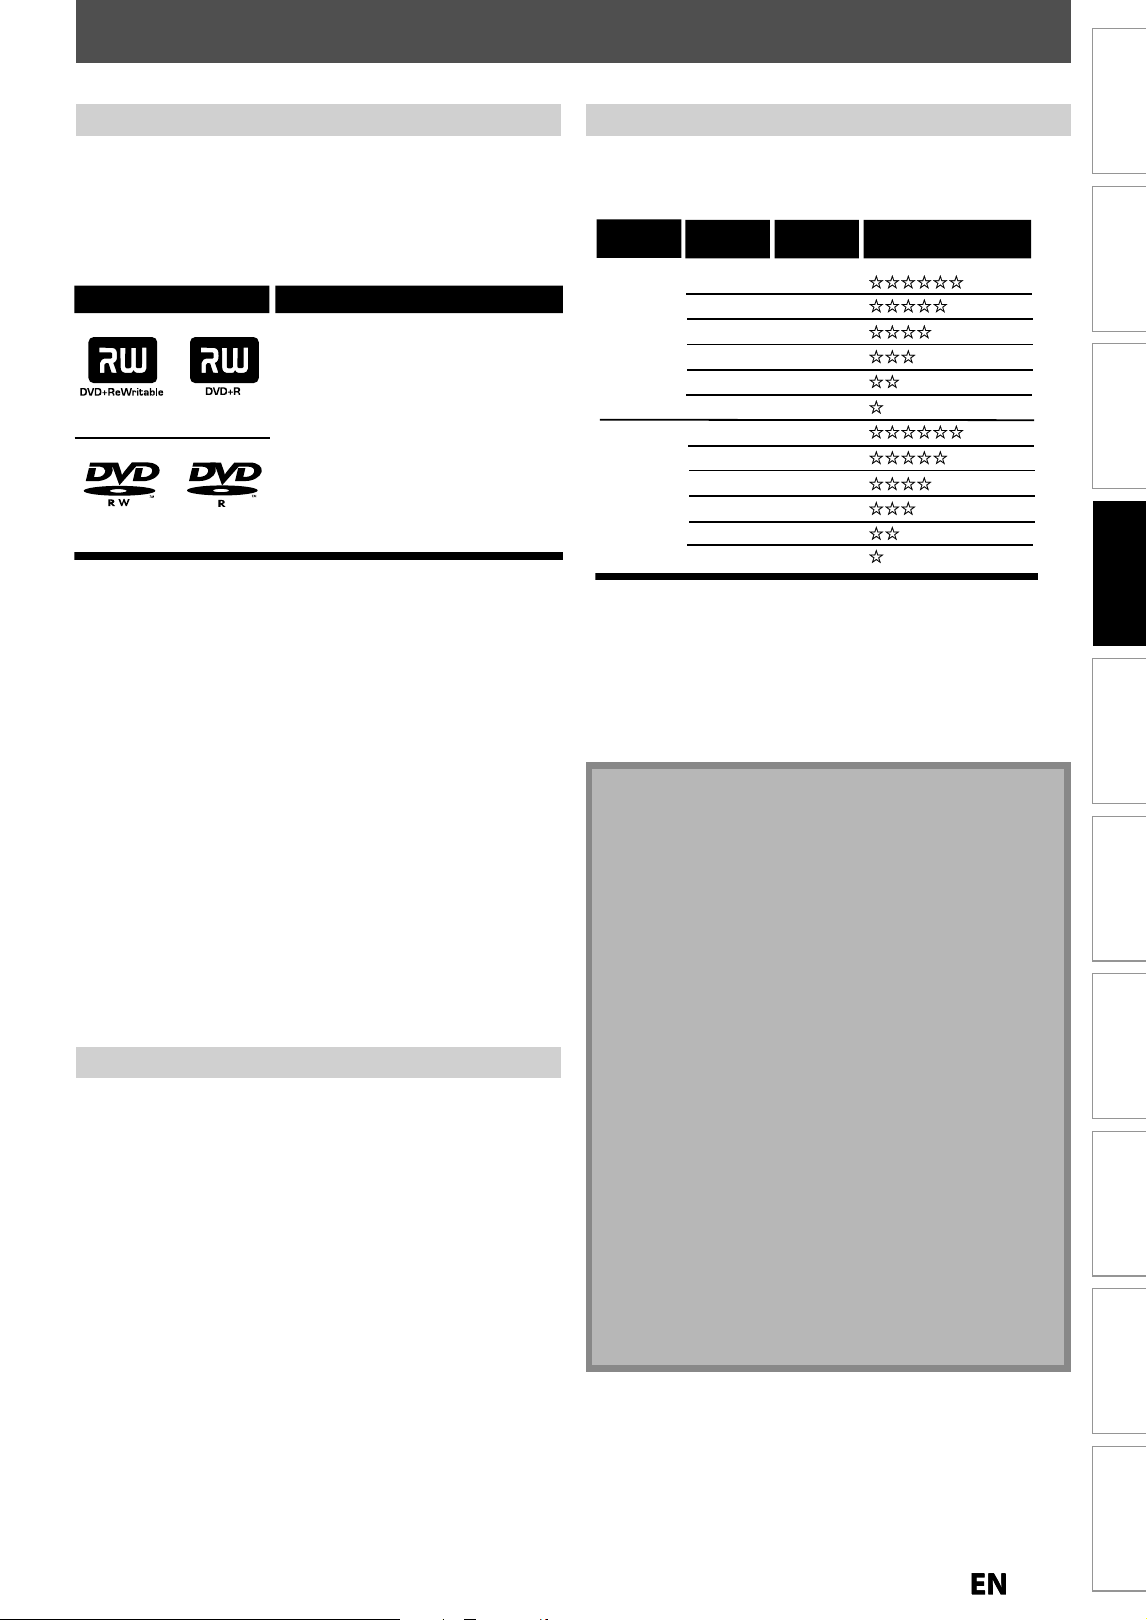
27
EN
EN
Recording
Playback Editing
Introduction
Connections Basic Setup Function Setup VCR Functions
Others Español
INFORMATION ON DVD RECORDING
Logos
Attributes
8cm/12cm, single-sided,
single layer disc
Approx. max. recording time
(SLP mode):
360 minutes (4.7GB) (for 12cm)
108 minutes (1.4GB) (for 8cm)
DVD+RW DVD+R
DVD-RW
DVD-R
T
his unit can record to DVD+RW
,
DVD+R
,
DVD-RW and
D
V
D
-
R.
D
VD+R/DVD-R can onl
y
be recorded to once. DVD+RW
/
D
VD-RW can
b
e recor
d
e
d
to an
d
erase
d
man
y
times
.
DVD-RW/-R wi
ll
b
e recor
d
e
d
in t
h
e DVD+VR mo
d
e
automatica
lly
in t
h
is unit
.
You can select a recordin
g
mode amon
g
6 options, and
t
h
e recor
d
ing time wi
ll
d
epen
d
on t
h
e recor
d
ing mo
d
e
y
ou select as follows
.
Recording
mode
Recording
time
Video/sound
quality
Disc size
8cm Disc
60 min
120 min
150 min
180 min
240 min
360 min
12cm Disc
(poor)
(poor)
(good)
(good)
HQ
(1Hr)
SP (2Hr)
SPP
(2.5Hr)
LP (3Hr)
EP (4Hr)
SLP (6Hr)
18 min
36 min
45 min
54 min
72 min
108 min
HQ
(1Hr)
SP (2Hr)
SPP
(2.5Hr)
LP (3Hr)
EP (4Hr)
SLP (6Hr)
• T
h
e recor
d
ing time is on
l
y an estimate. T
h
e actua
l
recording time may di
ff
er
.
• The audio and video qualit
y
gets poorer as the recording
time becomes lon
g
er
.
• E
ach
t
im
e
[
REC MODE
]
is presse
d
, recor
d
in
g
mo
d
e an
d
its allowed recording time will be displa
y
ed
.
•
Followin
g
discs are recommended for
g
ood recordin
g
q
ualit
y
and are proven to be compatible with this unit.
However, dependin
g
on the media condition the unit
ma
y
not read the disc properl
y.
Ver
b
atim DVD+R 8x, DVD+RW 4x,
D
V
D
-
R
8x,
D
V
D
-
R
W 2
x
JV
C
DVD-RW 4x
Maxe
ll
DVD+R 4x/8x/16x, DVD-R 8x/16x
S
O
NY DVD+R 4x
/
8x
/
16x, DVD+RW 4x
TDK DVD+R 4x
/
8x
/
16
x
Per
f
ormance o
f
an
y
other discs are not guaranteed
.
•
You can pla
y
back DVD+RW on most DVD pla
y
ers
without finalizing. However, if
y
ou have added or
d
eleted chapters, or made chapters hidden,
y
ou
must perform “Make Edits Compatible” before bein
g
able to see those effects on other units.
(
Refer to
page 71 for more details.) To pla
y
back discs other
t
han DVD+RW on other DVD pla
y
ers,
y
ou will need
to
fin
a
lize
.
Note
• Thi
s
u
nit c
a
nn
o
t rec
o
r
d
t
o
C
D-RW
o
r
C
D-R
.
• All high de
f
inition pictures will be down converted to
t
he standard definition pictures when the
y
are
r
eco
r
ded
o
n
th
i
s
u
ni
t.
• DVD+RW/+R, DVD-RW/-R an
d
CD-RW/-R recor
d
e
d
on
a
persona
l
computer or a DVD or CD recor
d
er may
not be pla
y
ed back i
f
the disc is damaged or dirt
y
or
if
there is condensation on the player’s lens
.
• If
y
ou record a disc using a personal computer, even
i
f it is recorded in a compatible format it ma
y
not be
pla
y
ed back because of the settings of the
app
lication software used to create the disc. (Chec
k
w
ith the software
p
ublisher for more detailed
i
nformation.
)
• Since the recording is made b
y
the VBR (variable bit
rate) method, depending on the picture
y
ou are
recordin
g
, the actual remainin
g
time for recordin
g
ma
y
be a little shorter than the remaining time
d
isp
l
a
y
e
d
on t
h
e TV screen
.
• You cannot recor
d
copy-protecte
d
program using
th
is unit. (Copy-protecte
d
signa
l
is inc
l
u
d
e
d
in DVD
-
vi
d
eo or some sate
ll
ite
b
roa
d
casts.
)
• You cannot record “cop
y
-once onl
y
” program on
D
VD
.
R
ec
o
r
dabl
e Di
s
c
s
Be
f
ore
y
ou make a recording, read the
f
ollowing in
f
ormation
.
Recor
d
in
g
Mo
d
e
•
DVD-RW r
eco
r
ded
in
the
m
ode
othe
r
tha
n +VR i
s
n
ot
recor
d
a
bl
e on t
h
is unit un
l
ess you erase a
ll
contents in
t
he disc (re
f
er to page 70)
.
•
DVD-R recor
d
e
d
in t
h
e mo
d
e ot
h
er t
h
an +VR is not
recor
d
a
bl
e on t
h
is unit
.
U
nrec
o
r
dabl
e Di
s
c
s
E9P8CUDZV427MG9BOMv1.indd27E9P8CUDZV427MG9BOMv1.indd27 2012/03/0113:06:132012/03/0113:06:13
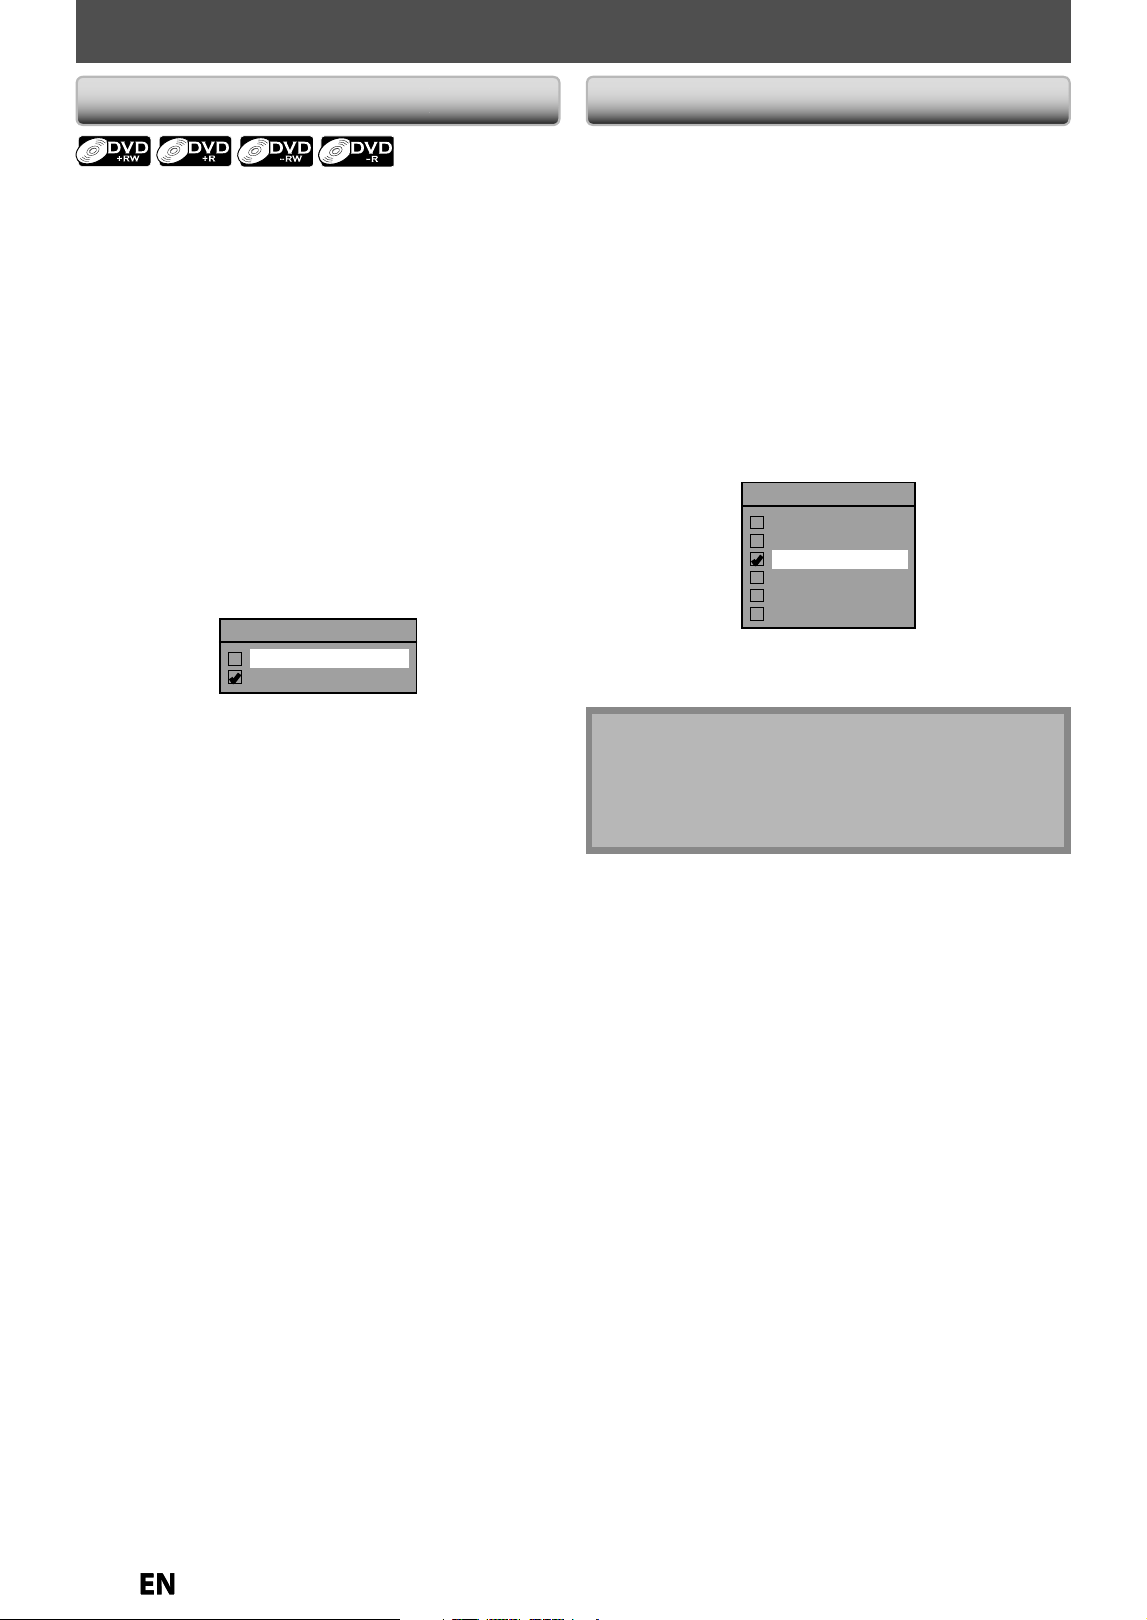
28
EN
EN
BEFORE RECORDING
Use
t
hi
s
f
eatu
r
e
to
m
a
k
e
t
h
e
u
nfin
a
liz
ed
+VR m
ode
d
i
scs
recorded on other unit recordable on this unit. When
y
ou
make an additional recordin
g
on this unit with “Make
Recordin
g
Compatible” set to “ON”, the title menu is
automaticall
y
converted to our st
y
le
.
1
)
Press [SETUP] and use
[
K
/
L
]
to select “General
Settin
g
”, then press [OK]
.
“Genera
l
Settin
g
” menu wi
ll
appear
.
2
)
Use [
K
/
L
] to se
l
ect “Recor
d
in
g
”, t
h
en press [OK]
.
“Recor
d
ing” menu wi
ll
appear
.
3
)
Use
[
K
/
L
] to se
l
ect “Ma
k
e Recor
d
ing Compati
bl
e”,
t
h
en press [OK]
.
4
)
Use
[
K
/
L
] to se
l
ect “ON” or
“O
FF
”
, t
h
en press [OK]
.
Make Recording Compatible
ON
OFF
O
N
:
Title list will be replaced when
y
ou make
additional recordings to the discs recorded b
y
ot
h
e
r
u
ni
ts.
O
FF
:
Pro
h
i
b
itin
g
a
dd
itiona
l
recor
d
to t
h
e
d
isc t
h
at
h
as a tit
l
e
l
ist create
d
by
ot
h
er units
.
5
)
Press [SETUP] to ex
i
t
.
Ma
k
e Recor
d
in
g
Compati
ble
S
ettin
g
f
or Auto Chapte
r
You can set a specified time for chapter marks.
1
)
Press [SETUP] an
d
use
[
K
/
L
] to se
l
ect “Genera
l
Settin
g
”, then press [OK]
.
“Genera
l
Setting” menu wi
ll
appear
.
2)
Use [
K
/
L
] to se
l
ect “Recor
d
ing”, t
h
en press [OK]
.
“Recor
d
ing” menu wi
ll
appear
.
3
)
Use [
K
/
L
] to se
l
ect
“
Auto C
h
apte
r
”, t
h
en press [OK]
.
4)
Use
[
K
/
L
] to se
l
ect a
d
esire
d
time option, t
h
en
press
[O
K
].
Auto Chapter
OFF
5 minutes
10 minutes
15 minutes
30 minutes
60 minutes
5)
Press [SETUP] to exit
.
N
ote
• The interval
f
or auto chapter ma
y
be up to two
minutes di
ff
erent
f
rom the time option
y
ou set.
• A
bl
an
k
c
h
apter may
b
e create
d
d
epen
d
ing on t
h
e
remaining time o
f
the disc
.
E9P8CUDZV427MG9BOMv1.indd28E9P8CUDZV427MG9BOMv1.indd28 2012/03/0113:06:132012/03/0113:06:13
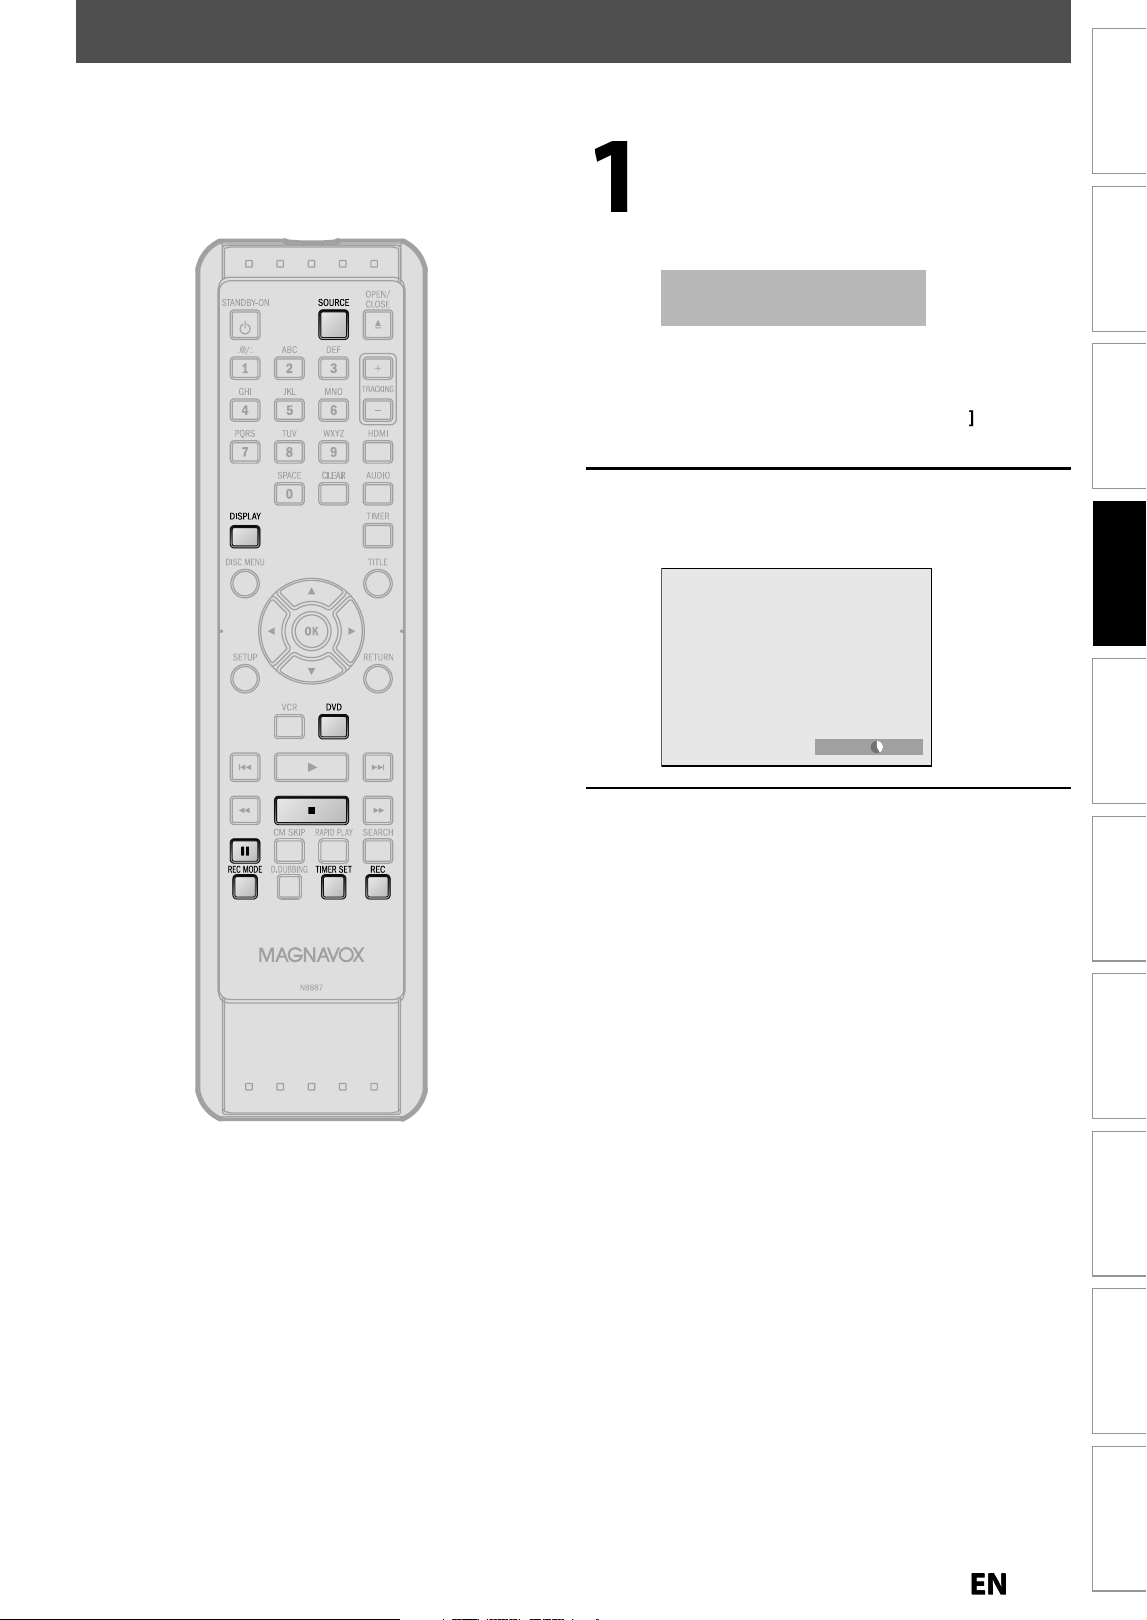
29
EN
EN
Recording
Playback Editing
Introduction
Connections Basic Setup Function Setup VCR Functions
Others Español
BASIC RECORDING & ONE-TOUCH TIMER RECORDING
Press
[
DVD
]
f
irst
.
1
Insert a recordable disc (refer to pa
g
e
24 on how to insert a disc
).
* Ma
k
e sure t
h
e
d
isc is compati
bl
e wit
h
t
h
is unit.
(
Refer to pa
g
e 27 for the list of compatible
d
iscs.
)
It ma
y
ta
k
e a w
h
i
l
e to
l
oa
d
the
d
i
s
c
.
• When insertin
g
a brand-new DVD+RW/DVD-RW,
the unit automaticall
y
starts to format
.
• If titles have been recorded on the disc
,
the
tit
l
e
l
ist is
d
isp
l
a
y
e
d
. Press
[
STOP
C
]
to
e
xi
t
the
t
i
t
l
e
li
st.
2
Press [REC MODE] repeate
dl
y to
se
l
ect a recor
d
ing mo
d
e
.
Re
f
er to “Recording Mode” on page 27.
SP(2Hr) 0h58m
3
Press [SOURCE] to se
l
ect t
h
e
appropriate externa
l
input position
(L1/L2) to w
h
ic
h
your externa
l
tuner
is connecte
d
. T
h
en se
l
ect t
h
e
d
esire
d
c
h
anne
l
to recor
d
on t
h
e externa
l
t
uner
.
Follow the steps to record TV pro
g
rams from an external
tu
n
e
r
.
Th
is unit
h
as no tuner s
y
stem so cannot receive TV
b
r
oadcasts
wi
thout
e
x
te
rn
al
tu
n
e
r
o
r
such
de
vi
ces.
E9P8CUDZV427MG9BOMv1.indd29E9P8CUDZV427MG9BOMv1.indd29 2012/03/0113:06:142012/03/0113:06:14
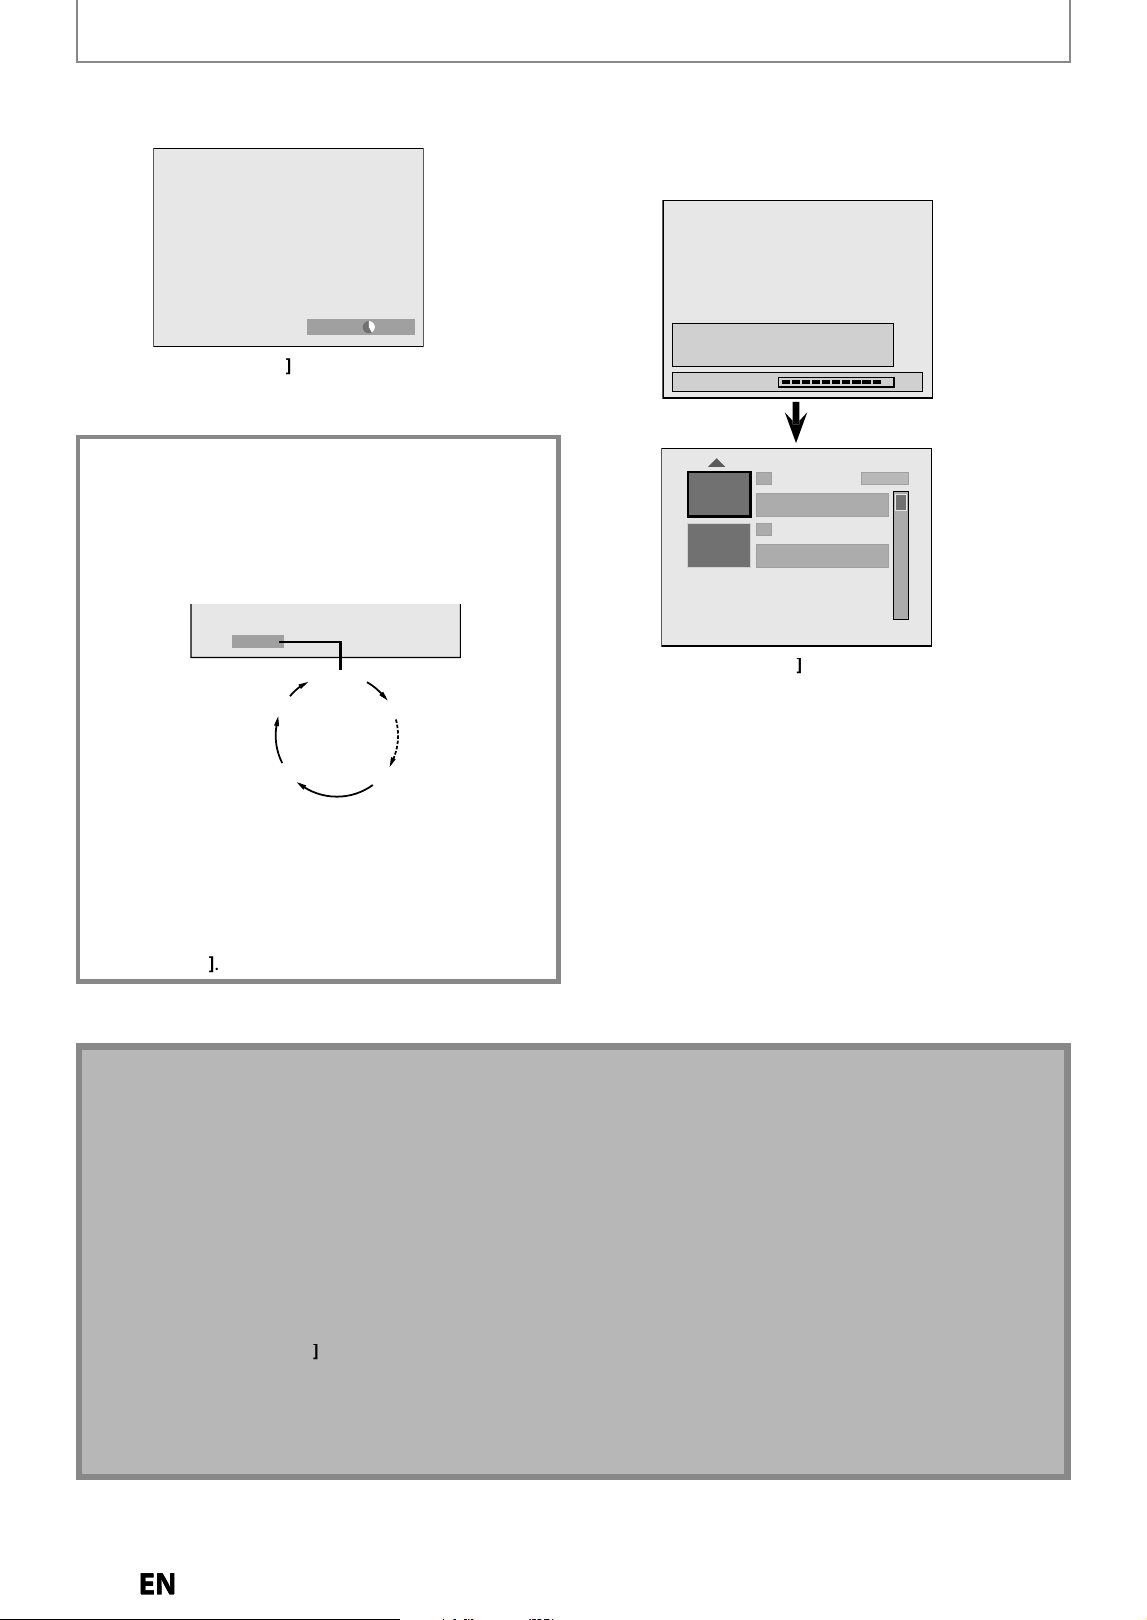
30
EN
EN
BASIC RECORDING & ONE-TOUCH TIMER RECORDING
5
Press [STOP
C
]
to stop recor
d
in
g
.
T
h
e recor
d
e
d
tit
l
e wi
ll
appear in t
h
e tit
l
e
l
ist.
(Re
f
er to “Guide to a Title List” on pa
g
e 60.
)
e.g.
)
DVD+
R
Writing to Disc
Please finalize the disc when the writing is
completed before playing back on other DVD
players.
90%
1 SP(2Hr)
2
EMPTY TITLE
1:41:17
SP(2Hr)
NOV/21/12 11:00
AM
L1 SP
NOV/21/12 0:20:44
•
P
ress
[
ST
O
P
C
]
to exit t
h
e tit
l
e
l
ist
.
4
Press [REC] to start recor
d
in
g
.
“
I
” will be displa
y
ed
f
or 4 seconds
.
I
SP(2Hr) 2h00m
P
ress
[
PAUSE
F
]
to pause recor
d
ing.
P
ress
[
PAUSE
F
]
]
or
[
REC
]
aga
i
n to restart
recor
d
ing
.
To set one-touc
h
timer recor
d
ing (OTR)..
.
T
his is a simple wa
y
to set the recording time in blocks
o
f
30
min
utes.
P
r
ess
[
REC
]
repeate
dly
unti
l
t
h
e
d
esire
d
recor
d
ing time
(30 minutes to 6
h
ours) a
pp
ears on t
h
e TV screen
.
One-touc
h
timer recor
d
ing wi
ll
start
.
0h30m
(normal recording)
6h00m
5h30m
1h00m
I
0h30m
To c
h
ange t
h
e recor
d
ing
l
engt
h
d
uring t
h
e
one-touc
h
timer recor
d
ing
:
Pr
ess
[
REC
]
repeatedl
y
until the desired length appear.
To cance
l
t
h
e one-touc
h
timer recor
d
ing wit
h
in t
h
e
speci
f
ied time
:
Pr
ess
[
STOP
C
]
.
N
ote
•
W
h
en you press
[
REC
]
,
recording starts immediately and continues until the disc is
f
ull or you stop recording
.
•
This unit cannot record ima
g
es as aspect ratio of 16:9. The 16:9 ima
g
es will be recorded as 4:3.
•
When the unit clock has not been set, the s
p
ace for a date and time of title names will be blank
.
•
You cannot c
h
ange t
h
e recor
d
ing mo
d
e
d
uring t
h
e recor
d
ing pause mo
d
e
.
•
You can chan
g
e a channel (external input) to be recorded durin
g
the recordin
g
pause mode
.
Note for one-touch timer recordin
g
•
The remaining recording time will be displa
y
ed on the
f
ront panel displa
y
during one-touch timer recording. Press
[
DISPLAY
]
to see it on t
h
e TV screen
.
•
Unlike the timer recording,
y
ou can perform the following operations during one-touch timer recording
.
- Turning the power to standb
y
to stop one-touch timer recording.
- Usin
g
[
REC
]
o
r
[
STOP
C
]
o
n
t
h
e
r
e
m
ote
co
n
t
r
o
l
.
•
You cannot use the pause
f
unction durin
g
one-touch timer recordin
g.
•
When one-touch timer recording is
f
inished and the power is turned to standby, the unit will switch to the timer
-
standby mode automatically i
f
a timer recording has been programmed. Press
[
TIMER SET
]
to cance
l
t
h
e timer-
stan
db
y mo
d
e to use t
h
e unit continuous
l
y
.
E9P8CUDZV427MG9BOMv1.indd30E9P8CUDZV427MG9BOMv1.indd30 2012/03/0113:06:152012/03/0113:06:15
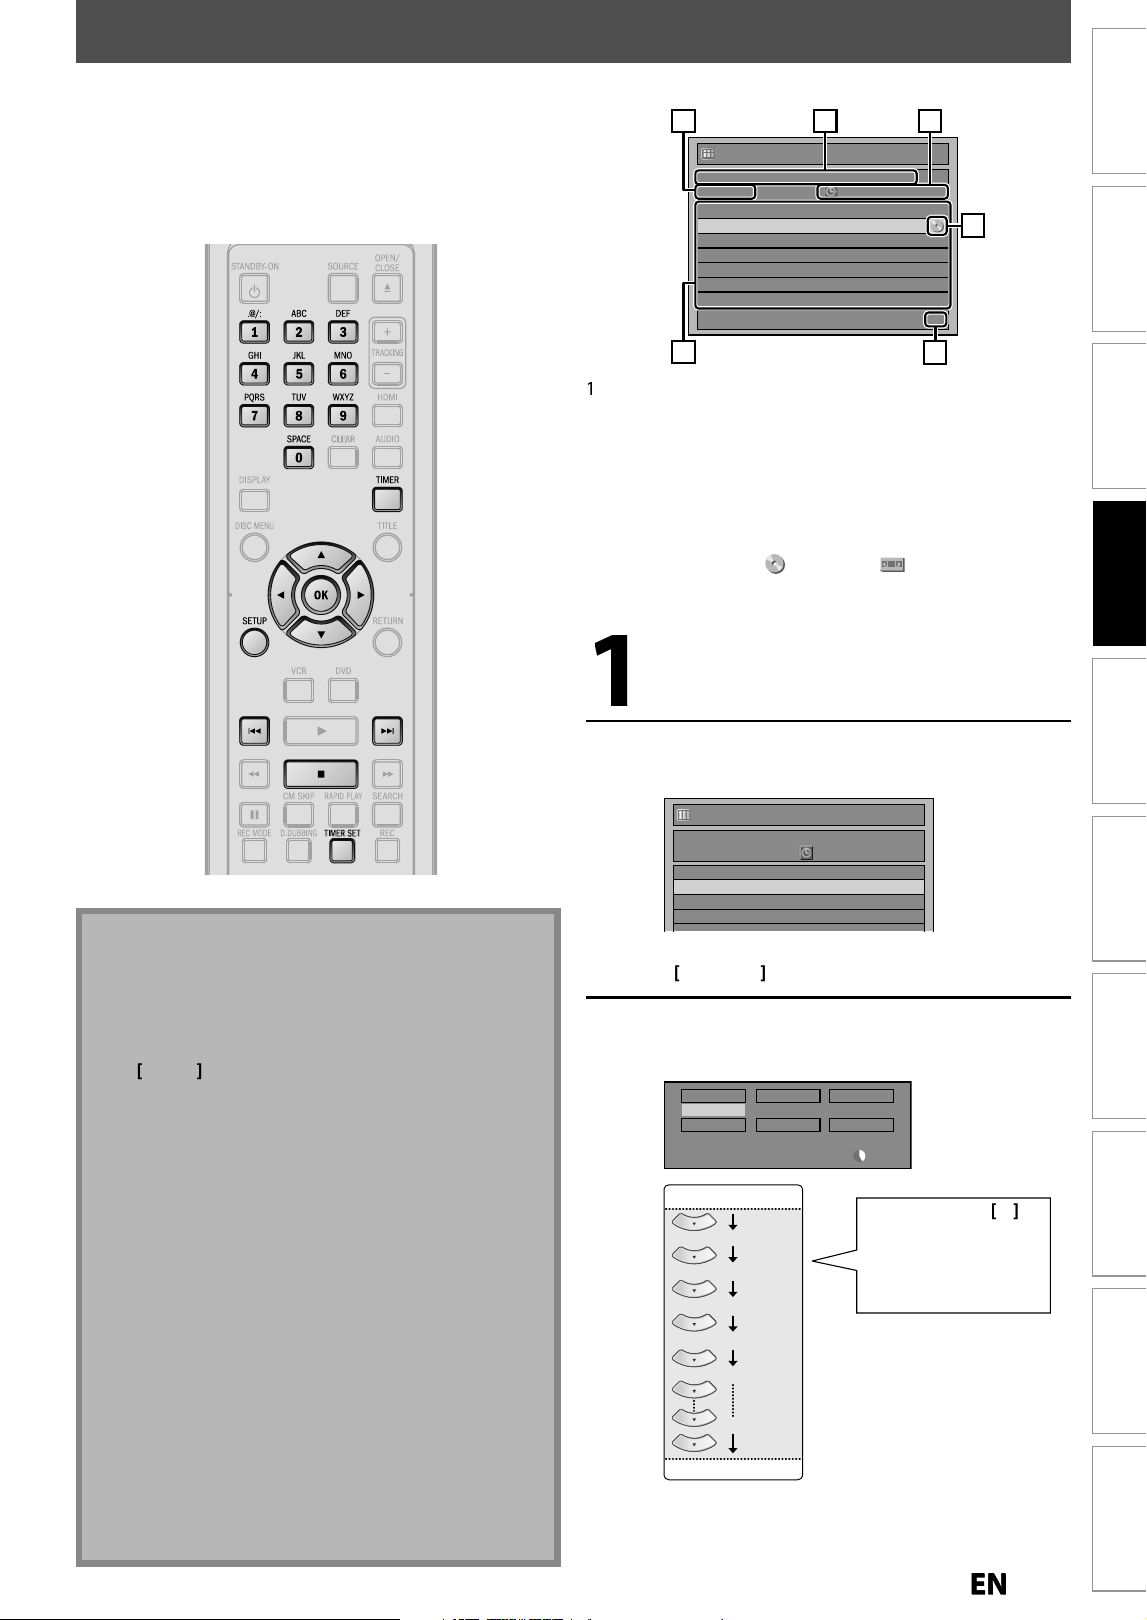
3
1
EN
EN
Recording
Playback Editing
Introduction
Connections Basic Setup Function Setup VCR Functions
Others Español
TIMER RECORDING
1
Press
[
TIMER
]
.
2
Use
[
K
/
L
] to se
l
ect “New Program”,
t
h
en press [OK]
.
Timer Programming
THU JAN/05 11:00AM
Date Start End L1/L2
New Program
• I
f
there are 6 or more programs, use
[
H
/
G
]
to chan
g
e pa
g
es.
3
Use
[
K
/
L
] to enter t
h
e
d
ate
,
t
h
en
p
ress
[
B
]
.
Date
JAN/06
REC To Mode
DVD SP
SP 2h00m
Start
- - : - -
End
- - : - -
L1/L2
L1
Daily
MON-SAT
JAN/01
JAN/31
MON-FRI
SAT
FRI
SUN
You can pro
g
ram the unit to record up to 12 pro
g
rams
wit
h
in a mont
h
in a
d
vance. Dai
l
y or wee
kl
y program
recor
d
ings are a
l
so avai
l
a
bl
e
.
Be
f
ore recordin
g
, make sur
e
•
Set the clock be
f
ore settin
g
a timer pro
g
rammin
g
.
•
Insert a recor
d
a
bl
e
d
isc wit
h
enou
gh
recor
d
a
bl
e space
.
Guide to Timer Programming Displa
y
Timer Programming
1/1
THU JAN/05 11:00AMSP (1:00)
JAN/ 6/12 12:00 AM L1 SP
Date Start End L1/L2
JAN/06 12:00AM 1:00AM L1
New Program
1
5
3
4
2
6
Title o
f
a timer pro
g
ram (Contains date, time, selected
e
xternal input position, recordin
g
mode of the
p
ro
g
ram
)
2 Current
d
ate an
d
tim
e
3 Recordin
g
mode, and len
g
th of the recordin
g
4 Timer pro
g
ram lis
t
5 Total number o
f
pages and current page (2 pages
m
aximum
)
6 Recor
d
ing me
d
ia (
“
”
(
DVD
)
or
“
”
(
VCR
))
W
h
en pressing
[
L
]
a
t
th
e current
d
ate, t
h
e
d
ate wi
ll
c
h
ange as
fo
ll
o
w
s.
e.g.
)
January 1s
t
N
ote
• If
y
ou have not set the clock
y
et
:
Entry screen
f
or the clock setting will appear instead
of
the timer programming list at step 1. Continue
wit
h
t
h
e step 3 in “SETTING THE CLOCK” on page 26
be
f
ore setting a timer programming
.
•
Use
[
s
/
B
]
to
m
o
v
e
t
h
e
cu
r
so
r
to
t
h
e
l
e
f
t
a
n
d
t
h
e
right in the entr
y
screen for the timer programming
.
• I
f
a basic recordin
g
or one-touch timer recordin
g
is in
pro
g
ress on one component (e.
g
., VCR) and the timer
recordin
g
set for the other component (e.
g
., DVD) is
a
b
out to
b
egin, t
h
e unit automatica
lly
switc
h
es to t
h
e
pro
g
rammed channel for timer recordin
g
2 minutes
before the pro
g
rammed startin
g
time, and the
recordin
g
in pro
g
ress (
f
or VCR) will be canceled
U
NLESS their recordin
g
channels are the same. If their
recordin
g
channels are the same, the timer recordin
g
w
i
ll
start wit
h
out cance
l
ing t
h
e recor
d
ing current
ly
in
pro
g
ress. In this case, the recordin
g
of the same
c
h
a
nn
e
l will
be
m
ade
o
n
bot
h DVD
a
n
d
V
C
R
.
• You cannot ma
k
e a program w
h
ose recor
d
ing time
e
xcee
d
s 12
h
ours
.
• Cancel the timer-standb
y
mode b
y
pressing
[
TIMER SET
]
before o
p
eration for either DVD or VCR.
When finished operatin
g
, press
[
TIMER SET
]
to
resume the timer-standb
y
mode
.
• In t
h
e timer-stan
dby
mo
d
e,
y
ou can turn on t
h
e
p
ower and use the com
p
onent (VCR or DVD) which is
not currentl
y
timer-programmed
.
E9P8CUDZV427MG9BOMv1.indd31E9P8CUDZV427MG9BOMv1.indd31 2012/03/0113:06:162012/03/0113:06:16
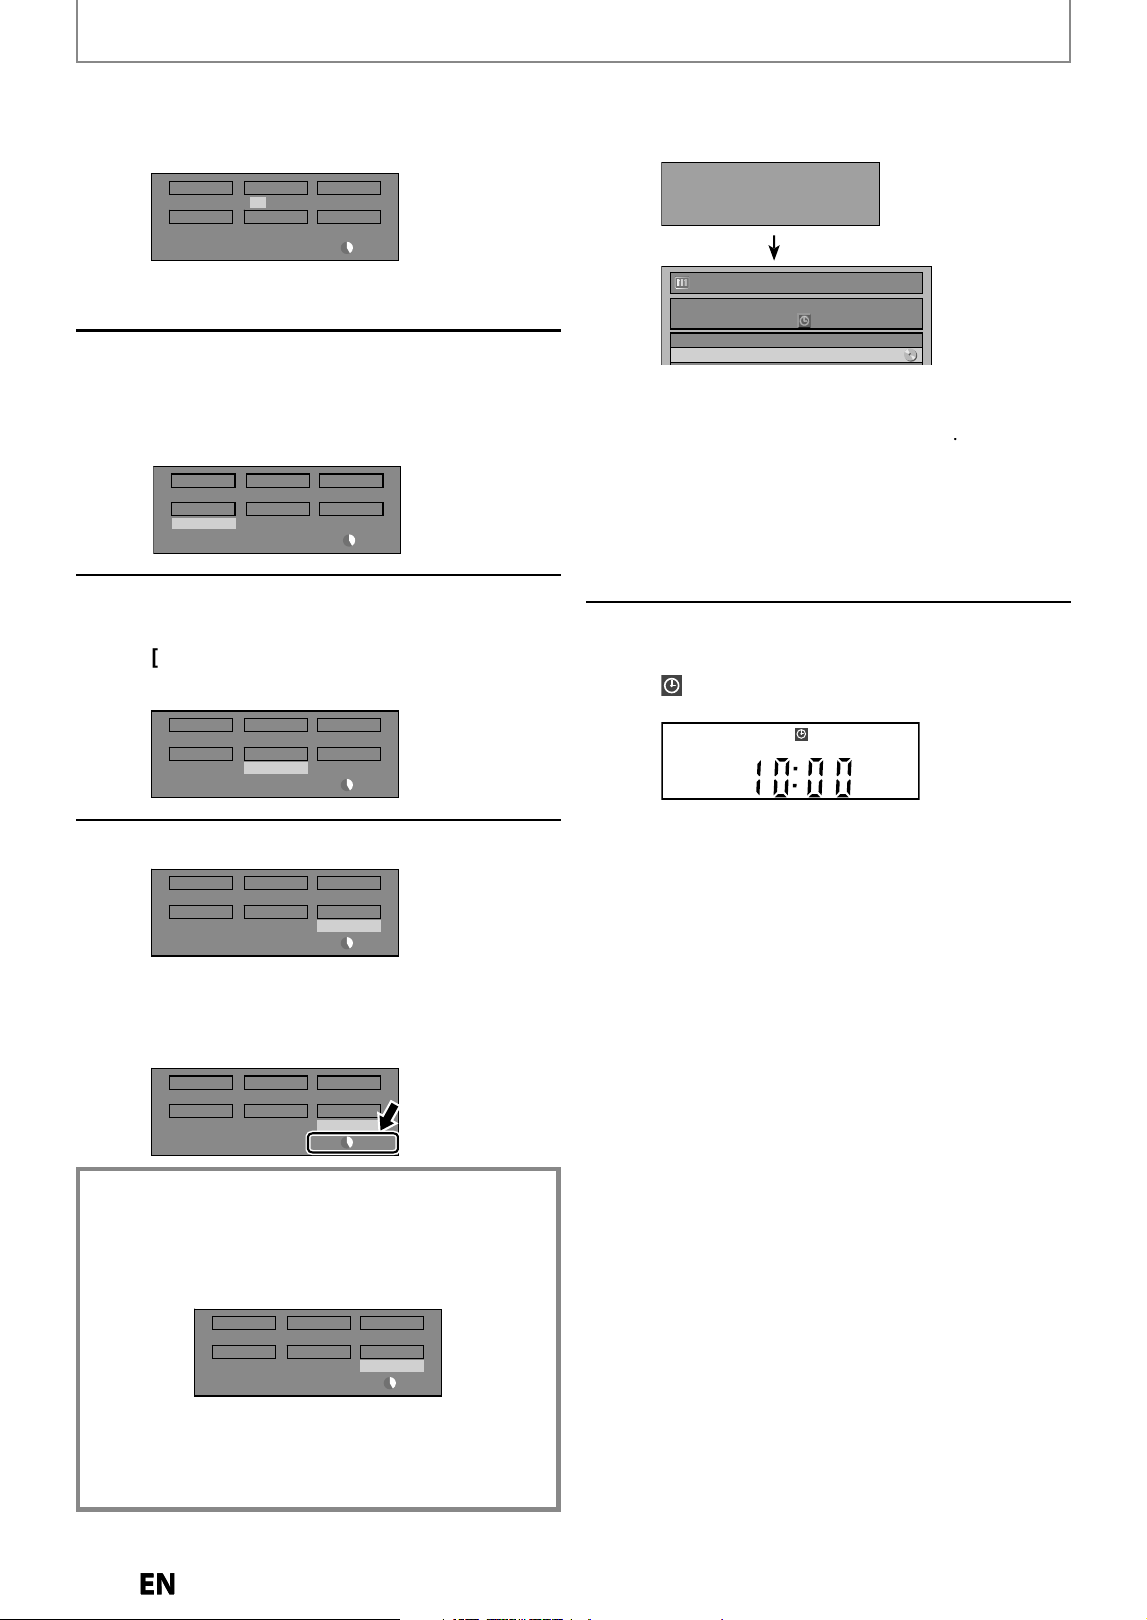
3
2
EN
EN
4
Use
[
K
/
L
/
s
/
B
]
or
[
t
h
e Num
b
er
b
uttons
]
to enter t
h
e start an
d
en
d
time, t
h
en press
[
B
].
Date
JAN/06
REC To Mode
DVD SP
SP 2h00m
Start End
- - : - -
L1/L2
L1
12 : 00AM
• You cannot ma
k
e a program w
h
ic
h
recor
d
ing
time excee
d
s 12
h
ours
.
5
Use
[
K
/
L
] to select the a
pp
ro
p
riate
external in
p
ut
p
osition (L1 / L2) to
which
y
our external tuner is
connected, then
p
ress
[
B
].
Date
JAN/06
REC To Mode
DVD SP
SP 1h00m
Start End
L1/L2
L1
1 : 00AM
12 : 00AM
6
Use
[
K
/
L
] to select the recordin
g
media (“DVD” or “VCR”), then
p
ress
[
B
].
e
.g.) recor
d
ing to DV
D
Date
JAN/06
REC To Mode
DVD SP
SP 1h00m
Start
12 : 00AM
End
1 : 00AM
L1
L1/L2
7
Use
[
K
/
L
] to se
l
ect a recor
d
ing mo
d
e.
Date
JAN/06
REC To Mode
DVD
SP 1h00m
Start End
L1/L2
L1
1 : 00AM
12 : 00AM
SP
Refer to “Recordin
g
Mode” on pa
g
e 27
.
• W
h
en recor
d
ing to DVD, you can c
h
ec
k
t
h
e
remaining recordable space o
f
the disc when
you se
l
ect t
h
e recor
d
ing mo
d
e
.
Date
JAN/06
REC To Mode
DVD
SP 1h00m
Start End
L1/L2
L1
1 : 00AM
12 : 00AM
SP
A
uto recor
d
ing mo
d
e se
l
ect (DVD on
l
y)..
.
When “Auto” is selected as a recordin
g
mode, the unit
ca
l
cu
l
ates
h
o
w m
uc
h
t
im
e
i
s
a
v
a
il
ab
l
e
o
n
t
h
e
d
i
sc
a
n
d
s
elects the best recordin
g
mode available
automaticall
y
to complete recording the program
.
Date
JAN/06
REC To Mode
DVD
Auto 1h00m
Start End
L1/L2
L1
1 : 00AM
12 : 00AM
Auto
•
“Auto” is only available
f
or one program in the timer
program
l
ist
.
•
The recording ma
y
be cut short when the available
recordin
g
space of the disc is too limited
.
8
Press [OK] w
h
en a
ll
items are entere
d
.
A
f
ter displa
y
ing an instructive message
f
or 10
secon
d
s, timer pro
g
ram
l
ist wi
ll
appear
.
Press TIMER SET to Timer Standby mode.
When Timer set on DVD or VCR,
it is not available in the standby mode.
Press TIMER SET to cancel the Standby mode.
Timer Programming
THU JAN/05 11:00AMSP (1:00)
JAN/ 6/12 12:00 AM L1 SP
Date Start End L1/L2
JAN/06 12:00AM 1:00AM L1
Your pro
g
ram settin
g
is now stored
.
• To set anot
h
er program, repeat steps 2 to 8
.
• To ex
i
t, press
[
TIMER
]
or
[
SETUP
]
.
• When 2 or more pro
g
rams are overlapped,
“
Timer pro
g
ram overlapped” appears, and the
overlapped program will be displa
y
ed in blue
.
• To correct the timer program re
f
er to
“
C
h
ec
k
ing, cance
l
ing, or correcting t
h
e timer
programming in
f
ormation” on page 33
.
9
Press
[
TIMER SET
]
to set a timer
pro
g
rammin
g.
will appear on the
f
ront panel display, while
t
h
is unit waits to ma
k
e t
h
e recor
d
ing
.
CS DR CD
HDD
DVD
“VCR” will appear on the front panel displa
y
i
f
VCR timer recording have been set
.
TIMER RECORDING
E9P8CUDZV427MG9BOMv1.indd32E9P8CUDZV427MG9BOMv1.indd32 2012/03/0113:06:182012/03/0113:06:18
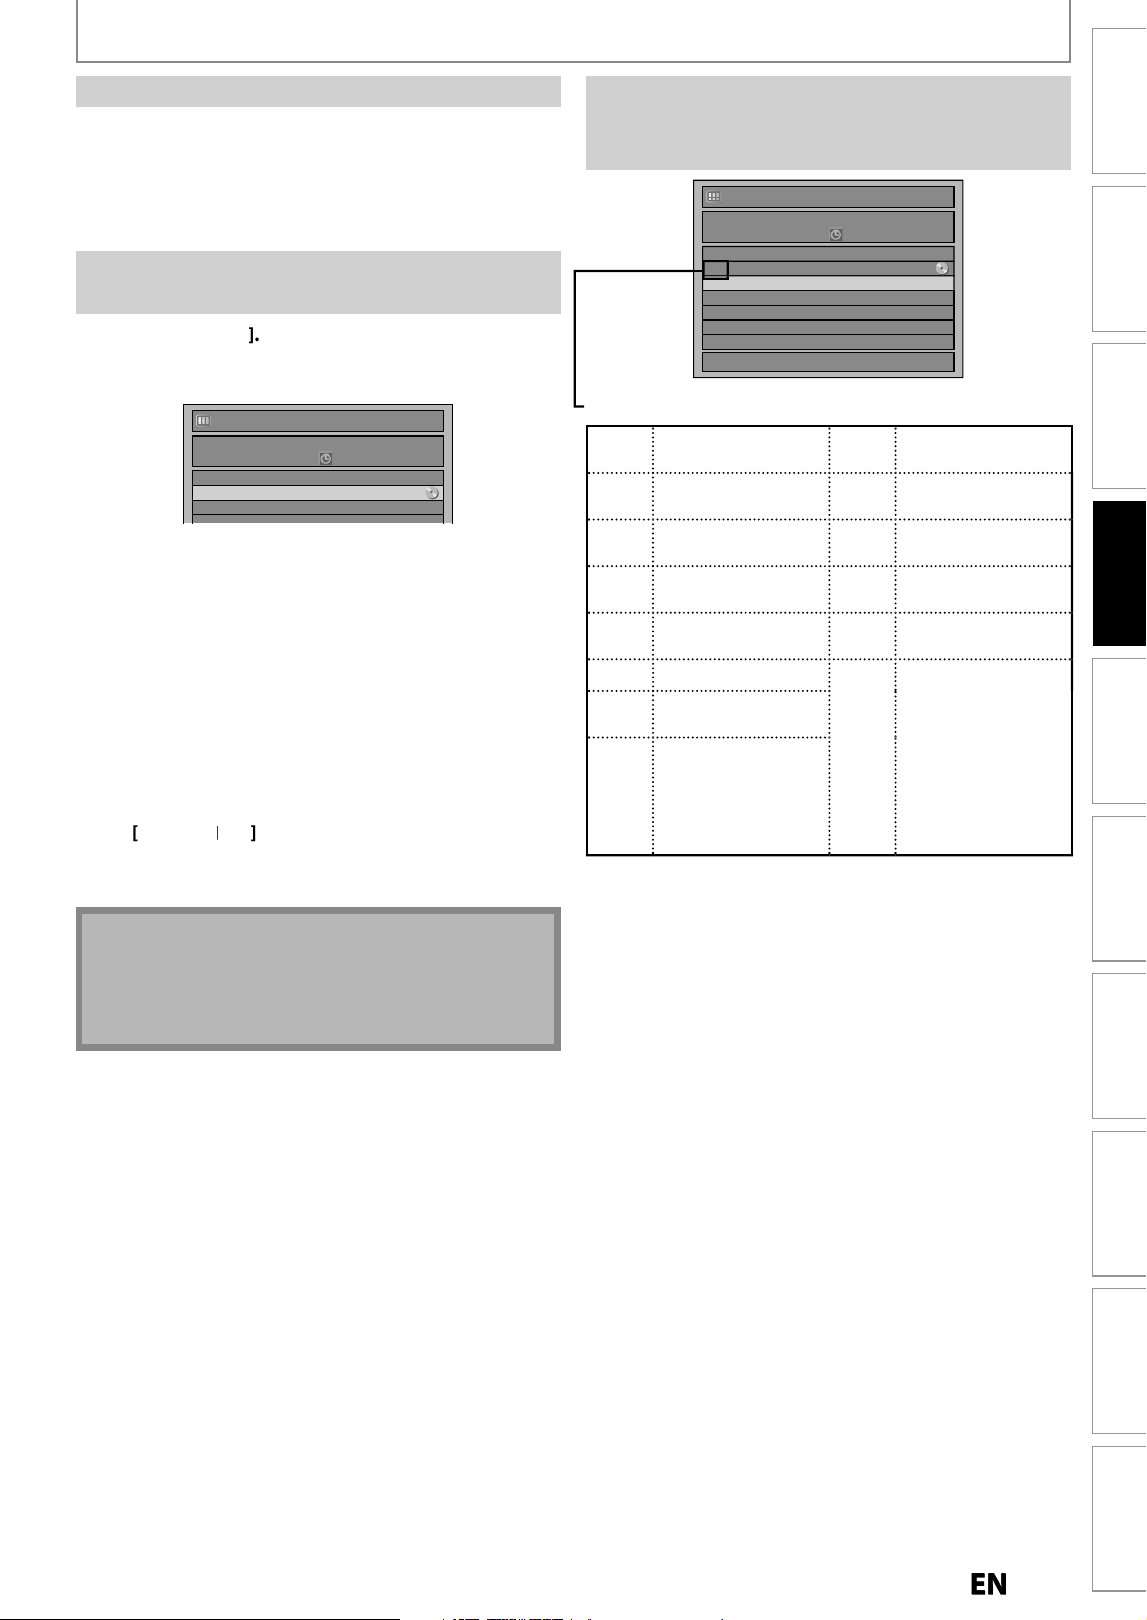
33
EN
EN
Recording
Playback Editing
Introduction
Connections Basic Setup Function Setup VCR Functions
Others Español
TIMER RECORDING
C
h
ec
k
ing, cance
l
ing, or correcting t
h
e timer
programming in
f
ormation
I
f
the timer program did not complete correctly,
t
h
e error num
b
er a
pp
ears in t
h
e time
r
pro
g
rammin
g
l
ist
.
1
)
Press [TIMER SE
T
]
.
2)
Press [TIMER]
.
3
) Check the in
f
ormation
.
Timer Programming
THU JAN/05 11:00AMSP (1:00)
JAN/ 6/12 12:00 AM L1 SP
Date Start End L1/L2
JAN/06 12:00AM 1:00AM L1
New Program
4-A) To delete the timer pro
g
ram:
1 Use
[
K
/
L
] to se
l
ect t
h
e program you want to
d
e
l
ete, t
h
en press [OK]
.
2
Use
[
K
/
L
] to se
l
ect “De
l
ete”, t
h
en
p
ress [OK]
.
Confirmation window will a
pp
ear
.
3 Use
[
K
/
L
] to se
l
ect “Yes”, t
h
en press [OK]
.
4-B) To correct t
h
e timer program:
1 Use
[
K
/
L
] to select the program
y
ou want to
correct, then
p
ress [OK]
.
2
Use
[
K
/
L
] to se
l
ect “Program C
h
ange”, t
h
en
press
[O
K
]
.
3 Correct the timer program b
y
usin
g
[
K
/
L
/
{
/
{
B
]
, t
h
en
p
ress [OK]
.
5
)
Press [TIMER] to exit
.
6
) Press [TIMER SET] to return to t
h
e timer stan
db
y mo
d
e
.
Note
•
P
ress
[
TIMER
]
to c
h
ec
k
t
h
e timer recor
d
ing in progress
.
W
h
en t
h
e timer recor
d
ing is procee
d
ing, t
h
at
program wi
ll
b
e
h
ig
hl
ig
h
te
d
wit
h
re
d
. In t
h
is case,
you cannot se
l
ect any ot
h
er program
.
Timer Programming
1/1
FRI JAN/06 11:00AM
Date Start End L1/L2
E41 JAN/06 12:00AM 1:00AM L1
New Program
Eac
h
error num
b
er means
:
E1
-
22
E
3
7-
39
R
ecordin
g
error other
t
h
a
n
be
l
ow
E41
Po
w
e
r f
a
il
ed
E24
U
nr
eco
r
dab
l
e
d
i
sc
E42
No
d
i
sc
wh
e
n
r
ecordin
g
E
25-2
6
C
op
y
pro
h
i
b
ite
d
program
E
4
3
Al
rea
dy
49 tit
l
es
r
ecor
d
e
d
E
2
9
D
isc protecte
d
E
4
4
Al
rea
d
y 254 c
h
apters
r
ecor
d
e
d
E
30
D
i
sc
f
u
l
l
E4
5
C
op
y
prohibited
p
ro
g
ram
E
35
PC
A f
u
ll *1 E4
6
I
t is im
p
ossible to
r
ecord additionall
y
o
n
a
d
i
sc
r
eco
r
ded
by
other units
w
hen settin
g
“
M
ake Recordin
g
C
om
p
atible” to “OFF”
.
E
36
A
lread
y
finalized
v
i
deo
f
o
rm
at
d
i
sc
E
4
0
S
ome portion
h
as
not
bee
n r
eco
r
ded
b
ecause o
f
program
o
ver
l
apping.
R
ecor
d
ing
d
i
d
not
s
tart at t
h
e start time
.
• E23, E27, E28, E31, E32, E33 and E34 are not displa
y
ed
.
• A program with the error number is gra
y
ed in the timer
pro
g
rammin
g
list
.
• Timer pro
g
ram with an error number will be cleared
once the entr
y
screen
f
or the program is displa
y
ed
.
*
1 PCA is a disc's space reserved
f
or recording test.
T
o stop t
h
e timer recor
d
in
g
in pro
g
ress
1
)
Press [STOP C
]
on t
h
e remote contro
l
.
2
) Con
f
irmation messa
g
e will appear. Select “Yes”,
th
en press [OK]
.
• To stop the timer recording immediatel
y
, press
[
C
STOP
]
on the unit
.
E9P8CUDZV427MG9BOMv1.indd33E9P8CUDZV427MG9BOMv1.indd33 2012/03/0113:06:202012/03/0113:06:20
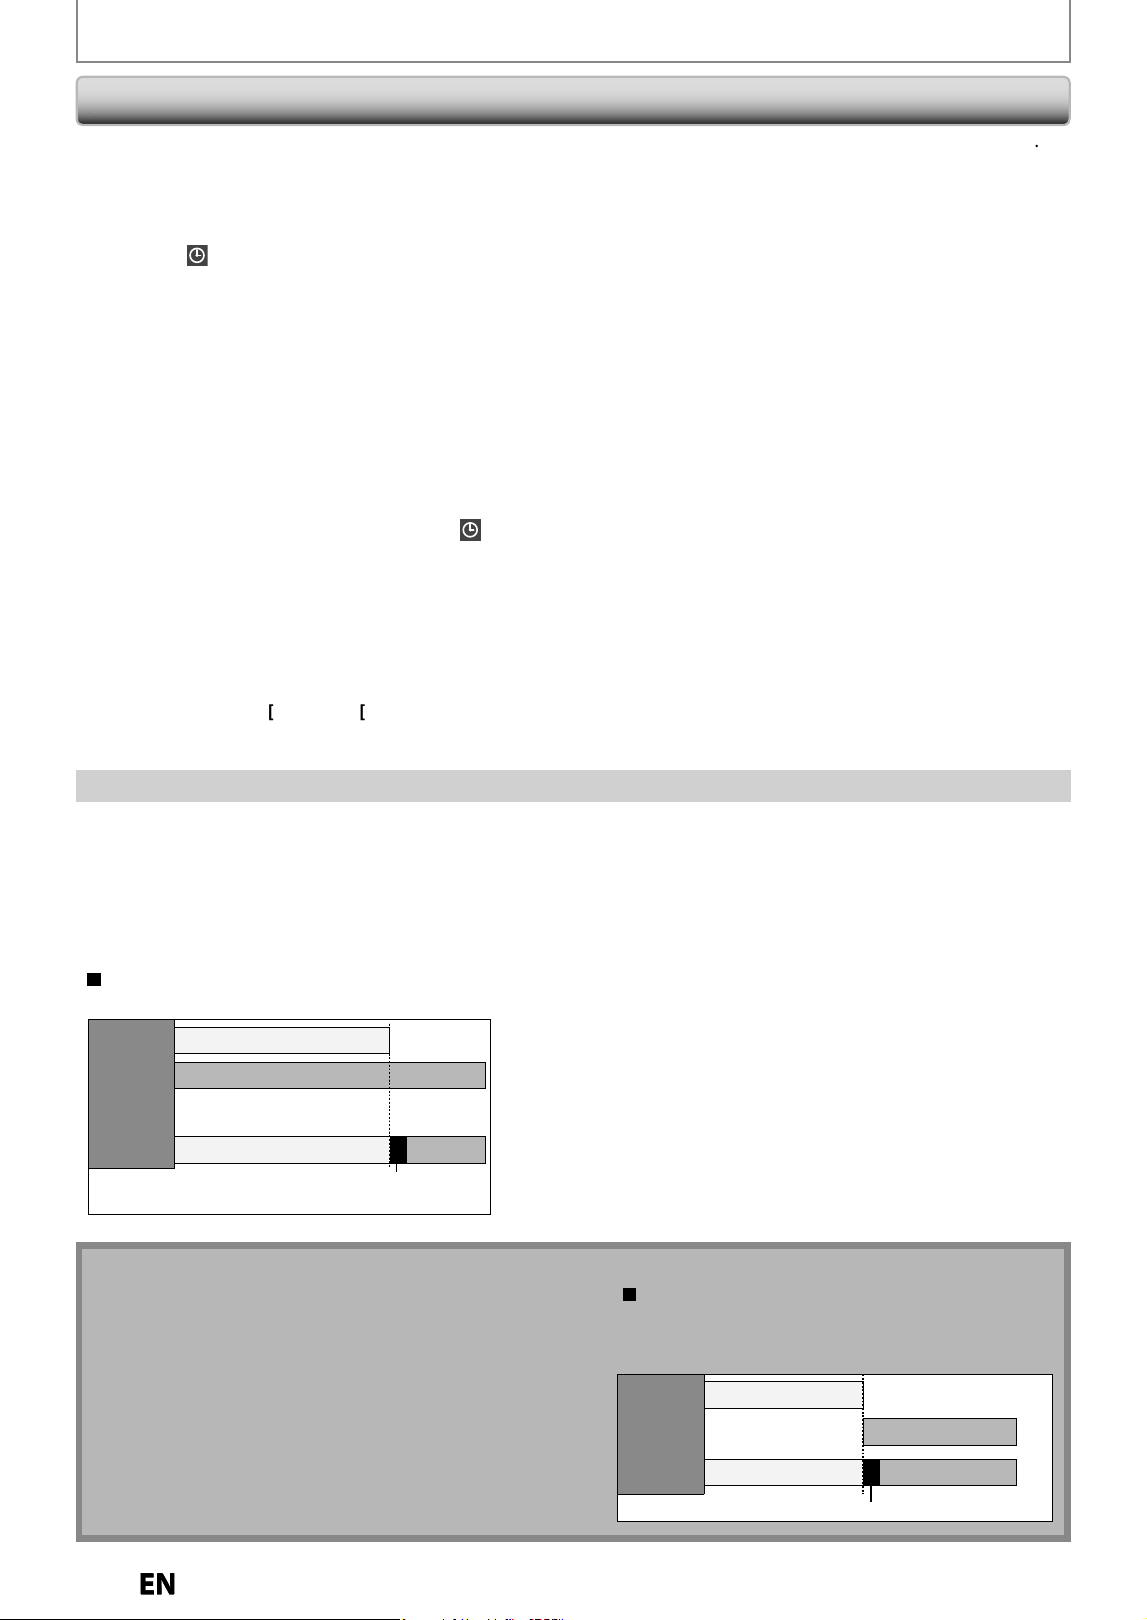
34
EN
EN
TIMER RECORDING
Hints
f
or Timer Recordin
g
When the starting time is the same:
A program set previously (PROG. A) has priority.
PROG. A
PROG. B
actual
recording
PROG. A
PROG. B
The rst 2 minutes (at the longest) will be cut o
(when recording to DVD only).
PROG. A
•
Timer program which has the earlier start time will be placed first in the timer program list, and be given priorit
y
over
the pro
g
rams with the later start time when timer pro
g
rams overlap
.
•
When timer pro
g
rams overlap, the first 2 minutes (at the lon
g
est) of the later recordin
g
will be cut off
.
•
When 2 or more timer programs have the same start time, the program set
f
irst will be given priority
.
•
A timer recording of lower priorit
y
will be canceled or start from the middle.
•
Check the overlapped timer programmings and change the priorit
y
if necessar
y.
T
he Priorit
y
o
f
Overlapped Setting
s
N
ote for DVD recordin
g
• When the recording time o
f
2 programs are overlapped, or
the end time o
f
a program and the start time o
f
another
program is the same, the
f
irst 2 minutes (at the longest) o
f
the subsequent program will be cut o
ff.
• If the cut-off
p
ortion comes u
p
to 3 minute or more, this
program will be displa
y
ed with error number E40 in the
timer pro
g
rammin
g
list
.
PROG. A
PROG. B
actual
recording
The rst 2 minutes (at the longest) will be cut o.
PROG. BPROG. A
When the end time of the programming
currently being recorded and the start time
of the subsequent program are same:
The beginning of the PROG. B may be cut o.
• I
f
there is a power
f
ailure or this unit has been unplugged
f
or more than 30 seconds, the clock setting and all timer
pro
g
rammin
g
wi
ll
b
e
l
ost
.
• I
f
a disc is not inserted
,
"
DVD" on the
f
ront panel displa
y
flashes and timer recordin
g
cannot be performed. In
some cases
,
wi
ll
appear momentari
ly
aroun
d
t
h
e start
time as the unit attem
p
ts to record. Please insert a
r
eco
r
dab
l
e
d
i
sc.
• I
f
a cassette tape with a erase-protection tab is not in the
cassette compartment or t
h
ere is no cassette tape in t
h
e
cassette compartment, “VCR” on the
f
ront panel display
f
lashes and timer recording cannot be per
f
ormed. Please
insert a recor
d
a
bl
e cassette tape
.
• I
f
a cassette tape ends during the timer recording, the unit
wi
ll
automatica
ll
y stop, eject t
h
e cassette tape, an
d
turn
itsel
f
to the standby mode. To continue recording, insert a
recor
d
a
bl
e tape
.
• When all the timer recordin
g
s are completed
,
fl
as
h
es.
P
r
ess
[
TIMER SET
]
to
r
e
l
ease
t
h
e
u
ni
t
fr
o
m
t
h
e
t
im
e
r
standb
y
mode
.
• I
f
both DVD and VCR are timer programmed, you cannot
use any
f
unctions
f
or either unit during timer standby or
timer recording. I
f
y
ou want to use
f
unctions other than
recor
d
ing un
d
er suc
h
con
d
ition, cance
l
timer recor
d
ing
b
y pressing
[
TIMER SET
]
d
uring timer stan
db
y or stop
recor
d
ing
b
y pressing
[
C
ST
O
P
]
/
[
C
A
S
T
O
P
/
EJECT
]
on
the
f
ront panel o
f
the unit during timer recording
.
• To cance
l
t
h
e timer stan
dby
mo
d
e, press
[
TIMER SET
]
.
• W
h
en t
h
e startin
g
an
d
t
h
e en
d
in
g
time are t
h
e same,
“
Exceeds 12 hours” appears and the pro
g
ram settin
g
will
n
ot
b
e acce
p
te
d
.
• When the disc or cassette tape becomes
f
ull during the
r
ecording, the unit turns itsel
f
to the standby mode.
• I
f
the starting time is earlier and the ending time is later
t
han the current time, the recording will start right a
f
ter
yo
u
press
[
TIMER SET
]
at step
9
on page
32
.
• The timer recordin
g
cannot be performed in DVD and
V
CR at the same time. If
y
ou set 2 programmings with the
s
ame channel and time in both devices, the pro
g
ram
w
hich is set first will have the priorit
y
.
• “Press TIMER SET
f
or timer recording” will appear on the
T
V screen 5 minutes be
f
ore the programmed starting
ti
me.
E9P8CUDZV427MG9BOMv1.indd34E9P8CUDZV427MG9BOMv1.indd34 2012/03/0113:06:212012/03/0113:06:21
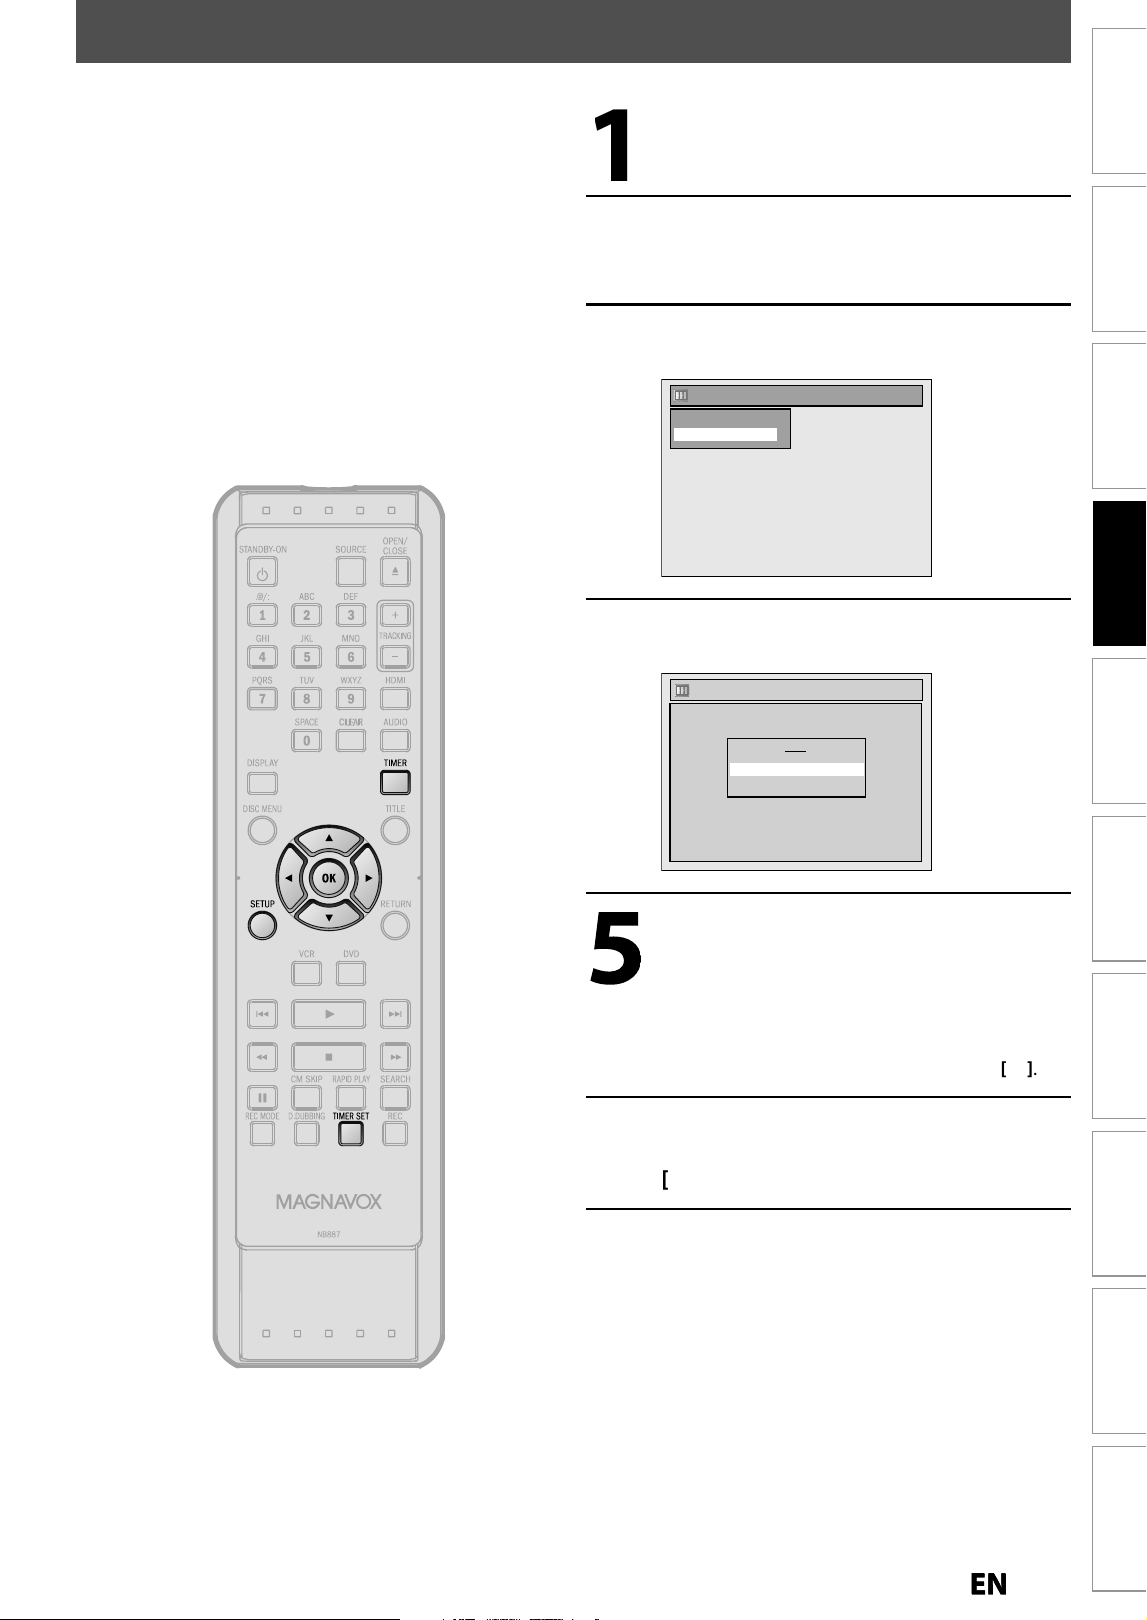
35
EN
EN
Recording
Playback Editing
Introduction
Connections Basic Setup Function Setup VCR Functions
Others Español
SATELLITE LINK
You can set the unit to start recordin
g
whenever it
detects the video signal
f
rom the external tuner
.
Preparin
g
f
or the satellite link timer recordin
g:
Pre
p
aration on t
h
e tune
r
•
Satellite link accepts onl
y
the connection
f
rom L1 (rear)
w
ith the external tuner.
(
The connection from L2 cannot
read any signals
f
rom the external tuner.
)
•
The external tuner should be e
q
ui
pp
ed with some kind
of timer function. Usin
g
timer function of the tuner, set
i
t to output audio/video si
g
nals when it comes to the
t
ime
y
ou want to start recording, and stop output audio
/
video signals when it comes to the time
y
ou want to
f
inish recordin
g
. Refer to the tuner’s manual on how to
set
t
h
e
t
im
e
r
.
•
Make sure to set the satellite link standb
y
mode when
you
f
inish setting
.
1
Press
[
SETUP
]
.
2
Use
[
K
/
L
]
to select “Timer
Pro
g
rammin
g
”, then press [OK]
.
3
Use
[
K
/
L
] to se
l
ect “Sate
ll
ite Lin
k
”,
t
h
en press [OK]
.
Timer Programming
Satellite Link
Timer Programming
4
Use
[
K
/
L
] to se
l
ect t
h
e time
,
me
d
ia
an
d
recor
d
ing mo
d
e, t
h
en press [OK]
.
Satellite Link
To Standby Mode
5:00PM DVD SP (2Hr)
Start Mode
DVD
VCR
Use
[
K
/
L
] to set the desired startin
g
time, then
p
ress [
B
].
• Th
e
h
ou
r
ca
n
be
se
l
ected
f
r
o
m 1
to
12 wi
t
h AM
o
r
P
M
.
• Repeat proce
d
ures in step 5 to set t
h
e
d
esire
d
mi
nutes
.
• If
y
ou wish to go back to the left, press
[
{
]
.
6
Use
[
K
/
L
] to se
l
ect a recor
d
ing
me
d
ia (“DVD” or “VCR”), t
h
en press
[
B
].
7
Use
[
K
/
L
] to select the recordin
g
m
od
e
.
Refer to pa
g
e 27 for details
.
E9P8CUDZV427MG9BOMv1.indd35E9P8CUDZV427MG9BOMv1.indd35 2012/03/0113:06:222012/03/0113:06:22
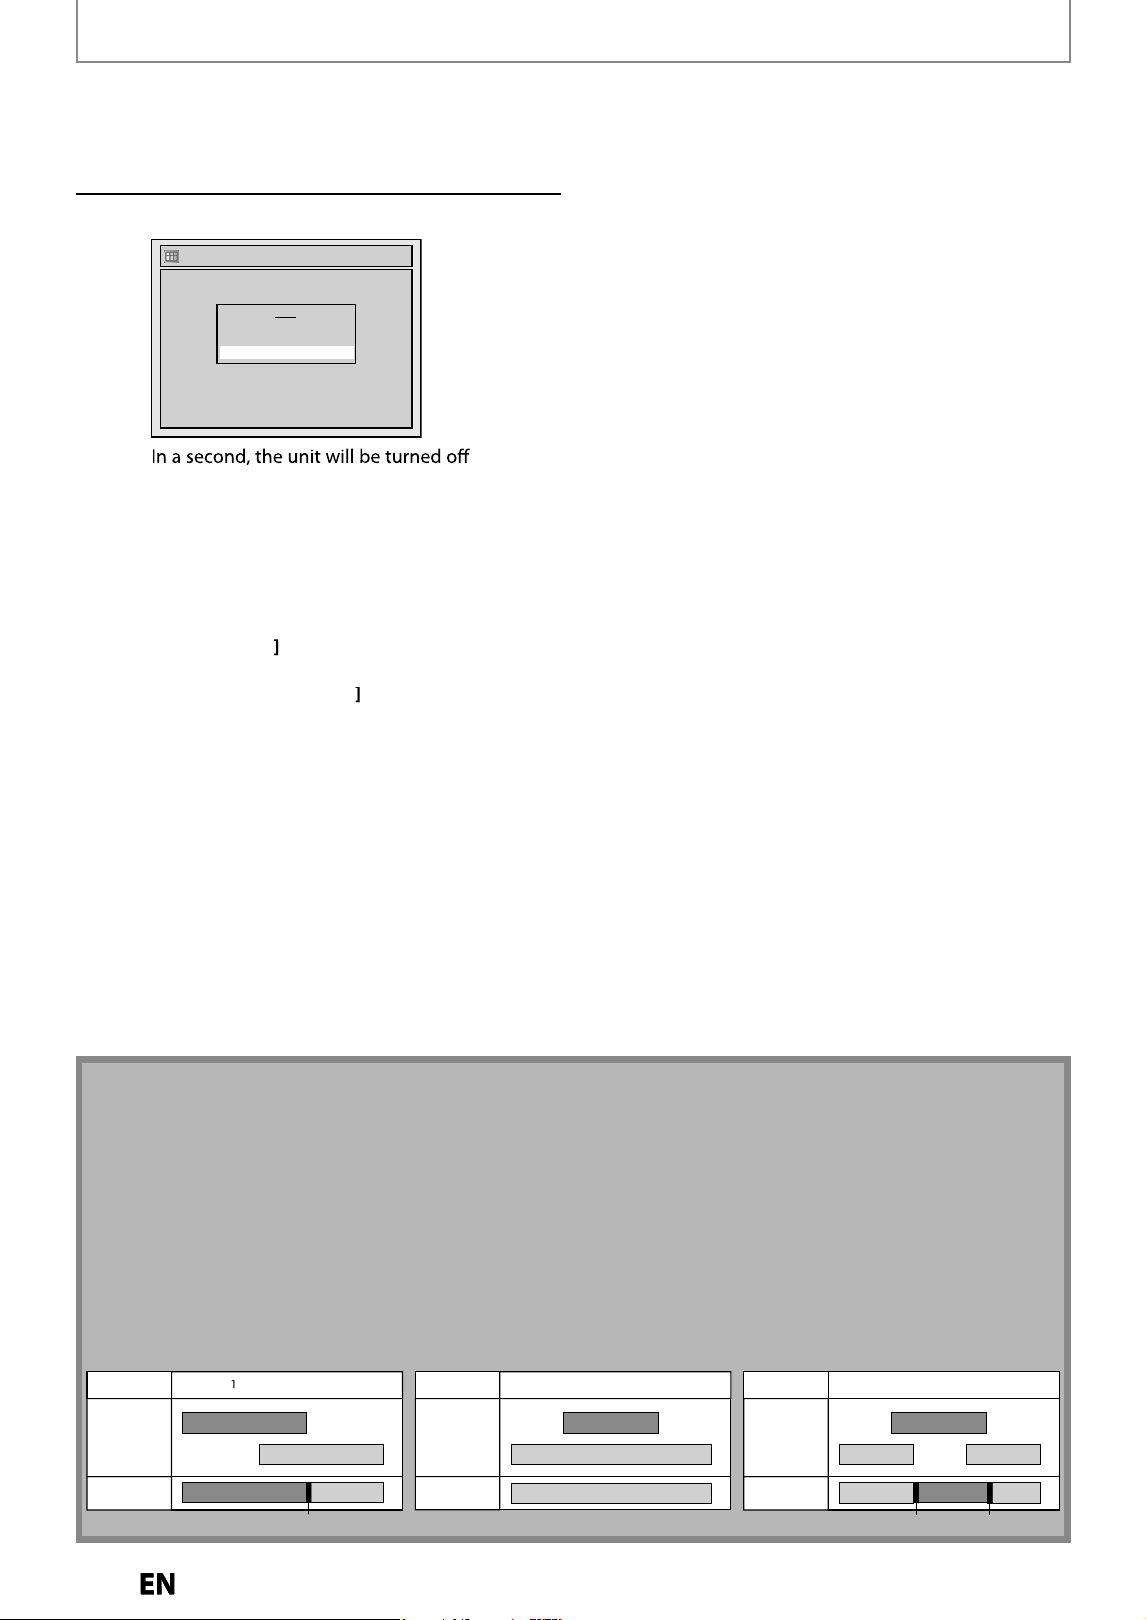
36
EN
EN
SATELLITE LINK
8
Press
[O
K
].
“To Standb
y
Mode” is highlighted
.
9
Press [OK] a
g
ain
.
Satellite Link
To Standby Mode
5:00PM DVD SP (2Hr)
Start Mode
DVD
VCR
automatica
ll
y as it goes into t
h
e sate
ll
ite
l
in
k
stan
db
y mo
d
e
.
T
o
c
a
ncel the
sa
tellite link f
u
ncti
o
n while in
t
he satellite link standb
y
mode
:
P
r
ess
[
TIMER SET
]
to
tu
rn
o
n
the
u
ni
t.
To cancel the satellite link
f
unction while the
sate
ll
ite
l
in
k
recor
d
ing is in progress
:
Pr
ess
[
STOP
C
]
on the front
p
anel to sto
p
the
disc recordin
g.
P
r
ess
[
ST
O
P
C
/
EJECT
A
]
on the
f
ront
p
anel to
stop t
h
e cassette tape recor
d
in
g.
N
ote
s
• If the si
g
nal of external input breaks up over 5 seconds, satellite link function will be canceled
.
• I
f
y
ou have not set the clock, “Clock Setting” menu will appear at step 4. Follow to step 3 in “SETTING THE CLOCK”
on pa
g
e
2
6
.
• You cannot set the ending time
f
or the satellite link timer recording on this unit
.
• Recording picture will be distorted if the cop
y
protection signal is being detected during satellite link timer
recordin
g.
• You can record the satellite link b
y
using S-video input jacks on the rear panel. Refer to page 17 for more
in
fo
rm
at
i
o
n
.
• W
h
en a regu
l
ar timer recor
d
ing an
d
t
h
e sate
ll
ite
l
in
k
timer recor
d
ing are over
l
appe
d
, t
h
ose recor
d
ings are
recor
d
e
d
as i
ll
ustrate
d
b
e
l
ow
.
• Pr
ess
[
TIMER
]
durin
g
the satellite link timer recordin
g
to check the satellite link timer recordin
g
in pro
g
ress
.
e
xam
pl
e
2
actua
l
recor
d
i
n
g
t
i
me
r
recor
d
i
n
g
sate
ll
ite
l
in
k
e
xam
p
le
3
actual
r
eco
r
d
i
n
g
t
i
m
e
r
recor
d
i
n
g
satell
i
te
link
The rst 2 minutes (at the longest) will be cut o.
exam
p
le
1
t
i
m
e
r
recor
d
i
n
g
actual
reco
r
d
i
n
g
sate
lli
te
link
The rst 2 minutes (at the longest) will be cut o.
E9P8CUDZV427MG9BOMv1.indd36E9P8CUDZV427MG9BOMv1.indd36 2012/03/0113:06:232012/03/0113:06:23
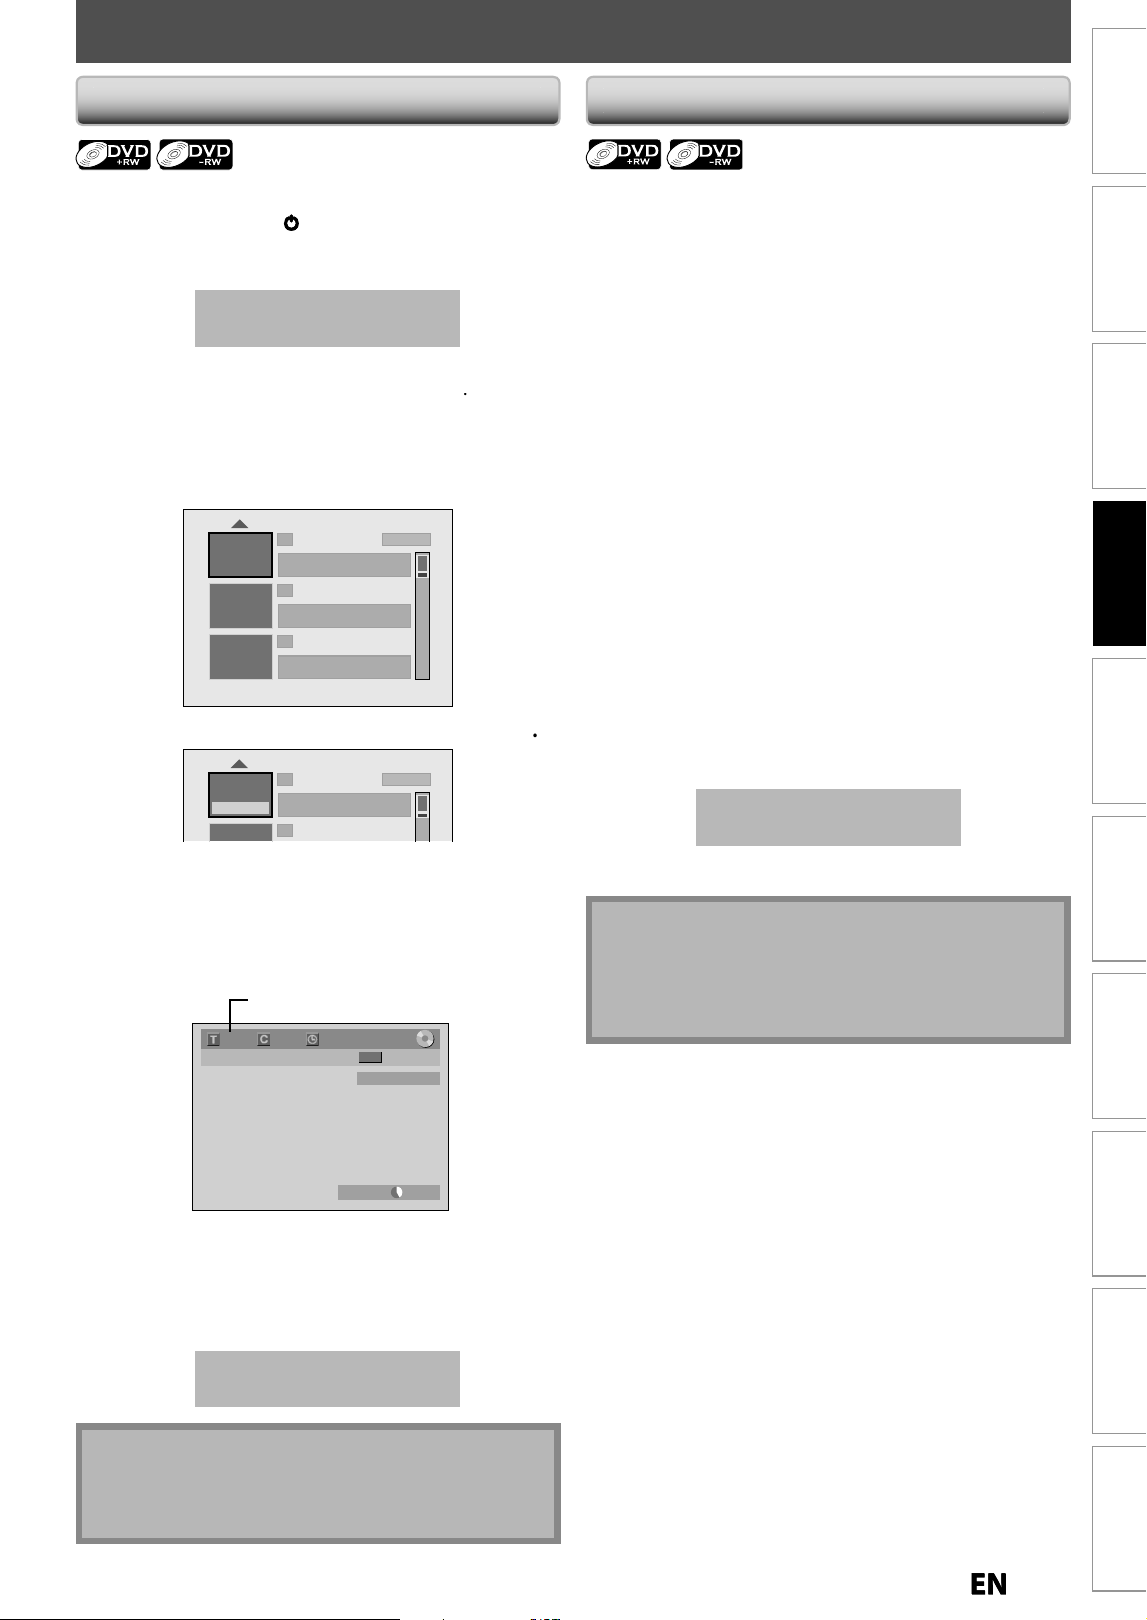
3
7
EN
EN
Recording
Playback Editing
Introduction
Connections Basic Setup Function Setup VCR Functions
Others Español
OVERWRITING UNNECESSARY TITLE
You can overwrite the existin
g
title
f
rom the be
g
innin
g.
1
)
P
ress
[
STANDBY-
O
N
yy
]
.
M
ake sure that the TV in
p
ut is set on the unit
.
2)
Load the disc that includes a title to be overwritten
.
I
t takes a while to displa
y
t
he title li
s
t
.
T
itle list will a
pp
ear
.
I
f
the title list does not appear, press
[
TITLE
]
.
3)
Press [REC MODE] repeatedl
y
to select a recording mode
.
Refer to “Recordin
g
Mode” on pa
g
e 27
.
4
)
Use
[
K
/
L
] to se
l
ect a tit
l
e to
b
e overwritten, t
h
en
press
[O
K
].
1 SP (2Hr)
2
3
NOV/21/12 11:00
AM
L1 SP
NOV/21/12 0:20:44
NOV/22/12 11:35
AM
L1 EP
NOV/22/12 0:10:33
EMPTY TITLE
1:37:52 SP(2Hr)
5
)
Use
[
K
/
L
]
to se
l
ect “Overwrite
”
,
t
h
en press
[O
K
]
.
1 SP (2Hr)
2
NOV/21/12 11:00
AM
L1 SP
NOV/21/12 0:20:44
Edit
Overwrite
Play
6
) Se
l
ect t
h
e appropriate externa
l
input c
h
anne
l
(L1
/
L2) to w
h
ic
h
your externa
l
tuner is connecte
d
b
y
press
i
ng [SOURCE]
.
T
h
en se
l
ect t
h
e
d
esire
d
c
h
anne
l
to recor
d
on t
h
e
e
xterna
l
tuner
.
e
.g.
)
DVD+R
W
L1 (Rear)
11
+RW
0:00:00
SP(2Hr) 2h00m
F
F
I
selected title number
to be overwritten
7)
Press [REC]
.
O
verwriting recor
d
ing starts
.
Th
e e
l
apse
d
-time counter starts running
.
8)
Press [STOP
C
]
to stop recordin
g
.
T
i
t
l
e
n
a
m
e
i
s
a
l
so
o
v
e
rwri
tte
n
.
This operation ma
y
take a
w
hile to be com
p
leted
.
You can overwrite the existin
g
title from the selected
p
osition
.
1
) Follow the steps 1, 2 and 4 on the le
f
t
.
2
)
Use
[
K
/
L
] to se
l
ect “P
l
ay”, t
h
en press [OK]
.
P
l
ay
b
ac
k
wi
ll
start
.
3)
Press
[
PAUSE
F
]
a
t the point
f
rom which you want
to start overwr
i
t
i
ng
.
4
)
Press [REC]
.
“
S
I
”
,
d
isp
l
ay menu, c
h
anne
l
, an
d
t
h
e time
l
apse wi
ll
be displayed as illustrated on the le
f
t
.
5) Select the a
pp
ro
p
riate external in
p
ut channel (L1
/
L2) to w
h
ic
h
y
our externa
l
tuner is connecte
d
by
pressin
g
[SOURCE]
.
Then
s
elect the
d
e
s
ire
d
ch
a
nnel t
o
rec
o
r
d
o
n the
extern
a
l t
u
ner
.
6
) Press [REC] a
g
ain
.
Overwritin
g
recordin
g
starts
.
7)
Press [STOP
C
] to stop recordin
g.
T
his operation ma
y
take a
while to be com
p
leted
.
Overwriting
f
rom the Beginning o
f
the Titl
e
N
ot
e
• T
h
e remaining recor
d
ing time is
d
isp
l
aye
d
on t
h
e
bottom right corner o
f
the TV screen during
o
verwr
i
t
i
ng
.
N
ote
• Recording mode o
f
the overwriting title is the same
as that of the ori
g
inal (overwritten) title when
overwritin
g
in the middle o
f
the title
.
• Tit
l
e name wi
ll
not
b
e overwritten
.
O
verwriting in the Middle o
f
the Titl
e
E9P8CUDZV427MG9BOMv1.indd37E9P8CUDZV427MG9BOMv1.indd37 2012/03/0113:06:242012/03/0113:06:24
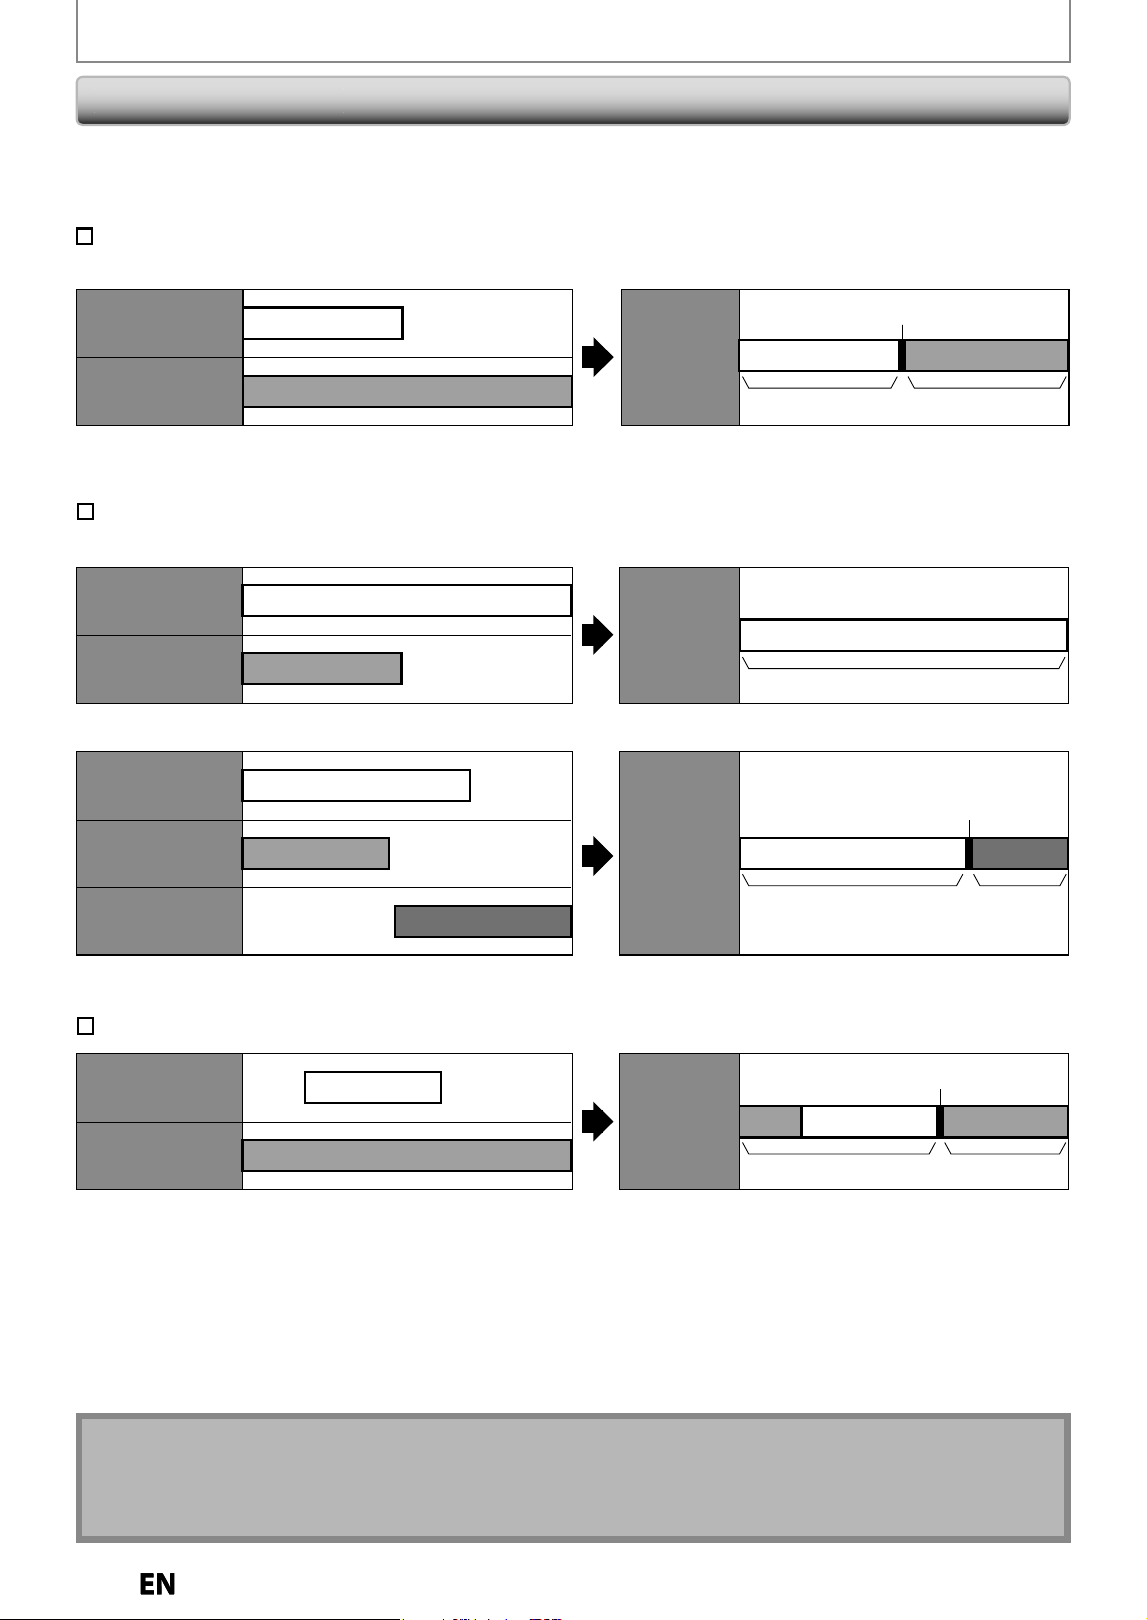
38
EN
EN
OVERWRITING UNNECESSARY TITLE
W
hen
y
ou overwrite on the unnecessar
y
title, there were various circumstances such as
f
ollows. Please note that
f
ollowing cases onl
y
describe the overwriting without an
y
recording mode discrepanc
y
. To avoid accidental deletion
please check if there is no important title after the overwriting point.
When overwriting title is shorter than the existing title:
(overwriting from the beginning of the title)
overwrite
recording : A
existing title : B
after
overwriting
30 - 180 seconds will be cut o.
When overwriting title is longer than the existing title:
(overwriting from the beginning of the title)
overwrite
recording : A
existing title : B
after
overwriting
When overwriting in the middle of the title:
30 - 180 seconds will be cut o.
30 - 180 seconds will be cut o.
overwrite
recording : A
existing title : B
after
overwriting
overwrite
recording : A
existing title : B
existing title : C
after
overwriting
title name : A
title name : A
title name : B
title name : A
title name : C
title name : B*
title name : B
*
Overwritten section and the rest of the sections will
have the same title name as the original existing
title (B).
Hints
f
or Overwritin
g
Note
• W
h
en a tit
l
e name is overwritten, its t
h
um
b
nai
l
is a
l
so overwritten
.
• “Auto Chapter” interval time is reset at the overwritin
g
start point
.
• A chapter mark is put at the beginning of the overwrite title when overwriting in the middle of the title
.
E9P8CUDZV427MG9BOMv1.indd38E9P8CUDZV427MG9BOMv1.indd38 2012/03/0113:06:242012/03/0113:06:24
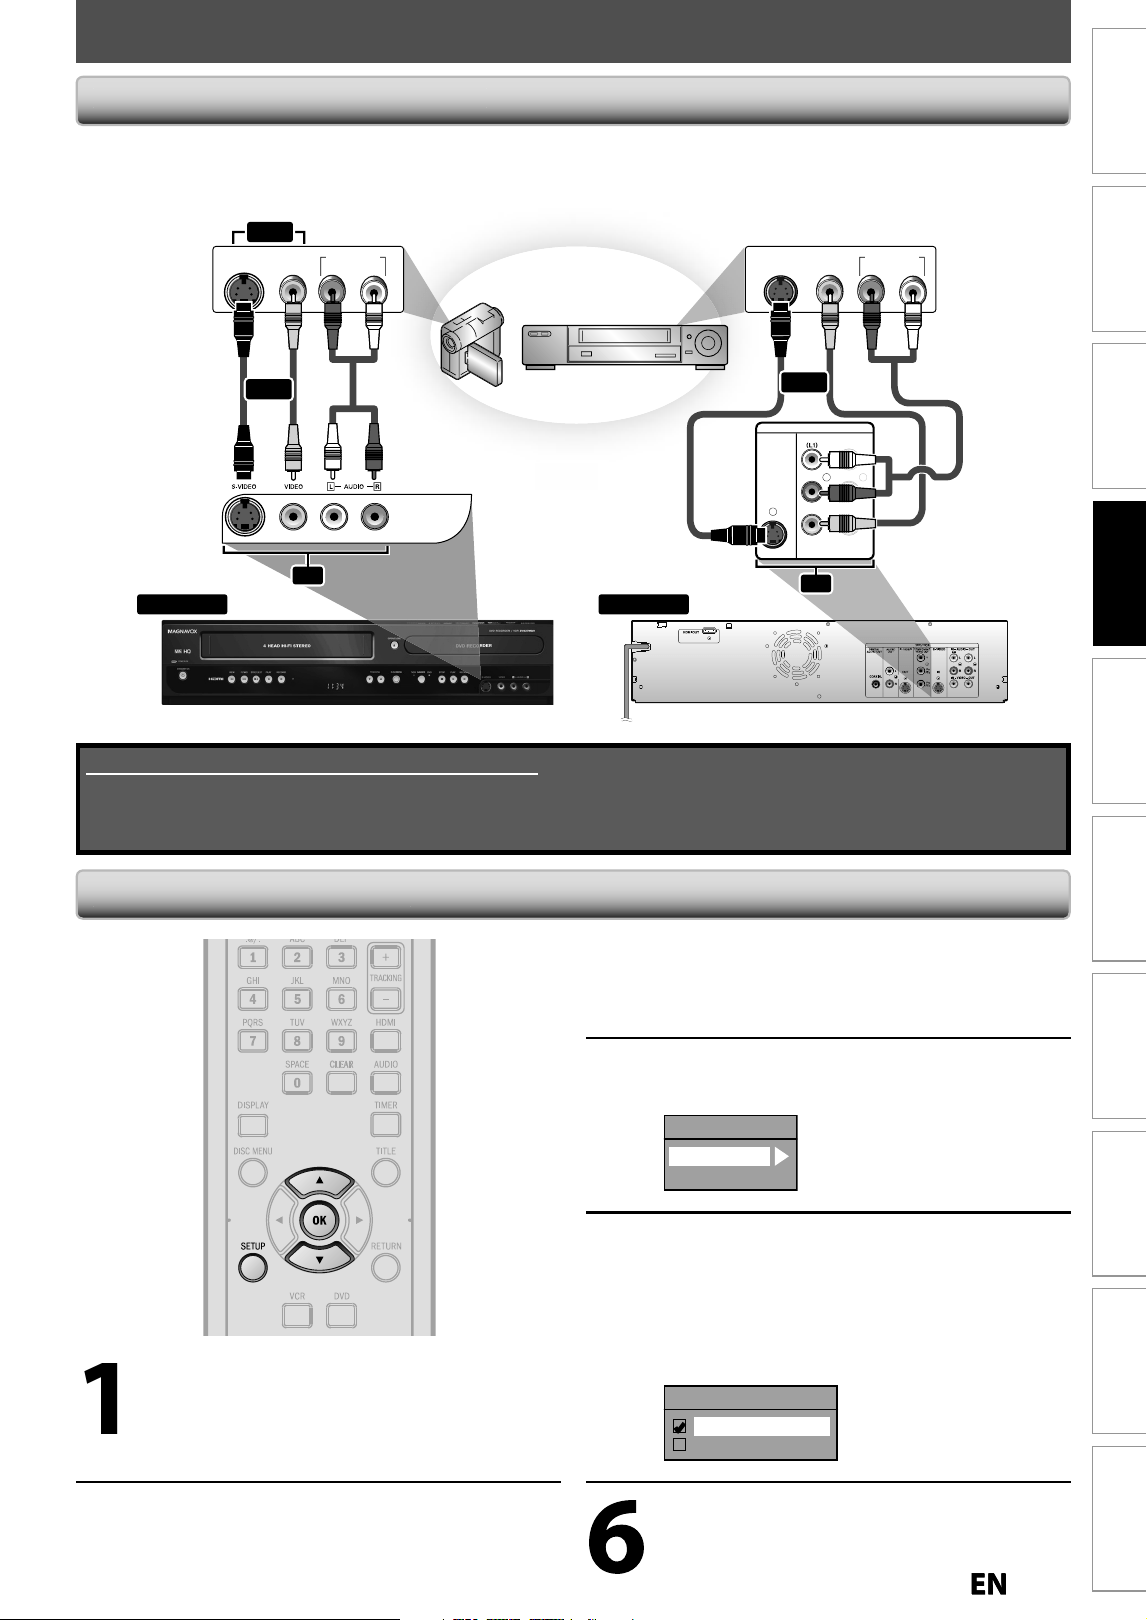
3
9
EN
EN
Recording
Playback Editing
Introduction
Connections Basic Setup Function Setup VCR Functions
Others Español
SETTINGS FOR AN EXTERNAL DEVICE
front of this unit
rear of this unit
IN
L
R
L
R
S-VIDEO IN --- AUD IO --- OU T
IN --- VIDEO --- OU T
AUDIO OUT
LR
VIDEO
OUT
S-VIDEO
OUT
AUDIO OUT
LR
VIDEO
OUT
S-VIDEO
OUT
to L1 IN
external device
(camcorder, VCR etc.)
S-video
cable
RCA
video
cable
RCA
audio
cable
to L2 IN
or
or
L1
S-video
cable
RCA
video
cable
RCA
audio cable
or
L2
or
3
Use
[
K
/
L
] to se
l
ect “Vi
d
eo Input”,
t
h
en press [OK]
.
4
Use
[
K
/
L
]
to se
l
ect
d
esire
d
externa
l
in
p
ut, t
h
en
p
ress [OK]
.
Video Input
L1 (Rear)
L2 (Front)
5
Use
[
K
/
L
] to select the input
j
ac
k
t
y
pe to connect, then press [OK]
.
I
f
y
ou want to use VIDEO IN jack, select “Video
In
”.
I
f
you want to use S-VIDEO IN jack, select
“S-Vi
d
eo In”
.
L1 (Rear)
Video In
S-Video In
Press [SETUP] to ex
i
t
.
Connect t
h
e externa
l
d
evice proper
ly
to t
h
e unit
by
using input jac
k
s eit
h
er L2 (Front) or L1 (Rear)
.
When connecting an external device o
f
monaural output to this unit, use AUDIO L
j
ack o
f
L2 (Front) or L1 (Rear).
Use S-video or the RCA audio
/
video cables
f
or this connection
.
Co
nnecti
o
n t
o
a
n Extern
a
l Devic
e
Supplied cables used in this connection are as follows:
• RCA audio cable (L/R) x 1
• RCA video cable x 1
Please purchase the rest of the necessary cables at your local store.
1
Press [SETUP] an
d
use
[
K
/
L
]
to
se
l
ect “Genera
l
Setting”, t
h
en press
[O
K
].
“General Settin
g
” menu will appear
.
2
Use [
K
/
L
] to select “Video”
,
then
press
[O
K
].
Su
b
menu wi
ll
appear
.
S
ettin
g
for the Video Inpu
t
E9P8CUDZV427MG9BOMv1.indd39E9P8CUDZV427MG9BOMv1.indd39 2012/03/0113:06:252012/03/0113:06:25
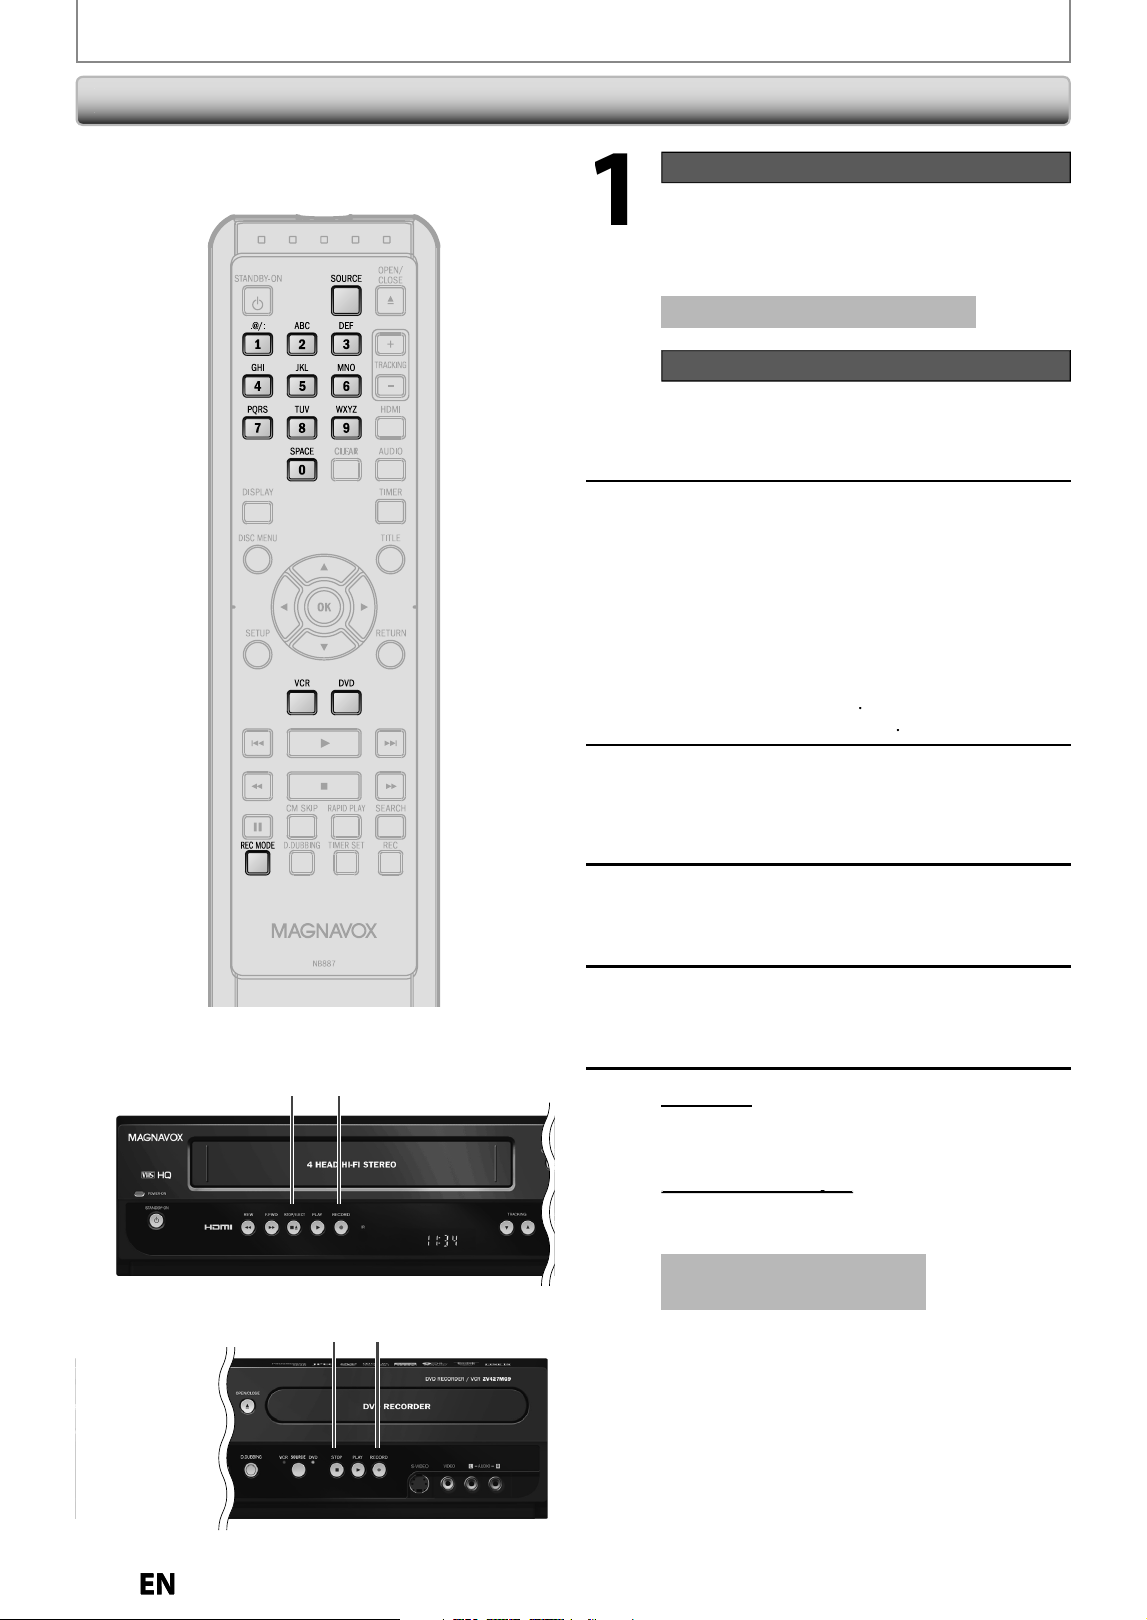
4
0
EN
EN
SETTINGS FOR AN EXTERNAL DEVICE
Recordin
g
f
rom an External Device
1
Recording to a DVD
Press
[
DVD
].
Insert a recordable disc (refer to pa
g
e
24 on how to insert a disc
).
It t
ak
e
s
a
w
h
i
l
e t
o
load
t
h
e
d
i
s
c
.
Recording to a Cassette Tape
Press
[
VCR
].
Insert the cassette ta
p
e with an
erase-
p
rotection tab intact
.
2
Select the a
pp
ro
p
riate external in
p
ut
channel (L1 or L2) b
y
pressing
[
SOURCE
].
• If
t
h
e
e
x
te
rn
a
l
de
vi
ce
i
s
co
nn
ected
to
t
h
e
r
ea
r
of this unit
,
select L1
.
• I
f
the external device is connected to the
f
ront
o
f
this unit, select L2
.
• You can also select L1 or L2 channel b
y
using
[
the Number buttons
]
.
e.
g
.) For L1, press
[
0
]
,
[
0
]
,
[
1
]
.
3
Press [REC MODE] repeatedl
y
to
select a recordin
g
mode
.
Refer to “Recordin
g
Mode” on pa
g
e 27 for DVD,
or “Recordin
g
” on pa
g
e 83 for VCR
.
4
Press
[
I
R
E
CO
R
D
]
on the unit to start
recordin
g.
5
Start p
l
a
yb
ac
k
on t
h
e externa
l
d
evice
t
o
rec
o
r
d
f
r
o
m
.
6
For
d
isc
:
Press
[
C
S
TOP] on the unit to sto
p
recordin
g.
For cassette tape:
p
p
Press
[
C
A
S
TOP/EJECT] on t
h
e unit
to stop recor
d
ing
.
This operation ma
y
take a
w
hile to be com
p
leted
.
Before recordin
g
from an external device, refer to the
instructions
f
or the connection on pa
g
e 39
.
4
4
6
6
E9P8CUDZV427MG9BOMv1.indd40E9P8CUDZV427MG9BOMv1.indd40 2012/03/0113:06:272012/03/0113:06:27
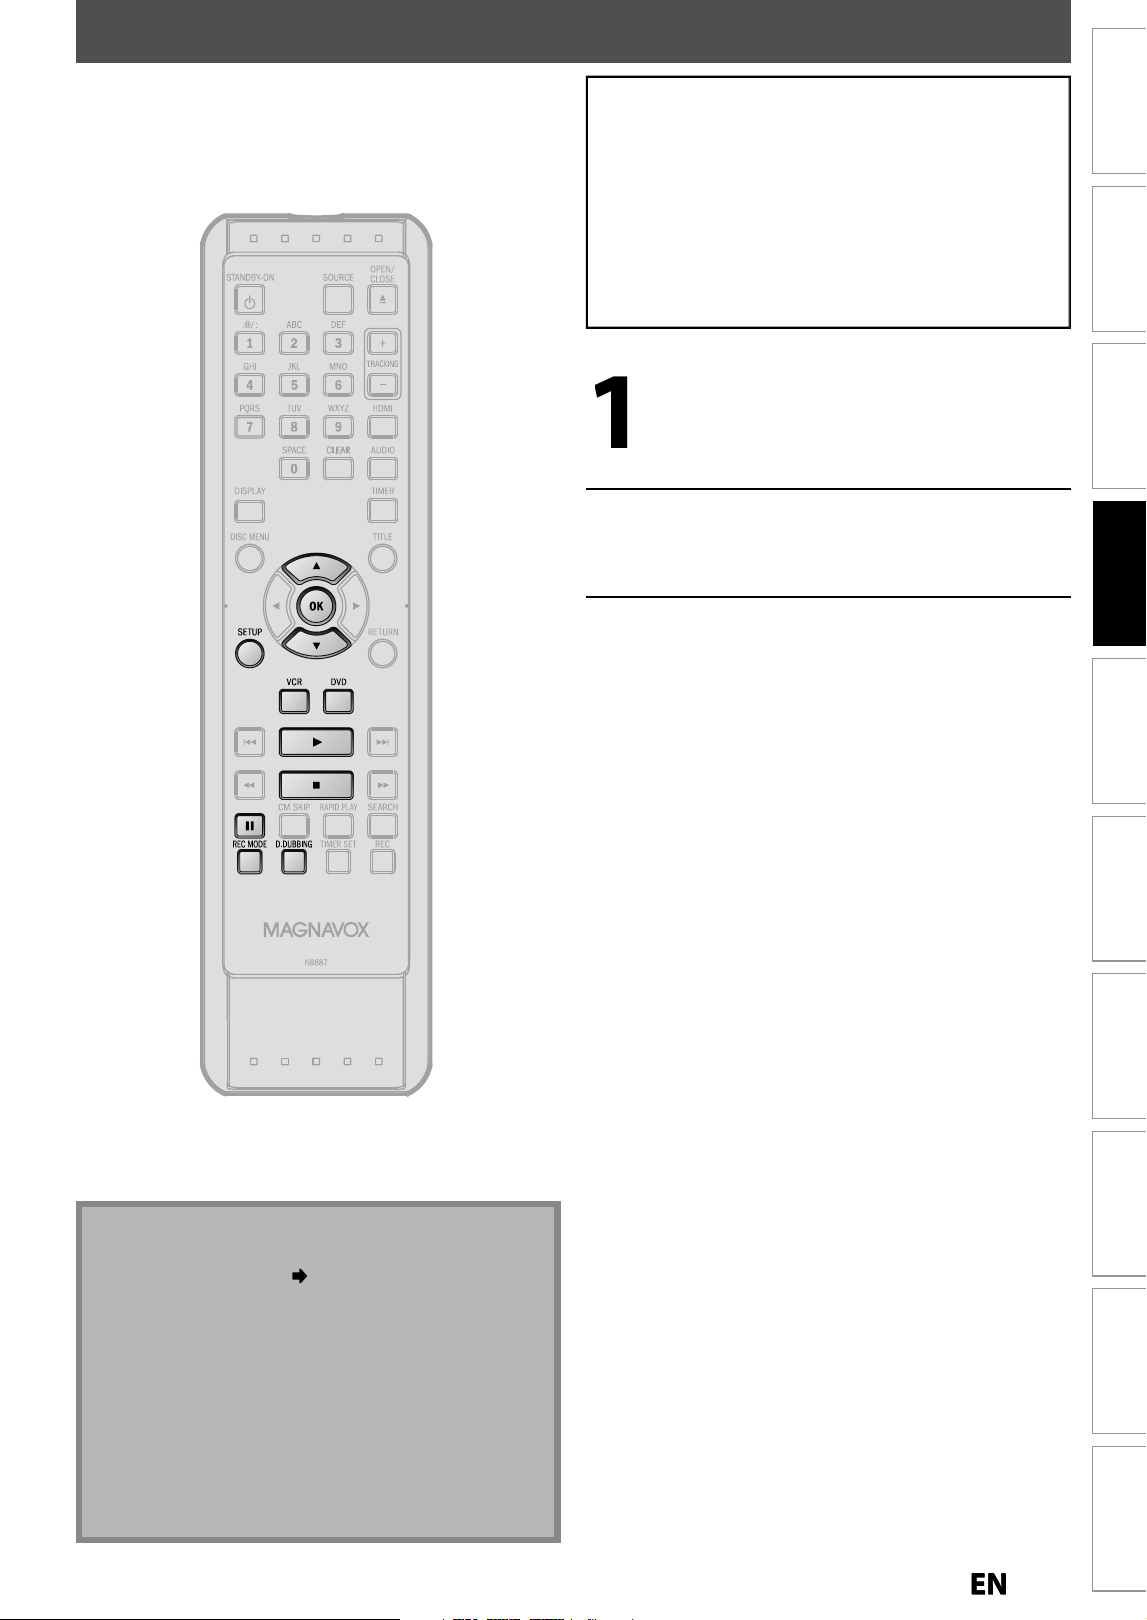
41
EN
EN
Recording
Playback Editing
Introduction
Connections Basic Setup Function Setup VCR Functions
Others Español
BI-DIRECTIONAL DUBBING
1
Press [SETUP] and use [
K
/
L
]
to
se
l
ect “Genera
l
Setting”, t
h
en press
[O
K
].
“Genera
l
Setting” menu wi
ll
appear
.
2
Use
[
K
/
L
] to se
l
ect “Recor
d
ing”,
t
h
en press [OK]
.
“Recordin
g
” menu will appear
.
3
Use
[
K
/
L
] to se
l
ect “Du
bb
ing
Mo
d
e”, t
h
en press [OK]
.
Se
l
ection menu wi
ll
appear
.
You can cop
y
contents in a DVD to a cassette tape, or do
v
ice versa. This
f
unction is available only when the contents
are not cop
y
-protected. (Be
f
ore
y
ou start, re
f
er to page 27
f
or the list o
f
compatible discs.)
N
ote
f
or dubbin
g
•
Dubbin
g
direction settin
g
in “Dubbin
g
Mode” menu
is alwa
y
s reset to “VCR DVD” whenever
y
ou turn
the power to the standb
y
mode
.
•
You cannot chan
g
e the output mode durin
g
VCR to
DVD or DVD to VCR
d
u
pl
ication
.
Note
f
or recording to a tape
:
M
a
k
e
su
r
e
- t
h
e cassette tape’s erase-protection ta
b
is intact
.
- t
h
e cassette tape is
l
ong enoug
h.
Note for recordin
g
to a disc
:
M
ake
su
r
e
- the disc is compatible (re
f
er to page 27).
Preparing
f
or dubbing (cassette tape to DVD)
:
• Insert a cassette ta
p
e to be dubbed
.
• In
se
r
t
a
r
eco
r
dable
DVD
.
• Ma
k
e sure t
h
ere is enou
gh
space on t
h
e DVD
.
Preparing
f
or dubbing (DVD to cassette tape)
:
• In
se
r
t
a
d
i
sc
to
be
dubbed.
• Insert a cassette ta
p
e wit
h
an erase-
p
rotection ta
b
in
t
ac
t.
• Ma
k
e sure t
h
ere is enoug
h
recor
d
a
bl
e
l
engt
h
on t
h
e
t
ape
.
E9P8CUDZV427MG9BOMv1.indd41E9P8CUDZV427MG9BOMv1.indd41 2012/03/0113:06:292012/03/0113:06:29
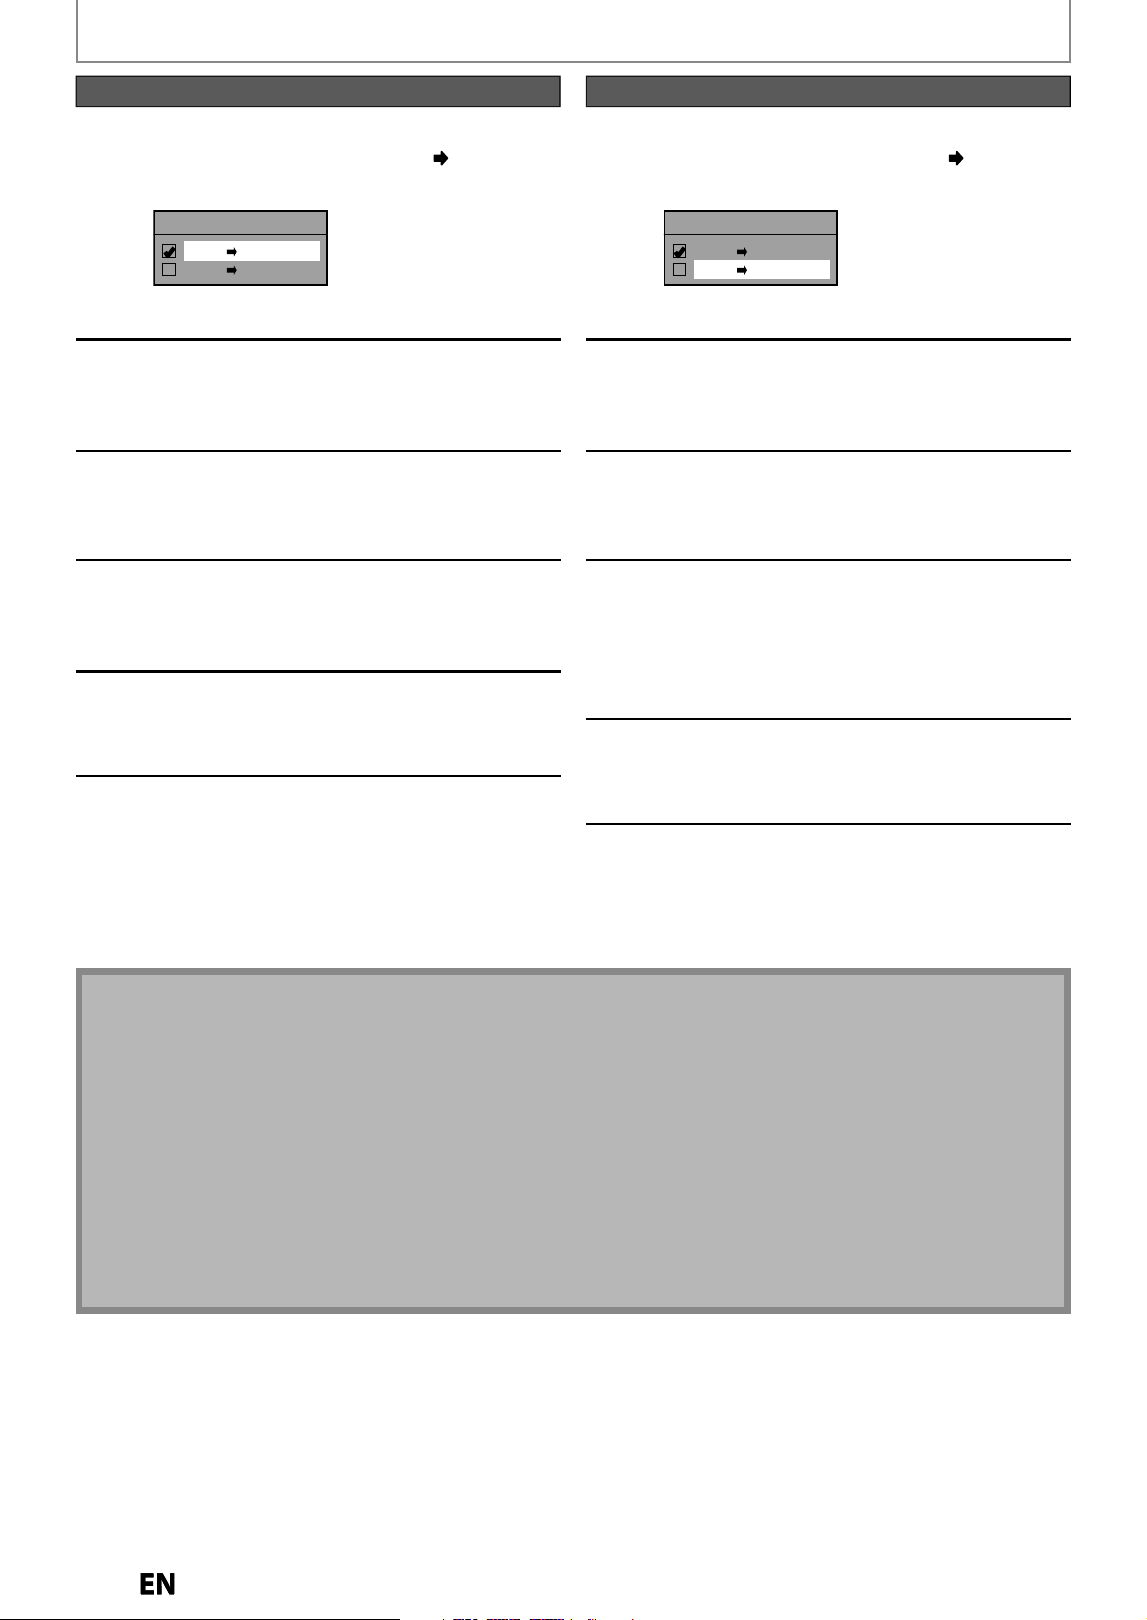
42
EN
EN
BI-DIRECTIONAL DUBBING
Note for DVD to VCR du
p
licatio
n
• This function is available for audio CD
,
but not with MP3 / JPEG / KODAK Picture CD files
.
• The recording mode
f
or VCR cannot be displa
y
ed at step 7 when using HDMI / Component / S-Video connection.
T
o
d
isp
l
ay t
h
e VCR recor
d
ing mo
d
e on t
h
e screen, t
h
e unit must
b
e connecte
d
b
y t
h
e VIDEO OUT jac
k
an
d
t
h
e TV’s
input se
l
ect s
h
ou
ld
b
e set to t
h
e appropriate externa
l
input c
h
anne
l.
Note for VCR to DVD du
p
licatio
n
• After starting VCR to DVD duplication, the picture ma
y
be distorted because of the auto tracking function. This is
not a malfunction. Be advised to pla
y
back the tape until the picture is stabilized, then set the starting point which
y
ou wish to start recording, and start VCR to DVD duplication.
• This unit will automaticall
y
stop the duplication i
f
pla
y
back with no image is detected
f
or more than 3 minutes
d
uring VCR to DVD
d
up
l
ication
.
• Playback sound mode o
f
the dubbed contents is determined by the playback sound mode o
f
the VCR at the point
o
f
dubbing
.
4
Use
[
K
/
L
]
to select “VCR DVD
”,
t
h
en press [OK]
.
Dubbing Mode
VCR DVD
DVD VCR
Press
[
SETUP
]
to exit
.
5
Press [VCR], t
h
en press [PLAY
B
]
to
f
ind the point where you wish to start
d
u
bb
ing
.
6
Press
[
PAUSE
F
] w
h
en
y
ou come to
t
h
e
d
esire
d
start point
.
7
Press [DVD], t
h
en
p
ress [REC MODE]
repeate
dly
to se
l
ect t
h
e
d
esire
d
recor
d
in
g
mo
d
e
.
8
Press
[
D.DUBBING
].
VCR to DVD du
p
lication will start
.
9
Press
[
STOP
C
] to stop the dubbin
g.
4
Use
[
K
/
L
]
to select “DVD VCR
”,
t
h
en press [OK]
.
Dubbing Mode
VCR DVD
DVD VCR
Press
[
SETUP
]
to exit
.
5
Press [DVD], t
h
en press [PLAY
B
]
to
f
ind the point where you wish to start
d
u
bb
ing
.
6
Press
[
PAUSE
F
]
w
h
en
y
ou come to
t
h
e
d
esire
d
start point
.
7
Press [VCR], t
h
en
p
ress [REC MODE]
repeate
dly
to se
l
ect t
h
e
d
esire
d
recor
d
in
g
mo
d
e
.
Rewind or
f
ast
f
orward the tape to the point
w
h
ere you want to start recor
d
ing
.
8
Press
[
D.DUBBING
]
.
DVD to VCR
d
up
l
ication wi
ll
start
.
9
Press
[
ST
O
P
C
]
to stop t
h
e
d
u
bb
in
g
.
VCR to DVD DVD to VCR
E9P8CUDZV427MG9BOMv1.indd42E9P8CUDZV427MG9BOMv1.indd42 2012/03/0113:06:302012/03/0113:06:30
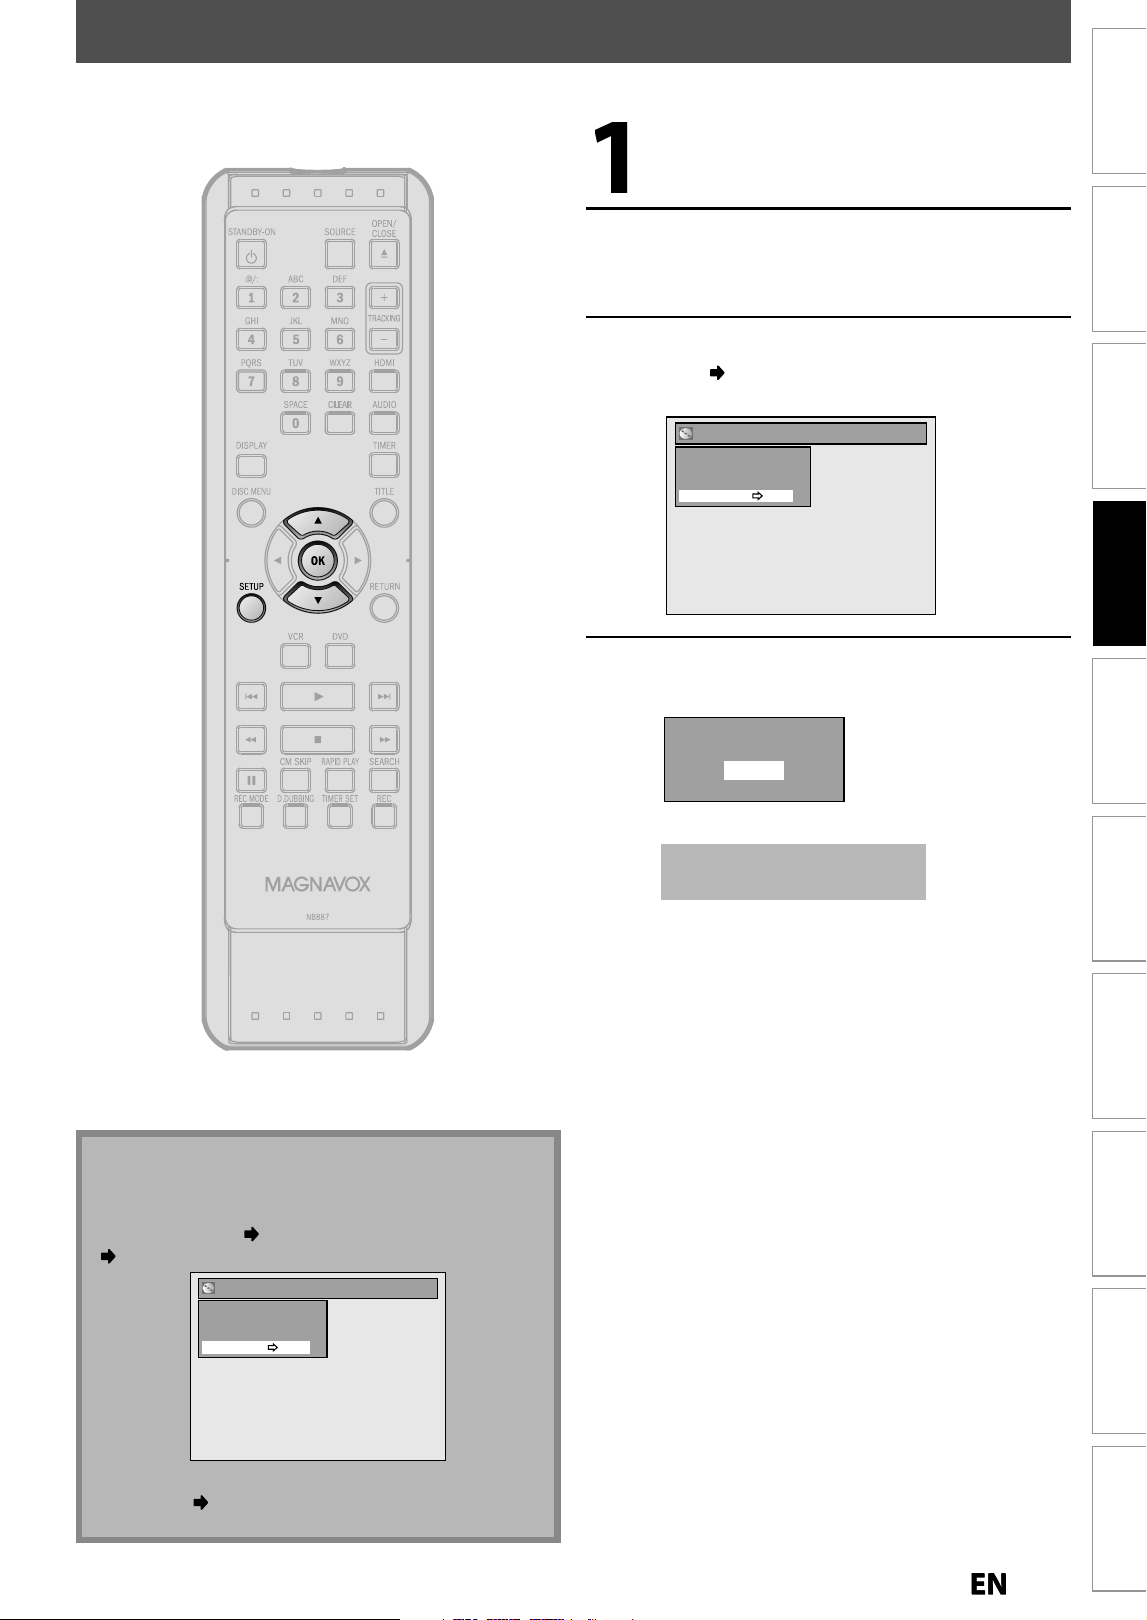
43
EN
EN
Recording
Playback Editing
Introduction
Connections Basic Setup Function Setup VCR Functions
Others Español
SETTING A DISC TO PROTECT
1
Press
[
SETUP
]
.
2
Use
[
K
/
L
] to se
l
ect “Disc E
d
it”
,
t
h
en
p
ress
[O
K
].
3
Use
[
K
/
L
]
to select “Disc Protect
O
FF ON”, then
p
ress [OK]
.
e.g.
)
DVD+R
W
Disc Edit
Edit Disc Name
Erase Disc
Make Edits Compatible
Disc Protect OFF ON
4
Use
[
K
/
L
] to select “Yes”, then
p
ress
[
OK
].
Protect this disc?
Yes
No
A
d
isc wi
ll
b
e protecte
d.
This operation ma
y
take a
w
hile to be com
p
leted
.
T
o prevent accidental recordin
g
, editin
g
or erasin
g
the
titles, you can protect them
f
rom “Disc Edit” menu
.
N
ote
To cancel the disc
p
rotect
:
• W
h
en you insert a
d
isc protecte
d
wit
h
t
h
is unit,
“
Disc Protect ON OFF” will appear instead o
f
“OFF
ON
”
at step 3
.
Disc Edit
Edit Disc Name
Erase Disc
Make Edits Compatible
Disc Protect ON OFF
To release the protection
f
or the disc, select “Disc
P
r
otect
O
N OFF” at ste
p
3, then follow rest of the
p
roce
d
ures.
E9P8CUDZV427MG9BOMv1.indd43E9P8CUDZV427MG9BOMv1.indd43 2012/03/0113:06:312012/03/0113:06:31
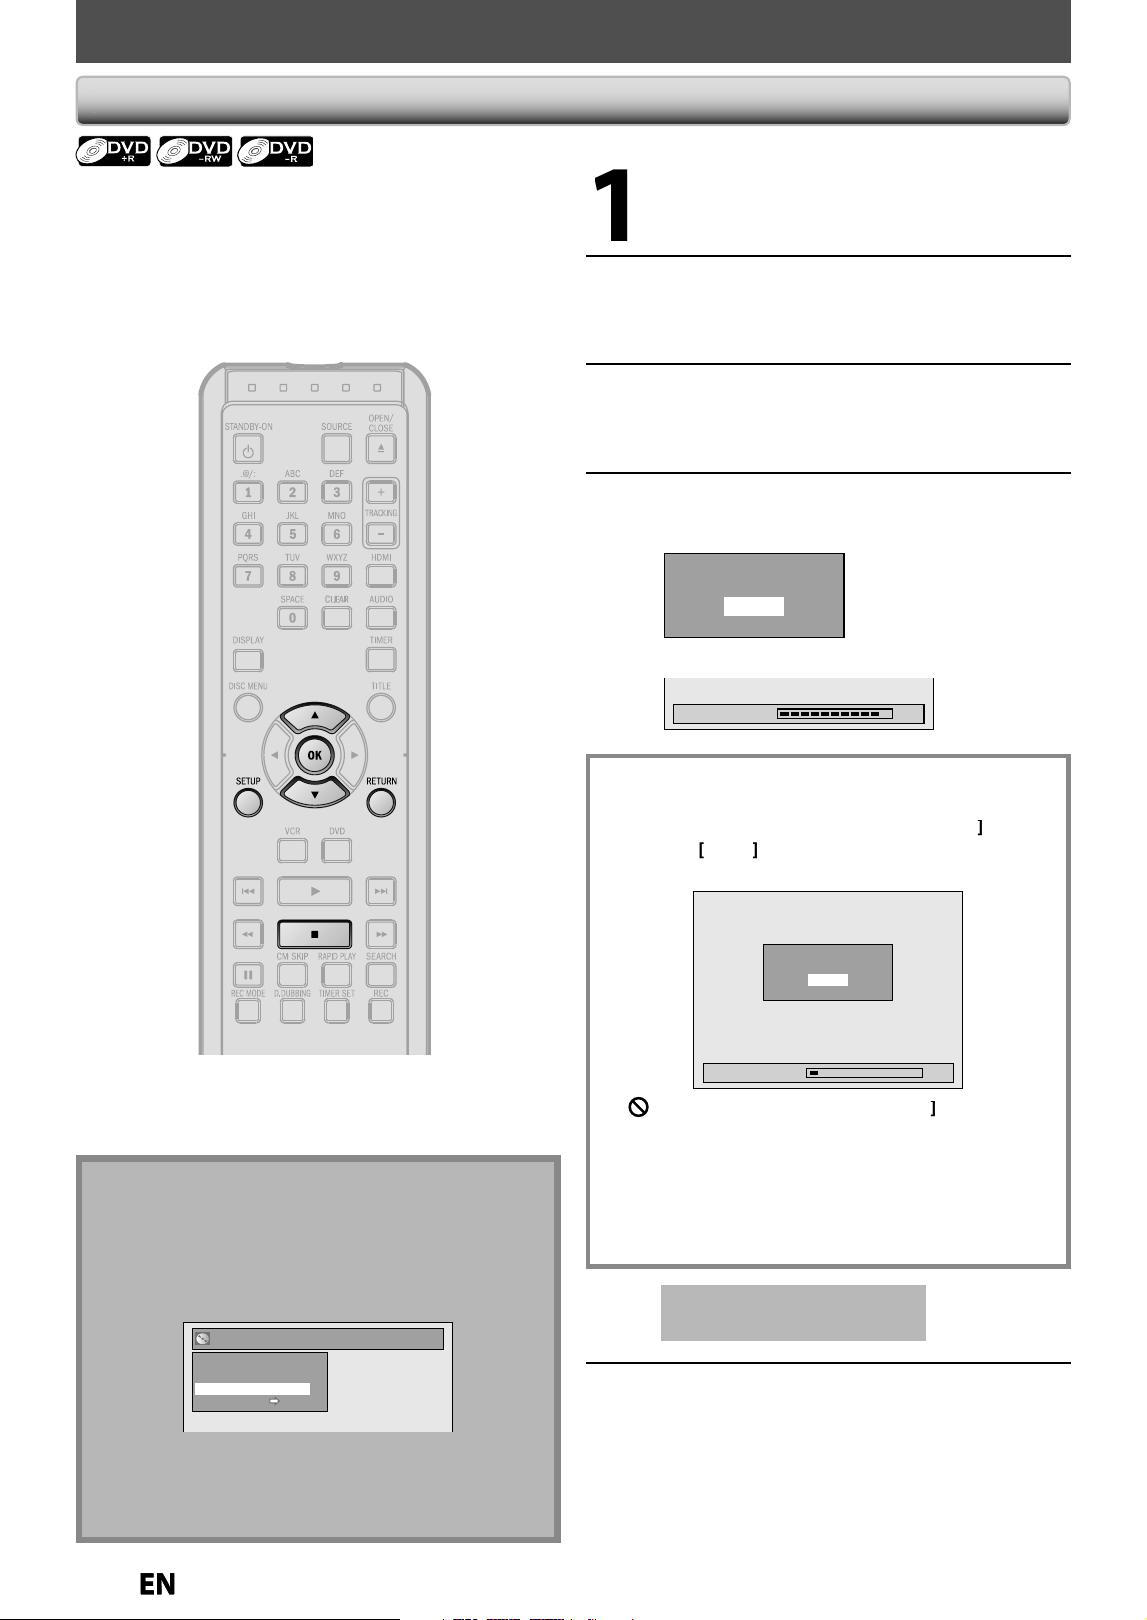
44
EN
EN
PLAYING THE DISCS ON OTHER DVD PLAYERS
Fina
l
izin
g
a Dis
c
1
Press
[
SETUP
]
.
2
Use
[
K
/
L
] to select “Disc Edit”
,
then
p
ress
[O
K
].
“Disc E
d
it” menu wi
ll
appear
.
3
Use
[
K
/
L
] to select “Finalize”
,
then
p
ress [OK]
.
4
Use
[
K
/
L
] to se
l
ect “Yes”, t
h
en press
[O
K
].
Finalize disc?
Yes
No
Finalizin
g
will start
.
Finalizing 90%
To cancel finalizin
g
..
.
(DVD-RW on
ly)
• To cancel
f
inalizing at step 4, press
[
ST
O
P
C
]
,
se
l
ect
“Yes” wit
h
[
K
/
L
]
,
t
h
en press
[O
K
]
.
Fina
l
izing is
c
ance
l
e
d
an
d
t
h
e unit wi
ll
b
e in stop mo
d
e
.
Finalizing 5%
Yes
No
Do you want to cancel ?
•
If
appears w
h
en pressin
g
[
ST
O
P
C
]
,
y
ou canno
t
c
ancel finalizin
g
because the finalizin
g
has been in
c
ertain progress
.
• W
h
en se
l
ecting “No” an
d
press
[O
K
]
or
[
RETURN
]
,
f
inalizing will be continued
.
• You cannot cancel finalizin
g
the DVD+R/DVD-R once
i
t
h
as
sta
r
ted.
This operation ma
y
take a
w
hile to be com
p
leted
.
5
Finalizin
g
is completed.
Y
ou will need to
f
inalize DVD+R
,
DVD-RW or DVD-R to
p
l
a
y
t
h
em
b
ac
k
on ot
h
er DVD p
l
a
y
ers
.
Finalizing ma
y
take several minutes up to an hour
.
A
s
h
orter recor
d
ing perio
d
on t
h
e
d
isc wi
ll
require a
l
on
g
er time period
f
or
f
inalization. Do not unplu
g
the
power cord durin
g
f
inalization
.
N
ot
e
•
Once
y
ou have finalized a DVD+R/ DVD-R,
y
ou
cannot edit or record an
y
thing on that disc
.
•
Th
e
r
e
i
s
n
o
n
eed
to
fin
a
liz
e
DVD+RW
.
•
When you insert a DVD-RW
f
inalized with this unit,
“Undo Finalize” will appear instead o
f
“Finalize”
.
Disc Edit
Edit Disc Name
Erase Disc
Undo Finalize
Disc Protect ON OFF
To release the finalizin
g
for the disc, select “Undo
Finalize” at ste
p
3
.
*
DO NOT turn the power o
ff
or to the standby mode
during
f
inalization, this will result in mal
f
unction
.
E9P8CUDZV427MG9BOMv1.indd44E9P8CUDZV427MG9BOMv1.indd44 2012/03/0113:06:322012/03/0113:06:32
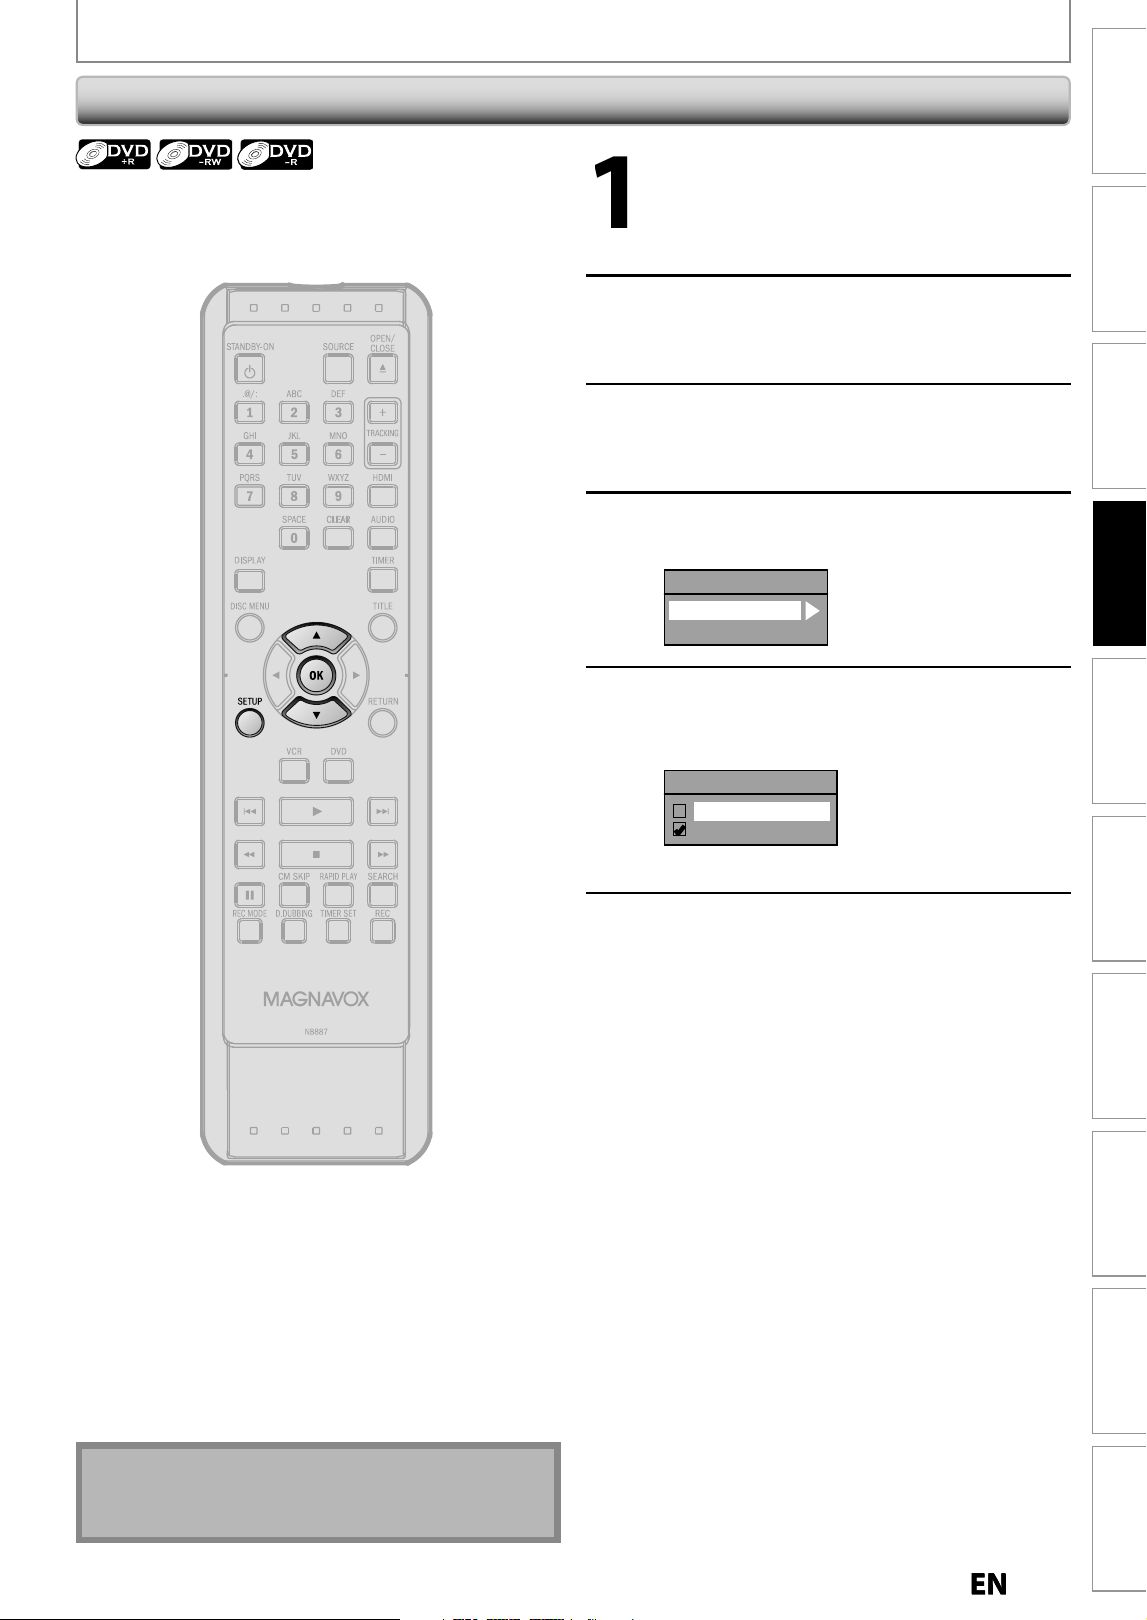
45
EN
EN
Recording
Playback Editing
Introduction
Connections Basic Setup Function Setup VCR Functions
Others Español
PLAYING THE DISCS ON OTHER DVD PLAYERS
1
Press
[
SETUP
]
an
d
use
[
K
/
L
]
to
se
l
ect “Genera
l
Settin
g
”, t
h
en press
[
OK
].
“Genera
l
Setting” menu wi
ll
appear
.
2
Use
[
K
/
L
] to se
l
ect “Recor
d
ing”,
t
h
en press [OK]
.
“Recordin
g
” menu will appear
.
3
Use
[
K
/
L
] to select “Auto Finalize”
,
t
h
en
p
ress [OK]
.
4
Use
[
K
/
L
]
to select “Disc Full” or
“End of Timer Rec”, then
p
ress [OK]
.
Auto Finalize
Disc Full
End of Timer Rec
5
Use
[
K
/
L
] to se
l
ect “ON”, t
h
en press
[O
K
].
e.g.) “Disc Fu
ll
”
Disc Full
ON
OFF
Your settin
g
will be activated
.
6
Press [SETUP] to ex
i
t
.
You can
f
inalize discs automaticall
y
using this
f
unction.
You can use this function to finalize discs after finishin
g
timer recordin
g
s and at the end of the disc space
.
Auto Finalizing
Note
• This function is not available after finishing dail
y
or
weekl
y
program recording
.
E9P8CUDZV427MG9BOMv1.indd45E9P8CUDZV427MG9BOMv1.indd45 2012/03/0113:06:332012/03/0113:06:33
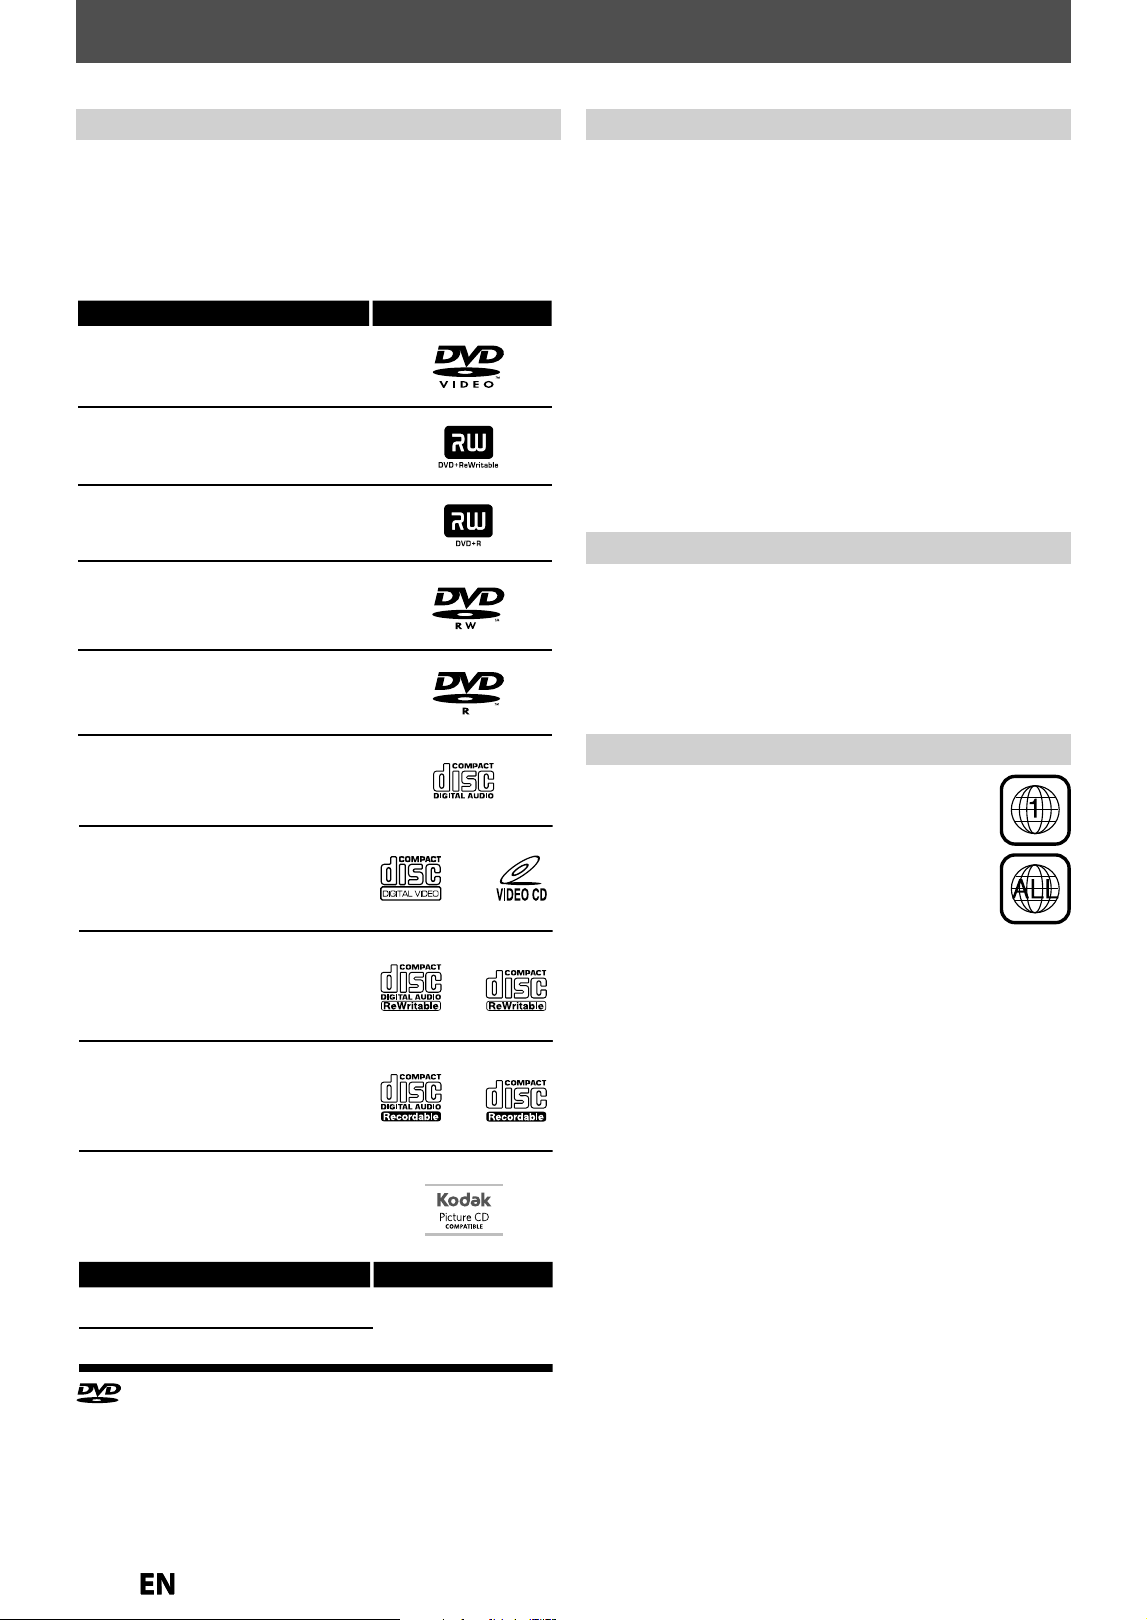
4
6
EN
EN
INFORMATION ON PLAYBACK
Be
f
ore
y
ou pla
y
back DVD, read the
f
ollowing in
f
ormation
.
T
his unit is compatible to pla
y
back the
f
ollowing discs
.
T
o p
l
a
y
b
ac
k
a DVD, ma
k
e sure t
h
at it meets t
h
e
requirements for region codes and color s
y
stems as
described below. You can pla
y
back discs that have the
f
ollowing logos will pla
y
back on the unit. Other disc
t
y
pes are not guaranteed to pla
y
back
.
P
l
a
y
a
bl
e Discs an
d
Fi
l
es
D
VD is recorded in different color s
y
stems throughout
the world. The most common color s
y
stem is NTSC
(
which is used primaril
y
in the United States and Canada)
.
T
his unit uses NTSC, so DVD
y
ou pla
y
back must be
recorded in the NTSC s
y
stem. You cannot pla
y
back DVD
recorded in other color s
y
stems
.
Color S
y
stems
T
his unit has been designed to pla
y
back DVD
with re
g
ion 1. DVD must be labeled for ALL
regions or
f
or region 1 in order to pla
y
back on
t
h
e unit. You cannot p
l
a
y
b
ac
k
DVD t
h
at are
labeled for other regions. Look for the s
y
mbols
on the right on
y
our DVD. If these region
s
y
mbols do not appear on
y
our DVD,
y
ou cannot
p
l
a
y
b
ac
k
t
h
e DVD in t
h
is unit
.
T
he number inside the globe re
f
ers to region o
f
the
w
o
r
ld.
A DVD labeled
f
or a speci
f
ic region can only play back on
t
h
e unit wit
h
t
h
e same region co
d
e
.
Region Co
d
es
LogosPlayable discs
CD-DA (audio CD)
video CD
CD-RW
DVD-video
DVD+RW
DVD+R
DVD-RW
(Finalized video mode discs only)
DVD-R
(Finalized video mode discs only)
MediaPlayable les
MP3
JPEG
CD-RW/-R
CD-R
KODAK Picture CD
is a trademark of DVD Format/Logo Licensing Corporation.
T
he
f
ollowing discs will not pla
y
back on this unit
.
•
CD-ROM • Compact Disc-Interactive
(
CD-I
)
•
DVD-RAM • Vi
d
eo Sing
l
e Disc (VSD)
•
DVD-R
O
M • DVD-
aud
i
o
•
Un
f
inalized dis
c
•
DVD or CD contains Windows Media™ Audio
/
DivX® files
•
DVD-R
o
r DVD-RW r
eco
r
ded
in VR m
ode
o
r n
o
n
c
ompatible recordin
g
forma
t
•
B
l
u-ray Disc™ • HD DV
D
•
Su
p
er Video C
D
O
n the
f
ollowing disc, the sound may not be heard
.
•
Super audio CD - Onl
y
the sound on the CD la
y
er can be
h
eard. The sound on the high-densit
y
super audio CD
l
a
y
er cannot be heard
.
Unp
l
a
y
a
bl
e Discs
E9P8CUDZV427MG9BOMv1.indd46E9P8CUDZV427MG9BOMv1.indd46 2012/03/0113:06:342012/03/0113:06:34
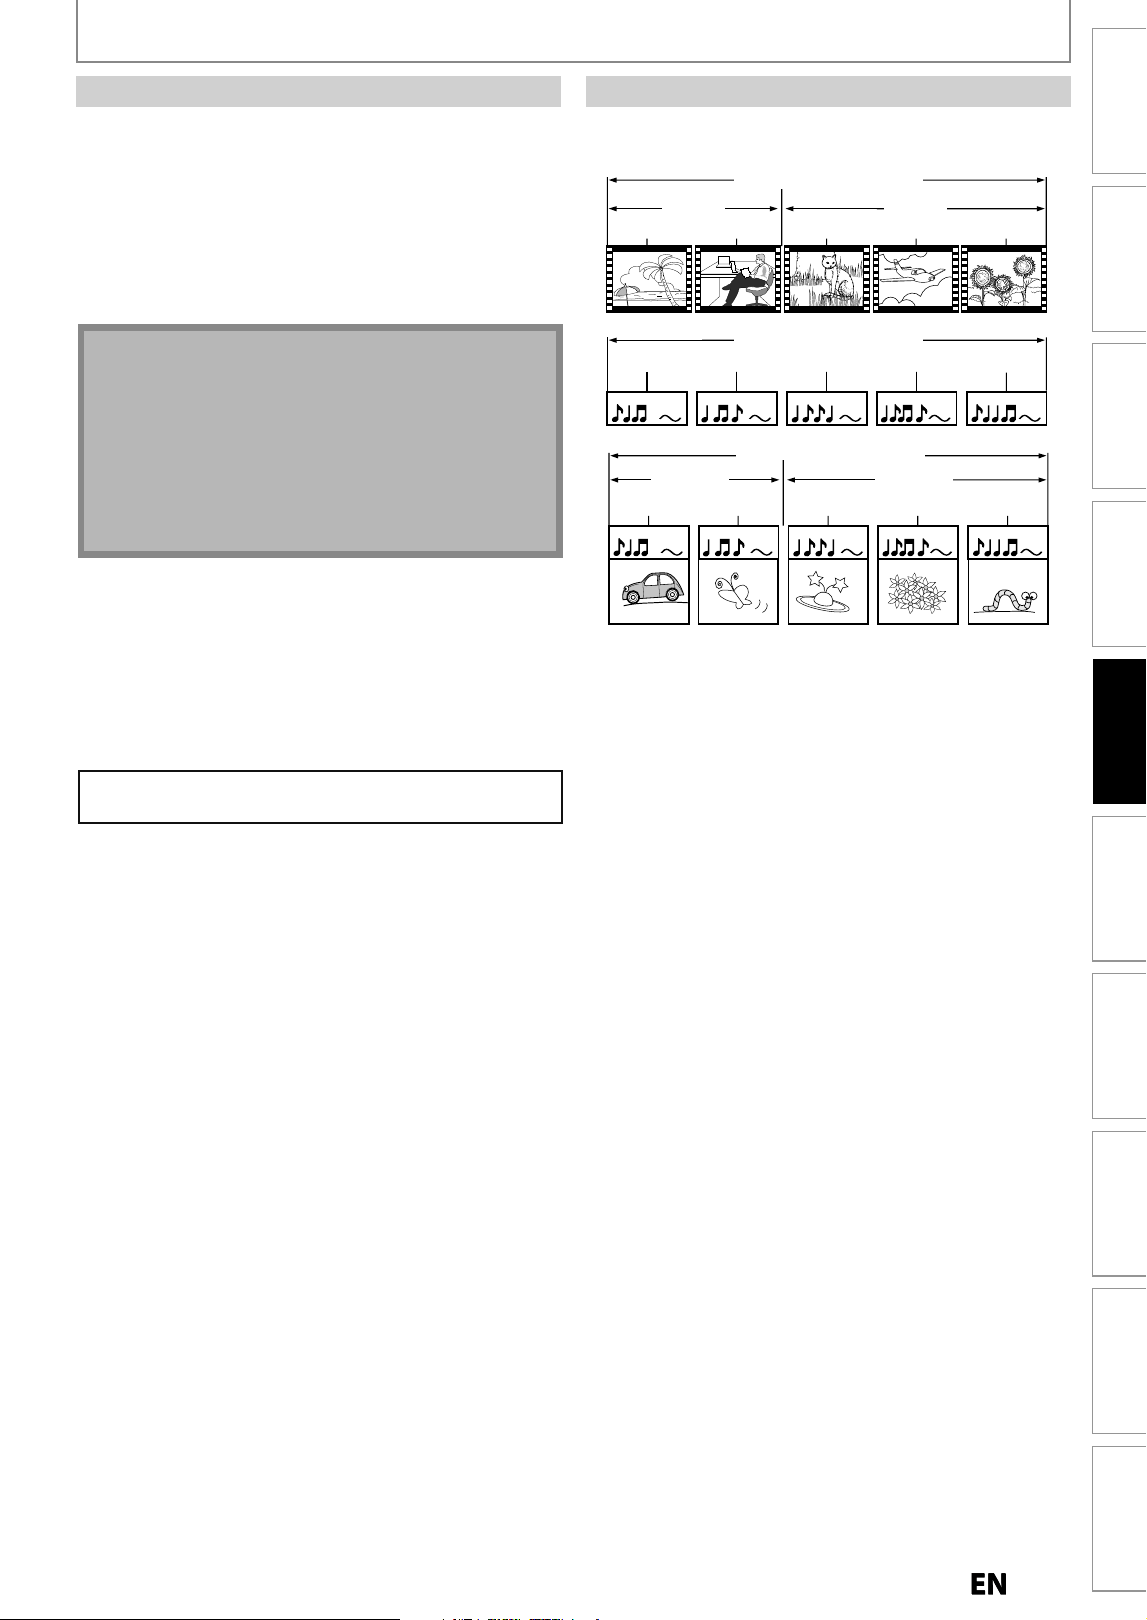
47
EN
EN
Recording
Playback
Editing
Introduction
Connections Basic Setup Function Setup VCR Functions
Others Español
MP3, JPEG
MP3, JPEG
fld 1
f
o
ld
er
1
fld 2
f
o
ld
er
2
f
il
e
1
fil
e
2
f
il
e
3
f
il
e
4
fil
e
5
You can select images or in
f
ormation on the menu
s
creen b
y
activating the PBC (pla
y
back control) function
of
t
h
e
vi
deo
C
D
.
T
hi
s
u
ni
t
co
nf
o
rm
s
to
v
e
r
.
1
.
1
a
n
d
v
e
r
.
2
.0
o
f vi
deo
C
D
sta
n
da
r
d
wi
t
h PB
C
fu
n
ct
i
o
n
.
Ver.1.1 (without PBC function): You can enjo
y
pla
y
bac
k
p
icture as well as music CD
.
Ver.2.0 (with PBC function): While usin
g
a video CD with
P
BC function, “PBC” a
pp
ears on the TV screen
.
N
ote
• PBC settin
g
turns to “ON” when loadin
g
video CD
with PBC
f
unction, thus, even a
f
ter setting PBC to
“OFF” and ejecting the video CD then reloading the
vi
d
eo CD, t
h
is setting turns to “ON” automatica
lly.
• Some operations cannot be per
f
ormed while PBC
f
unction is on. Cancel PBC
f
unction temporarily to
p
er
f
orm those operations by
f
ollowing the
instruction
b
e
l
ow
.
1
)
Press [SETUP]
.
2)
Use
[
K
/
L
] to se
l
ect “DISC P
l
ay
b
ac
k
Mo
d
e”, t
h
en
p
ress
[O
K
].
“DISC P
l
ay
b
ac
k
Mo
d
e” menu wi
ll
appear
.
3)
Use
[
K
/
L
] to select “PBC (Video CD onl
y
)”, then
p
ress [OK]
.
4) Use
[
K
/
L
] to select “ON” or “OFF”, then
p
ress [OK]
.
Your setting wi
ll
b
e activate
d.
You can pla
y
back interactive so
f
tware using menu
sc
r
ee
n
s.
R
e
f
e
r
to
in
st
r
uct
i
o
n
s
in
t
h
e
vi
deo
C
D
.
P
BC (pla
y
back control) for Video CD
T
he contents of DVD are generall
y
divided into titles.
T
itles ma
y
be
f
urther subdivided into chapters
.
Hint for DVD Pla
y
back
DVD
DVD
titl 1
title
1
titl 2
title
2
cha
p
ter 1
c
ha
p
ter 2 cha
p
ter
1
cha
p
ter 2 cha
p
ter 3
audio CD, video CD
au
di
o
CD,
v
id
eo
CD
t
r
ac
k 1
t
r
ac
k 2
t
r
ac
k
3
t
r
ac
k 4
t
r
ac
k
5
INFORMATION ON PLAYBACK
E9P8CUDZV427MG9BOMv1.indd47E9P8CUDZV427MG9BOMv1.indd47 2012/03/0113:06:352012/03/0113:06:35
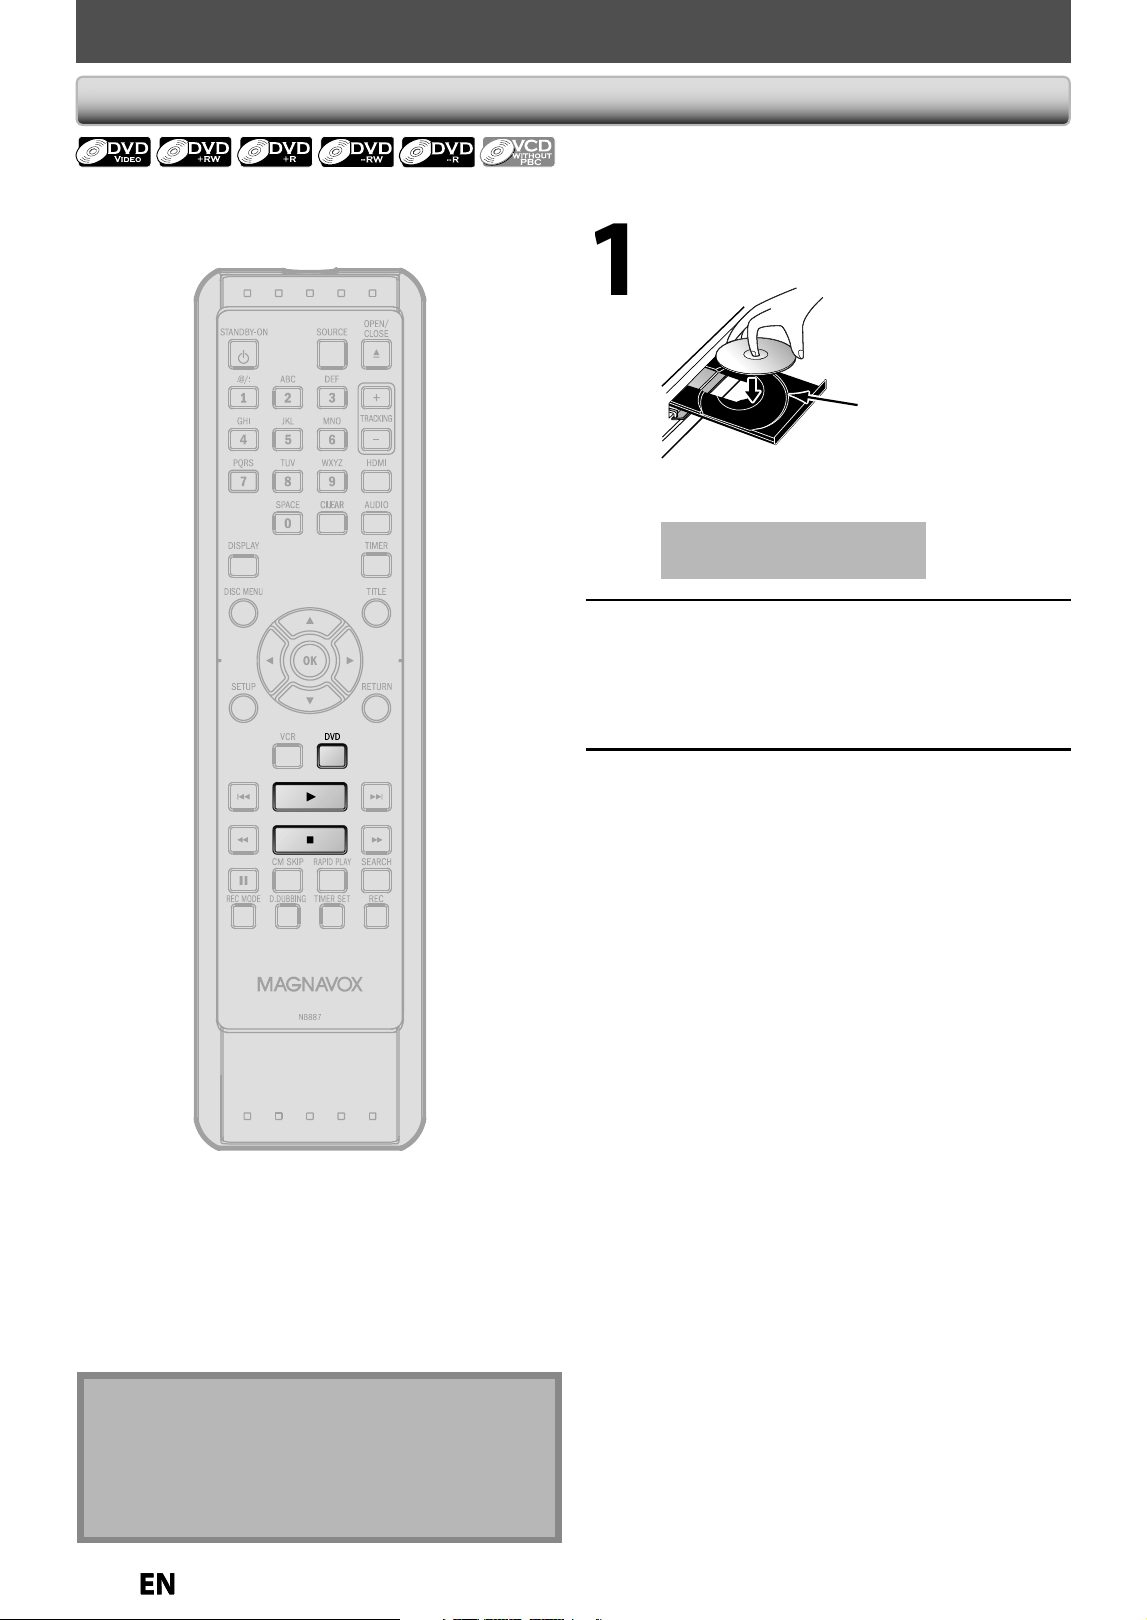
4
8
EN
EN
BASIC PLAYBACK
Direct P
l
ay
b
ac
k
Press [DVD]
f
irst
.
1
Insert a pla
y
able disc (refer to page
24 on how to insert a disc
).
Align the disc to
the disc tray guide.
* Ma
k
e sure t
h
e
d
isc is compati
bl
e wit
h
t
h
is unit.
(Re
f
er to page 46
f
or the list o
f
compatible discs.
)
It ma
y
take a while to load
the
d
i
s
c
.
2
Press
[
PLAY
B
]
to start p
l
ay
b
ac
k
.
If
y
ou are pla
y
ing back a DVD-video or video CD
with PBC function, a menu ma
y
appear
.
Refer to “Usin
g
the Title / Disc Menu” on pa
g
e
5
1
.
3
Press
[
ST
O
P
C
]
once to stop p
l
ay
b
ac
k
temporari
l
y
.
• Refer to “Resume Pla
y
back” on page 52
.
N
ote
• Some
d
iscs ma
y
start p
l
a
yb
ac
k
automatica
lly.
• You can select images or in
f
ormation on the menu
screen by activating PBC (playback control)
f
unction
(
page 47
)
.
• Pla
y
back will stop when
y
ou change the output mode
.
E9P8CUDZV427MG9BOMv1.indd48E9P8CUDZV427MG9BOMv1.indd48 2012/03/0113:06:362012/03/0113:06:36
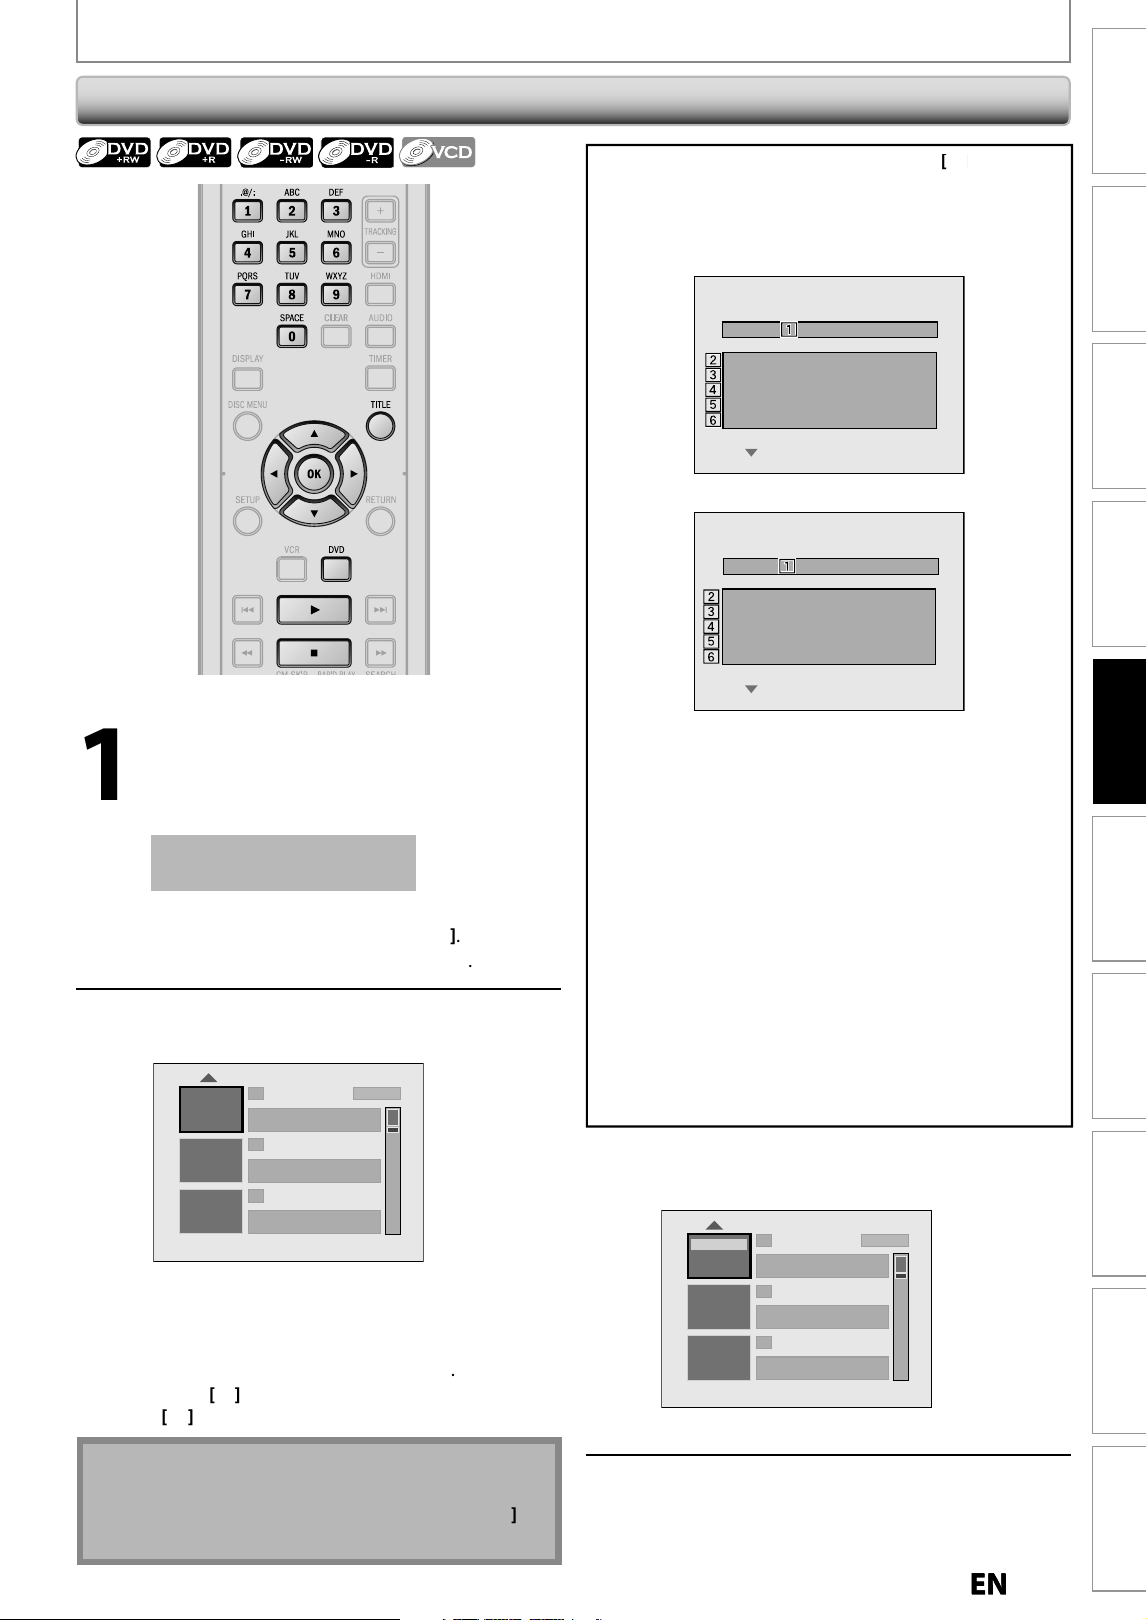
49
EN
EN
Recording
Playback
Editing
Introduction
Connections Basic Setup Function Setup VCR Functions
Others Español
BASIC PLAYBACK
Press
[
DVD
]
f
irst
.
1
Insert a playable disc (re
f
er to page
2
4 on
h
ow to insert a
d
isc).
* Ma
k
e sure t
h
e
d
isc is compati
bl
e wit
h
t
h
is unit.
(Re
f
er to page 46
f
or the list o
f
compatible discs.
)
It ma
y
take a while to load
t
he
d
i
s
c
.
•
Tit
l
e
l
ist wi
ll
appear automatica
lly.
•
To exit t
h
e tit
l
e
l
ist, press
[
ST
O
P
C
]
.
•
To resume the title list,
p
ress
[
TITLE
]
.
2
Use
[
K
/
L
] to se
l
ect a
d
esire
d
tit
l
e
,
t
h
en press [OK]
.
1 SP (2Hr)
2
3
NOV/21/12 11:00
AM
L1 SP
NOV/21/12 0:20:44
NOV/22/12 11:35
AM
L1 EP
NOV/22/12 0:10:33
EMPTY TITLE
1:37:52 SP(2Hr)
•
For video CD, when “PBC (Video CD onl
y
)” in
“DISC pla
y
back Mode” menu is set to “ON”, the
video CD main menu will a
pp
ear when
insertin
g
a disc. In such case, select a numbered
m
e
n
u
wi
t
h
[
the Number buttons
]
.
•
P
r
ess
[
B
]
to displa
y
the next page, and press
[
{
]
to
d
isp
l
a
y
t
h
e previous page
.
N
ote
• Some discs ma
y
start pla
y
back automaticall
y.
• You can a
l
so start p
l
ay
b
ac
k
b
y pressing
[
PLAY
B
]
i
nstead o
f
[O
K
]
at step
2.
P
layback
f
rom the Title List
3
Use
[
K
/
L
] to se
l
ect “P
l
ay”, t
h
en
press
[O
K
].
1 SP (2Hr)
2
3
NOV/21/12 11:00
AM
L1 SP
NOV/21/12 0:20:44
NOV/22/12 11:35
AM
L1 EP
NOV/22/12 0:10:33
EMPTY TITLE
1:37:52 SP(2Hr)
Edit
Overwrite
Play
P
l
a
yb
ac
k
wi
ll
start
.
4
Press
[
STOP
C
]
once to stop pla
y
back
temporaril
y.
• Re
f
er to “Resume Pla
y
back” on page 52
.
If
y
ou want to see disc information, press
[
{
]
{
wh
e
n
t
h
e
f
irst page o
f
the title list is displa
y
ed or press
[
K
]
w
he
n
the first title is selected but not when “Pla
y
”, “Edit” or
“Overwrite” is
h
ig
hl
ig
h
te
d.
e.
g
.) DVD+R
W
No Disc Name
Disc DVD+RW
Total Titles 3
Disc Space Used 0:30:48
Disc Protect OFF
Make Edits Compatible Needed
e.g.
)
DVD+
R
No Disc Name
Disc DVD+R
Total Titles 5
Disc Space Used 1:30:48
Disc Protect OFF
Finalize Finalized
1
.
D
i
sc
n
a
m
e
(
De
f
ault “No Disc Name”
)
2.
D
isc type
(
DVD+RW/DVD+R/ DVD-RW/DVD-R
)
3.
T
ota
l n
u
m
be
r
o
f
t
i
t
l
e
(
include “EMPTY TITLE”
)
4. Total time o
f
recorded disc space
5. Status o
f
disc protectio
n
(
“ON” is protecte
d
d
isc.
)
6. Makin
g
edits compatible/finalize
• W
he
n DVD+RW i
s
in
se
r
ted:
If
the disc needs to be set “Make Edits Compatible”,
“
Nee
d
e
d
” is
d
isp
l
aye
d
. Ot
h
erwise, “Not Nee
d
e
d
” is
d
ispla
y
ed. (Re
f
er to page 71.
)
• W
h
en DVD+R, DVD-RW or DVD-R is inserte
d:
If
“Finalize” is done, “Finalized” is displayed.
O
therwise, “Un
f
inalized” is displayed
.
E9P8CUDZV427MG9BOMv1.indd49E9P8CUDZV427MG9BOMv1.indd49 2012/03/0113:06:372012/03/0113:06:37
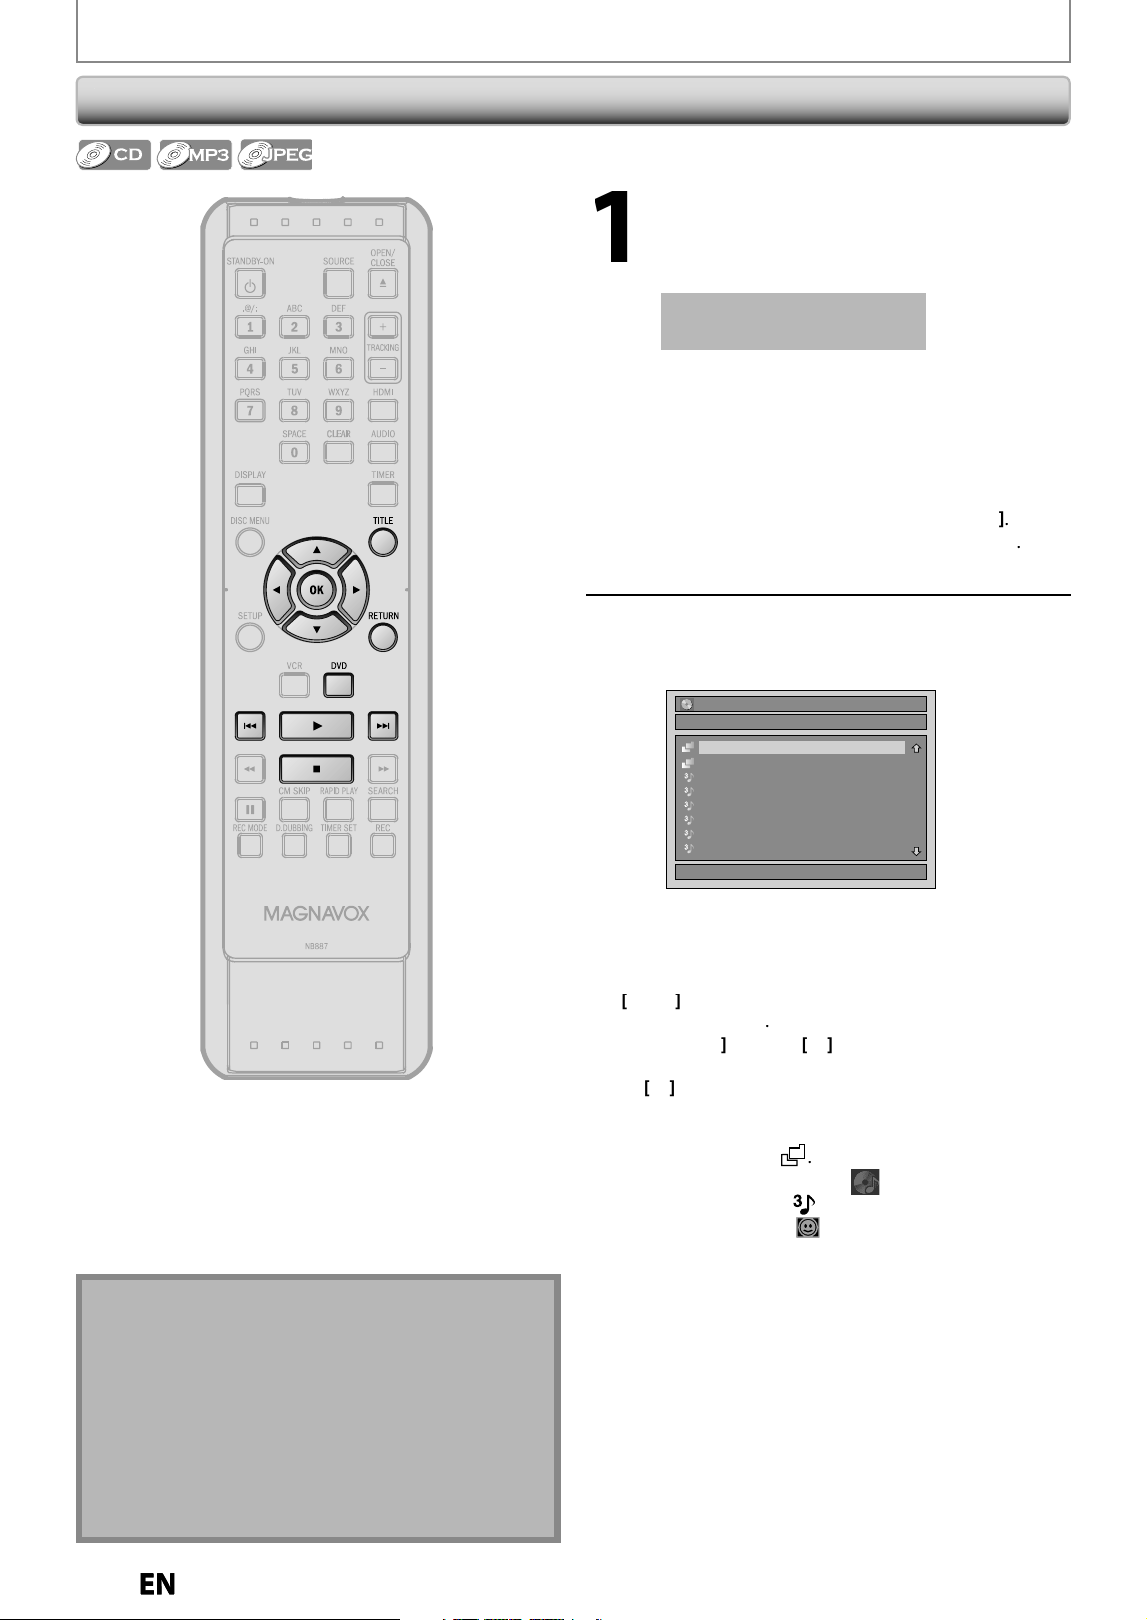
50
EN
EN
P
l
a
y
ing Bac
k
an Au
d
io CD an
d
a CD-RW / -R wit
h
MP3 / JPEG Fi
l
es
N
ote
• Th
e
aud
i
o
sou
r
ce
o
f MP
3
fil
es
ca
nn
ot
be
r
eco
r
ded
as
d
igita
l
soun
d
by
an MD or DAT
d
ec
k.
• Fi
l
es w
h
ose extension is ot
h
er t
h
an “.mp3(MP3)” or
“. jpg / . jpeg (JPEG)” wi
ll
not
b
e
l
iste
d
.
• Some unpla
y
able folders or files ma
y
be listed due to
the recordin
g
status
.
• High-resolution JPEG files take longer to be displa
y
ed.
• Progressive JPEG
f
iles (JPEG
f
iles saved in progressive
f
ormat) cannot be played back on this unit
.
Press
[
DVD
]
f
irst
.
1
Insert a pla
y
able disc (re
f
er to page
24 on
h
ow to insert a
d
isc)
.
* Make sure the disc is com
p
atible with this unit.
(Refer to pa
g
e 46 for the list of compatible discs.)
It ma
y
take a while to load
the
d
i
s
c
.
W
h
en an au
d
io CD is inserte
d
, trac
k
l
ist wi
ll
appear
.
When a CD-RW/-R with MP3 / JPEG
f
iles is inserted,
f
ile list will appear
.
When
y
ou insert a CD-RW/-R mixed with MP3/JPEG
files, the pla
y
back media selection screen will be
displa
y
ed
.
For MP3
,
select “Music”
,
for JPEG
,
select “Photo”
.
• To exit the track/
f
ile list, press
[
ST
O
P
C
]
.
• To resume the track/file list,
p
ress
[
TITLE
]
.
2
Use
[
K
/
L
]
to select a desired folder
or track/file, then
p
ress [OK]
.
e.
g
.) File lis
t
File List
DISC NAME
1/ 2
Folder 1
Folder 2
MP3 file 1
MP3 file 2
MP3 file 3
MP3 file 4
MP3 file 5
MP3 file 6
W
hen selectin
g
track/file:
Pl
a
yb
ac
k
wi
ll
start
.
W
hen selectin
g
the folder (Not available for audio CD)
:
T
he
f
iles in the
f
older will a
pp
ear
.
U
se
[
K
/
L
]
to select the
f
ile or
f
older you want to play
b
ac
k
, t
h
en press
[O
K
]
.
•
Pr
ess
[
PLAY
B
]
,
[
OK
]
o
r
[
B
]
to move to an
y
lower
hi
e
r
a
r
c
hi
es.
•
Pr
ess
[
s
]
or
[
RETURN
]
to move back to the
p
revious
hierarch
y.
Hints for audio CD tracks and MP3
/
JPEG files
:
•
Folders are shown b
y
.
•
Au
d
io CD trac
k
s are s
h
own
by
.
•
MP3 files are shown b
y
.
•
JPEG files are shown b
y
.
•
The s
y
stem can recognize up to 255
f
olders, up to 99
tracks
/
999
f
iles
.
•
Letters o
f
a
f
ile/
f
older name over
f
lowing the given space
wi
ll
b
e
d
isp
l
aye
d
as “...”. Unrecogniza
bl
e c
h
aracters wi
ll
b
e rep
l
ace
d
wit
h
asteris
k
s
.
•
If there are no files in the folder, “No Files” will be displa
y
ed.
It is recommended that
f
iles to be played back in this
unit are recorded under the
f
ollowing speci
f
ications
:
<
M
P3>
•
Sampling
f
requency : 44.1 kHz or 48 kHz.
•
Constant bit rate : 112 kb
p
s - 320 kb
ps
<J
PEG
>
•
Upper
l
imit : 6,300 x 5,100
d
ots.
•
L
o
w
e
r limi
t
:
3
2 x
3
2
dots.
•
File size o
f
image maximum : 12 MB
.
BASIC PLAYBACK
E9P8CUDZV427MG9BOMv1.indd50E9P8CUDZV427MG9BOMv1.indd50 2012/03/0113:06:392012/03/0113:06:39
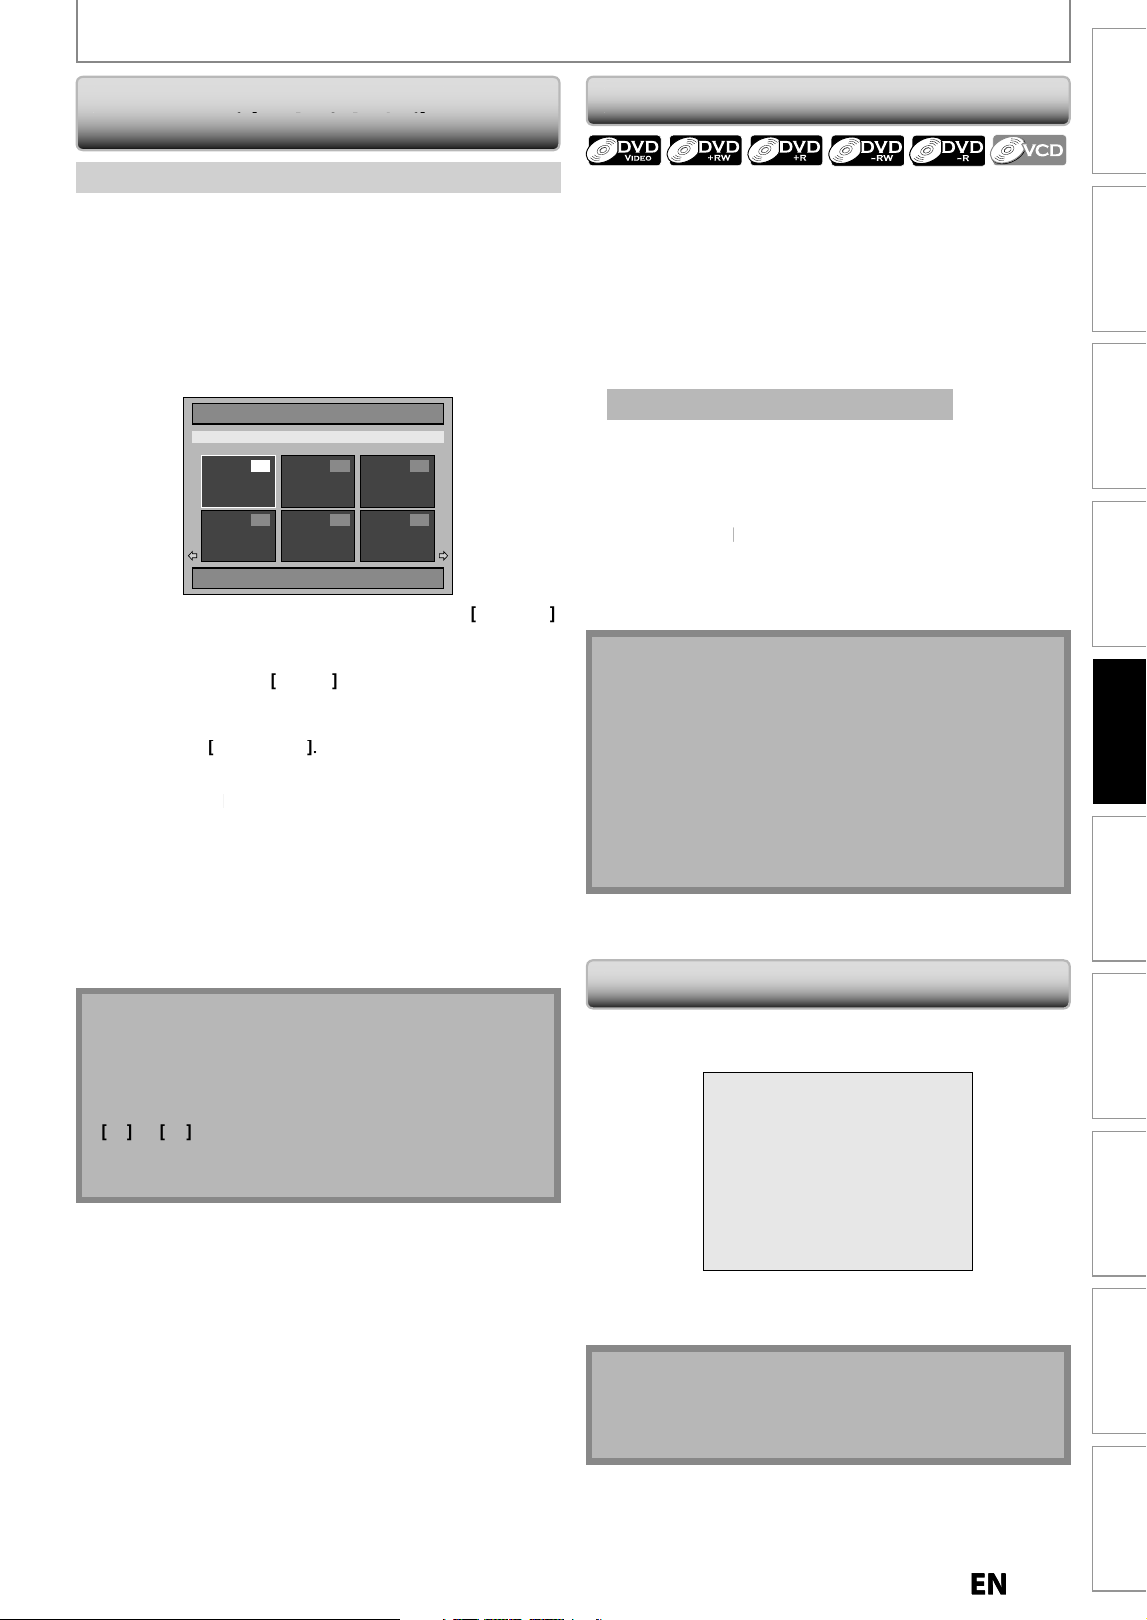
5
1
EN
EN
Recording
Playback
Editing
Introduction
Connections Basic Setup Function Setup VCR Functions
Others Español
BASIC PLAYBACK
U
sing t
h
e Tit
l
e / Disc Men
u
D
VD or video CD with PBC function ma
y
contain a title
l
ist
,
which describes the contents o
f
the disc
,
or a disc
menu, which guides
y
ou through the available functions
i
n
the
d
i
sc.
P
ress [DVD]
f
irst
.
1) Insert a playable disc (re
f
er to page 24 on how to
insert a
d
isc
)
.
* Make sure the disc is compatible with this unit. (Re
f
er
to page 46
f
or the list o
f
compatible discs.
)
It ma
y
take a while to load the disc.
2
) Press [TITLE] or [DISC MENU] to ca
ll
up t
h
e tit
l
e
l
ist
or
d
isc menu
.
3)
Use
[
K
/
L
/
{
/
{
B
] to ma
k
e a se
l
ection, an
d
t
h
en
press [OK] to ena
bl
e your se
l
ection
.
4
)
Press [
S
T
O
P
C
] to ex
i
t
.
1) During p
l
a
yb
ac
k
, press [PAUSE
F
]
.
P
l
ay
b
ac
k
wi
ll
b
e pause
d
an
d
soun
d
wi
ll
b
e mute
d.
F
F
2)
Press [PLAY
B
] to return to t
h
e norma
l
p
l
ay
b
ac
k.
N
ot
e
• Y
ou
ca
n
se
l
ect
a
n
u
m
be
r
ed
m
e
n
u
wi
t
h
[
the Number
b
uttons
]
a
l
so.
• Menus var
y
among discs. Refer to the information
a
ccompan
y
ing the disc for details
.
•
[
TITLE
]
or
[
DISC MENU
]
wi
ll
not a
l
ways
b
e active
w
it
h
a
ll
DVD
.
• For vi
d
eo CD, w
h
en “PBC (Vi
d
eo CD on
l
y)” in “DISC
Pl
ay
b
ac
k
Mo
d
e” menu is “ON”, t
h
e vi
d
eo CD main
menu wi
ll
appear w
h
en inserting a
d
isc
.
Note
• On DVD, set “Sti
ll
Mo
d
e” to “Fie
ld
” in “P
l
ay
b
ac
k
”
menu i
f
pictures in the pause mode are blurred.
(Re
f
er to page 76.
)
Pause
KO
DAK P
i
ct
u
re
CD
Pl
a
y
in
g
Bac
k
an Au
d
io CD an
d
a
CD-RW / -R with MP3 / JPEG Files (cont’d)
y
g
Th
e Picture CD is a service to convert p
h
otograp
h
s ta
k
en
b
y
a conventional film camera into digital data and write
t
he data on a CD. You can enjo
y
picture images on the T
V
s
et b
y
pla
y
ing back the Picture CDs
.
For details of KODAK Picture CD, contact a sho
p
that
provides developin
g
service of Kodak Inc
.
1
)
Press [TITLE]
.
Picture CD
1 / 2
4 5 6
1 2 3
Image 1
• To exit the Picture CD thumbnail List,
p
ress
[
RET
U
R
N
]
o
r
[
STOP
C
].
Arr
o
w i
co
n
s
m
ea
n
t
h
e
t
i
t
l
e
li
st
in
c
l
udes
a
n
e
x
t
o
r
previous pa
g
e. Use
[
{
/
B
]
in
t
h
e
d
ir
ect
i
o
n
o
f
t
h
e
i
con
y
ou wish to follow. You can quick review the six
t
humbnails at once between the first and last pa
g
es
b
y
pressing
[
H
]
/
[
G
]
.
2)
Use
[
K
/
L
/
{
/
{
B
]
to select a desired track to be
pla
y
ed back, then press [PLAY
B
]
or
[
OK
]
.
An image will be pla
y
ed back from the selected trac
k
and
g
o to the next one in turn
.
3)
Press [STOP
C
]
to stop pla
y
back.
•
P
r
ess
[
TITLE
]
to
d
isp
l
a
y
t
h
e t
h
um
b
nai
l
again
.
N
otes on JPEG an
d
KODAK Picture CD
:
• After track is displa
y
ed for 5 seconds or 10 seconds
(set in “Slide Show” on page 55) the displa
y
moves to
t
h
e
n
e
x
t
t
r
ac
k
.
During JPEG or KODAK Picture CD pla
y
back, press
[
B
]
o
r
[
{
]
to rotate a picture 90 de
g
rees clockwise
o
r counterclockwise respectivel
y.
(Not avai
l
a
bl
e w
h
en t
h
e
d
isp
l
ay menu appears.
)
E9P8CUDZV427MG9BOMv1.indd51E9P8CUDZV427MG9BOMv1.indd51 2012/03/0113:06:412012/03/0113:06:41
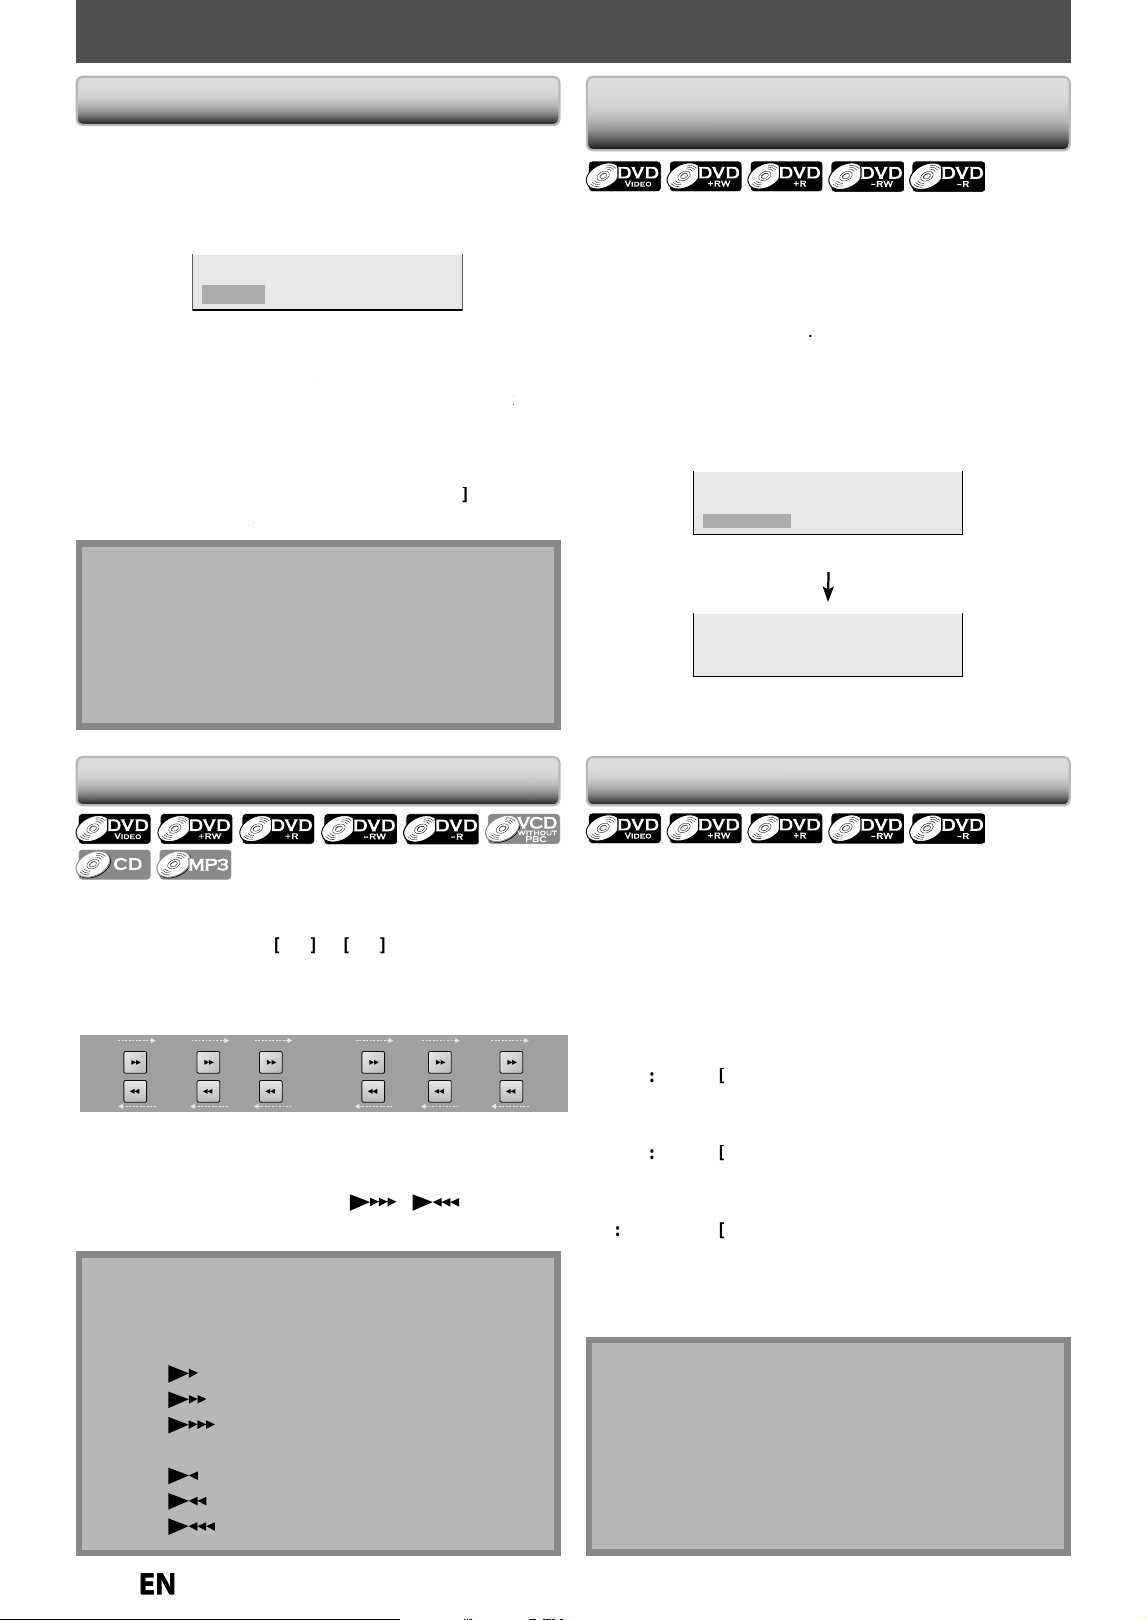
5
2
EN
EN
SPECIAL PLAYBACK
You can s
k
ip TV commercia
l
s to enjoy t
h
e recor
d
e
d
programs wit
h
out interrupting
.
D
uring p
l
ay
b
ac
k
, press [CM SKIP]
.
Normal pla
y
back will start at 30 seconds ahead from the
point
y
ou press
[
CM SKIP
]
.
E
ver
y
t
i
me
y
ou press
[
CM SKIP
]
, t
h
e searc
h
ing point wi
ll
b
e exten
d
e
d
by
30 secon
d
s a
h
ea
d.
Y
ou can press
[
CM SKIP
]
up to 6 times (180 secon
d
s)
.
e.
g
.) Press
[
CM SKIP
]
o
n
ce.
B
B
CM Skip 30 sec.
(forwardin
g
30 seconds
)
P
l
ay
b
ac
k
wi
ll
return to t
h
e norma
l
p
l
ay
b
ac
k.
You can pla
y
back
f
rom where
y
ou stopped pla
y
ing bac
k
the
d
i
sc
last.
1) During pla
y
back, press [STOP
C
]
.
Th
e resume messa
g
e wi
ll
appear
.
Resume ON
2
)
Press [PLAY
B
].
In a
f
ew seconds, pla
y
b
ac
k
will resume from the point
k
at w
h
ic
h
it stoppe
d
l
ast. You can resume p
l
a
y
back
at
k
the same point even i
f
you turn the unit to the standby
m
ode.
T
o cancel the resume pla
y
back
and start playing back
k
the disc from the be
g
innin
g
, press
[
STOP
C
]
a
g
ain
while the pla
y
back
is stopped.
k
Resume P
l
ay
b
ac
k
Note
•
For MP3 / JPEG
f
iles, pla
y
back will resume
f
rom the
beginning o
f
the
f
ile at which pla
y
back was stopped
.
•
Resume P
l
ay
b
ac
k
is avai
l
a
bl
e w
h
en you p
l
ay
b
ac
k
t
h
e
video CD without PBC
f
unction
.
•
So
m
e
vi
deo
C
D wi
t
h
t
h
e
PB
C
f
u
n
ct
i
o
n r
esu
m
e
pla
y
back from the beginning of the track
.
N
ot
e
•
Forward/reverse s
p
eed will be indicated with icons
as
f
o
ll
o
w
s.
f
orward (approx. speed
)
2
x:
2
0
x
:
4
0
x
:
reverse (approx. spee
d)
5
x
:
20
x
:
4
0
x:
1) During p
l
ay
b
ac
k
, press
[
D
]
or
[
E
]
.
E
ver
y
time
y
ou press
[
D
]
o
r
[
E
]
, a
pp
roximate s
p
eed
will be chan
g
ed as follows.
F
ast forward or fast reverse pla
y
back across titles (for
DVD) or
f
iles (
f
or MP3
f
iles) is not
p
ossible
.
20x
normal
speed
playback
2x 20x5x 40x40x
F
or video CD, approximate
f
orward/reverse speeds are
2
x,
8
x, 16x
.
F
or audio CD, MP3 files, a
pp
roximate s
p
eed is fixed at
8x with sound
(
indicated with
/
)
.
2
)
Press
[
P
LAY
B
] to return to t
h
e norma
l
p
l
ay
b
ac
k.
Fast Forward / Fast Reverse Pla
y
bac
k
Sk
ip
pi
ng
TV Commercia
l
s Duri
ng
Pl
a
yb
ac
k
Rapid playback
f
unction is available only during
p
l
ay
b
ac
k.
This
f
unction is available only on discs recorded in the
Dolby Digital
f
ormat, and plays back in a slightly
f
aster
/
s
l
ower spee
d
w
h
i
l
e
k
eeping t
h
e soun
d
qua
l
ity just as
norma
l
p
l
ay
b
ac
k.
1) During p
l
ay
b
ac
k
, press [RAPID PLAY]
.
B
x
0
.
8
:
P
ress
[
R
APID PLAY
]
o
nce
d
uring p
l
ay
b
ac
k.
Plays back approximately at 0.8 times o
f
normal
p
l
ay
b
ac
k.
B
x
1
.
3
:
P
ress
[
R
APID PLAY
]
t
wice
d
uring p
l
ay
b
ac
k.
Plays back approximately at 1.3 times o
f
normal
p
l
ay
b
ac
k.
B
:
P
ress
[
R
APID PLAY
]
3
times to p
l
ay
b
ac
k
in
norma
l
spee
d.
No e
ff
ects
.
2
)
Press [PLAY
B
] to return to t
h
e norma
l
p
l
ay
b
ac
k.
Rapi
d
P
l
ay
b
ac
k
N
ot
e
• Audio (lan
g
ua
g
e) settin
g
cannot be chan
g
ed while
usin
g
this mode
.
• This
f
eature ma
y
not work at some point in a disc
.
• Au
d
io is PCM
d
uring rapi
d
p
l
ay
b
ac
k
mo
d
e except
w
h
en using
d
igita
l
au
d
io connection
.
• When usin
g
di
g
ital audio connection (COAXIAL), the
LPCM sound (2 channel) will be out
p
ut
.
E9P8CUDZV427MG9BOMv1.indd52E9P8CUDZV427MG9BOMv1.indd52 2012/03/0113:06:412012/03/0113:06:41
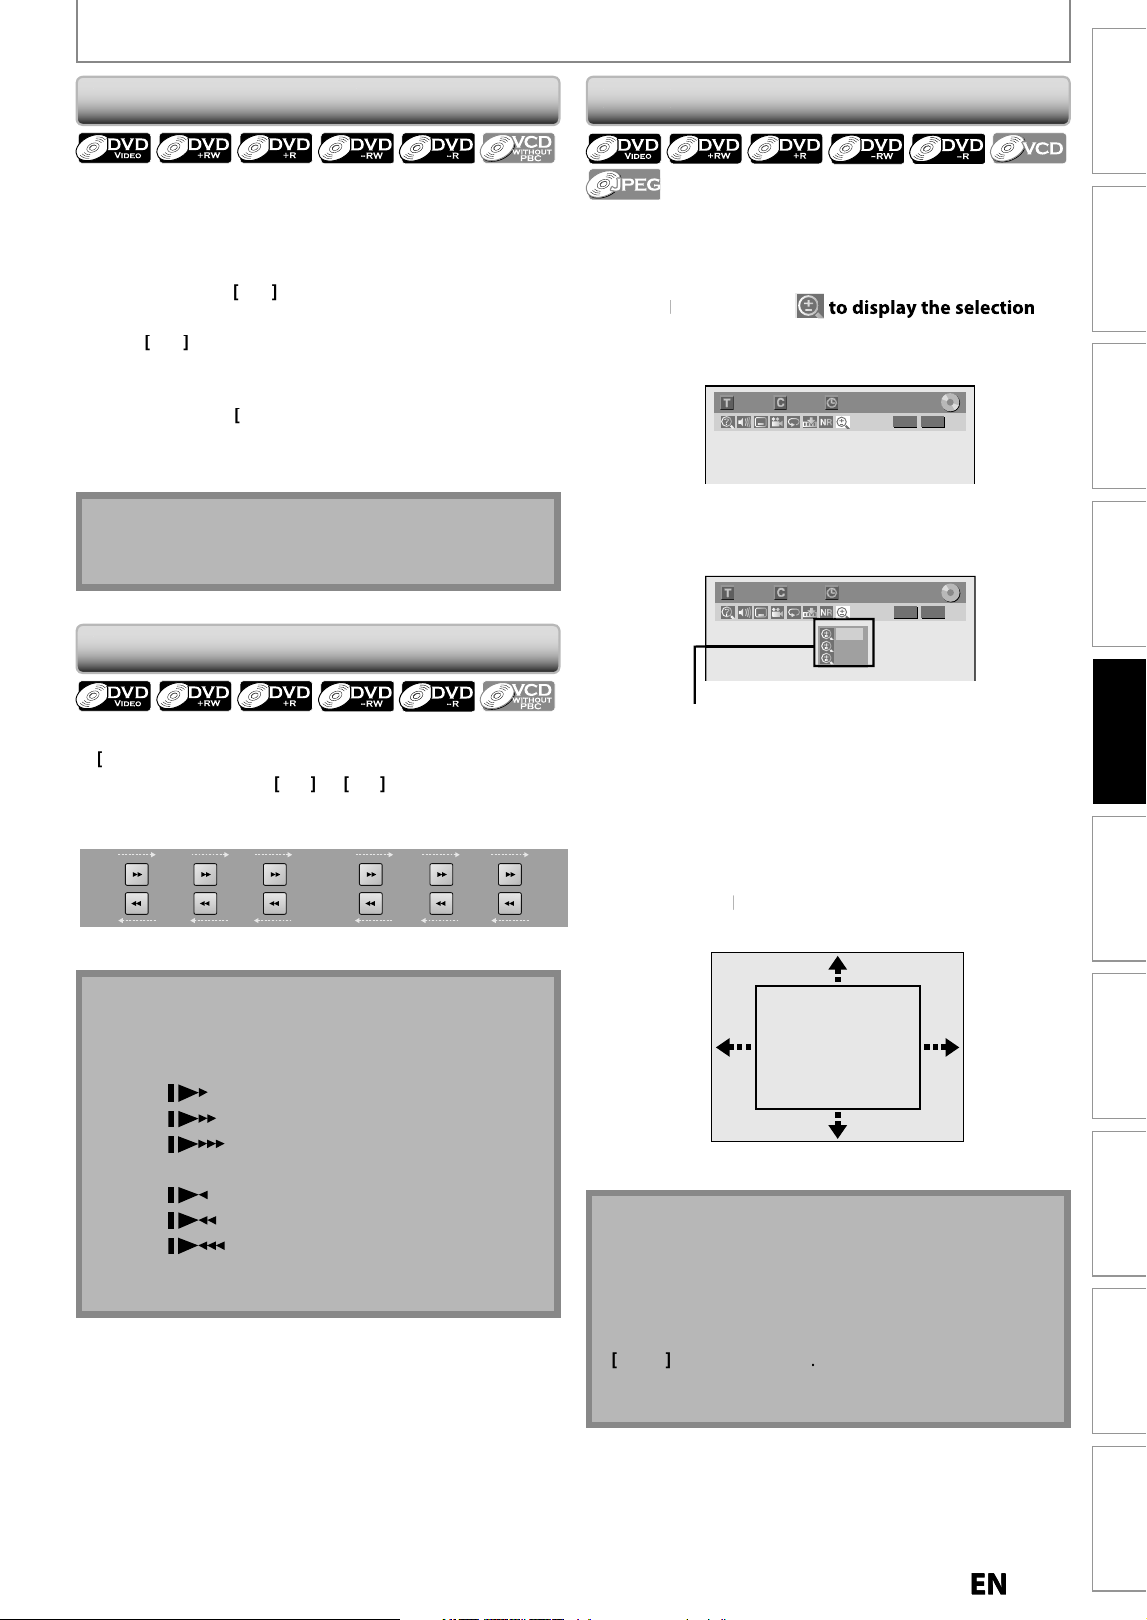
53
EN
EN
Recording
Playback
Editing
Introduction
Connections Basic Setup Function Setup VCR Functions
Others Español
SPECIAL PLAYBACK
Step by Step Playbac
k
1) During pla
y
back, press [PAUSE
F
]
.
Pla
y
back will be paused and sound will be muted
.
2)
Press [
G
] repeatedl
y
.
Pla
y
back will advance one
f
rame (or step) at a time
w
hen
y
ou press
[
G
]
wi
t
h
t
h
e
sou
n
d
m
uted.
T
o p
l
ay
b
ac
k
step
b
y step
b
ac
k
war
d:
Pr
ess
[
H
]
repeatedl
y.
E
ver
y
time
y
ou press the button, the pla
y
back will go
backward b
y
one
f
rame
.
•
Pr
ess
a
n
d
hold
[
H
]
/
[
G
]
to reverse
/
a
d
vance
continuous
l
y
.
3
)
Press [PLAY
B
] to return to the normal pla
y
back
.
N
ot
e
• Onl
y
step b
y
step forward pla
y
back is available for
pla
y
ing back video CD
.
Note
•
Forward/reverse s
p
eed will be indicated with icons
as
f
o
ll
o
w
s.
f
orward (approx. speed
)
1
/
16x:
1
/
8x:
1
/
3x:
reverse (approx. spee
d
)
1
/
16x:
1
/
8x:
1
/
4x:
•
Onl
y
slow forward is available when pla
y
ing bac
k
vi
deo
C
D
.
Slow Forward / Slow Reverse Pla
y
back
1
) During p
l
a
yb
ac
k
, press [PAUSE
F
]. T
h
en press
[
D
]
or
[
E
].
E
very t
i
me you press
[
D
]
or
[
E
]
,
approximate spee
d
will be changed as
f
ollows. (The sound will remain
mute
d
.
)
1/8x
pause
1/16x 1/8x1/16x 1/3x1/4x
2
)
Press [PLAY
B
]
to return to t
h
e norma
l
p
l
ay
b
ac
k
.
Zoom
N
ote
• When selectin
g
a smaller factor than the current one,
t
h
e zoom area wi
ll
not
b
e
d
isp
l
a
y
e
d.
• To exit t
h
e zoom menu, press
[
RETURN
]
repeate
dl
y
at step
3.
• To cancel the zoom function, select “x1.0” usin
g
[
K
/
L
]
,
then
p
ress
[
OK
]
.
• You cannot s
l
i
d
e t
h
e zoome
d
picture on some JPEG
fil
es.
1
) During p
l
ay
b
ac
k
, press [DISPLAY] to
b
ring up t
h
e
d
isp
l
ay menu
.
2)
Use [
{
/
{
B
]
to se
l
ect
m
enu
.
e
.
g
.) DVD-vide
o
1/ 5 1/ 5
DVD
0:01:00 / 1:23:45
Video
3)
Use [
K
/
L
]
to select a desired zoom factor to zoom
,
t
hen
p
ress [OK].
1/ 5 1/ 5
DVD
× 1.2
× 1.5
× 2.0
0:01:00 / 1:23:45
Video
Z
oom menu wi
ll
appear
.
T
here are four o
p
tions
(
x1.0, x1.2, x1.5 an
d
x2.0), t
h
ese are
d
isp
l
a
y
e
d
e
xcludin
g
the current zoom rate
.
Z
oom area wi
ll
b
e
d
isp
l
aye
d.
4)
Use [
K
/
L
/
{
/
{
B
]
to se
l
ect a
d
esire
d
zoom
p
osition, t
h
en press [OK]
.
Z
oom p
l
a
yb
ac
k
wi
ll
start
.
E9P8CUDZV427MG9BOMv1.indd53E9P8CUDZV427MG9BOMv1.indd53 2012/03/0113:06:432012/03/0113:06:43
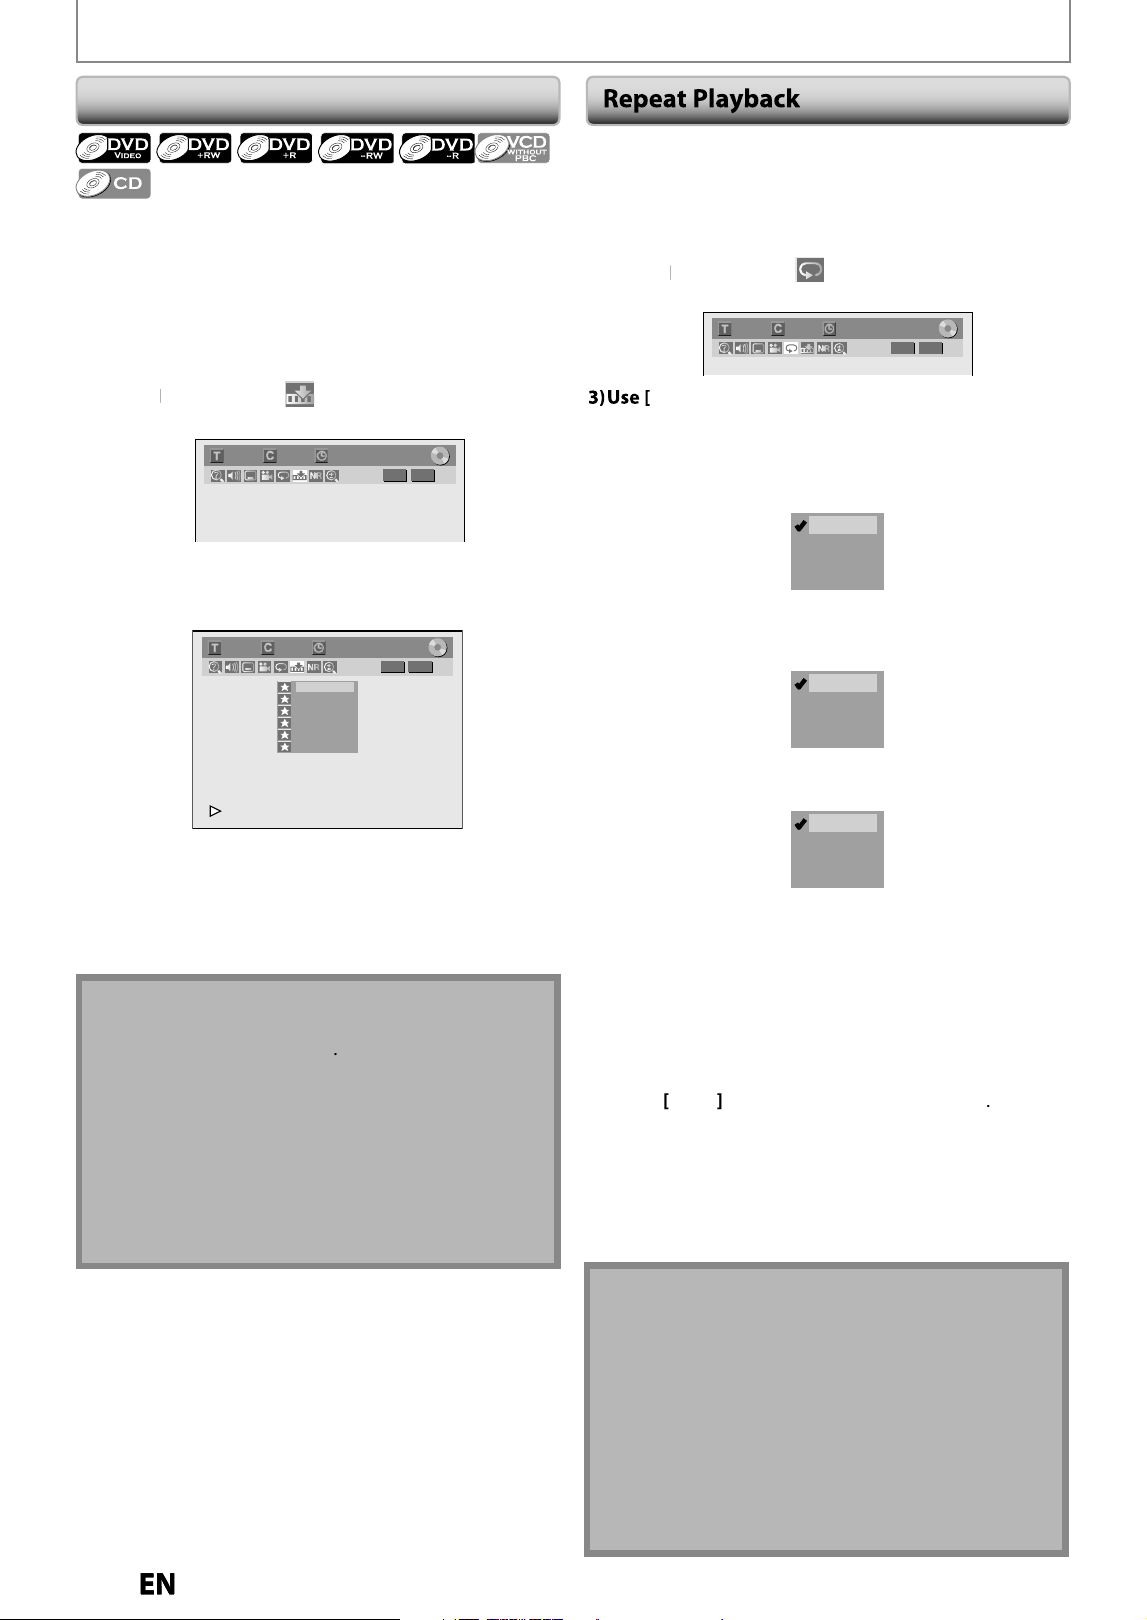
54
EN
EN
SPECIAL PLAYBACK
T
his feature allows
y
ou to assign a specific point on a disc
to
be
ca
ll
ed
bac
k l
ate
r
.
1) During pla
y
back, press [DISPLAY] to bring up the
displa
y
menu
.
If the displa
y
menu is alread
y
shown, skip to step 2
.
2
)
Use
[
{
/
{
B
]
to select to displa
y
the marker list
.
e.g.) DVD-vi
d
e
o
1/ 5 1/ 5
DVD
0:01:00 / 1:23:45
Video
3)
Use
[
K
/
L
]
to se
l
ect a
d
esire
d
mar
k
er num
b
er.
W
h
en it reac
h
es t
h
e
d
esire
d
point, press [OK]
.
1/ 5 1/ 5
DVD
---
---
---
---
---
---
1
2
3
4
5
6
0:01:00 / 1:23:45
Video
Th
e tit
l
e (trac
k
) num
b
er an
d
t
h
e time wi
ll
b
e
d
isp
l
a
y
e
d.
4)
To return to the marker later
:
Use
[
K
/
L
]
to se
l
ect t
h
e
d
esire
d
mar
k
er num
b
er
,
t
h
en pres
s
[O
K
].
Mar
k
er Settin
g
Note
•
To clear a marker
,
select the marker number to be
cleared, then
p
ress
[
CLEAR
]
.
•
All markers will be erased when
y
ou operate these
o
p
erations listed below
.
–
Opening t
h
e
d
isc tra
y
–
Turning the unit to standby / o
ff
–
R
eco
r
d
o
n
a
r
eco
r
dab
l
e
d
i
sc
•
You can mar
k
up to 6 points
.
•
Mar
k
er setting is not avai
l
a
bl
e w
h
en you p
l
ay
b
ac
k
the video CD with PBC
f
unction
.
Available repeat
f
unction ma
y
var
y
depending the discs.
1) During p
l
a
yb
ac
k
press [DISPLAY] to
b
ring up t
h
e
d
isp
l
ay menu, t
h
en procee
d
to step 2), or press
[REPEAT] t
h
en procee
d
to step 3).
I
f
the displa
y
menu is alread
y
shown, skip to step 2
.
2)
Use
[
{
/
{
B
] to se
l
ect to
d
isp
l
ay t
h
e se
l
ection
m
enu
.
1/ 5 1/ 5
DVD
0:01:00 / 1:23:45
Video
K
/
L
] to se
l
ect a
d
esire
d
repeat type, t
h
en
press
[O
K
]
.
T
he selected repeat pla
y
back will start
.
e
.
g
.) DVD-vi
d
e
o
OFF
Title
Chapter
A – B
e
.
g
.) audio CD, video CD
OFF
Track
All
A – B
e
.
g
.) MP3 / JPEG file
s
OFF
Track
All
Group
Tit
l
e
:
T
he current title will be pla
y
ed back repeatedl
y.
Cha
p
ter
:
The current chapter will be pla
y
ed back repeatedl
y.
A
ll:
Th
e current
d
isc wi
ll
b
e p
l
aye
d
b
ac
k
repeate
dl
y
.
A-B
:
Desired section can be pla
y
ed back repeatedl
y.
1
)
Use
[
K
/
L
]
to select “A-B”, then
p
ress
[
OK
]
.
2
)
Press
[
OK
]
at the desired startin
g
point A
.
3
)
Press
[O
K
]
at the desired endin
g
point B
.
Tr
a
ck
:
T
he current track or file will be pla
y
ed back repeatedl
y.
Grou
p:
T
he current folder will be pla
y
ed back repeatedl
y
.
N
ote
• Point B for the repeat A-B pla
y
back should be set
w
it
h
in t
h
e same tit
l
e or trac
k
as point A
.
• To cance
l
t
h
e repeat p
l
ay
b
ac
k
, se
l
ect “OFF” at step 3.
Th
e repeat setting wi
ll
a
l
so
b
e cance
l
e
d
w
h
en you
s
top p
l
ay
b
ac
k.
• You cannot select “Group” during the random pla
y
back
.
• Repeat p
l
a
yb
ac
k
is not avai
l
a
bl
e w
h
en
y
ou p
l
a
y
b
ac
k
t
h
e
vi
deo
C
D wi
t
h PB
C
fu
n
ct
i
o
n
.
• During the A-B repeat, i
f
you reaches the point A with any
r
everse p
l
ay
b
ac
k
, t
h
e reverse p
l
ay
b
ac
k
wi
ll
b
e cance
l
e
d
a
nd the A-B repeat playback resumes
f
rom point A.
E9P8CUDZV427MG9BOMv1.indd54E9P8CUDZV427MG9BOMv1.indd54 2012/03/0113:06:452012/03/0113:06:45
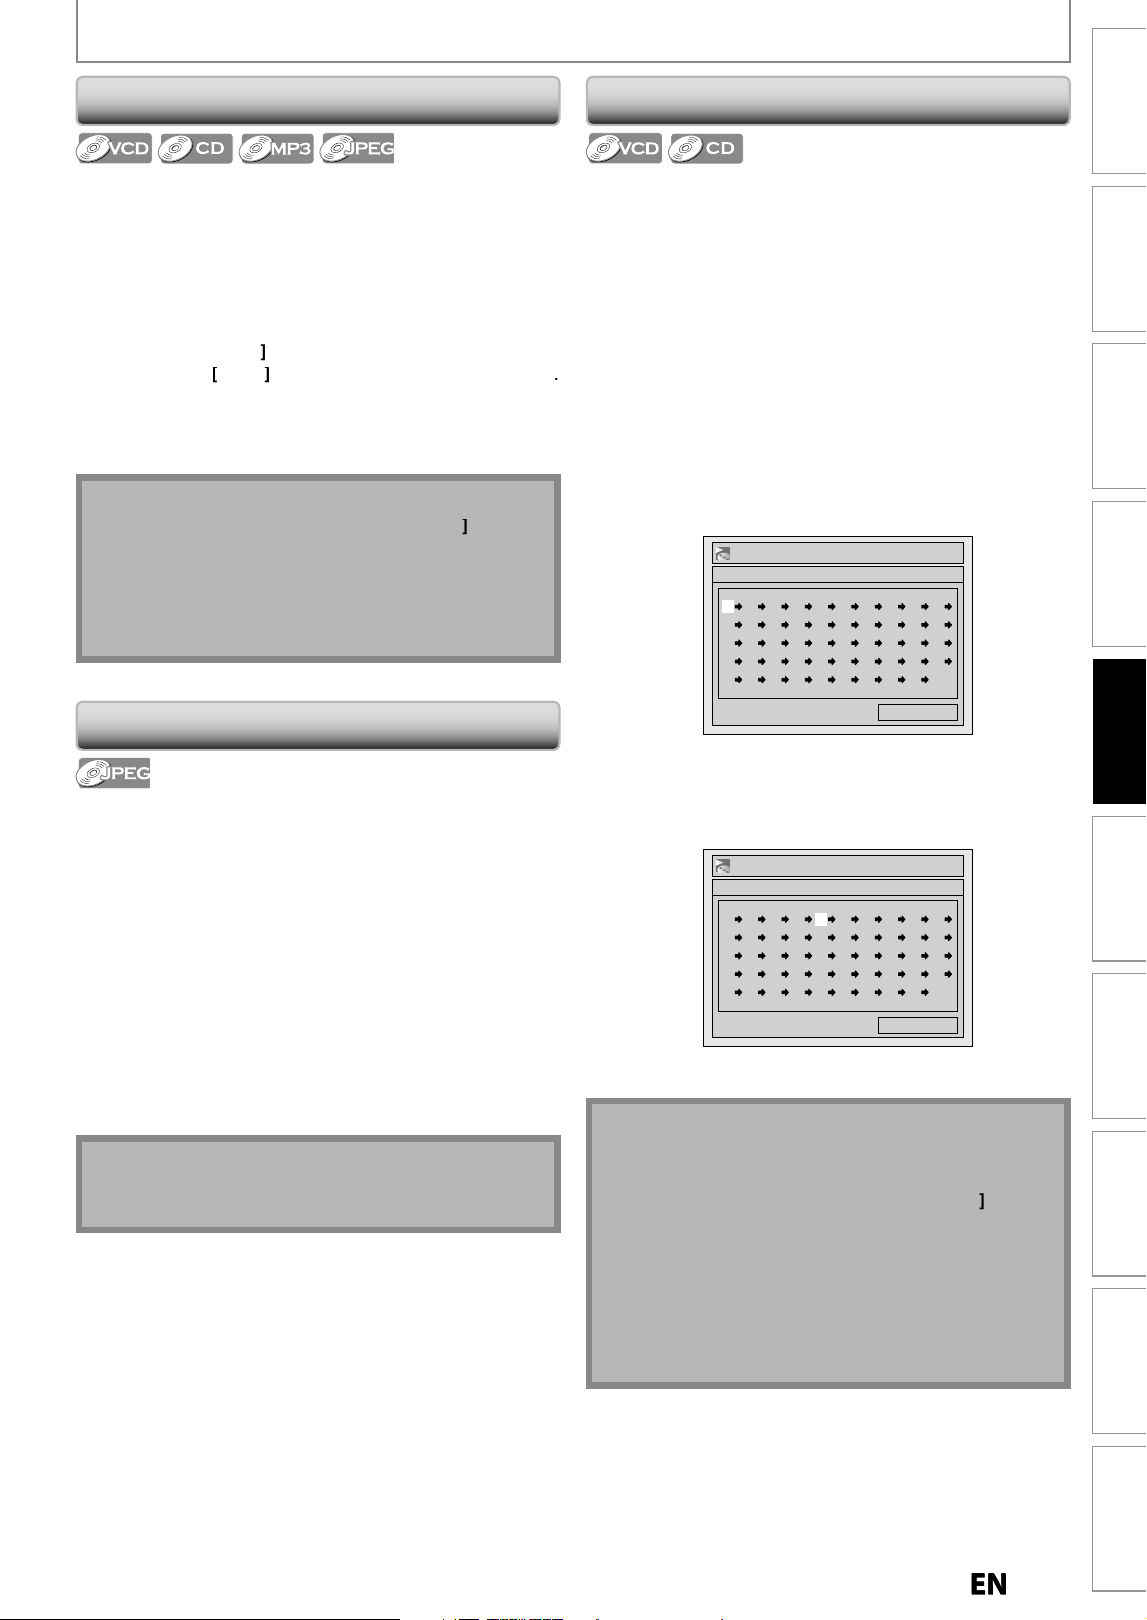
55
EN
EN
Recording
Playback
Editing
Introduction
Connections Basic Setup Function Setup VCR Functions
Others Español
Random Playbac
k
You can pla
y
back a disc randoml
y
instead o
f
pla
y
ing
back in the ori
g
inal order
.
1
)
Press [SETUP]
.
2)
Use [
K
/
L
] to select “DISC Pla
y
back Mode”, then
p
ress [OK].
“DISC P
l
a
yb
ac
k
Mo
d
e” menu wi
ll
appear
.
For M
P
3, us
e
[
K
/
L
]
to se
l
ect “Music”, t
h
en press
[O
K
]
.
For JPE
G
, use
[
K
/
L
]
to se
l
ect “P
h
oto”, t
h
en press
[O
K
]
.
3)
Use
[
K
/
L
] to se
l
ect “Ran
d
om P
l
a
y
”, t
h
en press
[O
K
].
Ran
d
om p
l
ay
b
ac
k
wi
ll
start
.
Note
• To cance
l
ran
d
om p
l
a
yb
ac
k
, press
[
ST
O
P
C
]
t
w
ice
during random pla
y
back. “OFF” appears on the TV
screen.
• For video CD with PBC
f
unction, the PBC setting will
be switched to o
ff
automatically when you start
ran
d
om p
l
ay
b
ac
k.
SPECIAL PLAYBACK
P
rogram Playbac
k
N
ote
• To erase tracks
y
ou selected, press
[
CLEAR
]
at ste
p
4
.
• You can ma
k
e pro
g
ram settin
g
s up to 50 trac
k
s
.
• To cance
l
program p
l
ay
b
ac
k
, press
[
ST
O
P
C
]
tw
i
ce
d
uring program p
l
ay
b
ac
k
. “OFF” appears on t
h
e TV
screen.
• You ma
y
also select a desired track using
[
the
Number buttons
]
at ste
p
4
.
• For video CD with PBC
f
unction, the PBC setting will
be switched to off automaticall
y
when
y
ou start
program p
l
ay
b
ac
k.
You can program t
h
e
d
isc to p
l
a
y
b
ac
k
in
y
our
d
esire
d
o
r
de
r
.
1
)
Press [SETUP]
.
2
)
Use
[
K
/
L
] to se
l
ect “DISC P
l
a
yb
ac
k
Mo
d
e”, t
h
en
p
ress
[O
K
]
.
“DISC P
l
ay
b
ac
k
Mo
d
e” menu wi
ll
appear
.
3
)
Use [
K
/
L
] to se
l
ect “Program P
l
ay”, t
h
en press
[O
K
].
4
)
Use [
K
/
L
] to se
l
ect a
d
esire
d
trac
k
, t
h
en press [OK]
or
[
B
]
.
DISC Playback Mode
Program Play
0:00:00Total
--
-- -- -- -- -- -- -- -- --
-- -- -- -- -- -- -- -- -- --
-- -- -- -- -- -- -- -- -- --
-- -- -- -- -- -- -- -- -- --
-- -- -- -- -- -- -- -- -- --
Repeat this step until
y
ou program all the desired
t
r
ac
k
s.
5
)
Press [PLAY
B
].
DISC Playback Mode
Program Play
0:31:07Total
09
04 10 06 -- -- -- -- -- --
-- -- -- -- -- -- -- -- -- --
-- -- -- -- -- -- -- -- -- --
-- -- -- -- -- -- -- -- -- --
-- -- -- -- -- -- -- -- -- --
Program pla
y
back will start
.
You can se
l
ect t
h
e
d
isp
l
a
y
time
b
etween 5 secon
d
s an
d
1
0
seco
n
ds.
1
) Fo
ll
ow steps 1 an
d
2 in “Ran
d
om P
l
a
yb
ac
k
” on t
h
is
pa
g
e
.
2
)
Use
[
K
/
L
]
to se
l
ect “S
l
i
d
e S
h
ow”, t
h
en press [OK]
.
3
)
Use
[
K
/
L
] to se
l
ect t
h
e
d
isp
l
ay time, t
h
en press
[O
K
].
4
)
Press [SETUP] to ex
i
t
.
N
ote
•
Lar
g
e-size JPEG
f
iles take a
f
ew moments to be
d
ispla
y
ed
.
Sl
id
e
Sh
ow
E9P8CUDZV427MG9BOMv1.indd55E9P8CUDZV427MG9BOMv1.indd55 2012/03/0113:06:472012/03/0113:06:47
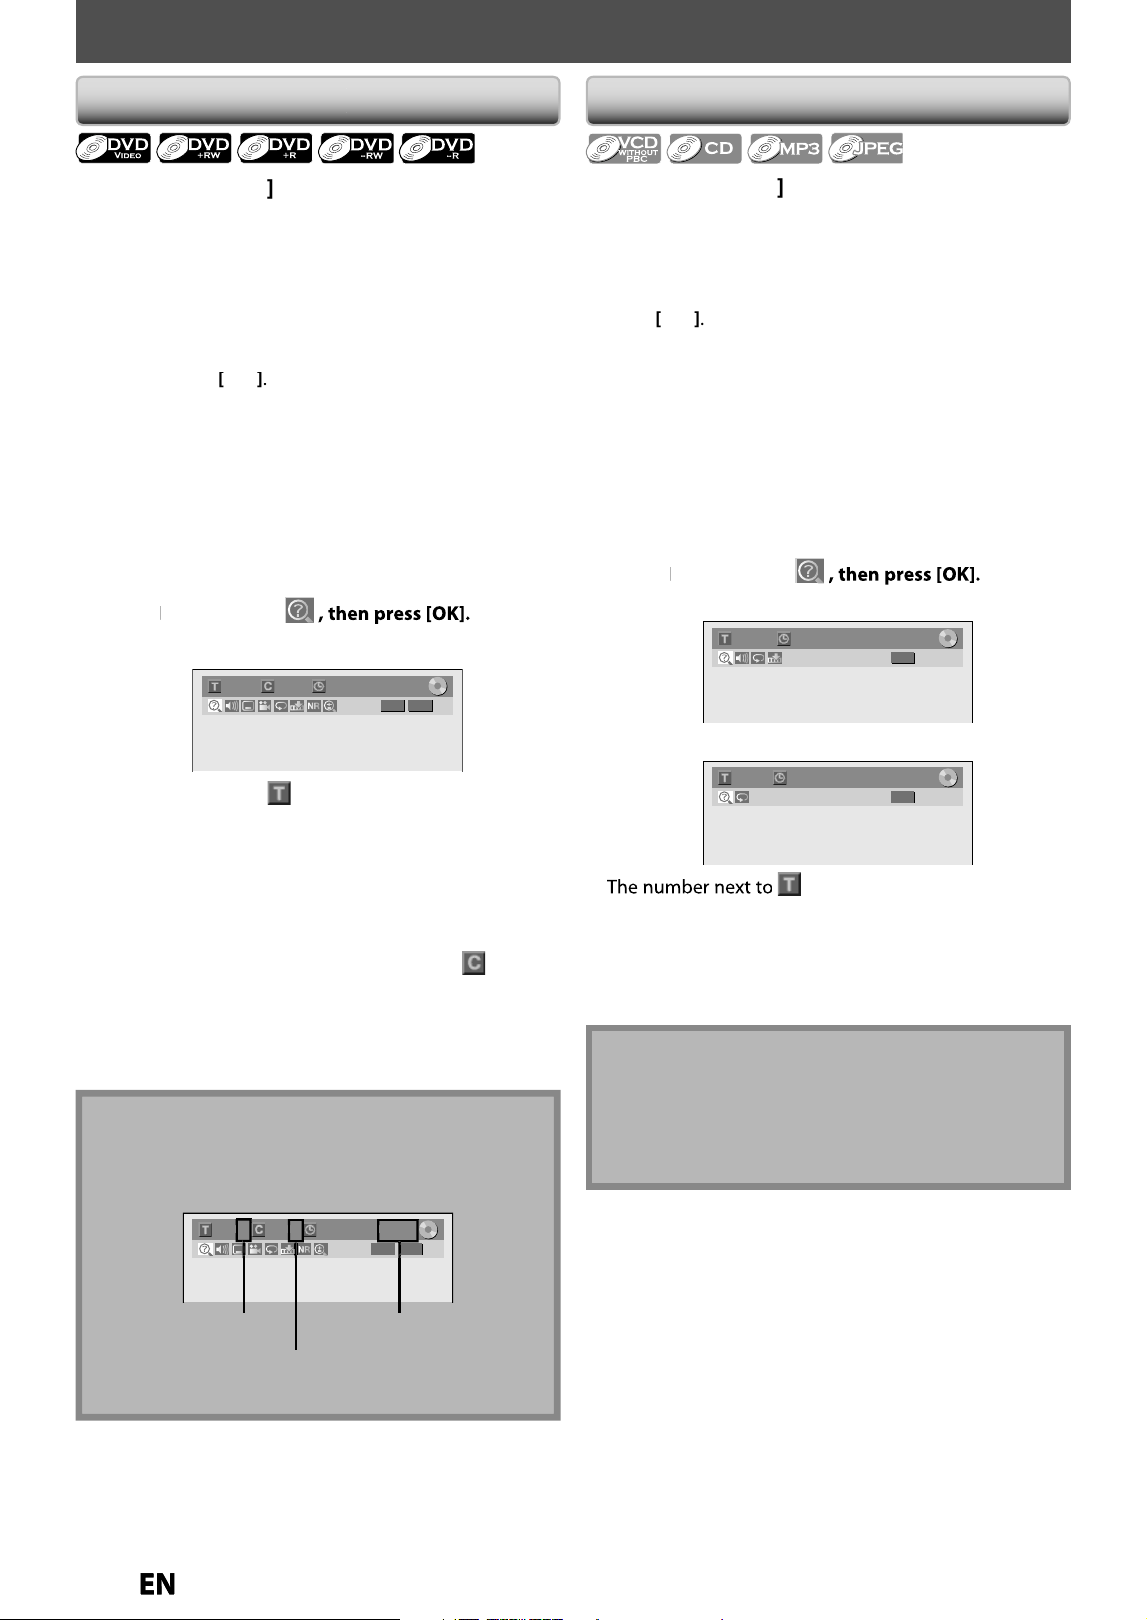
56
EN
EN
SEARCH
U
s
i
ng
[
H
]
/
[
G
]
1) During p
l
ay
b
ac
k
, press
[
G
] to s
k
ip t
h
e current
tit
l
e or c
h
apter an
d
move to t
h
e next
.
T
he title or chapter will move forward b
y
one at a time
.
• If there is no cha
p
ter in one title, the current title will
be ski
pp
ed.
T
o go back to the beginning o
f
the current title or
c
h
apter, press
[
H
]
.
Press it repeate
dl
y to go to t
h
e previous tit
l
e or
c
h
apter. T
h
e tit
l
e or c
h
apter wi
ll
move
b
ac
k
war
d
one
at a t
i
me
.
U
s
i
n
g
[DISPLAY
]
1) During p
l
ay
b
ac
k
, press [DISPLAY] to
b
ring up t
h
e
d
isp
l
ay menu
.
2
)
Use
[
{
/
{
B
] to se
l
ect
e.
g
.) DVD-vide
o
1/ 5 1/ 5
DVD
0:01:00 / 1:23:45
Video
The
n
u
m
be
r n
e
x
t
to
wi
ll
b
e
h
i
ghl
i
gh
te
d.
3)
Title
:
Use
[
K
/
L
]
or [t
h
e Num
b
er
b
uttons] to enter a
d
esire
d
tit
l
e num
b
er to searc
h
, t
h
en press
[O
K
]
.
T
it
l
e searc
h
wi
ll
start
.
C
h
apter
:
Press
[
B
] to move to t
h
e num
b
er next to
f
or
c
h
apter.
Use
[
K
/
L
]
or
[
the Number buttons
]
to enter a
desired cha
p
ter number to searc
h
,
then
p
ress
[
OK
].
A
f
ter the search, pla
y
back will start automaticall
y.
Tit
l
e / C
h
apter Searc
h
Us
i
n
g
[
H
]
/
[
G
]
1) During p
l
ay
b
ac
k
, press [
G
] to s
k
ip t
h
e current
t
rack/
f
ile and move to the next
.
T
he track
/
file will move forward one at a time
.
T
o go back to the beginning o
f
the current track/
f
ile,
press
[
H
]
.
Press it repeatedly to go to the previous track/
f
ile. The
track/
f
ile will move backward one at a time.
For JPEG
f
iles, press it once to go to the previous
f
ile
.
Tr
a
c
k
Se
a
rc
h
N
ot
e
• During CD pla
y
back
y
ou can enter a track number
directl
y
using
[
the Number buttons
]
f
o
r
t
r
ac
k
sea
r
c
h
without displa
y
ing the menu
.
• Trac
k
searc
h
using
[
DISPLAY
]
is
n
ot
a
v
a
i
lable
w
he
n
y
ou pla
y
back the video CD with PBC
f
unction
.
Usin
g
[DISPLAY
]
1) During p
l
ay
b
ac
k
, press [DISPLAY] to
b
ring up t
h
e
d
isp
l
ay menu
.
I
f
the display menu is already shown, skip to step 2
.
2)
Use
[
{
/
{
B
] to se
l
ect
e
.
g
.) audio C
D
1/ 5
CD
0:00:15 / 0:05:00
e
.
g
.) MP3 file
s
1/ 5 0:00:15
MP3
will be highlighted.
3
)
Use
[
K
/
L
] or [t
h
e Num
b
er
b
uttons] to enter a
desired track/
f
ile number to search, then press
[O
K
].
A
f
ter the search, playback will start automatically
.
Note
•
In search mode display, total numbers o
f
each search
contents (tit
l
e/c
h
apter/time) are s
h
own as a
d
enominator
.
1/ 5 1/ 5 0:01:00 / 1:23:45
DVD
Video
tota
l n
u
m
be
r
o
f
t
i
t
l
es
tota
l n
u
m
be
r
of cha
p
ter
s
tota
l
t
im
e
of
t
h
e
t
i
t
l
e
1
V
E9P8CUDZV427MG9BOMv1.indd56E9P8CUDZV427MG9BOMv1.indd56 2012/03/0113:06:472012/03/0113:06:47
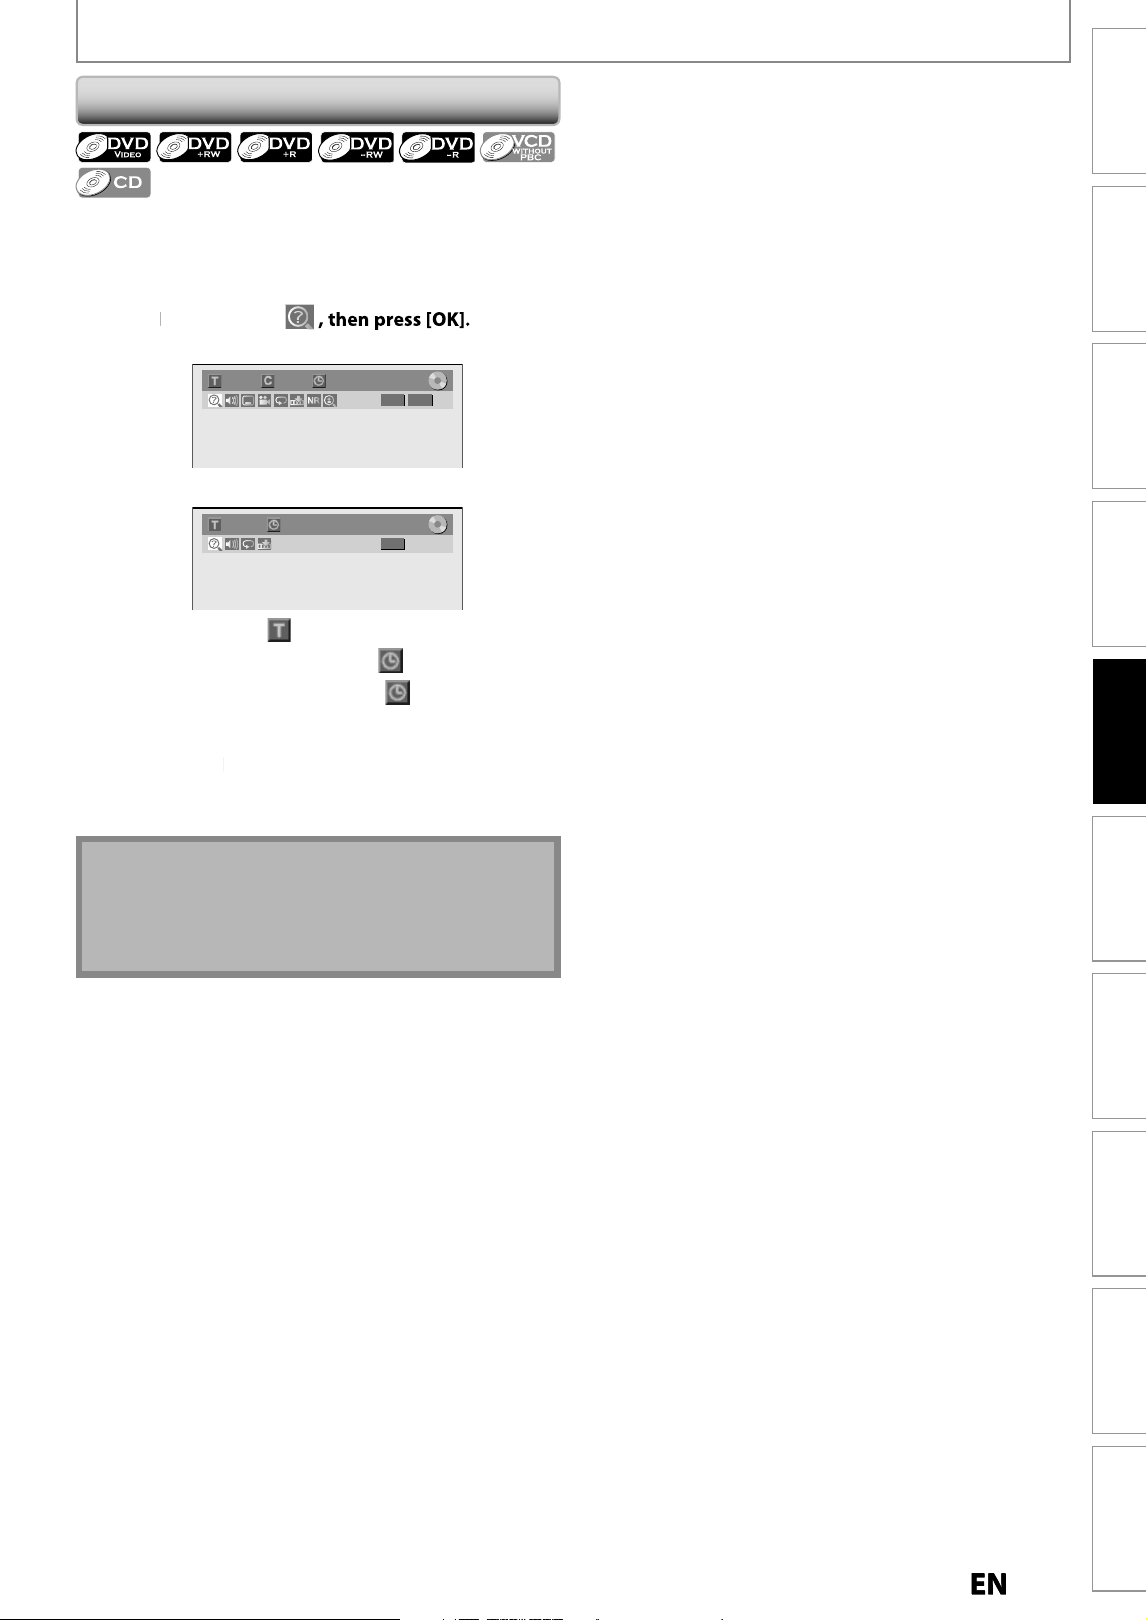
5
7
EN
EN
Recording
Playback
Editing
Introduction
Connections Basic Setup Function Setup VCR Functions
Others Español
1) During p
l
ay
b
ac
k
, press [DISPLAY] to
b
ring up t
h
e
d
isp
l
ay menu
.
I
f
the display menu is already shown, skip to step 2
.
2)
Use
[
{
/
{
B
]
to se
l
ect
e.
g
.) DVD-vide
o
1/ 5 1/ 5 0:01:00 / 1:23:45
DVD
Video
e.
g
.) audio CD
1/ 5
CD
0:00:15 / 0:05:00
T
he
n
u
m
be
r n
e
x
t
to
wi
ll
b
e
h
i
ghl
i
gh
te
d.
T
o
m
o
ve t
o
the n
u
m
b
er next t
o
,
Press
[
B
].
W
h
en time searc
h
is not avai
l
a
bl
e, an
d
time
counter are not
d
isp
l
aye
d.
3)
Use
[
K
/
L
/
{
/
{
B
] or [t
h
e Num
b
er
b
uttons] to
enter a
d
esire
d
time to searc
h
, t
h
en press [OK]
.
A
fter the search, pla
y
back will start automaticall
y.
Note
•
Time search is available onl
y
in the same track, file or
t
i
t
l
e.
•
Time searc
h
is not avai
l
a
bl
e w
h
en you p
l
ay
b
ac
k
t
h
e
video CD with PBC
f
unction
.
Time Se
a
rc
h
SEARCH
E9P8CUDZV427MG9BOMv1.indd57E9P8CUDZV427MG9BOMv1.indd57 2012/03/0113:06:492012/03/0113:06:49
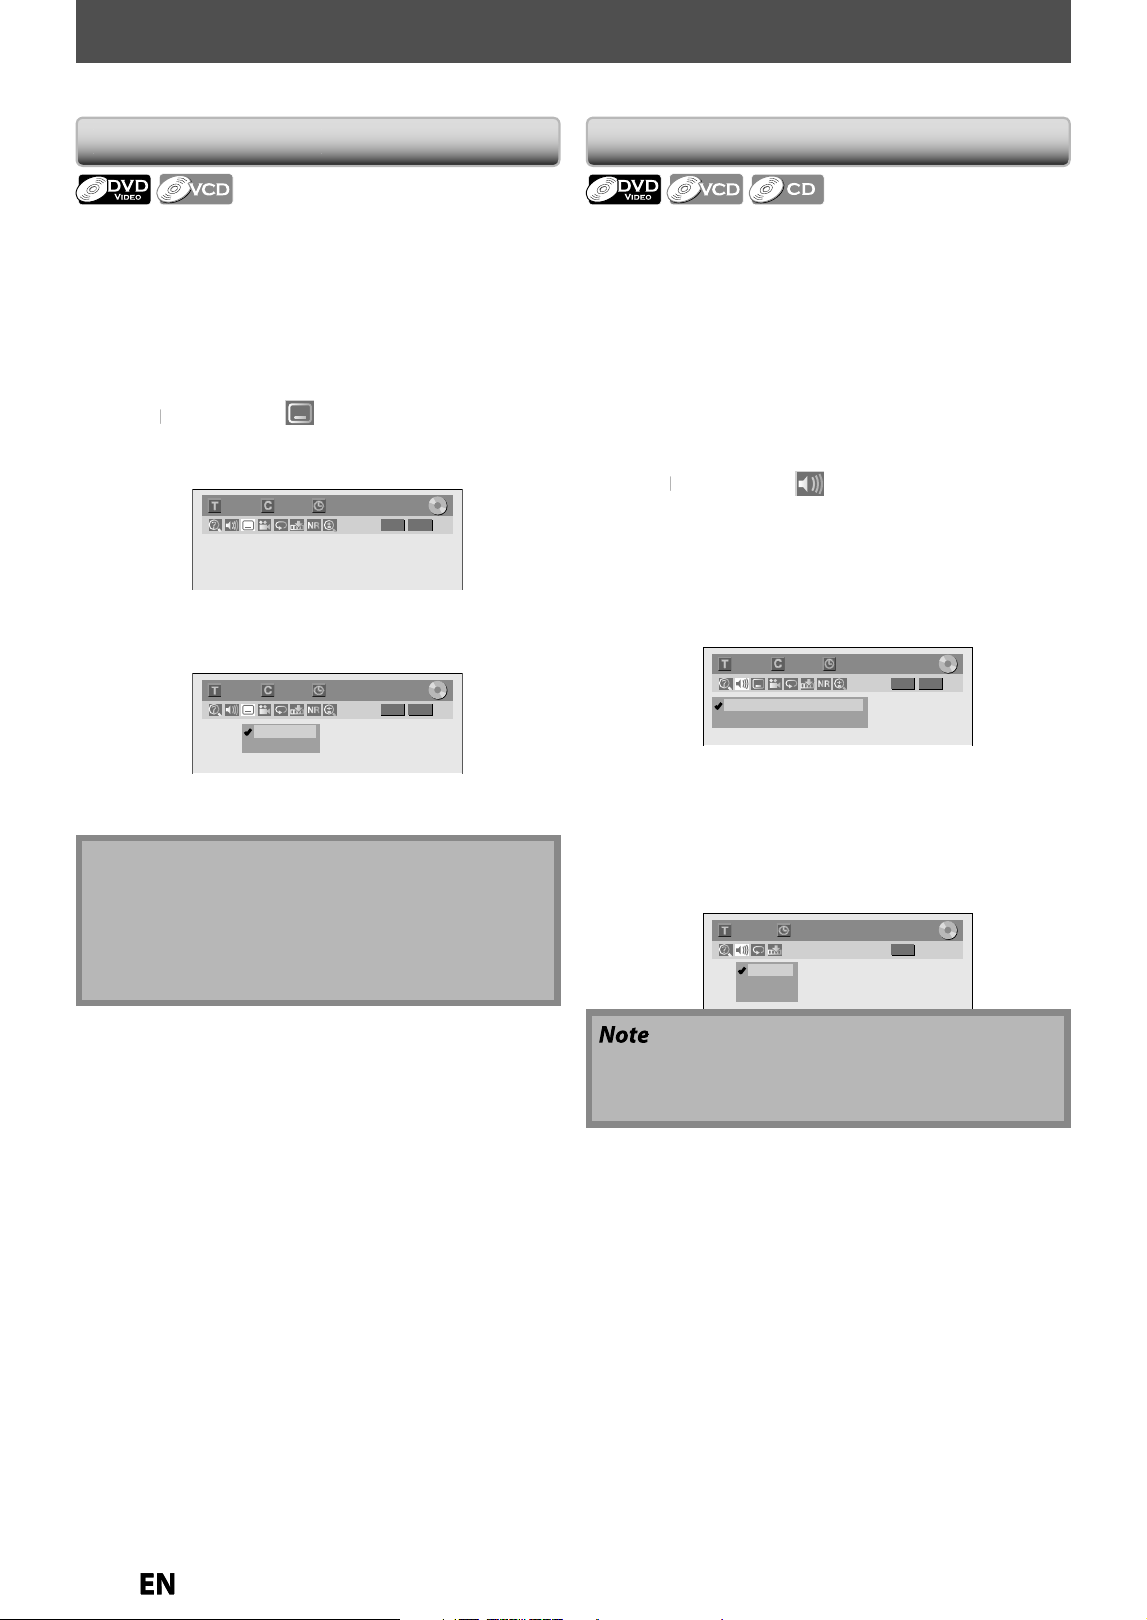
58
EN
EN
DVD-vi
d
eo may
h
ave su
b
tit
l
es in 1 or more
l
anguages.
A
vailable subtitle languages can be
f
ound on the disc
c
ase. You can switc
h
su
b
tit
l
e
l
anguages anytime
d
uring
p
l
ay
b
ac
k.
1) During p
l
ay
b
ac
k
, press [DISPLAY] to
b
ring up t
h
e
d
isp
l
ay menu
.
2
)
Use
[
{
/
{
B
]
to select to displa
y
the selection
men
u.
e.g.) DVD-vi
d
e
o
1/ 5 1/ 5
DVD
0:01:00 / 1:23:45
Video
3)
Use
[
K
/
L
]
to select a desired subtitle lan
g
ua
g
e,
then
p
ress [OK]
.
1/ 5 1/ 5
DVD
0:01:00 / 1:23:45
OFF
1.English
Video
Subtitle will be displa
y
ed in the selected language
.
W
h
en se
l
ecting “OFF”, su
b
tit
l
e wi
ll
d
isappear
.
SELECTING THE FORMAT OF AUDIO AND VIDEO
Switc
h
ing Su
b
tit
l
e
s
N
ote
• Some
d
iscs wi
ll
on
l
y a
ll
ow you to c
h
ange t
h
e su
b
tit
l
e
f
rom the disc menu. Press
[
TITLE
]
or
[
DISC MENU
]
t
o
d
isp
l
ay t
h
e
d
isc menu
.
• If a 4-di
g
it lan
g
ua
g
e code appears in the subtitle
menu, refer to “LANGUAGE CODE” on pa
g
e 90
.
You can select the
f
ormat o
f
audio and video as
y
ou pre
f
er depending on the contents o
f
the disc
y
ou are pla
y
ing back.
Wh
en p
l
aying
b
ac
k
a DVD-vi
d
eo recor
d
e
d
wit
h
2 or more
soundtracks (these are o
f
ten in di
ff
erent languages), you
can switc
h
t
h
em
d
uring p
l
ay
b
ac
k.
W
hen pla
y
ing back video CD, audio CD
y
ou can switch
“L/R”(stereo), “L”(left) or “R”(ri
g
ht)
.
1) During pla
y
back press [DISPLAY] to bring up the
displa
y
menu, then proceed to
ste
p
2), or
p
ress [AUDIO] then
p
roceed to ste
p
3)
.
• If the displa
y
menu is alread
y
shown, skip to step 2
.
2)
Use
[
{
/
{
B
]
to se
l
ect to
d
isp
l
a
y
t
h
e se
l
ection
m
en
u.
3
)
Use
[
K
/
L
]
to select a desired audio soundtrack or
au
d
io c
h
anne
l
, t
h
en
p
ress [OK]
.
F
o
r DVD-vi
deo
• A
ud
i
o
sou
n
dt
r
ac
k will
s
wi
tc
h
.
1/ 5 1/ 5
DVD
0:01:00 / 1:23:45
1.Dolby Digital 5.1ch English
2.Dolby Digital 2ch English
Video
• If the title contains both main and sub audio,
y
ou can
further select “L” (main)
,
“R” (sub)
,
or “L/R” (mixed o
f
main an
d
su
b).
For audio CD
,
video C
D
•A
ud
i
o
c
h
a
nn
e
l will
s
wi
tc
h
.
e
.g.) au
d
io CD
1/ 5
CD
0:00:15 / 0:05:00
1. L/R
2. L
3. R
Switc
h
ing Au
d
io Soun
d
trac
k
• Some
d
iscs wi
ll
on
ly
a
ll
ow
y
ou to c
h
ange t
h
e
sou
n
dt
r
ac
k fr
o
m
t
h
e
d
i
sc
m
e
n
u.
Pr
ess
[TITLE
]
o
r
[
DISC MENU
]
to displa
y
the disc menu.
E9P8CUDZV427MG9BOMv1.indd58E9P8CUDZV427MG9BOMv1.indd58 2012/03/0113:06:492012/03/0113:06:49
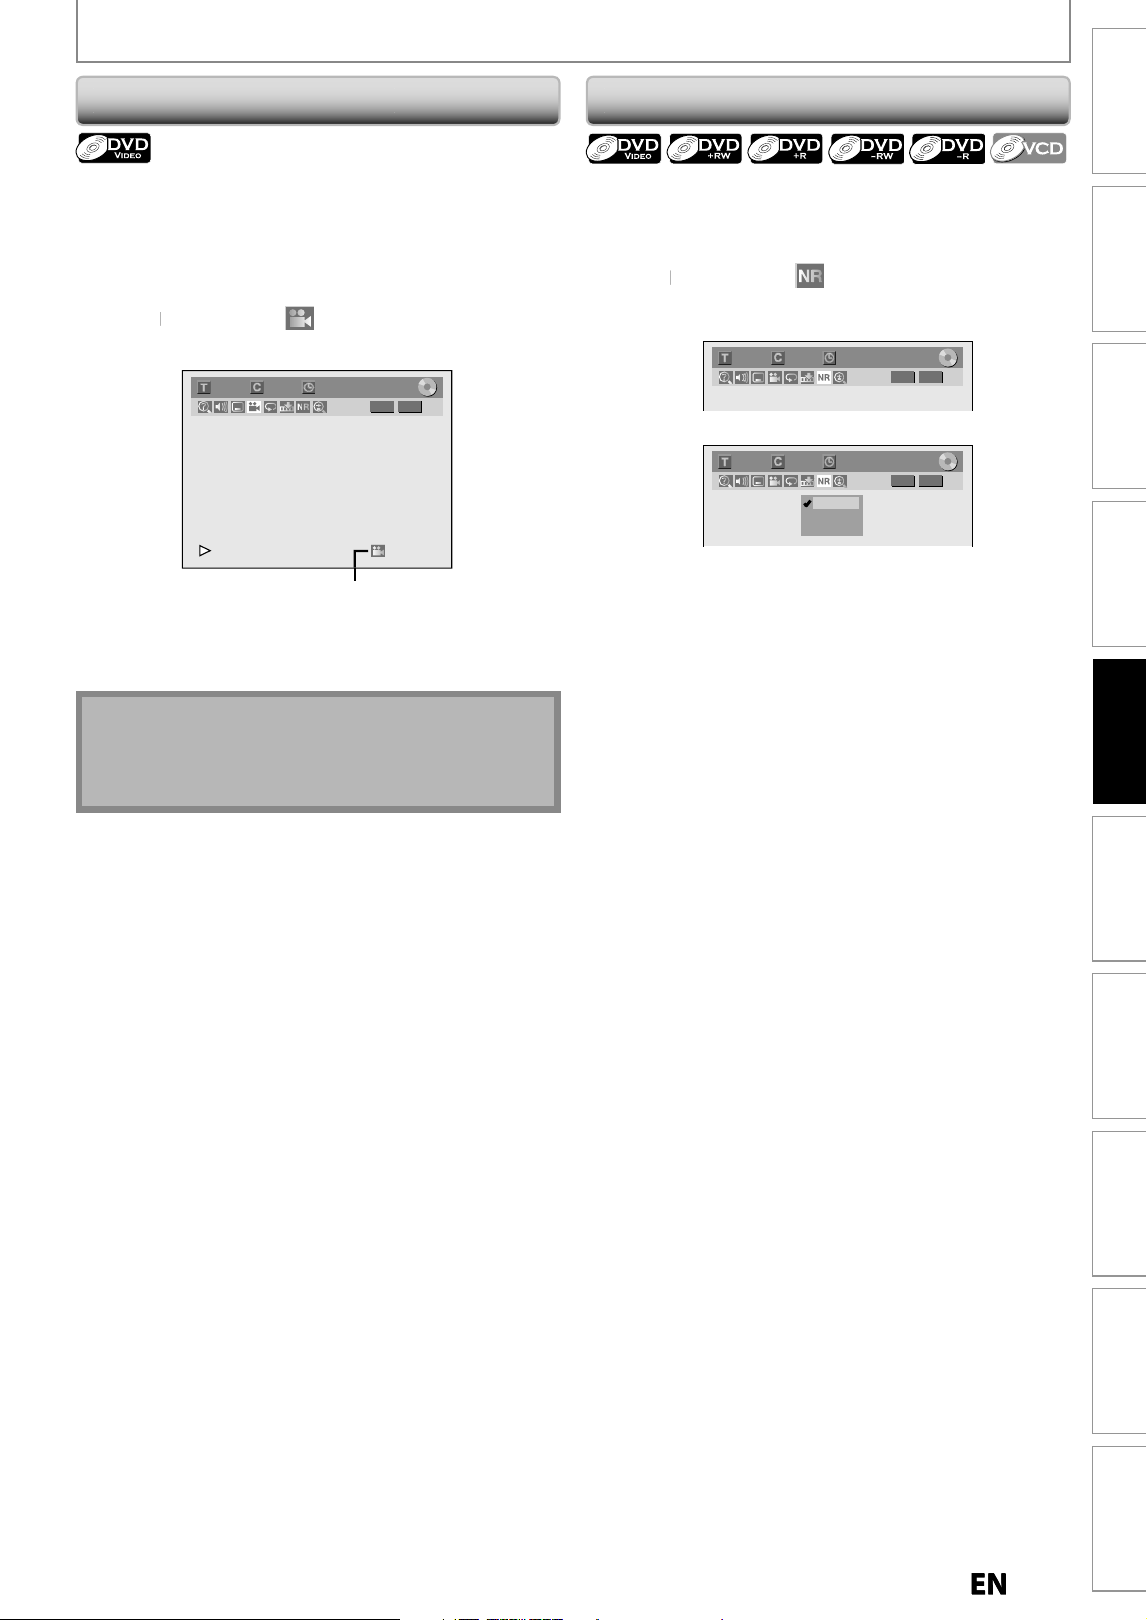
5
9
EN
EN
Recording
Playback
Editing
Introduction
Connections Basic Setup Function Setup VCR Functions
Others Español
SELECTING THE FORMAT OF AUDIO AND VIDEO
Switching Camera Angles
R
educing Block Noi
se
So
m
e
DVD-vi
deo
h
a
v
e
sce
n
es
s
h
ot
f
r
o
m 2
o
r m
o
r
e
angles. Angle in
f
ormation should be on the disc case i
f
th
e
d
isc contains mu
l
ti-ang
l
e scenes
.
1) During pla
y
back, press [DISPLAY] to bring up the
displa
y
menu
.
2)
Use
[
{
/
{
B
]
to se
l
ect , t
h
en press [OK]
.
e
.g.) DVD-vi
d
e
o
1/ 5 1/ 5
DVD
0:01:00 / 1:23:45
Video
An
g
le icon appears when a switchin
g
camera an
g
le is
a
v
a
il
ab
l
e.
Angle will switch each time
y
ou press
[
OK
].
This
f
unction reduces noise in the pla
y
back picture.
1) During pla
y
back, press [DISPLAY] to bring up the
displa
y
menu
.
2
)
Use [
{
/
{
B
] to select to displa
y
the selection
m
en
u.
e.g.) DVD-vi
d
e
o
1/ 5 1/ 5
DVD
0:01:00 / 1:23:45
Video
3
)
Use [
K
/
L
] to se
l
ect a
d
esire
d
option, t
h
en press
[O
K
].
1/ 5 1/ 5
DVD
0:01:00 / 1:23:45
Video
OFF
Type 1
Type 2
Your settin
g
will be activated
.
O
FF
:
When pla
y
ing back titles with a few noises
suc
h
as
DVD-vi
deo.
T
ype 1 : For t
h
e tit
l
es recor
d
e
d
in
l
ong time mo
d
e
such
as
EP
o
r
S
LP m
ode.
T
ype 2 : Same as type 1, only more e
ff
ective
.
N
ote
• An
g
le icon does not appear on the TV screen in a
case
y
ou set “Angle Icon” to “OFF” in “Pla
y
back”
menu. Refer to pa
g
e 76.
E9P8CUDZV427MG9BOMv1.indd59E9P8CUDZV427MG9BOMv1.indd59 2012/03/0113:06:512012/03/0113:06:51
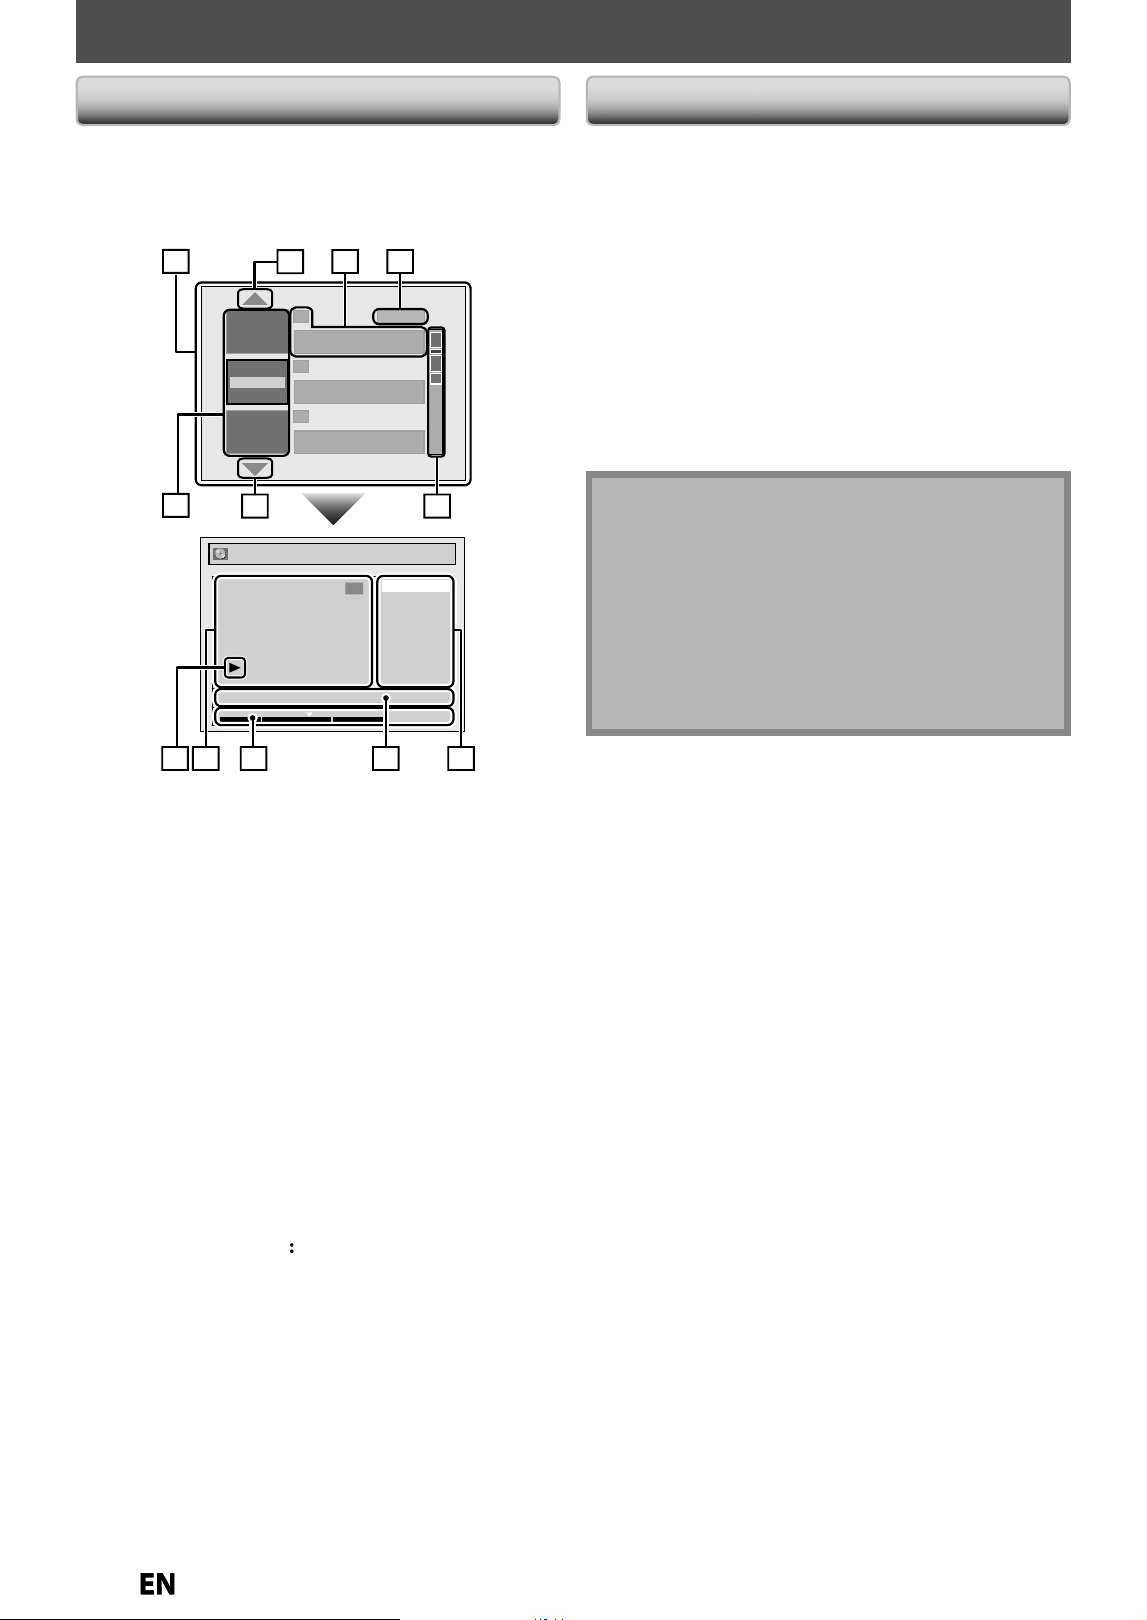
60
EN
EN
INFORMATION ON DISC EDITING
G
u
i
d
e t
o
a
Tit
l
e Li
st
Ed
itin
g
Disc
s
T
it
l
e
l
ist a
ll
ows
y
ou to c
h
ec
k
t
h
e tit
l
es recor
d
e
d
on t
h
e
disc easil
y
. You can choose a title to pla
y
back
f
rom this
l
ist and easil
y
edit the titles as
y
ou prefer
.
Press [DVD], t
h
en press [TITLE]
.
Chapter Mark
Hide Chapter
Index Picture
Title Dividing
Edit Title Name
Title Delete
Edit
NOV/22/12 11:35AM L1 EP
2
1 : 05 : 00
1
2
3
NOV/21/12 11:00
AM
L1 SP
NOV/21/12 0:20:44
Overwrite
NOV/22/12 11:35
AM
L1 EP
NOV/22/12 0:10:33
EMPTY TITLE
1:37:52 SP(2Hr)
Play
Edit
SP (2Hr)
2
2
789
10
11
5
43
6
1
1
.
Title li
s
t
:
List of the titles recorded on the disc
,
and
t
h
e
ir inf
o
rm
at
i
o
n
.
2
.
A
rr
o
w
:
In
d
icatin
g
t
h
ere is a previous / next pa
g
e
.
3. Title in
f
ormation: On the
f
irst line, title name
(e
d
ita
bl
e) is
d
isp
l
aye
d
. On t
h
e secon
d
l
ine, t
h
e
d
ate
recorded and length o
f
the title are displayed.
E
mpty tit
l
e
:
The portion o
f
the disc where there is no
recordings are made. As
f
or the empty title, available
recor
d
ing time
b
y t
h
e se
l
ecte
d
recor
d
ing mo
d
e is
d
isp
l
aye
d
on t
h
e secon
d
l
ine
.
4. Recordin
g
mode: Currentl
y
selected recording mode
is displa
y
ed here
.
5. Capacit
y
in
d
icator: In
d
icatin
g
t
h
e position an
d
t
h
e
amount o
f
each title in the disc. The
p
ortion
f
or the
se
l
ecte
d
tit
l
e is
h
ig
hl
ig
h
te
d.
6. T
h
um
b
nai
l
s
:
A cut
f
rom the recorded content is
d
isp
l
aye
d
h
ere
.
7
.
S
ub
men
u:
Sub
m
e
n
us
f
o
r
t
h
e
se
l
ected
m
e
n
u
a
r
e
displa
y
ed here
.
8.
Title n
a
m
e
(
editable
)
:
If
y
ou do not name the title,
the recorded date, time, selected external in
p
ut
position, and the recording mode are displa
y
ed here
.
9. Progress
b
ar
:
Indicating the progress o
f
the
p
l
ay
b
ac
k.
1
0.
Preview win
do
w
:
Pr
e
vi
e
w
o
f
t
h
e
se
l
ected
t
i
t
l
e
i
s
displa
y
ed here
.
11. Pla
y
back status
:
Indicating the current pla
y
back
status
o
f
t
h
e
se
l
ected
t
i
t
l
e.
Press
[
ST
O
P
C
] to exit t
h
e tit
l
e
l
ist
.
N
ote
• When selecting “Edit” on pop-up menu o
f
the title
l
ist and edit the title, the title list is displayed a
f
ter
w
riting t
h
e e
d
ite
d
contents onto t
h
e
d
isc
.
• The capacity indicator in the right side o
f
the title list
may not in
d
icate t
h
e precise capacity in t
h
e
d
isc
.
• The capacit
y
indicator ma
y
not indicate the capacit
y
f
or the titles of which recordin
g
time is short
.
• Once you have
f
inalized a DVD+R/ DVD-R, you
c
annot e
d
it or recor
d
anyt
h
ing on t
h
at
d
isc.
You can edit discs
f
or the
f
ollowin
g
items. Be sure that
once
y
ou e
d
it tit
l
es, t
h
e
y
wi
ll
not remain as origina
l.
•
Deletin
g
a Title (Re
f
er to pa
g
e 61.)
•
Puttin
g
Names on Titles (Refer to pa
g
e 62.
)
•
Setting Chapter Marks (Re
f
er to page 63.)
•
Clearing Chapter Marks (Re
f
er to pages 64-65.)
•
Hidin
g
Chapters (Refer to pa
g
e 66.)
•
Setting Pictures
f
or Thumbnails (Re
f
er to page 67.
)
•
Divi
d
ing a Tit
l
e (DVD+RW/DVD-RW on
l
y)
(Re
f
er to page 68.
)
•
Puttin
g
Name on Disc (Refer to pa
g
e 69.)
•
Erasing Disc (Re
f
er to page 70.)
•
Making Edits Compatible (Re
f
er to page 71.
)
E9P8CUDZV427MG9BOMv1.indd60E9P8CUDZV427MG9BOMv1.indd60 2012/03/0113:06:522012/03/0113:06:52
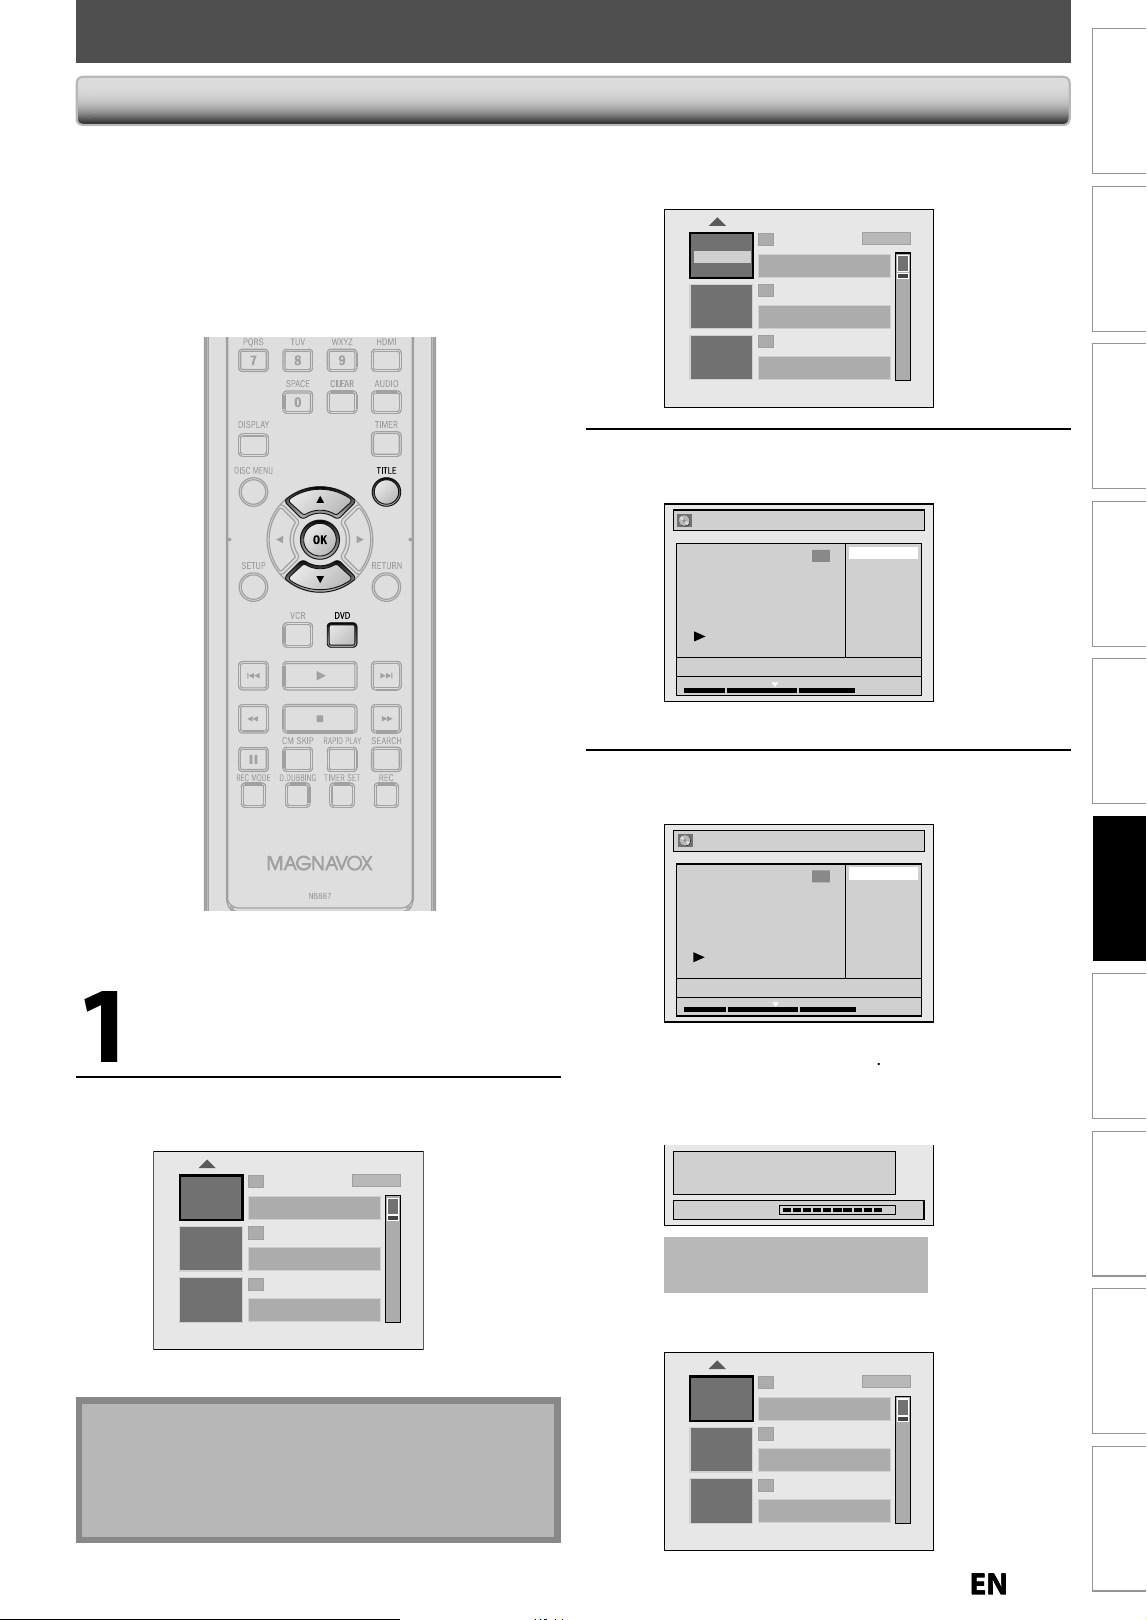
6
1
EN
EN
Recording Playback
Editing
Introduction
Connections Basic Setup Function Setup VCR Functions
Others Español
EDITING DISCS
3
Use
[
K
/
L
] to select “Edit”
,
then
p
ress [OK]
.
1
2
3
NOV/21/12 11:00
AM
L1 SP
NOV/21/12 0:20:44
Overwrite
NOV/22/12 11:35
AM
L1 EP
NOV/22/12 0:10:33
EMPTY TITLE
1:37:52 SP(2Hr)
SP (2Hr)
Edit
Play
4
Use
[
K
/
L
] to se
l
ect “Tit
l
e De
l
ete”
,
then press [OK]
.
Edit
Title Delete
Edit Title Name
Chapter Mark
Index Picture
Title Dividing
Hide Chapter
NOV/21/12 11:00AM L1 SP
1
1 : 05 : 00
Con
f
irmation message will appear
.
5
Use
[
K
/
L
] to select “Yes”, then
p
ress
[
OK
].
Edit - Title Delete
No
Yes
1
NOV/21/12 11:00AM L1 SP
1 : 05 : 00
A
f
ter that, “Are you sure?” will appear, select
“Yes” an
d
t
h
en press
[O
K
]
.
Ti
t
l
e
will
be
de
l
eted.
Data will be written onto the disc momentaril
y.
e.g.
)
DVD+R/DVD-RW/-
R
Writing to Disc
Please finalize the disc when the writing is
completed before playing back on other DVD
players.
90%
T
h
is operation may ta
k
e a
w
h
i
l
e to
b
e comp
l
ete
d.
A
f
ter editing is complete, the title list will appear
.
e.
g
.) DVD+RW/DVD-R
W
1
2
3
EMPTY TITLE
0:21:14 SP(2Hr)
NOV/22/12 11:35
AM
L1 EP
NOV/22/12 0:10:33
EMPTY TITLE
1:37:52 SP(2Hr)
SP (2Hr)
You can delete a title which
y
ou do not need an
y
more
.
P
l
ease
be
ad
vi
sed
t
h
at
t
h
e
t
i
t
l
es
o
n
ce
de
l
eted
ca
nn
ot
be
b
roug
h
t
b
ac
k
to t
h
e
d
isc
.
For DVD+RW/DVD-RW
,
when the last recorded title in the
tit
l
e
l
ist is
d
e
l
ete
d
, t
h
e avai
l
a
bl
e
d
isc space to recor
d
on
wi
ll
b
e increase
d
. For DVD+R/DVD-R, t
h
e
d
isc space to
recor
d
on wi
ll
not
b
e c
h
ange
d.
N
ot
e
• Deleted part of the titles in the capacit
y
indicator
chan
g
es in color
.
• As
f
or DVD+RW/DVD-RW i
f
y
ou delete the title, deleted
tit
l
e wi
ll
b
e
d
isp
l
a
y
e
d
as “EMPTY TITLE”
.
D
eleting a Titl
e
Press [DVD]
f
irst
.
1
Press
[
TITLE
].
2
Use
[
K
/
L
] to se
l
ect a
d
esire
d
tit
l
e
,
t
h
en press [OK]
.
1
2
3
NOV/21/12 11:00
AM
L1 SP
NOV/21/12 0:20:44
NOV/22/12 11:35
AM
L1 EP
NOV/22/12 0:10:33
EMPTY TITLE
1:37:52 SP(2Hr)
SP (2Hr)
E9P8CUDZV427MG9BOMv1.indd61E9P8CUDZV427MG9BOMv1.indd61 2012/03/0113:06:532012/03/0113:06:53
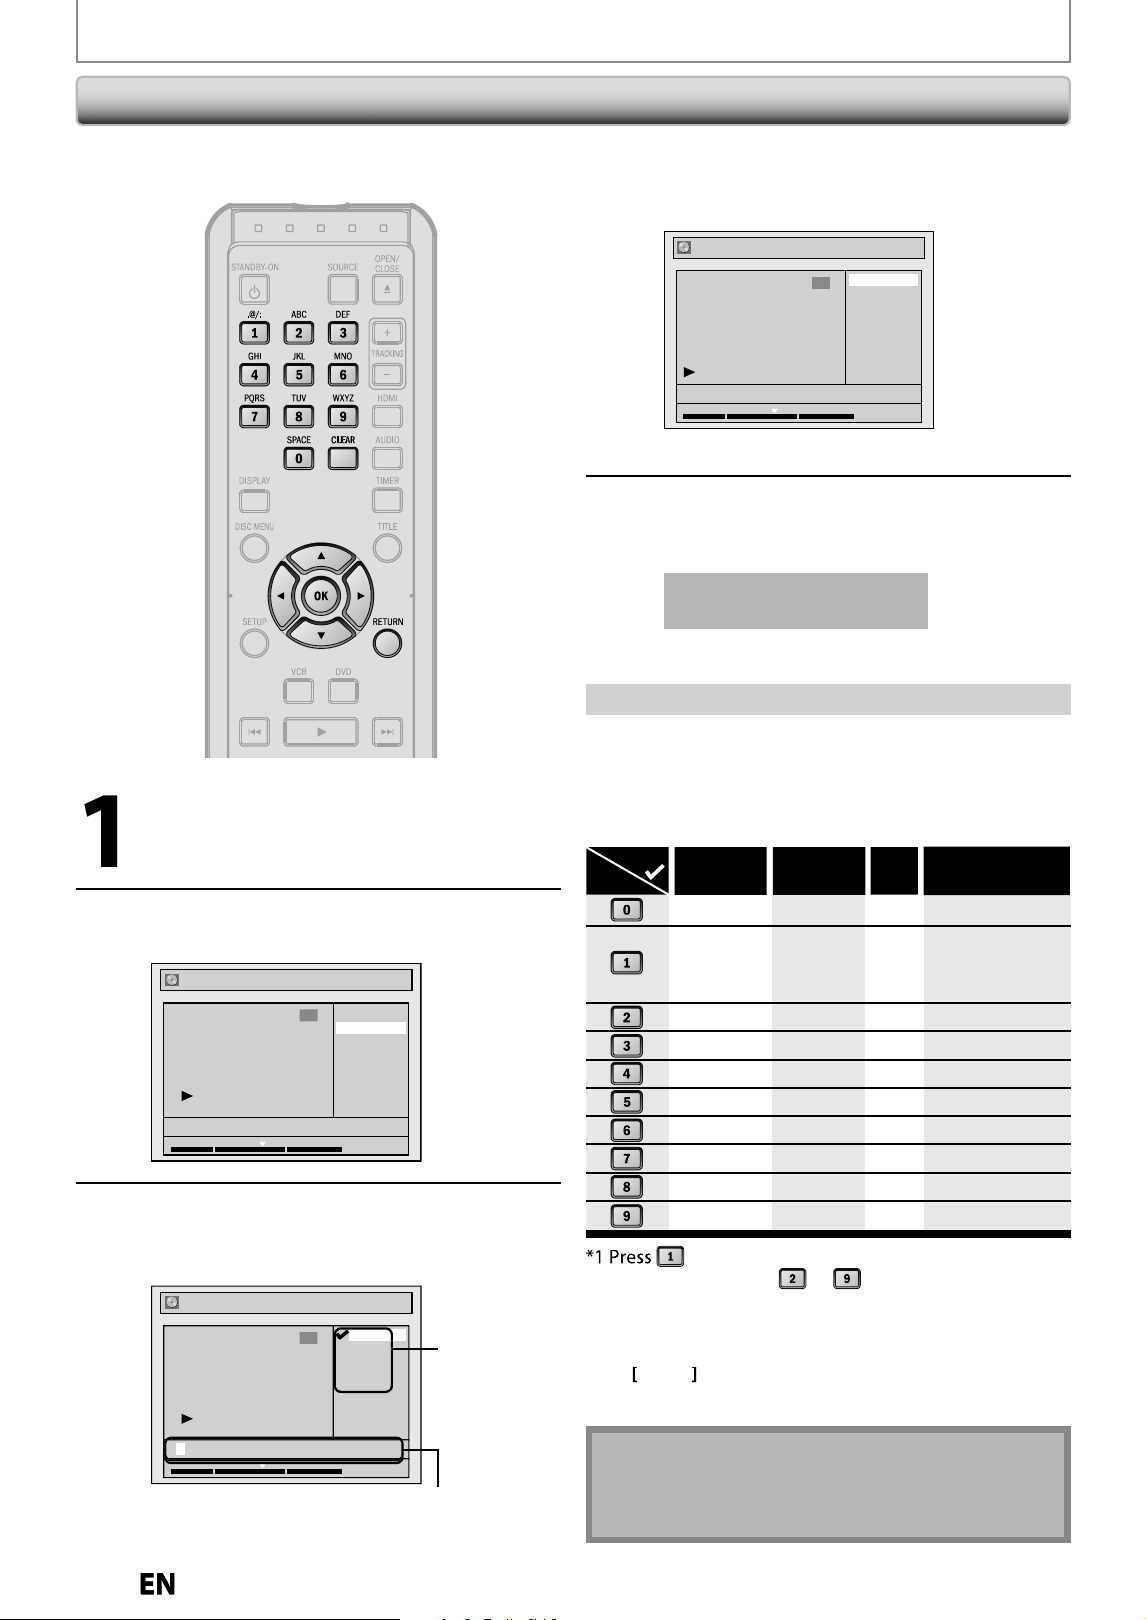
6
2
EN
EN
EDITING DISCS
Puttin
g
Names on Tit
l
es
4
Use
[
K
/
L
] to se
l
ect “Yes”, t
h
en press
[O
K
].
Edit - Edit Title Name
No
Yes
MY FAVORITE
1
1 : 05 : 00
The name
y
ou entered will be activated
f
or the title
.
5
After this o
p
eration is com
p
leted,
p
ress [RETURN] to exit
.
Data wi
ll
b
e written onto t
h
e
d
isc momentari
ly.
This operation ma
y
take a
w
hile to be com
p
leted
.
Y
ou can put title names on the titles and chan
g
e the
n
a
m
es
f
r
o
m
t
hi
s
m
e
n
u.
1
)
Use
[
K
/
L
] to se
l
ect a
d
esire
d
c
h
aracter set, t
h
en
press
[O
K
]
.
2
) Fo
ll
ow t
h
e
l
ist
b
e
l
ow, use [t
h
e Num
b
er
b
uttons]
repeate
dl
y unti
l
t
h
e
d
esire
d
l
etter appears
.
W
hen you
f
inish entering a title name, press [OK]
.
ABC
DEF
GHI
JKL
MNO
PQRS
TUV
WXYZ
abc
def
ghi
jkl
mno
pqrs
tuv
wxyz
! ” # $ % & ’ ( )
*
+ , - . / : ; < = >
? @ [ ] ^ _ { | }
2
3
4
5
6
7
8
9
0
1
ABC
abc @ ! ?
123
(*1) (*1)
Select
Press
<space> <space> <space>
, character set will be chan
g
ed to “ @!? ” mode
automaticall
y
. Press
to
to back to the
p
revious
c
h
a
r
acte
r
set.
•
To
d
e
l
ete
l
etters, press
[
CLEAR
]
repeate
dl
y.
Ho
ld
ing
[
CLEAR
]
to
d
e
l
ete a
ll
l
etters.
•
U
se
[
s
/
B
]
to move the cursor to the le
f
t and right
.
•
You can enter u
p
to 30 letters
.
Note
• Unde
f
ined letters in a title name are shown by “*”. I
f
you
d
e
l
ete t
h
em, a
d
joining
l
etters may c
h
ange to “*”
or ot
h
er
.
G
u
i
d
e t
o
E
d
it Tit
l
e N
a
me
1
Follow steps 1 to 3 in “Deletin
g
a
T
itle” on page 61 to displa
y
“Edit”
men
u.
2
Use
[
K
/
L
]
to select “Edit Title
Name”, then
p
ress [OK]
.
Edit
Title Delete
Edit Title Name
Chapter Mark
Index Picture
Title Dividing
Hide Chapter
NOV/21/12 11:00AM L1 SP
1
1 : 05 : 00
3
To enter a title name
,
follow the
ste
p
s of “Guide to Edit Title Name”
on t
h
is page
.
Edit - Edit Title Name
abc
ABC
123
@! ?
1
1 : 05 : 00
M
c
h
a
r
acte
r
set
area for enterin
g
title name
s
E9P8CUDZV427MG9BOMv1.indd62E9P8CUDZV427MG9BOMv1.indd62 2012/03/0113:06:552012/03/0113:06:55
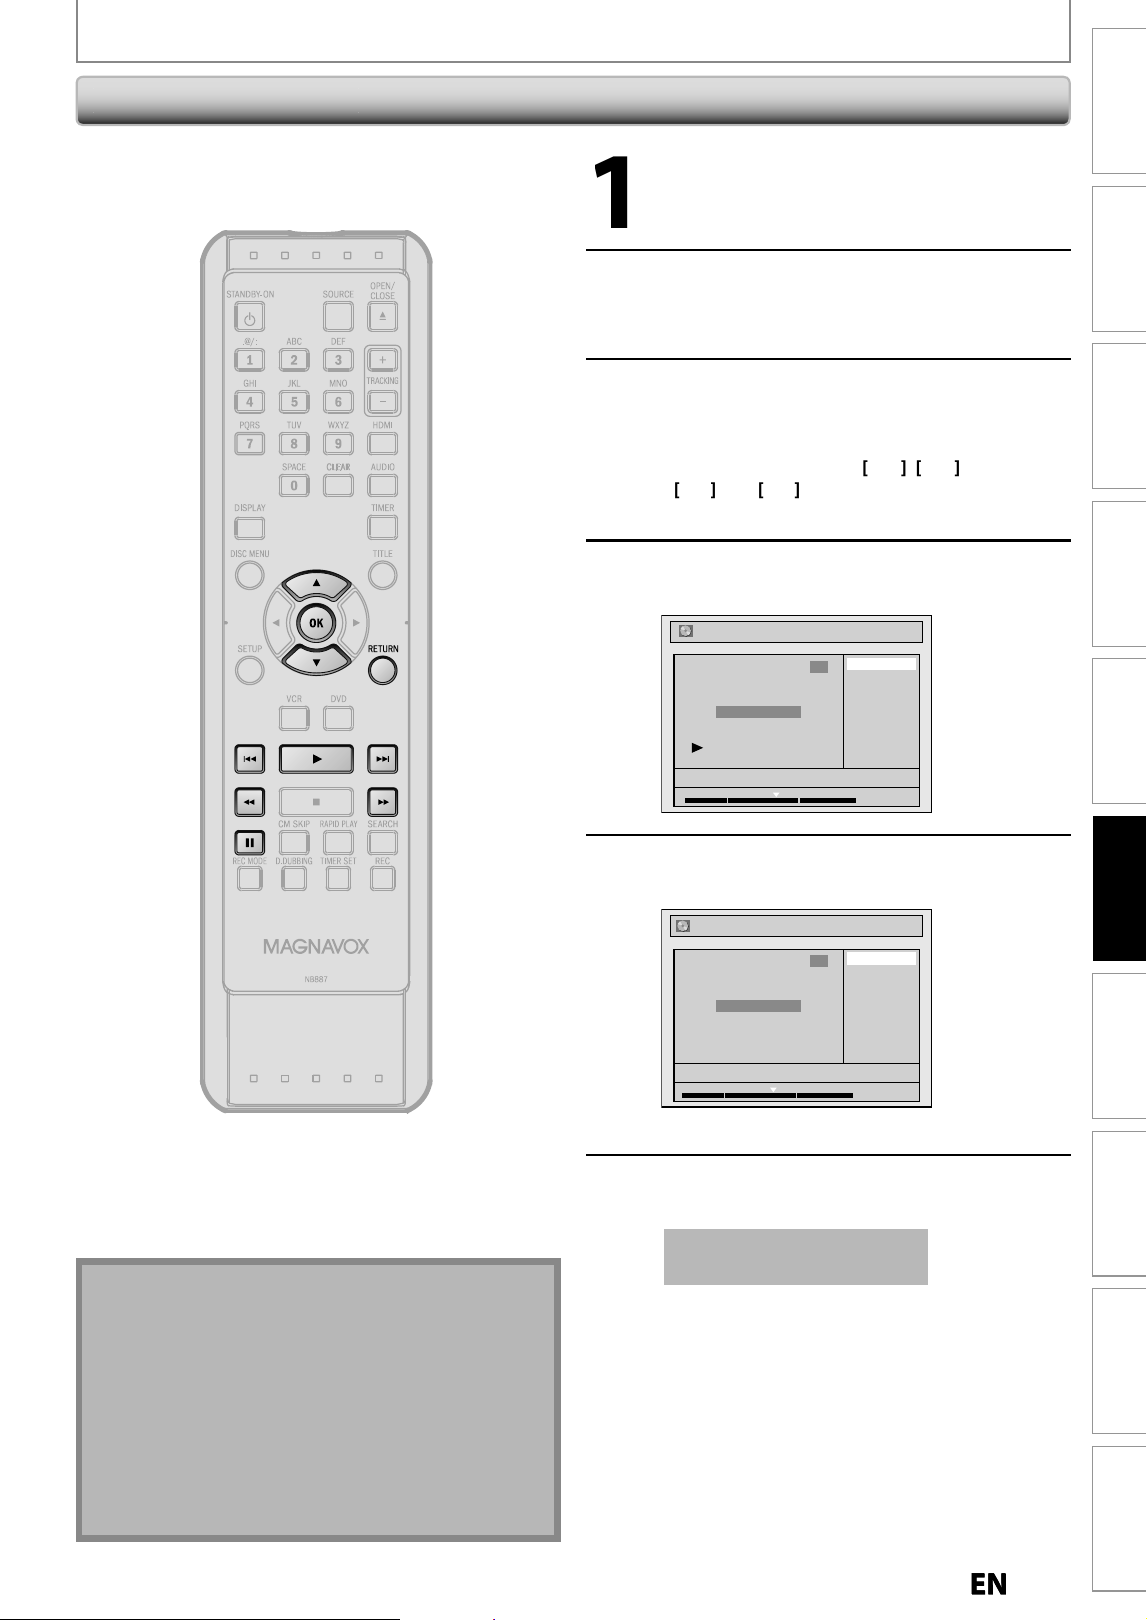
63
EN
EN
Recording Playback
Editing
Introduction
Connections Basic Setup Function Setup VCR Functions
Others Español
EDITING DISCS
S
etting Chapter Marks
1
Fo
ll
ow steps 1 to 3 in “De
l
etin
g
a
Tit
l
e” on page 61 to
d
isp
l
a
y
“E
d
it”
men
u.
2
Use
[
K
/
L
] to select “Chapter Mark”,
then
p
ress [OK]
.
Su
b
menu wi
ll
appear
.
3
Press
[
PLAY
B
]
and then
[
PAUSE
F
]
to decide the point at which
y
ou will
create a new cha
p
ter mark
.
• I
t
i
s
co
nv
e
ni
e
n
t
to
use
[
H
]
,
[
G
]
,
[
E
]
a
n
d
[
D
]
f
or
f
indin
g
the point to add a
n
ew cha
p
ter mark
.
4
Use
[
K
/
L
] to se
l
ect “A
dd
”, t
h
en press
[O
K
].
Delete
Delete All
Add
NOV/21/12 11:00AM L1 SP
1
Chapter 2/ 3
Edit - Chapter Mark
1 : 05 : 00
5
Use
[
K
/
L
] to se
l
ect “Yes”, t
h
en
p
ress
[
OK
].
Edit - Chapter Mark - Add
No
Yes
NOV/21/12 11:00AM L1 SP
1
Chapter 2/ 3
F
1 : 05 : 00
A new cha
p
ter mark will be added
.
6
Press [RETURN] twice to exit.
Data wi
ll
b
e written onto t
h
e
d
isc momentari
l
y
.
T
h
is operation ma
y
ta
k
e a
wh
i
l
e to
b
e com
pl
ete
d.
You can
p
ut cha
p
ter marks in each title. Once a cha
p
ter is
marked,
y
ou can use it
f
or the chapter search
f
eature
.
N
ot
e
• When the number of cha
p
ter marks in a title is 99
and the number of cha
p
ter marks in a disc is 254,
cha
p
ter marks cannot be added
.
• Besi
d
es t
h
e a
b
ove-mentione
d
, it is not
l
i
k
e
ly
to
b
e
able to add accordin
g
to recorded time and number
o
f
chapters.
• Remaining time o
f
the disc may decrease when
a
dd
ing c
h
apter mar
k
s or increase w
h
en c
l
earing
c
h
apter mar
k
s
d
epen
d
ing on t
h
e recor
d
ing time or
e
d
ite
d
contents
.
E9P8CUDZV427MG9BOMv1.indd63E9P8CUDZV427MG9BOMv1.indd63 2012/03/0113:06:572012/03/0113:06:57
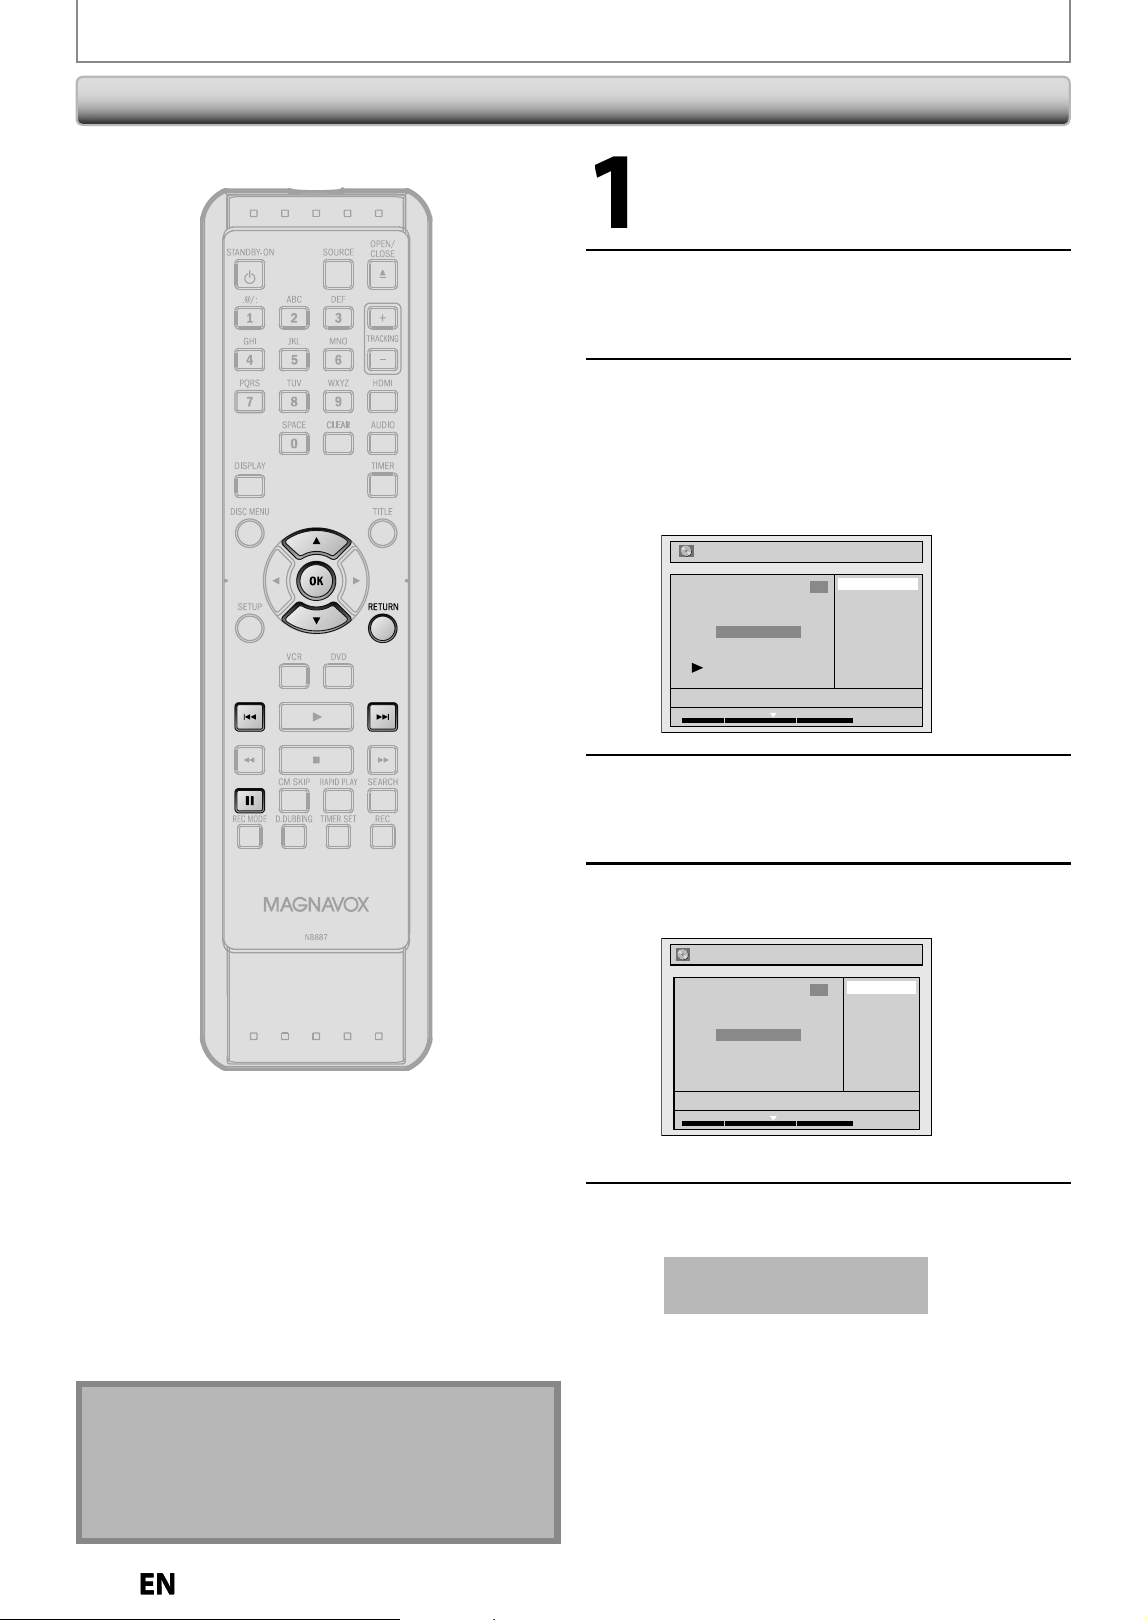
64
EN
EN
EDITING DISCS
C
l
earin
g
C
h
apter Mar
k
s
1
Fo
ll
ow steps 1 to 3 in “De
l
etin
g
a
Tit
l
e” on page 61 to
d
isp
l
ay “E
d
it”
men
u.
2
Use
[
K
/
L
] to select “Chapter Mark”,
then press [OK]
.
Su
b
menu wi
ll
appear
.
3
Use
[
H
]
/
[
G
] to select a cha
p
ter
mark to be deleted, then
p
ress
[
PAUSE
F
]
.
C
h
apter mar
k
num
b
er is
d
isp
l
a
y
e
d
on t
h
e
p
rev
i
ew screen
.
e.g.
)
DV
D
Delete
Delete All
Add
NOV/21/12 11:00AM L1 SP
1
Chapter 2/ 3
Edit - Chapter Mark
1 : 05 : 00
4
Use
[
K
/
L
] to se
l
ect “De
l
ete”
,
t
h
en
p
ress [OK]
.
5
Use
[
K
/
L
] to select “Yes”, then
p
ress
[
OK
].
Edit - Chapter Mark - Delete
No
Yes
NOV/21/12 11:00AM L1 SP
1
Chapter 2/ 3
F
1 : 05 : 00
T
h
e se
l
ecte
d
c
h
apter mar
k
wi
ll
b
e
d
e
l
ete
d.
6
Press
[
RETURN
]
twice to exit
.
Data will be written onto the disc momentaril
y.
This operation ma
y
take a
w
hile to be com
p
leted
.
N
ot
e
• Remaining time of the disc ma
y
decrease when
addin
g
chapter marks or increase when clearin
g
chapter marks dependin
g
on the recordin
g
time or
ed
i
ted
co
n
te
n
ts.
• You cannot
d
e
l
ete t
h
e c
h
apter mar
k
1
.
E9P8CUDZV427MG9BOMv1.indd64E9P8CUDZV427MG9BOMv1.indd64 2012/03/0113:06:582012/03/0113:06:58
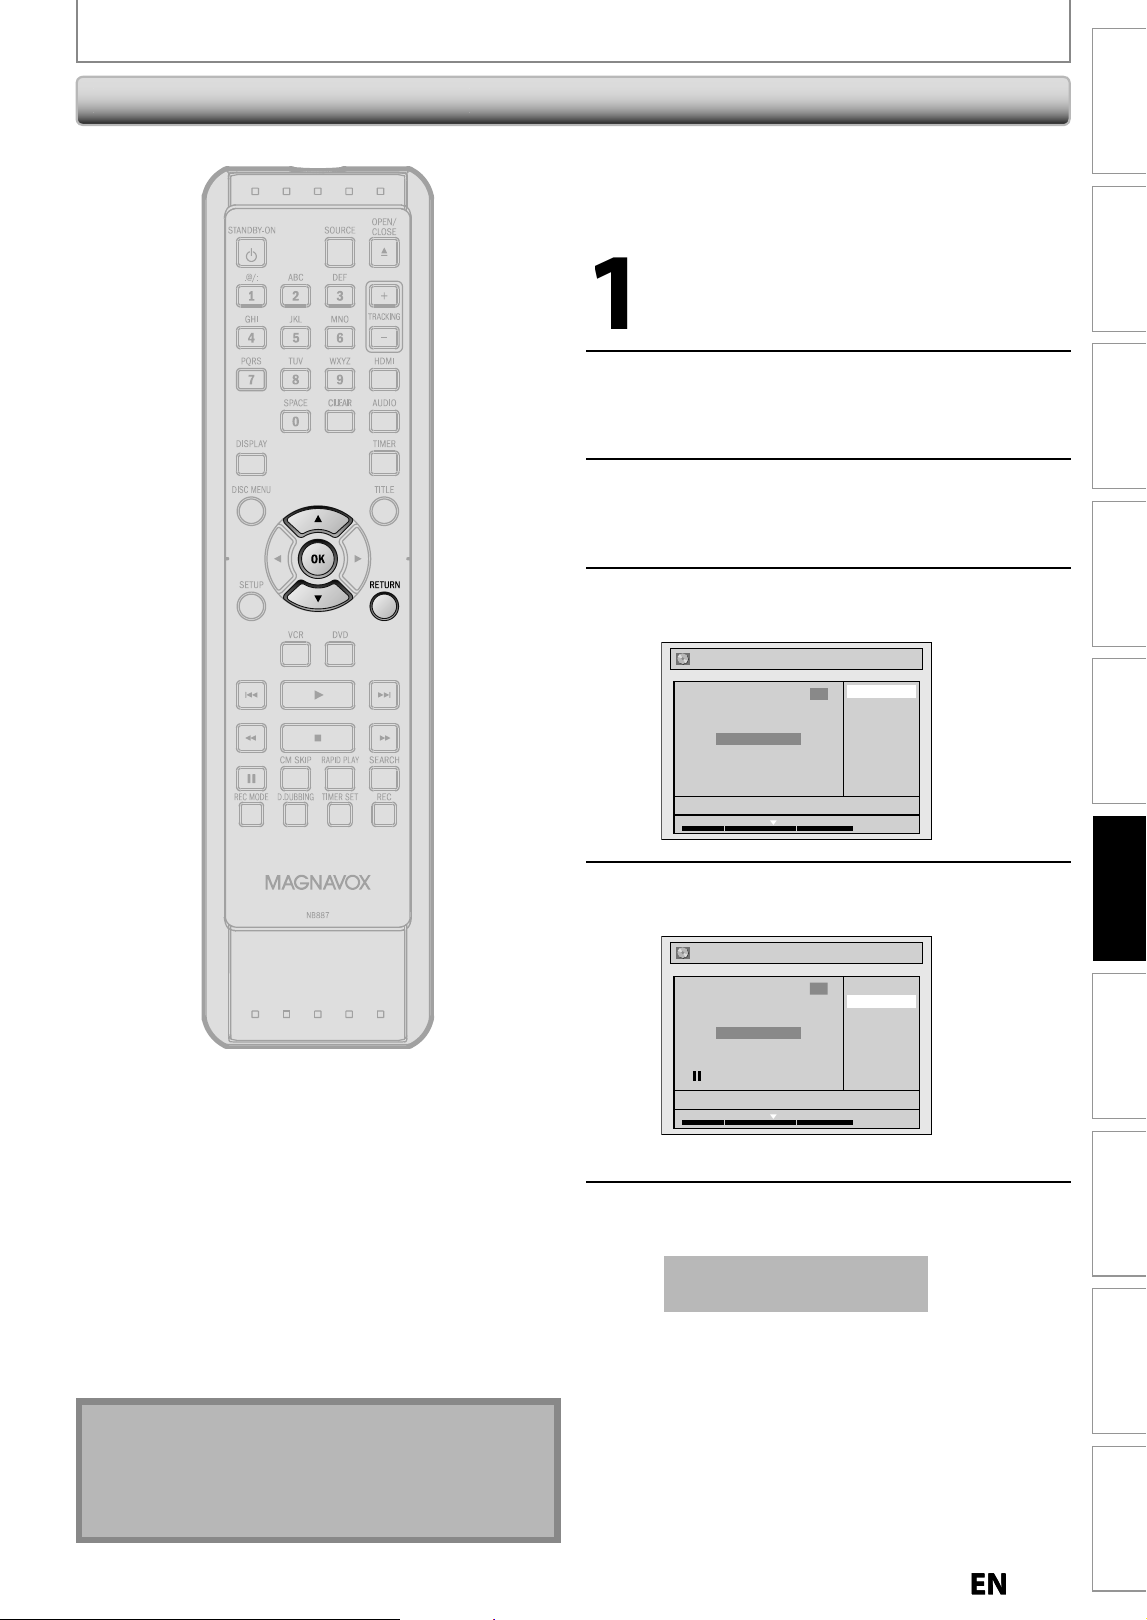
65
EN
EN
Recording Playback
Editing
Introduction
Connections Basic Setup Function Setup VCR Functions
Others Español
EDITING DISCS
Clearing Chapter Marks (cont’d
)
T
o
d
e
l
ete a
ll
c
h
apter mar
k
s:
1
Fo
ll
ow steps 1 to 3 in “De
l
etin
g
a
Tit
l
e” on page 61 to
d
isp
l
a
y
“E
d
it”
men
u.
2
Use
[
K
/
L
] to se
l
ect “C
h
apter Mar
k
”,
t
h
en press [OK]
.
Submenu will a
pp
ear
.
3
Use
[
K
/
L
] to select “Delete All”
,
then
p
ress [OK]
.
4
Use
[
K
/
L
] to select “Yes”, then
p
ress
[
OK
].
Edit - Chapter Mark - Delete All
No
Yes
NOV/21/12 11:00AM L1 SP
1
Chapter 2/ 3
F
1 : 05 : 00
5
Use
[
K
/
L
] to se
l
ect “Yes”, t
h
en press
[O
K
].
Chapter 2/ 3
Edit - Chapter Mark - Delete All
No
Yes
Are you sure?
NOV/21/12 11:00AM L1 SP
1
1 : 05 : 00
All cha
p
ter marks will be deleted
.
6
Press [RETURN] tw
i
ce to ex
i
t.
Data will be written onto the disc momentaril
y.
T
h
is operation may ta
k
e a
wh
i
l
e to
b
e comp
l
ete
d.
Note
• Remaining time o
f
the disc may decrease when
a
dd
ing c
h
apter mar
k
s or increase w
h
en c
l
earing
ch
apter mar
k
s
d
epen
d
in
g
on t
h
e recor
d
in
g
time or
ed
i
ted
co
n
te
n
ts.
E9P8CUDZV427MG9BOMv1.indd65E9P8CUDZV427MG9BOMv1.indd65 2012/03/0113:06:592012/03/0113:06:59
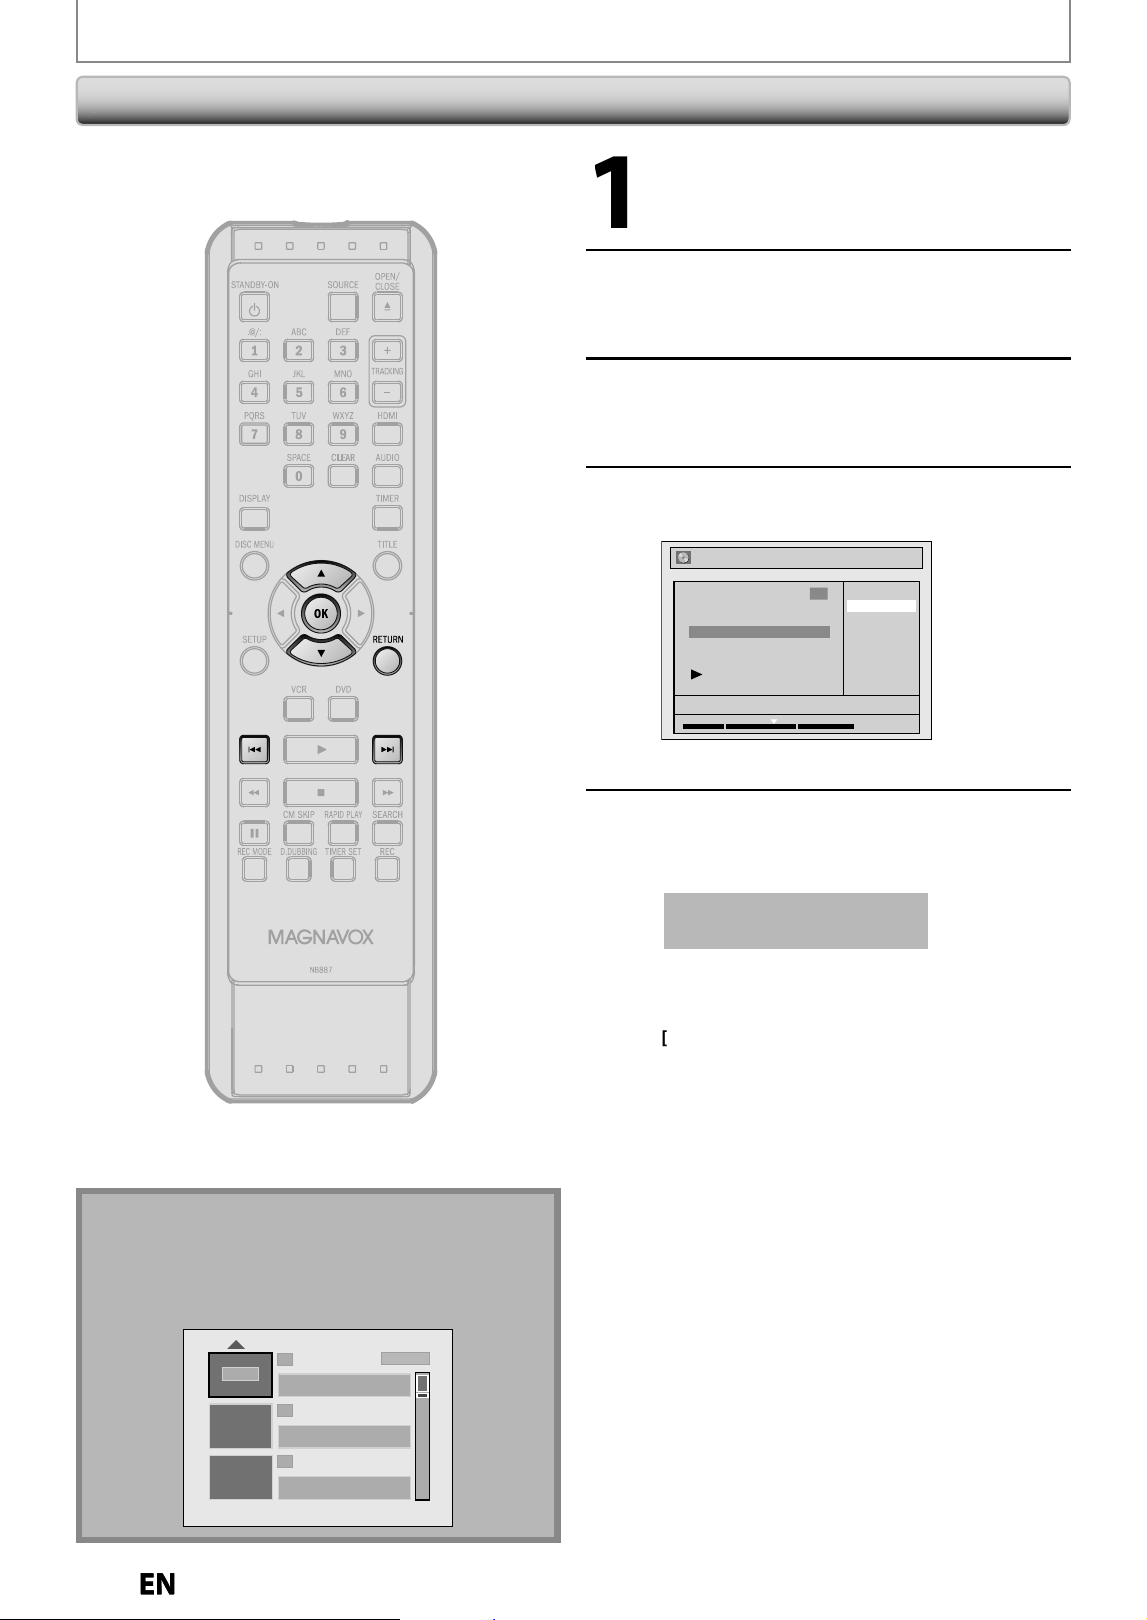
66
EN
EN
EDITING DISCS
Hi
d
in
g
C
h
apter
s
1
Fo
ll
ow steps 1 to 3 in “De
l
etin
g
a
Tit
l
e” on page 61 to
d
isp
l
ay “E
d
it”
men
u.
2
Use
[
K
/
L
] to select “Hide Chapter”,
then press [OK]
.
Su
b
menu wi
ll
appear
.
3
Use
[
H
]
/
[
G
]
to decide the
cha
p
ter to be hidden
.
4
Use
[
K
/
L
] to select “Hidden”
,
then
p
ress [OK]
.
Edit - Hide Chapter
Hidden
Visible
1
NOV/21/12 11:00AM L1 SP
Chapter 2/ 3 Visible
1 : 05 : 00
The cha
p
ter is now hidden
.
5
After this o
p
eration is com
p
leted,
p
ress [RETURN] twice to exit
.
Data wi
ll
b
e written onto t
h
e
d
isc momentari
l
y
.
T
h
is operation ma
y
ta
k
e a
w
hile to be com
p
leted
.
If
y
ou want hidden chapters to be “Visible”,
se
l
ect t
h
e c
h
a
p
ter to
b
e s
h
own. T
h
en use
[
K
/
L
]
to se
l
ect “Visi
bl
e” at t
h
e ste
p
4 on t
h
is
p
ag
e
.
Data wi
ll
b
e written onto t
h
e
d
isc momentari
l
y
.
After that, title list is displa
y
ed
.
N
ot
e
• ”Hidden” will be displa
y
ed in the preview window
while previewin
g
the hidden chapter
.
• When
y
ou make all chapters in the title “Hidden”,
“Hidden” is displa
y
ed in a thumbnail o
f
the title list
.
1
2
3
NOV/22/12 11:35
AM
L1 EP
NOV/22/12 0:10:33
NOV/21/12 11:00
AM
L1 SP
NOV/21/12 0:20:44
Hidden
EMPTY TITLE
1:37:52 SP(2Hr)
SP (2Hr)
Y
ou can hide cha
p
ters
f
rom the title list
.
Hi
dd
en c
h
apters are s
k
ippe
d
d
uring p
l
a
yb
ac
k.
E9P8CUDZV427MG9BOMv1.indd66E9P8CUDZV427MG9BOMv1.indd66 2012/03/0113:07:002012/03/0113:07:00
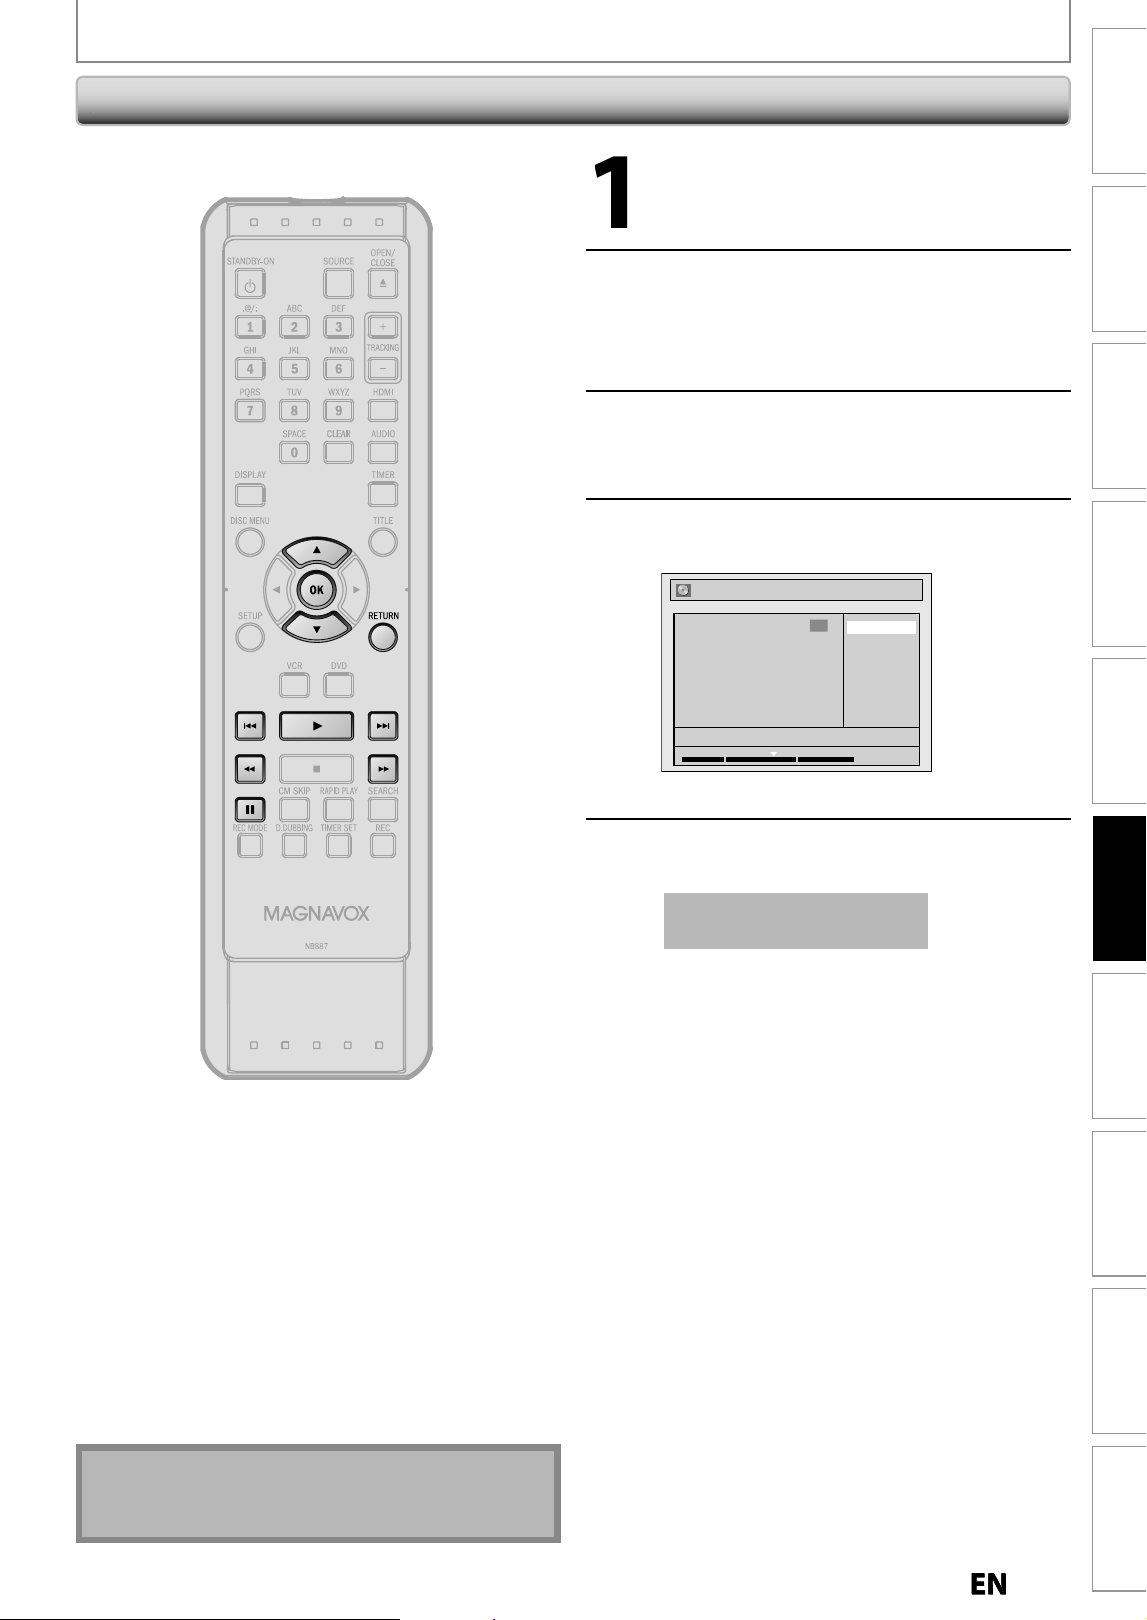
6
7
EN
EN
Recording Playback
Editing
Introduction
Connections Basic Setup Function Setup VCR Functions
Others Español
EDITING DISCS
S
etting Pictures
f
or Thumbnail
s
1
Fo
ll
ow steps 1 to 3 in “De
l
etin
g
a
Tit
l
e” on page 61 to
d
isp
l
a
y
“E
d
it”
m
en
u.
2
Use
[
H
]
,
[
G
]
,
[
E
]
,
[
D
]
,
[
PAUSE
F
] an
d
[PLAY
B
] to
d
eci
d
e t
h
e
picture you want to se
l
ect as a
t
h
um
b
nai
l.
3
Use
[
K
/
L
] to se
l
ect “In
d
ex Picture”
,
t
h
en
p
ress [OK]
.
4
Use
[
K
/
L
] to select “Yes”, then
p
ress
[O
K
].
No
Yes
1
Edit - Index Picture
NOV/21/12 11:00AM L1 SP
F
1 : 05 : 00
A
p
icture for thumbnail will be set
.
5
Press [RETURN] to ex
i
t
.
Data wi
ll
b
e written onto t
h
e
d
isc momentari
l
y
.
T
h
is operation may ta
k
e a
wh
i
l
e to
b
e comp
l
ete
d.
Note
• I
f
the selected picture
f
or a thumbnail is overwritten,
t
he thumbnail is reset to the
f
irst scene o
f
the title
.
You can set
y
our desired scene as a thumbnail
f
or each
tit
l
e
.
E9P8CUDZV427MG9BOMv1.indd67E9P8CUDZV427MG9BOMv1.indd67 2012/03/0113:07:012012/03/0113:07:01
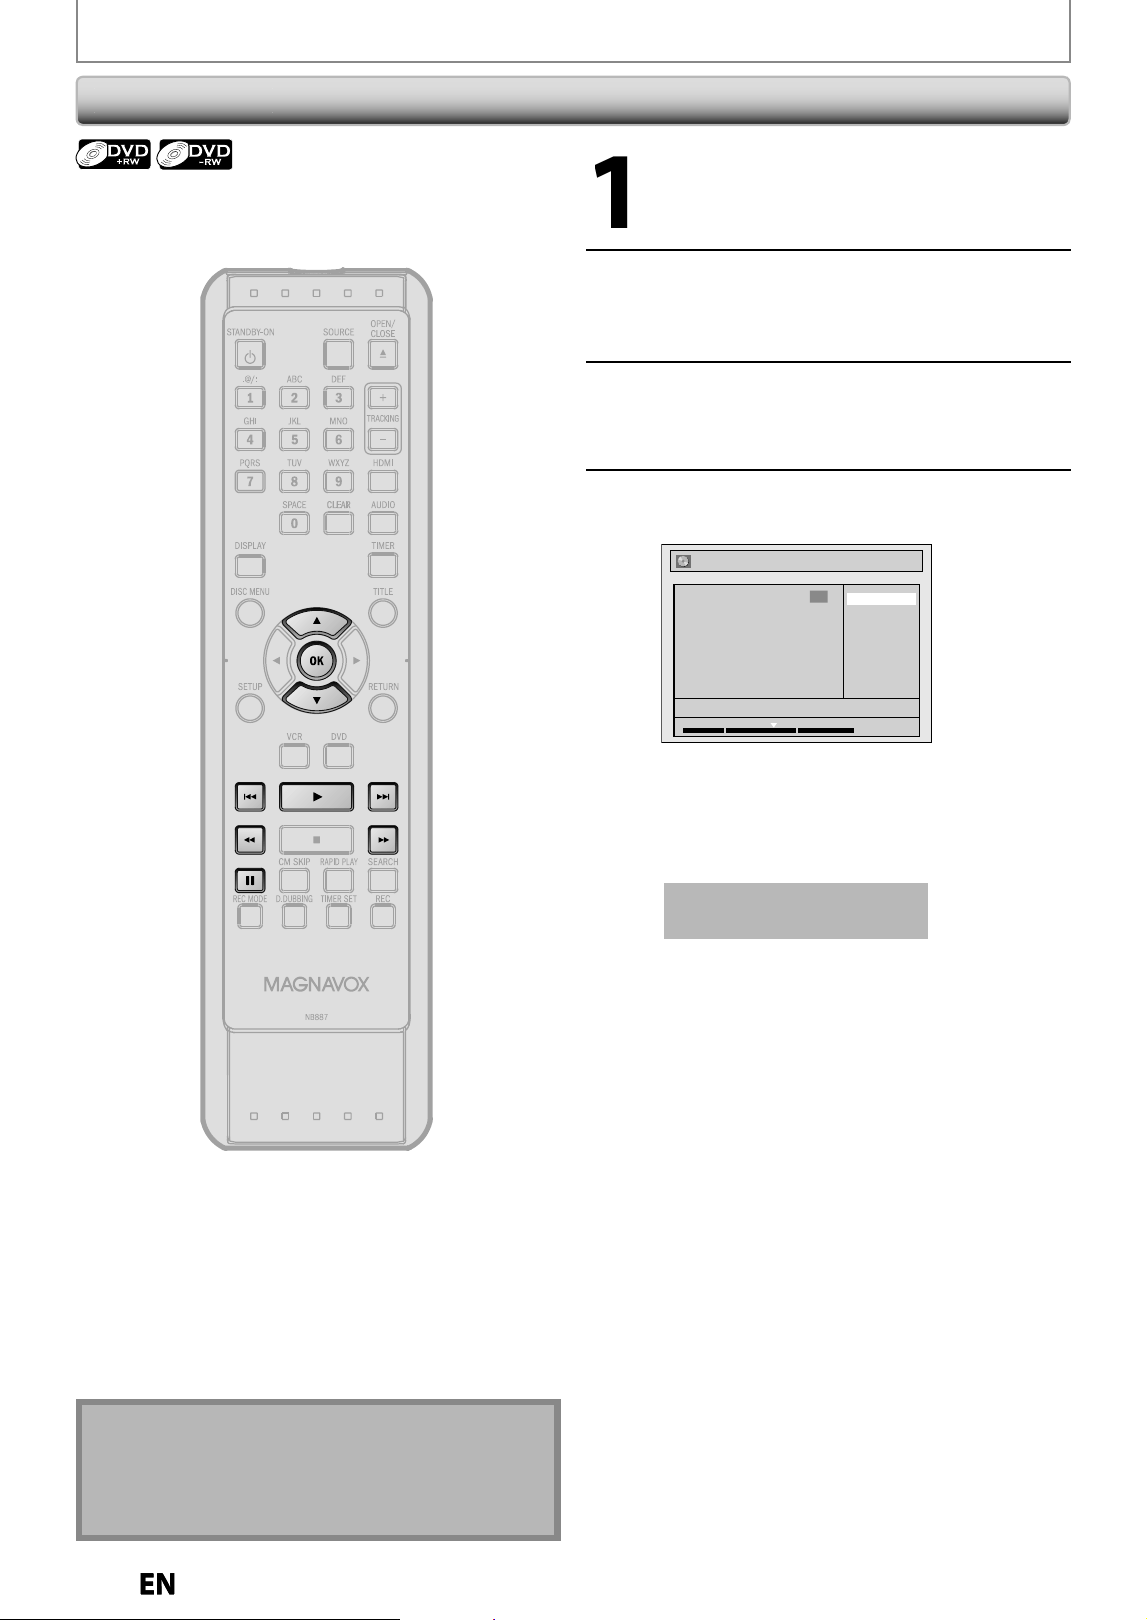
68
EN
EN
EDITING DISCS
Divi
d
ing a Tit
le
1
Fo
ll
ow steps 1 to 3 in “De
l
etin
g
a
Tit
l
e” on page 61 to
d
isp
l
a
y
“E
d
it”
men
u.
2
Use
[
H
]
,
[
G
]
,
[
E
]
,
[
D
]
,
[
PAUSE
F
] an
d
[PLAY
B
] to
d
eci
d
e t
h
e point
at w
h
ic
h
you wi
ll
d
ivi
d
e t
h
e tit
l
e
.
3
Use
[
K
/
L
] to select “Title Dividing”,
then
p
ress [OK]
.
4
Use
[
K
/
L
] to select “Yes”, then
p
ress
[
OK
].
No
Yes
1
Edit - Title Dividing
NOV/21/12 11:00AM L1 SP
F
1 : 05 : 00
Th
e
t
i
t
l
e
will
be
d
ivi
ded
in
to
2 n
e
w
t
i
t
l
es.
Both title names are identical
,
and thumbnails
are reset to the first scene at this
p
oint
.
Data will be written onto the disc momentaril
y.
T
h
is operation may ta
k
e a
wh
i
l
e to
b
e comp
l
ete
d.
You
ca
n
d
ivi
de
o
n
e
t
i
tle
in
to
2 n
e
w
t
i
tles.
N
ot
e
• Y
ou
ca
nn
ot
d
ivi
de
a
t
i
t
l
e
o
f
t
h
e
d
i
sc
wh
e
n
t
h
e
number of recordin
g
titles reaches the maximum of
49, and the number of recordin
g
chapters reaches
t
h
e
m
a
xim
u
m
o
f 2
5
4
.
E9P8CUDZV427MG9BOMv1.indd68E9P8CUDZV427MG9BOMv1.indd68 2012/03/0113:07:022012/03/0113:07:02
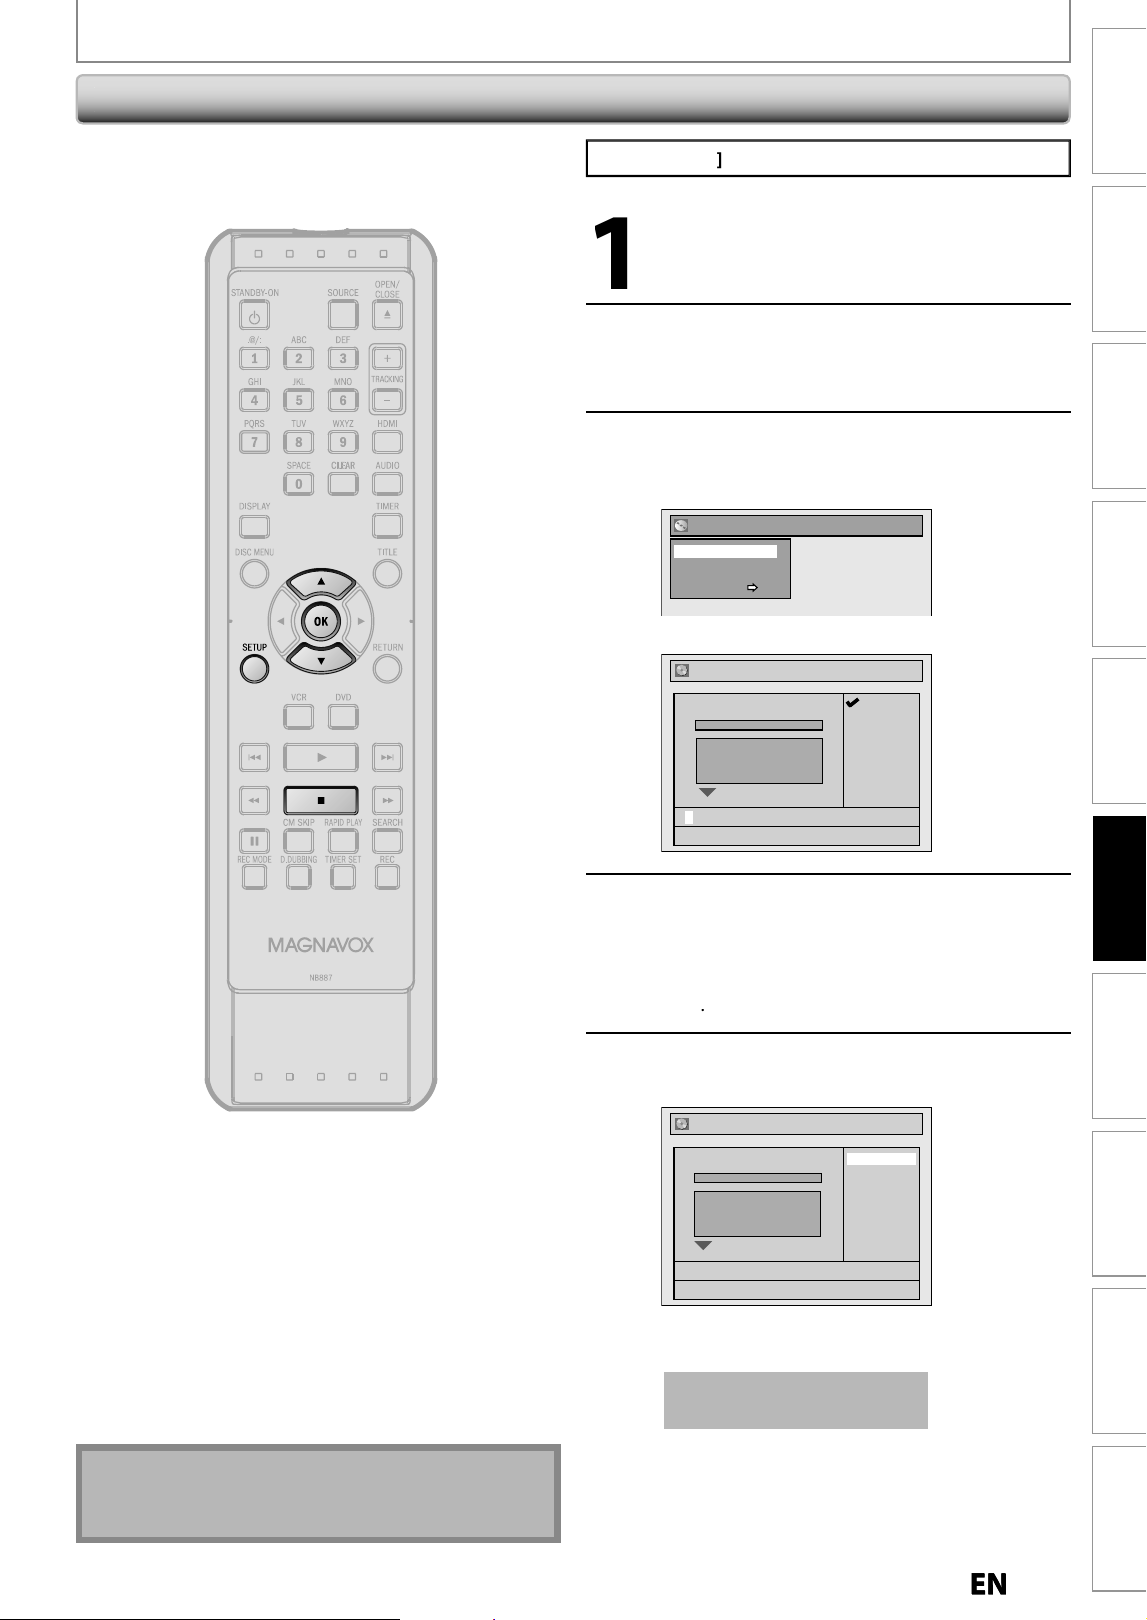
6
9
EN
EN
Recording Playback
Editing
Introduction
Connections Basic Setup Function Setup VCR Functions
Others Español
P
utt
i
ng Name on D
i
s
c
Pr
ess
[
ST
O
P
C
]
i
f
y
ou are pla
y
ing back a disc
.
1
Press
[
SETUP
]
.
2
Use
[
K
/
L
] to select “Disc Edit”
,
then
p
ress [OK]
.
3
Use
[
K
/
L
] to se
l
ect “E
d
it Disc
Name”, t
h
en press [OK]
.
e.
g
.
)
DVD+R
W
Disc Edit
Edit Disc Name
Erase Disc
Make Edits Compatible
Disc Protect OFF ON
A window for enterin
g
a title name will appear
.
Edit Disc Name
abc
ABC
123
@! ?
No Disc Name
Disc DVD+RW
Total Titles 3
Disc Space Used 0:30:48
Disc Protect OFF
Make Edits Compatible Needed
4
To enter a disc name, follow the ste
p
s
of “Guide to Edit Title Name” on pa
g
e
6
2
.
When
y
ou finish entering a title name, press
[O
K
]
.
5
Use
[
K
/
L
] to select “Yes”, then
p
ress
[
OK
].
Edit Disc Name
MY FAVORITE DISC
No
Yes
No Disc Name
Disc DVD+RW
Total Titles 3
Disc Space Used 0:30:48
Disc Protect OFF
Make Edits Compatible Needed
T
he name you entered will be activated
f
or the title
.
Data will be written onto the disc momentaril
y.
T
h
is operation may ta
k
e a
wh
i
l
e to
b
e comp
l
ete
d.
Note
• Y
ou
ca
nn
ot
se
l
ect
“Di
sc
E
d
i
t
” wh
e
n
f
in
a
liz
ed
DVD+R
o
r DVD-R is inserte
d.
You can put a name on the disc and chan
g
e it
f
rom this
men
u
.
EDITING DISCS
E9P8CUDZV427MG9BOMv1.indd69E9P8CUDZV427MG9BOMv1.indd69 2012/03/0113:07:032012/03/0113:07:03
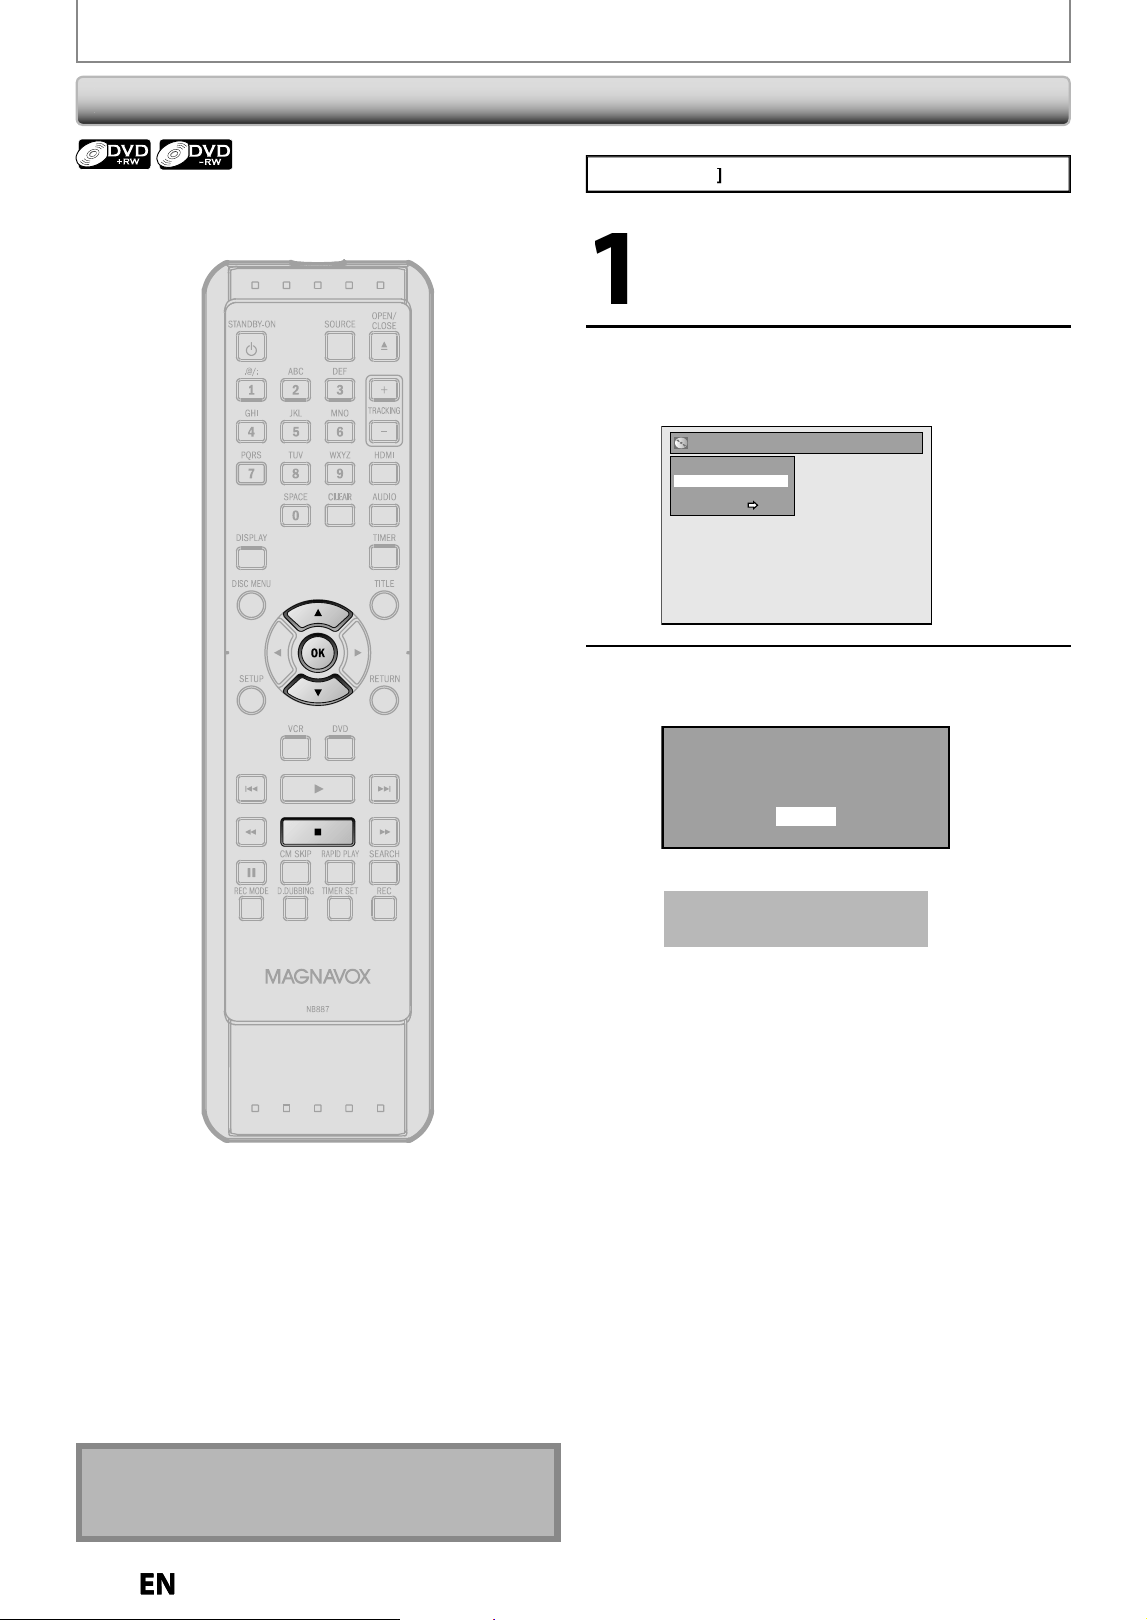
70
EN
EN
EDITING DISCS
Eras
i
ng D
i
s
c
P
r
ess
[
ST
O
P
C
]
i
f
y
ou are pla
y
ing back a disc
.
1
Fo
ll
ow steps 1 to 2 in “Putting Name
on Disc” on page 69 to
d
isp
l
a
y
“Disc
E
d
it” men
u.
2
Use
[
K
/
L
] to select “Erase Disc”
,
then
p
ress [OK]
.
e.g.
)
DVD+R
W
Disc Edit
Edit Disc Name
Erase Disc
Make Edits Compatible
Disc Protect OFF ON
3
Use
[
K
/
L
] to select “Yes”, then
p
ress
[O
K
].
When you press “Yes”, all the
contents in the disc will be erased.
Are you sure to erase the disc?
Yes
No
Data will be written onto the disc momentaril
y.
T
h
is operation may ta
k
e a
wh
i
l
e to
b
e comp
l
ete
d.
The contents o
f
the disc is now deleted
.
You
ca
n
e
r
ase
all
t
i
tles
o
n
a
d
i
sc.
N
ote
• When
y
ou select “Yes” at step 3, all contents o
f
the
d
isc wi
ll
b
e erase
d
.
E9P8CUDZV427MG9BOMv1.indd70E9P8CUDZV427MG9BOMv1.indd70 2012/03/0113:07:052012/03/0113:07:05
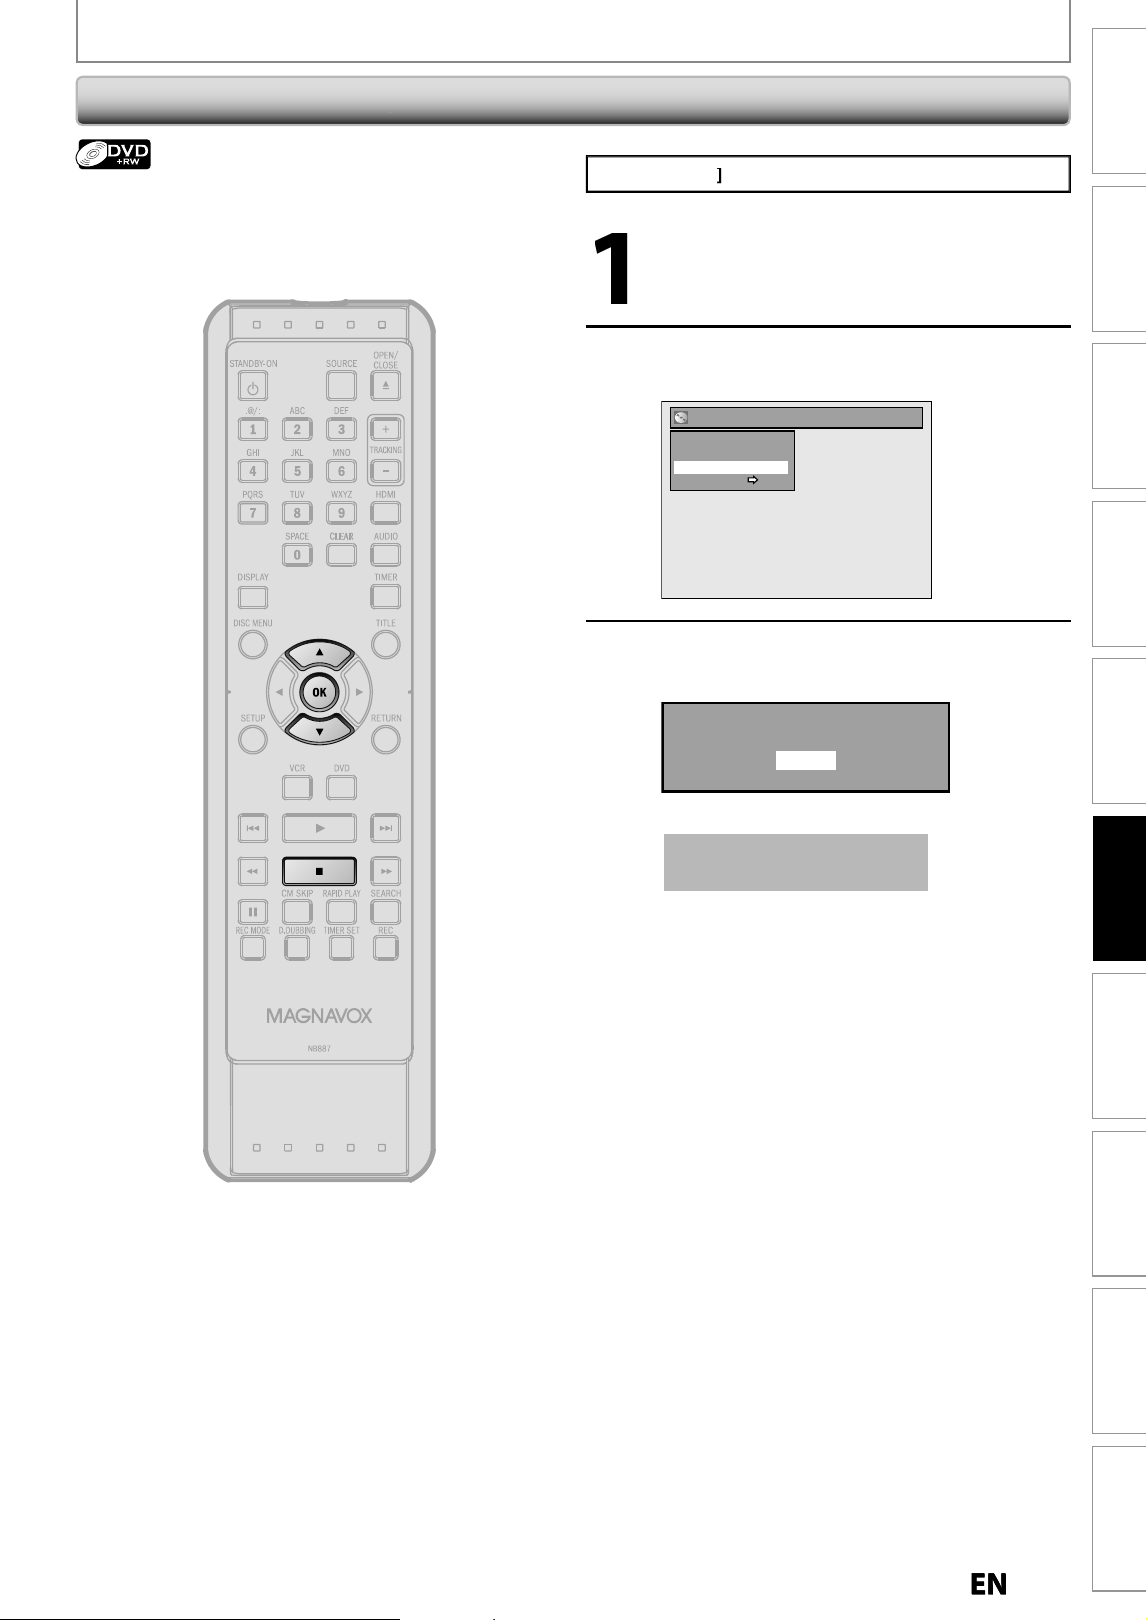
71
EN
EN
Recording Playback
Editing
Introduction
Connections Basic Setup Function Setup VCR Functions
Others Español
EDITING DISCS
M
a
k
in
g
E
d
its Compati
ble
P
r
ess
[
ST
O
P
C
]
i
f
y
ou are pla
y
ing back a disc
.
1
Follow steps 1 to 2 in “Puttin
g
Name
on Disc” on page 69 to displa
y
“Disc
E
d
it” men
u.
2
Use
[
K
/
L
] to se
l
ect “Ma
k
e E
d
its
Compati
bl
e”, t
h
en press [OK]
.
Disc Edit
Edit Disc Name
Erase Disc
Make Edits Compatible
Disc Protect OFF ON
3
Use
[
K
/
L
] to se
l
ect “Yes”, t
h
en press
[O
K
].
Activate the Make Edits Compatible?
Yes
No
Data will be written onto the disc momentaril
y.
This operation ma
y
take a
w
hile to be com
p
leted
.
I
f
you have added or deleted chapters, or made chapters
h
idden,
y
ou must perform “Make Edits Compatible” to
see those e
ff
ects on other unit
.
E9P8CUDZV427MG9BOMv1.indd71E9P8CUDZV427MG9BOMv1.indd71 2012/03/0113:07:062012/03/0113:07:06
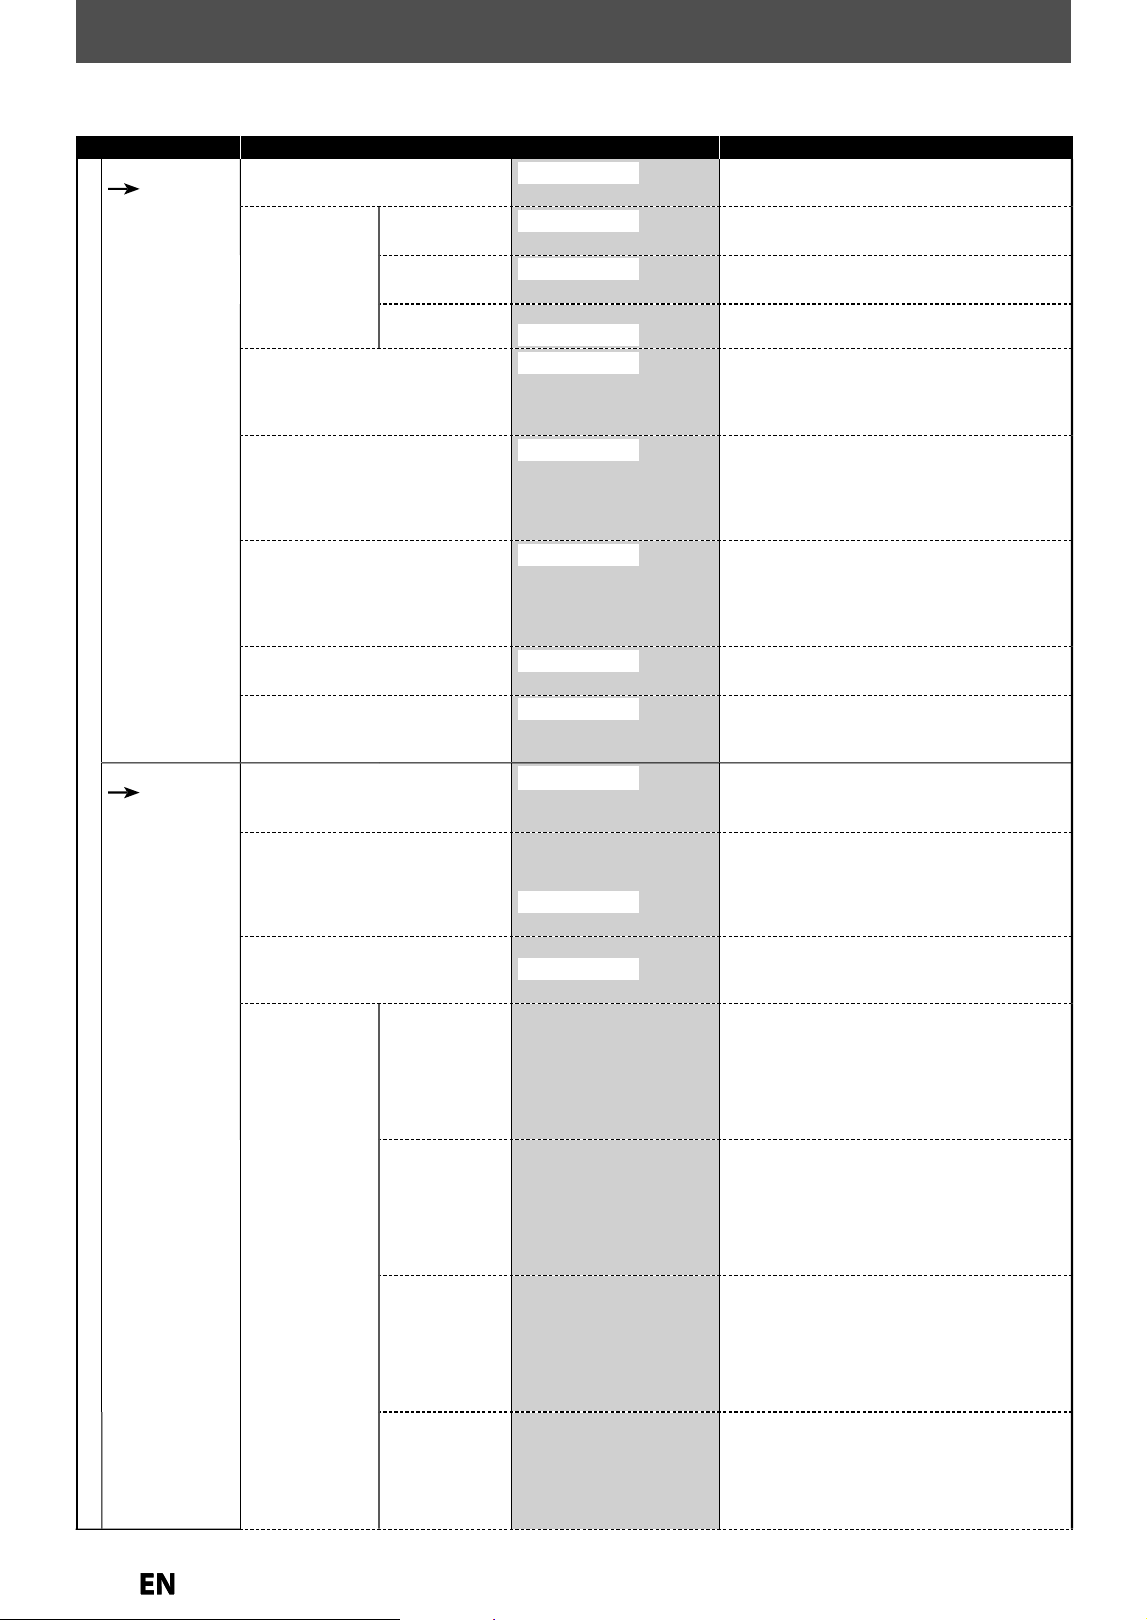
72
EN
EN
LIST OF SETTINGS
T
he
f
ollowing table is the contents which
y
ou can set and the de
f
ault setting
.
Re
f
er to the
f
ollowin
g
table
f
or use
f
ul operation
.
Setup Items (highlight is the default) Contents
General Setting
P
l
ay
b
ac
k
P
ages 74-7
6
Pa
r
e
n
tal
L
ock
O
F
F
level 8
[
Adult
]
to 1
[
Kid Sa
f
e
]
S
et the parental level
f
or DVD playback
.
D
isc Au
d
io
D
ynamic
R
ange
C
ontro
l
ON
O
F
F
C
ompressing the range o
f
sound volume
.
PC
M
4
8
kH
z
9
6
kH
z
Set
w
hethe
r
the
sou
n
d
r
eco
r
ded
in 9
6k
Hz wi
ll
b
e down sampled in 48kHz
.
D
olb
y
Digita
l
P
CM
S
trea
m
S
et the t
y
pe of sound signal which outputs
f
rom the digital audio output
j
ack
.
D
isc Menu Lan
g
ua
ge
En
g
lis
h
Frenc
h
Spanis
h
Ot
h
e
r
S
et the lan
g
ua
g
e for disc menu lan
g
ua
g
e.
A
u
d
io Languag
e
Ori
g
ina
l
En
gl
is
h
Fr
e
n
ch
S
p
anis
h
Other
S
et the language
f
or audio.
S
u
b
tit
l
e Lan
g
ua
g
e
O
F
F
En
g
lis
h
Fr
e
n
ch
S
p
anis
h
Ot
h
er
S
et the lan
g
ua
g
e for subtitles.
A
n
g
le Icon
ON
O
F
F
S
et whether or not to displa
y
the angle icon
.
S
ti
ll
Mo
d
e
A
uto
Fi
e
l
d
Fr
a
m
e
S
et the type o
f
still image in pausing playback
.
Displa
y
Pa
g
es 77-7
9
O
SD Lan
g
ua
ge
En
g
lis
h
Fran
ç
a
is
Es
p
año
l
S
et the language for OSD (on-screen displa
y
)
.
Sc
r
ee
n
Sa
v
e
r
O
F
F
1min
ute
5
m
i
n
utes
1
0
min
utes
1
5
min
utes
S
et the idlin
g
time before the screen saver
sta
r
ts.
F
L Dimm
er
A
uto
Brig
ht
D
a
r
k
S
et the brightness of the front panel displa
y
.
V
-C
h
ip
MP
AA
R
atin
g
X
N
C
-1
7
R
P
G
-1
3
P
G
G
N
R
S
et t
h
e viewing
l
imitation accor
d
ing to US
m
ov
i
e rat
i
ngs
.
T
V
R
atin
g
TV
-
MA
TV
-1
4
TV-P
G
TV-
G
TV
-
Y7
TV
-
Y
No
n
e
S
et t
h
e viewing
l
imitation accor
d
ing to US T
V
p
rogram rat
i
ngs.
Ca
n
ad
i
a
n
E
ng
l
is
h
Rating
1
8+
14+
P
G
G
C
8
+
C
E
S
et t
h
e viewing
l
imitation accor
d
ing to
C
ana
d
ian Eng
l
is
h
l
anguage ratings.
Ca
n
ad
i
a
n Fr
e
n
ch
R
ating
1
8a
n
s
+
1
6a
n
s
+
1
3a
n
s
+
8a
n
s+
G
E
S
et t
h
e viewing
l
imitation accor
d
ing to
C
ana
d
ian Frenc
h
l
anguage ratings
.
E9P8CUDZV427MG9BOMv1.indd72E9P8CUDZV427MG9BOMv1.indd72 2012/03/0113:07:072012/03/0113:07:07
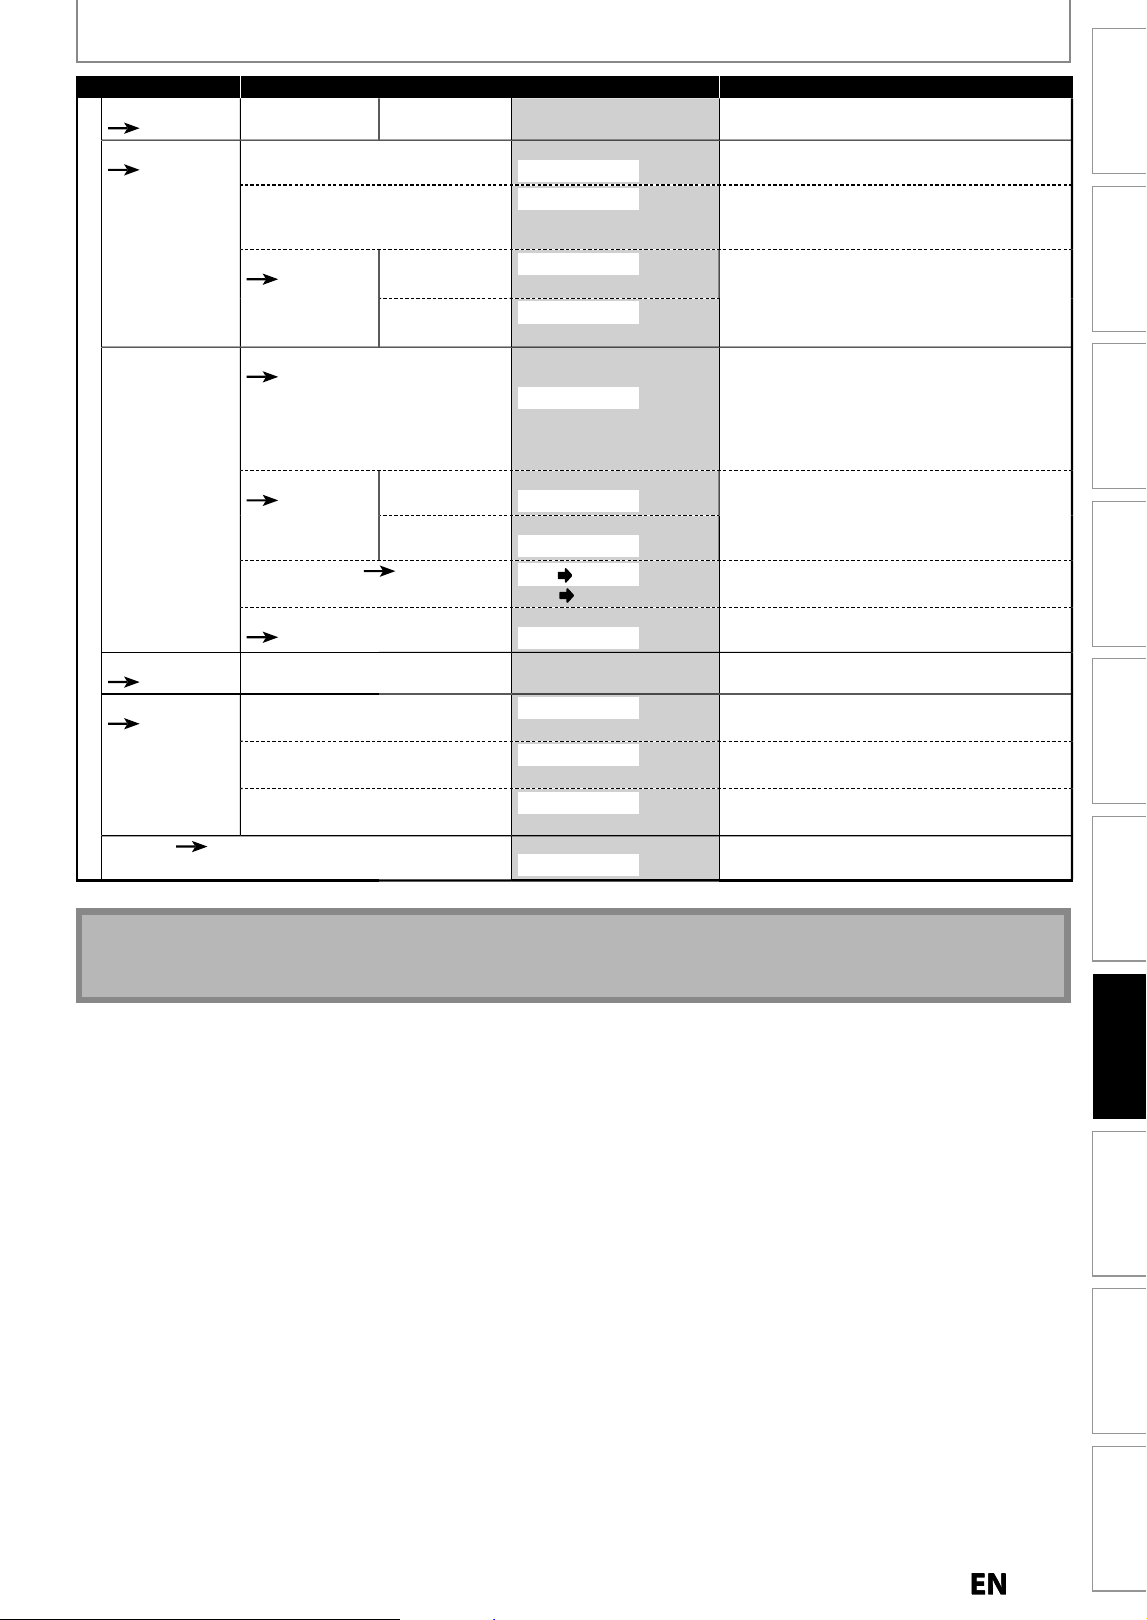
73
EN
EN
Recording Playback Editing
Introduction
Connections Basic Setup
Function Setup
VCR Functions
Others Español
LIST OF SETTINGS
Setup Items (highlight is the default) Contents
General Setting
Disp
l
a
y
P
a
g
es 77-7
9
V
-C
h
ip
Ch
ange
Pass
w
o
r
d
Ch
ange t
h
e passwor
d.
Vi
d
e
o
P
a
g
e 8
0
P
rogressive Scan O
N
O
F
F
S
et to t
h
e progressive scan mo
d
e (set to "ON")
o
r to the interlace scan mode
(
set to "OFF"
).
T
V As
p
ec
t
4
:3
L
ette
r
Box
4
:3
P
a
n
&
Scan
1
6:
9 Wi
de
S
et a picture size accordin
g
to aspect ratio o
f
y
our TV
.
V
ideo In
p
u
t
Pa
g
e 39
L
1
(
Rear
)
Vi
deo
I
n
S-Vi
d
eo I
n
S
et the video input t
y
pe for the external input
.
L
2
(
Front
)
Vi
deo
I
n
S
-Vi
deo
I
n
Recordin
g
A
uto Cha
p
te
r
Pa
g
e 28
O
F
F
5
min
utes
10 m
i
nute
s
15 m
i
nute
s
30 m
i
nute
s
60 m
i
nute
s
I
nsert cha
p
ter marks at even time interval
.
A
uto Fina
l
iz
e
P
age 45
D
isc Fu
ll
ON
O
F
F
S
et the unit to
f
inalize the disc automatically
.
E
n
d
o
f Tim
e
r R
ec
ON
O
F
F
D
ubbin
g
Mode Pa
g
es 41-4
2
V
C
R
D
V
D
D
V
D
V
CR
S
et the dubbin
g
direction
.
M
ake Recordin
g
Compatibl
e
Pa
g
e 28
ON
O
F
F
S
et to prohibitin
g
additional recordin
g
(OFF)
o
r to replace the title list after recordin
g
(ON)
.
C
l
ock
P
a
g
e 26
C
lock Settin
g
Set
t
h
e
c
l
oc
k
.
HD
MI
P
a
g
e 8
1
Fo
rm
at
R
GB
Y
CbCr
S
et the color space
f
or the HDMI output
.
H
DMI A
ud
i
o
ON
O
F
F
S
et w
h
et
h
er to output t
h
e HDMI au
d
io signa
l
o
r n
ot.
R
GB Ran
ge
Norma
l
Enh
a
n
ced
Set
t
h
e
b
l
ac
k-whi
te
co
n
t
r
ast
l
e
v
e
l f
o
r HDMI
R
GB out
p
ut
.
R
eset
All Pa
g
e 8
2
Y
es
N
o
S
et to the default settin
g.
Note
• Your change to each setting stays on even when the power is o
ff
except
f
or Dubbing Mode
.
• An item w
h
ic
h
is not current
l
y avai
l
a
bl
e is graye
d
in t
h
e settings
.
E9P8CUDZV427MG9BOMv1.indd73E9P8CUDZV427MG9BOMv1.indd73 2012/03/0113:07:072012/03/0113:07:07
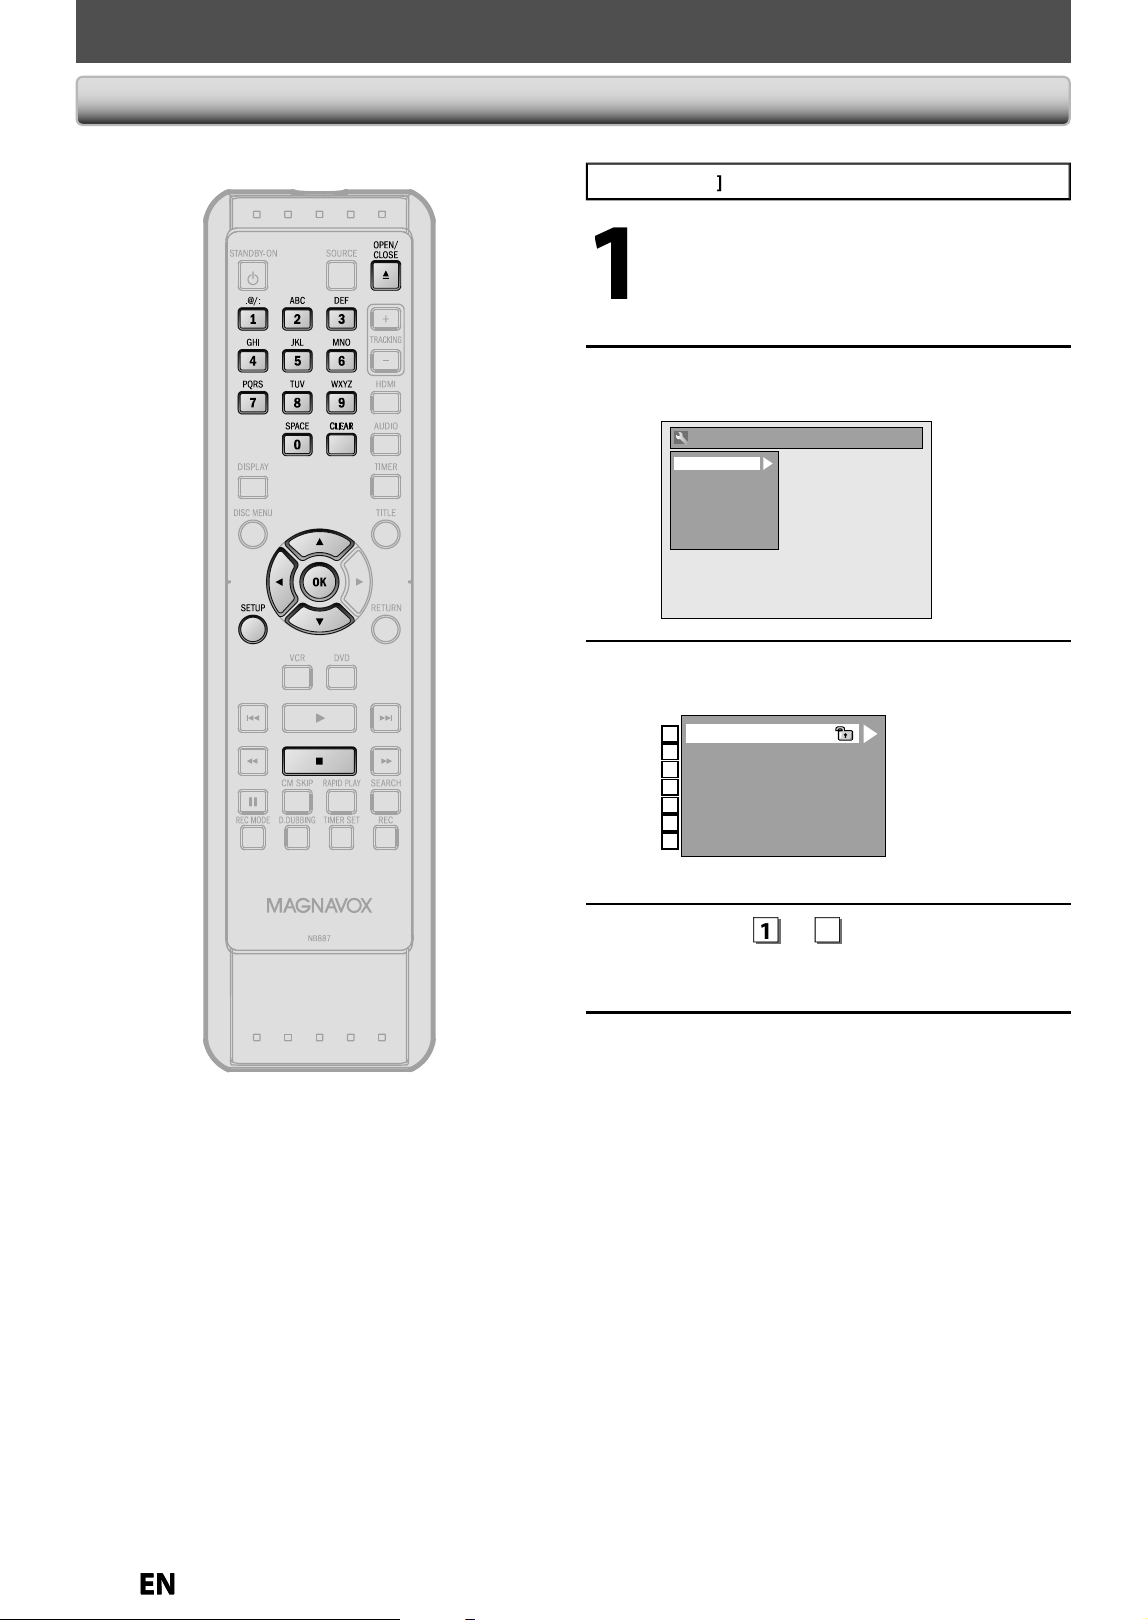
74
EN
EN
SETUPS
P
r
ess
[
STOP
C
]
if
y
ou are pla
y
ing back a disc
.
1
Press [SETUP] and use [
K
/
L
]
to
se
l
ect “Genera
l
Settin
g
”, t
h
en press
[O
K
].
“Genera
l
Setting” menu wi
ll
appear
.
2
Use
[
K
/
L
] to select “Pla
y
back”, then
p
ress [OK]
.
General Setting
Playback
Display
Video
Recording
Clock
HDMI
Reset All
3
Use
[
K
/
L
] to se
l
ect a
d
esire
d
item,
t
h
en press [OK]
.
1
2
3
4
5
6
7
Parental Lock
Disc Audio
Disc Menu Language
Audio Language
Subtitle Language
Angle Icon
Still Mode
Su
b
menu wi
ll
appear
.
4
Refer t
o
1
t
o
7
on pa
g
es 75-76 and
s
et the
s
electe
d
item
.
5
When
y
ou
f
inish with setting, press
[SETUP] to ex
i
t
.
Pl
ay
b
ac
k
E9P8CUDZV427MG9BOMv1.indd74E9P8CUDZV427MG9BOMv1.indd74 2012/03/0113:07:082012/03/0113:07:08
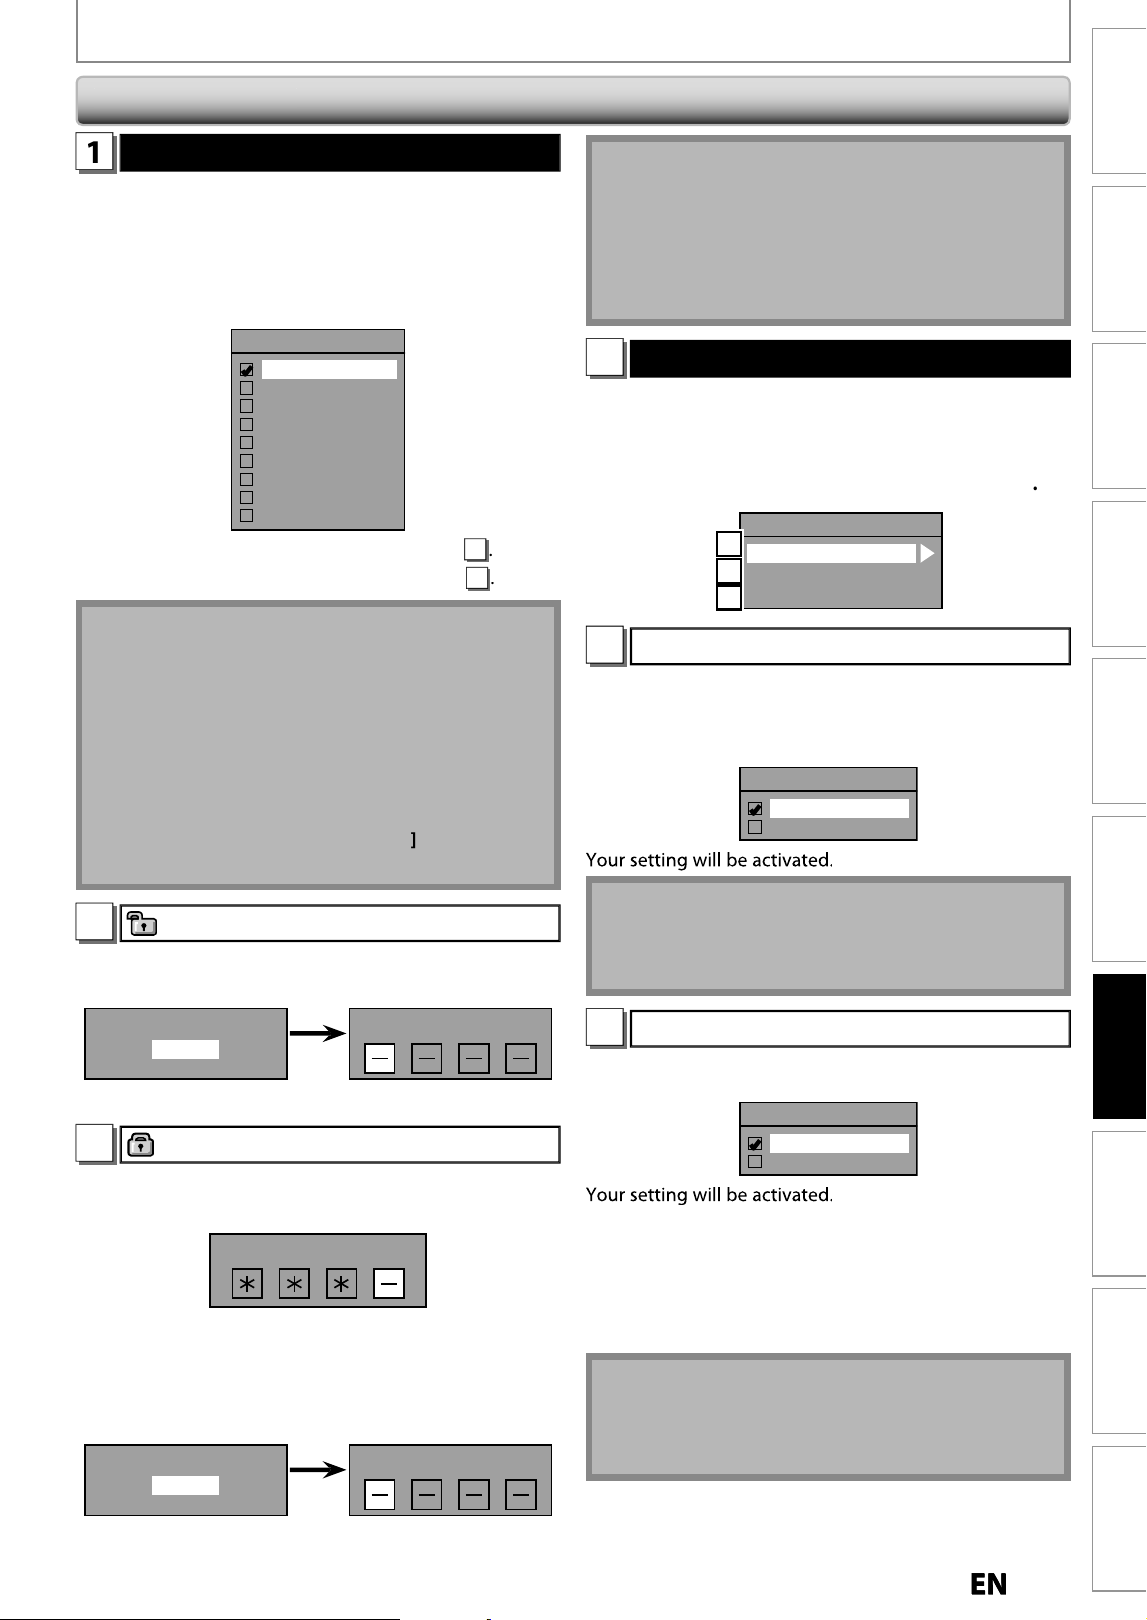
75
EN
EN
Recording Playback Editing
Introduction
Connections Basic Setup
Function Setup
VCR Functions
Others Español
SETUPS
1
Parental Lock (Default: OFF)
Some DVD-video feature a parental lock level. Pla
y
bac
k
will stop i
f
the ratings exceed the levels
y
ou set, it will
require
y
ou to enter a password before the disc will
pla
y
back. This feature prevents
y
our children from
v
iewin
g
inappropriate material
.
Use
[
K
/
L
] to se
l
ect t
h
e
d
esire
d
l
eve
l
, t
h
en press [OK]
.
Parental Lock
OFF
8 [Adult]
7 [NC 17]
6 [R]
5 [PG R]
4 [PG 13]
3 [PG]
2 [G]
1 [Kid Safe]
I
f
a password has not been set yet, proceed to
A
.
I
f
a password has been set already, proceed to
B
.
N
ot
e
• Parental lock function ma
y
not be available to some
d
i
scs.
• With some DVD, it ma
y
be di
ff
icult to
f
ind i
f
the
y
are
compatible with parental lock. Be sure to check if the
parental lock
f
unction operates in the wa
y
that
y
ou
ha
v
e
set.
• Record the password in case you
f
orget it
.
• If there is a DVD in the unit when
y
ou set up the
p
arental lock,
p
ress
[
OPEN/CLOSE
A
]
to
act
iv
ate
t
h
e
p
arental lock level
.
A
A passwor
d
h
as not
b
een set
y
et
.
Use
[
K
/
L
]
to se
l
ect “Yes”. Use
[
t
h
e Num
b
er
b
uttons
]
to
enter a new
p
assword exce
p
t for 4737, then
p
ress [OK]
.
Change Password?
Yes
No
Password Input
Y
es
Your settin
g
will be activated
.
B
A passwor
d
h
as
b
een set a
l
rea
d
y
.
•
Use [t
h
e Num
b
er
b
uttons] to enter t
h
e current
passwor
d.
Password Input
Your settin
g
will be activated
.
•
I
f
you want to change password, use
[
K
/
L
] to se
l
ect
“Yes”. Use [t
h
e Num
b
er
b
uttons] to enter a new
password except
f
or 4737, then press [OK]
.
<
c
h
ange t
h
e passwor
d>
Change Password?
Yes
No
Password Input
Y
es
Your settin
g
will be activated
.
Note
•
P
r
ess
[
CLEAR
]
to erase num
b
ers entere
d
incorrect
l
y
.
• When
y
ou
f
orget the password or
y
ou want to clear
all settings in “Parental Lock” menu, enter 4737 using
[t
h
e Num
b
er
b
uttons
]
in passwor
d
input win
d
ow.
Passwor
d
wi
ll
b
e c
l
eare
d
an
d
parenta
l
l
eve
l
s wi
ll
b
e
set
to
“O
FF
”.
2
Disc Audio
C
hoose the appropriate audio setting
f
or
y
our external
de
vi
ce.
It will onl
y
affect a disc pla
y
back
.
Use
[
K
/
L
] to se
l
ect a
d
esire
d
item, t
h
en
p
ress
[
OK
]
.
Disc Audio
Dynamic Range Control
PCM
Dolby Digital
A
B
C
A
D
ynamic Range Control (De
f
ault : ON)
Set to “ON” to compress the ran
g
e between soft and loud
sou
n
ds.
U
se
[
K
/
L
] to se
l
ect a setting, t
h
en press [OK]
.
Dynamic Range Control
ON
OFF
N
ot
e
• D
y
namic range control function is available onl
y
on
the discs which are recorded in the Dolb
y
Digital
f
o
rm
at.
B
P
CM
(
Default : 48kHz
)
U
se
[
K
/
L
] to se
l
ect a setting, t
h
en press [OK]
.
PCM
48kHz
96kHz
4
8
kHz
:
If
y
our amplifier/decoder is NOT compatible
wit
h
96
k
Hz PCM, se
l
ect “48
k
Hz”. 96
k
Hz soun
d
wi
ll
b
e out
p
ut in 48
k
Hz
.
96k
Hz
:
I
f
your ampli
f
ier/decoder is compatible with
96
k
Hz PCM, se
l
ect “96
k
Hz”. 96
k
Hz soun
d
wi
ll
b
e out
p
ut
.
Note
When pla
y
ing back disc with cop
y
right protectio
n
• Even if
y
ou select “96kHz”, the sound will be down
sam
p
led at 48kHz
.
Pl
a
yb
ac
k
(cont’
d
)
E9P8CUDZV427MG9BOMv1.indd75E9P8CUDZV427MG9BOMv1.indd75 2012/03/0113:07:092012/03/0113:07:09
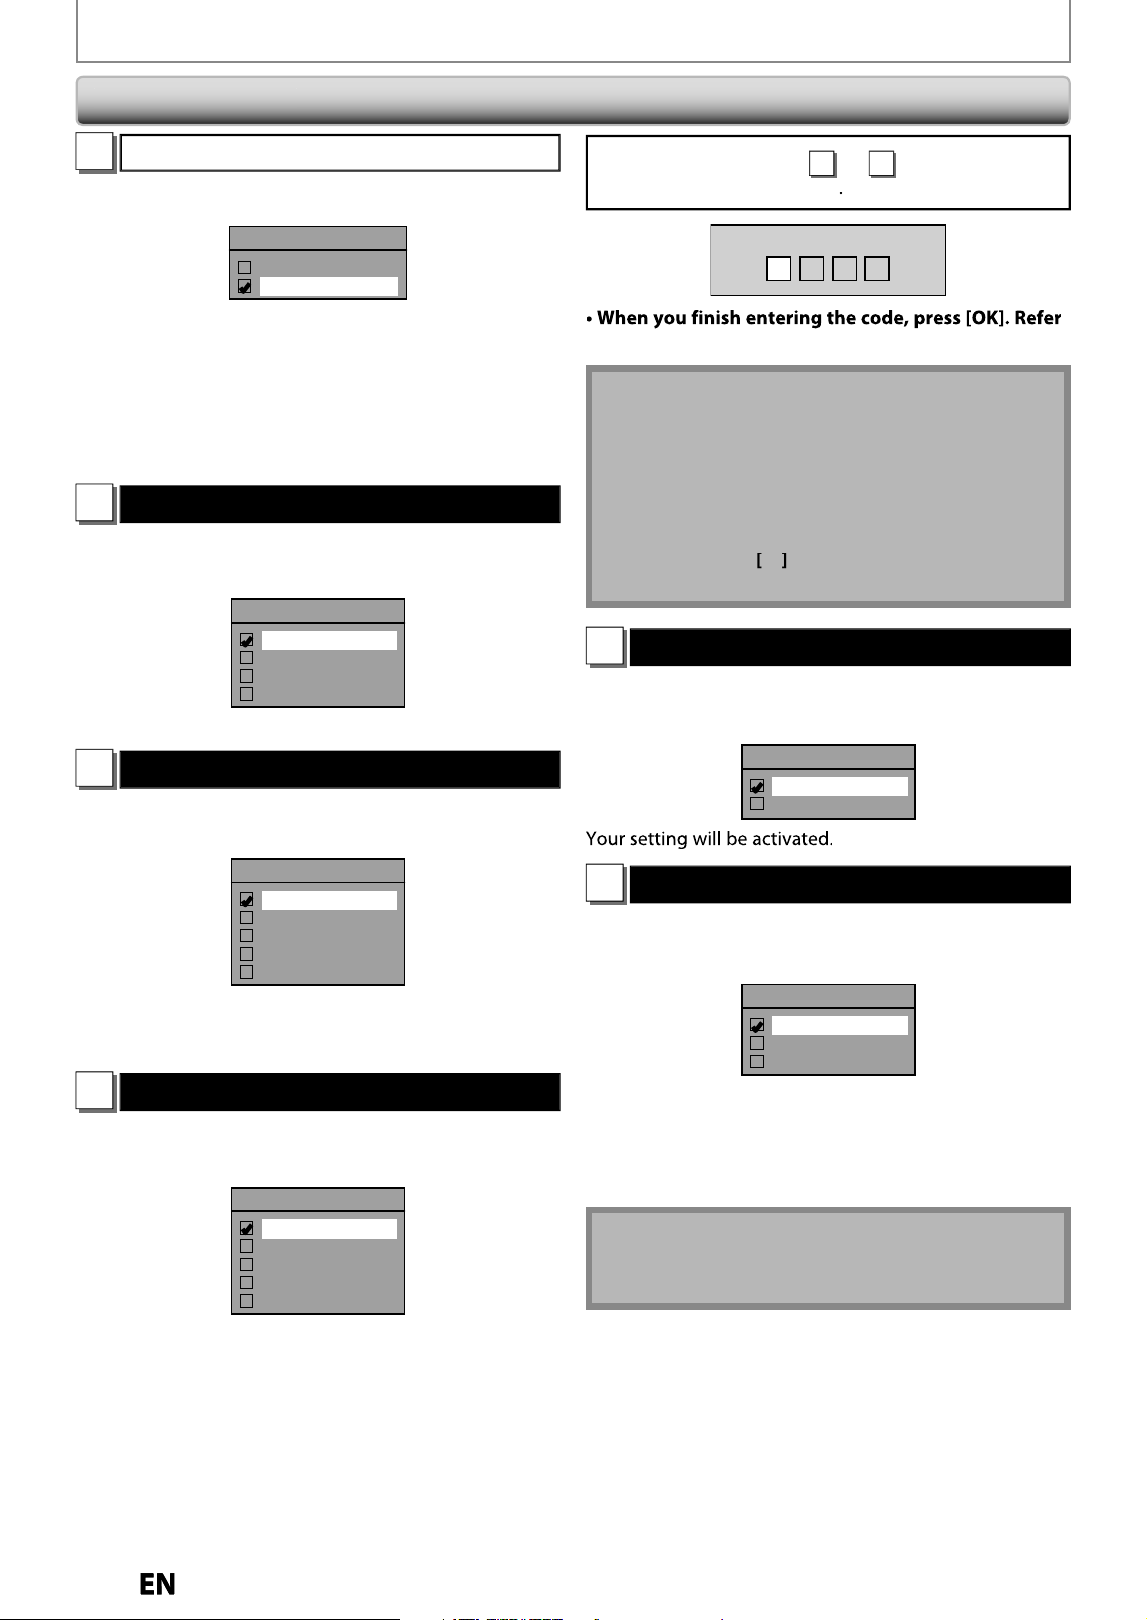
7
6
EN
EN
SETUPS
C
Dolb
y
Digital (De
f
ault : Stream
)
Use
[
K
/
L
] to select a setting, then press [OK]
.
Dolby Digital
PCM
Stream
Your setting wi
ll
b
e activate
d.
P
C
M
:
Converts the Dolb
y
Digital into PCM (2 channel).
When
y
our amplifier/decoder is NO
T
compatible with Dolb
y
Digital, set to “PCM”
.
Stre
a
m
:
Outputs Dolb
y
Digital signals
W
hen
y
our amplifier/decoder is compatible
with Dolb
y
Digital, set to “Stream”
.
3
Disc Menu Language (Default : English)
Set the lan
g
ua
g
e
f
or disc menu
.
Use
[
K
/
L
] to select a settin
g
, then press [OK]
.
Disc Menu Language
English
French
Spanish
Other
Your settin
g
will be activated
.
4
Audio Language (Default : Original)
Set the audio lan
g
ua
g
e
.
Use
[
K
/
L
] to se
l
ect a setting, t
h
en press [OK]
.
Audio Language
Original
English
French
Spanish
Other
Your settin
g
will be activated
.
• When “Ori
g
inal” is selected, the audio lan
g
ua
g
e will be
in the disc’s default lan
g
ua
g
e
.
5
Subtitle Language (Default : OFF)
Set the subtitle lan
g
ua
g
e
.
Use
[
K
/
L
] to select a settin
g
, then press [OK]
.
Subtitle Language
OFF
English
French
Spanish
Other
Your settin
g
will be activated
.
I
f
“Other” is selected
f
or
3
t
o
5
, press 4-
d
i
g
it co
d
e
us
i
n
g
[
t
h
e Num
b
er
b
uttons
]
.
Code Input
----
to the lan
g
ua
g
e code table on pa
g
e 90
.
Note
• On
l
y t
h
e
l
anguages supporte
d
b
y t
h
e
d
isc can
b
e
se
l
ecte
d.
• Audio language setting ma
y
not be available to
so
m
e
d
i
scs.
• You can change or switch o
ff
the subtitles on a DVD
a
l
so
f
r
o
m
t
h
e
d
i
sc
m
e
n
u
i
f
i
t
i
s
a
v
a
il
ab
l
e.
•
P
ress
[
CLEAR
]
or
[
s
]
to erase num
b
ers entere
d
incorrect
l
y
.
6
Angle Icon (Default : ON)
S
et to “ON” to s
h
ow t
h
e ang
l
e icon
d
uring t
h
e p
l
ay
b
ac
k.
Use
[
K
/
L
] to select a setting, then press [OK]
.
Angle Icon
ON
OFF
7
Still Mode (Default : Auto)
S
e
l
ect “Auto” usua
ll
y
.
Use
[
K
/
L
] to se
l
ect a settin
g
, t
h
en press [OK]
.
Still Mode
Auto
Field
Frame
Your settin
g
wi
ll
b
e activate
d.
A
uto
:
Optimum reso
l
ution setting (“Fie
ld
” or
“Frame”) wi
ll
b
e se
l
ecte
d.
Fie
ld
:
Images in t
h
e sti
ll
mo
d
e wi
ll
b
e sta
b
i
l
ize
d
.
F
rame
:
Images in the still mode will be highly de
f
ined
.
N
ote
•
Frame is 1 completed video image made up o
f
2
f
ields (There are 30
f
rames per second o
f
NTSC video)
.
Pl
ay
b
ac
k
(cont’
d
)
E9P8CUDZV427MG9BOMv1.indd76E9P8CUDZV427MG9BOMv1.indd76 2012/03/0113:07:102012/03/0113:07:10
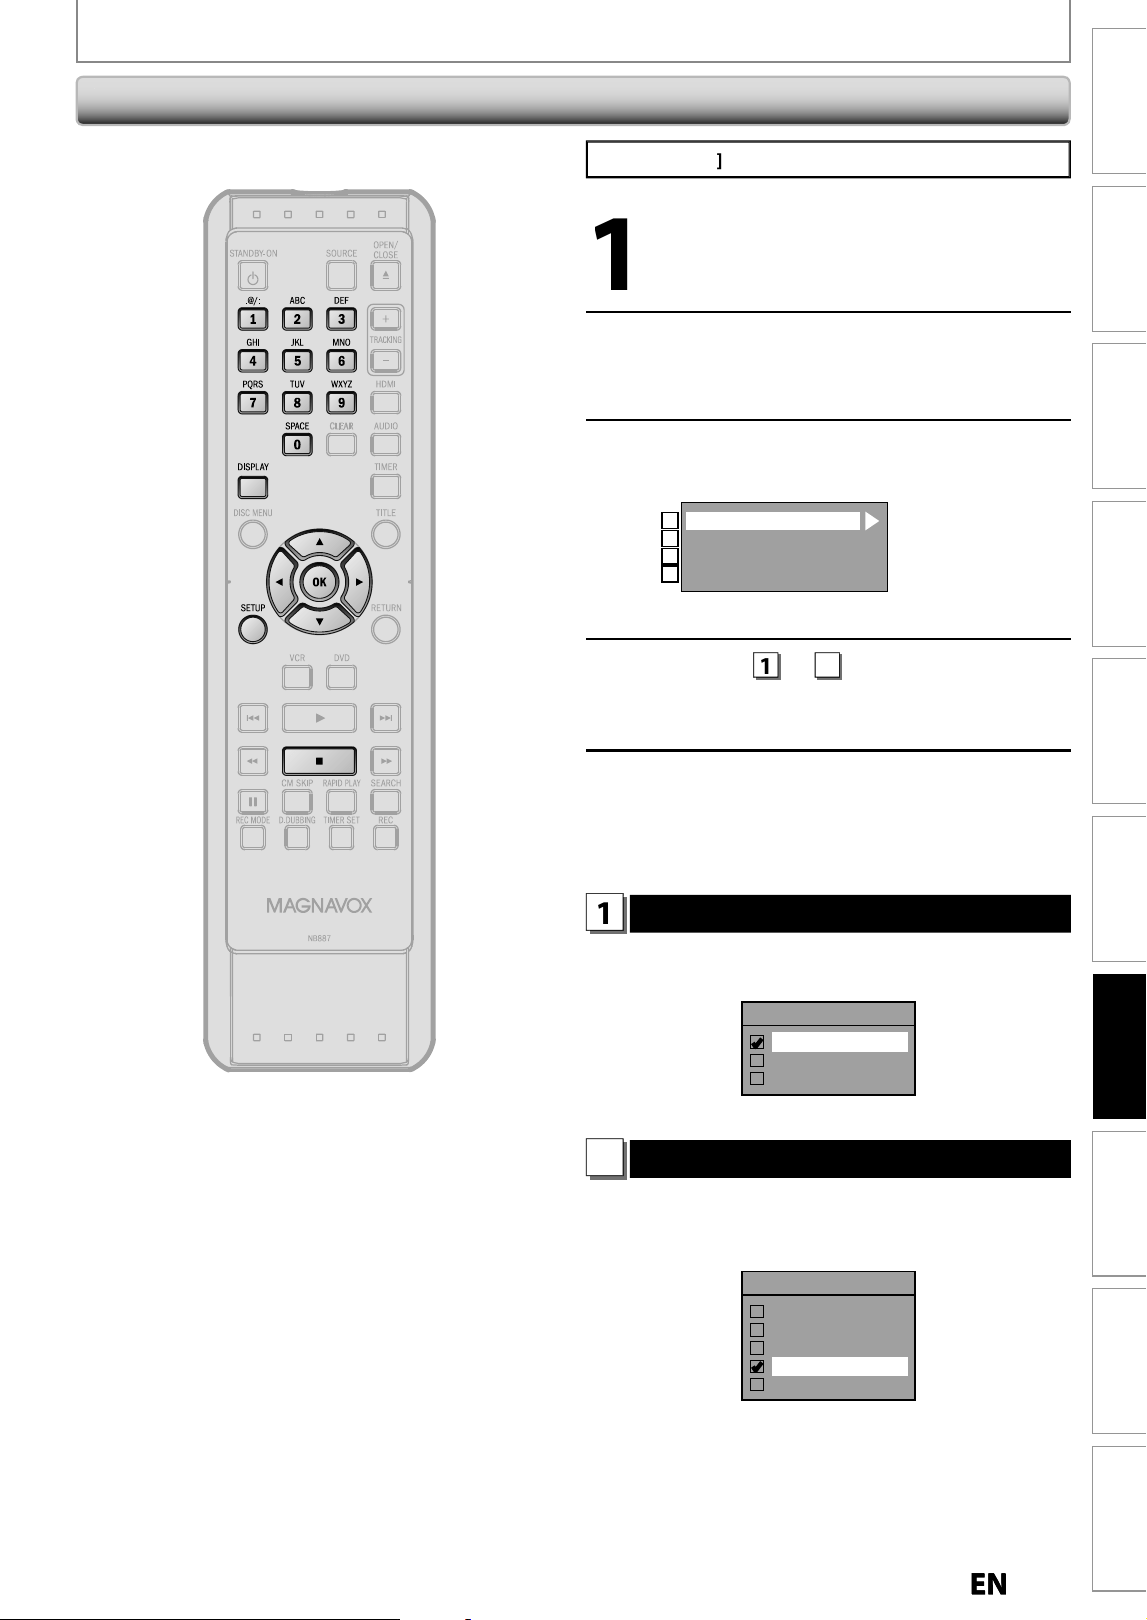
77
EN
EN
Recording Playback Editing
Introduction
Connections Basic Setup
Function Setup
VCR Functions
Others Español
SETUPS
P
r
ess
[
ST
O
P
C
]
if
y
ou are pla
y
ing back a disc
.
1
Press
[
SETUP
]
and use
[
K
/
L
]
to
select “General Settin
g
”, then press
[
OK
].
2
Use
[
K
/
L
] to se
l
ect “Disp
l
ay”, t
h
en
press
[O
K
].
3
Use
[
K
/
L
] to se
l
ect a
d
esire
d
item,
t
h
en press [OK]
.
OSD Language
Screen Saver
FL Dimmer
V-Chip
1
2
3
4
Se
l
ection menu wi
ll
appear
.
4
Refer t
o
1
t
o
4
on pa
g
es 77-79 an
d
s
et the
s
electe
d
item
.
5
When you
f
inish with setting, press
[SETUP] to ex
i
t
.
1
OSD Language (Default : English)
Set the language for the on-screen displa
y.
U
se
[
K
/
L
] to se
l
ect a setting, t
h
en press [OK]
.
OSD Language
English
Français
Español
Your settin
g
will be activated
.
2
Screen Saver (Default : 10 minutes)
Set
t
h
e
t
im
e
to
act
iv
ate
t
h
e
sc
r
ee
n
sa
v
e
r
fu
n
ct
i
o
n
o
n
t
h
e
TV
sc
r
ee
n
.
U
se
[
K
/
L
] to select a settin
g
, then press [OK]
.
Screen Saver
OFF
1 minute
5 minutes
10 minutes
15 minutes
Your settin
g
will be activated
.
D
isp
l
a
y
E9P8CUDZV427MG9BOMv1.indd77E9P8CUDZV427MG9BOMv1.indd77 2012/03/0113:07:112012/03/0113:07:11
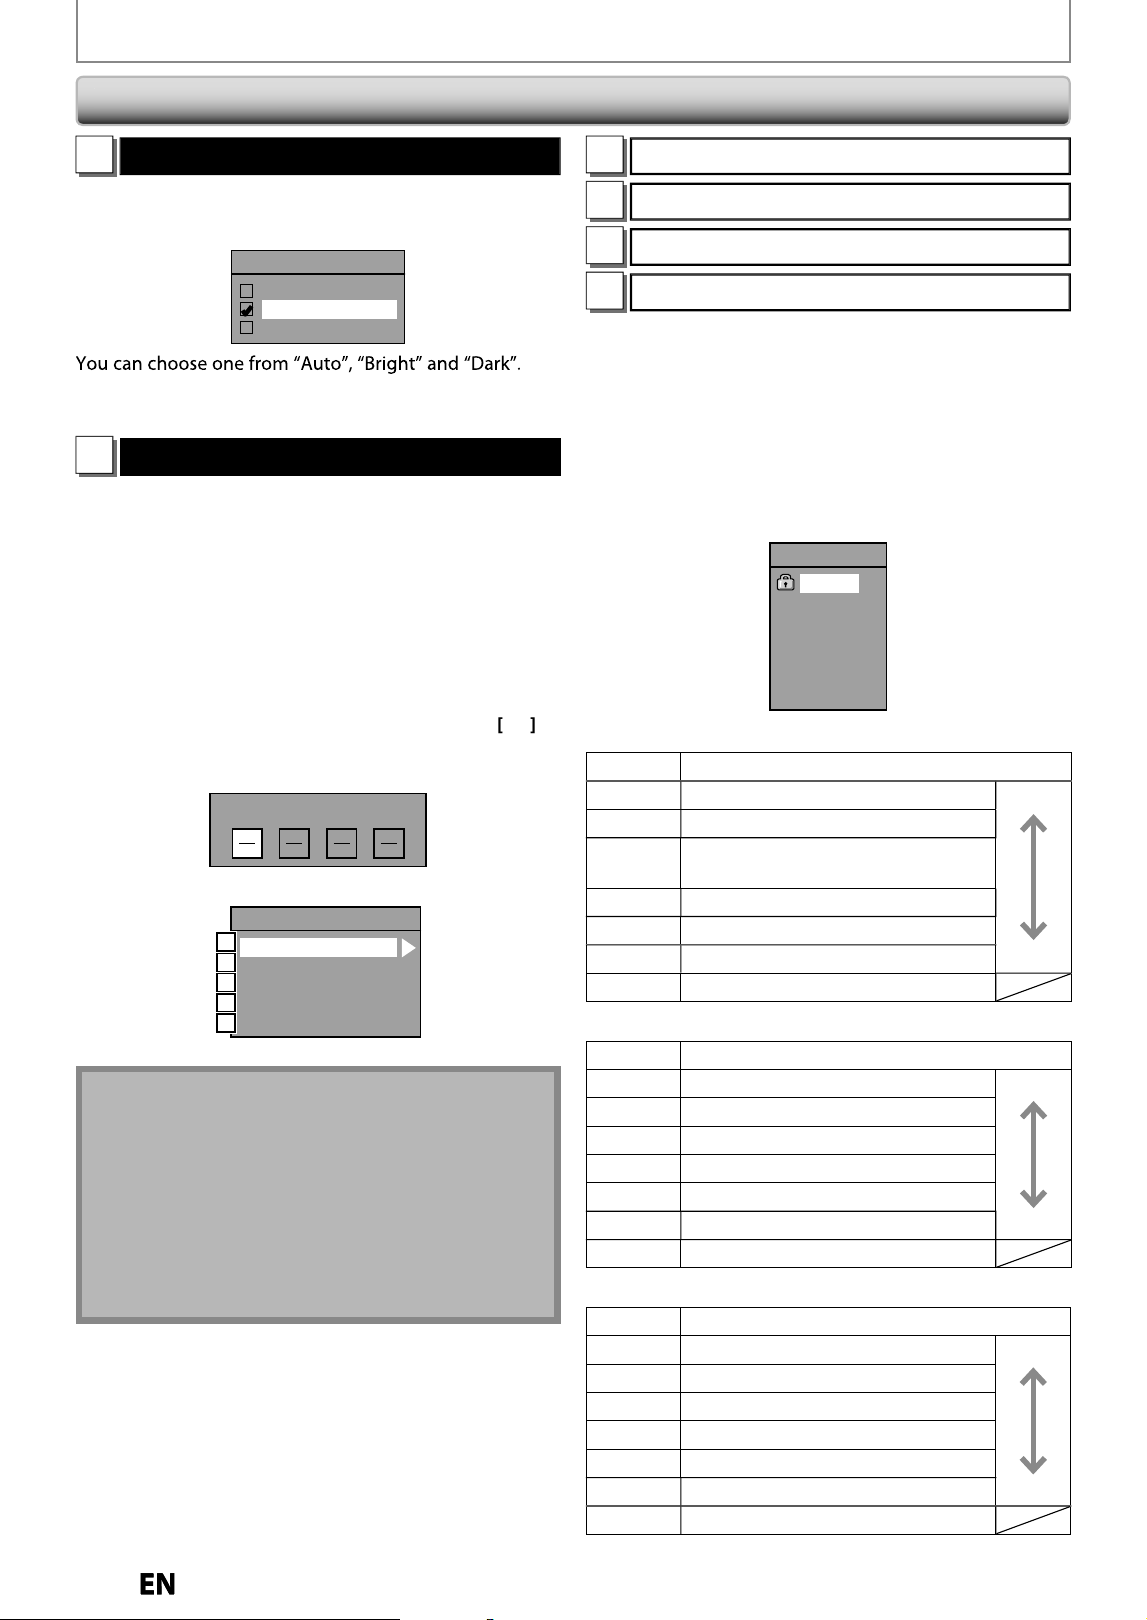
7
8
EN
EN
SETUPS
3
FL Dimmer (Default: Bright)
S
et the
f
ront panel displa
y
brightness
.
U
se
[
K
/
L
] to se
l
ect a settin
g
, t
h
en press [OK]
.
FL Dimmer
Auto
Bright
Dark
If
“Auto” is selected, the display gets dark when the
power is in t
h
e stan
db
y mo
d
e
.
4
V-Chip
Wit
h
t
h
e V-c
h
ip system in t
h
is unit, you can set t
h
e
viewing limitation
f
or the analog/digital TV programs
received
f
rom the external tuner or recorded on DVDs to
prevent your children
f
rom watching inappropriate
programs. I
f
the unit detects a blocked program, a
restriction message appears an
d
you are not a
ll
owe
d
to
view or recor
d
t
h
e program
.
1)
Use [the Number buttons] to enter the access
p
assword
.
If
y
ou have not set the password,
f
irst, use
[
t
h
e Num
b
er
b
uttons
]
to set t
h
e access passwor
d
, t
h
en press
[
O
K
]
.
Th
e num
b
er
y
ou entere
d
wi
ll
b
e store
d
as t
h
e access
passwor
d
.
Password Input
2)
Use
[
K
/
L
] to select a desired item, then
p
ress [OK]
.
V-Chip
MPAA Rating
TV Rating
Canadian English Rating
Canadian French Rating
Change Password
A
B
C
D
E
A
MP
AA
R
atin
g
B
T
V
R
atin
g
C
C
anadian En
g
lish Ratin
g
D
C
ana
d
ian Frenc
h
Ratin
g
You can set the viewin
g
limitation accordin
g
to MPAA
ratin
g
(
US movie ratin
g
s
)
, TV Ratin
g
(
US TV pro
g
ram
ratin
g
s), Cana
d
ian En
gl
is
h
Ratin
g
(Cana
d
ian En
gl
is
h
l
an
g
ua
g
e Ratin
g
s) , Canadian French Ratin
g
(Canadian
F
rench lan
g
ua
g
e Ratin
g
s)
.
1)
Use
[
K
/
L
] to se
l
ect t
h
e
d
esire
d
rating, t
h
en press
[OK] repeate
dl
y to switc
h
b
etween view an
d
bl
oc
k
.
W
h
en it is
bl
oc
k
e
d
a
k
ey icon wi
ll
appear
.
e.g.
)
MPAA ratin
g
MPAA Rating
X
NC-17
R
PG-13
PG
G
NR
[MPAA Ratin
g]
R
at
i
ng
C
ategor
y
X
M
ature audience onl
y
hi
g
her
N
C
-1
7
No
o
n
e
u
n
de
r 17
ad
mi
tted
R
R
estricte
d
; un
d
er 17 requires
a
ccompanying parent or a
d
u
l
t guar
d
ian
PG-1
3
U
n
su
i
tab
l
e
f
o
r
c
hil
d
r
e
n
u
n
de
r 1
3
P
G
P
arental
g
uidance su
gg
ested
G
Ge
n
e
r
a
l
aud
i
e
n
ce
l
o
we
r
NR
N
o ratin
g
[TV Ratin
g]
R
at
i
ng
C
ategor
y
TV
-
MA
M
ature au
d
ience on
ly
h
ig
h
er
TV
-1
4
U
n
su
i
tab
l
e
fo
r
c
hil
d
r
e
n
u
n
de
r 14
TV-P
G
P
arenta
l
g
ui
d
ance su
gg
este
d
TV-
G
Ge
n
e
r
a
l
aud
i
e
n
ce
TV
-
Y7
App
ro
p
riate for all children 7 and older
TV
-
Y
App
ro
p
riate for all children
l
o
we
r
N
o
n
e
N
o ratin
g
[Canadian En
g
lish Ratin
g]
R
at
i
ng
C
ategor
y
1
8+
Ad
u
l
t au
d
ience on
l
y
h
ig
h
er
14
+
U
nsuitable
f
or ages under 1
4
P
G
P
arental
g
uidance su
gg
ested
G
Ge
n
e
r
a
l
aud
i
e
n
ce
C8+
Fo
r
c
hil
d
r
e
n
o
v
e
r
8
C
Fo
r
a
ll
c
hil
d
r
e
n
l
o
wer
E
E
xempt pro
g
ram
D
isp
l
ay (cont’
d
)
N
ote
• When
y
ou record a TV program blocked b
y
the
v-c
h
ip settin
g
s on t
h
e cassette tape, t
h
e au
d
io/vi
d
eo
si
g
nal of the blocked part cannot be recorded
properl
y
. No audio/video signal will be output when
p
l
a
y
ing
b
ac
k
t
h
at part
.
• W
h
en you press
[
DISPLAY
]
w
h
i
l
e p
l
aying
b
ac
k
t
h
e
bl
oc
k
e
d
part on t
h
e cassette tape, t
h
e counter
d
isp
l
ay wi
ll
not
b
e s
h
own proper
l
y. T
h
is is not a
mal
f
unction
.
E9P8CUDZV427MG9BOMv1.indd78E9P8CUDZV427MG9BOMv1.indd78 2012/03/0113:07:132012/03/0113:07:13
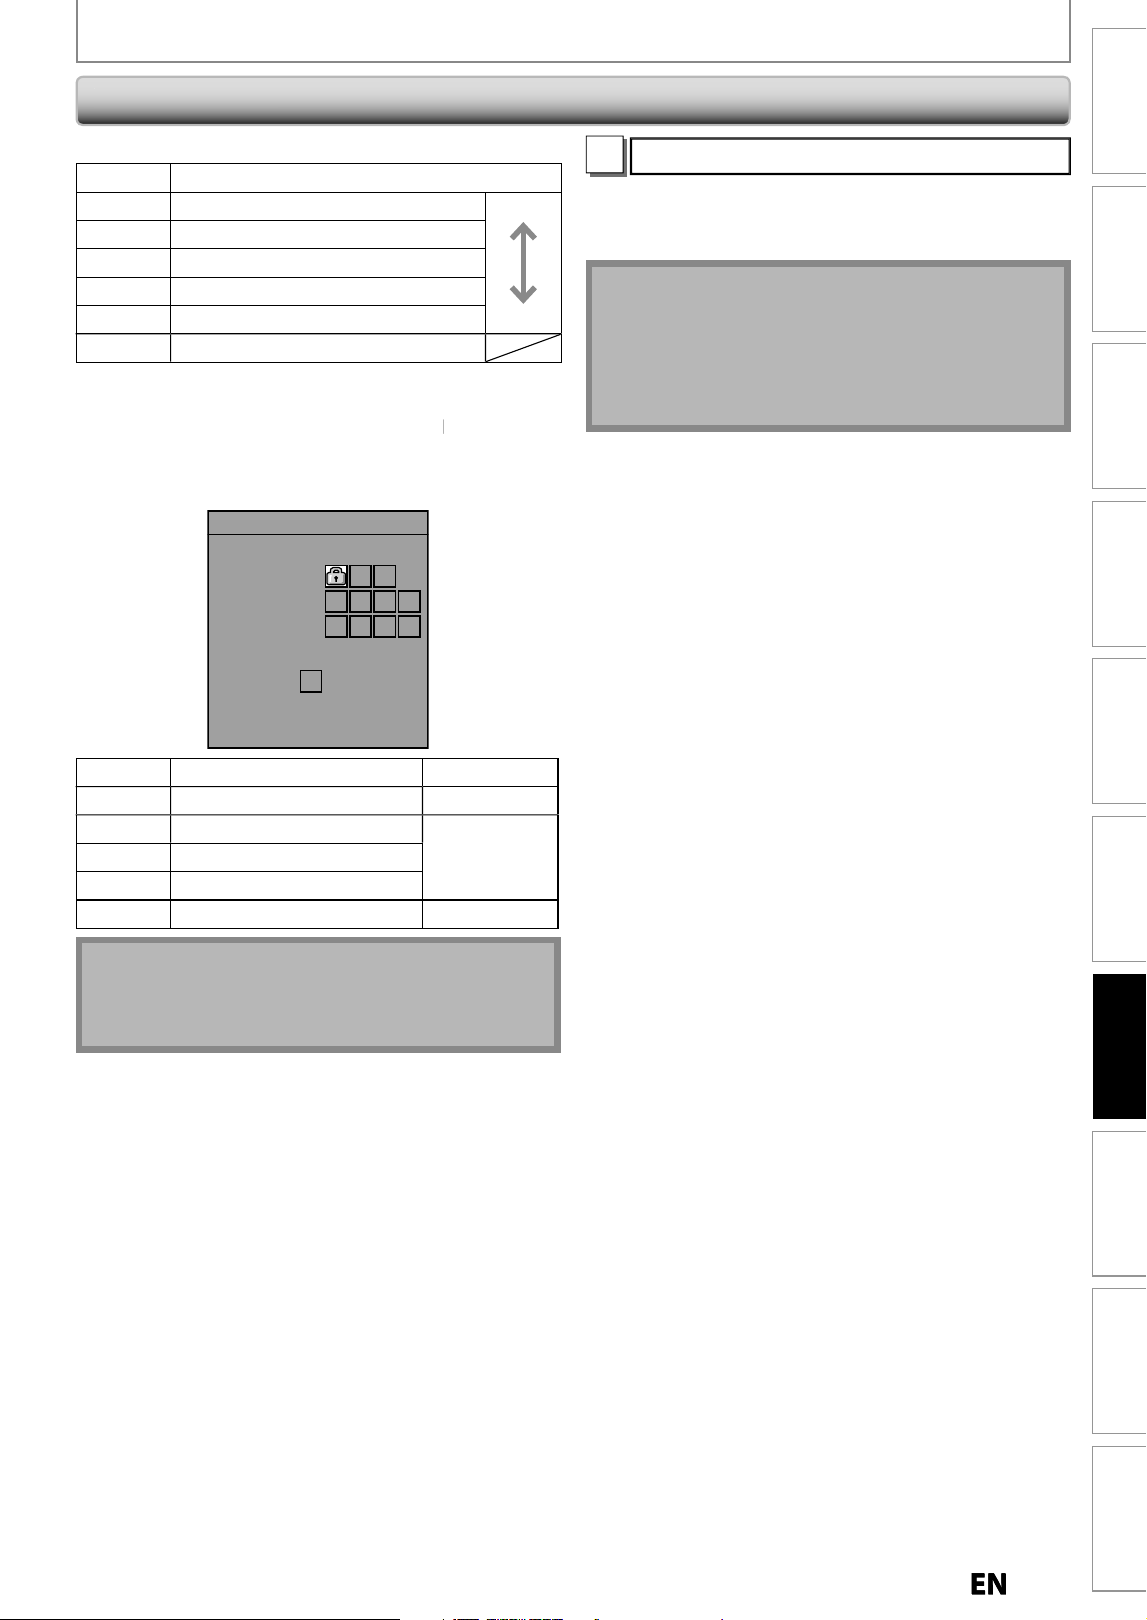
79
EN
EN
Recording Playback Editing
Introduction
Connections Basic Setup
Function Setup
VCR Functions
Others Español
SETUPS
D
isp
l
a
y
(cont’
d
)
[Cana
d
ian Frenc
h
Rating
]
Rat
i
n
g
C
ategor
y
1
8
a
n
s
+ A
d
u
l
t au
d
ience on
ly
h
i
gh
e
r
1
6
a
n
s
+
U
nsuitable for a
g
es under 16
1
3
a
n
s
+
U
nsuitable for a
g
es under 13
8
a
n
s
+
U
nsuitable for a
g
es under 8
G
Ge
n
e
r
a
l
aud
i
e
n
ce
l
o
we
r
E
E
xempt progra
m
As for TV Rating’s TV-MA, TV-14, TV-PG, or TV-Y7,
y
ou
can further set the sub ratin
g
s to block specific
elements of pro
g
rammin
g
. Press
[
K
/
L
/
{
/
{
B
]
to select
the desired ratin
g
or sub ratin
g
, then press [OK]
r
epeatedl
y
to switch between view and block. Sub
r
atin
g
status will appear on the side of the main ratin
g.
TV Rating
TV-MA
TV-14
TV-PG
TV-G
TV-Y7
TV-Y
None
FV V S L D
Sub Ratin
g
Categor
y
R
atin
g
FV
F
antasy Vio
l
enc
e
TV
-
Y7
V
Vio
l
enc
e
T
V-P
G
TV
-1
4
TV
-
MA
S
Sexua
l
Situatio
n
L
C
oarse Languag
e
D
Su
gg
estive Dia
l
o
g
u
e
T
V-P
G
, TV-1
4
N
ote
• C
h
anging t
h
e main rating to
bl
oc
k
or view
automaticall
y
changes all its sub ratings to the same
(bl
oc
k
or view
).
E
Ch
ange Passwor
d
Ch
an
g
e t
h
e current passwor
d.
U
se [the Number Buttons] to enter new access
p
asswor
d.
N
ote
• When you
f
orget the access password at step 1),
enter 4737 us
i
ng [t
h
e Num
b
er
b
uttons
]
in
the
passwor
d
input win
d
ow. Passwor
d
wi
ll
b
e c
l
eare
d.
• Depending on the type o
f
rating system, you may set
t
h
e
l
eve
l
s in
d
ivi
d
ua
ll
y.
E9P8CUDZV427MG9BOMv1.indd79E9P8CUDZV427MG9BOMv1.indd79 2012/03/0113:07:142012/03/0113:07:14
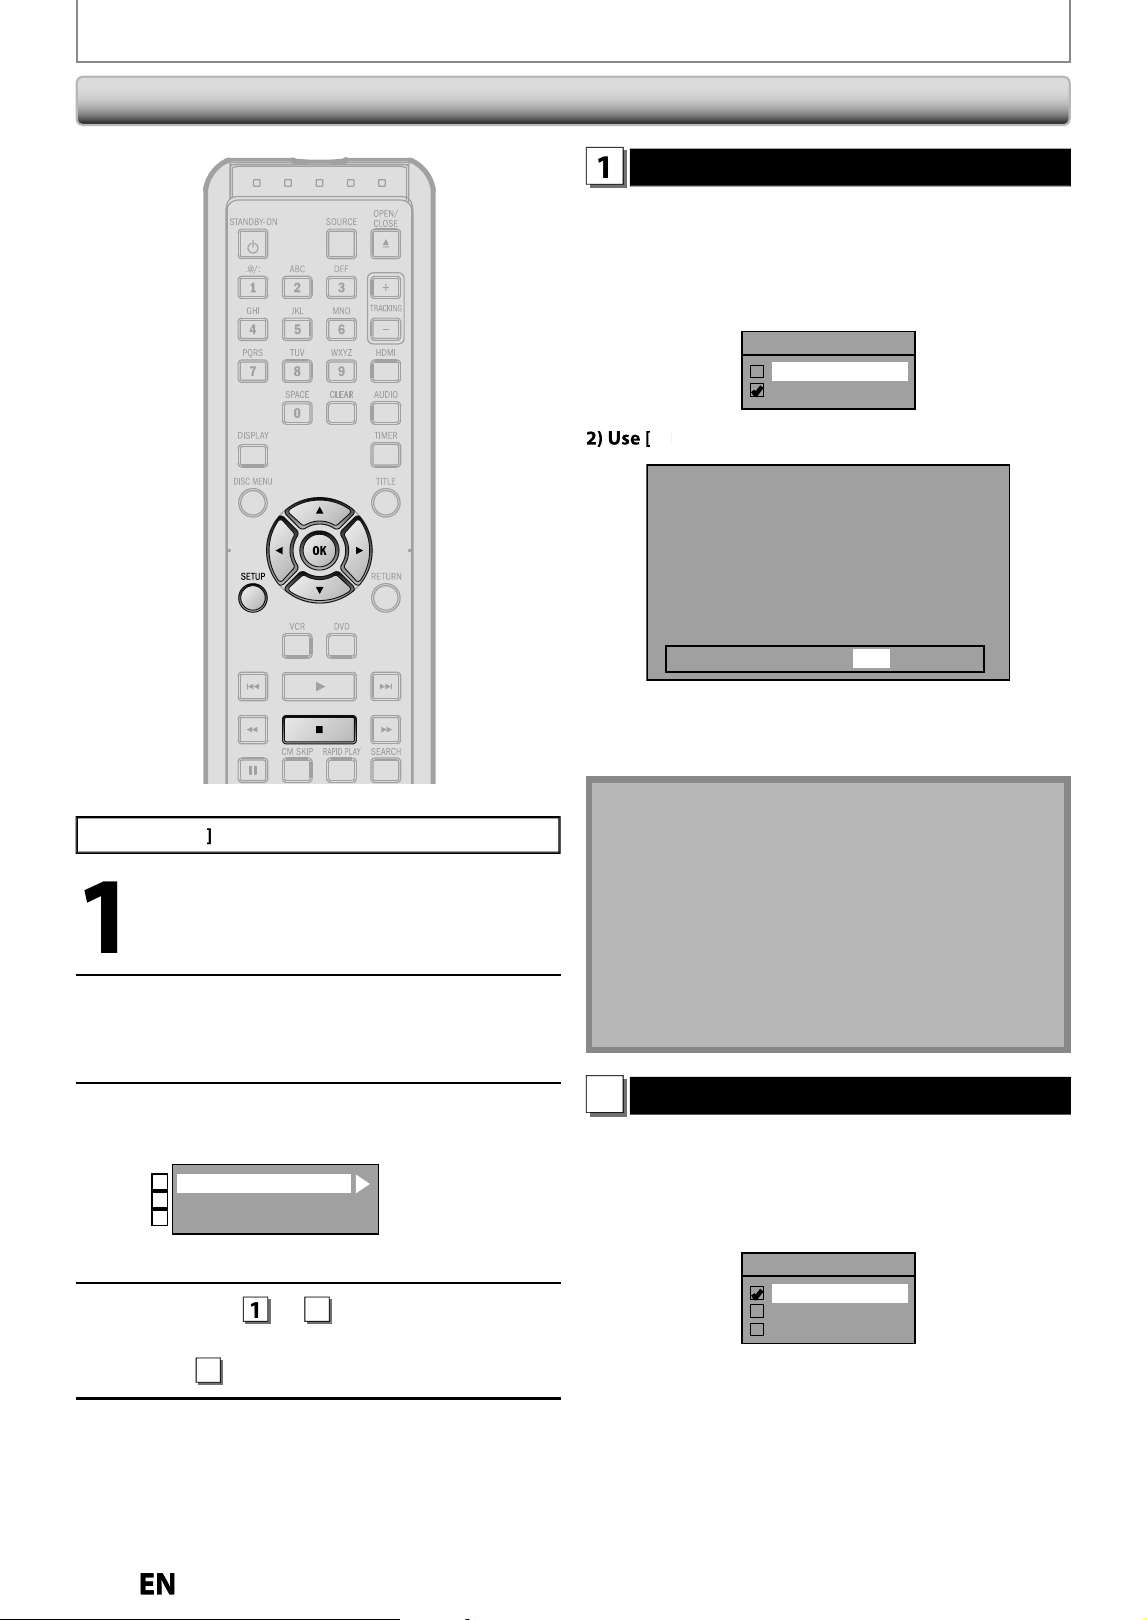
80
EN
EN
SETUPS
P
ress
[
ST
O
P
C
]
i
f
you are playing back a disc.
1
Press [SETUP] an
d
use
[
K
/
L
]
to
se
l
ect “Genera
l
Setting”, t
h
en press
[O
K
].
2
Use
[
K
/
L
] to select “Video”
,
then
p
ress [OK]
.
3
Use
[
K
/
L
] to se
l
ect a
d
esire
d
item,
th
en press [OK]
.
Progressive Scan
TV Aspect
Video Input
1
2
3
Submenu will a
pp
ear
.
4
Re
f
er to
1
t
o
2
on t
h
is page an
d
set
t
h
e se
l
ecte
d
item
.
•
F
or
3
re
f
er to page 39
.
5
When
y
ou finish with setting, press
[
SETUP
]
to exit
.
Vi
d
e
o
1
Progressive Scan (Default : OFF)
Th
is unit is compati
bl
e wit
h
t
h
e progressive scan s
y
stem.
T
he
f
eature provides you with the higher de
f
inition
i
mages t
h
an t
h
e tra
d
itiona
l
output system
d
oes. To uti
l
ize
t
his
f
eature, you must set progressive scan mode to “ON”
.
1)
Use
[
K
/
L
] to select “ON“, then
p
ress [OK]
.
Progressive Scan
ON
OFF
{
/
{
B
] to select “Yes“, then
p
ress [OK]
.
Activating progressive scan:
Check your TV has progressive scan
and connect with component video cable.
NOTE :
Activate? Yes No
If there is no picture or picture is
distorted after selecting “Yes”,
Wait about 15 seconds for auto recovery.
3)
Use
[
K
/
L
] to select “Yes“ within 15 seconds
,
then
p
ress [OK]
.
Your settin
g
will be activated
.
N
ote
• I
f
your TV is compatible with progressive scan (525p
/
480p), you are recommen
d
e
d
to use t
h
e HDMI or
component vi
d
eo ca
bl
e (commercia
lly
avai
l
a
bl
e) to
connect this unit to the TV. (Re
f
er to pages 16-17.) I
f
not, use t
h
e RCA vi
d
eo ca
bl
e an
d
set t
h
e progressive
scan to “OFF” or press an
d
h
o
ld
[
SETUP
]
f
or more
t
h
an 3 secon
d
s
d
uring DVD p
l
ay
b
ac
k
.
• When selecting “No” or not pressing an
y
buttons on
the unit or remote control within 15 seconds at ste
p
3,
pro
g
ressive scan remains to be “OFF” (interlace scan).
2
TV Aspect (Default: 4:3 Letter Box)
You can select the TV as
p
ect ratio to match the formats o
f
w
hat
y
ou are pla
y
ing back or watching digital T
V
broadcasting with the unit and
y
our TV screen (4:3
s
tan
d
ar
d
or 16:9 wi
d
escreen TV
)
.
Use
[
K
/
L
] to select a settin
g
, then press [OK]
.
TV Aspect
4:3 Letter Box
4:3 Pan & Scan
16:9 Wide
I
f
you have a standard TV
:
Se
l
ect “4:3 Letter Box”, so t
h
at
bl
ac
k
b
ars appear on t
h
e
top and bottom o
f
the TV screen when playing back a
wide-screen picture. Select “4:3 Pan & Scan”
f
or a
f
ull
h
eig
h
t picture wit
h
b
ot
h
si
d
es trimme
d
w
h
en p
l
aying
b
ac
k
wi
d
e-screen picture
.
I
f
y
ou have a widescreen TV
:
Se
l
ect “16:9 Wi
d
e”
.
E9P8CUDZV427MG9BOMv1.indd80E9P8CUDZV427MG9BOMv1.indd80 2012/03/0113:07:142012/03/0113:07:14
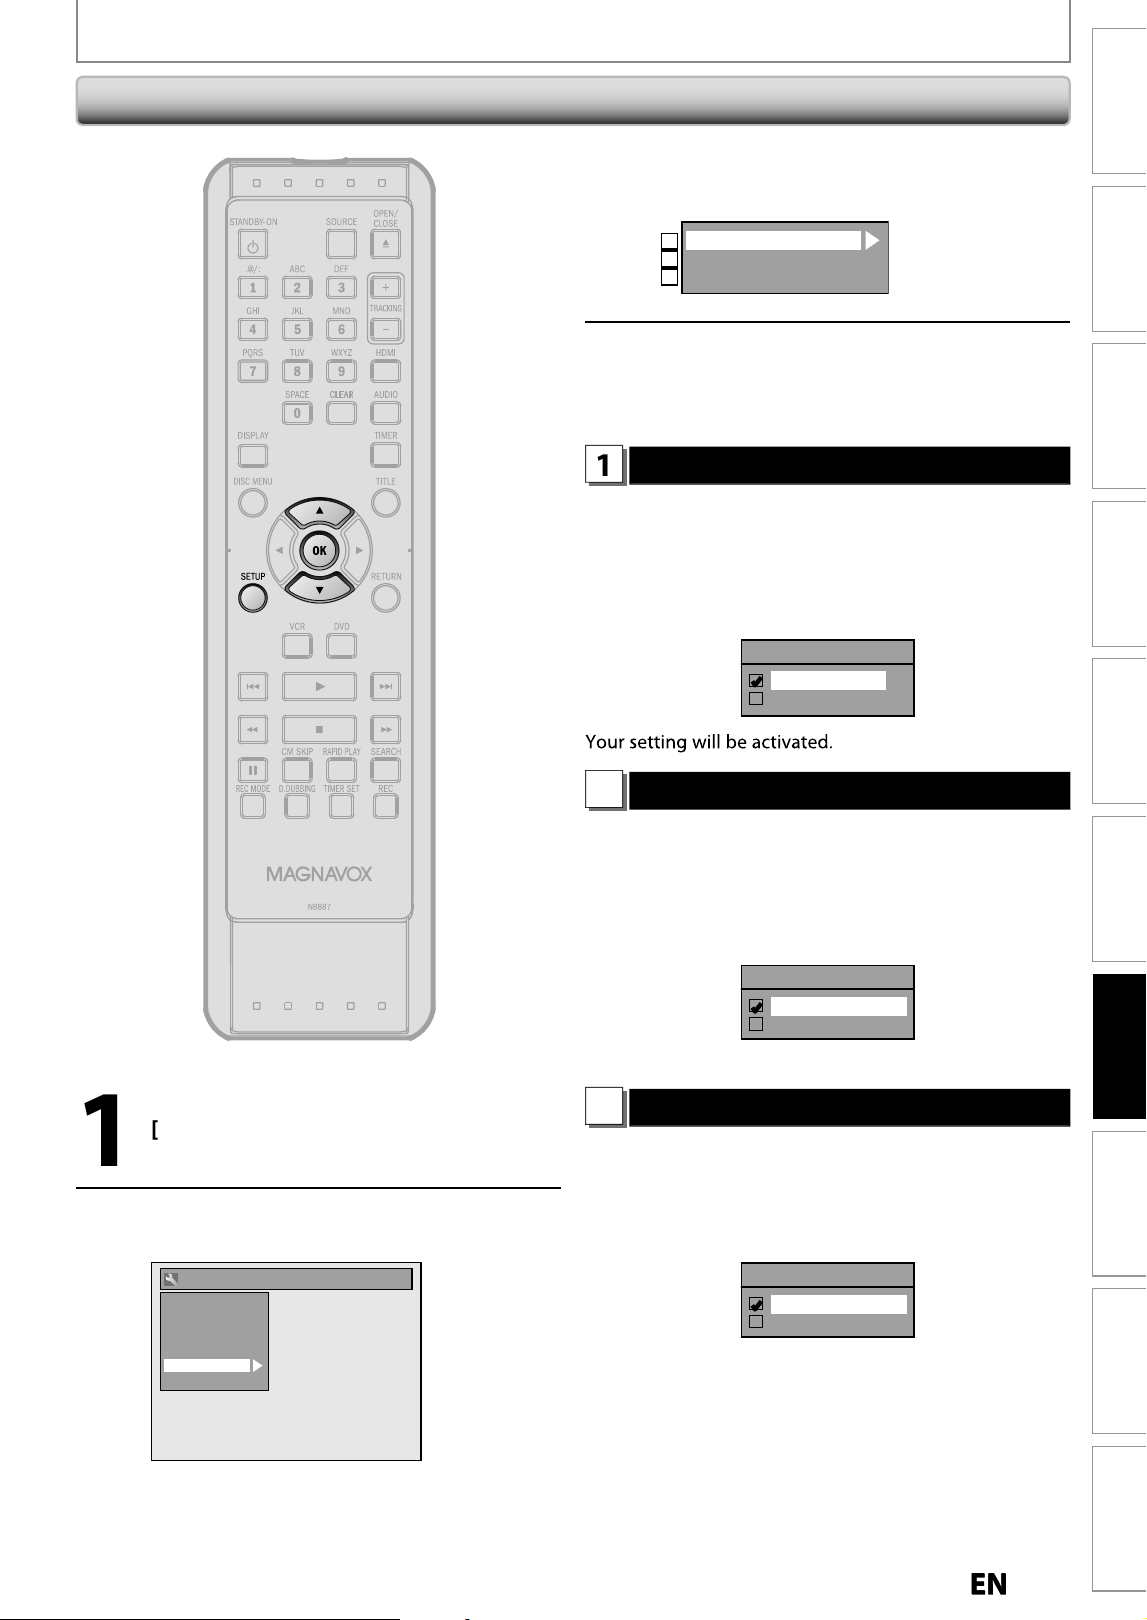
8
1
EN
EN
Recording Playback Editing
Introduction
Connections Basic Setup
Function Setup
VCR Functions
Others Español
SETUPS
1
Press [SETUP] in sto
p
mode and use
[
K
/
L
] to select “General Settin
g
”,
then
p
ress [OK]
.
2
Use
[
K
/
L
] to se
l
ect “HDMI”, t
h
en
press
[O
K
].
General Setting
Playback
Display
Video
Recording
Clock
HDMI
Reset All
•
You cannot se
l
ect HDMI w
h
en an HDMI ca
bl
e is
not connecte
d
an
d
t
h
e items are s
h
own in grey
co
l
or
.
H
D
MI
3
Use
[
K
/
L
] to se
l
ect a
d
esire
d
item,
t
h
en press [OK].
Format
HDMI Audio
RGB Range
1
2
3
4
When
y
ou
f
inish with the setting,
p
ress [SETUP] to ex
i
t
.
1
Format (Default : RGB)
You can select the color s
p
ace for HDMI out
p
ut.
Set the appropriate color space
f
or
y
our displa
y
device
.
Use
[
K
/
L
] to select a settin
g
, then press [OK]
.
• When the connected device is not com
p
atible with the
Y
/Cb/Cr, HDMI signal is output as RGB regardless of the
s
ettin
g.
Format
RGB
YCbCr
2
HDMI Audio (Default : ON)
If
y
ou do not want to output the audio through HDMI
(when
y
ou digitall
y
output the audio through the
COAXIAL DIGITAL AUDIO OUT jack to
y
our audio s
y
stem,
etc.),
y
ou can set the HDMI audio output off.
Use
[
K
/
L
] to se
l
ect a setting, t
h
en press [OK]
.
• Set to “OFF” when the HDMI sound is not out
p
ut
.
HDMI Audio
ON
OFF
Your setting wi
ll
b
e activate
d.
3
RGB Range (Default : Normal)
You can adjust the RGB range to make the dark areas o
f
t
h
e HDMI images
b
rig
h
ter
.
Use
[
K
/
L
] to se
l
ect a settin
g
, t
h
en press [OK]
.
• Select “Enhanced“ i
f
the black-white contrast is not clear
.
• This setting is effective onl
y
for HDMI RGB output
.
RGB Range
Normal
Enhanced
Your setting wi
ll
b
e activate
d.
E9P8CUDZV427MG9BOMv1.indd81E9P8CUDZV427MG9BOMv1.indd81 2012/03/0113:07:152012/03/0113:07:15
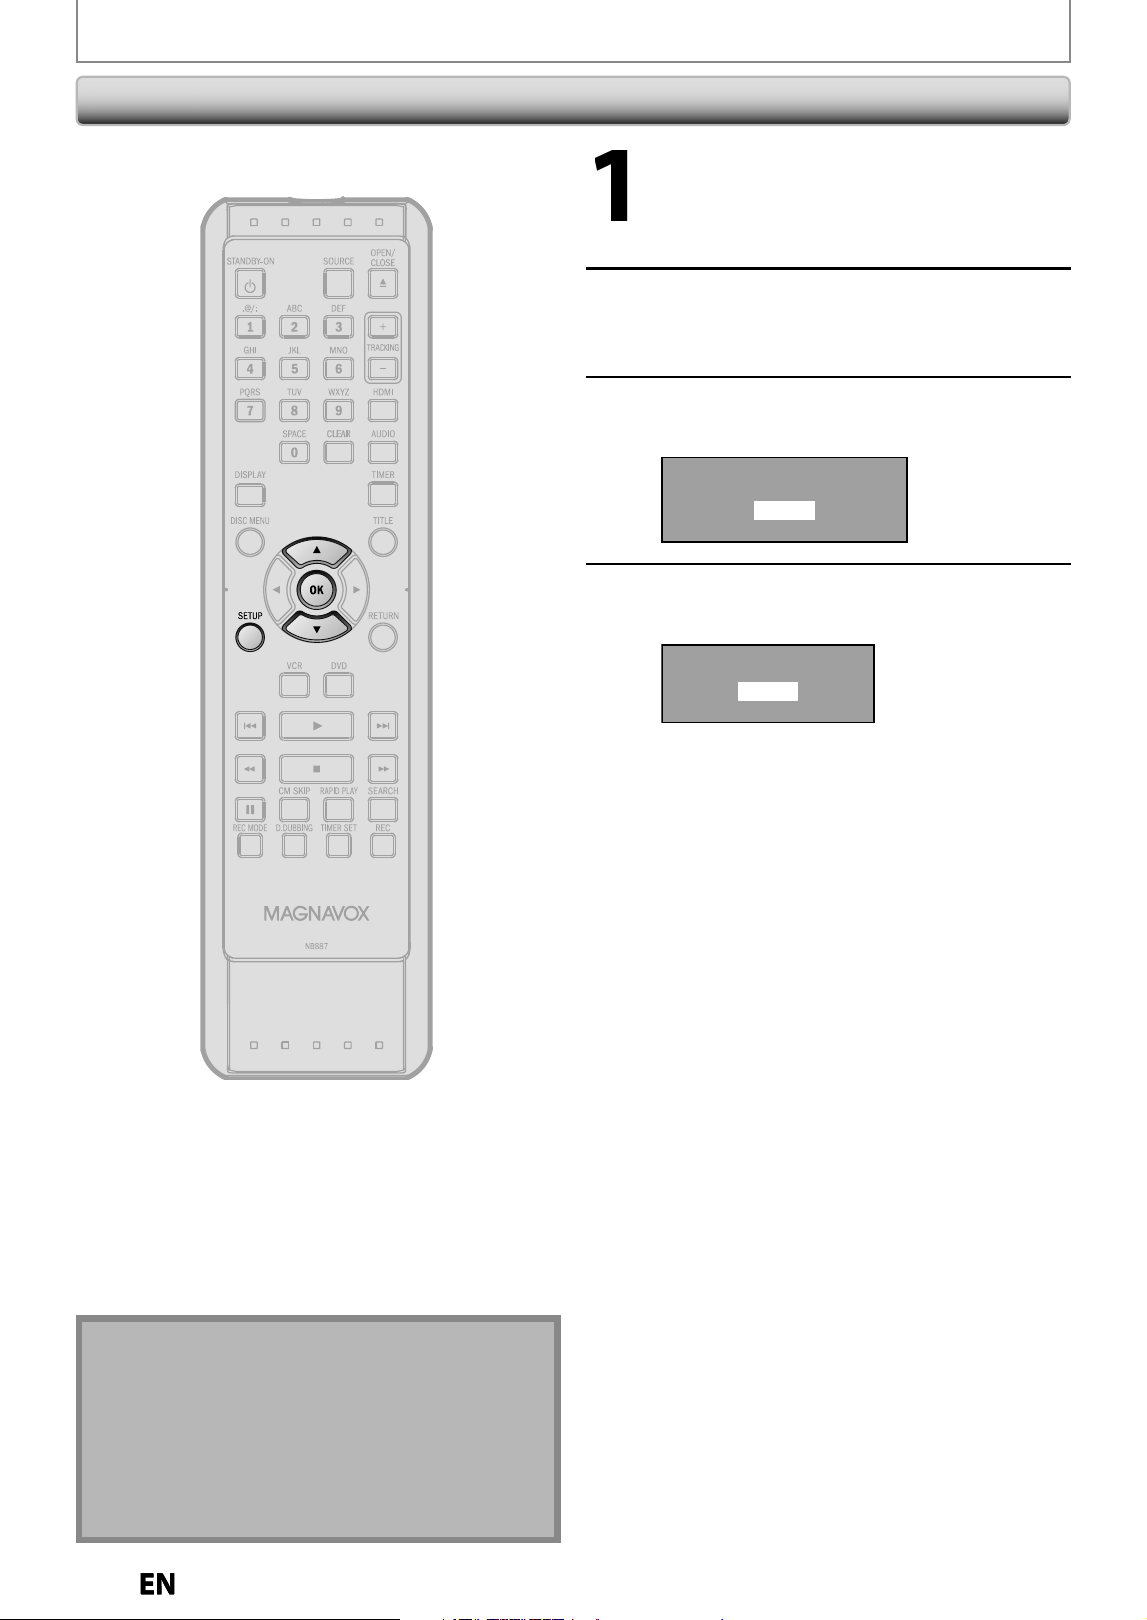
82
EN
EN
Reset the settin
g
to de
f
ault
.
1
Press [SETUP] an
d
use [
K
/
L
]
to
se
l
ect “Genera
l
Setting”, t
h
en press
[O
K
].
“Genera
l
Setting” menu wi
ll
appear
.
2
Use
[
K
/
L
] to select “Reset All”
,
then
p
ress [OK]
.
3
Select “Yes” usin
g
[
K
/
L
]
, then
p
ress
[
OK
].
Reset to factory default?
Yes
No
4
Select “Yes” a
g
ain usin
g
[
K
/
L
]
,
then
p
ress [OK]
.
Are you sure?
Yes
No
Your settin
g
in recordin
g
will be initialized
.
R
e
s
et A
ll
SETUPS
Note
• T
h
e settings
l
iste
d
b
e
l
ow wi
ll
remain unc
h
ange
d
even a
f
ter resetting to the
f
actory de
f
ault
.
–
OSD lan
g
ua
g
e settin
g
–
C
l
oc
k
settin
g
–
Parenta
l
l
oc
k
setting
–
V-chip settin
g
–
Timer pro
g
rammin
g
informatio
n
E9P8CUDZV427MG9BOMv1.indd82E9P8CUDZV427MG9BOMv1.indd82 2012/03/0113:07:172012/03/0113:07:17
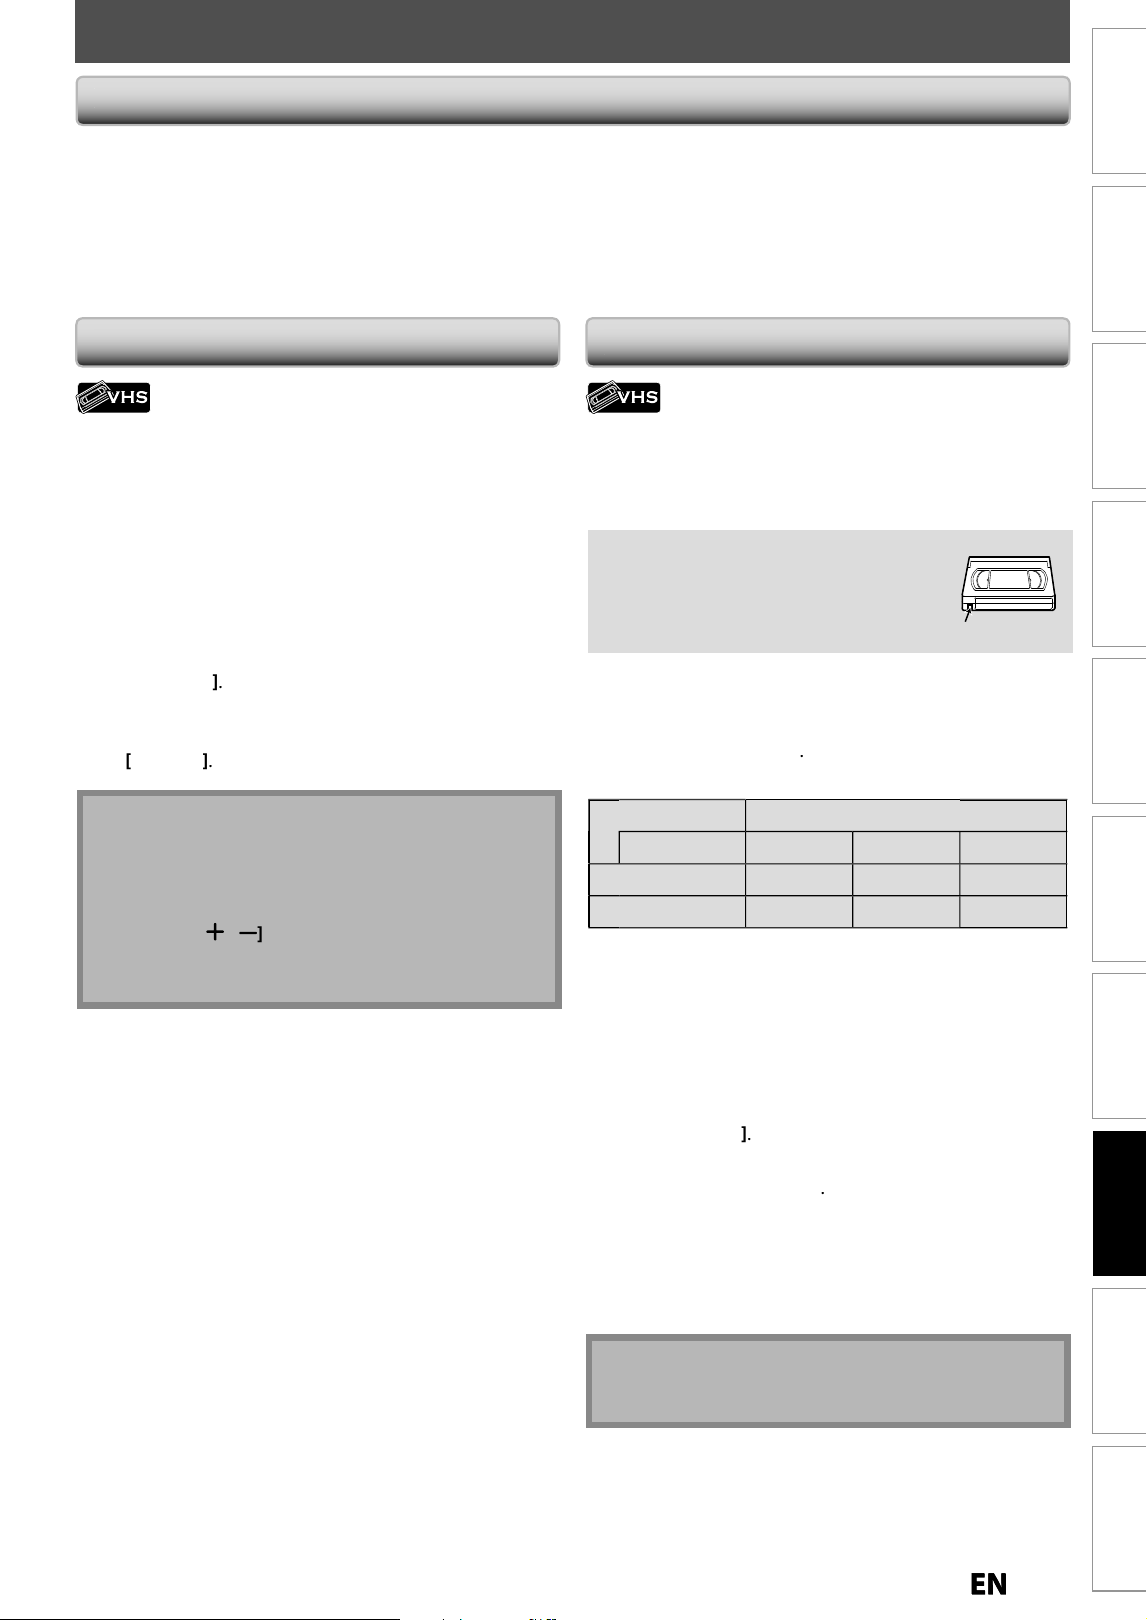
83
EN
EN
Recording Playback Editing
Introduction
Connections Basic Setup Function Setup
VCR Functions
Others Español
VCR FUNCTIONS
P
l
a
yb
ac
k
Recor
d
in
g
P
ress [VCR]
f
irst
.
1) Insert a prerecorded tape (re
f
er to page 24 on how
to
i
nsert a cassette tape).
2)
Press [PLAY
B
]
to start p
l
ay
b
ac
k
.
3
)
Press [STOP
C
]
to stop p
l
ay
b
ac
k
.
N
ot
e
• When a cassette ta
p
e without erase-
p
rotection tab is
i
nserted, the unit will start pla
y
back automaticall
y.
• Tracking will be automaticall
y
adjusted upon
p
l
ay
b
ac
k
. To a
d
just t
h
e trac
k
ing manua
ll
y, press
[
TRACKING
/
]
o
n
the
r
e
m
ote
co
n
t
r
ol.
• S-VHS cassette tape is not avai
l
a
bl
e on t
h
is unit
.
• Pla
y
back will stop when
y
ou change the output mode
.
P
ress [VCR]
f
irst
.
1
) Insert a recor
d
a
bl
e tape wit
h
an erase-protection
t
a
b
intact
.
Acci
d
enta
l
erasure preventio
n
To prevent acci
d
enta
l
recor
d
ing on a
recor
d
e
d
cassette tape, remove its erase
-
protection ta
b
. To recor
d
on it
l
ater, cover
t
h
e
h
o
l
e wit
h
ce
ll
op
h
ane tape
.
erase-protection tab
2
) Se
l
ect t
h
e recor
d
ing mo
d
e using [REC MODE]
.
•
The desired recordin
g
mode is selected in SP
(standard pla
y
) or SLP (super long pla
y
) mode b
y
pressin
g
[
REC MODE
]
.
R
ecor
d
ing mo
d
e
:
Ta
p
e s
p
ee
d
R
ecording / pla
y
back time
Ty
pe of tap
e
T60
T
12
0
T1
60
S
P m
ode
1h
our
2
h
ou
r
s
2
-2
/
3hour
s
S
LP m
ode
3
h
ou
r
s
6
h
ou
r
s
8
h
ou
r
s
3
) Press [SOURCE] to se
l
ect t
h
e appropriate externa
l
i
nput position (L1/L2) to w
h
ic
h
your externa
l
tuner
i
s connecte
d.
4
) Press [REC] to start recordin
g.
Press
[
ST
O
P
C
]
to stop t
h
e recor
d
ing
.
To pause recordin
g
:
P
r
ess
[
PAUSE
F
]
.
To resume recordin
g
:
P
r
ess
[
PAUSE
F
]
or
[
REC
]
.
A
fter the unit has been in
p
ause mode for 5 minutes, it
will stop automaticall
y
to protect the tape and the
v
ideo head from dama
g
e
.
•
Re
f
er to pages 31-34
f
or instructions on timer recording.
T
o pause p
l
ay
b
ac
k:
P
r
ess
[
PAUSE
F
]
.
Pl
a
yb
ac
k
wi
ll
pause an
d
soun
d
wi
ll
b
e mute
d.
T
o resume pla
y
back
:
P
r
ess
[
PLAY
B
]
.
In
fo
rm
a
ti
o
n
o
n V
C
R F
u
ncti
o
n
s
Caution on using S-video, component, or HDMI connection
f
or VCR
:
•
O
n
ly
t
h
e p
l
a
yb
ac
k
au
d
io / vi
d
eo are avai
l
a
bl
e wit
h
t
h
ese connections.
•
U
n
d
er t
h
e con
d
ition
l
iste
d
b
e
l
ow, t
h
e p
l
a
yb
ac
k
image cannot
b
e viewe
d
. Use t
h
e stan
d
ar
d
vi
d
eo connection, in suc
h
case;
-
d
urin
g
DVD recor
d
in
g
.
•
H
DMI vi
d
eo reso
l
ution cannot
b
e c
h
ange
d
w
h
en t
h
e unit is in VCR mo
d
e
.
N
ote
• This
f
unction is available onl
y
when the unit is
connecte
d
b
y t
h
e VIDEO OUT jac
k.
E9P8CUDZV427MG9BOMv1.indd83E9P8CUDZV427MG9BOMv1.indd83 2012/03/0113:07:182012/03/0113:07:18
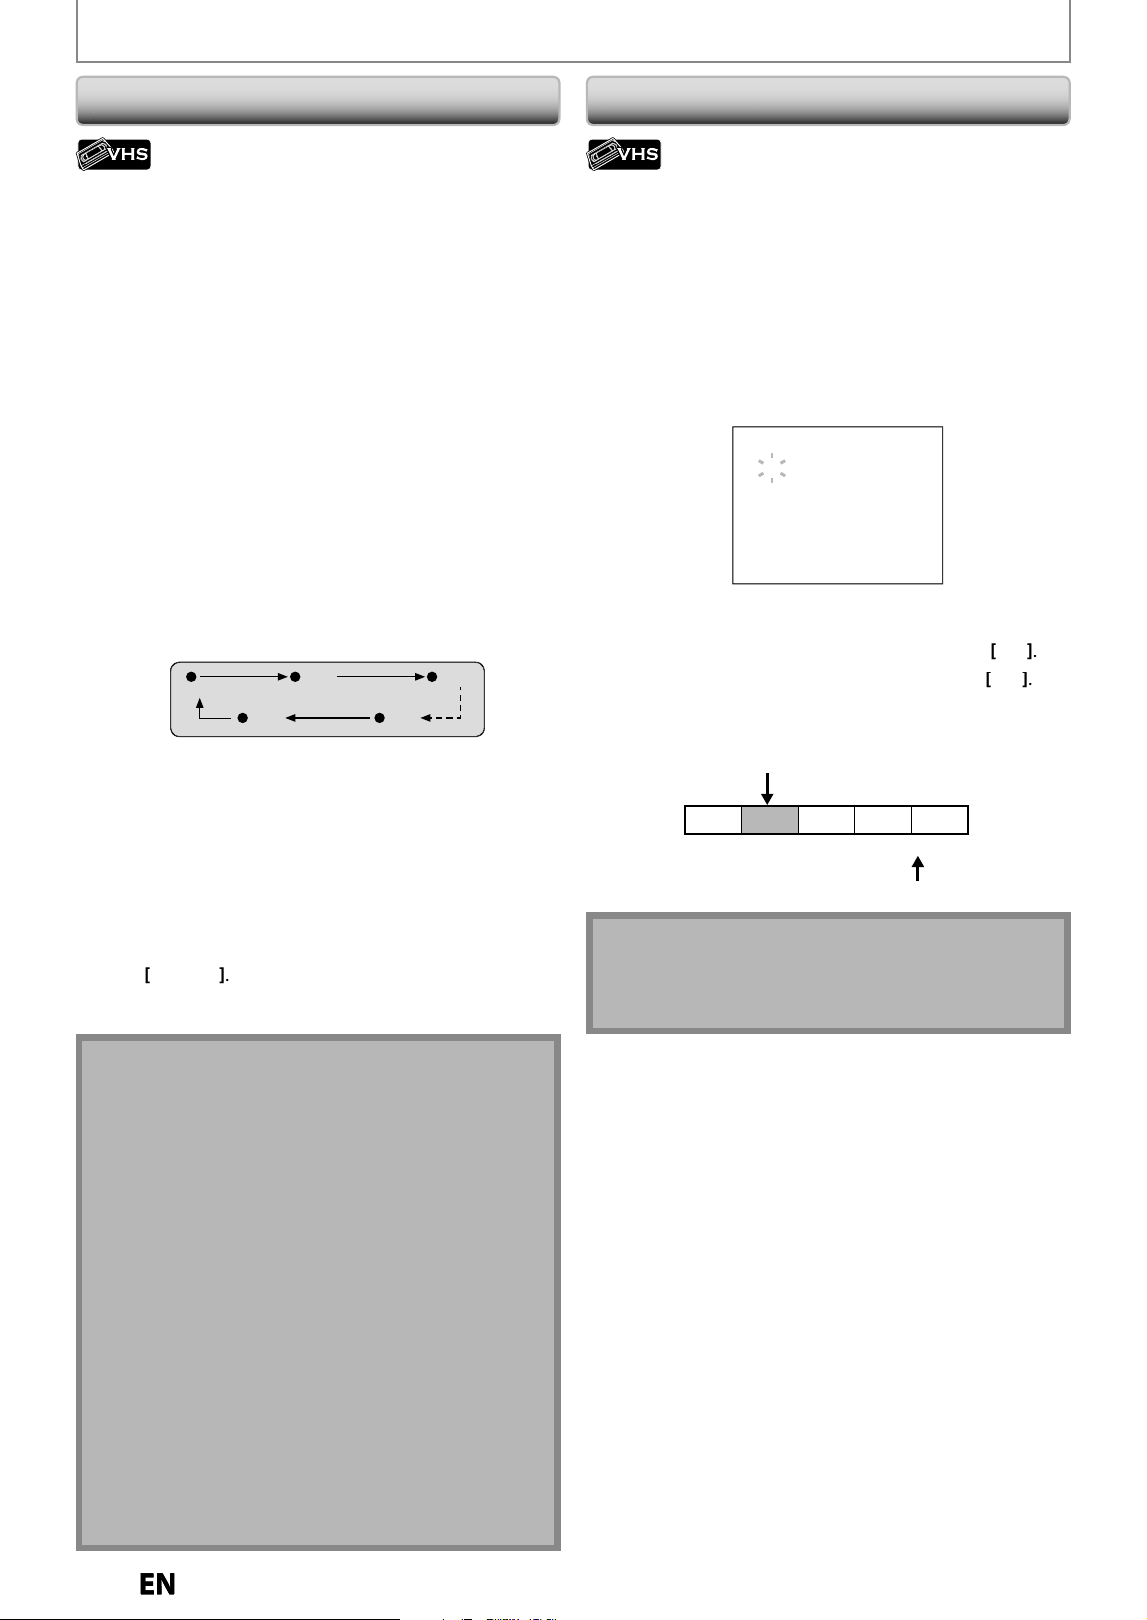
8
4
EN
EN
VCR FUNCTIONS
One-touc
h
Timer Recor
d
ing (OTR
)
I
n
d
ex Se
a
rc
h
T
his
f
eature allows
y
ou to set the recording length simpl
y
by
pressing
[
REC
]
o
n
the
r
e
m
ote
co
n
t
r
ol.
Press
[
VCR
]
first
.
1
) Insert a recordable ta
p
e with an erase-
p
rotection
t
ab
int
a
ct
.
2
) Select the recordin
g
mode usin
g
[REC MODE]
.
(Re
f
er to “Note
f
or DVD to VCR duplication” on pa
g
e 42
an
d
“Recor
d
in
g
” on pa
g
e 83.
)
3) Press [SOURCE] to select the appropriate external
input position (L1/L2) to w
h
ic
h
y
our externa
l
tuner
i
s
c
o
nnecte
d.
4) Press [REC] to be
g
in the one-touch timer recordin
g.
You can select a
f
ixed recording time by pressing
[
REC
]
repeate
dl
y.
(0:30) (1:00)
(Normal recording)
(7:30)(8:00)
W
hen the one-touch timer recordin
g
is finished, the
unit will turn to the standb
y
mode automaticall
y.
To c
h
ange t
h
e recor
d
ing
l
engt
h
d
uring t
h
e one
-
touc
h
timer recor
d
ing
:
Pr
ess
[
REC
]
repeatedl
y
until the desired length appear
.
To cance
l
t
h
e one-touc
h
timer recor
d
ing wit
h
in t
h
e
speci
f
ied time
:
Pr
ess
[
ST
O
P
C
]
.
N
ote
• The remaining recording time will be displa
y
ed on the
front panel displa
y
during one-touch timer recording.
P
r
ess
[
DISPLAY
]
to
see
i
t
o
n
t
h
e
TV
sc
r
ee
n
.
• You cannot pause t
h
e one-touc
h
timer recor
d
ing
.
• If VCR one-touch timer recordin
g
is completed durin
g
DVD pla
y
back or recording, the VCR will be in stop
mode and the DVD kee
p
s the current mode
.
• Unlike a timer recording,
y
ou can perform the following
operations durin
g
the one-touch timer recordin
g.
- Turning t
h
e power to t
h
e stan
dby
mo
d
e to stop one-
touc
h
timer recor
d
in
g
.
- Us
i
ng
[
REC
]
or
[
ST
O
P
C
]
on t
h
e remote contro
l.
•
When the one-touch timer recordin
g
is finished and the
power is in the standb
y
mode, the unit will switch to
the timer standb
y
mode automaticall
y
if a timer
recordin
g
has been pro
g
rammed. Press
[
TIMER SET
]
to
cancel the timer standb
y
mode for using the unit
continuousl
y.
•
This
f
unction is available only when the unit is
connecte
d
b
y t
h
e VIDEO OUT jac
k.
An index mark will be assi
g
ned at the be
g
innin
g
o
f
each
recording
y
ou make. You ma
y
skip to a speci
f
ic marked
point by
f
ollowing the steps below
.
P
ress [VCR]
f
irst
.
1)
Press [SEARCH] so that “INDEX SEARCH” menu
a
pp
ears
.
2
) Usin
g
[the Number buttons], enter the number o
f
recordings
y
ou wish to skip within 30 seconds
.
INDEX
S
EAR
C
H
03
3
)
Press [
E
]
,
[
D
]
to start in
d
ex searc
h.
I
f
y
ou want to go in the forward direction, press
[
D
]
.
If
you want to go in the reverse direction, press
[
E
]
.
A
f
ter index search, the VCR will play back the cassette
t
ape automatica
lly.
Pro.1 Pro.2 Pro.3 Pro.4 Pro.5
02 01 01 02 03
Beginning
of tape
End
of tape
CURRENT PROGRAM
INDEX MARK
Note
•
You can ma
k
e t
h
e in
d
ex mar
k
up to 20.
•
This function is available onl
y
when the unit is
connected b
y
the VIDEO OUT jack
.
E9P8CUDZV427MG9BOMv1.indd84E9P8CUDZV427MG9BOMv1.indd84 2012/03/0113:07:192012/03/0113:07:19
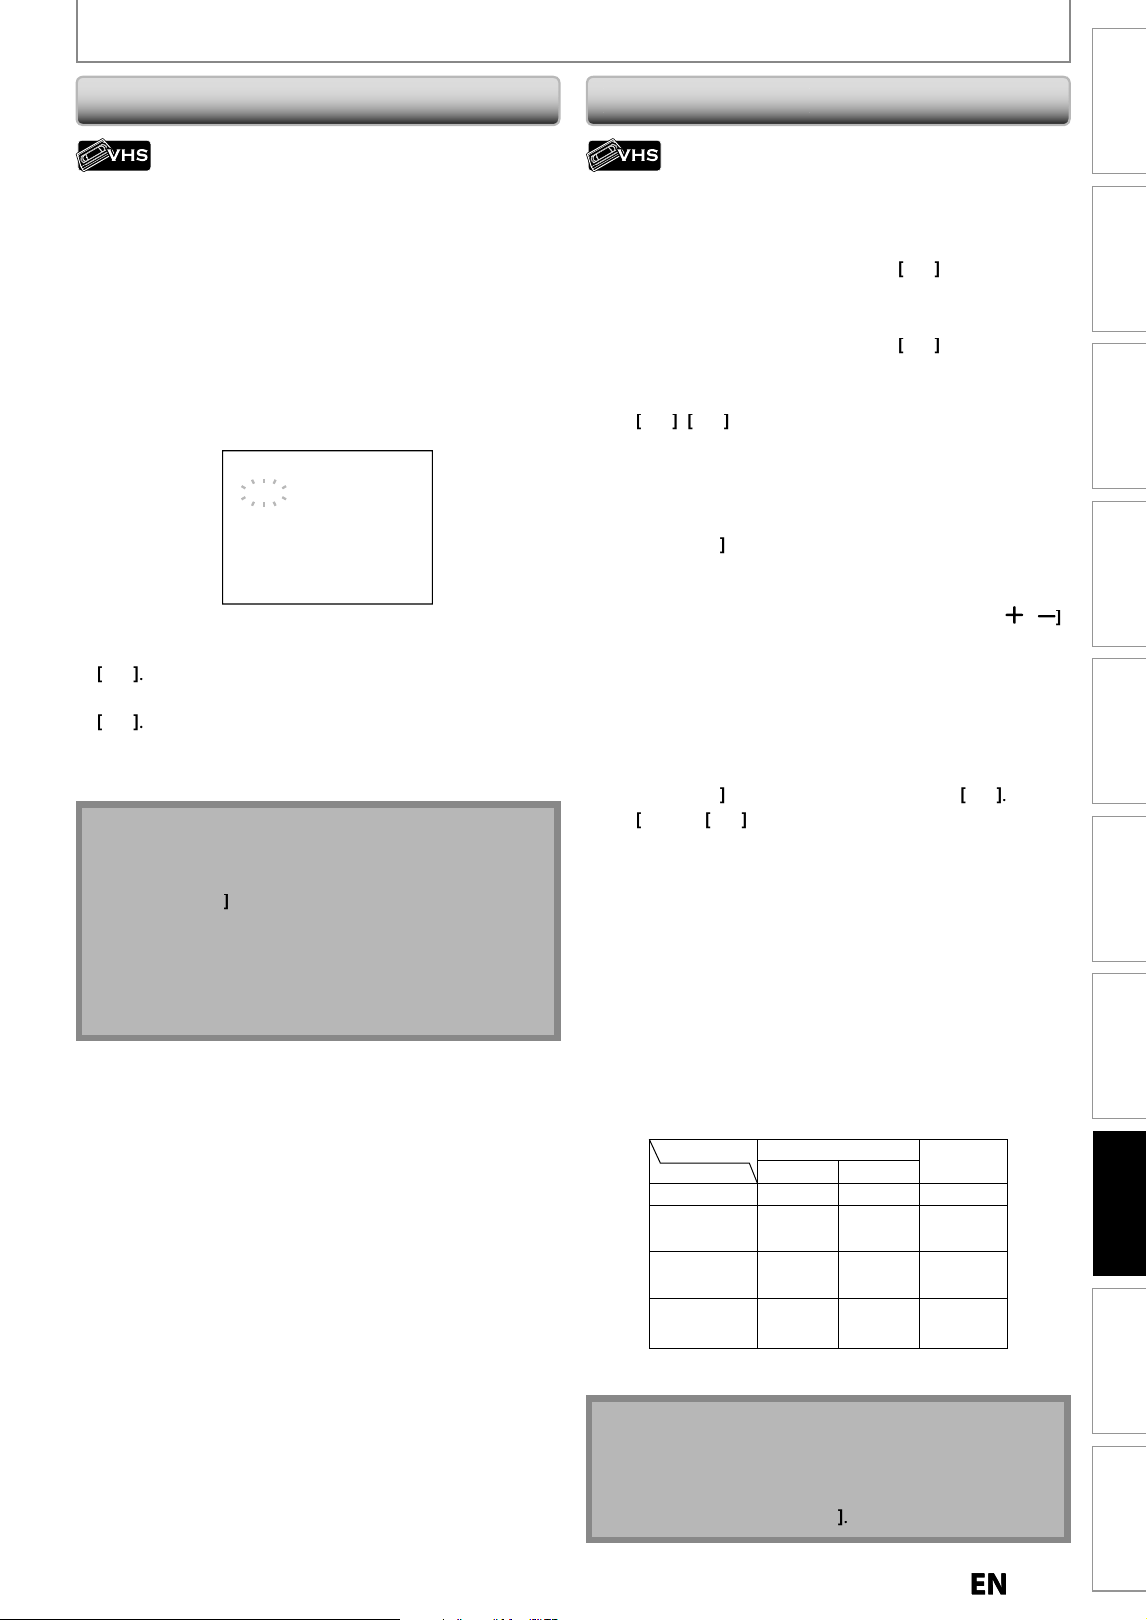
85
EN
EN
Recording Playback Editing
Introduction
Connections Basic Setup Function Setup
VCR Functions
Others Español
VCR FUNCTIONS
T
ime Se
a
rc
h
O
t
h
er Operation
s
T
his feature allows
y
ou to go to a specific point on a
c
assette tape b
y
entering the exact amount o
f
time
y
ou
w
ish to ski
p
in order to reach the
p
oint
.
P
ress
[
VCR
]
first
.
1) Press [SEARCH] repeate
dl
y so t
h
at “TIME SEARCH”
m
enu
a
ppe
ars.
2
) Using [t
h
e Num
b
er
b
uttons], enter your
d
esire
d
t
ime to s
k
ip wit
h
in 30 secon
d
s
.
You can set t
h
e time up to 9:59
.
TIME
S
EAR
CH
2
:50
3)
Press
[
E
],
[
D
] to start time search
.
I
f
you want to go in the
f
orward direction, press
[
D
]
.
If
y
ou want to go in the reverse direction, press
[
E
]
.
After time search, the unit will pla
y
back the cassette
tape automaticall
y.
Note
•
In
d
ex searc
h
an
d
time searc
h
are not avai
l
a
bl
e
d
urin
g
recor
d
in
g.
•
P
ress
[
ST
O
P
C
]
to stop t
h
e searc
h.
•
If the end of the cassette tape is reached durin
g
search
,
this unit will cancel the search and rewind the
c
assette ta
p
e
.
•
This function is available onl
y
when the unit is
c
onnecte
d
by
t
h
e VIDEO OUT jac
k.
P
ress [VCR] first
.
F
as
t f
o
rw
a
r
d:
When the unit is in sto
p
mode,
p
ress
[
D
]
to
f
ast
f
o
rw
a
r
d
the cassette ta
p
e
.
Rewin
d:
When the unit is in sto
p
mode,
p
ress
[
E
]
to
r
e
win
d
t
h
e
c
assette ta
p
e
.
T
o cue or review picture
d
uring p
l
ay
b
ac
k
(picture searc
h
):
P
r
ess
[
E
]
,
[
D
]
during pla
y
back.
P
ress it again an
d
t
h
e unit wi
ll
searc
h
in super
h
ig
h
spee
d
. (in t
h
e SLP mo
d
e on
l
y
)
To freeze the picture on TV screen during pla
y
bac
k
(
still mode
):
P
r
ess
[
PAUSE
F
]
. Eac
h
time you press t
h
e
b
utton, t
h
e
picture will be
f
orwarded b
y
one
f
rame
.
I
f
the picture begins to vibrate vertically during the still
mo
d
e, sta
b
i
l
ize t
h
e picture
b
y pressing
[
TRACKING
/
]
on remote contro
l.
If the picture is distorted or rolling verticall
y
, adjust the
v
ertical hold control on
y
our TV, if equipped
.
C
ounter reset
:
P
r
ess
[
CLEAR
]
to
r
eset
t
h
e
cou
n
te
r
to
“
0:00:00
”
.
To p
l
ay
b
ac
k
in s
l
ow motion
:
P
r
ess
[
PAUSE
F
]
during pla
y
back, then press
[
D
]
.
P
r
ess
[
D
]
or
[
E
]
repeate
dl
y to se
l
ect t
h
e
d
esire
d
spee
d.
A
u
t
o
m
a
tic rewin
d:
When a cassette tape is pla
y
ed back or
f
ast
f
orwarded to its
e
nd, the cassette tape will rewind to the be
g
innin
g
, stop
a
nd e
j
ect itsel
f
.
W
hen
y
ou pla
y
back a cassette tape recorded in Hi-Fi
s
tere
o:
P
r
ess
[
AUDI
O]
o
n
the
r
e
m
ote
co
n
t
r
ol
to
select
Hi-Fi
o
r
M
ONO for pla
y
back sound mode
.
• I
f
you have connected a stereo TV to this unit, select “HIFI”
.
• If
y
ou have connected a monaural TV to this unit, select
“M
O
N
O
”
.
HIFI
Your Selection
Type of recorded tape
non Hi-Fi tapes
Hi-Fi tapes
recorded in
Hi-Fi stereo
Hi-Fi tapes
recorded second
audio program
Hi-Fi tapes
recorded main
audio program
MONO
Monaural
L+R
Main audio
program
Second audio
program
Monaural
R-channelL-channel
R
Main audio
program
Second audio
program
Monaural
L
Main audio
program
Second audio
program
N
ote
• Still/slow mode will stop a
f
ter 5 minutes to prevent
dama
g
e to the cassette tape and the video head
.
• To return to playback
f
rom the picture search/still
/
sl
ow mo
d
e, press
[
PLAY
B
]
.
E9P8CUDZV427MG9BOMv1.indd85E9P8CUDZV427MG9BOMv1.indd85 2012/03/0113:07:192012/03/0113:07:19
86
EN
TROUBLESHOOTING
Before requesting service for this unit, check the table below for a possible cause of the problem
y
ou are experiencing.
S
ome simp
l
e c
h
ec
k
s or a minor a
d
justment on
y
our part ma
y
e
l
iminate t
h
e pro
bl
em an
d
restore proper operation
.
Remedy
GENERAL
Th
e power
d
oes not turn on
.
•
C
h
ec
k
t
h
at t
h
e AC power cor
d
is connecte
d
secure
ly
.
•
Check the breaker (in case o
f
p
ower
f
ailure)
.
•
P
ress
[
TIMER SET
]
to cance
l
t
h
e timer stan
db
y mo
d
e
.
T
here is no
p
icture
.
•
Re-connect the connecting cords securel
y
.
•
Check if the connectin
g
cords are dama
g
ed
.
•
Check the connection to
y
our TV (pages 15-18)
.
•
Switch the input selector on
y
our TV (such as to “L1”) so that the signal
from the unit a
pp
ears on the TV screen
.
Cannot record a TV pro
g
ram.
•
This unit does not have a tuner to receive TV broadcastin
g.
•
You must connect t
h
is unit to an externa
l
tuner to recor
d
TV programs
(
page 15
).
Th
ere is no soun
d
or t
h
e soun
d
is
d
istorte
d.
•
Re-connect a
ll
connections secure
l
y
.
•
Check i
f
the connecting cord is damaged.
•
Check the connections to the ampli
f
ier input.
•
Check i
f
the input device setting on the ampli
f
ier is correct
.
•
W
h
en t
h
e unit is in pause mo
d
e or in s
l
ow-motion p
l
ay
b
ac
k
mo
d
e,
s
ound is not output. This is not a mal
f
unction
.
•
When the unit is in
f
ast
f
orward or
f
ast reverse mode, sound is not
output. This is not a mal
f
unction
.
•
W
h
i
l
e t
h
e setup menu or timer programming
d
isp
l
ay is s
h
own, or w
h
i
l
e
th
e screen saver is active, t
h
e au
d
io is mute
d.
T
h
e
r
e
m
ote
co
n
t
r
o
l
does
n
ot
f
u
n
ct
i
o
n
.
•
B
atte
ri
es
a
r
e
w
ea
k
.
•
Th
e
r
e
a
r
e
obstac
l
es
bet
w
ee
n
t
h
e
r
e
m
ote
co
n
t
r
o
l
a
n
d
t
h
e
u
ni
t.
•
Th
e
r
e
m
ote
co
n
t
r
o
l i
s
f
a
r fr
o
m
t
h
e
u
ni
t.
•
Th
e
r
e
a
r
e
n
o
batte
ri
es
in
t
h
e
r
e
m
ote
co
n
t
r
o
l
.
•
C
h
ec
k if
t
h
e
u
ni
t
i
s
tu
rn
ed
o
n
.
•
C
heck if
y
ou are pointing the remote control at the recorder and NOT the TV.
I
f
y
ou have a plasma TV, it ma
y
interfere with the IR signal. Tr
y
the
remote with the plasma off. If the remote works,
y
ou ma
y
need to move
t
he unit awa
y
from the plasma TV
.
•
Pr
ess
[
DVD
]
o
r
[
VCR
]
,
whichever
y
ou need. Then, tr
y
again.
•
Pr
ess
[
TIMER SET
]
to cancel the timer standb
y
mode
.
T
he unit does not operate properl
y.
•
When static electricit
y
, etc., causes the unit to operate abnormall
y
,
unp
l
u
g
t
h
e unit an
d
t
h
en p
l
u
g
it in a
g
ain
.
DVD • VCR
Pla
y
back picture is distorted
.
•
Keep the device which ma
y
cause electrical disturbances, such as a
ce
ll
u
l
ar p
h
one, awa
y.
Not
h
ing was recor
d
e
d
even t
h
oug
h
you set t
h
e timer setting correct
l
y
.
•
There was a power
f
ailure during recording.
•
The unit’s internal clock stopped due to a power
f
ailure that lasted
f
or
more t
h
an 30 secon
d
s. Reset t
h
e c
l
oc
k
(page 26)
.
•
T
h
e program contains copy protection signa
l
s t
h
at restricts copying.
•
T
h
e timer setting over
l
appe
d
wit
h
anot
h
er setting t
h
at
h
as priority.
T
imer recordin
g
is not complete or did
not start from the be
g
innin
g.
•
The timer setting overlapped with another setting that has priorit
y
(page 34)
.
•
Disc space was not enou
g
h
.
T
imer recordin
g
is impossible
.
•
Ma
k
e sure appears on the
f
ront panel display o
f
this unit. I
f
not, press
[
TIMER SET
]
.
No ima
g
e from HDMI connection
.
•
Check the HDMI connection.
(
Check the status of the HDMI related
i
ndications.
)
•
C
h
ec
k
w
h
et
h
er t
h
e connecte
d
monitor
d
evice or ot
h
er
d
evice su
pp
orts
H
DCP. (This unit will not output a video si
g
nal unless the other device
s
u
pp
orts HDCP.
)
•
Check the settin
g
of HDMI.
•
Check whether the out
p
ut format of this unit (HDMI FORMAT) matches
t
he su
pp
orted in
p
ut format of other connected device
.
•
I
f
the unit is connected to the unauthorized displa
y
device with an
H
DMI ca
bl
e, t
h
e au
d
io/vi
d
eo signa
l
ma
y
not
b
e output w
h
en p
l
a
y
ing
back
a
co
mm
e
r
c
i
al
DVD-vi
deo.
E9P8CUDZV427MG9BOMv1.indd86E9P8CUDZV427MG9BOMv1.indd86 2012/03/0113:07:202012/03/0113:07:20
8
7
EN
Recording Playback Editing
Introduction
Connections Basic Setup Function Setup VCR Functions
Others
Español
TROUBLESHOOTING
Symptom Remedy
DVD • VCR
The
r
e
i
s
n
o
sou
n
d
o
r
the
sou
n
d
i
s
d
i
sto
r
ted.
• T
h
e HDMI soun
d
is not output w
h
en “HDMI Au
d
io” is set to “OFF”
.
• Check the RCA audio cable connection. I
f
y
ou are using HDMI-DVI
conversion cable,
y
ou must connect the RCA audio cable, too.
• Check whether the out
p
ut
f
ormat o
f
this unit (HDMI FORMAT) matches
the supported input
f
ormat o
f
other connected device
.
Setu
p
menu cannot be called u
p
. • Setup menus cannot be called up during DVD recording or DVD pla
y
back
.
DVD
Th
ere is no picture
.
• I
f
the main menu appears on the TV screen, press
[
RETURN
]
to
e
x
it.
• Check if the progressive scan mode is set correctl
y
according to
y
our T
V
(
pa
g
e 80
).
P
icture noise appears
.
• C
l
ean t
h
e
d
isc wit
h
a c
l
eaning c
l
ot
h.
T
h
e
r
e
i
s
n
o
sou
n
d.
• If
y
ou are using DIGITAL AUDIO OUT (COAXIAL) jack, check the setting in
“Disc Audio” (pa
g
es 75-76)
.
• Clean the disc with a cleanin
g
cloth
.
Soun
d
is nois
y.
• C
l
ean t
h
e
d
isc wit
h
a c
l
eanin
g
c
l
ot
h.
No DTS soun
d
is output
.
• T
h
is unit is not compati
bl
e wit
h
DTS soun
d.
Th
e
d
isc
d
oes not p
l
ay
b
ac
k.
• No
d
isc is inserte
d.
• A
bl
an
k
d
isc is inserte
d.
• The disc is upside down. Insert the disc with the labeled side
f
acing up
.
• T
h
e
d
isc is not correct
l
y inserte
d.
• T
h
e unit cannot p
l
ay
b
ac
k
certain
d
iscs (suc
h
as a CD-ROM) (page 46)
.
• T
h
e region co
d
e on t
h
e DVD-vi
d
eo
d
oes not matc
h
t
h
e unit (page 46)
.
• Moisture
h
as con
d
ense
d
insi
d
e t
h
e unit. Remove t
h
e
d
isc an
d
l
eave t
h
e
unit turned on
f
or about 2 hours until the moisture evaporates (page 3).
• I
f
the disc was recorded on another recorder, the unit cannot play bac
k
the disc i
f
it was not
f
inalized
.
Di
scs
r
eco
r
ded
o
n
t
hi
s
u
ni
t
ca
nn
ot
be
pla
y
ed back on other DVD pla
y
ers
.
• If
y
ou are using DVD+R/DVD-RW/-R, please ensure
y
ou finalized the disc
after recordin
g
(pa
g
es 44-45)
.
T
he disc does not start pla
y
back
f
rom
th
e
b
eginning
.
• Resume pla
y
back was activated (page 52). Press
[
ST
O
P
C
]
t
w
ice.
• You
h
ave inserte
d
a
d
isc w
h
ose tit
l
e menu or DVD menu automatica
ll
y
appears on the TV screen when it is
f
irst inserted
.
Th
e unit starts p
l
aying
b
ac
k
t
h
e
d
isc
automatica
ll
y
.
• The DVD-video
f
eatures an auto playback
f
unction
.
Some functions such as sto
p
, search,
or slow-motion pla
y
back cannot be
p
erformed
.
• Depending on the disc,
y
ou ma
y
not be able to do some of the
o
p
erations. Refer to the instruction manual su
pp
lied with the disc
.
T
he lan
g
ua
g
e for the sound trac
k
cannot
b
e c
h
an
g
e
d.
• The title does not have the multilin
g
ual audio tracks
.
• The DVD-video prohibits the chan
g
in
g
o
f
the lan
g
ua
g
e
f
or the sound
t
r
ack.
Th
e su
b
tit
l
e
l
anguage cannot
b
e
changed or turned o
ff.
• Mu
l
ti
l
ingua
l
su
b
tit
l
e are not recor
d
e
d
on t
h
e DVD-vi
d
eo
.
T
he an
g
les cannot be chan
g
ed
.
• Multi-angles are not recorded on the DVD-video being pla
y
ed back
.
• The an
g
le-chan
g
e operation is whenever possible as lon
g
as the disc
contains a multi-an
g
le portion. Actual chan
g
e will be performed when
the
p
ortion has come u
p.
• The DVD-video prohibits chan
g
in
g
an
g
les
.
• Tr
y
changing the angle using the DVD-video’s menu
.
Recording does not stop immediatel
y
after
y
ou press
[
STOP
C
]
.
• It ma
y
take a few seconds for the unit to input disc data before
recordin
g
stops
.
E9P8CUDZV427MG9BOMv1.indd87E9P8CUDZV427MG9BOMv1.indd87 2012/03/0113:07:202012/03/0113:07:20
88
EN
TROUBLESHOOTING
Symptom Remedy
DVD
Th
e
d
isc tra
y
d
oes not open w
h
en
y
ou
press
[O
PEN
/
CL
O
SE
A
]
.
•
It ma
y
take a
f
ew seconds
f
or the disc tra
y
to open a
f
ter
y
ou have
recor
d
e
d
or e
d
ite
d
a
d
isc. T
h
is is
b
ecause t
h
e unit is a
dd
ing
d
isc
d
ata to
the
d
i
sc.
“Repairin
g
” appears on t
h
e TV screen
.
Repairing
formatting or editing (even after “Repairing” disappears), a repairing
process will begin automatically just a
f
ter turning the unit on again
.
It may ta
k
e severa
l
minutes up to a
b
out severa
l
h
ours.
I
n a case
y
ou intend to cancel the
repairin
g
process
.
Repairing
Do you want to cancel a repairing
process? When selecting “Yes”,
the disc may not be usable.
Yes
No
•
If
y
ou intend to cancel the repairing process, press
[
A
OPEN/CLOSE
]
on the front
p
anel, then select “Yes” and
p
ress
[
OK
]
. After that,
p
ress
[
OPEN/CLOSE
A
]
to
ta
k
e
out
t
h
e
d
i
sc.
T
he disc canceled durin
g
the
repairin
g
process MAY NOT work
.
VCR
P
icture noise appears
.
•
Head cleaning
f
or VCR may be necessary. Re
f
er to “Auto head cleaning”
(
page 4
).
•
Adjust tracking control for better picture b
y
pressing
[
TRACKING
/
]
while
y
ou are pla
y
ing back a cassette tape
.
Th
e cassette tape
d
oes not p
l
a
y
b
ac
k.
•
No cassette ta
p
e is inserte
d.
Recording does not start a
f
ter you press
[
REC
]
.
•
Ma
k
e sure t
h
e cassette tape
h
as an erase-protection ta
b
w
h
en you
record to a cassette tape. I
f
needed, cover the hole with cellophane
t
ape
.
T
he remote control does not
f
unction
.
•
Check i
f
a cassette tape is in this unit.
T
h
e
m
oto
r r
otates
e
v
e
n wh
e
n
pla
y
back / recording is stopped
.
•
The motor ma
y
rotate for the duration of approximatel
y
5 minutes for
efficient o
p
eration. This is not a malfunction
.
E9P8CUDZV427MG9BOMv1.indd88E9P8CUDZV427MG9BOMv1.indd88 2012/03/0113:07:202012/03/0113:07:20
8
9
EN
Recording Playback Editing
Introduction
Connections Basic Setup Function Setup VCR Functions
Others
Español
TROUBLESHOOTING
Disc Error message Cause Solution
Di
sc
Err
o
r
—
P
l
ease e
j
ect t
h
e
d
isc.
—
Pla
y
back
f
eature ma
y
not be available on
t
hi
s
Di
sc.
•
Unp
l
a
y
a
bl
e
d
isc is inserte
d
in t
h
e unit.
•
T
h
e
d
isc is u
p
si
d
e
d
own.
• In
se
r
t
the
sta
n
da
r
d
iz
ed
d
i
sc
w
h
i
ch
bea
r
t
h
e mar
k
s on page 46
.
• In
se
r
t
t
h
e
d
i
sc
wi
t
h
t
h
e
l
abe
l
ed
s
i
de
f
acin
g
up.
R
egion Erro
r
— P
l
ease eject t
h
e
d
isc.
—
P
l
ay
b
ac
k
is not aut
h
orize
d
in your region.
•
P
l
ay
b
ac
k
is not aut
h
orize
d
in t
h
e region
of
the DVD-video which you inserted in
the
u
ni
t.
• Insert t
h
e DVD-vi
d
eo wit
h
region co
d
es
1 or
ALL.
P
a
r
e
n
ta
l L
oc
k
O
n
The current selected
p
arental level
prohibits pla
y
back
.
•
The current selected
p
arental level
prohibits pla
y
back.
• Check “Parental Lock” settin
g
in
“Pla
y
back” menu (page 75).
Recor
d
in
g
Erro
r
This pro
g
ram is not allowed to be
r
eco
r
ded.
•
The recordin
g
function encountered
t
he cop
y
prohibited program
.
• You cannot recor
d
cop
y
pro
h
i
b
ite
d
pro
g
rams.
Recor
d
ing Erro
r
T
h
is program is not recor
d
a
bl
e in +VR
mo
d
e.
•
You are trying to recor
d
t
h
e copy-once
program
.
• You cannot recor
d
t
h
e copy-once
program.
Recordin
g
Erro
r
Ca
n n
ot
r
eco
r
d
o
n
t
hi
s
d
i
sc.
•
You are tr
y
ing to record onto the disc
w
hich is unrecordable
,
or the disc status
is
u
n
ab
l
e
to
r
eco
r
d.
•
The disc is dirt
y
.
•
The disc is dama
g
ed.
• Insert the recordable disc
,
and ensure
the disc status satisfies the recordin
g
requirements (pa
g
e 27)
.
• Clean the disc with a cleanin
g
cloth
.
• Re
p
lace the disc
.
Recor
d
ing Erro
r
T
h
is
d
isc is
p
rotecte
d
an
d
not recor
d
a
bl
e
.
•
You are tr
y
ing to recor
d
on to t
h
e
p
rotecte
d
d
isc w
h
ic
h
is set in “Disc E
d
it”
m
e
n
u.
• Re
l
ease t
h
e
d
isc protect setting in “Disc
E
d
it” menu (page 43)
.
Recor
d
ing Erro
r
Disc is
f
ull.
(No area
f
or new recording
)
•
You are trying to recor
d
onto t
h
e
d
isc
w
hich has no space
f
or recording
.
• Insert t
h
e recor
d
a
bl
e
d
isc wit
h
enoug
h
recor
d
ing space.
Recordin
g
Erro
r
Y
ou
ca
nn
ot
r
eco
r
d
m
o
r
e
t
h
a
n 49
t
i
t
l
es
o
n
o
n
e
d
i
sc.
(
The maximum is 49
)
•
You are tr
y
ing to record onto the disc
o
n which the number of recordin
g
titles
c
omes u
p
to the maximum (49).
• Delete unnecessar
y
titles (page 61)
.
Recor
d
ing Erro
r
You cannot recor
d
more t
h
an 254 c
h
apters
on one
d
isc.
(T
h
e maximum is 254
)
•
You are trying to recor
d
onto t
h
e
D
VD+RW
o
r DVD-RW
o
n w
h
i
ch
the
number o
f
recording chapters comes
u
p to t
h
e maximum (254)
.
• De
l
ete unnecessary c
h
apter mar
k
s
(
pages 64-65
).
Recor
d
ing Erro
r
You cannot recor
d
on t
h
is
d
isc as Power
Calibration Area is
f
ull
.
•
When recordings are per
f
ormed
repeate
dl
y onto an unsta
bl
e
d
isc, t
h
is
a
rea may come up to be
f
ull.
•
Every time you insert a disc
f
or
recor
d
ing, t
h
e
d
isc’s wor
k
ing area wi
ll
be taken up. And i
f
you repeat this
f
requently, it will be used up sooner
a
nd you may not be able to record
f
ull
4
9 tit
l
es.
• Insert a new
d
isc
.
Recordin
g
Erro
r
This disc is alread
y
finalized
.
•
You are tr
y
ing to record onto the disc
a
lread
y
finalized.
• Release the
f
inalizin
g
f
or this disc
(
pa
g
e 44
).
Recor
d
ing Erro
r
T
h
e
d
isc
h
as no recor
d
ing compati
b
i
l
ity.
Set “Ma
k
e Recor
d
ing Compati
bl
e” to
“ON” to convert t
h
e
d
isc
.
•
You are trying to recor
d
onto t
h
e
d
isc t
h
at
h
a
d
b
een recor
d
e
d
b
y ot
h
er
recor
d
ers.
• Set “Ma
k
e Recor
d
ing Compati
bl
e” to
“ON” to rewrite the menu, a
f
ter that you
wi
ll
recor
d
to
d
isc (page 28).
*
If
y
ou are still having trouble with the unit after checking “TROUBLESHOOTING”, write down the error code and the
e
rror description for callin
g
our help line mentioned on the front pa
g
e to locate an Authorized Service Center
.
E9P8CUDZV427MG9BOMv1.indd89E9P8CUDZV427MG9BOMv1.indd89 2012/03/0113:07:212012/03/0113:07:21

9
0
EN
LANGUAGE CODE
Language Code
A
b
kh
a
zi
an
474
8
Af
ar
4747
A
f
rik
aa
n
s
47
52
A
lba
ni
an
6563
Am
h
ari
c
475
9
Ar
ab
i
c
47
64
Arm
e
n
ian
5
47
1
A
ssames
e
47
65
A
y
mar
a
4771
Azerbai
j
an
i
4772
B
ashk
i
r
4
8
4
7
B
asqu
e
51
67
Ben
g
ali;Ban
g
l
a
4
860
B
huta
n
i
50
7
2
Bi
h
ar
i
4
8
5
4
Bi
s
l
a
m
a
4
855
B
r
eton
4
864
Bu
l
garia
n
4
8
5
3
B
urmes
e
5
9
7
1
B
y
elorussia
n
4
851
Ca
m
bod
i
an
5
7
59
Cata
l
a
n
4
9
4
7
C
hin
ese
72
54
Co
r
s
i
can
49
61
C
roatia
n
54
64
C
z
ech
49
65
D
a
ni
sh
50
4
7
D
utch
6058
Eng
l
is
h
516
0
Es
p
erant
o
5
1
61
E
sto
n
ian
5
1
66
F
aroes
e
5
2
6
1
Fi
ji
5
2
56
Finni
sh
5
2
55
Frenc
h
5
2
6
4
Fr
i
s
i
a
n
5
2
7
1
G
a
li
c
i
an
5358
Georgia
n
5747
G
erma
n
5
0
5
1
Gr
eek
5
1
58
Gr
ee
n
la
n
d
i
c
5
7
58
G
uaran
i
5
3
6
0
Gu
j
arat
i
5367
H
ausa
5447
H
eb
r
ew
5569
Hin
di
5455
Language Code
Hungar
i
a
n
5
4
67
I
cela
n
d
i
c
5565
In
do
n
es
i
an
5560
Inter
l
in
g
u
a
55
4
7
Inter
l
ingu
e
5551
Inu
p
ia
k
5557
Iri
sh
53
4
7
Ita
l
ia
n
5
5
66
Ja
p
anes
e
56
4
7
Ja
v
a
n
ese
5669
K
a
nn
ada
5
7
60
Kas
h
mir
i
5
7
65
K
a
z
a
k
h
5
7
57
Kin
y
arwan
da
6
4
69
Kirg
h
i
z
5771
Kir
u
n
di
6
4
60
K
o
r
ean
5
7
61
Kur
d
is
h
5
7
67
Laot
h
ia
n
58
6
1
L
at
i
n
58
4
7
Latvian
;
Lettis
h
5868
Linga
la
58
6
0
Li
t
h
ua
ni
an
5866
M
acedo
ni
an
5
9
57
Ma
l
agas
y
59
5
3
Mala
y
5
9
65
Mala
y
ala
m
5
9
58
M
altese
5966
Maor
i
59
5
5
M
a
r
at
h
i
5
9
64
M
olda
vi
an
5
9
61
Mongo
l
ia
n
59
6
0
N
au
r
u
60
4
7
Ne
p
al
i
6051
Norweg
i
a
n
60
6
1
O
ccita
n
6
14
9
Ori
ya
6
1
64
Oromo
(
A
f
an
)
6
1
59
Panja
bi
62
4
7
Pashto
;
Pusht
o
6
2
65
Pe
r
s
i
an
5
24
7
Po
l
is
h
62
5
8
Portu
g
ues
e
6
2
66
Q
uechu
a
6367
R
haeto
-R
o
m
a
n
ce
6
4
59
R
omania
n
6
4
61
Language Code
Russ
i
an
6
4
67
Sa
m
oan
6559
S
an
gho
6553
Sa
n
sk
ri
t
65
4
7
S
cots Gae
l
i
c
5
3
5
0
Se
r
b
i
an
6564
Se
r
bo
-
C
r
oat
i
an
6554
S
esot
ho
6
5
66
Sets
w
a
n
a
6660
S
h
o
n
a
6560
S
in
dhi
6550
S
ing
h
a
l
es
e
6
55
5
S
i
s
w
at
6565
Slo
v
ak
6557
Sl
ovenia
n
655
8
So
m
a
l
i
6561
Sp
anis
h
5
1
65
S
un
d
anes
e
6
5
67
S
wa
h
i
li
656
9
S
w
ed
i
sh
6568
T
agalo
g
6658
T
aji
k
665
3
Ta
mil
66
4
7
Tata
r
6666
T
e
l
ug
u
66
5
1
T
h
a
i
6654
T
i
betan
4
861
Ti
gr
i
ny
a
6655
T
ong
a
6661
T
son
ga
6665
Tu
r
k
i
sh
6664
T
ur
k
me
n
66
5
7
Twi
6669
U
kr
a
ini
an
6
7
57
U
r
du
6
7
64
U
z
b
e
k
677
2
V
i
et
n
a
m
ese
6855
V
o
l
apu
k
6861
W
e
l
s
h
4
9
7
1
Wo
l
o
f
6
9
61
Xhosa
7
054
Y
i
dd
is
h
5
6
5
5
Yo
r
uba
71
61
Zu
l
u
72
67
E9P8CUDZV427MG9BOMv1.indd90E9P8CUDZV427MG9BOMv1.indd90 2012/03/0113:07:212012/03/0113:07:21
9
1
EN
Recording Playback Editing
Introduction
Connections Basic Setup Function Setup VCR Functions
Others
Español
Ana
l
o
g
Au
d
i
o
g
A
n e
l
ectrica
l
signa
l
t
h
at
d
irect
ly
represents soun
d
.
C
ompare this to di
g
ital audio which can be an electrical
signal, but is an indirect representation o
f
sound. See also
“Digital Audio”
.
As
p
ect Rat
io
p
T
he width o
f
a TV screen relative to its height.
C
onventiona
l
TVs are 4:3 (in ot
h
er wor
d
s, t
h
e TV screen
is a
l
most square); wi
d
escreen mo
d
e
l
s are 16:9 (t
h
e T
V
screen is a
l
most twice as wi
d
e as it is
h
ig
h
)
.
C
h
a
p
ter (DVD on
ly)
py
Just as a book is s
p
lit u
p
into several cha
p
ters, a title on a
DVD is usuall
y
divided into chapters. See also “Title”
.
Com
p
onent Video Out
p
ut
pp
Each si
g
nal of luminance (Y) and component (P
B
/
C
B
,
P
R
/
C
R
) is in
d
epen
d
ent to output so t
h
at
y
ou can experience
p
icture color as it is
.
Al
so,
d
ue to compati
b
i
l
it
y
wit
h
progressive vi
d
eo
(525p/480p),
y
ou can experience higher-densit
y
picture
than that in interlace
(
525i/480i
).
Di
g
ital Audi
o
g
A
n indirect representation o
f
sound by numbers. During
recor
d
ing, t
h
e soun
d
is measure
d
at
d
iscrete interva
l
s
(44,100 times a second
f
or CD audio) by an analog
-
to-digital converter, generating a stream o
f
numbers.
O
n p
l
a
yb
ac
k
, a
d
igita
l
-to-ana
l
og converter generates
an ana
l
og signa
l
b
ase
d
on t
h
ese num
b
ers. See a
l
so
“Samp
l
ing Frequenc
y
” an
d
“Ana
l
og Au
d
io”
.
Do
lby
Di
g
ita
l
yg
Th
e system to compress
d
igita
l
soun
d
d
eve
l
ope
d
b
y
Dolby Laboratories. It o
ff
ers you sound o
f
stereo(2ch) or
mu
l
ti c
h
anne
l
au
d
io
.
Fina
l
iz
e
T
o make DVD, which have been recorded on,
p
ossible to
pla
y
back in DVD pla
y
ers. With this unit, it is possible to
fin
a
liz
e
DVD+R
,
DVD-RW
,
and DVD-
R
.
HDMI™ (hi
g
h definition multimedia interface
)
g
A
digital inter
f
ace between audio and video source. It can
transmit component vi
d
eo, au
d
io, an
d
contro
l
si
g
na
l
wit
h
o
n
e
cable
co
nn
ect
i
o
n
.
JPEG (joint photographic experts group)
jpgp pgp
JPEG is a method o
f
compressing still image
f
iles. You can
c
op
y
JPEG files on CD-RW/-R from a computer and pla
y
bac
k
t
h
e
f
il
es
o
n
t
hi
s
u
ni
t.
M
P3 (MPEG au
d
io
l
a
y
er 3)
y
M
P3 is a method o
f
compressing
f
iles. You can copy MP3
f
iles on CD-
R
W
/
-R
f
rom the computer and pla
y
back the
f
iles on this unit
.
PB
C
(
pl
a
yb
ac
k
contro
l
py
)
(
vi
d
eo CD on
ly
y
)
This
f
unction enables
y
ou to pla
y
back interactive
software usin
g
a menu screen. See also “Video CD”.
PCM (
p
u
l
se co
d
e mo
d
u
l
ation
)
p
The most common s
y
stem o
f
encoding digital audio,
f
ound on CD and DAT. Excellent quality, but requires a
lot o
f
data compared to
f
ormats such as Dolby Digital
an
d
MPEG au
d
io. For compati
b
i
l
ity wit
h
d
igita
l
au
d
io
recorders (CD, MD and DAT) and AV ampli
f
iers with
d
igita
l
inputs, t
h
is unit can convert Do
lb
y Digita
l
an
d
MPEG au
d
io to PCM. See a
l
so “Digita
l
Au
d
io”
.
Pro
g
ress
i
ve Scan (525
p
/480
p)
gpp
A t
y
pe of displa
y
that does not split each frame into
fields, and instead scans directl
y
through all the scanlines
of each frame in order. Pro
g
ressive scan provides less
flickerin
g
and hi
g
her ima
g
e resolution than traditional
(525i/480i) TV si
g
nals. Refer to pa
g
e 80 for instructions on
selective pro
g
ressive scan mode
.
Re
g
ion Code
g
Regions associate discs and pla
y
ers with particular areas
o
f
the world. This unit will onl
y
pla
y
back discs that have
compatible re
g
ion codes. You can find the re
g
ion code
o
f
y
our unit b
y
looking on the rear panel. Some discs are
compatible with more than one re
g
ion (or all re
g
ions)
.
Sam
p
lin
g
Fre
q
uenc
y
pg q y
The rate which sound is measured b
y
a speci
f
ied interval
to turn into digital audio data. The numbers o
f
sampling
in one second de
f
ines as sampling
f
requenc
y
. The higher
t
h
e rate, t
h
e
b
etter t
h
e soun
d
qua
l
ity
.
S-Vi
d
eo Out
p
ut
p
It delivers independently each signal o
f
color(C) and
l
uminance(Y) to TV as vi
d
eo signa
l
s, so t
h
at
h
ig
h
er-qua
l
ity
picture wi
ll
b
e gaine
d.
Tit
l
e (DVD on
ly
)
y
A collection of cha
p
ters on DVD. See also “Cha
p
ter”
.
Tr
a
c
k
Audio CD use tracks to divide up the content o
f
a
d
isc. T
h
e DVD equiva
l
ent is ca
ll
e
d
a c
h
apter. See a
l
so
“C
h
a
p
ter”
.
Vi
d
e
o
C
D
A digital
f
ormat
f
or store video data in compact disc
.
GLOSSARY
E9P8CUDZV427MG9BOMv1.indd91E9P8CUDZV427MG9BOMv1.indd91 2012/03/0113:07:222012/03/0113:07:22
92
EN
SPECIFICATIONS
N
ot
e
• The specifications and design of this product are sub
j
ect to change without notice
.
General
V
C
R vi
deo
h
eads
Fou
r h
eads
P
ower requirement
s
120V A
C
, 60H
z
P
ower consum
p
tio
n
3
0W (stan
dby
: 3.8W
)
Dimensions (wi
d
t
h
x
h
ei
gh
t x
d
ept
h)
17.2 x 4.0 x 10.3 inc
h
es
(
435 x 99.5 x 260mm
)
Weig
ht
9
.5
lb
s. ( 4.3
k
g
)
O
perating temperatur
e
4
1°F
(
5°C
)
to 104°F
(
40°C
)
Operating
h
umi
d
it
y
L
ess t
h
an 80%
(
no con
d
ensation
)
Recording
Recordin
g
forma
t
+
VR (video recordin
g
) forma
t
Recordin
g
disc
s
D
VD+Rewritable
,
DVD+Recordabl
e
D
VD-Rewritable, DVD-Recordable (+VR mode onl
y)
y
Video recordin
g
forma
t
Sampling frequenc
y
Com
p
ression forma
t
1
3.5
MH
z
M
PE
G
Audio recordin
g
forma
t
Sampling frequenc
y
Com
p
ression forma
t
48
kH
z
D
olb
y
Digita
l
Terminals
Front
Audio in
p
u
t
RCA
j
ack x 2
j
2
V rms (in
p
ut im
p
edance: more than 22kΩ
)
pp
Vi
d
eo inpu
t
RCA
j
ac
k
x
1
j
1V
p
-
p
(
75Ω
)
pp
S-video in
p
u
t
Mini DIN 4-
p
in x
1
p
Y
: 1V
p
-
p
(75Ω) C: 286mV
p
-
p
(75Ω
)
pp pp
Rear
Au
d
io inpu
t
RCA
j
ac
k
x 2
j
2
V rms (in
p
ut im
p
e
d
ance: more t
h
an 22
k
Ω
)
pp
Audio out
p
u
t
RCA
j
ack x
4
j
2
V rms (out
p
ut im
p
edance: more than 1kΩ
)
pp
Vi
d
eo inpu
t
RCA
j
ac
k
x
1
j
1V
p
-
p
(
75Ω
)
pp
Video out
p
u
t
RCA
j
ack x
1
j
1V
p
-
p
(75Ω
)
pp
S-vi
d
eo inpu
t
Mini
D
IN 4-
p
in x
1
p
Y
: 1V
p
-
p
(
75Ω
)
C: 286mV
p
-
p
(
75Ω
)
pp pp
S-video out
p
u
t
Mini DIN 4-
p
in x
1
p
Y
: 1V
p
-
p
(75Ω) C: 286mV
p
-
p
(75Ω
)
pp pp
Com
p
onent video out
RCA
j
ack x
3
Y
: 1V
p
-
p
(75Ω)
P
B
/C
B
: 700mV
p
-
p
(75Ω)
P
R
/C
R
: 700mV
p
-
p
(75Ω
)
Coaxial di
g
ital audio ou
t
RCA
j
ack x
1
j
5
00mV
p
-
p
(75Ω
)
pp
HDMI out
p
u
t
HDMI
j
ack x 1
E9P8CUDZV427MG9BOMv1.indd92E9P8CUDZV427MG9BOMv1.indd92 2012/03/0113:07:222012/03/0113:07:22
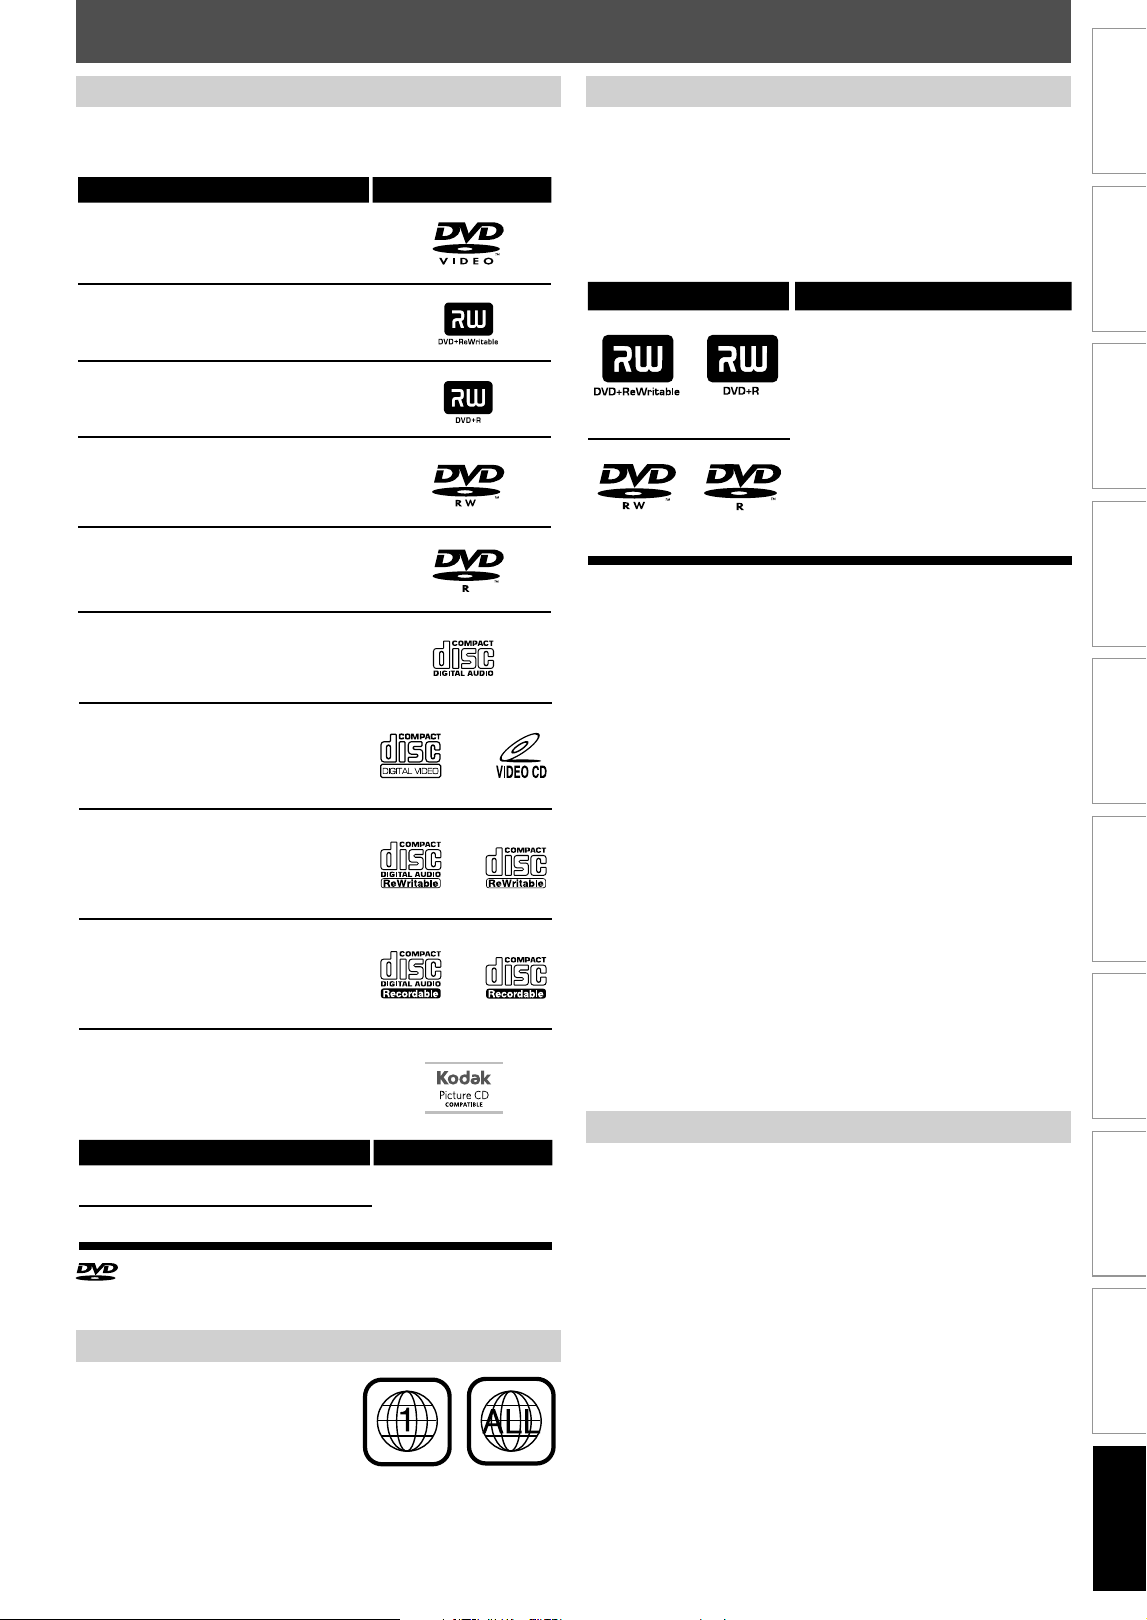
Recording Playback Editing
Introduction
Connections Basic Setup Function Setup VCR Functions
Others
Español
93
ES
ESPAÑOL
LogotiposDiscos reproducibles
CD-DA (CD de audio)
CD de video
CD-RW
CD-R
DVD-video
DVD+RW
DVD+R
DVD-RW
(Sólo discos en modo de video nalizados)
DVD-R
(Sólo discos en modo de video nalizados)
SoportesArchivos reproducibles
MP3
JPEG
CD-RW/-R
KODAK Picture CD
es una marca registrada de
DVD Format/Logo Licensing Corporation.
Discos Reproducible
s
Este a
p
arato es com
p
atible con la re
p
roducción de los
siguientes
d
iscos
y
arc
h
ivos
.
Có
d
igos
d
e Regió
n
Di
s
c
o
Gr
abab
le
E
ste aparato puede grabar a DVD+RW, DVD+R, DVD-RW
y
D
V
D
-
R.
L
os
d
iscos DVD+R/DVD-R pue
d
en ser gra
b
a
d
os só
l
o una
vez. Los
d
iscos DVD+RW/DVD-RW pue
d
en ser gra
b
a
d
os
y
bo
rr
ados
m
uchas
v
eces.
En este aparato
l
os
d
iscos DVD-RW/-R serán gra
b
a
d
os
au
t
o
m
á
tic
a
mente en e
l
m
odo
DVD+VR
.
Logotipos
Atributos
Disco de 8 cm / 12 cm, un solo lado,
una sola capa
Tiempo de grabación máx. aprox.
(modo SLP):
360 minutos (4,7 GB) (para 12 cm)
108 minutos (1,4 GB) (para 8 cm)
DVD+RW DVD+R
DVD-RW
DVD-R
• Los siguientes
d
iscos se recomien
d
an para o
b
tener una
b
uena ca
l
i
d
a
d
d
e gra
b
ación
y
h
an si
d
o compro
b
a
d
os
c
omo compati
bl
es con este aparato. Sin em
b
argo, según
sea
l
a con
d
ición
d
e
l
me
d
io e
l
equipo po
d
ría no
l
eer e
l
d
i
sco
co
rr
ecta
m
e
n
te.
Verbatim DVD+R 8x
,
DVD+RW 4x
,
DVD-R 8x
,
DVD-RW 2x
J
V
C
DVD-RW 4x
Maxell DVD+R 4x/8x/16x
,
DVD-R 8x/16x
SONY DVD+R 4x/8x/16x
,
DVD+RW 4x
TDK DVD+R 4x
/
8x
/
16
x
E
l
comportamiento
d
e cua
l
quier otro
d
isco no está
g
arantiza
d
o
.
•
Uste
d
p
ue
d
e re
p
ro
d
ucir
d
iscos DVD+RW en
l
a
mayoría de los reproductores de DVD sin
f
inalizarlos.
Sin em
b
argo, si uste
d
h
a aña
d
i
d
o o e
l
imina
d
o
capítu
l
os, u ocu
l
ta
d
o capítu
l
os,
d
e
b
e ejecutar
“
Com
p
ati
b
i
l
izar e
d
ic.” antes
d
e
p
o
d
er ver
d
ic
h
os
e
f
ectos en otros equipos. (Consulte la página 71.)
Para re
p
ro
d
ucir
d
iscos
q
ue no sean DVD+RW en
otros repro
d
uctores
d
e DVD, uste
d
necesitará
f
in
a
liz
a
rl
os.
El número
p
resente en el interior
el
g
lobo se refiere a una re
g
ión
del mundo.Este a
p
arato
p
uede
re
p
roducir discos DVD
q
ue estén
rotulados para ALL las re
g
iones o
para la re
g
ión 1
.
Di
s
c
o
n
o
Gr
abab
le
• Un DVD-RW gra
b
a
d
o en un mo
d
o
d
istinto
d
e +VR no
será gra
b
a
bl
e en este aparato a menos que uste
d
b
orre
to
d
o e
l
conteni
d
o
d
e
l
d
isco. (Consu
l
te
l
a página 70.
)
• Un DVD-R gra
b
a
d
o en un mo
d
o
d
istinto
d
e +VR no será
gra
b
a
bl
e en este aparato
.
E9P8CUDZV427MG9BOMv1.indd93E9P8CUDZV427MG9BOMv1.indd93 2012/03/0113:07:222012/03/0113:07:22
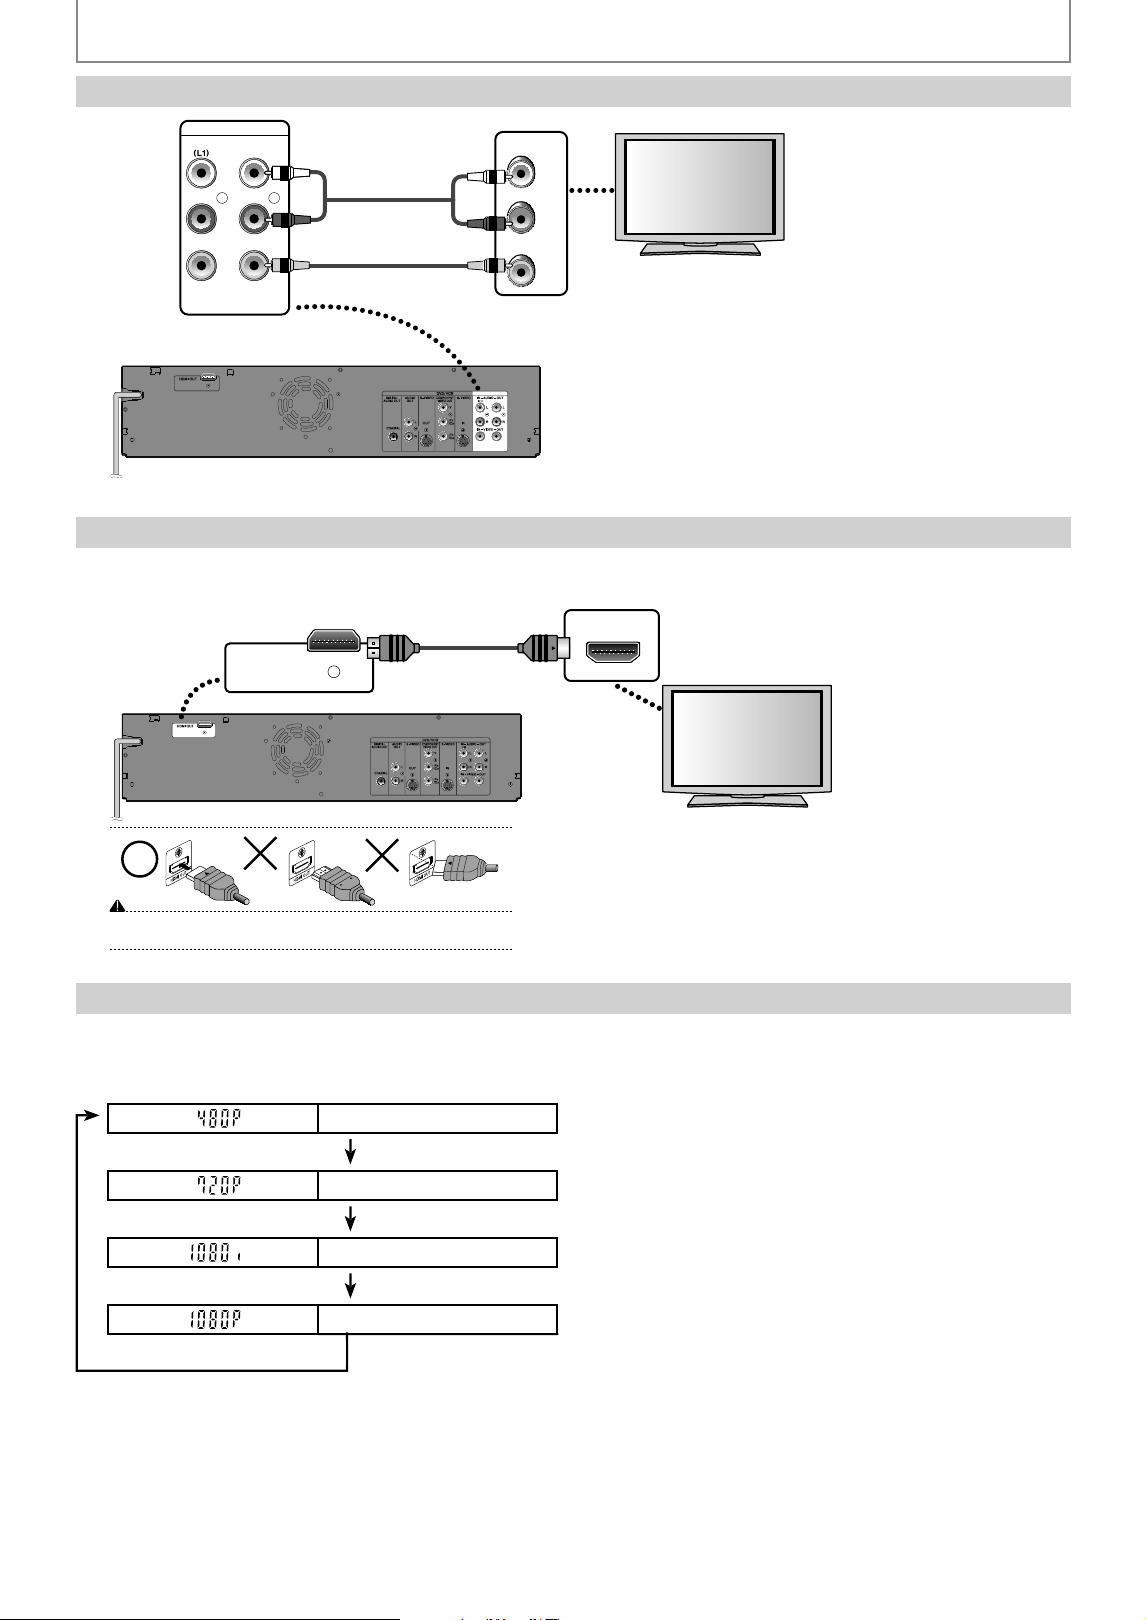
9
4E
S
Co
nexi
ó
n B
ás
ic
a
Conexión a un Te
l
evisor con un Puerto Compati
bl
e con HDMI™
VIDEO IN
AUDIO IN
L
R
L
R
IN --- AUDI O --- OU T
IN --- VIDEO --- OU T
parte trasera de este aparato
cable RCA de video
cable RCA de audio
ESPAÑOL
M
odo HDMI y señales e
f
ectivas de salida
P
r
es
i
o
n
e
[
HDMI
]
p
ara seleccionar el modo de salida HDMI. Cada vez
q
ue se
p
resiona
[
HDMI
]
el modo de salida varía como si
g
ue.
Panta
ll
a
d
e
l
p
anel
f
ronta
l
Seña
l
d
e sa
l
i
d
a
d
e vi
d
e
o
Progresivo
d
e 480
Pres
i
one [HDMI
]
Pro
g
resivo de 720
Pres
i
one [HDMI
]
1
080
entrel
a
z
ado
Presione
[
HDMI
]
P
ro
g
resivo de 108
0
Presione
[
HDMI
]
•
E
l
mo
d
o HDMI que no esté a
d
miti
d
o por e
l
d
ispositivo
d
e ex
h
i
b
ición será pasa
d
o por a
l
to
.
•
HDMI emite
l
as seña
l
es
d
e vi
d
eo / au
d
io sin convertir
l
as en seña
l
es ana
l
ógicas
.
•
N
o
es
n
ecesa
ri
a
u
n
a
co
n
e
xi
ó
n
de
aud
i
o.
HDMI IN
HDMI OUT
parte trasera de este aparato
No incline el conector para introducirlo en la toma HDMI y compruebe que el tipo
de toma corresponde con el tipo de conector.
cable HDMI
E9P8CUDZV427MG9BOMv1.indd94E9P8CUDZV427MG9BOMv1.indd94 2012/03/0113:07:232012/03/0113:07:23
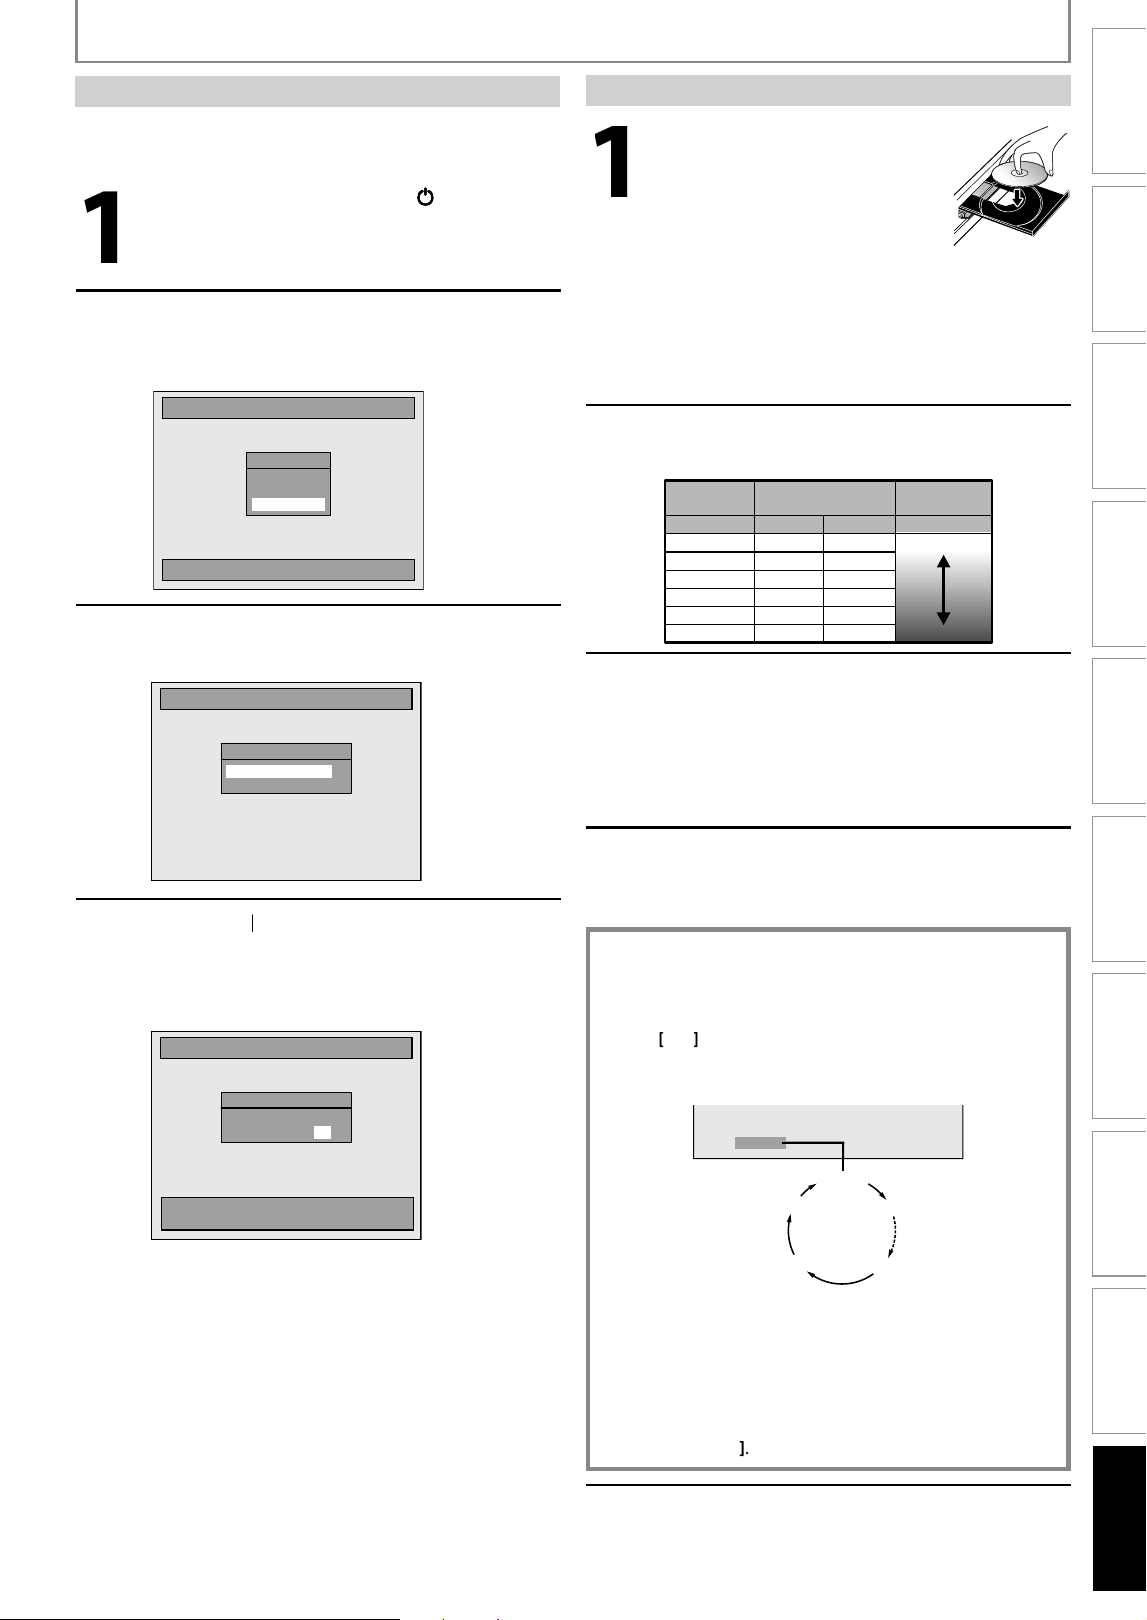
Recording Playback Editing
Introduction
Connections Basic Setup Function Setup VCR Functions
Others
Español
95
ES
Cuan
d
o uste
d
encien
d
a este a
p
arato
p
or
p
rimera vez
neces
i
ta segu
i
r estos pasos
.
ESPAÑOL
Con
f
iguración Inicia
l
1
Presione
[
DVD
].
Pres
i
one
[
OPEN/CLOSE
A
]
para abrir la bande
j
a de
d
i
s
c
os
e in
s
ert
a
r
su
d
i
s
c
o
con e
l
rótu
l
o aupntan
d
o
ha
ci
a
a
rri
ba.
Pre
s
i
o
ne
d
e n
u
ev
o
[O
PEN
/
CL
O
SE
A
] para cerrar
l
a
b
an
d
eja
d
e
d
iscos
.
* Asegúrese de que el disco sea compatible con este
aparato.(Para obtener la lista de discos compatibles
consulte la página 93.)
2
Para se
l
eccionar un mo
d
o
d
e
gra
b
ación presione [REC MODE]
.
Buena
Deciente
18 min
36 min
45 min
54 min
72 min
108 min
60 min
120 min
150 min
180 min
240 min
360 min
Disco de 8 cm Disco de 12 cm
HQ (1Hr)
SP (2Hr)
SPP (2.5Hr)
LP (3Hr)
EP (4Hr)
SLP (6Hr)
Calidad del video
y el sonido
Modo de
grabación
Tiempo de
grabación
3
Presione [SOURCE]
p
ara seleccionar la
p
osición a
d
ecua
d
a
d
e
l
a entra
d
a
externa
(
L1/L2
)
a la cual está
c
o
nect
ado
su
s
int
o
niz
ado
r extern
o.
Lue
g
o seleccione en el sintonizador
externo el canal que desea
g
rabar
.
4
Presione [REC] para iniciar
l
a
gra
b
ación
.
Para con
f
igurar la grabación a un toque con
temporiza
d
or (OTR)...
Esta es una manera sencilla de confi
g
urar el tiempo de
g
rabación en
blo
q
ues de 30 minutos.
P
r
es
i
o
n
e
[
R
E
C
]
re
p
eti
d
amente
h
asta
q
ue a
p
arezca en
l
a
p
anta
ll
a
d
e
l
te
l
evisor
l
a
l
on
g
itu
d
d
esea
d
a
d
e
g
ra
b
ación (30 minutos a 6
h
oras)
.
C
omenzará
l
a gra
b
ación a un toque con temporiza
d
or
.
0h30m
(grabación normal)
6h00m
5h30m
1h00m
I
0h30m
Para cam
b
iar
l
a
d
uración
d
e
l
a gra
b
ación
d
urante
l
a
g
rabación a un toque con temporizador:
Presione [
RE
C
] repetidamente hasta que aparezca la duración
deseada.
Para cancelar la
g
rabación a un toque con
temporizador dentro del tiempo especi
f
icado
:
P
resione
[
ST
O
P
C
]
.
5
Para
d
e tener
l
a gra
b
ación presione
[
ST
O
P
C
]
.
Gr
aba
ci
ó
n B
ás
ic
a
1
Pres
i
one [STANDBY-ON
yy
]
.
Encien
d
a e
l
te
l
evisor. Se
l
eccione
l
a entra
d
a a
l
a cua
l
está conecta
d
o e
l
aparato
.
2
Uti
l
ice
[
K
/
L
]
para se
l
eccionar su
i
d
ioma
d
esea
d
o, y
l
uego presione
[OK] para esta
bl
ecer
l
o
.
Initial Setup
OSD Language
English
Français
Español
Elija idioma de preparación.
3
Pres
i
one [OK] para act
i
var “A
j
ste
Manua
l
d
e Re
l
oj”
.
Ajuste inicial
Ajste Manual de Reloj
- - - / - - / - - - - ( - - - )
- - : - - - -
4
Uti
l
ice
[
{
/
{
B
]
para se
l
eccionar un
elemento a con
f
igurar, y utilice
[
K
/
L
]
para se
l
eccionar e
l
conteni
d
o
d
e su
pre
f
erencia,
y
luego presione [OK]
.
OK :
Ajuste hora.
RETURN : Salir de Ajuste inicial.
Ajuste inicial
Ajste Manual de Reloj
ENE / 05 / 2012 ( JUE )
12 : 00 AM
E9P8CUDZV427MG9BOMv1.indd95E9P8CUDZV427MG9BOMv1.indd95 2012/03/0113:07:242012/03/0113:07:24
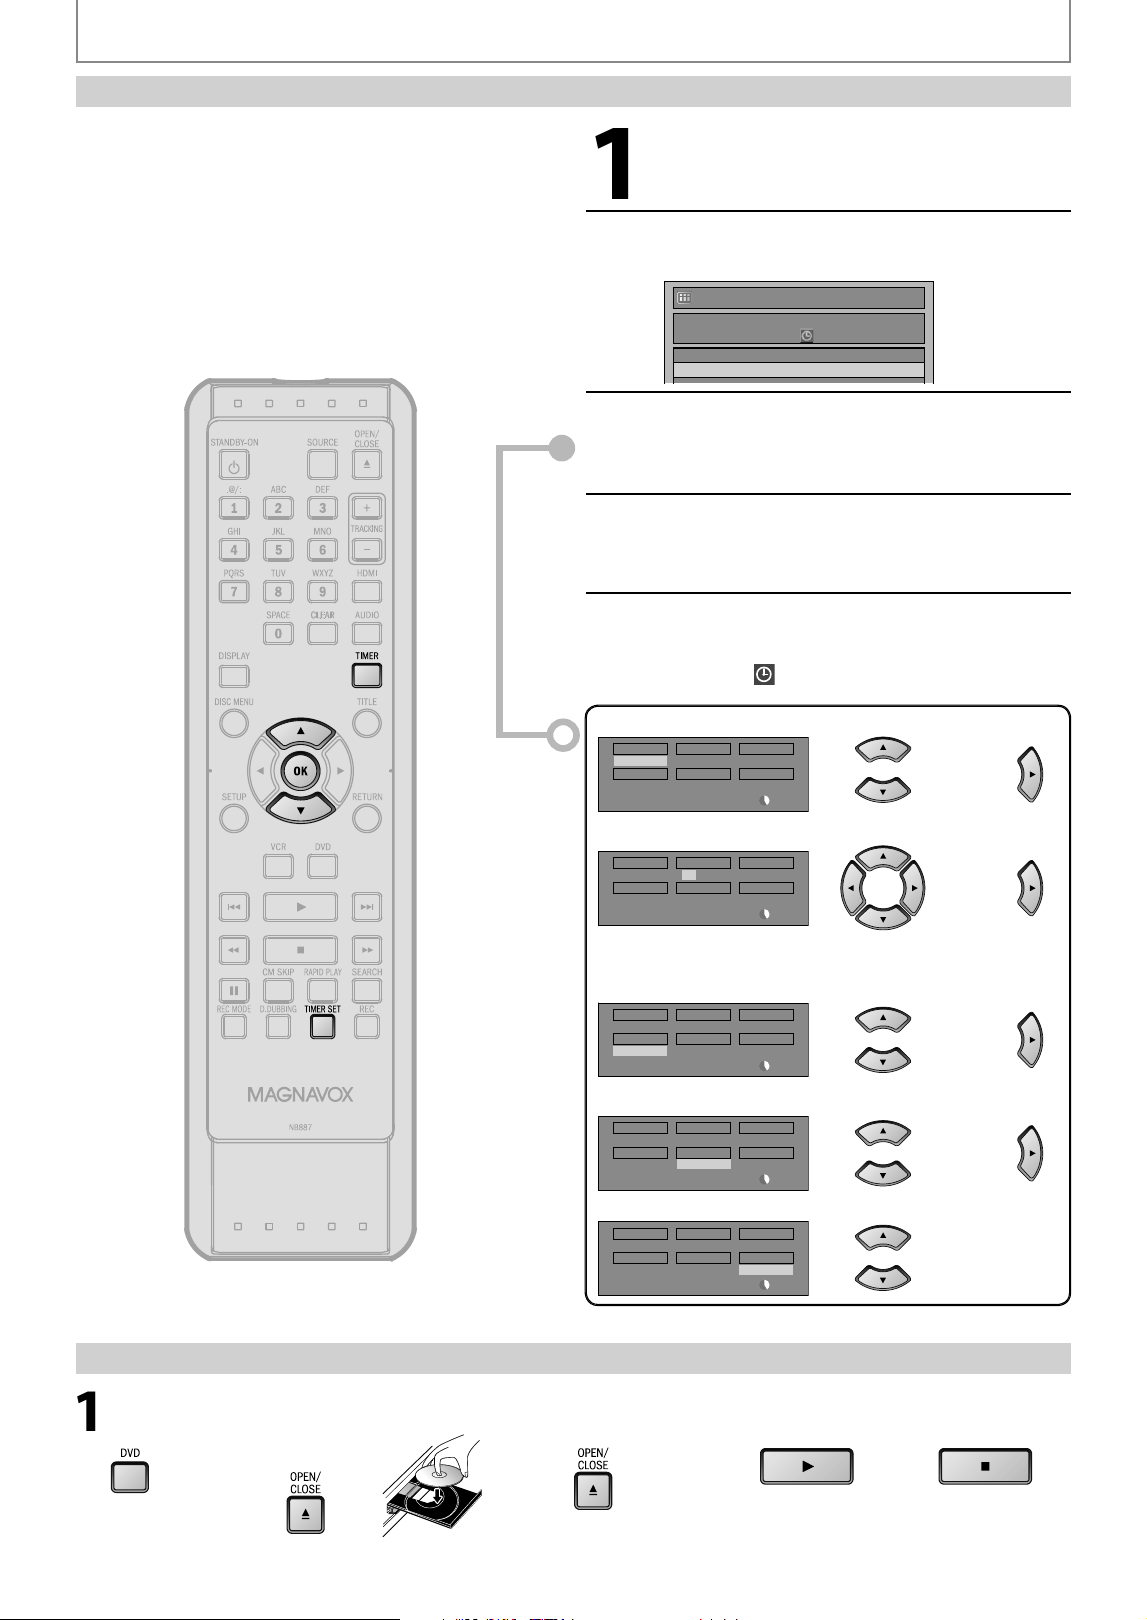
9
6
E
S
1
Pre
s
i
o
ne
[
DVD
].
2
Abra la bande
j
a de
discos,
y
Inserte un
d
i
s
c
o.
3
Cerrar la bande
j
a
d
e
d
i
s
c
os.
4
Co
mience
a
re
p
roducir
.
1
Pres
i
one [TIMER]
.
2
Uti
l
ice
[
K
/
L
] para se
l
eccionar
“
Prog.
nuevo”, y
l
uego presione [OK].
Programaci. con Reloj
JUE ENE/05 11:00AM
Fcha Empieza Termina
L1/L2
Prog. nuevo
3
Con
f
igure una programación del
t
emporiza
d
or
.
4
Pres
i
one [OK]
.
5
Presione [TIMER
S
E
T
] para configurar
una programación del temporizador.
A
parecer
á
en el pantalla del panel
f
rontal
.
ESPAÑOL
R
e
p
roducció
n
Gra
b
ación con Tem
p
oriza
d
or
U
ste
d
pue
d
e programar e
l
equipo para que gra
b
e
h
asta 12
programas, con un mes
d
e anticipación. Tam
b
ién
h
a
y
d
isponi
bl
es
g
ra
b
aciones
d
e pro
g
ramas
d
iarias o semana
l
es
.
Antes
d
e
g
ra
b
ar, ase
g
úrese
d
e qu
e
• Antes de establecer una pro
g
ramación del temporizador
configure el relo
j.
• Inserte un disco grabable con su
f
iciente espacio libre o
una cinta
d
e cassette con una
l
engüeta
d
e gra
b
ación
.
SP 2h00m
Fcha
ENE/06
L1/L2
L1
DVD
Empieza
- - : - -
Termina
- - : - -
GRAB a Modo
SP
SP 2h00m
Fcha
ENE/06
L1/L2
L1
DVD
Empieza Termina
- - : - -
GRAB a Modo
SP
12 : 00AM
SP 1h00m
Fcha
ENE/06
L1/L2
Empieza Termina
GRAB a Modo
12 : 00AM 1 : 00AM
L1
DVD
SP
Confi
g
ure la fecha
.
Con
f
igure las horas de inicio
y
f
inalización
.
Se
l
eccione un mo
d
o
d
e gra
b
ación
.
SP 1h00m
Fcha
ENE/06
L1/L2
Empieza Termina
GRAB a Modo
SP
12 : 00AM 1 : 00AM
L1
DVD
Seleccione un medio de
g
rabació
n
(
“DVD” o “VCR”
)
.
5
D
eten
g
a la
r
e
p
roducción.
Fcha
ENE/06
L1/L2
DVD
Empieza Termina
GRAB a Modo
SP
12 : 00AM 1 : 00AM
L1
SP 1h00m
Seleccione la
p
osición adecuada de la entrada
externa
(
L1/L2
)
a la cual está conectado su
s
int
o
niz
ado
r extern
o.
E9P8CUDZV427MG9BOMv1.indd96E9P8CUDZV427MG9BOMv1.indd96 2012/03/0113:07:262012/03/0113:07:26

Recording Playback Editing
Introduction
Connections Basic Setup Function Setup VCR Functions
Others
Español
9
7
ES
MEMO
E9P8CUDZV427MG9BOMv1.indd97E9P8CUDZV427MG9BOMv1.indd97 2012/03/0113:07:282012/03/0113:07:28

P
rin
ted
in
C
hin
a
E9P
8CUD
1VMN
3
27
33
★★★★★
*1VMN32733*
LIMITED
WA
RRANT
Y
F
UNAI
COR
P.
will r
P.
ep
air t
h
is
pr
oduct,
fr
,
ee o
f
char
g
e in the U
S
A in the
ev
ent o
f
de
f
ect in materials o
r
wo
rkmanshi
p
as
f
ollows
:
DU
R
A
TION:
A
A
PA
R
TS:
RR
F
U
NAI
COR
P.
will pr
P.
ovide
p
a
r
ts
to
r
e
p
lace de
f
ecti
v
e
pa
r
t
s without char
g
e
f
or one
(1)
ye
a
r
fr
o
m
t
he
date o
f
original
r
etai
l
pu
r
c
h
as
e
.
C
er
t
ai
n pa
r
t
s a
r
e excluded
fr
om this warranty
.
y
y
L
AB
OR
:
F
U
NAI
COR
P.
will pr
P.
ovide the labor without charge for a period of ninety (90) da
ys fr
a
a
o
m
t
he da
t
e
of
ori
g
ina
l
r
e
tai
l
p
u
r
ch
a
se
.
Note:
An
y
pr
oduct
so
l
d
a
n
d
ide
n
tified
as
r
efu
r
bis
h
ed
or
re
ne
w
e
d carries a ninety (90) da
y
s
l
a
b
o
r
a
a
an
d
pa
r
t
s
l
i
m
ited
w
a
rr
a
n
t
y.
L
IMIT
S
AND EX
C
L
US
I
O
N
S:
T
HI
S
W
ARRANTY IS EXTENDED ON
WW
LY
T
O
THE ORIGINAL RET
AIL PURCHASER
T
T
.
A P
U
R
C
HA
S
E RE
C
EIPT
OR O
THER PR
O
O
OOF OF ORIGINAL RET
R
R
AIL PURCHASE
T
T
WILL BE RE
Q
UIRED T
O
G
ETHE
R
WITH
THE
PR
ODUCT
RR
TO
OBT
AIN SER
T
T
VICE UNDER
R
R
THI
S
W
ARRANTY
W
W
.
Y
Y
Th
is warrant
y
s
h
a
ll
not
b
e exten
d
e
d
to a
n
y
other
p
erson or trans
fe
r
e
e
.
Th
is warrant
y
is
vo
id and
of
n
o
e
ff
e
ct
i
f
a
n
y
seria
l
num
b
ers on t
h
e
pr
oduct
a
r
e a
lt
e
r
ed
,
r
e
pl
ace
d
,
d
e
f
a
c
e
d
,
mi
ss
i
n
g
o
r if
s
e
r
vice was attem
p
ted b
y
an unauthorized se
r
vic
e
c
en
te
r
.
This limited warrant
y
does not a
pp
l
y
to a
n
y
pr
oduct not
p
u
r
c
ha
s
ed and
us
ed in
t
he
U
ni
t
ed
St
a
t
e
s.
Th
is warrant
y
on
ly
co
v
e
r
s
f
ail
u
r
es due to def
ects in material or w
f
f
or
k
mans
h
i
p
w
h
ic
h
occur
d
urin
g
norma
l
u
s
e
.
I
t
d
o
e
s
n
ot
co
v
er dama
g
e which occurs in shi
p
men
t
,
o
r
f
ail
u
re
s
w
hi
c
h are
c
a
us
ed
by
r
y
epairs,
alterations or
,
pr
oducts not su
pp
lied b
y
F
U
NAI
COR
P
.
,
o
r dama
g
e,
which
,
re
su
l
ts
f
r
om accident,
m
isuse
,
,
a
bus
e,
mishandling,
,
misapplication,
a
lt
era
t
i
on
,
,
f
aulty installatio
n
,
i
mproper ma
i
ntenanc
e
,
co
mme
r
c
ia
l
us
e
such
a
s
hot
e
l
,
r
en
t
a
l
or
o
ff
ice use o
f
this
pr
oduct
,
o
r
d
ama
g
e w
h
ic
h
r
e
su
l
ts
fr
o
m
fi
re
,
f
l
oo
d
,
l
i
g
htnin
g
or other acts o
f
G
od
.
T
HI
S
WA
RRANTY DOES NO
T CO
O
O
VER
O
O
PA
CKING MA
A
A
TERIALS
A
A
,
ANY
A
CCESSORIES (EXCEPT REM
A
A
OT
E
CONTR
OL),
R
R
ANY
COS
METI
C
PA
R
TS,
R
R
CO
MPLETE
,
A
SS
EM
B
LY
PA
R
TS,
RR
DEM
O
O
R FL
OO
R M
O
DEL
S.
,
FUNAI CORP
.
P
P
AND IT
S
REPRE
S
E
N
TA
TIVES OR
AA
A
G
ENT
S
S
HALL IN N
O
EVENT BE LIABLE F
OR
ANY
G
ENERAL
,
INDIRE
C
T
O
R
CO
N
S
E
Q
UENTIAL
DA
MA
G
AA
E
S
A
RI
S
IN
G
OU
T
O
F
O
R
OC
CA
S
I
O
NED B
Y
T
HE
US
E
O
F
OR
T
HE INABILIT
Y
TO
US
E
THIS PR
O
R
R
DUCT
.
T
T
THI
S
WA
RRANTY I
S
MADE IN LIE
U
O
F
A
LL O
THER
O
O
WA
RRANTIE
S,
EXPRESS OR IMPLIED
,
D
D
A
ND
O
F
ALL O
THER LIABILITIES ON
O
O
THE
P
A
RT
OF FUNAI,
T
ALL O
THER
O
O
WA
RR
A
NTI
E
S
IN
C
L
U
DIN
G
THE
WA
RRANTY OF MERCHANT
A
BILIT
Y
T
T
AND FITNE
SS
F
OR
A
P
A
R
TICULAR PURPOSE,
R
R
AR
E
H
EREBY DI
SC
LAIMED BY F
U
NAI AND IT
S
REPRE
S
E
N
TA
TIVES IN
AA
THE
U
NITED
S
TAT
E
S
.
ALL
W
ARRANTY INSPECTIONS
W
W
AND REP
AIRS MUST BE PERFORMED BY
P
P
AN
AU
TH
O
RIZED
SE
R
V
I
C
E
C
ENTE
R
.
T
HI
S
W
ARRANTY IS ON
WW
LY
VA
L
ID
WHEN
THE
U
NIT I
S
C
ARRIED
-
IN
T
O
AN
AU
TH
O
RIZED
SE
RV
I
C
E
C
ENTE
R
.
THE
PR
ODUCT MUST BE
RR
A
CCOM
PA
NIED
BY
A
CO
PY
O
F
THE ORIGINAL RET
AIL PURCHASE RECEIPT
T
T
.
T
T
IF NO PR
OOF OF PURCHASE IS
R
R
AT
TA
C
H
E
D,
THE
W
ARRANTY
W
W
WILL NO
T BE HONORED
O
O
AND REP
AIR
P
P
COS
T
S
WILL BE
C
HAR
GE
D
.
I
MP
O
RT
AN
T
T
T:
THI
S
LIMITED
W
ARRANTY GIVES
WW
Y
OU SPECIFIC LEGAL RIGHTS.
Y
Y
Y
O
U MA
YHA
A
A
VE
A
A
OT
HER RI
G
HT
S
THA
T
A
A
VA
RY
FR
OM ST
RR
A
T
T
TE
A
A
T
O
ST
A
T
T
TE.
A
A
IF
.
, AT
F
F
ANY
TIME D
U
RIN
G
THE
W
ARRANTY PERIO
WW
D,
Y
O
U
A
RE
U
N
A
BLE T
O
OBT
AIN SA
T
T
TISF
A
A
A
F
F
C
TI
O
N
W
ITH
THE REP
AIR OF
P
P
THIS PR
ODUCT
R
R
,
T
T
PLEASE CONT
A
T
T
CT FUNAI CORP
.
P
P
A
TTENTION:
AA
FUNAI CORP
.
P
P
RESER
VES
R
R
THE RI
G
H
T
T
O
M
O
DIF
Y
ANY DE
S
I
G
N
O
F
T
HIS PR
O
R
R
D
UCT
W
ITHOUT PRIOR NO
T
O
O
IC
E
.
WA
RRANTY ST
A
T
T
TEMENT REGARDING NON
AA
AU
THORIZED REP
AIRS
P
P
:
T
o
obtain warrant
y
ser
v
ic
e
,
yo
u
m
ust
ta
k
e
the pr
oduct,
r
r
o
r deli
v
,
er the pr
oduct fr
r
r
ei
g
ht
pr
e
p
ai
d
,
in either its ori
g
ina
l
p
acka
g
in
g
or
p
acka
g
in
g
a
ffo
rd
in
g
an e
q
ua
l
d
e
gr
ee of pr
rr
ot
e
ction
r
r
,
to
a
n
y
A
U
TH
O
RIZED
SE
RV
ICE CENTER.
FUNA
.
I
CORP
.
P
P
w
ill n
ot
r
e
i
m
bu
r
s
e
yo
u
fo
r a
n
y
s
e
r
v
ice done b
y
unauthorized s
e
r
v
i
ce
pr
oviders without prior written appr
rr
ov
a
l
.
To
l
ocate
y
our
near
est
A
UTHORIZED SER
VICE CENTER or for
R
R
ge
ne
r
al
ser
vice inquiries,
please
,
co
n
tact
us
at:
FUNAI SER
VICE CORPORA
R
R
TION
A
A
Te
l:
1-800-605-8610
:
www
.ma
ww
gna
vo
a
a
x.com
/
su
ppo
r
t
2200
Sp
ie
g
el Drive,
G
rove
p
ort,
O
H
43125
E9P8CUDZV427MG9BOMv1.indd98E9P8CUDZV427MG9BOMv1.indd98 2012/03/0113:07:282012/03/0113:07:28