
User Manual of Vision-Fused Multi-Point
Deformation
1
Monitoring System
Syste
Vision-Fused Multi-Point
Deformation Monitoring
m
User Manual
March 2026

User Manual of Vision-Fused Multi-Point
Deformation
2
Monitoring System
Device Usage Statement
Dear customer :
Welcome to [Z8] (hereinafter referred to as "the Device"). We hereby formally
notify you that, to ensure the proper functioning of the slope equipment monitoring
system and to clearly define the rights and obligations of both parties, you must
carefully read and fully understand this statement, with particular attention to the
exemption and/or limitation clauses.
1、Application scenarios of monitoring equipment
Vision-Fused Multi-Point Deformation Monitoring System is only suitable for
real-time monitoring of slow deformation in landslide bodies, such as the creep stage
and gradual change stage. It cannot yet capture sudden deformation scenarios like
collapse, rock rolling, falling rocks, rock mass detachment, or soil layer detachment.
Additionally, due to the limited penetration capability of waves, the system cannot
penetrate vegetation, resulting in significantly compromised data quality in areas
covered by vegetation.
2、Installation and layout of monitoring equipment
(1) Vision-Fused Multi-Point Deformation Monitoring System equipment is
designed to detect deformation in the LOS (Line of Sight) direction. The measured
deformation values are significantly influenced by factors such as installation
location and angle. The monitoring points and angles must be precisely designed and
installed by qualified entities with slope stability assessment credentials.
(2) To ensure stable operation of the monitoring system, a reliable power supply,
network, and server environment is essential. You should implement various measures
to maintain operational stability, including but not limited to power supply, network,
and server configurations. The server side must guarantee stable power and network
supply, avoid downloading non-monitoring system software, and implement robust
network security measures. For the Vision-Fused Multi-Point Deformation Monitoring
System side, critical components such as solar power systems, mains stability, UPS,
inverters, communication equipment, and auxiliary materials (e.g.,transparent

User Manual of Vision-Fused Multi-Point
Deformation
3
Monitoring System
panels) should use our recommended models to prevent issues like power supply,
communication, or echo intensity from affecting normal operation.
3、Threshold settings for monitoring data
Vision-Fused Multi-Point Deformation Monitoring System equipment provides a
variety of alarm modes and multi- level alarms, but the realization of the relevant
alarm functions requires reasonable and correct early warning thresholds. These
thresholds should be regularly and accurately updated and adjusted by the mine design
institute or the unit with slope stability evaluation qualifications based on the
actual geological conditions and historical data of the monitored area.
4、Operation and maintenance of monitoring system
(1 ) The registration, point relocation, and software upgrades for monitoring
equipment models must be performed by trained technicians in accordance with standard
requirements. You may also complete these operations with assistance from our
professional technicians ; otherwise, the equipments performance may be compromised.
(2) The initial threshold should be set according to the recommended values in
the design documentation. Should the design threshold be modified, the platform
threshold must be updated promptly. For configuration assistance, please notify us
in writing in advance.
(3) After relocating the Vision-Fused Multi-Point Deformation Monitoring System
station, the monitoring parameters must be configured and updated prior to the first
operation, including latitude, longitude, elevation, zero point orientation,
monitoring range parameters, and data upload parameters, followed by creating a new
task. When moving the equipment, it should be securely stored in the instrument box
during transportation to prevent damage.
(4) We will develop a comprehensive training program covering system principles,
equipment installation and operation, debugging procedures, software management,
troubleshooting, and equipment maintenance. Upon completing all equipment
installation, we will dispatch technical experts to conduct centralized on-site
training at the mining site. The training aims to ensure participants fully understand
and master the operational, maintenance, and repair techniques of the project

User Manual of Vision-Fused Multi-Point
Deformation Monitoring System
equipment. During the training period, we will provide you with required materials
including textbooks, technical documentation, blueprints, as well as product manuals,
4
user guides, and operational instructions for the relevant equipment.
(5) We will provide technical training to your professional engineers or
management personnel in accordance with the contract terms. To ensure your staff are
competent in all system operations, including operation, line maintenance, fault
analysis and resolution, as well as equipment repair and maintenance, you must
organize relevant personnel to actively participate in the services organized by
Party B and diligently acquire operational skills.
(6) You are responsible for conducting regular inspections of on-site equipment,
power supply lines, communication links, and software operations. If you identify
any faults or abnormalities, you may perform preliminary diagnostics or repairs. If
you are unable to resolve the issue, you may request remote assistance from us. Should
remote solutions prove ineffective, we will promptly dispatch personnel to the site
for on- site resolution.
(7) For issues arising from force majeure or currently unsolvable by existing
technical capabilities, both parties shall engage in amicable negotiations. In the
event of failure to reach consensus, resolution shall be made in accordance with legal
provisions and the principle of fairness.
5、Interpretation and Application of Monitoring Data
(1) You fully understand that Vision-Fused Multi-Point Deformation Monitoring
System is a specialized monitoring device, not a measuring instrument. The collected
monitoring data constitutes objective raw data and does not constitute definitive
conclusions, recommendations, or judgments, and should not be directly cited. The
relationship between the monitoring data and the actual conditions of the monitored
area, as well as how the data matches or verifies each other, requires comprehensive
analysis and interpretation by professional technicians from geological disaster
assessment, mine design institutes, or units qualified for slope stability evaluation,
in conjunction with other data and circumstances. Qualified and experienced units
must conduct the analysis and application of the monitoring data. If you require data

User Manual of Vision-Fused Multi-Point
Deformation
5
Monitoring System
analysis and application, our company can provide assistance from qualified units,
with the associated costs to be borne by those units.
(2) Monitoring data shall not be privately misused, altered, or tampered with
in any other form.
This statement is intended to clearly outline your rights and obligations when
using the device, preventing unnecessary disputes or losses due to misunderstandings
or negligence. We shall not be liable for any losses resulting from your failure
to comply with the instructions or requirements set forth herein.
We kindly ask you to always use our equipment safely and properly, exercise
caution in operation, and ensure the safety and interests of yourself and others,
so as to jointly create a good usage environment.
disclaimer
This manual may contain inaccuracies, discrepancies in product
functionality, or printing errors.
Our company will update this operating manual in accordance with
enhancements and changes to product features, with regular
improvements and updates.
This manual describes the information. The updated information will be
reflected in the latest version of this manual. No separate notice will
be given.
Due to our continuous adoption of new technologies, we will not provide
separate notifications regarding product parameter changes (including
software version updates).
This manual is intended solely as a reference guide for users and does
not guarantee complete consistency with the actual product. For
practical application, please refer to the...
The actual item shall prevail.
The parts, components, and accessories mentioned in this manual do not

User Manual of Vision-Fused Multi-Point
Deformation
6
Monitoring System
constitute the standard equipment configuration. The actual
configuration is specified in the packing list.
be as the criterion 。
All text, tables, and images in this manual are protected by relevant
national laws and shall not be used without permission.
Unauthorized use.
Indoor Use Only: This equipment is designed for indoor use only. Do
not install in outdoor locations, wet areas, or areas subject to
condensation, rain, or splashing liquids.
For applications such as periodic monitoring, mobile emergency monitoring,
and scientific research, any resulting property damage, personal injury,
or legal liabilities shall be borne by the user.
Do not disassemble the internal components of the Vision-Fused
Multi-Point Deformation Monitoring System. This product contains no
self-repairable parts.
All maintenance work must be performed by authorized personnel of our
company. No disassembly or modification of the equipment is permitted. Any
issues arising from unauthorized modifications or repairs shall be the
users responsibility.
All rights and final interpretation of this manual are reserved by our
company.

User Manual of Vision-Fused Multi-Point
Deformation
7
Monitoring System
Catalogue
目录
1 summary
.................................................................................................................................................
9
1.1. brief introduction
...........................................................................................................
9
1.2. operational principle
.....................................................................................................
9
1. 3 . functional characteristics
.........................................................................................
10
1.4. system composition
.........................................................................................................
11
1. 4 . 1. Vision- Fused Multi- Point Deformation Monitoring System
...............
11
1.4.2. Cloud server platform
...............................................................................................
11
Figure 1-1 Cloud Server Platform
..............................................................................
12
1.5. technical parameter
.......................................................................................................
12
(13) Protection rating: IP6 6
................................................................................
12
2 Equipment Installation Instructions
.....................................................................................
13
2. 1 Installation site selection
.........................................................................................
13
(1) installation site
.....................................................................................................
13
(2) Installation level
...................................................................................................
13
(3) Installation environment
.......................................................................................
13
2.2 Installation steps
...........................................................................................................
13
2.2.1 site operation
.......................................................................................................
13
2.2.2 Open the box and remove the equipment
..................................................
14
2.2.3Fixing
..........................................................................................................................
15
2.2.4 Power Supply and Network Connection
..............................................................
15
2.2.5Integrity confirmation (initial unpacking)
..............................................
15
Cable requirements
.............................................................................................
12.2.6 5
2. 3 Equipment on/ off operation
.............................................................................................
15
2.3.1 Startup operation
.................................................................................................
15
2.3.2 Shutdown operation
...............................................................................................
16
3 Operation Instructions of Host Platform
............................................................................
17
3.1 brief introduction
...........................................................................................................
17
3.1 .1 Java runtime environment Java
................................................................................
17
3.1.2 agree on
....................................................................................................................
18
3.2 Software login
...........................................................................................................
18
3.2.1 Software login
................................................................................................................
18
3.2.2 Introduction to the software main interface
..........................................
19
View QR code data on the go
.................................................................................
20
3. 3 Setting and Control of Radio Host Parameters
....................................................
20
3. 3 .1 Location and orientation configuration
....................................................
20
3.3.2 Scan range configuration
...........................................................................................
22
1 ) Manual configuration range
.....................................................................................
22
2 ) Visual configuration range
.....................................................................................
23
3.3.3 Upload TIFF file
...........................................................................................................
25
3.4 Switch work mode
.......................................................................................................
26
Platform configuration switch
.............................................................................................
27

User Manual of Vision-Fused Multi-Point
Deformation Monitoring System
1) Logical Introduction
.........................................................................................................
28
2) Pattern Configuration
.......................................................................................................
28
2、 Alarm Mode 2
................................................................................................................................
3.4.1 Communication log
.........................................................................................................
27
3.4.2 Alarm mode
..............................................................................................................
28
1、 Alarm Mode 1
................................................................................................................................
28
29
1) Logical Introduction
.........................................................................................................
29
2) Pattern Configuration
.......................................................................................................
30
3. 5 Basic software operations
.....................................................................................
30
3.5.1 View Deformation Diagram
..................................................................................
30
3.5.2 View scatter plot
.................................................................................................
31
3.5.3 Add monitoring points and view data
............................................................
32
3. 5 . 4 Query and write configuration parameters
................................................
33
3.5.5 Video
..........................................................................................................................
37
3.5.6 View historical images
.......................................................................................
38
1 ) Capture images at fixed points
.....................................................................................
38
2) Angle recognition image
.................................................................................................
38
3 ) Report images at regular intervals
............................................................................
39
3.5.7 Select layers and thematic maps
....................................................................
39
3.6 Basic operations of host computer
............................................................................
40
3.6.1 Network port upgrade
...........................................................................................
40
1) TCP CLIENT connection host
.............................................................................................
40
4. 1 Equipment positioning failed
.......................................................................................
54
4. 2 The platform cannot view the deformation graph
................................................
54
3.6.1.2 PTZ Upgrade
.........................................................................................................
42
3.6.1.3 Upgrade
..................................................................................................................
43
3.6.1.4 Router Upgrade
...................................................................................................
43
3.6.2 Device information query
..................................................................................
44
3. 6 . 3 Equipment Parameter Query and Setting
......................................................
45
3.6.4
A
larm threshold
.....................................................................................................
47
3.6.5 Configure
.................................................................................................................
48
3.6.6 Operation function
............................................................................................
...48
3.6.7 MQTT Platform 1
.....................................................................................................
50
3.6.8 MQTT Platform 2
.....................................................................................................
50
3.6.9 HTTP Platform 1
.....................................................................................................
51
3.6.10 HTTP Platform 2
...................................................................................................
51
3.6.11 Parameter configuration
..................................................................................
52
3. 6 . 12 Equipment scanning range configuration
..................................................
52
3.6.13 Upload data
...........................................................................................................
53
3.6.14 Pan-Tilt
..................................................................................................................
53
4 Frequently Asked Questions and Solutions
..........................................................................
54
8
4. 3 The platform cannot view the scatter diagram
....................................................
54
5 Maintenance and Care of Equipment
..........................................................................................
55
6 After-sales service of equipment
............................................................................................55
7 FCC Statement
.....................................................................................................................................
57
8 Laser Safety Information...............................................................................................................57

User Manual of Vision-Fused Multi-Point
9
Deformation Monitoring System
1 summary
This user manual for the Vision-Fused Multi-Point Deformation
Monitoring System is designed to guide you through the product before you
begin using it. To ensure optimal performance, please read the manual
thoroughly and follow the detailed instructions for installation,
calibration, and operation. By doing so, you will be able to easily utilize
all features of the equipment and enjoy the best possible user experience.
1.1.brief introduction
The Z8 is a versatile system that employs synthetic aperture imaging
technology and phase difference interferometry deformation extraction
algorithms to detect minute deformations. By integrating video processing,
edge computing,and self-organizing network (SONET) technologies, it
enables non-contact, omnidirectional, short-range, sub-millimeter-level
surface monitoring. The system also features image forensics, SONET
coordination, and adaptive data acquisition and reporting capabilities.
1.2.operational principle
True aperture antenna emits electromagnetic wave signals, receives the
reflected echoes from targets, and forms images through signal processing
techniques. Its resolution is directly limited by the size of the antenna
aperture, which is one of its main differences from synthetic aperture
antenna.

User Manual of Vision-Fused Multi-Point
Deformation
10
Monitoring System
1.3.functional characteristics
(1)360 ° panoramic monitoring: With PTZ integration, it supports
360 ° horizontal rotation and 30 °-60 ° vertical adjustment, enabling
comprehensive coverage of wide-area surveillance.
(2)All-weather and all-weather operation: Utilizing active
microwave technology, it is unaffected by climatic conditions such as rain,
snow, and fog, enabling continuous operation under various weather
conditions with excellent environmental adaptability.
(3)Non-contact, high-precision monitoring: By using synthetic
aperture imaging technology and phase difference interferometry
deformation extraction algorithm, it can achieve sub-millimeter level
high-precision monitoring.
(4)High protection rating: The device features IP66-rated design,
engineered to withstand harsh outdoor conditions.
(5)Image forensics: When detects abnormal points, it can be used for
forensic analysis of images, reducing the need for personnel to visit the
site for on-site inspection.
(6)Low power consumption and low TCO (Total Cost of Ownership): The
systems average power consumption is below 20W, representing a 70%
reduction compared to traditional slope equipment, which significantly
lowers field power supply costs.
(7)Quick Update: Leveraging edge computing technology, it enables
minute-level data updates.
(8)Linked Trigger:The built-in self-organizing network module
enables synchronized activation with contact devices.
(9)Built-in filtering algorithm: Built-in atmospheric correction
algorithm and error filtering algorithm, less affected by slope surface
vegetation interference and the impact of slope on the movement of vehicles
and personnel;

User Manual of Vision-Fused Multi-Point
Deformation Monitoring System
11
(10)Adaptive data acquisition:Equipped with an adaptive data
processing algorithm that automatically adjusts the frequency of data
collection and upload based on real-time field conditions, enabling
continuous monitoring in motion.
(11)Automatically report anomalies: The system automatically flags
unexpected anomalies at designated points using internal algorithms,
alerting customers to detect issues promptly.
1.4.system composition
1.4.1.Vision-Fused Multi-Point Deformation Monitoring System
1) Vision-Fused Multi-Point Deformation Monitoring System is mainly
used to collect deformation and scattering data at regular intervals, and
monitor planar Deformation
The Vision-Fused Multi-Point Deformation Monitoring System
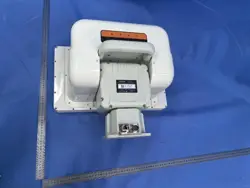
primarily consists of a radar module (including an antenna), a pan-tilt
unit, a camera.
data.
2) The gimbal primarily supports acquisition, enabling a horizontal
scanning range of 0-360 ° and a vertical range of-30 to 60°.
3) The camera is primarily designed for periodic point selection and
real-time capture of surveillance area images. When a threshold is
triggered at a specific location, it can also capture photos of the area
to assist in Deformation alarm detection.
1.4.2.Cloud server platform

User Manual of Vision-Fused Multi-Point
Deformation
12
Monitoring System
Figure 1-1 Cloud Server Platform
(15)Image resolution: The integrated built-in camera has a pixel
count of ≥2 million and supports zoom, enabling active capture of abnormal
locations for auxiliary judgment. The photography function remains intac
(1)Monitoring range: 10m to 1000m
(2)Angle monitoring range: 360° (azimuth) × 30° (pitch)
(3)Deformation accuracy: 0.1 mm
(4)Resolution: 0.3m
(5)Angle resolution: 9 mrad
(6)Minimum sampling interval: ≤1 min
(7)Power supply: 9-22V DC
(8)Power supply method: Solar power, mains power
(9)Installation method: observation pier installation
(10)Communication method: LAN
(11)Average power consumption: ≤ 20W
(12)Operating temperature: -40℃ to +65℃
(13)Protection rating: IP66
(14)
The host transmits data wirelessly to the cloud server. The
cloud platform software sends control signals to operate the radar. For
software operation details, refer to Section 3.4.
1.5. technical parameter
Frequency Band: Ku (17.1GHz~17.3GHz)
t

User Manual of Vision-Fused Multi-Point
13
Deformation Monitoring System
and has been upgraded to perform AI analysis on captured photos,
identifying the proportion of vegetation in the images and alerting to
vehicle-related sources.
(16)Nighttime lighting: Laser illumination lamps provide
supplementary lighting for night photography.
(17)Panoramic background map update:The built-in camera can generate
a panoramic background map, enabling bidirectional synchronization
between data and the map.
2 Equipment Installation Instructions
2.1 Installation site selection
(1) installation site
The installation site must be selected to prevent ground subsidence,
collapse, or landslides, with no obstructions or buildings within a 5-meter
radius to ensure unimpeded operation.
(2) Installation level
Ensure the equipment installation is level with the ground to prevent
settlement or other issues after rain or snow, maintaining proper alignment.
Pre-installation leveling can be performed to ensure ground level. If
conditions permit, a concrete base may be laid.
(3) Installation environment
There is no strong magnetic and electric interference around th1 e
equipment installation position.
There is no high-rise building around the equipment installatio
2
n
position, otherwise it will affect the normal operation of the external
positioning and orientation module of the equipment .
2.2 Installation steps
2.2.1 site operation

User Manual of Vision-Fused Multi-Point
Deformation Monitoring System
14
1
The start and end scanning angles of equipment are determined
according to the target imaging range, and the fixing position of the pole
is determined accordingly.
After the pole erection is completed, the system can be powere2 d
by solar energy or municipal electricity, depending on the site conditions.
2.2.2 Open the box and remove the equipment .
Open the radar packaging box, grasp the equipment handle with both
hands, and carefully remove the equipment from the box. Refer to Figure
2-1 for the radar storage diagram.

User Manual of Vision-Fused Multi-Point
Deformation
15
Monitoring System
Figure 2-1 Schematic diagram of equipment storage
2.2.3Fixing
After removing the equipment , it is fixed to the gimbal by screws
on the bottom of the gimbal.
2.2.4Power Supply and Network Connection
If a solar power supply solution is adopted, the recommende1 d
configuration list is shown in the table below:
To meet the power requirements of the Z8, the solar panel should be
equipped with a 200W solar panel, a 600Ah battery, and a solar
controller rated at 20A or higher.
specification
model
s
solar panel
200W
a solar cell 600Ah
lightning rod
/
underground battery box
/
20A/30
solar controller
A
If the mains power supply solution is adopted, the matching main2 s
power adapter can be used for power supply.
2.2.5Integrity confirmation (initial unpacking)
After the equipment installation is completed, inspect the entire
radar structure to confirm that all component units are intact and show
no deformation or other abnormalities. If any abnormalities are detected,
contact the relevant personnel for resolution.
2.2.6 Cable requirements
Always use the original cables supplied by our factory. Do not cut or
reconnect cables arbitrarily. (All cables for equipment use are
pre-assembled before leaving the factory.)
2.3Equipment on/off operation
2.3.1 Startup operation

User Manual of Vision-Fused Multi-Point
Deformation
16
Monitoring System
Confirm power
After powering on the equipment , check the power status via the
indicator lights. The rightmost red light staying on indicates normal power
supply.
Confirm before shutting down
Before shutting down, it is recommended to configure the equipment in
software to "manual mode" and rotate the radar to the origin position
Startup confirmed
When powered on, the equipment will return to its origin if its current
position deviates from it. If the equipment communication is normal, the
first green indicator light on the left will remain on. Under normal network
signal and SIM card conditions, the network will connect within
approximately 2 minutes, with the second orange indicator light on the left
staying on. If the positioning and orientation status is normal, the third
blue indicator light on the left will remain on. Note: Re-positioning and
re-orientation are required for initial installation or relocation. Refer
to Section 3.3.1 for the positioning and orientation steps.
2.3.2 Shutdown operation
.
Shut down operation
After completing the above steps, simply unplug the power. Note: Do
not unplug the device through the interface knob. For mains power, unplug
the adapter. For solar power, unplug the solar power and battery power in
sequence.
i Note: 1. Before shutting down, ensure you return to the original
position to save time when the equipment starts up again.
2. Before shutting down, ensure the radar returns to its
original position to align the radar base with the inner
lining of the packaging box.
The position is consistent, which is convenient for the equipment to
be put back into the packaging box.

User Manual of Vision-Fused Multi-Point
17
Deformation Monitoring System
3 Operation Instructions of Host Platform
3.1 brief introduction
3.1.1 Java runtime environment Java
The display control software adopts a B/S architecture, supporting
both standalone deployment and remote access via cloud servers. It
integrates functions such as data collection, control, analysis, and
reporting into a unified system. The software features intuitive operation,
convenient data storage and retrieval, and powerful analytical
capabilities. Key features include:
(1)configure the operation parameters, control the equipment start,
stop, power off and other operations, and display the equipment ,
communication can receive the equipment intensity map, deformation map and
so on in real time;
(2)It can import 3D terrain data in various formats and achieve fast
and accurate matching with 2D images through its proprietary algorithm,
with a matching accuracy reaching sub-meter level. The 3D terrain and
overlaid images support smooth operations such as rotation, translation,
and scaling.
(3)Monitoring points can be added, deleted, and named, with automatic
extraction and display of cumulative deformation, deformation rate,
acceleration, and other curves for multiple monitoring points. Detailed
historical information at specific time points can be obtained by
traversing the curves.
(4)It supports storage of intensity maps, deformation maps, and
deformation data from monitoring points/areas for any time period, with
unrestricted access to historical data and rapid display of historical
images and curves.
(5)The platform enables remote camera control for monitoring point

User Manual of Vision-Fused Multi-Point
18
Deformation Monitoring System
selection, streamlining maintenance operations.
3.1.2 agree on
For the sake of convenience, this manual adopts the following
conventions:
Software/Systems: Z8 Cloud Server software.
Host: Z8 host.
Deformation value: Cumulative deformation value.
Scatterplot/Intensity Map: These are equipment reflection intensity
renderings derived from data processed by the equipment hosts monitoring
output. Both scatterplot and intensity map belong to the same category
of images, differing only in terminology.
Deformation map: A visual rendering of the monitored areas
deformation status, generated from the cumulative deformation data
collected by the equipment host and processed through data analysis.
DEM: Digital Elevation Model data of the equipment host location.
3.2 Software login
3.2.1 Software login
Access zms.iot-monitor.cn:10000/home in your browser. To log in,
contact the operations team for your account credentials. The software
login interface is shown below:

User Manual of Vision-Fused Multi-Point
Deformation
19
Monitoring System
3.2.2 Introduction to the software main interface
The software organically integrates most functions into the main
interface, with simple and quick operation that is clear at a glance. Users
can master all operational skills in a short time.
The main functions include:
The setting and inquiry of the operating parameters of the host;
radar host control;
The status of equipment operation is displayed;
Switch intensity map, deformation map, and average velocity map
Switch between real-time mode and historical mode for deformation and
average velocity graphs
Edit and annotate monitoring points

User Manual of Vision-Fused Multi-Point
Deformation
20
Monitoring System
Edit warning threshold
Role permissions management
Communication log management
View QR code data on the go
Fixed-point capture, video calibration, video viewing, scheduled
capture, and alert capture
coordinate location and distance measurement
angular discrimination
3.3 Setting and Control of Radio Host Parameters
3.3.1 Location and orientation configuration
After initial equipmentinstallation or relocation, reconfiguration of
positioning and orientation is required. The Z8 currently utilizes an
external positioning and orientation module for this operation, as shown
in the installation diagram below.
1)Connect the positioning and orientation components by securing two
antennas to opposite ends of the positioning rod, then connect them to the
CGI230 (GNSS host) via the matching feeder. Note: Connect the antennas to
the main and auxiliary antenna interfaces specified on the CGI230. Failure
to do so will cause an azimuth deviation of 180° and compromised
positioning accuracy.

User Manual of Vision-Fused Multi-Point
Deformation
21
Monitoring System
2)Set the Z8 to the origin position. During initial setup, the
equipment defaults to the origin and requires no configuration. For
subsequent installations where the equipment is not at the origin, connect
it via Ethernet and use the equipment host computer to configure it. Follow
these steps: [Working Mode] → [Manual Configuration Mode] → [Pan-Tilt
Zeroing].
3)Enter the available SWAS/CORS parameters to obtain differential
data for rapid RTK positioning and orientation.
4)After configuration, connect the 7-pin data cable on the positioning
and orientation component to the equipment, as shown in the figure below.

User Manual of Vision-Fused Multi-Point
Deformation
22
Monitoring System
5)After ensuring the network indicator light (second from the left)
stays on, click [One-Click Localization] on the host computer and wait for
the localization to complete. The process usually takes 2-3 minutes. During
this time, the localization indicator light will flash, and it will remain
on after successful localization.
3.3.2 Scan range configuration
1)Manual configuration range
Step 1: Configure the equipment scanning range using the host computer
via the following sequence: [Working Mode] → [Manual Configuration Mode]
→ [Data Acquisition].
Step 2: Check the current scanning parameters. These are the default
settings during initial installation and can be adjusted according to the

User Manual of Vision-Fused Multi-Point
Deformation
23
Monitoring System
actual scanning range on-site.
2)Visual configuration range
Step 1: Log in to the ZMS platform and search for the device by its
geographic coordinates. The following diagram illustrates this process
using a test device as an example.
step2: If the device is in automatic mode, switch to manual mode (click
the manual mode button). The device defaults to manual mode at the factory.

User Manual of Vision-Fused Multi-Point
Deformation
24
Monitoring System
Step 3: Tap Video Calibration and wait for the camera to wake up and
start sending video.
Step 4: Depending on the actual field conditions, you can perform
zooming and pan/tilt control. First, configure the pitch angle according
to the page instructions. If the current scanning range doesnt meet the

User Manual of Vision-Fused Multi-Point
Deformation
25
Monitoring System
field requirements, adjust the pan/tilt head vertically in step increments
until the target pitch angle is achieved. Click Next to set the starting
azimuth angle, then rotate the equipment head to reach the desired starting
angle. Continue to the next step to complete the azimuth scanning. Click
Finish to save the current pitch angle and azimuth angles as scanning
parameters.
3.3.3 Upload TIFF file
Log in to the platform, click [Device Management] → [Device
Management], and search by equipment SN number. The following figure shows
a test device as an example.
During initial setup, the [TIFF file uploaded] option shows as No. You
need to upload the 3D model as a TIFF file.
Click [Upload TIFF file], select the data to upload, and wait for the
upload to complete.

User Manual of Vision-Fused Multi-Point
Deformation
26
Monitoring System
3.4 Switch work mode
The device is initially configured in [Manual Mode] to prevent
initialization (i.e., rotational scanning) upon power-on, which may cause
wire harness entanglement or equipment instability-induced collisions.
After completing the aforementioned steps, ensure that equipment
positioning, orientation, and scanning range are properly configured
before switching to [Normal Mode]. Once switched to Normal Mode, the
equipment will periodically collect data and upload it to the platform.
1)Switching of host computer configuration
Connect the network cable to the equipment.The host computer
establishes a TCP connection. Click [Working Mode], select [Normal
Working Mode], then click [Configure] to complete the mode switch.

User Manual of Vision-Fused Multi-Point
Deformation
27
Monitoring System
Platform configuration switch
The platform locates the device by coordinates. Click the device
icon and select [Auto Mode]. The system will then send commands to the
equipment to switch its operational mode.
3.4.1 Communication log
The platform displays the status information of devices uploaded
regularly, with a default upload interval of one hour. Click the [Log
Information] icon, as shown in the figure below:

User Manual of Vision-Fused Multi-Point
Deformation
28
Monitoring System
3.4.2 Alarm mode
1、 Alarm Mode 1
1) Logical Introduction
The device can implement alarm functionality through self-
organizing networks. The logic is:
The device scans deformation data every 5 minutes, storing it in its
cache. When the difference between the 13th data packet (current) and the
first packet exceeds the alarm threshold (30mm), an alarm will be
triggered if alarm mode is enabled.
2) Pattern Configuration
Step 1: Launch the host computer and configure the network.

User Manual of Vision-Fused Multi-Point
Deformation
29
Monitoring System
Step 2: Configure the operation function. By default, it is
disabled. Select Always On for the Keep Always On option, choose Normal
Alarm for the alarm type, then click Configure.
2、 Alarm Mode 2
1) Logical Introduction
When on-site acceptance is required, a rapid alarm function should be
implemented. This feature enables quicker alerts compared to the standard
alarm mode, which requires at least one hour to activate.

User Manual of Vision-Fused Multi-Point
Deformation Monitoring System
30
When the real-time alarm mode is enabled, the system will trigger an
alarm immediately if Deformation exceeding the trigger threshold (default
4mm) is detected during two consecutive scans.
2) Pattern Configuration
See 3 for the remaining steps.3.6.1 Select the alarm type as [Immediate
Alarm].
3.5 Basic software operations
3.5.1 View Deformation Diagram
Click the equipment icon to view the deformation map based on the
latitude and longitude query device. You can switch between real-time and
historical data views according to your needs.

User Manual of Vision-Fused Multi-Point
Deformation
31
Monitoring System
3.5.2 View scatter plot
Equipment does not upload scatter maps by default. Users can obtain
them as needed. To view scatter maps, configure to [Manual Mode] and click
[Manual Obtain].
1)Do not recognize corner reverse acquisition
To manually acquire scatter maps without angle recognition, follow
these steps: Click [Manual Acquisition] → [Is it a base map?] and
select Yes. After the platform issues the command, it will send the
equipment to scan the scatter data and transmit the results. Wait 5
minutes for the platform to generate the map.
2)Identify the corner angle and obtain it

User Manual of Vision-Fused Multi-Point
Deformation Monitoring System
32
The platform supports automatic corner reflection detection. To
enable this feature, users must scan twice: first for the base map,
and second for the corner reflection (which should not be within the
scan range). Configuration steps: [Manual Acquisition] → [Is Base
Map?] (Select Yes), then wait for the equipment scan to complete and
upload scattering data.
After 5 minutes, deploy the corner reflector at the target location
and scan again. Configuration steps: [Manual Acquisition] - [Is it a
background map?] Select No- [Is corner reflector calculated?] Select
Yes. Wait for the equipment scan to complete and upload the scatter
data. Once corner reflector recognition is complete, check the scatter
map and the corner reflector icon will be marked.
3.5.3 Add monitoring points and view data
After the deformation map is generated, the platform supports adding
monitoring points and viewing measurement data.
Step 1: Click the add monitoring point icon, select the location to
monitor, click OK, and enter the monitoring point name.

User Manual of Vision-Fused Multi-Point
Deformation
33
Monitoring System
Step 2: Once the measurement point is added, the equipment will upload
hourly deformation data for that point. Users can view the data by selecting
the corresponding point from the measurement point list on the right.
3.5.4 Query and write configuration parameters

User Manual of Vision-Fused Multi-Point
Deformation Monitoring System
34
The platform supports setting and writing common configuration
parameters. Supported parameters include:
1)orientation and positioning parameters
SWAS/CORS information
2)Rotational speed, start/stop azimuth, nearest/farthest distance,
pitch angle, equipment base elevation
Status data upload interval
3)Equipment jamming acquisition, data timing acquisition, upload
interval
4)Encryption alert threshold, alarm threshold, report frequency, and
image capture count
3.5.4.1 Configuration of Positioning and Orientation Parameters
The platform supports manual input of latitude, longitude, elevation,
and azimuth data into the equipment. Before writing, ensure the information
is correct to avoid potential imaging errors.
The platform also supports automatic positioning and targeting. Before
configuration, ensure the external positioning and targeting components
are properly connected (see connection diagram in 3.3.1) and that SWAS/CORS
information is configured. Click [One-click Configuration] to enable
automatic positioning and targeting.

User Manual of Vision-Fused Multi-Point
Deformation
35
Monitoring System
3.5.4.2 SWAS/CORS Parameter Configuration
The platform supports remote configuration of SWAS/CORS parameters.
Before positioning and orientation, configure the available SWAS/CORS
information in advance. Password information is hidden.
3.5.4.3 Scan Range Configuration
Configure the expected start and end azimuth angles, pitch angle, and
minimum/maximum scanning distance based on the actual scanning range. Note:
The platform restricts invalid inputs. If the input parameters are abnormal,
check whether the characters are valid.

User Manual of Vision-Fused Multi-Point
Deformation
36
Monitoring System
3.5.4.4 Interval Settings
The platform allows configuration of data collection and upload
intervals. Status data indicates equipment parameters including power
supply voltage, signal strength, and operational status of components
(e.g., cameras, equipment units, and pan-tilt units). The encryption
interval activates when monitoring points exceed predefined thresholds,
while the data collection interval enables regular deformation data
acquisition. The upload cycle interval controls periodic transmission of
monitoring point deformation data. These settings generally require no
modification and should operate at factory default parameters.

User Manual of Vision-Fused Multi-Point
Deformation
37
Monitoring System
3.5.4.5 Threshold Setting
The platform supports configuring encryption warning thresholds and
alarm thresholds. Configure them based on actual Deformation conditions,
or run with factory default parameters [encryption warning threshold 4mm,
alarm threshold 30mm].
3.5.5 Video
The platform supports remote viewing of live videos with a 3-second
time limit. Users can click the video interface to view it. During viewing,
users can save the video locally (limited to 30 seconds) or take
screenshots.
To proceed: Select [Manual Mode], tap [Video], and wait for the camera
to wake up and the video to upload.

User Manual of Vision-Fused Multi-Point
Deformation
38
Monitoring System
3.5.6 View historical images
The platform allows viewing images uploaded in the devices history,
corner recognitioncategorized as fixed-point snapshots,
scheduled reports, and more
images,
.
1)Capture images at fixed points
Users can take location-based snapshots as needed. Click the
[Location-Based Snap] icon (see the image below) to select the target
spot. The system will upload the captured image to [Historical
Snapshots] after the process is complete.
2) Angle recognition image
When viewing a scatter chart with corner reflection detection

User Manual of Vision-Fused Multi-Point
Deformation
39
Monitoring System
enabled, the platform will automatically capture the corner reflection
and upload it to [Historical Snapshots] after the detection completes.
Users can then check if the image contains corner reflections.
3)Report images at regular intervals
When users add monitoring points to the platform, the equipment will
upload the images of these points at 10:00 daily and save them to the
[Historical Snapshots].
3.5.7 Select layers and thematic maps
Click the [Switch Layers] button to select the appropriate base map
and thematic map as needed. The thematic map is used to generate 3D views
for stereoscopic imaging.


User Manual of Vision-Fused Multi-Point
Deformation
41
Monitoring System
2) Click [Upgrade Management], select the main control board as the upgrade
target, and choose the files to upgrade
3) Click [Start Upgrade] to transfer the firmware to the specified file
directory. The device will then restart and the TCP connection will be
disconnected.
4) Wait for the device to restart and complete the upgrade. After
reconnecting the device, check the firmware version.

User Manual of Vision-Fused Multi-Point
Deformation
42
Monitoring System
3.6.1.2 PTZ Upgrade
1) Open the host computer and establish a TCP connection
2) Click [Upgrade and Command Issuance] → [Upgrade Target], select the
PTZ camera, and choose the file path. (Note: If the firmware prompts Check
and import the corresponding firmware later, simply modify the PTZ camera
firmware name to include the keyword update_fy.)

User Manual of Vision-Fused Multi-Point
Deformation Monitoring System 3
) Click Start Upgrade and wait for the PTZ upgrade to complete. Note: The
PTZ will perform a self-check regardless of whether the upgrade succeeds
or fails.
3.6.1.3 Upgrade
1) Select [Radar] as the upgrade target and choose the corresponding
equipment firmware (Note: The file name must contain the keyword
"update_equipment
43
")
2) Just wait for the equipment upgrade to be completed.
Note: The host computer has a timeout logic for pan-tilt and radar
upgrades. The upgrade process should take no more than 2 minutes under
normal conditions. If the upgrade fails after 5 minutes, the host computer
will automatically mark it as unsuccessful.
3.6.1.4 Router Upgrade
1) Enter 192.168.1.1 in the web browser. Note: The URL may be inaccessible
during initial startup. Try using cmd to ping this IP first. Connect only
after successful ping.

User Manual of Vision-Fused Multi-Point
Deformation
44
Monitoring System
2) Click [Manage] → [Firmware Update], select the router firmware to
upgrade, and wait for the update to complete. Note: As recommended by the
router manufacturer, the factory settings should generally be restored
after the firmware update.
3.6.2 Device information query
The host computer supports both serial and TCP connections, with most
functions being redundant. The following sections will be explained using
the Ethernet-TCP connection method. Note: Serial connection only does not
support all firmware upgrades or command issuance. Refer to the final TAB

User Manual of Vision-Fused Multi-Point
Deformation
45
Monitoring System
page [Upgrade and Command Issuance].
You can check general information in this interface. See the details
below:
The firmware version includes all module versions:
Core: The main control board, which refers to the firmware version of
the host.
Equipment: Firmware version for radar systems;
Cam: Firmware version of the camera;
Ptz: PTZ firmware version;
3.6.3 Equipment Parameter Query and Setting
In this interface, you can set the collection and reporting intervals.
These settings are generally not required to modify, as the host machine
has already provided the configuration range.
1)Data collection interval: the frequency of equipment scans, default
is 300S

User Manual of Vision-Fused Multi-Point
Deformation Monitoring System
2)Encryption collection interval: How often the equipment
46
scans after
being triggered. The default is 60 seconds.
3)Report count: The number of encrypted data acquisitions triggered
by the equipment, with a default of 6.
4)Periodic report interval: the interval for uploading status data,
default is 3600S
5)Number of snapshots: The maximum number of photos captured per
trigger, with a default of 2. For example, if 10 points are detected to
have shifted during a scan, the system will sort these points and take
photos of the top two.
Camera Upgrade
1) Enter 192.168.1.68 in your browser.
2) Go to [System Settings] → [System Upgrade] → [File Selection],
select the camera firmware, then click [File Upload]. Wait for the firmware
upload to complete. After the upload finishes, click [System Restart] and
reconnect to the web page in about 5 seconds.

User Manual of Vision-Fused Multi-Point
Deformation
47
Monitoring System
3) Click [System Information] to check if the camera firmware upgrade was
successful.
3.6.4 Alarm threshold
As mentioned earlier, when the encryption threshold is exceeded, the
device will encrypt data during collection. If the alarm threshold is
surpassed, the device will trigger an alarm (provided this mode is
configured).

User Manual of Vision-Fused Multi-Point
Deformation
48
Monitoring System
3.6.5 Configure
This is required when configuring networking parameters.
3.6.6 Operation function
Configure the alarm mode, with the detailed logic described in
Section 3.3.6.

User Manual of Vision-Fused Multi-Point
Deformation
49
Monitoring System
time service
Write the computer time to the device as its time.
Ethernet parameters
No changes are usually required. Proceed with caution!!!

User Manual of Vision-Fused Multi-Point
Deformation
50
Monitoring System
3.6.7 MQTT Platform 1
The default connection address is the IoT platform and usually does
not need to be modified.
3.6.8 MQTT Platform 2
It can be used to configure MQTT connections to other platforms.

User Manual of Vision-Fused Multi-Point
Deformation
51
Monitoring System
3.6.9 HTTP Platform 1
The default connection address is the ZMS data display platform and
usually does not need to be modified.
3.6.10 HTTP Platform 2
Reserve an interface.
This TAB page cannot be configured in normal mode. Change it to [Manual
Configuration Mode].

User Manual of Vision-Fused Multi-Point
Deformation
52
Monitoring System
3.6.11 Parameter configuration
To configure a router or camera, click these two buttons to go directly
to the web page.
3.6.12 Equipment scanning range configuration
Configure equipment start/stop angle, pitch angle, speed, and
minimum/maximum range. The supported range is displayed on the host
interface.

User Manual of Vision-Fused Multi-Point
Deformation
53
Monitoring System
3.6.13 Upload data
Use this button to upload deformation and scattering data. Note:
Scattering data cannot be uploaded if the equipment initialization is
incomplete. (Initialization: Complete 13 cycles of acquisition after
startup.)
3.6.14 Pan-Tilt
Control the gimbal and perform gimbal self-check through this
interface.

User Manual of Vision-Fused Multi-Point
54
Deformation Monitoring System
4 Frequently Asked Questions and Solutions
4.1 Equipment positioning failed
1)Check if the network indicator light is always on.
2)Check if the SWAS/CORS account is configured.
3)Check if the SWAS/CORS account is available.
4)Check whether the external positioning and orientation components
are connected in the correct sequence.
5)Check if the current equipment installation location is open and
free of obvious obstructions.
4.2 The platform cannot view the deformation graph
1)Check if the equipment has completed initialization. The
deformation map will not be uploaded until the device is fully initialized
after startup.
2)Check if the equipment is in manual mode. In manual mode, the
equipment does not upload data. Configure it to automatic mode for regular
data scanning.
4.3 The platform cannot view the scatter diagram
Equipment does not upload scatter maps by default; users must manually

User Manual of Vision-Fused Multi-Point
55
Deformation Monitoring System
obtain them on the platform, as detailed in Section 3.4.2.
5 Maintenance and Care of Equipment
a. Do not use strong chemicals, cleaning agents, or harsh detergents
to clean the equipment, as this may cause corrosion and damage.
b. The operating temperature of equipment is between-2 0℃ and +6 5℃.
Do not use the equipment in the environment beyond the operating range.
c. All equipment has undergone sealing tests before leaving the
factory and can be used in standardized working environments with dust and
rain protection. During long-term equipment operation, regular cleaning
should be performed to maintain the equipment cleanliness, thereby
extending its service life and ensuring monitoring accuracy.
d. If the temperature difference between the working area and the
storage area is too large, the equipment should be kept in the box until
it adapts to the ambient temperature before being taken out for use to
ensure good accuracy.
e. When the equipment is not in use for an extended period, disconnect
the power supply, clean the equipment surface to ensure overall dryness,
then place the equipment in the packaging box and store it in a dry and
well-ventilated location.
f. During equipment transportation, the device should be placed in the
packaging box. Care must be taken to avoid compression, impact, and severe
vibration during transit. Inversion of the device is strictly prohibited.
g. If the device malfunctions, troubleshoot according to the manual.
If unresolved, contact technical support. Do not disassemble the device
without authorization.
6 After-sales service of equipment
During the warranty period for the radar products manufactured by our

User Manual of Vision-Fused Multi-Point
Deformation Monitoring System
company, free repair services are provided. However, in the following cases,
56
material costs and labor hours may be charged at discretion:
The company states that due to our ongoing adoption of new
technologies, we will not provide separate notifications regarding changes
to product specifications
not properly stored, installed, used or maintained.
Product damage caused by non-compliance with the User Manual.
Lightning, fire and other natural disasters.
Damage caused by poor product design of other manufacturers
resulting in matching issues.
.
The unauthorized repair personnel and institutions disassemble and
repair the equipment.
The final interpretation right of this instruction manual belongs
to our company.

User Manual of Vision-Fused Multi-Point
57
FCC ID:SY4-A0208
Deformation Monitoring System
7 FCC Statement
0
Please take attention that changes or modification not expressly
approved by the party responsible for compliance could void the user’s
authority to operate the equipment.
(1) This device may not cause harmful interference, and (2) This
device must accept any interference received, including interference
that may cause undesired operation
This device complies with Part 15 of the FCC Rules. Operation is
subject to the following two conditions:
.
This equipment complies with FCC radiation exposure limits set forth
for an uncontrolled environment. This equipment should be installed and
operated with minimum distance 20cm between the radiator & your body.
8 Laser Safety Information
Laser Classification:Class 3R Laser Product
per
IEC 60825-1:2014 and
EN 60825-1:2014+A11:2021
Laser Parameters:
- Maximum Average Output:<10 mW
- Wavelength: 850nm
- Beam Divergence:1.8-71°
- Laser Aperture: Face the device, the light output warning label is
located near the left camera of the device.
Safety Warnings:
CAUTION –
INVISIBLE LASER RADIATION
– CLASS 3R LASER PRODUCT
Avoid direct eye exposure.
Reflections from specular surfaces may also be hazardous to the eyes.
Product Laser Labels:

Laser Warning Device Instructions:
In dark environments, when the device's blue indicator light turns
on, the laser fill-light will activate after 3 seconds. Avoid direct
viewing of the laser fill-light while it is in operation. When the
blue indicator light turns off, the laser fill-light will stop
working.
Laser on
Laser off