MICROWAVE OVEN
INSTRUCTION MANUAL
T30PXP24-A0F
IMPORTANT SAFETY INSTRUCTIONS
READ CAREFULLY AND KEEP FOR FUTURE REFERENCE
Household use only
SAVE THESE INSTRUCTIONS

2
1. IMPORTANT SAFEGUARDS
When using electrical appliances basic safety precautions should
be followed, including the following:
WARNING – To reduce the risk of burns, electric shock, fire, injury
to persons, or exposure to excessive microwave energy:
1. Read all instructions before using the appliance.
2. Read and follow the specific "PRECAUTIONS TO AVOID
POSSIBLE EXPOSURE TO EXCESSIVE MICROWAVE
ENERGY" found on page 8.
3. This appliance must be grounded. Connect only to properly
grounded outlet. See "GROUNDING INSTRUCTIONS" found
on page 10.
4. Install or locate this appliance only in accordance with the
provided installation instructions.
5. Some products such as whole eggs and sealed containers –
for example, closed glass jars – are able to explode and
should not be heated in this oven.
6. Use this appliance only for its intended use as described in the
manual. Do not use corrosive chemicals or vapors in this
appliance. This type of oven is specifically designed to heat,
cook, or dry food. It is not designed for industrial or laboratory
use.
7. HOT CONTENTS CAN CAUSE SEVERE BURNS. DO NOT
ALLOW CHILDREN TO USE THE MICROWAVE. Use caution
when removing hot items.
8. Do not operate this appliance if it has a damaged cord or plug,
if it is not working properly, or if it has been damaged or
dropped.
9. This appliance should be serviced only by qualified service
personnel. Contact nearest authorized service facility for
examination, repair, or adjustment.
10. Do not cover or block any openings on the appliance.
11. Do not store this appliance outdoors. Do not use this product
near water – for example, near a kitchen sink, in a wet
basement, near a swimming pool, or similar locations.
12. Do not immerse cord or plug in water.

3
13. Keep cord away from heated surfaces.
14. Do not let cord hang over edge of table or counter.
15. When cleaning surfaces of door and oven that comes together
on closing the door, use only mild, nonabrasive soaps, or
detergents applied with a sponge or soft cloth.
16. To reduce the risk of fire in the oven cavity:
a. Do not overcook food. Carefully attend appliance when
paper, plastic, or other combustible materials are placed inside
the oven to facilitate cooking.
b. Remove wire twist-ties from paper or plastic bags before
placing bag in oven.
c. If materials inside the oven ignite, keep oven door closed,
turn oven off, and disconnect the power cord, or shut off power
at the fuse or circuit breaker panel.
d. Do not use the cavity for storage purposes. Do not leave
paper products, cooking utensils, or food in the cavity when
not in use.
17. Liquids, such as water, coffee, or tea are able to be
overheated beyond the boiling point without appearing to be
boiling. Visible bubbling or boiling when the container is
removed from the microwave oven is not always present. THIS
COULD RESULT IN VERY HOT LIQUIDS SUDDENLY
BOILING OVER WHEN THE CONTAINER IS DISTURBED
OR A UTENSIL IS INSERTED INTO THE LIQUID.
18. Notice for extension cord:
a. A short power-supply cord is provided to reduce the risks
resulting from becoming entangled in or tripping over a longer
cord.
b. Longer cord sets or extension cords are available and may
be used if care is exercised in their use.
c. If a long cord or extension cord is used:
1) The marked electrical rating of the cord set or extension
cord should be at least as great as the electrical rating of the
appliance;
2) The extension cord must be a grounding-type 3-wire cord;
and
3) The longer cord should be arranged so that it will not drape

4
over the counter top or tabletop where it can be pulled on by
children or tripped over unintentionally.
The following basic precautions should always be followed when
using electrical appliance:
1. Read all instructions before using.
2. Make sure the voltage in your living area corresponding to the
one shown on the rating label of the appliance. And the wall
socket is properly grounded.
3. TO reduce the risk of fire in the oven cavity:
a. DO not overcook the food.
b. Remove wire twist -ties from paper or plastic bags before
placing bags in the oven.
c. Do not heat oil or fat for deep drying as the temperature of
oil cannot be controlled.
d. After use wipe the waveguide cover with a damp cloth,
followed by dry cloth to remove any food splashes and
grease. Built -up grease may overheat and begin to cause
smoke or catch fire.
e. If materials inside the oven should smoke or ignite, keep
oven door closed, turn oven off and disconnect the power
supply.
f. Close supervision is necessary when using disposable
containers made from plastic, paper or other combustible
material.
4. TO reduce the risk of explosion and sudden boiling:
a. Do not place sealed containers in the oven. Baby bottles
fitted with a screw cap or teat are considered to be sealed
containers.
b. When boiling liquid in the oven, use the wide -mouthed
container and stand about 20 seconds at the end of
cooking to avoid delayed eruptive boiling of liquids.
c. Potatoes, sausage and chestnut should be peeled or
pierced before cooking. Eggs in their shell, whole hard
-boiled eggs should not be heated in microwave ovens
since they may explode, even after microwave heating has
ended.

5
d. The cooked liquid should not be removed out immediately.
Several moments should be waited before removing. In
order to avoid possible hazards caused by delayed
eruptive boiling of 1iquids.
e. The contents of feeding bottles and baby food jars are to be
stirred or shaken and the temperature is to be checked
before consumption, in order to avoid burns.
5. Never operate the oven further if the door or door seals is
damaged or the oven is malfunctioned or supply cord is
damaged. Return the appliance to the nearest authorised
service center for repair and maintenance. Never try to adjust
or repair the oven yourself.
6. If the supply cord is damaged, it must be replaced by the
manufacturer or its service agent or a qualified technician in
order to avoid a shock hazard.
7. After cooking, the container is very hot. Using gloves to take
out the food and avoid steam burns by directing steam away
from the face and hands.
8. Slowly lift the furthest edge of dishes cover and microwave
plastic wrap and carefully open popcorn and oven cooking
bags away from the face.
9. Make sure the utensils do not touch the interior walls during
cooking.
10. Failure to maintain the oven in a clean condition could lead to
deterioration of the surface that could adversely affect the life
of the appliance and possibly result in a hazardous situation.
11. Only use utensils that are suitable for use in microwave ovens.
12. Do not store food or any other things inside the oven.
13. Do not operate the oven without any liquid or food inside the
oven. This would do damage the oven.
14. This appliance is not intended for using by young children or
infirm persons without supervision.
15. When the appliance is operated in the combination mode,
children should only use the oven under adult supervision due
to the temperatures generated.
16. Any accessories not recommended by the manufacturer may
cause injuries to persons.

6
17. Do not use outdoors.
18. Save these instructions.
19. WARNING: If the door or door seals are damaged, the oven
must not be operated until it has been repaired by a competent
person.
20. WARNING: It is hazardous for anyone other than a competent
person to carry out any service or repair operation that
involves the removal of a cover which gives protection against
exposure to microwave energy.
21. WARNING: Liquids and other foods must not be heated
sealed container since they are liable to explode.
22. WARNING: Only allow children to use the oven without
supervision when adequate instructions have been given so
that the child is able to use the oven in a safe way and
understands the hazards of improper use.
23. Only use utensils that are suitable for use in microwave ovens.
24. When heating food in plastic or paper containers, keep an eye
on the oven due to the possibility of ignition.
25. If smoke is observed, switch off or unplug the appliance and
keep the door closed in order to stifle any flames.
26. Microwave heating of beverages can result in delayed eruptive
boiling, therefore care must be taken when handling the
container.
27. The contents of feeding bottles and baby food jars shall be
stirred or shaken and the temperature checked before
consumption, in order to avoid burns.
28. Eggs in their shell and whole hard -boiled eggs should not be
heated in microwave ovens since they may explode, even
after microwave heating has ended.
29. The oven should be cleaned regularly and any food deposits
removed.
30. Failure to maintain the oven in a clean condition could lead to
deterioration of the surface that could adversely affect the life
of the appliance and possibly result in a hazardous situation.
31. During use the appliance becomes hot. Care should be taken
to avoid touching heating elements inside the oven.
32. WARNING: Accessible parts may become hot during use.
7
Young children should be kept away.
33. Do not use harsh abrasive cleaners or sharp metal scrapers to
clean the oven door glass since they can scratch the surface,
which may result in shattering of the glass.
34. This appliance is not intended for use by persons (including
children) with reduced physical, sensory or mental capabilities,
or lack of experience and knowledge, unless they have been
given supervision or instruction concerning use of the
appliance by a person responsible for their safety.
35. Children should be supervised to ensure that they do not play
with the appliance.
36. The appliances are not intended to be operated by means of
an external timer or separate remote -control system.
37. The temperature of accessible surfaces may be high when the
appliance is operating.
CAUTION: HOT SURFACE
38. This device complies with Part 18 of the FCC Rules.
PRECAUTIONS TO AVOID POSSIBLE EXPOSURE TO
EXCESSIVE MICROWAVE ENERGY
(a) Do not attempt to operate this oven with the door open since
open-door operation can result in harmful exposure to microwave
energy. It is important not to defeat or tamper with the safety
interlocks.
(b) Do not place any object between the oven front face and the
door or allow soil or cleaner residue to accumulate on sealing
surfaces.
(c) Do not operate the oven if it is damaged. It is particularly
important that the oven door close properly and that there is no
damage to the: (1) door (bent), (2) hinges and latches (broken or
loosened), (3) door seals and sealing surfaces.
(d) The oven should not be adjusted or repaired by anyone except
properly qualified service personnel.
(1) As with any appliance, close supervision is necessary when
used by children.

8
(2) If materials inside the oven should ignite, keep oven door
closed, turn oven off, and disconnect the power cord, or shut off
power at the fuse or circuit breaker panel.
(3) Information as to where qualified service may be obtained.
PRECAUTIONS TO BE OBSERVED BEFORE AND DURING
SERVICING TO AVOID POSSIBLE EXPOSURE TO EXCESSIVE
MICROWAVE ENERGY
(a) Do not operate or allow the oven to be operated with the door
open.
(b) Make the following safety checks on all ovens to be serviced
before activating the magnetron or other microwave source, and
make repairs as necessary: (1) interlock operation, (2) proper door
closing, (3) seal and sealing surfaces (arcing, wear, and other
damage), (4) damage to or loosening of hinges and latches, (5)
evidence of dropping or abuse.
(c) Before turning on microwave power for any service test or
inspection within the microwave generating compartments, check
the magnetron, wave guide or transmission line, and cavity for
proper alignment, integrity, and connection.
(d) Any defective or misadjusted components in the interlock,
monitor, door seal, and microwave generation and transmission
systems shall be repaired, replaced, or adjusted by procedures
described in this manual before the oven is released to the owner.
(e) A microwave leakage check to verify compliance with the
Federal Performance Standard should be performed on each oven
prior to release to the owner.
Switch and Fuse replacement Marking
WARNING - For continued protection against excessive radiation
emission, replace only with
1) Primary Switch : Type Nos.
2) Secondary Switch : Type Nos.
3) Monitor Switch : Type Nos.
4) Fuses : UL listed or recognized type fuse rated (N) A.
GROUNDING INSTRUCTIONS

9
This appliance must be grounded. In the event of an electrical
short circuit, grounding reduces the risk of electric shock by
providing an escape wire for the electric current. This appliance is
equipped with a cord having a grounding wire with a grounding
plug. The plug must be plugged into an outlet that is properly
installed and grounded.
WARNING – Improper use of the grounding can result in a risk of
electric shock. Consult a qualified electrician or serviceman if the
grounding instructions are not completely understood, or if doubt
exists as to whether the appliance is properly grounded, and
either:
1) If it is necessary to use an extension cord, use only a 3-wire
extension cord that has a 3-blade grounding plug, and a 3-slot
receptacle that will accept the plug on the appliance. The marked
rating of the extension cord shall be equal to or greater than the
electrical rating of the appliance, or
2) Do not use an extension cord. If the power supply cord is too
short, have a qualified electrician or serviceman install an outlet
near the appliance.
For a permanently connected appliances:
GROUNDING INSTRUCTIONS
This appliance must be connected to a grounded, metallic,
permanent wiring,system, or an equipment grounding conductor
should be run with the circuit conductors and connected to the
equipment grounding terminal or lead on the appliance.
2. INSTALLATION
1. Take out all the packing. if there is a safe film over the oven,
tear it off before Use. Check carefully for damage. If any,
immediately notify dealer or send to the manufacturer’s
service center.
2. Microwave ovens must be placed under dry and
non-corrosiveness environments, kept away from heat and
humidity, such as gas burner or water tank.
3. To ensure sufficient ventilation, the distance of the back of
microwave to the wall should be at least 10cm, the side to the
wall should be at least 5cm, the free distance above the top

10
surface at least 20cm. the distance of the microwave to the
ground should be at least 916mm.
4. The position of the oven shall be such that it is far from the TV,
Radio or antenna as picture disturbance, or noise may occur.
5. The appliance must be positioned so that the plug is
accessible, and must ensure a good grounding in case
leakage, ground loop can be formed to avoid electric shock.
6. The microwave oven must be operated with the door closed.
7. The microwave oven shall not be placed in a cabinet.
8. The back of the oven must be placed against a wall.
9. As there is manufacturing residue or oil remained on the oven
cavity or heat element, it usually would smell the odor, even a
slight smoke, It is normal case and would not occur after
several times use, keep the door or window open to ensure
good ventilation. So it is strongly recommended to place a cup
of water in the cavity, setting at high power and operate for
several times.
3. CLEANING
MICROWAVE OVEN CARE
The oven should be cleaned regularly and any food deposits
removed.
1. It is hazardous for anyone other than a competent person to
carry out any service or repair operation that involves the
removal of a cover which gives protection against exposure
to microwave energy
2. Remove the power cord from the wall outlet before cleaning
3. Failure to maintain the oven in a clean condition could lead
to deterioration of the surface that could adversely affect the
life of the appliance and possibly result in a hazardous
situation
4. The oven should be cleaned regularly and any food

11
deposits removed
5. Details for cleaning door seals, cavities and adjacent parts.
6. Never use hard detergent, gasoline, abrasive powder or
metal brush to clean any part of the appliance
7. Do not remove the waveguide cover
8. When the microwave oven has been used for a long time,
there may be some strange odors exist in oven, Following 3
methods can get rid of them:
a) Place several lemon slices in a cup, then heat with high
power for 2-3 min.
b) Place a cup of red tea in oven, then heat with high power
for 1 minute.
c) Put some orange peel into oven, and then heat them with
high power for 1 minute.
TIPS FOR CLEANING
Exterior:
Wipe the enclosure with a dampened soft cloth
Door:
Using a dampened soft cloth, wipe clean the door and window
Wipe the door seals and adjacent parts to remove any spill or
spatter
Wipe the control panel with a slightly dampened soft cloth
Interior walls:
Wipe clean the interior surfaces with a dampened soft cloth
Wipe clean the waveguide cover to remove any food splashed
12
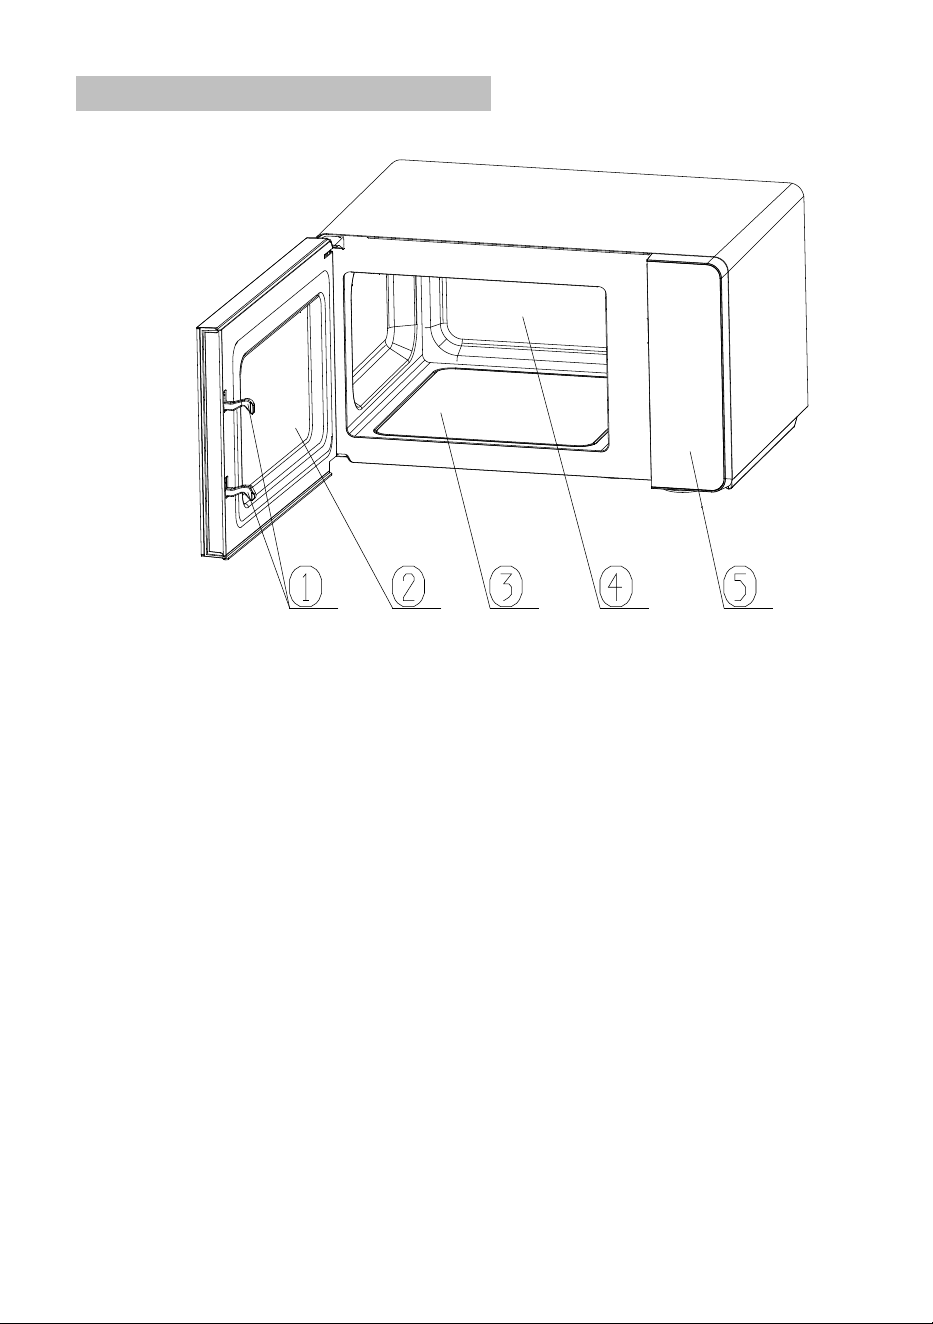
4. PRODUCT INSTRUCTION
1) Door lock
Microwave oven door must be properly closed in order for it to
operate.
2) Viewing window
Allow user to see the cooking status.
3) Borosilicate glass plate
4) Cavity
5) Control panel
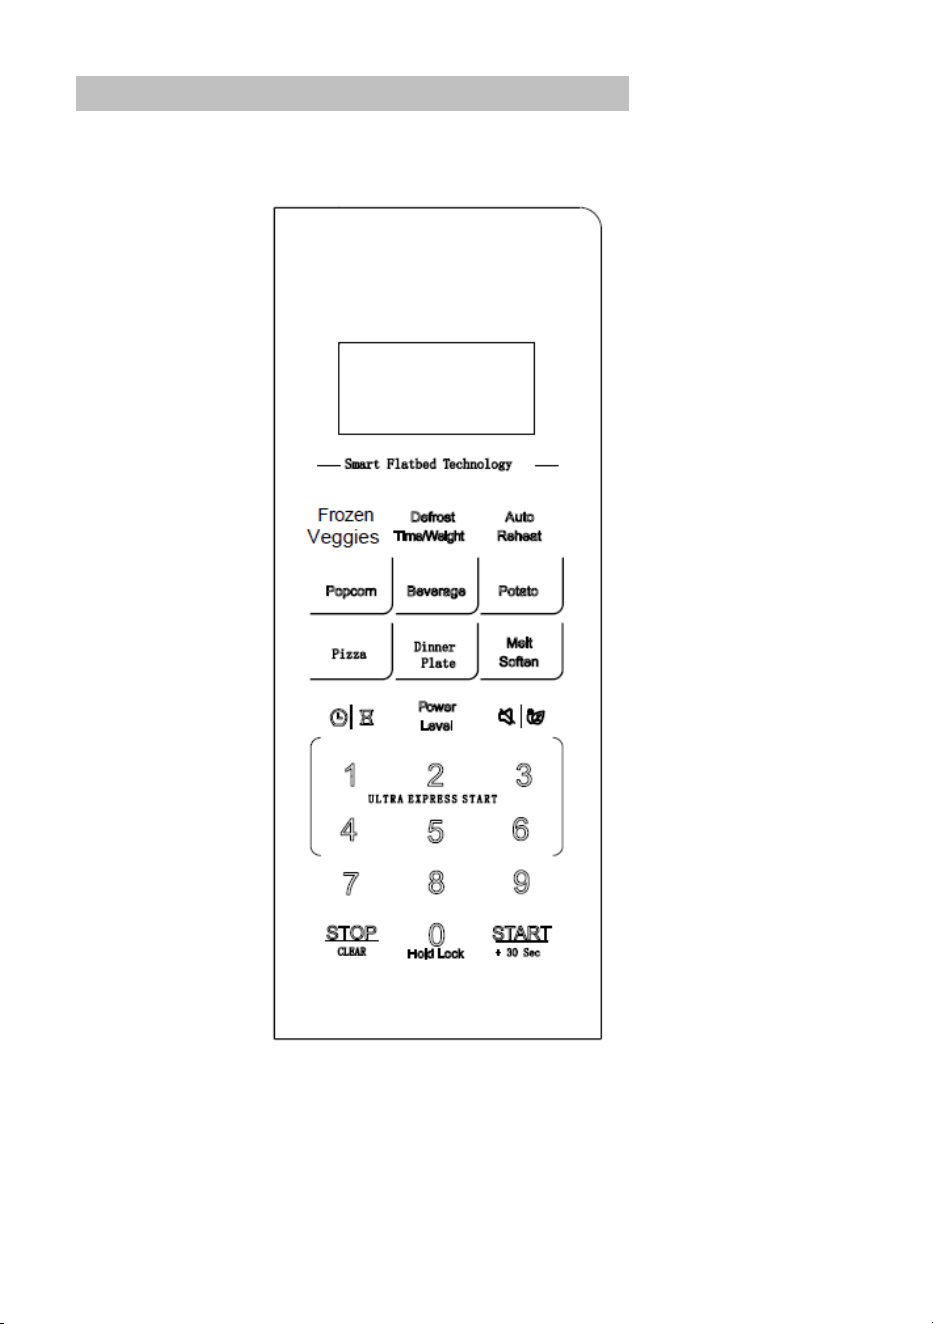
See below in details (the control panel is subject to change without
prior notice)
13
5. OPERATION OF CONTROL PANEL
1. BEFORE COOKING
The display lights up when plugged in power supply, then enter the

14
standby state and display shows 1:00.
2. TIME COOK/POWER
2.1 TIME COOK
Pressing this button activates the microwave oven’s default
high-power setting, while numeric button entries configure the
cooking duration, with a maximum allowable setting of 99 minutes
and 99 seconds. After entering the cooking time, press
“START/+30s” button to start work. An buzzing sound to notify
completion of the operation.
2.2 POWER
There are ten microwave power levels, 100P, 90P, 80P, 70P, 60P,
50P, 40P, 30P, 20P and 10P, respectively. Press and hold the
“TIME COOK/POWER” button to enter the microwave power
mode selection, and press numeric buttons to set the microwave
power levels. Press the "START/+30s" button again to confirm the
microwave power and enter the cooking time setting. Press
numeric buttons to input the cooking time, the maximum time that
can be input is 99:99. After entering the cooking time, press
“START/+30s” button to start work. An buzzing sound to notify
completion of the operation.
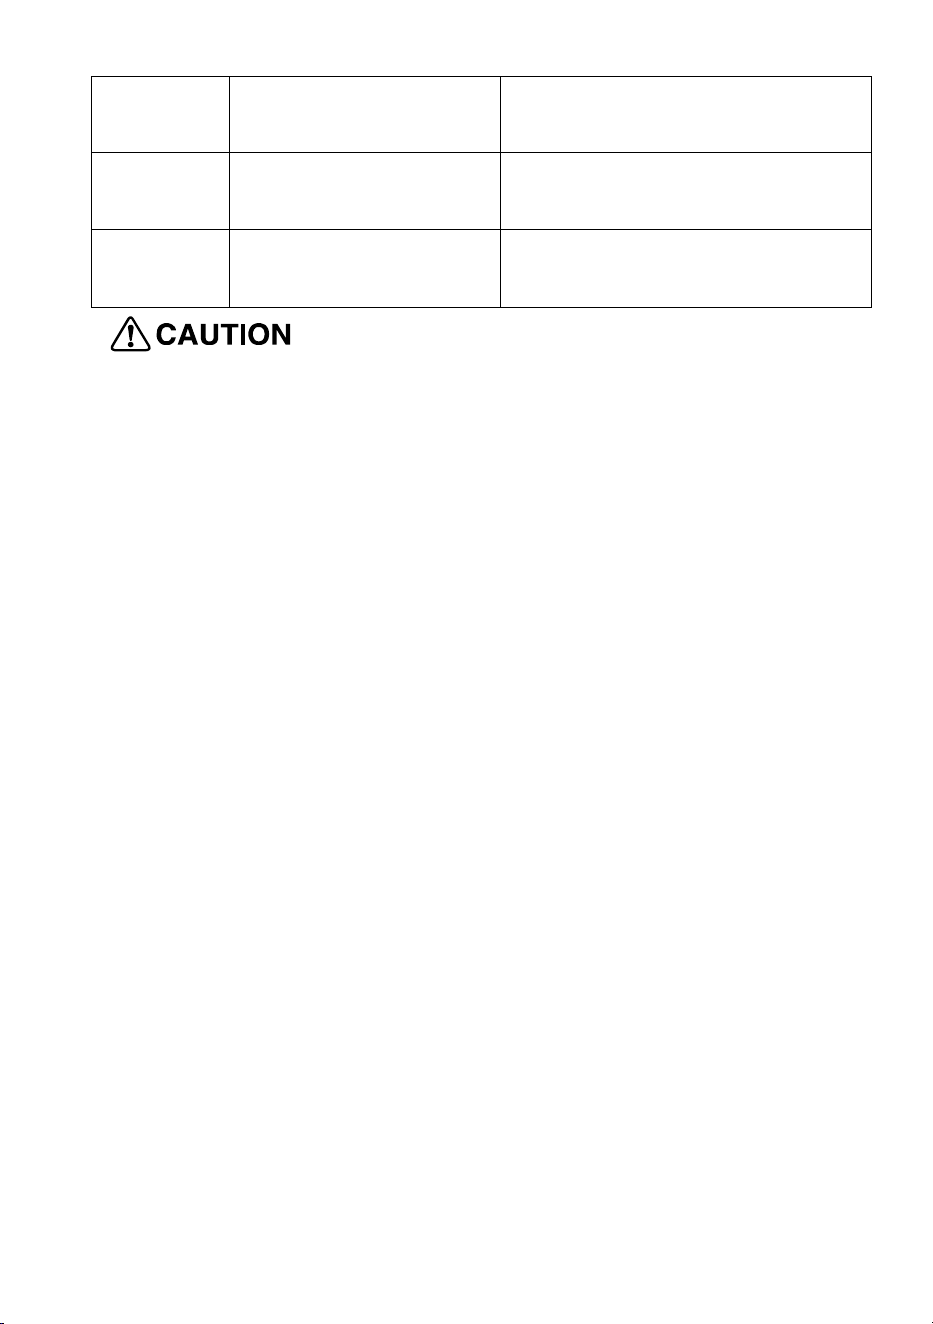
HIGH
100% and 90%
power output
(
Applicable for quick and
thorough cooking)
M.High
80% and 70% power
output
(Applicable for medium
express cooking)
15
Med
60% and 50% power
output
(
Applicable for steaming
food)
M.Low
40% and 30% power
output
(
Applicable for defrosting
food)
LOW
20% and 10% power
output
(
Applicable for keeping
warm)
a. The max time which can be set is 99 minutes and 99
seconds.
b. Never use the grill rack during microwave cooking.
c. Never operate the oven empty.
d. At the maximum microwave power, the oven will
automatically lower the power after a certain time of cooking
to lengthen the service life.
e. If you turn the food during operation, press the START/+30s
button once and the preset cooking procedure will continue.
f. If you intend to remove the food before the preset time, you
must press STOP/CLEAR button once to clear the preset
procedure to avoid unintended operation of next time use.
3. DEFROST
There are four defrost mode, defrost by time, dEF1, dEF2 and
dEF3, respectively. Press this button to select the desired
defrosting mode. After selecting to defrost by time, press the
numeric buttons to set the defrosting time. The maximum time
that can be entered is 99:99. Alternatively, select dEF1, dEF2, or
dEF3 to defrost and press the "START/+30s" button to confirm,
then press the numeric buttons to set the defrosting weight
within the range of 4-50oz. After selecting the cooking weight or
time, press the “START/+30s” button to start work. An buzzing
16
sound to notify completion of the operation. The dEF1, dEF2
and dEF3 defrost modes will have a beeping sound to prompt
the food to be turned over during defrosting.
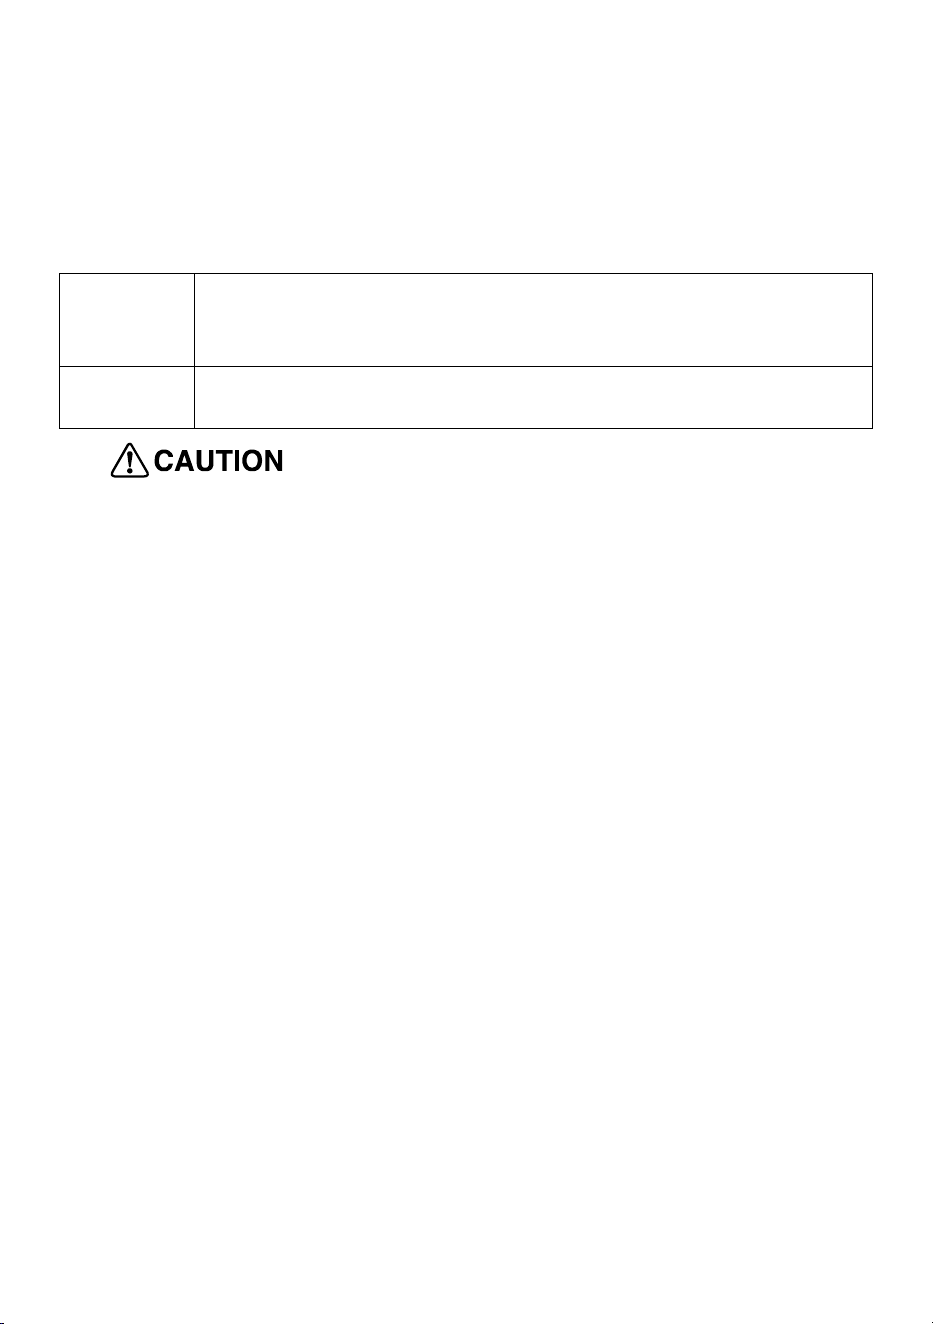
Below is some food defrosting time advice:
dEF1
dEF2
dEF3
For defrosting, the weight range from 4 to 50oz.
Defrost
by time
For defrosting, the maximum time is 99:99.
a. It is necessary to turn over the food during operation to
obtain uniform effect.
b. Usually defrosting will need longer time than that of cooking
the food.
c. If the food can be cut by knife, the defrosting process can be
considered completed.
d. Microwave penetrates around 4cm into most food
e. Defrosted food should be consumed as soon as possible, it
is not advised to put back to fridge and freeze again.
4. AUTO COOKING
There are five automatic menus, popcorn, beverage, potato, pizza
and frozen viggies respectively. Select the desired menu. Press
the corresponding menu button or numeric buttons which to be
selected continuously to select the desired food portion size, and
the display shows the corresponding portion size. After selecting
the cooking weight, press “START/+30s” button to start work. An
buzzing sound to notify completion of the operation.
17
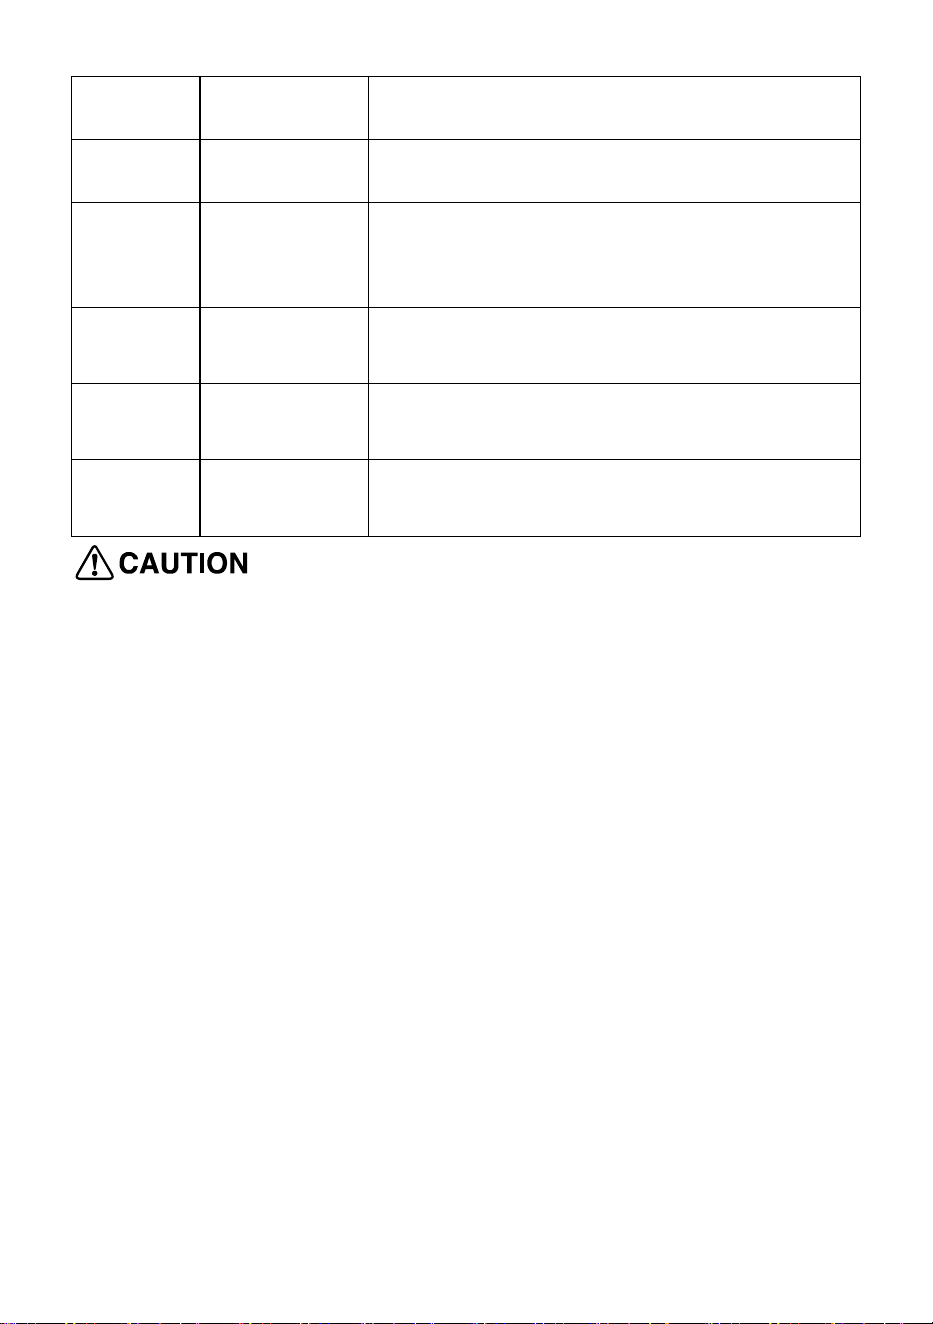
Display Kind Method
A.1 Popcorn The optional weight is 3.5oz.
A.2 Beverage
The optional weights are 1 cup, 2 cups or
3 cups, each one about 250ml.
A.3 Potato
The optional weights are 9oz, 18oz and
27oz.
A.4 Pizza
The optional weights are 4oz, 8oz, 12oz
and 16oz.
A.5
Frozen
Viggies
The optional weights are 7oz, 14oz and
21oz.
a. The temperature of food before cooking would be 20-25℃.
Higher or lower temperature of the food before cooking would
require increase or decrease of cooking time.
b. The temperature, weight and shape of food will largely
influence the cooking effect. If any deviation has been found to
the factor noted on above menu, you can adjust the cooking time
for best result.
5. CLOCK/TIMER
5.1 CLOCK
The clock is 24-hour system. The operation of the clock function is
as follows.
In standby mode, press and hold down this button for more than 3
seconds to enter the clock setting interface. Press this button to
select the 24-hour or 12-hour, press the numeric buttons 0~9 to
input the clock time directly and short press the “START/+30s”
button to confirm the specified time and exit the clock setting

18
mode.
5.2 TIMER
In standby mode, press this button to enter the setting interface,
and the countdown function icon and "0:00" will be displayed on
the display screen. Press the numeric buttons to input the time.
The maximum time that can be input is 99:99. After setting the
time, press the "START/+30s" button to begins the countdown. An
buzzing sound to notify completion of the countdown.
6. AUTO REHEAT
Reheat function is mainly to facilitate users to heat food according
to the weight of food, there are five automatic menus. The
operation of this function is as follows.
Press this button to select the desired menu, and the display
screen will show the corresponding menu number. Press the
“START/+30s” button again to confirm the menu and proceed to
the next step of portion selection. Press the numeric buttons to
select the portion size of the food, and the display screen will show
the corresponding portion size. After selecting the cooking weight,
press “START/+30s” button to start work. An buzzing sound to
notify completion of the operation.
Display Kind Method
AH-1 Bread
The optional weights are 4oz,
8oz, 12oz
and 16oz.
AH-2 Rice
The optional portion sizes---1 bowl, 2
bowls and 3 bowls (each bowl
19
approximately 7oz).
AH-3 Currires
The optional weights are 4oz,
8oz, 12oz
and 16oz.
AH-4 Soup
The optional portion sizes---
1 bowl, 2
bowls and 3 bowls
(each bowl
approximately 9oz).
AH-5 Casserole
The optional portion sizes---
1 bowl, 2
bowls and 3 bowls
(each bowl
approximately 9oz).
7. AUTO COOK
There are ten menus and the operation of this function is as
follows.
Press this button to select the desired menu, and the display
screen will show the corresponding menu number. Press the
"START/+30s" button to confirm the menu and proceed to the next
step of portion selection. Press the numeric buttons to select the
portion size of the food, and the display screen will show the
corresponding portion size. After selecting the cooking weight,
press “START/+30s” button to start work. An buzzing sound to
notify completion of the operation.
Display Kind Method
AC-1 Meat Pie The optional portion sizes---1, 2 and 3.
AC-2
Frozen Entr
é
e
The optional weights are 8oz, 12oz and
16oz.
AC-3 Risotto
The optional weights are 4oz,
8oz, 12oz
and 16oz.
20
AC-4
Instant
Noodle
The optional portion sizes---1 and 2.
AC-5 Porridge The optional weights are 2oz, 4oz and 6oz.
AC-6 legumes
The optional weights are 4oz,
8oz, 12oz
and 16oz.
AC-7
Beef
Lasagne
The optional portion size---1.
AC-8 Fish Filet
The optional weights are 8oz, 12oz and
16oz.
AC-9 QUINOA
The optional weights are 4oz, 8oz and
12oz.
AC-10 Dinner plate
The optional weights are 8oz, 12oz and
16oz.
8. MELT/SOFTEN
Press this button to select the desired menu, and the display
screen will show the corresponding menu number. Press the
"START/+30s" button to confirm the menu and proceed to the next
step of portion selection. Press the numeric buttons to select the
portion size of the food, and the display screen will show the
corresponding portion size. After selecting the cooking weight,
press “START/+30s” button to start work. An buzzing sound to
notify completion of the operation.
Display Kind Method
So-1 Chocolate
The optional weights are 4oz,
8oz, 12oz
and 16oz.
So-2 Butter
The optional weights are 4oz,
8oz, 12oz
and 16oz.

21
So-3
Cream
Cheese
The optional weights are 4oz,
8oz, 12oz
and 16oz.
So-4 Ice cream
The optional weights are 4oz,
8oz, 12oz
and 16oz.
9. MUTE/ECO
9.1 MUTE
The mute function is operated as follows.
Press this button in standby mode to enter the sound on/off
selection, and corresponding to the display of the current sound
mode. After selecting whether to turn on or off the sound, it will
automatically exit the selection after 3 seconds, and the buzzer
sound will be turned on or off according to the corresponding
settings.
9.2 ECO
In standby mode, press and hold down the button to activate ECO
mode, and the display screen will turn off. When the display
screen is turned off, press any button to turn on the display screen.
If there is no operation for 30 seconds in standby mode, the
display screen will automatically turn off. In standby mode, after
activating ECO mode, press and hold down the button to turn off
ECO mode, and the screen will display normally.
10. EXPRESS COOK
10.1 In standby mode, users may initiate microwave operation by
pressing numeric buttons 1 through 6, each corresponding to a
preset cooking duration of 1 to 6 minutes, respectively. Specifically,

22
pressing button 1 activates a 1-minute cycle, button 2 a 2-minute
cycle, and so forth.
10.2 In standby mode, after putting food in and closing the door,
press the “START/+30s” button to start the microwave quickly. The
default working time is 30 seconds. In the working process, press
the “START/+30s” button once for 30 seconds. An buzzing sound
to notify completion of the operation.
11. STOP/CLEAR
In the process of cooking settings, can press “STOP/CLEAR”
button to cancel the settings and return to standby mode. During
the operation of the microwave oven, can press “STOP/CLEAR”
button to pause it. In the paused state, can press “STOP/CLEAR”
button again to cancel the function and return to standby mode.
12. CHILD LOCK FUNCTION
Use this feature to lock the control panel when you are cleaning or
so that children cannot use the oven unsupervised. All the buttons
(except the "0" button) are rendered inoperable in this mode.
1) Set lock: In standby mode, press and hold down the "0" button
for more than 3 seconds, the child lock function is activated, and
all buttons of the microwave oven cannot be operated except the
"0" button.
2) Cancel lock: In the child lock state, press and hold down the "0"
button for more than 3 seconds to cancel the child lock function. All
the buttons on the microwave oven have been restored to normal
23
functionality.
13. THE OPERATION METHOD AND SETTING OF THE
TWO-STEP DOOR OPENING FUNCTION
13.1 The operation method of two-step door opening
In the operating state or after the operation is completed, the first
step is to press the STOP button to pause or return to standby
mode of the microwave oven. The second step is to open the oven
door.
When not in operating condition or after 30 minutes of work, the
oven door can be opened directly.
13.2 Setting of two-step door opening function
In the standby mode of the microwave oven, press and hold down
the STOP+START+POWER buttons in order to turn on/off this
function, and the corresponding display will be "ON" or "OFF".
1. To enable this function, it is not possible to directly open the
oven door during operation, and a two-step door opening
operation is required.
2. Turn off this function, and you can directly open the oven door in
any state.
3. After the product is powered on, it defaults to the two-step door
opening function.
6. UTENSILS GUIDELINE
It is strongly recommended to use the containers which are
suitable and safe for microwave cooking. Generally speaking, the
containers which are made of heat-resistant ceramic, glass or
plastic are suitable for microwave cooking. Never use the metal
containers for microwave cooking and combination cooking as
spark is likely to occur. You can take the reference of below table.
Material Microwave Notes
24
of container
Heat-resistant
ceramic
Yes
Never use the ceramics
which are decorated with
metal rim or glazed.
Recommend using
ceramic, heat-resistant
glass, and plastic
container
s that can
withstand temperatures
above 248
℉
.
Heat-resistant plastic Yes
Cannot be used for long
time microwave cooking
Heat-resistant glass Yes
Grill rack No
Plastic film
Yes
It should not be used when
cooking meat or chops as
the over-temperature may
do damage to the film
7. COOKING TIPS
The following factors may affect the cooking result:
Food arrangement
Place thicker areas towards outside of dish, the thinner part
towards the centre and spread it evenly. Do not overlap if
possible.
Cooking time length
Start cooking with a short time setting, evaluate it after it times out
and extend it according to the actual need. Over cooking may
result in smoke and burns.
Cooking food evenly

25
Food such as chicken, hamburger or steak should be turned once
during cooking.
Depending on the type of food, if applicable, stir it from outside to
centre of dish once or twice during cooking
Allow standing time
After cooking times out, leave the food in the oven for an adequate
length of time, this allows it to complete its cooking cycle and
cooling it down in a gradual manner
Whether the food is done
Color and hardness of food help to determine if it is done, these
include:
- Steam coming out from all parts of food, not just the edge
- Joints of poultry can be moved easily
- Pork or poultry shows no signs of blood
- Fish is opaque and can be sliced easily with a fork
Browning dish
When using a browning dish or self-heating container, always
place a heat-resistant insulator such as a porcelain plate under it
to prevent damage to the turntable and rotating ring.
Microwave safe plastic wrap
When cooking food with high fat content, do not allow the plastic
wrap come into contact with food as it may melt
Microwave safe plastic cookware
Some microwave safe plastic cookware might not be suitable for
cooking foods with high fat and sugar content. Also, the preheating
time specified in the dish instruction manual must not be
exceeded.
8. MAINTENANCE
SERVICING
Please check the following before calling for services.
1. Place one cup of water (approx.150ml) in a glass measure
in the oven and close the door securely. Oven lamp should

26
go off if the door is closed properly. Let the oven work for 1
min.
2. Does the oven lamp light?
3. Does the cooling fan work?
(Put your hand over the rear ventilation openings.)
4. Is the water inside the oven hot?
If “NO” is the answer to any of the above questions, please
check your wall socket and the fuse in your meter box.
If both the wall socket and the fuse are functioning properly,
CONTACT YOUR NEAREST SERVICE CENTER APPROVED.
SERVICING SAFEGUARDS
MICROWAVE RADIATION!
It is hazardous for anyone, other than a qualified service
technician, to carry out any service for repairing operation which
involves removal of any cover which gives protection against
exposure to microwave energy.
The temperature of accessible surfaces may be high when the
appliance is operating.
The high voltage capacitor remains charge after disconnection;
short the negative terminal of H. V capacitor to the oven chassis
(use a screwdriver) to discharge before touching.
During servicing below listed parts are liable to be removed and
give access to potentials above 250V to earth.
1. Magnetron
2. High voltage transformer

27
3. High voltage capacitor
4. High voltage diode
5. High voltage fuse
The actual configuration in order to prevail in kind.
The following conditions may cause undue microwave exposure
during servicing.
Improper fitting of magnetron;
Improper matching of door interlock, door hinge and door;
Improper fitting of switch support;
Door, door seal or enclosure has been damaged.
1. If LED displays Err0 during working, it indicates that sensor
has been short circuit and you need replace it at the nearest
repaired department.
2. If LED displays Err1 during working, it indicates that sensor
has been open circuit and you need replace it at the nearest
repaired department.
If the door or door seals are damaged, the oven must not be
operated until it has been repaired by a competent person.
It is hazardous for anyone, other than a qualified service
technician, to carry out any service for repairing operation which
involves removal of any cover which gives protection against
exposure to microwave energy.
Liquids or other foods must not be heated in sealed containers
since they are liable to explode.
Only allow children to use the oven without supervision when
adequate instructions have been given so that the child is able
to use the oven in a safe way and understands the hazards of
improper use.
28
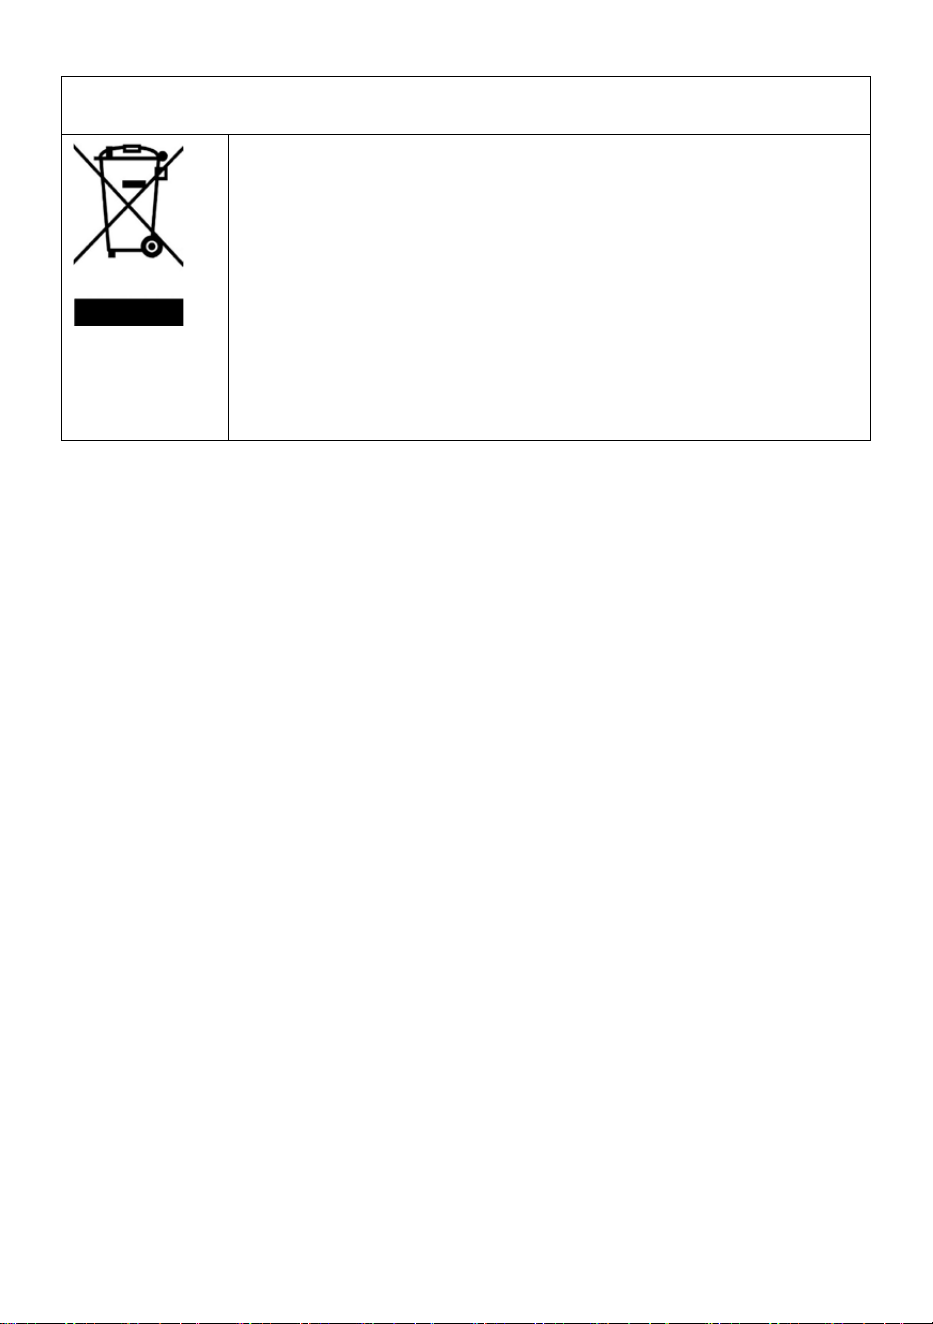
Correct Disposal of this product
This marking indicates that this product should not be
disposed with other household wastes throughout the EU.
To prevent possible harm to the environment or human
health from uncontrolled waste disposal, recycle it
responsibly to promote the su
stainable reuse of material
resources. To return your used device, please use the return
and collection systems or contact the retailer where the
product was purchased. They can take this product for
environmental safe recycling.

