
Dog Training Collar User Manual
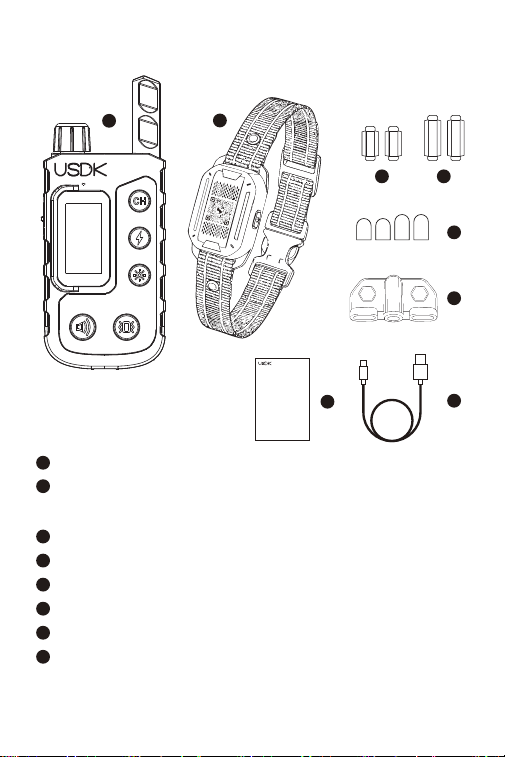
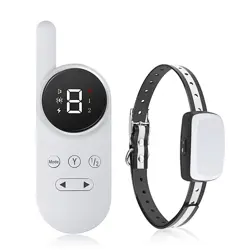
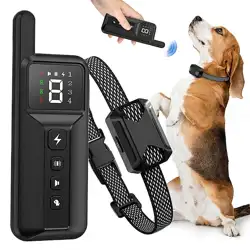
Remote Transmitter x1
Collar Receiver (with Adjustable Collar Strap) x1
or x2(Varies by package)
Short Contact Point x 2
Long Contact Points x 2
Conductive Silicone Caps x 4
Test Light x 1
USB Charging Cable x 1
User Manual x 1
Ⅰ.Package Includes
Dog Training Collar User Manual
1
1
2
2
3
3
4
4
6
6
5
5
7
8
7
8
1
Ⅱ.Product Specifications
White light stays on
White light flashes
2
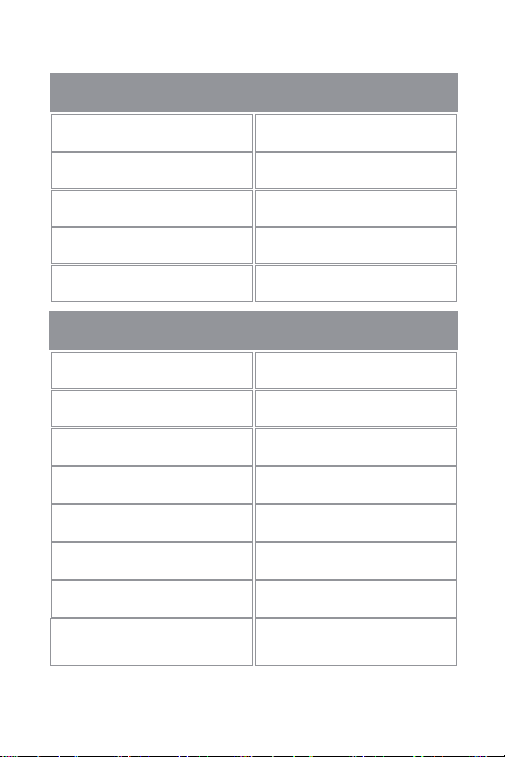
Battery
Charging Voltage
Charging Current
Charging Time
Remote Range
Battery
Charging Voltage
Charging Current
Charging Time
Vibration Levels
Tone Levels
Static Levels
3.7 V, 300 mAh
5 V (USB Type-C)
Approx. 330 mA
2–4 hours
1–99
1–8
1–99
5 V (USB Type-C)
Approx. 330 mA
2–4 hours
Up to 4500FT
3.7 V, 300 mAh
Receiver Collar
Remote Transmitter
Light
Ⅲ.Product Description
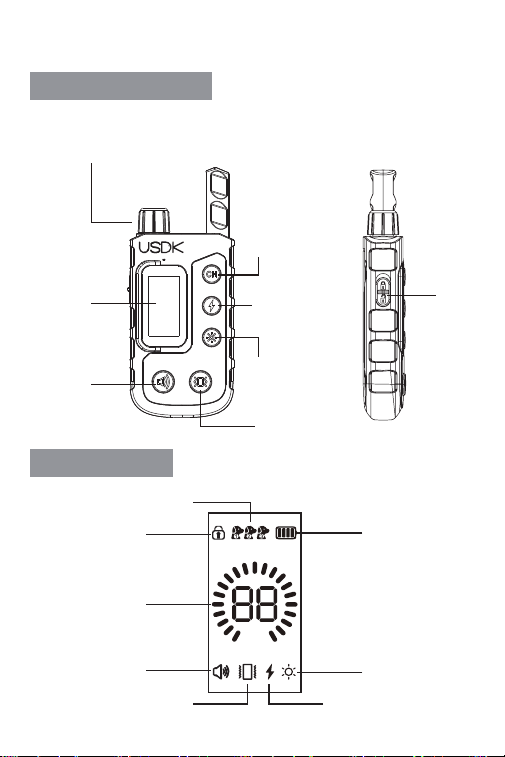
Remote Transmitter
Screen Display
Mode/Intensity Dial
-Press to select Tone, Vibration, or Static.
-Rotate to adjust the selected intensity level.
Digital
Display
Beep
Button
Static
Button
Light
Button
Vibration
Mode
Channel
Select
Safety
Lock
Channel Display
Safety Lock
Static Grade
Beep Tone
Vibration
Battery Status
Lighting
Static
3
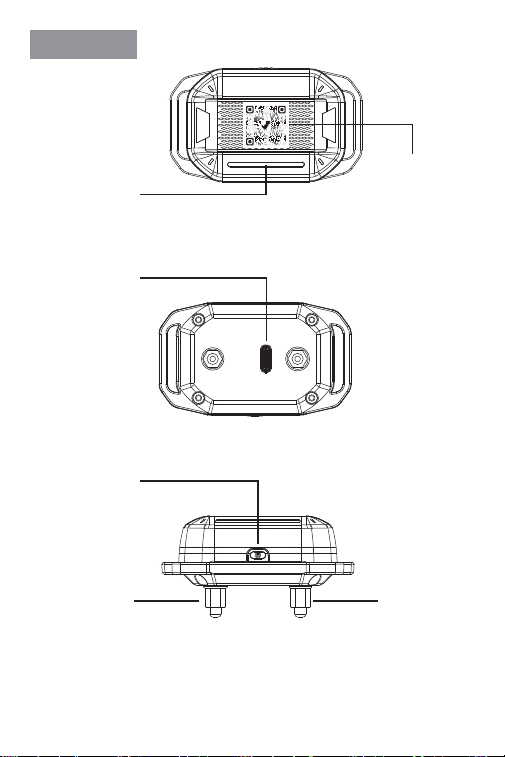
SCAN IF LOST
Receiver
LED Status
Light
Type-C
Charging
Power
Button
Contact Point Contact Point
4
QR Pet ID Tag

Ⅳ.Pairing the Receiver Collar with
the Remote Transmitter
Ⅴ. Remote Transmitter Operation
If the remote and collar become disconnected (e.g., due to
signal interference or power loss), follow these steps to pair
them again:
1.Press the Channel Switch button on the Remote Transmit-
ter to select the desired channel (1, 2, or 3).
2.Turn off the collar receiver.
3.Press and hold the Power button for 3 seconds until the
green light flashes rapidly (every 0.5 s), indicating Pairing
Mode.
4.Press any function button on the remote (Beep, Vibration,
Shock, or Light).
5.When pairing is successful, the collar emits one long beep,
and the green light stops flashing.
For 1 Remote Transmitter to 3 Receiver Collars: Repeat
the steps above to pair each Receiver Collar with a differ-
ent channel.
Safety Lock (Anti-Accidental Touch)
Prevent accidental button presses during transport or storage.
Lock: Slide the safety lock upward to disable all function
buttons.
Unlock: Slide the safety lock downward to restore all button
functions.
Tip: When locked, pressing any button will briefly display
the battery and lock icons.
5

Intensity Adjustment
Press the Mode/Intensity Dial to enter adjustment mode.-
Adjust the stimulation intensity for your selected training
mode.
Rotate the wheel to increase (+) or decrease (−) the level.
*Static Stimulation: Levels 1–99
*Vibration: Levels 1–99
*Press any function button or wait 15 seconds to save and
exit.
*Beep: Levels 1–8
Channel Switching (Multi-Dog Control)
Control up to 3 receiver collars with one remote.
*Press the Channel button to switch between Dog 1 / Dog 2
/ Dog 3.
*The selected channel icon will remain displayed on the
screen.
*Each receiver collar must be paired with a different channel.
Core Function Buttons
Use the dedicated function buttons to activate your
selected training mode.
*Beep – Emits an audible training tone.
*Vibration – Delivers vibration stimulation.
*Static Stimulation – Delivers adjustable static
stimulation.
*LED Light – Activates the receiver LED for visibility in
low-light conditions.
Remote Transmitter Indicators
6
Understand the status of your remote transmitter at a glance.
Ⅵ.Collar Receiver Operation and Indicator
*Green Indicator On – Signal transmitted successfully.
*Function Icon Flashing – Function selected.
*Function Icon Steady On – Function active.
*Battery Icon Flashing – Charging in progress.
*Battery Icon Full – Fully charged.
*Low Battery Icon – Recharge the transmitter.
Power On / Off
*Power On: Short press the Power button. The receiver
vibrates once, and the indicator light flashes green briefly
before turning off.
*Power Off: Press and hold the Power button for 2 sec-
onds. The receiver vibrates, and the indicator light flashes
green briefly before turning off.
Receiver Indicator Light
Indicator Status Description
Green light flashes briefly,
then turns off
Collar Receiver Power On
Green light flashes quickly
(every 0.5 seconds)
Pairing Mode
Red light flashes briefly,
then turns off
Collar Receiver Low Battery
Red light flashes slowly Charging in progress
Solid Green (while charging) Fully charged
White Light Flashing or
Steady On
Press the Light Button on
the Remote Transmitter
7
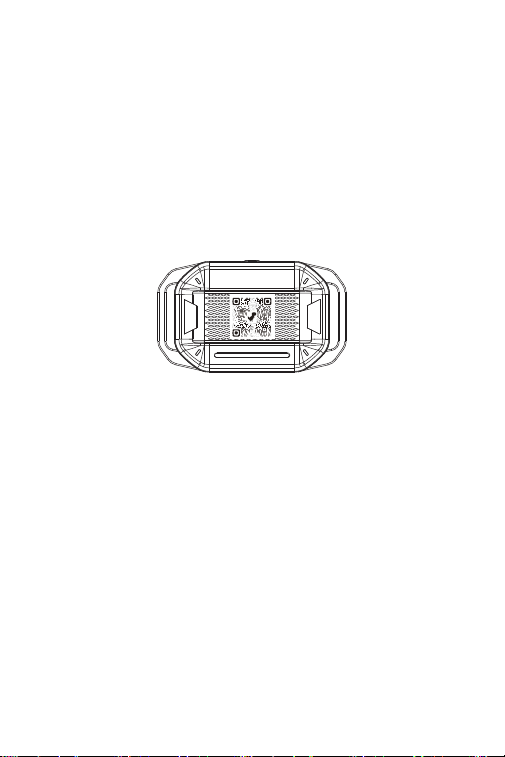
Pet ID & Lost Pet Protection
Every receiver collar has its own unique QR code and ID
number, allowing you to create a personalized pet profile.
Scan the QR code on the Collar Receiver to create your
pet's profile and add important information, including:
If your pet is ever lost, anyone who scans the QR code can
view the information you've chosen to share and contact
you directly, helping reunite you with your pet as quickly as
possible.
Note: Keep your contact information up to date so you can
be reached if your pet is found.
-Pet's name
-Your contact details (such as your phone number, email
address, or WhatsApp)
-Additional information (optional)
8
SCAN IF LOST

Ⅶ. Precautions for Use
1.If your pet has any health issues or a heart condition, consult
your veterinarian before use.
2.The Shock and Vibration functions automatically stop after 10
seconds of continuous activation. Avoid prolonged or repeated
use to prevent discomfort or injury to your pet.
3.When the Remote Transmitter is not in use, enable the Safety
Lock to prevent accidental activation of stimulation functions.
4.The Remote Transmitter and Receiver Collar must be paired to
the same channel to operate together. Switch to the corre-
sponding channel before controlling a different Receiver Collar.
5.When the Receiver Collar indicator flashes red slowly, recharge
the battery promptly to avoid interruptions during training.
6.Ensure the Receiver Collar fits snugly but comfortably. You
should be able to fit two fingers between the collar and your
pet's neck.
7.Do not leave the Receiver Collar on your pet for more than
8–12 hours per day. Remove it regularly and check the skin for
signs of irritation.
8.Begin training with the lowest effective stimulation level and
increase gradually only if necessary.
9.Use the device only for training purposes. Do not use it to
punish or intentionally frighten your pet.
10.Do not use the device on puppies under 6 months of age or
on pets that are injured, ill, pregnant, or have skin conditions
around the neck.
11.Clean the contact points and your pet's neck regularly to help
prevent skin irritation.
12.Although the Receiver Collar is designed with a sealed hous-
ing for water resistance, avoid prolonged immersion in water.
Ensure the charging contacts are clean and dry before charging.
13. Keep out of reach of children.
9

Ⅷ.FCC Statement
This equipment has been tested and found to comply with the
limits for a Class B digital device, pursuant to part 15 of the
FCC Rules. These limits are designed to provide reasonable
protection against harmful interference in a residential instal-
lation. This equipment generates, uses and can radiate radio
frequency energy and, if not installed and used in accordance
with the instructions, may cause harmful interference to radio
communications. However, there is no guarantee that interfer-
ence will not occur in a particular installation. If this equip-
ment does cause harmful interference to radio or television
reception, which can be determined by turning the equipment
off and on, the user is encouraged to try to correct the inter-
ference by one or more of the following measures:
Reorient or relocate the receiving antenna.
Increase the separation between the equipment and receiver.
Connect the equipment into an outlet on a circuit different from
that to which the receiver is connected.
Consult the dealer or an experienced radio/TV technician for
help.
Caution: Any changes or modifications to this device not explic-
itly approved by manufacturer could void your authority to oper-
ate this equipment.
This device complies with part 15 of the FCC Rules. Operation
is subject to the following two conditions:
(1) This device may not cause harmful interference, and
(2) this device must accept any interference received, including
interference that may cause undesired operation.
RF Exposure Information
The device has been evaluated to meet general RF exposure
requirement. The device can be used in portable exposure
condition without restriction.
10

Ⅸ.Customer Support
We are committed to providing reliable support and ensuring
you have the best experience with your product.
If you experience any issues during use, please contact our
Customer Support team. Our team will assist you with trou-
bleshooting, product guidance, and after-sales support.
To help us provide faster and more efficient assistance,
please provide:
-Your order number
-A description of the issue
-Photos or videos of the problem (if available)
Our support team will review your request and provide the
best possible solution.
E-mail: [email protected]
11