1
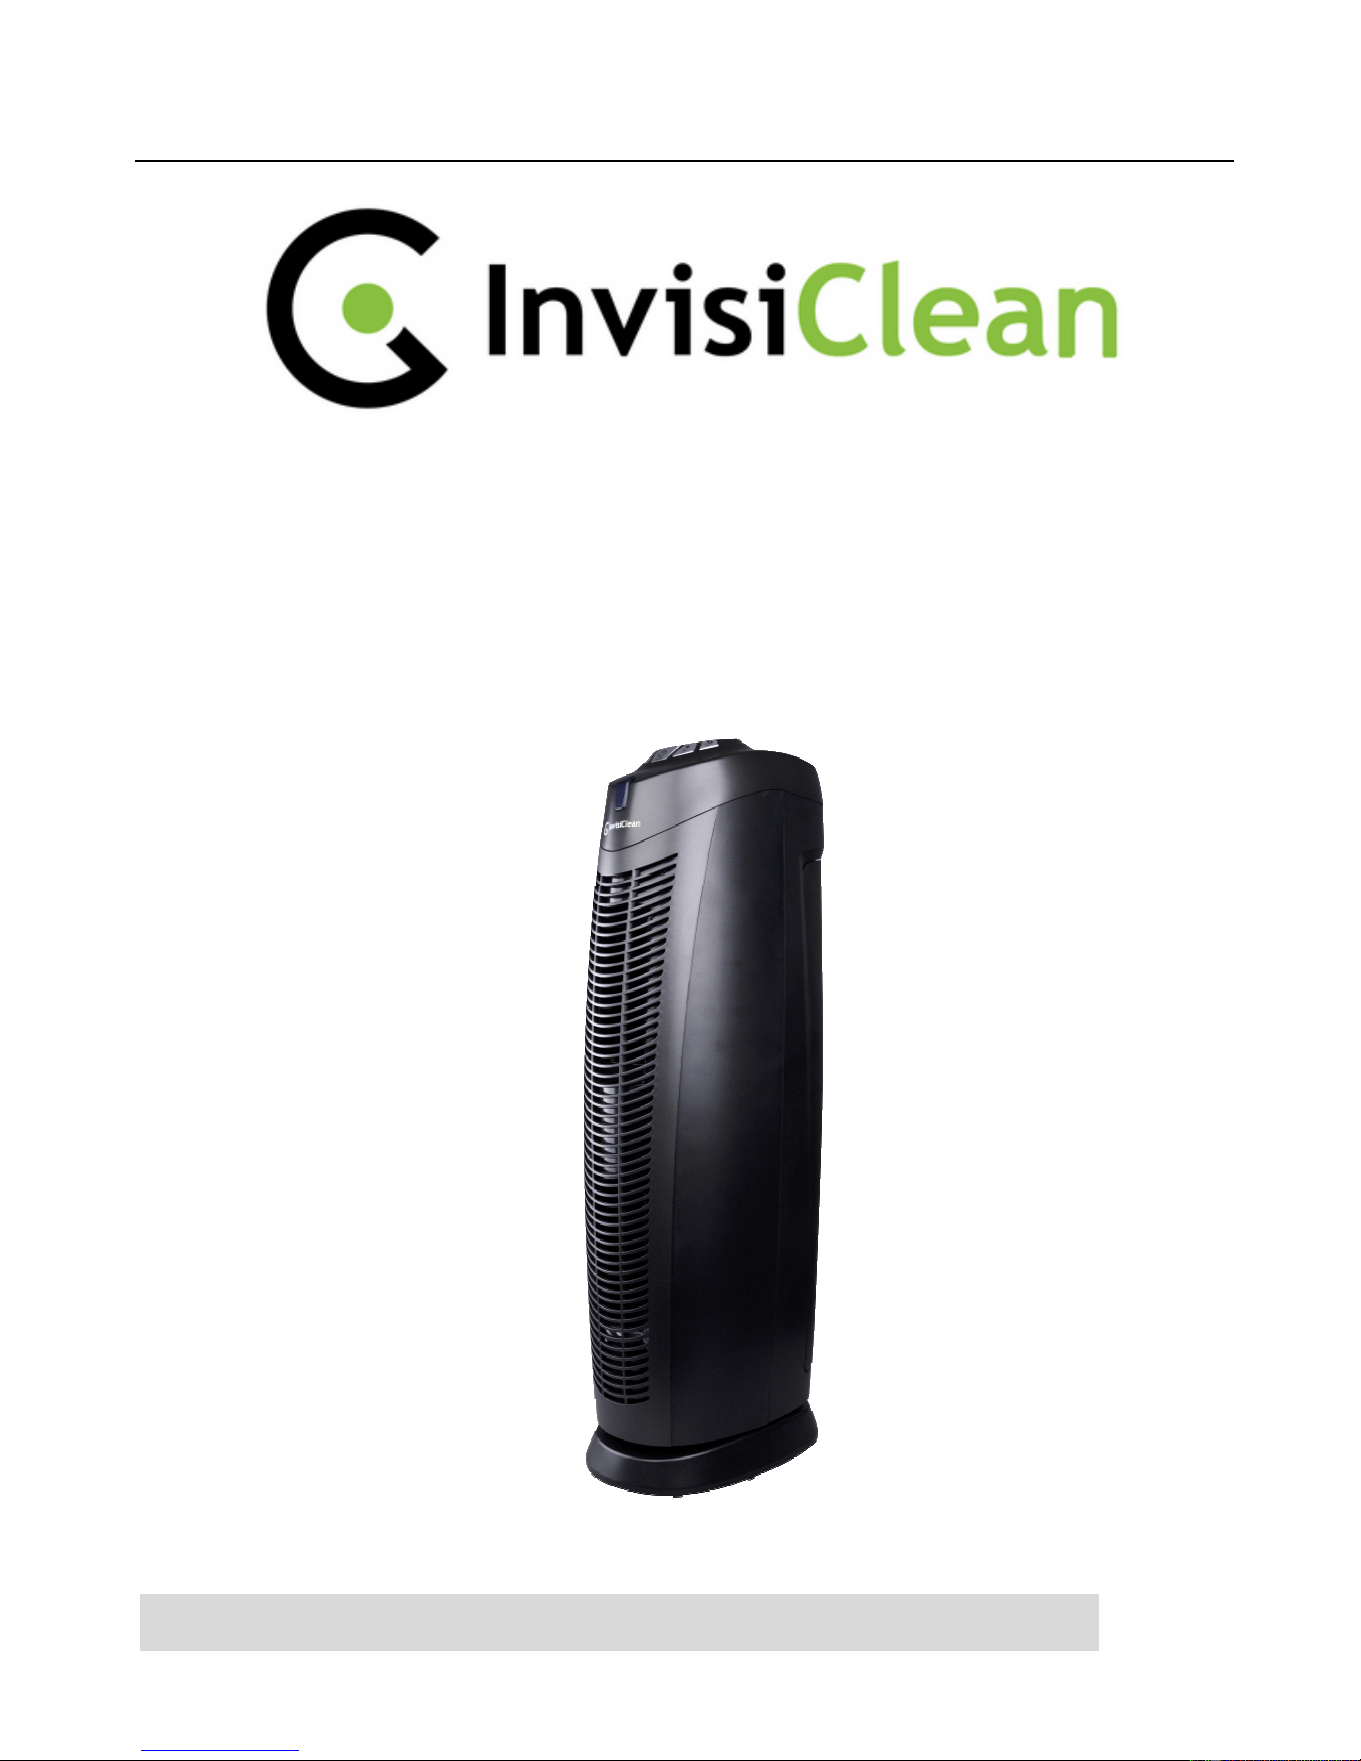
AIR PURIFIER
with TRUE HEPA FILTER
Model No.: IC-7028-Black
READ AND SAVE THESE INSTRUCTIONS:

2
Failure to comply with the warnings listed below may result in electric shock or
serious injury
This product should be used only in accordance with the specifications outlined
in this manual. Usage other than what has been specified here may result in
serious injury.
WARNING: The cords, wires and/or cables supplied with this product
contain chemicals, including lead or lead compounds, known to the state
of California to cause cancer and birth defects or other reproductive harm.
Wash hands after using. (California Code of Regulations Proposition 65)
When using electrical appliances, basic precautions should always be followed to
reduce the risk of fire, electric shock and injury to persons, including the following:
• Read all instructions before using appliance.
• IMPORTANT - This appliance has a polarized plug (one blade is wider than
the other).
• To reduce the risk of electric shock, this plug is intended to fit in a polarized
outlet only one way. If the plug does not fit fully in the outlet, reverse the
plug. If it still does not fit, contact a qualified electrician. Do not attempt to
defeat this safety feature.
• To avoid fire or shock hazard, plug the appliance directly into a 120V AC
electrical outlet.
• Keep the cord out of heavy traffic areas. To avoid fire hazard, NEVER put the
cord under rugs, near heat registers, radiator, stoves or heaters.
• To protect against electrical hazards, DO NOT immerse in water or other
liquids. Do not use near water.
• Children cannot recognize the hazards associated with the usage of electrical
appliances. For this reason, always supervise children when they are near the
unit.
3
• Always unplug the air purifier before moving it, opening the grill, changing
filters, cleaning or whenever the air purifier is not in use. Be sure to pull by
the plug and not the cord.
• NEVER drop or insert any object into any openings.
• DO NOT run cord under carpeting.
• DO NOT cover cord with throw rugs, runners, or similar coverings.
• DO NOT route cord under furniture or appliances. Arrange cord away from
traffic area and where it will not be tripped over.
• DO NOT operate any appliance with a damaged cord or plug, if motor fan
fails to rotate, after the appliance malfunctions, or if it has been dropped or
damaged in any manner.
• Use appliance only for intended household use as described in this manual.
Any other use not recommended by the manufacturer may cause fire,
electric shock or injury to persons.
• DO NOT use outdoors.
• DO NOT place anything on top of unit.
MAIN PARTS
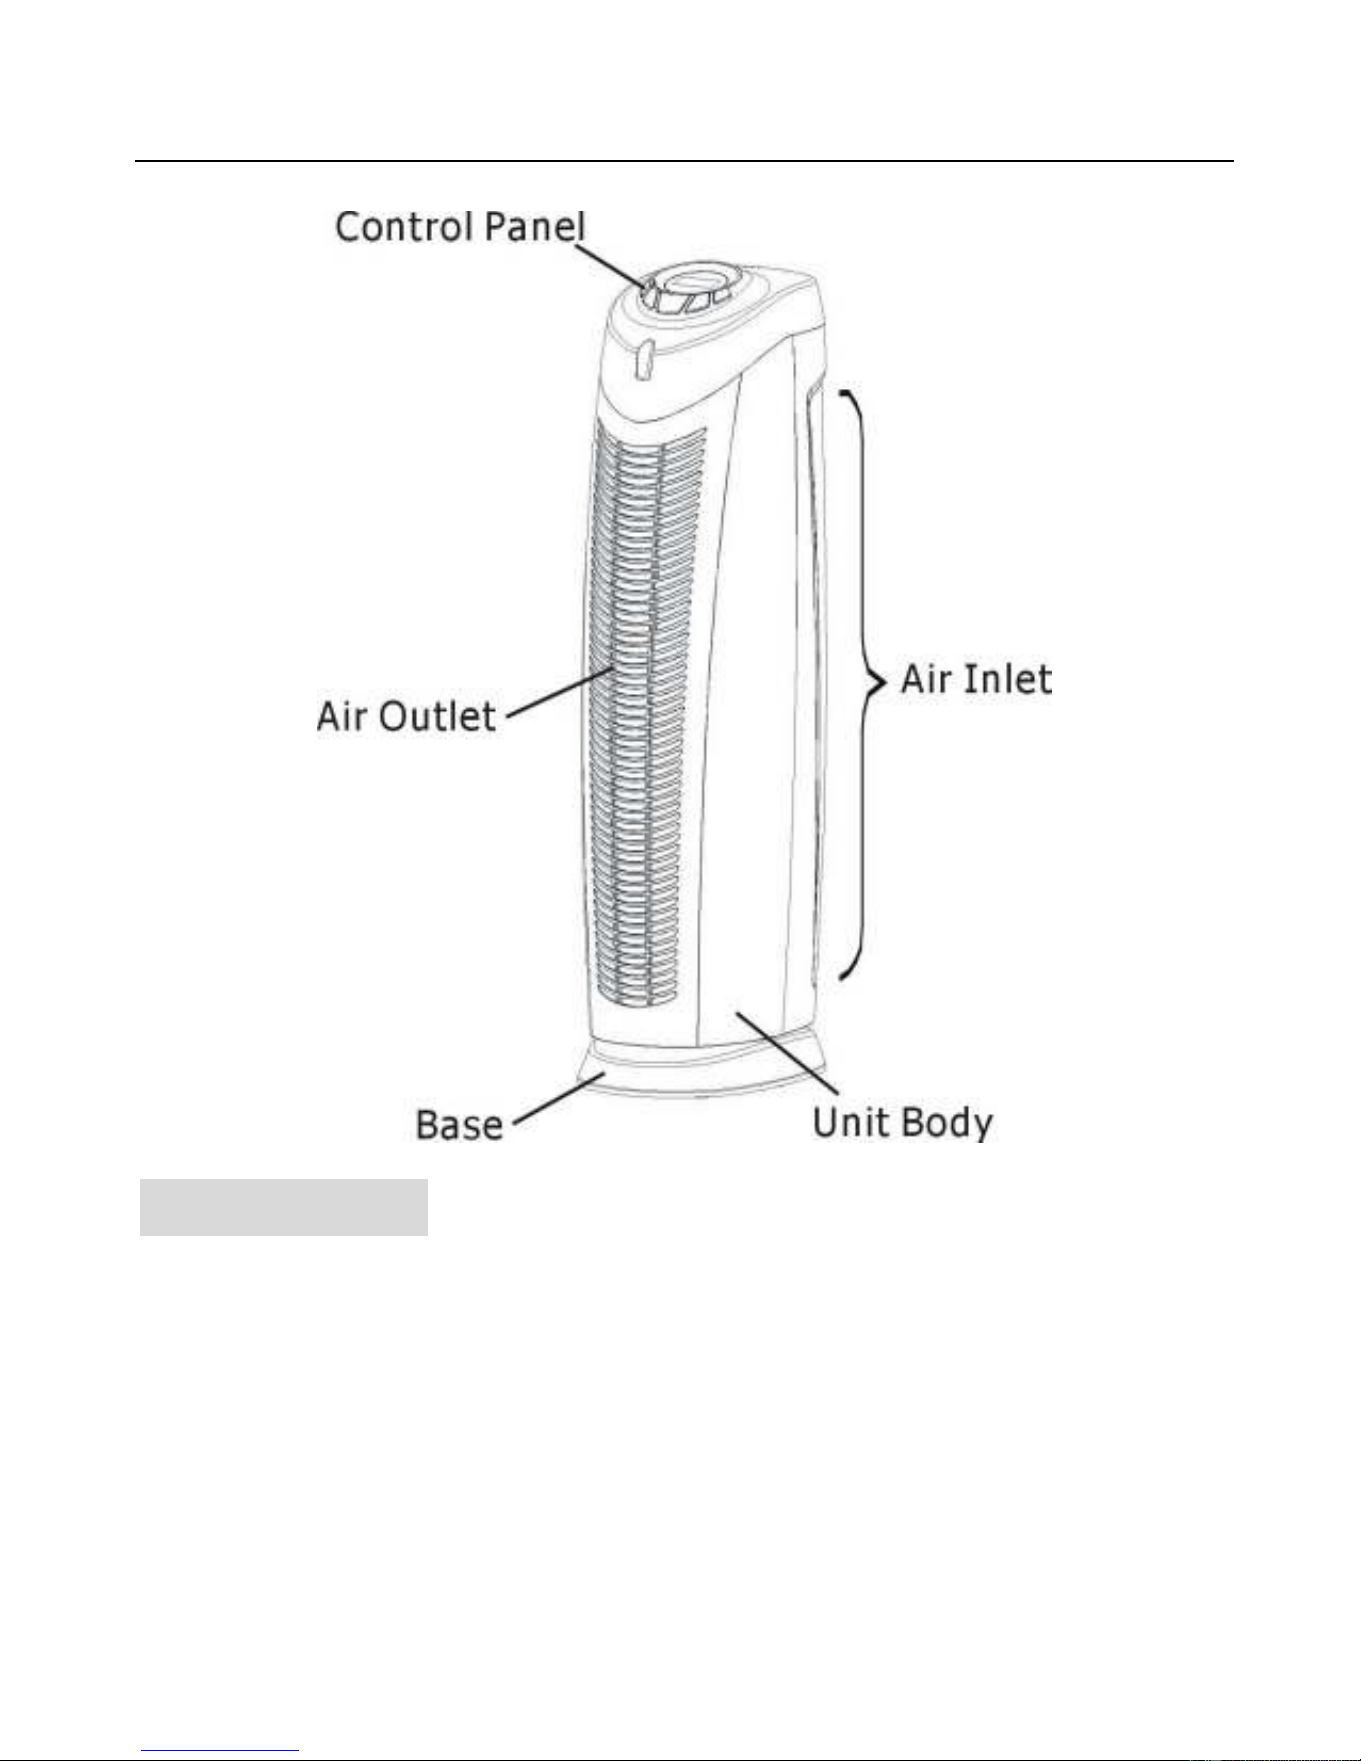
4
OPERATION
PREPARING FOR FIRST USE
1. Carefully unpack your air purifier from the box and remove from the plastic bag.
2. Select a firm, level, and flat location. For proper air flow, place the unit at least 1
foot from any wall or furniture. Ensure no grills are blocked.
3. Plug the power cord into a 120V AC outlet.
4. Always lift your air purifier by the handle of the unit.
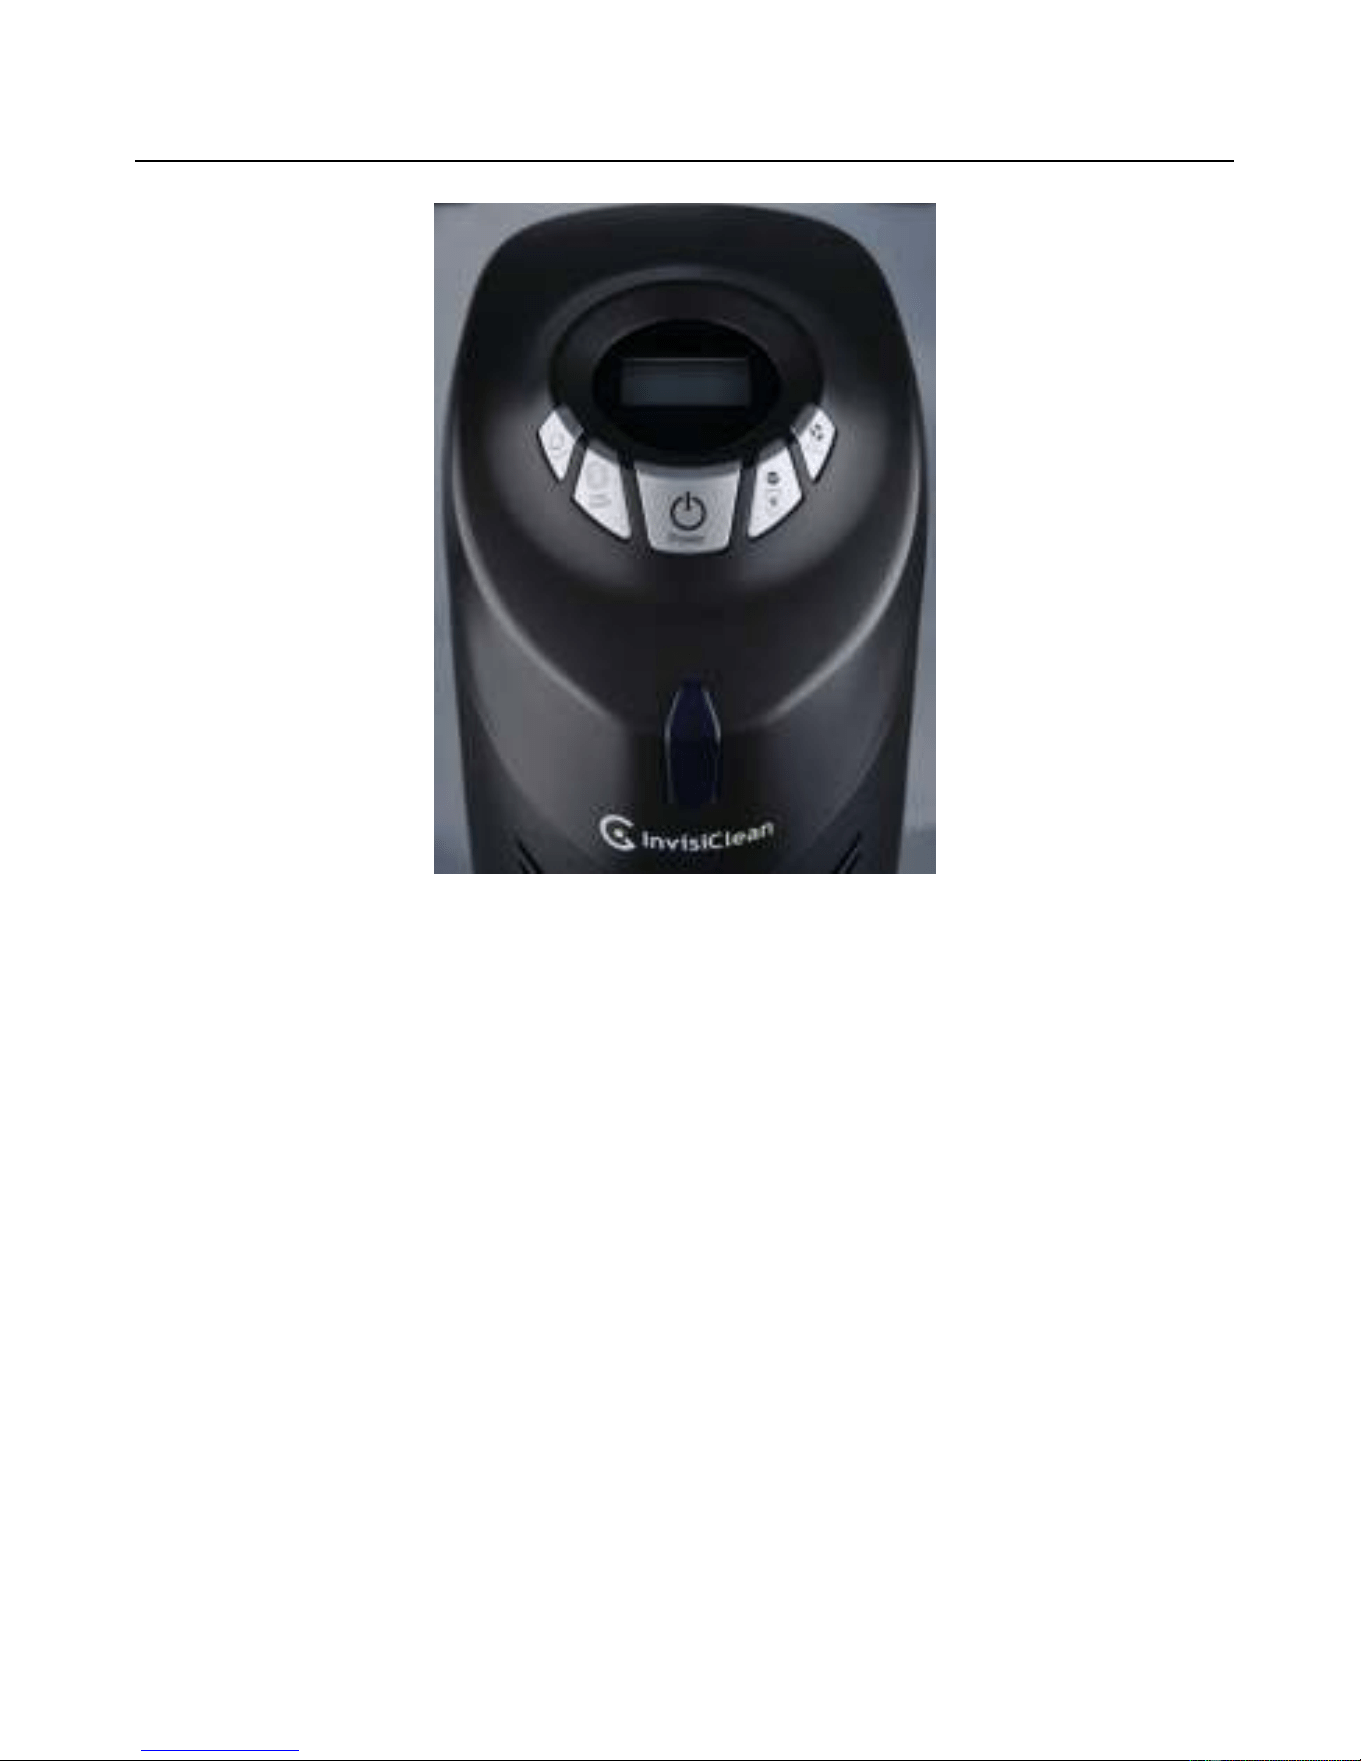
5
Figure 1
OPERATING INSTRUCTIONS
The air purifier may be operated by the manual controls located on the air purifier
(as shown in Figure 1).
1. Turn the air purifier on by pressing On/Off Button, press On/Off Button
again to turn off the machine.
2.
Turn on the UV-C lamp and Ionizer ON or OFF by using UV&ION Button.
Press the UV&ION Button to cycle through the following modes:
Mode 1 – Both UV lamp and Ionizer are on.
Mode 2 – Ionizer off, UV lamp on.
Mode 3 – Ionizer on, UV lamp off.
Mode 4 – Both UV lamp and Ionizer are off.
3. Press Fan Speed Button to select fan speed MODE 1-3.
(1= lowest speed setting; 3= highest speed setting)
4. To turn the air purifier off, press the On/Off Button.

6
TIMER FUNCTION:
This function will work in any mode. The timer function allows you to set the length
of operation from 1 hour (1H) to 8 hours (8H). Press Timer Button to set your
desired operation time. Once the timer is set, the timer indicator will lit and the timer
will count down the hours till the air purifier turn itself off. Pressing Timer Button
once more after the timer indicator reflects 8 hours (8H) will reset the air purifier to
continuous running.
HEPA RESET FUNCTION:
If the HEPA filter needs to be replaced, the HEPA Filter Reset Indicator on LCD
will blink. After replacing the HEPA filter, reset the HEPA Filter Indicator by
pressing HEPA RESET Button, and the indicator will stop blinking. Pressing HEPA
RESET Button during normal use, when the indicator is not blinking, will not do
anything.
CLEANING AND MAINTENANCE
7
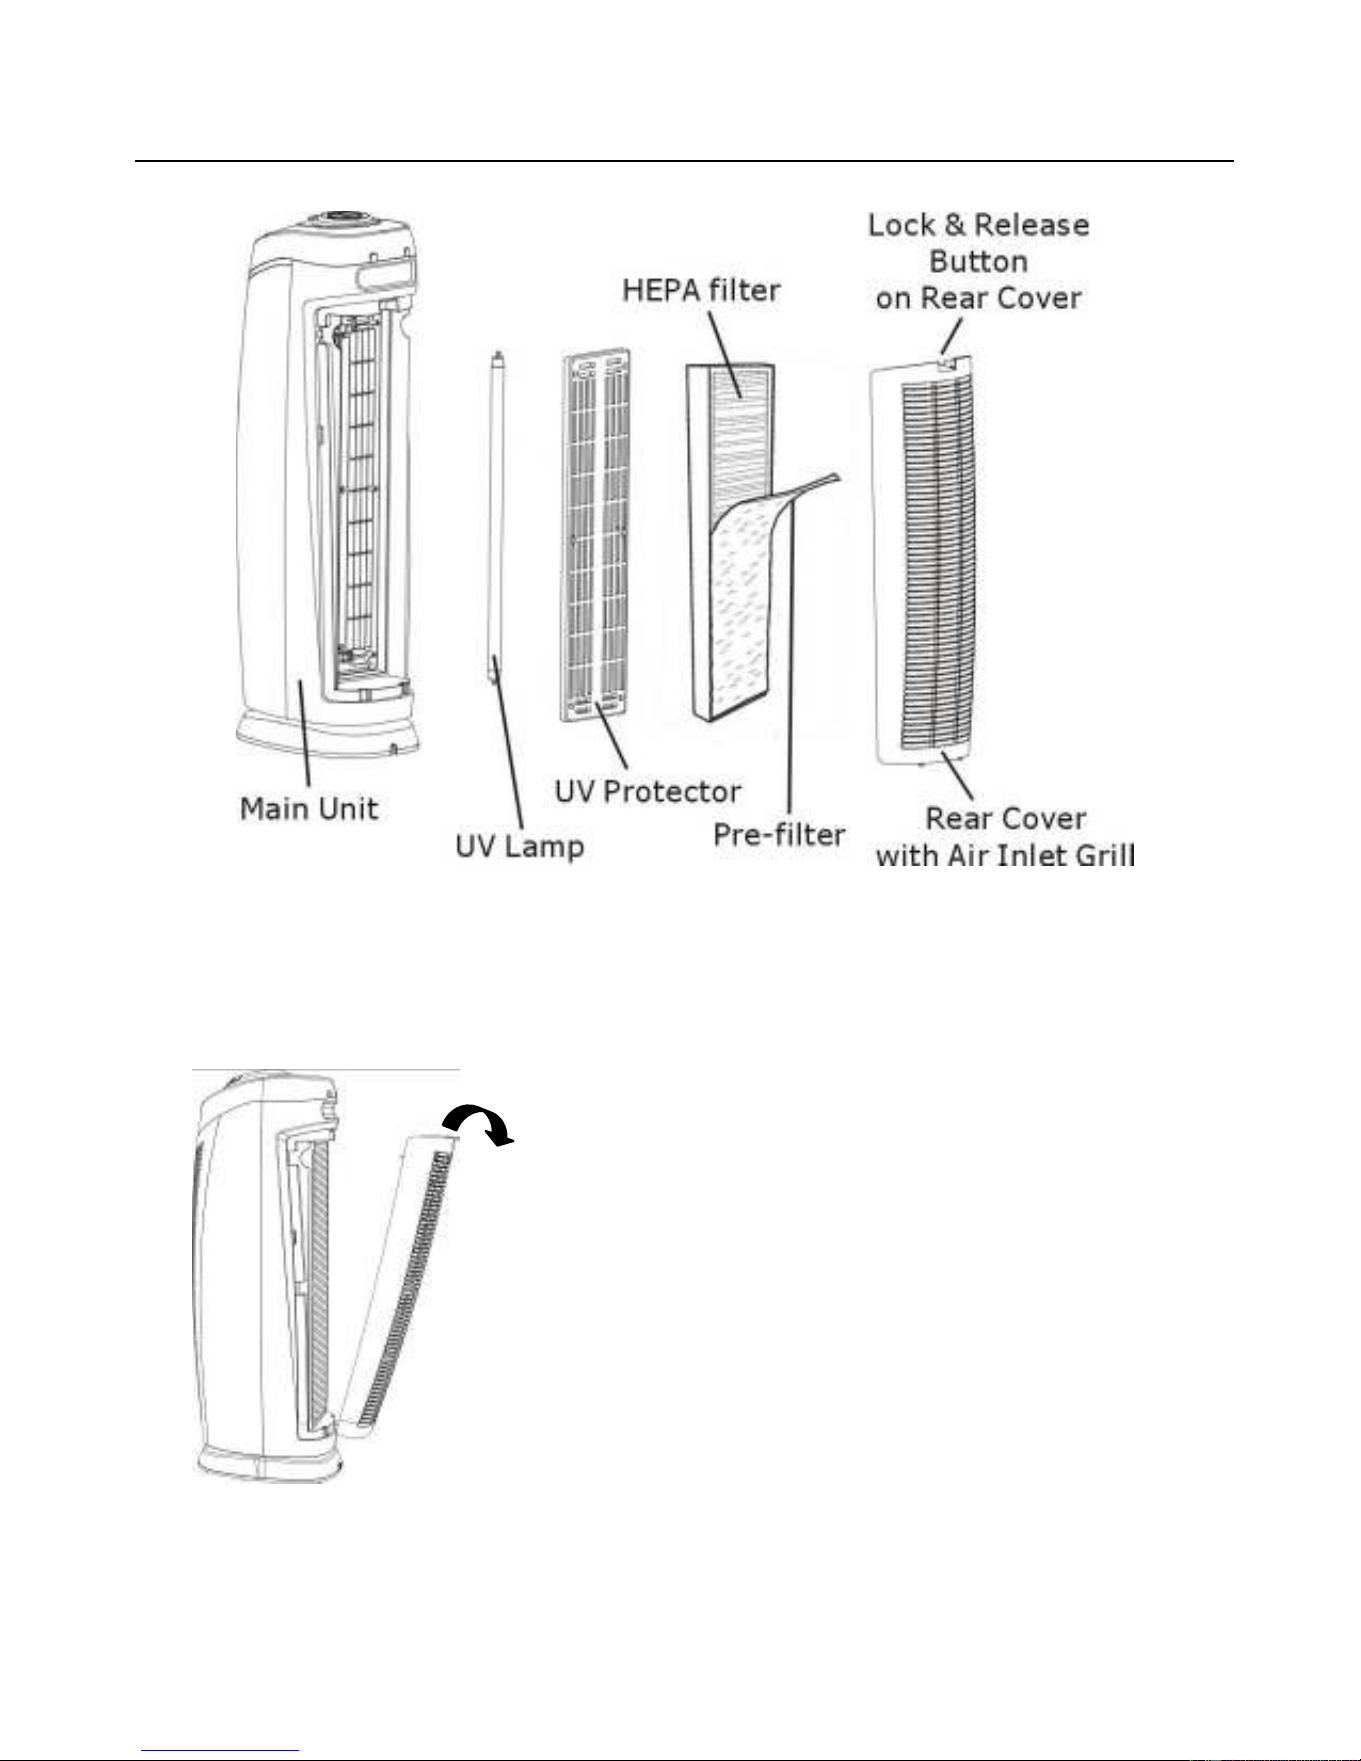
Figure 3
CLEANING or REPLACING HEPA FILTER (See Figure 3)
1. Turn off and unplug the unit. Press the lock & release button and remove the
rear cover from the unit.
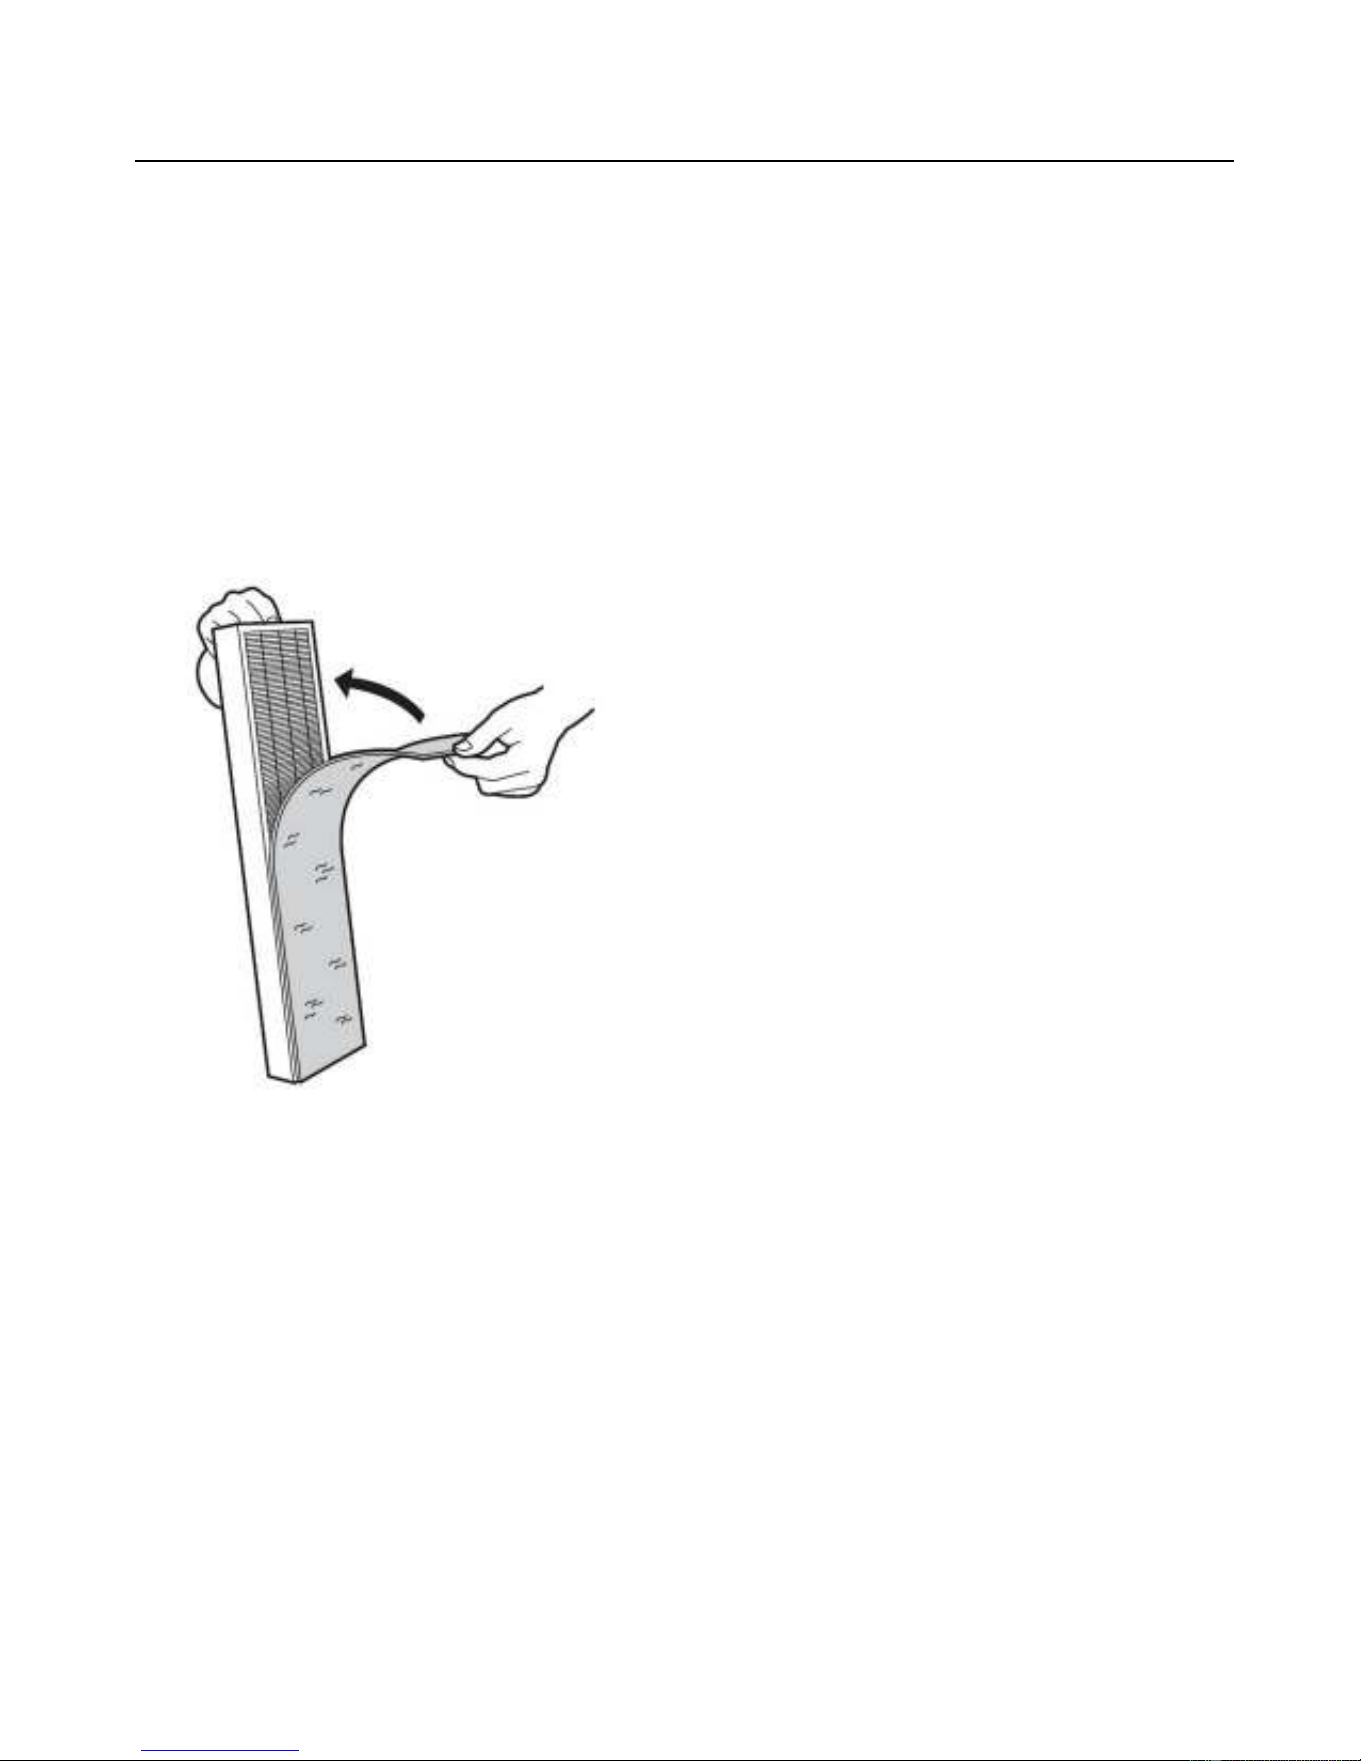
2. Take out the used filter and discard it properly. (See Figure 4)
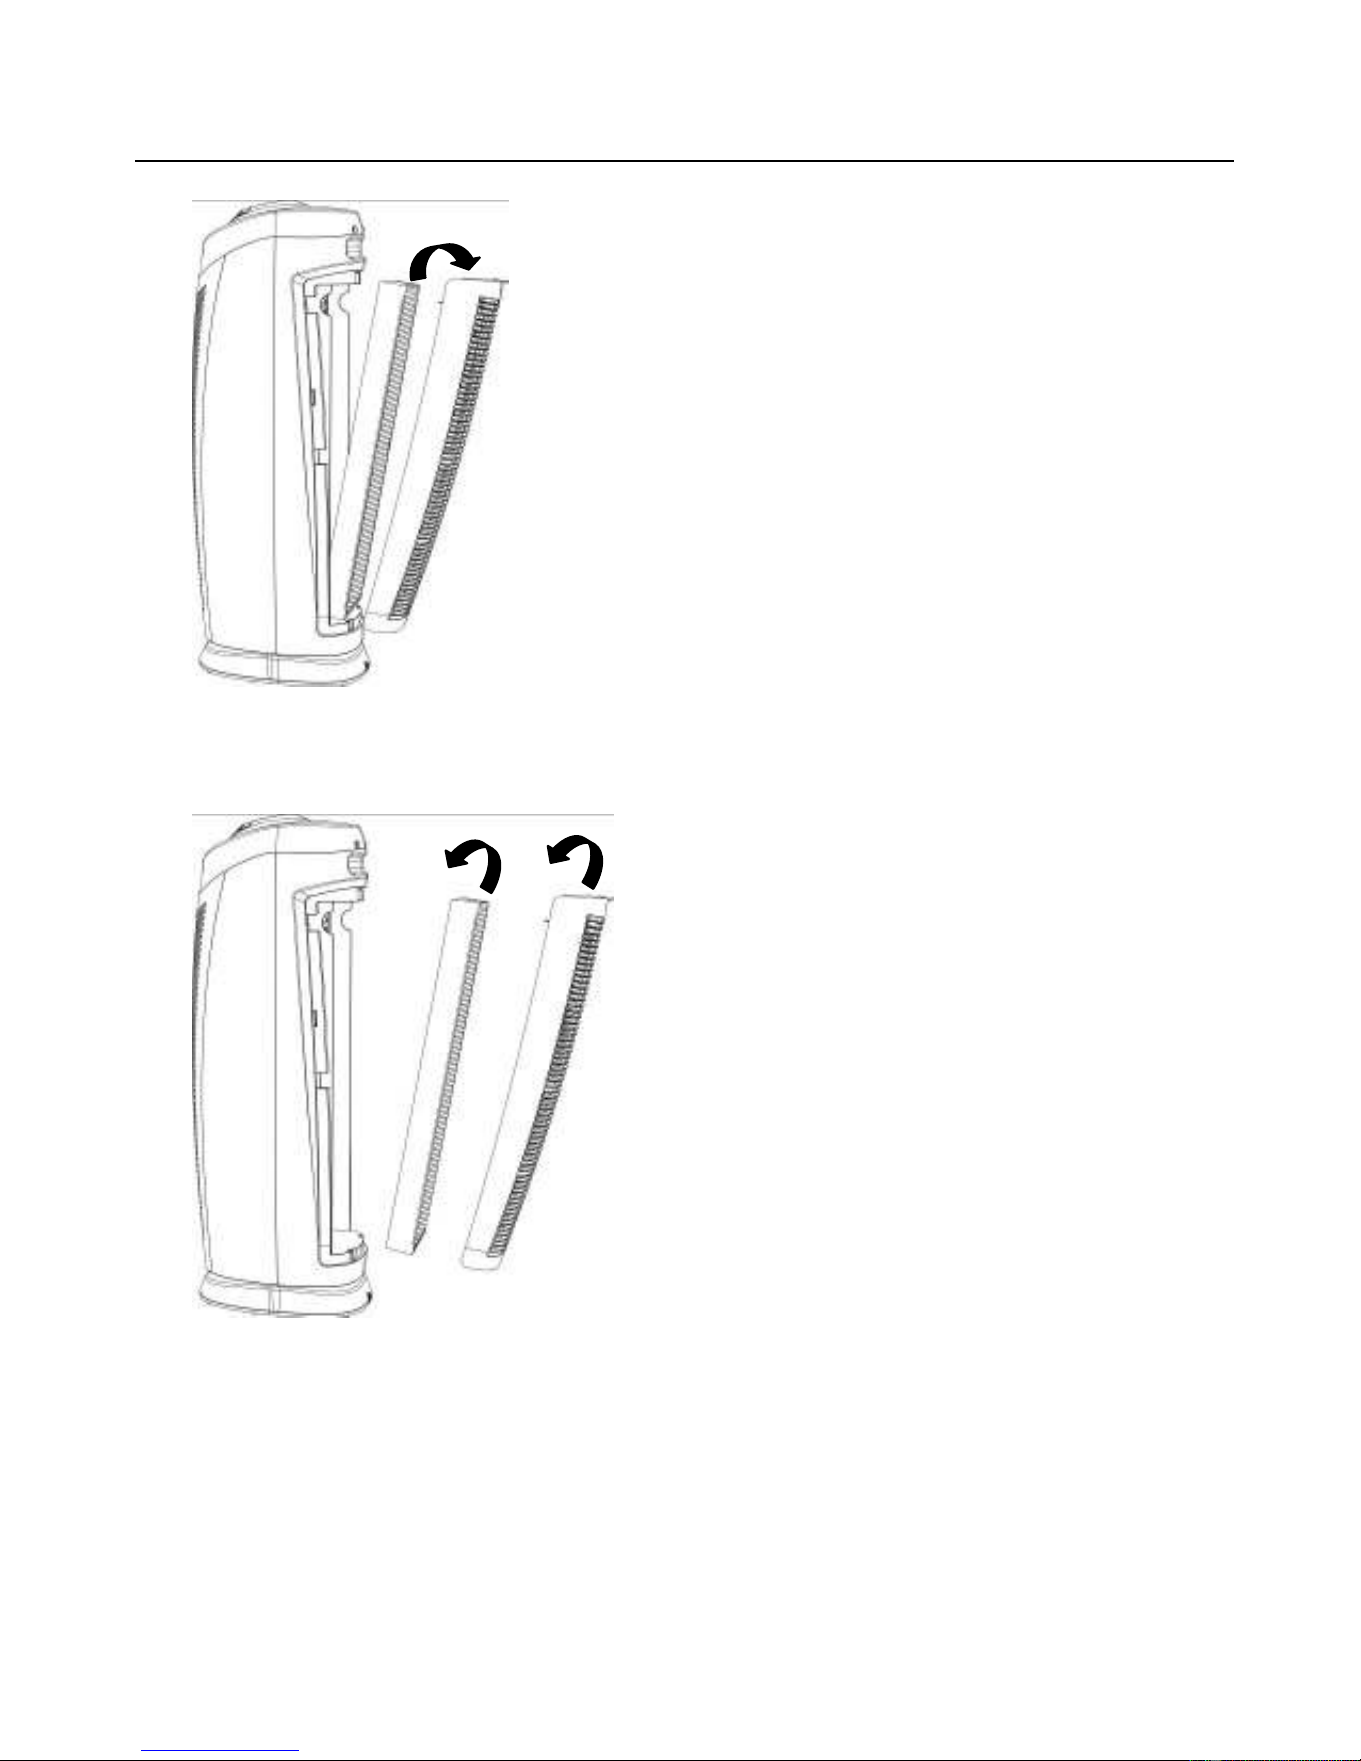
8
Figure 4
3.
Attach the pre-filter to the HEPA filter using Velcro and insert the new HEPA filter.
4.
Install the rear cover back onto the unit and securely latch in place.
(See Figure 5)
Figure 5
NOTE: Do not use water or any other household cleaners to clean the HEPA filter.
Due to varying environmental conditions, the filter may need to be replaced earlier
or later than indicated by the HEPA Filter Reset Indicator. If the HEPA filter turns
from white to dark grey or black, it means you need to change the filter. If the HEPA
filter is still white, it does NOT need to be replaced, even if the HEPA Filter Reset
Indicator on the LCD is blinking. Please contact the manufacturer to purchase a
new HEPA filter.
9
CLEANING PRE-FILTER (See Figure 6)
1. Turn off and unplug the unit.
2. Press the Lock & Release Button and remove the Rear Cover from the unit.
3. Remove the pre-filter from the HEPA Filter. Clean the pre-filter with vacuum
brush attachment of your vacuum cleaner. This will remove lint and dirt from the
filter.
Figure 6
4. After cleaning, reattach the pre-filter to the HEPA Filter and install the rear
cover back to unit and securely latch in place.
5. To ensure optimal performance, clean the pre-filter often.
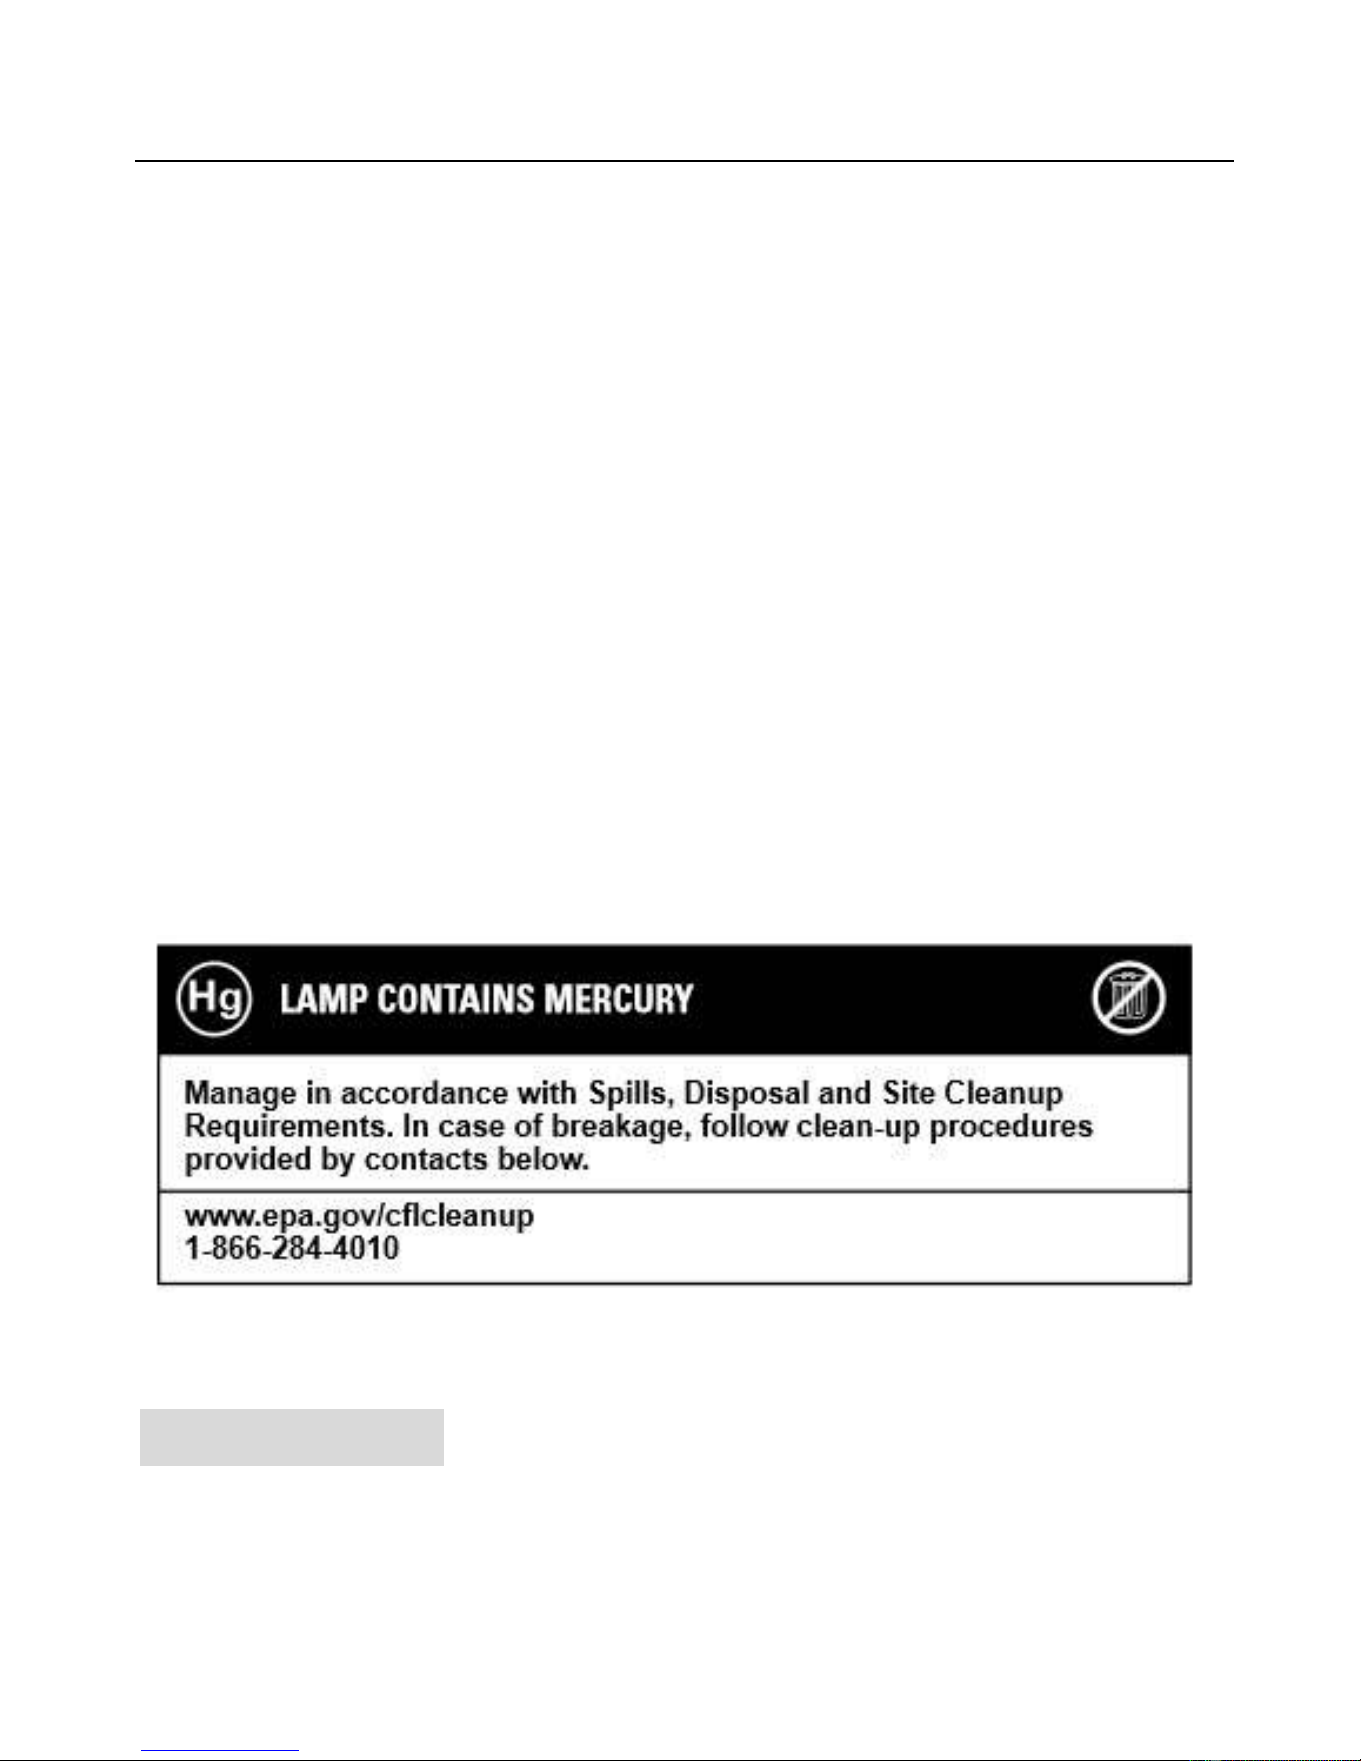
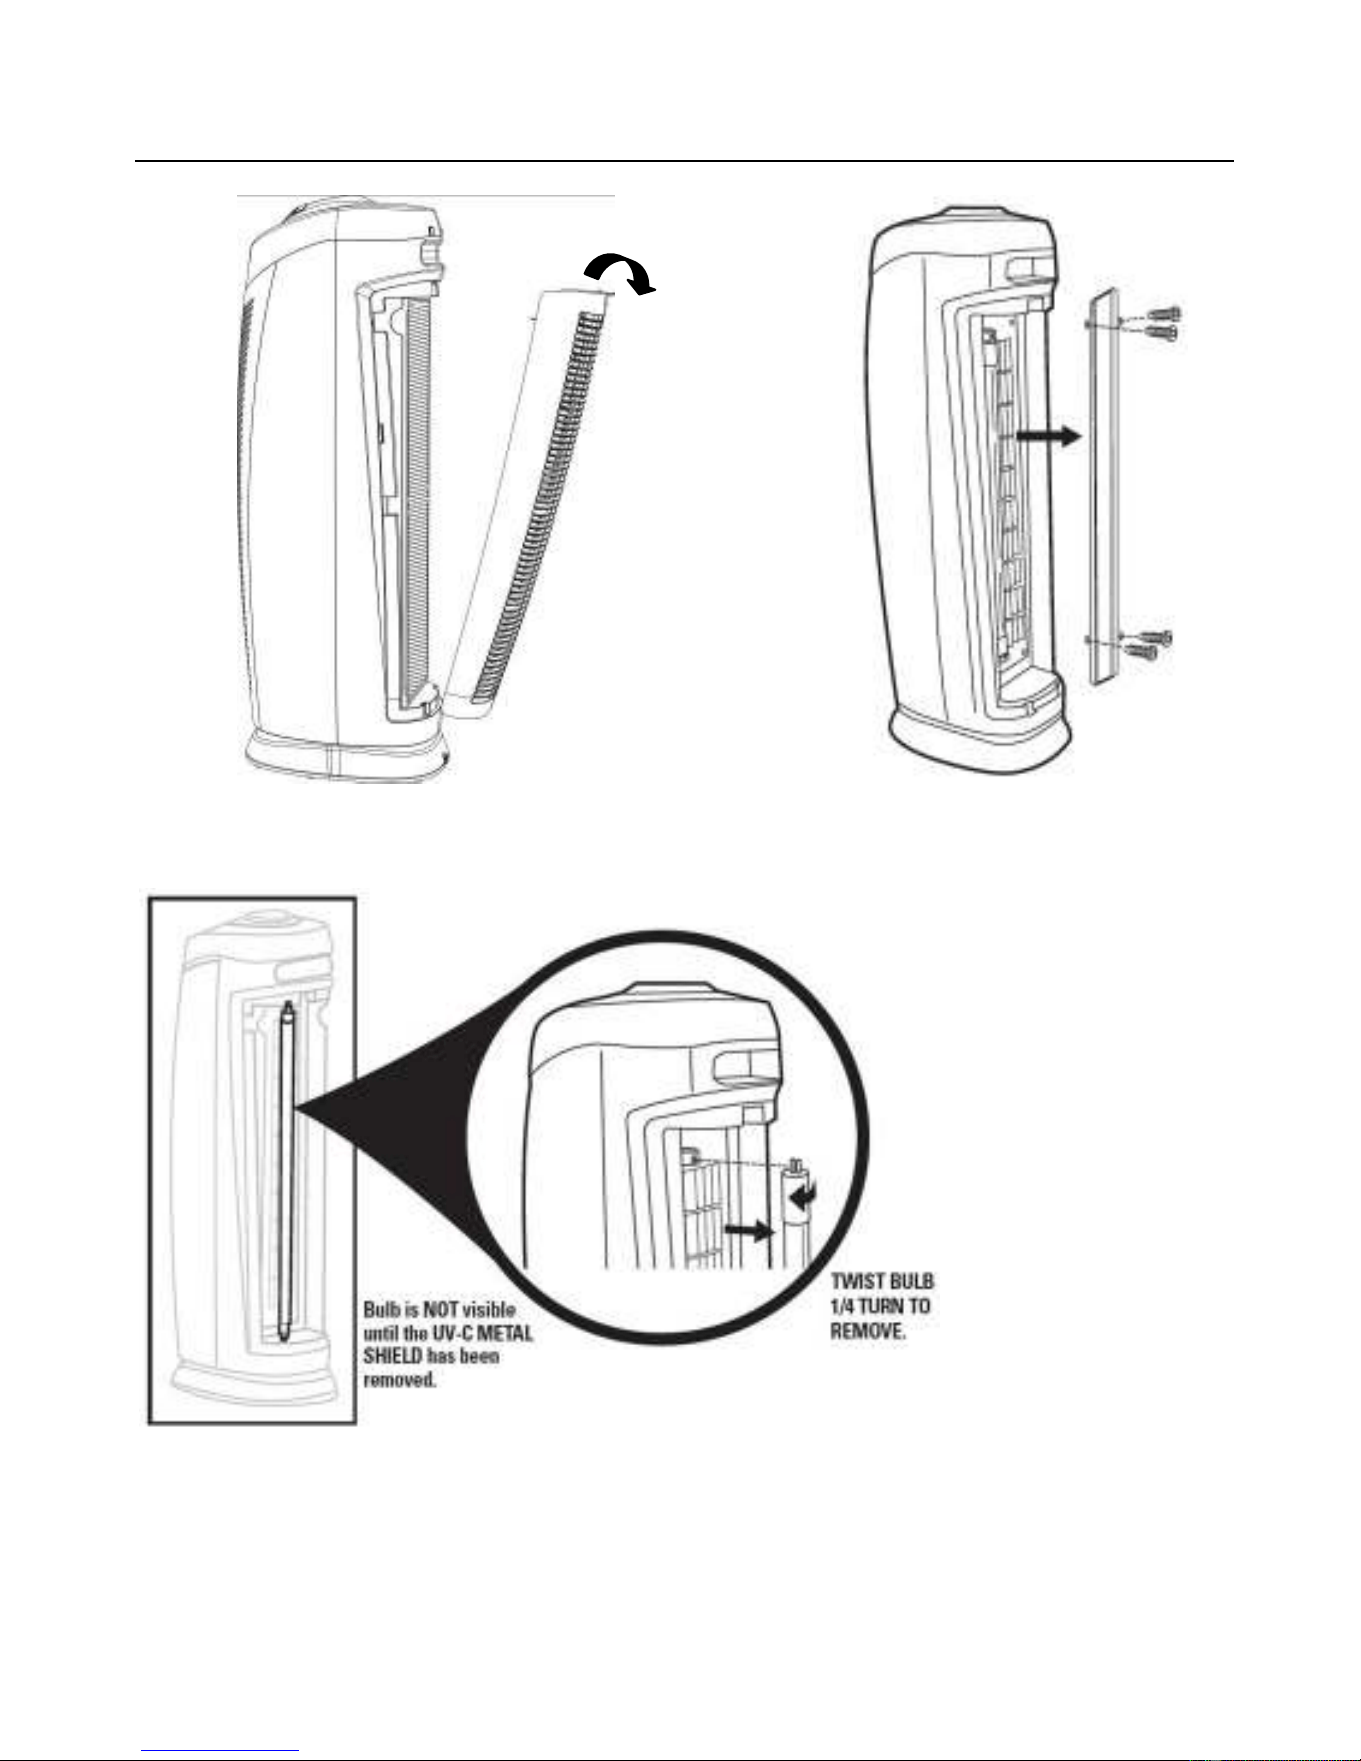
REMOVING/INSTALLING UV LAMP
1. To access the UV lamp, remove the rear cover and HEPA filter. After removing
HEPA filter, use a screwdriver to remove the four screws holding the UV shield
and remove the UV shield. (See Figure 7)
10
Figure 7
2. To remove the UV lamp, rotate it 1/4 turn and then slide it out of the top and
bottom lamp sockets. (See Figure 8)
Figure 8
3. To install the UV lamp, slide it into the top and bottom lamp sockets and rotate it
1/4 turn.
4. The UV lamp should be replaced once a year.
MAINTENANCE

11
1. The air purifier should be checked once a month.
2. Clean the pre-filter with the vacuum cleaner, which will remove lint and dirt.
3. Use a clean, dry, soft cloth to wipe the external surface of unit.
NOTE: Do not stick any foreign objects or your fingers into the unit.
CAUTION:
Do not use gasoline, benzine, thinner, harsh cleaners, etc., as
they will damage the product. NEVER use ALCOHOL OR SOLVENTS.
TROUBLE SHOOTING TIPS
If the air purifier shuts off unexpectedly, safety features may have been activated to
prevent damage or injury. If this happens:
1. Make sure the air purifier is plugged into a working electrical outlet.
2. Make sure the HEPA filter is firmly seated in place.
3. Make sure the rear cover is latched firmly in place.
NOTE: IF YOU CONTINUE TO EXPERIENCE A PROBLEM, PLEASE RETURN THE AIR
PURIFIER TO THE PLACE OF ORIGINAL PURCHASE. DO NOT ATTEMPT TO TAKE
APART THE UNIT BY YOURSELF. DOING SO WILL VOID YOUR WARRANTY AND
MAY CAUSE DAMAGE TO THE PRODUCT OR PERSONAL INJURY.

12
3 YEAR LIMITED WARRANTY
To the consumer, InvisiClean warrants this product to be free of defects in materials
or workmanship commencing upon the date of the original purchase. Save your
original sales receipt to validate start of warranty period. Warranty is not valid
without receipt
.
If this product should become defective within the warranty period, we will repair or
replace any defective parts free of charge. All warranty repairs must be completed
by InvisiClean. This warranty does not cover unauthorized repairs. The warranty
does not include unusual wear, damage resulting from accident, or unreasonable
use of the product. This warranty only covers the product when used with genuine
InvisiClean accessories. This warranty covers product that was purchased from
authorized distributors. This warranty gives you specific legal rights and you may
also have other rights (other rights may vary from state to state in the U.S.A.).
To submit product under warranty the complete machine must be delivered pre-paid
to InvisiClean. Please include complete information including: the problem, the
model number of the product, the day of purchase, and a copy of the original sales
receipt along with your name, address, and telephone (email optional). Please
contact the original authorized retailer for return authorization and instructions.