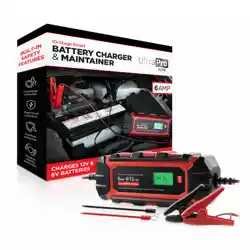

Beleeb Pulses of High-Voltage Automatic Battery
Charger 12V 24V 36V 48V 60V 72V
Why choose Beleeb Series versatile battery charger?
Desulfation is particularly important for applications, such as solar arrays or electric wheelchairs, that don't often allow for
a complete charging cycle. The interrupted charging cycles common in these applications can lead to extensive sulfation
within the battery, causing premature battery death.
However, a new technology called battery desulfation promises to help extend the life of lead-acid batteries. This technology
uses specialized equipment to send periodic frequency-based pulses and/or pulses of high-voltage electricity through the
battery, helping to break up these hardened sulfate crystals over the course of many days. By breaking up the sulfate crystals,
battery desulfation allows the lead dioxide plates to regain their full functionality, increasing the potential current that can
be generated within the battery. When used correctly, this desulfation technology can restore functionality to worn-out
batteries and extend the useful lifespan of fresh batteries.
By extending battery life, Beleeb series battery charger is designed to charge and maintain 12V 24V 36V 48V 60V 72V lead-
acid and lithium-ion batteries, including flooded, gel, AGM, and deep-cycle batteries.
Read and understand this instruction manual thoroughly before using the product. It contains important information for
your safety as well as operating and maintenance advice.
Keep this instruction manual for future use. Should this product be passed on to a third party, this instruction manual must
be included.
This Beleeb product carries a one (1) year warranty against defects in workmanship and materials.
This product is not guaranteed against wear or breakage due to misuse and/or abuse.
INTRODUCTION
Beleeb chargers use an isolation transformer as a step-down unit, this isolation transformer converts high-voltage, low-current power
into low-voltage, high-current power. A bridge rectifier converts mains AC input to pulsating DC output. And CPU is used to control
the output voltages and current.
They can be used on batteries of differing types, including power batteries, capacity batteries, start-up batteries. Or they can be used
in a 12, 24, 36, 48, or 72 volt system using a combination of 6,8,12 volt lithium-ion or lead-acid batteries. Beleeb battery chargers will
handle their own charging and stop when full charged . Therefore there's no need for a person to be on duty.
They also have devulcanization repair and equalization mode, equalizing charge can compensate for the unbalance between
batteries, which lengthens the life of batteries.
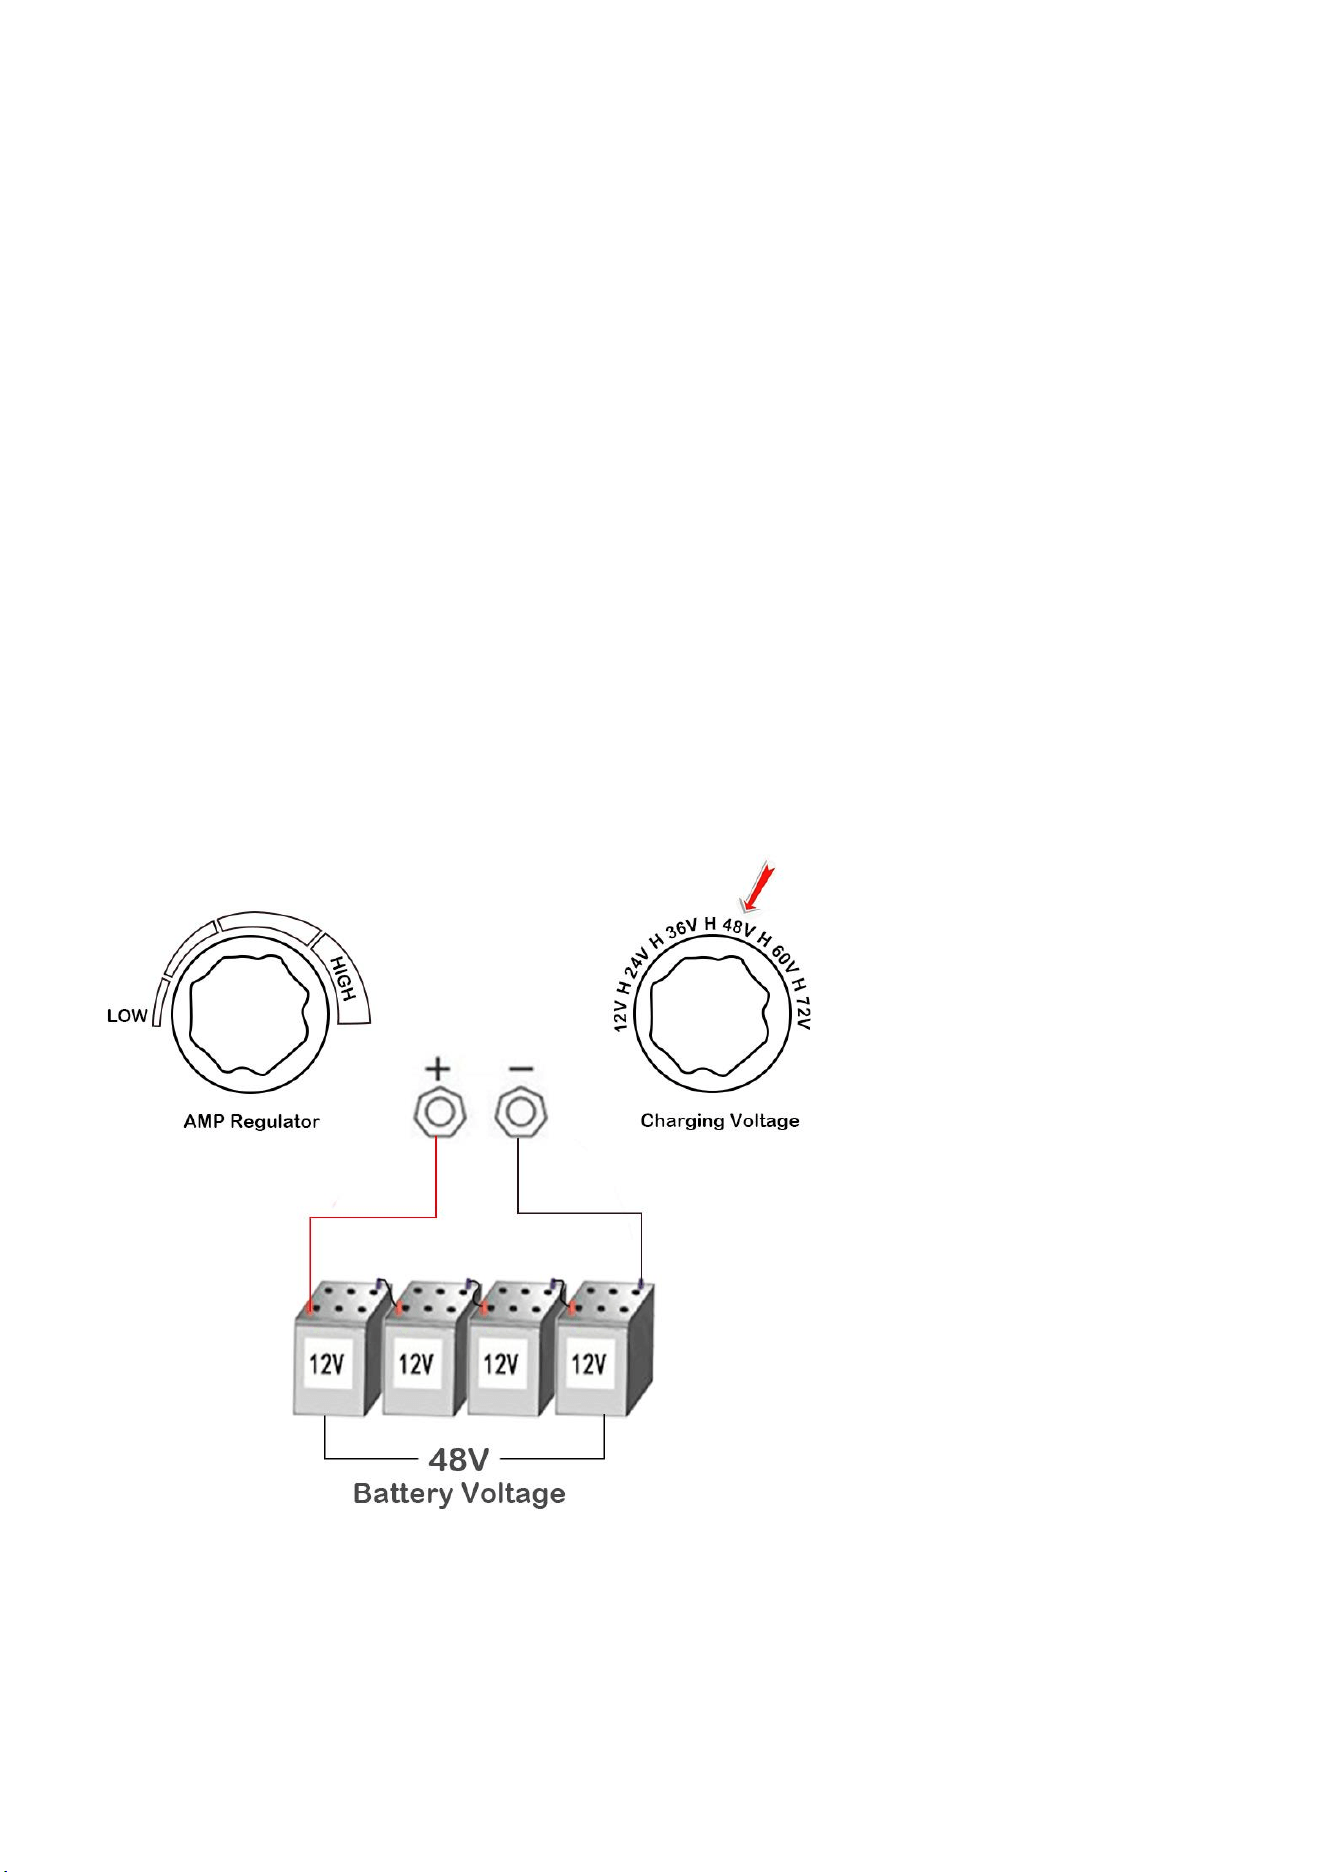
1. Beleeb series battery chargers are designed for charging various voltage battery packs (12V/24V/36V/48V/60V/72V). The voltage
output is critical and must match your battery pack.
2. The charger's output current is adjustable, and the internal protection circuit will limit the max charging current to prevent overload.
Charging speed will differ based on a charger amperage. Pick the charger amperage and charging speed that’s right for your batteries.
3. They are equipped with both normal and equalizing charge modes. The normal charging mode is used to charge the battery daily,
and the deep charging mode can desulfurize and equalize the battery through pulse high voltage.

IMPORTANT SAFETY INSTRUCTIONS
1. SAVE THESE INSTRUCTIONS.
Read all instructions, warnings, and cautions printed on the battery charger, battery, and vehicle or equipment using the
battery.
DO NOT expose the charger to rain or snow.
Use of an attachment not recommended or sold by the battery charger manufacturer may result in a risk of fire, electric
shock, or injury to persons.
To reduce the risk of damage to the electric plug and cord, pull by plug rather than cord when disconnecting charger.
An extension cord should not be used unless absolutely necessary.
The use of an improper extension cord could result in a risk of fire and electric shock.
DO NOT operate charger with a damaged cord or plug—replace the cord or plug immediately.
DO NOT operate charger if it has received a sharp blow, been dropped, or otherwise damaged in any way—take it to a
qualified serviceman.
DO NOT disassemble the charger. Take it to a qualified service professional if service or repair is required. Incorrect assembly
may result in fire or electric shock.
To reduce the risk of electric shock, unplug the charger from the outlet before attempting any maintenance or cleaning.
Turning off controls will not reduce this risk.
2. WARNING—RISK OF EXPLOSIVE GASES.
WORKING IN THE VICINITY OF A LEAD-ACID BATTERY IS DANGEROUS.
BATTERIES GENERATE EXPLOSIVE GASES DURING NORMAL BATTERY OPERATION. FOR THIS REASON, IT IS OF UTMOST
IMPORTANCE THAT YOU FOLLOW THE INSTRUCTIONS EACH TIME YOU USE THE CHARGER.
To reduce the risk of battery explosion, follow these instructions and those published by the battery manufacturer and
manufacturer of any equipment you intend to use in the vicinity of the battery.
Review cautionary markings on these products and on the engine.
3. PERSONAL SAFETY INSTRUCTIONS.
Consider having someone close by coming to your aid when you work near a lead-acid battery.
Have plenty of fresh water and soap nearby in case battery acid contacts skin, clothing, or eyes.
Wear complete eye protection and clothing protection. Avoid touching eyes while working near the battery.
If battery acid contacts skin or clothing, wash immediately with soap and water. If acid enters the eyes, immediately flood
the eyes with running cold water for at least 10 minutes and get medical attention immediately.
NEVER smoke or allow a spark or flame in the vicinity of the battery or engine.
Take extra precautions to avoid dropping a metal tool onto the battery. It may spark or create a short circuit that can cause
an explosion.
Remove personal metal items such as rings, bracelets, necklaces, and watches when working with a lead-acid battery. A lead-
acid battery can produce a short-circuit current high enough to weld a ring or the like to metal, causing a severe burn.
Use the charger for charging a LEAD-ACID and LITHIUM-ION battery only. It is not intended to supply power to a low voltage
electrical system other than in a starter-motor application. Do not use the battery charger for charging dry-cell batteries that
are commonly used with home appliances. These batteries may burst and cause injury to persons and damage to property.
NEVER charge a frozen battery.
4. PREPARING TO CHARGE
If it is necessary to remove the battery from the vehicle to charge, always remove the grounded terminal from the battery
first. Make sure all accessories in the vehicle are off so as not to cause an arc.

Be sure the area around the battery is well ventilated while the battery is being charged.
Clean battery terminals. Be careful to keep corrosion from coming in contact with eyes.
Study all battery manufacturer’s specific precautions while charging and follow recommended rates of charge.
Determine voltage of battery by referring to car owner’s manual and make sure that output voltage selector switch is set at
the correct voltage.
5. CHARGER LOCATION
Locate charger as far away from battery as DC cables permit.
Never place charger directly above battery being charged; gases from battery will corrode and damage the charger.
Never allow battery acid to drip on the charger when reading electrolyte specific gravity or filling the battery.
Do not operate the charger in a closed-in area or restrict ventilation in any way.
Do not set a battery on top of the charger.
6. DC CONNECTION PRECAUTIONS
Connect and disconnect DC output clips only after removing the AC cord from the electrical outlet.
Never allow clips to touch each other.
Attach clips to the battery and chassis as indicated in the Connecting Your Battery section.
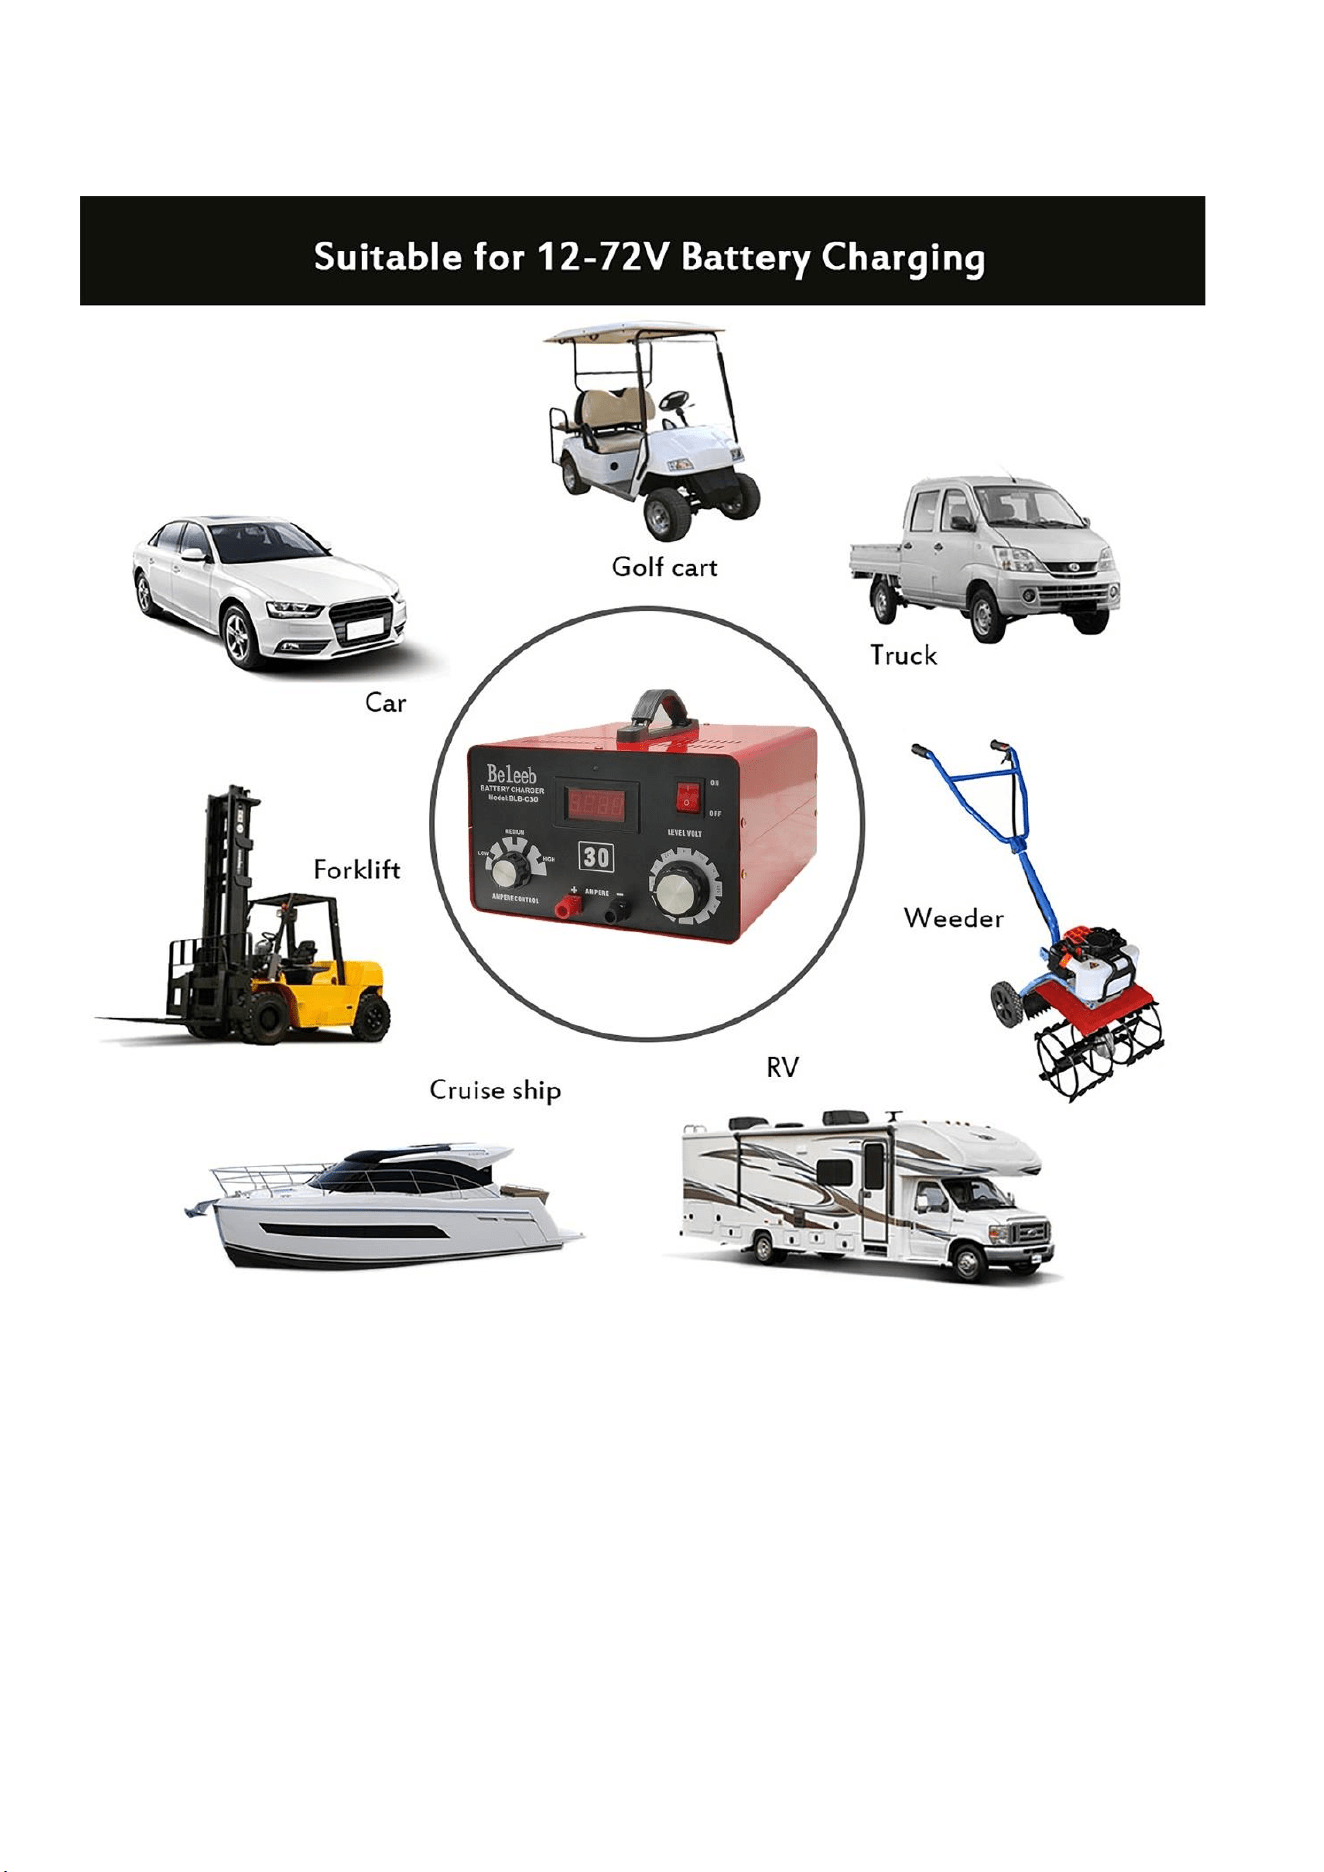
APPLICATION
Beleeb stocks commercial quality battery chargers for marine, RV, automotive, electronic/security, industrial, and military
applications. They can be used in a 12, 24, 36, 48, 72 volt system using a combination of 6, 8, 12 volt batteries.
Battery systems using 24 volts are found in mobility applications (wheelchairs, scooters), military vehicles and other military
use, industrial systems, material carts, scissor-lifts, RV and marine, aircraft, riding scooters, and many others.
Battery systems using 36 volts are found in industrial systems, golf carts, RV and marine, riding scooters, and others.
Battery systems using 48 volts are found in industrial systems, golf carts, floor scrubbers, scissor lifts, forklifts, etc.
Beleeb battery chargers are also excellent for floor scrubbers, lifts, industrial carts, etc., where higher volts (60V, 72V)
are desirable.

CONNECTING YOUR BATTERY
FOLLOW THESE STEPS WHEN THE BATTERY IS INSTALLED IN THE VEHICLE
WARNING: A SPARK NEAR THE BATTERY MAY CAUSE A BATTERY EXPLOSION. TO REDUCE THE RISK OF A SPARK NEAR THE
BATTERY:
Position AC and DC cords to reduce the risk of damage by the hood, door, or moving engine part.
Stay clear of fan blades, belts, pulleys, and other parts that can cause injury to persons.
Check the polarity of battery posts. POSITIVE (POS, P, +) battery post usually has a larger diameter than NEGATIVE (NEG, N,
-) post.
Determine which post of battery is grounded (connected) to the chassis.
If the negative post is grounded to chassis (as in most vehicles), see the step "For negative-grounded vehicle". If the positive
post is grounded to the chassis, see the step "For positive-grounded vehicle".
For a negative-grounded vehicle, connect POSITIVE (RED) clip from battery charger to POSITIVE (POS, P, +) ungrounded post
of the battery. Connect NEGATIVE (BLACK) clip to vehicle chassis or engine block away from the battery. Do not connect the
clip to carburetor, fuel lines, or sheet-metal body parts. Connect to a heavy-gauge metal part of the frame or engine block.
For a positive-grounded vehicle, connect NEGATIVE (BLACK) clip from battery charger to NEGATIVE (NEG, N, -) ungrounded
post of the battery. Connect POSITIVE (RED) clip to vehicle chassis or engine block away from the battery. Do not connect
the clip to carburetor, fuel lines, or sheet-metal body parts. Connect to a heavy-gauge metal part of the frame or engine
block.
When disconnecting the charger, turn the switch off, disconnect the AC cord, remove the clip from the vehicle chassis, and
then remove the clip from the battery terminal.
FOLLOW THESE STEPS WHEN THE BATTERY IS OUTSIDE THE VEHICLE
WARNING: A SPARK NEAR THE BATTERY MAY CAUSE A BATTERY EXPLOSION. TO REDUCE THE RISK OF A SPARK NEAR THE
BATTERY:
Check the polarity of battery posts. POSITIVE (POS, P, +) battery post usually has a larger diameter than NEGATIVE (NEG, N,
-) post.
Attach at least a 24" (61 cm) 6-gauge (AWG) insulated battery cable to NEGATIVE (NEG, N, -) battery post.
Connect POSITIVE (RED) charger clip to POSITIVE (POS, P, +) post of the battery.
Position yourself and the free end of the cable as far away from the battery as possible—then connect the NEGATIVE (BLACK)
charger clip to the free end of the cable.
Do not face battery when making the final connection.
When disconnecting the charger, always do so in the reverse sequence of connecting procedure and break the first
connection while as far away from the battery as practical.
A marine (boat) battery must be removed and charged onshore. To charge it on board requires equipment specially designed
for marine use.

CONTROLS AND INDICATORS
Current control
Through a stepless adjustment knob, you can adjust the charging current.
Turn the knob counterclockwise to reduce the current, and the minimum current value is 2A; turn the knob clockwise to
increase the current to the maximum. You can rest assured to turn the knob to the maximum, the charger will automatically
limit the current within a safe range (see the table below for the maximum output current). The optimal charging current of
the battery is one-fifth of the battery capacity.
Maximum output current in constant current stage
Model
C20
C30
C40
Output voltage
Maximum output current
12V
12A
14A
16A
24V
10A
12A
14A
36V
8A
10A
12A
48V
6A
8A
10A
60V
/
6A
8A
72V
/
4A
6A
Charging voltage in constant voltage stage
Normal charging
Deep charging
Mode
Constant voltage
Mode
Constant voltage
12V
14.7V
H(between 12V-24V)
16V
24V
29.4V
H(between 24V-36V)
32V
36V
44.1V
H(between 36V-48V)
48V
48V
58.8V
H(between 48V-60V)
64V
60V
73.5V
H(between 60V-72V)
80V
72V
88.2V
/
/
How to charging batteries?
Beleeb Series battery charger are engineered for precision recharging to promote battery life, deliver consistent reliability
and prevent overcharging mistakes.
Step 1
Read the specifications for your battery.
Read the specifications of Beleeb Series Battery charger
Step 2
Identify the positive negative on your battery.
Step 3
Set the charger to deliver the correct voltage.
Connect the charger to the battery. Attach the black cable from the charger with the negative (-) sign on it to the negative
terminal on the battery marked with the same symbol. Then attach the red cable with the positive (+) sign to the positive
terminal on the battery with the corresponding symbol
Step 4
Select charging voltage matches to batteries voltage, 12V for 12V batteries, 48V for 48V Batteries.
Step 5
Plug the charger into an outlet. The charger should be equipped with a grounded plug (three pronged plug) and should be
plugged into a properly grounded outlet (three prong outlet). An adapter should not be used.
Step 6
Leave the battery on the charger until the battery is fully charged,
Once fully charged the current will turn Zero.
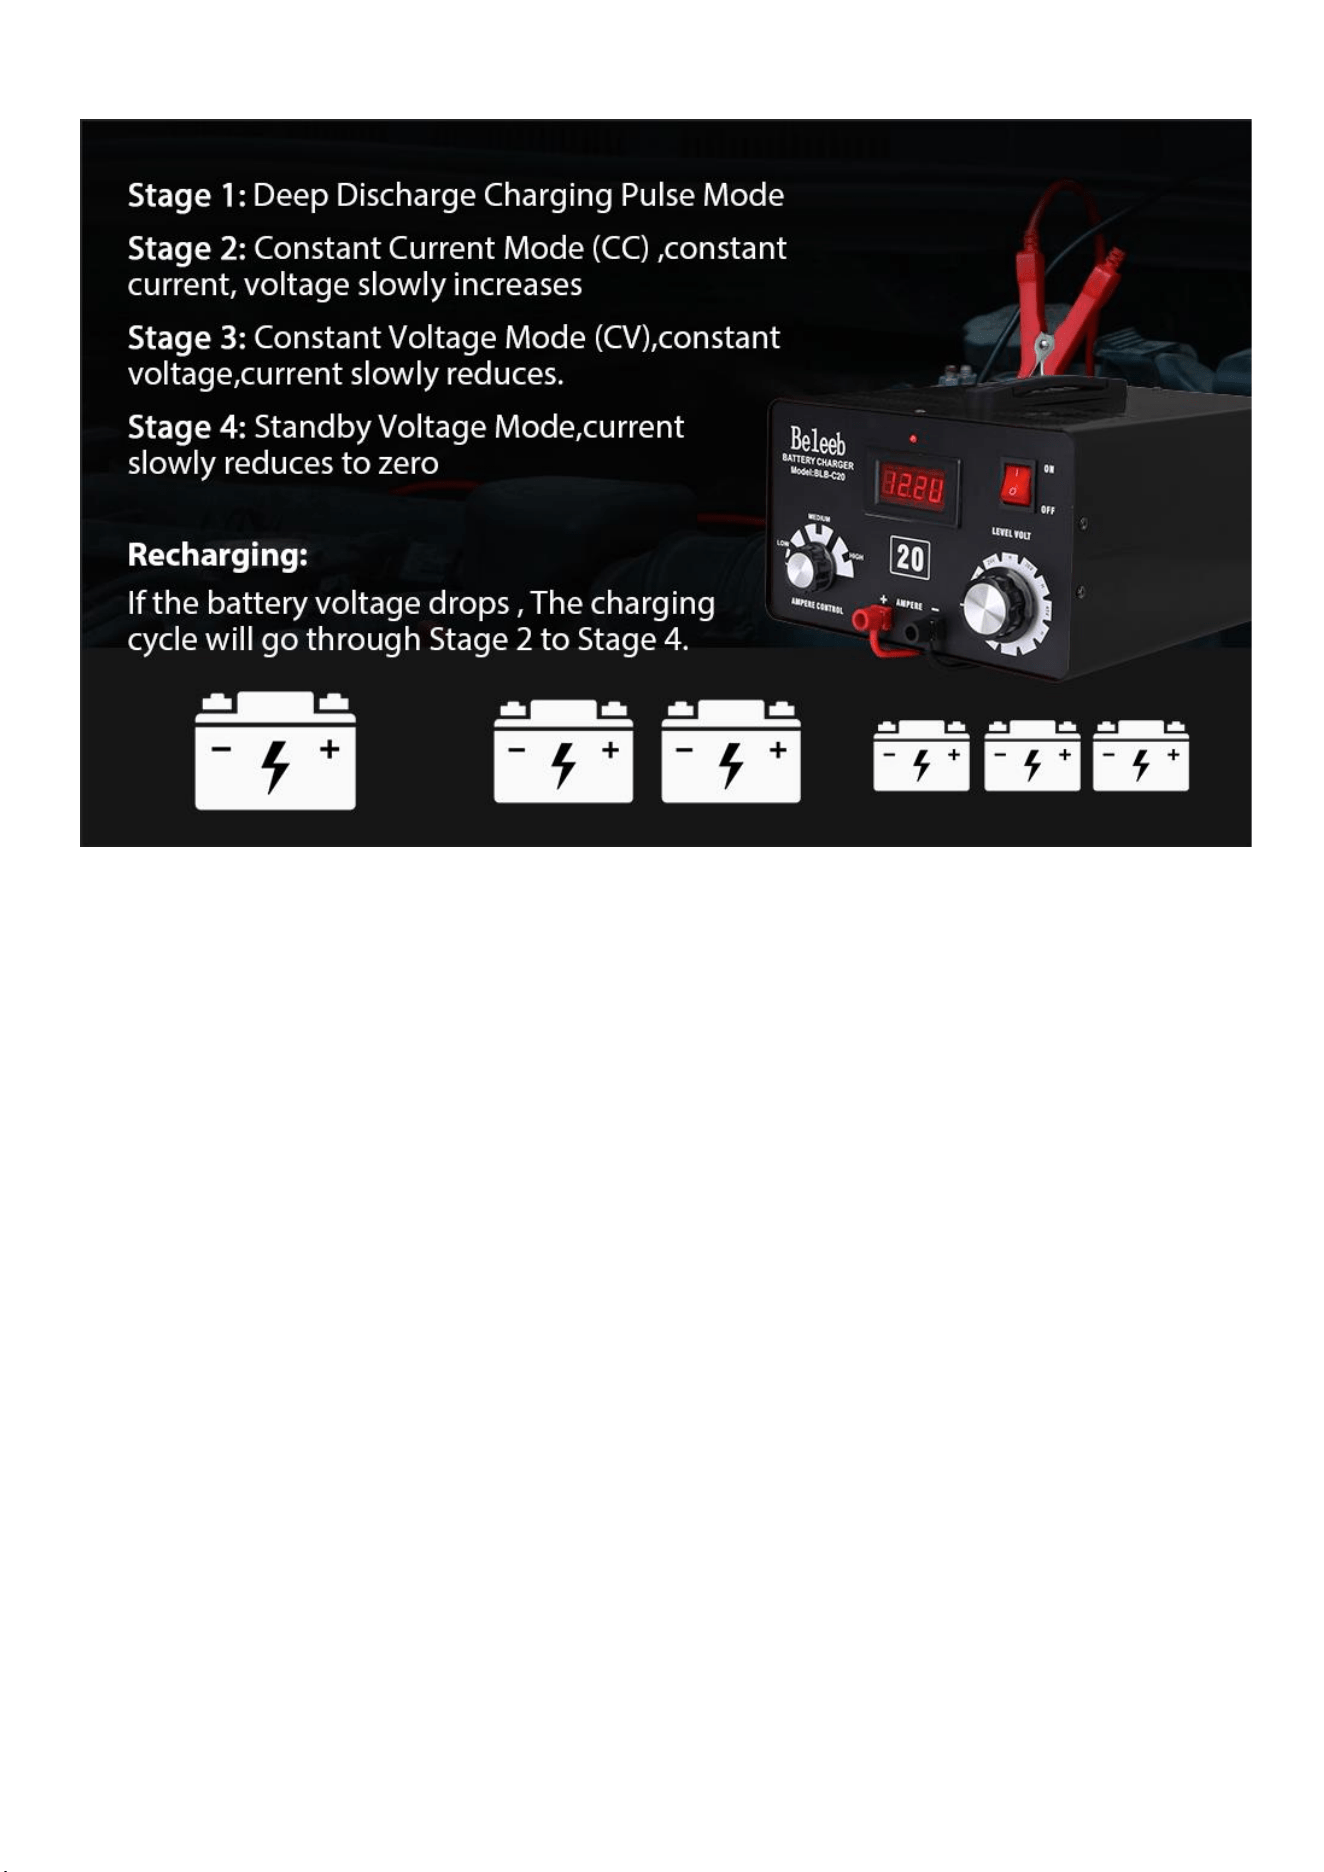
Charging process
Stage 1: Deep Discharge Charging Pulse Mode
Stage 2: Constant Current Mode (CC) ,constant current, voltage slowly increases
Stage 3: Constant Voltage Mode (CV),constant voltage,current slowly reduces.
Stage 4: Standby Voltage Mode,current slowly reduces to zero
Recharging:
If the battery voltage drops , The charging cycle will go through Stage 2 to Stage 4.

TROUBLESHOOTING
Condition
Cause
Solution
The charger does not
recognize the battery.
Connect the battery to the
charger BEFORE connecting
the charger to AC power
The digital display shows
"OFF"
Poor clamp connection
Ensure battery posts are clean.
Rock clamps back and forth on
battery posts to ensure a good
connection
The charging voltage does not
match the battery.
Check your battery voltage.
The AC protector pops up
The circuit is short-circuited
Press AC to restore
The DC protector pops up
The battery clamps are
incorrectly connected
Reverse clamp connections,
press DC after 30 seconds to
restore
TECHNICAL SPECIFICATIONS
Input AC
100V-130V 50-60HZ 6A/7A/8A
200V-260V 50-60HZ 6A/7A/8A
Battery Voltage
12V/24V/36V/48V/60V/72V
Output DC
13.5V-85V 2A-16A
Charger Type
4-step
Compatible Battery Types
All lead-acid (Wet, MF, Ca, AGM and Gel),
lithium-ion battery
Protection mechanism
Reverse connection protection, short circuit
protection
Temperature control
Cooling fan(when under 1.5A, it stop working
after 10mins)
Dimensions (L x W x H)
29cmx22cmx16.5cm
Weight
6.8kg/8kg/11kg

Certification