1. Overview

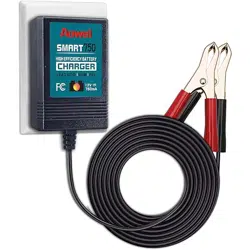
The Aowel 750mA Trickle Battery Charger is a fully-automatic smart charger and maintainer designed for 12V lead-acid batteries. Its primary functions are to charge depleted batteries and maintain the charge of batteries in storage, such as during winter months or long periods of inactivity.
The charger features a 4-step charging program, smart LED indicators for status feedback, and safety protections including reverse polarity and spark-proof connection.
3. Use Guide
3.1 Before You Begin
Compatibility Check: Ensure your battery is a 12V lead-acid type (flooded, Gel, AGM, deep-cycle, maintenance-free). This charger is NOT compatible with 6V, 24V, or NiCd batteries.
Safety Precautions:
- Work in a well-ventilated area.
- Wear protective eyewear.
- Keep the charger away from water and flammable materials.
- Ensure the battery is not damaged or leaking.
3.2 Connection Steps
- Power Off: Ensure the charger is unplugged from the AC wall outlet.
- Identify Terminals: Locate the positive (+) and negative (-) terminals on your battery. They are usually marked and the positive terminal is often larger.
- Connect Clips:
- Connect the RED alligator clip to the battery's POSITIVE (+) terminal.
- Connect the BLACK alligator clip to the battery's NEGATIVE (-) terminal or to a clean, unpainted metal part of the vehicle chassis (ground).
- Plug In: Once connections are secure, plug the charger into a standard 120V AC wall outlet.
WARNING: Always connect the clips to the battery BEFORE plugging the charger into the outlet. Reverse connection (red to negative, black to positive) will activate the reverse polarity protection and the charger will not operate.
3.3 Understanding the LED Indicators
The charger uses LED lights to communicate its status. Refer to the following guide:
- Red LED (Solid): Battery is charging (Bulk/Absorption mode).
- Red LED (Flashing): Battery voltage is very low; charger is in initialization or desulfation mode.
Green LED (Solid): Battery is fully charged and the charger is in Float/Maintenance mode.
- Green LED (Flashing): Battery is connected in reverse polarity. Disconnect and correct the clip connections.
- No LED Lights: Check power connection and battery clips. Ensure the outlet is live.
3.4 Charging & Maintenance
For Charging a Depleted Battery: Leave the charger connected. The process is automatic. It will progress through the 4-step program and switch to maintenance (float) mode when complete. This can take several hours depending on battery size and depletion level.
For Long-Term Maintenance (e.g., Winter Storage): The charger can be left connected indefinitely. In Float Mode, it provides a small trickle charge to counteract natural discharge, keeping the battery at optimal charge without risk of overcharging.
Disconnecting: To disconnect, always unplug the charger from the wall outlet first, then remove the black (negative) clip, followed by the red (positive) clip from the battery.
6. Warranty and Support
This product is covered by a 2-Year Limited Warranty from the date of purchase for quality-related issues.
For product support or warranty service, please contact the seller's customer service team directly.
Manufacturer: Aowel
Model/Part Number: AOW075
UPC: 711731901640
ASIN: B0B38HH48R