Product Manual
English
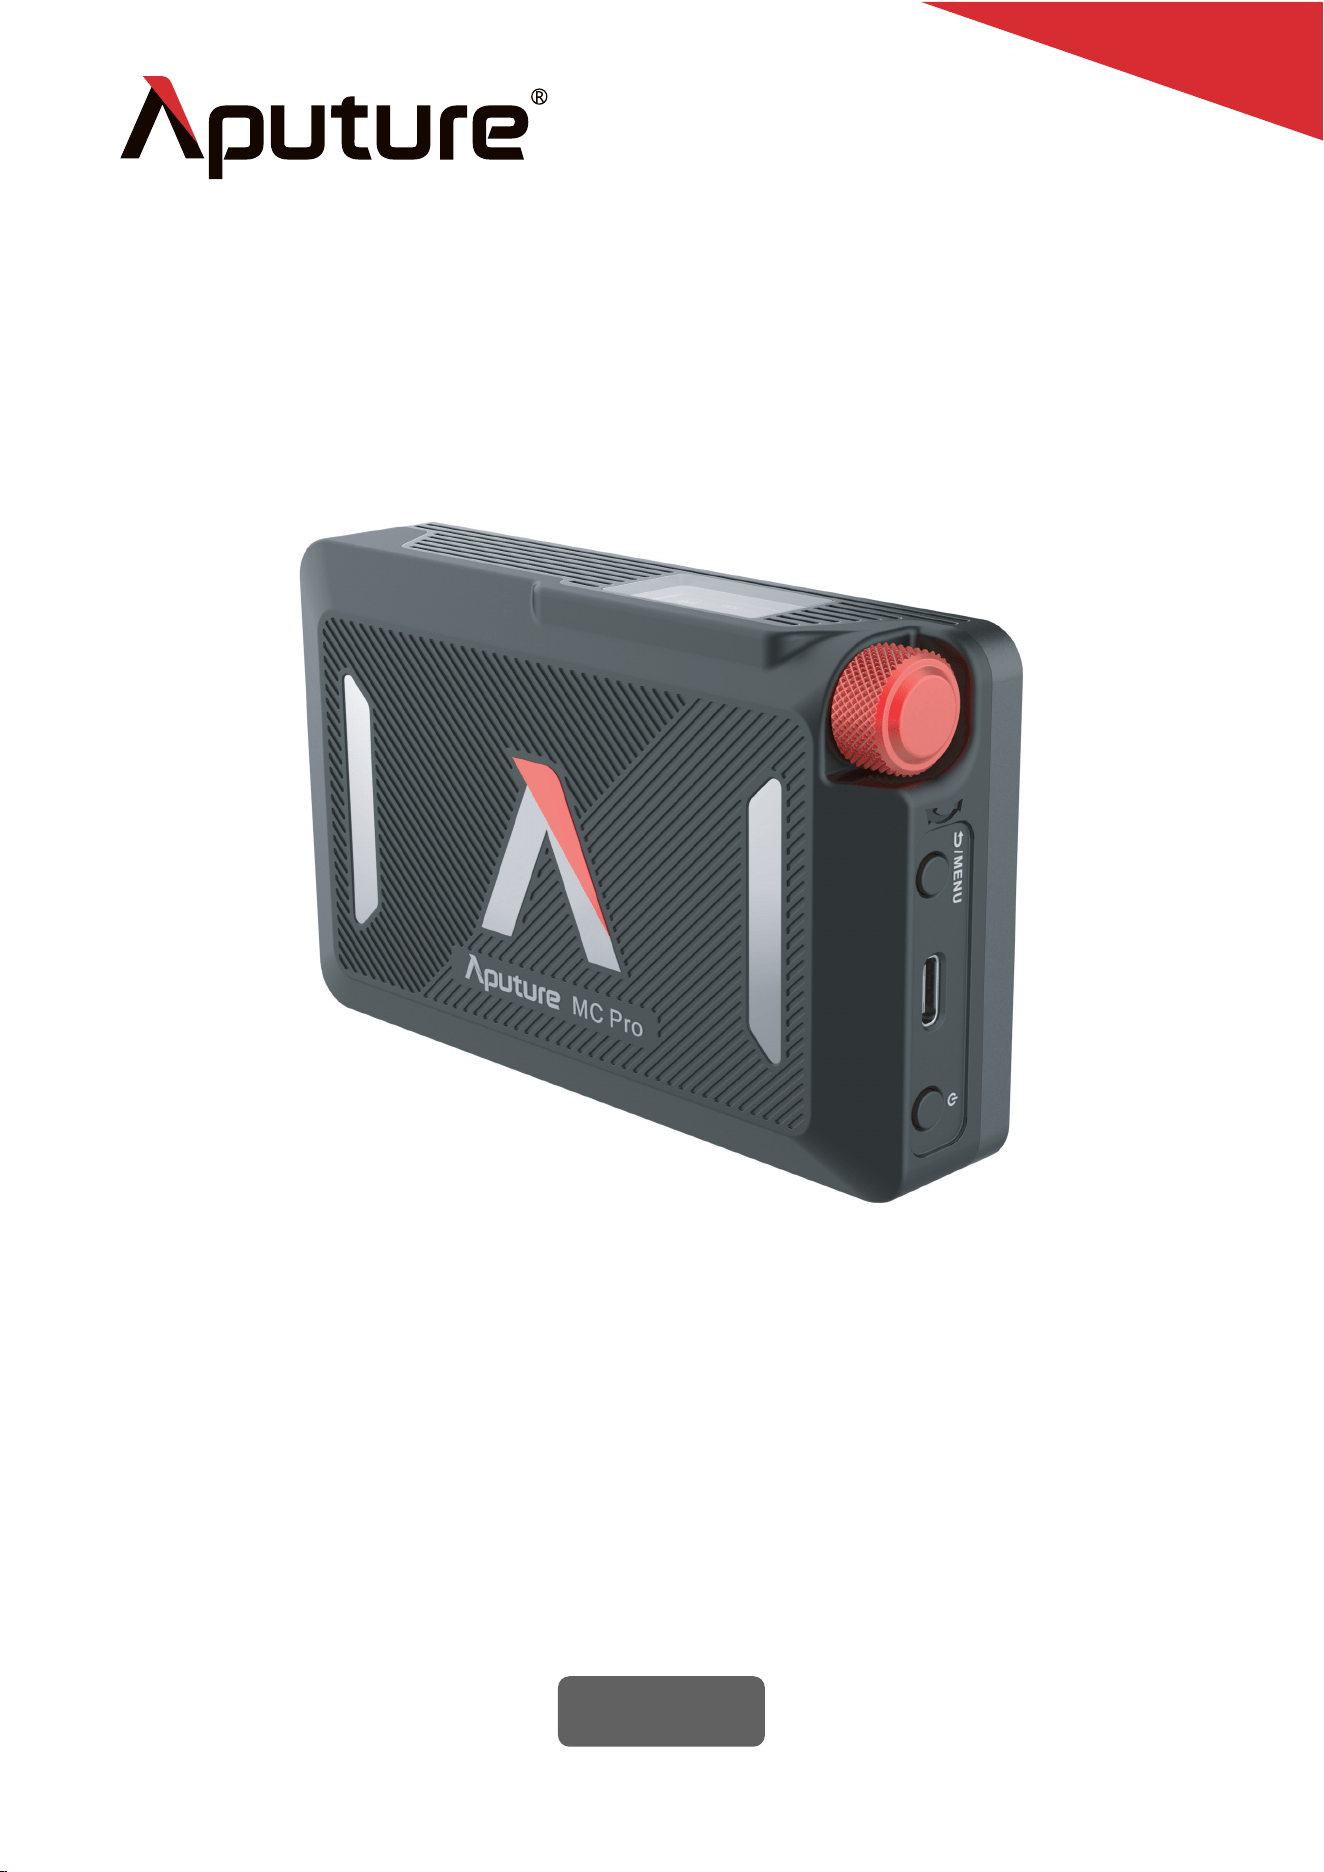
MC Pro

Introduction
Thank you for purchasing the Aputure® MC Pro.
The Aputure MC Pro is a full-color mini LED light built for cinematographers and lighting
professionals. Designed for fast-paced film sets, the MC Pro’s heavy-duty construction
features an IP65 rating, integrated battery, and built-in magnets.Its compact size provides
extreme versatility and freedom when lighting, with complete color control, magnetic lighting
accessories, and advanced wireless connectivity using LumenRadio CRMX or our innovative
Sidus Link mobile app.
With the MC Pro’s powerful feature set, you can achieve unlimited flexibility in the palm of
your hand.
Read and understand all instructions before using.
Please keep MC Pro away from diskette, credit cards, monitors, mechanical watches,
mobile phones, medical devices (pacemakers), etc.
Close supervision is necessary when any fixture is used by or near children. Do not leave
the fixture unattended while in use.
Care must be taken as burns can occur from touching hot surfaces.
Do not operate the fixture if a cord is damaged, or if the fixture has been dropped or dam-
aged, until it has been examined by qualified service personnel.
Position any power cables such that they will not be tripped over, pulled, or put into con-
tact with hot surfaces.
If an extension cord is necessary, a cord with an amperage rating at least equal to that of
the fixture should be used. Cords rated for less amperage than the fixture may overheat.
Always unplug the lighting fixture from the electrical outlet before cleaning and servic-
ing, or when not in use. Never yank the cord to remove the plug from the outlet.
Let the lighting fixture cool completely before storing. Unplug the power cable from light-
ing fixture before storing and store the cable at assigned space of the carrying case.
To reduce the risk of electric shock, do not immerse this fixture in water or any other
liquids.
To reduce the risk of fire or electric shock, do not disassemble this fixture. Contact
[email protected] or take the lighting fixture to qualified service personnel when service
or repair is required. Incorrect reassembly may cause electric shock when the lighting
fixture is in use.
The use of any accessory attachment not recommended by the manufacturer may
increase the risk of fire, electric shock, or injury to any persons operating the fixture.
Please power this fixture by connecting it to a grounded outlet.
Please do not block the ventilation or do not look at the LED light source directly when it
is powered on. Please do not touch the LED light source in any condition.
Please do not place the LED lighting fixture near any flammable object.
Only use a dry microfiber cloth to clean the product.
Please do not use the light fixture in wet condition on account of electric shock may be caused.
Please have the product checked by an authorized service personnel agent if the product
has a problem. Any malfunctions caused by unauthorized disassembly are not covered
by the warranty. The user may pay for maintenance.
1 .
2 .
3 .
4 .
5 .
6 .
7 .
8 .
9 .
10 .
11.
12.
13.
14.
15.
16.
17.
18.
Important Safety Instructions
When using this unit, basic safety precautions should always be followed, including the
following:
- 1 -
SAVE THESE INSTRUCTIONS
FCC Compliance Statement
If this equipment does cause harmful interference to radio or television reception, which can
be determined by turning the equipment off and on, the user is encouraged to try reorient or
relocate the receiving antenna.
· Increase the separation between the equipment and receiver.
· Connect the equipment to an outlet on a different circuit than the receiver is connected to.
· Consult the dealer or an experienced radio/TV technician for help.
RF Warning Statement:
This device has been evaluated to meet general RF exposure requirements.
- 2 -
We recommend only using the original Aputure cable accessories. Please note that any
malfunctions caused by using unauthorized accessories are not covered by the warran-
ty. The user may pay for maintenance.
When hanging the product overhead, always ensure an extra safety measure has been
attached - such as a safety chain- that is certified for the weight of the product.
This product is certified by RoHS, CE, KC, PSE, and FCC. Please operate the product in
full compliance with relevant country's standards. Any malfunctions caused by incorrect
use are not covered by warranty. The user may pay for maintenance.
The instructions and information in this manual are based on thorough, controlled com-
pany testing procedures. Further notice will not be given if the design or specifications
change.
19.
20.
21.
22.
WARNING
NOTICE
Changes or modications not expressly approved by the party responsible for compliance
could void the user's authority to operate the equipment.
This equipment has been tested and found to comply with the limits for a Class B digital
device, pursuant to Part 15 of the FCC Rules. These limits are designed to provide
reasonable protection against harmful interference in a residential installation. This
equipment generates, uses, and can radiate radio frequency energy and, if not installed and
used in accordance with the instructions, may cause harmful interference to radio
communications. However, there is no guarantee that interference will not occur in a
particular installation.
- 3 -
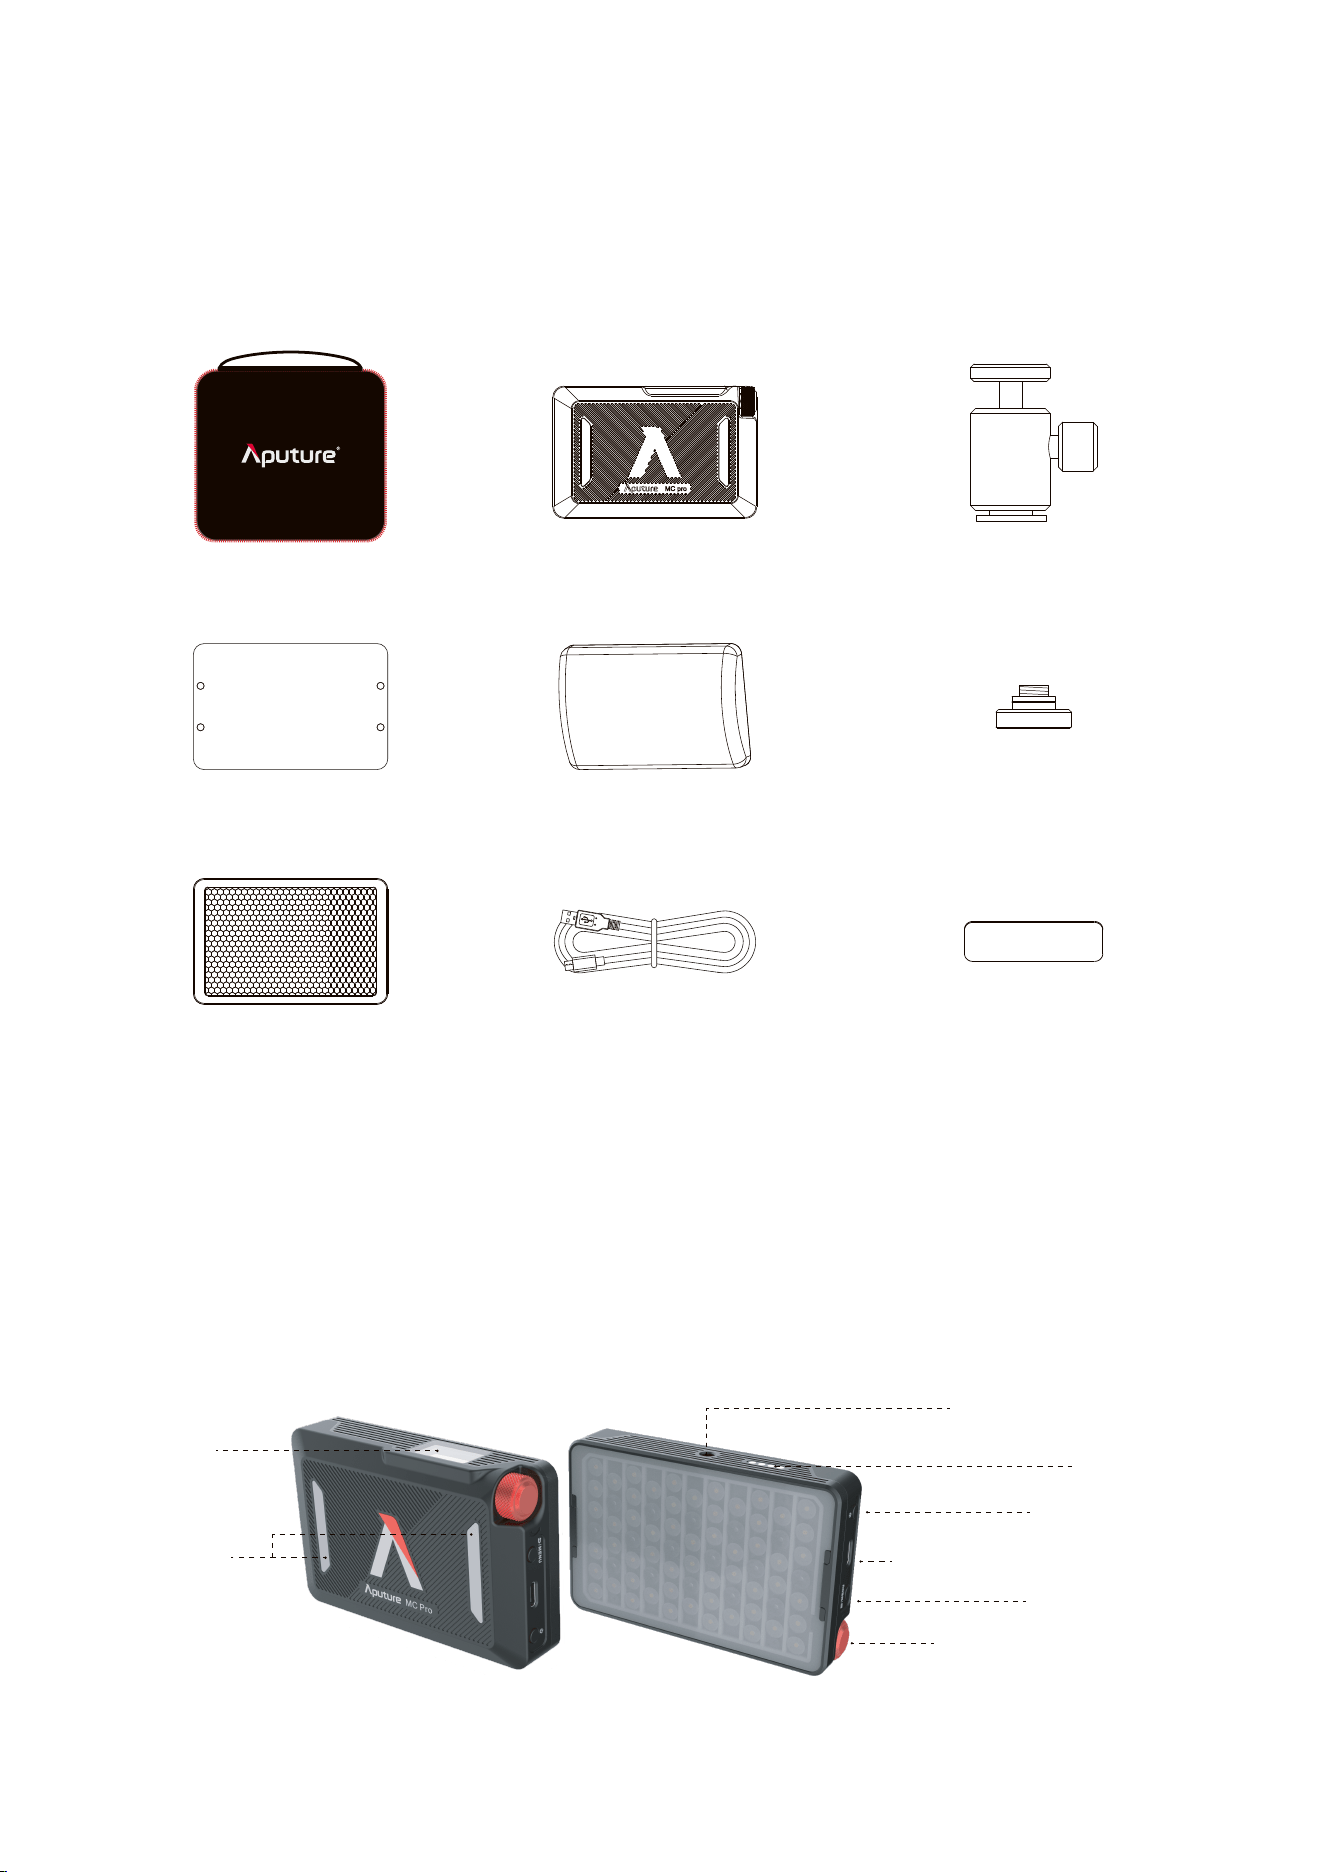
Display
1/4"
Screw Mount
Power Button
Pogo Pin
Function Control Knob
USB-C Charging /DMX Port
MENU/Return
Magnets
Components List
Please make sure all accessories listed below are completed before using.
If not, please contact with your sellers immediately.
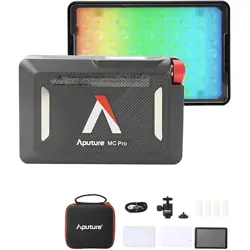
MC Pro Standard Kit:
* Tips: The illustrations in the manual are only diagrams for reference. Due to the continuous
development of new versions of the prouct, if there are any differences between the product and
the user manual diagrams, please refer to the product itself.
Product Details
Carrying Case
×1
MC Pro
×1
Flat Diffusers
×1
Light Control Grids
×1
Dome Diffusers
×1
1/4"
Coldshoe Ball Heads
×1
1/4"
Screw to Magnet Adapters
×1
USB Type-C Charging Cables
×1
Metal Adhesive Mounting Pads
×4
- 4 -
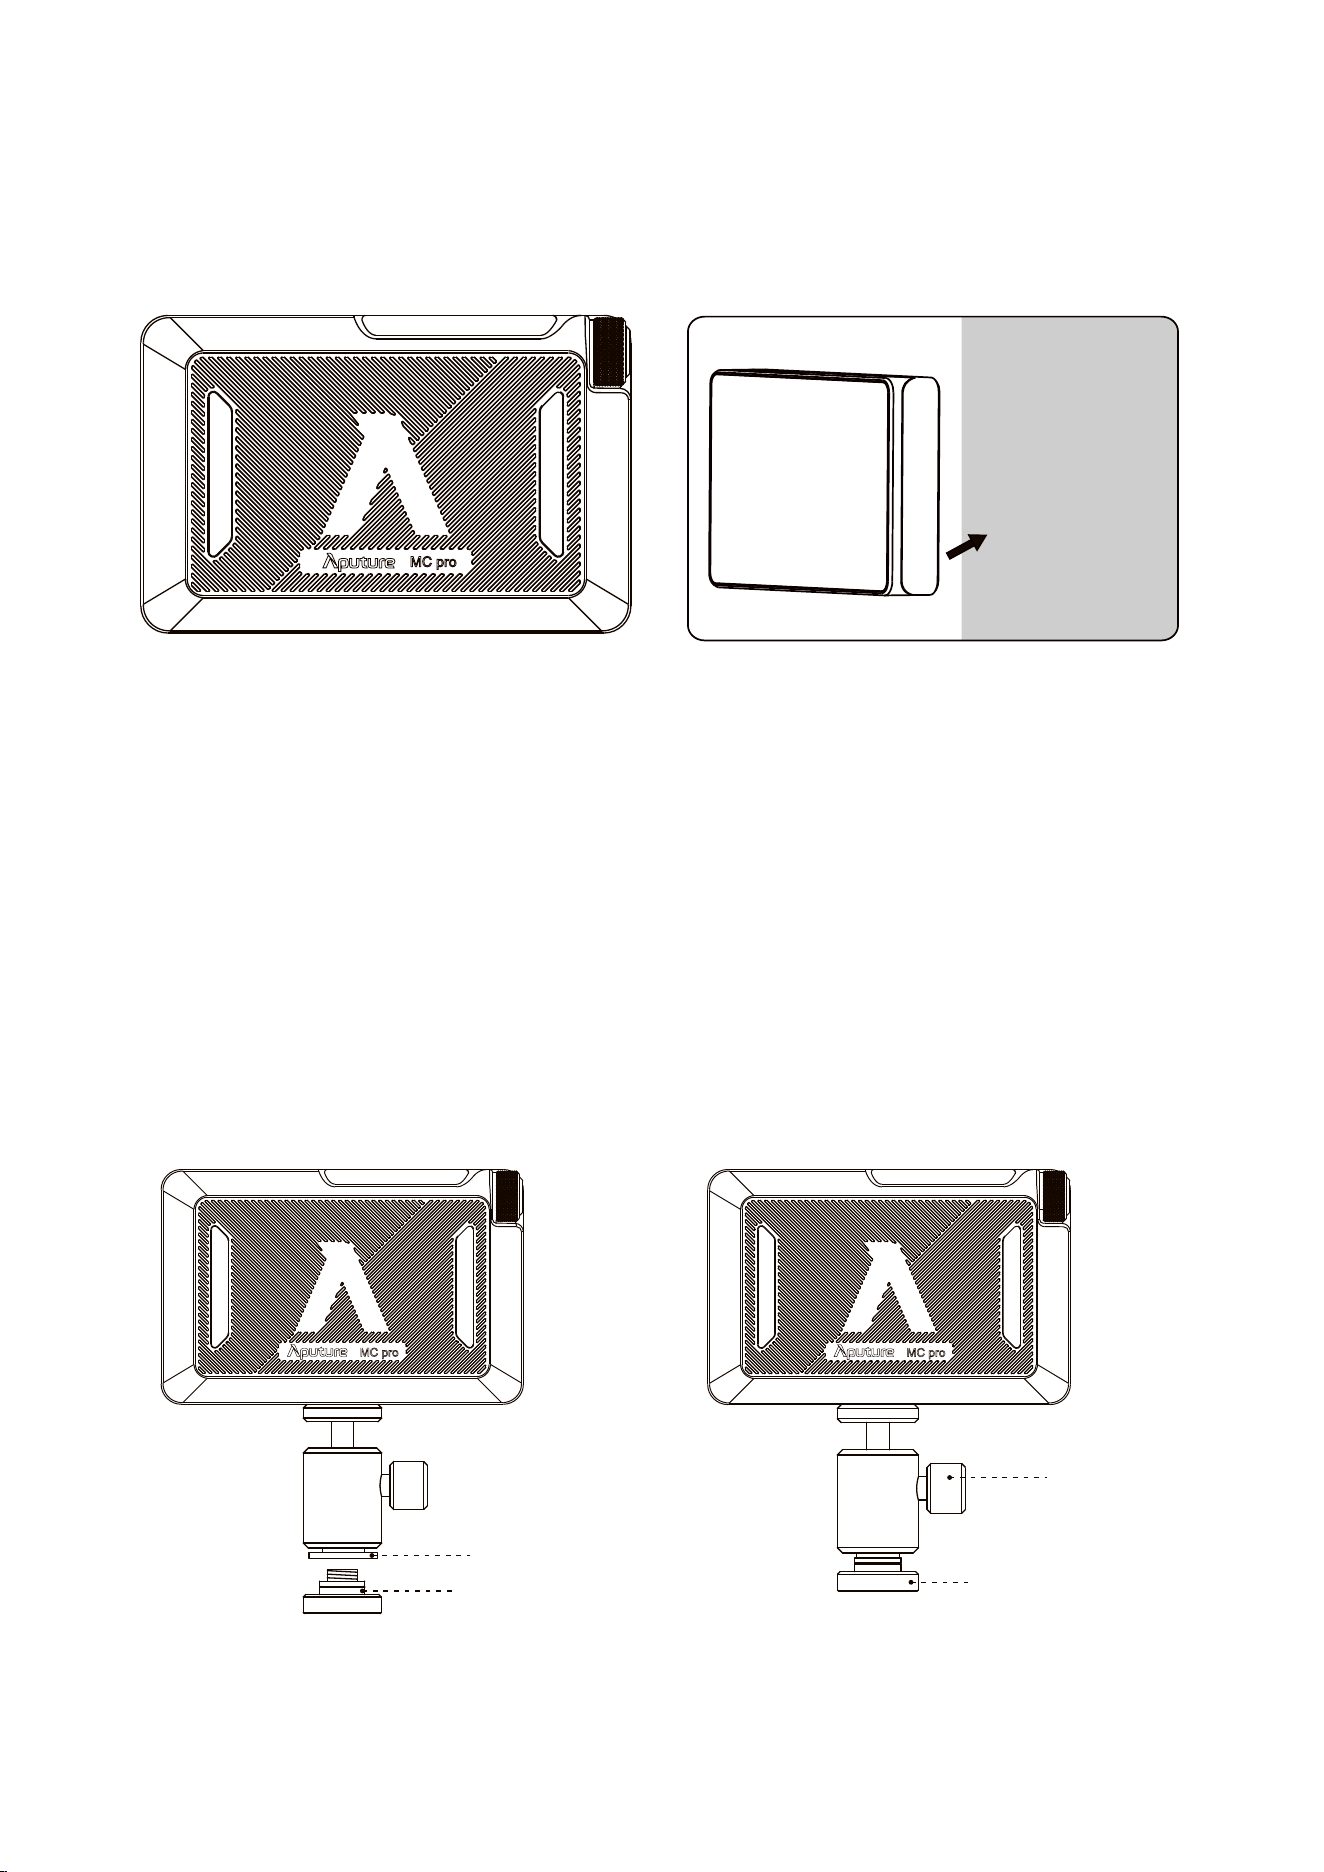
Installations
1. Magnets
Ferrous Metal Surface
* Please keep MC Pro away from diskette, credit cards, monitors, mechanical watches, mobile
phones, medical devices (pacemakers), etc.
* Do not install MC Pro on any surface where the temperature is above 80°C, as this may
damage the magnet.
2. 1/4
"
Coldshoe Ball Heads
Mount the MC Pro with a
1/4"
Coldshoe Ball Heads.
Cold Shoe
1/4"
Screw
Lock Knob
Magnet Adapters
Metal surface
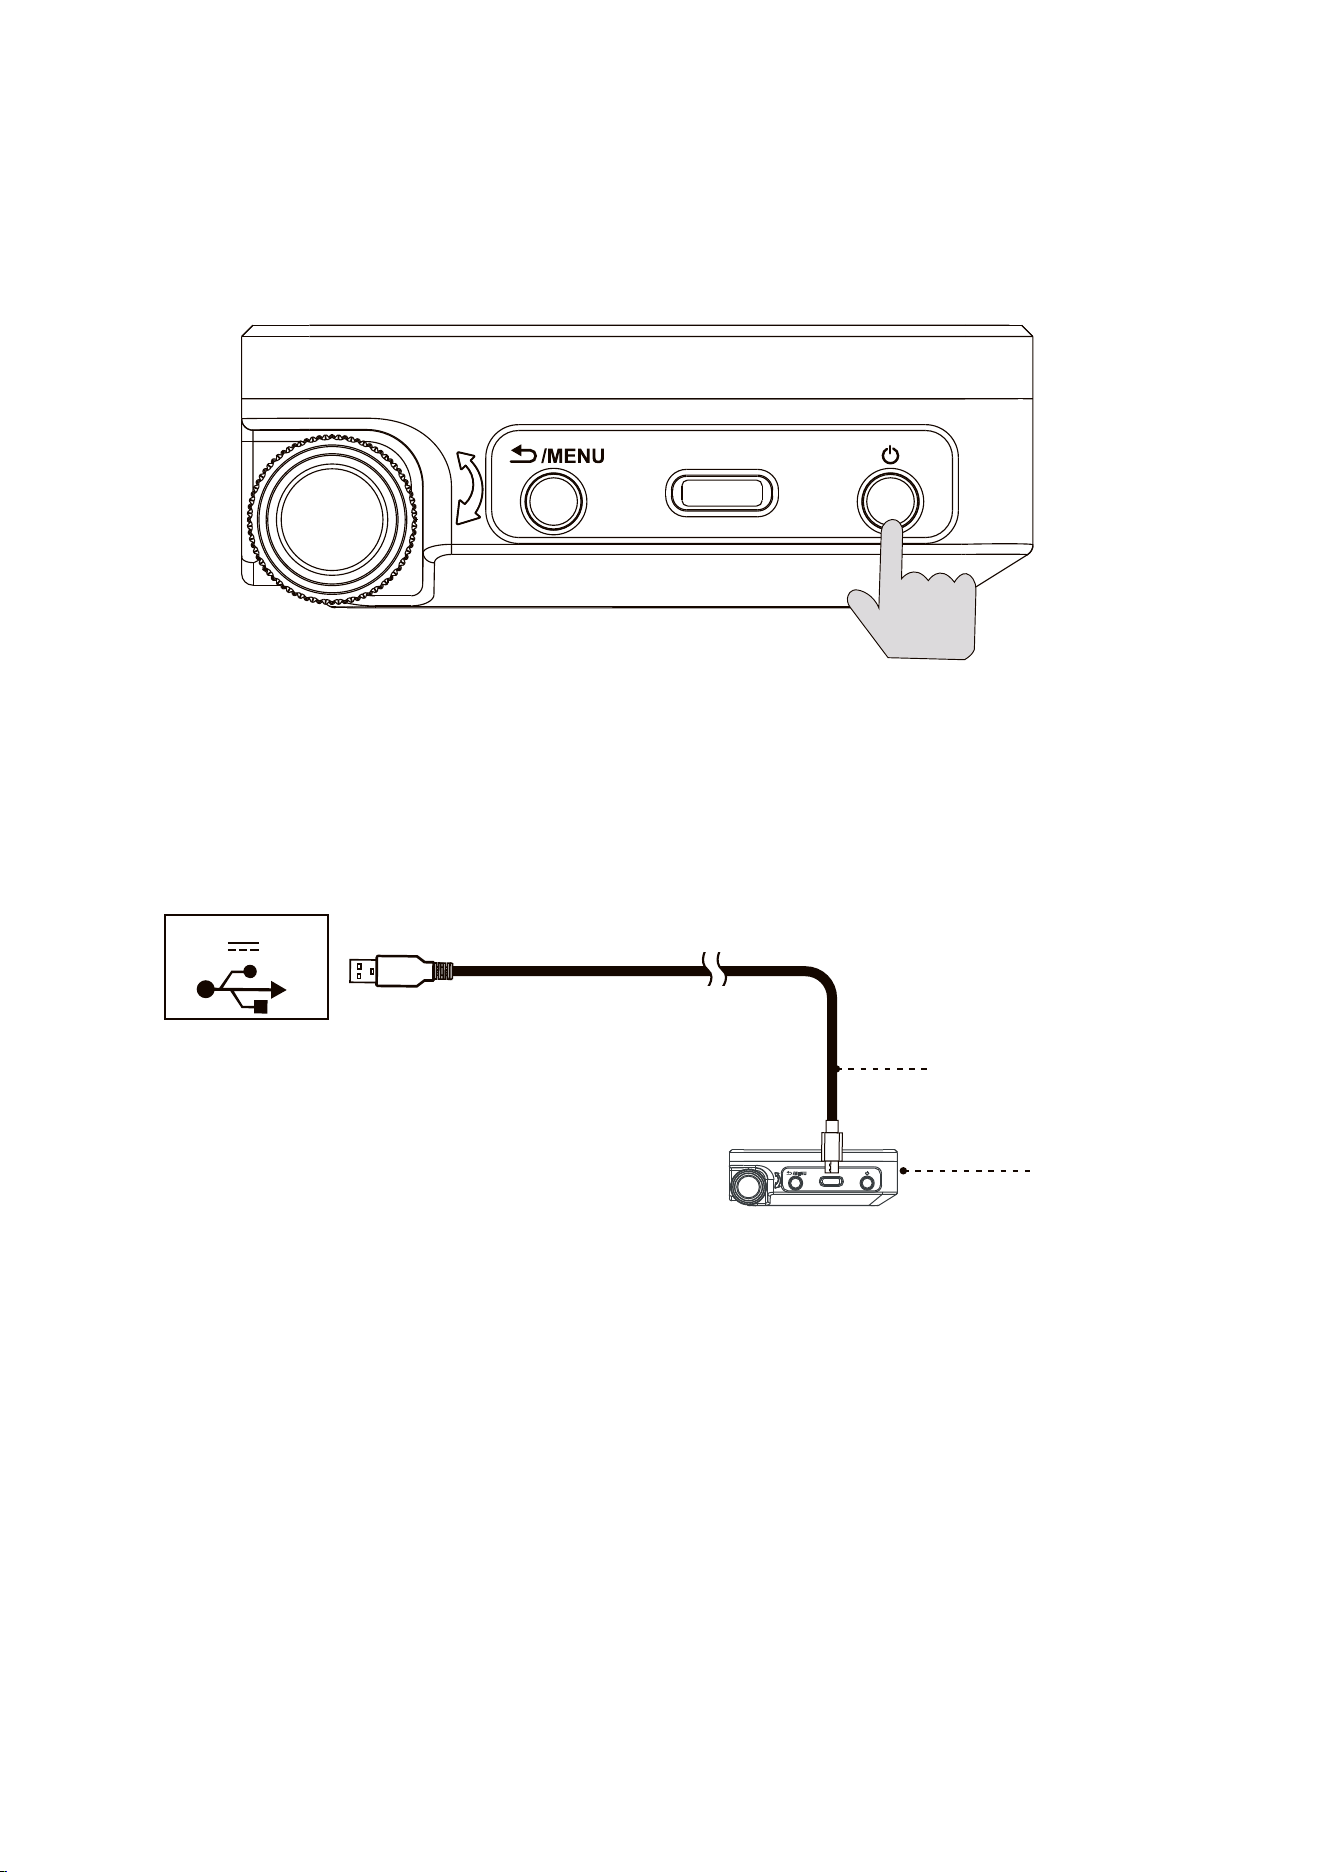
Operations
1. Power ON/OFF
Press and hold the power button for 1 seconds to turn the MC Pro on or off.
2. Charging
2.1 USB Type-C Charging
* Supports 5V/2A charging via charger or power banks.
* Charging rate will slow down when the light is powered on. Turn the light off for optimal
charging.
5V 2A
USB Type-C
Charging Cables
MC Pro
- 5 -
2.2 Pogo Pin Charging
MC Pro supports Pogo Pin charging.
* MC Pro 8-Light Production Kit sold separately.
3. Manual Control
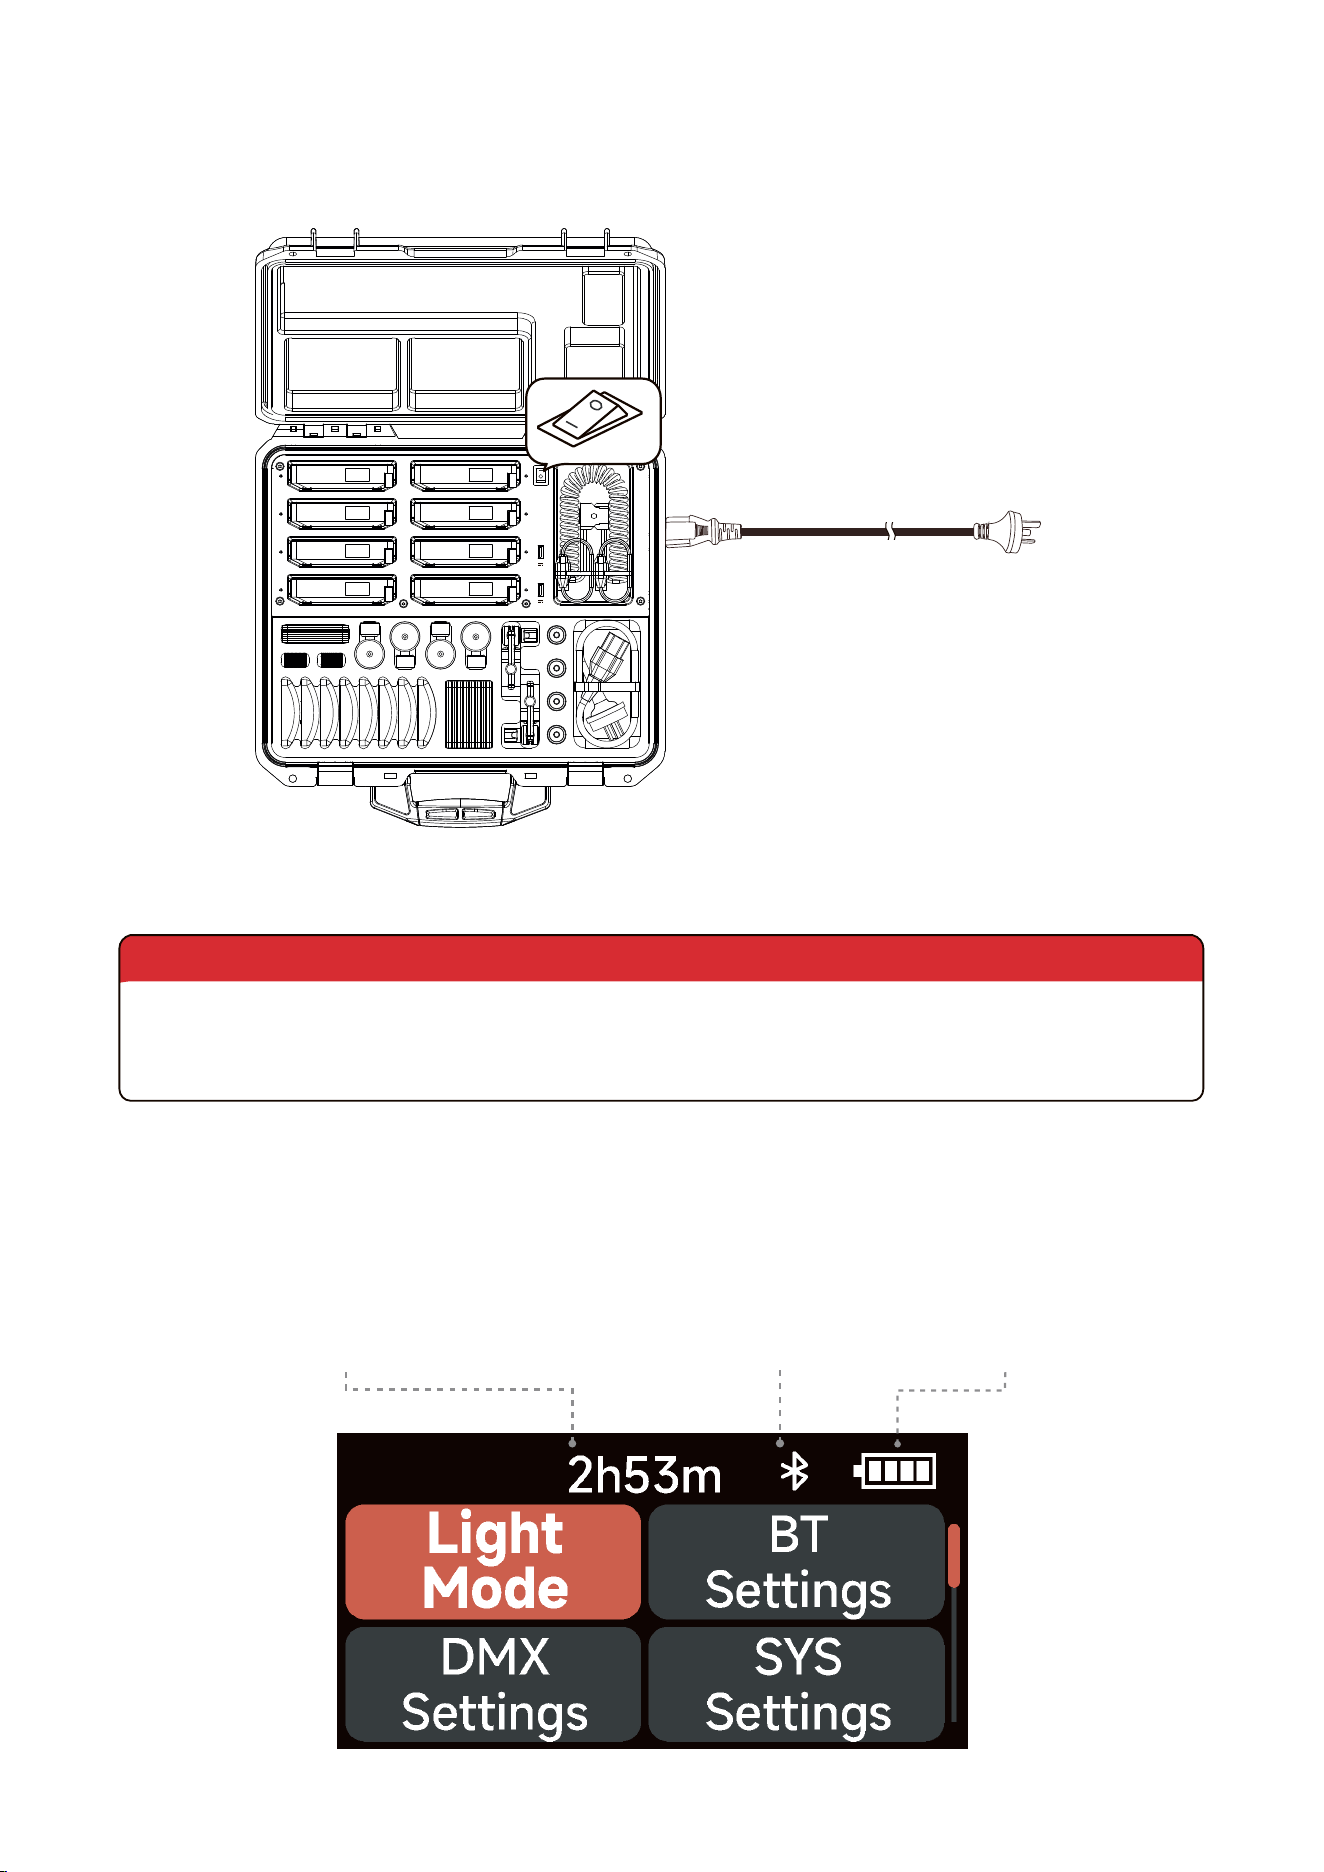
3.1 UI Introducing
WARNING
Do not close the lid when the charging case on or in an active charging state, to prevent
overheating. Failure to do so will result in the internal temperature of the case and the MC
Pros being charged to become extremely hot.
5V 2A
5V 2A
AC 100V-240V
Battery remaining time Wireless connection status Battery level
- 6 -
3.2 Menu
Press MENU to access the system menu, rotate and press the knob to select the Light Mode
/ Bluetooth Settings / DMX Settings / System Settings.
3.3 Light Mode
Rotate and press the knob to select Light Mode in system menu. Rotate and press the knob
to select CCT / HSI / RGB / GEL / Source / XY / FX / Custom FX.
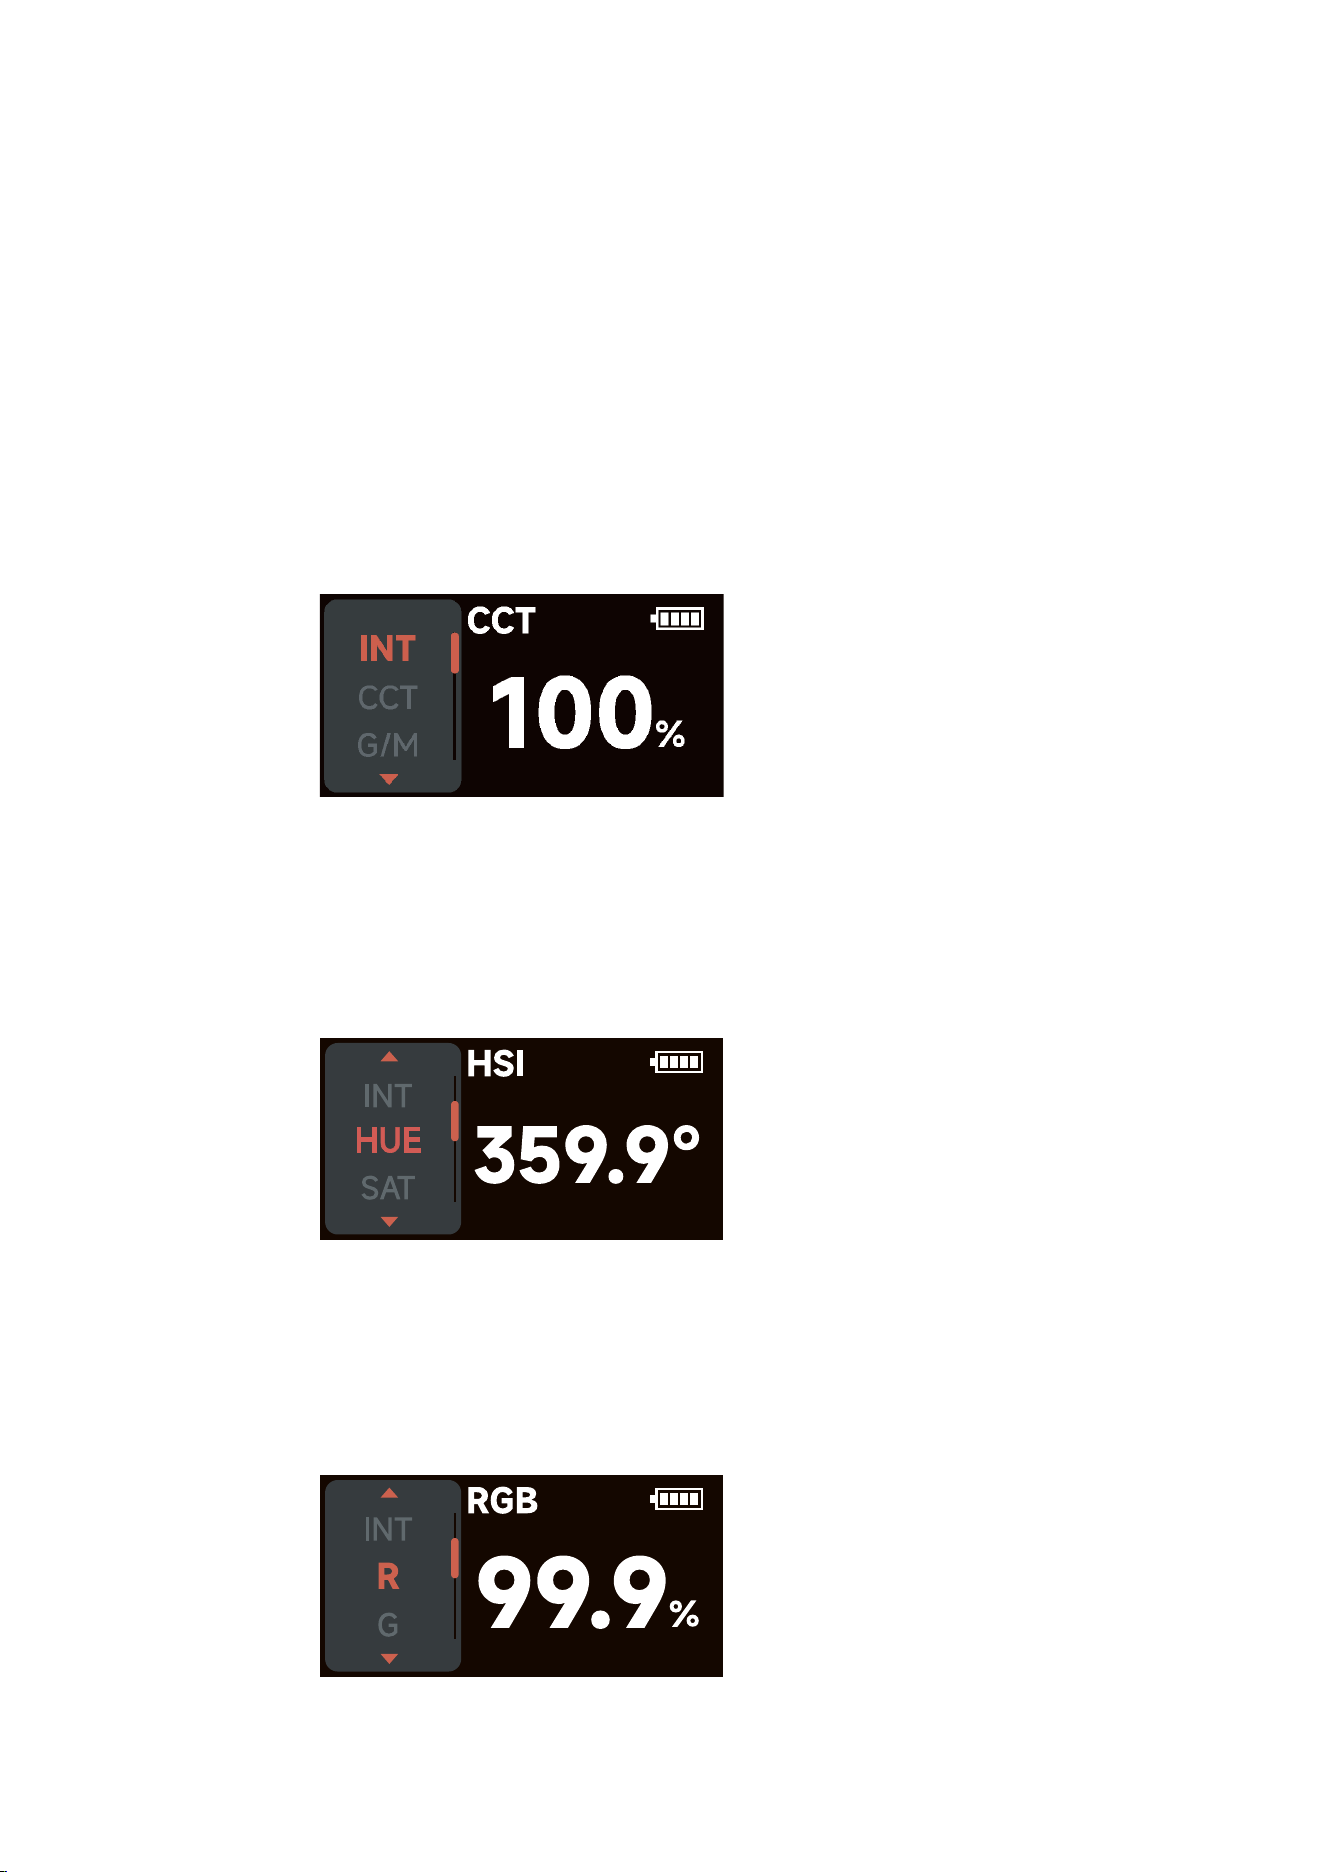
3.3.1 CCT
Rotate and press the knob to select CCT in Light Mode.
INT (Intensity): 0.0%- 100.0%
CCT (Correlated Color Temp.): 2000 K - 10000 K
G/M (Green / Magenta adjustment): -1.0 ~ +1.0
3.3.2 HSI
Rotate and press the knob to select HSI in Light Mode.
INT (Intensity): 0.0%- 100.0%
HUE (Hue): 0.1° - 360.0°
SAT (Saturation): 0.0%- 100.0%
CCT (Correlated Color Temp.): 2000 K - 10000 K
3.3.3 RGB
Rotate and press the knob to select RGB in Light Mode.
INT (Intensity): 0.0%- 100.0%
R (Red): 0.0%- 100.0%
G (Green): 0.0%- 100.0%
B (Blue): 0.0%- 100.0%
- 7 -
3.3.4 GEL
Rotate and press the knob to select GEL in Light Mode.
INT (Intensity): 0.0%- 100.0%
CCT (Correlated Color Temp.): select 3200 or 5600K as the virtual light color temperature
ROSCO: Select a lighting color filter from ROSCO filter library
LEE: Select a lighting color filter from LEE filter library
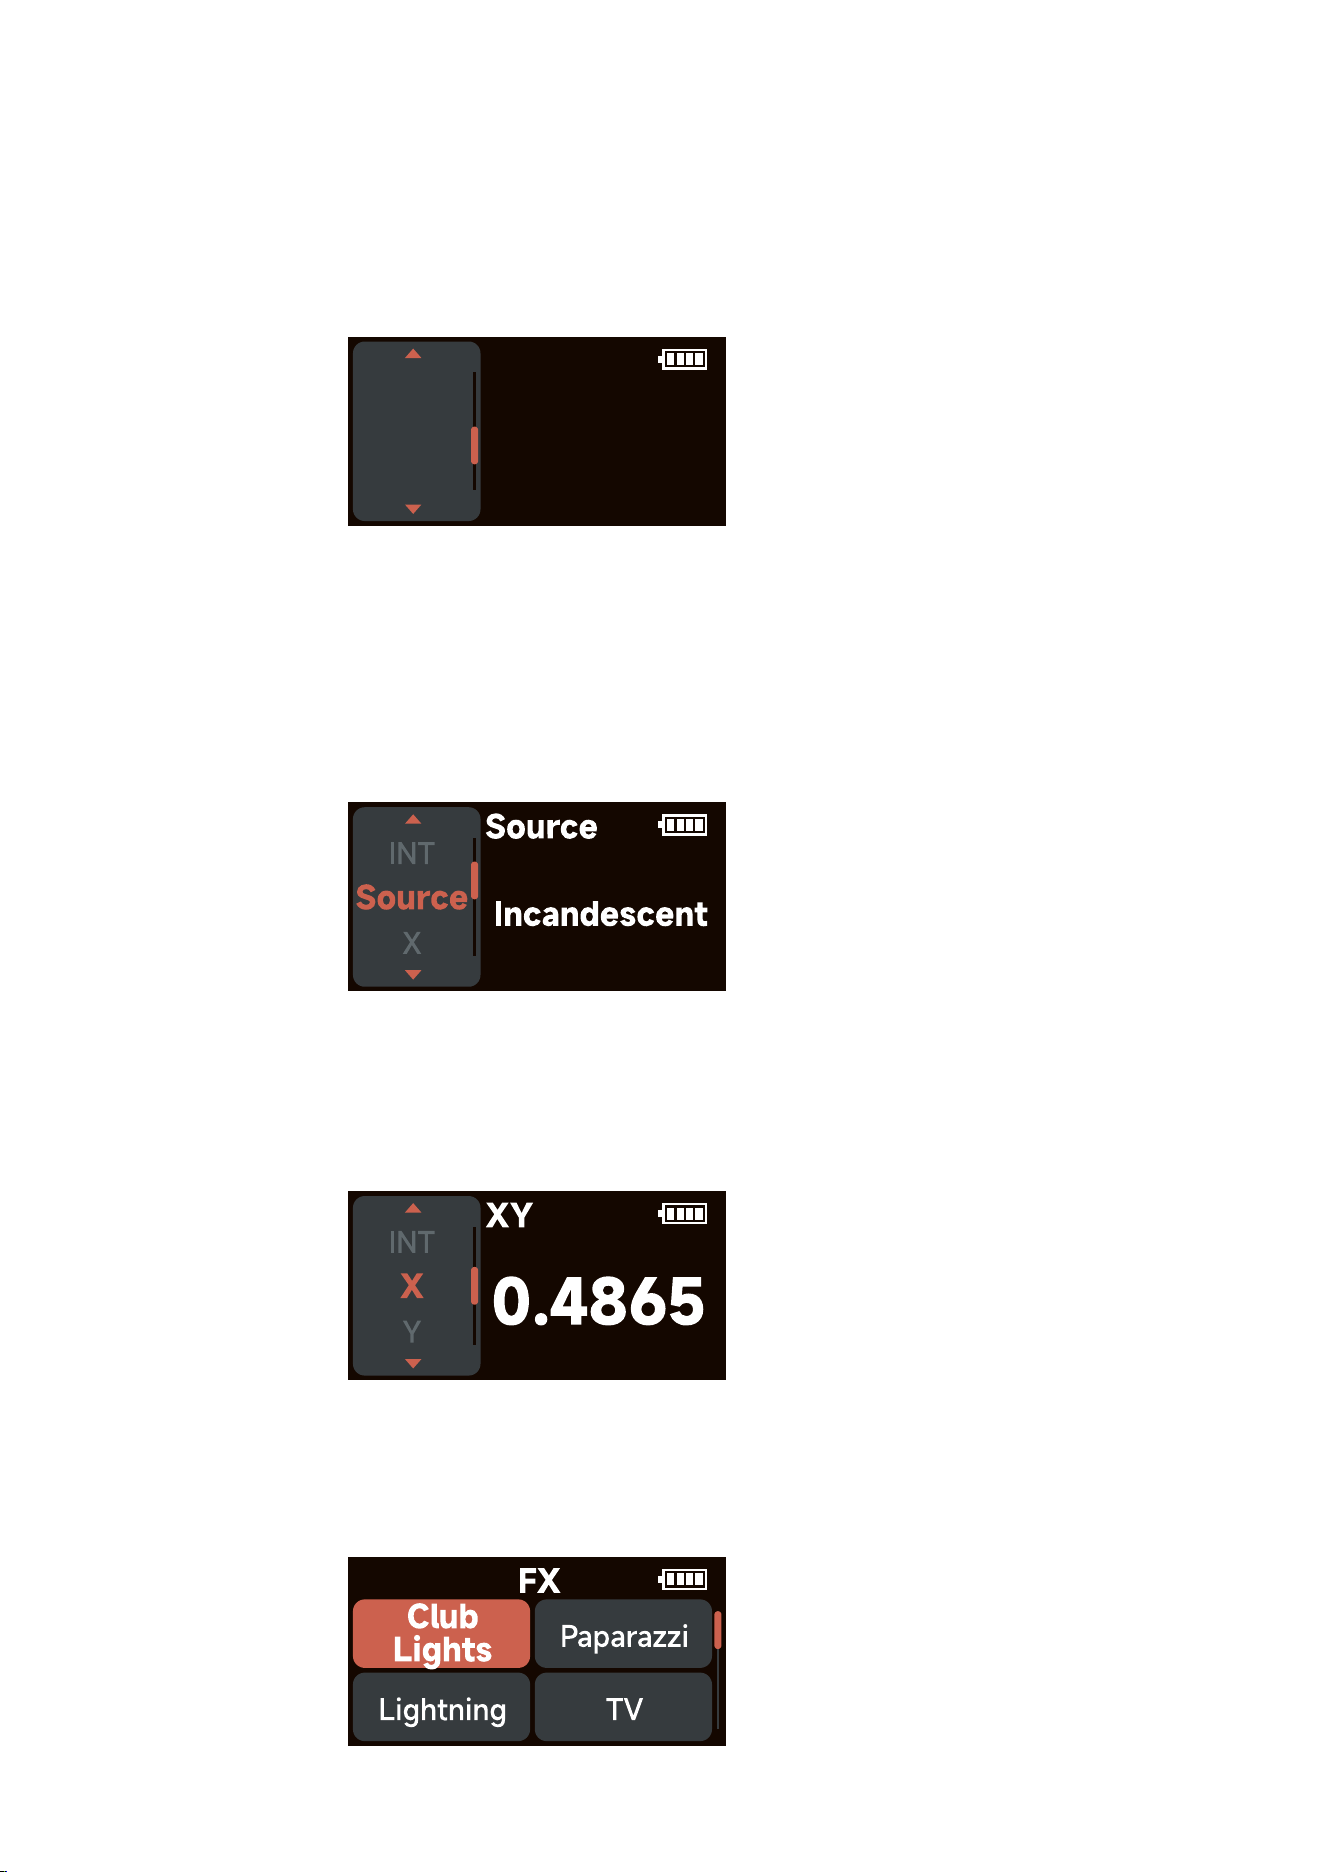
3.3.5 Source
Rotate and press the knob to select Source in Light Mode.
INT (Intensity): 0.0%- 100.0%
Source: Select the light source that best matches the illumination of the scene from the
Source library
X: Adjust the value of the x coordinate within ±0.0050
Y: Adjust the value of the y coordinate within ±0.0050
3.3.6 XY
Rotate and press the knob to select XY in Light Mode.
INT (Intensity): 0.0%- 100.0%
X (x coordinate): 0.0000 – 0.8000
Y (y coordinate): 0.0000 – 0.8000
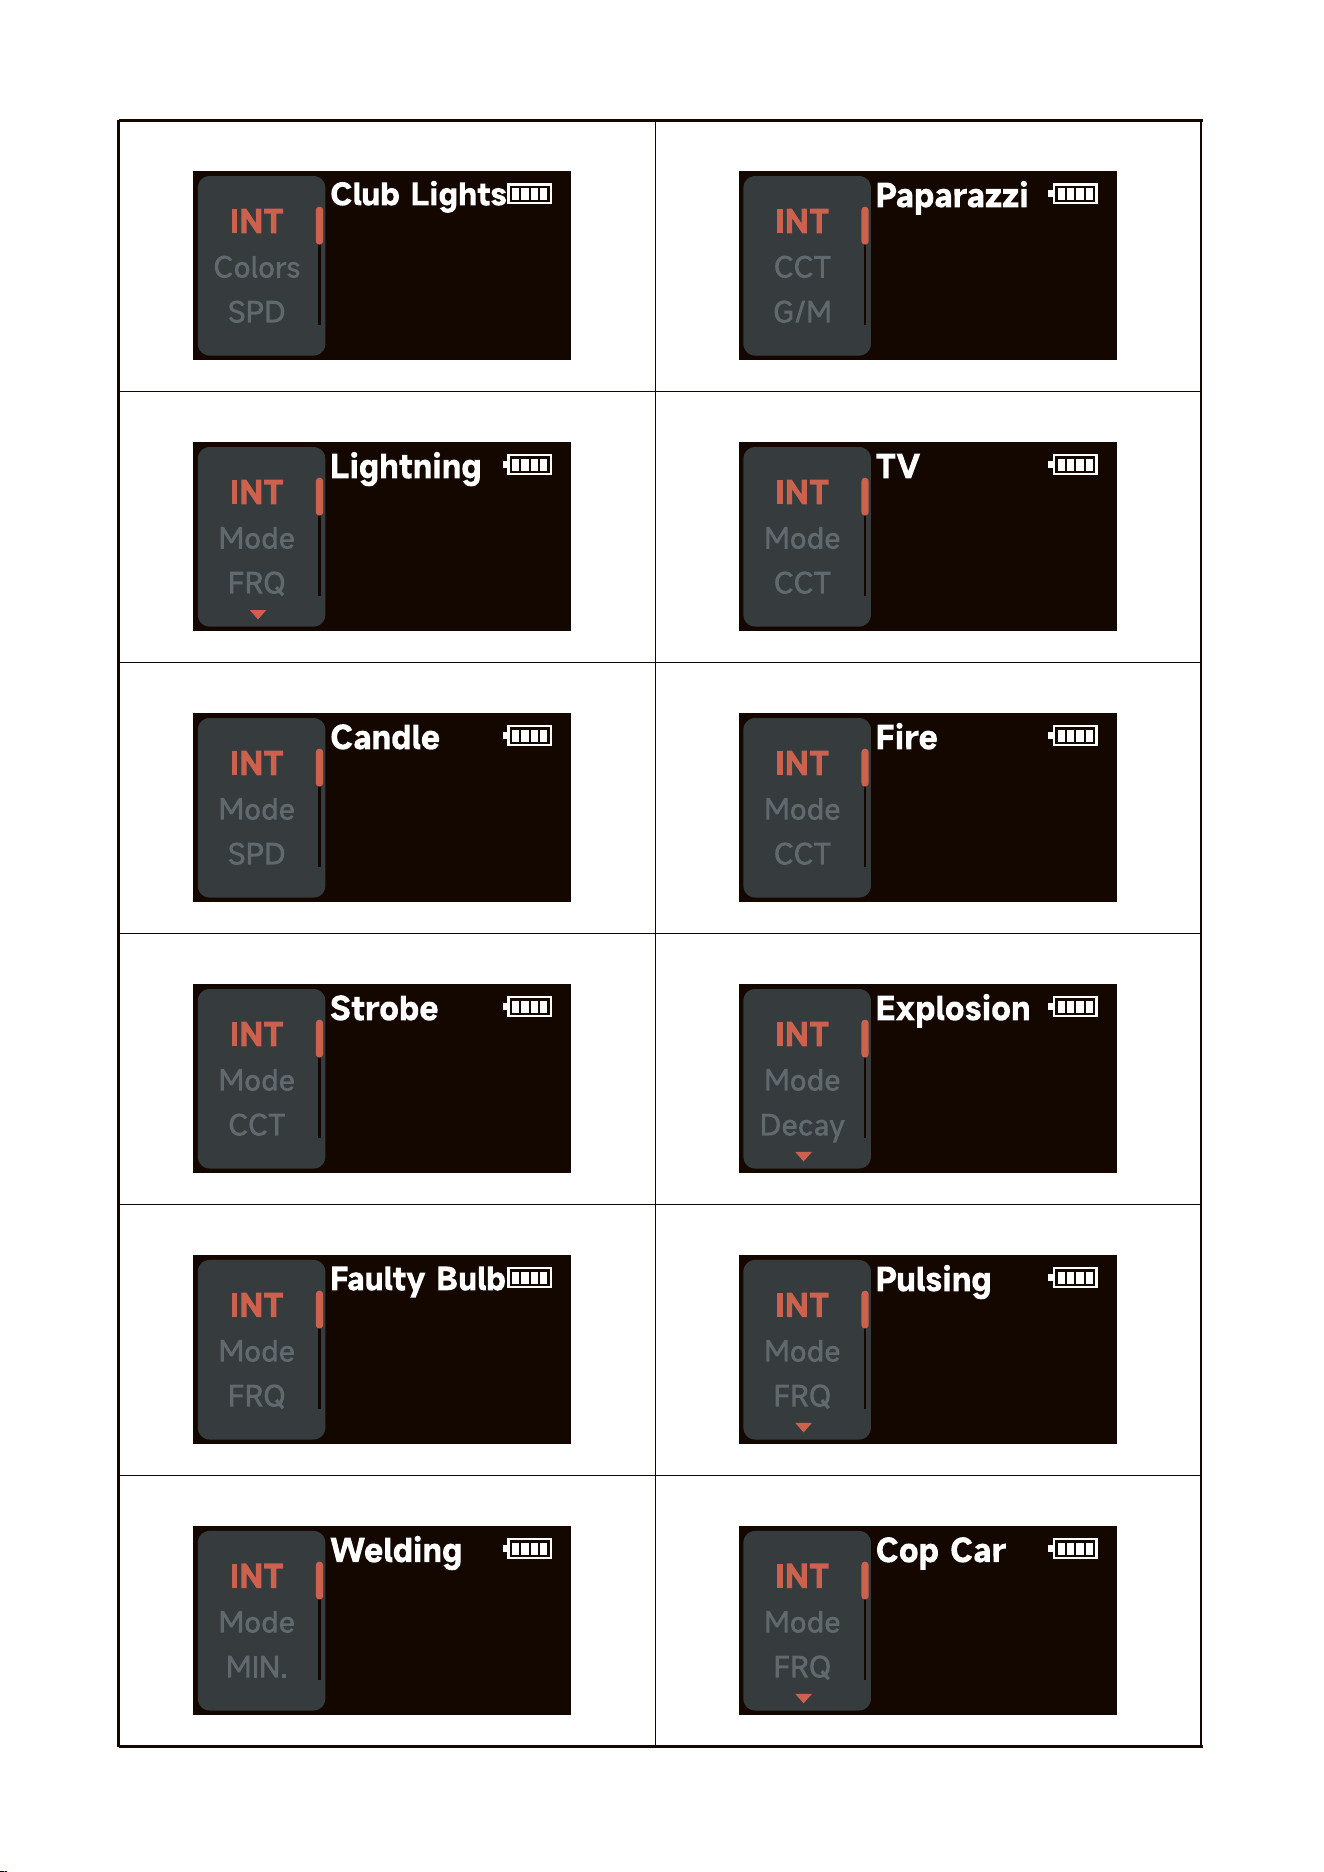
3.3.7 FX
Rotate and press the knob to select FX in Light Mode. Rotate and press the knob to select Club
Lights/Paparazzi/Lightning/TV/Candle/Fire/Strobe/Explosion/Faulty Bulb/Pulsing/Welding/Cop
Car/Colors Chase/Party Lights/ Fireworks.
- 8 -
GEL
Col.Cor
ROSCO
CCT
LEE
- 9 -
1.Club Lights 2.Paparazzi
3.Lightning 4.TV
5.Candle 6.Fire
7.Strobe 8.Explosion
9.Faulty Bulb 10.Pulsing
11.Welding 12.Cop Car
100%
100%
100%
100%
100%
100%
100%
100%
100%
100%
100%
100%
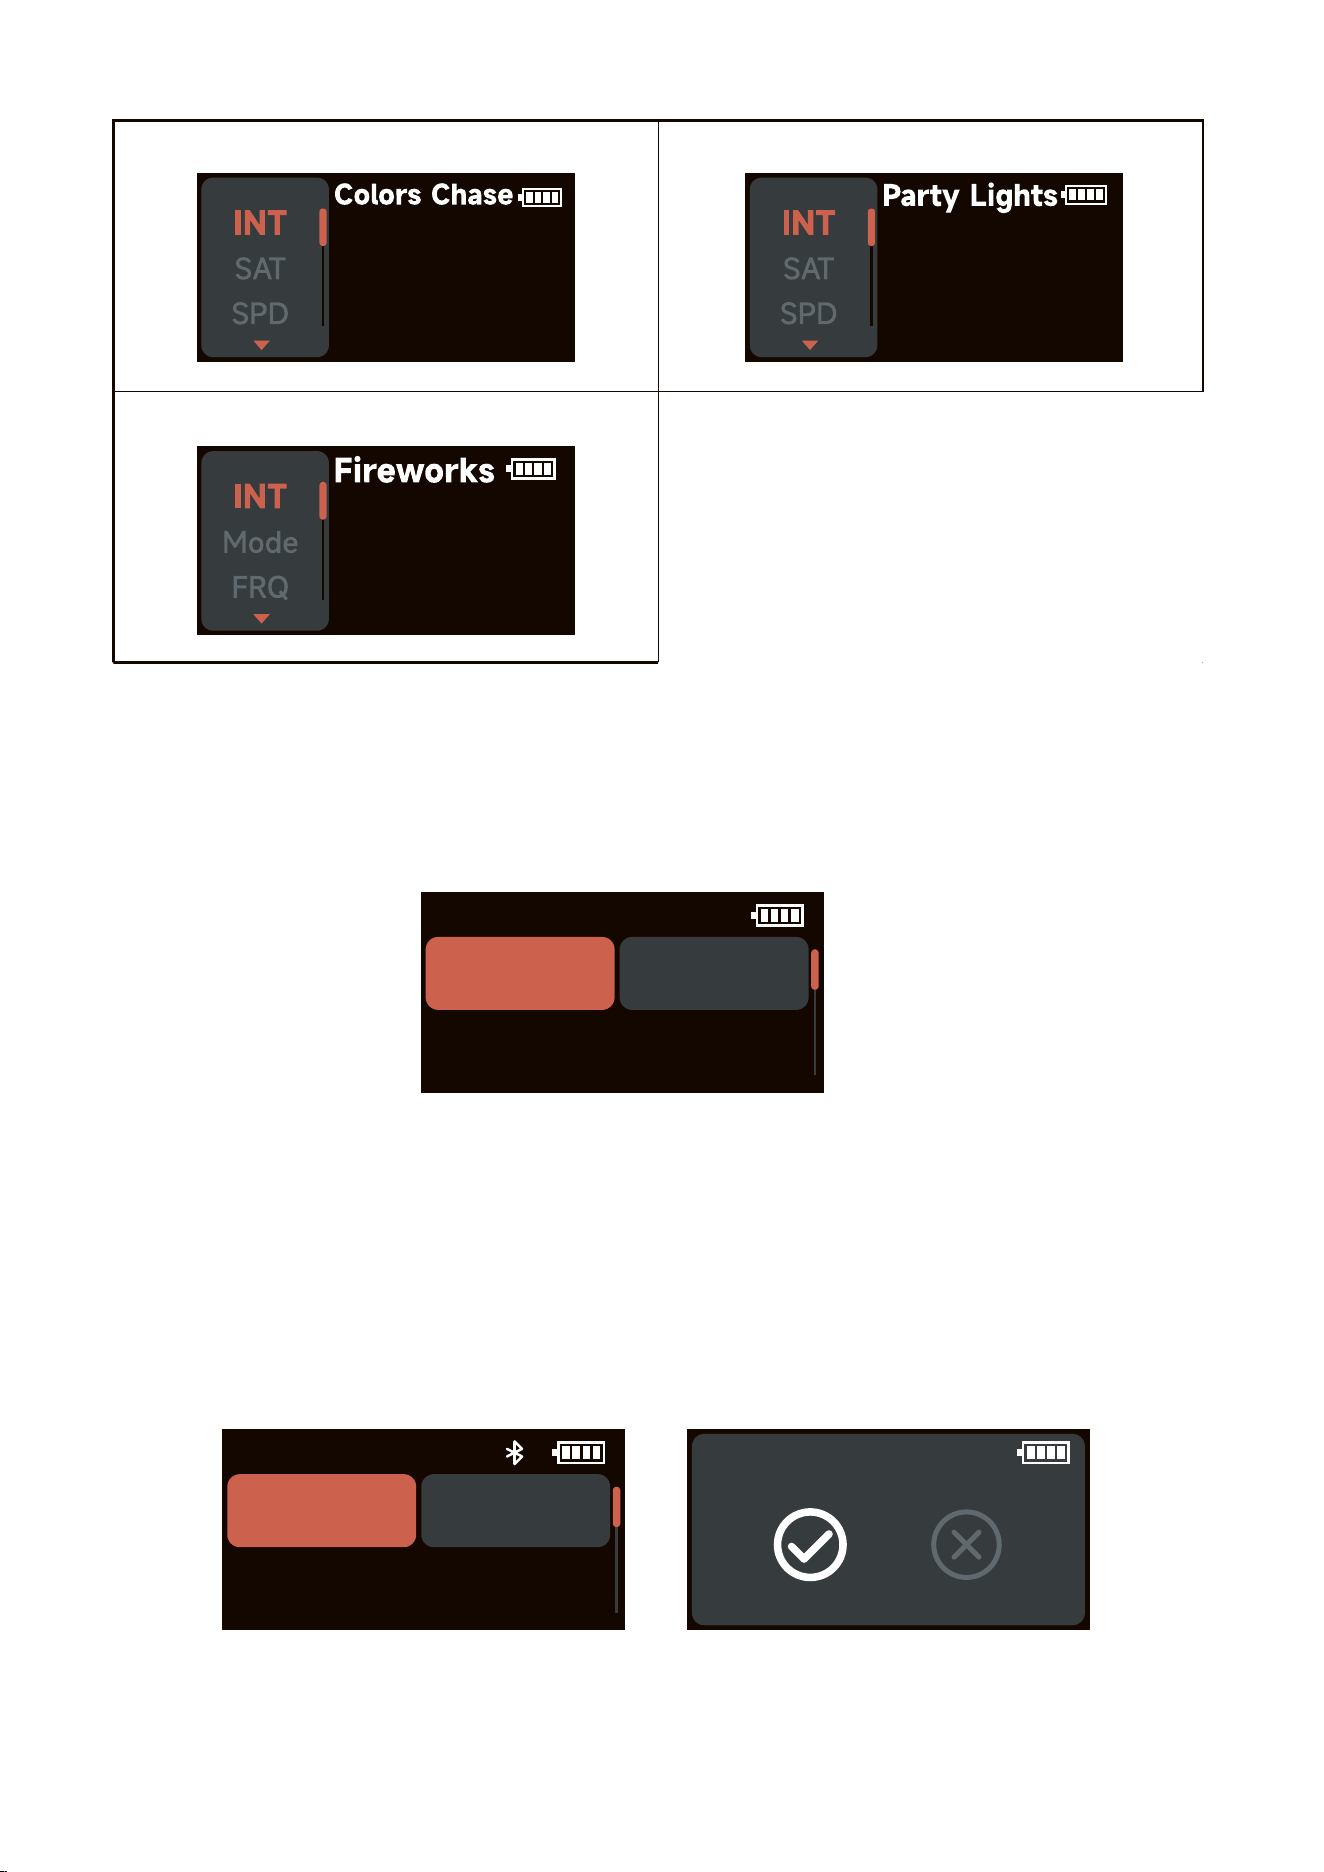
13.Colors Chase 14.Party Lights
3.3.8 Custom FX
Rotate and press the knob to select FX in Light Mode. You can choose to enter Music FX
or Picker FX. Each type can be uploaded and renamed in Sidus Link with 10 custom
effects. "NO CFX" means unsaved FX.
3.4 BT Settings
Rotate and press the knob to select BT Settings in system menu, rotate and press the knob
to select BT Status/ BT Reset/ BT UID.
BT Status: Turn on/off Bluetooth.
BT Reset: Reset the MC Pro Bluetooth connection, and your mobile phone or tablet will be
able to connect to and control the light with Sidus Link App.
BT UID: See the Bluetooth Unique Identifier.
CFX
Picker FX Music FX
2h53m
BT Status BT Reset
BT UID: 200000
BT Reset
- 10 -
15.Fireworks
100%
100%
100%
- 11 -
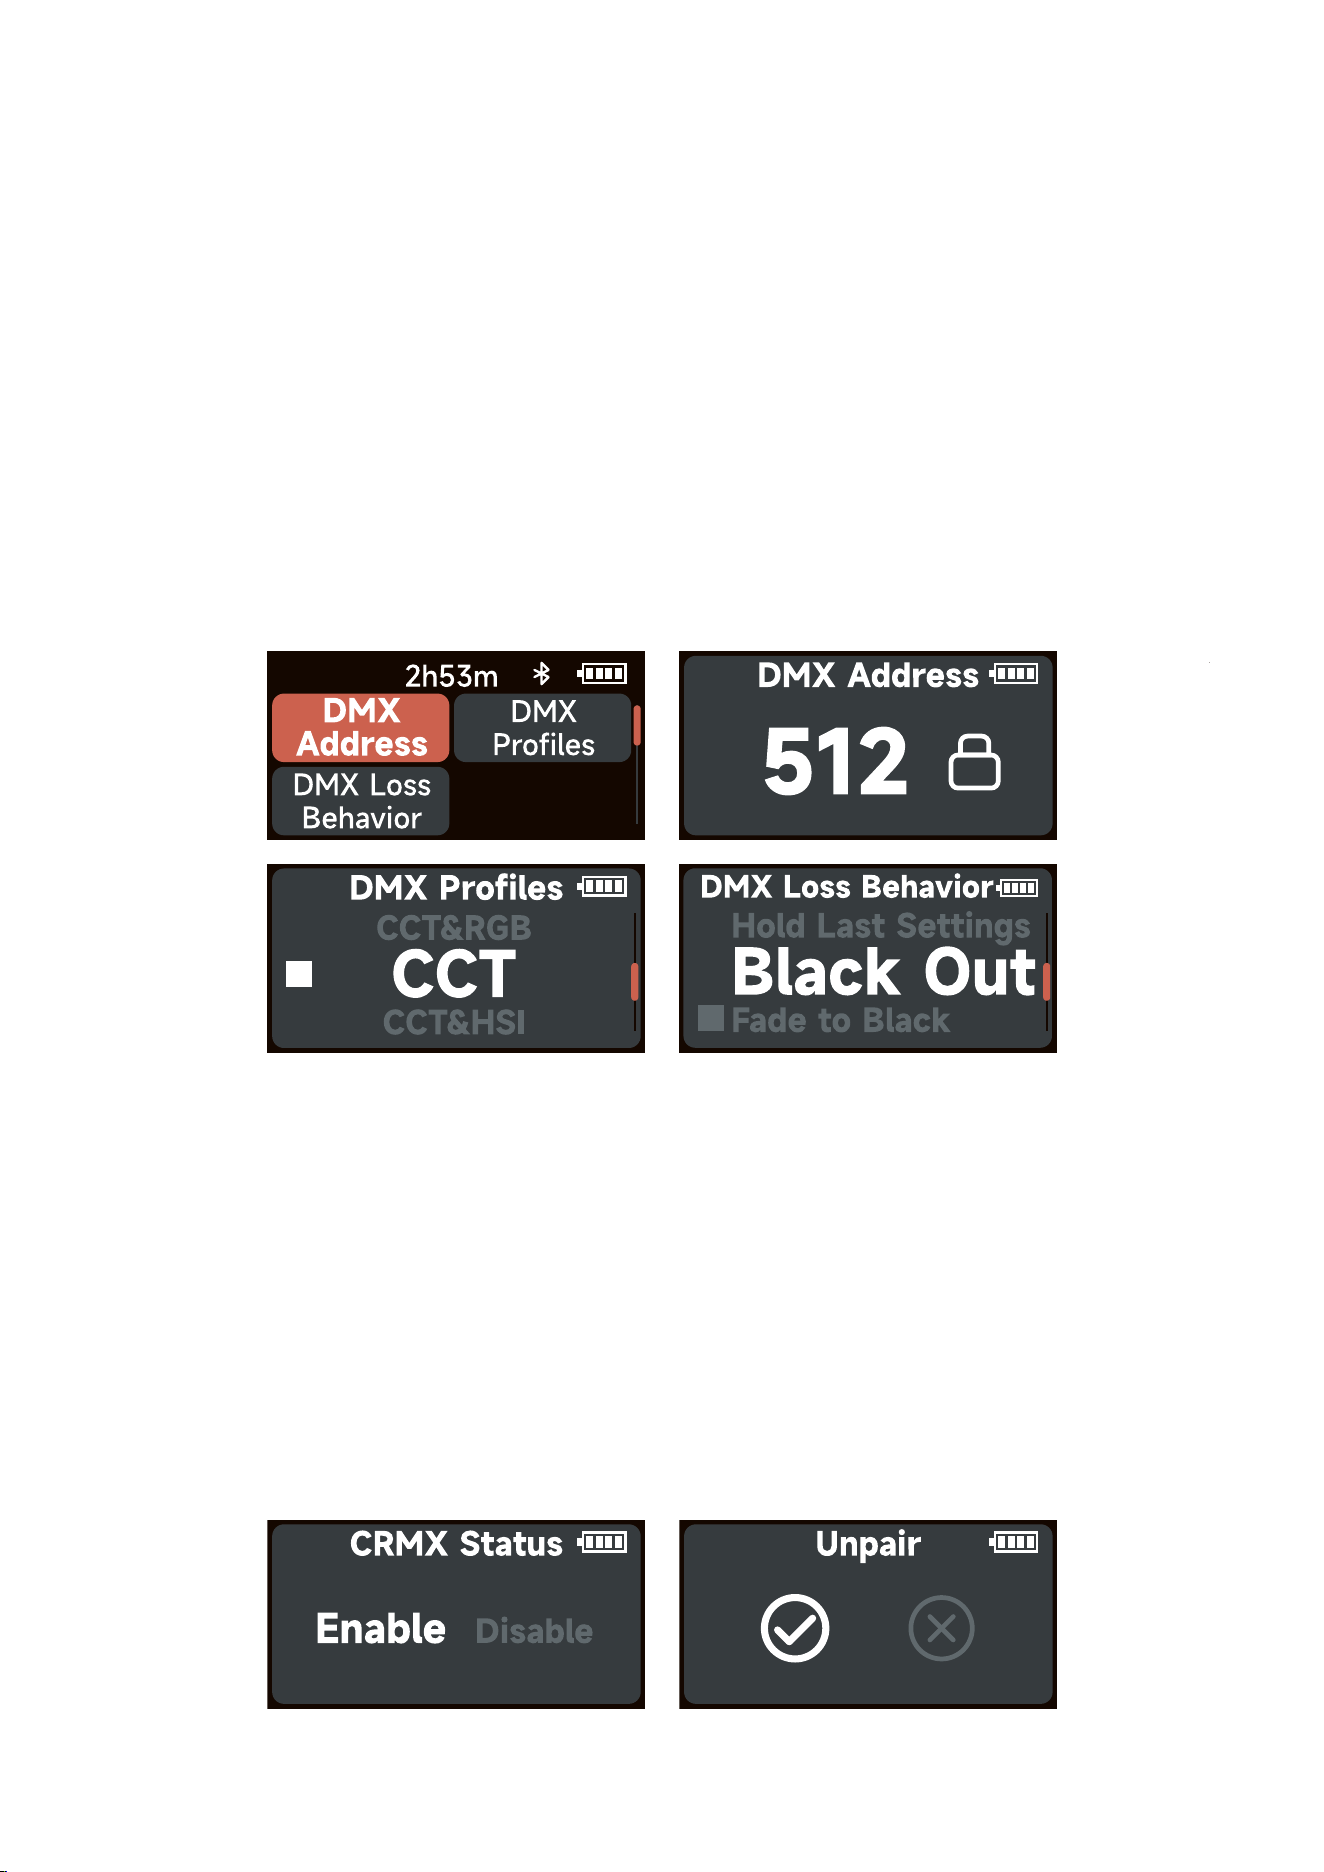
3.5 DMX Settings
Rotate and press the knob to select DMX Settings in system menu. Rotates the knob to select
DMX Settings/CRMX Settings.
3.5.1 DMX Settings
Rotate and press the knob to select DMX Settings in DMX Settings.
DMX Address: Choose the DMX address of MC Pro, press and hold the control wheel for 2
seconds to lock/unlock the DMX address (Prevent accidental touch to exit DMX mode).
DMX Profiles: Rotate the knob to choose DMX profile.
DMX Loss Behavior:
1. Hold Last Settings: After DMX signal is lost, remember the last control setting.
2. Black Out: When the DMX signal is lost, it will be black out.
3. Fade To Black: After DMX signal is lost, it will fade to black in 60 seconds.
4. Hold 2min & Fade Out: After the DMX signal is lost, keep the last control setting for two
minutes, and then fade to black within 60 seconds.
* The fade-out time decreases as the percentage of brightness decreases. When the brightness
output is 100%, the fade-out time is 60 seconds, which decreases in sequence.
* If the signal is reconnected, the DMX console will continue to maintain the signal output as
same as before.
3.5.2 CRMX Settings
Rotate and press the knob to select CRMX Settings in DMX Settings.
CRMX Status: When CRMX Status is ON, it will continuously search for a pairable signal in
the background to connect.
Unpair: Unpair will disconnects the currently established connection so that other signal
transmitters can be paired.

- 12 -
3.6 System Settings
Rotate and press the knob to select System Settings in system menu. Rotates and press the
knob to select .
Freq. Selection/Language/Product Info/Factory Reset.
Freq. Selection: Rotate the knob to adjust the light frequency by 100Hz every turn.
Language: Rotate and press the knob to select English or Simplified Chinese.
Product Info: Rotate and press the knob to select Product Info to see Firmware Version /
Hardware Version.
Factory Reset: Rotate and press the knob to select Factory Reset.
Factory Setting:
Light Mode: Intensity 50%, CCT 5600K, GM 0
BT Status: ON
DMX: Address 001, Profile CCT&RGB, Hold Last Setting, CRMX OFF.
System setting: Freq. Selection 0Hz, Language English.
Language
English 中文
- 13 -
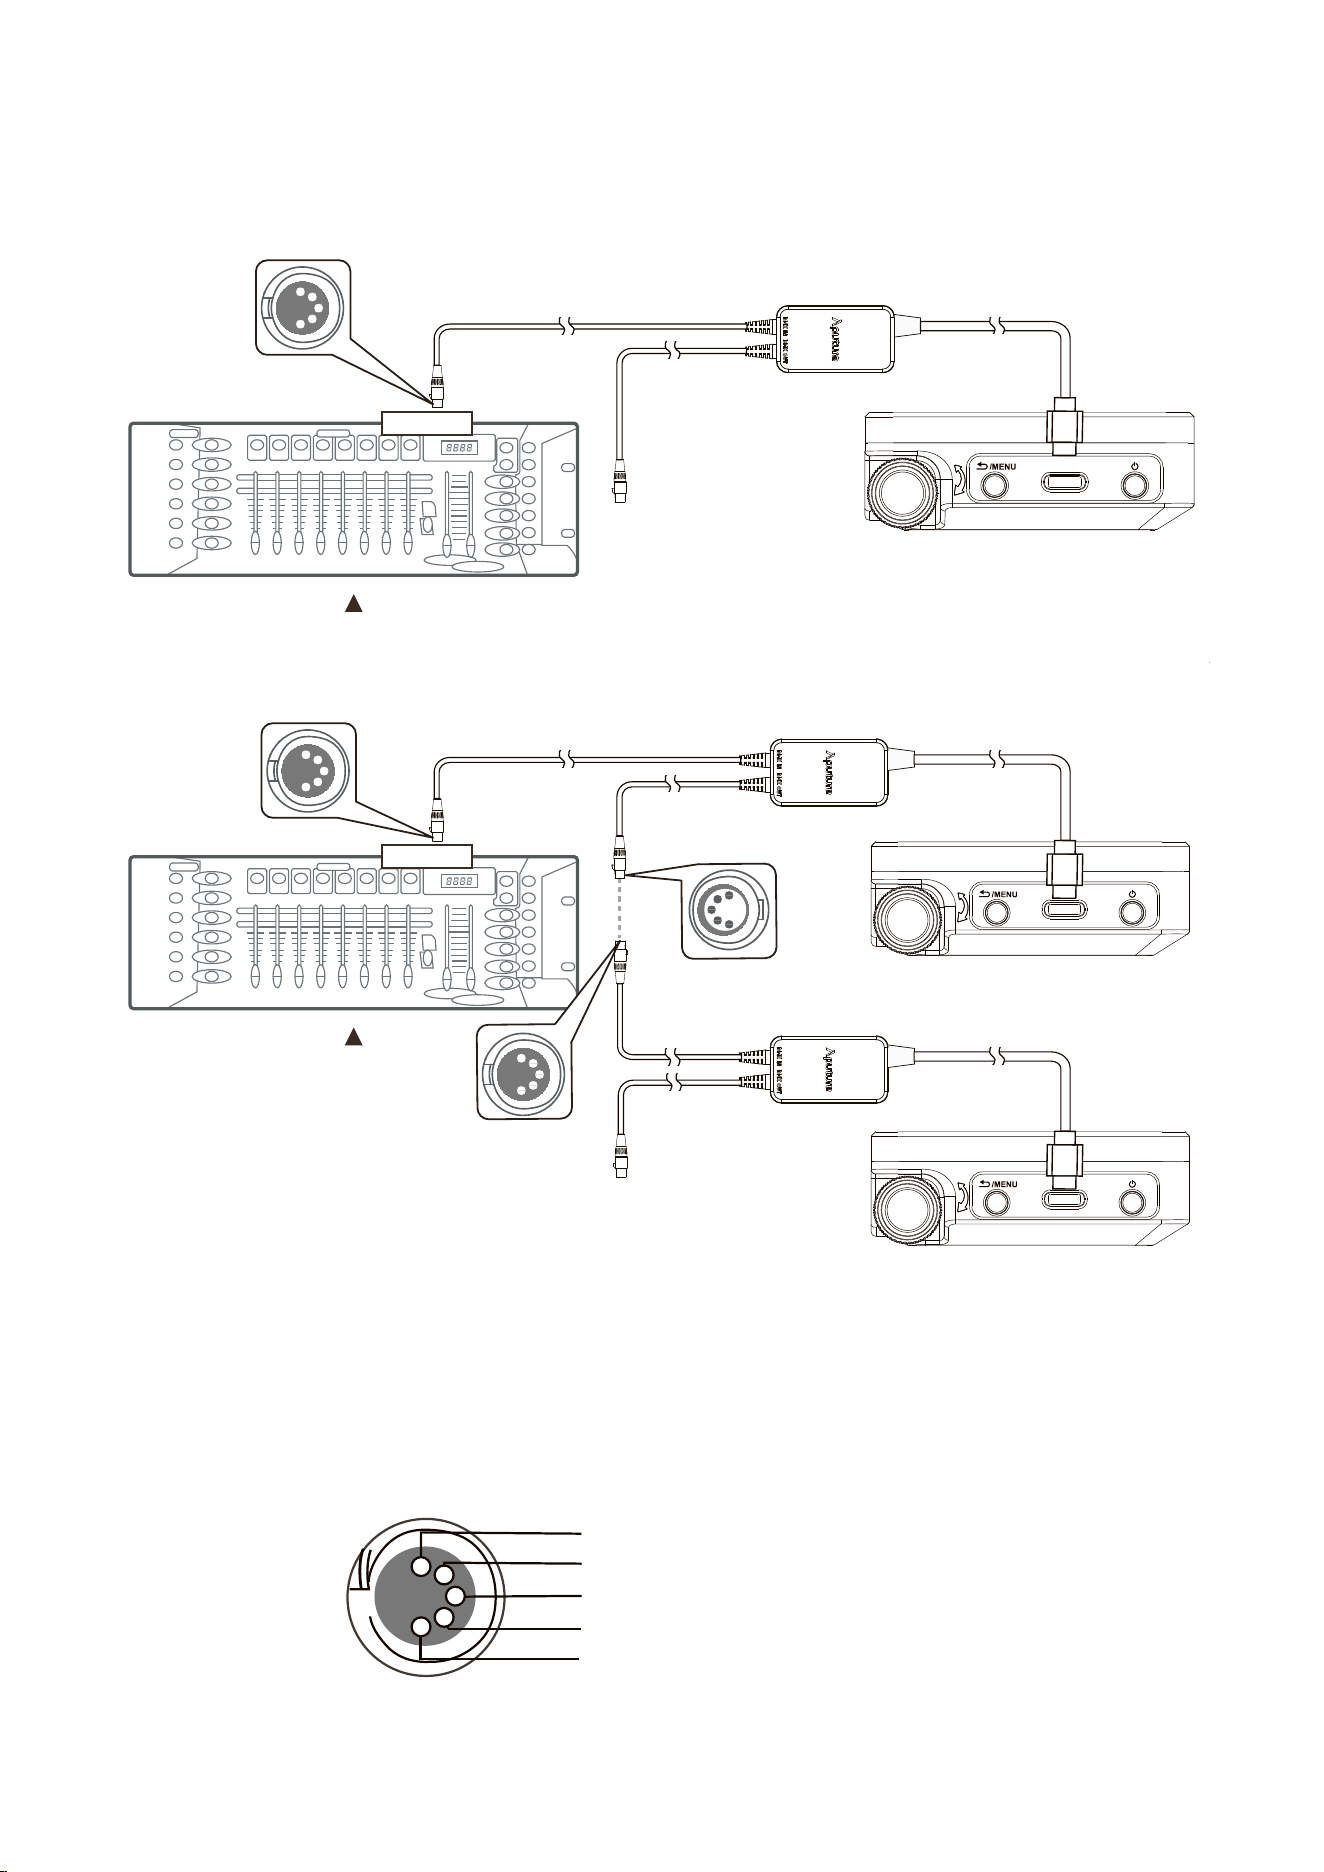
4. Wired DMX Control
4.1 Connect a standard DMX controller
* USB-C to 5-Pin XLR In & Out adapter sold separately
4.2 DMX Interface Info
1
2
3
4
5
Data 2+(Optional Secondary Data Link)
Data 2-(Optional Secondary Data Link)
Data 1+(Primary Data Link)
Data 1-(Primary Data Link)
Signal Common
Connecting DMX to a MC Pro hardwired
DMX512
OUTPUT
DMX512
1
2
3
4
5
DMX512
OUTPUT
Daisy chaining multiple lights over DMX
DMX512
1
2
3
4
5
1
2
3
4
5
1
2
3
4
5
- 14 -
4.3 Channel selection
In DMX mode, match the channel of your DMX controller with the light, and then adjust
accordingly.
* The default DMX channel is 001.
* The range of DMX channels is 1 to 512.
4.4 Controlling Device Via DMX
The MC Pro offers a variety of DMX modes. Please find a detailed overview of all DMX modes
in the document, DMX Chart is available for free download on the Aputure official website
https://www.aputure.com.
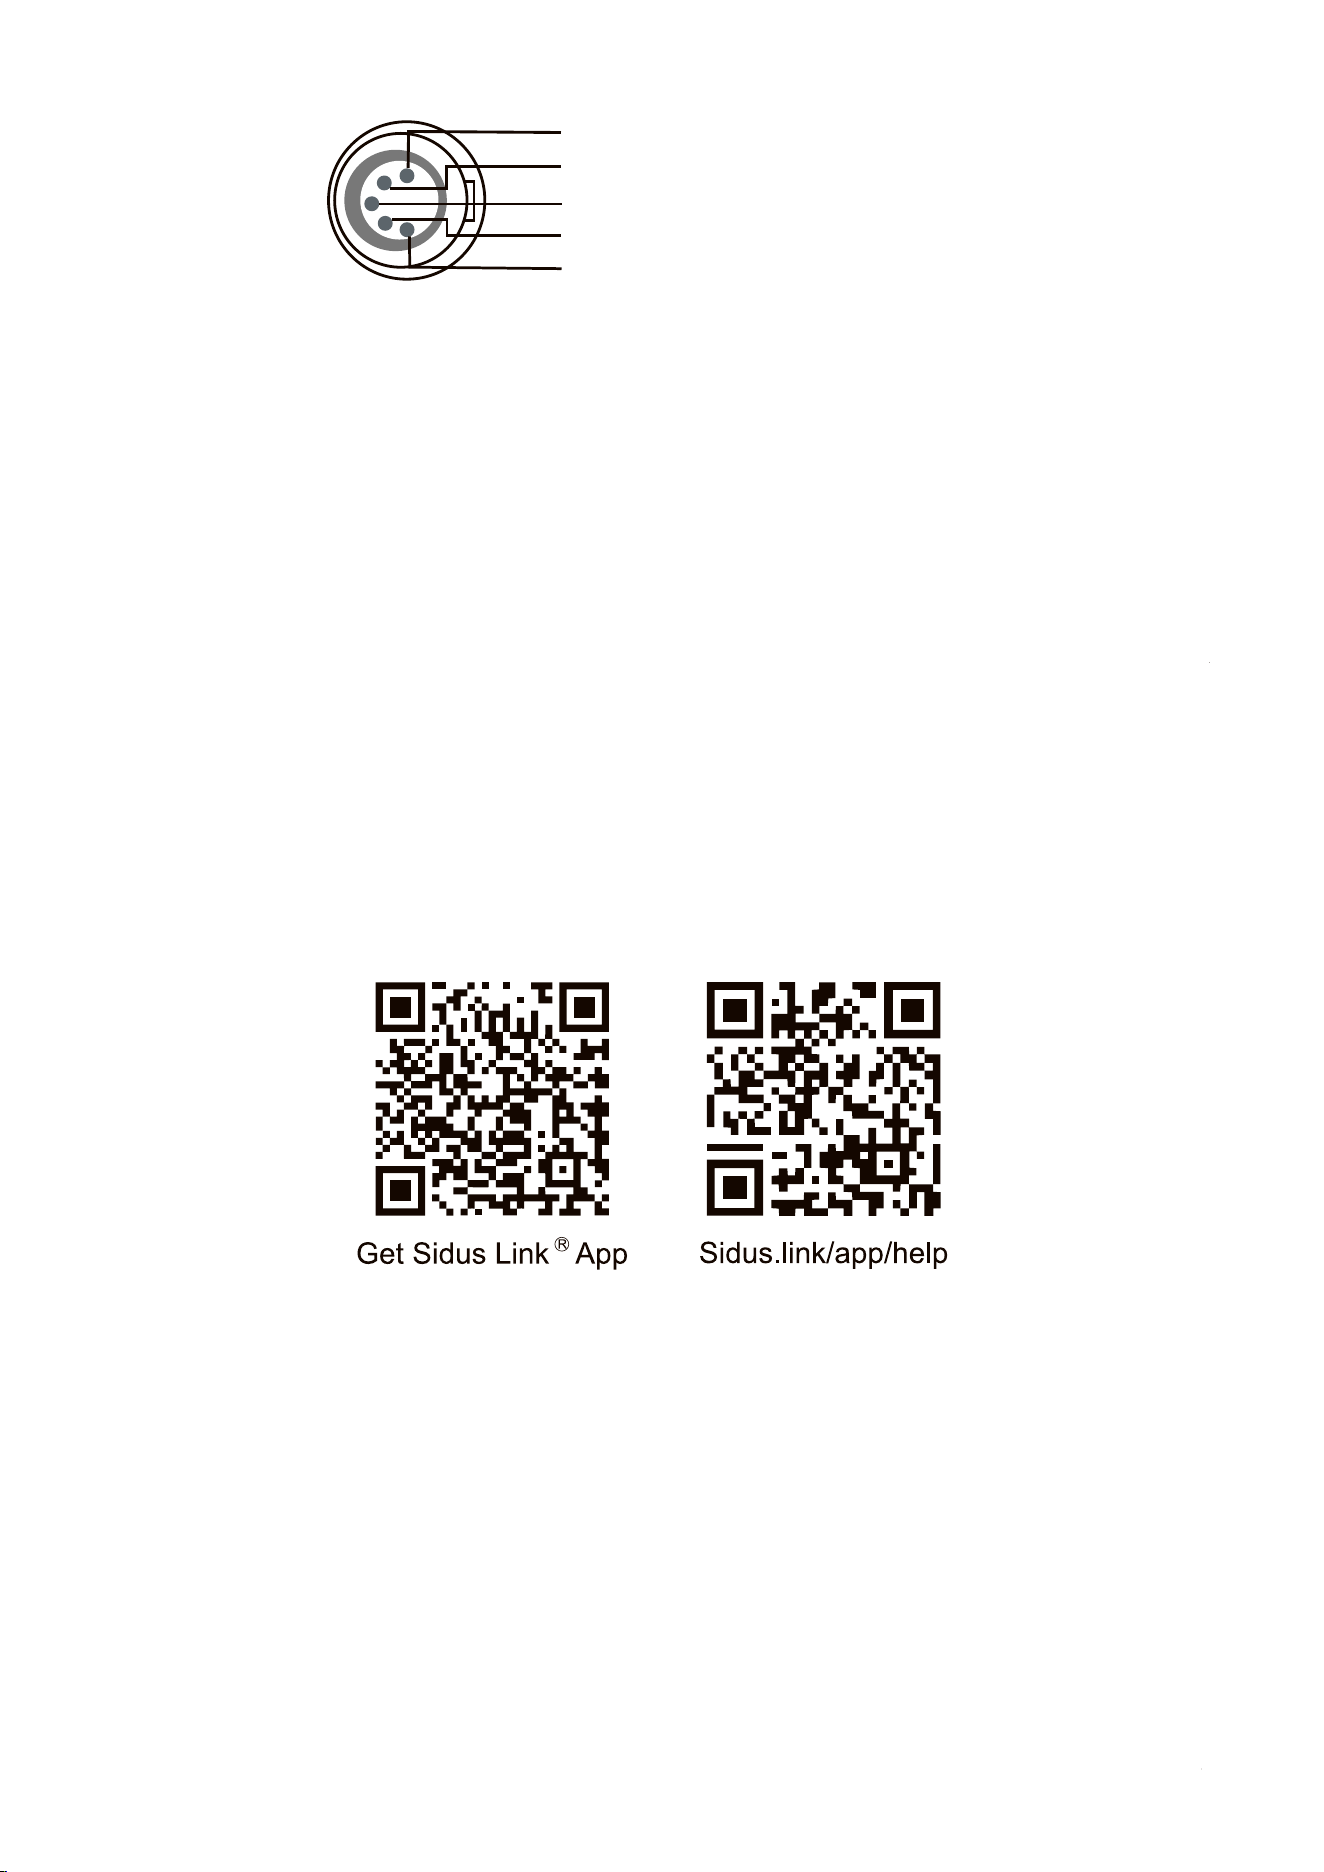
5. Using the Sidus Link APP
You can download the Sidus Link app from the iOS App Store or Google Play Store for
enhancing the functionality of the light. Please visit Sidus.link/app/help for more details
regarding how to use the app to control your Aputure lights.
Data 2+(Optional Secondary Data Link)
Data 2-(Optional Secondary Data Link)
Data 1+(Primary Data Link)
Data 1-(Primary Data Link)
Signal Common
1
2
3
4
5
- 15 -
Specifications
Continue table:
* USB-C to 5-Pin XLR In & Out adapter sold separately.
Power Input
CCT
TICI
SSI(D32)
TM-30 Rf(avg)
Operating Voltage
Operating
Temperature
Battery
Control Methods
Dimensions
(L x W x H)
Cooling Method
7W
2000K-10000K
95
82
94
3.0V-4.2V
-20℃~+45℃
3.7V/4200 mAh
Manual,Sidus Link®
App,DMX/RDM*,
Lumenradio® CRMX
108*70*25mm/
4.25*2.76*0.98 in
Passive
Power Output
CRI
CQS
SSI(D56)
TM-30 Rg(avg)
Operating Current
Charging Time
Battery Runtime
Firmware Upgrade
Method
Weight
IP Rating
5W
95
95
72
103
0.84A
About 1.5h
(USB Type-C 5V/2A)
100% Intensity
(5600K):120 minutes
Sidus Link
247g/0.54 lbs
IP65
- 16 -
CCT
2000K
2500K
3200K
4300K
5600K
6500K
7500K
8500K
10000K
R
G
B
Distance
0.5m
0.5m
0.5m
0.5m
0.5m
0.5m
0.5m
0.5m
0.5m
0.5m
0.5m
0.5m
MC Pro
Bubble
Diffuser
194 lux
226 lux
262 lux
291 lux
297 lux
295 lux
291 lux
289 lux
283 lux
146lux
279lux
56lux
Bare Bulb
1027 lux
1244 lux
1459 lux
1597 lux
1585 lux
1559 lux
1558 lux
1528 lux
1492 lux
442lux
849lux
143lux
Dome
Diffusers
253 lux
297 lux
344 lux
384 lux
392 lux
390 lux
385 lux
388 lux
381 lux
175lux
329lux
63lux
Flat
Diffusers
463 lux
543 lux
628 lux
696 lux
706 lux
697 lux
693 lux
685 lux
670 lux
295lux
570lux
101lux
Light Con-
trol Grids
838 lux
1014 lux
1183 lux
1314 lux
1322 lux
1304 lux
1296 lux
1285 lux
1243 lux
336lux
716lux
121lux
Photometrics
* This is an averaged result. The luminance of your individual unit may vary slightly from this
data.