
OPERATION MANUAL
OF POWER STEERING PUMP
1.Before installation, carefully examine and clean the inlet and outlet
joints, storage tanks, piping system to ensure smooth flow and free of
impurities to prevent dirt in the oil causing premature wear
, strain, and
noise or even causing damage to the steering pump. If the filter
element or hydraulic oil is used for a long time and has impurities,
please replace it before installation.
2.Check that the vent hole of the booster pump oil pot cover must
not be blocked by dirt. Check whether the oil inlet and outlet are tightly
connected with the pipeline system without looseness or air leakage.
3.If you need to install the oil pot, please install the matching
sealing ring at the joint of the oil pot, otherwise there will be leakage
or air intake and noise. When adding the booster oil, pay attention
to add it according to the scale of the oil pot cover
, not too much or
too little, otherwise it may cause poor air intake and oil absorption
of the booster pump, resulting in noise and work difficulties.
4.The connection between the pump shaft (pulley) and the engine
must be concentric, otherwise vibration and noise will be generated,
and product wear will be intensified, which will seriously af
fect
product life.
INSTALLATION REQUIREMENTS
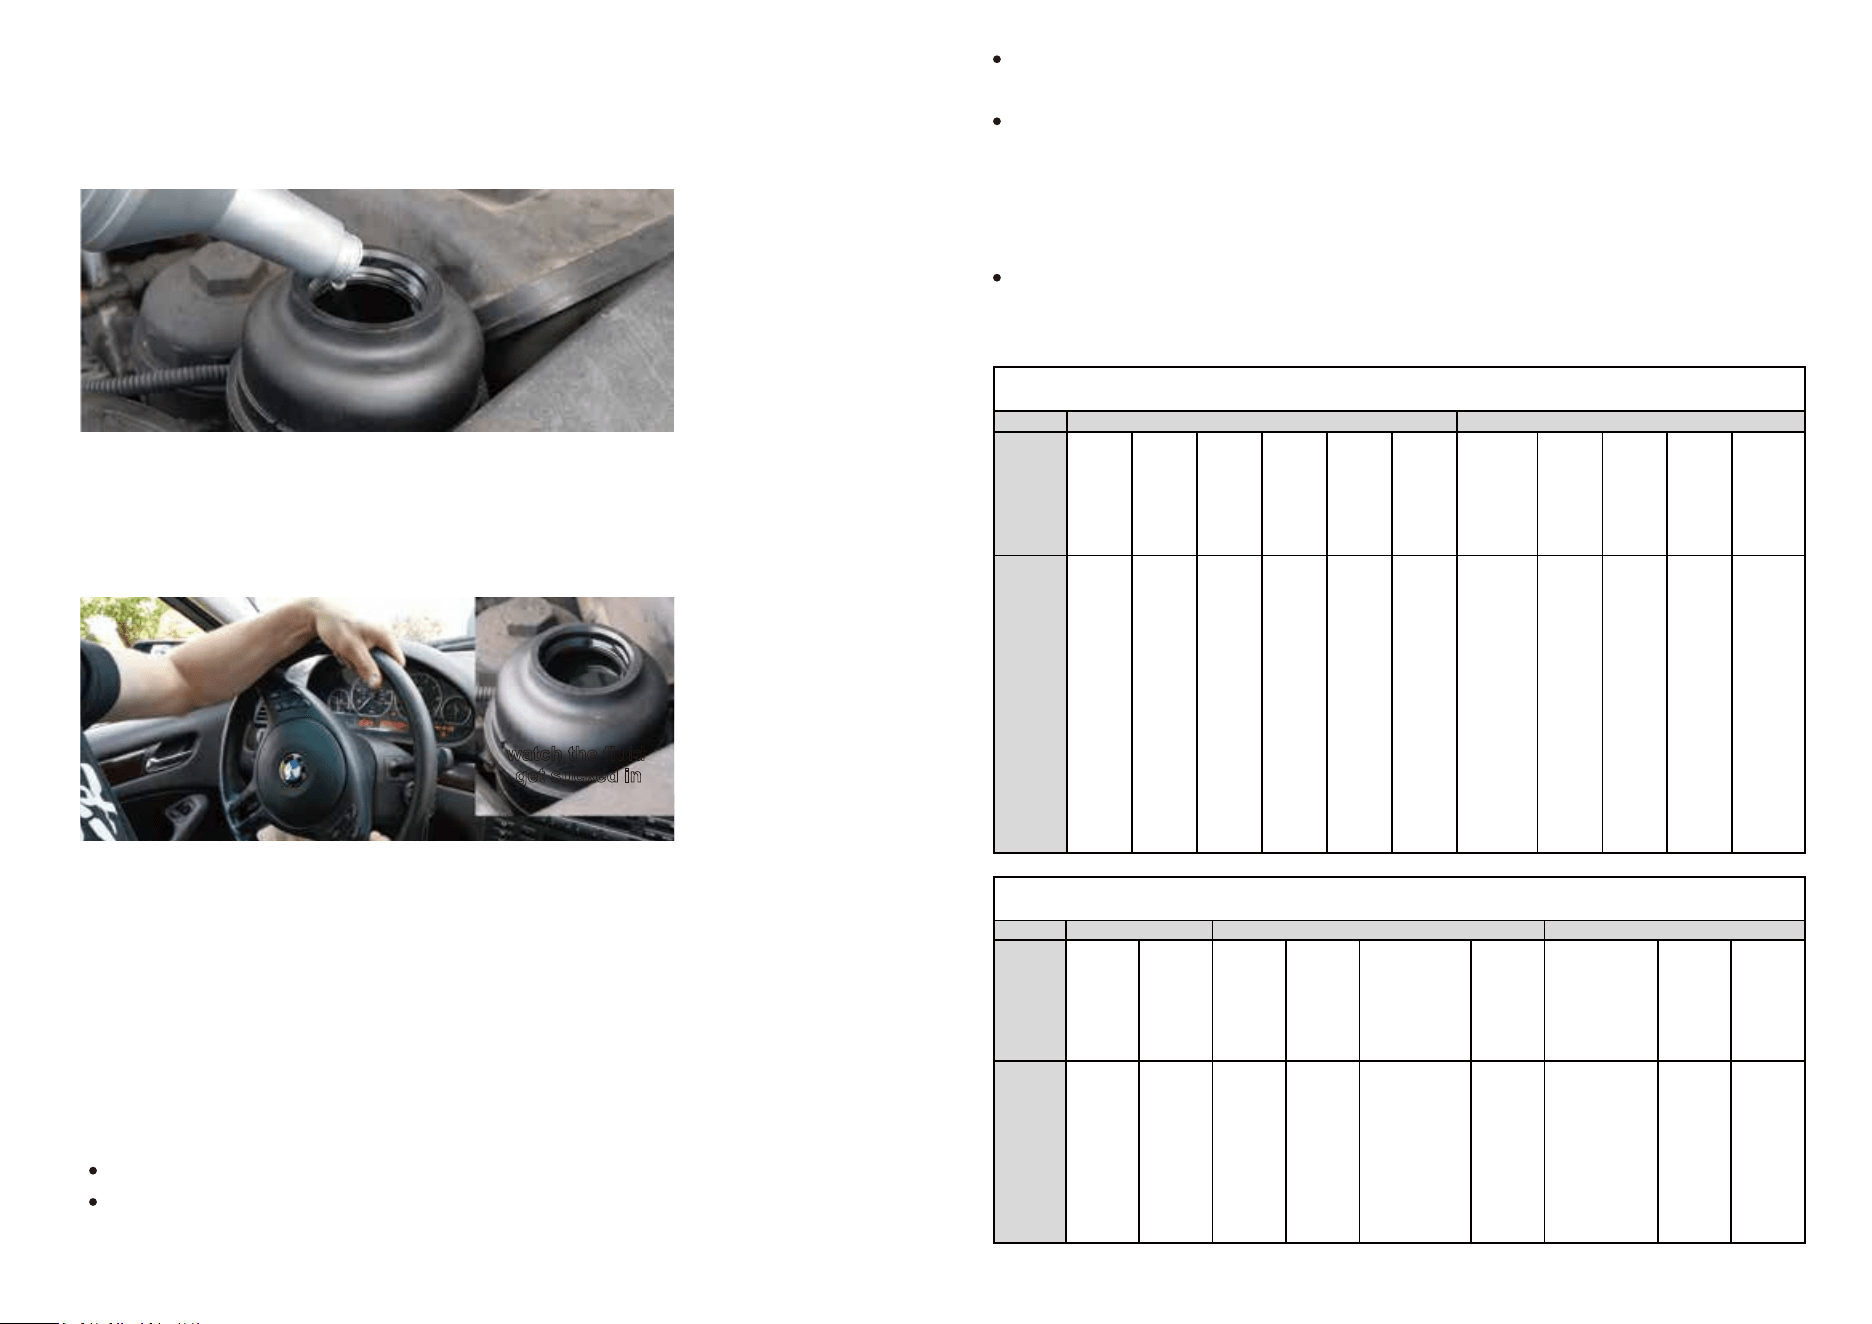
1.Drain the power steering fluid
INSTALLATION AND COMMISSIONING
The medium used in the power steering pumpshall be able to meet
the temperature requirements of - 40℃~ + 120℃, as well as have
certain viscosity and antiwear.It is recommended to use l-hm46
anti-wear hydraulic oil or special oil for automobile power steering.
When using other hydraulic oil, please pay attention to whether the
product description is suitable for the steering pump. Fluid
contamination should be less than NAS9 grade.
FLUID REQUIREMENT
1 2
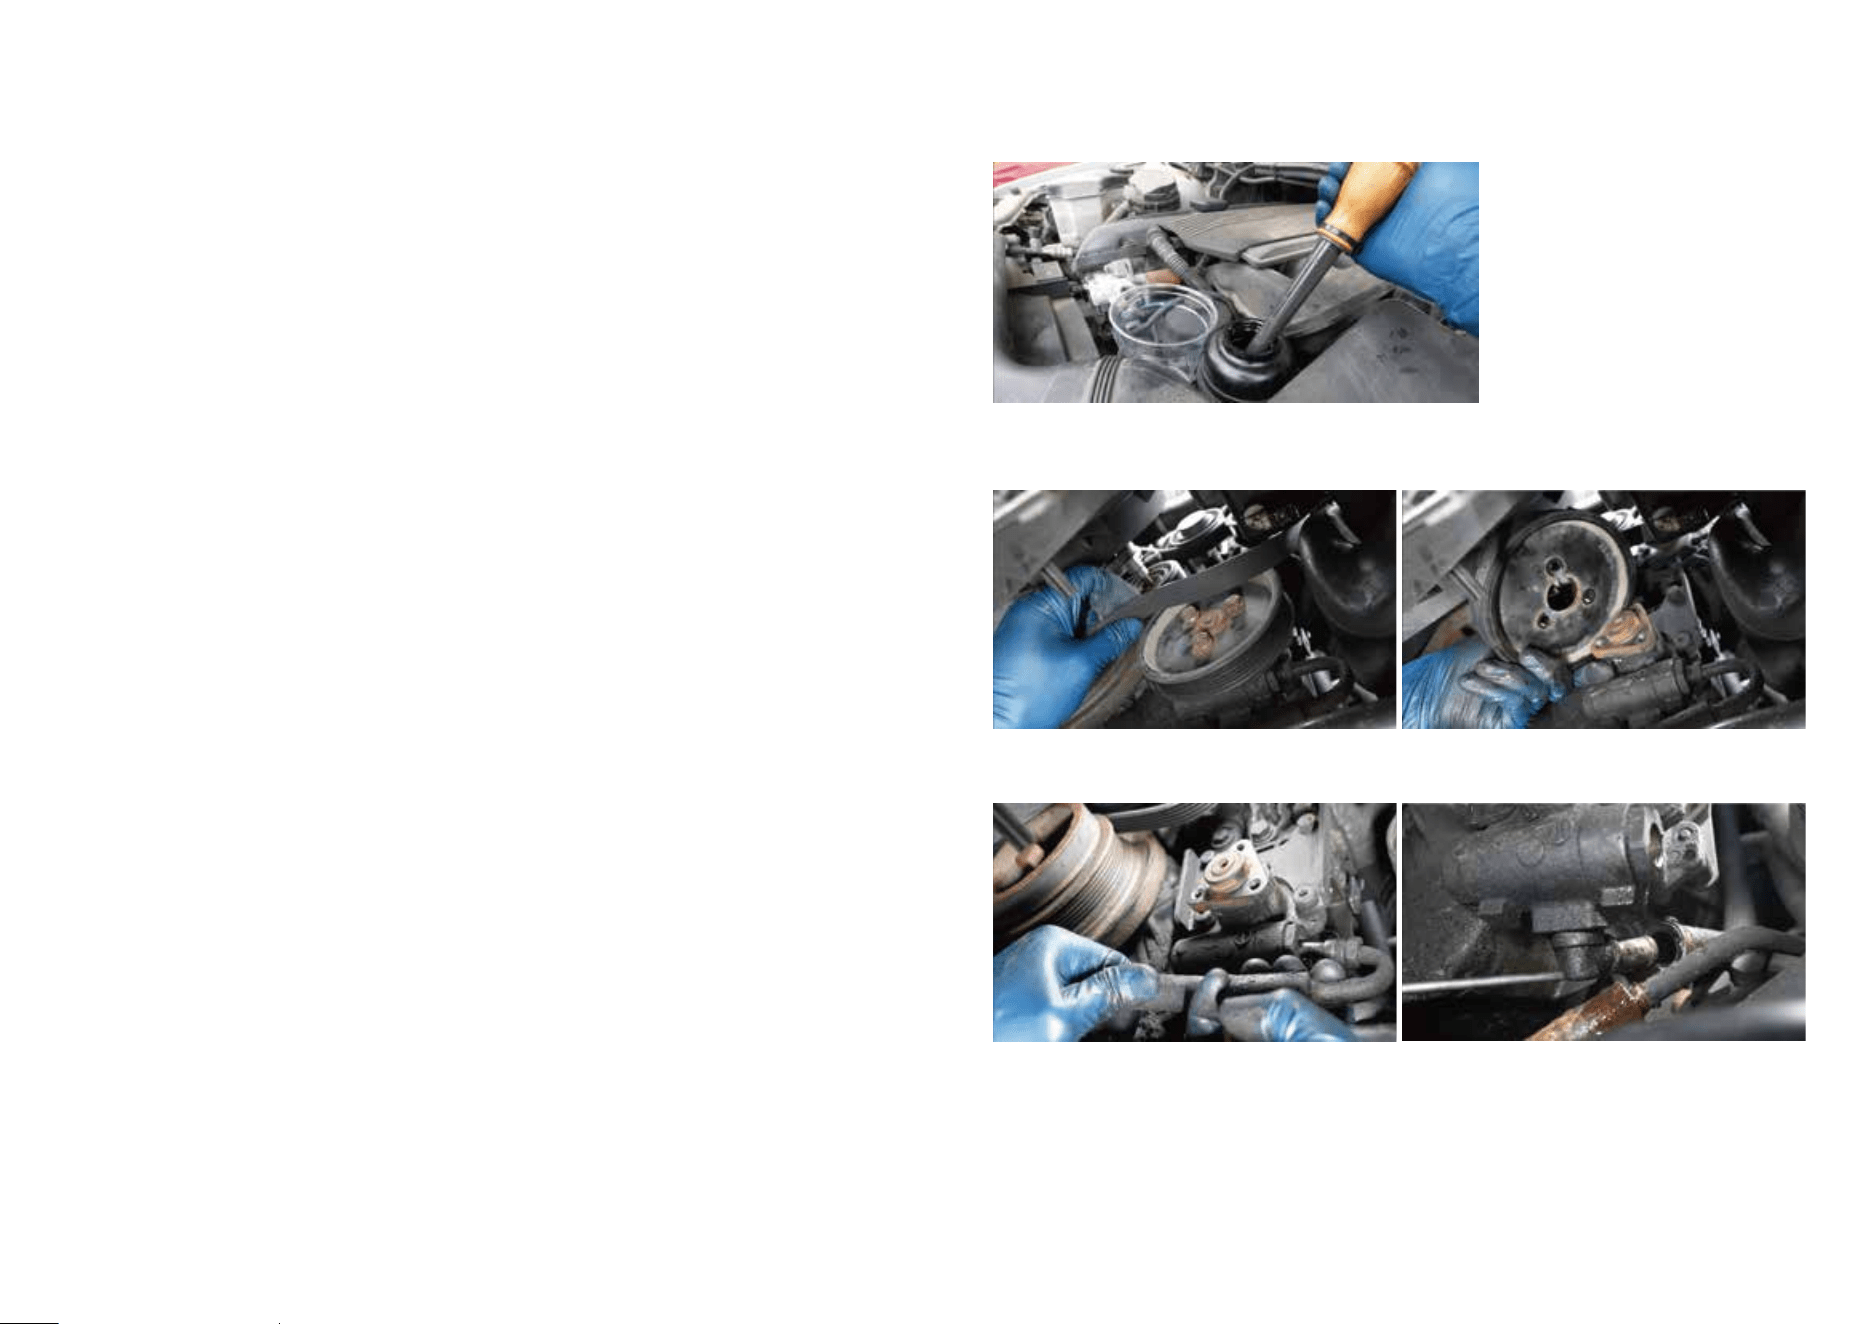
2.Remove the power steering belt and pulley
3.Remove the high pressure outlet hose line and inlet hose line
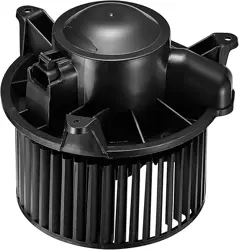
4.Remove the pump and clean up
5.Remove the reservoir and clean up
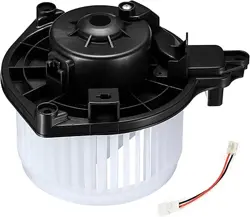
6.Place the reservoir and the new pump
7.Attach each hose line and pulley and belt according to original
assembling stage. Tighten pump attaching bolts.
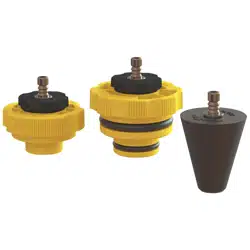
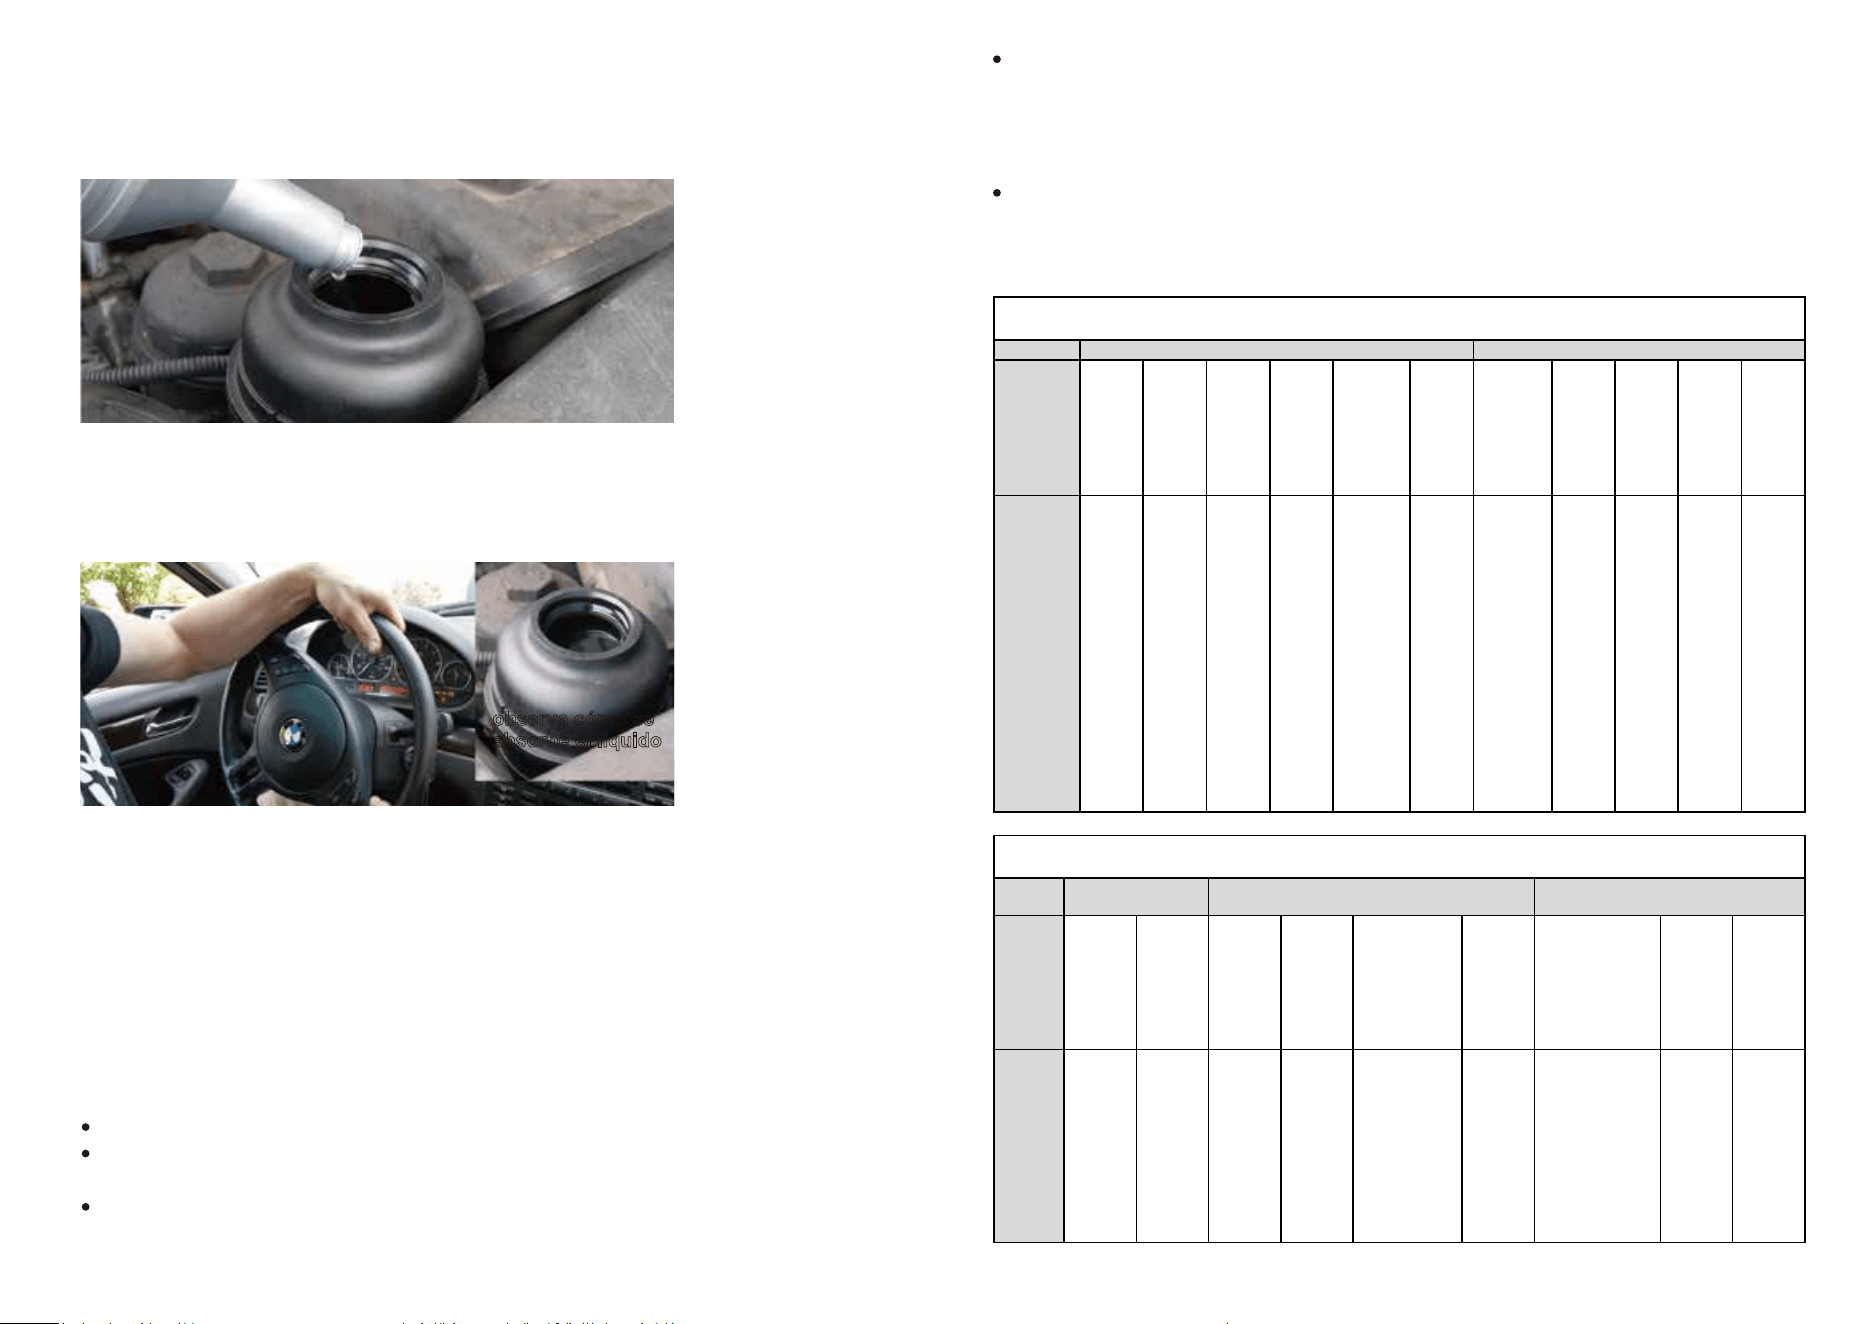
1.After the product is installed, add clean hydraulic oil as required
above to the highest mark without closing the cap.
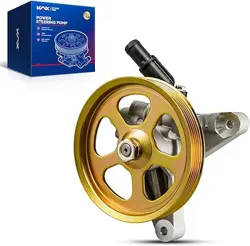
2.Lift the vehicle so that there is no load on the front axle
3.Keep the engine at rest, slowly turn the steering wheel right and
left to the extreme position several times.
Add the clean hydraulic
oil to the highest mark again
4. Start the engine, first idle for tens of seconds, then lightly press
the accelerator
, slowly accelerate to 2000 rpm, and then lower to idle
speed, repeatedly work for several times, lasting for 2 minutes.
Finally turn the steering wheel left and right to the extreme position
several times. Check the reservoir to see if the bubble has
disappeared. If bubble is still visible, then repeat the above method
and check again, if the bubble problem is not solved, then system
leakage inspection should be carry out.
5.Turn off the engine and test drive
Do not stay in the extreme position for more than 5 seconds
Do not use excessive force at the extreme position, otherwise the
oil will foam.
COMMISSIONING-EXHAUST THE AIR
3 4
During commissioning, observe whether the oil of the power steering
pump is sufficient. If not, add it.
If the steering pump makes abnormal noise or the oil in the oil tank
foams during test driving, this is because there is still residual air in
the steering system. This residual air will automatically overflow after
driving 10-20 kilometers, and the abnormal noise will disappear
automatically.
Keep a reasonable distance between high pressure outlet hose line
and adjacent hose to avoid noise caused by contact.
Air in the
pump
Pipeline
leakage
Over
pressure
Clogged oil
filter
The vent
hole of the
oil pot
cover is
blocked
The
hydraul ic
oil has not
been
changed for
a long �me
There is air
inside the
steering pump
or the oil
inside the
steering pump
has not been
added enough.
Valve core
stuck open,
flow
leakage
Valve core
wear
The val ve
element is
blocked by
dirt
Insuffi cient
booster oil
and poor oil
absorp� on
Start the
e
ngine,
graduall y
accelerate
from idle
speed, and
then
accelerate
to idle
speed for
several
�mes, and
turn the
steering
wheel le�
and right to
exhaust the
gas in the
pump.
Check
whether the
pipeli ne of
power
steering
system
leaks and
repair it if
any.
Repair the
safety val ve
and adjust
it to the
value
consistent
with the
product
pressure
parameter.
Note: This
ar� cle
needs to be
carried out
by
professi
ona
ls
Clean the
filter
element and
filter
screen.
Take out the
rubber pad
in the cover,
check
whether the
vent hole in
the cover is
blocked,
use an air
gun to blow
the dirt out
of the vent
hole, or use
a needle to
vent the
vent hole.
Clean all
pipeli nes of
steering
system,
replace
standard
hydraul ic
oil and
filter
element.
Start the
engine,
graduall y
accelerate
from idle
speed, and
then accelerate
to idle speed
for several
�mes, and turn
the steeri ng
wheel le� and
ri ght to
exhaust the
gas in the
pump.
Remove the
oil nozzle,
take out the
valve core
for
cl eani ng,
cl ean the
valve hole
in the
pump, and
discharge
the dirty oi l
in the
pump.
COMMON FAULTS AND TROUBLESHOOTING METHODS
Fault type
Noise
No pressure/not work /Heavy steering
Cause of
failure
Elimina�on
method
Replacemen
t of spool
Remove the
oil outlet
nozzle, take
out and
disassembl
e the valve
core, clean
and
discharge
the dirt
Add it again
accordi ng to
the scale on
the cover of
booster
pump oil pot,
and pay
a�en� on not
to be too
much or too
li�le.
Excessi ve
pump
pressure and
flow
The fl ow hole
of oil outlet
nozzle is too
large
The oil pot is
loos e or the
joint is not
well seal ed;
or the
pipeli ne leaks
The oil i nlet
pipe was not
fixed with
cl amps
The oil outlet nozzle
is not sealed with
seal ing ring or
seal ant, or the joint
of the oil outlet nozzle
is not connected
properly
Poor seali ng
at the back
cover of pump
body
the installa�on
posi � on of the
product is not
adjus ted properl y
The belt of the
power
steering pump
is worn or the
tension of the
belt is not
adjus ted
properly.
It may be that
the runout of
the pul ley
itself of the
product is out
of tolerance.
Determine if
the pump i s
the same as
the model
used. Adjust
the safety
COMMON FAULTS AND TROUBLESHOOTING METHODS
Fault type Light and drifing in high Leaking Product ji�er
Cause of
failure
Elimina�on
method
valve and
remove one
adjus �ng
gasket
Replace the
oil outlet
nozzle.
Check the oil
pot and
pipeli ne, and
check whether
the sealing
ri ng fall s off.
If it is
reinstalled or
replaced, the
seal ing ring
shall be
replaced
Pay a�en�on
to leakage
preven�on
measures for
oil
inl et/outlet
pipes duri ng
loading.
Pay a�en�on to
leakage preven� on
measures for oil
inl et/outlet pipes
during l oadi ng.
Re �ghten the
rear cover
moun� ng
screws or
replace the
rear cover
seal ing ring
When replacing the
power steering pump,
recheck the
installa� on posi� on
of the pump to ensure
that the belt pul ley
and the connec� on
posi � on are
accurate a
nd
concentric, and there
is no deflec� on.
Recheck the
belt or
readjus t the
tension of the
belt.
Replace
pulley.
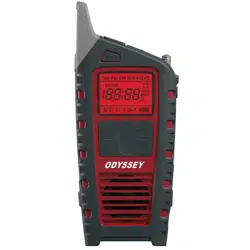
watch the fluid
get sucked in
MANUAL DE FUNCIONAMIENTO DE
LA BOMBA DE DIRECCIÓN ASISTIDA
1.Antes de la instalación, examine y limpie cuidadosamente las juntas de
entrada y salida, los tanques de almacenamiento y el sistema de tuberías
para garantizar un flujo suave y libre de impurezas para evitar que la
suciedad en el aceite cause desgaste prematuro, tensión y ruidos o
incluso cause daños a la bomba de dirección. . Si el elemento filtrante o el
aceite hidráulico se ha utilizado durante mucho tiempo y contiene
impurezas, reemplácelo antes de la instalación.
2. Compruebe que el orificio de ventilación de la tapa del recipiente de
aceite de la bomba de refuerzo no esté bloqueado por suciedad.
Compruebe si la entrada y salida de aceite están firmemente conectadas
con el sistema de tuberías sin holguras ni fugas de aire.
3. Si necesita instalar el recipiente de aceite, instale el anillo de sellado
correspondiente en la junta del recipiente de aceite; de lo contrario, habrá
fugas o entrada de aire y ruido. Al agregar el aceite de refuerzo, preste
atención a agregarlo de acuerdo con la escala de la tapa del tanque de
aceite, ni demasiado ni muy poco, de lo contrario puede causar una mala
entrada de aire y absorción de aceite de la bomba de refuerzo, lo que
resulta en ruido y dificultades de trabajo.
4. La conexión entre el eje de la bomba (polea) y el motor debe ser
concéntrica; de lo contrario, se generarán vibraciones y ruidos y se
intensificará el desgaste del producto, lo que afectará gravemente la
vida útil del producto.
REQUISITOS DE INSTALACIÓN
1.Drene el líquido de la dirección asistida.
INSTALACIÓN Y COMPROBACIÓN
El medio utilizado en la bomba de dirección asistida deberá poder cumplir
con los requisitos de temperatura de - 40 ℃ ~ + 120 ℃, además de tener
cierta viscosidad y antidesgaste. Se recomienda utilizar aceite hidráulico
antidesgaste l-hm46 o aceite especial para dirección asistida del automóvil.
Cuando utilice otro aceite hidráulico, preste atención a si la descripción del
producto es adecuada para la bomba de dirección. La contaminación del
fluido debe ser inferior al grado NAS9.
REQUISITO DE LÍQUIDO
1 2
2.Retire la correa y la polea de la dirección asistida.
3.Retire la manguera de salida de alta presión y la manguera de entrada.
4.Retire la bomba y limpie.
5.Retire el depósito y límpielo.
6.Colocar el depósito y la nueva bomba.
7.Conecte cada manguera, polea y correa de acuerdo con la etapa de
ensamblaje original.
Apriete los pernos de fijación de la bomba.
1.Después de instalar el producto, agregue aceite hidráulico limpio como
se requiere arriba hasta la marca más alta sin cerrar la tapa.
2.Levante el vehículo para que no haya carga en el eje delantero.
3.Mantenga el motor en reposo. Gire lentamente el volante hacia la
derecha y hacia la izquierda hasta la posición extrema varias veces.
Agregue nuevamente el aceite hidráulico limpio hasta la marca más alta.
4.Arranque el motor, primero al mínimo durante decenas de segundos,
luego presione ligeramente el acelerador, acelere lentamente a 2000 rpm
y luego baje al ralentí, operar repetidamente varias veces, con una
duración de 2 minutos. Finalmente, gire el volante varias veces hacia la
izquierda y hacia la derecha hasta la posición extrema. Revisa el depósito
para ver si la burbuja ha desaparecido. Si aún se ven burbujas, repita el
método anterior y verifique nuevamente; si el problema de las burbujas no
se resuelve, entonces se debe realizar una inspección de fugas del sistema.
5.Apague el motor y pruebe la conducción.
No permanezca en la posición extrema durante más de 5 segundos.
No utilice fuerza excesiva en la posición extrema, de lo contrario el aceite
formará espuma.
Durante la puesta en servicio, observe si el aceite de la bomba de la
dirección asistida es suficiente. Si no, agréguelo.
PUESTA EN MARCHA-EXTRACCIÓN DEL AIRE
3 4
Si la bomba de dirección produce un ruido anormal o el aceite en el
tanque de aceite hace espuma durante la prueba de conducción, esto se
debe a que todavía hay aire residual en el sistema de dirección. Este aire
residual se desbordará automáticamente después de conducir de 10 a
20 kilómetros y el ruido anormal desaparecerá automáticamente.
Mantenga una distancia razonable entre la manguera de salida de alta
presión y la manguera adyacente para evitar el ruido causado por el
contacto.
Presión y
caudal
excesivos de
la bomba
El orificio de
flujo de la
boquilla de
salida de
aceite es
demasiado
grande
La aceitera
está suelta o
la junta no
está bien
sellada; o la
tubería tiene
fugas
El tubo de
entrada de
aceite no
estaba fijado
con
abrazaderas
La boquilla de salida
de aceite no está
sellada con anillo de
sellado o sellador, o
la junta de la
boquilla de salida de
aceite no está
conectada
correctamente.
Mala
estanqueidad
en la tapa
trasera del
cuerpo de la
bomba
la posición de
instalación del producto
no está bien ajustada
La correa de
la bomba de
la dirección
asistida está
desgastada o
la tensión de
la correa no
está bien
ajustada.
Puede ser
que la
excentricidad
de la propia
polea del
producto
esté fuera de
tolerancia.
Determine si
la bomba es
la misma que
el modelo
utilizado.
Ajustar la
válvula de
seguridad y
retirar una
junta de
ajuste.
Sustituya la
boquilla de
salida de
aceite.
Comprobar la
olla de aceite
y la tubería,
y comprobar
si el anillo de
sellado se
cae. En caso
de
reinstalación
o sustitución,
se sustituirá
el anillo de
sellado
Preste
atención a
las medidas
de
prevención
de fugas en
las tuberías
de
entrada/salid
a de aceite
durante la
carga.
Preste atención a
las medidas de
prevención de fugas
en las tuberías de
entrada/salida de
aceite durante la
carga.
Vuelva a
apretar los
tornillos de
fijación de la
tapa trasera
o
Averías comunes y métodos de resolución de problemas
Tipo de
avería
Luz y deriva en direclon
de alta velocidad
Fugas Fluctuación del producto
Causa del
fallo
Método de
eliminación
sustituya la
junta de
estanqueidad
de la tapa
trasera.
Al sustituir la bomba de
la dirección asistida,
vuelva a comprobar la
posición de instalación
de la bomba para
asegurarse de que la
polea de la correa y la
posición de conexión
son
precisas y
concéntricas, y que no
haya desviaciones.
Vuelva a
comprobar la
correa o
reajuste su
tensión.
Sustituya la
polea.
Aire en la
bomba
Fugas en
las tuberías
Sobrepresi
ón
Filtro de
aceite
obstruido
El orificio de
ventilación de
la tapa del
tanque de
aceite está
obstruido
El aceite
hidráulico
no se ha
cambiado
durante
mucho
tiempo.
Hay aire
dentro de la
bomba de
dirección o no
se ha añadido
suficiente
aceite dentro
de la bomba
de dirección.
Núcleo de
válvula
atascado
abierto,
fuga de
flujo
Desgaste
del núcleo
de la
válvula
El
elemento
de válvula
está
obstruido
por
suciedad
Aceite de
refuerzo
insuficiente
y mala
absorción
del aceite
Arranque el
motor,
acelere
gradualmen
te desde la
velocidad
de ralentí,
y luego
disminuya
la velocidad
al mínimo
varias
veces, y
gire el
volante a la
izquierda y
a la
derecha
para liberar
el gas en la
bomba
Compruebe
si la tubería
del sistema
de
dirección
asistida
tiene fugas
y repárela
si las tiene.
Repare la
válvula de
seguridad y
ajústela al
valor
coherente
con el
parámetro
de presión
del
producto.N
ota: Este
artículo
debe ser
realizado
por
profesional
es
Limpie el
elemento
filtrante y la
rejilla del
filtro.
Retire la tapa
de goma o
almohadilla de
la cubierta,
compruebe si
el orificio de
ventilación de
la cubierta
está
bloqueado,
utilice una
pistola de aire
para soplar la
suciedad del
orificio de
ventilación o
utilice una
aguja para
ventilar el
orificio de
ventilación.
Limpiar
todas las
tuberías del
sistema de
dirección,
sustituir el
aceite
hidráulico
estándar y
el elemento
filtrante.
Arranque el
motor, acelere
gradualmente
desde la
velocidad de
ralentí, y
luego
disminuya la
velocidad al
mínimo varias
veces, y gire
el volante a la
izquierda y a
la derecha
para liberar el
gas en la
bomba
Retire la
boquilla de
aceite,
saque el
núcleo de
la válvula
para su
limpieza,
limpie el
orificio de
la válvula
en la
bomba y
descargue
el aceite
sucio en la
bomba.
Sustitución
del carrete
Quitar la
boquilla de
salida de
acei
te,
sacar y
desmontar
el núcleo
de la
válvula,
limpiar y
descargar
la
suciedad.
Añádalo de
nuevo
según la
escala de
la tapa del
depósito de
aceite de la
bomba de
refuerzo, y
preste
atención a
que no
Averías comunes y métodos de resolución de problemas
Tipo de avería
Ruido
Sin presión/no funciona /dirección pesada
Causa del
fallo
Método de
eliminación
sea
ni
demasiado
ni poco.
observa cómo se
absorbe el líquido