
USER MANUAL
Please read carefully before use and keep for future reference.
PORTABLE CD &
CASSETTE STEREO
BOOMBOX
EPB-4000

2
1. R
ead these instrucons – All the safety and operang instrucons should be read
before this product is operated.
2. K
eep these instrucons. The safety and operang instrucons should be retained for
future reference.
3. Heed all w
arnings. All warnings on the appliance and in the operang instrucons
should be adhered to.
4. Do not use this appar
atus near water. The device should not be used near water or
moisture – for example, in a wet basement or near a swimming pool, and the like.
5. Clean only with a dr
y cloth.
6. Do not block an
y venlaon openings.
7. Do not oper
ate or place near any heat sources such as radiators, heat registers,
stoves, or other apparatus (including ampliers) that produce heat.
8. Pr
otect the power cord from being walked on or pinched parcularly at the plugs,
power outlets, and at the point where they exit from the apparatus.
9. Only use a
achments/accessories specied by the manufacturer.
10. Unplug the appar
atus during lightning storms or when unused for long periods of
me.
11. R
efer all servicing to qualied personnel. Servicing is required when the apparatus has
been damaged in any way, such as a damaged power supply cord or plug.
12. W
ARNING: To reduce the risk of re or electric shock, do not expose this device to
any moisture, including rain or high humidity. Do not place any vases, or any liquid
containers on the speaker.
13. Only use the de
vice in moderate climates.
14. The v
enlaon should not be impeded by covering the venlaon openings with
items, such as newspapers, tablecloths, curtains, etc.
15. Do not place open ame sour
ces, such as lighted candles, on the apparatus.
16. CA
UTION: These servicing instrucons are for use by qualied service personnel only.
17. T
o reduce the risk of electric shock do not perform any servicing other than that
contained in the operang instrucons unless you are qualied to do so.
18. CA
UTION: TO REDUCE THE RISK OF ELECTRIC SHOCK, DO DOT REMOVE THE DEVICE
HOUSING. DO NOT OPEN THE UNIT. SERVICING SHALL ONLY BE DONE BY QUALIFIED
SERVICE PERSONNEL.
19. D
ANGER: This Compact Disc player is classied as a Class 1 LASER PRODUCT. The
CLASS 1 LASER PRODUCT label is located on the rear exterior.
20. NO
TE: The manufacturer is not responsible for any radio or TV interference caused by
unauthorized modicaons.
SAFETY INSTRUCTIONS
3
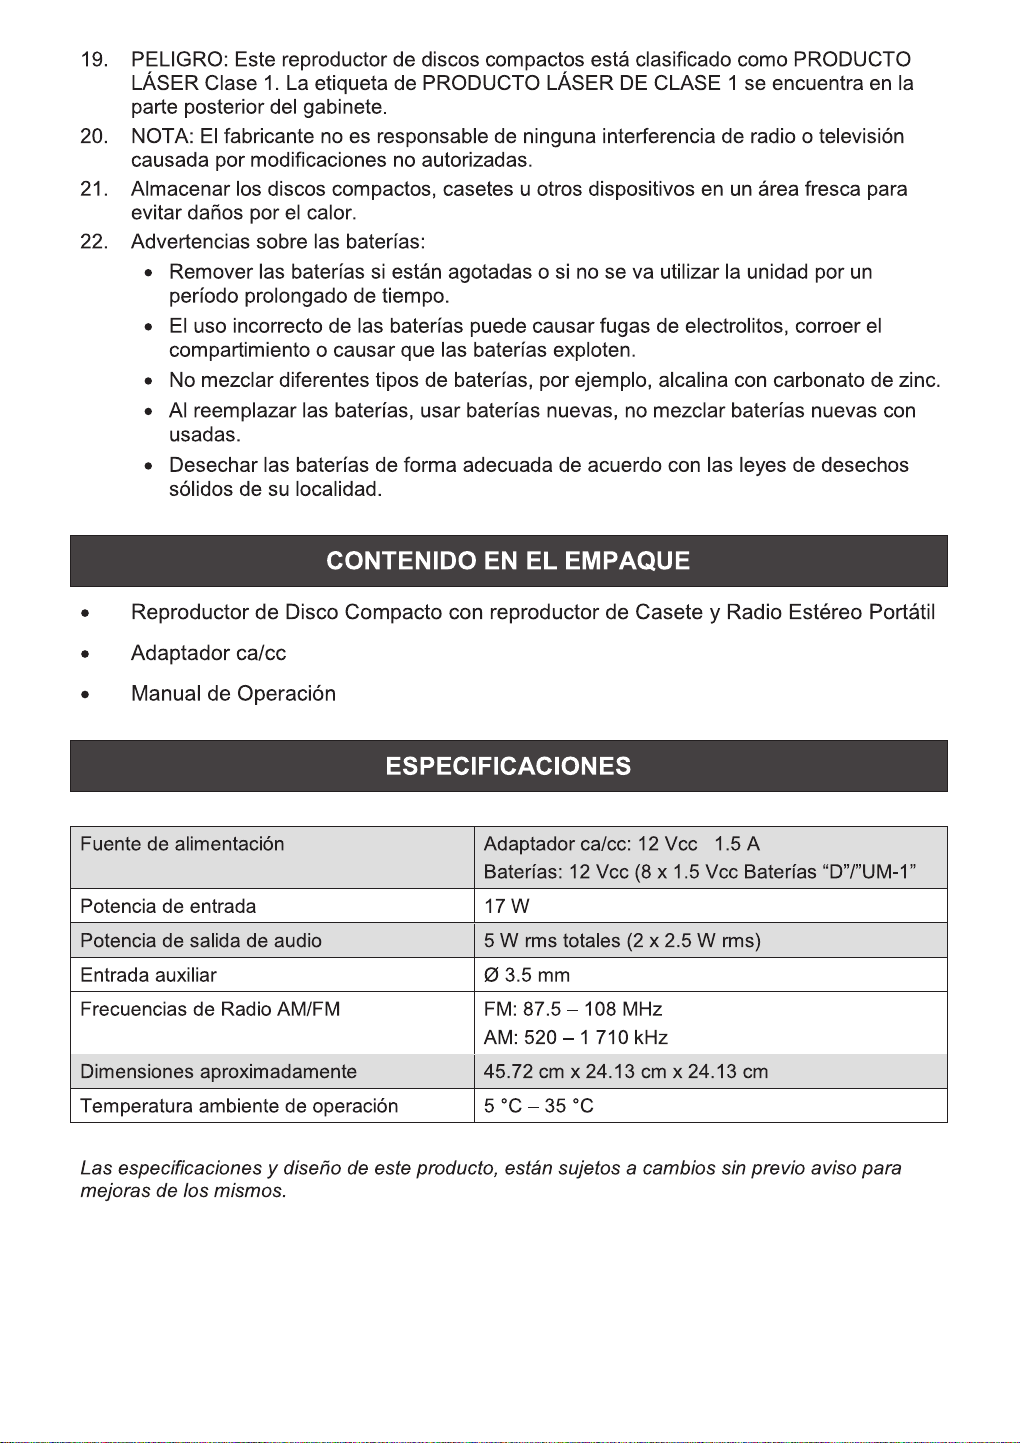
PACKAGE CONTENTS
Power Adapter .......... 1 Piece
User Manual .............. 1 Piece
DEVICE SPECIFICATIONS
NOTE: SPECIFICATIONS AND ACCESSORIES ARE SUBJECT TO CHANGE WITHOUT NOTICE
21. Store your CD or other devices in a cool
area to avoid damage from heat.
22.
•
•
•
•
Portable CD Player .......... 1 Piece
..........
..........
DC IN 12V 1.5A
DC 12V 1.5V UM-1/D x 8 Pieces
Power Consump�on
17 Wa�s
2.5W x 2
Total 5W RMS
Auxiliary Input Port
3.5 mm
FM: 87.5 - 108 MHz
AM: 520 - 1710 kHz
Length: 18 Inches
Width: 9.5 Inches
Height: 9.5 Inches
Opera�ng Temperature
41° - 95° F
Power Source
Audio Output of the Soundbar
Radio Frequency Range
Unit Dimensions (Approximate)

4
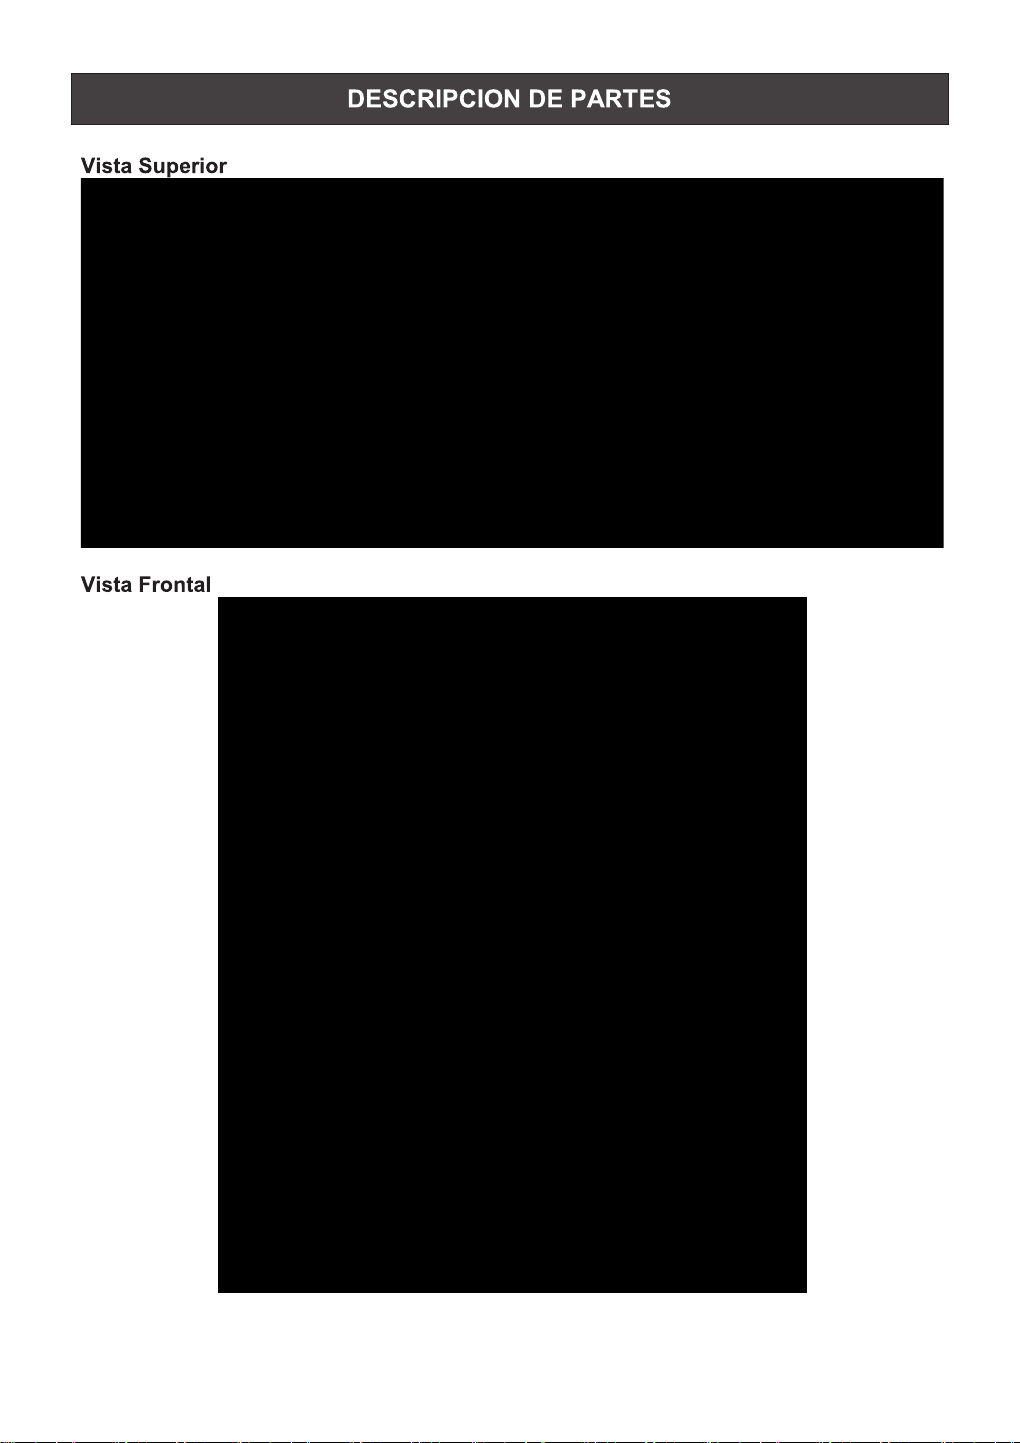
DEVICE FE
ATURES
Fr
ont View
Top View

5
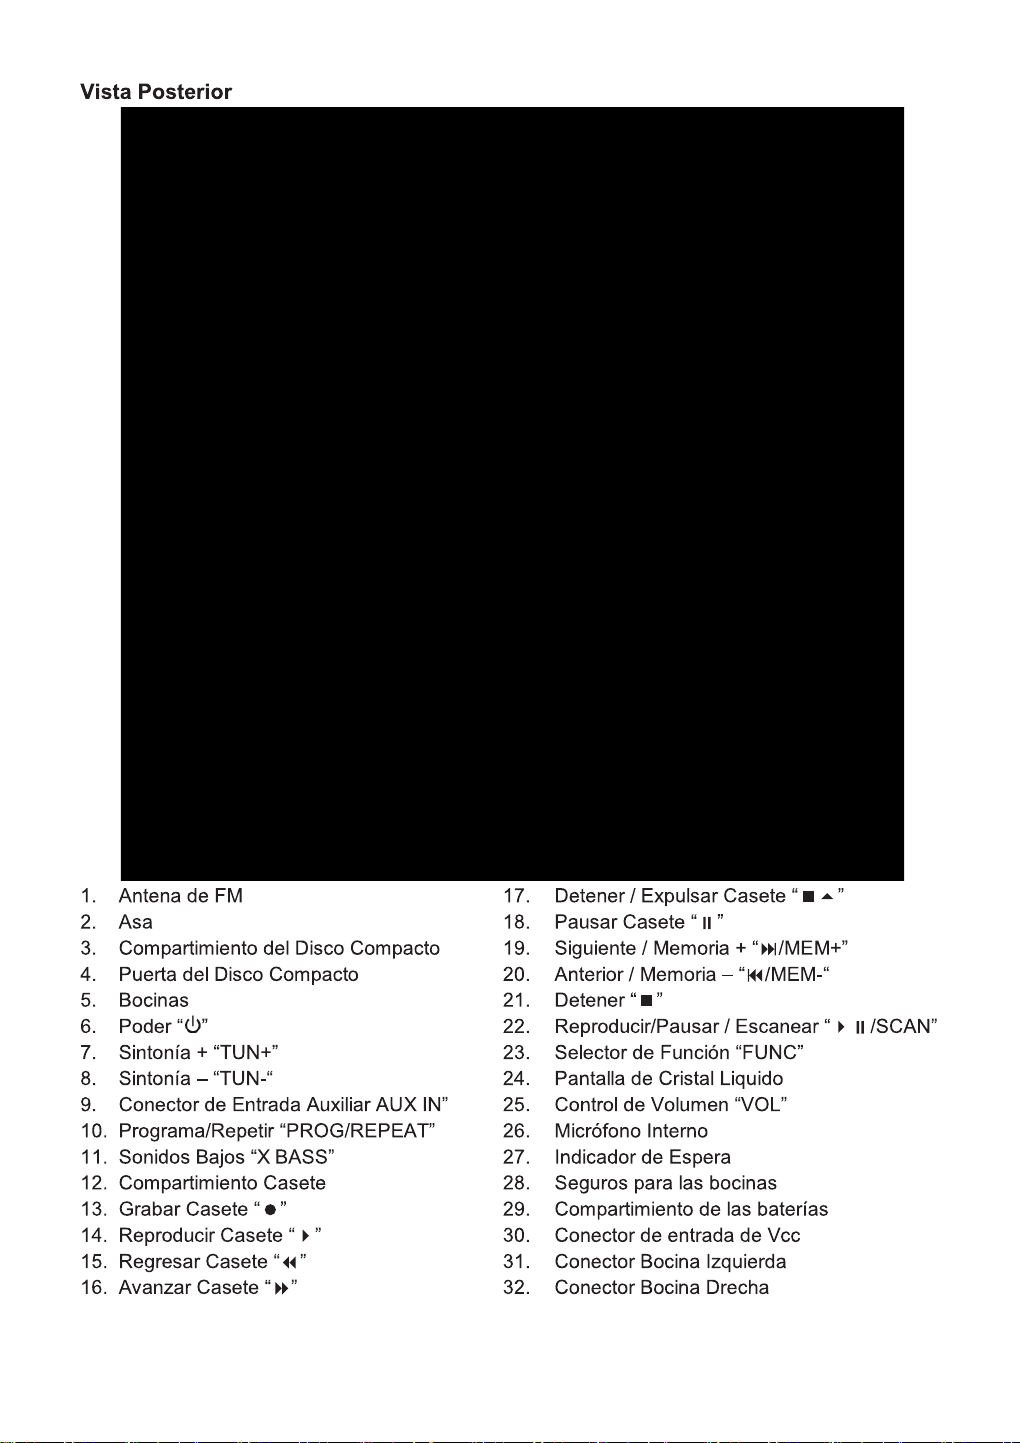
Rear View
1. FM ANTENNA
2. HANDLE
3. CD COMPARTMENT
4. CD DOOR
5. SPEAKERS
6.
BUT
TON
7. TUN. + BUTTON
8. TUN. - BUTTON
9. AUX IN JACK
10. PROG./REPEAT BUTTON
11. X.BASS BUTTON
23. FUNCTION BUTTON
24. LCD DISPLAY
25. VOLUME CONTROL BUTTON
26. BUILT-IN MICROPHONE
27. STANDBY INDICATOR
28. SPEAKER LATCH
29. BATTERY COMPARTMENT
30. DC IN JACK
31. SPEAKER INPUT (L)
32. SPEAKER INPUT (R)
12. CASSETTE COMPARTMENT
13. CASSETTE RECORD KEY
14. CASSETTE PLAY KEY
15. CASSETTE REWIND KEY
16. CASSETTE FAST FORWARD KEY
17. CASSETTE STOP/EJECT KEY
18. CASSETTE PAUSE KEY
19. /MEM.+ BUTTON
20. /MEM.- BUTTON
21. STOP BUTTON
22. /SCAN BUTTON

6
ABOUT THE SPEAKERS
• A
�ach the speakers when you want to travel with the unit.
•
The speakers can be installed a�ached to or detached from the main unit.
Detach the speakers and posi�on them as far away from each other as
possible in order to increase stereo separa�on.
• The t
op of the speaker rises one inch above the top of the main unit, and
•
1. Posi�on the speaker next to the main unit so that:
The four hooks on the main unit sit flush inside the rectangular indent on
the speaker.
2. Slowly slide the speaker down un�l the retaining tab on the speaker clicks into
the speaker latch on the main unit.
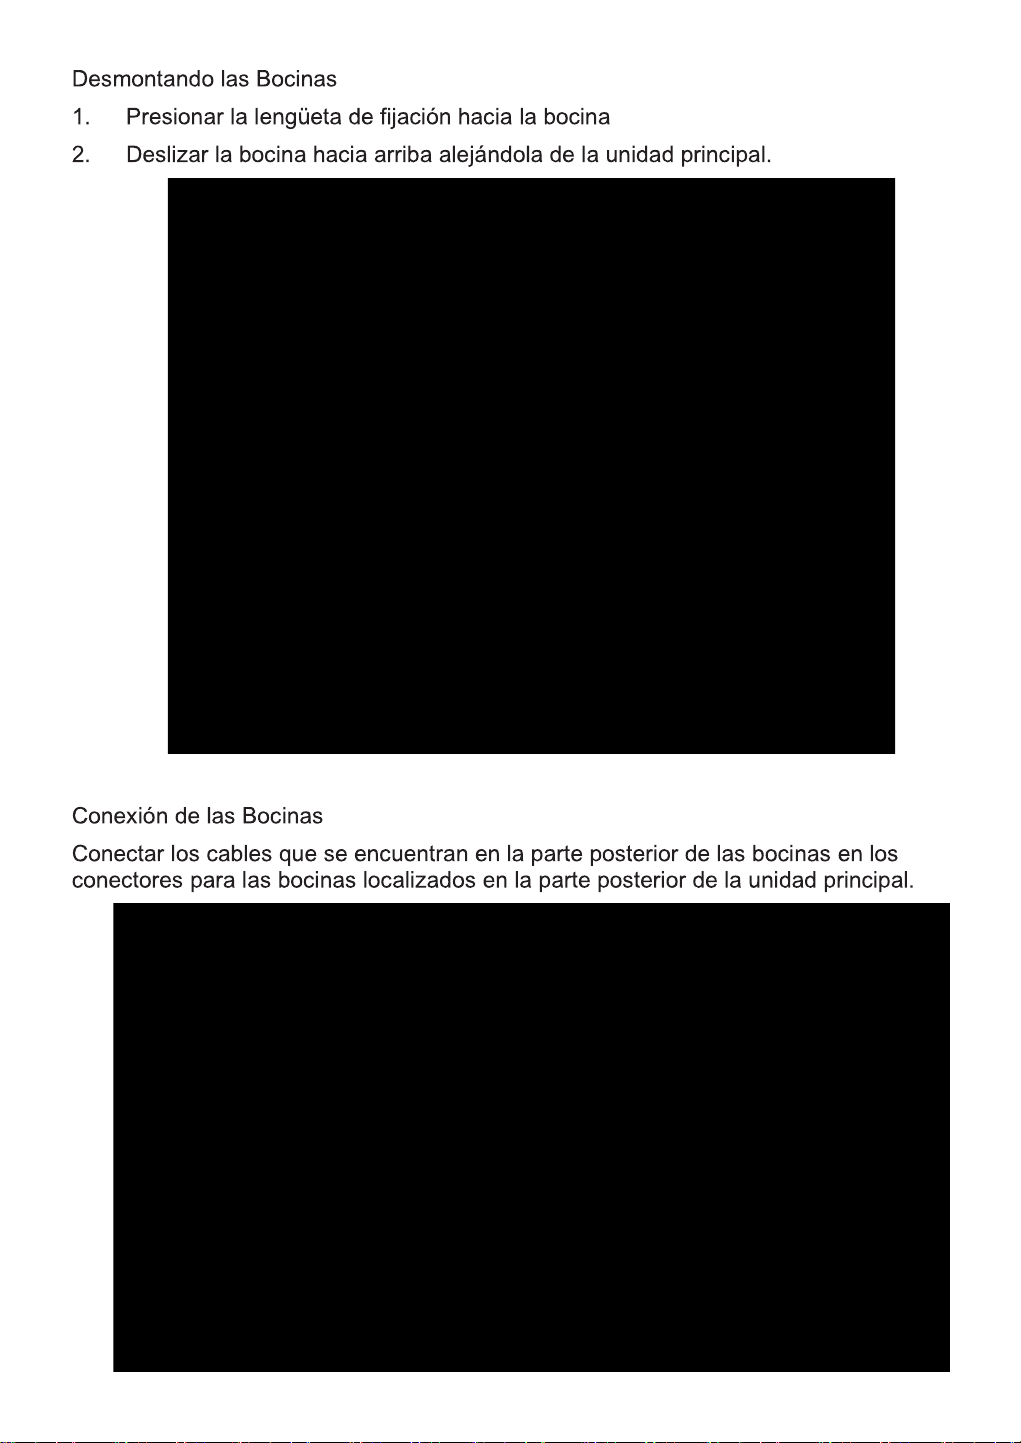
A�aching the Speakers

7
ABOUT THE SPEAKERS
De
taching the Speakers
1. Press the retaining tab down towards the speaker.
2. Slide the speaker up and then away from the main unit.
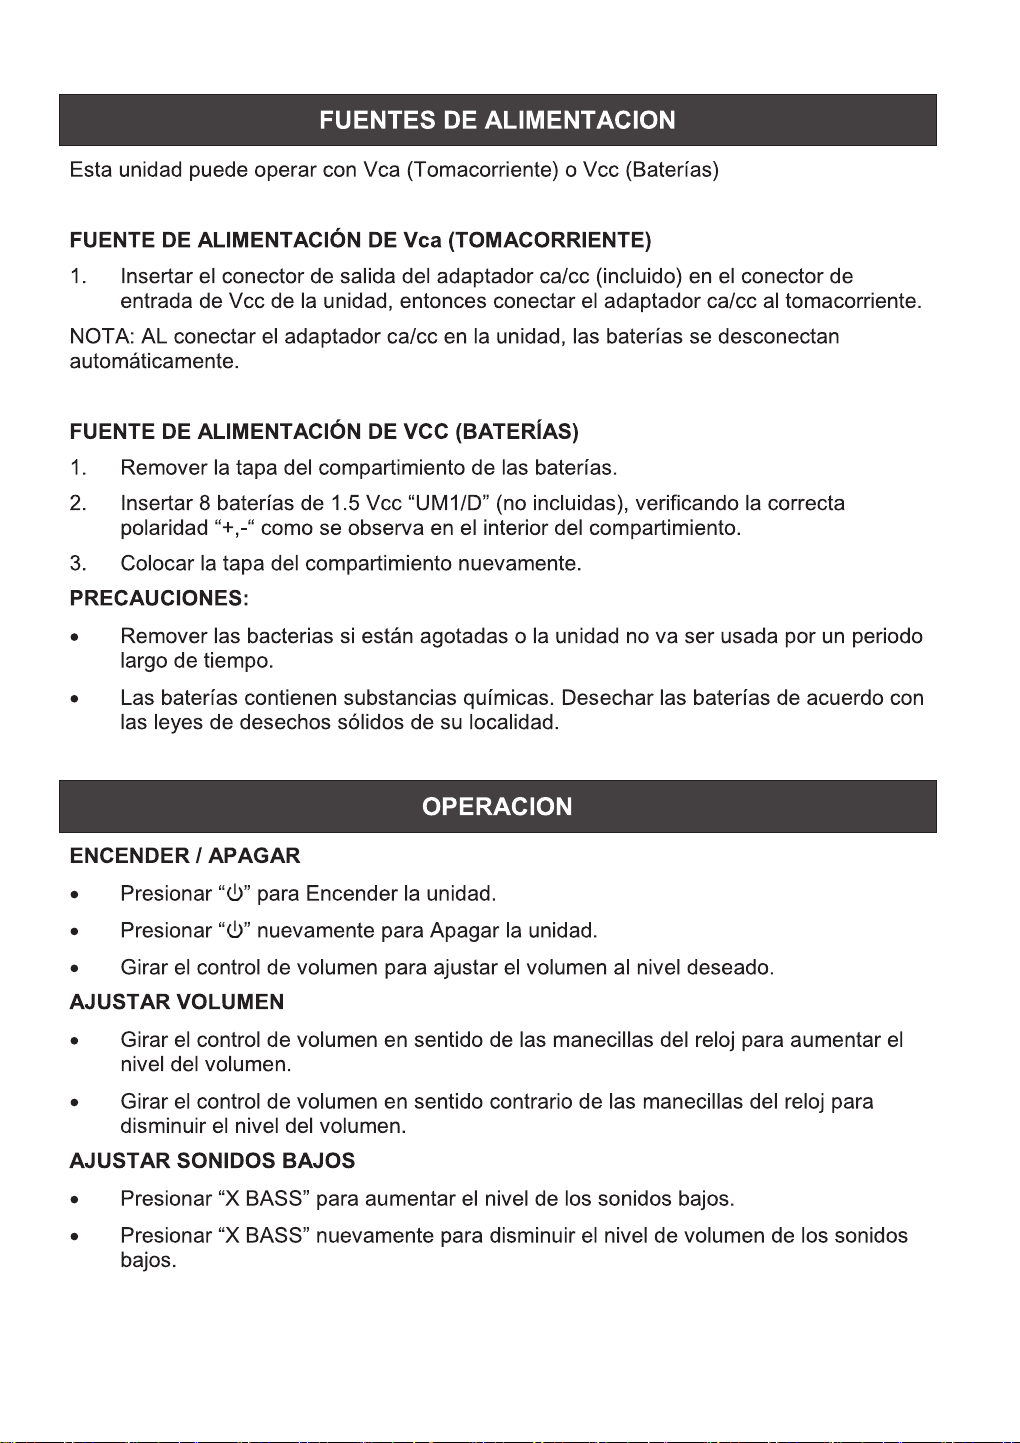
Connec�ng the Speak
ers
Plug the speaker cables running from the back of each speaker to the le�
and right speaker inputs found on the back of the unit.

8
TURN ON & OFF DEVICE
• T
o turn ON the device, press the
bu
on.
• T
o turn OFF the device, press the
bu
on again.
• T
o adjust the volume, rotate the volume control clockwise to increase the
volume and an-clockwise to decrease the volume.
ADJUST THE VOLUME
• R
otate the volume control dial clockwise to increase the volume
• R
otate the volume control dial an-clockwise to decrease the volume.
BASS ADJUSTMENT
• Pr
ess the X.BASS buon to increase the bass volume.
• Pr
ess X.BASS buon again to turn o increased bass volume.
AC POWER
• Connect the A
C/DC adapter to the device and into an AC wall outlet.
NOTE: Connecng to AC power automacally disengages the baery power
source.
BATTERY POWER
1. Open the door t
o the baery compartment.
2. Ins
tall a quanty of eight (8) UM-1/D size baeries (not included) into the
compartment. Make sure to install the baeries according to the indicated
posive and negave markings.
CAUTIONS:
• R
emove baeries if they are depleted or not being used for long periods.
• Ba
eries contain chemical substances. Dispose of empty baeries per
local laws and requirements.
OPERATING THE DEVICE
CONNECTING POWER

9
OPERATING MODES
USING THE CASSET
TE PLAYER
• RE
CORD - Press to record from the radio or CD/USB player.
• PLA
Y - Press to play cassees.
• REWIND - Fr
om stop mode, press to rewind the tape toward the
beginning.
• F
.FWD - From stop mode, press to advance the tape toward the end.
• S
TOP/EJ. - Press to stop the tape. Press to open the cassee compartment
when no buons are acvated.
• P
AUSE - Press to interrupt the tape play or record mode. Press two mes
to resume tape play or tape record mode.
PLAYING A CASSETTE TAPE
1. Pr
ess the FUNCTION buon on the unit to select TAPE mode.
2. Pr
ess the STOP/EJ. buon to open the cassee compartment door.
3. Insert a c
assee tape into the compartment with the open edge facing up
and the full reel on the right.
4. Close the door secur
ely.
5. Pr
ess REWIND or F.FWD to move the tape to the desired starng point.
6. Pr
ess the PLAY buon to begin playing the tape.
7. Adjus
t the volume to your desired listening level.
AUTOMATIC STOP FEATURE
When the cassee deck is operang in play or record mode and the end of
the tape is reached, the unit automacally shuts itself o and returns all
buons to the o posion.

10
RECORDING AUDIO FROM THE RADIO
1. Load a blank tape into the tape compartment and close the door.
2. Select the AM/FM functon mode. Use the Tuning butons to locate a staton.
3. Press the RECORD buon to begin recording. Note: The RECORD buon and
PLAY buon are depressed simultaneously.
4. Press the STOP/EJ. buons to end recording.
5. To hear what you recorded, follow instrucons in PLAYING A CASSETTE TAPE.
NOTE: PAUSE FOR A MOMENT - Using the PAUSE buon on the cassee deck
instead of the STOP/EJ. buons to momentarily interrupt recording gives you a
much clear recording. Press PAUSE key again to resume recording.
RECORDING AUDIO FROM CDs
1. Insert a blank cassee tape into the tape compartment.
2. Select the CD functon mode.
3. Load a CD and select the desired track you want to record.
4. Press PLAY/PAUSE buon to start playback. Press RECORD key to begin
recording. The RECORD buon and PLAY buon are depressed simultaneously.
5. Press the PAUSE buon to interrupt or edit a recording. Press it again to resume
the recording.
6. Press the STOP/EJ buon to end the recording.
RECORDABLE CASSETTE TYPES
Use only good quality cassees (IEC TYPE 1) for making recordings. The device
may be used to replay other types of cassees, but it is unable to properly record
on other types of cassees.
RECORDING FROM A BUILT--- IN MICROPHONE
1. Insert a blank cassee tape into the tape compartment.
2. Select the TAPE mode.
3. Press the RECORD buon to begin recording. The RECORD buon and PLAY
buon are depressed simultaneously. You can start the recording through the built
in MICROPHONE.
4. Press STOP/EJ. buon to stop the recording.
5. To hear what you recorded, follow the instrucons in PLAYING A CASSETTE
TAPE.

11
PROTECTING THE RECORDING
Normally, anything recorded on the tape is automacally erased when a new
recording is made. It is possible to protect your recording from accidental erasure
by removing the tabs found on the rear of the cassee.
• When the c
assee is held with the recorded side upper-most and the exposed
tape facing the front, the protecve tab will be found on the le rear of the
cassee.
• All pr
e-recorded cassees are protected in this way to prevent accidental
erasure of the commercial recording. “Protected” cassees will prevent the
record buon from being operated.
• If y
ou aempt to record and nd that this buon will not be depressed, never
force the mechanism or it may be damaged. Check that a cassee has been
loaded and that the tab has not been removed. Recording on a cassee from
which the tabs have been removed can be done by covering the tab openings
with a piece of adhesive tape.
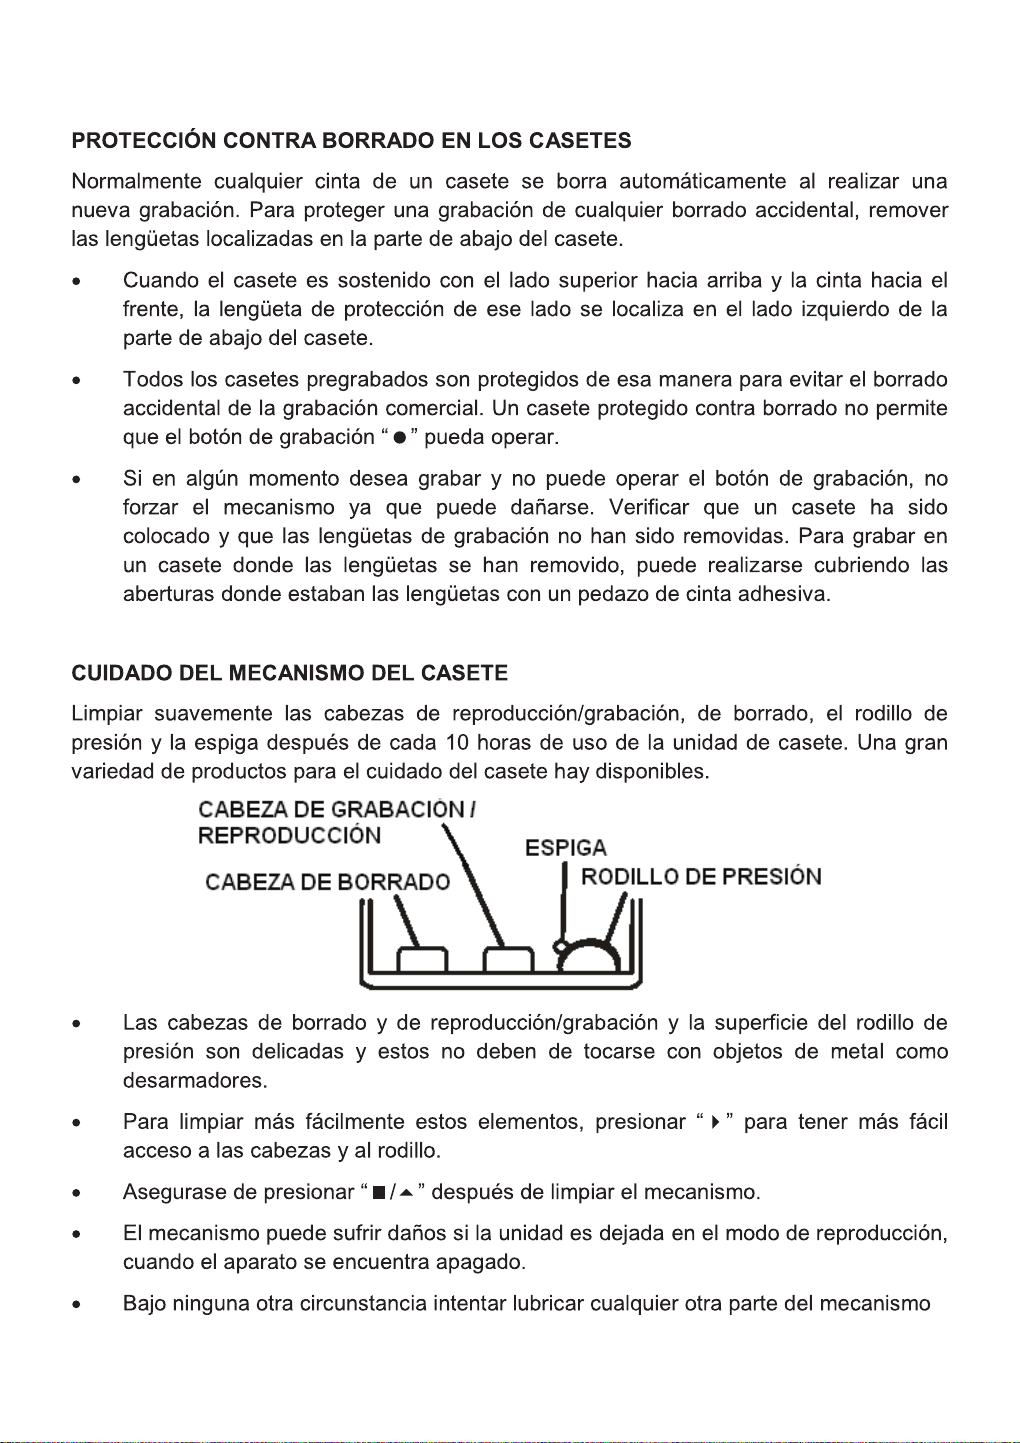
CARE OF THE CASSETTE MECHANISM
Gently clean the tape head and pinch wheel/capstan assemblies aer every 10
hours of using the unit. A range of cassee care products are available.
• The erase head, record/play head, and the surface of the pinch roller are
delicate and must not be touched with metal objects, such as screwdrivers.
• Y
ou may nd it easier to clean the assembly by pressing the PLAY buon to
move the bright head and pinch roller into view.
• Be sur
e to press the STOP buon aer cleaning the mechanism.
• Damag
e to the pinch roller can occur if the unit is le in PLAY mode with the
power switch o.
• Under no cir
cumstances should you aempt to lubricate any part of the
machine.

12
CD OPERATION
CD TYPES
This de
vice can only play digital audio CDs, nalized digital audio CD-Recordable (CD-R)
discs, nalized digital audio CD-Rewritable (CD-RW) discs, and CD-DA format digital audio
CD/CD-R/CD-RW discs.
LOADING A DISC
1. Select CD Mode b
y pressing the FUNCTION buon
.
2. Pr
ess the OPEN/CLOSE buon to open the CD door, “OP” will be shown on the display
3. Place an audio CD DISC in
to the tray with the front side facing up.
4. Close the CD door
.
5. T
o remove the CD, press the STOP buon to stop playback, press OPEN/CLOSE buon
to open CD door, the display will show “OP”. Hold the CD by its edges, and carefully
take it out.
NOTES:
• Mak
e sure the disc is stopped before opening the CD DOOR.
• T
o ensure good system performance; wait unl the unit completely reads the disc
before proceeding.
• If no disc is loaded in
to the tray, or if the disc is unreadable, the display will show
“NO”.
PLA
YING A DISC
1. To start playback, press the /SCAN buon.
• T
o interrupt playback, press the /SCAN buon.
• T
o resume playback, press the /SCAN buon again.
2. T
o stop playback, press the STOP buon.
3. T
o select a desired track, press the /MEM- or /MEM+ buons to select the next or
previous tracks.
4. T
o fast forward or reverse the track, press and hold the /MEM- or /MEM+ buons.
Release to play at the desired me.

13
PROGRAM TRACKS
Pr
ogramming tracks of disc are possible when playback is stopped. Up to CD 20 tracks can
be stored in the memory in any order.
1. In s
top mode, press the
PROG./REPEAT buon
. The P01 will ash on the displa
y.
2. Pr
ess the /MEM- or /MEM+ buons to select the rst desired track to be
programmed. Press the
PR
OG./REPEAT
bu
on to store the track. The display will
change to show P02.
3. R
epeat steps 1 & 2 to store other desired tracks.
4. Pr
ess the /SCAN buon buon to start playback from the rst programmed track.
5. Pr
ess the STOP buon to stop program playback. To clear the program, press the STOP
buon when the disc is stopped and open the CD compartment lid. The program will
be erased.
REPEAT PLAY
T
o Repeat a Single Track
1. When in pla
y mode, press the
PR
OG./REPEAT buon. The icon
will ash on the
displa
y. The current track will be played repeatedly unl you press the STOP buon.
2. T
o cancel repeat play, press the
PR
OG./REPEAT buon unl the icon stops
ashing on the display.
T
o Repeat All the Tracks
1. When in pla
y mode, press the
PR
OG./REPEAT buon twice.
The ic
on will be
displayed. The tracks will be played repeatedly unl you press the STOP buon.
2. T
o cancel repeat play, press the
PROG./REPEAT buon
un
l the icon is no
longer displayed.
RANDOM PLA
Y
1. When in pla
y mode, press the
PR
OG./REPEAT buon
un
l RAND is displayed.
Random play will start automacally, and will connue to play random tracks unl all
tracks are played. You can press the buon to change tracks.
2. T
o cancel random play, press the
PR
OG./REPEAT buon
un
l RAND is no longer
displayed.

15
A
UXILIARY INPUT OPERATION
This unit includes an A
UX-IN jack, which can be used to connect and amplify external
audio sources.
1. Pr
ess the FUNCTION buon to select “AUX” mode.
2. Connect one end of the audio c
able into the AUX-IN jack and the other end to the
AUDIO OUT jack of the external audio source.
3. Adjus
t the volume of the main device to your desired level.
NOTE: In Aux-in mode, Play/Pause and Next/Previous track are controlled by the
connected external device.
RADIO AUTO SCAN (SEARCH)
1. Pr
ess and hold the /SCAN buon. The device will automacally scan the radio unl
nding a strong signal. The device will start to broadcast from the P01 aer searching
is nished.
2. Use the /MEM- or /MEM+ bu
ons to choose between the preset staons.
RADIO S
TATION MEMORY OPERATION
You can store up to 20 FM and 20 AM radio statons in memory for your preference.
1. Pr
ess the TUN.+ or TUN.- buons to select the rst desired staon. Then press the
PR
OG./REPEAT buon
on the unit. P02 will sho
w on the display.
2. Use the /MEM- or /MEM+ bu
ons to choose the desired sequence you want to
store, then press the
PROG./REPEAT buon
on the de
vice to conrm.
3. Sear
ch another staon, repeat steps (1) & (2) unl all desired staons stored. Up to 20
staons can be programmed.
4. T
o choose between the stored staons, press and hold the /MEM- or /MEM+
buons.
Tel: (866 )-411-6292

EPB-4000
BOOMBOX ESTÉREO
PORTÁTIL DE CD Y
CASETE
2
3
4
5

6
7
8

9
10
11
12
13
14
15
16
Tel: (866 )-411-6292