HJ-Customer-Service@outlook.com
EST 9:00AM--17:00PM
6269443420 | 6267435564
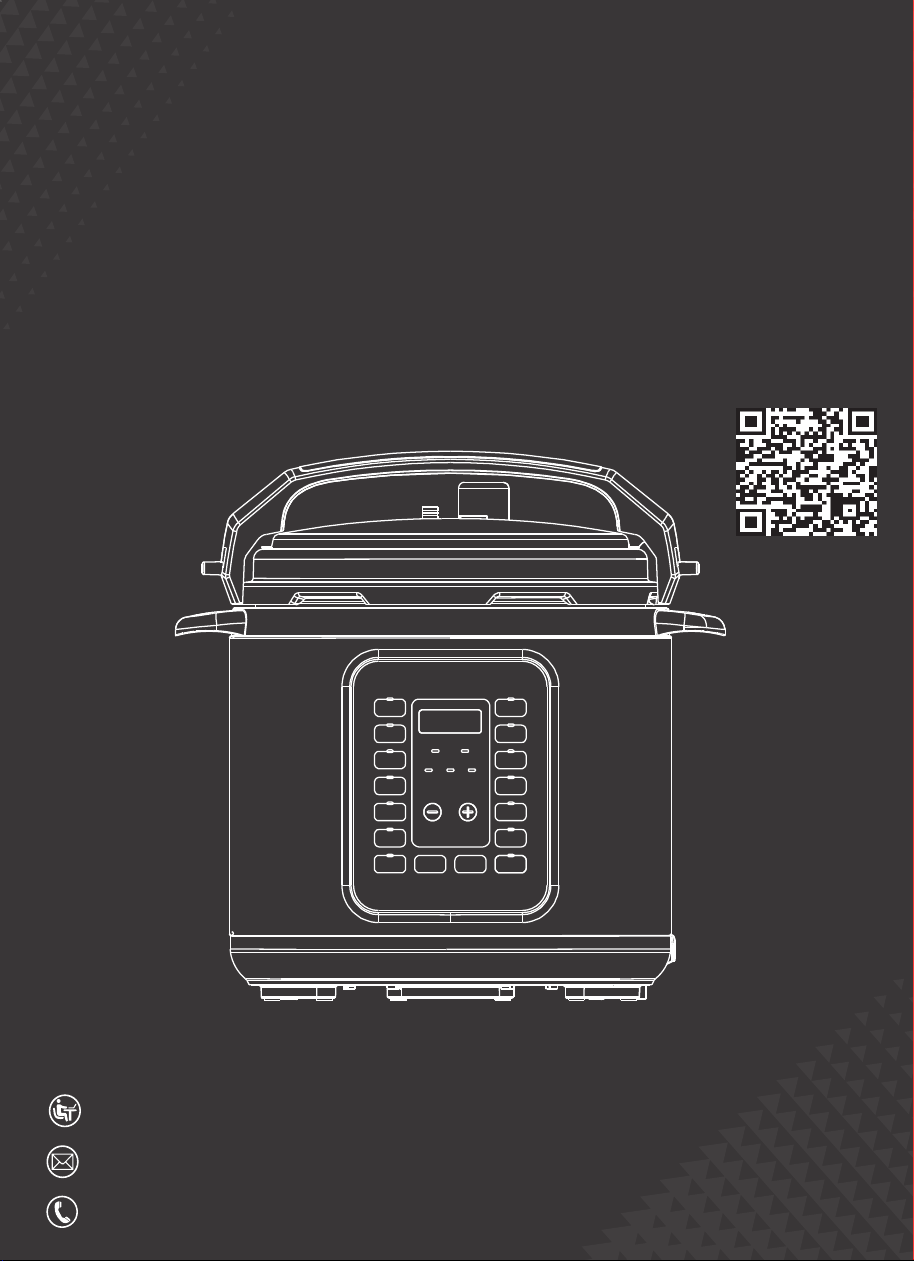
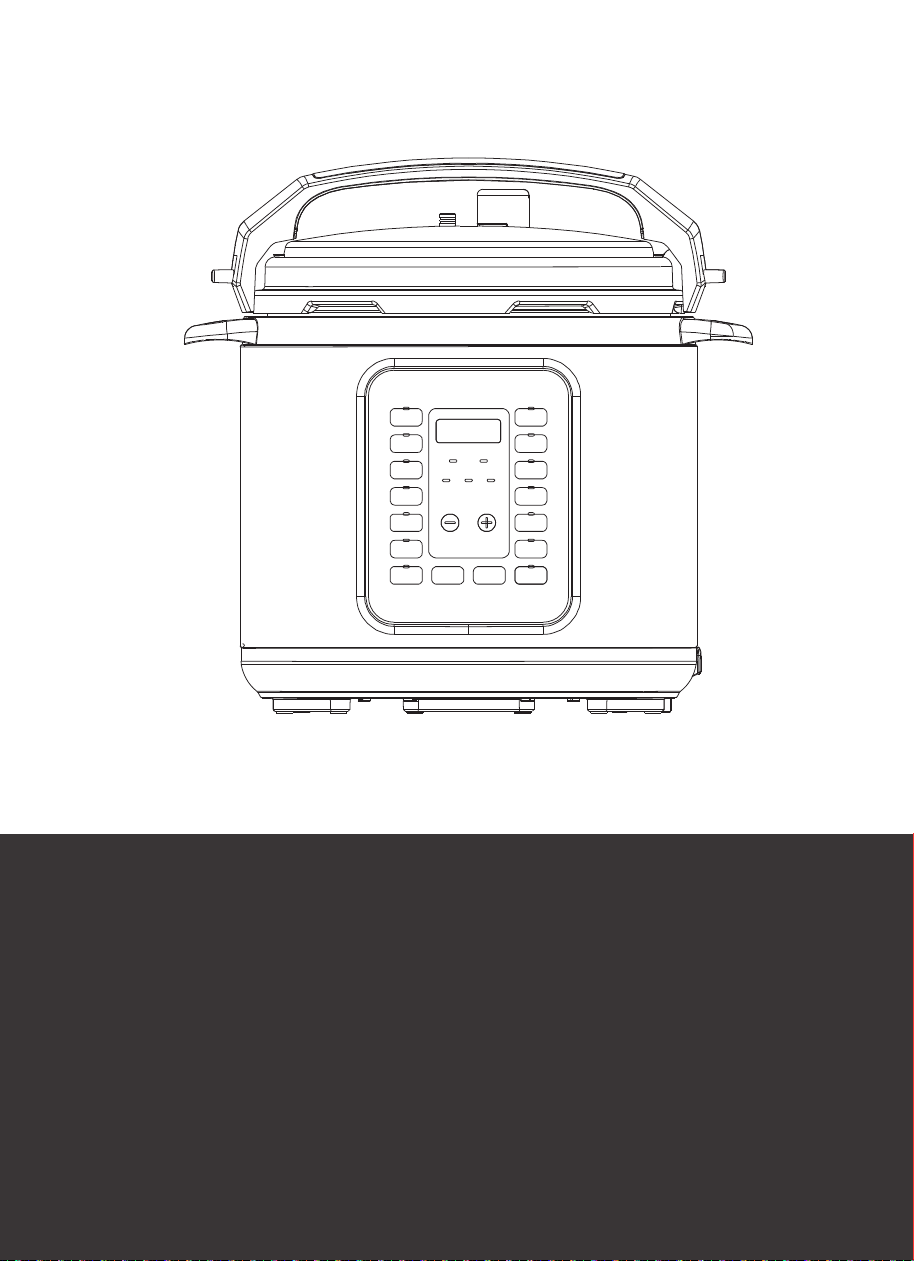
Electric Pressure
Cooker
Instruction Manual
AH-YLG6JBD
MODEL: M-60F6
M-80F6


CONTENTS
Specifications
Important Safeguards
Product Overview
1
1
3
Control Panel Introduction
7
4
Before the First Use
5
Cooking Preparation
7
Cooking Programs
Cleaning and Maintenance
10
Troubleshooting
10
Warranty Information
11
15. Unplug the appliance from the power outlet when not in use and before cleaning. Allow the unit to
cool before putting on or removing parts, and before cleaning. To disconnect, turn all controls to OFF,
then remove the plug from the power outlet.
16. Do not operate this appliance if the cord or plug is damaged, or if the appliance malfunctions or has
been damaged in any manner.
17. Use only accessories and parts recommended by the manufacturer. Cooking should be done only
in the provided inner pot.
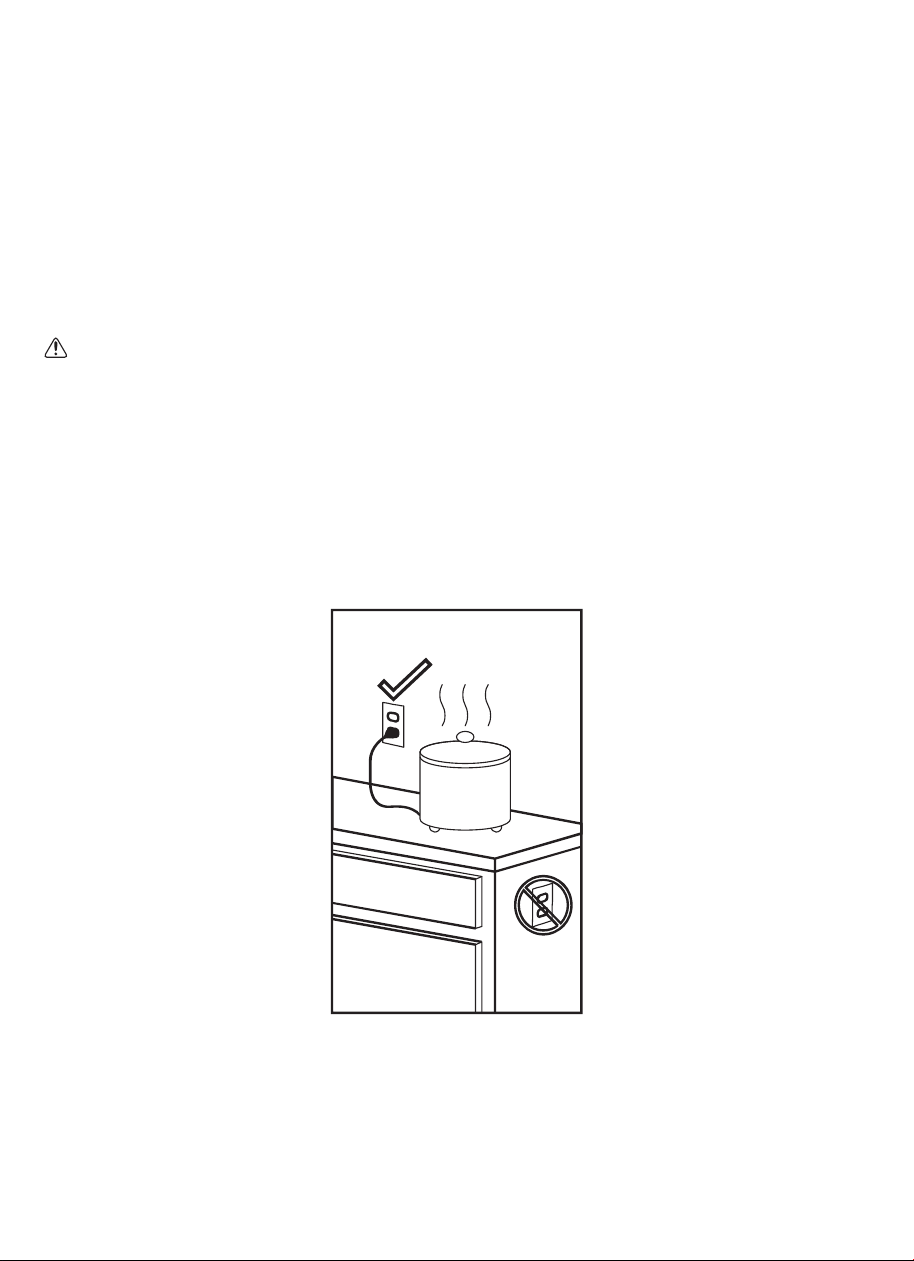
18. Do not let the cord hang over the edge of a table or counter, or touch hot surfaces.
2
Electrical Safety Precautions
WARNING: Electrical Shock Hazard
1. This appliance is equipped with a polarized plug (one blade is wider than the other) to reduce the
risk of electric shock. The plug will fit into a polarized outlet only one way. Do not defeat the safety
purpose of the plug by modifying it in any way or by using an adapter. If the plug does not fully fit
into the outlet, reverse the plug. If it still does not fit, contact a qualified electrician to replace the
outlet.
2. The length of the power cord is selected to reduce the risk of entanglement or tripping. To avoid
overloading the electrical circuit, do not operate another high-wattage appliance on the same circuit.
3. Never drape the cord over the edge of a counter, use an outlet below the counter, or use this
appliance with an extension cord.
4. Spilled food may cause serious burns. Keep the appliance and cord out of children’s reach.
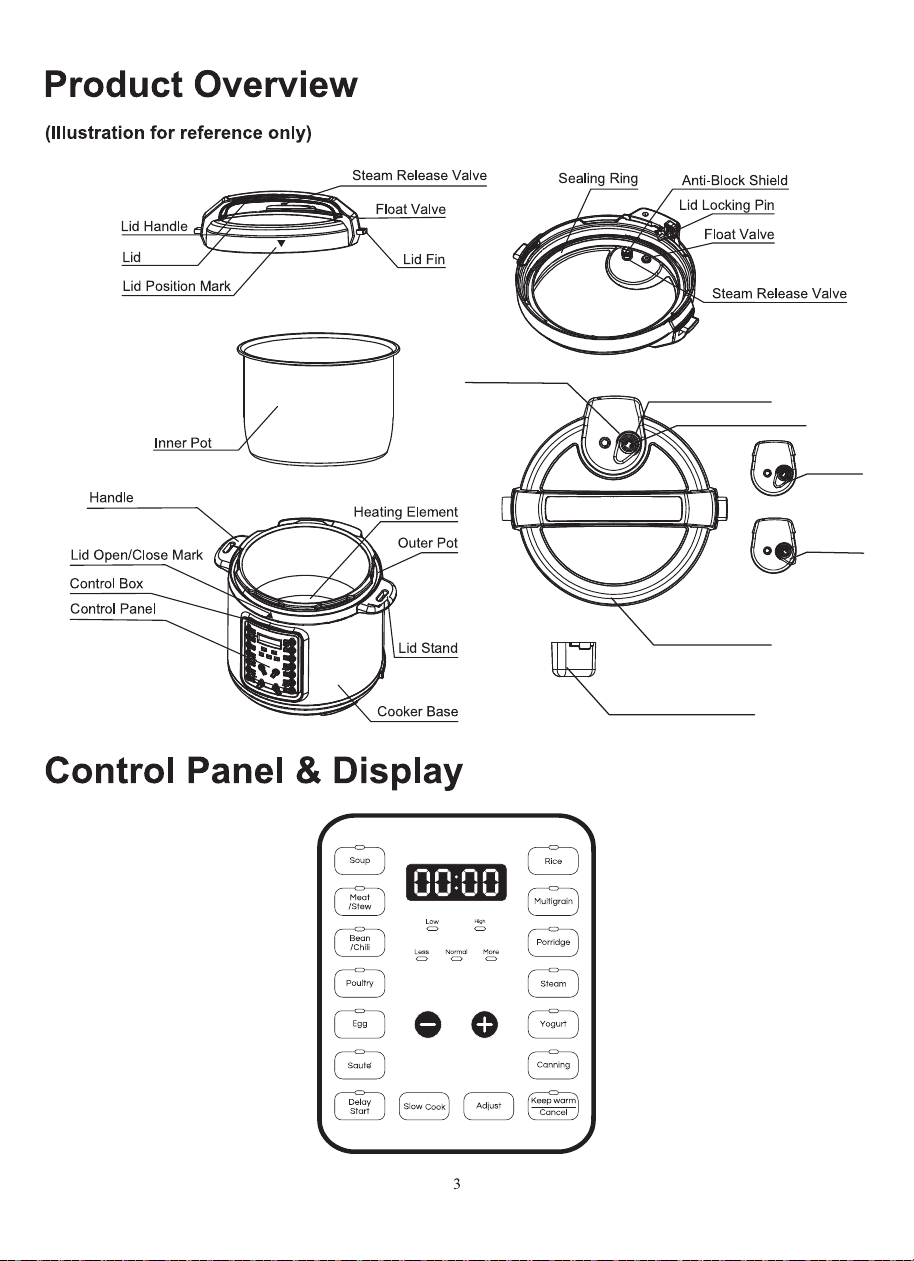
Sealing Position
Steam Release Valve
Venting Position
Lid Position Mark
Sealing
Venting
Condensation Collector
Before the First Use
4
1. Remove all accessories from the package and read this manual carefully.
2. Wash the inner pot and the inside of the lid with warm, soapy water. Rinse and dry thoroughly.
3. Wipe the outside of the cooker base with a clean, damp cloth. Never immerse the cooker base
in water or any other liquid.
4. Do not clean the cooker base and outer pot in the dishwasher. The lid and sealing ring can be
washed in the dishwasher. Make sure they are fully drained after washing.
Install the Condensation Collector
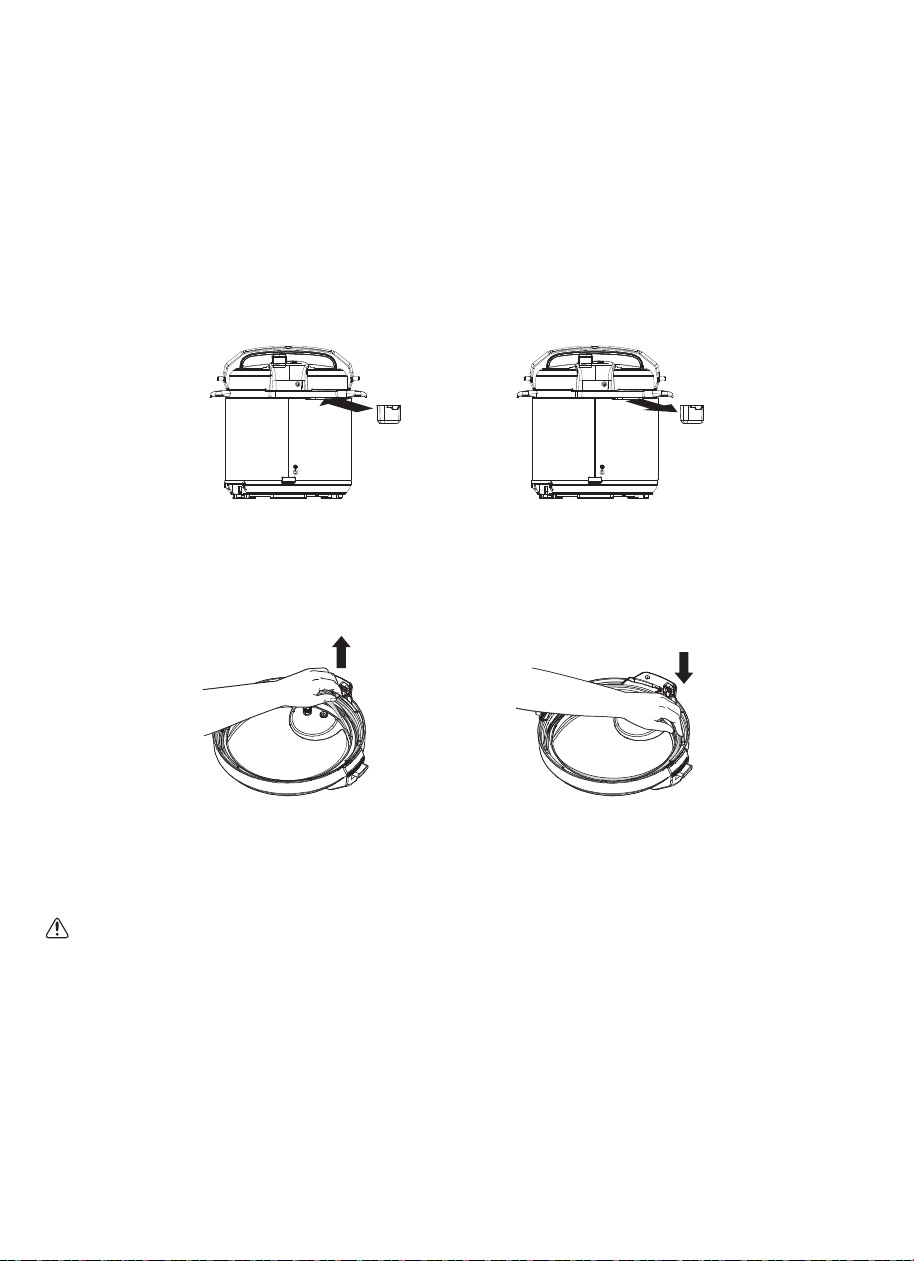
Slide the condensation collector into the slot on the cooker base. Remove for cleaning.
Remove and Install the Sealing Ring
To remove, gently pull the sealing ring outward from the slots inside the lid.
To reinstall, press the sealing ring back into the slots, making sure it is seated evenly.
The ring can be installed with either side facing up.
WARNING:
1. Before each use, check that the sealing ring is properly seated.
2. After use, remove any food debris from the sealing ring.
3. Keep the sealing ring clean to prevent odors. Washing in warm, soapy water or in the dishwasher
can remove most odors. Some smell from acidic foods is normal.
4. Never pull the sealing ring forcefully, as this may deform it and affect the pressure seal.
5. Replace the sealing ring immediately if it is cracked, cut, or otherwise damaged.

Safe Steam Release
5
Before opening the lid, ensure the pressure cooking program has ended, or press the “Keep
Warm/Cancel” button to stop it. Then release the pressure using one of the following methods:
a) Quick Release
Turn the “steam release valve” to the “Venting” position and release steam until the “float valve”
drops.
Caution:
1. Keep hands and face away from the steam vent while releasing steam. Escaping steam is hot and
can cause burns.
2. Never pull out the steam release valve while it is venting steam.
3. Quick release is not recommended for foods with a high liquid content or high starch content (e.g.,
porridge, congee, soups, or sticky liquids), as food may splatter.
b) Natural Release
Allow the cooker to cool naturally until the float valve drops. This may take 10 –15 minutes or longer,
depending on the amount of food. After cooking, the cooker will enter Keep Warm mode.
Tip: Placing a damp towel over the lid may help speed up cooling.
How to Open the Lid
To prevent vacuum suction, turn the Steam Release Valve to the Venting position to let air in. Hold
the lid handle, turn the lid counterclockwise to the open position, and lift the lid.
Caution:
1. Do not open the lid until all pressure inside the pot has been fully released. The lid is equipped with
a safety mechanism and will not open until the float valve drops.
2. If the float valve is stuck due to food residue or sticky liquid, gently push it down with a pen or
chopstick only after confirming that all pressure has been completely released.
3. Never force the float valve to open the lid. Do not open the lid until the pressure has been fully
released, either naturally or manually via the steam release valve.
Cooking Preparation
① Open the Lid
Hold the lid handle and rotate it approximately 30° counterclockwise until the “▼” mark on the lid aligns
with the “▲” (Open) mark on the top rim of the outer pot.
② Check Lid Components
• Check the float valve and steam release valve for obstructions.
• Make sure the sealing ring is properly seated.
• Verify that the float valve moves up and down freely.
③ Add Food and Liquid
• Remove any food residue and wipe the outer surface of the inner pot and the heating plate inside the
cooker base dry.
• For all pressure cooking programs, the total amount of food and liquid should never exceed 2/3 of the
inner pot capacity.

• When cooking foods that expand during cooking (e.g., rice, beans, dried vegetables), do not fill more
than 1/2 of the inner pot capacity.
• Overfilling may clog the steam release valve and cause excess pressure, leakage, personal injury, or
damage to the appliance.
• For non-pressure cooking programs, do not exceed the MAX line.
④ Place the Inner Pot in the Cooker Base
Place the inner pot in the cooker base and rotate it slightly to ensure full contact with the heating
element.
⑤ Close the Lid Completely
• Place the lid on the cooker, aligning the “▼” mark on the lid with the “▲” (Open) mark on the top rim
of the outer pot.
• Rotate the lid clockwise approximately 30° until the “▼” mark aligns with the “▲” (Close) mark on the
top rim of the outer pot.
Caution:
• For the following programs, the lid must be completely closed: Soup, Meat/Stew, Bean/Chili, Poultry,
Egg, Rice, Multigrain, Porridge, Steam, and Canning. If the lid is not properly closed, the display
will flash "Lid".
• For Slow Cook and Yogurt, the lid may be open or closed.
• For Sauté, the lid must remain open. If it is closed, the display will flash "Lid".
⑥ Position the Steam Release Valve
• It is normal for the steam release valve to be loose. It operates by weight and rests on top of the steam
release outlet.
• The steam release valve can be removed for cleaning by pulling it straight out.
• For all programs except Keep Warm, Sauté, Slow Cook, or Yogurt, turn the steam release valve to
the “Sealing” position to ensure the cooker is sealed.
• The Sauté program must be used without the lid. Slow Cook, Yogurt, and Keep Warm programs may
be used with or without the lid.
Caution:
When using Keep Warm, Yogurt, or Slow Cook with the lid closed, the steam release valve must be
set to the “Venting” position.
6

Control Panel Introduction
7
Adjusts the cooking time for all cooking programs except Sauté, Egg, Slow Cook, and Keep Warm.
Adjusts the cooking time or delay start time. lt is recommended not to adjust the cooking time for Rice,
Multigrain, and Sauté programs.
Toggles the slow cook temperature setting between High and Low.
Press this button during programming or operation to cancel the current program and return the cooker
to standby mode.
When the cooker is in standby mode, press this button to activate the Keep Warm function.
Delays the start of a cooking program. To use, select a cooking program (except Sauté, Yogurt, and
Keep Warm), then press Delay Start. Use “+” or “–” to set the delay time in hours.
The delay time indicates how long the cooker will wait before starting the program. Allow sufficient time
for cooking and cooling before serving. The maximum delay time is 24 hours.
Refer to “How to Set Delay Start” (Page 8-9) for details.
Used for home canning of vegetables or fruits only. Use the button to set the cooking time as
needed.
Caution:
This function is intended for vegetable or fruit canning only. Do not use it for meat canning.
Cooking Programs
Select the appropriate cooking program as needed:
Soup, Meat/Stew, Bean/Chili, Poultry, Egg, Sauté, Rice, Multigrain, Porridge, Steam, Yogurt
The following instructions apply to the Soup, Meat/Stew, Bean/Chili, Poultry, Egg, Rice, Multigrain,
Porridge, Steam, and Canning programs.
① Follow the steps in “Cooking Preparation.”
② Select a cooking program (for example, Soup). When a program button is pressed, the indicator
light turns on. Within 5 seconds, you may select a different program or adjust the cooking time.
③ Select the Cooking Time.
• Press repeatedly to cycle through the Less, Normal, and More settings. The selected setting
appears on the display.
• If needed, use + or – to fine-tune the cooking time. Press and hold either button for faster
adjustment.
• The preset cooking times are suitable for most foods. Adjust the time as needed based on food
type, quantity, and desired texture.
How to Pressure Cook
&

• As pressure builds inside the cooker, a small amount of steam may escape from the float valve
until it rises. This is normal.
• Once pressurized, the cooking time will begin counting down. During this stage, steam should not
escape from the lid, although occasional small amounts of steam from the steam release valve are
normal.
• Soft clicking sounds may be heard during operation. This is normal and part of the pressure
regulation process.
• At any time during cooking, you can cancel the current program and return the cooker to standby
mode by pressing the Keep Warm / Cancel button.
⑤ Cooking complete
• When the pressure cooking cycle finishes, the cooker beeps and automatically enters the Keep
Warm mode. The timer counts up for up to 24 hours, after which the cooker switches to standby
mode.
• It is not recommended to keep cooked rice in Keep Warm mode for extended periods, as this may
affect its texture.
• To serve food, press the Keep Warm / Cancel button to stop the Keep Warm cycle, then open the
lid following the “Open the Lid” instructions (Page 5) in this manual.
8
How to Slow Cook
Follow the steps in the “Cooking Preparation” section of this manual. Ensure the steam release valve
is set to the “Venting” position.
① Select the Slow Cook program. Press the Slow Cook button repeatedly to switch between the High
and Low settings.
② Use + or – to set the cooking time from 1 to 10 hours.
Caution: Improper time settings may result in undercooked or overcooked food.
③ When cooking is complete, the cooker beeps and automatically enters Keep Warm mode for up to
24 hours.
How to Set Delay Start
This model features a Delay function that allows you to postpone the start of cooking for up to 24 hours.
The Delay function cannot be used with the Keep Warm, Yogurt, or Sauté programs.
① Follow the steps in “How to Pressure Cook” or “How to Slow Cook” to select a cooking program.
② Within 5 seconds of selecting a program, press the Delay button to set the delay time. Use + or – to
adjust the delay in hours. The displayed time indicates how long the cooker will wait before starting.
Ensure there is sufficient time for cooking and cooling before serving.
③ 5 seconds after the last button press, the Delay function activates. The display begins counting down,
and the Delay indicator changes from flashing to solid.
④ Cooking begins automatically when the delay timer reaches zero. After cooking is complete, the
cooker enters Keep Warm mode.
④ Start Cooking
• Cooking will start automatically 5 seconds after the last button press.
• A beep will sound to indicate that cooking has begun. The display will show “ ,” indicating that
the unit is in the preheating stage.
Note: Preheating time may vary depending on the type, quantity, and temperature of the food (fresh
or frozen).
Note: When opening the lid, the inner pot may stick to the lid due to a vacuum effect. If this occurs,
turn the steam release valve to the “Venting” position to allow air in while lifting the lid.

Canceling Delay:
Press the Keep Warm / Cancel button at any time to cancel the delayed start.
How to set Keep Warm
① In standby mode, press the Keep Warm / Cancel button to activate the Keep Warm function. The
Keep Warm indicator turns on, and the display shows the preset time.
② Use + or – to adjust the time from 1 to 24 hours.
③ The countdown begins when Keep Warm starts.
④ When the countdown ends, the cooker returns to standby mode.
9
How to Use Sauté
Follow the “Cooking Preparation” instructions. Keep the lid open to prevent pressure buildup.
① Plug the cooker into a power outlet and press the Sauté button. For safety, each Sauté cycle runs
for a maximum of 30 minutes. Press the Sauté button again if additional time is needed.
② The lid must remain open during Sauté. If the lid is accidentally closed, the display will flash “Lid” to
indicate an incorrect lid position.
Caution: Partially closing the lid during Sauté may cause pressure to build up, which can be
hazardous.
③ Heating starts automatically 5 seconds after the last button press. You can cancel the Sauté program
at any time by pressing the Keep Warm / Cancel button.
How to Make Yogurt
③ Press the Yogurt button to start fermentation. The cooker will beep when the program is complete.
2. Using Pasteurized (Boxed) Milk
① Pour the pasteurized (boxed) milk into a container or jar. Add a small amount of fresh yogurt and stir
well.
② Place the container on the steam rack inside the inner pot.
③ Press the Yogurt button. The program starts automatically after 5 seconds.
④ When the program is complete, the cooker beeps and returns to standby mode.
This cooker supports yogurt making using either raw milk or pasteurized (boxed) milk.
1. Using Raw Milk
① Heat the raw milk to 100°C / 212°F to sterilize it. This step:
• Kills harmful bacteria
• Denatures milk proteins, which improves fermentation and yogurt texture
To heat the milk:
• Add 1 cup of water to the inner pot.
• Place the steam rack(not included) inside the pot.
• Place the container(not included) or jar with milk on the rack.
• Select the Steam program and set the time to 1 minute.
• When the cycle is complete, allow pressure to release using the Natural Release method.
② After the milk has cooled to the appropriate temperature, add the yogurt starter (lactic acid bacteria)
and stir well.
10
Cleaning and Maintenance
Clean the cooker after each use. Wipe the inner rim of the cooker base and the slots with a dry cloth to
prevent rust.
Warning: Always unplug the appliance and allow it to cool before cleaning.
Inner Pot and Lid:
Remove the lid and inner pot. Wash with mild detergent, rinse thoroughly, and dry with a soft cloth. The
inner pot is dishwasher safe.
Lid and Sealing Ring:
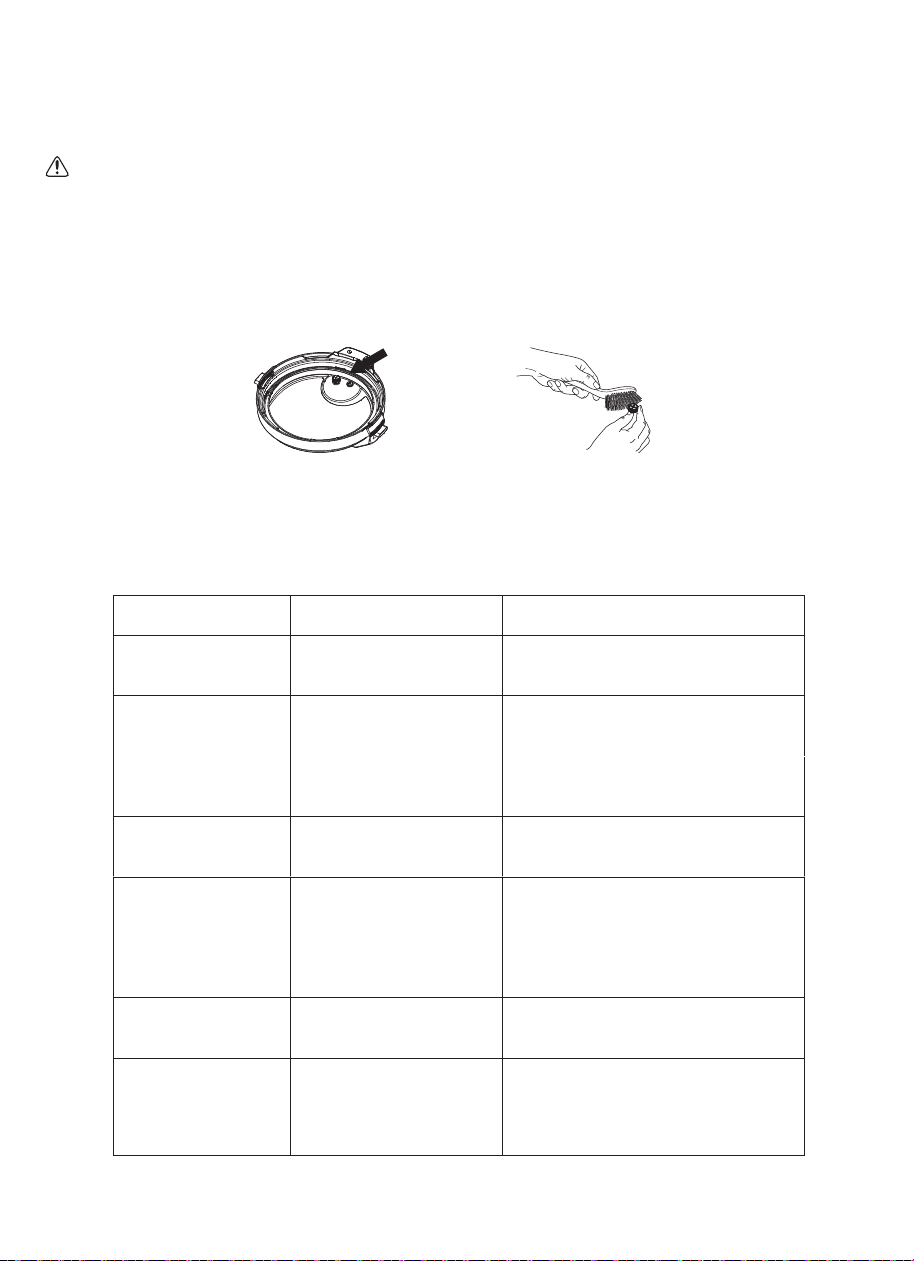
Clean the lid and the removable sealing ring with water and a soft cloth. Carefully clean the steam
release valve and float valve, removing any debris to prevent clogging. Do not disassemble the steam
release valve assembly.
Troubleshooting
Problem
Possible Cause Solution
Display shows Error
Codes 1–9
Unplug and restart. Contact customer
service if problem persists.
Display shows "Lid"
flashing
Align the “▼” mark on the lid with the
unlock mark on the top rim of the outer
pot, then rotate the lid clockwise to lock.
Remove the lid when using the Sauté
program.
Unit malfunction
Lid is not on or not
properly seated
Cooker will not turn on Check outlet or try a different outlet.
Outlet not functioning
Lid is difficult to close
Ensure sealing ring is seated correctly on
lid. Turn the Steam Release Valve to the
Venting position, close lid, then turn the
valve to the sealing position.
Sealing ring not properly
installed; residual
pressure from previous
cooking
Lid will not lock
Reinstall sealing ring correctly. Clean
sealing ring and valves.
Sealing ring improperly installed;
debris on sealing ring or valves
Steam escapes during
cooking
Ensure lid is properly closed and locked.
Check sealing ring installation and
cleanliness. Replace if damaged.
Normal steam release
until pressure builds;
lid not closed/locked
properly; sealing ring issue
Cooker Base:
Wipe the cooker base with a damp cloth. Never immerse the cooker base in water. Do not clean the
cooker while the power cord is plugged in.

Lid cannot be removed
Release all pressure before unlocking lid.
If float valve is stuck, push down manually
and clean before next use.
Pressure not fully released;
float valve stuck
Spattering during steam
release
Do not fill more than 2/3 full (1/2 for foods
that expand, e.g., rice, beans). Release
pressure using quick release with oven
mitts, or allow natural release.
Inner pot overfilled
Cooker takes too long
to come to pressure
Cooking time depends on quantity and
temperature of food/liquid.
Large amount of food/liquid;
cold starting temperature
Food is undercooked
Add more cooking time or use Sauté
function to simmer. Ensure at least 1 cup
(237 ml) liquid.
Insufficient cooking time;
not enough liquid
Food is overcooked
Cooking time too long
Reduce cooking time.
11
Warranty Information
1. This product is covered by a one (1)-year limited warranty against defects in materials and
workmanship, valid only for the original purchaser. The warranty period begins on the date of retail
purchase and is non-transferable.
2. This warranty does not cover normal wear and tear, or any damage resulting from misuse, negligent
use, use with improper voltage or current, failure to follow the operating instructions, or any
disassembly, repair, or modification not authorized by our after-sales service.
3. Additionally, this warranty does not cover damages caused by Acts of God (such as fire, flood,
hurricanes, or tornadoes) or force majeure events (such as arson, power outages, riots, or
vandalism).
4.This warranty gives you specific legal rights, and you may also have other rights which vary from
state to state (or province to province). Some states (or provinces) do not allow limitations on how
long an implied warranty lasts, or the exclusion or limitation of incidental or consequential damages,
so the above limitations or exclusions may not apply to you.

Technical Support
Other Info
Thank you for choosing this product. We strive to provide you with the
best quality products and service in the industry. Should you have
any issues, please don't hesitate to contact us.
6269443420 | 6267435564
物料/文件名: AH-YLG6JBD-说明书-1229
尺寸: (145*200mm) 16页次
尺寸公差: ±2mm
材质: 105g铜版纸
工艺: 骑马钉
印刷颜色: K
环保要求: 符合ROHS要求
日期:
制作人: 丁亚伟
制作单位: 杭州亚宾环保科技有限公司
2026-01-26