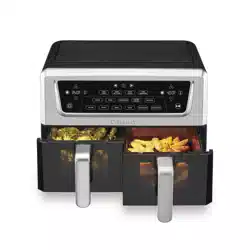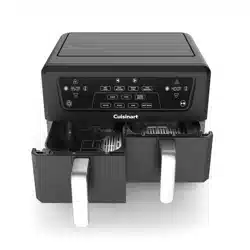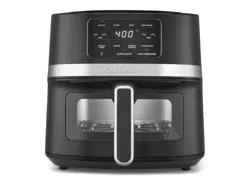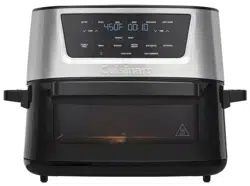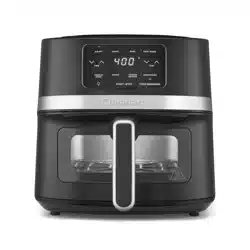
AFD-10OBLXA
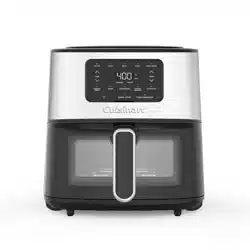
AFD-10XBLXA
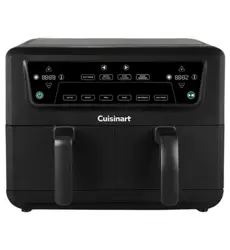
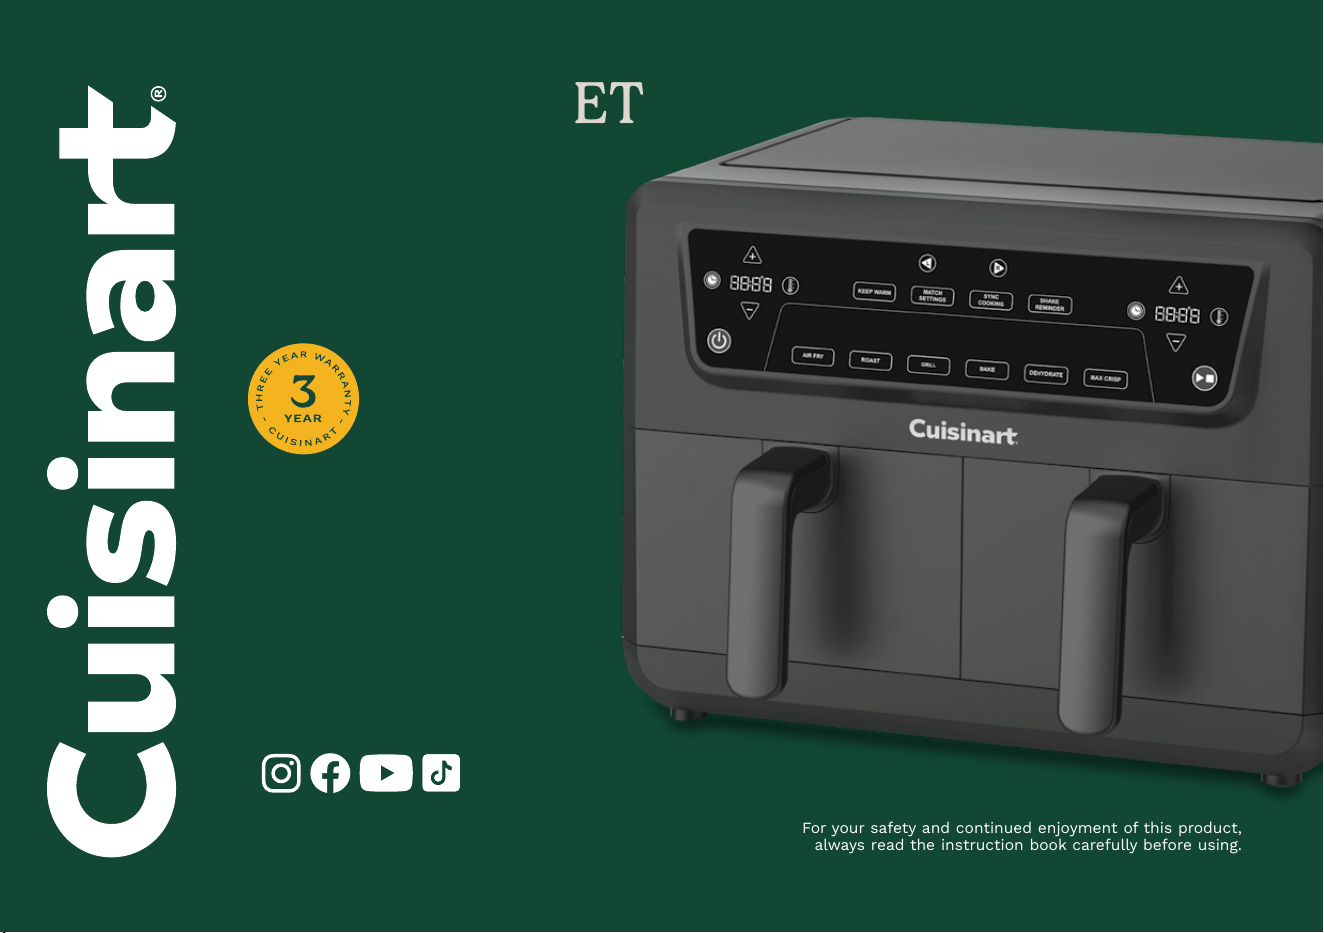
DUAL BASKET
AIR FRYER
Instruction
Booklet
Follow us @cuisinart_au
www.cuisinart.com.au
For your safety and continued enjoyment of this product,
always read the instruction book carefully before using.

2
CONTENTS
Important safeguards ...................................2
Special cord set instructions .............................4
Before first use ........................................4
Parts and features......................................4
Getting to know the digital control panel ...................5
Operating your air fryer..................................6
Air Frying tips & hints ...................................7
Cooking chart..........................................7
Troubleshooting ........................................11
Cleaning and maintenance .............................. 12
Warranty............................................. 12
IMPORTANT SAFEGUARDS
When using an electrical appliance, especially when children
are present, basic safety precautions should always be taken,
including the following:
1. Read all instructions before using your Cuisinart Dual Basket
Air Fryer.
2. UNPLUG APPLIANCE FROM OUTLET WHEN NOT IN USE AND
BEFORE CLEANING. Allow to cool before cleaning, handling, or
putting on or taking off parts.
3. Do not touch hot surfaces. Use handles or knobs.
4. To protect against electric shock, do not place cord or plugs
or the main body of the Air Fryer in water or other liquids. See
Cleaning and Maintenance.
5. This appliance should not be used by or near children or
individuals with certain disabilities.
6. Do not operate any appliance with a damaged cord or plug,
after the appliance has malfunctioned or has been dropped
or damaged in any way, or is not operating properly. Return
the Air Fryer to the store or retailer where purchased for
examination, repair, or adjustment.
7. The use of accessory attachments not recommended by
Cuisinart and may cause injury.
8. Do not use outdoors.
9. Do not let cord hang over the edge of the table or benchtop,
where it could be pulled on inadvertently by children or pets,
or touch hot surfaces, which could damage the cord.
10. Do not place the Air Fryer on or near a hot gas or electric
burner or in a heated oven.
11. Do not use this Air Fryer for anything other than its intended
purpose.
12. Extreme caution should be exercised when using containers
constructed of materials other than metal or glass in the Air
Fryer.
13. To avoid burns, use extreme caution when removing Air Fryer
accessories or disposing of hot grease.
14. When not in use, always unplug the appliance. Do not store
any materials other than manufacturer’s recommended
ovenproof accessories in this Air Fryer.
15. Do not place any of the following materials in the Air Fryer:
paper, cardboard, plastic, and similar products.
16. Do not cover any part of the Air Fryer with aluminium foil.
This will cause the unit to overheat.
17. Oversize foods, aluminium foil packages, and utensils must
not be inserted in the Air Fryer, as they may create the risk of
fire or electric shock.
18.
A fire may occur if the Air Fryer is covered or touching
flammable materials such as curtains, draperies, or walls when
in operation. Do not store any items on top of the appliance
when in operation. Do not operate under wall cabinets.
19. Do not clean with metal scouring pads. Pieces can break off
the pad and touch electrical parts, creating the risk of electric
shock.
20. Do not attempt to dislodge food when the Air Fryer is plugged
into an electrical outlet.
21. WARNING: To avoid possibility of fire, NEVER leave the Air
Fryer unattended during use.
3
22. Use recommended temperature settings when air frying.
23. Do not rest cooking utensils or baking dishes on the window
or on top of the unit.
24. Press
after use to turn off the Air Fryer.
25. Never operate the appliance inside a cupboard or directly
beneath overhead cabinets. Always unplug the unit before
storing it in an enclosed space to reduce the risk of fire.
26. Extreme caution must be used when moving an appliance
containing hot oil or other hot liquids.
27. To disconnect, press
to turn off, then remove plug from
wall outlet.
28. This appliance is not intended for use by persons (including
children) with reduced physical, sensory, or mental
capabilities, or lack of experience and knowledge, unless
they have been given supervision or instruction concerning
use of the appliance by a person responsible for their safety.
Children should be supervised to ensure that they do not play
with the appliance.
29. If the SUPPLY CORD is damaged, it must be replaced by the
manufacturer, its service agent, or a similarly qualified person
in order to avoid a hazard.
30. The appliance is intended for household use and not
applications such as:
- Staff kitchen areas in shops, offices, and other working
environments
- Farmhouses
- By clients in hotels, motels, and other residential type
environments
- Bed and breakfast type environments
31.
This symbol means: The surface of this product is hot;
please be careful when touching it.
32. The appliances are not intended to be operated by means of
an external timer or separate remote-control system.
33. Do not use this appliance for deep-frying.
34. Intended for benchtop use only. Do not move the appliance
when in use.
35. Prevent food contact with heating elements. Do not overfill
when cooking. Overfilling may cause personal injury or
property damage or affect the safe use of the appliance.
36. Any adjacent furniture must be able to withstand a minimum
temperature rise of 85°C above the ambient temperature of
the room it is located in, whilst in use. This appliance requires
100mm clearance around the front, back and sides of the
appliance. Certain types of vinyl or laminate kitchen furniture
are particularly prone to heat damage or discolouration
at temperatures even below the guidelines given above.
Any damage caused by the appliance being installed in
contravention of these instructions will be at the liability of
the owner. You should not use this appliance to store items
on or as work surface. Do not use the appliance near or under
combustible materials like curtains or furniture.
37.
Check all parts before use. If any part is damaged ‘DO NOT USE’
CAUTION: BURN HAZARD
WARNING: very hot surfaces.
Take care when using the oven, surface could be hot.
DO NOT TOUCH hot surfaces, as possible injury could
occur.
The appliance must not be placed inside furniture or any built-in
unit, when switched on and in use.
SAVE THESE
INSTRUCTIONS
Please read and keep this instruction handy. This instruction will
help you to safely operate your Cuisinart
®
Dual Basket Air Fryer and
get the most out of it with consistent, professional results.
4
SPECIAL CORD SET INSTRUCTIONS
A short power-supply cord is provided to reduce the risk of
someone tripping or becoming entangled. Extension cords may be
used if caution is exercised in their use.
If an extension cord is used, the marked electrical rating of the
extension cord must be at least as great as the electrical rating
of the appliance, and the longer cord should be arranged so that
it will not drape over the benchtop where it can be pulled by
children or tripped over unintentionally.
FOR HOUSEHOLD
USE ONLY
NOT INTENDED
FOR COMMERCIAL USE
BEFORE FIRST USE
1. Remove and discard any packaging material from the unit.
2.
R
emove all accessories and read the Instructions for use carefully.
Please pay attention to the Important Safeguards, warnings and
operating your air fryer sections to avoid any injury or damage.
3.
Wash the baskets and crisper plates in hot, soapy water, then
rinse and dry thoroughly. The baskets and crisper plates are the
ONLY dishwasher safe parts. To extend the life of the baskets
we recommend hand-washing. NEVER clean the main unit in the
dishwasher.
4. Place your Cuisinart
®
Air Fryer on a flat, level surface. Move 5 to
10cm away from the wall or from any objects on the benchtop. Do
not use on heat-sensitive surfaces.
NOTE: OBJECTS SHOULD NOT BE STORED ON TOP OF THE AIR
FRYER. IF THEY ARE, REMOVE ALL OBJECTS BEFORE YOU TURN
ON YOUR AIR FRYER. THE EXTERIOR WALLS GET HOT WHEN IN
USE. KEEP OUT OF REACH OF CHILDREN.
5. Plug power cord into the wall outlet.
PARTS AND FEATURES
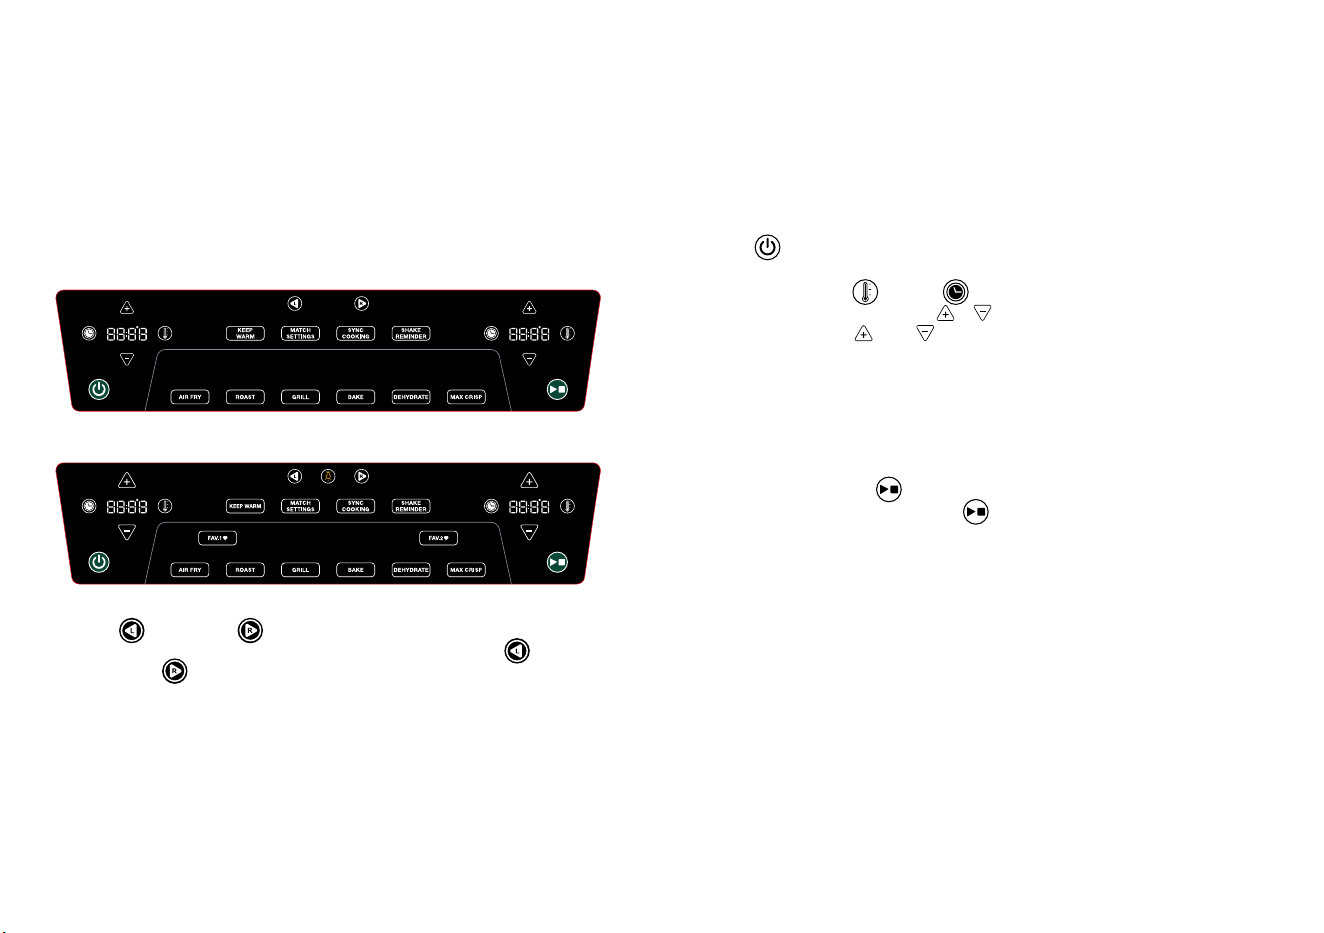
This instruction booklet applies to two models: AFD-10OBLXA and
AFD-10XBLXA. Both models share the same functions and operating
instructions. However, some features are only available on the AFD-
10XBLXA model, as shown below:
1. Digital Control Panel
Features easy-to-use touch controls to select left and right
b
asket, cooking function or air fry preset, time, temperature and
special functions.
2. Cooking Baskets
Each basket features a cooking surface of approximately
29 cm x 17 cm. Models may come with or without viewing
w
indows, depending on the version purchased. Images shown are
for reference only and may differ slightly from your model.
4
2
1
2
FEATURE: AFD-10OBLXA AFD-10XBLXA
Favourite buttons (FAV.1 / FAV.2)
✘
✔
Interior light
✘
✔
Basket viewing windows
✘
✔
5
3. Ceramic Coated Crisper Plates
Ensures even cooking. Must always be inserted in air fry baskets
f
or cooking.
4. Air Outlet
Two outlets on the back to let hot air discharge.
GETTING TO KNOW
THE DIGITAL CONTROL PANEL
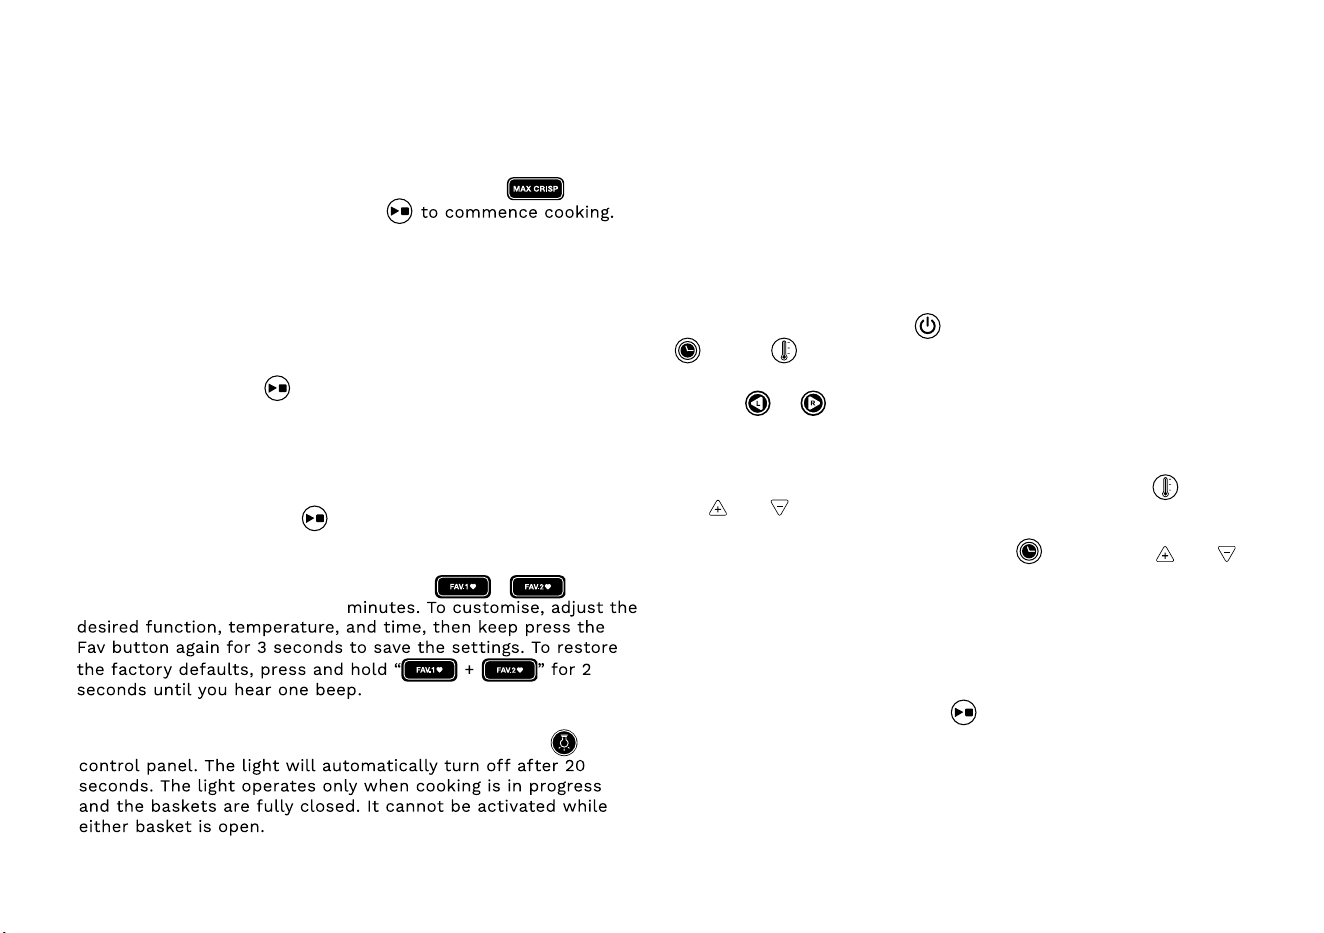
1. Left and Right basket control
The unit features two separate baskets: the Left
basket and
the Right
basket. Cooking functions for each basket can be
programmed independently, allowing you to cook two different
foods at once.
2.
Cooking functions
Select the desired cooking function based on your cooking
m
ethod: Air Fry, Roast, Grill, Bake, Dehydrate or Max Crisp.
AIR FRY: Use this function to give your food crisp with minimal
oil. Best for frozen snacks and fresh foods like chicken wings.
R
OAST: Use the roast setting for tender meats such as chicken
and pork, and also for roasting vegetables.
GRILL: Perfect for cooking fish or even a grilled toasted cheese
s
andwich.
B
AKE: Use this setting for making cakes and other baked treats.
DEHYDRATE: This setting is great for dehydrating fruit for fruit
crisps or making beef jerky.
MAX CRISP: Use this setting for small quantities of frozen food
that require high temperatures to cook such as french fries.
3. POWER ON / OFF
Press
to turn the appliance ON and OFF
4.
T
ime and temperature controls
The temperature
/ time symbols must be pressed prior to
the Time and Temperature
/ being visible and allowing for
changes. Use the
and buttons to adjust the cooking time
and temperature for your selected function. The temperature can
be adjusted in increments of 5°C, and the cooking time can be
adjusted in 1-minute increments up to 1 hour.
5. Preheat setting
The preheat setting will activate if the Bake or Grill cooking
f
unctions are selected.
6. Start/Stop button (
)
Press the Start/Stop button (
) to begin or end the cooking
process.
7. Shake reminder
The Shake reminder alerts you to flip or shake your food around
2
/3 through the cooking cycle. This reminder will automatically
activate for air frying functions, but you can also manually set
it for any function. If you want to disable the reminder, simply
press the Shake reminder button again to turn it off. When the
reminder activates, you will hear an audio alert.
8. Sync Cooking
The Smart Sync feature automatically syncs the cook times to
e
nsure both baskets finish cooking at the same time - even if
individual cooking times are both different and regardless of
function, timing or temperature.
AFD-10OBLXA Control panel
AFD-10XBLXA Control panel
6
9. Match setting
The Match setting feature automatically mirrors settings for both
b
askets. This is useful for when you want to cook two identical
dishes using the same cooking function, temperature and time.
10. Max crisp
To use the Max Crisp function, you must first select either the
L
eft or Right basket by pressing L or R and press
.
T
hen press the Start / Stop button
T
he Max Crisp function is a high-temperature setting designed
to get food crispy in 30 minutes or less. It is the only function
t
hat allows cooking at 210°C.
11. Ready indication
When the cooking time has finished, the unit will sound three
b
eeps, and the display will show 00 for 1 minute. After that, the
air fryer will automatically enter Keep Warm mode, unless the
basket is removed or
is pressed.
12.
A
uto Keep Warm
The Keep Warm function begins automatically at the end of any
c
ooking cycle to keep your food warm for up to 60 minutes.
During this time, the appliance will maintain a low temperature
to keep the food ready to serve. if the basket is removed for
longer than 5 minutes, or
is pressed, the appliance will exit
Keep Warm mode.
13. Favourite (FAV) Button(s) - model AFD-10XBLXA only
Models equipped with favourite buttons (
or ) have a
default setting of 180°C for 20
14.
I
nterior light - model AFD-10XBLXA only
To turn the interior light on or off, press the light icon
on the
OPERATING YOUR AIR FRYER
Follow these simple steps for cooking operation:
Place the Air Fryer on a stable surface
Place your air fryer on a flat, heat-resistant benchtop. Plug the unit
into a 220-240V~ power outlet. The unit will show a brief LED and
sound a single beep to indicate it is in standby mode.
Insert the baskets
When the basket is not securely locked into place 'out' will show
on the control panel where the temp / time is usually displayed.
Continue to push the basket in until you hear a 'click'.
Power on
Press the ON / OFF symbol . On both left and right sides the time
/ temp display will show “--:--” and the unit is ready for use.
Select cooking function
Tap the or icon at the top of the control panel to select the
cooking function for the left or right basket. Select your desired
cooking function from the menu - Air Fry, Roast, Grill, Bake,
Dehydrate or Keep Warm.
To adjust the temperature, press the temperature icon
and use
the
and buttons to adjust the temperature up or down in 5
degree increments.
To adjust the time, press the time icon
and use the and
buttons to adjust the time up or down in 1 minute increments.
After setting the desired temperature and time, you have the option
to set the shake reminder, match settings or sync cooking. Refer
to "Getting to know your control panel" for when to use these
functions.
Start cooking
Press the START / STOP button to commence the cooking
process. To stop cooking at any time press the START / STOP button
again.
NOTE: If the cooking process is stopped during the cooking cycle,
the appliance will reset and you will need to re-select the cooking
function, temperature and time to commence cooking again.

7
If the left or right basket is opened during the cooking process, the
cooking cycle will automatically pause until the basket is closed -
at which time cooking will re-commence.
Pre-heat setting
If you select either the BAKE or GRILL function, the pre-heat setting
will automatically activate when you press START to commence
cooking. When the appliance is pre-heating, the display will show a
scrolling rectangle symbol.
When the appliance has finished pre-heating, 5 audible beeps will
sound to indicate you can pull out the basket, add your food, and
close the basket again to commence cooking. The timer will then
begin counting down.
End of cooking
When the timer reaches 00, the appliance will sound 3 times to
signal the end of the cooking cycle. The Keep Warm function will
automatically activate.
Press the Start/Stop button
, or remove the basket to disable
the Keep Warm function. Press the
button to turn off the unit.
Unplug the unit when done.
AIR FRYING TIPS & HINTS
Air frying is a healthy alternative to deep-frying in oil. A high-
velocity fan and an upper heating element circulate air to prepare
a variety of foods that are both delicious and healthier than
traditional fried foods.
• Air frying doesn’t require oil, but a light coating of cooking spray
or drizzle of oil tossed with food can enhance browning.
• Shake Reminder is recommended when cooking large quantities
that overlap and larger foods. Shaking the basket on the sound
of the Shake Reminder is highly recommended. Do not overload
the basket; more surface area will result in faster cooking and
better results.
• Foods will cook more evenly when they are cut into equal-size
pieces with minimal overlap.
• An assortment of coatings can be used on air-fried foods.
Some examples of different crumb coatings include
breadcrumbs (plain, seasoned, and panko), crushed cornflakes,
potato chips, and crackers. Various flours (including gluten-free)
and other dry foods like cornflour work as well.
• When cooking proteins, marinades and juices will drip to the
bottom of the basket. This is a great base for a gravy or pan
sauce.
• When air frying greasy foods (e.g., bacon), grease will drain into
the bottom of the air fry basket. As a precaution, allow hot
grease to cool in the basket before cleaning.
• Use tongs or a silicone spatula to remove food from the basket.
• For models equipped with a window, use the light/window
feature to check on cooking food. The basket can also be
removed to check on the food (this will pause cooking until the
basket is reinserted into the unit).
COOKING CHART
• The amounts listed in this chart are recommended for optimal
cooking performance - ensuring even airflow, crisping, and
consistent results. They are not the maximum capacity of the
5.2L basket. Cooking larger quantities is possible, but may
require longer times, more frequent shaking or turning, and
could result in less even browning or crisping.
• Shake or turn food at least once during cooking (more for high
loads or fries)
• For food safety, use a food-grade meat thermometer to check
that meat, poultry, and seafood have reached safe internal
temperatures before serving. Insert the thermometer into the
thickest part of the food, avoiding bone. Refer to the internal
temperatures listed in this chart or follow Food Standards
Australia New Zealand (FSANZ) guidelines.
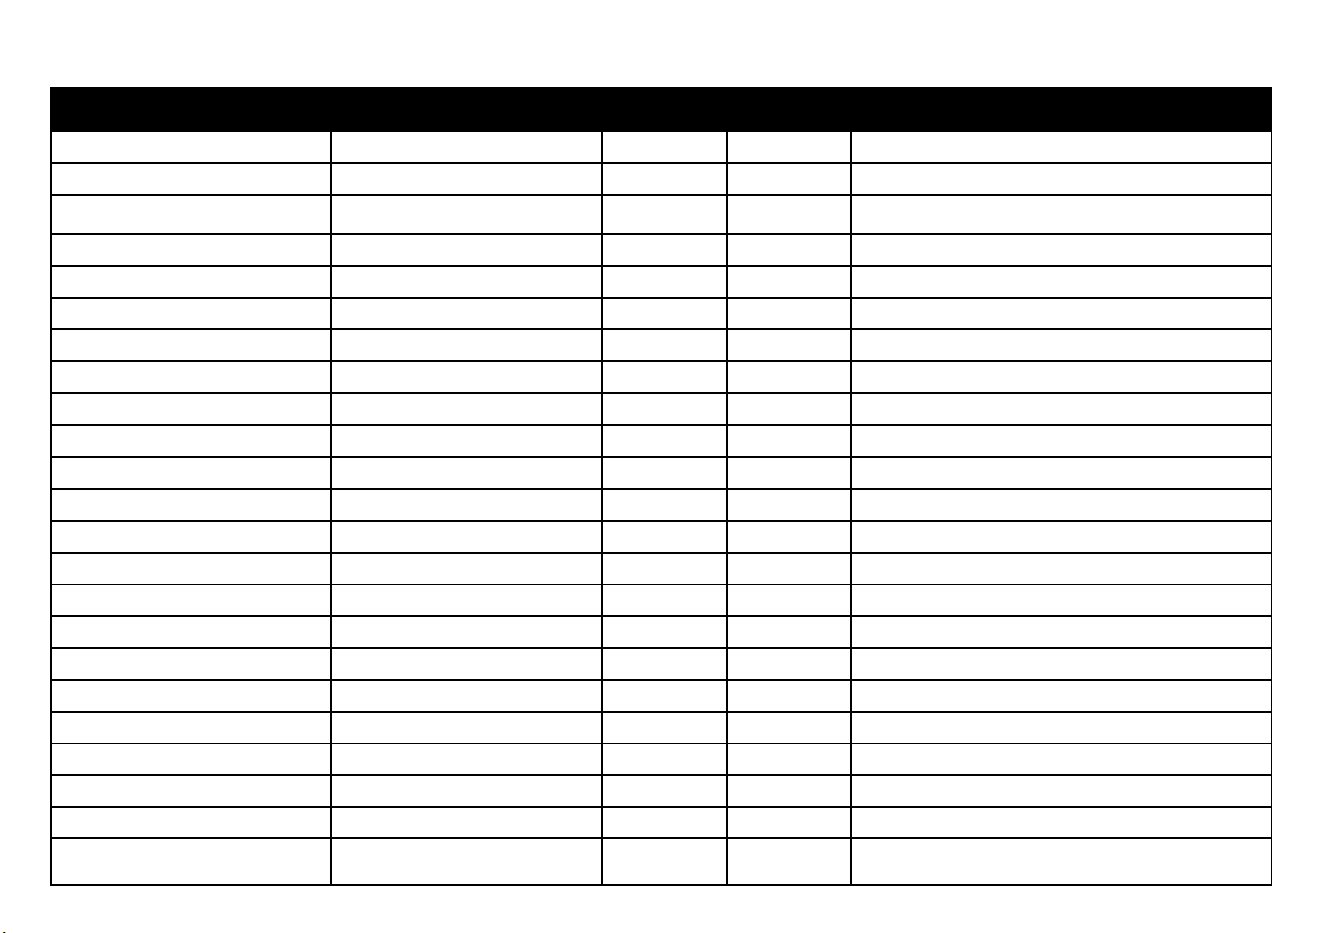
8
FOOD AMOUNT TEMP (°C) TIME NOTES
Thin frozen fries 200–600 g (per 5.2 L basket) 200 15–25 min Shake 2–3 times
Crinkle or thick-cut frozen fries 200–600 g (per 5.2 L basket) 200 18–28 min More time for thicker cuts
Frozen sweet potato fries 200–600 g (per 5.2 L basket) 190 20–25 min Shake halfway
Chicken nuggets (frozen) 200–600 g (per 5.2 L basket) 200 12–15 min Flip once
Chicken wings 400-700gr (per 5.2 L basket) 200 25–30 min Brush with oil, turn twice
Chicken drumsticks 300–600 g (per 5.2 L basket) 190 25–30 min Internal temp: 74°C
Chicken breast (160g each) 2–3 pcs (per 5.2 L basket) 200 17–20 min Brushed with oil
Chicken schnitzel (crumbed) 2-3 pcs (per 5.2 L basket) 200 12–16 min Flip halfway
Pork chops (bone-in) 2-3 pcs (per 5.2 L basket) 200 14–18 min Internal temp: 70–75°C
Beef steak (2.5 cm thick) 1pcs (per 5.2 L basket) 200 10–13 min Rare: 60°C, Medium: 65°C
Burgers (150 g) 1-4 pcs (per 5.2 L basket) 190 12–15 min Flip halfway
Sausages 4-6 pcs (per 5.2 L basket) 200 12–15 min Internal temp: 71°C
Salmon fillets 1-3 pcs (per 5.2 L basket) 200 10–12 min Skin-on, 2.5 cm thick. Internal temp: 63°C
Whole fish (300–400 g each) 1–2 pcs (per 5.2 L basket) 200 25–30 min Brush with oil, flip halfway
Fish fingers (frozen) 10 pcs (per 5.2 L basket) 180–200 12–15 min Flip halfway
Prawns (fresh, jumbo) 14–20 pcs (per 5.2 L basket) 200 6–8 min Shell off, deveined. No oil needed
Spring rolls (frozen) 200–500 g (per 5.2 L basket) 200 10–15 min Turn half way
Vegetable nuggets / bites 200–500 g (per 5.2 L basket) 200 12–15 min Single layer for crisping
Roast vegetables 400–700 g (per 5.2 L basket) 200 22–30 min Cut into 2–3 cm pieces
Broccoli, cauliflower 200–600 g (per 5.2 L basket) 200 12–16 min Light oil coating, small florets ensure even roast
Mushrooms 100–300 g (per 5.2 L basket) 200 10–12 min Whole or quartered
Corn on the cob 1-4 ears (per 5.2 L basket) 200 15–18 min Brush with oil
Homemade chips
(fresh-cut, 10
mm thick)
200–700 g (per 5.2 L basket) 200 20–30 min Soak 30 min, dry well. Shake every 7–10 min
AIR FRY MODE
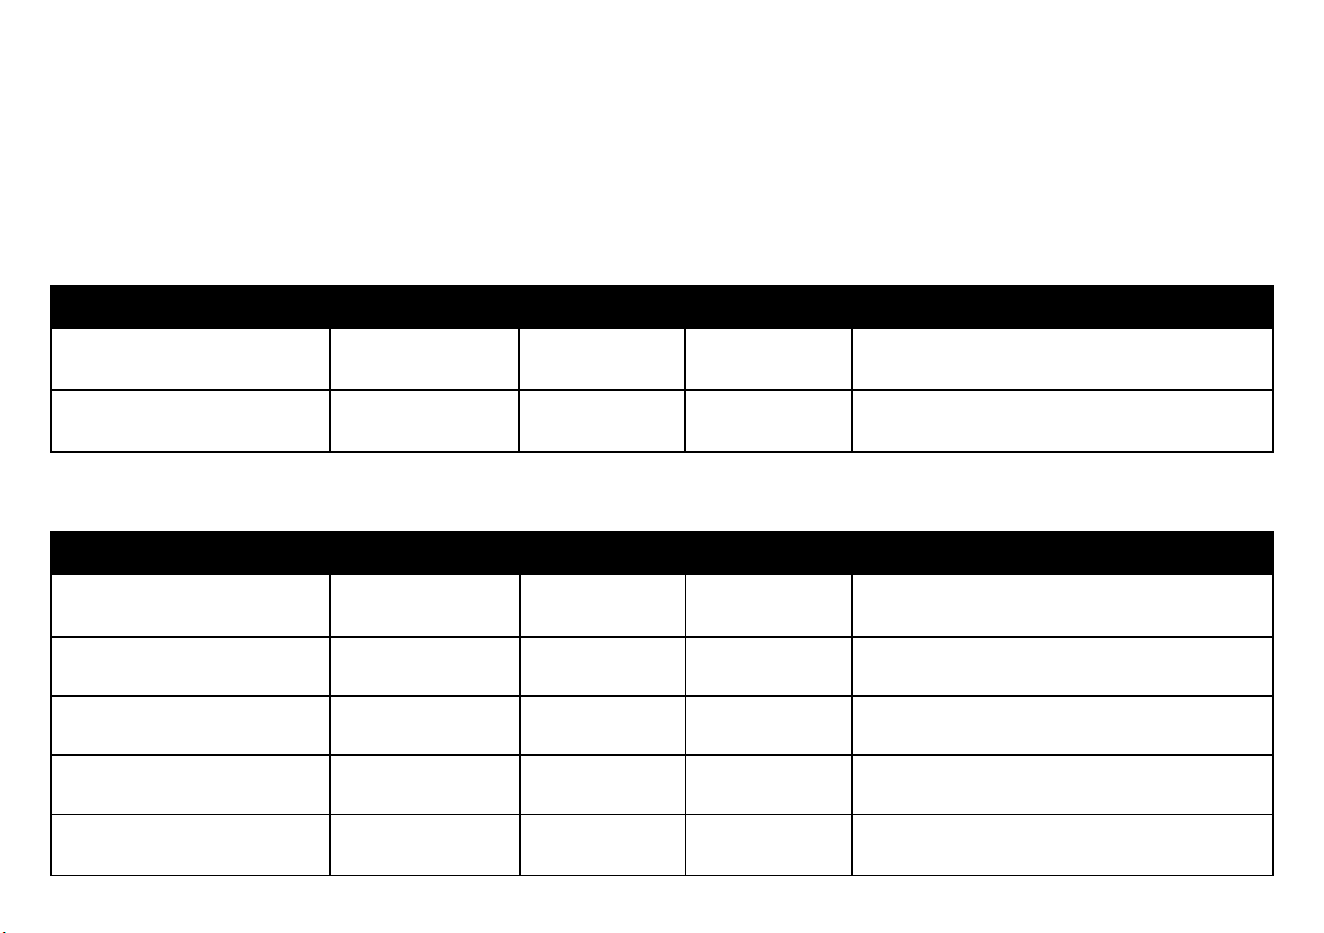
9
FOOD AMOUNT TEMP (°C) TIME NOTES
Muffins 4 (per 5.2 L basket) 160 15–18 min Use silicone cups or tray. Check centre is firm
Frozen pie (meat or veggie) 1 (per 5.2 L basket) 200 20–25 min
Ensure centre is piping hot and pastry
browned
FOOD AMOUNT TEMP (°C) TIME NOTES
Whole chicken
1.4 kg
(per 5.2 L basket)
180 55 min Internal temp: 74°C
Chicken thighs (bone-in)
2–6 pcs
(per 5.2 L basket)
200 25–30 min Turn halfway
Beef roast (topside, rump)
1kg -1.2kg
(per 5.2 L basket)
180 50–60 min
Rare: 60°C, Well: 70°C
Pork loin (boneless)
600g–800g
(per 5.2 L basket)
190 50–60 min
Score fat; crackle tip: start Max Crisp for
5 min at 210°C
Lamb leg (boneless)
800g - 1kg
(per 5.2 L basket)
190 50–60 min Internal: 63–70°C
MAX CRISP MODE
This mode is ideal for cooking smaller frozen foods quickly with a super crispy finish. Amounts shown are per 5.2 L basket. Suitable
recipes include:
• Frozen curly fries: 500g, 210°C, 20–22 min
• Frozen battered onion rings: 300g, 210°C, 11–12 min
• Hash brown patties: 2–3 pcs, 210°C, 10–12 min
BAKE MODE
ROAST MODE
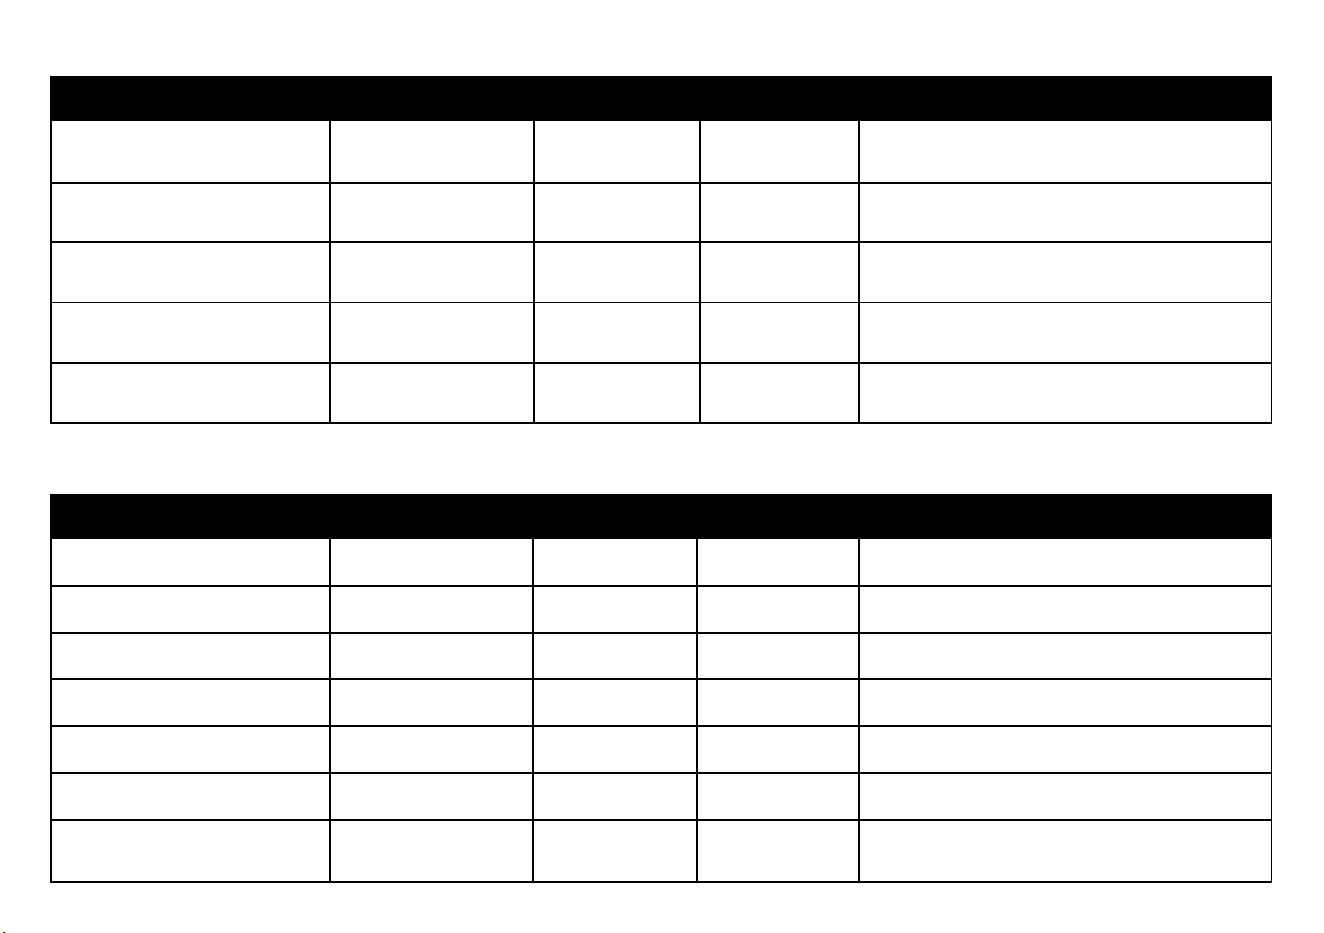
10
GRILL MODE
DEHYDRATE MODE
FOOD AMOUNT TEMP (°C) TIME NOTES
Bacon rashers
4–6
(per 5.2 L basket)
210 6–8 min No oil needed
Pork chops (boneless)
2–4
(per 5.2 L basket)
210 12–14 min Use top rack
Halloumi slices (1 cm)
200–300 g
(per 5.2 L basket)
200 10–12 min Flip once. Use baking paper or light spray oil
Tofu cubes
250 g
(per 5.2 L basket)
180–190 12–14 min Oil lightly
Veggie burgers
2–4
(per 5.2 L basket)
200 12–14 min Flip halfway
FOOD PREPARATION TEMP (°C) TIME NOTES
Apple slices (3 mm) Lemon water rinse 60 7–8 hrs
Bananas (sliced) Even slices 60 8–10 hrs
Strawberries Halved 60 6–8 hrs
Mushrooms Brushed clean 60 6–8 hrs
Tomatoes Sliced thin or grated 60 6–8 hrs
Fresh herbs
Stem removed 60 4 hrs
Beef jerky
Marinated overnight,
6 mm thick
70 5–7 hrs
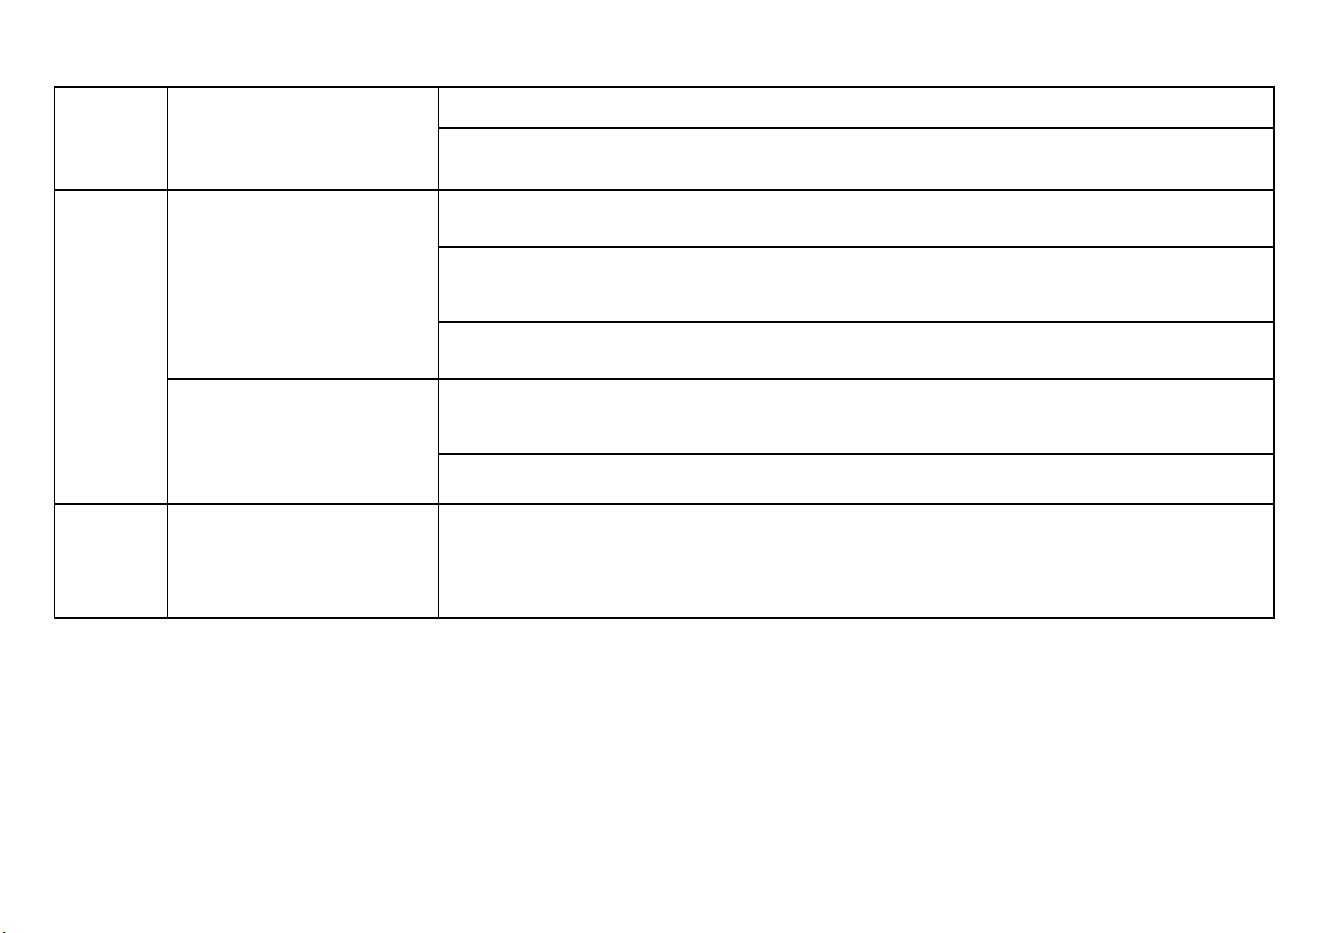
11
Operation Why won’t my unit turn on?
Make sure your unit is plugged into a functional outlet.
Make sure the air fryer basket is securely in place in the unit. "out" is displayed if a basket is
not inserted fully.
Cooking
Why are fried foods not
crispy or fried evenly?
Some foods may require more oil than others. If not crispy enough, lightly spray, brush, or
rub more oil on the food.
Make sure food is spread evenly in a single layer in the air fryer basket with no overlap. If
food still overlaps, toss or ip food halfway through cooking cycle; use the Shake Reminder
for an audio alert.
Put the food in for additional cooking time. Make sure to check frequently until food reaches
desired brownness.
Why is my food
undercooked?
If you put too much food in the basket, it may not cook in the suggested time. Try using
smaller batches of food and single layers, rather than stacking food items on top of each
other.
If the temperature is too low, the food may not fully cook.
Cleaning
How do I clean tough-to-
remove food residue from
the basket/crisper plate?
To remove baked-on grease, soak the accessories in hot, sudsy water or use a nonabrasive
cleaner.
We recommend hand-washing these parts in hot, sudsy water with a nylon scouring pad or
nylon brush and then thoroughly rinsing them, or washing in a dishwasher.
TROUBLESHOOTING

12
CLEANING AND MAINTENANCE
• Always unplug the air fryer from the electric outlet and allow it
to cool completely before cleaning.
• Do not use abrasive cleaners, as they will damage the finish.
Simply wipe the exterior with a clean, damp cloth and dry
thoroughly. Apply the cleansing agent to a cloth, not directly
onto the Air Fryer, before cleaning.
• To clean interior walls, use a damp cloth and a mild liquid
soap solution or a spray solution on a sponge. Remove any
residue from cleaners with a clean, damp rag. Never use harsh
abrasives or corrosive products, these could damage the Air
Fryer surface. Never use steel wool pads on interior of the Air
Fryer.
• Air fry baskets and crisper plates are dishwasher safe. They can
also be hand-washed in hot, soapy water with a nylon scouring
pad or nylon brush and thoroughly rinsed.
• Remove the crisper plate from the air fry basket to easily
access the bottom of the air fry basket.
• Any servicing should be performed by an authorised service
representative.
WARRANTY
Cuisinart warrants that, in the unlikely event that this product
develops any malfunction within 36 months of purchase of the
product used for household or domestic use (or within 3 months
of purchase of the product used for commercial use) due to
faulty workmanship, materials or manufacture, we will either (at
our discretion) repair or replace it for you.
This warranty applies for a period of 36 months for products
purchased for household or domestic use (and 3 months for
products purchased for commercial use) from the date of
purchase of the product after which time the warranty expires
and has no further force of effect.
Should you experience any operating difficulties refer to the FAQ
in this booklet or contact Customer Service for advice on 1800
566 567 in Australia or 0800 456 546 in New Zealand.
Please retain the Purchase Receipt as proof of purchase in order
for your warranty entitlement to be valid.This document must be
presented in the event of making a claim under the terms of the
Cuisinart Warranty Policy.
During the warranty period Cuisinart will repair or replace (at our
discretion) any defective product. However, if the product
includes a number of accessories, only the defective part or
relevant accessory will be replaced. Cuisinart reserves the right
to make minor adjustments to fix any defect instead of replacing
the entire product or accessory. Packaging, instructions, recipe
books etc. will not be replaced unless faulty. A product
presented for repair may be replaced by a refurbished product of
the same type rather than being repaired. Refurbished parts may
be used to repair the product.
If a spare part is required under warranty it will be shipped to
the customer or retailer at No Charge.
In the event of a product or accessory being replaced during the
warranty period, the guarantee on the replacement product or
accessory will expire 36 months for household or domestic use (or
3 months for commercial use) from the original purchase date.

13
This warranty does not include or cover the following:
• defects caused by the product not being used in accordance
with instructions;
• defects caused by accidental damage;
• defects caused by misuse or negligent handling of the
product;
• defects caused by the product not being maintained or
cleaned according to instructions;
• defects caused by being tampered with by unauthorised
persons;
• defects which are normal or fair wear and tear;
• freight or any other costs incurred in making a claim;
• consumable items or accessories that by their nature and
limited lifespan require periodic renewal (such as filters,
seals, blades or related accessories, such as trays, racks or
utensils);
• products serviced or modified other than by Cuisinart or an
authorised Cuisinart representative;
• to any claims made beyond 12 months if the filament of the
light bulb breaks i.e. the light bulb has burned out;
• exposure of the product to abnormally corrosive conditions;
• any product which has its serial number or appliance plate
removed or defaced;
• to any claims made beyond 3 months from the date of
purchase if the product is used in commercial, industrial,
educational or rental applications; or
• To any claims made beyond 36 months from the date of
purchase if the product is used in household or domestic
applications.
• Products purchased from any person who is not a retailer
serviced by Conair’s authorised distributors, overseas
retailers, parallel importers or purchased second hand.
The benefits given to you by our warranty are in addition to
other rights and remedies under the Australian Consumer Law.
In Australia our goods come with guarantees that cannot be
excluded under the Australian Consumer Law. You are entitled
to a replacement or refund for a major failure and for
compensation for any other reasonably foreseeable loss or
damage. You are also entitled to have the goods repaired or
replaced if the goods fail to be of acceptable quality and the
failure does not amount to a major failure.
Our goods also come with guarantees that cannot be excluded
under the New Zealand Guarantees Act.
To make a warranty claim or spare part, contact our customer
service agents:
Cuisinart Australia
Ph: 1800 566 567
PO Box 146, Terrey Hills
NSW 2084 AUSTRALIA
Cuisinart New Zealand
Ph: 0800 456 546
YOU MUST provide your full name, address, email and phone
details. A copy of your proof of purchase must be supplied.
You can contact Cuisinart Australia/New Zealand via email at
aus_cuisinart@conair.com or through the “Contact Us” option
on the Cuisinart website www.cuisinart.com.au
The warranty contained in this document is provided by:
Conair Australia Pty Ltd (ACN 068 492 044) (Cuisinart)
18 Rodborough Rd,
Frenchs Forest, NSW 2086
Australia

14
Notes:

15
Notes:

IB-25/353
Scan to get started with
your new air fryer.
www.cuisinart.com.au