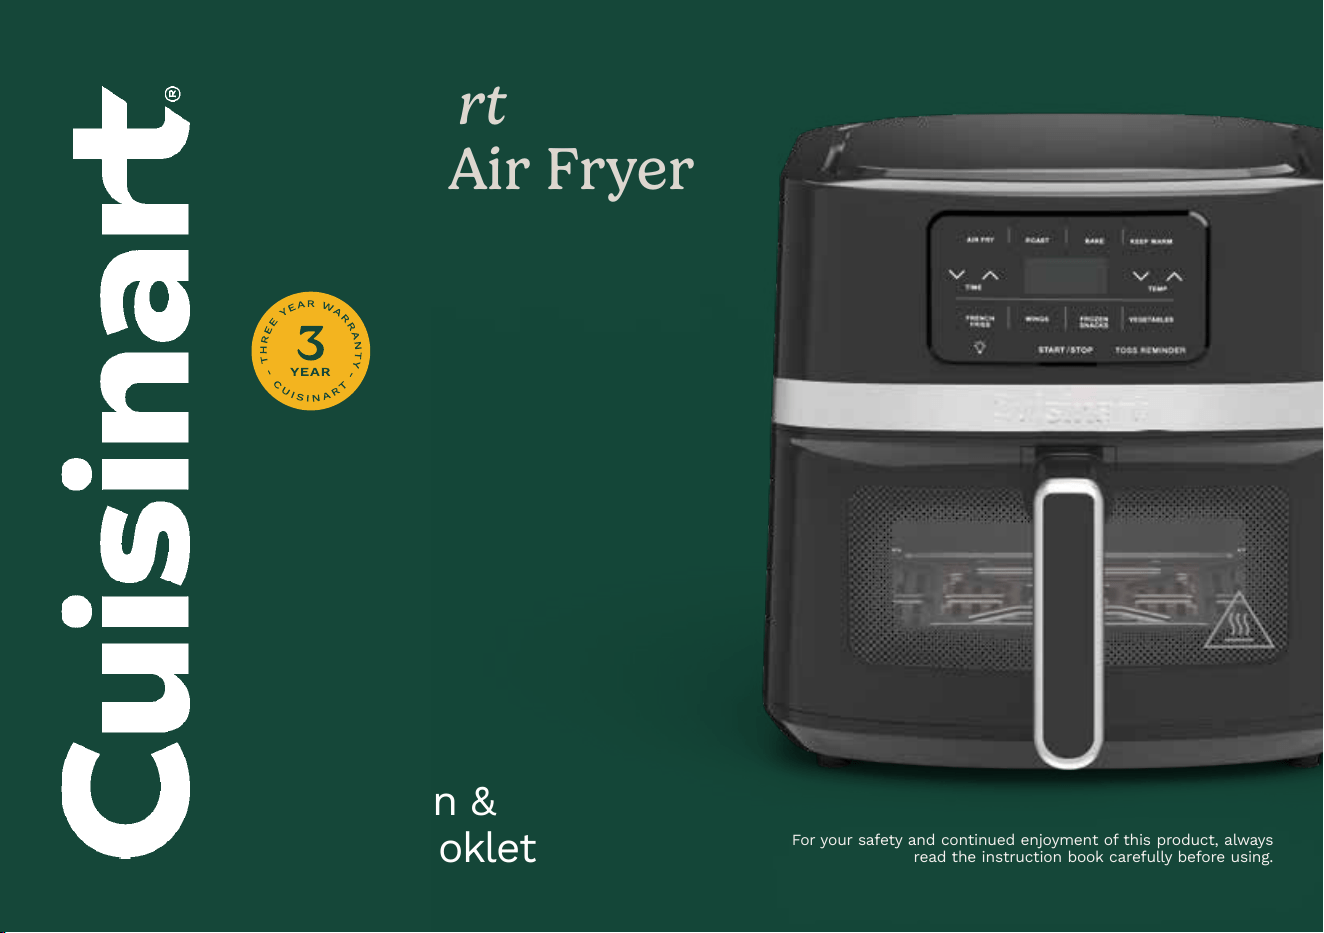
AIR-160
Instruction &
Recipe Booklet
For your safety and continued enjoyment of this product, always
read the instruction book carefully before using.
4.5-Quart
Basket Air Fryer

2
CONTENTS
Important Safeguards . . . . . . . . . . . . . . . . . . . . . . . . . . . . . . . . . . . . . . . . 2
Special Cord Set Instructions ..................................3
Features and Benefits ........................................4
Getting to Know the Digital Control Panel ........................5
Before First Use.............................................5
Operation ..................................................6
Air Frying Tips & Hints........................................6
Air Fryer Chart ..............................................7
Troubleshooting .............................................8
More Ways to Cook ..........................................9
Cleaning and Maintenance ....................................9
Recipes ..................................................10
Warranty..................................................21
IMPORTANT SAFEGUARDS
When using an electrical appliance, especially when children are present,
basic safety precautions should always be taken, including the following:
1. Read all instructions.
2. UNPLUG FROM OUTLET WHEN NOT IN USE AND BEFORE
CLEANING. Allow to cool before cleaning, handling, or putting
on or taking off parts.
3. Do not touch hot surfaces. Use handles or knobs.
4. To protect against electric shock, do not place cord or plugs or the
main body of the Cuisinart
®
Air Fryer in water or other liquids. See
Cleaning and Maintenance, page 9.
5. This appliance should not be used by or near children or individuals
with certain disabilities.
6. Do not operate any appliance with a damaged cord or plug, after the
appliance has malfunctioned or has been dropped or damaged in
any way, or is not operating properly. Return the Cuisinart
®
Basket Air
Fryer to the store or retailer where purchased for examination, repair,
or adjustment.
7. The use of accessory attachments not recommended by Cuisinart
®
may cause injury.
8. Do not use outdoors.
9. Do not let cord hang over the edge of the table or countertop, where
it could be pulled on inadvertently by children or pets, or touch hot
surfaces, which could damage the cord.
10. Do not place the Cuisinart
®
Basket Air Fryer on or near a hot gas
or electric burner or in a heated oven.
11. Do not use this Cuisinart
®
Basket Air Fryer for anything other than its
intended purpose.
12. Extreme caution should be exercised when using containers
constructed of materials other than metal or glass in the Cuisinart
®
Basket Air Fryer.
13. To avoid burns, use extreme caution when removing Cuisinart
®
Basket Air Fryer accessories or disposing of hot grease.
14. When not in use, always unplug the unit. Do not store any
materials other than manufacturer’s recommended ovenproof
accessories in this Cuisinart
®
Air Fryer.
15. Do not place any of the following materials in the Cuisinart
®
Basket
Air Fryer: paper, cardboard, plastic, and similar products.
16. Do not cover any part of the Cuisinart
®
Basket Air Fryer with metal
foil. This will cause the unit to overheat.
17. Oversize foods, metal foil packages, and utensils must not be
inserted in the Cuisinart
®
Basket Air Fryer, as they may create the risk
of fire or electric shock.
18. A fire may occur if the Cuisinart
®
Basket Air Fryer is covered or
touching flammable materials such as curtains, draperies, or walls
when in operation. Do not place or store any items on top of the
appliance. Do not operate under wall cabinets.
19. Do not clean with metal scouring pads. Pieces can break off the pad
and touch electrical parts, creating the risk of electric shock.

3
20. Do not attempt to dislodge food when the Cuisinart
®
Basket Air Fryer
is plugged into an electrical outlet.
21. WARNING: To avoid possibility of fire, NEVER leave the Cuisinart
®
Basket Air Fryer unattended during use.
22. Use recommended temperature settings for all air frying.
23. Do not rest cooking utensils or baking dishes on the window or on
top of the unit.
24. Press START/STOP after use to turn off the Cuisinart
®
Basket
Air Fryer.
25. Do not operate your appliance in an appliance garage or under a wall
cabinet. When storing in an appliance garage, always unplug the unit
from the electrical outlet. Not doing so could create the risk of fire,
especially if the appliance touches the walls of the garage, or the
door touches the unit as it closes.
26. Extreme caution must be used when moving an appliance containing
hot oil or other hot liquids.
27. To disconnect, press START/STOP to turn off, then remove plug from
wall outlet.
28. This appliance is not intended for use by persons (including children)
with reduced physical, sensory, or mental capabilities, or lack of
experience and knowledge, unless they have been given supervision
or instruction concerning use of the appliance by a person
responsible for their safety. Children should be supervised to ensure
that they do not play with the appliance.
29. If the SUPPLY CORD is damaged, it must be replaced by the
manufacturer, its service agent, or a similarly qualified person in
order to avoid a hazard.
30. This appliance is intended to be used in households.
31. This symbol means: The surface of this product is hot; please be
careful when touching it.
SAVE THESE
INSTRUCTIONS
Please read and keep these instructions handy. These instructions
will help you to safely operate your Cuisinart
®
Basket Air Fryer and
get the most out of it with consistent, professional results.
SPECIAL CORD SET INSTRUCTIONS
A short power-supply cord is provided to reduce the risk of someone
tripping or becoming entangled. Extension cords may be used if caution
is exercised in their use.
If an extension cord is used, the marked electrical rating of the extension
cord must be at least as great as the electrical rating of the appliance,
and the longer cord should be arranged so that it will not drape over
the countertop or tabletop where it can be pulled by children or tripped
over unintentionally.
NOTICE
This appliance has a polarized plug (one blade is wider than the other).
As a safety feature, this plug will fit in a polarized outlet only one way. If
the plug does not fit fully into the outlet, reverse the plug. If it still does
not fit, contact a qualified electrician. Do not attempt to modify the plug
in any way.
FOR HOUSEHOLD
USE ONLY
NOT INTENDED
FOR COMMERCIAL USE
4
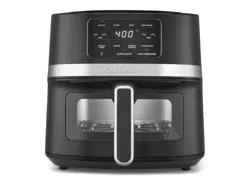
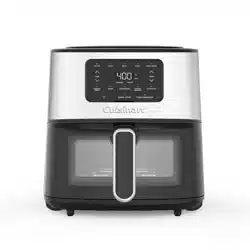
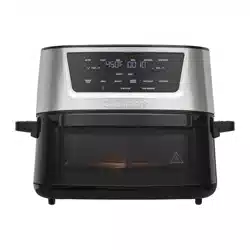
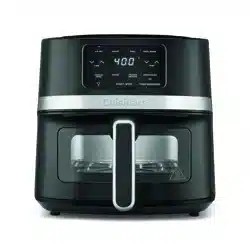
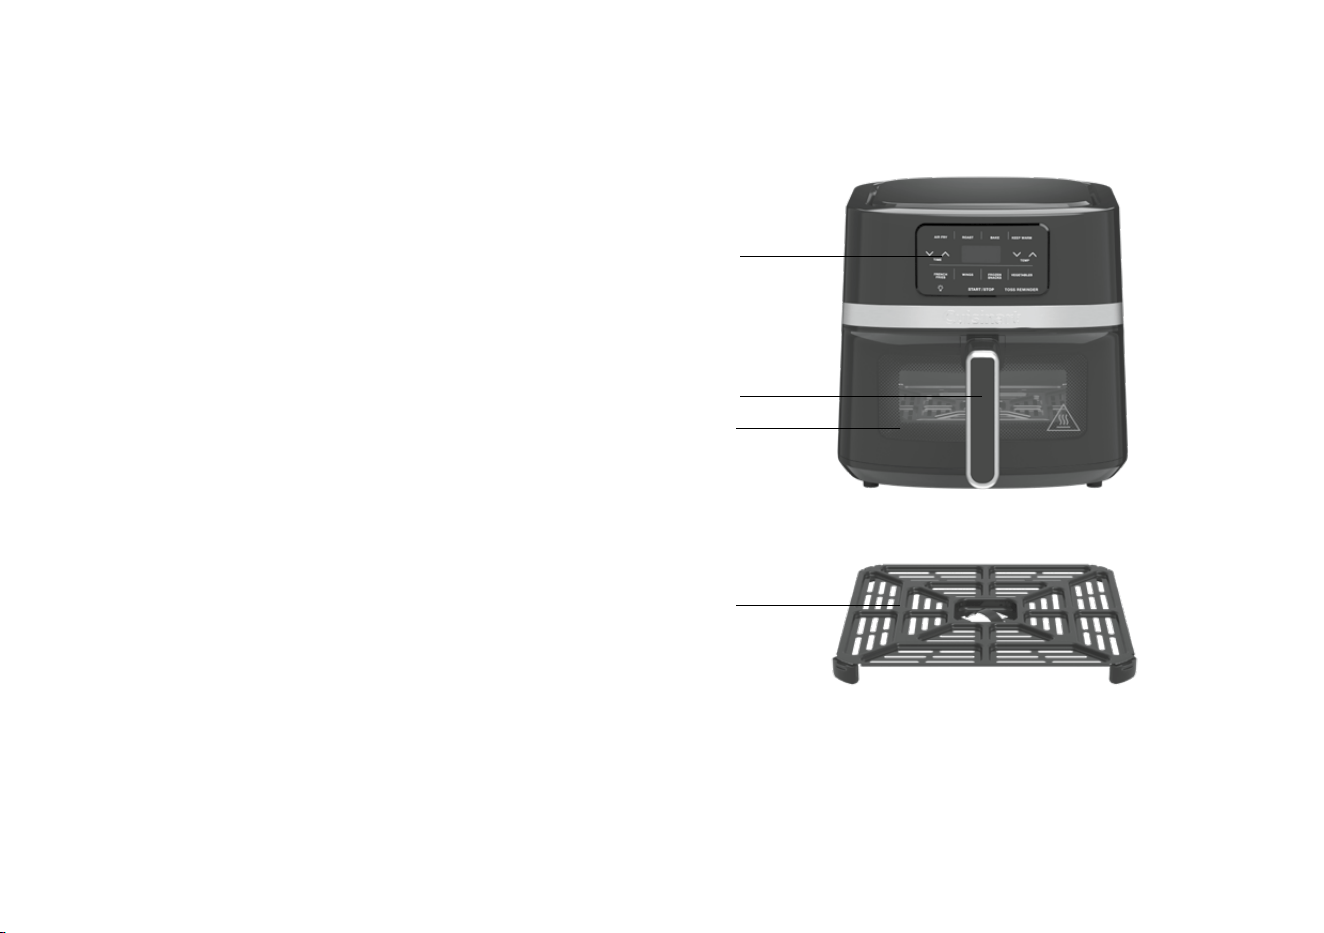
FEATURES AND BENEFITS
1. Digital Control Panel
Features easy-to-use touch controls to select time,
temperature, cooking function, and air fry presets, and a digital
display that shows temperature and countdown timer (details
on page 5).
a. Cooking Functions: Air Fry, Roast, Bake, Keep Warm
b. Air Fry Presets: French Fries, Wings, Vegetables,
Frozen Snacks
c. Light: To illuminate interior in order to view food during
the cooking process
d. Toss Reminder: Optional feature to remind to toss or flip
food midway through cooking. Toss reminder is automatic
for air fry presets with the option to deselect.
2. Air Fry Basket with Cool-Touch Handle
8x8-inch surface area for cooking food.
3. Viewing Window
See-through window to check progress.
4. Crisper Plate
Ensures even cooking. Must always be inserted in air fry
basket for cooking.
5. Cord Wrap (not shown)
For easy cord storage. Located on the back of the unit.
1
2
3
4

5
GETTING TO KNOW
THE DIGITAL CONTROL PANEL
1. Cooking Functions with Indicator Lights
Select function based on desired cooking method: Air Fry,
Roast, Bake, or Keep Warm. Indicator light above selected
function will turn on.
2. Air Fry Presets with Indicator Lights
The Cuisinart
®
Basket Air Fryer has convenient, easy-to-use
presets for your air-fried favorites, including french fries,
chicken wings, vegetables, and frozen snacks.
3. Time and Temp Controls
Use the up and down arrows to adjust the time and
temperature of cooking functions and air fry presets
(optional). The time/temperature will alternate on the digital
display.
4. Preheat Display
The Bake function of the Cuisinart
®
Basket Air Fryer has a
preheat feature. With food prepped and ready to cook, press
Bake with the basket in the air fryer, and then press Start/
Stop. Preheat will display as a scrolling rectangle on the
control panel. When the unit is preheated, an audio alert of 5
tones will sound, and the preheat icon time will flash. Remove
the basket from the air fryer, carefully add the prepared food,
and then return the basket to the unit. The countdown timer
will start.
5. Ready Indicator
Once the timer reaches 00, an audio alert will sound
three times and "00" will hold on the screen for 1 minute.
This display will hold for 1 minute. After 1 minute the unit
will automatically enter Keep Warm mode (see #9).
6. Light Button
To turn the interior light on and off, press the light
icon
.
Interior light will turn off automatically after
20 seconds.
7. Start/Stop with Indicator Light
Use to start and stop cooking, and to turn off the unit.
Indicator will illuminate when cooking.
8. Toss Reminder with Indicator Light
Press to set an audio alert halfway through cooking (with any
cooking function) as a reminder to toss or flip food. Indicator
light will turn on. At the halfway point of cooking, 10 quick
audio alerts will sound and the indicator light will flash.
Note: Air fry presets automatically activate the Toss
Reminder. To disable it, simply press Toss Reminder after
selecting desired preset. Indicator light will turn off.
9. Keep Warm with Indicator Light
The Keep Warm function begins automatically at the end of
any cooking cycle and keeps cooked food warm for up to 60
minutes unless the air fryer basket is removed to pause or
Start/Stop is pressed to turn off. During the automatic Keep
Warm mode, the warm indicator light will illuminate and the
display will scroll. Press Start/Stop to turn off.
BEFORE FIRST USE
1. Remove all packaging materials.
2. Place your Cuisinart
®
Basket Air Fryer on a flat, level surface.
3. Move 2 to 4 inches away from the wall or from any objects on
the countertop. Do not use on heat-sensitive surfaces.
NOTE: OBJECTS SHOULD NOT BE STORED ON THE TOP
OF THE AIR FRYER. IF THEY ARE, REMOVE ALL OBJECTS
BEFORE YOU TURN ON YOUR AIR FRYER. THE EXTERIOR
WALLS GET HOT WHEN IN USE. KEEP OUT OF REACH OF
CHILDREN.

6
4. Check that there is nothing inside the Cuisinart
®
Basket Air
Fryer (except the air fry basket and crisper plate).
5. Plug power cord into the wall outlet.
OPERATION
Follow these simple steps for cooking operation:
1. Place the appliance on a stable, at, heat-resistant surface.
Plug the
Cuisinart
®
Basket Air Fryer
into a wall outlet.
2. Remove the air fry basket from the unit and make sure the crisper
plate is inserted in the air fry basket.
3. Add desired food onto the crisper plate in the basket and insert
the basket into the unit.
Note: For the Bake function, the unit will automatically preheat.
See Preheat on page 5 for more information.
4. Use the digital controls to select the desired cooking function
or air fry preset, and to adjust time/temperature as needed.
5. Press Toss Reminder to activate or disable the audio-alert
reminder to toss/ip the food halfway through cooking.
6. Press Start/Stop to begin cooking.
7. Digital display will show cooking timer countdown.
8. Toss Reminder audio alert will sound halfway through cooking
(if applicable).
9. Once timer reaches 00, unit will beep to indicate end of
cooking cycle.
10. If basket stays inserted after the cooking cycle ends, unit enters
automatic Keep Warm mode.
11. Press Start/Stop or remove basket to disable Keep Warm
function and turn unit off.
12. Unplug unit when done.
AIR FRYING TIPS & HINTS
Air frying is a healthy alternative to deep-frying in oil. A high-velocity
fan and an upper heating element circulate air to prepare a variety
of foods that are both delicious and healthier than traditional fried
foods.
• Air frying doesn’t require oil, but a light coating of cooking spray
or drizzle of oil tossed with food can enhance browning.
• Toss Reminder is recommended when cooking large quantities
that overlap and larger foods like chicken cutlets. Do not overload
the basket; more surface area will result in faster cooking and
better results.
• Foods will cook more evenly when they are cut into equal-size
pieces with minimal overlap.
• An assortment of coatings can be used on air-fried foods.
Some examples of different crumb coatings include breadcrumbs
(plain, seasoned, and panko), crushed cornakes, potato chips,
and graham crackers. Various ours (including gluten-free) and
other dry foods like cornmeal work as well.
• When cooking proteins, marinades and juices will drip to the
bottom of the basket. This is a great base for a gravy or pan sauce.
• When air frying greasy foods (e.g., bacon), grease will drain into the
bottom of the air fry basket. As a precaution, allow hot grease to
cool in the basket before cleaning.
• Use tongs or a silicone spatula to remove food from the basket.
• Use the light/window feature to check on cooking food. The basket
can also be removed to check on the food (this will pause the
cooking until the basket is reinserted into the unit).

7
AIR FRYER CHART
The chart below lists recommended cooking times, temperatures, and portions for various types of foods that can be air fried in the
Cuisinart
®
Basket Air Fryer. If portions exceed recommendations, you can toss or flip foods occasionally while cooking to ensure
the crispiest, most even results. Smaller amounts of food may require less time. For best air fry results, periodically check on food
through viewing window.
NOTE: Use a heat-safe baking pan (not included) on the crisper plate for baked goods, quiches, or casseroles.
FUNCTION FOOD ITEM AMOUNT TIME TEMP PREHEAT TOSS/FLIP
Air Fry Breaded cutlets 2 to 3 cutlets 20 min 360°F - Flip
Air Fry Salmon 4 fillets (4 oz each) 10 min 375°F - -
Air Fry Shrimp 1½ lb 8 min 370°F - Toss
Air Fry Bacon 5 slices 12 min 320°F - -
Air Fry Frozen nuggets 20 pieces 10 min 380°F - Flip
Bake Round cake 7-inch pan 20 to 25 min 325°F
✓
-
Bake Dinner rolls 6 10 min 350°F
✓
-
Roast Chicken, whole
3.5 lb
55 min
350°F
- -
Roast Chicken drumsticks 5 pieces 25 min 380°F - Flip
Roast Corn on the cob 3 to 4 ears 20 min 350°F - Flip
Roast Melted cheese topping - 3 to 5 min 400°F
✓
-

8
Operation Why won’t my unit turn on?
Make sure your unit is plugged into a functional outlet.
Make sure the air fryer basket is securely in place in the unit.
Call Consumer Service at 1-800-726-0190.
Cooking
Why are fried foods not crispy
or fried evenly?
Some foods may require more oil than others. If not crispy enough, lightly spray, brush, or rub more
oil on the food.
Make sure food is spread evenly in a single layer in the air fryer basket with no overlap. If food still
overlaps, toss or ip food halfway through cooking cycle; use the Toss Reminder for an audio alert.
Put the food in for additional cooking time. Make sure to check frequently until food reaches desired
brownness.
Why is my food undercooked?
If you put too much food in the basket, it may not cook in the suggested time. Try using smaller
batches of food and single layers, rather than stacking food items on top of each other.
If the temperature is too low, the food may not fully cook. For air frying, the ideal temperature
is around 400ºF.
Cleaning
How do I clean tough-to-
remove food residue from the
basket/crisper plate?
To remove baked-on grease, soak the accessories in hot, sudsy water or use a nonabrasive cleaner.
We recommend hand-washing these parts in hot, sudsy water with a nylon scouring pad or nylon
brush and then thoroughly rinsing them, or washing in a dishwasher.
TROUBLESHOOTING
PRESET AMOUNT TIME TEMPERATURE PREHEAT TOSS/FLIP
French Fries 1½ lb 18 min 400°F
-
Toss
Wings 2 lb 25 min 400°F
-
Toss
Frozen Snack - 10 min 400°F
-
Toss
Vegetables 6 cups 10 min 375°F
-
Toss

9
MORE WAYS TO COOK
In addition to air frying, the Cuisinart
®
Basket Air Fryer can
be used for baking, roasting, and more. To cook using these
functions, simply select the function and use the temp/time arrows
to select the desired temperature and time (up to 60 minutes).
Some tips and recommendations on temperature and time are
listed below.
• When using the Cuisinart
®
Basket Air Fryer, cooking times may
need to be reduced because of the convection fan’s high speed.
Start checking foods 5 to 10 minutes before the end of the sug-
gested cooking time.
• When making baked goods in the unit, we recommend:
– Using a heat-safe baking pan (not included) on the
crisper plate.
– For recipes not specifically developed for this Cuisinart
®
Basket Air Fryer, we suggest cooking at a lower temperature
(25°F to 50°F lower) than what the recipe indicates.
• To roast vegetables and cuts of meat, set the temperature
to 400°F.
CLEANING AND MAINTENANCE
• Always unplug the air fryer from the electric outlet and allow
it to cool completely before cleaning.
• Do not use abrasive cleaners, as they will damage the finish.
Simply wipe the exterior with a clean, damp cloth and dry
thoroughly. Apply the cleansing agent to a cloth, not directly
onto the air fryer, before cleaning.
• To clean interior walls, use a damp cloth and a mild liquid
soap solution or a spray solution on a sponge. Remove any
residue from cleaners with a clean, damp rag. Never use harsh
abrasives or corrosive products. These could damage the air
fryer's surface. Never use steel wool pads on interior of the
air fryer.
• Air fry basket and crisper plate are dishwasher safe. They can
also be hand-washed in hot, sudsy water with a nylon scouring
pad or nylon brush and thoroughly rinsed.
• Remove the crisper plate from the air fry basket to easily access
the bottom of the air fry basket.
• Any servicing should be performed by an authorized service
representative.
Operation Why won’t my unit turn on?
Make sure your unit is plugged into a functional outlet.
Make sure the air fryer basket is securely in place in the unit.
Call Consumer Service at 1-800-726-0190.
Cooking
Why are fried foods not crispy
or fried evenly?
Some foods may require more oil than others. If not crispy enough, lightly spray, brush, or rub more
oil on the food.
Make sure food is spread evenly in a single layer in the air fryer basket with no overlap. If food still
overlaps, toss or ip food halfway through cooking cycle; use the Toss Reminder for an audio alert.
Put the food in for additional cooking time. Make sure to check frequently until food reaches desired
brownness.
Why is my food undercooked?
If you put too much food in the basket, it may not cook in the suggested time. Try using smaller
batches of food and single layers, rather than stacking food items on top of each other.
If the temperature is too low, the food may not fully cook. For air frying, the ideal temperature
is around 400ºF.
Cleaning
How do I clean tough-to-
remove food residue from the
basket/crisper plate?
To remove baked-on grease, soak the accessories in hot, sudsy water or use a nonabrasive cleaner.
We recommend hand-washing these parts in hot, sudsy water with a nylon scouring pad or nylon
brush and then thoroughly rinsing them, or washing in a dishwasher.

10
Recipes
French Toast Sticks.................................10
Lime Tortilla Chips .................................11
Quick Nachos......................................11
Peri-Peri Chicken Wings .............................12
Bualo Chicken Wings ..............................12
Bualo Cauliower .................................13
Air-Fried Calamari with Pickled Hot Peppers ............13
Chicken Caesar Salad ...............................14
Firecracker Shrimp .................................15
Mexican Street Corn Riblets..........................15
Parmesan True Fries ..............................16
Crispy Kung Pao Brussels Sprouts .....................16
Chicken Tinga Taquitos ..............................17
Roast Chicken with Fall Veggies ......................17
Thyme-Glazed Salmon
with Asparagus and Fingerling Potatoes ...............18
Cinnamon-Sugar Doughnut Bites......................19
Raspberry-Peach Hand Pies .........................20
French Toast Sticks
Make breakfast a real treat for your family in just 10 minutes.
Makes 12 sticks
4 large eggs
½ cup heavy cream
½ cup whole milk
3 tablespoons granulated sugar
1 teaspoon ground cinnamon
4 slices brioche, cut into thirds
1 tablespoon powdered sugar
Warm maple syrup, for serving
1. In a shallow baking dish, whisk the eggs, heavy cream, milk,
sugar, and cinnamon. Dip both sides of the brioche in the custard,
and place in the basket. Put the basket in the air fryer. Select
Air Fry, and set the time to 10 minutes and the temperature to
320°F. Press Start/Stop.
2. When ready, transfer the sticks to a serving plate, and then
dust with the powdered sugar. Serve immediately with the
maple syrup.
Nutritional information per serving (based on 12 servings):
Calories 115 (52% from fat) • Carb. 10g • Pro. 4g • Fat 7g • Sat. Fat 4g
Chol. 82mg • Sod. 84mg • Calc. 27mg • Fiber 0g

11
Lime Tortilla Chips
Trade in your store-bought chips for this quick and easy homemade
option. They’re perfect on their own or as a fun accompaniment to
your favorite dip.
Makes 20 chips
5 6-inch corn tortillas
2 tablespoons olive oil
½ lime
1 teaspoon lime zest
1 teaspoon kosher salt
1. Quarter the tortillas and lay out on a baking sheet. Brush both
sides of the tortilla pieces with olive oil.
2. Working in two batches, arrange the tortilla pieces in a single
layer in the basket. Put the basket into the air fryer. Select Air
Fry, and set the time to 8 minutes and the temperature to 350°F.
Press Toss Reminder and Start/Stop. Halfway through cooking
time, shake the basket to toss the chips, and then replace the
basket to finish cooking. When done cooking, transfer the chips
to a bowl. Repeat with the remaining tortilla pieces.
3. Once both batches are finished, squeeze the lime over the chips,
and then sprinkle with the lime zest and salt. Toss the chips in
the bowl so that the seasoning coats the chips evenly.
Nutritional information per serving:
Calories 172 (33% from fat) • Carb. 27g • Pro. 3g • Fat 7g • Sat. Fat 1g
Chol. 0mg • Sod. 949mg • Calc. 92mg • Fiber 3g
Quick Nachos
Here is a recipe that can get a delicious, and fast, snack on the
table in under 10 minutes. It is also very customizable – just add
your favorite nacho toppings in place of, or in addition to, what is
listed here.
Makes 6 servings
6 cups tortilla chips (as many as needed to cover the sur-
face area of the basket — this will differ with differ-
ent-style tortilla chips)
1½ cups shredded Cheddar and/or Monterey Jack
½ cup refried beans
2 tablespoons salsa, plus more for serving
1 jalapeño, halved, seeded, and thinly sliced
1 to 2 scallions, thinly sliced
¼ cup chopped green chiles
(about half a 4.5-ounce can, drained)
½ cup sliced black olives (if using canned olives, drain well)
¼ cup sweet pickled jalapeño slices, drained
Guacamole and sour cream, for serving
1. Put about 2 cups tortilla chips on the bottom of the air fryer
basket. Top with ½ cup of the shredded cheese and then
follow with another layer of chips. Dollop the refried beans
and 2 tablespoons salsa over the chips, and then top with
the sliced items. Finish with the remaining chips and then
the cheese.
2. Put the filled basket into the air fryer. Select Air Fry, and set
the time to 5 minutes and the temperature to 400°F. Press
Start/Stop.
3. Serve immediately with additional salsa, guacamole, and sour
cream on the side.
Nutritional information per serving:
Calories 270 (52% from fat) • Carb. 22g • Pro. 10g • Fat 3g • Sat. Fat 6g
Chol. 25mg • Sod. 578mg • Calc. 268mg • Fiber 3g

12
Peri-Peri Chicken Wings
A little sour, a little sweet, and slightly spicy—versatile peri-peri
sauce can be enjoyed on chicken wings and so much more!
Makes about 20 wings
2 pounds chicken wings*
1¾ teaspoons kosher salt, divided
1 ounce peri-peri chiles
(African bird’s eye peppers) or other red chiles, stems
removed
4 garlic cloves
1 small shallot
1 2-inch piece peeled fresh ginger
½ cup fresh cilantro leaves
¼ cup fresh oregano leaves
2 teaspoons smoked paprika
1 teaspoon granulated sugar
2 tablespoons red wine vinegar
1 tablespoon fresh lemon juice
Zest of 1 lemon
½ cup olive oil
* Many wings come separated into flats and drumettes,
but if only full wings are available, be sure to remove
the tips and separate into two pieces.
1. Arrange the chicken wings in the basket, and sprinkle with
¾ teaspoon of the salt. Place the basket into the air fryer.
Select the Wings preset, and press Start/Stop. When alerted,
toss the wings. Replace basket to finish cooking.
2. While the wings are air frying, prepare the sauce. In a small food
processor or chopper fitted with the metal chopping
blade,add the chiles, garlic, shallot, and ginger to the work
bowl. Process on High to finely chop. Scrape down the work
bowl. Add the cilantro, oregano, paprika, sugar, and 1 teaspoon
of the salt; pulse to roughly chop. With the unit running, add
the vinegar, lemon juice, and lemon zest, and process until
chopped and well blended. Continue running while adding the
olive oil. Process until completely homogeneous.
3. Once the wings have finished cooking, transfer to a large
bowl, and toss with the sauce. Serve immediately.
Nutritional information per wing (plain):
Calories 94 (39% from fat) • Carb. 0g • Pro. 14g • Fat 4g • Sat. Fat 1g
Chol. 39mg • Sod. 127mg • Calc. 7mg • Fiber 0g
Nutritional information per serving of peri-peri sauce (based on 20 servings):
Calories 92 (64% from fat) • Carb. 7g • Pro. 1g • Fat 7g • Sat. Fat 1g
Chol. 0mg • Sod. 209mg • Calc. 3mg • Fiber 0g
Buffalo Chicken Wings
For a healthier option than deep-frying, air fry chicken wings.
The Cuisinart
®
Basket Air Fryer makes them extra crispy with
no oil and little preparation.
Makes about 20 wings
2 pounds chicken wings*
¾ teaspoon kosher salt
¼ cup vinegar-based hot sauce
1 tablespoon unsalted butter, melted
* Many wings come separated into flats and drumettes,
but if only full wings are available, be sure to remove the
tips and separate into two pieces.
1. Arrange the chicken wings in the basket and sprinkle with the
salt. Place the basket in the air fryer. Select the Wings preset,
and press Start/Stop. When alerted, toss the wings. Replace
basket to finish cooking.

13
2. While the wings are air frying, put the hot sauce and butter into
a large bowl, and stir to combine.
3. Once the wings have finished cooking, transfer to the bowl
with the sauce, and toss the wings to coat.
Nutritional information per wing (plain):
Calories 94 (39% from fat) • Carb. 0g • Pro. 14g • Fat 4g • Sat. Fat 1g
Chol. 39mg • Sod. 127mg • Calc. 7mg • Fiber 0g
Nutritional information per serving of buffalo sauce (based on 20 servings):
Calories 6 (100% from fat) • Carb. 0g • Pro. 0g • Fat 1g • Sat. Fat 1g
Chol. 0mg • Sod. 28mg • Calc. 0mg • Fiber 0g
Buffalo Cauliflower
A healthy and simple snack to satisfy that savory and
crunchy craving.
Makes about 6 servings
1 medium head cauliflower, 2 to 2½ pounds
or approximately 10 cups of florets
1 tablespoon olive oil
¾ teaspoon kosher salt
½ tablespoon white rice flour
½ tablespoon tapioca flour
1 tablespoon plus 1 teaspoon unsalted butter
(or coconut oil for a vegan alternative)
1 tablespoon plus 1 teaspoon vinegar-based hot sauce
1. Cut the cauliflower into small individual florets. Toss with the
olive oil, salt, and white rice and tapioca flours. Place in the
basket, shaking to evenly distribute, and place the basket in
the air fryer.
2. Select the Vegetables preset. Set the time to 20 minutes and the
temperature to 325°F. Select Toss Reminder and press Start/
Stop. When alerted, toss cauliflower in the basket.
3. When cauliflower is finished cooking, give the basket another
shake. Then select the Vegetables preset again, and set for 5
minutes at 400°F.
4. While the cauliflower is cooking, melt the butter. Stir together
with the hot sauce until well blended.
5. The cauliflower is done when cooked through, and browned and
crispy on the outside. Toss to taste with the hot sauce/butter
mixture. Serve immediately.
Nutritional information per serving (based on 6 servings):
Calories 62 (73% from fat) • Carb. 3g • Pro. 1g • Fat 5g • Sat. Fat 2g
Chol. 8mg • Sod. 309mg • Calc. 15mg • Fiber 1g
Air-Fried Calamari with Pickled Hot Peppers
Old Bay
®
gives these calamari a salty and smoky kick.
Makes 1 to 2 servings
1/2 pound calamari rings
1/2 cup cornstarch
Extra-virgin olive oil, as needed
1/4 teaspoon kosher salt
1/4 teaspoon Old Bay
®
seasoning
2 tablespoons pickled hot pepper rings, drained
2 lemon wedges
Marinara sauce, warm, for serving
1. Pat the calamari thoroughly dry with paper towels. Sprinkle the
cornstarch on a baking pan. Scatter the calamari over the
cornstarch, and shake the pan to evenly coat the calamari.
2. Place the coated calamari rings in the basket, spray with an even
coating of extra-virgin olive oil, and season one side with salt
and Old Bay
®
. Place the basket in the air fryer. Select Air Fry, and
set the time to 10 minutes and the temperature to 400°F. Select

14
Toss Reminder and press Start/Stop. When alerted, shake the
basket and spray with additional oil if calamari appear dry.
3. When calamari rings are finished cooking, remove from the
basket. Top with the pickled hot pepper rings, and serve with
lemon wedges and marinara sauce.
Nutritional information per serving (based on 1 to 2 servings):
Calories 266 (24% from fat) • Carb. 25g • Pro. 24g • Fat 7g • Sat. Fat 1g
Chol. 352mg • Sod. 681mg • Calc. 50mg • Fiber 1g
Chicken Caesar Salad
Prepackaged croutons are full of unnecessary salt and other
ingredients. When making your own, you know exactly what you are
putting into your body, and once you see how easy they are, you
will wonder why they were ever purchased in the first place! Here,
the croutons are the star of the show, along with the simplest way
to prepare chicken.
Makes 4 servings
For the chicken:
2 boneless, skinless chicken breasts, even in thickness
1 tablespoon olive oil
1 garlic clove, smashed and peeled
Kosher salt
Freshly ground black pepper
For the croutons:
2 cups cubed (½- to 1-inch cubes) sourdough bread
2 tablespoons olive oil
2 pinches each kosher salt and freshly ground black pepper
Pinch garlic powder
For the salad:
1 small head romaine lettuce, roughly chopped
3 to 4 tablespoons Caesar dressing, store-bought or homemade
(see Cuisinart.com for a recipe)
2 tablespoons shaved Parmesan
1 lemon, cut into wedges, for serving
1. Put the chicken breasts, along with the 1 tablespoon olive oil, the
smashed garlic clove, and a hefty pinch of salt and pepper, into a
large shallow bowl. Massage the ingredients into the chicken, and
then cover and transfer to the refrigerator to marinate for 30
minutes.
2. While the chicken is marinating, prepare the croutons. Select
Bake, and set the time to 4 minutes and the temperature to
350°F. Press Start/Stop. While the unit is preheating, put the
bread cubes into a large shallow bowl with the 2 tablespoons
olive oil and pinches of salt, pepper, and garlic powder. Toss to
fully coat. Once preheated, add the seasoned bread cubes to the
basket and bake. Remove and reserve.
3. When the chicken is done marinating, transfer to the basket
and place into the air fryer. Select Air Fry, and set the time to 18
minutes and the temperature to 375°F. Press Start/Stop. When
the chicken is done cooking (the internal temperature should
be 170°F), remove and allow to rest for a few minutes, then
thinly slice.
4. Put the romaine into a large serving bowl and top with the
croutons, sliced chicken, and shaved Parmesan, and then drizzle
the dressing over the top. Gently toss. Serve each portion of
salad with a lemon wedge on the side.
Nutritional information per serving:
Calories 413 (42% from fat) • Carb. 28g • Pro. 33g • Fat 19g • Sat. Fat 4g
Chol. 79mg • Sod. 733mg • Calc. 130mg • Fiber 4g

15
Firecracker Shrimp
Succulent shrimp are coated in cornstarch and quickly air fried
before being tossed in a sticky-sweet and spicy sauce.
Makes 4 servings (14 to 16 large shrimp)
1 pound large shrimp
½ cup cornstarch
Extra-virgin olive oil, as needed
¼ cup sweet chili sauce
1 tablespoon fresh lime juice
1 teaspoon lime zest
1 tablespoon soy sauce
1 tablespoon Sriracha
1 teaspoon toasted sesame seeds
Scallions and cilantro, chopped, for garnish
1. Pat the shrimp thoroughly dry with paper towels. Sprinkle the
cornstarch on a baking pan. Scatter the shrimp over the
cornstarch, and shake the pan to evenly coat the shrimp.
2. Arrange the shrimp in the basket and spray with an even coating
of extra-virgin olive oil. Place into the air fryer. Select
Air Fry, and set the time to 8 minutes and the temperature to
350°F. Select Toss Reminder and press Start/Stop. When alerted,
shake the basket and spray with additional oil if needed. Replace
the basket to finish cooking.
3. While the shrimp are cooking, combine the chili sauce, lime
juice, lime zest, soy sauce, and Sriracha in a medium bowl, and
set aside.
4. When the shrimp are finished, transfer to the bowl with the
sauce, and gently stir to coat. Transfer to a serving bowl, and top
with the sesame seeds, scallions, and cilantro.
Nutritional information per serving (based on 4 servings):
Calories 222 (20% from fat) • Carb. 27g • Pro. 16g • Fat 5g • Sat. Fat 1g
Chol. 143mg • Sod. 1225mg • Calc. 62mg • Fiber 1g
Mexican Street Corn Riblets
Easier to eat than classic corn on the cob and incredibly
flavorful, these corn riblets are a must-try in your Cuisinart
®
Basket Air Fryer!
Makes 8 riblets
¼ cup olive oil
1 teaspoon kosher salt
1 teaspoon onion powder
1
1
/
8
teaspoons chili powder, divided
½ teaspoon garlic powder
1
/
8
teaspoon freshly ground black pepper
2 ears corn, quartered lengthwise
¼ cup mayonnaise
Juice of 1 lime
½ cup crumbled cotija cheese
Cilantro, chopped, for garnish
1. In a small bowl, whisk the olive oil, kosher salt, onion powder,
1
/
8
teaspoon of the chili powder, garlic powder, and black pepper.
Brush the corn quarters with the oil mixture and arrange in the
basket. Place the basket in the air fryer. Select Air Fry, and set
the time to 20 minutes and the temperature to 350°F. Press
Start/Stop.
2. While the corn is cooking, mix the mayonnaise and lime juice in a
small bowl and set aside.
3. When corn is finished, brush the riblets with a thin layer of the
mayonnaise mixture, and sprinkle with the cotija and cilantro.
Serve immediately.
Nutritional information per serving:
Calories 170 (76% from fat) • Carb. 7g • Pro. 3g • Fat 15g • Sat. Fat 4g
Chol. 12mg • Sod. 530mg • Calc. 4mg • Fiber 1g

16
Parmesan Truffle Fries
These crispy shoestring fries are savory and packed with umami
flavor. They’re proof that you don’t need a deep fryer to make
delectable fries!
Makes 4 to 6 servings
11/2 pounds frozen shoestring french fries
¼ cup grated Parmesan
1/2 teaspoon porcini powder (optional)
2 tablespoons chopped fresh parsley
1 tablespoon truffle oil
2 teaspoons kosher salt
1. Select the French Fries preset. Press Start/Stop. Add the french
fries to the basket, shaking to distribute evenly. When alerted,
shake the basket to toss the french fries, and replace the basket
to finish cooking.
2. When done, place the fries in a bowl. Toss with the Parmesan,
porcini powder (if using), parsley, truffle oil, and salt, and serve
immediately.
Nutritional information per serving (based on 6 servings):
Calories 314 (41% from fat) • Carb. 41g • Pro. 5g • Fat 14g • Sat. Fat 2g
Chol. 2mg • Sod. 1330mg • Calc. 65mg • Fiber 4g
Crispy Kung Pao Brussels Sprouts
Try this vegetarian spin on the beloved Chinese dish. Crispy
air fried Brussels sprouts get a tingle of heat from Sichuan pepper.
For the Brussels sprouts:
1½ pounds Brussels sprouts
2 tablespoons toasted sesame oil
For the sauce:
1 tablespoon toasted sesame oil
½ to 1 teaspoon Sichuan peppercorns, to taste depending
on desired spice
2 scallions, green and white parts separated,
thinly s liced
4 dried red chiles, halved and stems removed
1 1½-inch piece fresh ginger, peeled and grated
2 garlic cloves, sliced
3 tablespoons soy sauce
3 tablespoons hoisin sauce
2 tablespoons rice wine vinegar
1 tablespoon granulated sugar
¼ cup unsalted roasted peanuts, chopped
1. Trim the bottom of each Brussels sprout and cut in half
lengthwise. Toss with the 2 tablespoons of sesame oil.
2. Select Air Fry, and set the time to 12 minutes and the
temperature to 350°F. Select Toss Reminder and press Start/
Stop. Once the unit is preheated, add the Brussels sprouts
to the basket, shaking to distribute evenly. When alerted,
shake the basket to toss the sprouts, and then replace the
basket to finish cooking. The sprouts should be soft yet crispy.
3. While the sprouts are cooking, heat the 1 tablespoon of sesame
oil in a small pot over medium heat. Add the peppercorns,
scallion whites, dried chiles, ginger, and garlic. Toast in the
sesame oil until fragrant, about 1 minute. Add the soy sauce,
hoisin sauce, rice wine, and sugar. Bring to a boil, then reduce
the heat to a simmer. Cook to reduce the sauce by half.
4. When the Brussels sprouts are ready, remove from the basket
and toss in the sauce with the sliced scallion greens and
peanuts. Serve immediately.
Nutritional information per serving:
Calories 293 (45% from fat) • Carb. 32g • Pro. 9g • Fat 16g • Sat. Fat 2g
Chol. 0mg • Sod. 1g • Calc. 91mg • Fiber 8g

17
Chicken Tinga Taquitos
These rolled corn tortillas are filled with smoky shredded chicken
and air fried to crispy perfection.
Makes 6 taquitos
1 tablespoon olive oil, plus more for brushing
1 medium white onion, sliced
3 garlic cloves, minced
1 can (14.5-ounce) fire-roasted tomatoes
¼ cup adobo sauce
½ teaspoon chipotle powder
½ teaspoon ground cumin
½ teaspoon dried oregano
1 teaspoon kosher salt
½ teaspoon freshly ground black pepper
2 cups shredded leftover or rotisserie chicken
6 6-inch corn tortillas
½ cup shredded Oaxaca cheese
Sour cream, chopped fresh cilantro, and crumbled
Cotija cheese, for garnish
1. Heat 1 tablespoon of the olive oil in a large skillet over medium
heat. Add the onion and garlic, and cook until the onion is
translucent and softened, but not browned, about 5 minutes.
Add the tomatoes, adobo sauce, chipotle powder, cumin, oregano,
salt, and pepper. Cook until the spices are aromatic, 2 to 3
minutes longer. Add the shredded chicken and toss in the sauce.
Cook until heated through.
2. Wrap the tortillas in a damp towel, and microwave for about
15 seconds. Keep covered until using.
3. Place the first tortilla flat on your work surface. Place about
2 tablespoons of the chicken mixture across the lower half
of the tortilla. Sprinkle with some of the Oaxaca cheese, then
tightly roll up the tortilla. Use a toothpick to secure the tortilla.
Add to the basket and repeat with the remaining tortillas.
4. Once the taquitos are assembled and in the basket, brush with a
thin coating of olive oil. Place the basket in the air fryer. Select
Air Fry, and set the time to 8 minutes and the temperature to
350°F. Press Start/Stop.
5. When the taquitos are done cooking, remove from the basket.
Top with a drizzle of sour cream and a sprinkle of cilantro and
cotija cheese.
Nutritional information per serving (based on ½ taquito):
Calories 522 (59% from fat) • Carb. 9g • Pro. 43g • Fat 34g • Sat. Fat 22g
Chol. 107mg • Sod. 2619mg • Calc. 34mg • Fiber 1g
Roast Chicken with Fall Veggies
One-pot cooking, à la Cuisinart
®
Basket Air Fryer.
Makes 4 to 6 servings
16 ounces Brussels sprouts, halved
8 ounces butternut squash, cut into 1-inch cubes
1 tablespoon olive oil
1¾ teaspoons kosher salt, divided
Freshly ground black pepper
1 3½-pound chicken
4 garlic cloves, smashed
1 medium lemon, halved
1. In a medium bowl, toss the Brussels sprouts and butternut
squash with the olive oil, 1 teaspoon of the salt, and black
pepper to taste. Select Roast, and set the time to 25 minutes
and the temperature to 300°F. Press Start/Stop. Once the unit is
preheated, add the vegetables to the basket, tossing to evenly
distribute.

18
2. While the vegetables are cooking, prepare the chicken. Pat the
chicken completely dry with paper towels, and then press on the
chicken to flatten it slightly for more even cooking. Season with
the ¾ teaspoon salt all over the skin and also inside the cavity.
Season lightly with pepper. Add the garlic to the cavity and
then squeeze the lemon into the cavity, leaving the lemon
halves inside.
3. When the vegetables have finished cooking, transfer to a mixing
bowl. Place the chicken in the basket, and put the basket in the
air fryer. Select Roast again with the time set to 55 minutes and
the temperature set to 350°F. Press Start/Stop.
4. With 10 minutes remaining in cooking time, add the vegetables
back to the basket, distributing them evenly around the chicken.
Replace the basket to finish cooking.
5. When finished (the chicken should register 165°F with an instant
read thermometer), remove and carve the chicken into individual
pieces. Serve with the vegetables.
Nutritional information based on 6 servings:
Calories 268 (23 % from fat) • Carb. 16g • Pro. 36g • Fat 7g • Sat. Fat 1g
Chol. 103mg • Sod. 768mg • Calc. 130mg • Fiber 5g
Thyme-Glazed Salmon with Asparagus and
Fingerling Potatoes
This complete weeknight meal comes together easily and quickly
thanks to the Cuisinart
®
Basket Air Fryer.
Makes 4 servings
10 ounces fingerling potatoes, multicolor if available, halved
lengthwise
1 tablespoon olive oil, divided
1½ teaspoons kosher salt, divided
2 pinches freshly ground black pepper, divided
1 pound asparagus, hard ends trimmed and discarded
1 tablespoon honey
½ teaspoon fresh lemon zest, divided
½ teaspoon fresh lemon juice
½ teaspoon fresh thyme leaves
1 pound salmon, cut into 4-ounce fillets
1. In a large mixing bowl, toss the halved potatoes with 1 teaspoon
of the olive oil, ¾ teaspoon of the salt, and a pinch of pepper.
Select the Vegetables preset, and adjust the cooking time to 15
minutes. Press Start/Stop. Once the unit is preheated, add the
potatoes to the basket, shaking to evenly distribute. When
alerted, toss the potatoes. Replace the basket to finish cooking.
2. While the potatoes are cooking, toss the asparagus in the mixing
bowl with 1 teaspoon of the oil, ¼ teaspoon of the salt, a pinch
of pepper, and ¼ teaspoon of the lemon zest.
3. Stir together the final teaspoon of olive oil with the honey, lemon
juice, remaining lemon zest, thyme, and ½ teaspoon kosher salt.
Brush evenly over the salmon fillets. Reserve.
4. When the potatoes are finished, transfer to a bowl or platter.
Tent lightly with aluminum foil to keep warm.

19
5. Add the asparagus to the basket and place in the air fryer.
Select the Vegetables preset and adjust the cooking time to 8
minutes. Press Start/Stop. When finished, transfer to the dish
with the potatoes.
6. Add the salmon to the basket, and place in the air fryer. Select
Air Fry, and set the time to 10 minutes and the temperature to
375°F. Select Toss Reminder and press Start/Stop.
7. Once the salmon is finished cooking, serve with the potatoes
and asparagus.
Nutritional information per doughnut bite:
Calories 367 (35% from fat) • Carb. 23g • Pro. 39g • Fat 14g • Sat. Fat 2g
Chol. 94mg • Sod. 877mg • Calc. 59mg • Fiber 4g
Cinnamon-Sugar Doughnut Bites
Not that they will likely hang around much longer, but these
doughnut bites are best eaten just after cooking.
Makes 16 doughnut bites
¾ cup bread flour, plus more for kneading
(up to ¼ cup) and as needed
2 teaspoons granulated sugar
¾ teaspoon active dry yeast
2 pinches kosher salt
2 pinches ground cinnamon
Pinch ground nutmeg
1 large egg, lightly beaten, room temperature
3 tablespoons buttermilk, room temperature
½ teaspoon pure vanilla extract
1 tablespoon unsalted butter, room temperature and cut
into 4 pieces
Melted butter, for finishing (approximately 2 tablespoons)
Cinnamon sugar, for finishing (if preparing at home,
combine ¼ cup granulated sugar with 1 tablespoon
ground cinnamon)
1. Put the flour, sugar, yeast, salt, cinnamon, and nutmeg into a
large mixing bowl. Whisk to combine.
2. Whisk the egg, buttermilk, and vanilla together, and then slowly
combine with the flour mixture (use your hands or a wooden
spoon). Lightly dust a clean work surface with flour, and transfer
the dough to the work surface, dusting the dough lightly with
flour. Knead the dough, adding flour as necessary 1 teaspoon at
a time to keep the dough from sticking to your hands. Add the
butter, 1 piece at a time, until all the butter has been
incorporated into the dough. Continue adding flour 1 teaspoon
at a time to keep the dough from sticking to your hands. The
dough should be tender and smooth, and when pulled should
not break apart.
3. Form the dough into a ball. Put in a clean mixing bowl, cover
with a damp towel or plastic wrap, and allow to rise for 1 hour.
After 1 hour, gently turn the dough over, and press it down (do
not punch). Cover and allow to rest for another hour.
4. On a lightly floured surface, divide the dough into 16 pieces.
Working with one piece at a time and keeping the others covered
loosely with plastic wrap, roll between your hands to form into a
small, smooth ball. Once each ball is rolled, cover loosely with
plastic wrap.
5. Once 8 balls of dough have been formed, transfer to the
air fryer basket.
6. Place basket in the air fryer. Select Bake and set the time to 8
minutes and the temperature to 350°F. Press Start/Stop.
Doughnuts bites are done when they are lightly browned. Repeat
with the remaining dough.
7. Once each batch of doughnut bites is finished and still warm,
brush with butter on all sides, and then gently toss in the
cinnamon sugar. Serve immediately.
Nutritional information per doughnut bite:
Calories 66 (43% from fat) • Carb. 8g • Pro. 1g • Fat 3g • Sat. Fat 2g
Chol. 20mg • Sod. 25mg • Calc. 7mg • Fiber 0g

20
Raspberry-Peach Hand Pies
All the best parts of the pie without the fuss. There is a reason
hand pies are so popular – they are delicious, easy to assemble,
and very forgiving. If you’re feeling creative, have fun crimping the
edges of the crust or scoring designs on top of each pie.
Makes 10 to 12 hand pies
For the dough:
2 cups unbleached all-purpose flour
2 teaspoons granulated sugar
1 teaspoon kosher salt
½ pound (2 sticks) unsalted butter, cold and cubed
¼ cup ice water
For the filling:
1 bag (10 ounces) frozen peach slices, thawed
6 ounces fresh raspberries
1
/
3
cup granulated sugar
2 tablespoons tapioca flour/starch
1 tablespoon finely chopped candied ginger
2 teaspoons fresh lemon juice
½ teaspoon pure vanilla extract
¼ teaspoon kosher salt
¼ teaspoon ground ginger
For the egg wash:
1 large egg whisked with 1 teaspoon water and pinch of salt
Coarse sugar, for sprinkling (optional)
1. Prepare the dough. Whisk together the flour, sugar, and salt, and
then add the butter cubes. Using your hands, rub the butter into
the flour until the butter is fully coated and broken into pieces
the size of peas. Then add the water and mix until the dough is
no longer powdery dry and is coming together when pinched.
(This process could also be done in a food processor fitted
with the metal chopping blade. First, process the dry ingredients
on Low, and then add the butter. Pulse on High until the butter
pieces are about the size of peas. Slowly pulse in the water
1 tablespoon at a time. Finish bringing the dough together on a
lightly floured surface by hand.) Fold the dough over itself
a few times (this helps to make extra flaky layers), and then
form into two rounds. Wrap well and chill a minimum of two hours
or up to overnight.
2. Just before getting ready to cook, prepare the filling. In a
medium to large mixing bowl, combine the peaches, raspberries,
sugar, tapioca flour, candied ginger, lemon juice, vanilla, salt, and
ground ginger, and mix gently to combine. Reserve.
3. Roll one of the pieces of dough into a large round about
1
/
8
to
¼ inch thick, and then cut out pieces with a 4-inch round cutter.
Use a slotted spoon to scoop a couple of tablespoons of filling,
letting any excess liquid drain back into the bowl, and place in
the center of one of the rounds. Brush the edge of the filled
round with the egg wash, and then top with an unfilled round of
dough. Press to seal, and then use a paring knife to cut a couple
of small slits on top. Repeat with the remaining dough rounds
from the first piece of dough. Refrigerate the prepared hand pies.
Reserve any dough scraps.
4. Repeat with the second round of dough, combining and rerolling
any dough scraps. Hand pies are very forgiving, so don’t let the
extra dough go to waste!
5. Once the hand pies are assembled and chilled, select Bake,
and set the time to 20 minutes and the temperature to 350°F.
Press Start/Stop.
6. While the air fryer is preheating, brush the tops of four of the
hand pies with egg wash and sprinkle with coarse sugar, if
desired. Once preheated, place into the basket and bake until
nicely browned.
7. Remove and repeat with the remaining hand pies.
Nutritional information per hand pie:
Calories 250 (53% from fat) • Carb. 27g • Pro. 2g • Fat 15g • Sat. Fat 11g
Chol. 41mg • Sod. 238mg • Calc. 6mg • Fiber 2g

21
WARRANTY
Limited Three-Year Warranty
This warranty is available only to U.S. consumers who purchase products
directly from Cuisinart or an authorized Cuisinart
®
reseller. You are a con-
sumer if you own a Cuisinart
®
Basket Air Fryer that was purchased at retail
for personal, family, or household use. Except as otherwise required under
applicable law, this warranty is not available to retailers or other commer-
cial purchasers or owners or consumers who purchase from unauthorized
Cuisinart
®
resellers. We warrant that your Cuisinart
®
Basket Air Fryer will
be free of defects in materials and workmanship under normal home use
for 3 years from the date of original purchase. We recommend that you
visit our website, https://cuisinart.registria.com, for a fast, efficient way
to complete your product registration. However, product registration does
not eliminate the need for the consumer to maintain the original proof of
purchase in order to obtain the warranty benefits. In the event that you do
not have proof of purchase date, the purchase date for purposes of this
warranty will be the date of manufacture.
CALIFORNIA RESIDENTS ONLY
California law provides that for In-Warranty Service, California residents
have the option of returning a nonconforming product (A) to the store
where it was purchased or (B) to another retail store that sells Cuisinart
products of the same type. The retail store shall then, according to its
preference, either repair the product, refer the consumer to an independent
repair facility, replace the product, or refund the purchase price less the
amount directly attributable to the consumer’s prior usage of the product.
If neither of the above two options results in the appropriate relief to the
consumer, the consumer may then take the product to an independent
repair facility, if service or repair can be economically accomplished.
Cuisinart and not the consumer will be responsible for the reasonable cost
of such service, repair, replacement, or refund for nonconforming products
under warranty. California residents may also, according to their prefer-
ence, return nonconforming products directly to Cuisinart for repair or, if
necessary, replacement by calling our Consumer Service Center toll-free
at 1-800-726-0190. Cuisinart will be responsible for the cost of the repair,
replacement, and shipping and handling for such nonconforming products
under warranty.
HASSLE-FREE REPLACEMENT WARRANTY
Your ultimate satisfaction in Cuisinart products is our goal, so if your
Cuisinart
®
Basket Air Fryer should fail within the generous warranty period,
we will repair it or, if necessary, replace it at no cost to you. To obtain a
return shipping label, visit us at https://www.cuisinart.com/customer-
care/product-assistance/product-inquiry/. Or call our toll-free Consumer
Service Center at 1-800-726-0190 to speak with a representative. Your
Cuisinart
®
Basket Air Fryer has been manufactured to the strictest
specifications and has been designed for use only in 120-volt outlets and
only with authorized accessories and replacement parts. This warranty
expressly excludes any defects or damages caused by attempted use of
this unit with a converter, as well as use with accessories, replacement
parts, or repair service other than those authorized by Cuisinart. This
warranty does not cover any damage caused by accident, misuse,
shipment, or other than ordinary household use. This warranty excludes
all incidental or consequential damages. Some states do not allow the
exclusion or limitation of these damages, so these exclusions may
not apply to you. You may also have other rights, which vary from state
to state.
Important: If the nonconforming product is to be serviced by someone
other than Cuisinart’s Authorized Service Center, please remind the
servicer to call our Consumer Service Center at 1-800-726-0190 to ensure
that the problem is properly diagnosed, the product is serviced with the
correct parts, and the product is still under warranty.
©2025 Cuisinart
Glendale, AZ 85307
24CE091177
IB-18383-ESP-A_ID
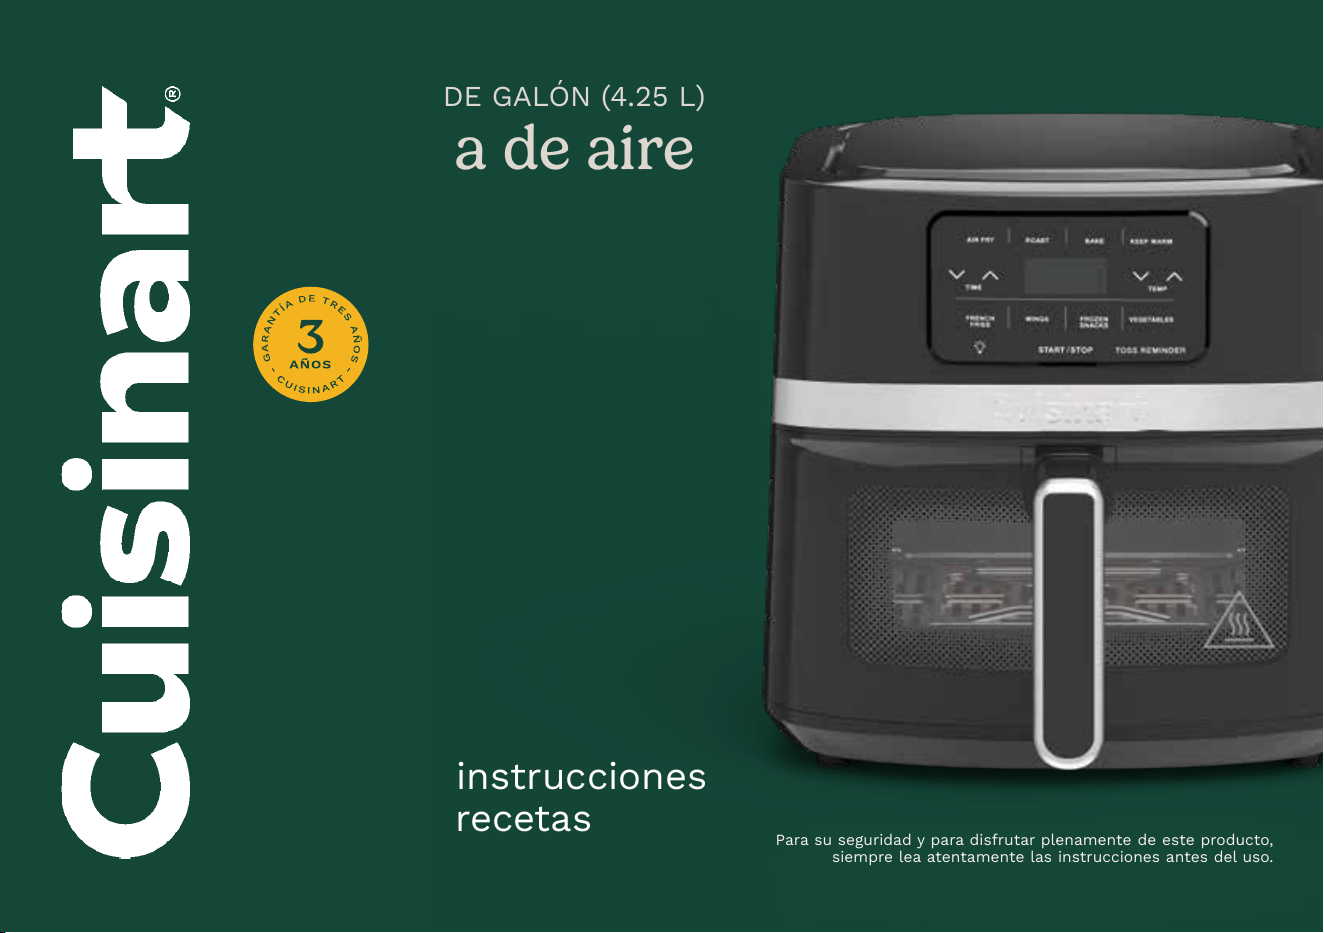
AIR-160
Manual de instrucciones
& Libro de recetas
Para su seguridad y para disfrutar plenamente de este producto,
siempre lea atentamente las instrucciones antes del uso.
4.5 CUARTOS DE GALÓN (4.25L)
Freidora de aire

2
ÍNDICE
Medidas de seguridad importantes ..............................2
Uso de alargadores ..........................................3
Piezas y características ....................................... 4
Familiarícese con el panel de control digital . . . . . . . . . . . . . . . . . . . . . . . 5
Antes del primer uso .........................................6
Instrucciones de uso .........................................6
Consejos y sugerencias para freír con aire ........................6
Tabla de referencia...........................................8
Resolución de problemas .....................................9
Más formas de cocinar ......................................10
Limpieza y mantenimiento .................................... 10
Recetas ..................................................11
Garantía ..................................................23
MEDIDAS DE SEGURIDAD
IMPORTANTES
Al usar aparatos eléctricos, especialmente en presencia de niños, siempre
se deben tomar precauciones básicas de seguridad, entre ellas las
siguientes:
1. Lea todas las instrucciones.
2. DESENCHUFE EL APARATO CUANDO NO ESTÉ EN USO Y ANTES
DE LIMPIARLO. Deje que se enfríe antes de limpiarlo, manipularlo
o instalar/sacar piezas.
3. No toque las superficies calientes; use los mangos/asas/agarraderas y
los botones/perillas/diales.
4. Para reducir el riesgo de descarga eléctrica, no sumerja la carcasa
del aparato, el cable o el enchufe en agua u otros líquidos. Véase la
sección “Limpieza y mantenimiento” en la página 9.
5. Este aparato no debe ser usado por o cerca de niños o personas con
ciertas discapacidades.
6. No use este aparato si el cable o el enchufe están dañados, después
de un mal funcionamiento, después de una caída, o si está dañado;
devuélvalo a un centro de servicio autorizado o al lugar de compra
para su revisión, reparación o ajuste.
7. El uso de accesorios no recomendados por Cuisinart puede causar
lesiones.
8. No lo use en exteriores.
9. No deje que el cable cuelgue de la encimera o de la mesa, donde
niños o animales lo puedan jalar o tropezar, ni que tenga contacto con
superficies calientes.
10. No coloque el aparato sobre o cerca de un quemador a gas o de un
hornillo eléctrico caliente, ni en un horno caliente.
11. Solo use este aparato para el uso previsto.
12. Tenga sumo cuidado al usar fuentes que no sean de metal o vidrio
en el aparato.
13. Para evitar las quemaduras, tenga sumo cuidado al sacar los
accesorios del aparato o tirar la grasa caliente.
14. Desenchufe el aparato cuando no esté en uso. Almacene
solamente los accesorios recomendados por el fabricante
en el aparato.
15. No ponga papel, cartón, plástico o materiales similares en el aparato.
16. No cubra ninguna parte del aparato con papel de aluminio; esto
causará un sobrecalentamiento.
17. No introduzca alimentos muy grandes, papel de aluminio o utensilios
de metal en el aparato; esto presenta un riesgo de incendio o de
descarga eléctrica.
18. Puede ocurrir un incendio si el aparato está cubierto, toca o se
encuentra cerca de materiales inflamables, tales como cortinas,
colgaduras o paredes. No coloque ningún artículo sobre el aparato
durante el funcionamiento. No coloque ningún artículo sobre el aparato
durante el funcionamiento. No haga funcionar el aparato debajo de un
armario/gabinete.
19. No use estropajos metálicos para limpiar el aparato; partículas
de metal podrían depositarse en sus componentes eléctricos,
presentando un riesgo de descarga eléctrica.

3
20. No intente desalojar alimentos atascados mientras el aparato está
enchufado.
21. ADVERTENCIA: Para evitar el riesgo de incendio, NUNCA descuide/
deje el aparato sin vigilancia durante el uso.
22. Use las temperaturas recomendadas para freír con aire.
23. No apoye ningún utensilio de cocina o fuentes en la ventanilla o arriba
del aparato.
24. Para apagar el aparato después del uso, presione el botón START/
STOP .
25. No haga funcionar el aparato debajo o dentro de un armario/gabinete.
Siempre desenchufe el aparato antes de almacenarlo en un armario/
gabinete. Dejar el aparato enchufado representa un riesgo de incendio,
especialmente si este toca las paredes o la puerta del armario/
gabinete cuando se cierra.
26. Tenga sumo cuidado al mover un aparato que contenga aceite u otro
líquido caliente.
27. Para desconectar, presione el botón START/STOP, y luego
desenchufe el aparato.
28. Los niños o las personas que carezcan de la experiencia o de los
conocimientos necesarios para manipular el aparato, o aquellas
cuyas capacidades físicas, sensoriales o mentales estén limitadas, no
deben usar el aparato sin la supervisión o la dirección de una persona
responsable por su seguridad. No deje que los niños jueguen con este
aparato.
29. Para su seguridad, si el cable está dañado, debe ser sustituido por el
fabricante, un técnico autorizado u otra persona calificada.
30. Este aparato ha sido diseñado para uso doméstico.
31. Este símbolo significa que la superficie del aparato se pone muy
caliente; tenga cuidado al tocarla.
GUARDE ESTAS
INSTRUCCIONES
Por favor, lea y conserve estas instrucciones en un lugar seguro.
Estas instrucciones le ayudarán a usar este aparato de forma segura
y siempre obtener resultados consistentes y profesionales.
USO DE ALARGADORES
El cable provisto con este aparato es corto para reducir el riesgo de que
alguien se enganche o tropiece con un cable más largo. Puede usarse un
cable alargador/de extensión, pero con cuidado.
La clasificación nominal del cable alargador/de extensión debe ser por lo
menos igual a la del aparato. El cable más largo debe ser acomodado de
tal manera que no cuelgue de la encimera/mesa, donde puede ser jalado
por niños o causar tropiezos.
AVISO
El cable de este aparato cuenta con un enchufe polarizado (una pata es
más ancha que la otra).
Como medida de seguridad, se podrá enchufar de una sola manera en
las tomas de corriente polarizadas. Si el enchufe no entra en la toma de
corriente, inviértalo. Si aun así no entra completamente, comuníquese con
un electricista. No intente modificarlo.
PARA USO DOMÉSTICO
SOLAMENTE
NO APROBADO PARA
USO COMERCIAL

4
PIEZAS Y CARACTERÍSTICAS
1. Panel de control digital
Cuenta controles táctiles de fácil uso para elegir el tiempo, la
temperatura, el modo de cocción y la función para freír con aire,
así como con una pantalla digital que muestra la temperatura
y el temporizador de cuenta regresiva (detalles en la página
siguiente).
a. Modos de cocción: “AIR FRY” (freír con aire), “ROAST” (asar),
“BAKE” (hornear), “KEEP WARM” (mantener caliente)
b. Funciones preprogramadas para freír con aire: “FRENCH
FRIES” (papas fritas), “WINGS” (alitas de pollo),
“VEGETABLES” (vegetales), “FROZEN SNACKS” (bocadillos
congelados)
c. Botón de luz: Ilumina el interior del aparato para ver los
alimentos durante el proceso de cocción
d. Botón TOSS REMINDER: Función opcional para recordarle
agitar la cesta o voltear los alimentos a mitad de cocción.
Se activa automáticamente cuando se usan las funciones
preprogramadas para freír con aire, pero puede ser
desactivada.
2. Cesta para freír con aire con mango de tacto frío
Superficie de cocción de 8 x 8in(20 x 20cm).
3. Ventanilla
Permite observar el progreso de la cocción.
4. Rejilla
Asegura una cocción uniforme. Siempre se debe colocar
en la cesta.
5. Espacio para enrollar el cable (no ilustrado)
Para un fácil almacenamiento. Situado en la parte posterior
del aparato.
1
2
3
4

5
FAMILIARÍCESE CON EL
PANEL DE CONTROL DIGITAL
1. Modos de cocción con indicadores luminosos
Presione el botón correspondiente al modo de cocción
deseado: “AIR FRY” (freír con aire), “ROAST” (asar), “BAKE”
(hornear) o KEEP WARM” (mantener caliente); el indicador
luminoso de la función seleccionada se encenderá.
2. Funciones preprogramadas para freír con aire con
indicadores luminosos
Presione el botón correspondiente a la función preprogramada
deseada: “FRENCH FRIES” (papas fritas), “WINGS” (alitas
de pollo), “VEGETABLES” (vegetales) o “FROZEN SNACKS”
(bocadillos congelados); el indicador luminoso de la función
seleccionada se encenderá.
3. Botones TIME (tiempo) y TEMP (temperatura)
Use las flechas para ajustar el tiempo y la temperatura de los
modos de cocción o de las funciones preprogramadas para
freír con aire (opcional); el tiempo y la temperatura aparecerán
por turnos en la pantalla digital.
4. Indicador “PREHEAT” (precalentamiento)
La función “BAKE” (hornear) incluye un período de
precalentamiento. Cuando los alimentos estén listos, deje la
cesta en el aparato y presione el botón BAKE, y luego el botón
START/STOP; el indicador “PREHEAT” se encenderá. Cuando
el aparato alcance la temperatura deseada, emitirá 5 pitidos
y el tiempo de cocción parpadeará. Retire la cesta, coloque
cuidadosamente los alimentos en ella y devuélvala al aparato;
la cuenta regresiva empezará.
5. Indicador de listo
Cuando el temporizador llegue a “00:00”, el indicador
“OFF” empieza a parpadear en la pantalla y el aparato
emite 3 pitidos. Después de 1 minuto, el aparato ingresará
automáticamente a la función “mantener caliente”
(véase el punto n.°9).
6. Botón de luz
Para encender/apagar la luz interior, presione el botón
.
Nota:
La luz se apagará automáticamente después de 20 segundos.
7. Botón START/STOP (encendido/apagado) con indicador
luminoso
Presiónelo para iniciar/detener el ciclo de cocción.
Nota: El indicador luminoso permanecerá encendido durante la
cocción.
8. Botón TOSS REMINDER con indicador luminoso
Presiónelo para que el aparato emita una señal sonora a
mitad de cocción para recordarle agitar la cesta o voltear los
alimentos; el indicador luminoso se encenderá. A mitad de
cocción, el aparato emitirá 10 pitidos y el indicador luminoso
se encenderá.
Nota: El recordatorio se activa automáticamente con
las funciones preprogramadas para freír con aire. Para
desactivarlo, simplemente presione TOSS REMINDER después
de elegir la función deseada; el indicador luminoso se apagará.
9. Botón KEEP WARM (mantener caliente) con indicador
luminoso
La función “KEEP WARM” se inicia automáticamente al
final de cualquier ciclo de cocción y mantiene los alimentos
calientes por hasta 60 minutos (a menos que haya retirado
la cesta o presionado el botón START/STOP para apagar el
aparato). Durante el ciclo de mantener caliente, el indicador
luminoso del botón KEEP WARM se encenderá y el tiempo y la
temperatura aparecerán por turnos en la pantalla. Presione el
botón START/STOP para apagar el aparato.

6
ANTES DEL PRIMER USO
1. Quite todo el material de embalaje.
2. Coloque el aparato sobre una superficie nivelada y estable.
3. Deje un espacio libre de 2-4in(5-10cm) alrededor del
aparato. No lo coloque sobre una superficie sensible al calor.
NOTA: NO GUARDE NINGÚN OBJETO ENCIMA DEL
APARATO. SI LO HACE, QUÍTELOS ANTES DE ENCENDERLO.
EL EXTERIOR DEL APARATO SE PONE MUY CALIENTE
DURANTE EL USO; MANTÉNGALO FUERA DEL ALCANCE DE
LOS NIÑOS.
4. Compruebe que no haya nada en el aparato (excepto la cesta
y la rejilla).
5. Enchufe el cable en una toma de corriente.
INSTRUCCIONES DE USO
Siga estos pasos sencillos para cocinar:
1. Coloque el aparato sobre una superficie plana, estable y
resistente al calor.
Enchufe el cable en una toma de corriente
.
2. Retire la cesta del aparato y compruebe que la rejilla esté en ella.
3. Coloque los alimentos deseados en la cesta y vuelva a colocar
esta en el aparato.
Nota: Si usa la función “BAKE” (hornear), el aparato se
precalentará automáticamente. Véase la sección “Indicador
PREHEAT” en la página 5 para más información.
4. Use el panel de control digital para elegir el modo de cocción o la
función preprogramada para freír con aire deseados, y para
ajustar el tiempo y la temperatura.
5. Presione el botón TOSS REMINDER si desea activar/desactivar el
recordatorio para agitar la cesta/voltear los alimentos a mitad de
cocción.
6. Presione el botón START/STOP para empezar la cocción.
7. La pantalla digital mostrará el tiempo de cocción restante.
8. Si la opción “TOSS REMINDER” está activada, el aparato emitirá
un pitido a mitad de cocción para recordarle revolver/voltear los
alimentos.
9. Cuando el tiempo llegue a “00”, el aparato emitirá un pitido para
indicar que el ciclo de cocción ha finalizado.
10. Si deja la cesta en el aparato, este ingresará automáticamente al
modo “KEEP WARM” (mantener caliente).
11. Para desactivar el modo “KEEP WARM” (mantener caliente) y
apagar el aparato, presione el botón START/STOP.
12. Desenchufe el aparato después del uso.
CONSEJOS Y SURERENCIAS PARA FREÍR CON AIRE
Freír los alimentos con aire es una alternativa saludable a freírlos con
aceite. Un ventilador de alta velocidad hace circular el aire para freír
una variedad de alimentos de forma más saludable que los métodos
de fritura tradicionales, consiguiendo siempre deliciosos resultados.
• Freír con aire no requiere aceite, pero rociar los alimentos con aceite
en aerosol/rocío vegetal o revolverlos con un poco de aceite antes
de la cocción ayuda a que se doren más.
• Se recomienda usar la función “TOSS REMINDER” (recordatorio
para agitar la cesta/voltear los alimentos a mitad de cocción)
cuando cocine grandes cantidades de alimentos o alimentos
grandes, tales como chuletas de pollo. No sobrellene la cesta;
disponer los alimentos en una sola capa logrará una cocción más
rápida y mejores resultados.

7
• Los alimentos se cocinarán más uniformemente si son del mismo
tamaño y si se disponen en la cesta en una sola capa.
• Una variedad de coberturas pueden ser usadas para rebozar/
empanar los alimentos antes de freírlos con freír con aire,
p
.ej., pan rallado (natural, sazonado o “panko”), hojuelas de maíz
picadas, chips de papa picadas, galletas Graham molidas, etc.
Algunas harinas (incluyendo las mezclas sin gluten y la harina de
maíz) también dan buenos resultados.
• Cuando cocine pollo, carne, pescado o mariscos, jugo se acumulará
en el fondo de la cesta. Este jugo es una buena base para preparar
salsa.
• Al freír con aire alimentos grasos (p.ej., tocino), la grasa se
acumulará en la cesta. Deje que la grasa caliente se enfríe antes de
tirarla y lavar la cesta.
• Use pinzas de cocina o una espátula de silicona para retirar los
alimentos de la cesta.
• Use la luz para monitorear la cocción. Nota: También puede retirar la
cesta del aparato para comprobar el estado de cocción (el
temporizador se detendrá hasta volver a colocar la cesta).

8
MODO ALIMENTOS CANTIDAD TIEMPO TEMPERATURA PRECALENTAR
AGITAR/
VOLTEAR
AIR FRY Chuletas rebozadas 2-3 chuletas 20min 360°F – Voltear
AIR FRY Salmón 4 filetes de 4oz (115g) 10min 375°F – –
AIR FRY Camarones 1½ lb (680g) 8min 370°F – Agitar
AIR FRY Tocino
5 SL (6 lonchas)
6 lonchas
12min 320°F – –
AIR FRY
“Nuggets” de pollo
congelados
20 piezas 10min 380°F – Voltear
BAKE Pastel redondo 7in(18cm) (usar molde) 20-25 min 325°F
✓
–
BAKE Pancitos 6 10min 350°F
✓
–
ROAST Pollo entero
3.5 lb (1.5 kg)
55min
350°F
– –
ROAST Muslos de pollo 5 piezas 25min 380°F – Voltear
ROAST Mazorcas de maíz 3-4 mazorcas 20min 350°F – Voltear
ROAST
Cobertura de queso
derretido
– 3-5 min 400°F
✓
–
TABLA DE REFERENCIA
La tabla a continuación indica el tiempo, la temperatura de cocción y las porciones recomendados para varios tipos de alimentos que
pueden freírse con aire en la freidora de aire Cuisinart
®
. Si desea freír con aire más alimentos que lo recomendado en la tabla, revuelva
o voltee ocasionalmente los alimentos para conseguir resultados uniformes y crujientes. Pequeñas cantidades de alimentos pueden
requerir menos tiempo de cocción. Para resultados óptimos, compruebe regularmente el estado de cocción por la ventanilla.
NOTA: Coloque una fuente resistente al calor (no incluida) directamente en la rejilla para hornear alimentos tales como pasteles/tartas,
“quiches” y cazuelas.

9
Funcionamiento El aparato no se enciende.
Compruebe que la toma de corriente en la cual está enchufado esté funcionando.
Compruebe que la cesta esté correctamente instalada.
Llame a nuestro servicio de atención al cliente al 1-800-726-0190.
Cocción
Los alimentos fritos no son
crujientes o no se cocinan
uniformemente.
Algunos alimentos requieren más aceite que otros. Si los alimentos no están lo suficientemente
crujientes, rocíelos o cepíllelos con aceite antes de cocinarlos.
Cerciórese de distribuir los alimentos uniformemente en la cesta, en una capa y sin superponerlos.
De ser necesario, agite la cesta o voltee los alimentos a mitad de tiempo (use la función “TOSS
REMINDER” para fijar una alerta sonora).
Cocine los alimentos por un tiempo adicional, comprobando el estado de cocción regularmente
hasta que estén dorados.
Los alimentos no
están completamente
cocinados.
Si coloca demasiados alimentos en la cesta, puede que no se cocinen bien dentro del tiempo
sugerido. Trate de cocinar cantidades más pequeñas de alimentos a la vez, disponiéndolos en una
sola capa en lugar de apilarlos.
Si la temperatura está muy baja, puede que los alimentos no se cocinen completamente. La
temperatura ideal para freír con aire es alrededor de 400°F.
Limpieza
¿Cómo quitar los residuos
de la cesta/rejilla?
Para eliminar grasa quemada, remoje los accesorios en agua caliente con jabón o use un limpiador
no abrasivo.
Se recomienda lavar los accesorios a mano en agua caliente con jabón, usando un estropajo o un
cepillo de nylon, y enjuagarlos bien.
RESOLUCIÓN DE PROBLEMAS
FUNCIÓN PREPROGRAMADA CANTIDAD TIEMPO TEMPERATURA PRECALENTAR AGITAR/VOLTEAR
FRENCH FRIES (papas fritas)
1½ lb (680 g) 18min 400°F
–
Agitar
WINGS (alitas de pollo)
2lb (910 g) 25min 400°F
–
Agitar
FROZEN SNACKS
(bocaditos congelados)
– 10min 400°F
–
Agitar
VEGETABLES (vegetales) 6 tazas 10min 375°F
–
Agitar

10
MÁS FORMAS DE COCINAR
La freidora de aire Cuisinart
®
también puede usarse para hornear,
dorar/gratinar, asar y más. Para usar estas funciones, simplemente
presione el botón correspondiente a la función deseada y fije la
temperatura y el tiempo (hasta 60 minutos). Siga los consejos y
las recomendaciones acerca de la temperatura y del tiempo a
continuación.
• Al usar la freidora de aire Cuisinart
®
, puede que tenga que
reducir el tiempo de cocción ya que el ventilador de convección
hace que los alimentos se cocinan más rápidamente. Empiece a
comprobar el punto de cocción 5-10 minutos antes del final del
tiempo recomendado.
• Para hornear, recomendamos:
– Colocar una fuente resistente al calor (no incluida) en la rejilla.
–
Usar una temperatura 25-50°F (15-30°C) más baja que
la temperatura indicada en la receta (para las recetas no
desarrolladas específicamente para este aparato).
• Para asar vegetales y carnes, fije la temperatura en 400°F.
LIMPIEZA Y MANTENIMIENTO
• Siempre desenchufe el aparato y deje que se enfríe
completamente antes de limpiarlo.
• No use limpiadores abrasivos; esto dañará el acabado. Limpie
el exterior del aparato con un paño húmedo y séquelo bien. Si
desea usar un limpiador, aplique este directamente en el paño;
no en el aparato.
• Para limpiar el interior del aparato, use una esponja ligeramente
humedecida con agua jabonosa o limpiador. Elimine los residuos
de limpiador con un paño húmedo limpio. Nunca use productos
abrasivos o corrosivos; esto puede dañar la superficie del
aparato. Nunca use estropajos metálicos (p.ej., lana de acero)
para limpiar el interior del aparato.
• La cesta y la rejilla son aptas para lavavajillas. También pueden
lavarse a mano, en agua caliente con jabón, usando un estropajo
o un cepillo de nylon. Cerciórese de enjuagarlas bien.
• Retire la rejilla de la cesta para la limpieza.
• Cualquier otro servicio debe ser realizado por un técnico
autorizado.

11
Recetas
Palitos de tostada francesa . . . . . . . . . . . . . . . . . . . . . . . . .11
Chips de lima . . . . . . . . . . . . . . . . . . . . . . . . . . . . . . . . . . . 12
Nachos rápidos.................................. 12
Alitas de pollo en salsa piri-piri.....................13
“Alitas” de pollo en salsa “Búfalo” ...................13
Colior en salsa “Búfalo” ..........................14
Calamares “fritos” con pimientos picantes encurtidos ...14
Ensalada César con pollo..........................15
Camarones picantes..............................16
“Costillitas” de maíz al estilo mexicano............... 17
Papas fritas con parmesano y aceite de trufa .......... 17
Coles de Bruselas crujientes en salsa Kung Pao ........18
Taquitos de tinga de pollo .........................18
Pollo asado con vegetales de otoño .................19
Salmón glaseado con tomillo
con espárragos y papas “ngerling” asados ...........20
Bolitas de dona con azúcar y canela .................22
Tartas de mano de durazno-frambuesa...............22
Palitos de tostada francesa
Convierta el desayuno en un auténtico placer
para su familia en solo 10 minutos.
Rinde 12 palitos
4 huevosgrandes
½ taza(120ml)decremalíquidaparabatir(“heavycream”)
½ taza(120ml)delecheentera
3 cucharadas(25g)deazúcargranulada
1 cucharaditadecanelaenpolvo
4 rebanadasde“brioche”,cortadasentercios
1 cucharada(5g)deazúcarglasé
Jarabedearce/mapletibio,paraservir
1. Colocar los huevos, la crema líquida, la leche, el azúcar y la
canela en una bandeja poco profunda; batir para combinar. Bañar
ambos lados de cada tira de “brioche” en la mezcla y colocarlas
en la cesta. Colocar la cesta en el aparato. Elegir el modo “AIR
FRY” y fijar el tiempo en 10 minutos y la temperatura en 320°F.
Presionar el botón START/STOP.
2. Cuando estén listos, espolvorear los palitos con azúcar glasé
y servir inmediatamente, con jarabe de arce/maple.
Información nutricional por porción (basado en 12 porciones):
Calorías 115 (52% de grasa) • Carbohidratos 10g • Proteínas 4g • Grasa 7g
Grasa saturada 4g • Colesterol 82mg • Sodio 84mg
Calcio 27 mg • Fibra 0 g

12
Chips de lima
Cambie sus chips/totopos comprados por esta versión casera
rápida y fácil de preparar. ¡Son perfecto solos o como un
divertido acompañamiento para su salsa favorita!
Rinde 20 chips
5 tortillasdemaízde6in(15cm)
2 cucharadas(30ml)deaceitedeoliva
½ lima/limónverde
1 cucharaditaderalladuradelima/limónverde
1 cucharaditadesalkosher
1. Cortar las tortillas en cuartos y disponerlas en una placa para
horno, en una sola capa. Pincelar ambos lados de cada pedazo
de tortilla con aceite vegetal.
2. Colocar la mitad de los pedazos de tortilla en la cesta, sin
superponerlos. Colocar la cesta en el aparato. Elegir el modo
“AIR FRY” y fijar el tiempo en 8 minutos y la temperatura en
350°F. Presionar los botones TOSS REMINDER y START/STOP. A
mitad de cocción, agitar la cesta para mezclar los chips, y luego
volver a colocar la cesta en el aparato. Al final del tiempo de
cocción, colocar los chips/totopos en un cuenco grande. Repetir
con los pedazos de tortilla restantes.
3. Cuando todos los chips/totopos estén cocinados, rociarlos con
el jugo de lima y espolvorear con ralladura de lima y sal. Revolver
para que el condimento cubra uniformemente cada chip/totopo.
Información nutricional por porción:
Calorías 172 (33% de grasa) • Carbohidratos 27g • Proteínas 3g
Grasa 7g • Grasa saturada 1g • Colesterol 0mg
Sodio 949mg • Calcio 92 mg • Fibra 3 g
Nachos rápidos
Con esta receta tendrás un delicioso y rápido tentempié en la
mesa en menos de 10 minutos. Además, es muy versátil: basta
con que añada sus coberturas favoritas en lugar o además de las
que se indican aquí.
Rinde 6 porciones
6 tazas(300g)dechipsdemaíz/totopos,olosuficiente
paracubrirelfondodelacesta(lacantidadvariarásegúnel
estilodeloschips)
1½ tazas(180g)dequesoCheddary/oMontereyJackrallado(s)
½ taza(100g)derefritodefrijoles
2 cucharadasdesalsamexicana+unpocomásparaservir
1 jalapeñopartidoporlamitad,sinsemillasycortadoen
rodajasfinas
1-2 cebolletas(“scallions”),finamenterebanadas
¼ taza(65g)dechilesverdespicados;aprox.mitaddeuna
latade4.5oz(130g),escurridos
½ taza(75g)deaceitunasnegrasrebanadas(siusaaceitunas
enlata/botella,escurrirlasbien)
¼ taza(65g)derebanadasdejalapeñoencurtidoescurrido
Guacamoleycremaagria,paraservir
1. Disponer aprox. 2 tazas (100 g) de chips de maíz/totopos en el
fondo de la cesta, en una capa. Cubrir con ½ taza (60 g) de
queso, y luego con otra capa de chips de maíz/totopos. Cubrir
con el refrito de frijoles, y luego 2 cucharadas de salsa mexicana.
A continuación, añadir los ingredientes rebanados. Terminar con
otra capa de chips de maíz/totopos y el queso restante.
2. Colocar la cesta llena en el aparato. Elegir el modo “AIR FRY” y
fijar el tiempo en 5 minutos y la temperatura en 400°F. Presionar
el botón START/STOP.
3. Servir inmediatamente con más salsa mexicana, guacamole y
crema agria.

13
Información nutricional por porción:
Calorías 270 (52% de grasa) • Carbohidratos 22g • Proteínas 10g
Grasa 3g • Grasa saturada 6g • Colesterol 25mg • Sodio 578mg
Calcio 268 mg • Fibra 3 g
Alitas de pollo en salsa piri-piri
Algo ácida, algo dulce y ligeramente picante, la versátil salsa
piri-piri se puede disfrutar con alitas de pollo y mucho más.
Rinde aprox. 20 alitas
2 libras(910g)dealitasdepollo*
1¾ cucharaditasdesalkosher
1 onza(30g)dechilespiri-piriuotroschilesrojos,sintallos
4 dientesdeajo
1 chalotepequeño
1 trozode2in(5cm)dejengibrefresco,pelado
½ tazallena(15g)dehojasdecilantrofresco
¼ taza(15g)dehojasdeoréganofresco
2 cucharaditasdepáprika(pimentón)ahumada
1 cucharadita(5g)deazúcargranulada
2 cucharadas(30ml)devinagredevinotinto
1 cucharadadejugodelimónfresco
Ralladurade1limón
½ taza(120ml)deaceitedeoliva
*Muchasalitasvienenseparadas,perosisolotienealasenteras,
cercióresedequitarlaspuntasysepararlasalasendospartes.
1. Disponer las alitas de pollo en la cesta y rociar con ¾ de
cucharadita de sal. Colocar la cesta en el aparato.
Presionar el botón WINGS, y luego el botón START/STOP. A mitad
de tiempo, cuando el aparato emita un pitido, revolver las alitas.
Volver a colocar la cesta en el aparato y seguir cocinando.
2. Mientras las alitas se están cocinando preparar la salsa.
Colocar los chiles, el ajo, el chalote y el jengibre en el bol
de una procesadora de alimentos equipado con cuchilla
picadora. Procesar a alta velocidad para picar finamente.
Raspar el bol. Agregar el cilantro, el orégano, la páprika,
el azúcar y 1 cucharadita de la sal; pulsar para picar. Sin apagar
la máquina, agregar el vinagre, el jugo de limón y la ralladura
y procesar hasta que todos los ingredientes estén picados
y bien combinados. Sin apagar la máquina, agregar el aceite
de oliva. Procesar hasta obtener una mezcla homogénea.
3. Al final de la cocción, colocar las alitas en un cuenco grande,
cubrir con la salsa y revolver. Servir inmediatamente.
Información nutricional por alita (simple):
Calorías 94 (39% de grasa) • Carbohidratos 0g • Proteínas 14g
Grasa 4g • Grasa saturada 1g • Colesterol 39mg • Sodio 127mg
Calcio 7 mg • Fibra 0 g
Información nutricional por porción de salsa piri-piri
(basada en 20 porciones):
Calorías 92 (64% de grasa) • Carbohidratos 7g • Proteínas 1g • Grasa 7g
Grasa saturada 1g • Colesterol 0mg • Sodio 209mg • Calcio 3 mg • Fibra 0g
“Alitas” de pollo en salsa “Búfalo”
Freír las alitas de pollo con aire es más saludable que freírlas
en aceite. La freidora de aire Cuisinart
®
logra resultados
muy crujientes sin aceite y con poca preparación.
Rinde aprox. 20 alitas
2 libras(910g)dealitasdepollo*
¾ cucharaditadesalkosher
¼ taza(60ml)desalsapicanteabasedevinagre
1 cucharada(15g)demantequillasinsal,derretida
*Muchasalitasvienenseparadas,perosisolotienealasenteras,
cercióresedequitarlaspuntasysepararlasalasendospartes.

14
1. Disponer las alitas de pollo en la cesta y rociar con la sal.
Colocar la cesta en el aparato. Presionar el botón WINGS,
y luego el botón START/STOP. A mitad de tiempo, cuando
el aparato emita un pitido, revolver las alitas. Volver a colocar
la cesta en el aparato y seguir cocinando.
2. Mientras las alitas se están cocinando, preparar la salsa:
Colocar la salsa picante y la mantequilla derretida en
un tazón grande; revolver para combinar.
3. Cuando las alitas estén cocinadas, colocarlas en el tazón
con la salsa y revolver suavemente para cubrirlas.
Información nutricional por alita (simple):
Calorías 94 (39% de grasa) • Carbohidratos 0g • Proteínas 14g
Grasa 4g • Grasa saturada 1g • Colesterol 39mg • Sodio 127mg
Calcio 7 mg • Fibra 0 g
Información nutricional por porción de salsa “Búfalo”
(basada en 20 porciones):
Calorías 6 (100% de grasa) • Carbohidratos 0g • Proteínas 0g • Grasa 1g
Grasa saturada 1g • Colesterol 0mg • Sodio 28mg • Calcio 0 mg • Fibra 0 g
Coliflor en salsa “Búfalo”
Un aperitivo sano y sencillo para satisfacer
ese antojo salado y crujiente.
Rinde aprox. 6 porciones
1 coliflormedianodeaprox.2½lb(1kg),oaprox.10tazas
decogollos
1 cucharada(15ml)deaceitedeoliva
¾ cucharaditadesalkosher
½ cucharadadeharinadearrozblanco
½ cucharadadeharina/almidón/féculadetapioca
1 cucharada+1cucharadita(20ml)demantequillasinsal
derretida(odeaceitedecocoparaunaalternativavegana)
1 cucharada+1cucharadita(20ml)desalsapicanteabase
devinagre
1. Cortar la coliflor en cogollos pequeños. Combinar con el aceite
de oliva, la sal, la harina de arroz blanco y la harina de tapioca.
Colocar los cogollos en la cesta, agitar para distribuir
uniformemente, y colocar la cesta en el aparato.
2. Presionar el botón VEGETABLES y fijar el tiempo en 20 minutos
y la temperatura en 325°F. Presionar los botones TOSS
REMINDER y START/STOP. A mitad de tiempo, cuando el aparato
emita un pitido, agitar la cesta revolver la coliflor.
3. Al final de la cocción, agitar la cesta otra vez. A continuación,
presionar el botón VEGETABLES otra vez y fijar el tiempo
en 5 minutos y la temperatura en 400°F.
4. Mientras la coliflor se está cocinando, derretir la mantequilla.
Agregar a la salsa picante y revolver para combinar.
5. La coliflor está lista cuando está cocinada por dentro, y dorada
y crujiente por fuera. Revolver con la mezcla de mantequilla/
salsa picante. Servir inmediatamente.
Información nutricional por porción (basado en 6 porciones):
Calorías 62 (73% de grasa) • Carbohidratos 3g • Proteínas 1g
Grasa 5g • Grasa saturada 2g • Colesterol 8mg • Sodio 309mg
Calcio 15 mg • Fibra 1 g
Calamares “fritos” con pimientos
picantes encurtidos
El sazonador de mariscos Old Bay
®
da a estos
un toque salado y ahumado
Rinde 1-2 porciones
½ libra(225g)dearosdecalamar
½ taza(60g)demaicena
Aceitedeolivavirgenextra
¼ cucharaditadesalkosher
¼ cucharaditadesazonadordemariscosOldBay
®

15
2 cucharadasdepimientospicantesencurtidosrebanados,
escurridos
2 gajosdelimón
Salsamarinaratibia,paraservir
1. Secar bien los calamares con papel absorbente. Colocar las
maicena en una bandeja de hornear. Disponer los calamares
por encima de la maicena y agitar la bandeja para cubrirlos
uniformemente.
2. Colocar los aros de calamar en la cesta, rociar con una capa
uniforme de aceite de oliva y espolvorear con sal y el sazonador
Old Bay
®
. Colocar la cesta en el aparato. Elegir el modo “AIR FRY”
y fijar el tiempo en 10 minutos y la temperatura en 400°F. A
continuación, presionar los botones TOSS REMINDER y START/
STOP. A mitad de tiempo, cuando el aparato emita un pitido,
agitar la cesta. Si los calamares parecen secos, rociarlos con
más aceite.
3. Al final de la cocción, retirar los aros de calamar de la cesta.
Cubrir con pimientos encurtidos y servir con gajos de limón
y salsa marinara al lado.
Información nutricional por porción
(basada en 1-2 porciones):
Calorías 266 (24% de grasa) • Carbohidratos 25g • Proteínas 24g
Grasa 7g • Grasa saturada 1g • Colesterol 352mg • Sodio 681mg
Calcio 50 mg • Fibra 1 g
Ensalada César con pollo
Los picatostes comprados están repletos de sal y otros
ingredientes innecesarios. Al prepararlos usted mismo, sabe
exactamente lo que está ingiriendo y, cuando vea lo fácil que es,
se preguntará por qué los compró para empezar. En esta receta,
los picatostes son la estrella, junto con la forma más sencilla de
preparar el pollo.
Rinde 4 porciones
Pollo:
2 pechugasdepollodeshuesadasysinpiel,
degrosoruniforme
1 cucharada(15ml)deaceitedeoliva
1 dientedeajo,peladoymachacado
Salkosher
Pimientanegrareciénmolida
Picatostes:
2 tazas(500g)decubosde½-1in(1.5-2.5cm)
depandemasafermentada
2 cucharadas(30ml)deaceitedeoliva
2 pizcasdesalkosher
2 pizcasdepimientareciénmolida
1 pizcadeajoenpolvo
Ensalada:
1 lechugaromanapequeña,picadagrueso
3-4 cucharadasdeaderezoCésarcompradoocasero(visitar
www.cuisinart.comparaencontrarunareceta)
2 cucharadasdehojuelasdequesoParmesano
1 limón,cortadoengajos,paraservir
1. Colocar las pechugas, 1 cucharada de aceite de oliva, el diente de
ajo machacado y una buena pizca de sal y de pimienta en un
recipiente grande poco profundo. “Masajear” el pollo con los

16
ingredientes y, a continuación, taparlo y trasladarlo a la nevera
para que se marine durante 30 minutos.
2. Mientras tanto, preparar los picatostes. Elegir el modo “BAKE” y
fijar el tiempo en 4 minutos y la temperatura en 350°F. Presionar
el botón START/STOP. Mientras el aparato se está precalentando,
colocar los cubos de pan en un recipiente poco profundo junto
con 2 cucharadas de aceite de oliva, la sal, la pimienta y el ajo
en polvo. Revolver para cubrir. Después del precalentamiento,
colocar los cubos de pan sazonados en la cesta y hornear.
Reservar.
3. Cuando el pollo esté listo, colocarlo en la cesta y colocar esta
en el aparato. Elegir el modo “AIR FRY” y fijar el tiempo en 18
minutos y la temperatura en 375°F. Presionar el botón START/
STOP. Cuando el pollo esté cocinado (la temperatura interna
debe alcanzar 170°F/77°C), retirarlo de la cesta, dejar que se
enfríe por unos minutos, y luego cortarlo en tajadas delgadas.
4. Colocar la lechuga en un cuenco grande. Cubrir con los
picatostes, el pollo y las hojuelas de queso Parmesano.
Rociar con la cantidad deseada de aderezo. Revolver
suavemente. Servir cada porción con un gajo de limón al lado.
Información nutricional por porción:
Calorías 413 (42% de grasa) • Carbohidratos 28g • Proteínas 33g
Grasa 19g • Grasa saturada 4g • Colesterol 79mg • Sodio 733mg
Calcio 130 mg • Fibra 4 g
Camarones picantes
Los suculentos camarones se rebozan en maicena y se fríen
rápidamente con aire antes de bañarlos en una salsa pegajosa,
dulce y picante.
Rinde 4 porciones (14-16 camarones grandes)
1 libra(455g)decamaronesgrandes
½ taza(60g)demaicena
Aceitedeolivavirgenextra
¼ taza(60ml)desalsadechiledulce
1 cucharada(15ml)dejugodelima/limónverdefresco
1 cucharaditaderalladuradelima/limónverde
1 cucharada(15ml)desalsadesoyabajaensodio
1 cucharada(15ml)desalsasriracha
1 cucharadadesemillasdeajonjolí/sésamotostadas
Cebolletas(“scallions”)enrodajasfinas,paradecorar
Cilantropicado,paradecorar
1. Secar bien los camarones con papel absorbente. Colocar las
maicena en una bandeja de hornear. Disponer los camarones
por encima de la maicena y agitar la bandeja para cubrirlos
uniformemente.
2. Colocar los camarones en la cesta y rociar con una capa
uniforme de aceite de oliva. Colocar la cesta en el aparato.
Elegir el modo “AIR FRY” y fijar el tiempo en 8 minutos y la
temperatura en 350°F. A continuación, presionar los botones
TOSS REMINDER y START/STOP. A mitad de tiempo, cuando el
aparato emita un pitido, agitar la cesta. De ser necesario, rociar
con más aceite y cocinar por más tiempo. Volver a colocar la
cesta en el aparato y seguir cocinando.
3. Mientras los camarones se están cocinando, combinar la salsa
de chile, el jugo de lima, la ralladura, la salsa de soya y la salsa
sriracha en un tazón mediano; reservar.

17
4. Cuando los camarones estén cocinados, colocarlos en el tazón
con la salsa y revolver suavemente para cubrirlos. Pasarlos a un
cuenco para servir y rociar con semillas de sésamo/ajonjolí,
cebolletas y cilantro.
Información nutricional por porción (basado en 4 porciones):
Calorías 222 (20% de grasa) • Carbohidratos 27g • Proteínas 16g
Grasa 5g • Grasa saturada 1g • Colesterol 143mg • Sodio 1225mg
Calcio 62 mg • Fibra 1 g
“Costillitas” de maíz al estilo mexicano
Más fáciles de comer que las clásicas mazorcas de maíz e
increíblemente sabrosas, ¡estas “costillitas” de maíz son algo
debe probar en su freidora Cuisinart
®
!
Rinde 8 “costillitas”
¼ taza(60ml)deaceitedeoliva
1 cucharaditadesalkosher
1 cucharaditadecebollaenpolvo
1
1
/
8
cucharaditasdechileenpolvo
½ cucharaditadeajoenpolvo
1
/
8
cucharaditadepimientanegrareciénmolida
2 mazorcasdemaíz,cortadasencuartosalolargo
¼ taza(60ml)demayonesa
Jugode1lima/limónverde
½ taza(75g)dequesoCotijadesmenuzado
Cilantropicado,paraservir
1. Combinar el aceite de oliva, la sal, la cebolla en polvo,
1
/
8
de
cucharadita del chile en polvo, el ajo en polvo y la pimienta negra
en un tazón pequeño, batiendo. Pincelar los cuartos de mazorca
con la mezcla y disponerlos en la cesta. Colocar la cesta en el
aparato. Elegir el modo “AIR FRY” y fijar el tiempo en 20 minutos
y la temperatura en 350°F. Presionar el botón START/STOP.
2. Mientras el maíz se está cocinando, combinar la mayonesa y el
jugo de lima en un tazón pequeño; reservar.
3. Cuando el maíz esté cocinado, pincelar las “costillitas” con una
capa fina de la mezcla de mayonesa y rociar con queso Cotija y
cilantro. Servir inmediatamente.
Información nutricional por porción:
Calorías 170 (76% de grasa) • Carbohidratos 7g • Proteínas 3g
Grasa 15g • Grasa saturada 4g • Colesterol 12mg • Sodio 530mg
Calcio 4 mg • Fibra 1 g
Papas fritas con parmesano y aceite de trufa
Estas crujientes papas “paja” son sabrosas y repletas de sabor
“umami”. ¡También son la prueba de que no hace falta una
freidora de aceite para hacer deliciosas papas fritas!
Rinde 4-6 porciones
1½ libras(680g)depapas“paja”congeladas
¼ taza(30g)dequesoParmesanorallado
½ cucharaditadepolvodeboletus(opcional)
2 cucharadasdeperejilfrescopicado
1 cucharada(15ml)deaceitedetrufa
2 cucharaditasdesalkosher
1. Presionar el botón FRENCH FRIES. Presionar el botón START/
STOP. Colocar las papas en la cesta y agitar esta para
distribuirlas uniformemente. A mitad de tiempo, cuando el
aparato emita un pitido, agitar la cesta otra vez y volver a
colocarla en el aparato.
2. Al final de la cocción, colocar las papas fritas en un cuenco.
Rociar con el queso Parmesano, el polvo de boletus (opcional), el
perejil, el aceite de trufa y la sal; revolver. Servir inmediatamente.
Información nutricional por porción (basado en 6 porciones):
Calorías 314 (41% de grasa) • Carbohidratos 41g • Proteínas 5g
Grasa 14g • Grasa saturada 2g • Colesterol 2mg • Sodio 1330mg
Calcio 65 mg • Fibra 4 g

18
Coles de Bruselas crujientes en salsa Kung Pao
Pruebe esta versión vegetariana del adorado plato chino.
Las coles de Bruselas fritas con aire son crujientes,
con un toque picante de pimienta de Sichuan.
Coles:
1½ libras(680g)decolesdeBruselas
2 cucharadas(30ml)deaceitedesésamo/ajonjolítostado
Salsa:
1 cucharada(15ml)deaceitedesésamo/ajonjolítostado
½-1 cucharaditadegranosdepimientadeSichuan(también
llamada“pimientajaponesa”o“pimientasansho”),agusto
2 cebolletas(“greenonions”),finamenterebanadas,partes
blancasyverdesporseparado
4 chilesrojossecos,partidosporlamitadysinsemillas
1 trozode1½in(4cm)dejengibre,peladoyrallado
2 dientesdeajo,rebanados
3 cucharadas(30ml)desalsadesoya
3 cucharadas(30ml)desalsaHoisin
2 cucharadas(30ml)devinagredevinodearroz
1 cucharada(10g)deazúcargranulada
¼ taza(40g)demanítostadosinsal,picado
1. Cortar la parte de abajo de cada col de Bruselas, y cortarlas
por la mitad a lo largo. Revolver con 2 cucharadas de aceite
de sésamo/ajonjolí.
2. Elegir el modo “AIR FRY” y fijar el tiempo en 12 minutos y la
temperatura en 350°F. A continuación, presionar los botones
TOSS REMINDER y START/STOP. Después del precalentamiento,
colocar las coles de Bruselas en la cesta y agitar esta para
distribuirlas uniformemente. A mitad de tiempo, cuando el
aparato emita un pitido, agitar la cesta otra vez y volver a
colocarla en el aparato. Cocinar hasta que las coles estén
suaves por dentro y crujientes por fuera.
3. Mientras las coles se están cocinando, calentar 1 cucharada
(15ml) de aceite de sésamo/ajonjolí a fuego medio en una
cacerola pequeña. Agregar la pimienta, la parte blanca de las
cebolletas, los chiles secos, el jengibre y el ajo. Cocinar por
aprox. 1 minuto, hasta que la mezcla esté fragrante. Agregar la
salsa de soya, la salsa Hoisin, el vinagre de arroz y el azúcar.
Cuando la mezcla empiece a hervir, reducir el fuego y dejar
hervir a fuego lento. Reducir la salsa a la mitad.
4. Cuando las coles estén listas, retirarlas de la cesta y colocarlas
en un tazón. Agregar la salsa, la parte verde de las cebolletas
y el maní. Servir inmediatamente.
Información nutricional por porción:
Calorías 293 (45% de grasa) • Carbohidratos 32g • Proteínas 9g • Grasa 16g
Grasa saturada 2g • Colesterol 0mg • Sodio 1g • Calcio 91 mg • Fibra 8 g
Taquitos de tinga de pollo
Estas tortillas de maíz están rellenas de pollo desmenuzado
ahumado y fritas con aire hasta alcanzar una crujiente
perfección.
Rinde 6 taquitos
1 cucharadasaceitedeoliva+unpocomásparapincelar
1 cebollarojamediana,enrodajas
3 dientesdeajo,finamentepicados
1 latade14.5oz(410g)detomatesasadosalfuego
machacados
¼ taza(60ml)deadobo
½ cucharaditadechilechipotleenpolvo
½ cucharaditadecominoenpolvo
½ cucharaditadeoréganoseco
1 cucharaditadesalkosher
½ cucharaditadepimientanegrareciénmolida
2 tazas(500g)desobrasdepolloopolloasado,
desmenuzado

19
6 tortillasdemaízde6in(15cm)
½ taza(60g)dequesoOaxacarallado
Cremaagria,cilantropicadoyquesoCotijadesmenuzado
paradecorar
1. Calentar 1 cucharada del aceite de oliva a fuego medio, en una
sartén grande. Agregar la cebolla y el ajo; saltear por aprox. 5
minutos, hasta que la cebolla esté suave y translúcida (no dejar
que se dore).
Agregar los tomates, el adobo, el chipotle en polvo, el comino, el
orégano, la sal y la pimienta. Cocinar por 2-3 minutos adicionales,
hasta que la mezcla esté aromática. Agregar el pollo
desmenuzado. Seguir cocinando hasta que esté caliente.
2. Envolver las tortillas en una toalla húmeda y meter al
microondas por aprox. 15 segundos para suavizarlas. Mantenerlas
cubiertas hasta el momento de usar.
3. Colocar la primera tortilla en una superficie de trabajo plana.
Esparcir unas 2 cucharadas de la mezcla de pollo en la mitad
inferior de la tortilla. Rociar con un poco de queso Oaxaca y
enrollar firmemente. Usar un palillo para que no se abra. Colocar
en la cesta y repetir con el resto de las tortillas.
4. Cuando toda las flautas estén en la cesta, pincelarlas con una
capa de aceite de oliva. Colocar la cesta en el aparato. Elegir el
modo “AIR FRY” y fijar el tiempo en 8 minutos y la temperatura
en 350°F. Presionar el botón START/STOP.
5. Al final de la cocción, retirar los taquitos de la cesta. Rociar con
crema agria, cilantro y queso Cotija.
Información nutricional por porción de ½ taquito:
Calorías 522 (59% de grasa) • Carbohidratos 9g • Proteínas 43g
Grasa 34g • Grasa saturada 22g • Colesterol 107mg • Sodio 2619mg
Calcio 34 mg • Fibra 1g
Pollo asado con vegetales de otoño
Plato único “à la Cuisinart”.
Rinde 4-6 porciones
16 onzas(455g)decolesdeBruselas,partidasalamitad
8 onzas(225g)decalabazamoscada(“butternutsquash”),
encubosde1in(2.5cm)
1 cucharada(15ml)deaceitedeoliva
1¾ cucharaditasdesalkosher
Pimientanegrareciénmolida
1 pollode3½lb(1.5kg)
4 dientesdeajo,machacados
1 limónmediano,partidoalamitad
1. Colocar las coles, la calabaza moscada, el aceite de oliva, 1
cucharadita de la sal y la pimienta negra (a gusto) en un tazón
mediano; revolver. Elegir el modo “ROAST” y fijar el tiempo en 25
minutos y la temperatura en 300°F. Presionar el botón START/
STOP. Después del precalentamiento, colocar los vegetales en la
cesta y agitar esta para distribuirlos uniformemente.
2. Mientras los vegetales se están cocinando, preparar el pollo.
Secar bien el pollo con papel absorbente y presionarlo
suavemente para aplastar suavemente la carne para que se
cocine de forma más uniforme. Restregar la piel y el interior de
la cavidad con ¾ de cucharadita de sal. Sazonar ligeramente con
pimienta. Colocar el ajo en la cavidad, y luego exprimir los
limones en ella (dejar las mitades de limón en ella).
3. Cuando los vegetales estén cocinados, colocarlos en un tazón.
Colocar el pollo en la cesta y colocar esta en el aparato. Elegir el
modo “ROAST” otra vez y fijar el tiempo en 55 minutos y la
temperatura en 350°F. Presionar el botón START/STOP.
4. Cuando queden 10 minutos de cocción, devolver los vegetales a
la cesta, distribuyéndolos uniformemente alrededor del pollo.
Volver a colocar la cesta en el aparato y seguir cocinando.

20
5. Al final de la cocción (la temperatura interna del pollo debe
alcanzar 165°F/74°C), retirar el pollo de la cesta y cortarlo en
porciones individuales. Servir con los vegetales.
Información nutricional por porción (basado en 6 porciones):
Calorías 268 (23% de grasa) • Carbohidratos 16g • Proteínas 36g
Grasa 7g • Grasa saturada 1g • Colesterol 103mg • Sodio 768mg
Calcio 130 mg • Fibra 5 g
Salmón glaseado con tomillo
con espárragos y papas “fingerling” asados
Esta comida completa de entre semana es fácil y rápida
de preparar gracias a la freidora de aire Cuisinart
®
.
Rinde 4 porciones
10 onzas(340g)depapas“fingerling”,preferiblemente
multicolores,cortadasporlamitadalolargo
1 cucharada(15ml)deaceitedeoliva
1½ cucharaditasdesalkosher
2 pizcasdepimientanegrareciénmolida
1 libra(455g)deespárragos,sinlasextremidadesduras
1 cucharada(15g)demiel
½ cucharaditaderalladuradelimónfresca
½ cucharaditadejugodelimónfresco
½ cucharaditadehojasdetomillofresco
1 libra(455g)desalmón,enfiletesde4oz(115g)
1. Colocar las mitades de papa, 1 cucharadita del aceite de oliva,
¾ de cucharadita de la sal y 1 pizca de pimienta en un tazón
grande; revolver. Presionar el botón VEGETABLES y ajustar el
tiempo de cocción en 15 minutos. Presionar el botón START/
STOP. Después del precalentamiento, colocar las papas en la
cesta y agitar esta para distribuirlas uniformemente. A mitad de
tiempo, cuando el aparato emita un pitido, revolver las papas.
Volver a colocar la cesta en el aparato y seguir cocinando.
2. Mientras las papas se estén cocinando, colocar los espárragos,
1 cucharadita de aceite, ¼ de cucharadita de sal, 1 pizca de
pimienta y ¼ de cucharadita de la ralladura en un tazón grande;
revolver.
3. Colocar la cucharadita de aceite de oliva, la miel, el jugo de
limón, la ralladura restante, el tomillo y ½ cucharadita de sal
kosher en un tazón pequeño; revolver. Pincelar uniformemente
los filetes de salmón con la mezcla; Reservar.
4. Cuando las papas estén cocinadas, colocarlas en un cuenco
grande o una bandeja. Cubrir con papel de aluminio para
mantener caliente.
5. Colocar los espárragos en la cesta y colocar esta en el aparato.
Presionar el botón VEGETABLES y ajustar el tiempo de cocción
en 8 minutos. Presionar el botón START/STOP. Al final de la
cocción, añadir a las papas.
6. Colocar el salmón en la cesta y colocar esta en el aparato.
Elegir el modo “AIR FRY” y fijar el tiempo en 10 minutos y la
temperatura en 375°F. A continuación, presionar los botones
TOSS REMINDER y START/STOP.
7. Cuando el salmón esté cocinado, servirlo con los vegetales.
Información nutricional por bolita de dona:
Calorías 367 (35% de grasa) • Carbohidratos 23g • Proteínas 39g
Grasa 14g • Grasa saturada 2g • Colesterol 94mg • Sodio 877mg
Calcio 59 mg • Fibra 4 g

21
Bolitas de dona con azúcar y canela
Aunque nunca durarán por mucho tiempo, estas bolitas
de dona son mejores frescas.
Rinde 16 bolitas de dona
¾ taza(95g)deharinadepan+más(hasta¼detaza/30g)
paraamasar
2 cucharaditas(10g)deazúcargranulada
¾ cucharaditadelevadurasecaactiva
2 pizcasdesalkosher
2 pizcasdecanelaenpolvo
1 pizcadenuezmoscada
1 huevogrande,ligeramentebatido,atemperaturaambiente
3 cucharadas(45g)desuerodeleche(“buttermilk”),a
temperaturaambiente
½ cucharaditadeextractonaturaldevainilla
1 cucharada(15g)demantequillasinsal,atemperatura
ambiente,en4pedazos
Mantequilladerretida(aprox.2cucharadas/30ml),para
terminar
Azúcarconcanela(¼taza/50gdeazúcar+1cucharadade
canelaparaterminar
1. Colocar la harina, el azúcar, la levadura, la sal y la nuez moscada
en un tazón grande; batir para combinar.
2. Colocar el huevo, el suero de leche y la vainilla en un tazón
pequeño; batir. A continuación, agregar lentamente a la mezcla
de harina mientras mezcla esta con las manos o un cucharón de
madera. Enharinar ligeramente una superficie de trabajo limpia y
colocar la masa encima, espolvoreándola ligeramente con harina.
Amasar a mano. De ser necesario, agregar harina, una
cucharadita a la vez, para evitar que la masa se pegue a sus
manos. Agregar la mantequilla, un pedazo a la vez, amasando
después de cada adición. Seguir agregando harina una
cucharadita a la vez para evitar que la masa pegue a sus manos.
La masa debe estar tierna y suave, y no debe romperse al
estirarse.
3. Formar una bola de masa y colocarla en un tazón limpio.
Cubrir con una toalla húmeda o con papel film/plástico y dejar
subir por 1 hora. Después de 1 hora, voltear la masa y presionar
ligeramente (no aplastar). Cubrir otra vez y dejar reposar por
una hora adicional.
4. Dividir la masa en 16 porciones uniformes y colocar estas en una
superficie ligeramente enharinada. Trabajando con una porción
a la vez (cubrir las demás sin apretar con papel fil/plástico),
hacer rodar la masa entre sus manos hasta formar una bolita
pequeña y lisa. Cubrir sin apretar con papel film/plástico.
5. Después de haber formado 8 bolitas, colocar estas en la cesta.
6. Colocar la cesta en el aparato. Elegir el modo “BAKE” y fijar
el tiempo en 8 minutos y la temperatura en 350°F. Presionar
el botón START/STOP. Las bolitas de dona están listas cuando
están luz doradas. Repetir con el resto de la masa.
7. Cuando cada tanda esté lista y aún tibia, pincelar las bolitas con
mantequilla derretida y cubrir con azúcar con canela, revolviendo
suavemente. Servir inmediatamente.
Información nutricional por bolita de dona:
Calorías 66 (43% de grasa) • Carbohidratos 8g • Proteínas 1g
Grasa 3g Grasa saturada 2g • Colesterol 20mg • Sodio 25mg
Calcio 7 mg • Fibra 0 g
Tartas de mano de durazno-frambuesa
Lo mejor de las tartas sin complicaciones. Hay una razón por
la que las tartas de mano son tan populares: son deliciosas,
fáciles de montar y versátiles. Si se siente creativa/o, diviértase
pinchando los bordes de forma especial o trazando diseños en la
parte superior de cada tarta.
Rinde 10-12 tartas de mano
Masa:

22
2 tazas(250g)deharinacomún
2 cucharaditasdeazúcargranulada
1 cucharaditadesalkosher
½ libra(225g)demantequillasinsalfría,encubitos
¼ taza(60ml)deaguahelada
Relleno:
10 onzas(285g)deduraznoscongelados,descongelados
6 onzas(170g)deframbuesasfrescas
1
/
3
taza(65g)deazúcargranulada
2 cucharadasdeharina/almidón/féculadetapioca
1 cucharadadejengibrecristalizadofinamentepicado
2 cucharaditasdejugodelimónfresco
½ cucharaditadeextractonaturaldevainilla
¼ cucharaditadesalkosher
¼ cucharaditadejengibreenpolvo
Barnizdehuevo:
1 huevogrande,1cucharaditadeaguay1pizcadesal,batidos
Azúcargrueso,paradecorar(opcional)
1. Preparar la masa: Colocar la harina, el azúcar y la sal en un
tazón grande; batir para combinar. A continuación, agregar los
cubitos de mantequilla. Usando sus manos, combinar la
mantequilla con la masa hasta conseguir “migajas” del tamaño
de arvejas. Agregar el agua helada y amasar hasta conseguir una
masa elástica. (Nota: También puede usar una procesadora de
alimentos, equipada con cuchilla picadora. Primero, procesar los
ingredientes secos a velocidad baja, y luego agregar la
mantequilla. Pulsar a velocidad alta hasta que los pedazos de
mantequilla tengan el tamaño de arvejas. Seguir pulsando
mientras agrega el agua helada, 1 cucharada a la vez.
Terminar de amasar a mano en una superficie ligeramente
enharinada). Doblar la masa sobre sí misma unas cuantas veces
(esto ayuda a crear capas extra hojaldradas) y, a continuación,
formar dos discos gruesos. Envolver bien y refrigerar un mínimo de
1 hora hasta un máximo de una noche.
2. Justo antes de empezar a cocinar, preparar el relleno: Colocar
los duraznos, las frambuesas, el azúcar, la harina de tapioca, el
jengibre cristalizado, el jugo de limón, la vainilla, la sal y el
jengibre en polvo en un tazón grande; revolver suavemente para
combinar. Reservar.
3. Extender cada disco de masa hasta que tenga un espesor de
1
/
8
in(3mm) a ¼in(6mm). A continuación, usar un cortador de
galletas grande para cortar círculos de 4in(10cm). Usando una
cuchara calada para dejar que el líquido se escurra, colocar unas
2 cucharadas de la mezcla de frutas en el centro de cada
círculo. Pincelar los bordes con barniz de huevo y cubrir con otro
círculo de masa. Presionar o pellizcar los bordes para sellar y
cortar un par de pequeñas hendiduras en la parte superior
usando un cuchillo mondador/pelador. Repetir con el resto de
los círculos de masa. Refrigerar las tartas de mano. Reservar los
restos de masa.
4. Repetir con el segundo disco de masa, combinándolo con los
restos de masa.
5. Cuando todas las tartas de mano estén listas y frías, elegir el
modo “BAKE” y fijar el tiempo en 20 minutos y la temperatura en
350°F. Presionar el botón START/STOP.
6. Mientras el aparato se está precalentando, pincelar barniz de
huevo en la parte superior de las tartas y rociar con azúcar
grueso si desea. Después del precalentamiento, colocar 4 tartas
en la cesta y hornear hasta que estén uniformemente doradas.
7. Retirar y repetir con el resto de las tartas.
Información nutricional por tarta de mano:
Calorías 250 (53% de grasa) • Carbohidratos 27g • Proteínas 2g
Grasa 15g • Grasa saturada 11g • Colesterol 41mg • Sodio 238mg
Calcio 6 mg • Fibra 2 g

23
GARANTÍA
Garantía limitada de tres años
Esta garantía es válida solo en los Estados Unidos, para los consumidores
que hayan comprado este producto directamente a Cuisinart o a un
revendedor autorizado de Cuisinart. Usted es un consumidor si posee una
freidora de aire Cuisinart
®
que haya sido comprada en una tienda, para uso
personal, familiar o casero. A menos que la ley aplicable exija lo contrario,
esta garantía no es para los minoristas u otros consumidores/compradores
comerciales, ni propietarios/consumidores que hayan comprado este
producto a revendedores no autorizados por Cuisinart. Cuisinart garantiza
este producto contra todo defecto de materiales o fabricación durante
3 años después de la fecha de compra original, siempre que haya sido
usado para uso doméstico y de acuerdo con las instrucciones. Se
recomienda llenar el formulario de registro disponible en https://cuisinart.
registria.com, a fin de facilitar la verificación de la fecha de compra
original de este producto. Sin embargo, no es necesario registrar el
producto para recibir servicio bajo esta garantía. En ausencia de prueba
de la fecha de compra, el período de garantía será calculado a partir de la
fecha de fabricación del producto.
RESIDENTES DE CALIFORNIA
La ley del estado de California ofrece dos opciones bajo el período de
garantía. Los residentes del estado de California pueden devolver el
producto defectuoso (A) a la tienda donde lo compraron o (B) a otra
tienda que venda productos Cuisinart
®
de este tipo. La tienda podrá, a su
elección, reparar el producto, referir al consumidor a un centro de servicio
independiente, sustituir el producto, o reembolsar al consumidor el precio
de compra menos la cantidad directamente atribuible al uso anterior
del producto por el consumidor. Si estas dos opciones no satisfacen al
consumidor, podrá llevar el aparato a un centro de servicio independiente,
siempre que se pueda arreglar o reparar el aparato de manera económica.
Cuisinart (no el consumidor) será responsable por los gastos de servicio,
reparación, sustitución o reembolso de los productos defectuosos bajo
garantía. Los residentes de California también pueden, si lo desean,
mandar el producto defectuoso directamente a Cuisinart para que sea
reparado o sustituido. Para esto, se debe llamar a nuestro servicio de
atención al cliente al 1-800-726-0190. Cuisinart será responsable por
los gastos de reparación, reemplazo, manejo y envío de los productos
defectuosos durante el período de garantía.
GARANTÍA DE REEMPLAZO SIN DIFICULTADES
Su máxima satisfacción es nuestra prioridad, así que, si este producto
Cuisinart
®
falla dentro del generoso período de garantía, lo repararemos
o, de ser necesario, lo reemplazaremos, sin costo alguno para usted.
Para obtener una etiqueta de devolución, visite https://www.cuisinart.
com/customer-care/product-assistance/product-inquiry/. O llame
sin cargo a nuestro servicio de atención al cliente, al
1-800-726-0190,
para hablar con un representante. Este producto satisface las más altas
exigencias de fabricación y ha sido diseñado para funcionar con 120V,
usando accesorios y repuestos autorizados solamente. Esta garantía
excluye expresamente los defectos o daños causados por accesorios,
piezas o reparaciones no autorizados por Cuisinart, así como los defectos
o daños causados por el uso de un convertidor de voltaje. Esta garantía
no cubre el uso comercial o industrial del producto, y no es válida en caso
de daños causados por mal uso, negligencia o accidente. Esta garantía
excluye todos los daños incidentales o consecuentes. Algunos Estados no
permiten la exclusión o limitación de daños incidentales o consecuentes,
de modo que las limitaciones mencionadas pueden no regir para usted.
Usted puede tener otros derechos que varían de un Estado a otro.
Importante: Si debe llevar el aparato defectuoso a un centro de servicio
no autorizado, por favor informe al personal del centro de servicio que
deben llamar al servicio de atención al cliente de Cuisinart, al 1-800-726-
0190 a fin de diagnosticar el problema correctamente, usar las piezas
correctas para repararlo, y comprobar que el producto aún esté bajo
garantía.
©2025 Cuisinart
Glendale, AZ 85307
24CE091177
IB-18383-ESP-A_ID