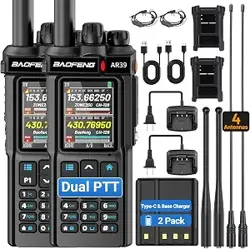

Amateur
Radio
AR -��UV
SERIES
USER’S MANUAL
PREFACE
Thank you very much for choosing our Multi-Band Amateur Ra dio in favor of our products.
This Amateur radios utilizes the latest advanced tec hnology to provide reliable communications in today's demanding communications
environments. It is extremely stable and reliable for long distance communication with a sleek and compact design. It features emergency
alarm, personnel death alarm, work alone, GPS, APRS position reporting, analog DT MF, 2TONE , 5TONE, CTCSS/DCS encode/decode. Whether
you are a professional who needs to keep in touc h with your active team (suc h as ranching, farming, driving, hunting, forest protection, tactical
training) or a recreational user who just wants to keep in to uch with frie nds and family, this product will surely bring you all kinds of
convenience in yo ur work, life and leisure.
To avoid personal injury or property damage caused by improper operatio n, please read all information carefully before using o ur products. To
ensure t hat you maximize the convenience of this product, please read this manual and the Safety Information Manual before use.
WARNING: MODIFICATION OF THIS DEVICE TO RECEIVE CELLULAR RADIOTELEPHONE
SERVICE SIGNALS IS PROHIBIITED UNDER FCC RULES AND FEDERRAL LAW.
A
TTENTION!
When programming the radio, start by reading the factory software data, and then rew rite t his data with your
frequency etc., to a new saved code plug, otherwise errors may occur. You can use the programming cable with a PC to program
the authorize d frequency, bandwidth, power, etc. your pro gramming must comply with your FCC (or EU other country) license
certification.
ATTENTION! Before using this product, read the RF Energy Exposure and Pro duct Safety Guide that ship with t he radio whic h
contains instructions for safe usage a nd R F energy awareness and control for complia nce with applicable standards and
regulation.
FRS, GMRS, MURS, PMR446
You may be tempted to use FRS, GMRS, MURS (in the USA) or PMR 446 (in Europe) freque ncies. Do note however that there are
restrictions on these bands that make this transceiver illegal for use.
1

Table of Contents
Chapter 1. Getting Started 5.5 Freque ncy (VFO) mode
1.1 Regulations and Safety Warnings 5.6 Channel (MR) mode and Channel selectio n
1.2 Content of the packaging 5.7 Select a Zone
1.3 Features a nd Functio ns 5.8 Making a call
Chapter 2. Battery Information 5.9 Emergency Alert
2.1 Charging the Battery Pack 5.10 FM Radio (FM)
2.2 Charger Supplied 5.11 Radio Interrupt
2.3 How to Charge 5.16 NOAA Weather/ Weather Alert
2.4 LED Indicator 5.17 One touch frequency Search
2.6 Using the Type-C USB C harger Chapter 6. Advanced Features
Chapter 3. Installation of Accessories 6.1 Scanner
3.1 Installing/ Removing the Antenna 6.2 DTMF
3.2 Installing the belt clip 6.5 Dual Watch
3.3 Installing the battery pack 6.6 Manual Progra mming (Channels Memory)
Chapter4. Radio Overview
4.1 Buttons and controls of the radio Chapter 7. Main Menu Functions
4.2 Main keypad controls 7.1 Basic use
4.3 Progra mmed Key (SK1/SK2) 7.2 Using short-cuts
4.4 Status Indications 7.3 Radio General Settings
4.5 LCD icon summa ry
Chapter 5. Basic Operations Appe ndix A. – Trouble shooting guide
5.1 Power on the radio Appendix B. - Technical Specifications
5.2 Adjusting the volume Appendix C. - Shortcut Me nu operations
5.3 Main Band/Sub Band Switc h Appe ndix D. - DCS Table
5.4 VFO/C hannel Switch Appe ndix E. - CTCSS Table
2

Chapter 1. Getting Started
1.1 Regulations and Safety Warnings
FCC Regulatory Conformance
This equipment has been tested and found to comply with the limits for a Class B digital device, pursuant to Part 15 of FCC Rules. These limits are designed to provide
reasonable protection against harmful interference in a residential installation. This equipment generates and can radiate radio frequency energy. If not installed and used
in accordance with the instructions, it may cause harmful interference to radio communications. However, there is no guarantee that interference will not occur in a
particular installation. Verification of harmful interference by this equipment to radio or television reception can be determined by turning it off and then on. The user is
encouraged to try to correct the interference by one or more of the following measures:
- Reorient or relocate the receiving antenna.
- Increase the separation between the equipment and receiver.
- Connect the equipment into an outlet on a circuit different from that to which the receiver is connected.
- Consult the dealer or an experienced radio/TV technician for help.
Changes or modifications not expressly approved by the party responsible for compliance could void the user's authority to operate the equipment.
This device complies with Part 15 of the FCC Rules. Operation is subject to the condition that this device does not cause harmful interference.
WARNING
!
MODIFICATION OF THIS DEVICE TO RECEIVE CELLULAR RADIOTELEPHONE SERVICE SIGNALS IS PROHIBIITED UNDER FCC RULES AND FEDERRAL LAW.
Compliance with RF Exposure Standards
The radio complies with the following RF energy exposure standards and guidelines:
• Uni ted States Federal Communications Commission, Code of Federal Regulations; 47 CFR § 1.1307, 1.1310 and 2.1093
• American National Standards Institute (ANSI) / Institute of Electrical and Electronic Engineers (IEEE) C95.1:2005; Canada RSS102 Issue 5 March 2015
• Institute of Electrical and Electronic Engineers (IEEE) C95.1:2005 Edition
RF Exposure Compliance and Control Guidelines and Operating Instructions
To control your exposure and ensure compliance with the occupational/ controlled environmental exposure limits, always adhere to the following procedures.
Guidelines:
• Do not remove the RF Exposure Label from the device.
• User awareness instructions should accompany device when transferred to other users.
• Do not use this device if the operational requirements described herein are not met.
Operating Instructions:
• Transmit no more than the rated duty factor of 50% of the time. To transmit (talk), press the Push-to-Talk (PTT) key. To receive calls, release the [PTT] key. Transmitting
50% of the time, or less, is important because the radio generates measurable RF energy only when transmitting (in terms of measuring for standards compliance).
3

• Keep the radio unit at least 2.5cm away from the face. Keeping the radio at the proper distance is important as RF exposure decreases with distance from the antenna.
The antenna should be kept away from the face and eyes.
• When worn on the body, always place the radio in an approved holder, holster, case, or body harness or by use of the correct clip for this product. Use of non-approved
accessories may result in exposure levels which exceed the FCC's occupational/ controlled environmental RF exposure limits.
• Use of non-approved antennas, batteries, and accessories causes the radio to exceed the FCC RF exposure guidelines.
• Contact your local dealer for the product's optional accessories.
■Precautions for Portable Terminals
Operating Prohibit ion s
To protect you against any property loss, bodily injury or even death, be sure to observe the following safety instructions:
1. Do not operate the product in a location containing fuels, chemicals, explosive atmospheres and other flammable or explosive materials. In such location, only an
approved Ex-protection model is allowed for use, but any attempt to assemble or disassemble it is strictly prohibited.
2. Do not operate the product near or in any blasting area.
3. Do not operate the product near any medical or electronic equipment that is vulnerable to RF signals.
4. Do not hold the product while driving.
5. Do not operate the product in any area where use of wireless communication equipment is completely prohibited.
Important Tips
To help you make better use of the product, be sure to observe the following instructions:
1. Do not use any unauthorized or damaged accessory.
2. Keep the product at least 2.5 centimeters away from your body during transmission.
3. Do not keep the product receiving at high volume for a long time.
4. For vehicles with an air bag, do not place the product in the area over the air bag or in the air bag deployment area.
5. Keep the product and its accessories out of reach of children and pets.
6. Please operate the product within the specified temperature range.
7. Continuous transmission for a long time may lead to heat accumulation within the product. In this case, please keep it at a proper location for cooling.
8. Handle the product with care.
9. Do not disassemble, modify or repair the product and its accessories without authorization.
■Precautions for Batteries
Charging Prohibitions
To protect you against any property loss, bodily injury or even death, be sure to observe the following safety instructions:
1. Do not charge or replace your battery in a location containing fuels, chemicals, explosive atmospheres and other flammable or explosive materials.
2. Do not charge your battery that is wet. Please dry it with a soft and clean cloth prior to charge.
4

3. Do not charge your battery suffering deformation, leakage and overheat.
4. Do not charge your battery with an unauthorized charger.
5. Do not charge your battery in a location where strong radiation is present.
6. Overcharge shall always be prohibited for it may shorten the life of your battery.
Maintenance Instructions
To help your battery work normally or prolong its life, be sure to observe the following instructions:
1. Accumulated dust on charging connector may affect normal charging. Please use a clean and dry cloth to wipe it on a regular basis.
2. It is recommended to charge the battery under 5℃~40℃. Violation of the said limit may cause battery life reduction or even battery leakage.
3. To charge a battery attached to the product, turn it off to ensure a full charge.
4. Do not remove the battery or unplug the power cord during charging to ensure a smooth charging process.
5. Do not dispose of the battery in fire.
6. Do not expose the battery to direct sunlight for a long time nor place it close to other heating sources.
7. Do not squeeze and penetrate the battery, nor remove its housing.
Transportation Instructions
1. Damaged batteries must not be transported.
2. To avoid short circuit, separate the battery from metal pars or from each other if two or more batteries are transported in one packaging.
3. The radio mus t be switched off and secured against switch-on, if the battery is attached.
The content of the shipment must be declared in the shipping documents and by a Battery Shipping Label on the packaging. Contact your hauler for the local regulations
and further information.
1.2 Content of the packaging
This transceiver comes shipped with the following items in the box:
• 1 Radio body • 1 Belt Clip • 1 Antenna
• 1 Lithium-Ion battery pack • 1 Cha rg er ( wi th T ype -C cable) • 1 Wrist Belt
• Instruction Manual
*If any item is missing, please notify your Baofeng / Pofung dealer.
5

1.3 Features and Functions
• 2.0" TFT large screen, full keyboard, fully open me nu operation
• Scanner function: VFO scan ra nge setting, three scan recovery metho ds, c hannel scan, CTC/DCS scan, scan cha nnel addition and removal
• 108-136,136-174,220-260,350-390,400-520MHz Multiband scanning receiver (*Suitable for North American users)
• Built-in input method, allows this device to edit channel name
• NOAA Weat her Ra dio Channel Receptio n in t he United States and Canada
• Frequency step, selectable between 2.5K | 5.0K | 6.25K | 10.0K | 12.5K | 20.0K | 25.0K | 50.0K
• Type-C direct charging and charging sta nd, more convenient battery life
• Dual-band handheld transceiver • DTMF enco der a nd DTMF manual dial
• High Capacity Lithium-Ion battery • Broadcast FM radio receiver 87.5-108 MHz
• 50 CTCSS tones and 105 DCS codes • VOX (voice activated transmit)
• 10 zones storage, Up to 640 na med memory c hannels • Alarm function
• High or low power selecta ble • Display illumination programmable via keypad
• Function beep on the keyboard • Dual watch / Dual reception
• Programmable repeater offset • Battery saving function
• Transmission time-out timer • Scan mode
• Busy channel lock out • Built in CTCSS/DCS tones
• LED flashlight • PC programmable
• Ten (10) levels of Squelch adjustment • Analog signaling DTMF, 2TONE, 5TONE, BDC1200 codecs
• End of transmission tone, aka “Roger Beep” • One to uch s earch frequency
6

Chapter 2. Battery Information
2.1 Charging the Battery Pack
The Li-ion battery pack is not charged at the factory; please charge it before use. Charging the battery pack for the first time after purchase or extended storage (more
than 2 months) may not bring the battery pack to its normal maximum operating capacity. Best operation will require fully charging/ discharging the battery two or three
times before the operating capacity will reach its best performance. The battery pack life may be depleted when it’s operating time decreases even though it has been
fully and correctly charged. If this is the case, replace the battery pack.
2.2 Charger Supplied
Please use the specified charger provided by our company. Other models may cause explosion and personal injury. After installing the battery pack, and if the radio
displays low battery with a voice prompt, please charge the battery.
2.3 Use Caution with the Li-ion Battery
a. Do not short the battery terminals or throw the battery into a fire. Never attempt to remove the casing from the battery pack, as our company cannot be held
responsible for any accident caused by modifying the battery.
b. The ambient temperature should be between 5℃-40℃ (40˚F - 105˚F) while charging the battery. Charging outside this range may not fully charge the battery.
c. Please turn off the radio before inserting it into the charger. It may otherwise interfere with correct charging.
d. To avoid interfering with the charging cycle, please do not cut off the power or remove the battery during charging until the green light is on.
e. Do not recharge the battery pack if it is fully charged. This may shorten the life of the battery pack or damage the battery pack.
f. Do not charge the battery or the radio if it is damp. Dry it before charging to avoid damage.
WARNING
!
When keys, ornamental chain or other electric metals contact the battery terminal, the battery may become damage or injure a human. If the batt ery terminals ar e
short circuited it will generate a lot of heat. Take care when carrying and using the battery. Remember to put the battery or radio into an insulated container. Do not
put it into a metal container.
2.3 How to Charge
a. Plug the AC adaptor into the AC outlet, and then plug the cable of the AC adaptor into the DC jack located on the back of the charger. The indicator light blinks orange
and is then ready to charge a battery.
b. Plug the battery or the radio into the charger. Make sure the battery terminals are good in contact with charging terminals. The indicator light turns to red--- charging
begi ns .
7
c. It takes approximately 2-5 hours to fully charge the battery. When the lamp lights green, the charging is completed. Remove the battery or the radio unit with its battery
from socket.
When charging a radio (with battery) the indicating lamp will not turn into green to show the fully charged status if the radio is powered on. Only when the radio is
switched off will the lamp indicate normal operation. The radio consumes energy when it is power-on, and the charger cannot detect the correct bat tery volt age when
the battery has been fully charged. So the charger will charge the battery in constant voltage mode and fail to indicate correctly when the battery has been fully
charged.
2.4 LED Indicator
S TATUS
LED
No Battery
Green and red alternately flashing
Charge Normally
Red
Fully Charged Green
Trouble
Red blinks fast for a long time
NOTE:Trouble means battery too warm, battery short-circuited or charger short-cir cuited.
2.5 How to Store the Battery
a. If the battery needs to be stored, keep it in status of 80% discharged.
b. It should be kept in low temperature and dry environment.
c. Keep it away from hot places and direct sunlight.
» Do not short circuit the battery terminals.
» Never attempt to remove the casing from the battery pack.
» Never store the battery in unsafe surroundings , as a short may cause an explosion.
» Do not put the battery in a hot environment or throw it into a fire, as it may cause an explosion.
2.6 Using the Type-C USB Charger
The Type-C USB charger is a handy port that allows you to conveniently charge your Li-ion battery pack.
1. Make sure your radio is turned OFF.
2. Plug the Type-C USB cable into the Type-C USB charging port on your battery. Connect the other end of the micro-USB charger to wall power outlet.
3. An empty battery will be fully charged in 4 hours.
4. The battery meter on LCD will move to indicate the battery is charging.
N ot e:
• It is recommended to power OFF your radio while charging. However, if power is turned on while charging, you may not be able to transmit a message if the battery
8
is completely empty. Allow time for the battery to charge to 1 bar before attempting to transmit a message.
• For optimal battery life, remove the radio from the charger within 6 hours. Do not store the radio while connected to the charger.
Chapter 3. Installation of Accessories
Before the radio is ready for use we need to attach the battery pack, as well as charge the battery.
3.1 Installing/ Removing the Antenna
1). Installing the Antenna: Screw the antenna into the connector on the top of the transceiver by holding the antenna at its base and turning it clockwise until secure.
2). Removing the Antenna: Turn the antenna counter-clockwise to remove it.
3.2 Installing the battery pack
Before attaching or removing the battery make sure your radio is turned off by turning the power/volume knob all the way counter-clockwise.
1). Make sure the battery is aligned in parallel with the radio body with the lower edge of the battery about 1-2cm below the edge of the radio.
2). Once aligned with the guide-rails, slide the battery upward until you hear a click as the battery locks in place.
Remove the battery pack
To remove the battery, press the battery release above the battery pack, as you slide the battery downward.
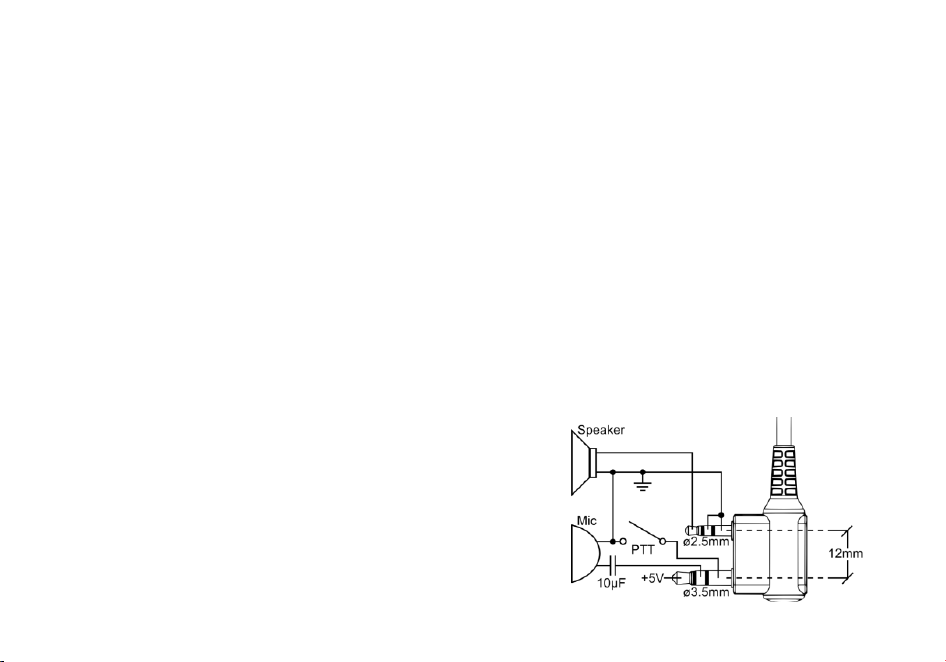
3.3 Installing the Additional Speaker/Microphone (Optional)
Pry open the rubber MIC-Headset jack cover and then insert the Speaker / Microphone plug into the double jack.
9
Chapter4. Radio Overview
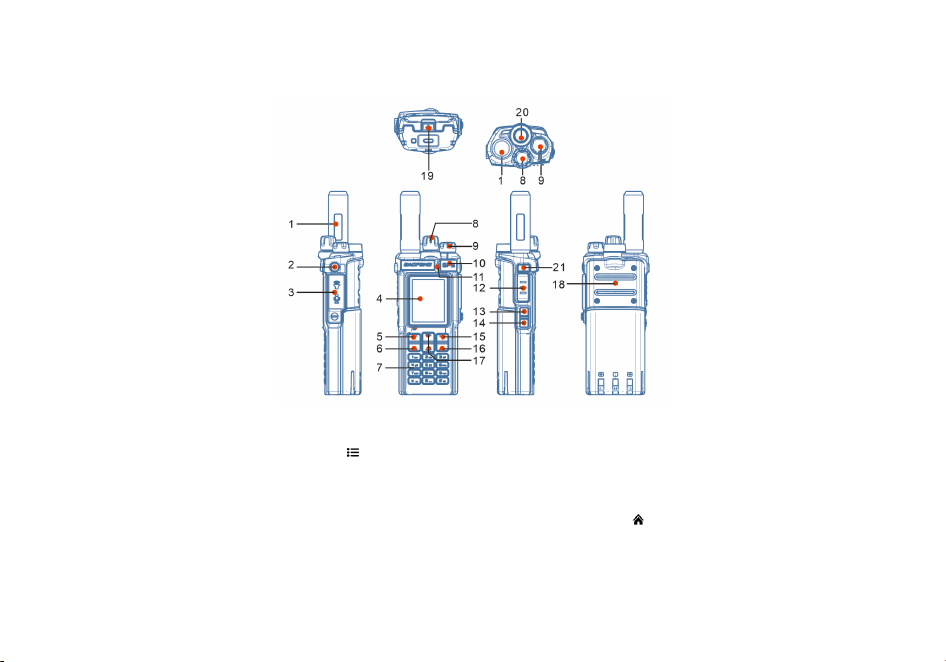
1. Antenna 2. PTT key 3. Accessory jack
4. Color LCD 5.
Ke y (MENU) 6. P1- VFO/MR mode key
7. Numeric keypad 8. Channel knob 9. Power/Volume knob
10. NC 11. R X_T X Status LED 12. PTT key
13. SK1 Programmable key (default: FM Radio/alarm) 14. SK2 Programmable key (Monitor /Flashlight) 15.
Key (EXIT)
16. P2- A / B select key 17. or navigation keys 18. Speaker
19. Battery release latch 20. LED flas hlight 21. Flashlight key
10
4.2 Main keypad controls
◎ P1- VFO/MR mode key: Short press to switch VFO /MR mode. Press and hold to s wi tches channel display mode: Channel CH, Frequency (display small channel number),
Name (channel alias).
◎ P2- A / B select key: Short press to switches between A (upper) and B (lower) displays. Press and hold to switch Double Wait / Signal Wait / Off dual watch mode.
◎
Key (EXIT): Short press to return to the menu or return to the previous menu.
◎
: Press and hold to lock or unlock the keyboard. In transit mode, short press the key in inverted frequency (display R)\offline (display T)
◎
: Short press to enter DTMF dial. Press and hold to scan on and off.
◎ 0[space] : Press and hold to enter weather switch to select weather channel.
4.3 Programmed Key (SK1/SK2)
It is possible to set different functions for [SK1], [SK2] , [SK3] keys .
Method 1: In radio Menu -Radio Setting –Press and Longpress SK1, SK2, SK3.
Method 2: In PC software –Buttons.
Opt ion
Functionality
None
No function is assigned to this button.
Scan
To enable or disable the Scan feature.
Monitor
To enable or disable the Monitor feature.
Flashlight
To enable or disable the flashlight fea ture.
FM Radio
To enable or disable the FM Radio feature.
SOS
To enable or disable the emergency alarm feature.
One Touch Search
To enable or disable the One Touch Search feature.
1750Hz
Transmits 1750Hz Tone Burst
One Touch Call
To make a call or send a message to the preset contact or implement an auxiliary feature.
Zone
To Switch between the two zone.
Battery Display
Chec k the current battery capacity voltage
Power
Switch the power between super high, high, middle and low power.
VOX
To enable or disable the VOX feature.
11
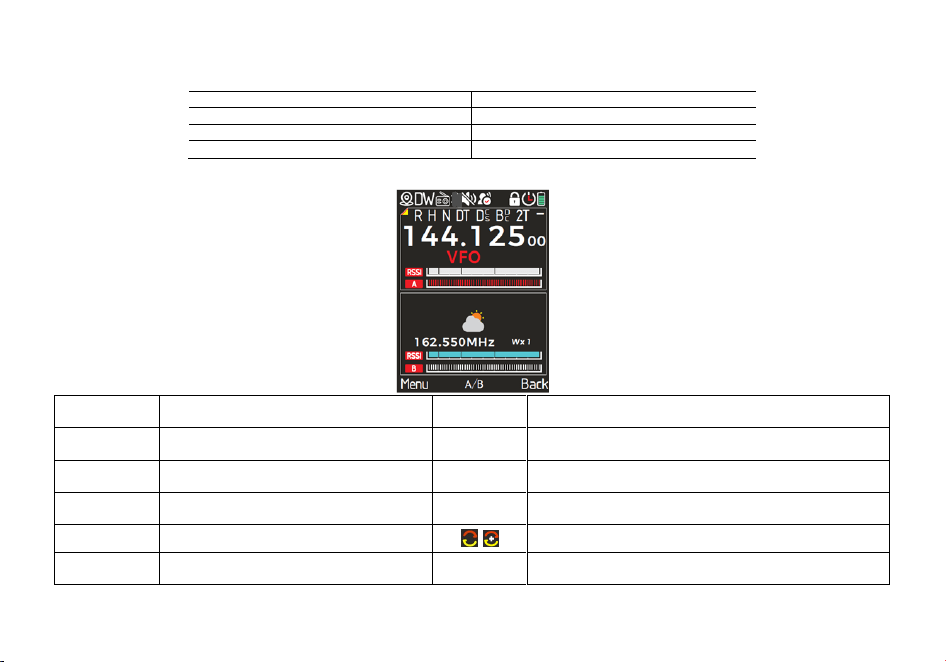
4.4 Status Indications
The top LED will help you to identify the current radio status.
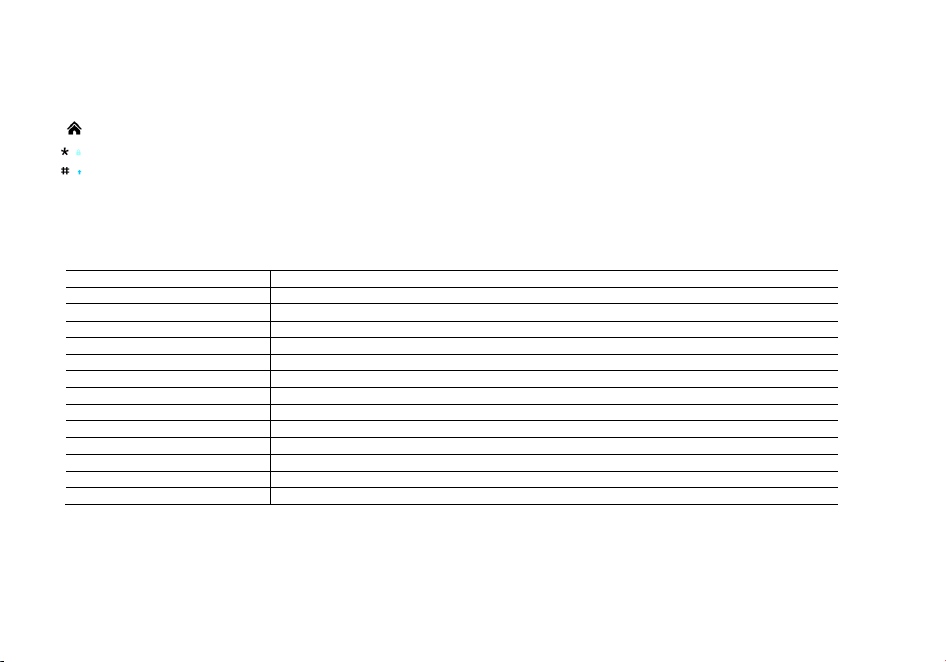
LED Indication
What it Indicates
Constant Green
Receiving Signal
Constant Red
Transmitting signal
Flashes Green
Monitor mode/Scanning Receiving
4.5 LCD icon summary
DT
Make sure you can hear the DTMF side tone from
the radio speaker, set to DT-ST, A NI-ST, DT+ANI.
R
Reverse function enabled
2T
2TONE signaling enabled for current
channel/frequency
+
Enables acces s of repeaters in VFO/Frequency Mode. TX will be
shifted higher in frequency than RX
。
5T
5TONE signaling enabled for current
channel/frequency
-
Enables access of repeaters in VFO/Frequency Mode. TX will be
shifted lower in frequency than RX
BDC
BDC1200 signaling enabled for current
channel/frequency
N
Narrowband enabled
CT
CTCSS enabled
Scan enabled
DCS
DCS enabled
T
Talkaround has been activated, off grid at the central turntable.
The transmission frequency is equal to the receive frequency
12

Chapter 5. Basic Operations
5.1 Power on the radio
• Turning the unit on
To turn the unit on, simply rotate the Volume/Power knob clockwise until you hear a "click". If your radio powers on correctly there should be an audible double beep
after about one second and the display will show a message or flash the LCD depending on settings for about one second. Then it will display a frequency or channel. If
the Voice prompt is enabled, the voice will announce "frequency mode" or "channel mode".
• Turning the unit off
Turn the Volume/Power knob counter-clock wise all the way until you hear a "click". The unit is now off.
5.2 Adjusting the volume
To turn up the volume, turn the volume/power knob clock-wis e. To turn the volume down, turn the Volume/Power knob counter-clock-wise. Be careful not to turn it too
far, as you may inadvertently turn your radio off.
5.3 Main Band/Sub Band Switch
Press the [P2] key switches between A (upper) and B (lower) displays. The frequency or channel on the selected display becomes the active listening and transmit
frequency or channel.
5.4 VFO/Channel Switch
Press the [P1] key switches between Frequency (VFO) Mode and Memory (MR) mode. Memory mode is sometimes also referred to as Channel mode.
For everyday use, Channel (MR) mode is going to be a whole lot more practical than Frequency (VFO) mode. However, Frequency (VFO) mode is very handy for
experimentation out in the field. Ultimately which mode you end up using will depend enti rely on your use cas e.
5.5 Frequency (VFO) mode
In Frequency (VFO) mode you can navigate up and down the band by using the or keys. Each press will increment or decrement your frequency according to the
frequency step you've set your transceiver to.
You can also input frequencies directly on your numeric keypad with kilohertz accuracy.
The following example assumes the use of a 12.5 kHz frequency step.
Example. Entering the frequency 436.61250 MHz on display A
(1) In standby mode, press [P1] key to switch to the frequency (VFO) mode.
(2) E nter [4][3][6][6][1][2][5] [0] on the numeric keypad.
WARNING!
Just because you can program in a channel does not mean you're automatically authorized to use that frequency. Transmitting on frequencies you're not authorized to
operate on is illegal, and in most jurisdictions a serious offence. However, it is legal in most jurisdictions to listen. Contac t your l oc al re gul at ory body f or fur t he r
13

information on what laws, rules and regulations apply to your area.
5.6 Channel (MR) mode and Channel selection
Press [P1] key switches between Frequency (VFO) Mode and Memory (MR) mode. select Channel mode.
• Operation 1: Press the or navigation key to select the channel.
• Operation 2: Turn the channel switch to select a channel.
• Operation 3: Input the channel numbers by the keyboard. For example, if you want switch to channel 12, input [1][2] a total of 2 digits, and it will switch to channel 12.
When the voice prompt function is enabled, the corresponding channel will be broadcast by voice.
5.7 Select a Zone
A zone is a group of channels with the same property. The radio supports up to 10 zones, with a maximum of 64 channels per zone. To select a zone, do one of the
following:
Press
key go to Menu > Zone, press or navigation key to select a zone, and then press key to switch to the selected zone.
The corresponding regional alias will be displayed at the bottom of the screen.
5.8 Making a call
NOTE: Press the key to switch the main channel to the other channel if there are 2 channels shown on the display. In standby mode, press [P1] key to switch
between frequency (VFO) mode and channel (MR) mode.
• Channel mode call: After select a channel, hold down the [PTT] key to initiate a call to the current channel. Speak into the microphone with normal tone. Making a call,
the red LED is on.
• Frequency mode call: Press [P1] key to s witch to the frequency mode, input the working frequency within the allowable frequency range, and press and hold the [PTT]
key to transmit on the current frequency. Speak into the microphone with normal tone. Making a call, the red LED is on.
• Rec eive a call: When you release the [PTT] key, you can answer it without any action.
When receiving a call, the green LED is on.
NOTE: To ensure the best reception volume, keep the distance between the microphone and the mouth at the time of transmission from 2.5 cm to 5 cm.
5.9 Emergency Alert
The Emergency Alert feature can be used to signal members in your group for help.
To activate the emergency alert function, Press the pre-programmed [SOS] key.
Press the pre-programmed [SOS] to exit the emergency alert function.
WARNING: The Emergency Alert feature should only be used in the even of an actual emergency.
5.10 FM Radio (FM)
Method 1: Press key go to the main Menu -> Radio Settings -> Press/ Longpress of "SK1/SK2" as [FM Radio], and turn on or off the radio by pressing the preset [FM
Radio] key.
14

Method 2: Press key go to the main Menu -> Radio Settings ->Radio On/Off, turn the radio on or off.
After turning on the radio function, the station search method is as follows:
-Press
key to enter radio search mode, the screen displays 'Seeking...', the radio will automatically save the searched radio frequency as a radio channel (memory
mode).
-Press or to select the radio channel.
-Directly input familiar radio frequency by numeric keys (frequency mode, e.g. 96.9MHz, input 969)
-Short press the preset [FM Radio] key or
key to exit the radio mode.
The frequency ranges to listen to the radio is 65-108MHz. When listening to broadcast FM, press [P2] key switches between 65-75 MHz and 76-108 MHz band.
5.11 Radio Interrupt
On: When FM radio is used, you can still receive or transmit on the channel.
Off: When FM radio is used, the radio will not permit a transmission or reception.
5.12 Monitor
In standby, Press the pre-programmed [Monitor] key to enter Monitor. When receiving matched carrier but the signaling or the signal is too weak, this function allows
monitor the weak signal.
Press the pre-programmed [Monitor] key again to turn off the speaker and exit the Monitor mode.
5.13 Keypad lock
The radio features a keypad lock that locks out all keys except for the three side keys.
To enable or disable the keypad lock, press and hold
the key for about two s econds.
You can also enable so that the radio automatically locks the keypad after ten seconds from the menu.
5.14 Frequency reversal
A short momentary press of the key enables the reverse function
If you for some reason want to listen to the repeater's input frequency instead, press
key momentarily and you'll reverse your transmit and receive frequencies.
5.15 TX Repeaters tone
Tone-burst 1750Hz, but also 1000Hz, 1450Hz, 2100Hz, these tone-bursts are mainly used for repeater activation and are more common in Europe.
Before us ing the Tone-burst function, the SK1/SK2 programmable key must be defined as the “1750Hz” function.
Press the pre-programmed [1750Hz] key to send 1750Hz tone-bursts. This function is useful for communications through repeaters.
5.16 NOAA Weather/ Weath er A lert
Your radio has a NOAA Weather Radio function, to enable the user to receive weather reports from designated NOAA stations. Your radio also has a NOAA Weather Scan
function, to enable the user to scan all 10 channels of the NOAA Weather Radio.
15
- Press and hold the key to enter NOAA scan reception mode.
-Us e the or keys to select a NOAA channel. or press and hold the
key to automatically cycle through NOAA channels.
Channels with strong signals will automatically remain on that channel for normal NOAA broadcast reception. You can perform the operations below:
Enable NOAA alert functionality:
Press the
key to enter the Weather Alert menu, then select ON to enable the Weather Alert functionality.
- While the Weather Alert functionality is enabled, select OFF to disable the Weather Alert functionality.
Press and hold the
key or press the key to exit NOAA reception mode and return to standby mode.
Weather channel frequencies and names
Channel Number
RX Frequency MHz
Channel Number
RX Frequency MHz
CH-01
162.550
CH-06
162.500
CH-02
162.400
CH-07
162.525
CH-03
162.475
CH-08
161.650
CH-04
162.425
CH-09
161.775
CH-05
162.450
CH-10
163.275
NOTE: Weather Channels Wx 1 Thru 10, Receive-only channels for NOAA and Canadian weather broadcasts. You cannot transmit on these
channels.
5.17 One touch frequency Search
Press
key go to the main Menu -> Radio Settings -> Press / Longpress of "SK1/SK2/SK3" as [OneTouch Search], and enter the frequency searc h mode by pressing the
preset [OneTouch Search] key.
When using the OneTouch Search function, this unit will act as a receiver.
Press the preset [OneTouch Search] key, the screen will display “Seeking” and the indicator light will be yellow.
Successful seeking will dis play the search frequency and CTCSS/DCS, and turn on the speaker.
-You can press the
key to save the search frequency and CTCSS/DCS to the channel.
-Press and hold the [PTT] key to make a callback.
Chapter 6. Advanced Features
6.1 Scanner
The radios features a built in scanner for the VHF and UHF bands. When in Frequency (VFO) mode it will scan in steps according to your set frequency step. In Channel
(MR) mode it will scan your channels.
To enable the scanner, press and hold the
key for about two seconds. You can change the scanning direction with the or keys. Press and hold the ke y to
16

exit scanning mode.
6.1.1 Frequency Ranger
In frequency mode, the frequency sweep range can be precisely set. Input the start value and end value of the sweep frequency through the keyboard.
EX: Enter 144146, in frequency mode, scan in the range of 144.000-146.000MHZ. Enter 430440, in frequency mode, scan in the range of 430.000-440.000MHZ.
Note: for VFO frequency Ranger, see Menu>SCAN>Freq Ranger.
6.1.2 Channel Scan Range
In channel mode, the scan range is allowed to be all channels in the current zone, channels that have been added to the current zone.
-All: All channels stored in the current zone.
-Memo ry Scan: Scanned channels that are added to the current zone.
6.1.3 Scan modes
The scanner is configurable to one of three ways of operation: Time, carrier or search, each of which is explained in further details in their respective section below.
-Time operation
In Time Operation (TO) mode, the scanner stops when it detects a signal, and after a factory preset time out, it resumes scanning.
-Carrier operation
In Carrier Operation (CO) mode, the scanner stops when it detects a signal, and after a factory preset time with no signal it resumes scanning.
-Search operation
In Search Operation (SE) mode, the scanner stops when it detects a signal.
To resume scanning you must press and hold the
key again.
Note: for Scan mode, see Menu>SCAN>Scan Mode.
6.1.4 Scan Sub-Code
To search for a CTCSS code, do the following:
(1) In VFO mode, enter a known frequency, such as 144.525.
(2) Press
key to enter menu>>Scan>>Scan Sub-Code.
(3) Press or to select CTCSS;
(4) Press the
key to enter the CTCSS code, and scan the CTCSS code in sequence. When a valid CTCSS code is scanned, it stays on the CTCSS code and the speaker is
turned on.
(5) Press the
key to store the scanned CTCSS code and exit the scan to return to the previous menu. In standby mode, the ‘CTC’ icon will be displayed on the top line
of the screen. Press and hold the PTT key to make a callback.
To search for a DCS code, do the following:
(1) In VFO mode, enter a known frequency, such as 144.525.
(1) Press
key to enter menu>>Scan>>Scan Sub-Code.
17
(2) Press or to select DCS;
(3) Press the
key to enter the DCS code scanning, and scan the DCS code in turn. When a valid DCS code is scanned, it stays on the DCS code and the speaker is turned
on.
(4) Press the
key to store the scanned DCS code and exit the scan to return to the previous menu. In standby mode, the ‘ DCS ’ icon will be displayed on the top line of
the screen. Press and hold the PTT key to make a callback.
6.1.5 Sub-Cod e sc an memory
In MR mode or VFO mode, the scanned CTCSS/DCS code can be stored as only TX CTCSS/DCS code, RX CTCSS/DCS code only, TX and RX CTCSS/DCS code to replace the
CTCSS/DCS code setting of the current channel or frequency mode of the radio.
To save the settings of CTCSS/DCS code scan, the operation is as follows:
(1) Press the
key to enter menu >> Scan >> Sca n Memory.
(2) Press the
key to enter the Scan Memory setting, and press the or key to select:
• EN CODER: The scanned CTCSS/DCS code will be stored as the transmitted CTCSS/DCS code of the current channel or frequency mode (only replace its transmitted TX
CTC/DCS).
• DECODER: The scanned CTCSS/DCS code will be stored as the receiver CTCSS/DCS code of the current channel or frequency mode (only replace its receiver RX
CTC/DCS).
• ALL: The scanned CTCSS/DCS code will be stored as the received and transmitted CTCSS/DCS code of the current channel or frequency mode (at the same time as the
received and transmitted Sub-Code).
(3) Press the
key to save the settings and return to the previous menu;
Note: Only when a valid CTCSS/DCS code is scanned and stopped, press the
key to store the CTCSS/DCS code and replace the corresponding CTCSS/DCS code of the
current channel or frequency.
6.2 DTMF
DTMF is an in-band signaling method using dual sinusoidal signals for any given code. Originally developed for telephony systems, it has proved a very versatile tool in
many other areas.
In two-way radio systems, DTMF is most commonly used for automation systems and remote control. A common example would be in amateur radio repeaters where
some repeaters are activated by sending out a DTMF sequence (usually a simple single-digit sequence).
DTMF frequencies and corresponding codes
1209Hz
1336Hz
1477Hz
1633Hz
697Hz
1
2
3
A
770Hz
4
5
6
B
852Hz
7
8
9
C
941Hz
*
0
#
D
18

The radios has a full implementation of DTMF, including the A, B, C and D codes. The numerical keys, as well as the and keys correspond to the matching DTMF
codes. The A, B, C and D codes are located in the
, , and keys res pec tivel y.
To send DTMF codes, press the key(s) corresponding to the message you want to send while holding down the PTT key.
DT MF En c
Set a DTMF ID as the default call ID for the current channel. Press the PTT key to transmit the selected DTMF ID.
Edit the DTMF ID in Menu or with the PC programing software.
6.3 2Tone Enc
Set a 2Tone as the default call ID for the current channel. Press the PTT key to transmit the selected 2Tone.
Edit the 2Tone in the PC programing software before it can be selected.
6.4 5Tone Enc
Set a 5Tone as the default call ID for the current channel. Press the [PTT] key to transmit the selected 5Tone.
Edit the 5Tone in the PC programing software before it can be selected.
6.5 Dua l Watch
In certain situations, the ability to monitor two channels at once can be a valuable asset. This can be achieved in one of two ways. You can either have one receiver in your
radio and flip-flop between two frequencies at a fixed interval (known as Dual Watch), or you can equip a radio with two receivers (known as Dual Receive or Dual VFO).
The former method is cheaper to implement and far more common than the latter.
The radio features Dual Watch functionality (single receiver) with the ability to lock the transmit frequency to one of the two channels it monitors.
Enabling or disabling Dual Watch mode
(1) Press the
key to enter the main menu.
(2) Enter 2 on the numeric keypad to get to Radio Settings.
(3) Press the
key to confirm, enter 18 on the numeric keypad to get to Dual Watch.
(4) Press the
key to select.
• Double Wait: Enable the dual-watch function. The radio will display and monitor both channel. ‘DW’ icon displayed in the first row.
• Signal Wait: Enable the single-watch function. The radio will display both channel. Transmit and receive on the main channel only, sub Channel disables reception. No
‘DW’ icon displayed in the first row.
(6) Press the
key to confirm.
(7) Press
to return to the previous menu.
6.6 Manual Programming (Channels Memory)
Memory channels are an easy way to store commonly used frequencies so that they can easily be retrieved at a later date.
Frequency Mode vs. Channel Mode
19

In standby mode, press [P1] key to switch between frequency (VFO) mode and channel (MR) mode.
These two modes have different functions and are often confused.
Frequency Mode (VFO): Used for a temporary frequency assignment, such as a test frequency or quick field programming if permitted.
Channel Mode (MR): Used for selecting preprogrammed channels.
Ex 1. Programming a Channel Repeater Offset with CTCSS Tone
EXAMPLE New memory in Channel 28:
RX = 432.55000 MHz
TX = 437.55000 MHz (This is a (+ 5) Offset)
TX CTCSS tone 123.0
(1) Press the
key to switch between menus.
(2) Press [P1] ke y to set the radio to VFO mode, and the VFO icon is displayed on the lift.
(3)
[3] [7] 123.0 Selects desired TX encode tone (Ex 123 CTCSS)
(4)
[3] [1][3] [0] [0][5] Enter the OFFSET frequency (Ex. 5.00MHz)
(5)
[3] [1][4] [2] Select the offset direction (Ex. positive offset
)
(6) Enter RX frequency (Ex. 43255000) Enter RX frequency (Ex. 43255000)
(7)
[3] [1][7] [2][8] Enter the same channel (Ex 10)
-->>
channel has been added
(8) Press [P1] key to return to the MR mode and the channel number will reappear.
Ex 2. Programming a Simplex Channel with CTCSS tone
EXAMPLE New memory in Channel 28:
RX = 432.6500 MHz
TX CTCSS tone 123.0
(1) Press the
key to switch between menus.
(2) Press [P1] key to set the radio to VFO mode, and the VFO icon is displayed on the lift.
(3)
[3] [7] 123.0 Selects desired TX encode tone (Ex 123 CTCSS)
(4) Enter RX frequency (Ex. 43265000) Enter RX frequency (Ex. 43265000)
(5)
[3] [1][7] [2][8] Enter the same channel (Ex 10)
-->>
Channel has been added
(6) Press [P 1] key to return to the MR mode and the channel number will reappear.
6.11 Repeaters Programming
The following instructions assume that you know what transmit and receive frequencies your repeater employs, and that you're authori zed to us e it.
20
(1) Press [P1] key, the transceiver is set to VFO mode, and the VFO icon will be displayed on the lift.
(2) Use the numeric keypad to enter the repeater's output (your receive) frequency.
(3) Press
[3] [1][3] to get the offset frequency.
(4) Use the numeric keypad to enter the specified frequency offset.
(5) Press
to confirm and save.
(6) Press
[3] [1][4] to get the offset direction.
(7) Use the or keys to select plus (positive) or minus (negative) offset.
(8) Press
to confirm and s ave.
(9) Optional:
a) Save to memory, see the section called “Manual programming” for details.
b) Set up CTCSS; see the section called “CTCSS” for details.
(10) Press
to exit the menu. If everything went well, you should be able to make a test call through the repeater.
NOTE:
If you're experiencing problems making a connection to the repeater, check your settings and/or go through the procedure again.
Certain Amateur Radio repeaters (especially in Europe) use a 1750Hz tone burst to open up the repeater. To see how this is done with the radios, see the section called
“1750Hz Tone-burst”.
If you're still unable to make a connection, contact the person in charge of the radio system with your employer or your local amateur radio club, as the case may be.
Chapter 7. Main Menu Functions
The menu function allows you to perform operations such as selecting zones, Setting SCAN, Radio Settings, Program Channels, and viewing Radio Information.
7.1 Basic use
Us e menus with arrow keys
(1) Press the
key to enter the main menu.
(2) Us e t h e or keys to navigate between menu items.
(3) After finding the desired next menu item, press the
key again to select the menu item.
(4) Us e t h e or keys to navigate between the next menu items.
(5) After finding the desired next menu item, press the
key again to select the menu item.
(6) Us e t h e or keys to select the desired parameter.
(7) When you have selected the parameter to be set for a given menu item;
-To confirm your selection, press
and it will save your setting and bring you back to the main menu.
-To cancel your changes, press
and it will reset that menu item and bring you out of the menu entirely.
21

(8) To exit out of the menu at any time, press the PTT key.
7.2 Using short-cuts
As you may have noticed if you looked at Appendix C, Menu definitions, every menu item has a numerical value associated with it. These numbers can be used for direct
access of any given menu item.
Using the menu with short-c uts
(1) Press the
key to enter the menu.
(2) Use the numerical keypad to enter the number of the menu item.
(3) To enter the menu item, press
the key.
(4) For entering the desired parameter you have two options:
a) Use the arrow keys as we did in the previous s ection; or
b) Use the numerical keypad to enter the numerical short-cut code.
(5) And just as in the previous section;
a) To confirm your selection, press and it will save your setting and bring you back to the main menu.
b) To cancel your changes, press and it will reset that menu item and bring you out of the menu entirely.
(6) To exit out of the menu at any time, press the key.
(7) All further examples and procedures in this manual will use the numerical menu short-cuts.
+ 1: Quick access to Zones selection, up to 10 Z ones are s tored, each zone stores 64 channels;
+ 2: Quickly enter the Scan Settings. You will be able to set the VFO frequency range, Scan mode, Scan Sub-Code, Scan Memory;
+ 3: Quickly enter the Radio settings (general settings of the radio);
+ 4: Quick access to Program Channel (Alias, TX and RX Frequency, TX Power, Bandwidth, Display mode, Channel Memory and Channel del ete);
+ 5: Quickly query the radio information (ANI ID, Firmware version, Hardware version);
7.3 Radio General Settings
7.3.1 Add Zone
Press the [P1] key to Channel Mode, press the
key >> Zone >> Add Zone, name the newly added zone and save it.
The newly added zone will be automatically configured with a channel, allowing parameters such as Channel Name, Receive Frequency, Transmit Frequency, Receive and
Transmit CTCSS/DCS to be reset via the Channel Configuration menu.
Add up to 10 zones, add a full 10 zone will automatically hide the “Add Zone” option.
7.3.2 Power On Displya Sett ing
-Pic tur e: The radio will display a preset picture when powered on. Picture requires .bmp format, size size 240*320 pixels
-Message: Through CPS programming software, General Setup>>General Setup>>Power On Character.
Or through self-station setup, press the
key >> Radio Setting >> Power On Message.
22

-Vo lt a g e: The power voltage is momentarily displayed.
7.3.3 Display Rever sal
For ease of use in different work scenarios, the radio's display interface can be oriented STAN and FAIL model.
Press
key >> Radio Settings >> DIR
-STAN : Normal display mode, suitable for desk or handheld scenarios.
-FAIL: the display interface is reversed, applicable to shoulder or waist-mounted scenarios.
7.3.4 MDF-A/ MDF-B Channel Mode A Display
[A][B] MR/Channel Mode Display Format.
-Freq: Displays programmed Frequency
-Name: Displays the channel name.
-CH: Displays the channel number.
-Freq+Name: Displays programmed Frequency and channel name.
7.3.6 A lar m Model
You can select the type of indication when an alarm is activated from the following options.
Press the key >> Radio Settings >> Alarm Mode.
-Off: Disable alarm function.
-On S ite: the alarm tone is given locally and the control center and group members will not receive the alarm signal.
-Code+Sound: After sending an alarm code to the control center and group members, it will automatically activate the hot microphone and send a background tone. The
receiver will hear the background sound of the alarm. There are no other audible or visual indications.
-Co de+S ound(No): After sending an alarm code to the Control Center and group members, no alarm tone will be sent locally. In the alarm state, there is no sound or visual
indication.
-Co de+Tone: After sending an alarm code to the control center and group members, a local alarm tone will be emitted. In alarm s tate, there are audible and visual
indications.
7.3.6 Auto Power Off
Allow to set automatic power off when not used for a period of 30 minutes, 60 minutes, 120 minutes, 240 minutes and 480 minutes of operation.
Off: Turn off the function.
7.3.7 Power-on Password
Allows the radio to set a power-on password to protect device security and settings.
Press
>> Radio Settings >> Password.
Prompts “Input password”.
Enter 1-8 digits (0-9), ******** will be displayed. Press the # key to display your entry.
23

Press the key to save and return to the previous menu.
To cancel the power-on password
Press the
key >> Radio Settings >> Password.
Prompts “Input password ********”.
Press the
key to delete until all are deleted.
Press
to save and return to the previous menu.
When the power-on password feature is enabled, the radio will prompt “Input Password” when turning on the radio, and only after entering the correct password will the
radio turn on properly.
The power-on password can be read and modified by CPS software.
7.3.8 Channel Alias
Allows you to view or reset the current channel alias as follows:
1. Press
+[4] to enter Program Channel.
2. Press
to select “CHL NAME”;
3. Press
to enter the channel alias editing interface, and you can perform the following operations:
-Press # key to switch input method, switch between numeric, alphabetic and pinyin input method.
-Press 1 to input symbols such as punctuation or brackets;
-Press 2-9 to insert letters or numbers.
-Press 0 to insert a space.
4. Press
to save the settings and return to the previous menu.
24
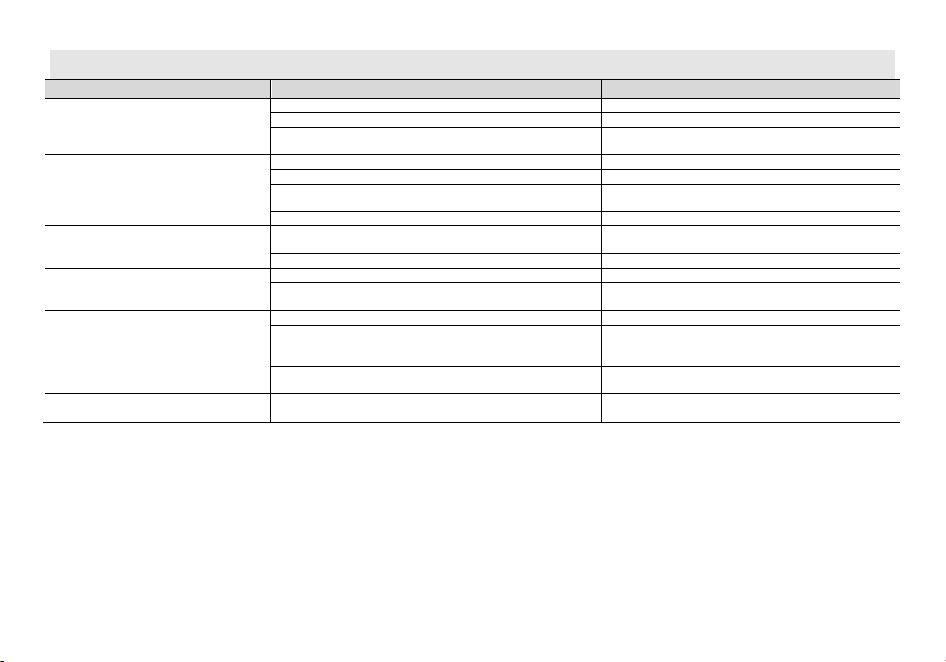
Appendix A. – Trouble shooting guide
Phenomena
Analysis
Solution
You cannot turn on the r adio.
The battery may be installed improperly.
Remove and reattach the battery.
The battery power may run out.
Recharge or replace the battery.
The battery may suffer from poor cont act caused by dirty or
damaged battery contact s.
Clean the battery contacts or replace the battery.
During receiving, the voice is weak or
intermittent.
The battery voltage maybe low.
Recharge or replace the battery.
The volume level may be low.
Increase the volume.
The antenna maybe loose or maybe inst alled incorrectly.
Turnoff the radio, and then remove and reattach the
antenna.
The speaker maybe blocked.
Clean the surface of the speaker.
You cannot communicate with other group
members.
The frequency or si gnaling type maybe inconsistent with that of
other members.
Verify that your TX/RX frequency and si gnaling type are
correct.
You may be too far away from other members.
Move towards other members.
You he ar unknown voices or noi se.
You may be interrupted by radios using the same frequency.
Change the frequency, or adjust the squelch level .
The radio in analog mode maybe set with no si gnali ng.
Request your de aler to set signaling for the current channe l
to avoid interference
You are unable to hear anyone because of
too much noi se and hiss.
You may be too far away from other members.
Move towards other members.
You may be in an unfavorable position. For example, your
communication may be bl ocked by hi gh buildings or bl ocked in an
underground area.
Move to an ope n and flat area, restart the radio, and try
again.
It may be the result of external disturbance (suc h as electromagnetic
interference).
Stay away from equipment that may cause interference.
The radio keeps transmitting.
VOX may be tur ned on or the headset is not inst alled in place
Turn off the VOX functi on. Check that the headphone s are in
place .
NOTE : If the above solu tions cannot fix your problems, or you may have some other queries, please contact your dealer for more technical support.
25
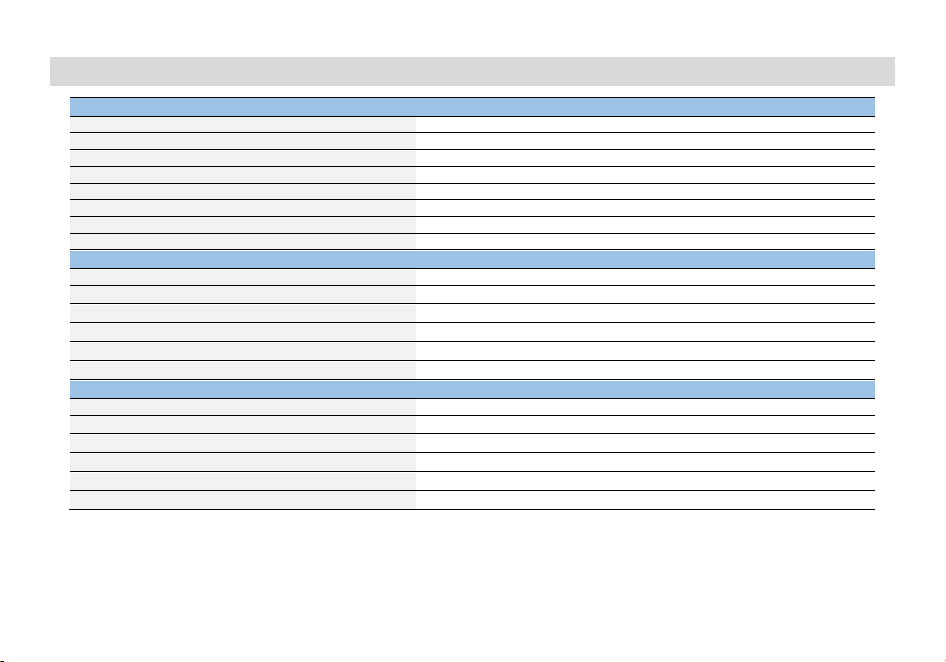
Appendix B. - Technical Specifications
GENERAL
Channel Capacity
640
Channel Spacing
25.0 KHz/12.5 KHz
Input Voltage
7.4 VDC
Battery Life: 5% TX, 5% RX, 90% Standby
Li-on: 20 hours @ 5 wa tts
Operating temperature
-10˚C to 50˚C
Antenna Impedance
50Ω
Radio Dimensions
155mm X 64mm X 40mm (not including antenna)
Radio Weight
354 g ( with Li-ON battery)
TRANSMITTER
Frequency Range (TX)
144 to 148 MHz, 420 to 450 MHz(America version)
Modulation
16K0F3E/11K0F3E
Spurious Emission
-16 dBm<1GHz, -16 dBm>1GHz
Frequency Stability
±2.5 ppm
Audio Distortion
≤5%
FM Hum & Noi se
40 dB
RECEIVER
Frequency Range
108-136, 136-174, 220-260, 350-390, 400 to 520 MHz (Scan Receiver)
Sensitivity: 12 dB SINAD
-121 dB m
Adjacent Channel Selectivity
-60 dBm
Intermodulation and Rejection
-70 dB m
Rated Audio Power Output
0.75 Watts @ 16 Ω
Rated Audio Distortion
≤5%
NOTE : All specifications may be modified without prior notice or liability. Thank you.
WARNING! The hardware is designed to support additional frequency bands, be sure to comply with local radio regulations and consult your local radio
administration for more compliance information.
26
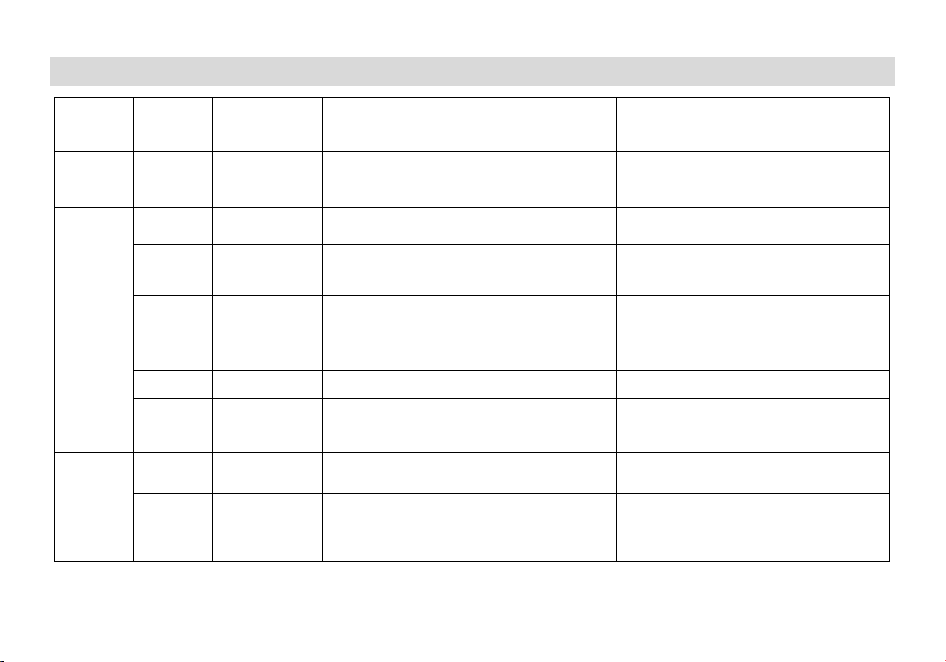
Appendix C. - Shortcut Menu operations
Main
Menu
Sub Menu
Sequence
Sub Menu Name Settings Description
Zone 1 Zone 1
•Channel 1-Channel 64
•+Add Zone: Add a zone and name the zone. The
newly added zone will default to one channel
430.12500 MHz
Stored zone, at least one zone saved.
Set up to 10 zones and store up to 64 channels
per zone.
No ADD ZONE option when store up to 10 zones.
Scan
1 Freq Ranger
Up Limit-Down Limit
Setting the upper and lower limit values of the
frequency scan range
2 Chan Ranger
•
ALL: Scans all channels in the current zone.
•MEMORY SCAN: Scans for channels that have been
added to the current zone
In channel mode, the channel scan range is
selected. All channels in the current area or
added channels when allowed
3 Scan Mode
•TO : Time Operation – scanning will resume after a
fixed ti me has passed
•CO : Carrier Operation - scanning will resume after
the signal disappears
•SE : Search Operation - scanning will not resume
Scanning Resume Method
4 Scan SubCode
•CTCSS: scan CTCSS (Scanning range 67-254.1)
•DCS: scan DCS ((Scanning range 023N-754I)
Scanning for CTCSS/DCS of known frequencies
5 Scan Memory
•ENCODER: Saved in TX CTCSS/DCS only.
•DECODER: Save only in RX CTCSS/DCS.
•ALL: RX_TX are saved (default is all, i.e., encoding
and decoding are the same)
This function is helpful to decode a CTCSS/DCS
tone if you don’t know the exact code.
Radio
Setting
1 Squelch
•OFF
•Level 1-Level 9
Squelch silences the receiver when there is no
signal.Setting the squelch to 0 will open up the
squelch entirely.
2 Power Save
•OFF
•1:1|1:2|1:4
Selects the ratio of sleep cycles to awake cycles
(1:1, 1:2, 1:4). The higher the number the longer
the battery lasts. The higher number increases
the RX sleep cycle, but you may miss the first few
syllables before the RX opens.
27
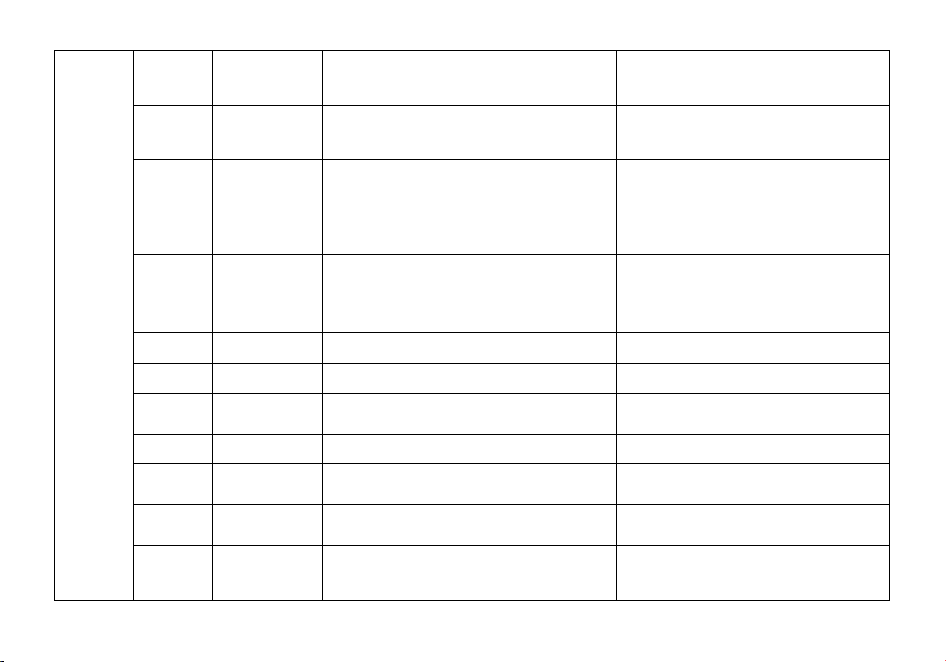
3 VOX Level
•OFF
•Level 1-Level 9
When enabled it is not necessary to push the
[PTT] button on the transceiver. Adjust the gain
level to an appropriate sensitivity to allow
smooth transmission.
4 VOX Delay 1.0……5.0s
When the VOX is enabled, set up the VOX delay to
help to extend the transmission time to avoid
stopping a transmission too early.
5 TOT
•OFF: Transmission is not time-limited, allowing
continuous transmission.
•15;30;45…210
This feature provides a safety switch that limits
transmission time to a programmed value. This
will promote battery conservation by not allowing
you to make excessively long transmissions, and
in the event of a stuck PTT switch it can prevent
interference to other users as well as battery
depletion.
6 TOA
•OFF: Disable the TOA feature.
•1……10: You can set from 1 to 10 TOA levels. Level 1
means that the transceiver warns you 1 second
before the transmission reaches the TOT; level 2
warns you 2 seconds before the TOT and so on.
With the TOA function enabled, if the TOT
function (Time Out Timer) has been turned on
and your transmission reaches the pre-set
end-transmission time, the transceiver will warn
you and the TX red indicator starts blinking.
7 Voice
•OFF| •C hi nes e| •English Allows audible voice confirmation of a key press
8 Language
•English| •C hi nes e
Setting the language type of function menus and
display screens
9 Beep
•OFF: Disable the Beep feature.
•ON: Enable Beep function, every time a button is
pressed, you will hear a Beep tone.
Allows audible confirmation of a key press
10 ROGER
•OFF|•ROGER 1|•R OGE R 2|•ROGER 3
Sends an end-of -transmission tone to indicate to
other stations that the transmission has ended.
11 BackLight
•Always On: The backlight is always on.
•5……30
Time-out for the LCD backlight. (seconds)
Note: This function is valid when turn off the
power save.
12 Brightness
1|2|3|4|5
Adjust the brightness of the LCD screen backlight,
1-5 levels of adjustable brightness. 1 level of the
darkest, 5 levels of the brightest
13 Power on Display
•PIC T URE : The radio will display an Baofeng picture
when powered on.
•MESSAGE: The radio will display the characters set
up in PC software when powered on.
Controls the behavior of the display when the
transceiver is turned on.
28
•VOLTAGE: The power voltage is momentarily
displayed.
14 Power on MSG
WELCOME
Allows editing of power-up messages on this unit.
Press MENU to enter message editing, press EXIT
to go forward to delete, and enter text or letters
via the keypad.
15 DIR
•STAN: normal display
•FAIL: Revers display
STAN: normal display . FAIL: Revers display
16 MDF-A
•Freq: Displays programmed Frequency
•Name: Displays the channel name.
•CH: Displays the channel number
•Freq+Name: Displays programmed Frequency and
channel name.
[A] MR/Channel Mode Display Format.
17 MDF-B
•Freq: Displays programmed Frequency
•Name: Displays the channel name.
•CH: Displays the channel number
•Freq+Name: Displays programmed Frequency and
channel name.
[B] MR/Channel Mode Display Format.
18 Dual Watch
•Double Wait:Enable the dual-watch function.
•Signal Wait:Enable the single-watch function.
Monitor [A] and [B] at the same time. The display
with the most recent activity ([A] or [B]) becomes
the selected display.
19 AutoLock
•OFF:Manual Lock. Long press the * key to lock the
keypa d.
•ON:Auto Lock. Radio will auto lock the keypad when
standby for a while.
Press MENU key, then press the * key to unlock
the keypad.
20 Alarm Mode
•Off: Disable alarm function
•On Site :The radio will emit siren locally, but will not
transmit any emergency signal to the control center.
•Code+Sound:The radio gives visible and audible
indications during emergency state.
•Code+Sound(No):The radio gives no indication
during emergency state, but will unmute its speaker
once i t receives a call.
•Code+Tone:
The radio transmits the emergency
signals to the control center first, and then gives siren
locally with visible indication.
This option allows you to choose the type of
emergency. The option specifies the type of alert
for the radio during emergency.
21 ID Verification
C onta ct 1
C onta ct 80
29
22 SideTone
•DTMF: DTMF enabled/ disabled.
•2 Tone: 2Tone enabled/ disabled.
•5 Tone: 5Tone enabled/ disabled.
•BDC1200: BDC1200 enabled/ disabled.
OFF: DTMF/2Tone/5Tone/BDC1200 disabled.
ON: DTMF/2Tone/5Tone/BDC1200 enabled.
23 PTT-ID
•OFF: No ID is sent.
•BOT: The selected S-CODE is sent at the beginning.
•EOT: The selected S-CODE is sent at the ending
•BOTH: The selected S-CODE is sent at the beginning
and ending.
When to Send PTT-ID Codes are sent during
either the beginning or ending of a transmission.
24 PTT-DLY 100-3000ms
This function allows you to set the delay in
sending the ANI code once the PTT is pressed
(ANI delay).
You can set it between 100 and 3000ms.
25 ALERT
•1000Hz •1450Hz
•1750Hz •2100Hz
Alert frequency is used to activate some dormant
repeaters, 1000Hz, 1450Hz, 1750Hz, 2100Hz a
total of 4 options are offered.
26 TAIL
•OFF •55Hz:
•120 •180
•240°
This function is used eliminate squelch tail noise
between BaoFeng handhelds that are
communicating directly (no repeater).
Reception of a 55 Hz or 134.4 Hz tone burst
mutes the audio long enough to prevent hearing
any squelch tail noise
30
27-32
Press/LongPress
SK1/SK2/SK3
•None:No Function
•SCAN:Scan on/off
•Monitor:Monitor the weak signal.
•Flashlight: Flashlight on/off.
•FM Radio: FM Radio on/off
•SOS: Long press the key to start alarm, s hort press
again to exit the alarm.
•One Touch Search: One Touch Search on/off.
•1750Hz:
•One Touch Call
•Zone:In standby, press the programmed "Zone
Select" key, it will allow you input the zone number
and then press confirm key will switch to the zone.
•Battery Display:Check the current battery capacity
voltage
•Power:Switch the power between super high, high,
middle and low power.
•VOX:Set up the VOX level
This part allows users to assign your desired
features as shortcut to some keys of the radio.
The programmable buttons vary with different
radios. Every key corresponds to two kinds of
operations: long press or short press. They can be
associated to different features or the same
feature.
33 FM Radio
Radio On/Off
Turn on or off the FM radio.
Radio Interrupt
On: When FM radio is used, you can still receive
or trans mit on the channel.
Off: When FM radio is used, the radio will not
permit a transmission or reception.
34 APO
•OFF: Turn off the function.
•30Min/60Min/120Min/240Min/480Min
Allow to set automatic power off when not used
for a period of 30Min/60Min/120Min/240Min
480Min of operation. Off: Turn off the function.
35 Theme
•White •Red •Orange •Yellow
•Green •Purple •Blue
Set theme colors: red, orange, yellow, green,
cyan, blue, purple
36 Password Input Password
This option allows users to create a password
required for powering up a radio. Range 0 –
99999999
37 Res et
•VFO: Reset VFO only
•ALL: Reset menu functions and VFO
Resets the radio to factory defaults, with some
exceptions.
Program
Channel
1 CH.NAME Displays the channel name of the current channel
Allow reset the channel name, this function is
only valid in channel mode.
2 RX Frequency Displays the RX frequency of the current channel
Input the RX frequency by keypad, click the Menu
key to save. Press the EXIT key to move forward
and delete bits one by one.
31
3 TX Frequency Displays the TX frequency of the current channel
Input the TX frequency by keypad, click the Menu
key to save. Press the EXIT key to move forward
and delete bits one by one.
4 Trans Power
•Low: At LOW power transmission
•High: At HIGH power transmission
Set up the TX power for current channel.
Selects between HIGH and LOW transmitter
power when in VFO/Frequency mode. Use the
minimum transmitter power necessary to carry
out the desired communications.
5 Bandwidth
•Narrow: 12.5 kHz bandwidth
•Wide: 25 kHz bandwidth
Choose wide band or narrow band for the analog
channel.
6 RX CTCSS
•OFF
•67-254.1
Mutes the speaker of the transceiver invthe
absence of a specific and continuous sub-audible
signal. If the station you are listening to does not
transmit this specific and continuous signal, you
will not hear anything.
7 RX DCS
•OFF
•023N-754I
Mutes the speaker of the transceiver in the
absence of a specific low-level digital signal. If the
station you are listening to does not transmit this
specific signal, you will not hear anything.
8 TX CTCSS
•OFF
•67-254
Transmits a specific and continuous subaudible
signal to unlock the s quelch of a distant receiver
(usually a repeater).
9 TX DCS
•OFF
•023N-754I
Transmits a specific low-level digital signal to
unlock the squelch of a distant receiver (usually a
repeater).
10 Signaling
•DTMF: Set a DTMF ID as the default call ID for the
current channel.
•2Tone: Set a 2Tone as the default call ID for the
current channel.
•5Tone: Set a 5Tone as the default call ID for the
current channel.
•MDC: Set a MDC as the default call ID for the current
channel
Edit the DTMF/ 2Tone/ 5Tone/ BDC1200 in the
PC programing software before it can be selected.
Press the PTT key to transmit the selected DTMF
ID/2Tone/ 5Tone/ BDC1200.
11 SP-Mute
•OFF: You can hear the call once the channel receive
matched carrier.
•QT: You can hear the call when receive matched
CTCSS/DCS signal.
•Optional Signal: You can hear the call when receives
a matched signaling.
•QT+DTMF: You can hear the call when receives a
When the channel is set up for both CTCSS/DCS
decoding and optional signaling, you can set up
the RX condition in this menu.
32
matched CTCSS/DCS and matched signaling.
12 Scan Add
•OFF: Disable scanning of the current channel
•ON: Add current channel to scan group
Add the current channel to allow it to be scanned
13 Scan Priority
•OFF: No channel is set as Priority Channel .
•ON: Sets the current channel as the scanning priority
channel.
This option allows users to select a channel in the
scan list as Priority Channel. If only Priority
Channel is set, 50% of a radio's scans are on
Priority Channel during scanning.
14 Busy Lockout
•Off: The user can transmit all the time.
•On: The radio allows transmission only when the
current channel is free.
This option defines the response from the
transmitter upon PTT press on the current
channel, in order to prevent the user transmitting
on channels that are already in use.
15 Skip Frequency
•OFF: Disable the Skip Frequency feature
•ON: Enable Skip Frequency function
16 Scramber
•OFF: Disable the Scramber feature
•ON: Enable Scramber function
This option allows you to decide whether to
enable the Scrambler feature. This technology
can invert the frequency spectrum at the
transmitting party to make the signal
unintelligible to unwanted at a receiving party, so
as to achieve communication privacy not
equipped with an appropriately set descrambling
device.
17 CH_Memory
CH01-CH64
This menu is used to either create new or modify
existing channels, so that they can be accessed
from MR/Channel Mode.
18 CH_Delete
CH01-CH64
This menu is used to delete the programmed
information from the specified channel. so that it
can either be programmed again or be left empty.
Radio Info
1 Ve rs i ons
•
Firmware Versions
•Hardware Versions Show the Radio ID, Radio name, serial number,
model name, frequency range, firmware version,
radio data version, latest program date, picture
version, language version etc.
2 My Radio
•Radio ID: View radio ID and allow reset of DTMF ID,
5Tone ID
•Radio Name: View radio aliases and allow resetting
of aliases
33
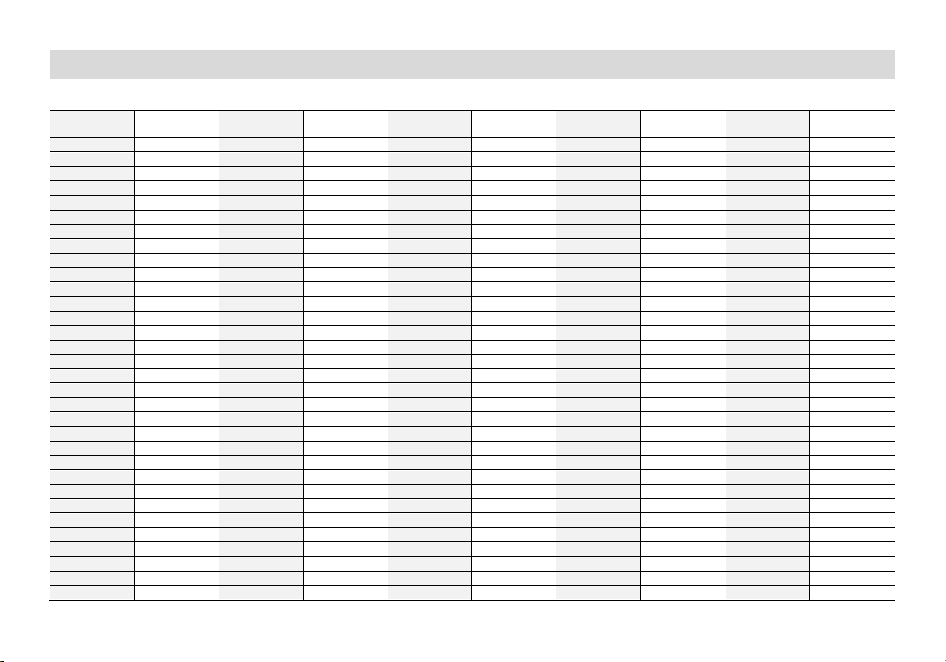
Appendix D. - DCS Table
DCS CODE LIST
Number
Code
Number
Code
Number
Code
Number
Code
Number
Code
1
D023N
2
D025N
3
D026N
4
D031N
5
D032N
6
D036N
7
D043N
8
D047N
9
D051N
10
D053N
11
D054N
12
D065N
13
D071N
14
D072N
15
D073N
16
D074N
17
D114N
18
D115N
19
D116N
20
D122N
21
D125N
22
D131N
23
D132N
24
D134N
25
D143N
26
D145N
27
D152N
28
D155N
29
D156N
30
D162N
31
D165N
32
D172N
33
D174N
34
D205N
35
D212N
36
D223N
37
D225N
38
D226N
39
D243N
40
D244N
41
D245N
42
D246N
43
D251N
44
D252N
45
D255N
46
D261N
47
D263N
48
D265N
49
D266N
50
D271N
51
D274N
52
D306N
53
D311N
54
D315N
55
D325N
56
D331N
57
D332N
58
D343N
59
D346N
60
D351N
61
D356N
62
D364N
63
D365N
64
D371N
65
D411N
66
D412N
67
D413N
68
D423N
69
D431N
70
D432N
71
D445N
72
D446N
73
D452N
74
D454N
75
D455N
76
D462N
77
D464N
78
D465N
79
D466N
80
D503N
81
D506N
82
D516N
83
D523N
84
D526N
85
D532N
86
D546N
87
D565N
88
D606N
89
D612N
90
D624N
91
D627N
92
D631N
93
D632N
94
D645N
95
D654N
96
D662N
97
D664N
98
D703N
99
D712N
100
D723N
101
D731N
102
D732N
103
D734N
104
D743N
105
D754N
106
D023I
107
D025I
108
D026I
109
D031I
110
D032I
111
D036I
112
D043I
113
D047I
114
D051I
115
D053I
116
D054I
117
D065I
118
D071I
119
D072I
120
D073I
121
D074I
122
D114I
123
D115I
124
D116I
125
D122I
126
D125I
127
D131I
128
D132I
129
D134I
130
D143I
131
D145I
132
D152I
133
D155I
134
D156I
135
D162I
136
D165I
137
D172I
138
D174I
139
D205I
140
D212I
141
D223I
142
D225I
143
D226I
144
D243I
145
D244I
146
D245I
147
D246I
148
D251I
149
D252I
150
D255I
151
D261I
152
D263I
153
D265I
154
D266I
155
D271I
156
D274I
157
D306I
158
D311I
159
D315I
160
D325I
34
161
D331I
162
D332I
163
D343I
164
D346I
165
D351I
166
D356I
167
D364I
168
D365I
169
D371I
170
D411I
171
D412I
172
D413I
173
D423I
174
D431I
175
D432I
176
D445I
177
D446I
178
D452I
179
D454I
180
D455I
181
D462I
182
D464I
183
D465I
184
D466I
185
D503I
186
D506I
187
D516I
188
D523I
189
D526I
190
D532I
191
D546I
192
D565I
193
D606I
194
D612I
195
D624I
196
D627I
197
D631I
198
D632I
199
D645I
200
D654I
201
D662I
202
D664I
203
D703I
204
D712I
205
D723I
206
D731I
207
D732I
208
D734I
209
D743I
210
D754I
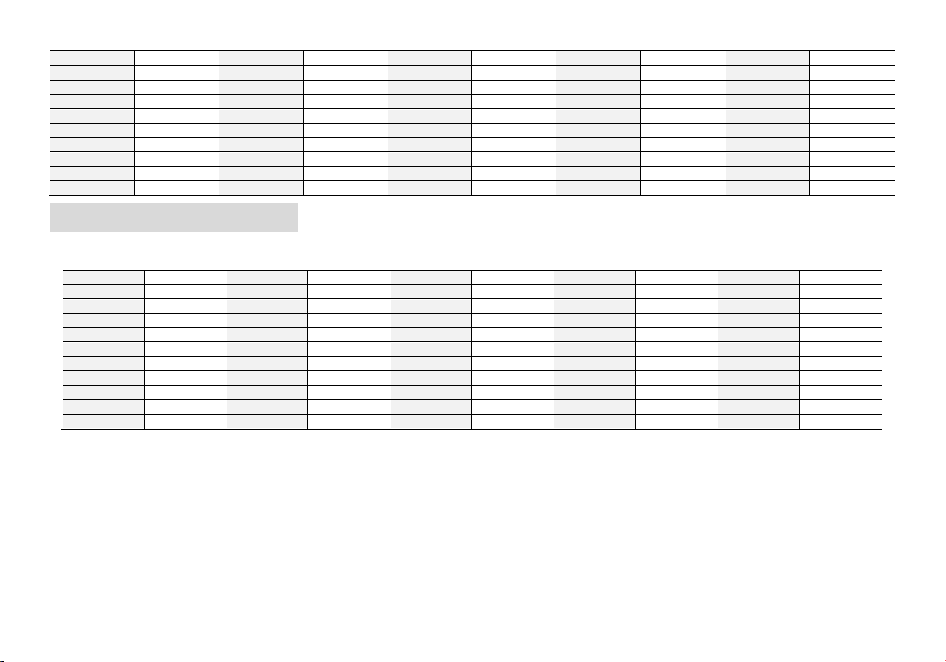
Appendix E. - CTCSS Table
CTCSS CHART (Hz)
Numbe r
Frequency
Numbe r
Frequency
Numbe r
Frequency
Numbe r
Frequency
Numbe r
Frequency
1
67.0
2
69.3
3
71.9
4
74.4
5
77.0
6
79.7
7
82.5
8
85.4
9
88.5
10
91.5
11
94.8
12
97.4
13
100
14
103.5
15
107.2
16
110.9
17
114.8
18
118.8
19
123.0
20
127.3
21
131.8
22
136.5
23
141.3
24
146.2
25
151.4
26
156.7
27
159.8
28
162.2
29
165.5
30
167.9
31
171.3
32
173.8
33
177.3
34
179.9
35
183.5
36
186.2
37
189.9
38
192.8
39
196.6
40
199.5
41
203.5
42
206.5
43
210.7
44
218.1
45
225.7
46
229.1
47
233.6
48
241.8
49
250.3
50
254.1
35
Disclaimer
The accuracy and completeness of the contents are sought in the process of compilation, but we do not bear any responsibility for the possible errors or omissions. With
the continuous development of technology, we reserve the right to change the design and specification of the product without notice. No copy, modification, translation
and dissemination of this handbook may be made in any form without the prior written authorization of our department.
PO FUNG ELECTRONIC (HK) INTERNATIONAL GROUP COMPANY LIMITED
ADD: Room 1508, 15/F, Office Tower II, Grand Plaza, 625 Nathan Road, Kowloon, Hong Kong
Http://www.baofengradio.com
www.pofungshop.com
Print version: UV39_(501) V1.0