SRD 7760
EN
User Manual PORTABLE DAB/FM RADIO RECEIVER
WITH USB/SD/BT AND DISPLAY
CZ
Uživatelská příručka PŘENOSNÝ DAB/FM RADIOPŘIJÍMAČ
SUSB/SD/BT ADISPLEJEM
SK
Používateľská príručka PRENOSNÝ DAB/FM RÁDIOPRIJÍMAČ
SUSB/SD/BT ADISPLEJOM
HU
Felhasználói kézikönyv HORDOZHATÓ DAB/FM RÁDIÓ
USB-VEL/SD-VEL/BT-SZAL ÉS
KIJELZŐVEL
PL
Podręcznik użytkownika PRZENOŚNY ODBIORNIK
RADIOWY DAB/FM ZUSB/SD/BT
IWYŚWIETLACZEM


EN - 3
IMPORTANT WARNINGS
• The device is intended for use with an internal
rechargeable battery.
• The device is not designed for prolonged/
permanent connection to the mains power
supply or on-board power supply in vehicles.
• For external power supply and battery charging,
use exclusively the supplied adapter or an
adapter explicitly described in the manual.
• When the device is connected to external
power and charging the battery, keep it under
constant supervision.
• When the device is not in operation, disconnect
it from external power supply and switch it o
using all available electronic and mechanical
switches.
• Do not operate the device with a depleted
battery or without a battery connected to
external power supply.
• The device is not intended for installation or
use on boats.
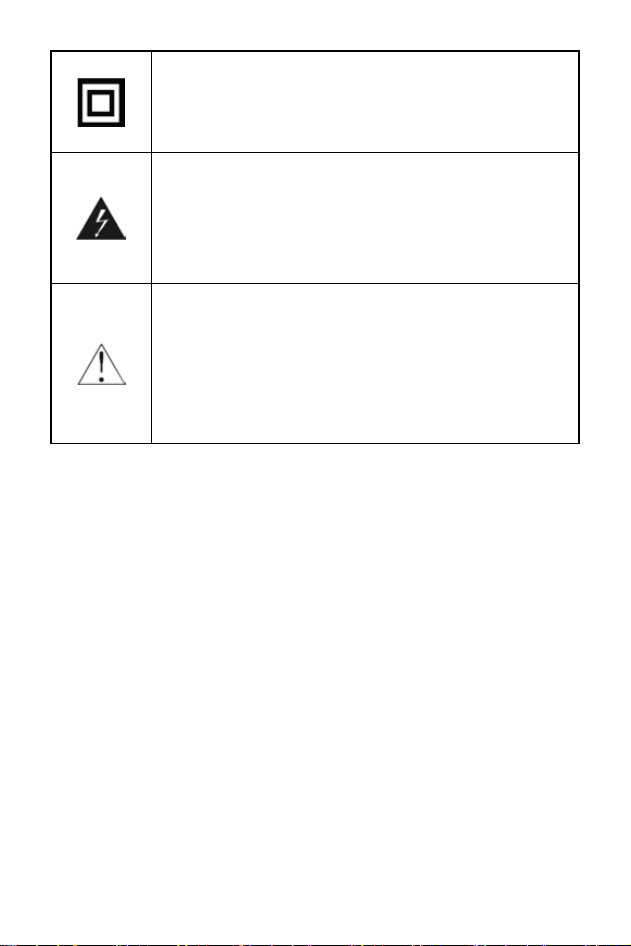
This mark is used to indicate
equipment that complies
with European safety and
electromagnetic compatibility
standards.
EN - 4
This symbol indicates that this unit
has double insulation. Grounding is
not required.
The lightning symbol in an equilateral
triangle warns of dangerous voltage
inside the device that could pose
a risk of electric shock.
The exclamation mark in an
equilateral triangle symbol indicates
important operating or servicing
instructions in the documentation
accompanying the device.
Note:
• Please read these instructions carefully before using this product and
keep them for future reference. The manual describes the software as
it was at the time of manufacture. Software is subject to development
and updates for improved performance and user experience. Future
updates may slightly alter the appearance or behaviour.
• In the case of any unusual events occurring during the use of the
device, e.g. if there is a distinct smell of burning insulation or smoke
comes out of the device, immediately turn o the device, disconnect
the device from the power source and do not use the device until you
have received the results of an inspection by the employees of the
professional service centre.

EN - 4
EN - 5
SAFETY INSTRUCTIONS
1. Please take the time to carefully follow the instructions in this user
manual. It will help you to correctly set up and operate your system and
use all its advanced features. Keep this user manual for future reference.
2. Pay attention to all warnings found on the product and in the user manual.
3. For your safety, carefully read and follow this manual to ensure proper
use of the product and to prevent any danger or physical damage.
4. CAUTION: TO REDUCE THE RISK OF ELECTRIC SHOCK OR
RADIATION, DO NOT REMOVE ANY COVERS, DISABLE ANY FUSES
OR PROTECTIVE ELEMENTS.
5. ALL SERVICING AND REPAIRS MUST BE CARRIED OUT BY
QUALIFIED SERVICE PERSONNEL. THERE ARE NO USER-
SERVICEABLE PARTS INSIDE THE DEVICE.
6. Damage requiring service – Unplug this product from the mains and have
it repaired by qualied service personnel under the following conditions:
A. If the power cord or power plug is damaged.
B. If liquid has entered the product or objects have fallen inside, or if it has
been exposed to rain or water.
C. If the product does not operate normally according to the user manual.
Only adjust controls specied in the manual, as incorrect settings may
cause damage and require extensive servicing of a qualied technician
to restore product functionality.
7. Use only the attachments/accessories specied by the manufacturer.
8. During thunderstorms or when unused for long periods, disconnect the
device from the socket to prevent damage.
9. Use appropriate power sources – Plug the product into an appropriate
power source as described in the operating instructions or as marked on
the product.
10. Make sure that the power cord is not stepped on or compressed,
particularly at plugs, sockets, and where it exits the device or adapter.
The power plug (adapter) serves as a disconnecting device and must
remain easily accessible.
11. Disconnect the device by pulling the plug, not the power cord.
12. The On/O switch does not completely isolate the device from the power
source. To disconnect the product from mains power, unplug the adapter.
13. To avoid the risk of re or electric shock, do not overload electrical
sockets, extension cables or integrated sockets.
14. Place the unit on a at and stable surface. If the device is designed
or equipped with accessories for mounting, ensure they are properly
secured. Avoid shocks, drops, and use in conditions involving vibration of
the device or the surface it stands on.
15. The device should be used in a temperate climate.

EN - 6
16. Do not use this device near water or moisture. Do not use the device
near a bathtub, washbasin, kitchen sink and laundry tub, in a damp
basement, near a swimming pool or anywhere with water or moisture
present. Protect the device from rain and humidity.
17. No heat sources or open ames should be placed on or near the device,
such as lit candles, replaces, heaters, radiators, radiant heaters,
halogen heaters, and also devices producing heat, such as ampliers,
televisions, etc.
18. Ensure a minimum clearance of 0.1 metres around the device for
adequate ventilation. Do not block ventilation openings with objects like
newspapers, tablecloths, curtains, etc.
19. If the device is moved from a cold to a warm environment, condensation
may form inside, aecting proper functionality. Allow the device to
acclimate for at least one hour before. Only then connect it to power and
switch it on.
20. Do not expose the unit to direct sunlight or objects that radiate heat.
21. Do not expose the batteries to excessive heat, such as sunlight or re.
22. Before you consent to children using the device, children must be
instructed in an age-appropriate manner on the correct and safe use of
the player.
23. If the device is equipped with a headphone jack, do not use headphones
set to an extreme volume. There is a danger of hearing damage or loss.
24. Clean the device only with a dry cloth. Do not use petrol, thinner or other
solvents for cleaning, and do not use abrasive cleaning agents, wire wool
or sponges with wire wool.
RECOMMENDATION:
• To maximise battery life, disconnect external power immediately after
charging is complete. Even though the device draws minimal power,
unplug the adapter once charging is nished. If you do not intend to use
the device for an extended period, charge the battery to at least half
its capacity. Estimate this according to the usual charging time. Avoid
storing the device with a fully discharged battery. If the battery is nearly
depleted (as indicated by low battery warnings or auto shuto). Have
a battery that has lost most of its capacity (the battery is consumed)
professionally replaced at a service centre.

EN - 6
EN - 7
CAUTION:
Before connecting to any power source, make sure that:
• All other connections have been completed.
• The socket is within reach during installation.
• The appliance and its adapter must be connected to
a 100 240 V 50/60 Hz AC power source using a two-pin plug.
Using USB and SD Cards:
• The USB/SD memory device needs to be connected directly to the
device. Do not use force.
• Do not use a USB extension cable to avoid data transmission failure and
interference. Electrostatic discharges may aect device operation. If this
occurs, restart the device.
• The device can play similar le types and formats from USB/SD
devices as it can from discs. Before using a memory device, test its
communication function with the device and the speed of data reading.
Please keep in mind that reading data through an external connector
may be slower and that les with high data ow rates may not be played
back smoothly. To achieve maximum reading speed, we recommend
keeping the disk space defragmented. Use the FAT32 le system, one
partition, without protection.
• If the memory device reading is not smooth, undesirable phenomena
may occur, such as dropout of parts of the image (pixelation) or entire
frames, sound faults, in extreme cases up to stopping the reading
operation. Unexpected device behaviour or the presence of viruses or
malware may also disrupt operation and require a restart.
• The USB connector is a standard type and cannot power USB devices
with high power consumption (e.g. HDD hard drives). Use devices with
their own power supply and power them from their own power sources.
• The device was designed with regard to maximum compatibility
with memory devices. Given the variety of devices on the market,
compatibility with every USB/SD device cannot be guaranteed. In case of
problems, try formatting the memory device. If the problem persists, try
using a dierent memory device.
EN - 8
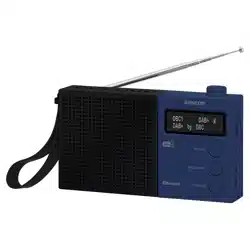
WHAT'S IN THE BOX
• Radio receiver
• USB-C cable
• User manual
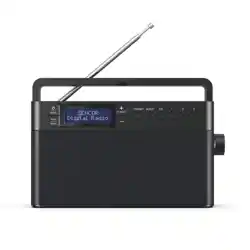
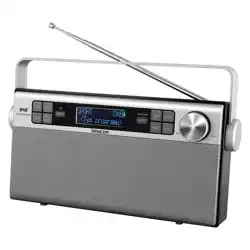
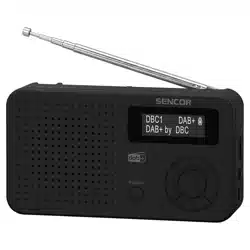
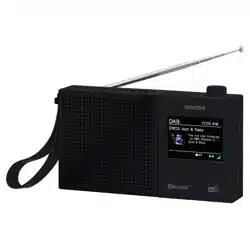
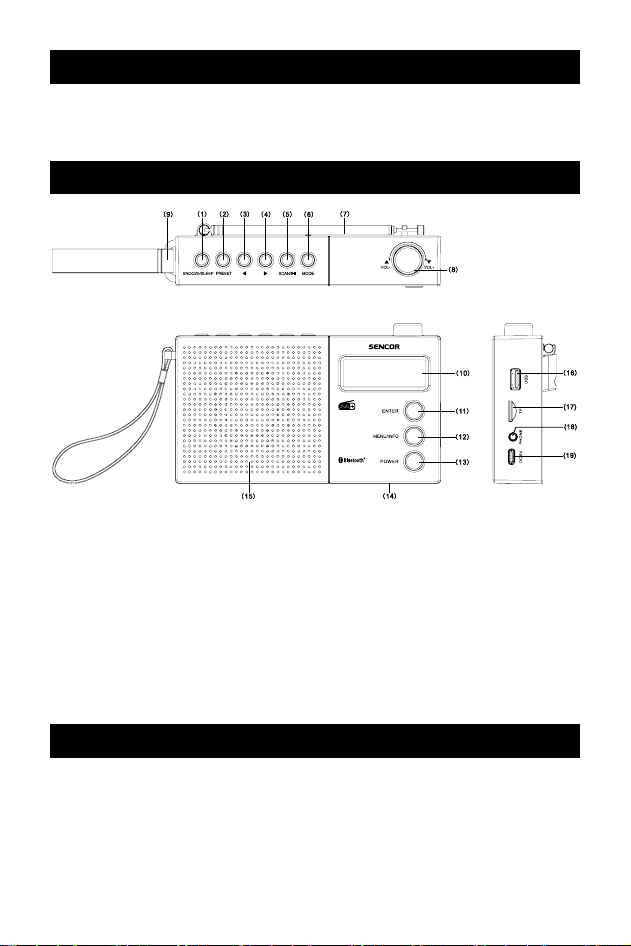
DEVICE DESCRIPTION
1. SLEEP /SNOOZE
2. PRESET
3. PREV – Previous
4. NEXT – Next
5. SCAN/PLAY/PAUSE
6. MODE (DAB/FM/BT/USB/SD)
7. Antenna
8. VOL–/+, LEFT/RIGHT
9. Hand strap
10. Display
11. ENTER
12. INFO/MENU
13. POWER ON/OFF
14. Built-in rechargeable battery
15. Speaker
16. USB port
17. MICRO SD card slot
18. Headphone connector
19. DC 5V – USB-C battery charging
input
OPERATION AND USE
Power Supply Modes
Power Supply via Rechargeable Battery
The device contains a built-in rechargeable battery that is not user-
replaceable and provides several hours of operation. When the battery is
depleted and does not have sucient capacity even when fully charged,

EN - 8
EN - 9
have it replaced with a new one at an authorised service centre. During
operation, the battery symbol on the display approximately indicates the
amount of energy contained. If the voltage of the battery in use is low,
a message will appear on the display. Shortly thereafter, the receiver will
shut o due to insucient power.
Charging the Li-Ion Battery from a 5V Power Source (Not Supplied)
Connect the provided cable to the USB-C connector on the device and
the other end to a power source. This can be your own 5V adapter with at
least 1 A output or a USB 2.0 port on a computer. When connected to a 5V
power supply, the battery symbol on the display will change and the Li-Ion
battery will start charging. Charging may take 2–5 hours, depending on the
battery's current state.
Caution: The device can be used while the Li-Ion battery is charging. Use
the USB-C power supply to recharge the internal battery. Once the battery
is fully charged, disconnect the USB-C power supply. Never leave USB
power supply connected for more than 24 hours, regardless of how the
device is being used.
Tip:
• If the device has not been used for a long time, the rechargeable
battery may have discharged on its own. This is a typical feature of
Li-Ion batteries. Prior to an extended period of non-use, charge the
rechargeable battery to maintain its properties.
Switching the Device On and O
1. Press and hold the POWER button for 3 seconds. The device will start
in the last mode used, if available.
2. Select the desired mode by pressing the MODE button.
3. Press and hold the POWER button for 3 seconds to turn the device o.
Standby mode
1. In the operating mode, press the POWER button briey. The device
switches to standby mode.
2. The display will continue to show the date and time if it was read during
operation. After approximately 2 minutes, the display will dim to save
battery power. You can turn it on again by pressing ENTER.
3. Press the POWER button briey to switch the device on.
Menu and settings
Settings can be adjusted in any operating mode or standby mode. The
settings content varies according to the selected input.
1. Press the MENU button for 2 seconds. The device will start in the last
mode used, if available.

EN - 10
2. Use the rotary encoder LEFT and RIGHT to select from available items
3. Press ENTER to access the selected item.
4. Repeat steps 2 and 3 in the submenu, or select from adjustable values
and conrm by pressing ENTER.
5. To return to the higher menu level, briey press MENU.
OSD language setting
1. Open the settings according to the procedure described above.
2. Go to system settings and select “Language”.
3. Select OSD language from: English/Deutsch/Polski/Čeština/
Slovenčina/Magyar/Hrvatski and conrm with ENTER.
4. Exit the settings.
Setting the Clock
1. Open settings.
2. Navigate to system settings and select “Time” followed by “Set time/
date”.
3. Use the LEFT and RIGHT to set individual numerical values and press
ENTER to proceed to the next one.
4. Exit the settings after setting the desired values.
Further time setting options include: Auto update/Setting 12–24 hours/Date
format setting. These allow you to adjust the display according to your
requirements. By enabling automatic updates, you allow time and date
updates when available in the broadcast. This is most commonly available
in DAB broadcasts and with some FM stations.
Setting the Alarm
You can set two alarms in the device with the option of a buzzer or music.
When setting, go through all steps; saving the set values is the last step.
You can snooze the alarm for 9 minutes by pressing ENTER. To stop the
alarm without snoozing, press POWER. The set alarm is indicated on the
display by one or two bell symbols.
1. Enter the menu and select ALARM. Use the LEFT and RIGHT to set
individual values.
2. Enter the system settings and select alarm settings.
3. Select alarm 1 or alarm 2 settings and choose to enable it.
4. Set the alarm time
5. Select the alarm duration.
6. Select Buzzer setting or other receiver music input or inserted memory.
7. Select alarm frequency between Daily/Once/Weekends/Workdays.
8. Select the alarm volume.

EN - 10
EN - 11
9. Activate the alarm by selecting “On” and save the selected values; the
device will inform you that the alarm values have been saved. The bell
symbol will appear on the display. If the save conrmation message
does not appear, the alarm will not be activated.
SLEEP function
1. Enter the menu, select System Settings, and then Sleep Mode
(SLEEP).
or
1. Press the SLEEP button.
2. Use the LEFT and RIGHT to select the shutdown time of
15/30/45/60/90 minutes
3. Conrm by pressing ENTER and exit the menu. The display will show
a countdown. The POWER button can be used at any time.
Restoring factory settings
1. Enter the menu and select system settings.
2. Select Factory values.
3. Conrm your intention to restore the device settings to factory values by
selecting “Yes”.
DAB/FM mode
When the device is switched on for the rst time in DAB mode, automatic
scanning will start. Wait for the process to complete.
For radio tuning and reception, use the following procedures:
Automatic DAB station scanning and selection
1. Complete DAB band scan – press the SCAN button or select “Full
Scan” in the DAB mode menu. The receiver will scan the entire band
and store available stations in the memory. Wait until the scan is
completed.
2. You can select a station from the tuned list by pressing the PREV and
NEXT buttons. The station will start playing with a slight delay until
decoding is complete. The length of the delay is determined by internal
broadcasting parameters and the error rate, for example in case of
interference or weak signal.

EN - 12
Manual FM scanning and tuning
1. Select FM mode
2. Use the LEFT and RIGHT to change the tuned frequency by 50 kHz.
Or
2. Press NEXT (repeatedly if needed), the receiver will quickly tune
upwards and stop when a station is found. By pressing and holding
SCAN, you scan the entire FM band and save available stations.
3. Once you nd the reception of the desired station, you can store it in the
preset following the procedure below. If the station broadcasts its name
and radiotext in a compatible manner, the receiver will display them.
Manual DAB scanning
1. Enter MENU, select “Manual search”.
2. Use the LEFT and RIGHT to select the multiplex (5A-13F) that you have
previously identied.
3. Press ENTER to scan the multiplex and save its stations to the list.
Radio station presets
You can store up to 30 radio stations in the preset memory. An occupied
preset can be deleted by storing another station in its place.
1. Tune a required station in the DAB mode.
2. Press and hold the PRESET button for 2 seconds; a number with
a colon and the name/frequency of the previously stored station will be
displayed, or it will be empty.
3. Use the LEFT and RIGHT to select the desired preset number
4. Press ENTER to store the station under this preset number.
5. Later, you can select from the stored presets by briey pressing the
PRESET button and using the LEFT and RIGHT to select the desired
preset number. Then press ENTER to listen.
Improving Reception:
The receiver is capable of receiving strong stations even with the antenna
folded. For weaker stations, fully extend the 50 cm antenna to improve
reception.
Tip:
• In some cases, the antenna direction may also aect reception. Try
adjusting the antenna direction to improve reception if the signal is
unstable.

EN - 12
EN - 13
Playback from USB and microSD Card
Warning: Insert memory media carefully and in the correct orientation.
Insert the SD card (max 128 GB) with the contacts facing inward and the
label facing outward (towards the back).
The device supports playback of MP3 les stored on memory media
connected via the USB port or microSD card slot.
1. Select USB or SD by pressing MODE.
2. If the USB/SD contains playable MP3/WMA music les, the device will
begin playback.
3. Playback can be controlled by pressing ENTER (PLAY/PAUSE), NEXT,
PRE V.
Bluetooth
1. Press the MODE button to select the Bluetooth mode.
2. Activate Bluetooth on your Bluetooth-enabled device.
3. Select “SRD 7760” from the list of available devices on your Bluetooth
device to pair. Conrm the pairing request on your device if prompted.
4. Start music playback on your Bluetooth device. Once connected, you
can control playback, pause, next track, and previous track either from
your Bluetooth device or directly on the unit.
Tip:
• The device will disconnect if moved out of Bluetooth range. To
reconnect the device to the unit, place it within the operating range.
The operating range of the Bluetooth device is approximately
10 metres. Obstacles or interference may reduce this range.
• Before connecting a Bluetooth device to this unit, check the capabilities
of your Bluetooth device. Compatibility with all Bluetooth devices is not
guaranteed.
Audio Output
You can connect headphones (purchased separately) to the 3.5 mm
headphone jack. The speaker will be automatically disabled.
Caution: To prevent hearing damage or loss, do not use headphones at
high volume levels.
EN - 14
TECHNICAL SPECIFICATIONS
Frequency range: FM: 87.5 – 108 MHz, DAB: 5A-13F
Speaker: 5 cm, dynamic
Output power: 1.2 W RMS
USB playback port: 5 V=,100 mA
External power supply: USB-C 5 V, 1A, DC
Rechargeable battery: Li-ion 3.7 V
Bluetooth: Bluetooth V5.0
Frequency range: 2402–2480MHz
Transmission power: max 6 dBm
Dimensions (W × H × D): 175×100×40 mm, with antenna folded
Weight: 315 g
INSTRUCTIONS AND INFORMATION ON DISPOSAL
OF USED PACKAGING MATERIAL
Dispose of used packaging material at a waste site in your
municipality.
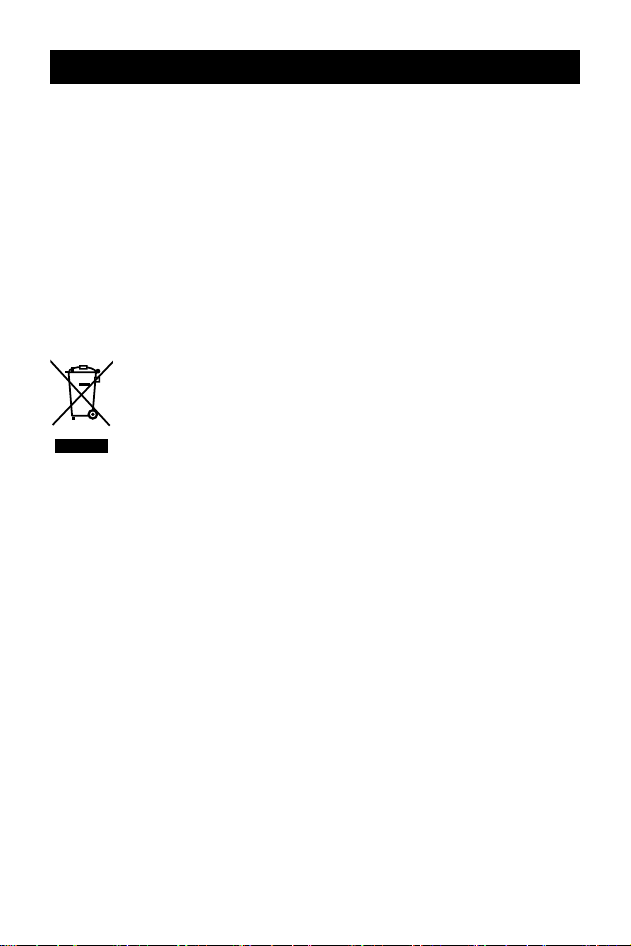
DISPOSAL OF USED ELECTRICAL AND
ELECTRONIC EQUIPMENT
This symbol on products or accompanying documents means
that used electric or electronic products must not be added
to ordinary municipal waste. To enable the proper disposal,
renewal and recycling of these products, deliver them to the
designated collection points. Alternatively, in some European
Union states or other European countries the products can be
returned to the local retailer when buying an equivalent new
product.
By disposing of this product correctly, you help to conserve
valuable natural resources and prevent any potential adverse
impact on the environment and human health that could result
from improper waste disposal. For more details, contact your
local authority or nearest collection point.
Fines may be imposed for the improper disposal of this type of
waste as per national regulations.
EN - 14
EN - 15
For business entities in European Union States
If you wish to dispose of electrical and electronic equipment,
please request the necessary information from your retailer or
supplier.
Disposal in other countries outside the European Union
This symbol is valid in the European Union. If you wish to
dispose of this product, request the necessary information
about the correct disposal method from the local council or from
your retailer.
The product meets the EU requirements.
FAST ČR, a.s. hereby declares that the SRD 7760 type radio equipment
complies with Directive 2014/53/EU. For full version of the EU Declaration
of Conformity, please refer to www.sencor.eu website.
Text, design and technical data are subject to change without notice; we
reserve the right to make such changes.
The original version is in Czech.
Manufacturer: FAST ČR, a. s., U Sanitasu 1621, Říčany 251 01, Czech
Republic, info@sencor.com
2025 08/2025

EN - 16
EN
Warranty conditions
Warranty card is not apart of the device packaging.
This product is warranted for the period of 24 months from the date of purchase to the end-user. Warranty
is limited to the following conditions. Warranty is referred only to the customer goods using for common
domestic use. The claim for service can be applied either at dealer’sshop where the product was bought, or
at below mentioned authorized service shops. The end-user is obligated to set up aclaim immediately when
the defects appeared but only till the end of warranty period. The end user is obligated to cooperate to certify
the claiming defects. Only completed and clean (according to hygienic standards) product will be accepted.
In case of eligible warranty claim the warranty period will be prolonged by the period from the date of claim
application till the date of taking over the product by end-user, or the date the end-user is obligated to take it
over. To obtain the service under this warranty, end-user is obligated to certify his claim with duly completed
following documents: receipt, certificate of warranty, certificate of installation.
This warranty is void especially if apply as follows:
Defects which were put on sale.
Wear-out or damage caused by common use.
The product was damaged by unprofessional or wrong installation, used in contrary to the applicable
instruction manual, used in contrary to legal enactment and common process of use or used for another
purpose which has been designed for.
The product was damaged by uncared-for or insufficient maintenance.
The product was damaged by dirt, accident of force majeure (natural disaster, fire, and flood).
Defects on functionality caused by low duality of signal, electromagnetic field interference etc.
The product was mechanically damaged (e.g. broken button, fall).
Damage caused by use of unsuitable media, fillings, expendable supplies (batteries) or by unsuitable
working conditions (e.g. high temperatures, high humidity, quakes).
Repair, modification or other failure action to the product by unauthorized person.
End-user did not prove enough his right to claim (time and place of purchase).
Data on presented documents differs from data on products.
Cases when the claiming product cannot be indentified according to the presented documents (e.g. the
serial number or the warranty seal has been damaged).
Manufacturer:
FAST ČR, a.s., U Sanitasu 1621, Říčany 251 01, Czech Republic
info@sencor.com
Authorized service centers:
Visit www.sencor.com for detailed information about authorized service centers.
The original version of the instructions is in the Czech language, other language versions are made by the
appropriate translation.