AUSTRALIA / NEW ZEALAND
Assembly and Operating Instructions
DETARGETNI
SERIES
BSH158SB, BSL158SB
BSH158DB,BSL158DB
This product is equipped with an AC adapter with
100-240V~ 50-60Hz 0.5A
Class II , IP24
This product operating environment requirements
are:ambient temperature -20℃ to 50℃,humidity 0%
to 90%,and altitude below 2000 meters.
Electrical Safety:The adapter is intended solely for
This barbecue is supplied s
Failure to adhere to the above warnings may cause injury
or property damage and affect your ability to make a claim
under the manafacturer’s warranty.
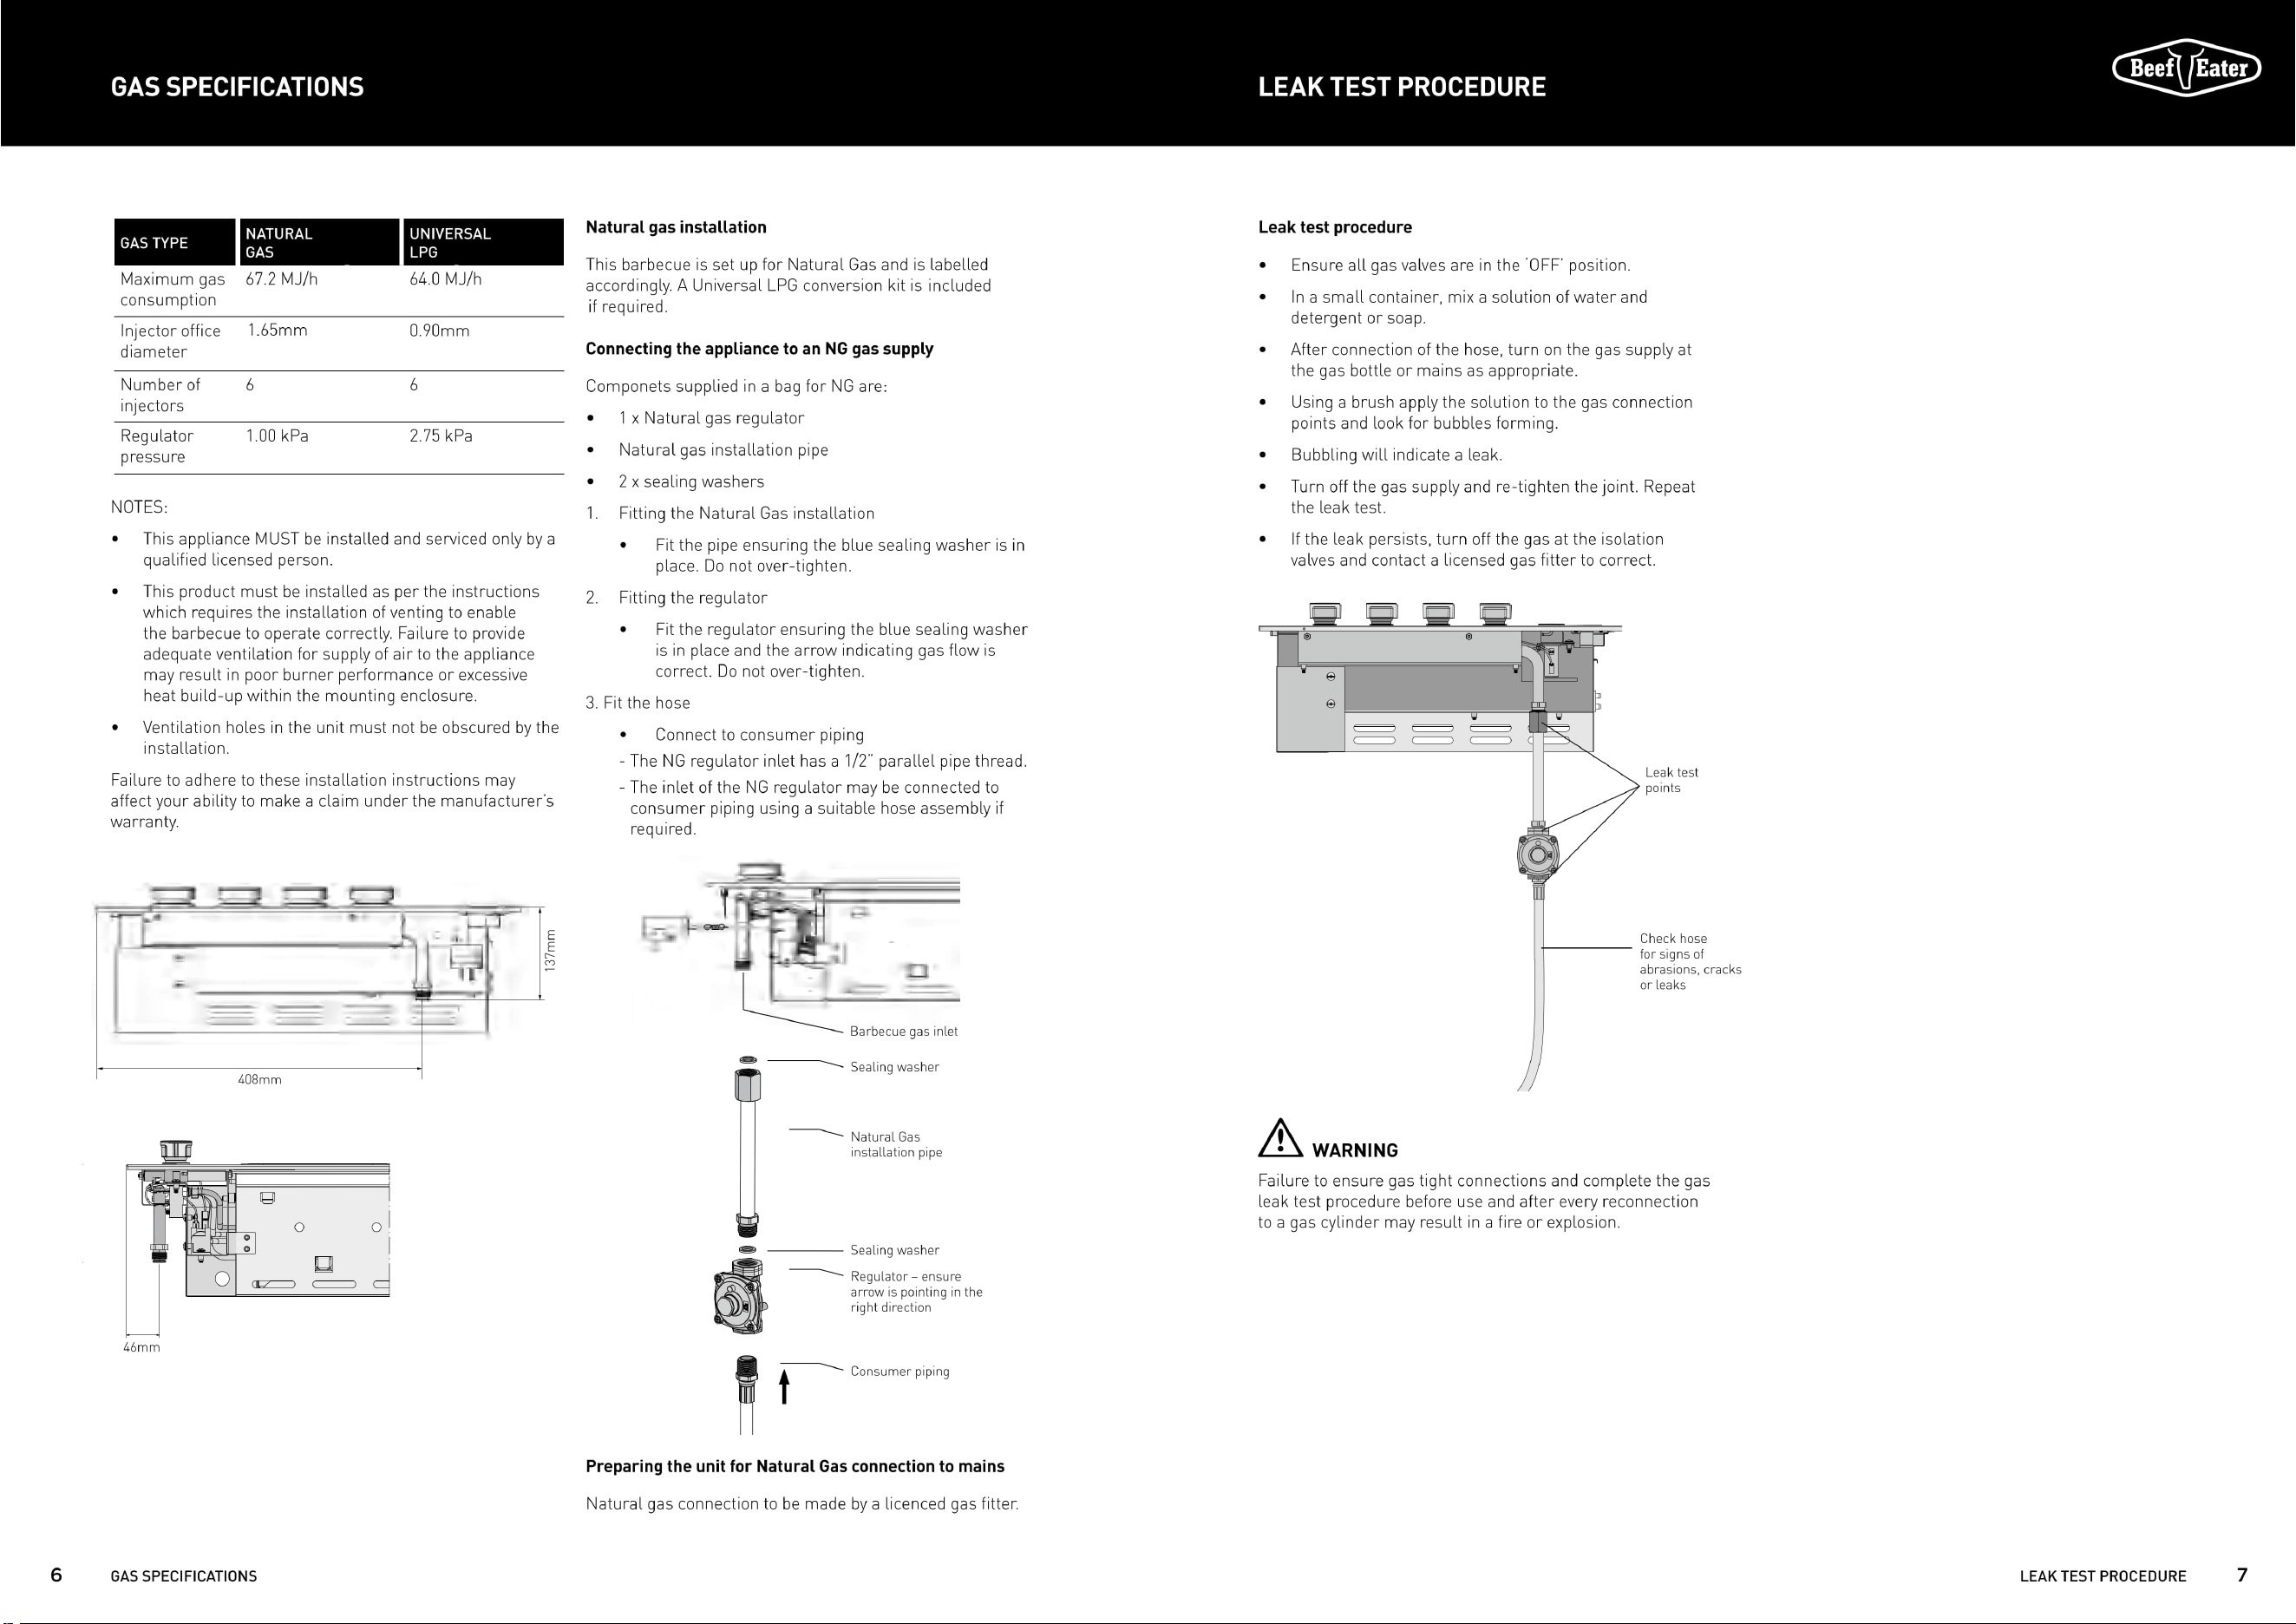
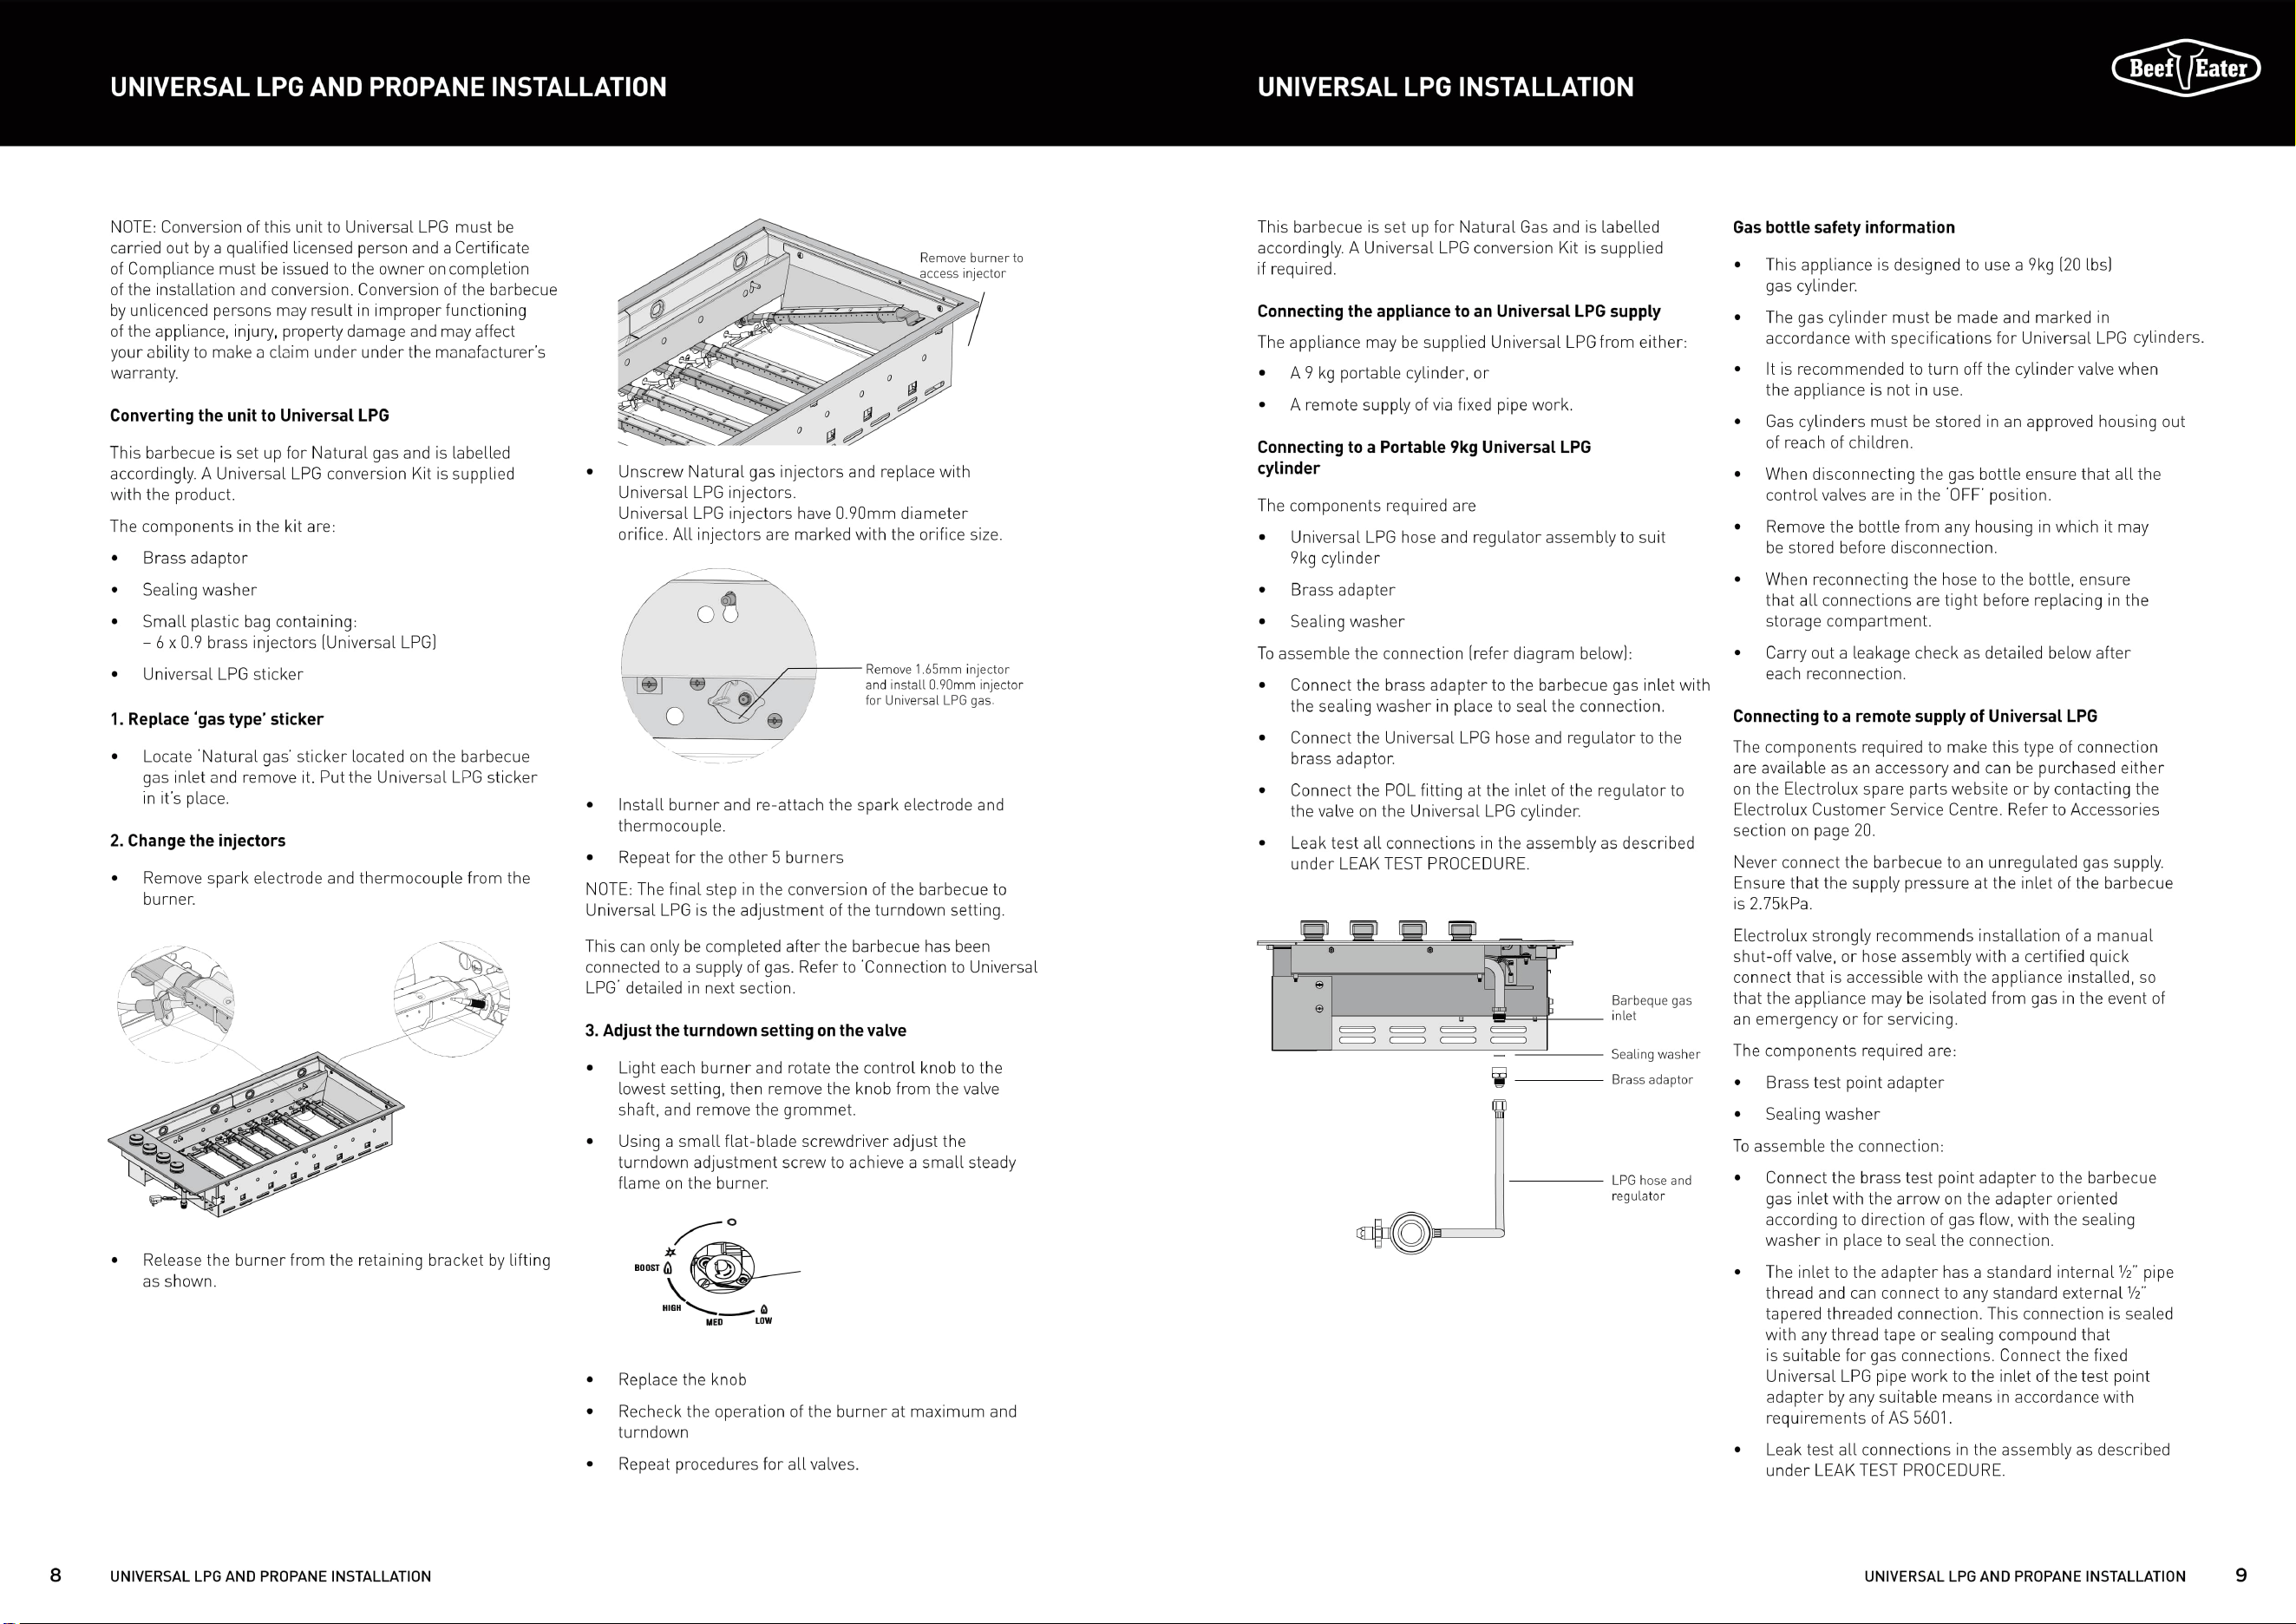
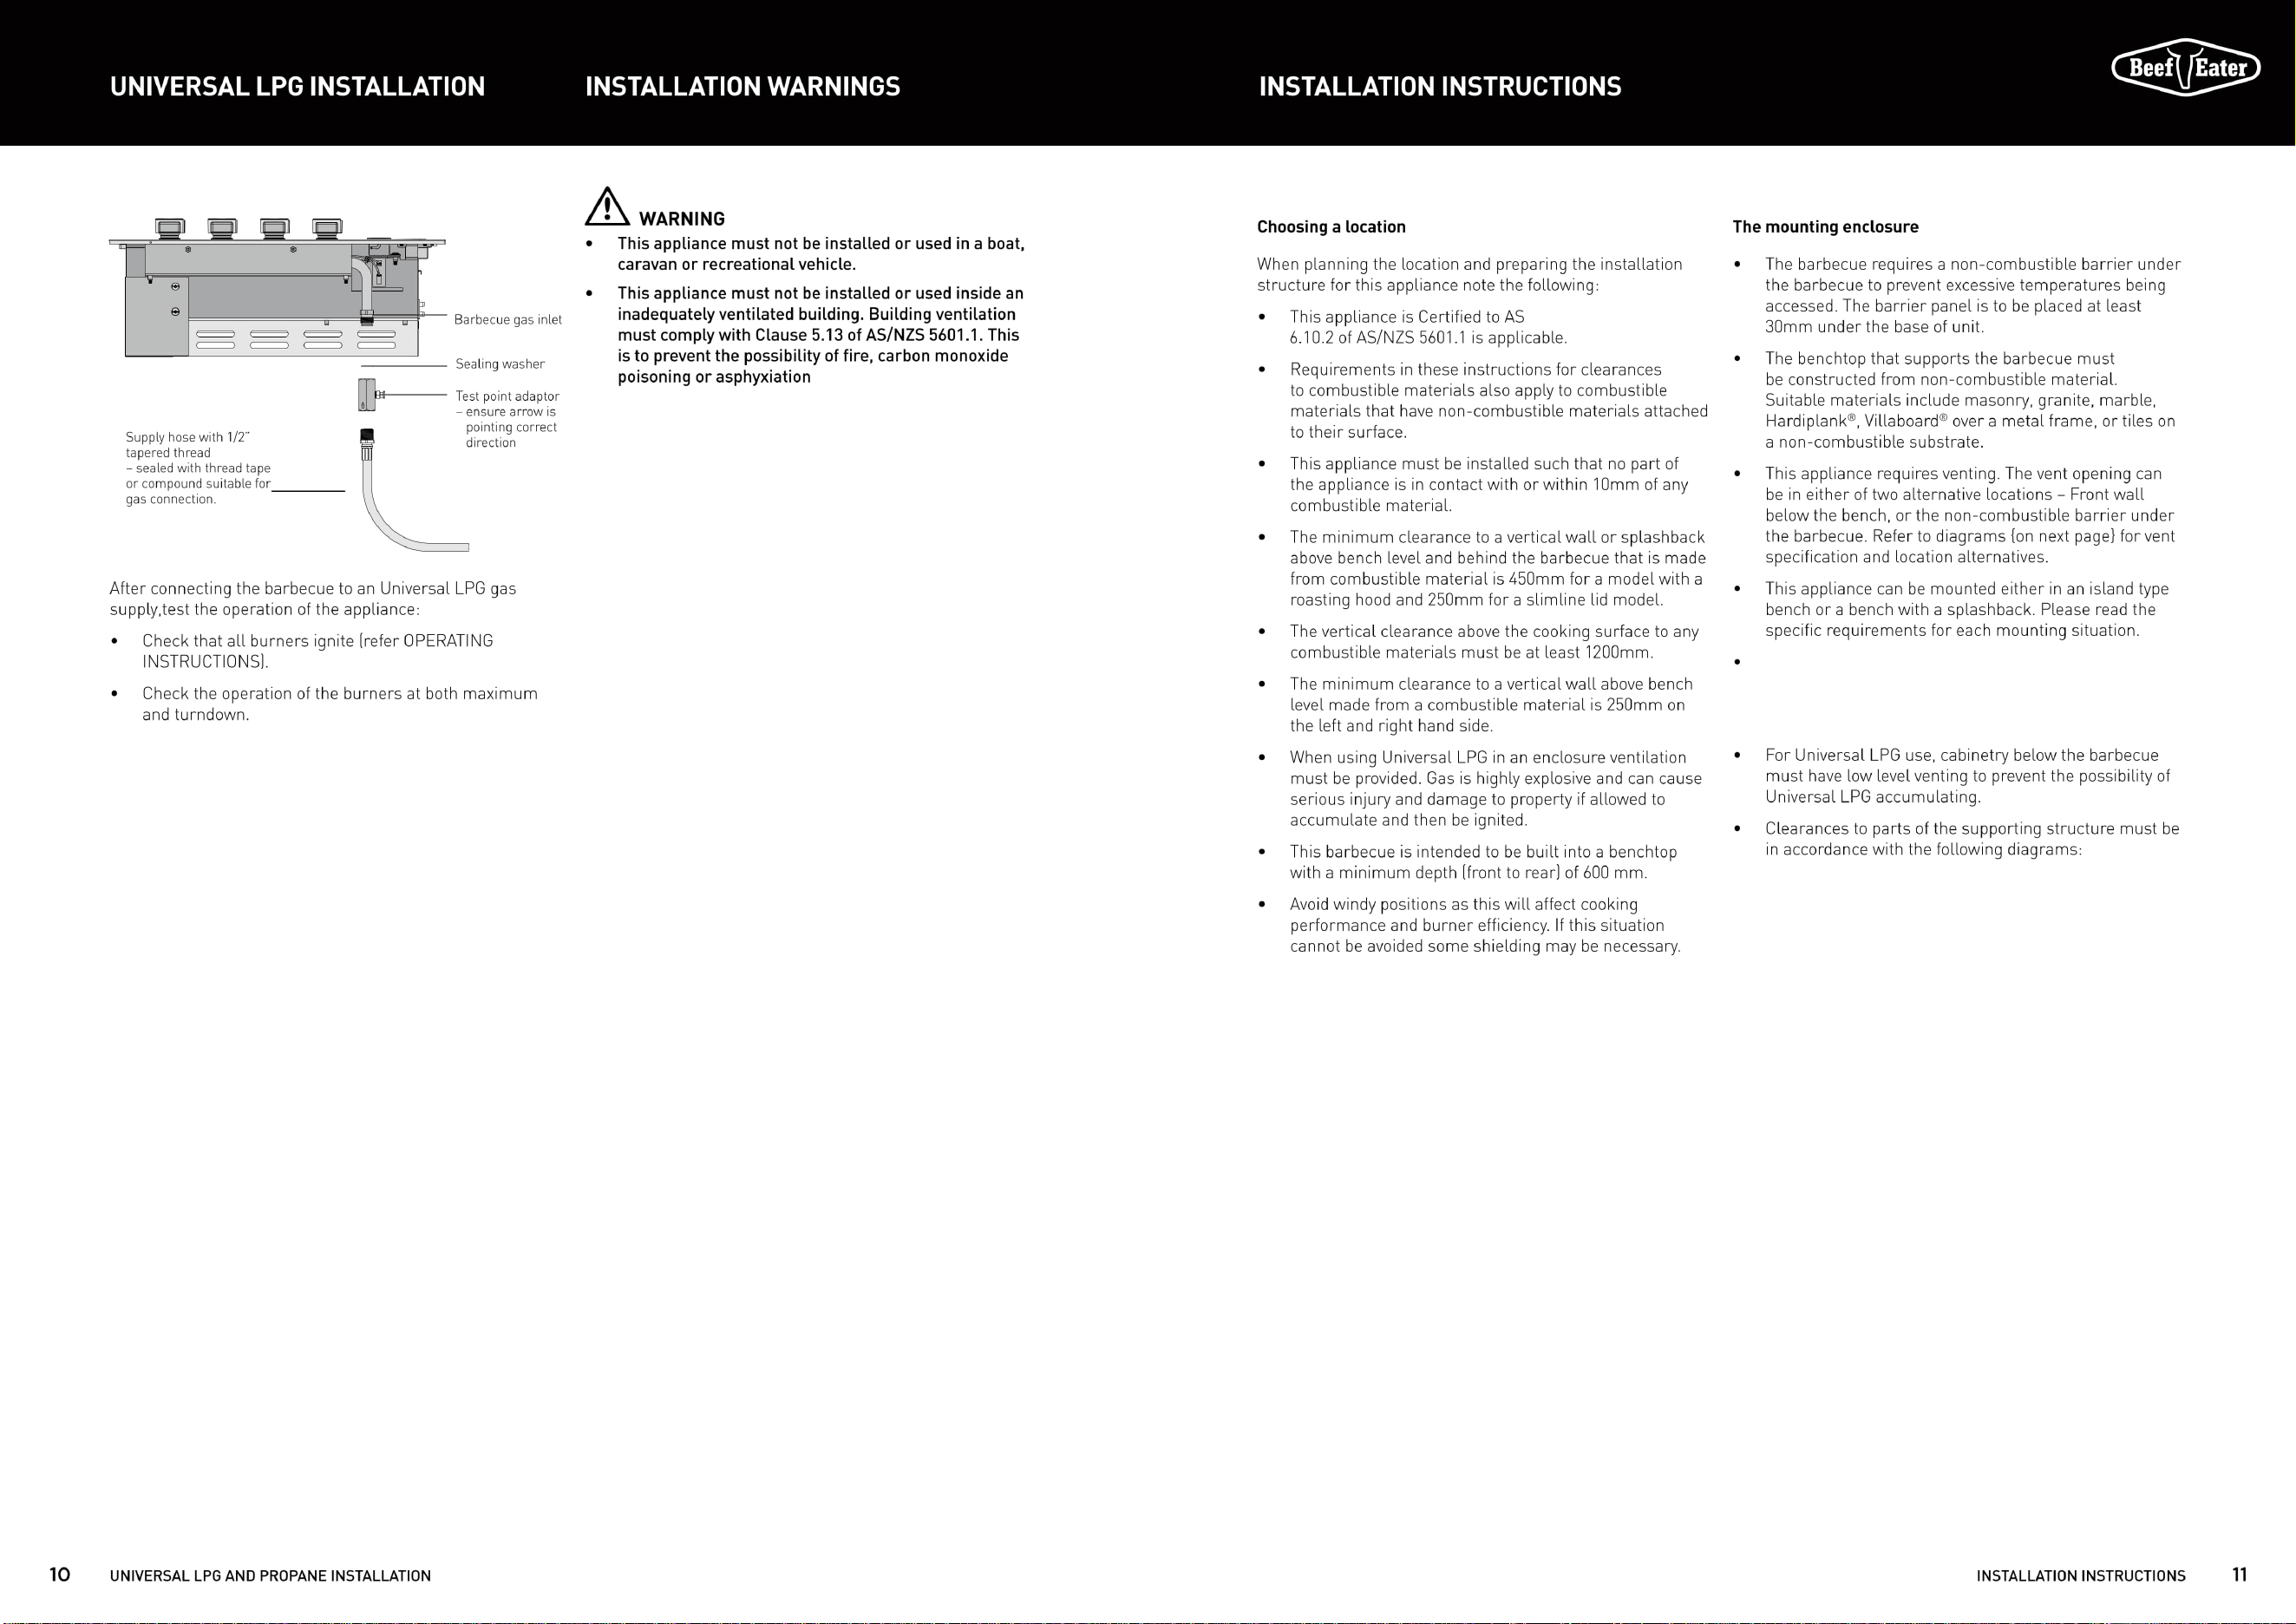
et up for Natural Gas and
is labelled accordingly.A Universal LPG and propane
conversion kit is included if required.Conversion of this
unit to Universal LPG or propane must be carried out by a
qualified licensed person and a Certificate of Compliance
must be issued to the owner at the completion of the
installation and conversion.
ignition.It is strictly prohibited to use it to power the
barbecue grill continuously after ignition or for any other
purposes.The adapter and all connecting components
must be kept dry, away from rain,water mist,and damp
surfaces.It is recommended to disconnect the adapter
when not in use.
4563
This appliance can be used by children aged from 8 years
and above and persons with reduced physical, sensory or
mental capabilities or lack of experience and knowledge if
they have been given supervision or instruction concerning
use of the appliance in a safe way and understand the
hazards involved. Children shall not play with the appli-
ance. Cleaning and user maintenance shall not be made by
children without supervision.
Please turn off and unplug the appliance before cleaning,
maintenance or relocation and whenever it is not in use.
DO NOT SPRAY AEROSOLS IN THE VICINITY OF THIS
APPLIANCE WHILE IT IS IN OPERATION.
DO NOT USE OR STORE FLAMMABLE MATERIALS IN OR
NEAR THIS APPLIANCE.
DO NOT PLACE ARTICLES ON OR AGAINST THIS APPLIANCE.
DO NOT MODIFY THIS APPLIANCE.
Do not lean over barbecue when lighting.
Do not leave the barbecue unattended when alight.
Do not delay lighting once the gas has been turned on.
Do not store or use aerosol cans in the vicinity of the
barbecue.
Do not store flammable liquids in the vicinity of the
barbecue.
Do not use caustic or abrasive based cleaners on the
barbecue.
Do not attempt to dismantle or adjust the control valves.
Do not attempt to dismantle or adjust the regulator.
Do not test for leaks with a naked flame.
Do not modify the construction of this appliance or
modify the injector orifice size.
Do not obstruct any ventilation of the barbecue.
Do not allow children to operate or play near the barbecue.
This appliance is not suitable for caravans or boat
installation.
Use manufacturer supplied grill plate and hotplate only,DO
NOT change the size and quantities of grill plate or hotplate.
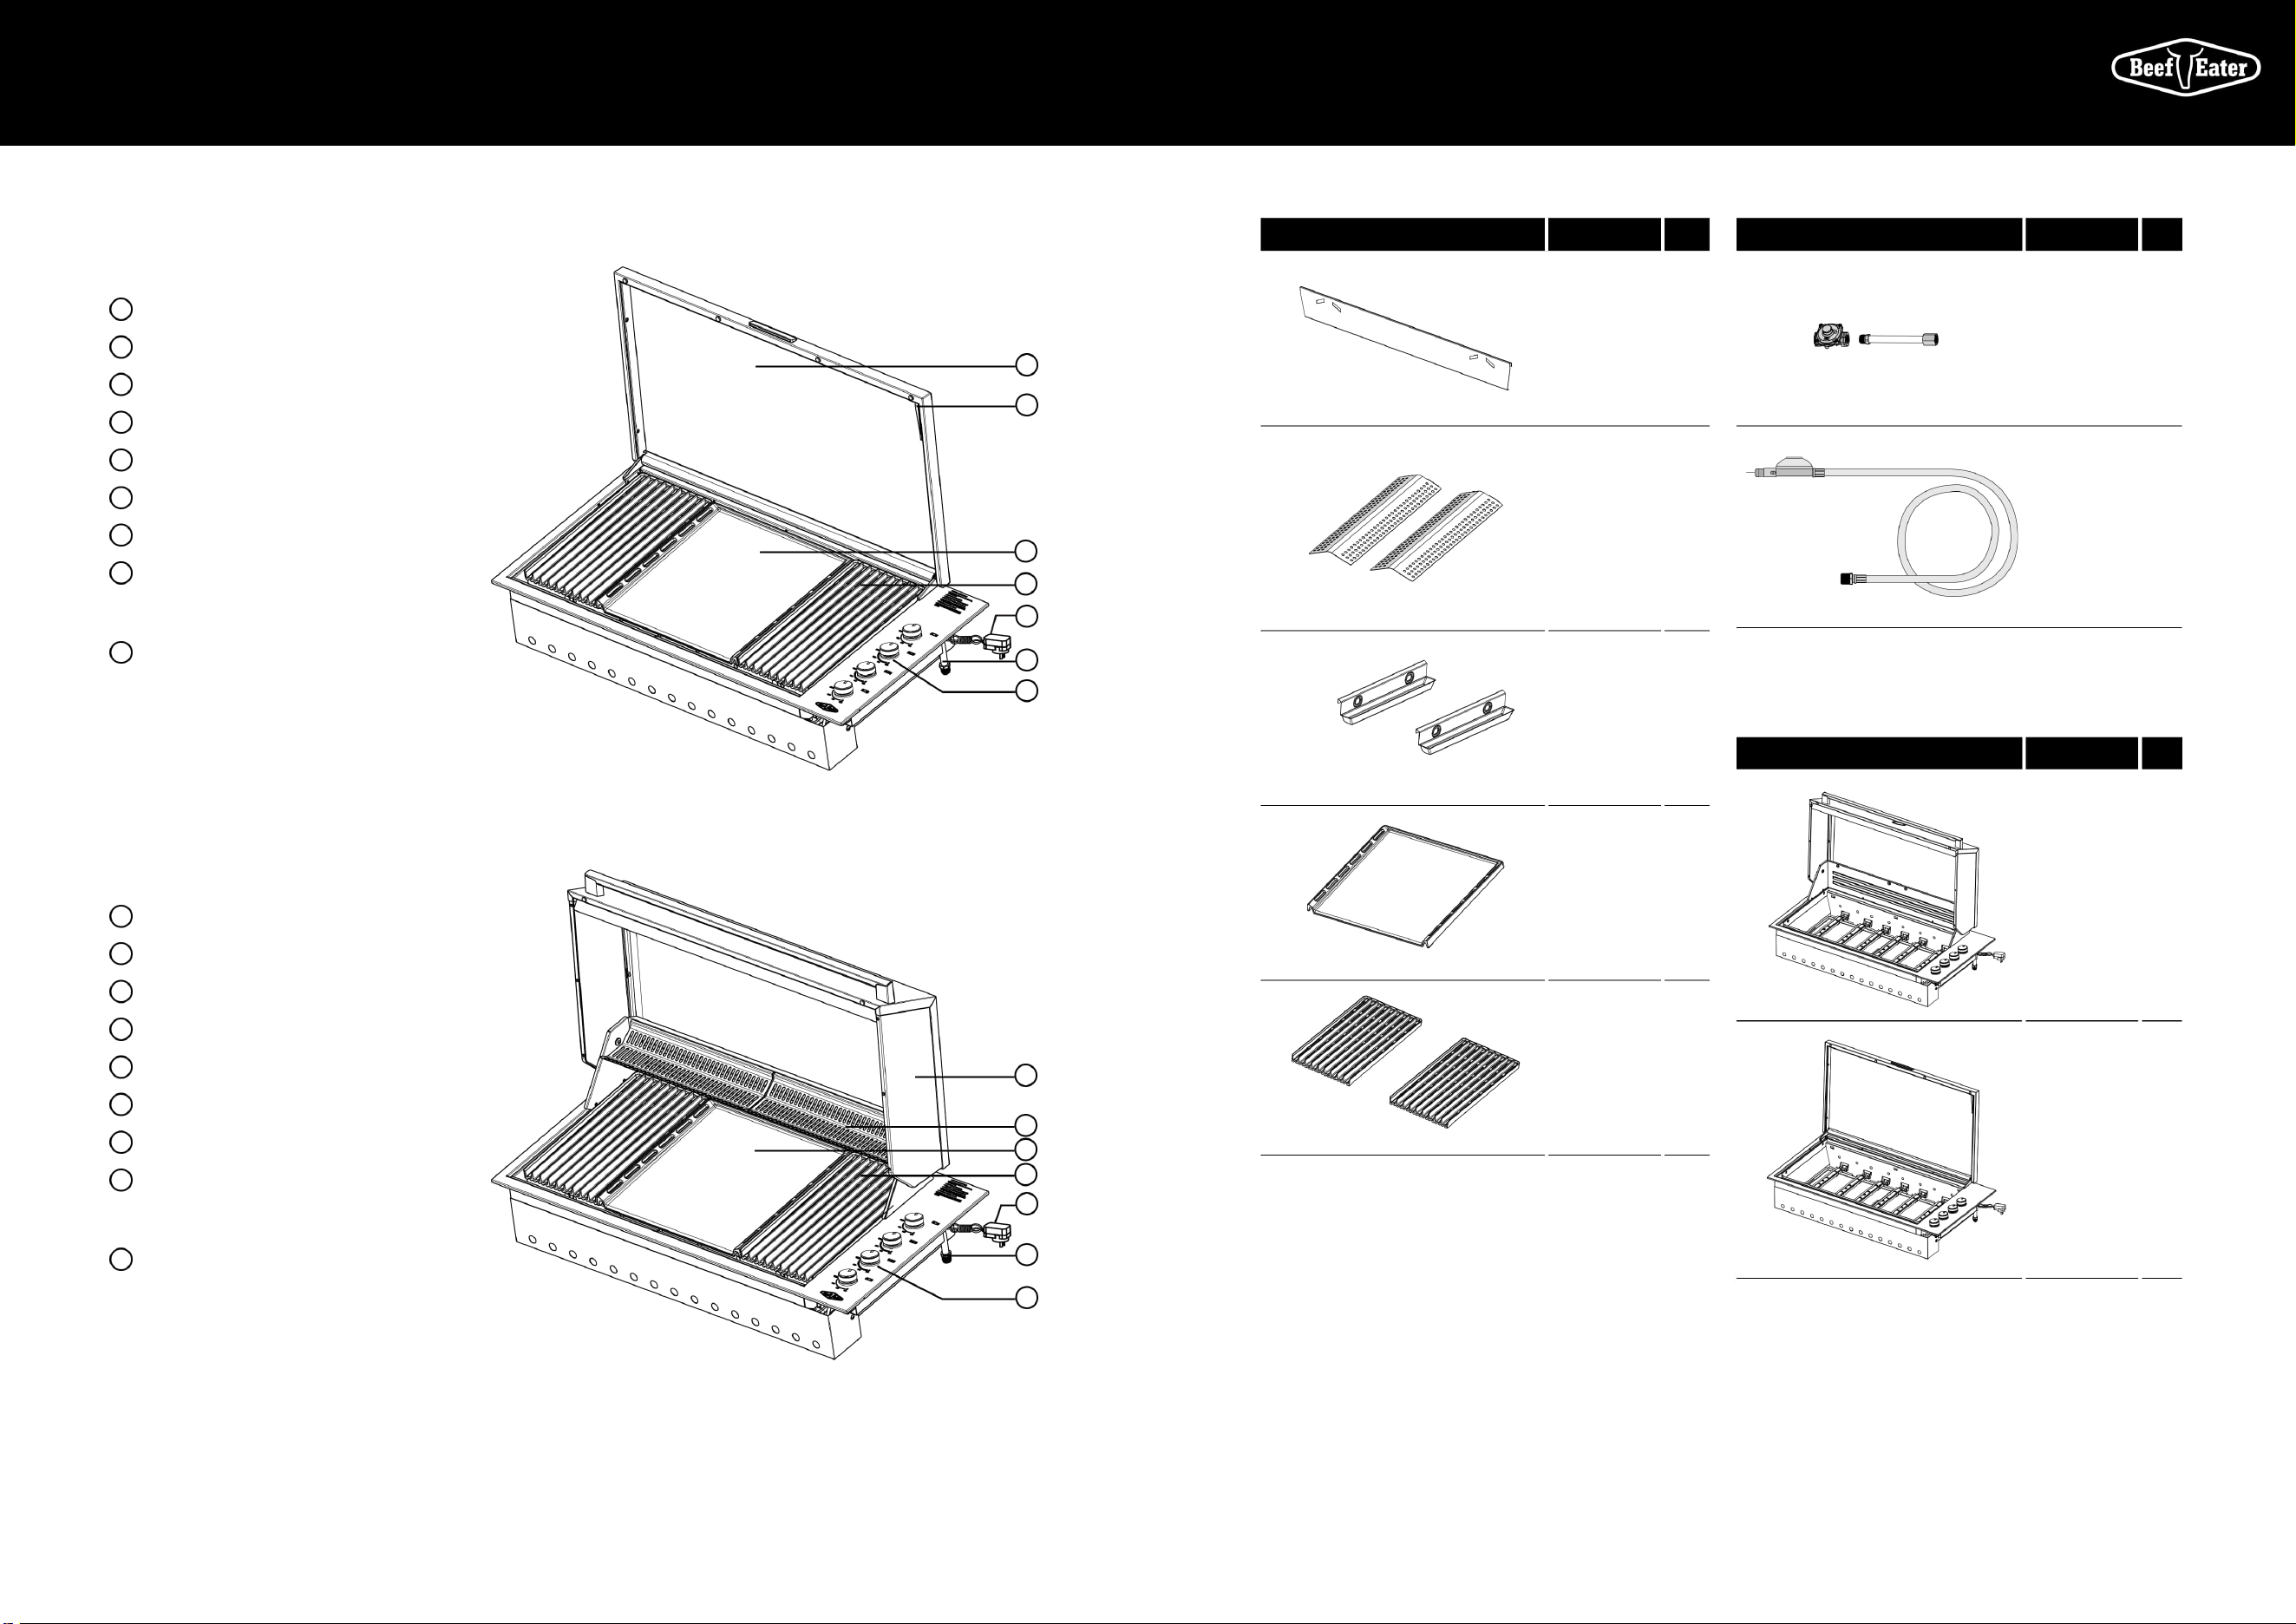
4 5PARTSPRODUCT DESCRIPTION
PRODUCT DESCRIPTION
PARTS
1
Pivotting leg
2
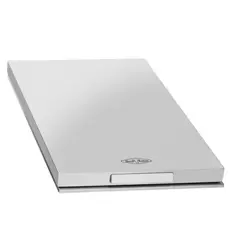
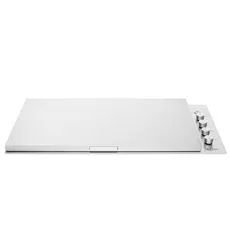
Slimline lid
3
Adapter
4
Gas connection point
5
Burner controls
6
Cast Iron Grill
7
Cast Iron Hotplate
8
Removable oil reservoir located at front of
cooking surface
(not illustrated)
9
Flame tamers x 2 located under grills
(not illustrated)
10
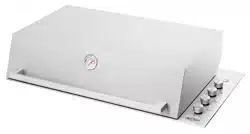
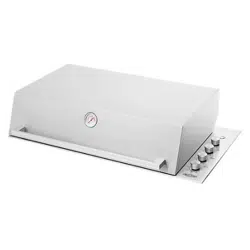
Roasting hood
11
Warming racks
12
Adapter
13
Gas connection point
14
Burner controls
15
Cast Iron Grill
16
Cast Iron Hotplate
17
Removable oil reservoir located at front of
cooking surface
(not illustrated)
18
Flame tamers x 2 located under grills
(not illustrated)
Integrated barbecue with slimline lid BSL158SA
Integrated barbecue with roasting hood BSH158SA
1
10
3
12
6
15
7
11
4
13
5
14
2
16
DESCRIPTION QTY
Rear heat
shield
1
Flame
tamers
2
Oil reservoirs
2
Cast Iron
plate
1
Cast iron grill
2
DESCRIPTION QTY
Natural gas
regulator and
installation
pipe
1
Universal
LPG hose
and regulator
assembly
1
1 Plastic bag, containing this instruction book,
labels, 1 fibre washer, match holder
and chain
EITHER
Roasting
hood
and base
assembly
1
Slimline lid
and base
assembly
1
Turndown screw
When use the combustible materials to moutingthis
appliance,it is needs to equipped with the TRIM KIT
”BACS
100A”,please contact the service for details
information.
4563, and Clause
12 13
DIMENSIONS DIMENSIONS
DIMENSIONS DIMENSIONS
Benchtop must be non-
combustible material
This side wall can be
combustible material
This side wall can be
combustible material
Rear panel must
be non-combustibl
Benchtop
must be
non-combustible
e
This front wall can
be combustible
material
non-combustible rear wall is 40mm
Non-combustible barrier – at least
30mm between barrier and base of
the appliance
549mm
71mm minimum
from cutout
Bench width 600mm minimum
540mm
464mm
177mm 42mm
30 mi
10 mi
250 min
n
600 min benchtop width
40 min
The minimum dimension is:
·The minimum dimension to a
n
250 min
870mm
Non-combustible barrier –
at least 30mm between barrier and
base of the appliance
580mm
540mm
464mm
212mm177mm
615mm
485mm
71mm minimum
from cutout
59mm
Installation in a bench with splashback
(example shown with barbecue with roasting hood)
924mm
1053mm
700mm
1059mm
536mm
634mm
135mm
25mm
71mm
Min.
540mm
924mm
700mm
1053mm
1025mm
502mm
600mm
135mm
25mm
71mm
Min.
540mm
Island style installation
(example shown with barbecue with slimline line)
WARNING!
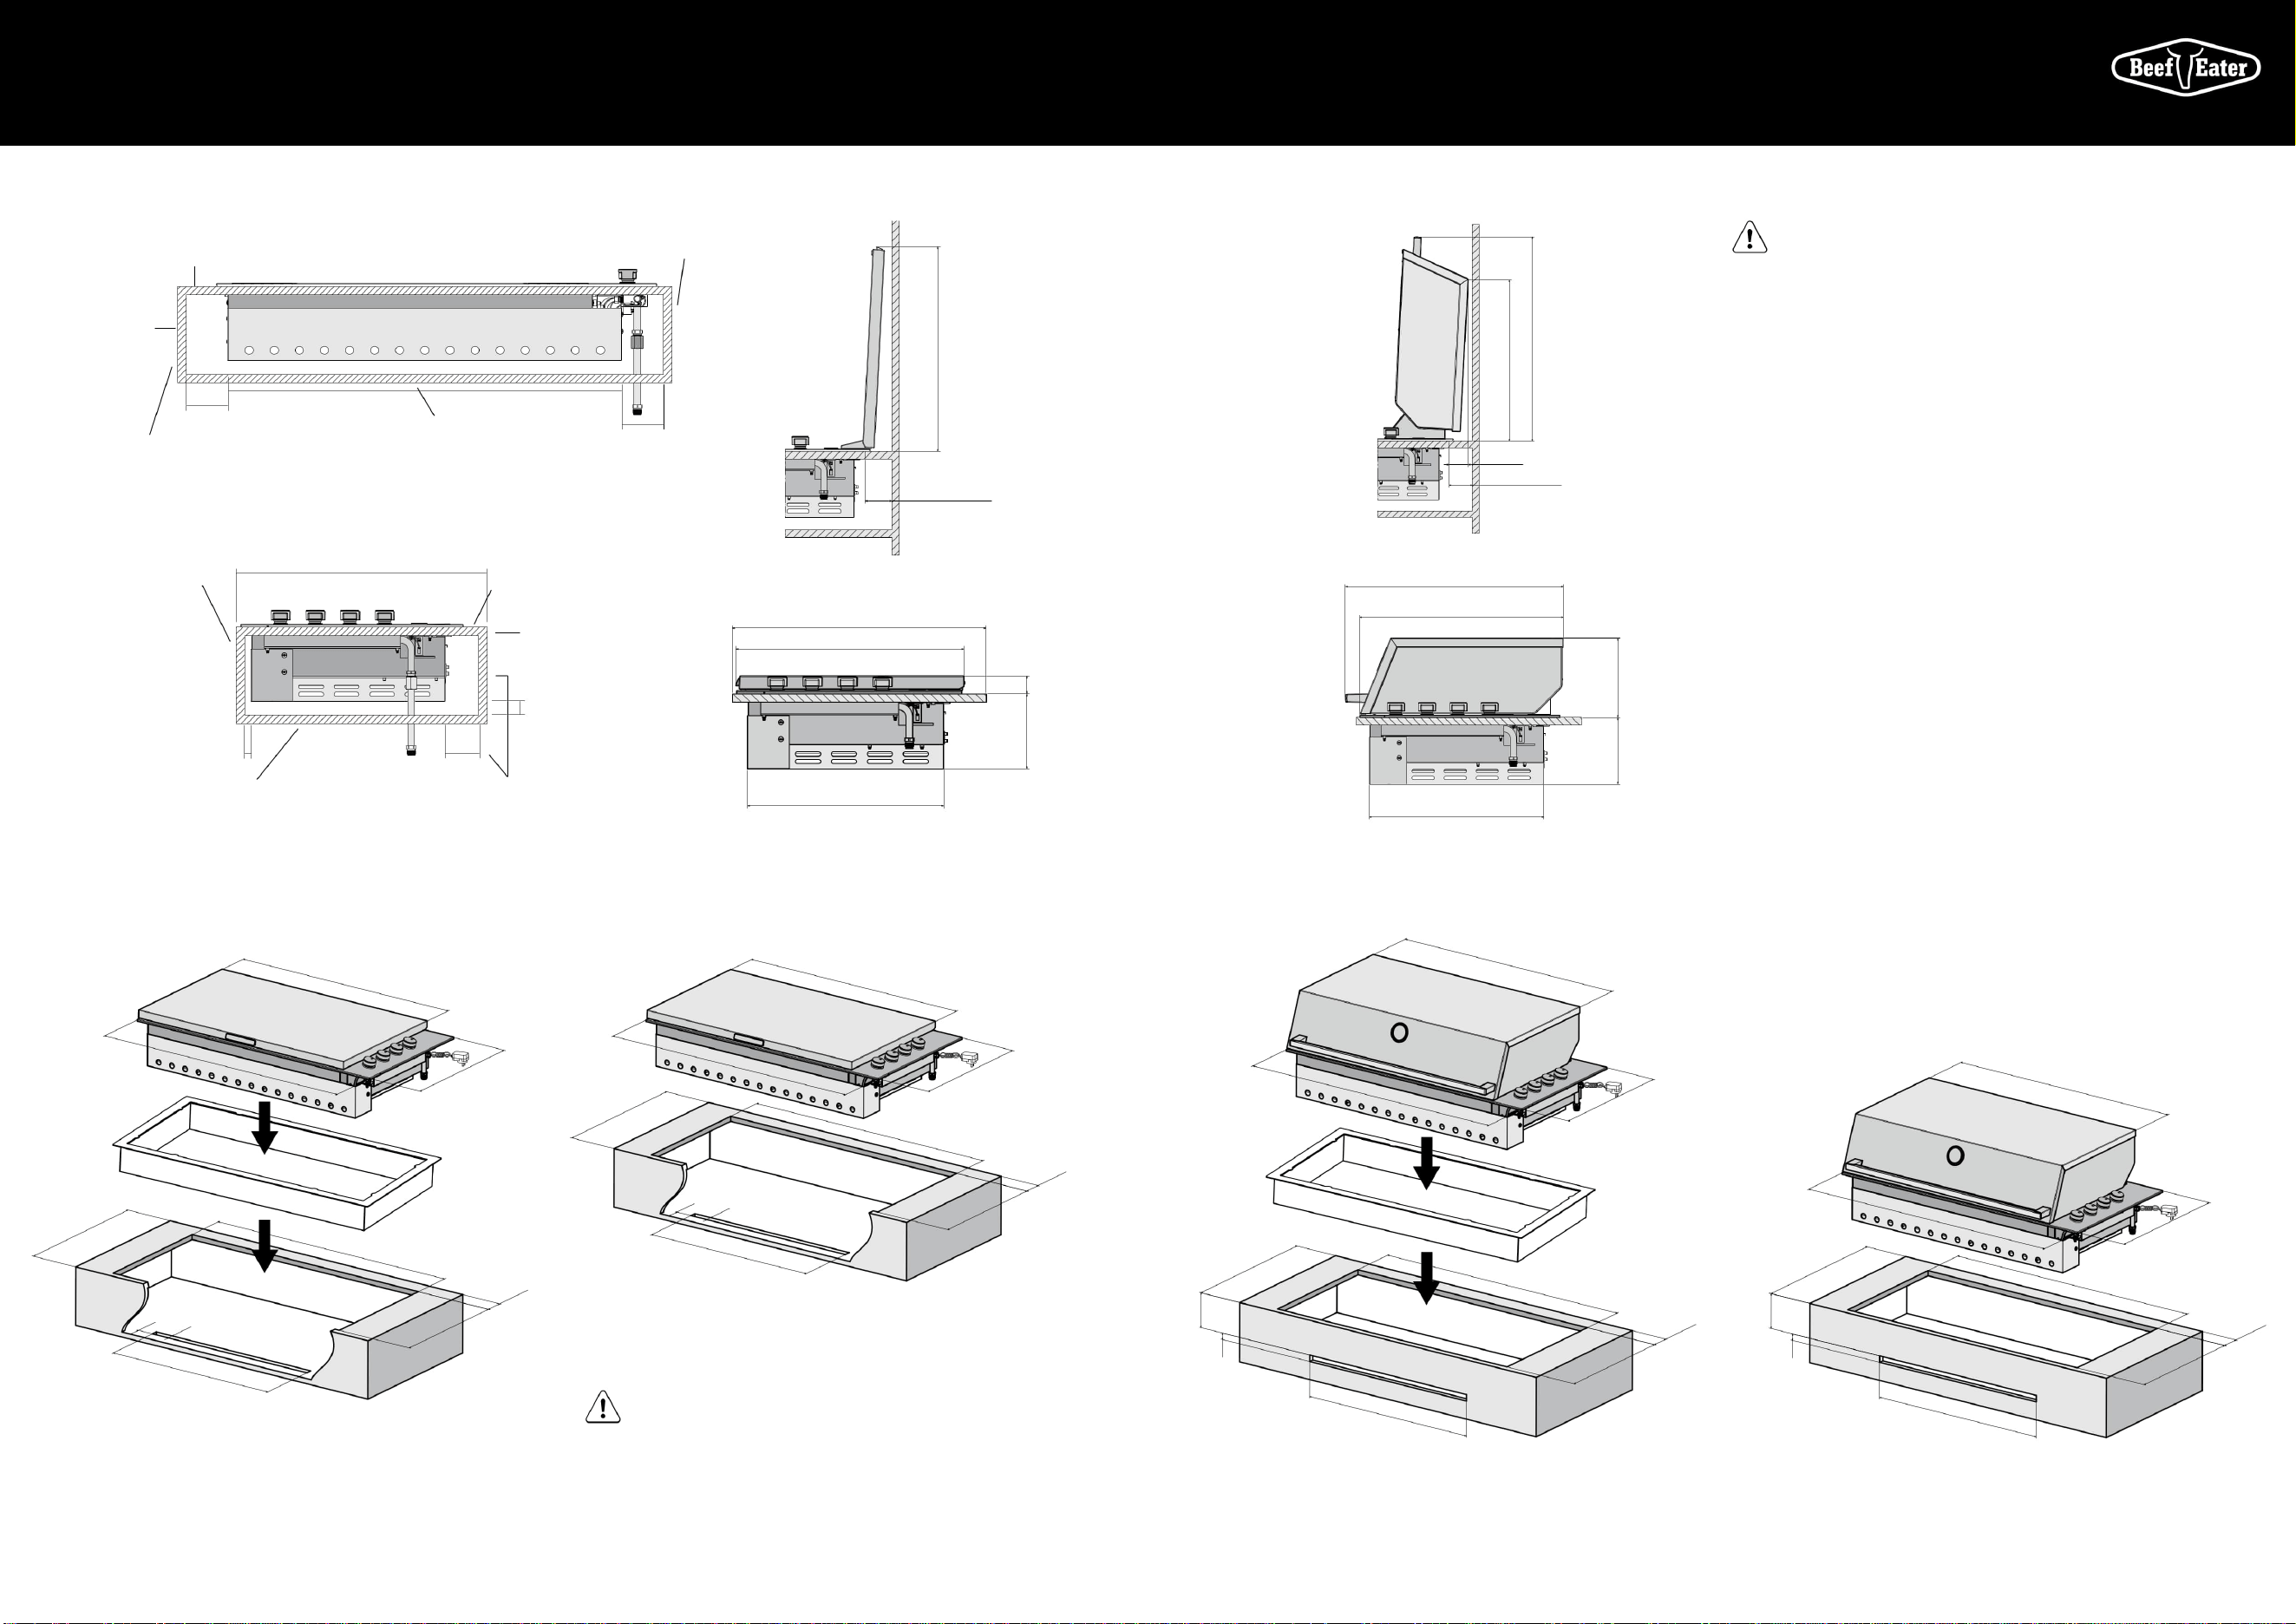
This appliance requires venting. An open area as indicated must
be allowed for. A suitable grille can be fitted if desired. This vent
area is to allow air into the enclosure for the correct combustion
of gases and for the correct exhausting of the products of
combustion. The vent must be no less than 700mm x 25mm.
Alternate vent location in base of enclosure
(front panel cut away for clarity)
928.5mm
1053mm
700mm
1025mm
502mm
71mm
Min.
25mm
50mm
Bench width
600mm Min
WARNING!
This appliance requires venting. An open area as indicated
must be allowed for. A suitable grille can be fitted if desired.
This vent area is to allow air into the enclosure for the
correct combustion of gases and for the correct exhausting
of the products of combustion. The vent must be no less
than 700mm x 25mm.
Installing in a bench with a splashback
· The splashback must be made from a non-combustible
material unless it is at least 450mm from the appliance.
· Clearances between the barbecue and a combustible
splashback are 250mm for the slimline lid model and
450mm for the roasting hood model.
· The minimum depth (front to rear) of the mounting
bench is 600mm.
· The bench cut-out size required is 1025mm x 502mm.
Refer to diagram above to left.
· For roasting hood models there is a specific clearance
required at the back of the barbecue between the
splashback and the bench cut-out of 71mm minimum.
This is to allow clearance for the hood to open.
Island style installation
· If this appliance is installed in an island mount,
it can be centrally positioned. provided all other
instructions regarding clearances to combustible
materials are followed. Special attention should be given
to the overalll size of the island top to consider the hood
open and the overhang. Please see illustration.
· The cut-out size required is 1025mm x 502mm.
Refer to diagram.
idth
700mm
50m
1059mm
536mm
71mm
Min.
25mm
m
Bench w
634mm Min
928.5mm
1053mm
When use the combustible materials to mounting
this appliance,it is needs to equipped with the extra
TRIM KIT "BACS100A" for better thermal insulation,please
contact the Electrolux Customer Service Centre for details
information.
When use the combustible materials to mounting this
appliance,it is needs to equipped with the extra TRIM KIT
"BACS100A" for better thermal insulation,please contact
the Electrolux Customer Service Centre for details information.
Clearance of
100mm if
surface is
Non-
Combustible.
14 15
GAS REQUIREMENTS
GAS REQUIREMENTS
HOTPLATE CONFIGURATIONASSEMBLING THE BARBECUE
HOTPLATE CONFIGURATION
Natural Gas requirements
· The enclosure must be constructed so that access can
be gained to the Natural Gas regulator at all times.
·
For pipe sizing requirements for supply pipe refer to
AS/NZS 5601.1.
Universal LPG Requirements
WARNING!
·
If an LPG bottle is to be stored in the enclosure
under the barbecue unit, it must be isolated from the
barbecue unit with a non-combustible panel.
The enclosure must comply with the requirements of
AS/NZS 5601.1.
·
AS/NZS 5601.1 ventilation requirements for cylinder
storage are:
Where of sheet metal or similar impervious construction
there shall be ventilation openings at the top and bottom
of the enclosure or recess, each opening providing a free
area of at least 200cm
2
2
for every cylinder enclosed.
·
For Universal LPG installations having enclosed
cabinetry below the separation panel that does not
contain a gas bottle, low level venting must be installed.
This is to allow the gas which is heavier than air to
escape from the enclosure in the situation where
there may be a leak. A minimum opening of 200cm
is required.
Setting up the barbecue
Setting up the barbecue in mounting enclosure
·
A match holder with attached chain has been included
with the instruction manual. This is provided for manual
ignition in the event the automatic ignition does
not work. The free end of chain is required to be
permanently fixed to the installation in a location that
enables the match holder to reach each burner (refer to
page 15 for manual lighting instructions).
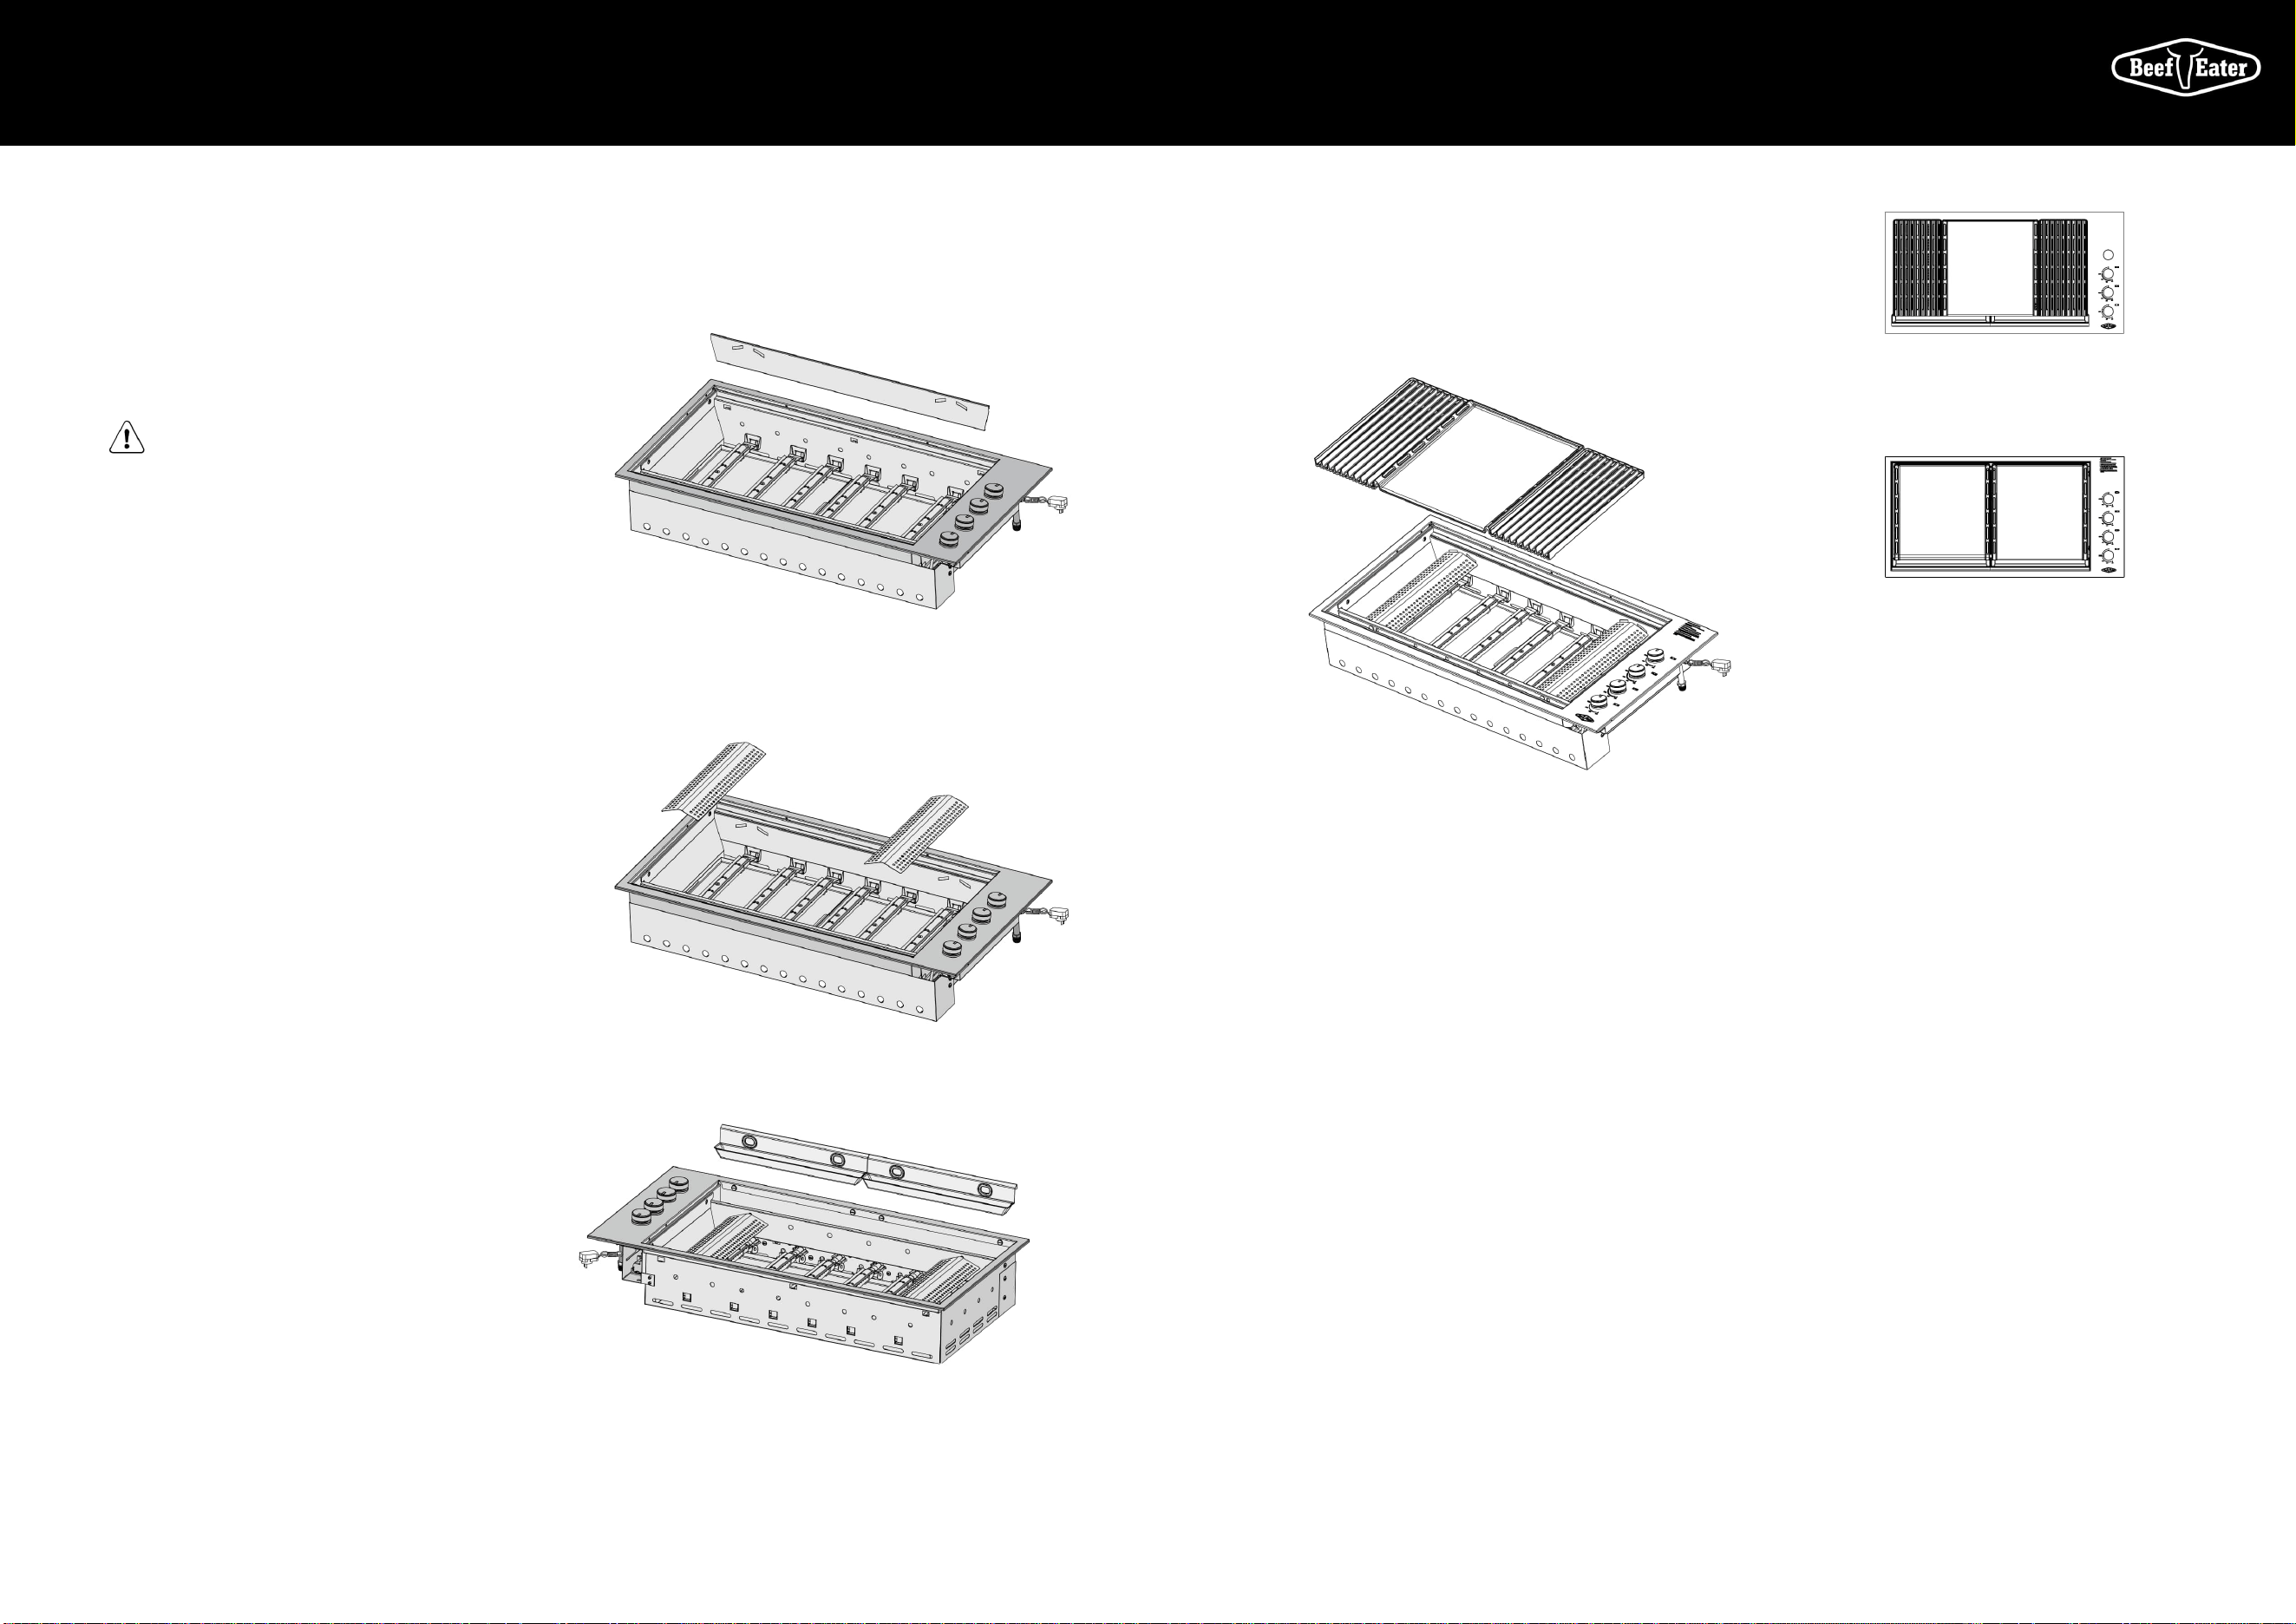
1. Remove all components from box.
2. Attach heat shield to rear of unit by inserting the
three top tabs into the rear holes and sliding the
shield down.
3. Install flame tamers (under grills) and fix back edge of flame
tamer into the heat shield panel.
4.
Fit oil reservoirs at front of barbecue.
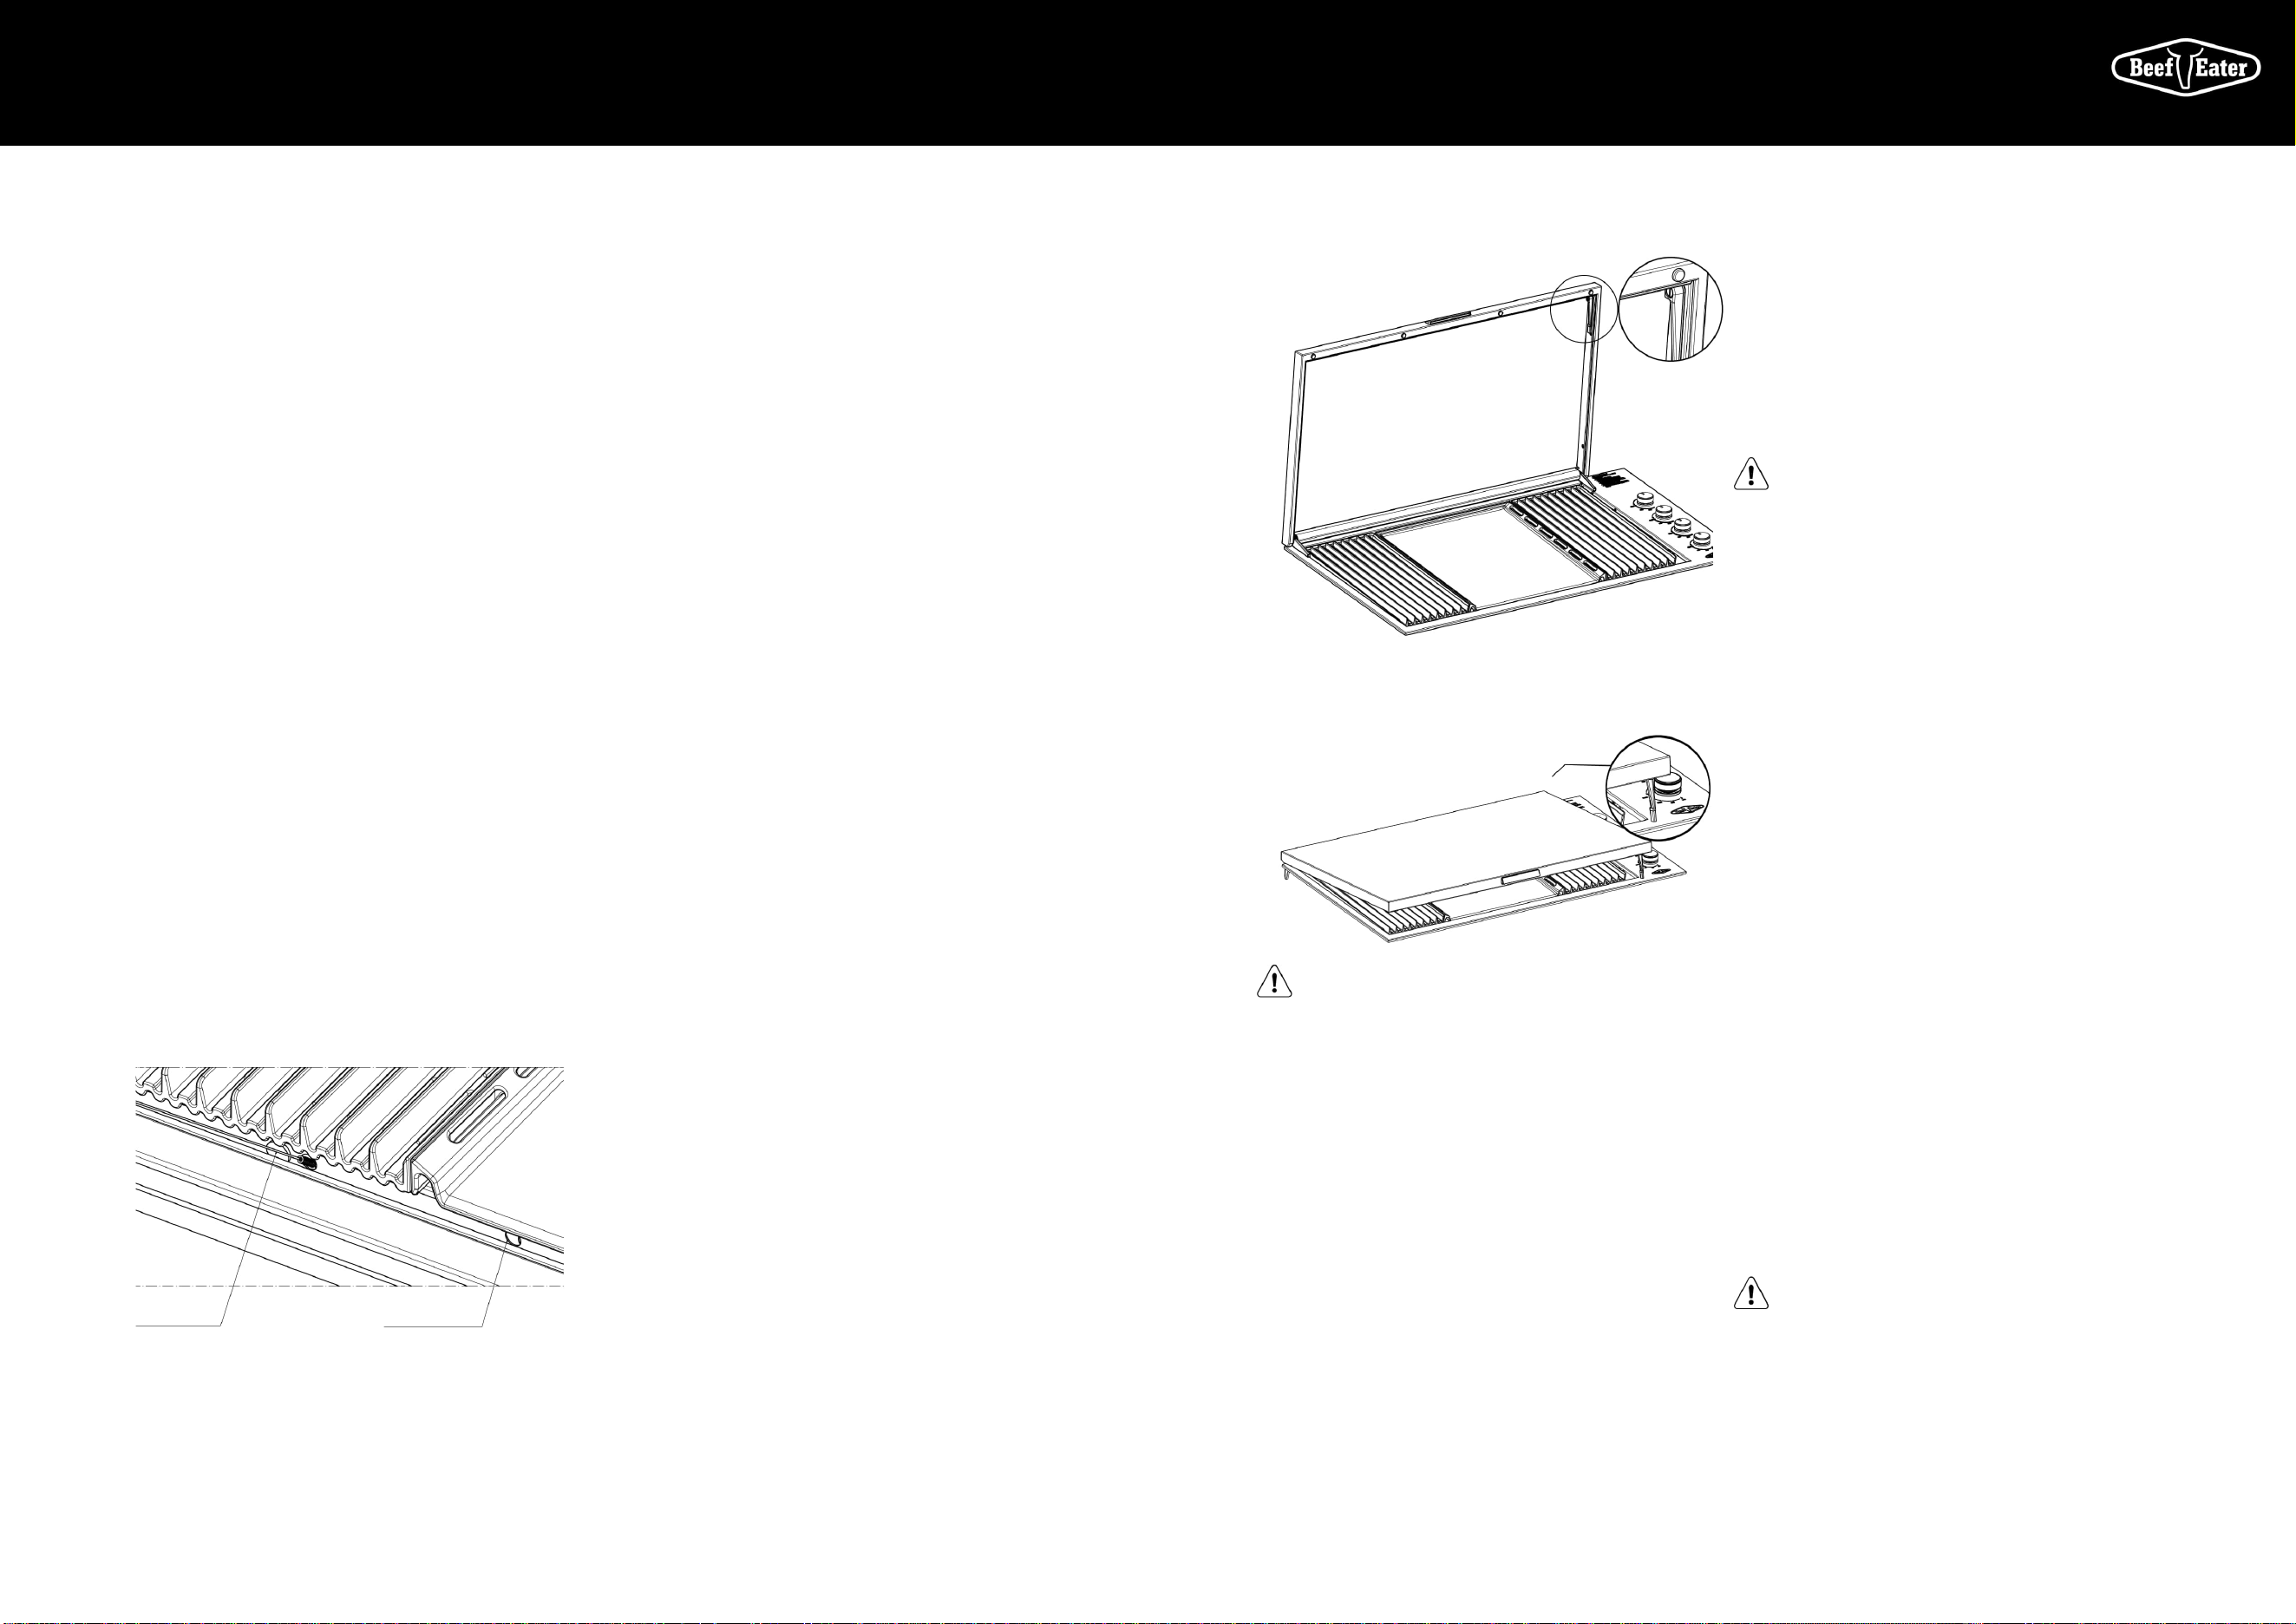
Recommended configuration: Hotplate in centre.
Recommended for roasting and grilling and offer the
optimal heat distribution across the cooking surface.
Non-recommended configuration: two Hotplates.
This may cause damage to the appliance as well as
excessive temperatures in surrounding surfaces and
reduced roasting performance (if roasting hood is
fitted).
5. Install hotplates and grills as shown, ensuring that
the flame tamers are located under the grills.
NOTE: ensure that grill assemblies are orientated correctly
so that the surface of the grill is sloping forward to allow oil to
drain into oil reservoirs.
16 17
OPERATING INSTRUCTIONS LID SAFETY – SLIMLINE ONLY CLEANING AND CARE
OPERATING INSTRUCTIONS LID SAFETY – SLIMLINE ONLY
Control functions
Before lighting the barbecue:
· Check that all hoses and gas fittings are tight.
· Open the slimline lid or the roasting hood.
NOTE: The slimline lid is designed as a cover for weather
protection. The lid is not designed to be used as a cooking
hood.
· Check all control knobs are in the ‘OFF’ position.
· Ensure that the cooking surfaces are clean.
· Turn the gas isolation valve ‘ON’.
Lighting instructions
· Do not attempt to light burners with the cooking
surfaces covered.
· Read instructions before lighting.
· To light a burner, depress the knob and rotate
to ‘BOOST’.
· Hold for 3 seconds, release and check the flame.
· If burner did not light, turn knob to the ‘OFF’ position.
Allow gas to disperse, then repeat lighting procedure.
Manual lighting
· If, in the event of the automatic ignition system not
working, the barbecue can be lit manually.
· To light manually, fit a 40mm match to match holder
provided. Pass lit match through viewing holes below the
front of cooking plates down towards the burner, then
rotate the knob to ‘BOOST’ to ignite. If ignition fails turn
the control valve off and allow several minutes for the
gas to disperse before attempting to light again.
· Once alight, repeat for other burners as required.
Preheating
For best cooking results it is recommended to preheat the
barbecue prior to cooking.
· This barbecue is fitted with high power burners. In
most conditions it will only be necessary to preheat the
barbecue for 5 minutes before cooking can commence.
· As with most things, experience will familiarise you
with the time required to achieve the desired cooking
temperature.
· If the barbecue is fitted with slimline lid, it is advisable to
remove the slimline lid in windy conditions.
· If the unit does not operate correctly refer to
troubleshooting section on page 18.
Cooking methods:
Direct cooking / grilling
· For best cooking results testing has shown that once
preheated burners can be reduced to a Medium to Low
setting to maintain satisfactory cooking temperatures.
· If burners are left to run too hot there will be excessive
smoking during the cooking process and subsequent
burning of the food being prepared. This may also result
in excessive flaring of the fat being emitted from the
food.
Indirect cooking / roasting
· For barbecue models fitted with a roasting hood, it is
recommended that once preheated only use the two
outer burners on a low setting to maintain satisfactory
cooking temperatures.
· Using more than two burners is not recommended
as hood can overheat and may cause damage to the
appliance. The temperature gauge indicates the desired
range of roasting temperatures.
To turn the burners off
· When the cooking is complete, rotate the knob
fully clockwise so the pointer is positioned at the
off position.
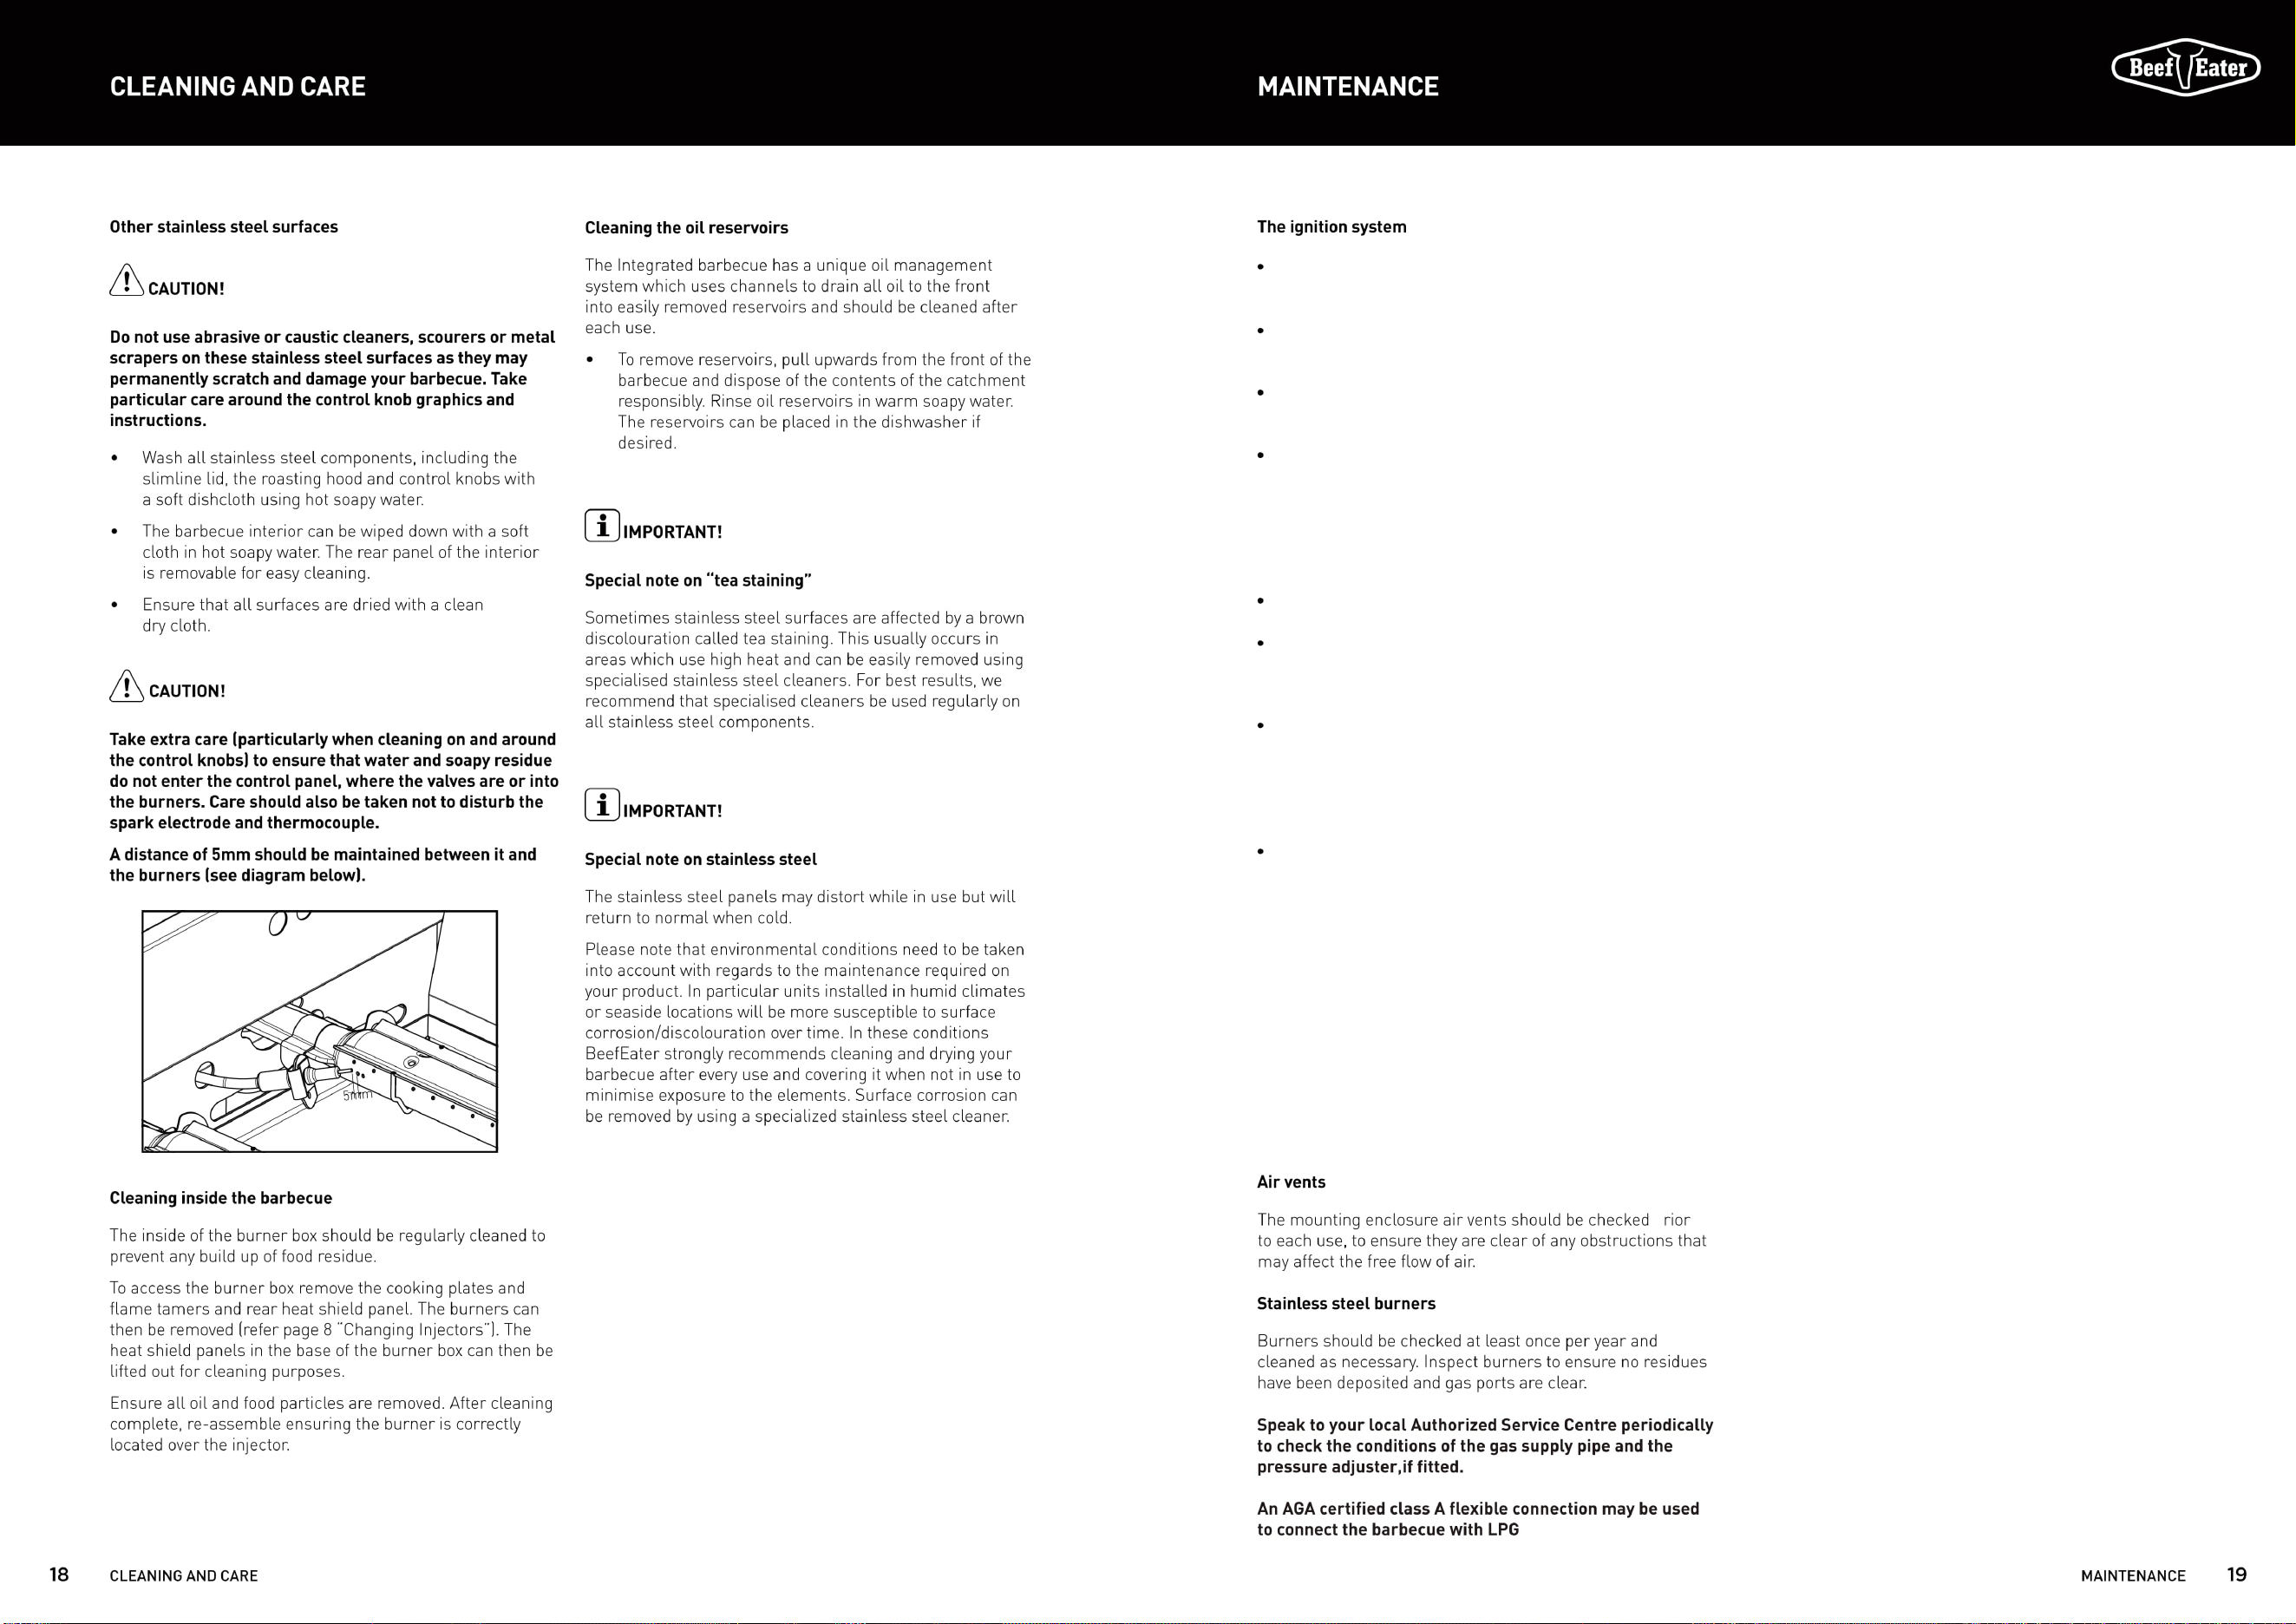
Match holder Viewing holes
To ensure that the user remembers to turn off the gas before
closing the lid, a pivoting safety leg has been fitted.
Pivoting safety leg
When closing the lid the safety leg will pivot forward and rest
against the trim surface to prevent the lid closing.
After ensuring the gas has been turned off, to fully close
the lid, the leg needs to be rotated backwards.
Pivoting safety leg
WARNING!
THE SLIMLINE LID MUST NOT BE CLOSED WHEN THE
BURNERS ARE OPERATING.
Closing the lid during burner operation can cause
discolouration and damage to the lid and barbecue unit.
Any damage caused to the unit by closing the lid during
the burner operation will not be claimable under your
manufacturer’s warranty.
The BeefEater Integrated barbecue has been constructed
from select grade stainless steel which, if not cared for, may
discolour over time. To keep your barbecue looking its best
we recommend that the cooking surfaces are cleaned after
every use.
The cleaning and care instructions are essential for the
proper functioning and operation of your appliance over
time. Failure to adhere to these care instructions may affect
your ability to make a claim under the manufacturer’s
warranty.
WARNING!
Please ensure that your barbecue is switched off and has
cooled down before following the instructions below.
Cast Iron plates
The cooking plates and grills have a porcelain enamel coating.
NOTE: Many food acids, juices, marinades and sauces
contain highly acidic elements that will slowly attack
the surface of the cast iron if not removed immediately after
cooking.
After use remove all the solid material from the cooking
surface using a brass bristled barbecue brush or plastic
bristled scourer. Wipe off the remaining grease with paper
toweling. Gently wash the surfaces with a cloth or a sponge
and a mild detergent and hot water. Dry the components
immediately and coat the cooking surface with a light layer
of cooking oil. This protects the surface when not in use. Do
not clean the cooking surface in a dishwasher.
Intensive cleaning cycle
Suitable for cast Hotplate and cast grills only!
In instances when the cooking surface becomes heavily
soiled and harder to clean, the barbecue can be set-up for
an intensive cleaning cycle.
To do this you must have the hood/lid fully open and remove
any stainless steel attachments such as the warming racks.
Turn all the burners on and set all controls to ‘BOOST’.
After approximately 30 minutes, this should turn any baked
on food or grease to ash. Once the surface has cooled, the
residual ash can be wiped clean with a damp cloth.
After cleaning, lightly season the cast MaxiPlate and cast
grills with cooking oil.
WARNING!
The hood or lid must be fully open during the
cleaning process.
Failure to do so can result in damage to the stainless steel
surfaces and to the barbecue unit.
This product is equipped with an AC adapter, with:
This product operating environment requirements are:
ambient temperature -20°C to 50°C, humidity 0% to
90%, and altitude below 2000 meters.
Environmental Requirements: Ambient temperature
-20℃ to 50℃, humidity 0% to 90%, altitude below 2,000
meters.
Electrical Safety: The adapter is intended solely for
ignition. It is strictly prohibited to use it to power the
barbecue grill continuously after ignition or for any
other purposes. The adapter and all connecting
components must be kept dry, away from rain, water
mist, and damp surfaces. It is recommended to
disconnect the adapter when not in use.
Adapter Placement: The power outlet used must be at
least 600mm away from the barbecue grill.
Pre-use Preparation and Inspection: Before each use,
check the adapter, cable, and plug for any damage,
cracks, or wear. If any damage is found, do not use the
adapter.
Post-use Operation:
- Turn off the gas control knob on the barbecue grill.
- Close the gas cylinder valve.
- Unplug the AC adapter from the power outlet.
- Store the adapter in a dry indoor environment after
the barbecue grill has completely cooled down.
Cleaning and Storage:
- **Cleaning**: After disconnecting and allowing the
adapter to cool completely, wipe the adapter casing with
a slightly damp cloth.
**Do not immerse the adapter in water or use harsh
cleaning agents**.
- **Storage**: Coil the adapter loosely to avoid exces-
sive bending. Store it in a cool, dry place away from high
temperatures and direct sunlight.
100-240V~ 50-60Hz 0.5A
Class Ⅱ, IP24

20 21
TROUBLESHOOTING
TROUBLESHOOTING
ACCESSORIES
NOTES
PROBLEM POSSIBLE
CAUSE
REMEDY
Barbecue
won’t light
No gas Check isolation valve is
ON.
Gas bottle empty -
refill or change gas bottle.
Ignition
system not
working
Ignition
electrode wet
or dirty
Gently clean and dry
electrode ensuring
position is correct.
Flame not
staying on
when kob is
released
Knob not
held down
long enough
for flame
safeguard to
engage
Repeat lighting procedure
and hold knob down for
5 seconds
Port blockage
adjacent to
thermocouple
Check the flame is
present and the tip of the
thermocouple is heated by
the flame
Excess smo
ke
being emitted
from the
cooking area
Gas valve set
too high
Turn gas valves down or
turn off selected burners.
Smell of gas
DO NOT
ATTEMPT TO
LIGHT THE
APPLIANCE
Gas leak Turn off gas at the
isolation valves.
Check for leaks,
tighten joints.
If problem persists call
Electrolux Service.
Oil not
draining into
removable
reservoirs
Incorrect
orientation
of plate and
grills.
Plate and grill
not clean
Ensure plate and grills are
assembled as shown on
page 14.
Follow cleaning procedure
for cast iron plates as
detailed on page 16.
Too hot when
roasting
Incorrect
burner
settings
When roast
ing only
use 2 outer burners on
a low setting. Check
temperature gauge and
adjust accordingly to
achieve desired roasting
temperature.
Too hot when
grilling
Incorrect
burner
settings
Once preheated, only
use a low burner
setting. Running “Boost”
will quickly achieve
temperatures in excess of
400°C and will char food
on contact. This should
be avoided.
To order any of the following accessories and spare parts, or
for more information on any oth er suitable accessories for this
product, please contact the Electrolux Customer Service Centre.
ACCESSORIES
standard inclusions+
gas conversion kit
- Universal LPG
optional extras *
weatherproof cover
(for model BSH158SB、BSL158SB、BSH158DB、BSL158DB)
+ Standard inclusion with the product but can also be purchased
separately via the Electrolux Customer Service Centre.
* Sold separately via the Electrolux Customer Service Centre.
For the full range of accessories please visit beefeaterbbq.com
NOTES
Check the plug if is loose,
the power supply if is
normal, and the
connection wire if
is normal.
22 23NOTESNOTES
NOTES
WARRANTY
This document sets out the terms and conditions of the product
warranties for Electrolux Appliances. It is an important document.
Please keep it with your proof of purchase documents in a safe place
for future reference should there be a manufacturing defect in your
Appliance. This warranty is in addition to other rights you may have
under the Australian Consumer Law.
1. In this warranty:
(a) ‘acceptable quality’ as referred to in clause 10 of this warranty has the
same meaning referred to in the ACL;
(b) ‘ACL’ means Schedule 2 to the Competition and Consumer Act 2010;
(c) ‘Appliance’ means any Electrolux product purchased by you and
accompanied by this document;
(d) ‘ASC’ means Electrolux’s authorised service centres;
(e) ‘Electrolux’ means Electrolux Home Products Pty Ltd of 163 O’Riordan
Street, Mascot, NSW 2020, ABN 51 004 762 341 in respect of
Appliances purchased in Australia and Electrolux (NZ) Limited
(collectively ‘Electrolux’) of 3-5 Niall Burgess Road, Mount Wellington, in
respect of Appliances purchased in New Zealand;
(f) ‘major failure’ as referred to in clause 10 of this warranty has the same
meaning referred to in the ACL;
(g) ‘‘Warranty Period’ means the period of 24 months fo
llowing the date
of original purchase of the Appliance in Australia or New Zealand and in
the case of the:
Additional 8 years for burner box, plates, grills (excludes burner, gas
valves and ignitions).
2. This warranty only applies to Appliances, purchased and used in Australia or
New Zealand in normal domestic applications and is in addition to (and does
not exclude, restrict, or modify in any way) any non-excludable statutory
guarantees in Australia and New Zealand.
3. During the Warranty Period Electrolux or its ASC will, at no extra charge if
your Appliance is readily accessible for service, without special equipment
and subject to these terms and conditions, repair or replace any parts which
it considers to be defective. Electrolux or its ASC may use remanufactured
parts to repair your Appliance. You agree that any replaced Appliances or
parts become the property of Electrolux. This warranty does not apply to
4. Parts and Appliances not supplied by Electrolux are not covered by
this warranty.
5. To the extent permitted by law, you will bear the cost of transportation, travel
and delivery of the Appliance to and from Electrolux or its ASC. If you reside
outside of the service area, you will bear the cost of:
(a) travel of an authorised representative;
(b) transportation and delivery of the Appliance to and from Electrolux or
its ASC, In all instances, unless the Appliance is transported by
Electrolux or an Electrolux authorised representative, the Appliance is
transported at the owner’s cost and risk while in transit to and from
Electrolux or its ASC.
6. Proof of purchase is required before you can make a claim under
this warranty.
7. You may not make a claim under this warranty unless the defect claimed is
due to faulty or defective parts or workmanship. Electrolux is not liable in the
following situations (which are not exhaustive):
(a) the Appliance is damaged by:
(i) accident
(ii) misuse or abuse, including failure to properly maintain or service
(iii) normal wear and tear
(iv) power surges, electrical storm damage or incor
rect power supply
(v) incomplete or improper installation
(vi) incorrect, improper or inappropriate operation
(vii) insect or vermin infestation
(viii) failure to comply with any additional instructions supplied with
the Appliance;
(b)
(c) the Appliance’s serial number or warranty seal has been removed
or defaced;
(d) the Appliance was serviced or repaired by anyone other than Electrolux,
an authorised repairer or ASC.
8. This warranty, the contract to which it relates and the relationship between
you and Electrolux are governed by the law applicable where the Appliance
was purchased. Where the Appliance was purchased in New Zealand for
commercial purposes the Consumer Guarantee Act does not apply.
9. To the extent permitted by law and subject to your non-excludable
statutory rights and guarantees, Electrolux excludes all warranties and
liabilities (other than as contained in this document) including liability for any
loss or damage whether direct or indirect arising from your purchase,
use or non-use of the Appliance.
10. For Appliances and services provided by Electrolux in Australia, the
Appliances come with guarantees by Electrolux that cannot be excluded
under the ACL. You are entitled to a replacement or refund for a major failure
and for compensation for any other reasonably foreseeable loss or damage.
You are also entitled to have the Appliance repaired or replaced if the
Appliance fails to be of acceptable quality and the failure does not amount
to your other rights and remedies under a law in relation to the Appliances or
services to which the warranty relates.
11. For Appliances and services provided by Electrolux in New Zealand, the
Appliances come with a guarantee by Electrolux pursuant to the provisions
of the Consumer Guarantees Act, the Sale of Goods Act and the Fair
Trading Act.
12. To enquire about claiming under this warranty, please follow these steps:
(a) carefully check the operating instructions, user manual and the terms of
this warranty;
(b) have the model and serial number of the Appliance available;
(c) have the proof of purchase (e.g. an invoice) available;
(d) telephone the numbers shown below.
13. You accept that if you make a warranty claim, Electrolux and its ASC may
exchange information in relation to you to enable Electrolux to meet its
obligations under this warranty.
Warranty
FOR SALES IN AUSTRALIA AND NEW ZEALAND
APPLIANCE: BEEFEATER SIGNATURE BARBECUE
BBS_Warr_May16
Important Notice
Before calling for service, please ensure that the steps listed in clause 12 above have been followed.
FOR SERVICE
state service centre in Australia
PLEASE CALL 1800 356 660
For the cost of a local call (Australia only)
SERVICE AUSTRALIA
ELECTROLUX HOME PRODUCTS
beefeaterbbq.com
FOR SPARE PARTS
state spare parts centre in Australia
PLEASE CALL 1300 666 019
For the cost of a local call (Australia only)
FOR SERVICE
authorised service centre in New Zealand
FREE CALL 0800 10 66 10
(New Zealand only)
SERVICE NEW ZEALAND
ELECTROLUX (NZ) Limited
beefeaterbbq.com
FOR SPARE PARTS
state spare parts centre in New Zealand
FREE CALL 0800 10 66 20
(New Zealand only)

JUN
2026