R
oomba
®
205
DustCompacto
r
™
Vac Combo
robot
Owner's Guide
For more information, visit global.irobot.com2
EN
Getting started
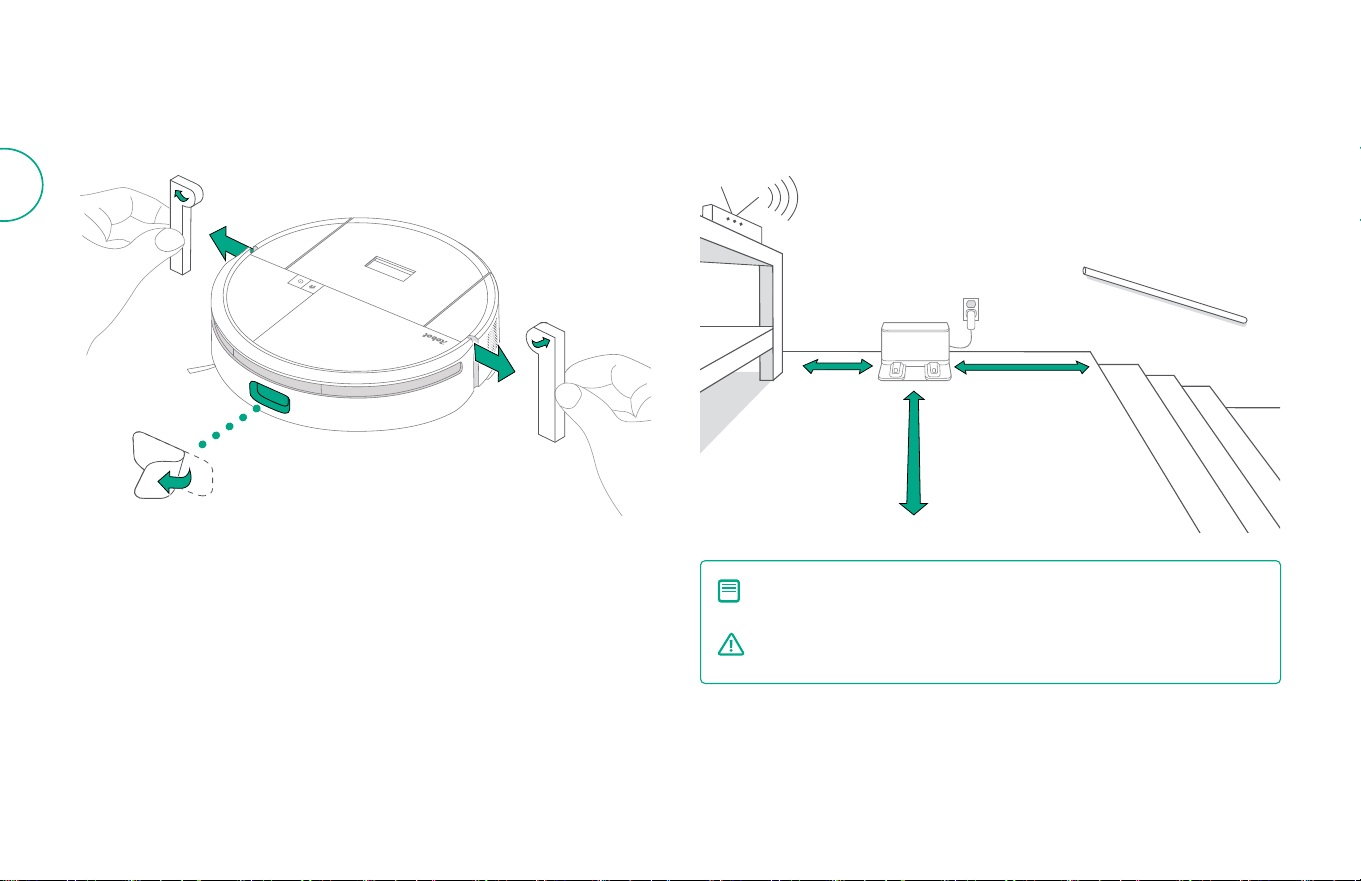
1
Remove protective lm from camera and foam inserts behind bumper 2 Place the dock on hard surface ooring
Good Wi-Fi® Coverage
1.6 ft (0.5 m)
both sides
5 ft (1.5 m)
from stairs
5 ft (1.5 m) in front
NOTE: Do not place it in direct sunlight. Ensure the area around the
dock is free of clutter to improve docking performance.
WARNING: To prevent the risk of your robot falling down stairs, ensure
that your dock is placed at least 5 feet (1.5 meters) away from stairs.
3Roomba® 205 DustCompactor™ Owner’s Guide
EN
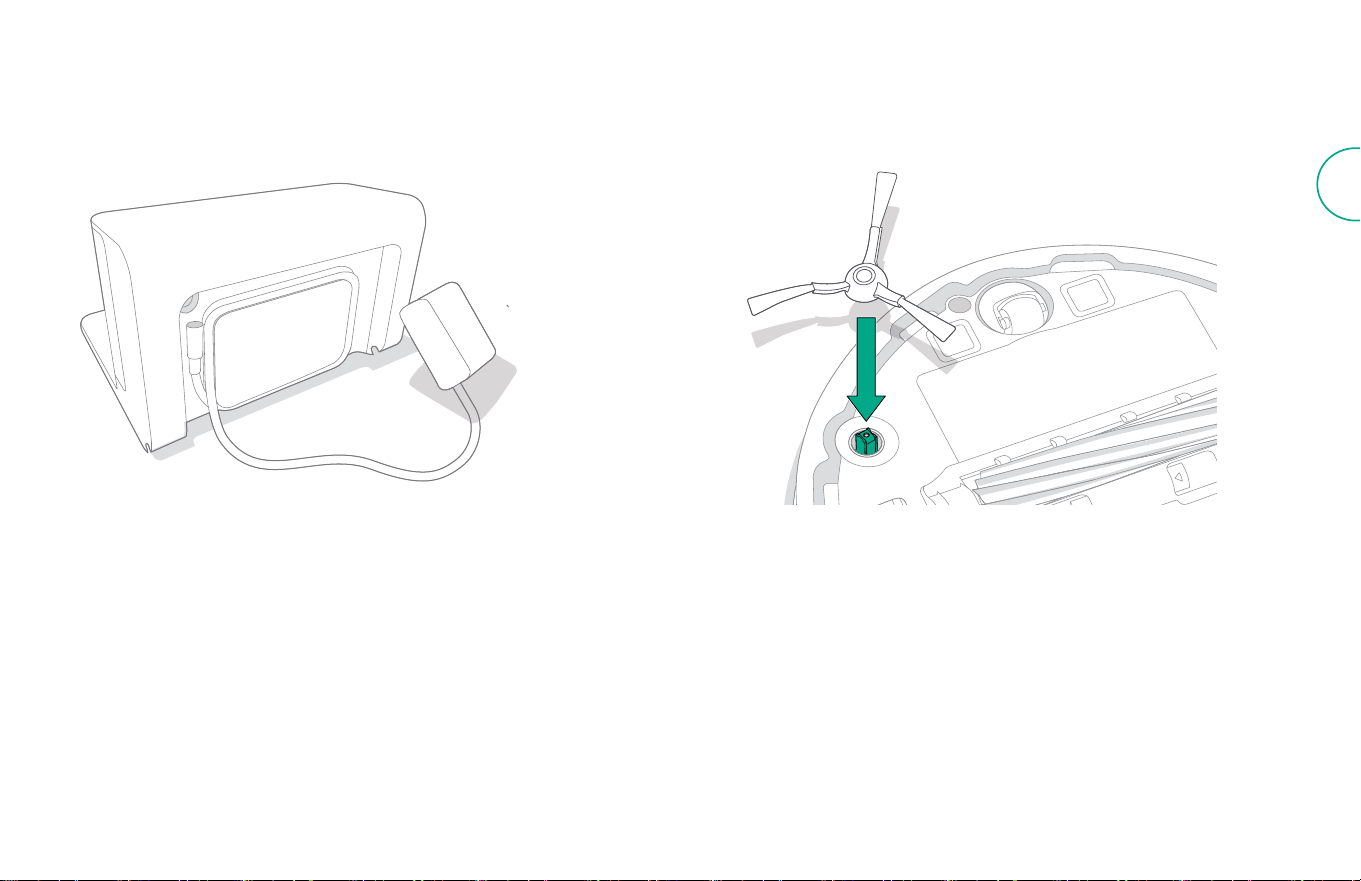
3 Plug in the dock
Plug the power cord into the wall. Wrap the cord back so it won’t get in the way of
the robot as it comes and goes.
4 Install the Edge Sweeping Brush
Align the edge sweeping brush and press down until you hear a click.
For more information, visit global.irobot.com4
EN
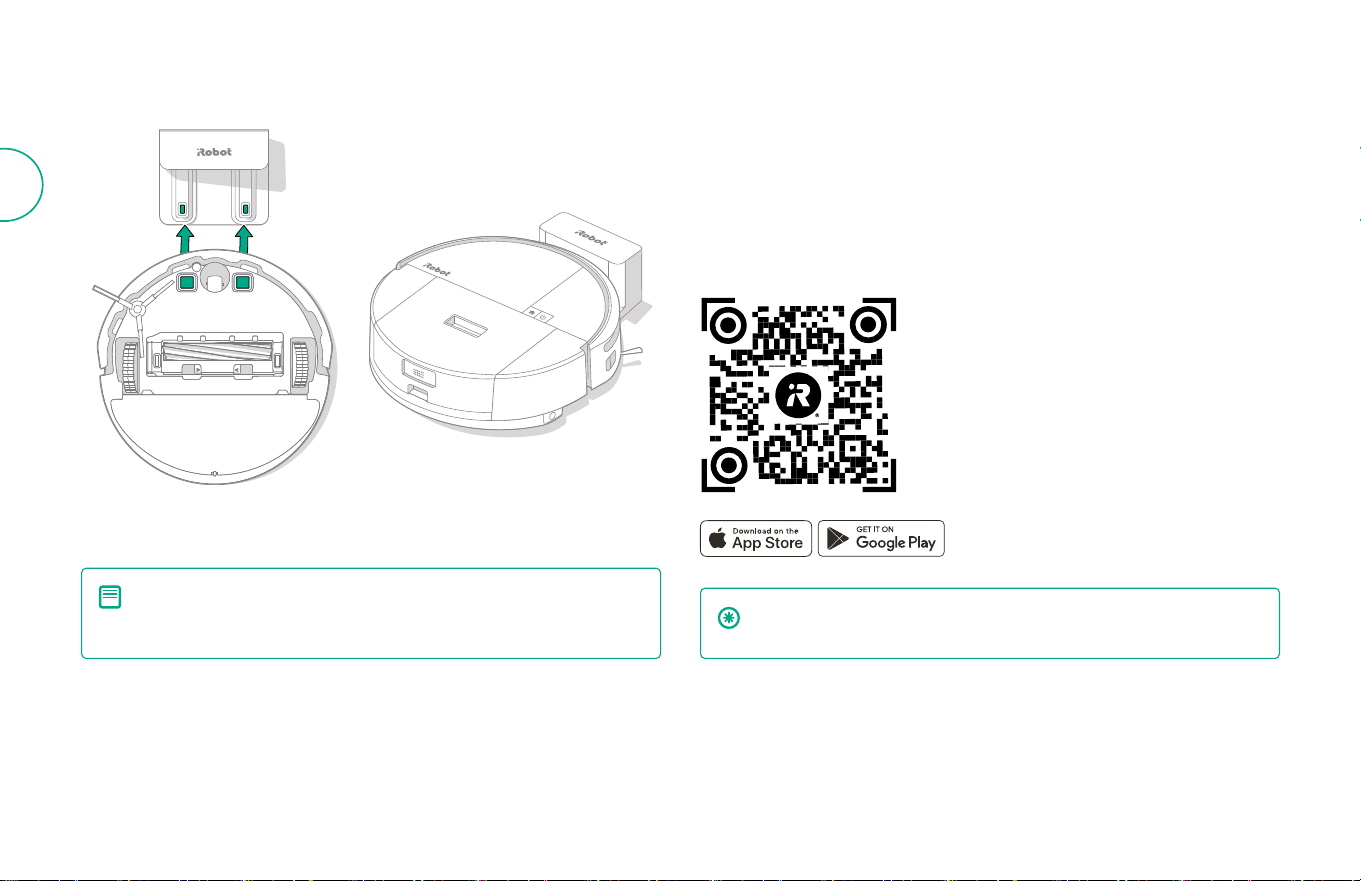
5 Wake up the robot
Place your robot in front of the dock, then slide it toward the dock, lining up the
metal charging contacts. After a few minutes, a sound will let you know it’s awake.
6 Download the Roomba® Home App
Scan the QR code with the camera on your mobile device or nd the Roomba®
Home App in your app store. The app will guide you through steps to setup your
robot. Once your robot is set up in the app, you’ll be able to:
• Control when, where, and how you clean
• Create automatic cleaning schedules
• Set custom cleaning preferences
• Unlock digital features
• Access to tips, tricks, and answers to commonly asked questions
NOTE: Your robot comes with a partial charge, but we recommend
that you charge the robot for 4 hours prior to starting the
rst cleaning.
IMPORTANT: Read enclosed safety information guide rst before
using your robot.

5Roomba® 205 DustCompactor™ Owner’s Guide
EN
About your Roomba® 205 DustCompactor™ Robot
Top View
12
13
14
15
16
14
17
18
19
14
14
16
18
20
22
21
8
9
10
11
Bottom View
1 Bin Release Button
2 Bin Lid Release Button
3 Bin Port
4 Arm Control
5 Home Button
6 Power Button
7 Bumper
8 ClearView™ LiDAR
9 Edge Infrared Sensor
10 Water Tank Release Button
(combo models only)
11 Water Tank (combo models only)
12 Carpet Sensor (combo
models only)
13 Charging Contacts
14 Cli Sensors
15 Edge Sweeping Brush
16 Wheels
17 Multi Surface Brush
18 Brush Cover Release Tab
19 Brush Cover
20 Caster Wheel
21 Pad Plate Attachment
(combo models only)
22 Mop Pad (combo models only)
For more information, visit global.irobot.com6
EN
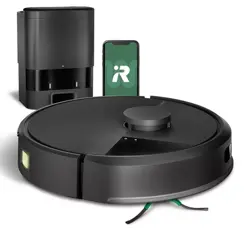
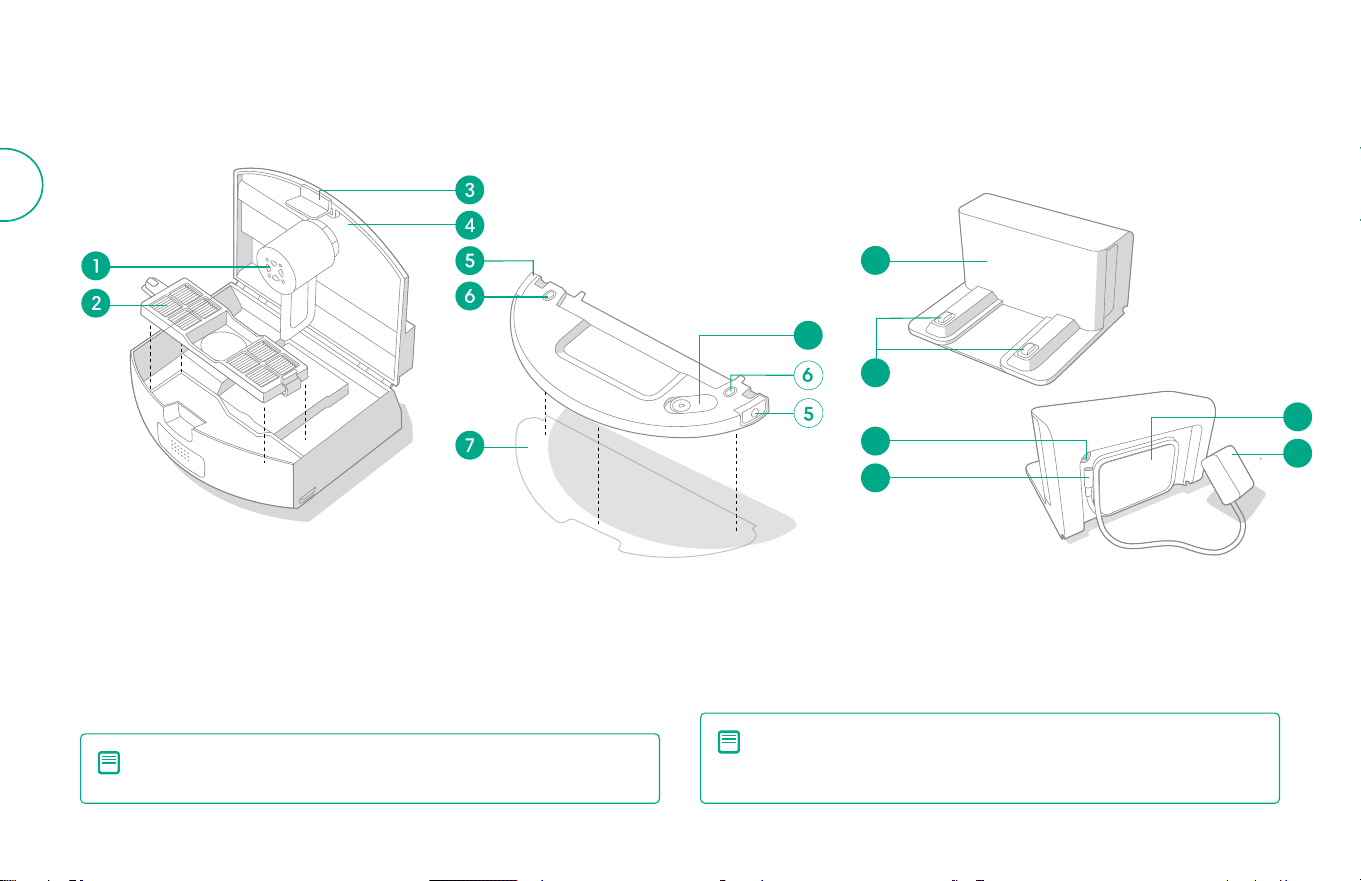
DustCompactor™ Bin Dock
(Place against a wall)
Water Tank
(Combo models only)
About your Roomba® 205 DustCompactor™ Robot
DustCompactor™ Bin
1 Compacting Arm
2 Filter
3 Bin Lid Release Button
4 Bin Lid
Water Tank
5 Water Tank Release Button
6 Electrode Plates
7 Mop Pad
8 Water Tank Cap
Dock
9 IR Window
10 Charging Contacts
11 Power Port
12 Cord Attachment
13 Cord Wrap
14 Plug
NOTE: The DustCompactor™ Bin must be installed for both
vacuuming mode and vacuuming & mopping mode otherwise the
vacuum-mop cannot be turned on.
NOTE: The water tank may contain a small amount of residual water
due to quality inspection. This is normal.
8
9
10
13
14
11
12
7Roomba® 205 DustCompactor™ Owner’s Guide
EN
Charging
Power Icon Indicator
Charging during a cleaning
You robot will return to the dock whenever it needs to recharge. Once it is
suciently charged, it will then resume cleaning where it left o.
Standby mode
Your robot uses a small amount of power whenever it is on the dock. You can put
it in a further-reduced power state when not in use by pressing
for 10 seconds.
To exit low power mode short press
button.
Storing your robot
For long-term storage, turn o your robot by removing it from the dock and
holding
for 10 seconds. Store in a cool, dry place.
Dock
(Place against a wall)
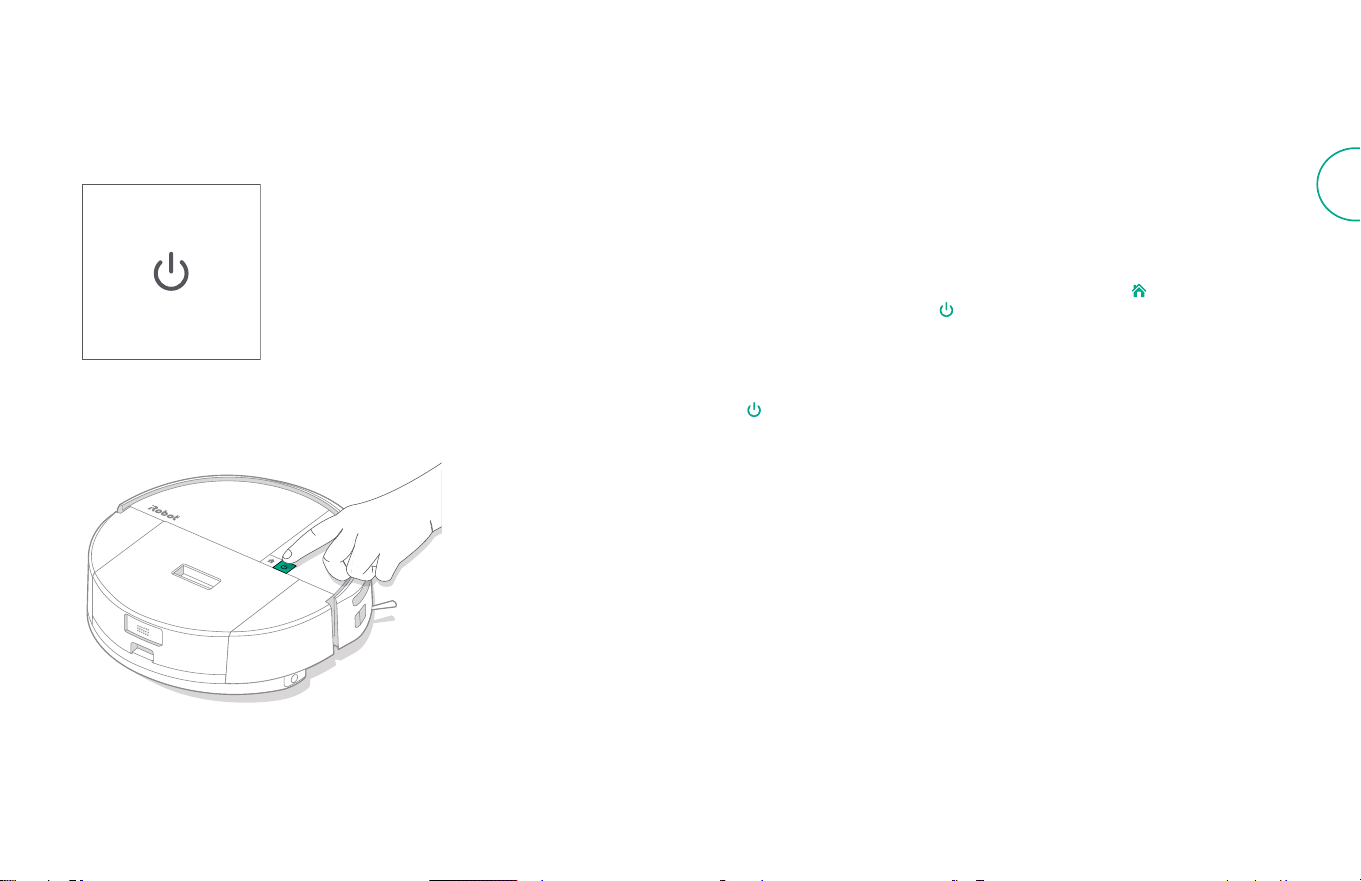
Powering on
POWER Button
White - Fully charged and connected
Flashing White - Return to dock to charge
Pulsing White - Charging (low battery) -
If the user tries to start a mission the buttons
will then FLASH Red and trigger an audio
telling users it can't start due to low battery.
Flashing Red - Low battery/Error
For more information, visit global.irobot.com8
EN
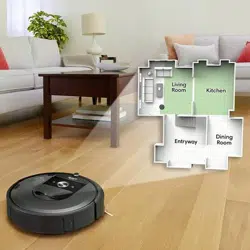
Cleaning
Button Controls Cleaning Pattern
Your robot will automatically explore and clean your home in neat rows. It will
return to the dock at the end of a cleaning routine whenever it needs to recharge.
Tips:
• Remove excess clutter from oors before cleaning.
• Use your robot frequently to maintain well-conditioned oors.
After 90 minutes of inactivity o the dock, your robot will automatically end its
cleaning. If you are unsure if it is nished or paused, visit the Roomba® Home App
to check on its status.
Spot clean
Tap button two times to spot clean a designated area.
After spot clean is complete, your robot will end the job.
Press
To send it back to its dock.
NOTE: It is highly recommended to use the Roomba® Home App
for cleaning control. The mobile app can be used to clean specic
rooms, setup cleaning routines, and create automations/schedules.
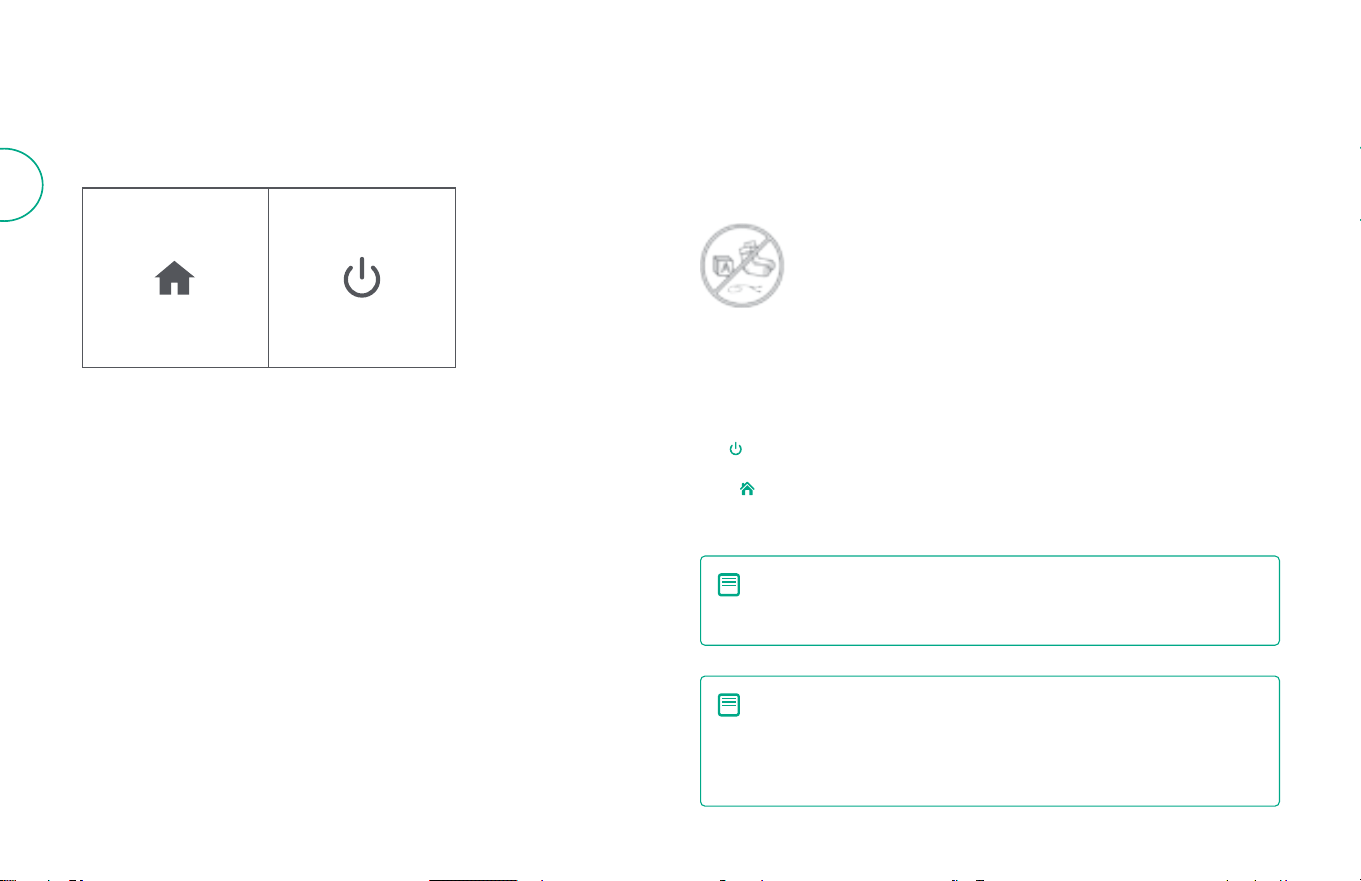
HOME button: Tap to send the robot home
Press when running to pause
Press when paused to dock
Press when docking to stop
POWER button: Tap to Start / Pause / Resume a job
Hold for 3 seconds to turn on
Hold for 10 seconds to turn o
NOTE: Roomba robots are generally designed to be used on most
oor types for vacuuming. We do not recommend using mopping
functions on unsealed hardwood oors and certain laminate/
vinyl planks due to potential water damage to the ooring and/or
suboor. For more info, please visit global.irobot.com..
9Roomba® 205 DustCompactor™ Owner’s Guide
EN
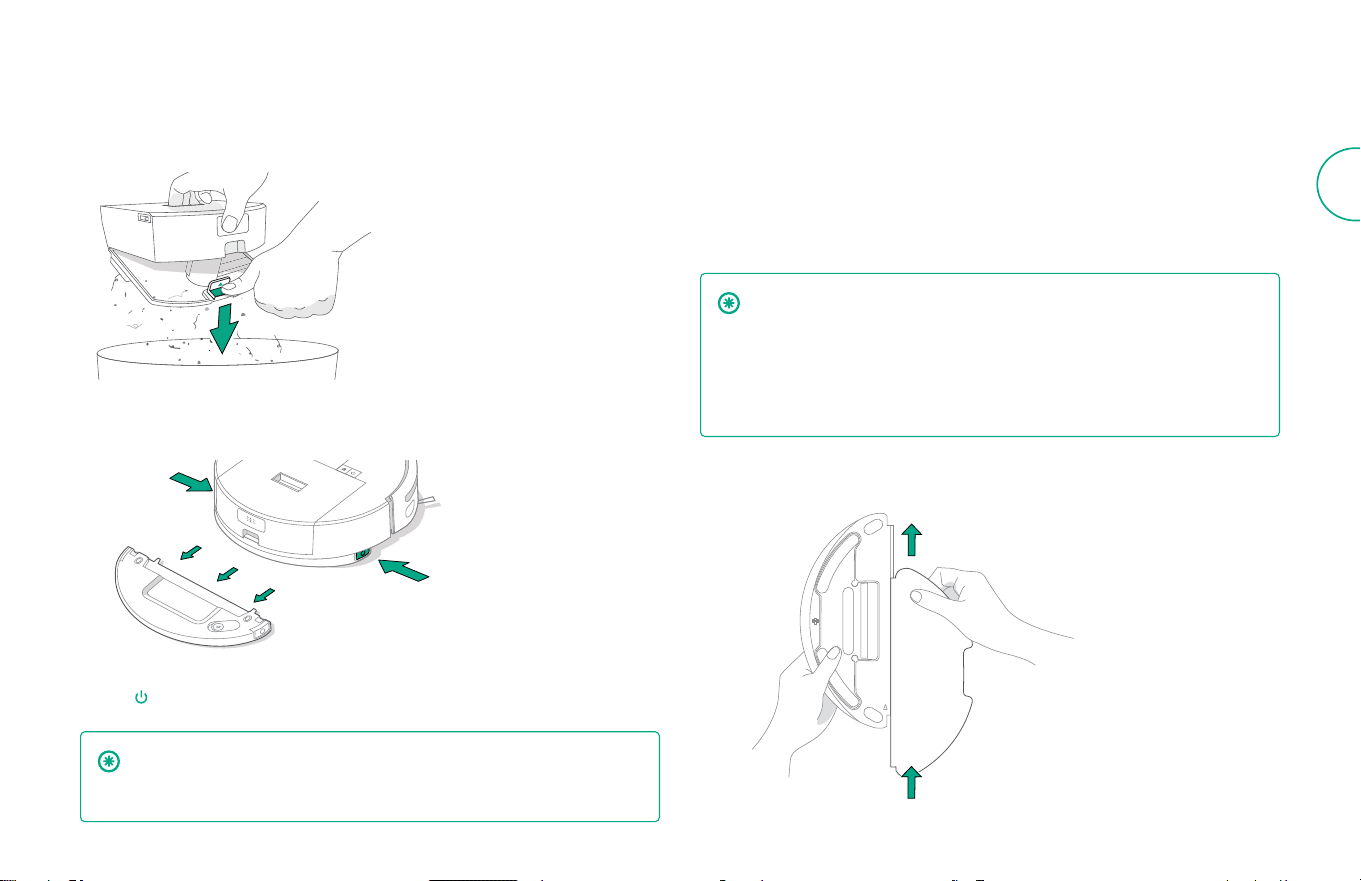
Vacuuming Only
1
If DustCompactor™ Bin is full, empty before starting a cleaning.
2
Remove water tank and mop pad, by pressing the tank release buttons on
both sides of the robot to slide out.
3
To start cleaning, place the robot back on dock and use the app or press
the
button.
Vacuuming and Mopping
(combo models only)
Your robot is able to both vacuum and mop at the same time when the water tank
and mop pad are installed.
Your robot will automatically avoid carpets in vac + mop or mop-only cleaning
modes when water tank and mop pad are installed.
IMPORTANT: Do not add liquids such as hot water, detergent, or
disinfectant as they could damage the robot. Only use cold water or
iRobot approved cleaning solution as shown on our support site at
global.irobot.com.
After completing your mopping and vacuum cleaning, make sure to
empty the water tank and replace the mop pad.
1
Slide the mop pad along the slot of the water tank, and then attach the pad
rmly onto the velcro.
IMPORTANT: Regularly cleaning the DustCompactor™ Bin can
prevent dirt from building up. Otherwise, the performance of the
vacuum-mop may be reduced.
For more information, visit global.irobot.com10
EN
2
Fill the tank with water by opening tank lid, lling the tank with water, and
reattaching the lid.
CAUTION: Do not rinse the water tank or immerse it in water. To
avoid corrosion and damage, do not use any detergent, disinfectant,
solid cleaner, or other cleaning products on the water tank.
CAUTION: Do not add hot water to the water tank, as this may cause
it to become deformed.
3
Reinstall water tank. Slide the water tank horizontally into the bottom of the
robot until it clicks into place.
NOTE: If your robot needs water in the middle of a job, tap the
button or press PAUSE in mobile app to pause. Remove tank,
add water, and reinstall the tank. Press
button or RESUME in
app., to resume.
4
Place the robot back on the dock and use app or button to start cleaning.
NOTE: Before using, wipe the electrode plates of the water tank
clean with a dry cloth.
11Roomba® 205 DustCompactor™ Owner’s Guide
EN
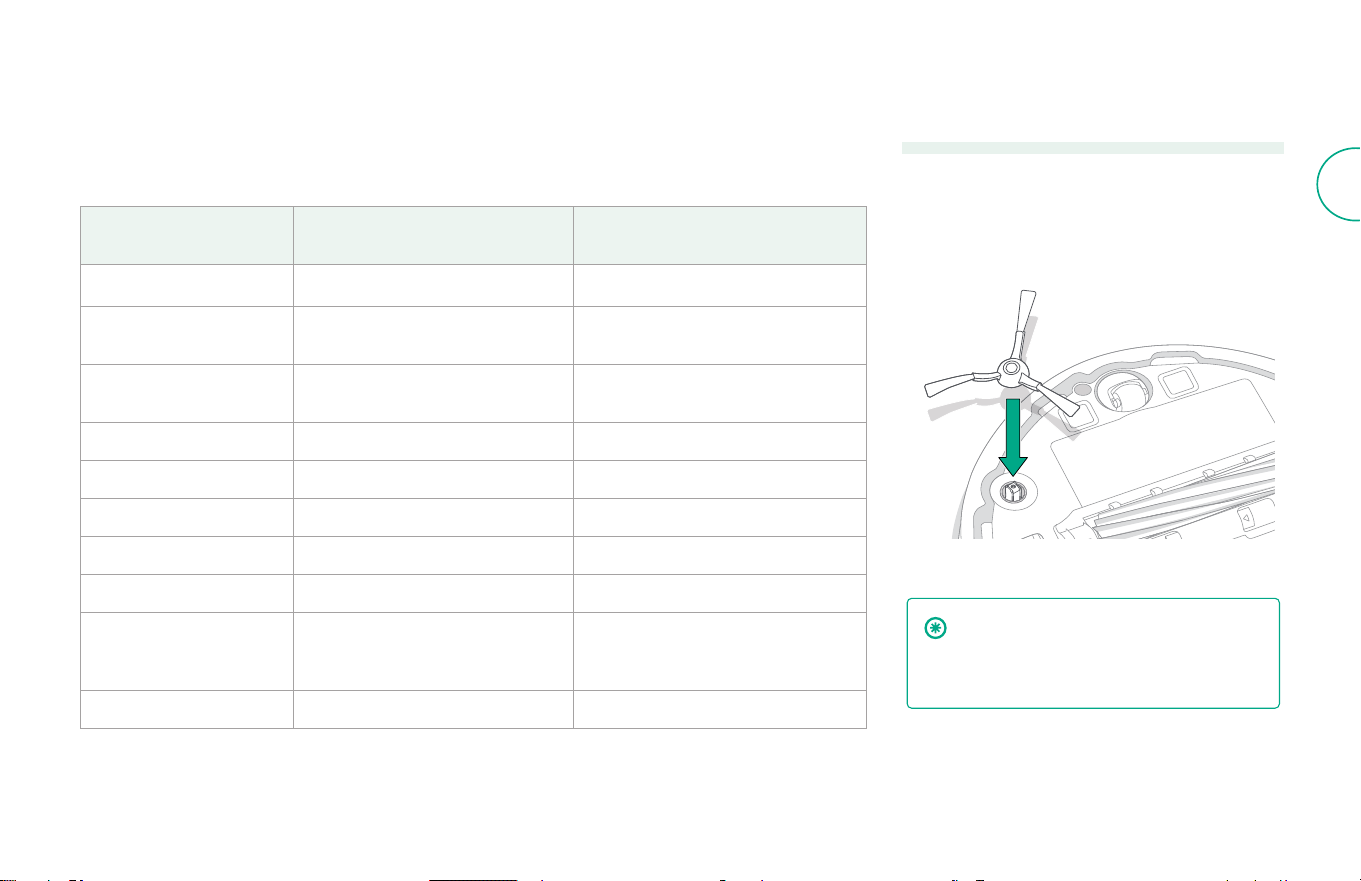
Care and maintenance for your robot
To keep your robot at optimal performance, make sure you periodically perform the following basic care &
maintenance. There are additional instructional videos in the Roomba® Home App. If you notice your robot
picking up less debris from your oor, empty the bin, clean the lter, and clean the brushes.
Part Care Frequency Replacement Frequency*
DustCompactor™ bin
Empty bin as needed
-
Water tank
(combo models only)
Empty after each job -
Filter
Clean once a week
(twice a week if you have a pet)
Every 3-6 months
Edge sweeping brush
Clean every 2 weeks or as needed
Every 3-6 months
Multi-surface brush
Clean once a week
Every 6-12 months
Front caster wheel
Clean every 2 weeks or as needed
-
Charging contacts
Clean every 2 weeks or as needed
-
Sensors
Clean once a month or as needed
-
Mop pad
(combo models only)
Clean after mopping
Every 3-6 months. Dispose in
household waste when no longer
usable
Brush cover
Inspect every 6 months
Replace if worn or damaged
* Replacement frequency may vary. Parts should be replaced if visible wear appears. If you think you need a replacement part,
please contact iRobot Customer Care for more information.
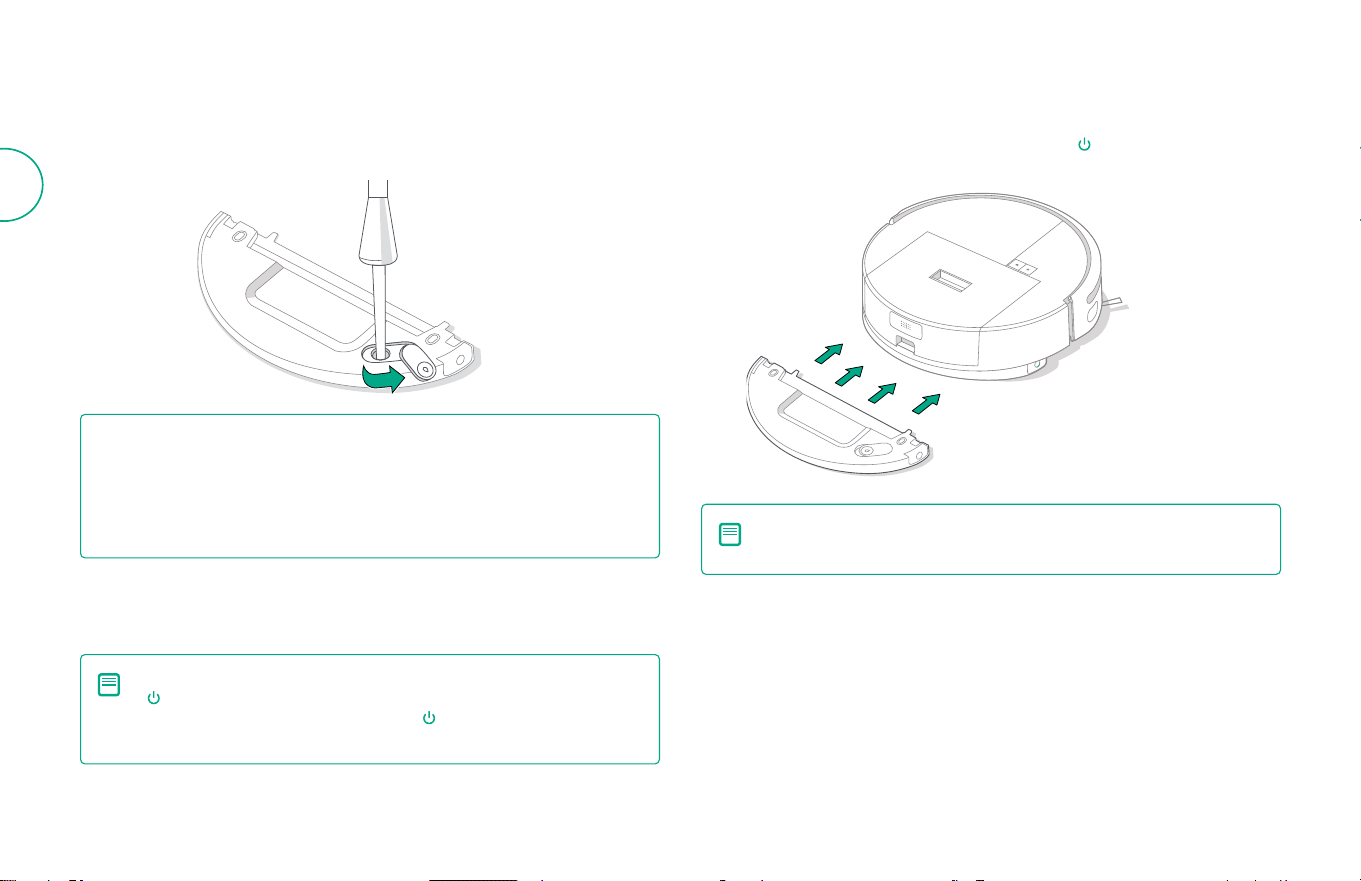
Cleaning the Edge-Sweeping Brush
Pull to remove the edge-sweeping brush. Remove
any hair or debris using the cleaning brush, then
reinstall the edge-sweeping brush.
IMPORTANT: It is recommended to
replace the edge-sweeping brush
every 3–6 months for an optimal
cleaning eect.
For more information, visit global.irobot.com12
EN
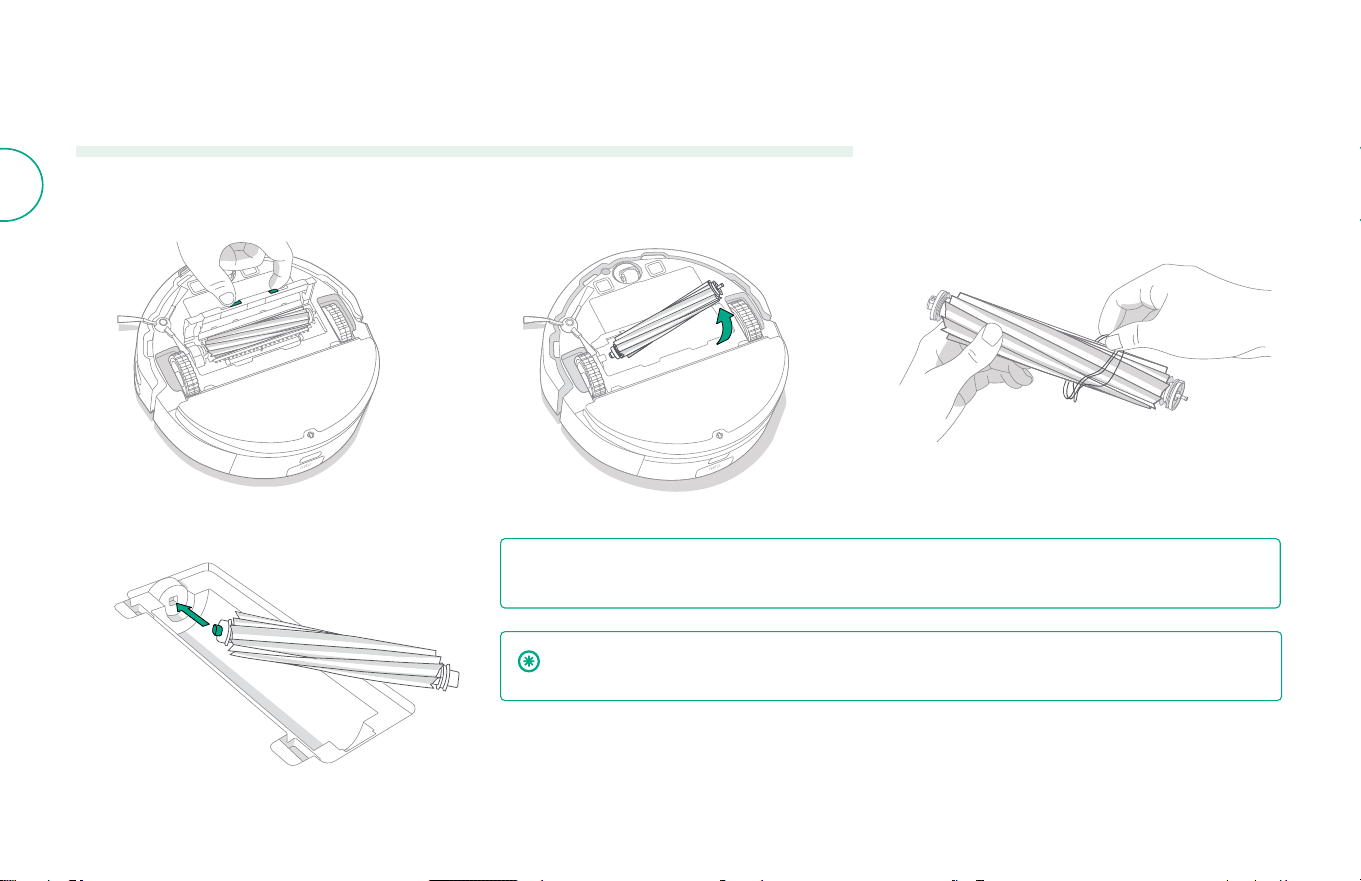
1
Press the brush cover release tabs and lift to
remove brush cover.
2
Remove the multi-surface brush.
3
Remove any hair and debris from the
cleaning brush.
NOTE: For instructions to perform a deeper cleaning of the multi-surface brush, see
global.irobot.com
Cleaning the Multi-Surface Brush
IMPORTANT: It is recommended to replace the main brush every 6-12 months for an optimal
cleaning eect.
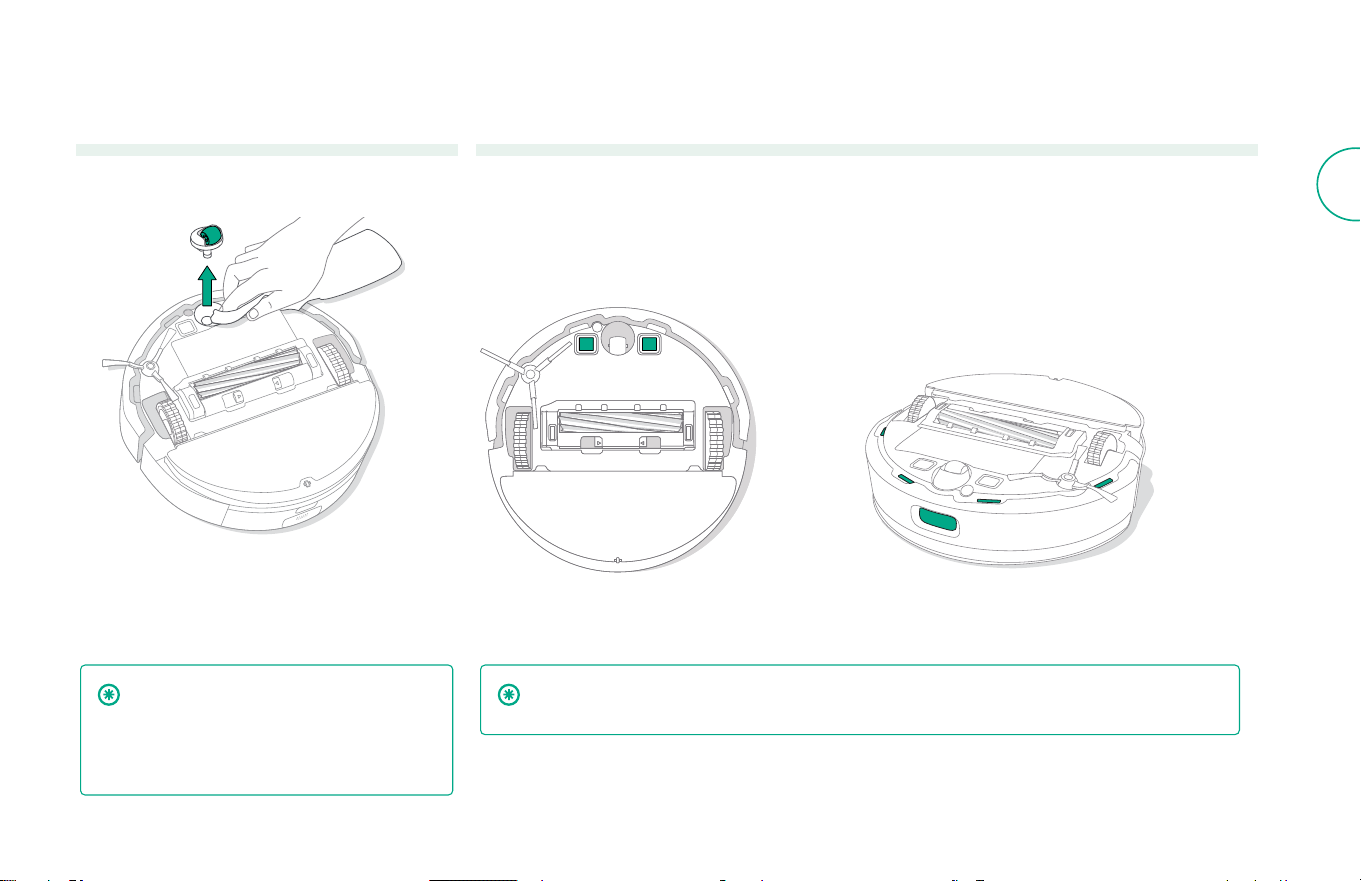
4
Reinstall the multi-surface brush and brush cover in
the robot.
13Roomba® 205 DustCompactor™ Owner’s Guide
EN
Cleaning the Front Caster Wheel
1
Pull the caster wheel upwards to remove.
2
Remove hair and debris from the front caster
wheel and the caster wheel cavity.
3
Reinstall the caster wheel.
Cleaning the Charging Contacts and Sensors
Unplug dock from wall and wipe charging contacts and sensors with a clean, dry cloth or lightly dampened
melamine foam.
CHARGING CONTACTS SENSORS
IMPORTANT: A front wheel clogged with
hair and debris could result in damage
to your oor. If the wheel is not spinning
freely after you have cleaned it, please
contact Customer Care.
IMPORTANT: Do not use spray cleaning solution, detergents or water onto the sensors or
sensor openings.
For more information, visit global.irobot.com14
EN
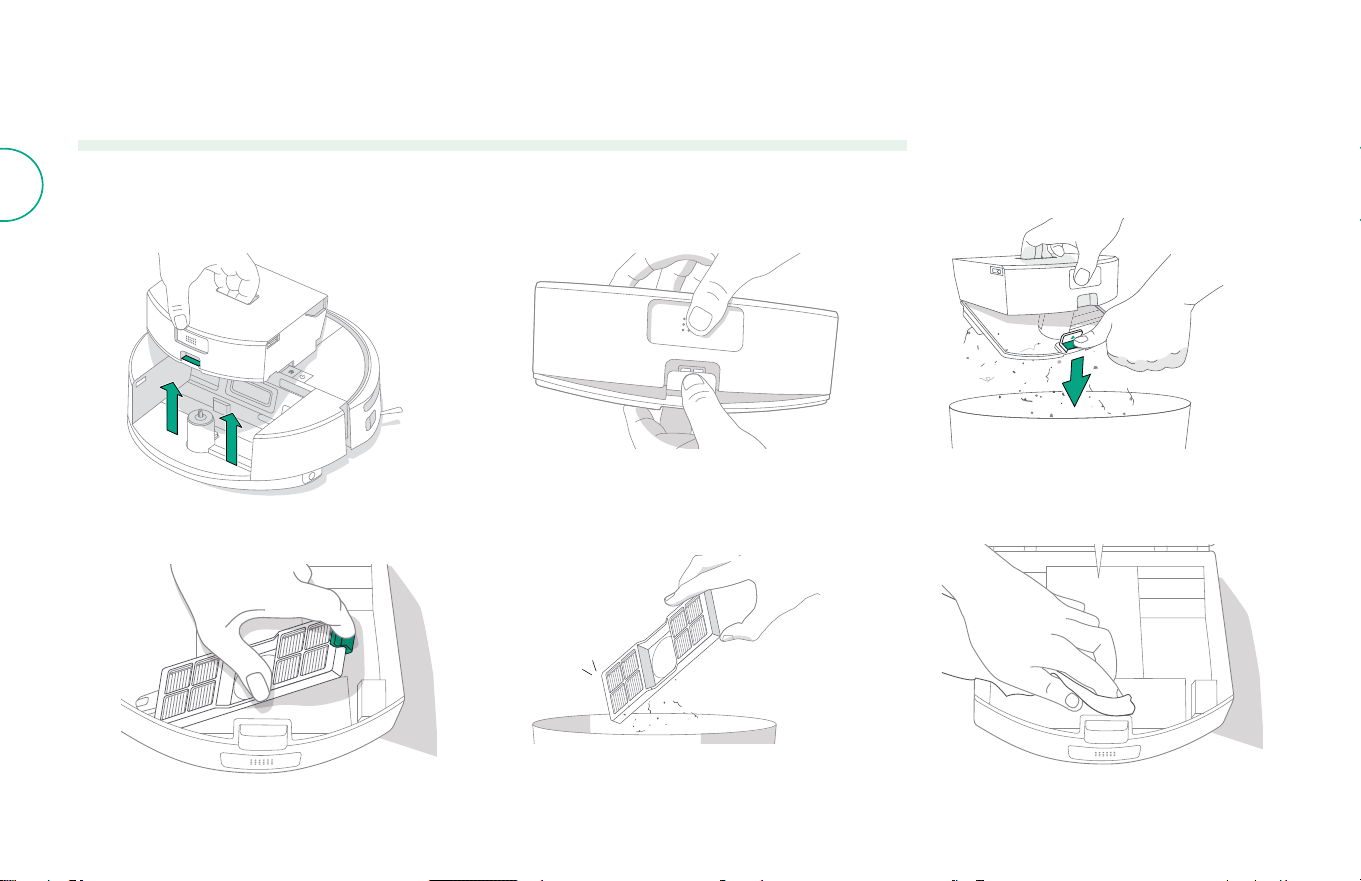
4
Remove the lter by pinching the tab and
pulling the lter out.
5
Remove debris by tapping the lter against your
trash container.
6
Wipe the Bin with clean cloth.
1
Press the DustCompactor™ bin release button
to remove the bin.
2
Make sure bin is upright, and over the trash,
push the release tab to open the bin.
3
Empty contents into the trash.
Emptying the DustCompactor™ Bin and Cleaning the Filter
15Roomba® 205 DustCompactor™ Owner’s Guide
EN
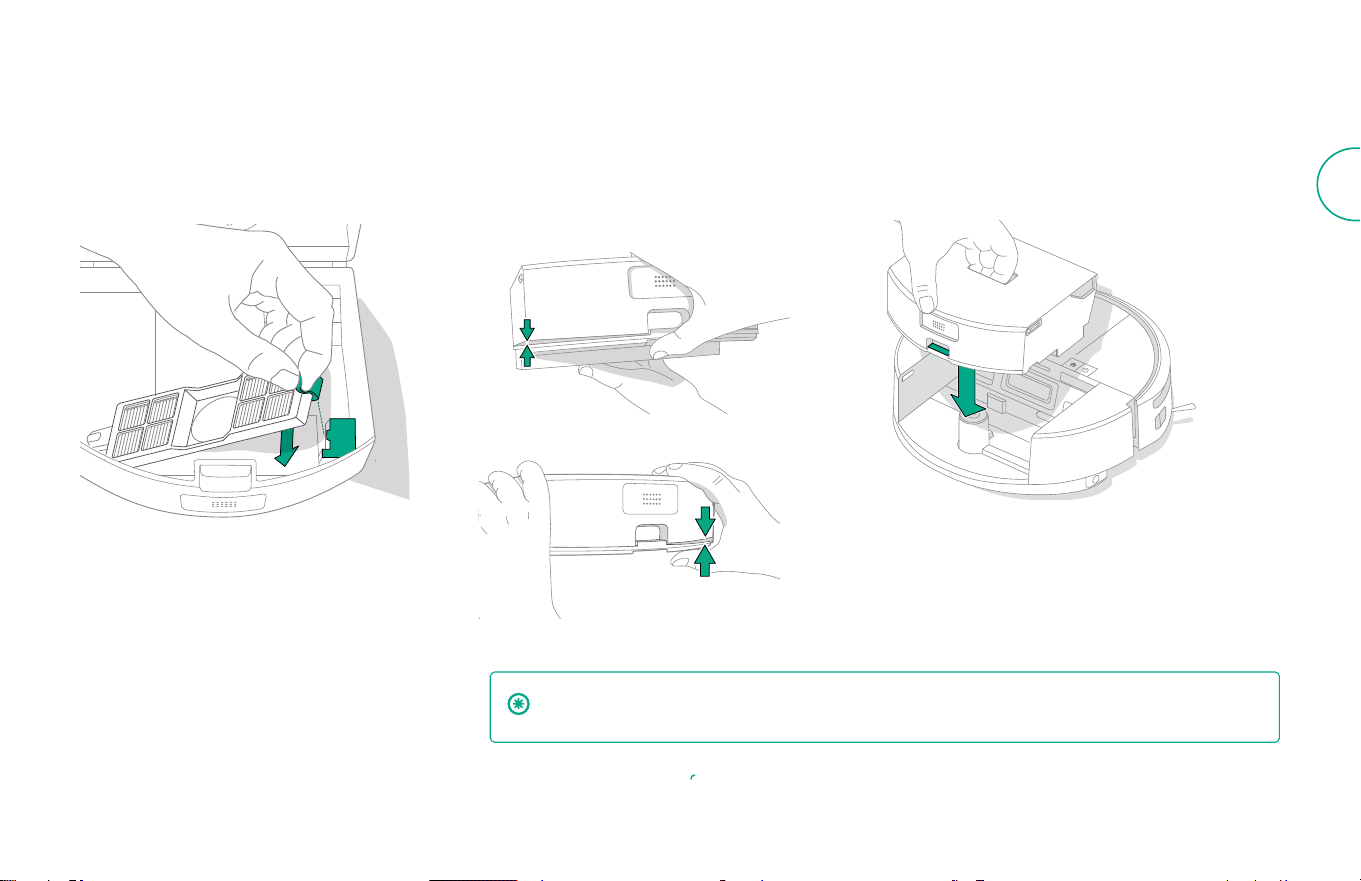
7
Reinsert lter.
8
Securely close bin by closing latch and
ensuring all sides are sealed
9
Place bin back in robot.
IMPORTANT: Squeeze all gaps that may exist around perimeter of lid. A proper seal on the bin is
required for optimal operation.
For more information, visit global.irobot.com16
EN
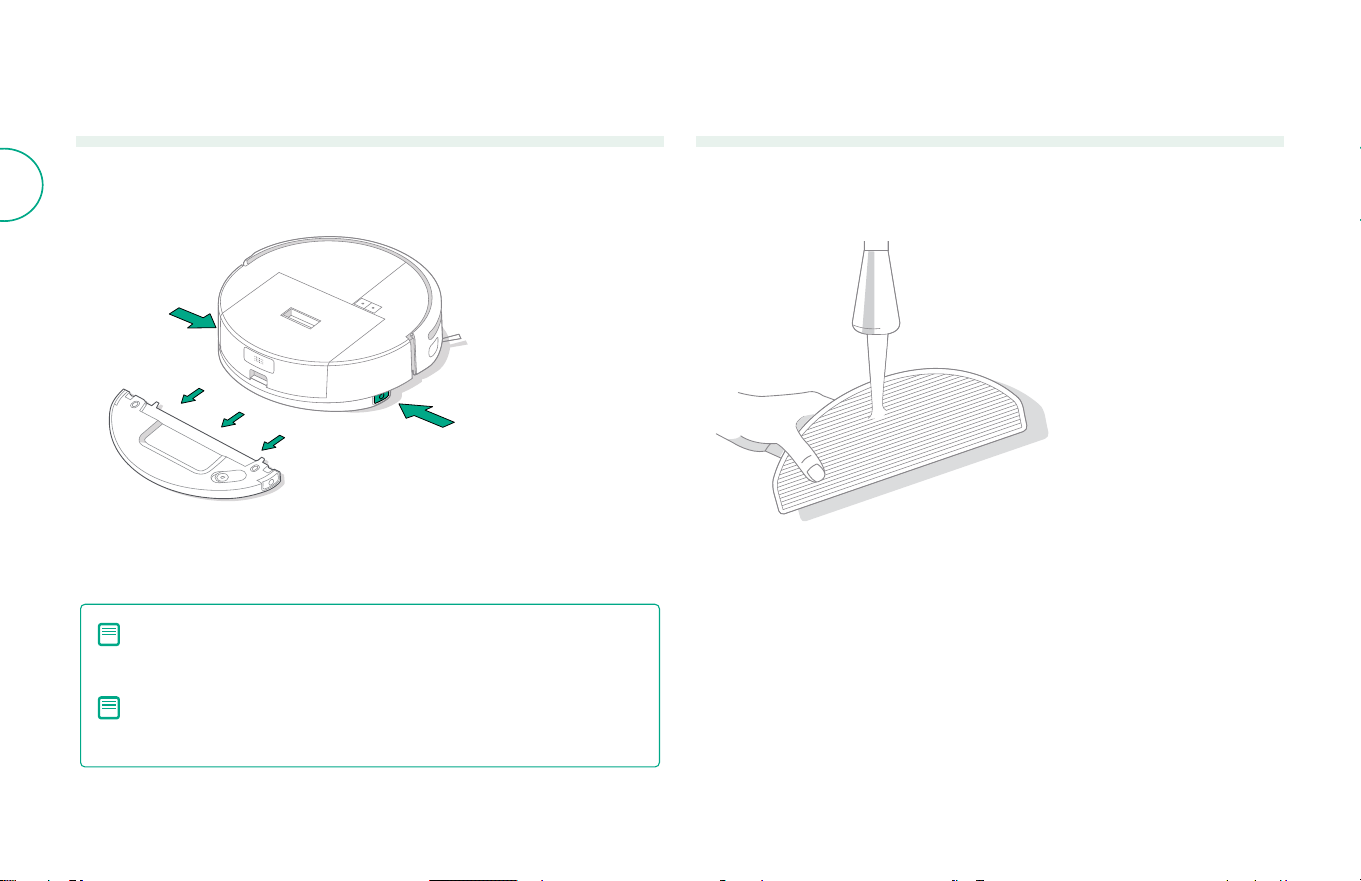
Cleaning the water tank (Combo models only)
1
Simultaneously press and hold both the release buttons of the water tank, and
then slide it out from the bottom of the vacuum-mop as illustrated.
2
Empty old water, rinse with fresh water.
3
Dry exterior of the tank well before reinstalling into robot
NOTE: If you use detergent to clean the tank, only use dish soap and
be sure to rinse thoroughly before using in robot again. Soap can
damage the robot during operation
NOTE: After mopping, immediately remove the water tank, empty
out any remaining water, and clean and dry the mop pad to prevent
lingering odor and mildew.
Cleaning the mopping pad
Thoroughly hand wash the mopping pad with cold water and let it air dry.
17Roomba® 205 DustCompactor™ Owner’s Guide
EN
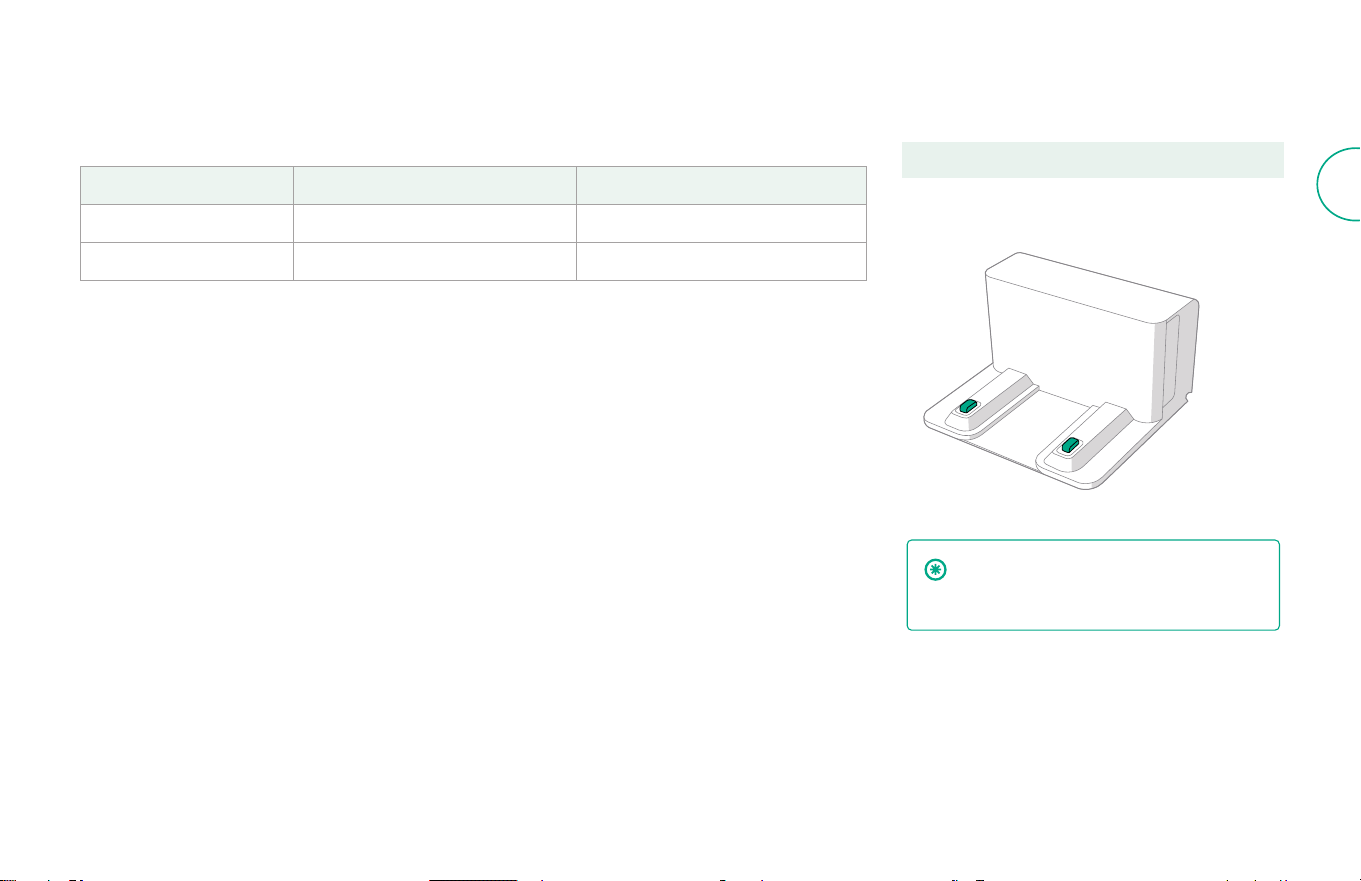
Care and maintenance for your dock
To keep your dock running at optimal performance, perform the procedures on the following pages.
Part
Care Frequency
Replacement Frequency*
Charging contacts
Clean once a month
-
IR window
Clean once a month
-
* Replacement frequency may vary. Parts should be replaced if visible wear appears. If you think you need a replacement part,
please contact iRobot Customer Care for more information.
Cleaning the charging contacts
and IR window
Inspect the components to make sure that they are
clear of debris. Wipe with a clean, dry cloth.
IMPORTANT: Do not spray cleaning
solution or water onto the sensors or
sensor openings.
For more information, visit global.irobot.com18
EN
Troubleshooting
Troubleshooting your robot
Your robot will alert you if something is wrong with a voice announcement or
audio alert. The Roomba® Home App will also provide notications with steps to
troublehoot any issues.
If you are unsure if the robot is nished or paused, consult the Roomba® Home
app to check on its status.
Factory Reset
To factory reset press for 5 seconds and then (within 5 seconds) press +
for 5 seconds.
BATTERY SAFETY & SHIPPING
WARNING: Lithium ion batteries and products that contain lithium
ion batteries are subject to stringent transportation regulations. If
you need to ship this product for service, travel or any other reason,
you MUST follow the below shipping instructions.
• Battery MUST be turned o before shipping.
• Turn o the battery by removing the robot from the dock and holding down the
button for 10 seconds. Press the bumper in for 10 seconds while holding the
button. All indicators will then turn o.
• Package the robot securely for shipping.
If you need further assistance, please visit your Roomba® Home app, contact our
Customer Care team or visit global.irobot.com.
Troubleshooting your dock
If the dock is not performing as expected, check the Roomba® Home app
for errors.

Need further assistance? We’re here to help.
Download the Roomba® Home App or visit global.irobot.com for product support or to
contact your local support center. If you need further assitance in the US & Canada, call the
US Customer Care team at (877) 855-8593.
iRobot USA Customer Care Hours
Monday to Friday, 9AM — 9PM Eastern Time
Saturday and Sunday 9AM — 6PM Eastern Time
Satety Information
Please see the safety guide that came with your robot, or visit global.irobot.com
4851446 vB
WC# 4851446 vA

For more information, visit global.irobot.com20
EN
©2025 iRobot Corporation, 8 Crosby Drive, Bedford, MA 01730 USA. All rights reserved.
iRobot, Roomba, DustCompactor and Roomba Combo are registered trademarks of iRobot
Corporation. Wi-Fi and the Wi-Fi logo are registered trademarks of Wi-Fi Alliance. Apple and
App Store are trademarks of Apple Inc., registered in the U.S. and other countries. Google Play
is a trademark of Google LLC.