Operating Instructions for the
Planar-Cart
Accessory
Stability & An-Tip Safety
Planar is designed to be mounted to a wall or used in
close relaonship with a wall for opmal performance.
When used in a freestanding posion, it may p if
subjected to sucient force.
REL strongly recommends installing the included
an-p restraint in all freestanding applicaons,
especially in environments with children, pets, or
high foot trac.
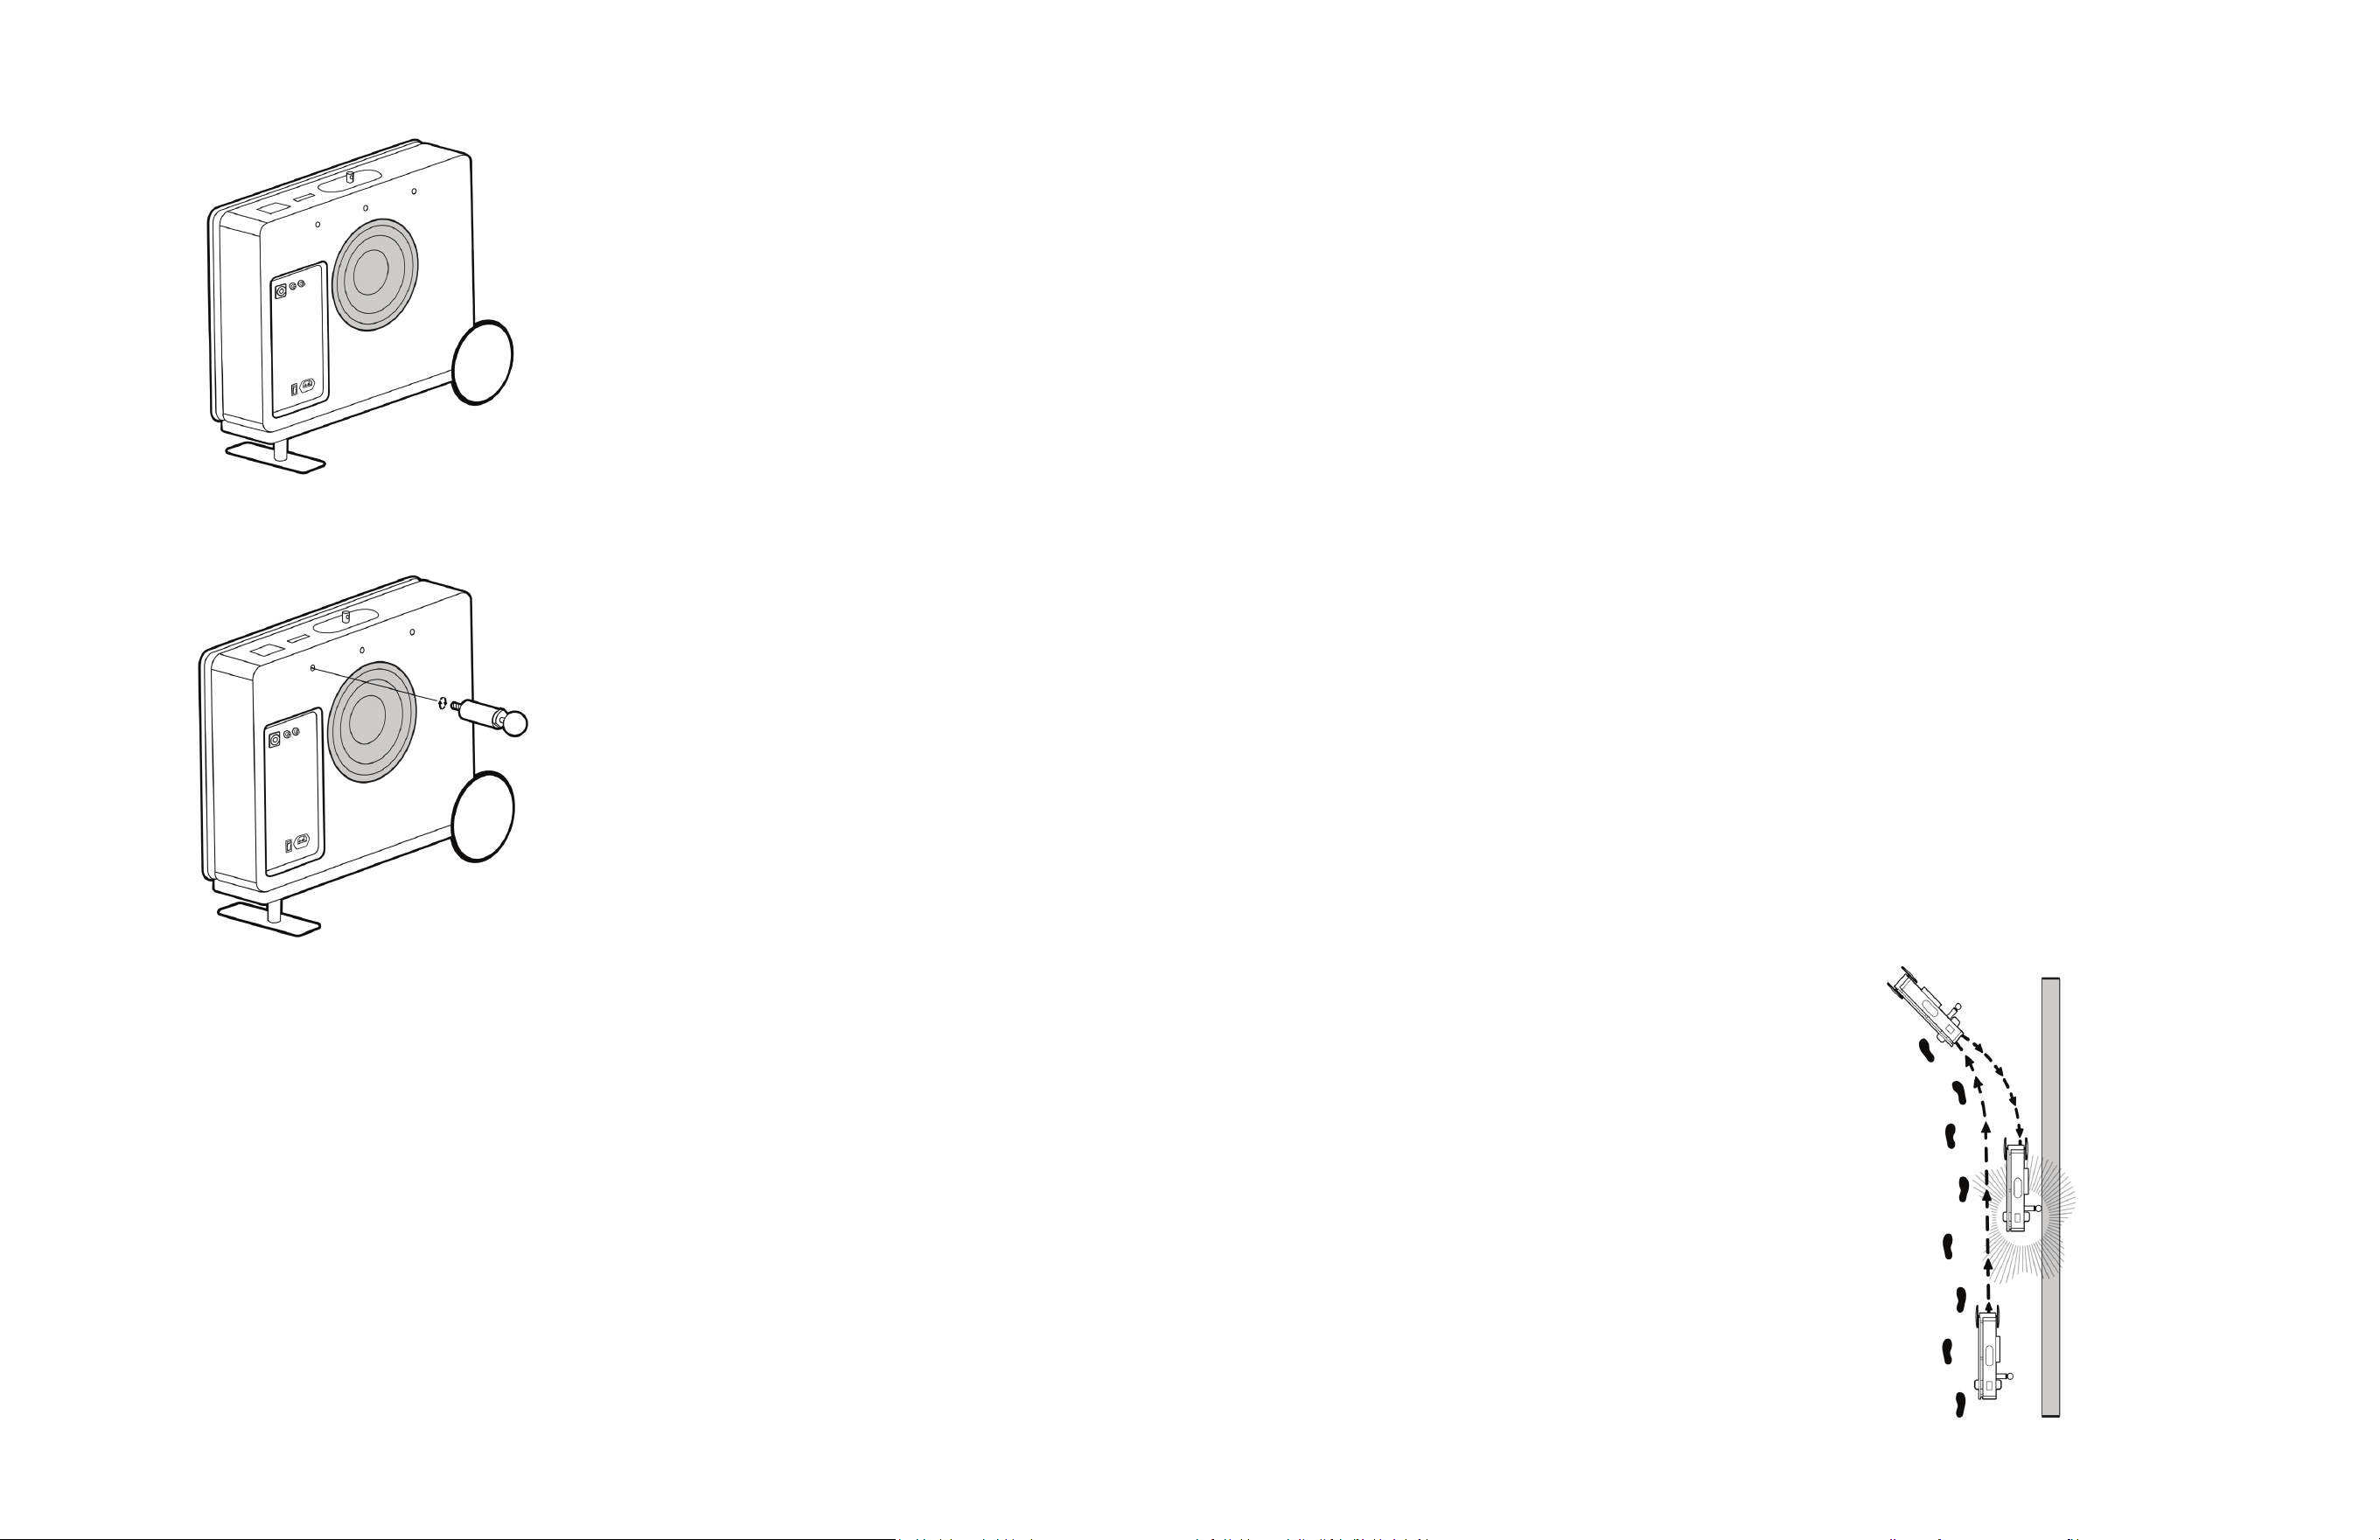
Installing the An-Tip Restraint
The An-Tip Restraint is comprised of a wall tether
block that will mount onto the back of your Planar
subwoofer’s cabinet, hardware that will screw into
your wall, and a tether that will anchor these pieces
together. For safe operaon when Planar is used in
a freestanding posion, install the included an-p
restraint as follows:
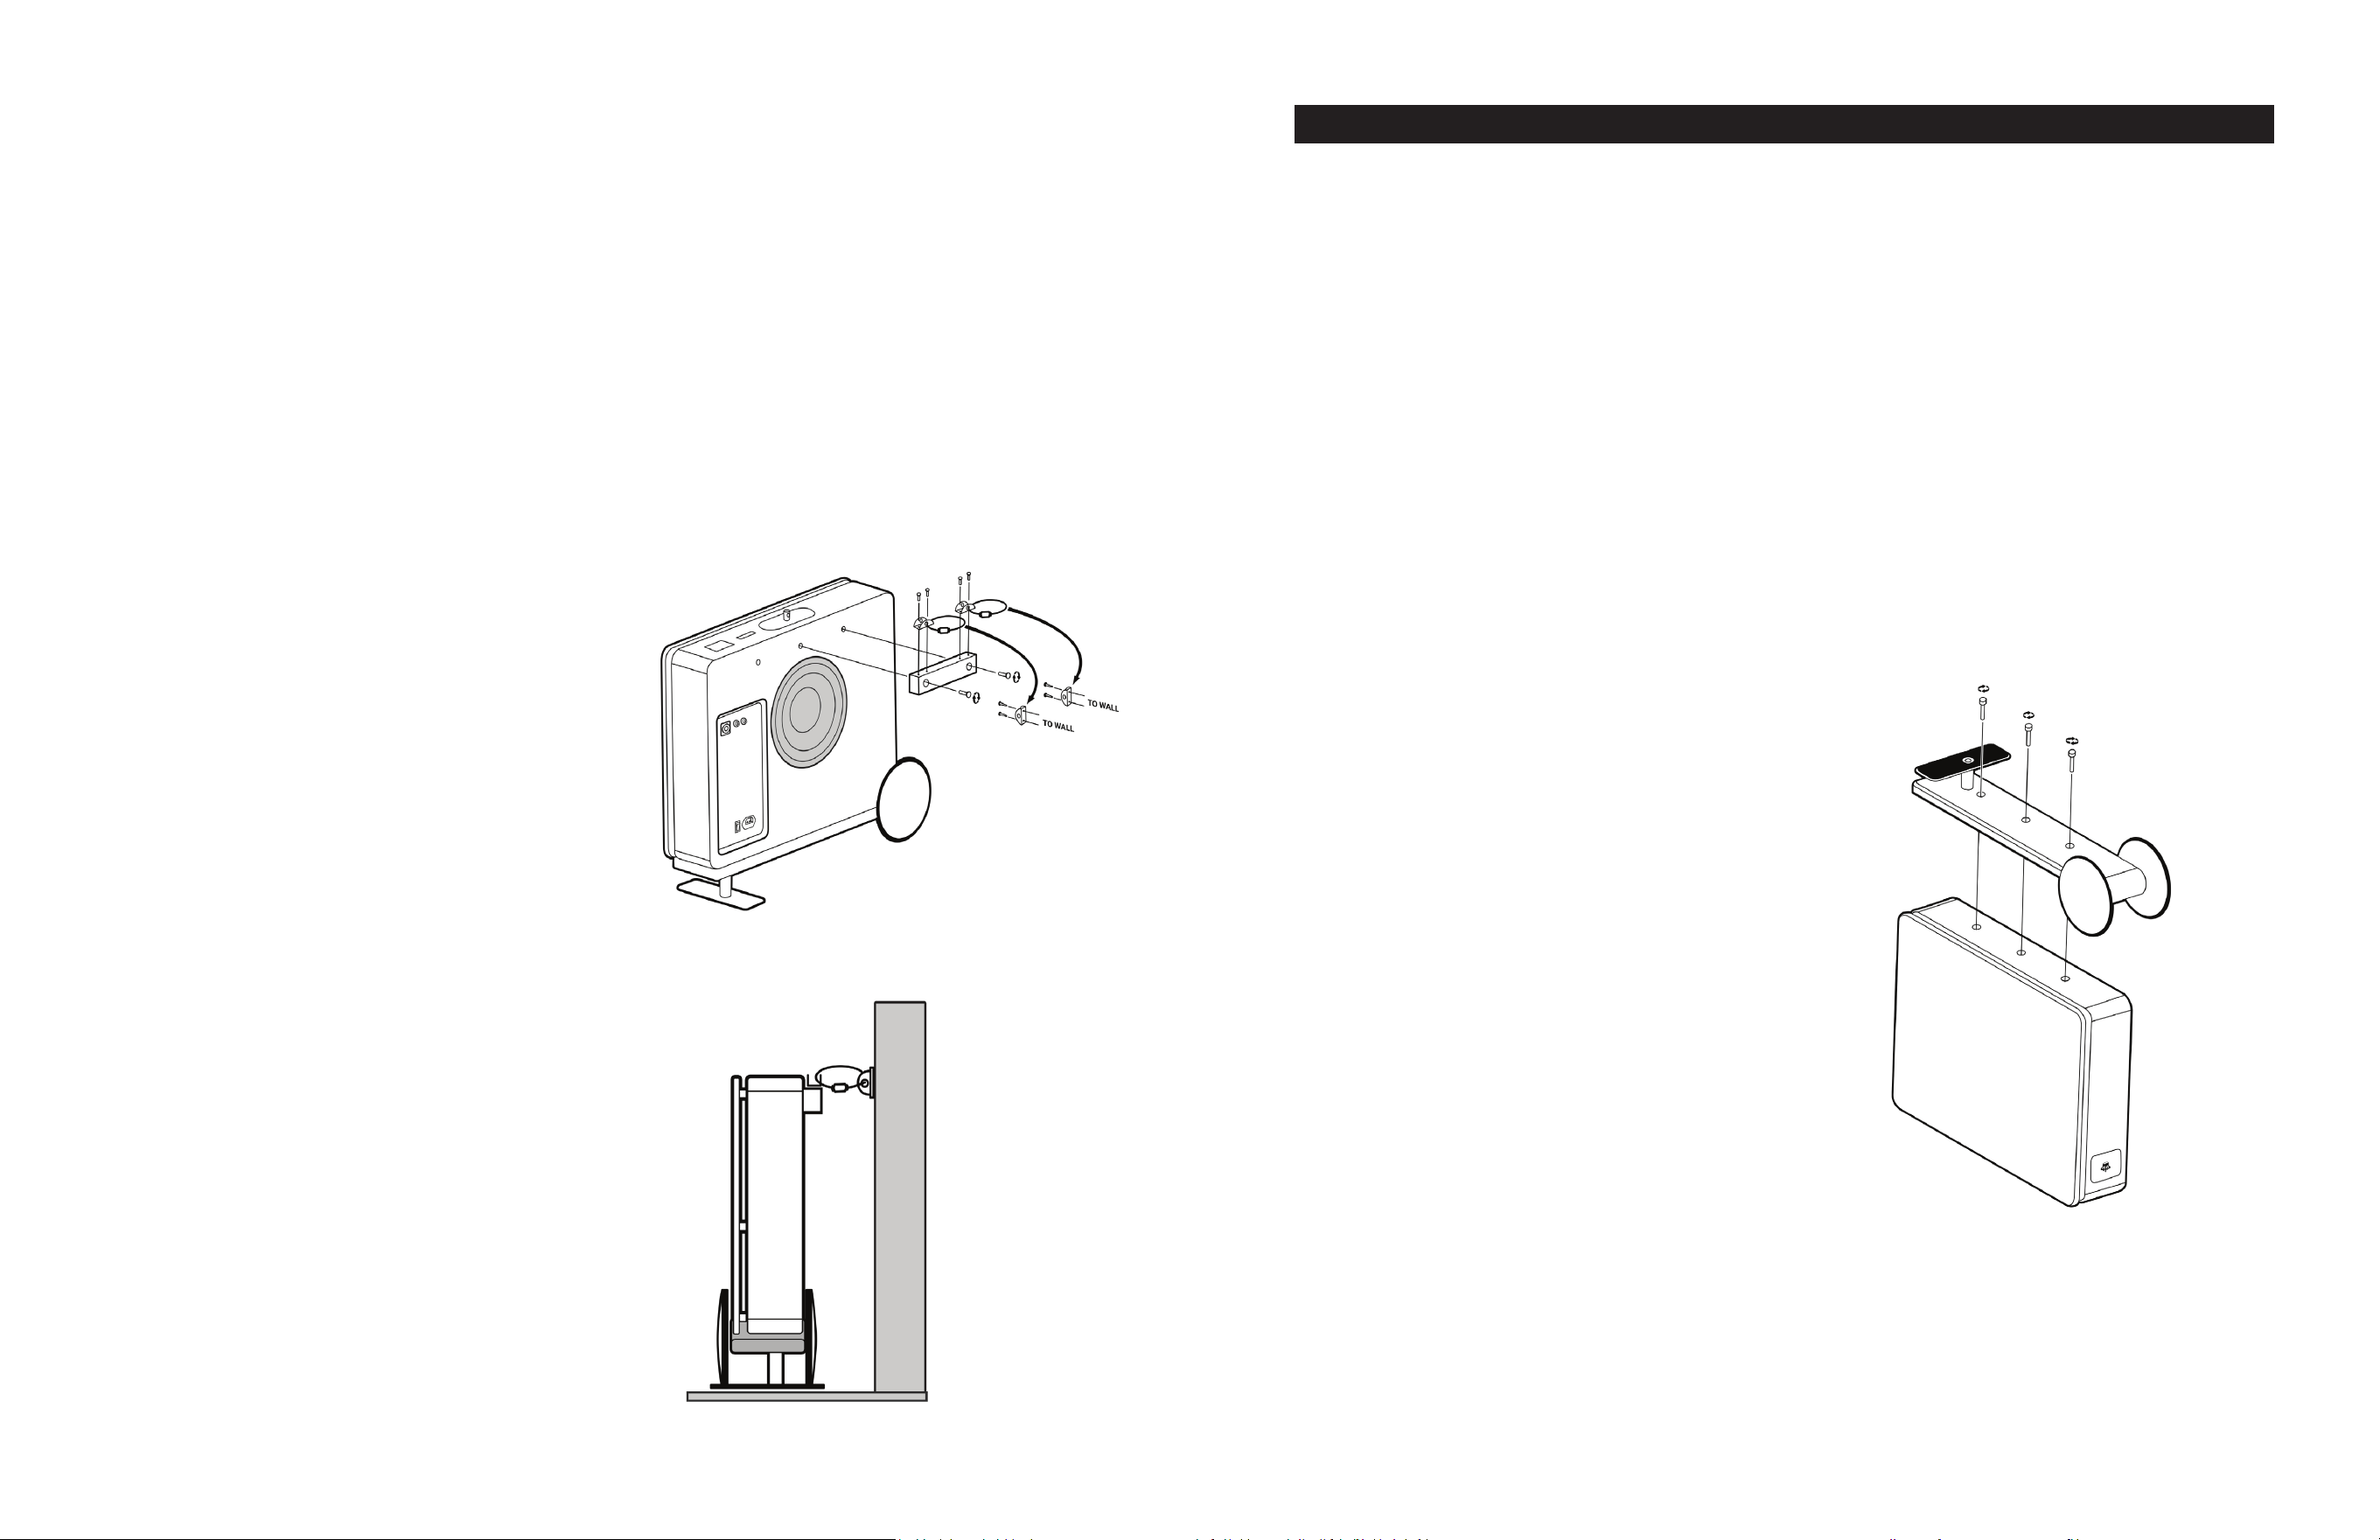
1 Secure the wall tether block to the subwoofer’s
cabinet, using the supplied bolts. This block and
the bolts are designed to mount to the center and
upper-right inserts found on the rear face of the
Planar subwoofer’s cabinet. See Cart Drawing 5.
2 Secure the two included loose anchors to your wall.
Each anchor uses two screws for securing to the wall.
We recommend marking the screw locaons with a
pencil, drilling pilot holes using a 6mm drill bit, then
pressing the plasc drywall anchors into the pilot
holes. You can then screw in the metal anchors.
3 Once the anchors are installed onto your wall and
the tether block is installed onto the subwoofer, you
can use the two supplied cables for securing each
anchor on the block to the corresponding anchor on
your wall. See Cart Drawing 6.
Inspect the an-p restraint periodically to conrm it
remains securely aached.
Use of the an-p restraint is the primary method
of prevenng p-over when Planar is used in a
freestanding posion.
(Cart Drawing 5)
(Cart Drawing 6)
IMPORTANT SAFETY WARNING
When Planar is not mounted to a wall, it may p if
subjected to force, impact, or climbing. This applies to
any freestanding use, including use with the accessory
stand (Cart).
To re duce the risk of p- ove r, an an - p re straint system
is included. REL strongly recommends installing this
restraint in all freestanding applicaons.
Failure to install the restraint may result in injury
or damage.
Do not allow children to climb, hang, or pull on
the product.
Instrucons for Installing
Planar Cart-1 or Planar Cart-2:
Note: Planar Cart is not a toy. Its wheels move slowly,
in part to discourage running around with it. It is a
precision tool designed to allow precise locaon of,
and placement on, deep bass nodes that are the key
to obtaining the performance that your Planar is
capable of delivering.
1 First, prepare your work area. Set out the necessary
tools and hardware (hex wrench and bolts, supplied
with Cart) and lay a so, clean cloth or blanket for
the subwoofer to rest on. At this me, install the
subwoofer’s grille if you intend to use it, as it cannot
be installed once the Cart is aached. Make sure the
control panel top cover has been removed, as turning
your Planar upside down will result in the cover falling
out and possibly incurring damage.
2 Fully power o the subwoofer, then carefully turn
the subwoofer over so that it is sing upside down
on the so cloth or blanket. You will then see three
(3) holes with threaded inserts in the boom of the
subwoofer’s cabinet. See Cart Drawing 1.
3 Carefully place the cart so that the so damping
material is resng on the boom of the subwoofer’s
cabinet, and the holes in the Cart are aligned with the
threaded inserts in the boom of the cabinet.
Instrucons for Planar Cart-1 and Planar Cart-2
(Cart Drawing 1)
Note: We recommend using track 4 from the CD
soundtrack to the 1992 movie Sneakers (tled Cosmo...
Old Friend) which features a deeply tuned concert bass
drum that is struck with precision and almost idencal
force to produce a deep bass signal that delivers
consistent dynamics. It is possible to achieve perfect
phase response and crossover sengs using this simple
mechanism of slow movement and careful listening.
Note: The cart is specically designed not to roll freely
because moving a subwoofer quickly guarantees missing
the seemingly minor, but important bass pulses that signal
spots in the room that produce deeper, cleaner bass.
1 Begin by gently rolling the cart into the general area
of your selected wall that you wish to have it perform.
Line it up carefully parallel to the wall about 2-3”
(50 –75mm) further way from the wall than the p
of the foam ball at the end of the handle. This extra
space will make it easier for you to maneuver.
2 While playing this setup track moderately loud, begin
slowly drawing the cart-mounted Planar parallel to the
wall by liing up the front of the cart and pulling the
handle. Be prepared to stop instantly, set down the Planar,
and mark locaons where bass appears to jump up in level
(a small coin or piece of tape next to the outer wheel works
well). Assess each locaon that is marked for depth of bass,
rmness of pulse, and the subjecve qualies of clarity
and fullness. Make your best choice among the 3-4 such
locaons that will work for the way your room lays out.
If one side of the front wall is not working opmally,
switch to the other side of the room. If the front wall
doesn’t produce the depth or quality of bass, select
another wall. Leave your marker in place and be careful
not to disturb it. Precision of placement means knowing
where the bass response will produce the best results.
3 Once you have decided on your ideal locaon, pull
your Planar a few inches forward and turn it toward the
room’s center. By this point it should be about 1’(30cm)
past and toed noceably inward toward the room’s
centerline. Now “parallel park” your planar, so that it is
parallel with the wall. The outer wheel of the Cart should
be aligned with your marker on the oor, and the foam
ball end of the handle should be just barely making
contact with your wall. Make any nal small adjustments
to get it aligned with the exact point on your marker and
then ne tune crossover and level sengs to give opmal
results. Remember, the rule of thumb is that Level
should, in most instances, be a higher click count than
your Crossover seng. See Cart Drawing 4.
(Cart Drawing 4)
4 Using the supplied hex wrench, insert and ghten
the three supplied bolts so they are hand-ght.Use the
supplied allen key to snug the bolts down. Please take
care not to over-ghten or apply too much torque to
these bolts.
5 Once the bolts are snugged down, carefully turn the
subwoofer’s cabinet over so that it is resng on the
Cart, with the two wheels and front stabilizer resng
on the oor. See Cart Drawing 2.
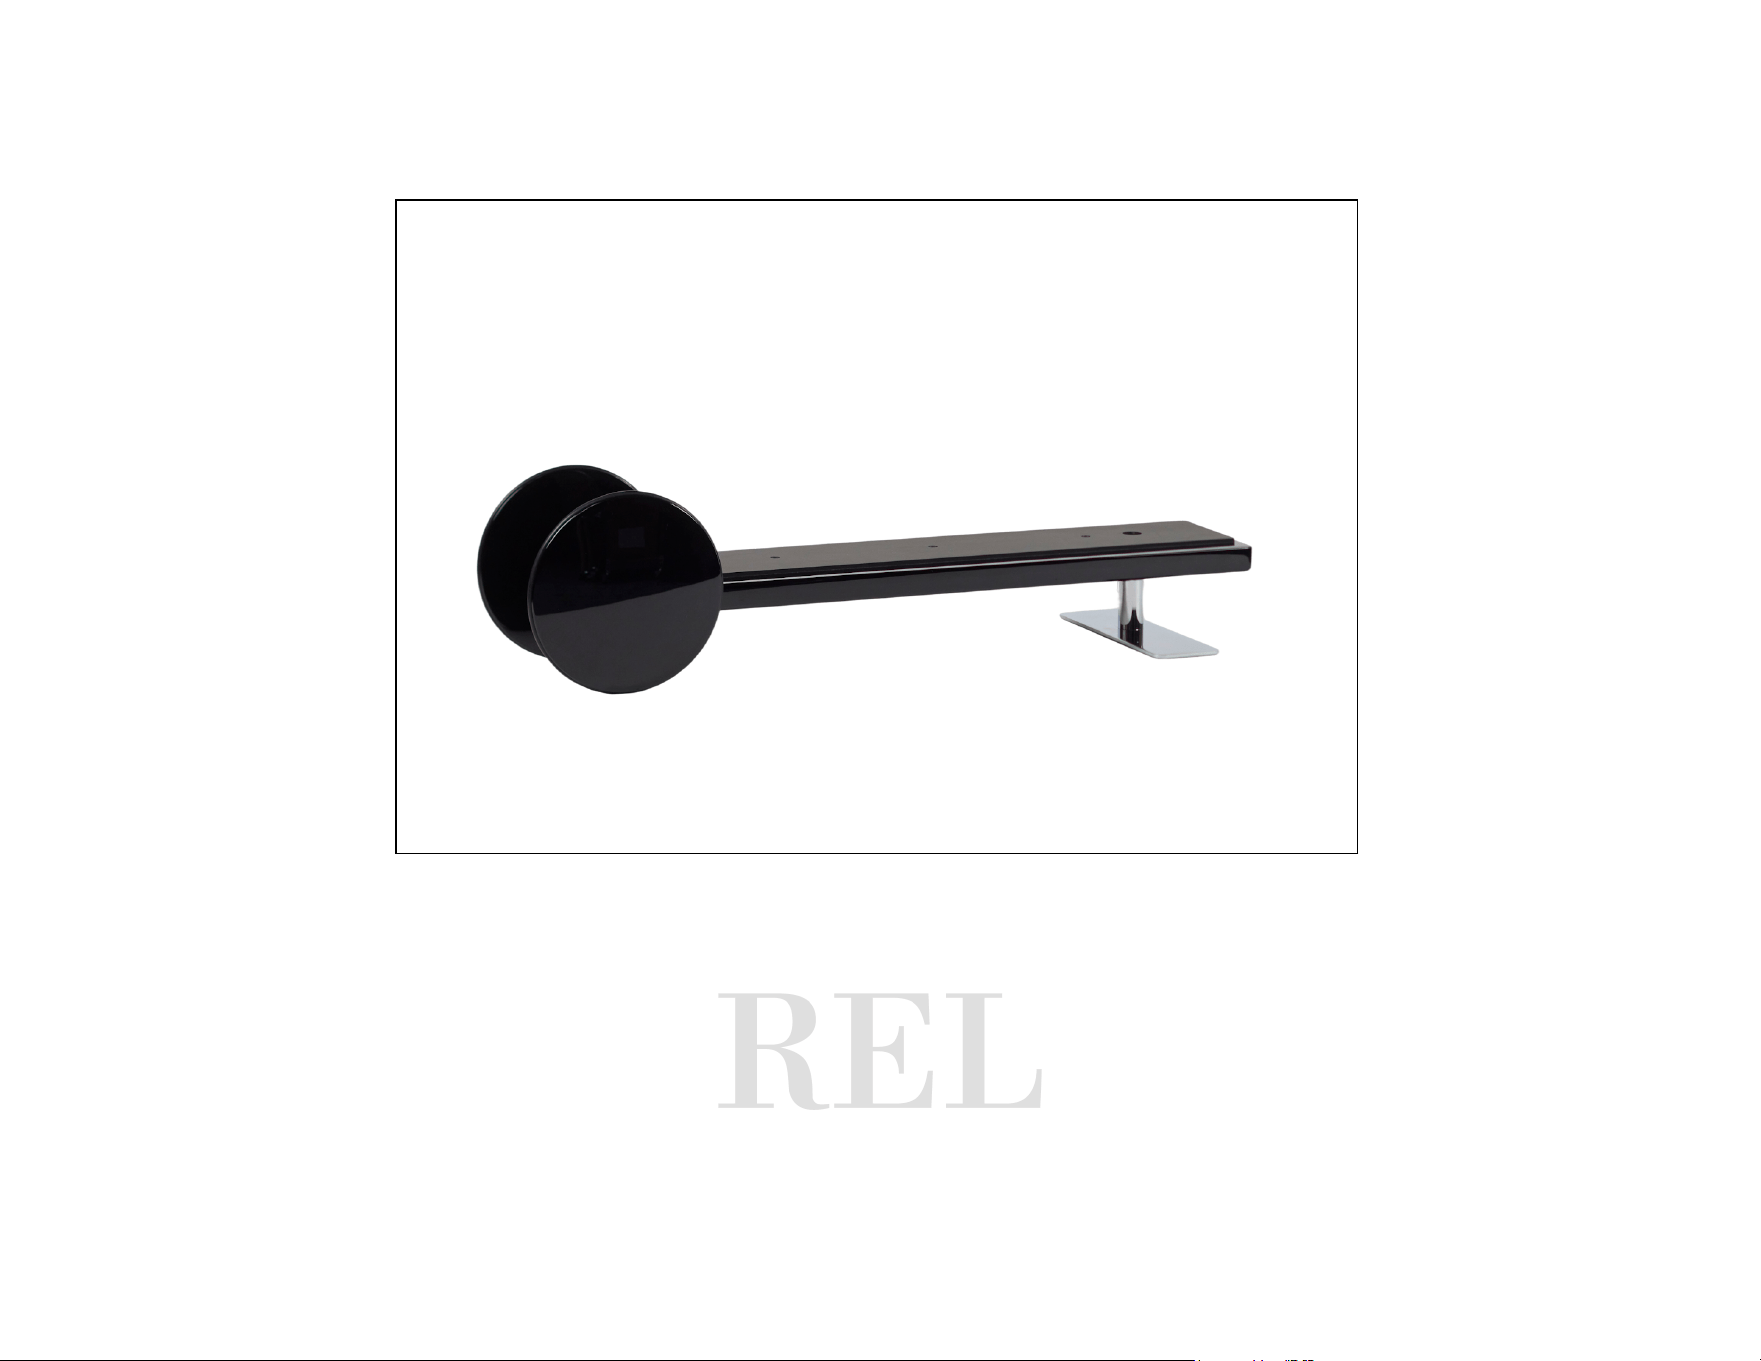
6 Next, please screw the handle into the upper-le
threaded insert on the rear of the subwoofer’s cabinet.
This will result in the handle being diagonally opposite
from the Cart’s wheels. See Cart Drawing 3.
7 Using the handle, carefully elevate the subwoofer
so that the front stabilizer lis o the oor, and then
carefully posion the Planar subwoofer and Cart in the
desired locaon in your room. The end of the handle
that will be closest to the wall has a so foam ball,
which is to be used to locate the subwoofer at the
appropriate distance from your wall.
Warnings/Things to Note:
– We strongly recommend placing a so cloth or
blanket on your work surface prior to rotang the
subwoofer or installing the Cart. This will help to
preserve the subwoofer’s gloss lacquer nish.
– Be sure to power o the subwoofer and disconnect
the power cord prior to installing the Cart.
– Secure the mounng bolts and handle ghtly to
the subwoofer’s cabinet, though be sure not to
over-ghten these bolts or the handle. Hand-ght
will be sucient.
– The Cart is designed to improve mobility and
posioning of the subwoofer in the event that
Planar subwoofer is not mounted on a wall. However,
the Cart’s wheels are not designed or intended for
excessive use.
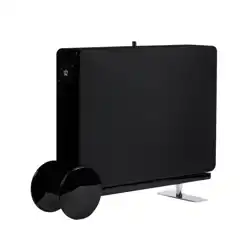
Direcons for Setup and Placement
When Using Planar Cart
The Planar cart is both a clever piece of design and a
calibraon tool. It is designed to allow precise locaon
of the deep bass nodes that determine where to place
a movable oor-mounted Planar to derive maximum
performance.
(Cart Drawing 3)
(Cart Drawing 2)