Overview
In this tutorial, shows how to use the SSD1306 0.96 inch I2C OLED display with the ESP32. We’ll show you
some features of the OLED display, how to connect it to the ESP32 board, and how to write text.
Component Required:
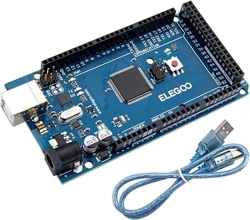
(1) x Elegoo ESP32/UNO
(1) x I2C OLED Display
(4) x F-F wires (Female to Female jumper wires)
Component
Introduction
I2C OLED Display
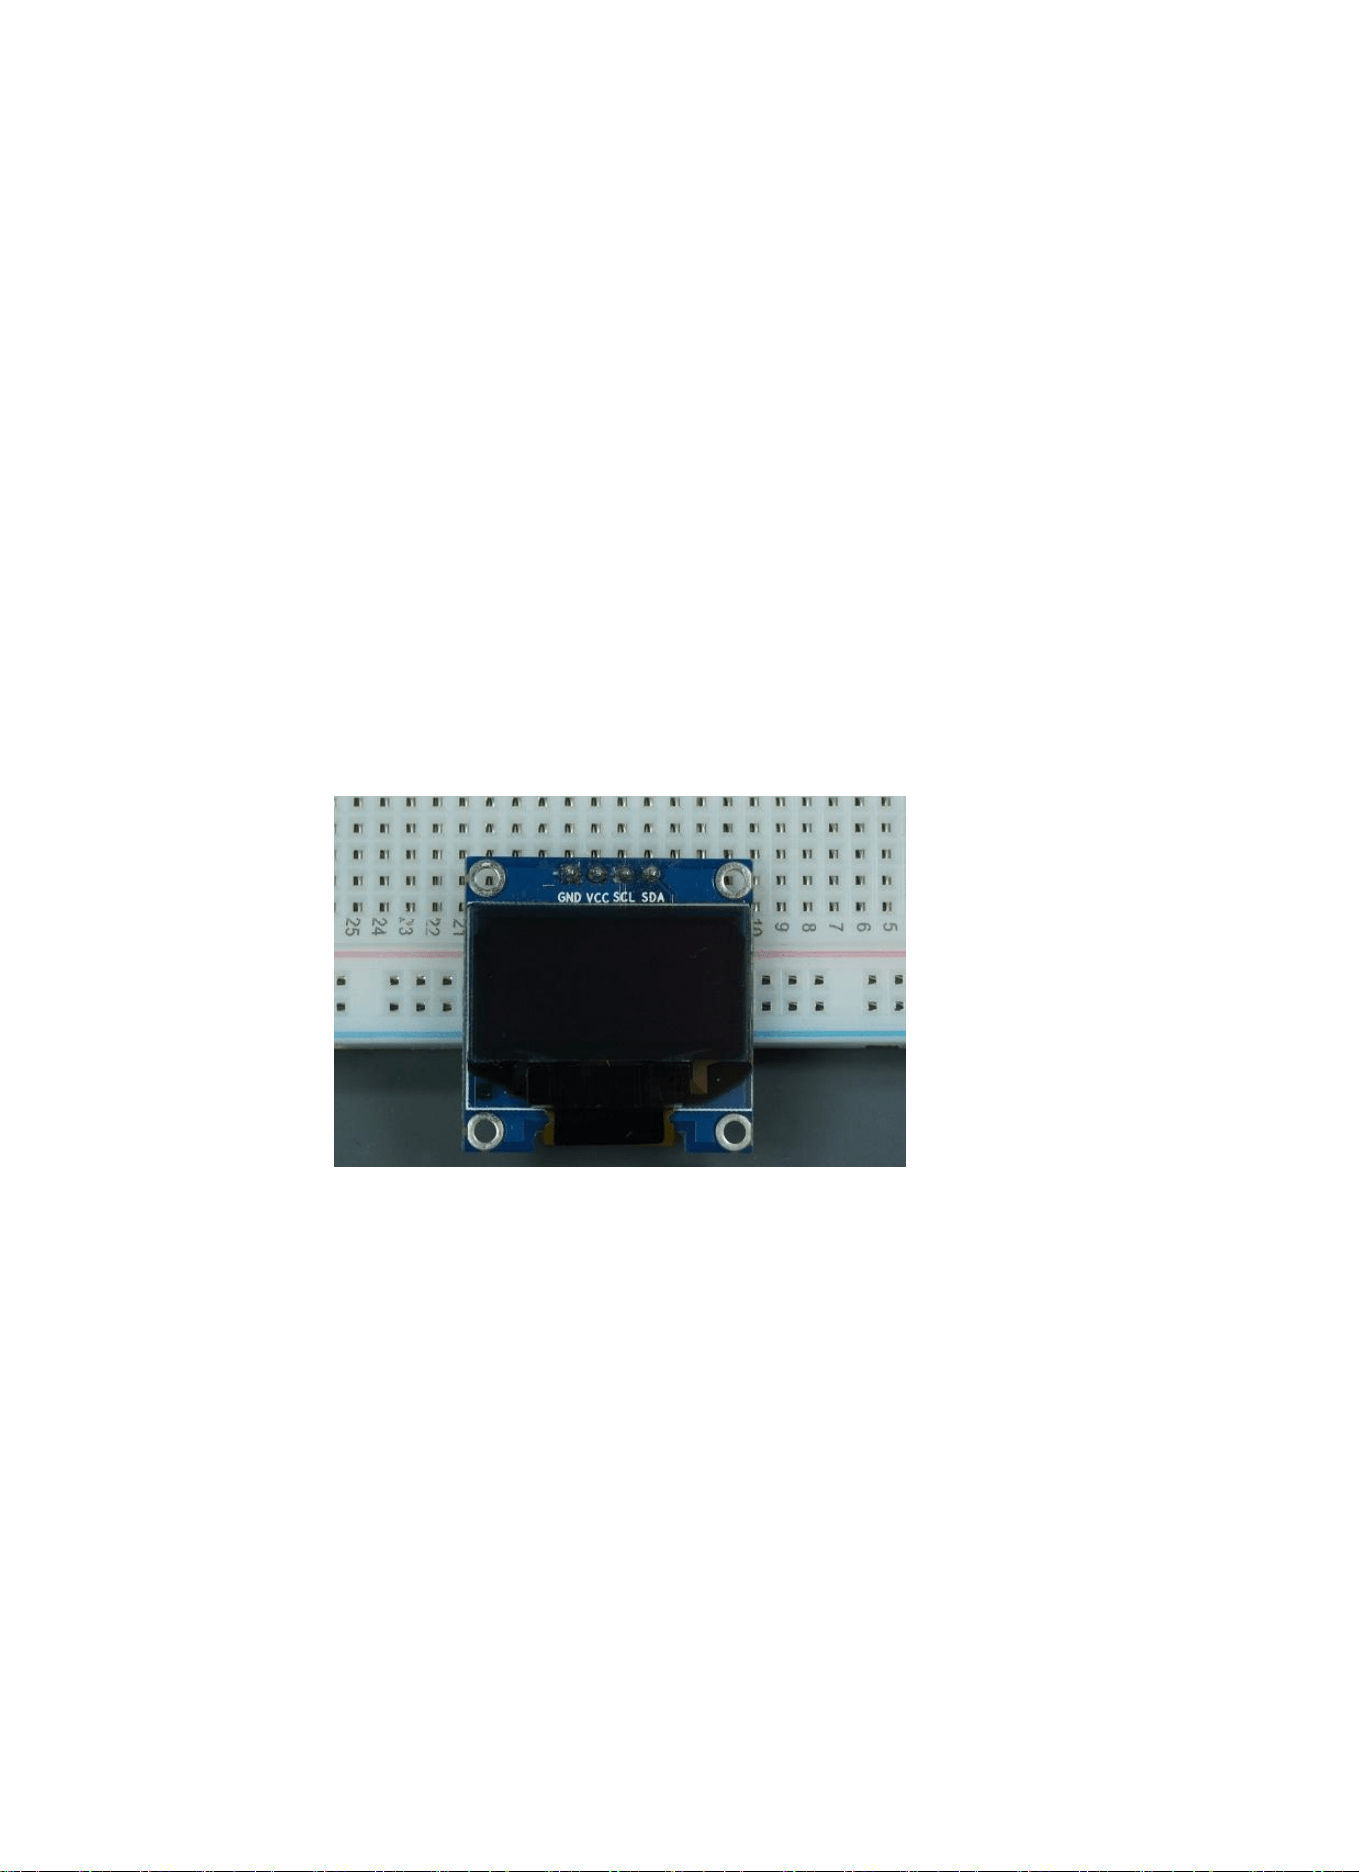
The organic light-emitting diode (OLED) display that we’ll use in this tutorial is the SSD1306 model: a
monocolor, 0.96-inch display with 128×64 pixels as shown in the following figure.
The OLED display doesn’t require backlight, which results in a very nice contrast in dark environments.
Additionally, its pixels consume energy only when they are on, so the OLED display consumes less power
when compared with other displays.
The model we’re using here has only four pins and communicates with the ESP32 using I2C communication
protocol. There are models that come with an extra RESET pin. There are also other OLED displays that
communicate using SPI communication.
Because the OLED display uses I2C communication protocol, wiring is very simple. You just need to connect
to the ESP32 I2C pins as D21(SDA)、D22(SCL)
To control the OLED display you need the adafruit_SSD1306.h and the adafruit_GFX.h libraries. Follow the
next instructions to install those libraries.
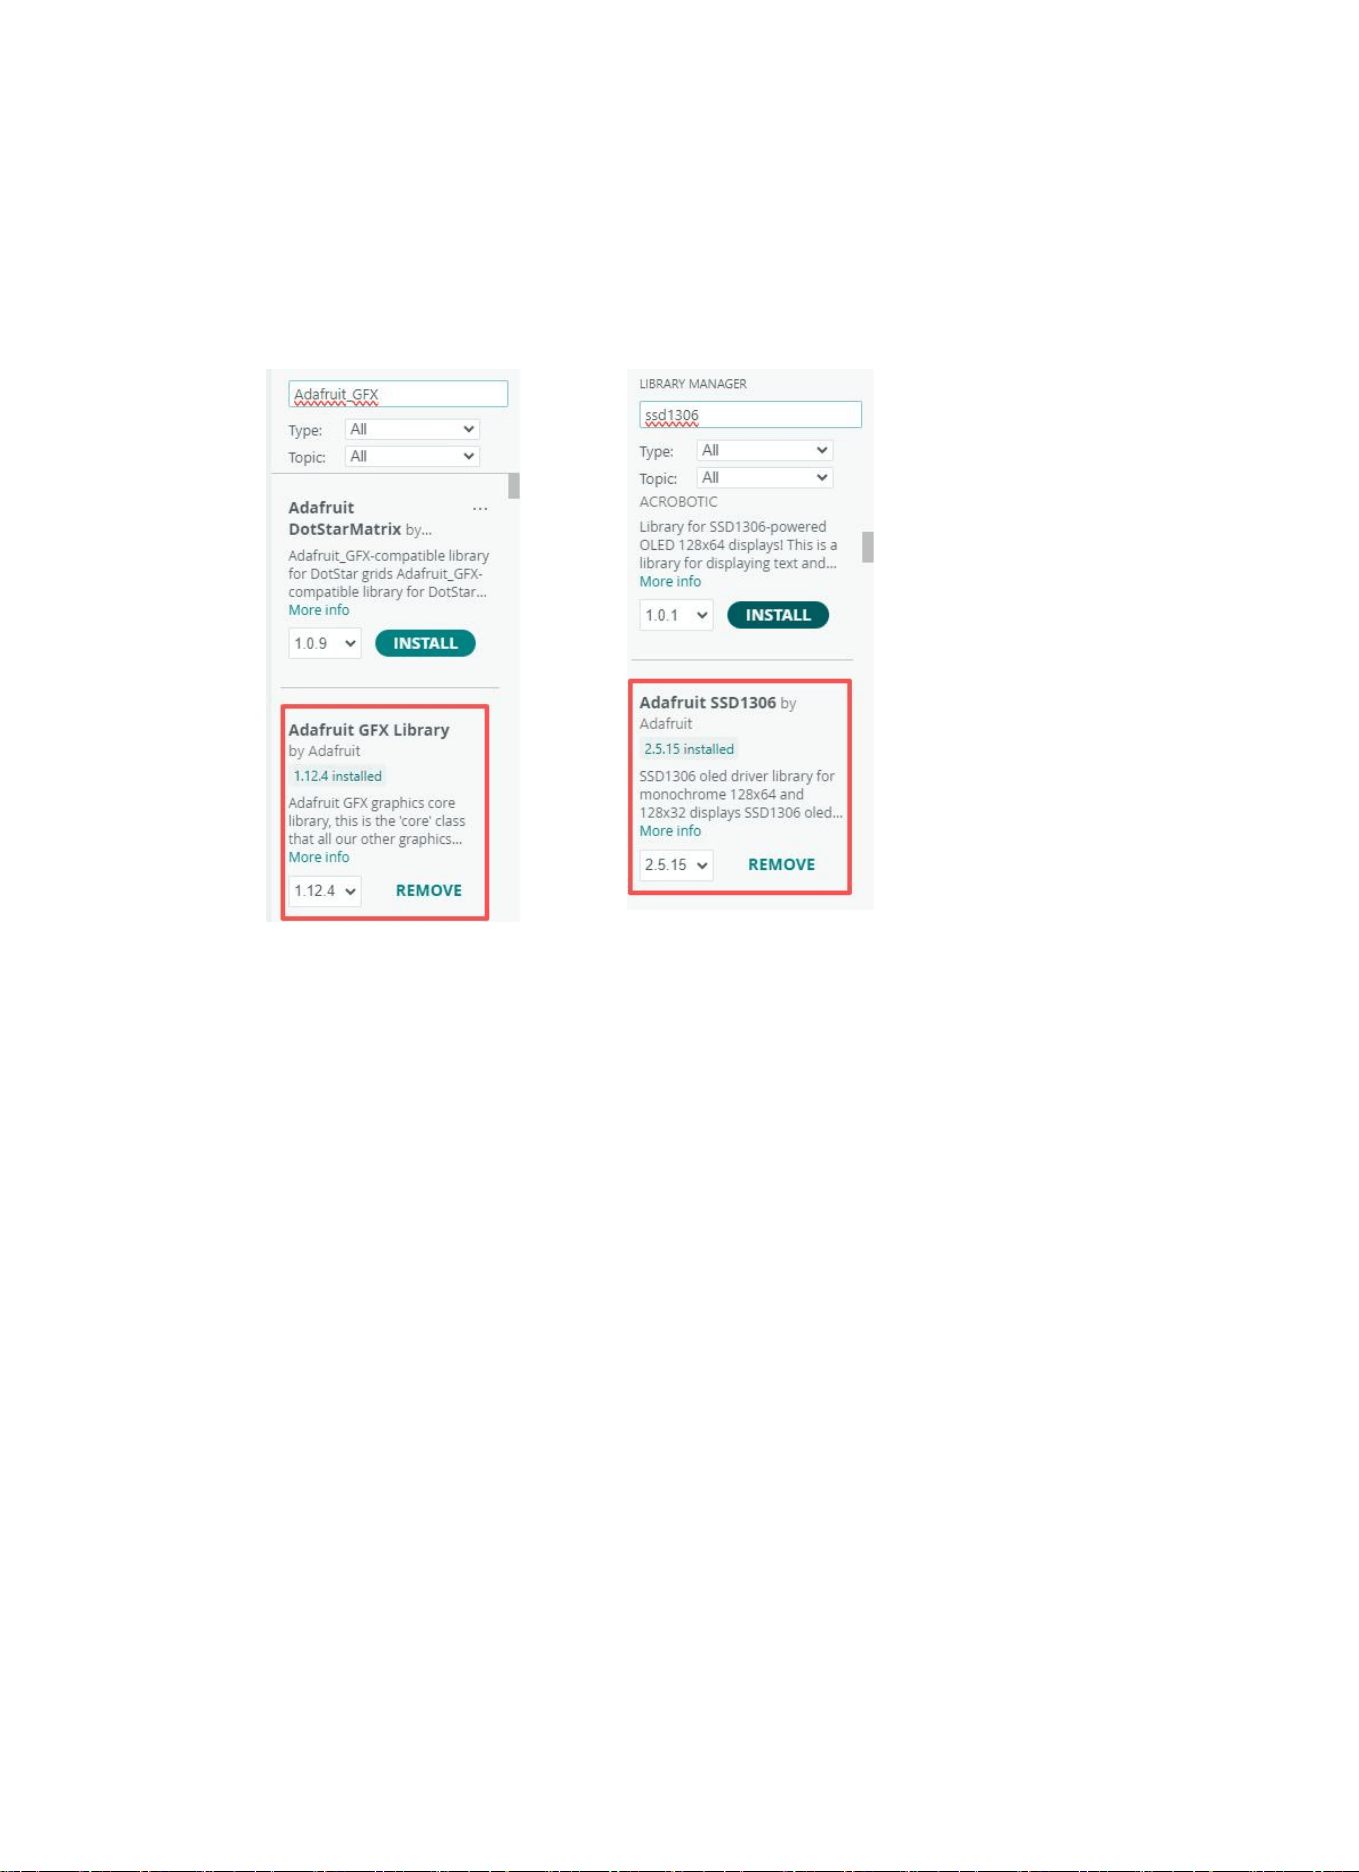
1. Open your Arduino IDE and go to Sketch > Include Library > Manage Libraries. The Library Manager
should open.
2. Type “SSD1306” in the search box and install the SSD1306 library from Adafruit.
Tips for writing text using these libraries
Here’s some functions that will help you handle the OLED display library to write text or draw simple
graphics.
display.clearDisplay() – all pixels are off
display.drawPixel(x,y, color) – plot a pixel in the x,y coordinates
display.setTextSize(n) – set the font size, supports sizes from 1 to 8
display.setCursor(x,y) – set the coordinates to start writing text
display.print(“message”) – print the characters at location x,y
display.display() – call this method for the changes to make effect
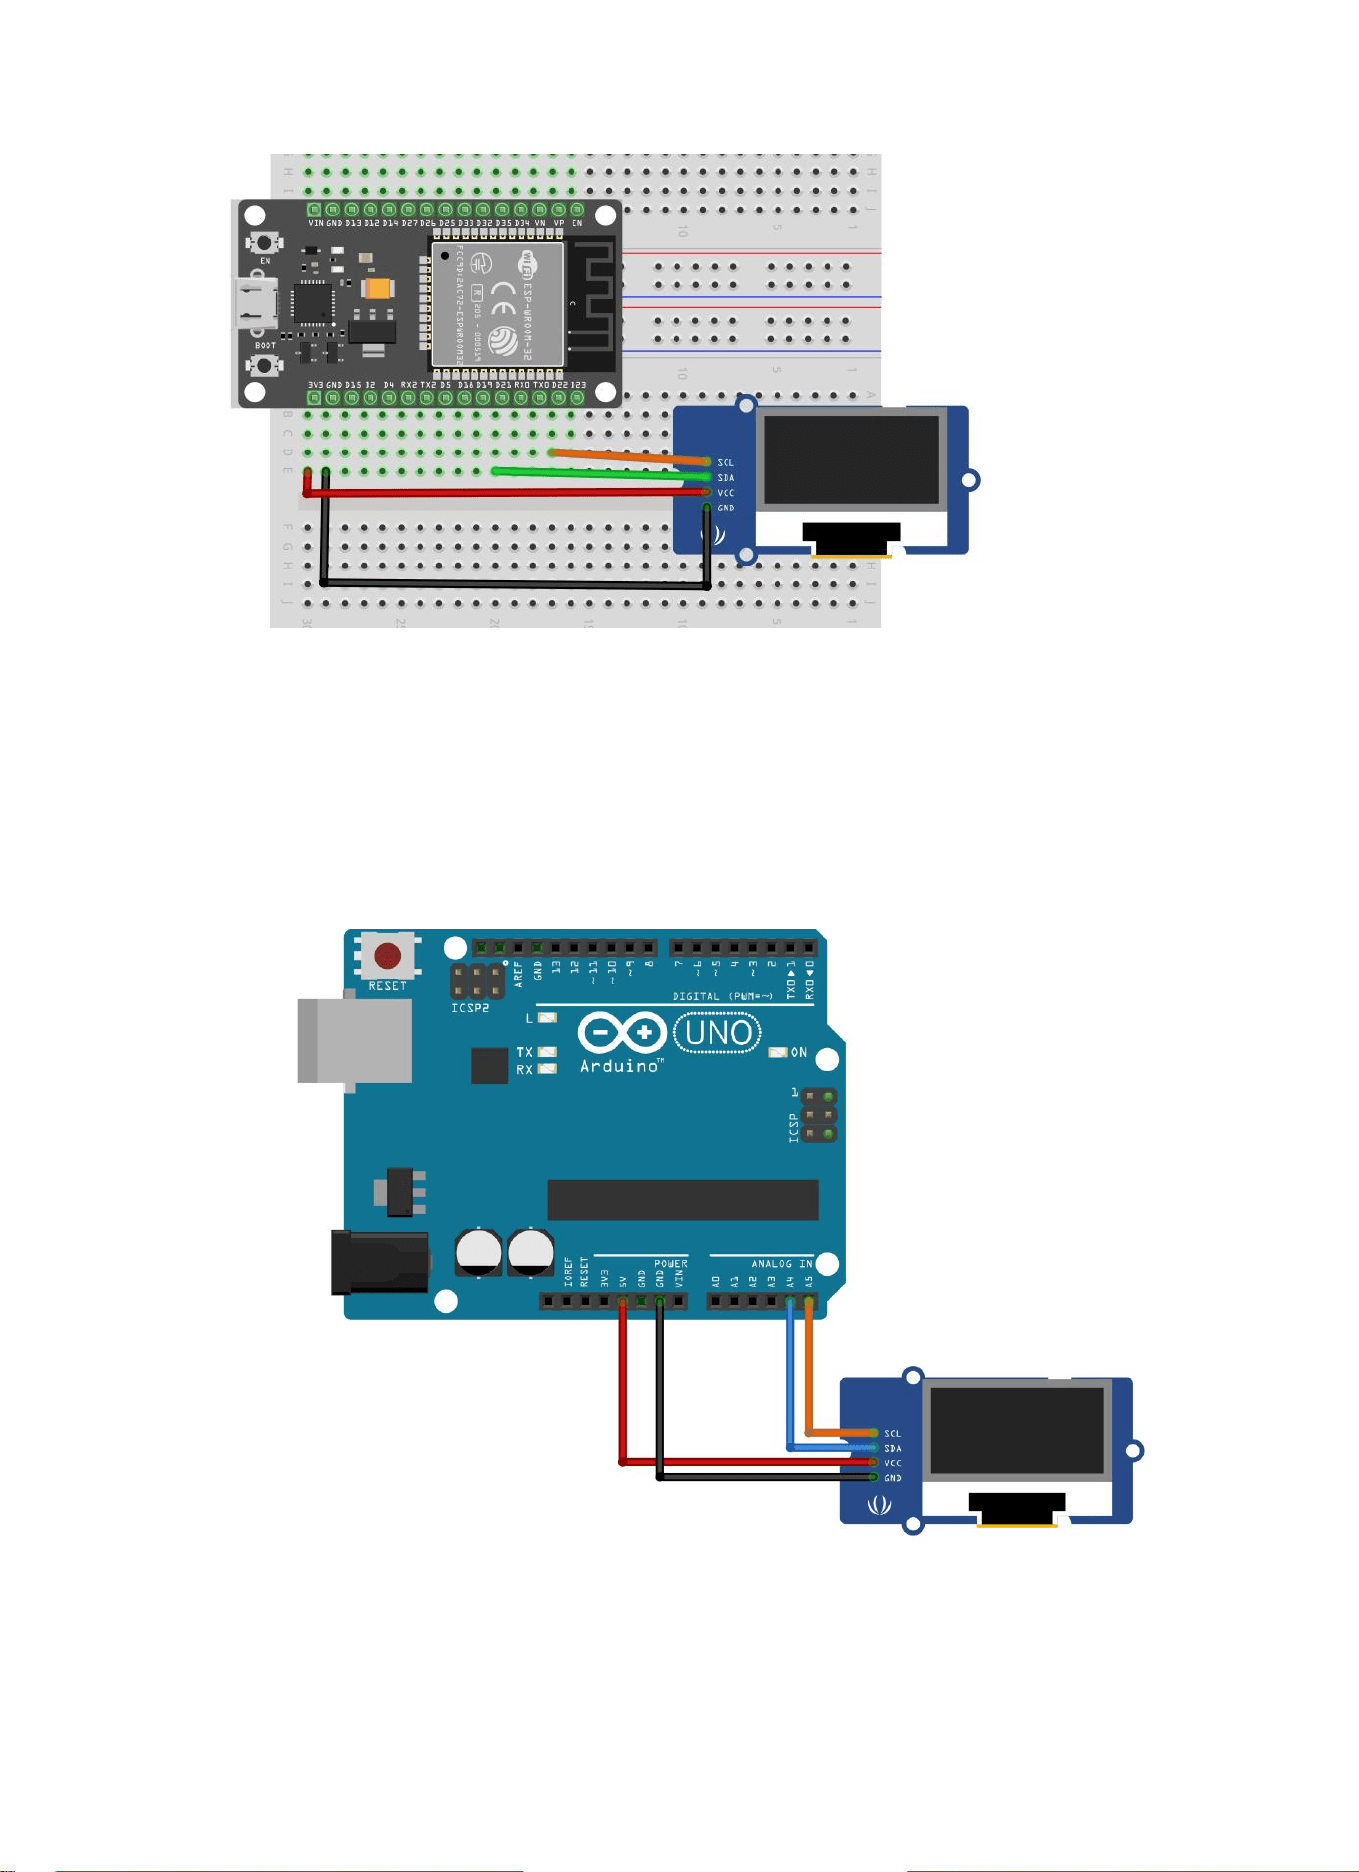
ESP 32 Wiring
diagram
Uno Wiring diagram
Code
After wiring the OLED display to the Arduino and installing all required libraries, you can use one
example from the library to see if everything is working properly.
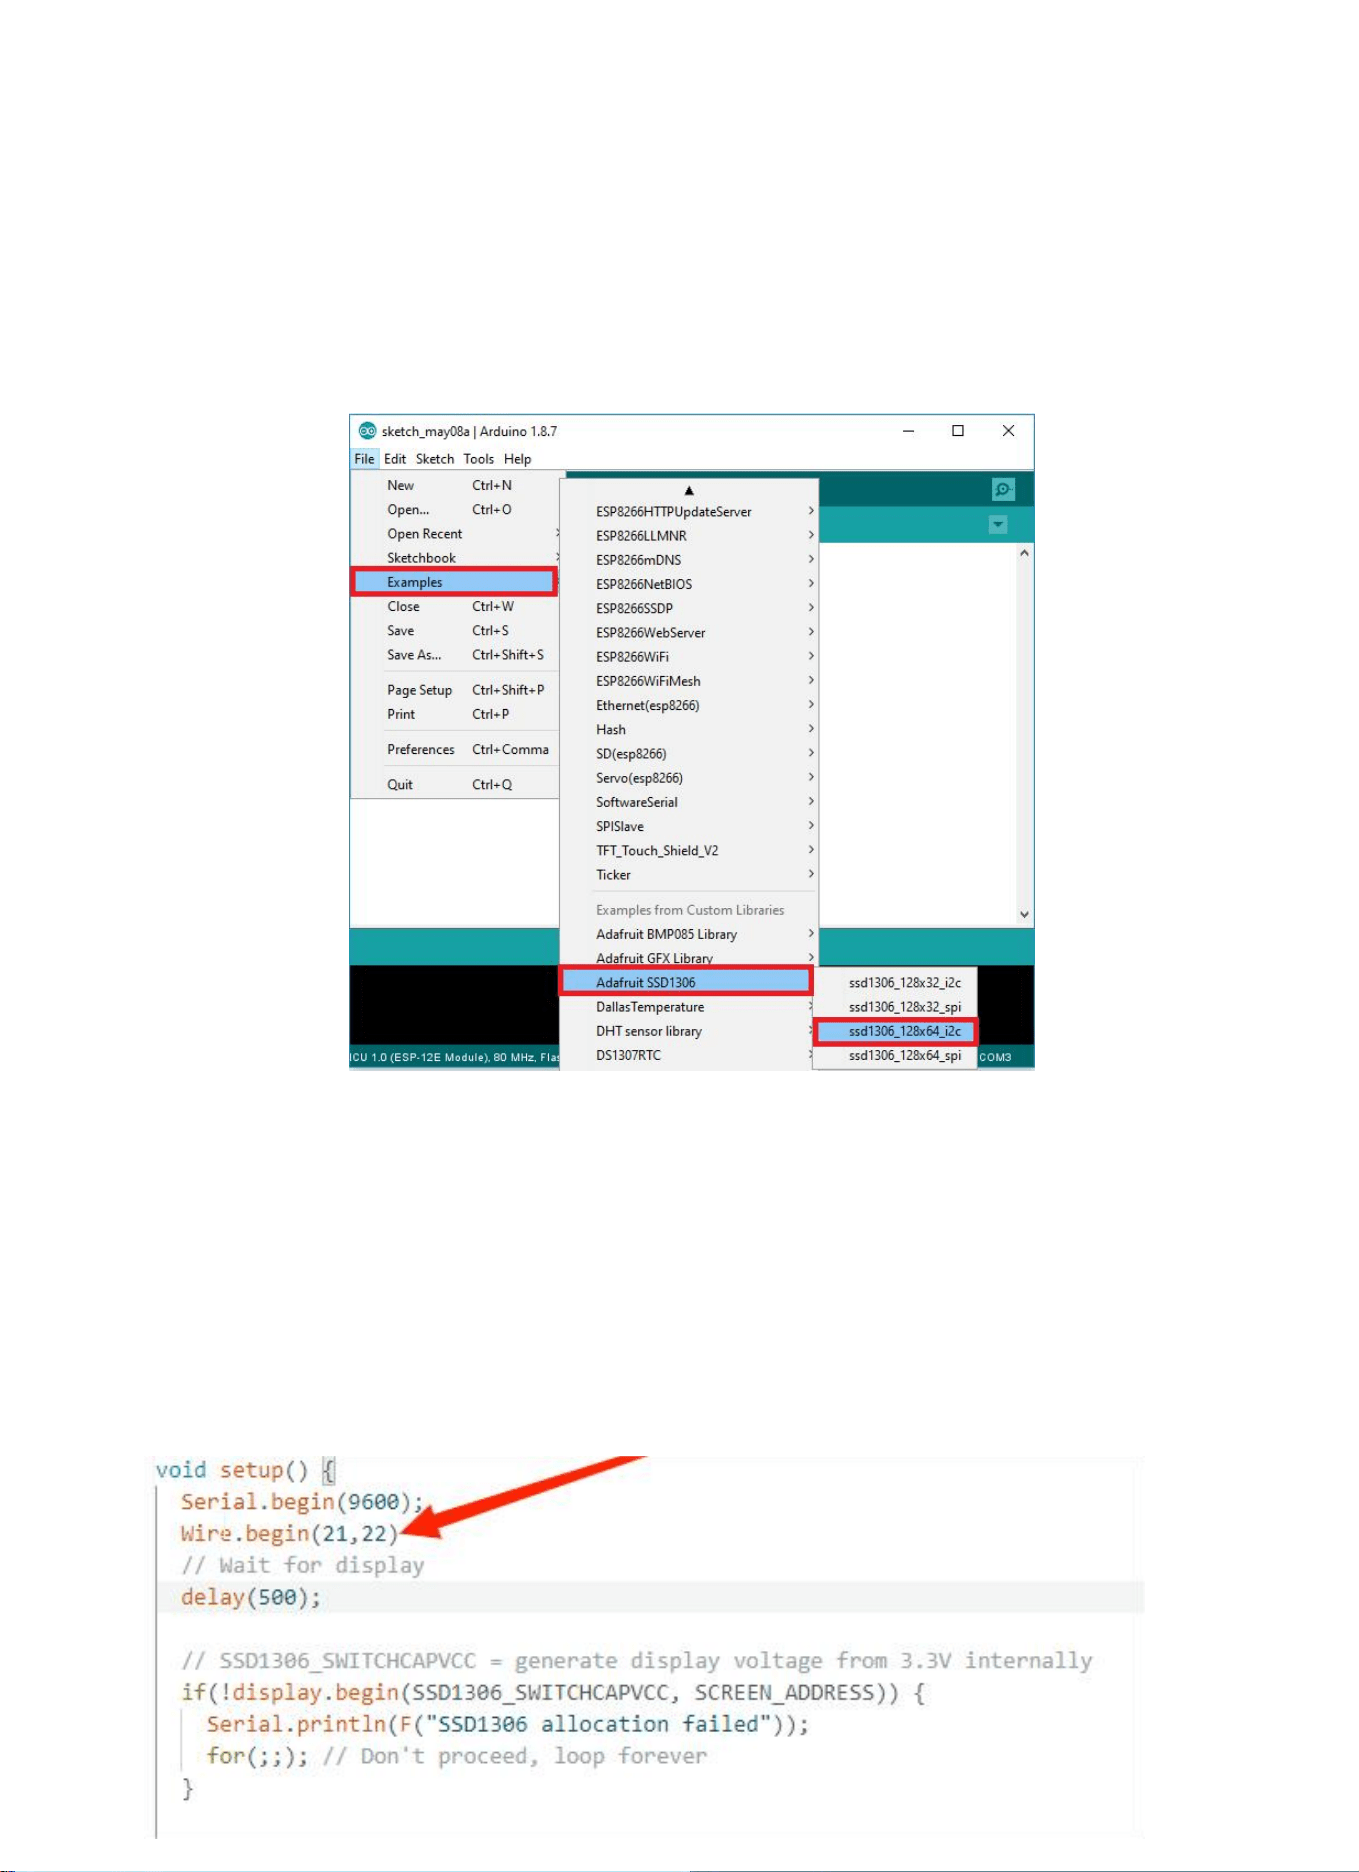
In your Arduino IDE, go to File > Examples > Adafruit SSD1306 and select the example for the display
you’re using.
The basic usage logic of ESP32 is consistent with that of Arduino UNO, with the core difference only
reflected in the definition and wiring method of hardware pins.
Under the premise of correct wiring, it can usually be put into use directly after the program is burned.
If display abnormalities (such as no content on the display screen, garbled characters, etc.) occur
when using ESP32 as the main control device, it is most likely caused by the incorrect pin binding of
the I2C (IIC) communication interface.
To solve this problem, you can add the statement Wire.begin(21,22) to the setup() function of the code
to forcibly bind the I2C bus of ESP32 to pin 21 (SDA) and pin 22 (SCL), thereby resolving the display
issue caused by abnormal interface binding.