PRODUCT FEATURES
IMPORTANT SAFETY NOTICE HELPFUL TIPS
PACKAGE CONTENTS TECHNICAL SPECIFICATION
TROUBLESHOOTINGTIPS ON BAG/ROLL CUTTER
STORAGE GUIDECLEANING AND MAINTENANCE
①
Unplug the appliance before cleaning.
Wipe the outer surface with a soft soapy cloth.
Wipe away any food or liquid on the vacuum chamber with
a paper towel.
Dry the appliance thoroughly before using it again.
Do not immerse the appliance in water or other liquids.
Prevent water or other liquids from entering the AC power
port on the appliance.
Do not clean the appliance with abrasive cleaning agent
to avoid damaging the surface.
②
③
④
⑤
⑥
Please read the user manual carefully before using and follow the safety
instructions.
1. Check if the voltage indicated on the appliance is corresponding to the local mains voltage before
you connect the appliance.
2. Do not operate the appliance if the power cord or plug is damaged, or if the appliance
malfunctions or is damaged in any way. Return it to an authorized service center for repair.
3. Always unplug the power cord from the electrical outlet to disconnect. Do not pull on the cord to
unplug.
4. Do not use an extension cord with the appliance.
5. If the supply cord is damaged, contact the manufacturer, an authorized service agent, or a
qualified technician for a replacement to avoid hazards.
6. Unplug the appliance when you’re not using it or before cleaning.
7. Do not use the appliance on wet or hot surfaces, or near a heat source.
8. Do not immerse any part of the appliance, power cord or plug in water or other liquids.
9.
A short power cord is provided to reduce the risks of becoming entangled in a long cord or tripping over.
10. Use accessories or attachments recommended by the manufacturer only.
11. Use the appliance for its intended use only. Household use only.
12. Closely supervise children when using any electrical appliance. Do not allow the appliance to be
used as a toy.
13. Allow the appliance to cool for 60 seconds begore using it again.
14. This appliance has a polarized plug (one blade is wider than the other) to reduce the risk of
electric shock. It fits into a polarized outlet only one way. If it does not fit, reverse the plug. If it still
doesn’t fit, contact a qualified electrician. Do not modify the plug.
15. CAUTION: HOT SURFACE. DO NOT TOUCH.
1. Do not overfill the bag. Always leave at least 3–4 inches between bag contents and top
of the bag.
2. Make sure the bag is dry. It will be difficult to make a tight seal if the bag is wet.
3. For best results, perishables still need to be frozen or refrigerated after vacuum sealing
process.
4. Clean the opening end of the bag inside and outside.
5. When vacuum packaging a large item, to
prevent wrinkles in the seal, gently stretch bag
flat before placing it into the vacuum chamber.
6. When you are vacuum sealing items with sharp edges protect the bag from punctures by
wrapping the item in soft cushioning material, such as a paper towel. You may use a
container instead of a bag.
7. When using containers, always leave 1 inch of space at the top of the container.
8. Allow the appliance to cool for 1 minute between uses to avoid activating overheating
protection.
9. If you are not sure whether your bag was sealed properly, simply reseal the bag.
10. For best results, use bags and containers produced by the manufacturer.
11. Microwave: Don’t heat sealed food in the microwave.
Room Temperature (25±2 ˚C)
Bread
Rice/Flour
Tea Leaves
3–6Months
1–2Days
3–5Months
5–6Months
>1 year
6–8Days
>1 year
>1 year
Storage Life with Our
Vacuum Sealing Accessory
In the Freezer (-16~-20 ˚C)
Meats
Seafood and Fish
3–5Months
3–5Months
1 Year
1 Year
Storage Life with Our
Vacuum Sealing Accessory
Cooked Meats
In the Refrigerator (5±2 ˚C)
Meats
Seafood and Fish
Vegetables
Eggs
4–6Days
Normal Storage Life
Normal Storage Life
Normal Storage Life
2–3Days
1–3Days
3–5Days
10–15Days
10–14 Days
8–9Days
4–5Days
7–10Days
30–50Days
Do not dispose of electrical appliances as unsorted municipal waste, use separate collection facilities. Contact your local government for information regarding the collection systems available.
If electrical appliances are disposed of in landfills or dumps, hazardous substances can leak into the groundwater and get into the food chain, damaging your health and well-being.
Storage Life with Our
Vacuum Sealing Accessory
Peanuts/Beans
FOOD
SEAL
VAC
SEAL
DRY
MOIST
STOP
PULSE
FO
O
D
SEAL
VAC
SEAL
DRY
MO
I
ST
STOP
PULSE
3
4
1
A
B
2
NO. Description
Description
SpecificationQuantityImage
FRONT BACK
Vacuum Sealer
AC Power Cord
Accessory Hose 1
5
1
Roll
1
1
1
2
3
4
5
Item Number SAFEPAC
Rated Voltage 100–120 V
Rated Frequency 50 Hz - 60 Hz
Rated Power
110 W
Sealing time
6–12seconds
Vacuum Level
Dimensions
15.8" L x 6.3" D x 3.2" H
Net weight
3.30 lb
Gross weight
Warranty
4.1 lb
1 year
Bag
-80 kPa
CONTACT US: +1 888-956-6866 –– customerservice@eurodib.com –– www.eurodib.com
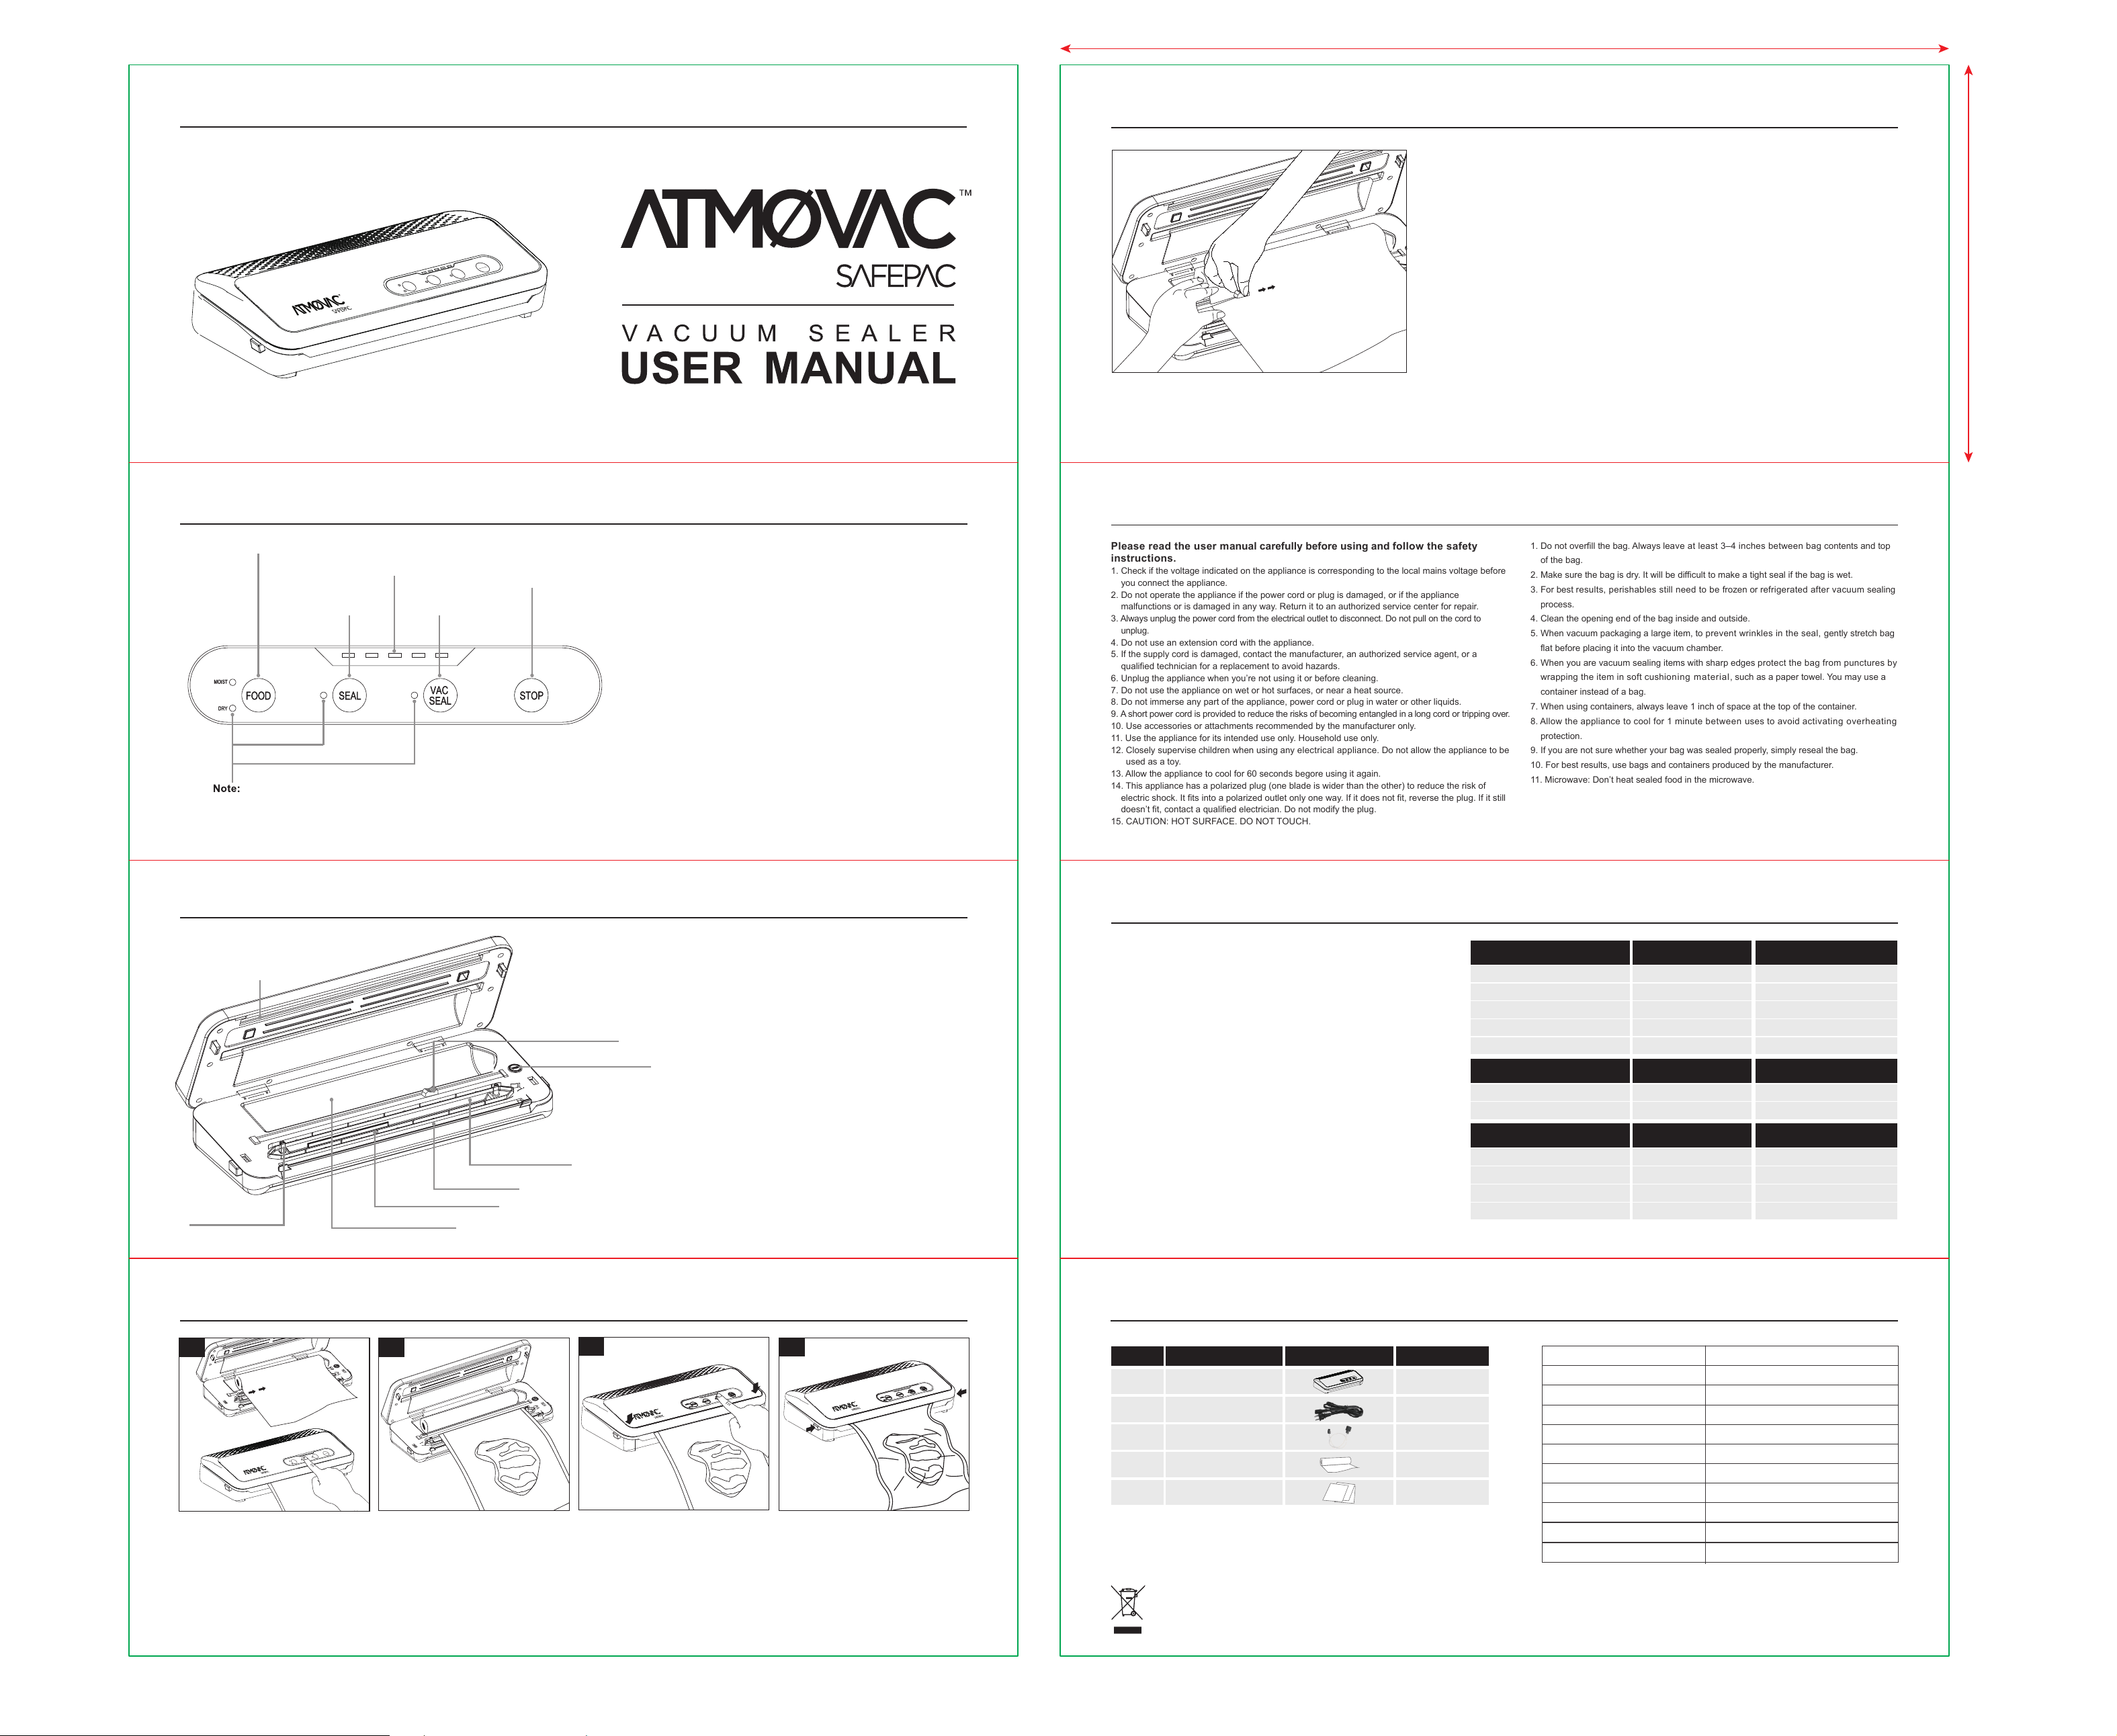
FUNCTIONS
OPERATION MANUAL
③ VAC & SEAL BUTTON
②
SEAL BUTTON
④
STOP AND PULSE VACUUM BUTTON
① DRY/MOIST FOOD SETTINGS BUTTON
INDICATOR LIGHTS
⑤
It will take longer to seal moist food than dry food.
The indicator light will be illuminated when the corresponding
function selected.
It is the most frequently used function. Press to vacuum
package and seal food airtight with a single touch. (Wait for
60s between uses to allow appliance to cool down .)
During any working setting, press STOP button to stop the
current processing immediately.
In standby mode, press and hold the PULSE/STOP button to
activate the function, when it starts to PULSE vacuum, the
operator can control the vacuum pressure manually with this button
according to different foods. After achieving the desired vacuum
effect, release the button and choose SEAL to weld the bag.
The indicator light will be illuminated when VAC SEAL/SEAL/PULSE
functions are working.
Press to create a seal no matter the bag is vacuumed or not.
(Wait for 60s between seals to allow appliance to cool down.)
①
DRY/MOIST FOOD SETTINGS BUTTON
⑤ INDICATOR LIGHTS
②
SEAL BUTTON ③ VAC & SEAL BUTTON
④
STOP AND PULSE VACUUM BUTTON
If several lights flashing at the same time after continuous working,
overheating protection activated. Please wait for 5–10 minutes for cooling
down and the appliance will be back in normal mode.
③ VACUUM NOZZLE
②
SEALING FOAM GASKET
④
VACUUM CHAMBER
① SILICONE CONTACT BAR
SEALING STRIP
⑤
The silicone sealing gasket works to provide optimal sealing.
An airtight chamber for vacuuming.
Works with silicone contact bar for sealing function.
BUILT-IN ROLL STORAGE
⑦
The width of the bag or roll should not exceed 11 inches.
BUILT-IN CUTTER
⑧
Open the upper lid, pull out the desired length of bag from the
roll, hold the bag with one hand, and slide the cutter across to
cut the bag to size.
⑥
Ensure the vacuum tube is properly connected before
vacuum-sealing wine stoppers or containers. Press the button
to begin the vacuum process. The machine will automatically
stop once it reaches the required vacuum level.
This ensures the ensures the vacuum chamber is airtight so the
bag can be vacuumed properly.
This is used for removing air from bags, containers or bottles.
Do not block the vacuum nozzle when vacuuming a bag. Accessory
hose is required when vacuuming a container or a bottle.
①
SILICONE CONTACT BAR
②
SEALING FOAM GASKET
⑦
BUILT-IN ROLL STORAGE
③ VACUUM NOZZLE
④ VACUUM CHAMBER
⑤ SEALING STRIP
ACCESSORY BUTTON
⑥ ACCESSORY BUTTON
⑧ BUILT-IN CUTTER
Insert the open end of the bag into the
vacuum chamber.
Make sure not to block the vacuum
nozzle.
A: Pull out the bag roll to the desired
length, then slide the cutter across to
cut the bag.
B: Place one open end of the bag into the
vacuum chamber. Firmly press down the
lid, then press the 'SEAL' button to begin
sealing. Once the seal indicator light turns
off, release the side locks and remove the
sealed bag.
Close the lid and press down firmly on
both ends. You should hear a 'click'
sound, indicating the lid is securely
locked. Once locked, you can proceed
with sealing or vacuum sealing.
When the SEAL indicator light turns off,
the process is complete.
Press the release buttons on both ends
to open the lid and remove the sealed
bag.
If several lights flashing at the same time after continuous working,
overheating protection activated. Please wait for 5–10 minutes for cooling
down and the appliance will be back in normal mode.
③ Air is removed from the bag but re-enters afterwards.
②
Appliance is plugged in but not vaccuming.
Notes:
① Nothing happens when the power cord is plugged into appliance.
A. Verify the power cord is not damaged.
B. Verify the power cord is correctly plugged into the electrical outlet and appliance.
A. Check if there is a hole or puncture on the bag. It may be punctured by sharp items. Use a new
bag if necessary.
B. Check the sealing seam. Any wrinkle along the sealing seam may cause air re-entering. If so,
simply cut the sealed edge and reseal.
C. If there is moisture or liquid near the sealing area, cut the bag, wipe it dry and use the moist food
setting to reseal.
D. If the bag has been stored for a long time and appears inflated, the food may have spoiled. It i
s
recommended to discard the contents.
1. To avoid overheating, allow the appliance to cool for at least 60 seconds between uses. Keeping the
lid open will help speed up heat dissipation.
2. A melted bag may indicate that the sealing strip is overheated. Let the appliance cool for 60 seconds
before using it again.
3. For the best preservation, do not reuse the bags after storing raw meats, fish or greasy foods. Do
not reuse the bags after simmering or microwaving.
A. Ensure the lid is properly closed and locked in place.
B. Make sure the open end of the bag is correctly positioned inside the vacuum chamber.
C. Check if the bag is punctured or damaged.
D. Inspect the foam sealing gasket for deformation or damage.
210 mm
94 mm
Open the upper lid.
Pull out the bag roll to the desired length.
Hold the bag with one hand and slide the cutter across to cut the bag.
NTC Thermistor-temperature sensor:
The appliance is equipped with a smart temperature monitoring
system. If the unit overheats, it will automatically entre protection
mode. In this mode, operations will be temporarily disabled and
indicator lights will flash to signal the overheat condition. Once the
appliance cools down, the lights will stop flashing and normal
operation will resume automatically.