Publication # GWP001 | May 15, 2026 | Revision 1.1
All Rights Reserved | Grain Weevil Corporation
Model Numbers:
GWR 1.1 (Robot) | GWC 1.0 (Controller) | GWV 1.1(Camera)
USER’S MANUAL

Publication # GWP001 | May 15, 2026 | Revision 1.1
All Rights Reserved | Grain Weevil Corporation

Publication # GWP001 | May 15, 2026 | Revision 1.1
All Rights Reserved | Grain Weevil Corporation
GRAIN WEEVIL
Robot User’s Manual
Model Numbers:
GWR 1.1 (Robot) | GWC 1.0 (Controller) | GWV 1.1 (Camera)
Grain Weevil Corporation
10327 Chandler Cir Ste 200
La Vista, NE 68128
(833) 497-6268
www.grainweevil.com

Publication # GWP001 | May 15, 2026 | Revision 1.1
All Rights Reserved | Grain Weevil Corporation
Publication # GWP001 | May 15, 2026 | Revision 1.1
All Rights Reserved | Grain Weevil Corporation
WELCOME
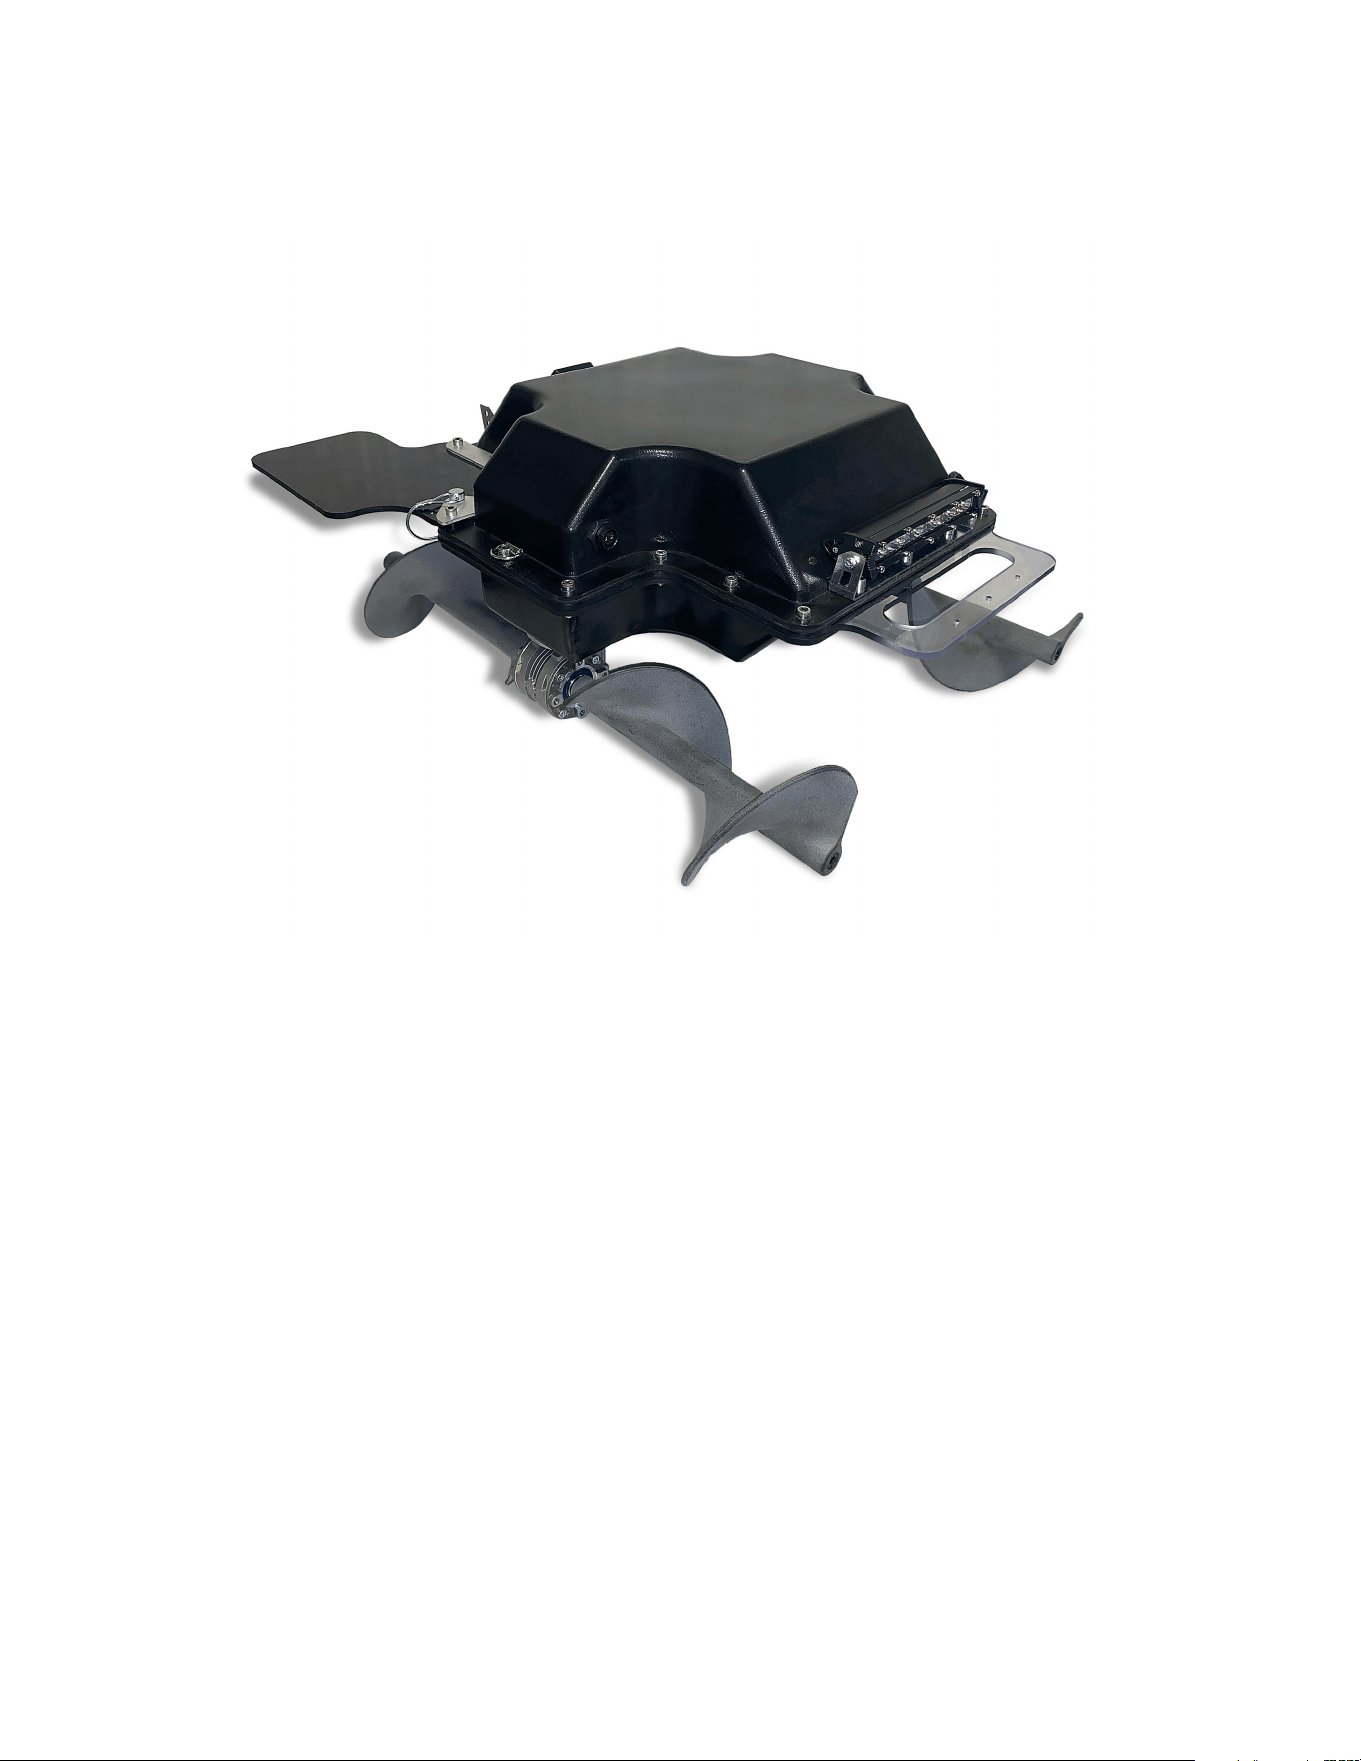
The Grain Weevil is a semi-autonomous robot designed to improve
grain bin safety, operational eciency, and grain quality. It eliminates
the need for humans to enter conned grain storage spaces, handling
tasks like leveling, crust breakup, and feeding grain into augers with
precision and control.
This manual contains essential safety information and
operating instructions—please read carefully before use to
ensure safe operation, maximize performance, and protect
your investment.

Publication # GWP001 | May 15, 2026 | Revision 1.1
All Rights Reserved | Grain Weevil Corporation
Table of Contents
Safety Warnings ...................................................1
Getting Started .....................................................2
Training Requirements .............................................2
Product Overview ..................................................3
Compliance & IP Statements .......................................4
Quick Installation & Setup Guide ...................................5
2.0 Safety Guidelines ...............................................6
2.1 Required PPE & General Safety
2.2 Hazard Classications & Bin Entry Conditions
2.3 Safety Expectations Checklist
3.0 Equipment Guidelines ..........................................8
3.1 Equipment Care ...........................................8
3.2 Equipment Use ............................................8
3.3 Deployment ..............................................9
3.3.1 Charging the Robot .................................9
3.3.2 Preparing for Deployment ..........................9
3.3.3 Running Operations ................................11
3.3.4 Retrieving the Robot ...............................12
4.0 Operations & Best Practices ....................................13
4.1 Operating Modes ...............................................13
4.1.1 Manual Drive ............................................13
4.1.2 Semi-Autonomous Mode ................................ 13
4.2 Driving Tips ....................................................14
4.3 Suggested Use Cases ...........................................15
4.4 Remote Control Quick Start Guide .............................16
4.5 Camera System Quick Start Guide ..............................18
4.6 Charger Quick Start Guide ...................................... 20
4.7 Robot Li System Quick Start Guide. . . . . . . . . . . . . . . . . . . . . . . . . . . . 22

Publication # GWP001 | May 15, 2026 | Revision 1.1
All Rights Reserved | Grain Weevil Corporation
Table of Contents cont.
5.0 Maintenance Troubleshooting & Repairs ....................24
5.1 Routine Maintenance ..................................24
5.2 Performance Indicators & Diagnostics .................26
5.3 Getting Support .......................................27
6.0 Legal / Acceptable Uses. . . . . . . . . . . . . . . . . . . . . . . . . . . . . . . . . . . . . .28
6.1 Permitted Use Environments ...........................28
6.2 Restricted Use Environments ..........................28
6.3 Warranty Overview ....................................29
6.4 Ownership, Resale, Transfer ...........................29
6.5 Soware and Data Policy ..............................29
7.0 Robot & Accessory Specications ............................30
7.1 Robot Specications ...................................30
7.2 Remote Control Specications .........................30
7.3 Camera System Specications ..........................31

Publication # GWP001 | May 15, 2026 | Revision 1.1
All Rights Reserved | Grain Weevil Corporation
Publication # GWP001 | May 15, 2026 | Revision 1.1
All Rights Reserved | Grain Weevil Corporation
1
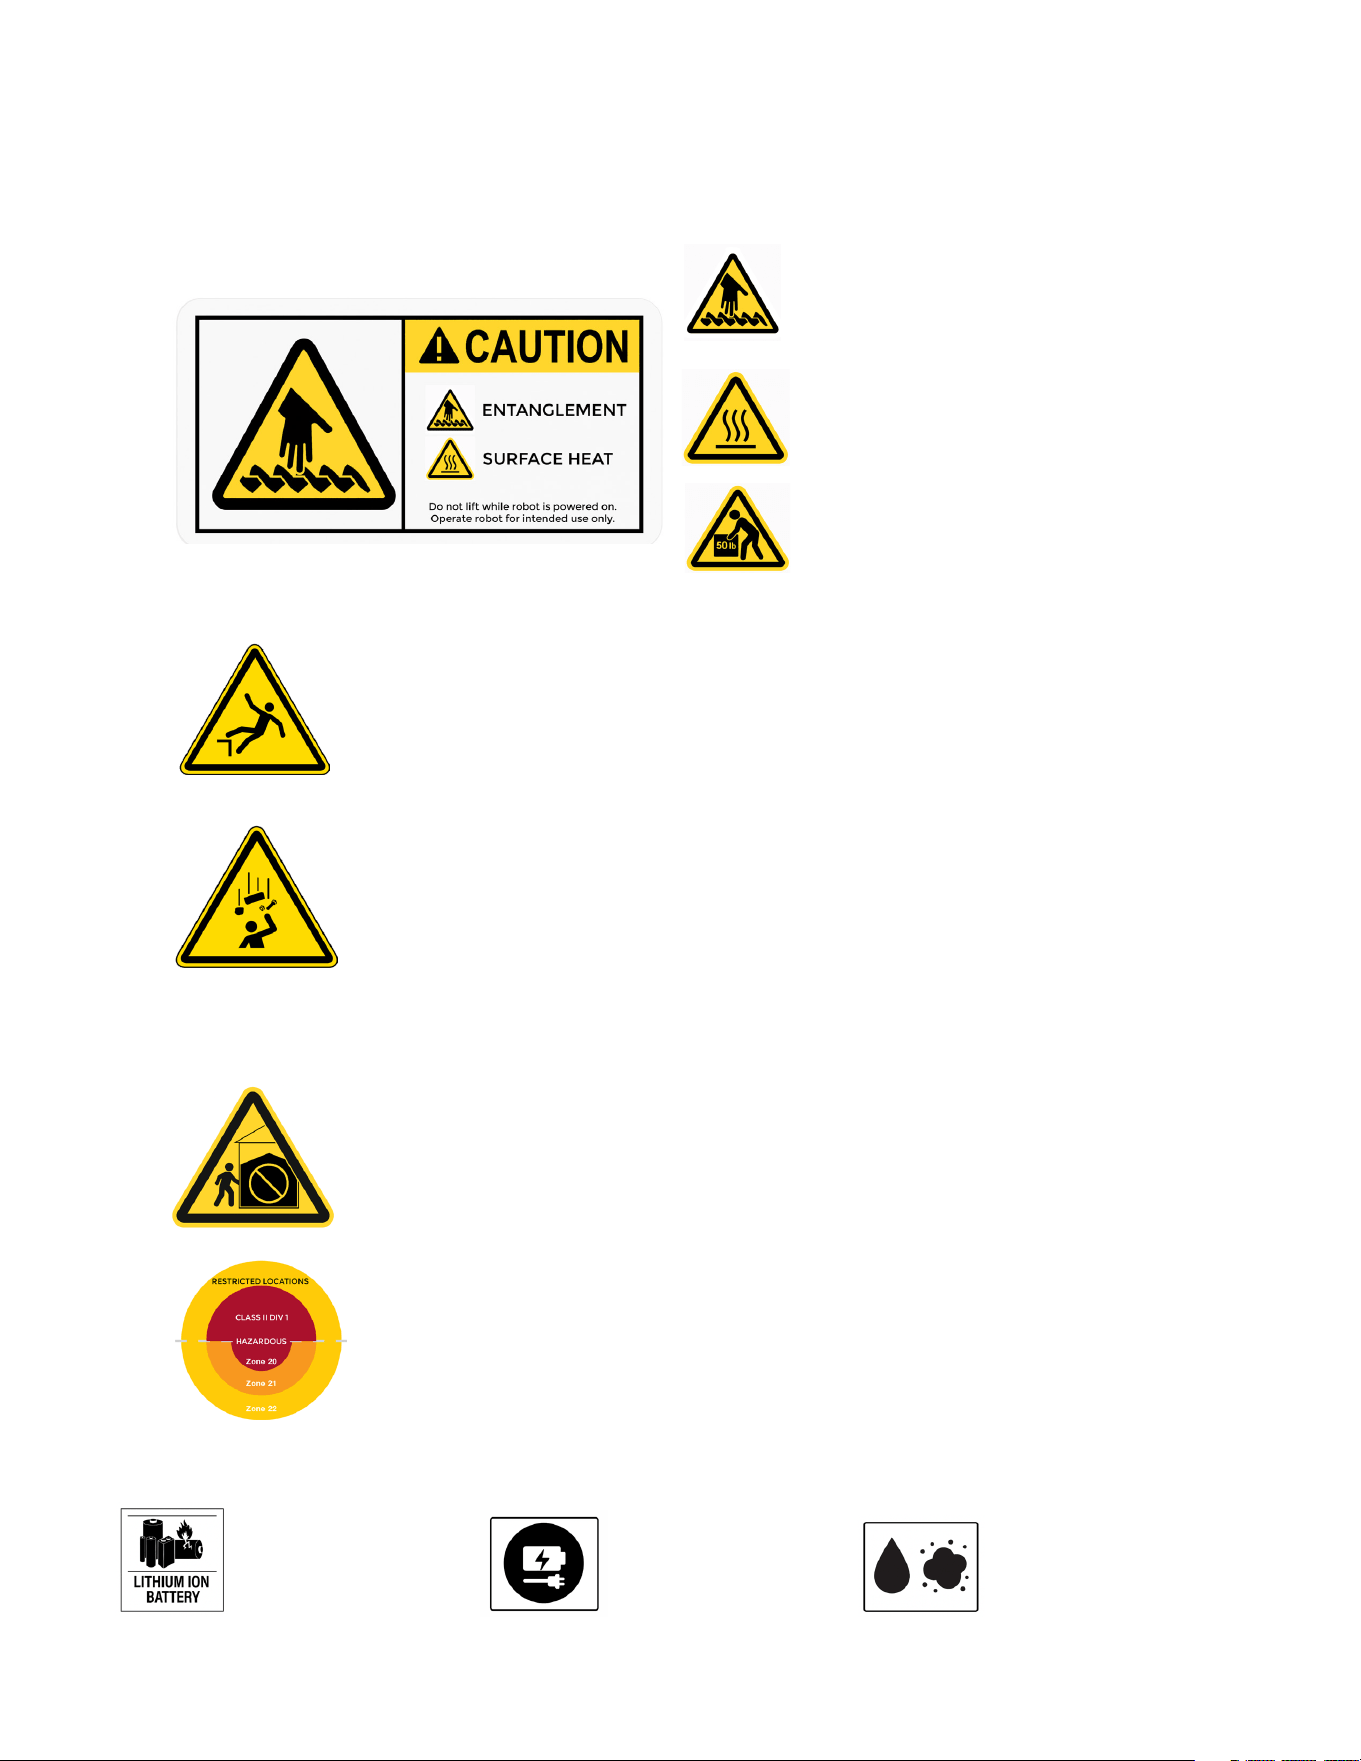
Safety Warnings
ROBOT
ENTANGLEMENT
Do not li or carry robot while powered on.
Pinch points and entanglement possible.
SURFACE HEAT
Gear boxes may be hot during and aer
operations.
LIFT SYSTEM
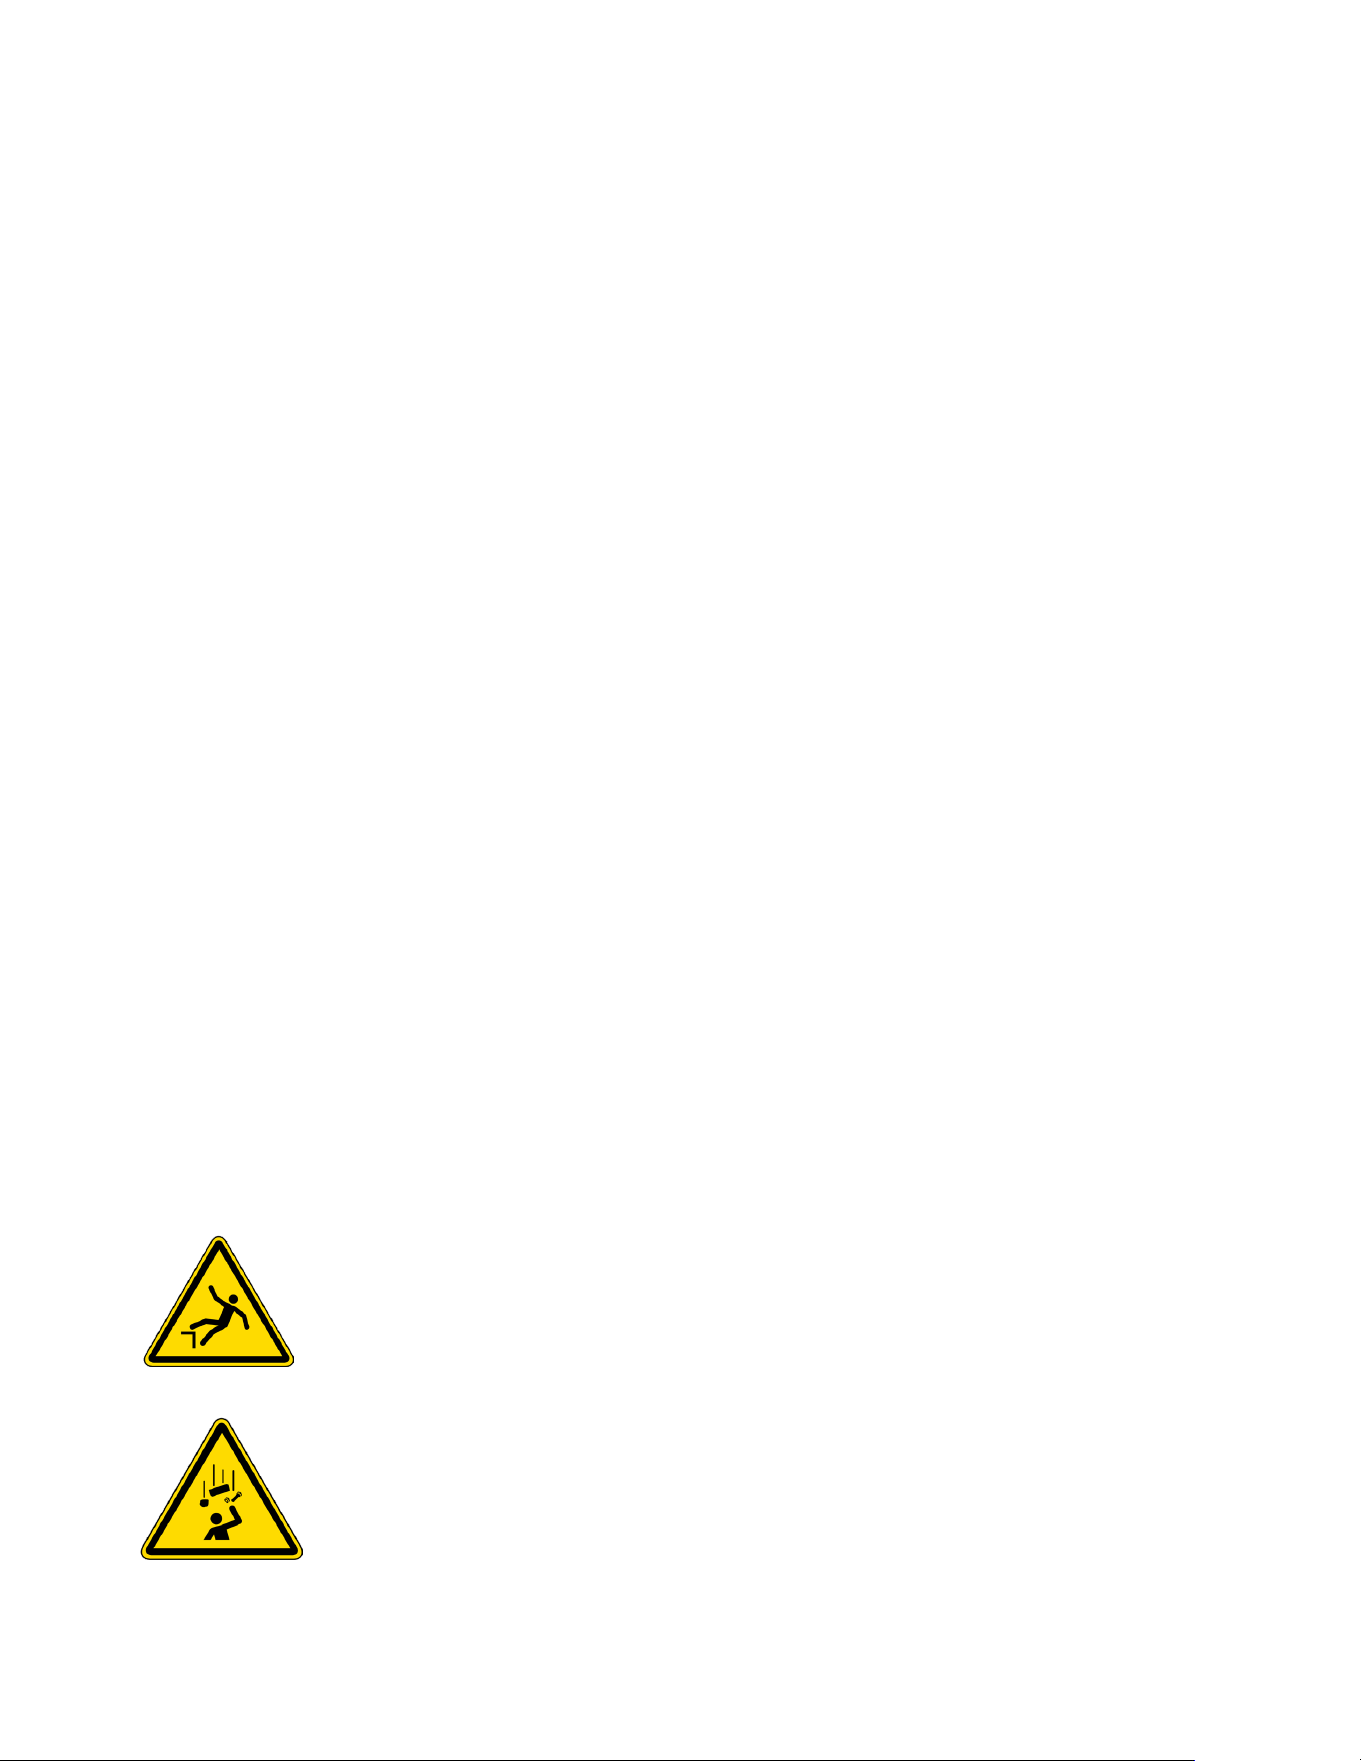
FALL HAZARD
Do not attempt to li or carry robot into the grain bin manually. Fall risk increases
when carrying heavy objects. While operating Li System - use caution and wear
all required personal protective equipment including a fall harness.
FALLING OBJECTS
Do not stand within the fall danger zone while liing or lowering the robot. If
using a single person operation, ensure winch is located in a safe orientation.
If using a two-person operation, ensure both parties are clear of danger before
winching robot.
GRAIN BIN WARNING
ZERO BIN ENTRY
Follow all recommended bin entry protocols. Grain Weevil recommends zero bin
entry and has provided suggested procedures to recover a stranded robot that can
be achieved with zero entry.
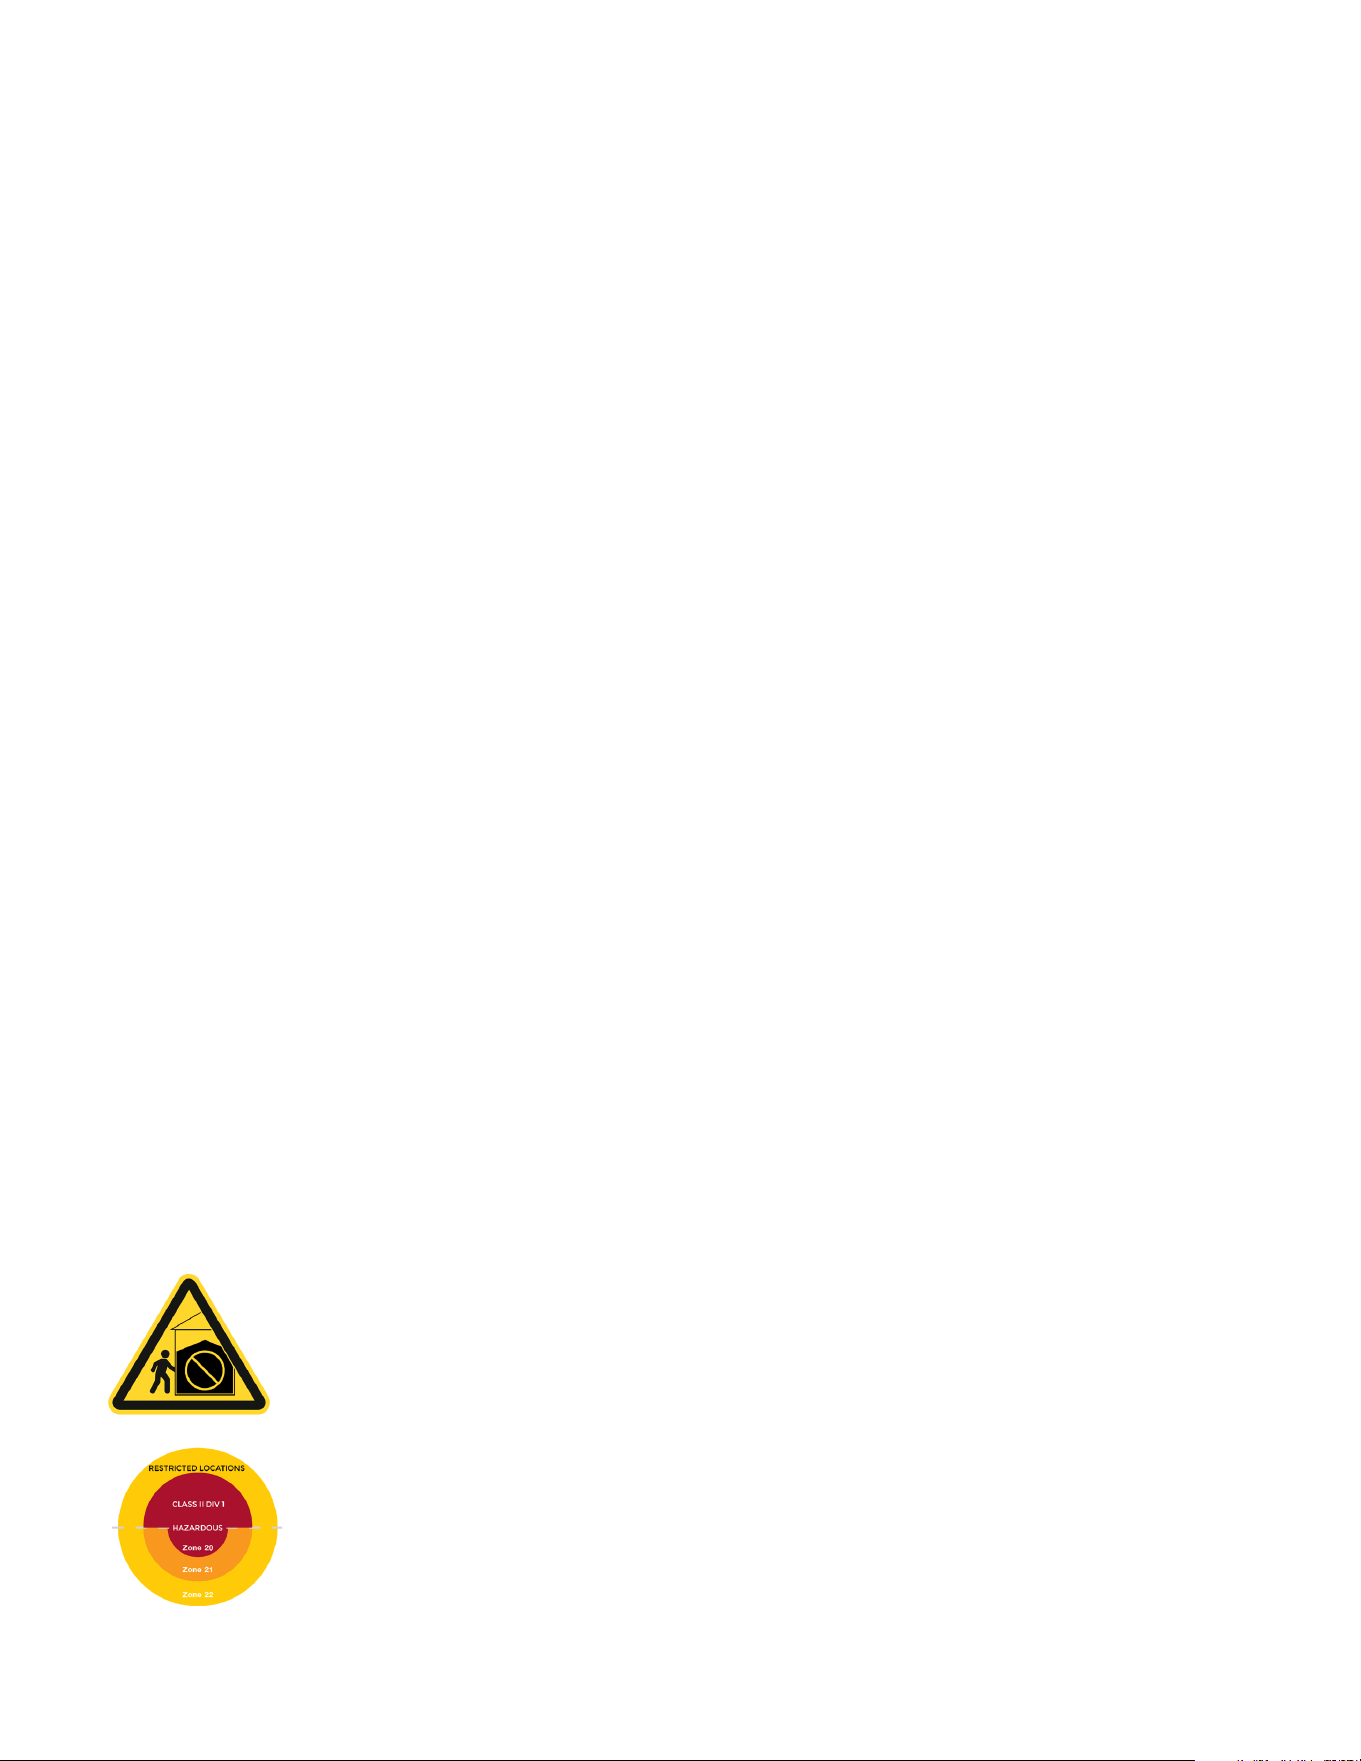
RESTRICTED LOCATIONS
Do not use the Grain Weevil or any of the associated equipment within a Zone
20 / Class II Div 1 Hazardous Environment without written consent from Grain
Weevil, accompanied by a company wide safety exemption.
ELECTRICAL SAFETY
Powered by:
Toshiba LTO
See Battery Manual
Do Not Charge
While Robot is in
the Bin
Engineered to IP65
Standards
DO NOT SUBMERGE
HEAVY OBJECT
Robot weighs 50 lbs but is also an unusual
shape. Use caution when liing / carrying
Publication # GWP001 | May 15, 2026 | Revision 1.1
All Rights Reserved | Grain Weevil Corporation
2
Getting Started
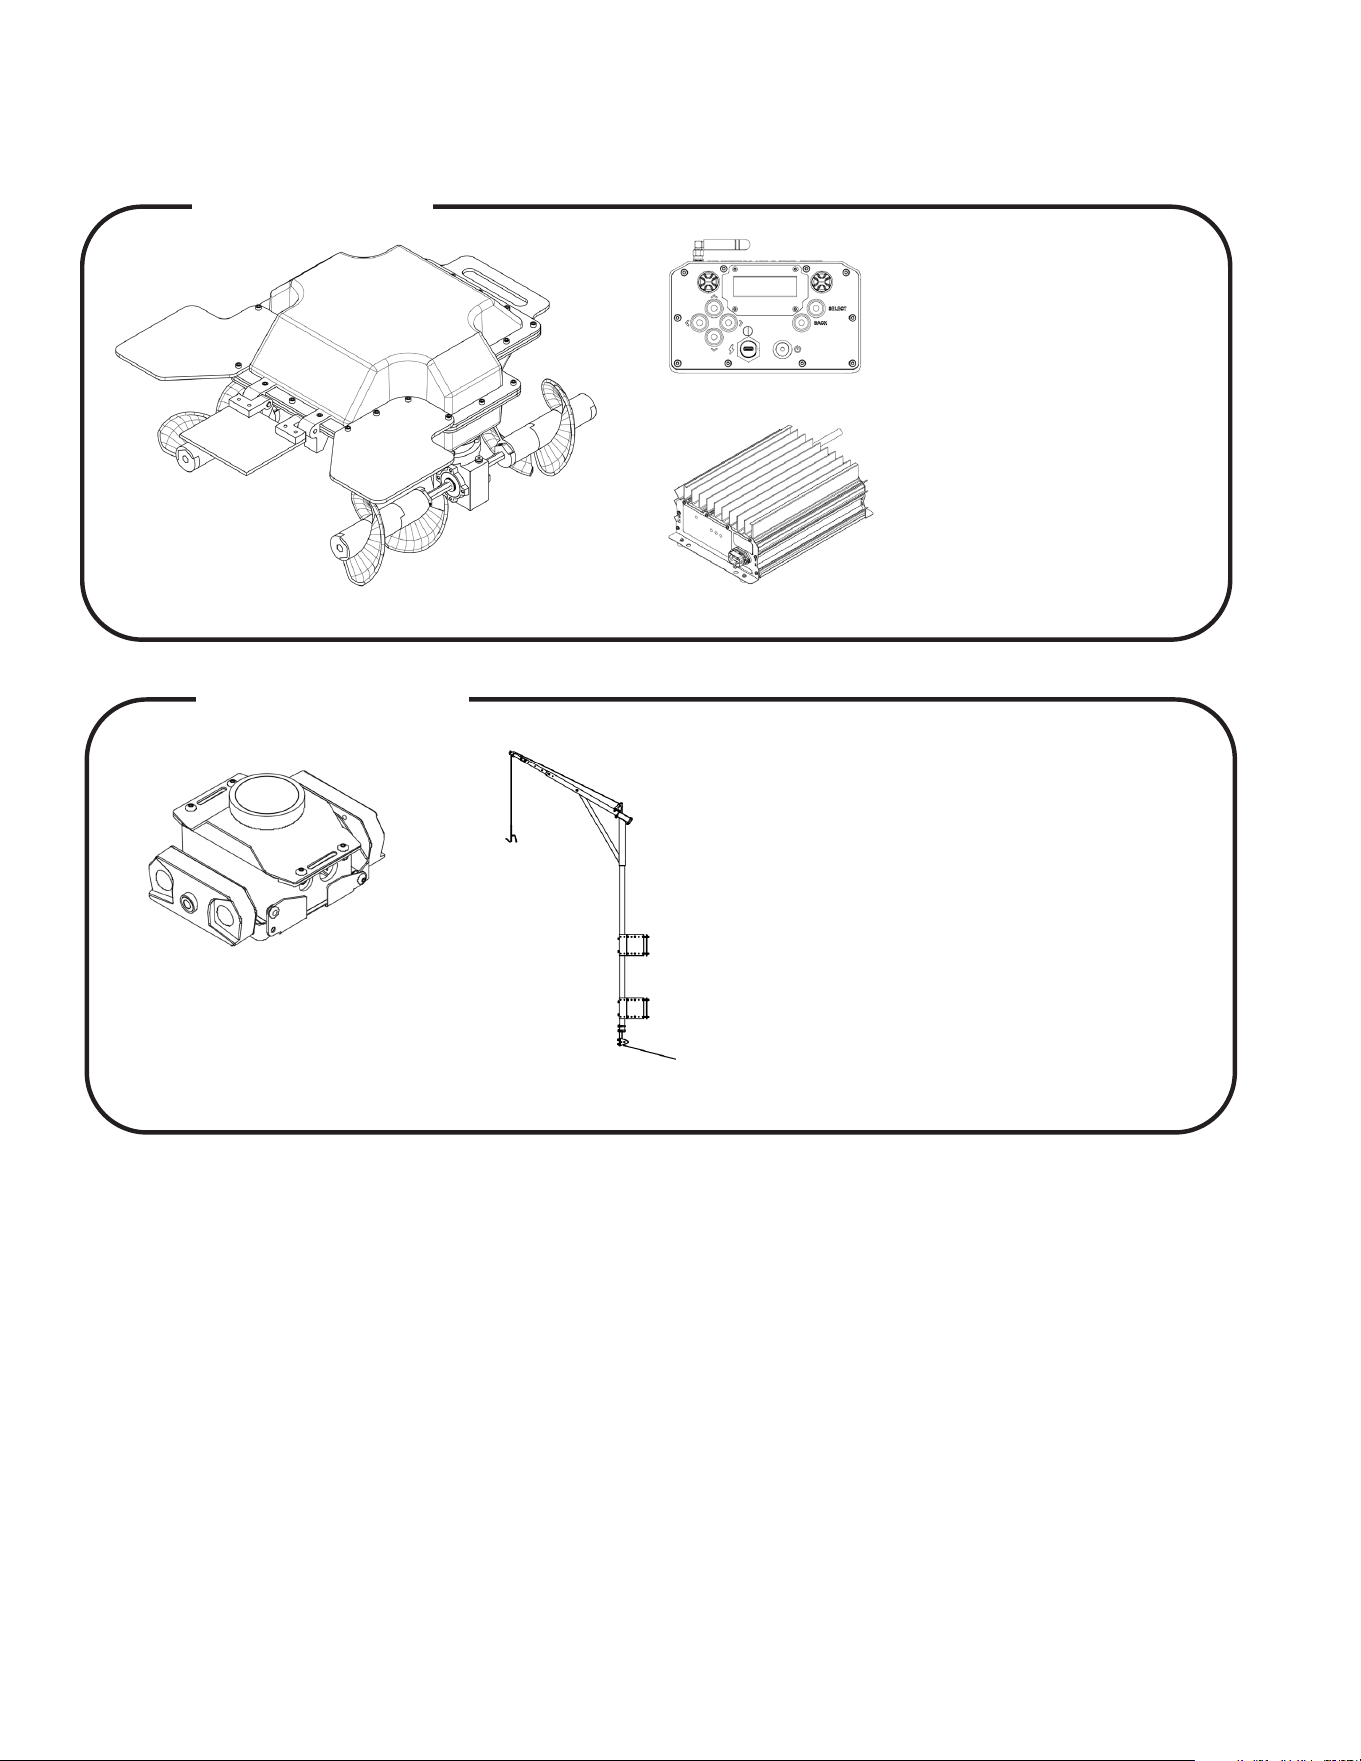
Core Components
GW Series 1 Robot w/Shovel & Wings
Remote Controller
Standard Charger
Safety Components
FPV Dual Camera
System
Robot Li System
Additional Items Included:
• Light Bar
• Safety Signage
• Tether Kits
Additional Items Required:
(Not Included)
• Android based phone or
tablet
Training Requirements
Before Operating the Grain Weevil Robot, all users must:
• Review this User’s Guide in full
• Be familiar with bin entry standards and personal protective equipment required
• Ensure the bin is NOT classied as a Class II Div 1 (or Zone 20) hazardous location
Where to Get Help
Support Contact: Scan QR Code on your robot
Visit www.grainweevil.com for links to training materials
Always contact support before attempting to open the robot body or perform non-routine repairs.
Publication # GWP001 | May 15, 2026 | Revision 1.1
All Rights Reserved | Grain Weevil Corporation
3
Product Overview
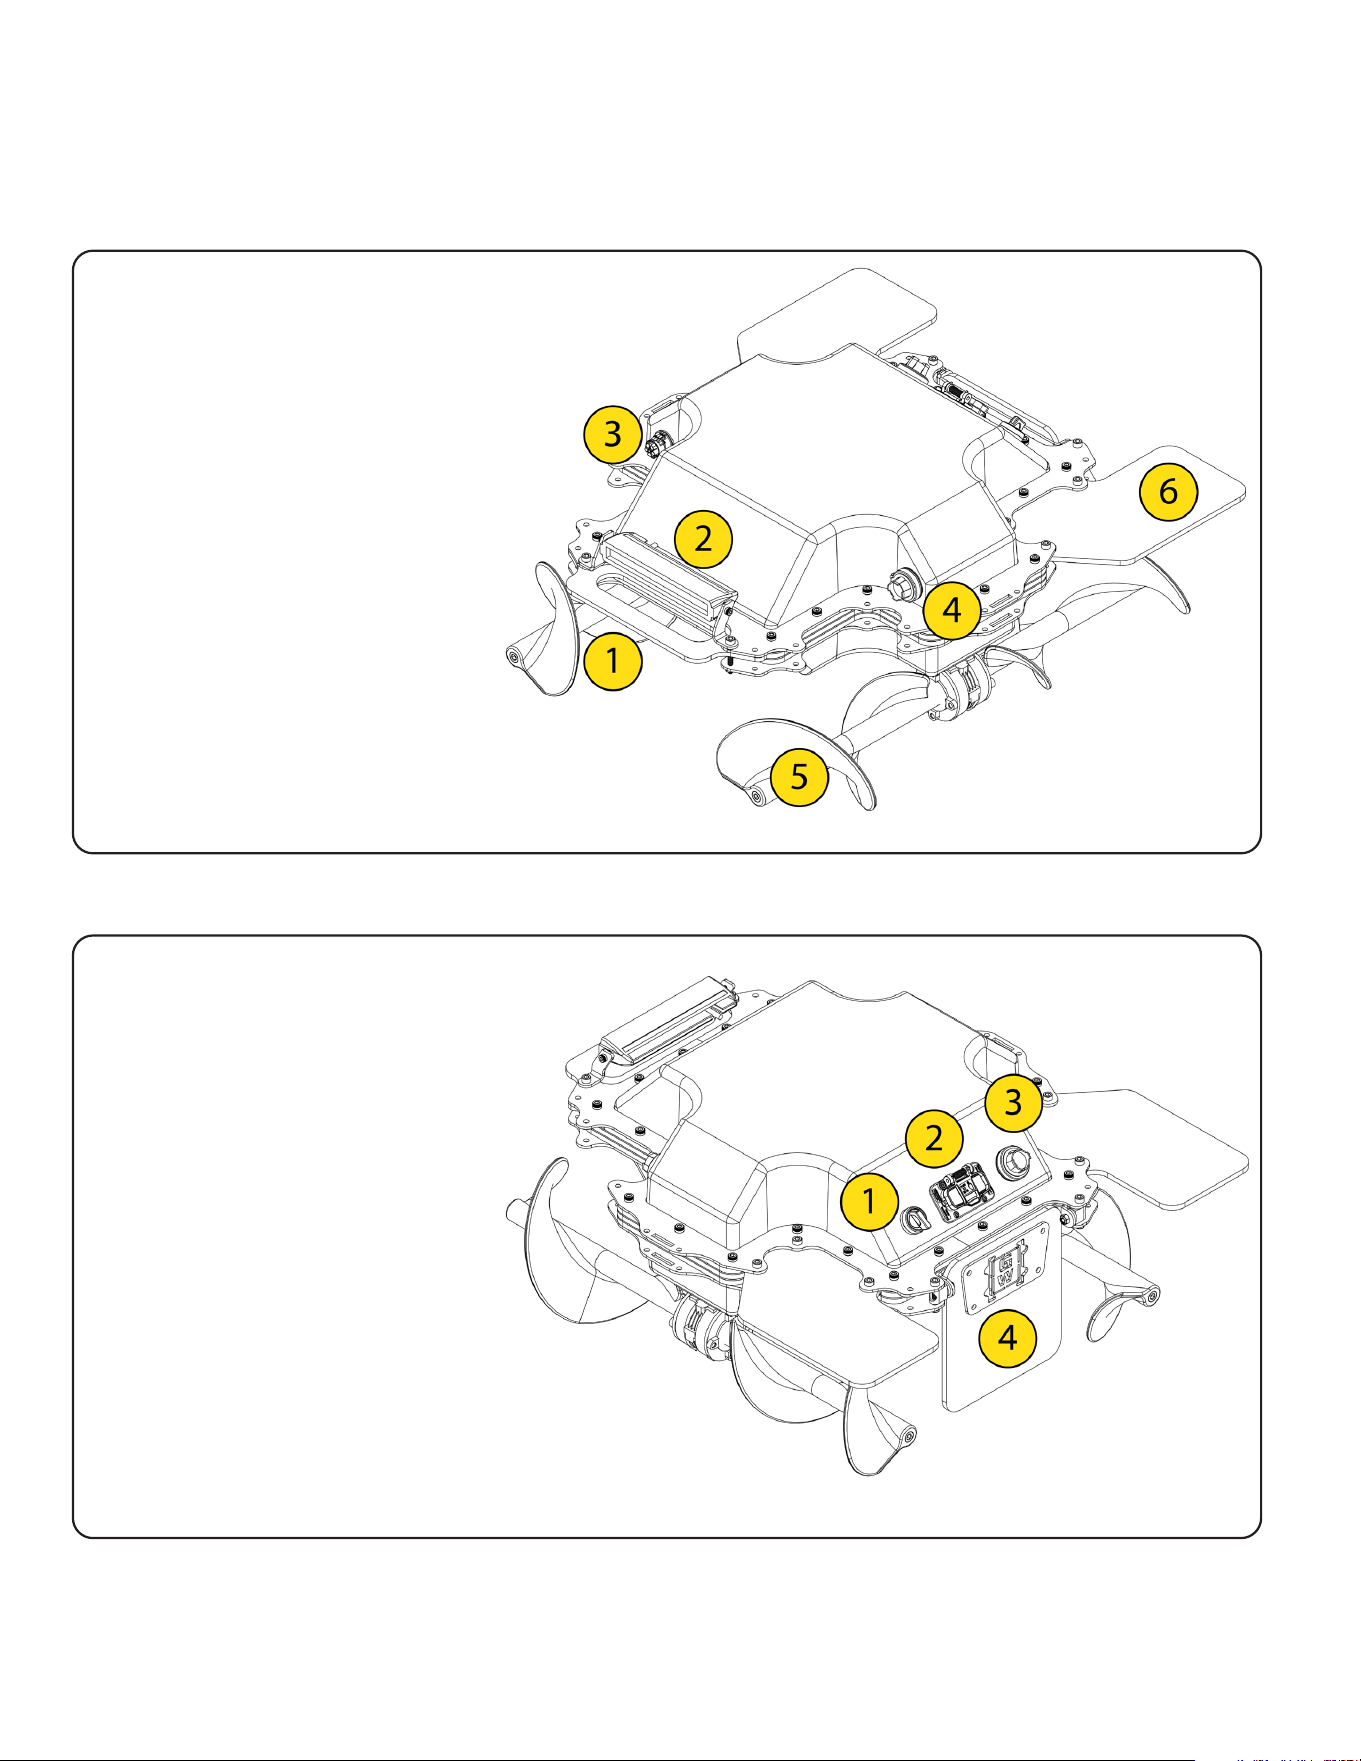
Essential Components: Front View
1. Robot handle
2. LED Headlight
3. Accessory Power Port
4. Accessory Data Port
5. Auger Drive System
6. Stablizer Wings
Essential Components: Rear View
1. On / O Switch
2. Charge Port
3. USB Programming Port
4. Shovel Accessory

Publication # GWP001 | May 15, 2026 | Revision 1.1
All Rights Reserved | Grain Weevil Corporation
4
Regulatory Statements
Applicable Products
Product Grain Weevil Robot Grain Weevil Remote
Model Number GWR1.1 GWC1.0
FCC ID: 2BRGK-GWRBT100 2BRGK-GWRMT300
IC: 35446-GWRBT100 35446- GWRMT300
United States (FCC)
is device complies with part 15 of the FCC Rules. Operation is subject to the following two conditions:
1) is device may not cause harmful interference, and
2) this device must accept any interference received, including interference that may cause undesired operation.
Changes or modications not expressly approved by the party responsible for compliance could void the user’s authority to operate the
equipment.
is equipment generates, uses and may radiate radio frequency energy and, if not installed and used in accordance with the instructions, may
cause harmful interference to radio communications. However, there is no guarantee that interference will not occur in a particular location. If
this equipment does cause harmful interference to radio or television reception, which can be determined by turning the equipment of and on,
the user is encouraged to try to correct the interference by one or more of the following measures:
• Reorient or relocate the receiving antenna.
• Increase the separation between the equipment and receiver.
• Connect the equipment into an outlet on a circuit dierent from that to which the receiver is connected.
• Consult the dealer or an experienced radio/TV technician for help.
Canada (ISED)
is product complies with Industry Canada’s licence-exempt RSSs. Operation is subject to the following two conditions:
1) is device may not cause interference; and
2) is device must accept any interference, including interference that may cause undesired operation of device.
Le présent appareil est conforme aux CNR d’Industrie Canada applicables aux appareils radio exempts de licence. L’exploitation est autorisée
aux deux conditions suivantes :
1) l’appareil ne doit pas produire de brouillage;
2) l’appareil doit accepter tout brouillage radioélectrique subi, même si le brouillage est susceptible d’en compromettre le fonctionnement.
Brazil (ANATEL)
Este equipamento não tem direito à proteção contra interferência prejudicial e não pode causar interferência em sistemas devidamente
autorizados. Este produto não é apropriado para uso em ambientes domésticos, pois poderá causar interferências eletromagnéticas que
obrigam o usuário a tomar medidas necessárias para minimizar estas interferências.
Intellectual Property
The Webpage and the List provided below are posted on the Internet to give notice to the public of patent rights in compliance with the virtual
patent marking provisions of the United States under 35 U.S.C. § 287(a). There is no charge or other requirement for accessing this publicly
available information.
The List is posted on the Internet at the web address or Link (Pat. www.grainweevil.com/patents) xed on or otherwise associated with a
corresponding patented article to give constructive notice to the public of the patent(s) listed. Other patent rights may be identied on the List
relating to patent rights in other jurisdictions.
The List might not be all inclusive and other Products not on the List may be associated with one or more Properties in the United States or
elsewhere. Absence of a Property and/or associated Product from the List should not be construed to mean that there is no constructive notice.
Properties currently not associated with a Product and Properties having method claims are but two examples of why a Property might not be
on the List yet entitled to the full measure of constructive notice available under law. Absence of any Property and/or Product from the List does
not prevent nor limit enforcing any and all legal rights and remedies associated with the Property and/or Product. In addition, including on the
List Properties not currently associated with a Product and, similarly, Properties with method claims associated with a Product resulting from or
otherwise related to the method claim(s) may be provided to provide disclosure and abundant notice to the public even if currently not required
under 35 U.S.C. § 287(a) and applicable judicial interpretations.
Publication # GWP001 | May 15, 2026 | Revision 1.1
All Rights Reserved | Grain Weevil Corporation
5
Installation & Setup Guide
QUICK
REGISTER YOUR SYSTEM
Using your cell phone or mobile device, scan the QR code on your robot’s name plate.
Once inside the Gripp App, create your account password and begin the New Robot
Setup Routine.
SITE PREP
Evaluating and preparing your grain bin sites for safe and ecient operations
is key to early success. Please use the QR code to watch a site prep video.
SAFETY CHECKLIST
The rst step of the New Robot Setup Routine on your app is to complete and sign o on a
safety checklist. Please complete this step to ensure you understand the safe operations of
the robot system.
LIFT INSTALL
Please refer to the the Li Install instruction manual for full details on how to
properly install your permanent li system. The QR code links you to a video
demonstration of the li install.
CHARGING INSTRUCTIONS
Each time you plan to operate the robot you should charge your robot battery,
your remote control battery, and your camera battery. You can nd specic
instructions for each in their individual quick start guides
GETTING TO KNOW YOUR ROBOT
While operating your robot is relatively intuitive, please ensure that you
understand the operating procedures, the operational best practices, and
maintenance routines.
BINASSIST & CUSTOMER SUPPORT
During your deployment consultation, your BinAssist Partner will ensure you know how to
reach them using the QR code on your robot, nd self-help instructions for frequently asked
questions, and initiate customer support services.
Publication # GWP001 | May 15, 2026 | Revision 1.1
All Rights Reserved | Grain Weevil Corporation
6
Safety Guidelines
2.1 Required PPE and General Safety
Before operating the Grain Weevil system, all personnel must wear:
• Tight-tting work gloves
• Safety glasses or goggles
• Dust mask or respirator when working in dusty environments
• Slip-resistant footwear
• Close-tting clothing (no loose sleeves, jewelry, or drawstrings)
Operators must not enter grain bins during or aer robot deployment. Always observe from out-
side the bin using camera or tethered view tools.
2.2 Hazard Classications and Bin Entry Conditions
Grain bins present multiple hazards including:
• Entrapment/engulfment in owing grain
• Crusted grain collapse
• Auger entanglement
• Poor air quality (dust, fumigants, mold)
• Structural failure
No operations should occur in bins classied as Class II Div 1 ( Zone 20 ) hazardous environments
unless the robot is explicitly certied for those conditions. This includes:
• Most commercial grain facilities
• Bins with high dust ignition risk
Conrm your bin is not at risk for dust explosion before deploying robot. If in doubt, do not use
the robot in that environment.
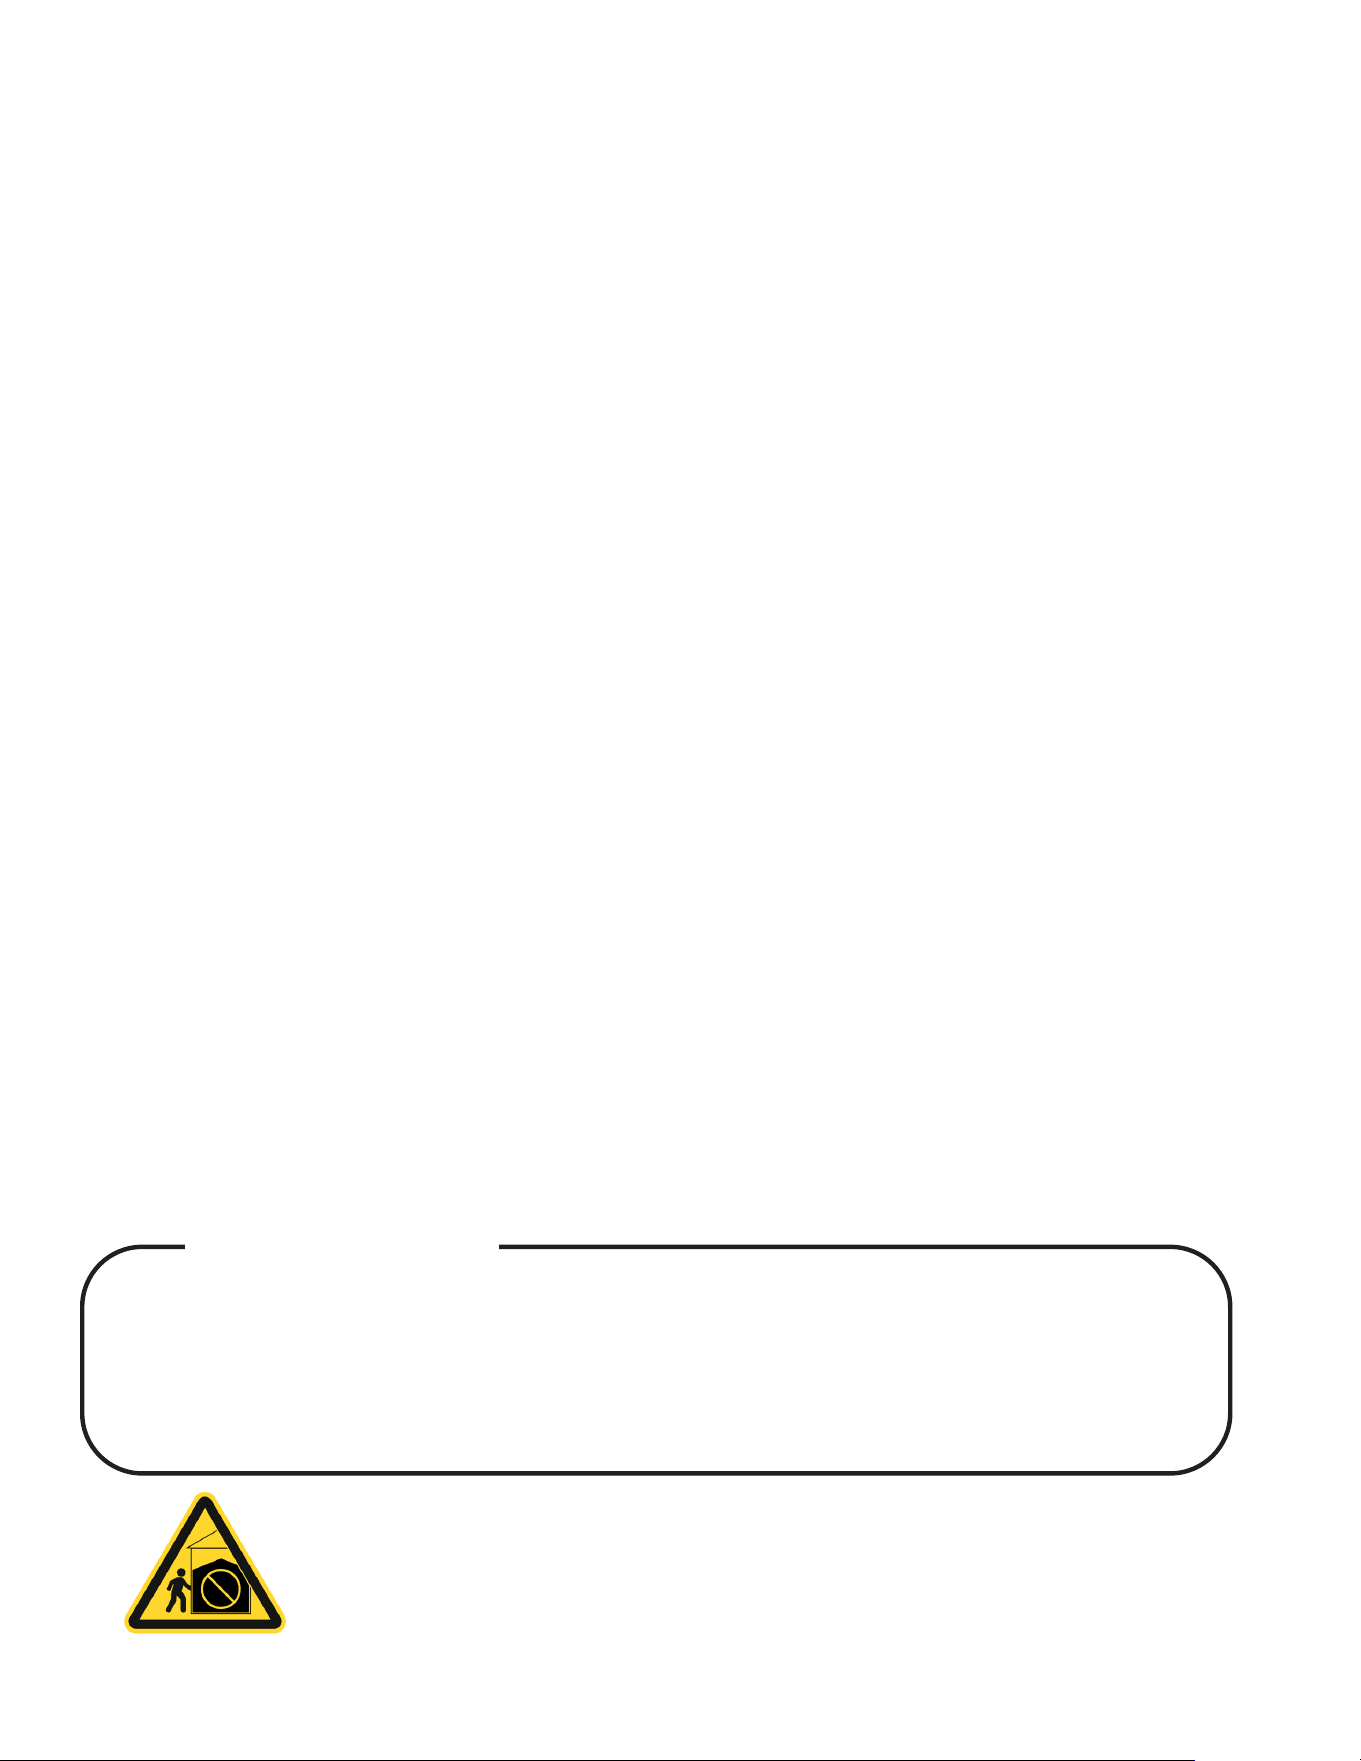
ZERO BIN ENTRY
Follow all recommended bin entry protocols. Grain Weevil recommends zero bin
entry and has provided suggested procedures to recover a stranded robot that can
be achieved with zero entry.
RESTRICTED LOCATIONS
Do not use the Grain Weevil or any of the associated equipment within a Zone
20 / Class II Div 1 Hazardous Environment without written consent from Grain
Weevil, accompanied by a company wide safety exemption.

Publication # GWP001 | May 15, 2026 | Revision 1.1
All Rights Reserved | Grain Weevil Corporation
7
Safety Guidelines
2.3 Safety Expectations and Checklist
The following expectations are required for all users of the Grain Weevil system:
Statement of Safety Expectations – Checklist
ESTABLISH FARM / ORGANIZATIONAL POLICIES
▢ Develop and implement a fall protection program for your farm/organization. Ensure all family
members and/or employees are trained on the program and maintain records of the training.
Make available, maintain, and replace as needed the necessary equipment for a fall protection
program.
▢ Develop and implement a grain bin entry program for your farm/organization. Ensure all
family members and/or employees are trained on the program and maintain records of the
training. Make available, maintain, and replace as needed the necessary equipment for a grain bin
entry program.
▢ Develop and implement a respiratory protection program for your farm/organization.
Ensure all family members and/or employees are trained on the program and maintain records
of the training. Make available, maintain, and replace as needed the necessary equipment for a
respiratory protection program.
▢ Verify that the grain bin OWNER is aware that the Grain Weevil robot does not have Class II,
Division 1 certication for use in a combustible dust environment. When the operation employs
more than 10 people, OSHA compliance is required by law.
PERSONAL SAFETY AND PROTECTION
▢ Wear adequate eye protection when working with the robot.
▢ Avoid wearing loose clothing when working with the robot.
▢ When gloves are worn, use tight tting gloves to avoid entanglement.
▢ Wear appropriate dust masks or respirators when working around grain bins.
▢ Always use caution when working from heights.
Publication # GWP001 | May 15, 2026 | Revision 1.1
All Rights Reserved | Grain Weevil Corporation
8
3.1 EQUIPMENT CARE
• Never pick up a robot to inspect, perform maintenance, transport, or otherwise handle unless
the robot has been powered o.
• Perform the recommended inspection, maintenance, component replacement, and
cleaning per Grain Weevil instructions, including applicable instructions from component
manufacturers.
• Do not open the robot enclosure unless you are an authorized Grain Weevil service technician.
• The robot utilizes a rechargeable, lithium-ion battery. Lithium-ion batteries may explode or
cause res when not properly cared for. Follow all safety, maintenance, operation, and storage
recommendations from the battery manufacturer. Do not attempt to repair, replace, or remove
the battery.
• Follow all battery and charger safety protocols when charging the battery.
• Follow all cord safety protocols when setting up the charger and when charging the battery.
• Store robot inside a building while not in use.
3.2 EQUIPMENT USE
• Only use the robot for its intended purpose of grain management.
• Only use the crane and winch assembly for their intended purpose of liing and lowering the
components of the Grain Weevil system.
• Post the overhead hazard sign. Ensure work area is clear prior to liing and lowering
operations.
• Do not operate the robot in owing grain.
• Follow robot recovery procedures.
Equipment Guidelines
FALL HAZARD
Do not attempt to li or carry robot into the grain bin manually. Fall risk increases
when carrying heavy objects. While operating Li System - use caution and wear
all required personal protective equipment including a fall harness.
FALLING OBJECTS
Do not stand within the fall danger zone while liing or lowering the robot. If
using a single person operation, ensure winch is located in a safe orientation.
If using a two-person operation, ensure both parties are clear of danger before
winching robot.
Publication # GWP001 | May 15, 2026 | Revision 1.1
All Rights Reserved | Grain Weevil Corporation
9
Deployment: From Charging to Retrieval
Follow this step-by-step example to deploy the Grain Weevil safely and eectively.
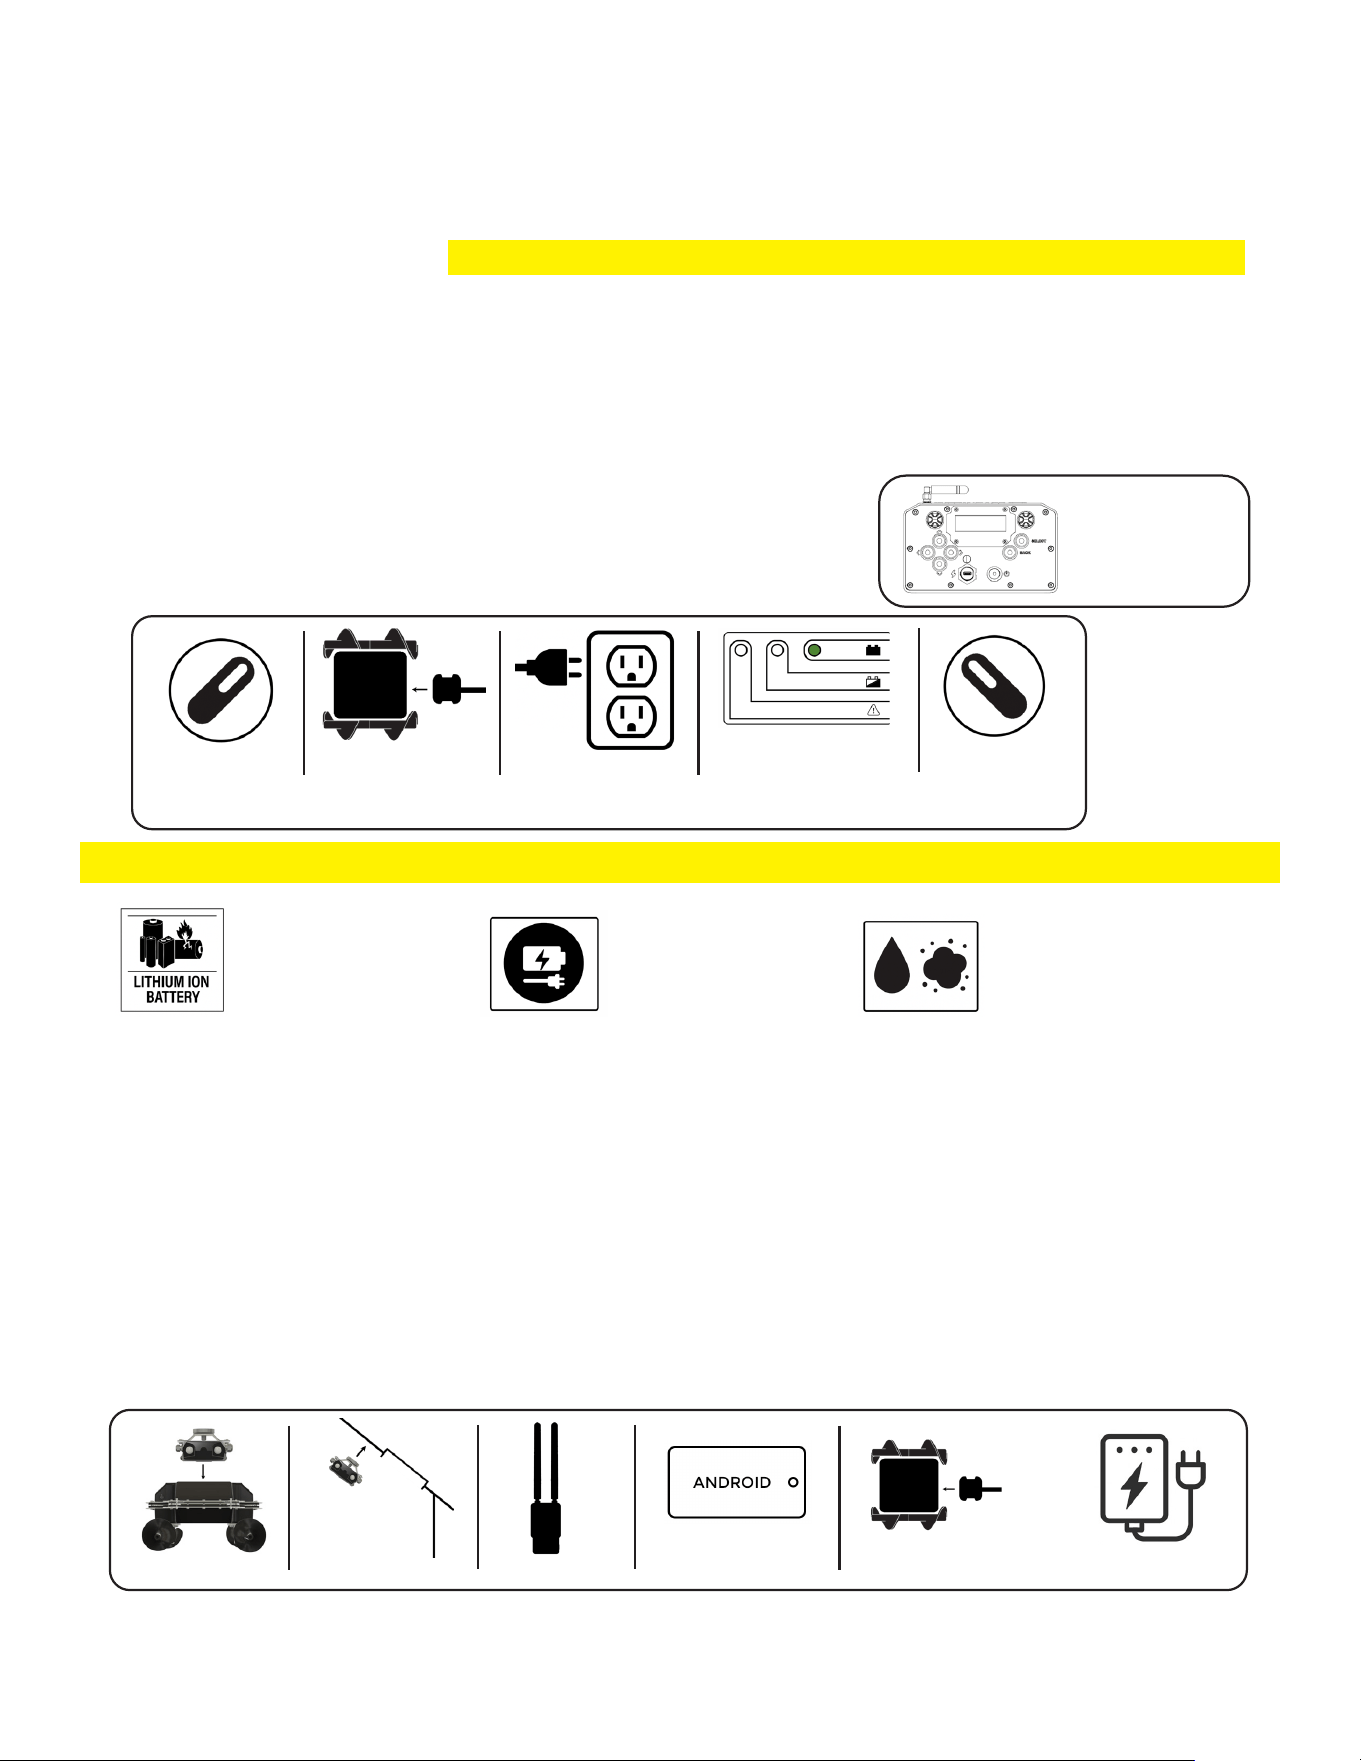
Step 1: Charging the Robot
1. Power the robot on (must be on to charge).
2. Connect the charging cable to the robot’s charger port. (Connect before plugging in charger into AC
Power)
3. Plug the charger’s AC power cord into a standard 120V or 220V outlet (if using a Super Charger),
ensuring the unit is grounded and dry.
4. Conrm charging LEDs status on charger
5. Wait until the LED on charger shows solid green = full charge.
6. Turn the robot o
7. Disconnect the charger, store and prepare for transport.
Charge
Your
Remote
Step 2: Preparing for Deployment
1. Conrm bin access is clear and all required PPE is in use.
2. Prepare the Permanent Li System (as shown in Li System User Guide)
3. Inspect hook, cable, and winch frame for damage.
4. Safely climb to open the hatch and prepare for a safe deployment from the bin platform.
5. Set up Bin Camera System inside of bin above the hatch door or mount directly to the robot.
ELECTRICAL SAFETY
Powered by:
Toshiba LTO
See Battery Manual
Do Not Charge
While Robot is in
the Bin
Engineered to IP65
Standards
DO NOT SUBMERGE
Robot Mount Hatch Mount Camera Link
Tablet
(Not Included)
Power Camera Via
Accessory Port
OR
External
Power Pack
Your Robot is shipped DISCHARGED - you must charge rst
PLUG IN
CHARGER
PLUG IN
ROBOT
ROBOT
ON
ROBOT
OFF
CHARGING
Publication # GWP001 | May 15, 2026 | Revision 1.1
All Rights Reserved | Grain Weevil Corporation
10
Deployment: From Charging to Retrieval
Step 2: Preparing for Deployment (continued)
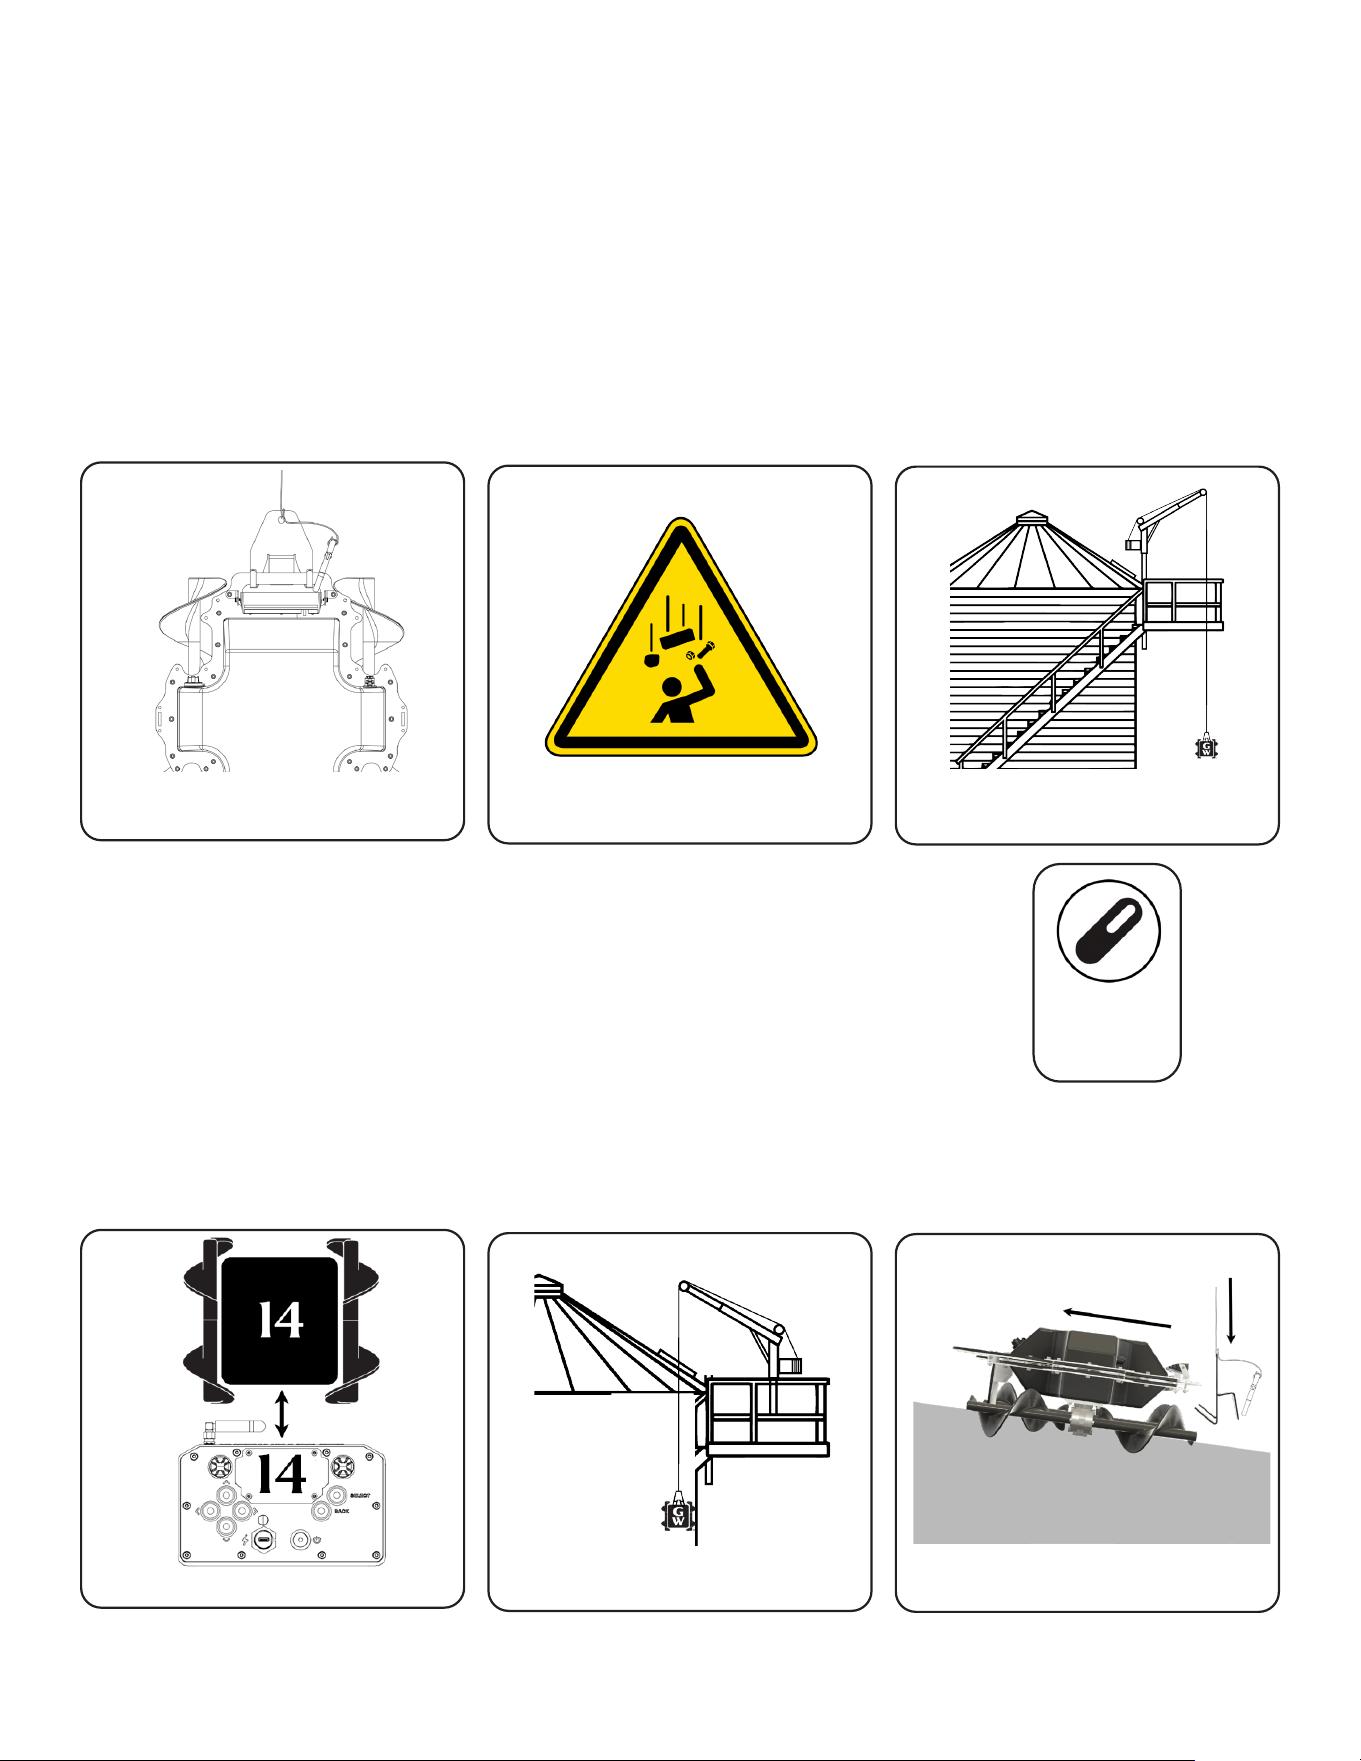
6. Ensure lowering and liing area is clear of humans or property. Use overhead liing signage in liing
area.
7. Use the winch and portable drill (user provided) to lower hook to ground or safe robot access point.
8. For all liing & lowering activities outside of the bin, connect the carabiner hook securely to the robot
handle.
9. Validate that the robot and remote control function as intended while still on the ground - then turn o.
9. Use the winch to slowly li robot to hatch door or access area.
10. Remove secured carabiner from robot hook attachment
11. Power on the robot; LED ring should glow solid green when paired.
12. Safely transfer Robot into the Bin.
13. When robot is positioned on the grain, the robot hook will release itself.
14. Power on the controller and pair it to the robot using ID Select screen.
15. Slowly back the robot away from the hook to disengage.
16. Retreive the robot hook by reversing the drill and liing far enough to not impede robot operations
** If required, please follow the special instructions for operating the robot while tethered **
Turn ON
Robot Before
Lowering
FALLING OBJECTS
Secure Robot Hook &
Safety Clip Before Liing
Slowly Li Robot to Top
of the Bin
Pair Robot & Remote
Lower Robot
into the Grain
Once Hook is Detached
Back Robot Away from Hook
Publication # GWP001 | May 15, 2026 | Revision 1.1
All Rights Reserved | Grain Weevil Corporation
11
Step 3: Running Operations
1. Using the Robot Controller buttons and screen, navigate to Manual Mode page to test drive. (as shown
in Robot Controller User Guide)
2. Adjust speed using the on-screen speedometer speed adjustment selector
3. Determine your operational task:
Leveling: push grain from peaks or edges.
Crust breakup: approach slowly and let augers engage.
Extraction assist: push grain toward grain sump or auger opening.
4. Ensure robot operations, controller, and camera are performing as expected.
5. Return to the safest location to operate the robot remotely - We suggest sitting in a vehicle near the
base of the bin you are working on.
6. Refer to Section 4 in your User’s Manual or scan the QR code on your robot for operational best
practices and driving techniques by task.
Deployment: From Charging to Retrieval
Robot Operation Specs
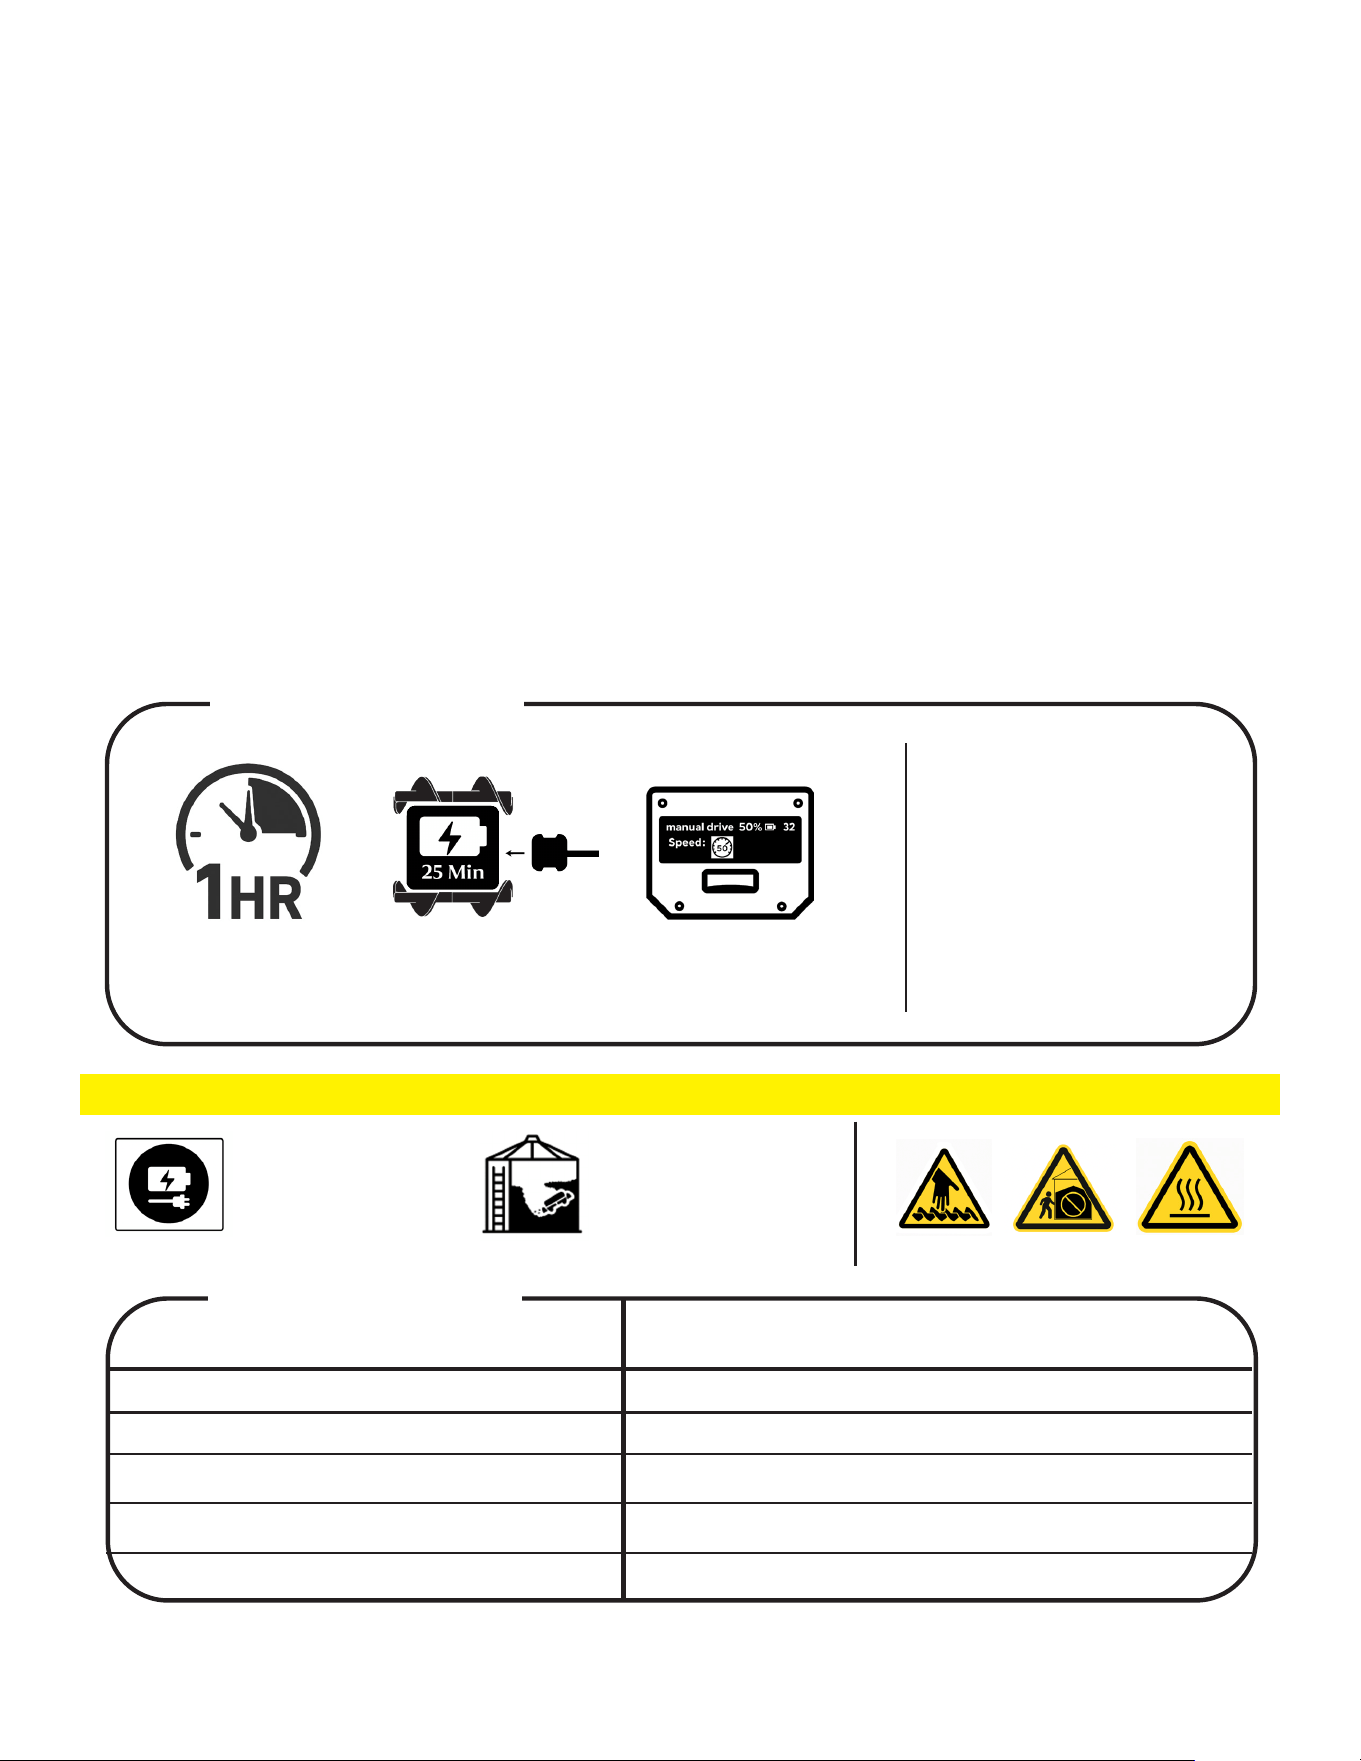
RUN TIME RECHARGE
DRIVE SPEED
50-70
• Watch for Robot Status Light
Changes
• Always Start at Lower Speeds
Then Progress to Comfortable
Pace
• If Robot Becomes Disabled in
Bin Follow All Safe Retreival
Recommendations
OPERATIONAL SAFETY
Do Not Charge
While Robot is in
the Bin
Consider Tethering
if Crust or Bridge
Present
(KNOW THE LIMITS OF
THE ROBOT)
LED Light Indicator
COLOR MEANING
Solid Green
Solid Amber
Solid Red
Blue
Yellow
Operating Normally
Low Battery Mode
Error
Disconnected
Startup Sequence in Process
Publication # GWP001 | May 15, 2026 | Revision 1.1
All Rights Reserved | Grain Weevil Corporation
12
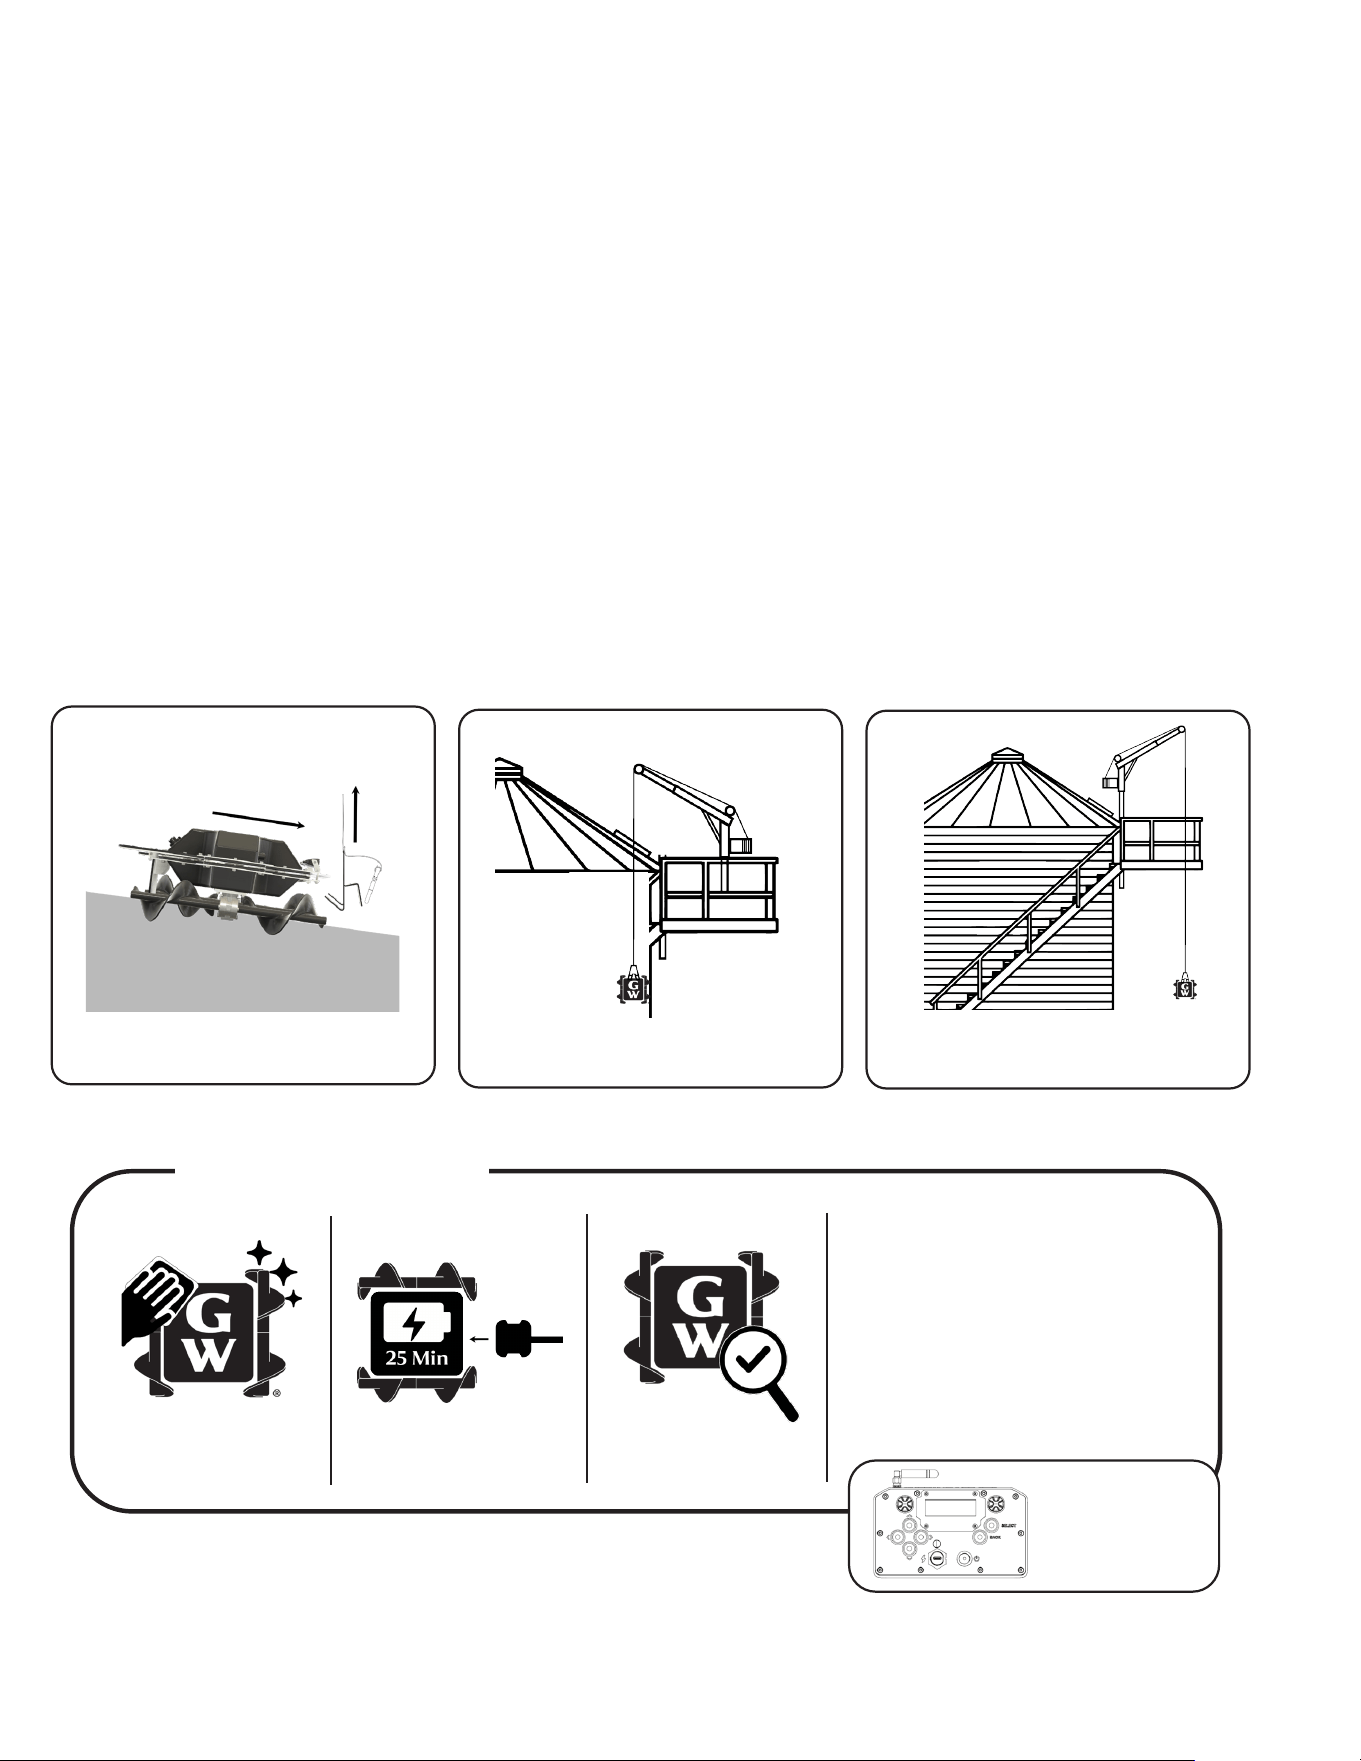
Step 4: Retrieving the Robot
1. Bring robot to below hatch door access point using controller and camera system.
2. Lower winch cable and reattach hook securely by slowing driving the robot into the hook
3. Slowly winch or li the robot out of the bin.
4. Power o the robot.
5. If re-charging is required to complete the task, be sure the charge port is free of debris and repeat
Step 1: Charging the Robot before re-entering robot into bin.
6. If the task is complete, clean o any grain dust or debris.
7. Reconnect the carabiner hook securely to the robot handle.
8. Ensure lowering and liing area is clear of humans or property. Use overhead liing signage in liing
area.
9. Use the winch to lower robot to ground or safe robot access point.
10. Remove Bin Camera System, Robot Charger and Portable winch and prepare for next task.
Deployment: From Charging to Retrieval
Lower Hook to Grain Surface
Drive Robot onto Hook
Carefully Li Robot
to Remove from Bin
Follow Safety Procedures to
Lower Robot to Ground
Aer Each Use
CLEAN ROBOT RECHARGE
• CLEAN: Wipe o grain dust with a
dry cloth (Deep clean if necessary)
• RECHARGE: Recharge your robot
and your remote before the next
use.
• INSPECTION: Visually inspect for
impact damage or loose hardware
Charge
Your
Remote
INSPECTION
Publication # GWP001 | May 15, 2026 | Revision 1.1
All Rights Reserved | Grain Weevil Corporation
13
Operations & Best Practices
4.1 Operating Modes
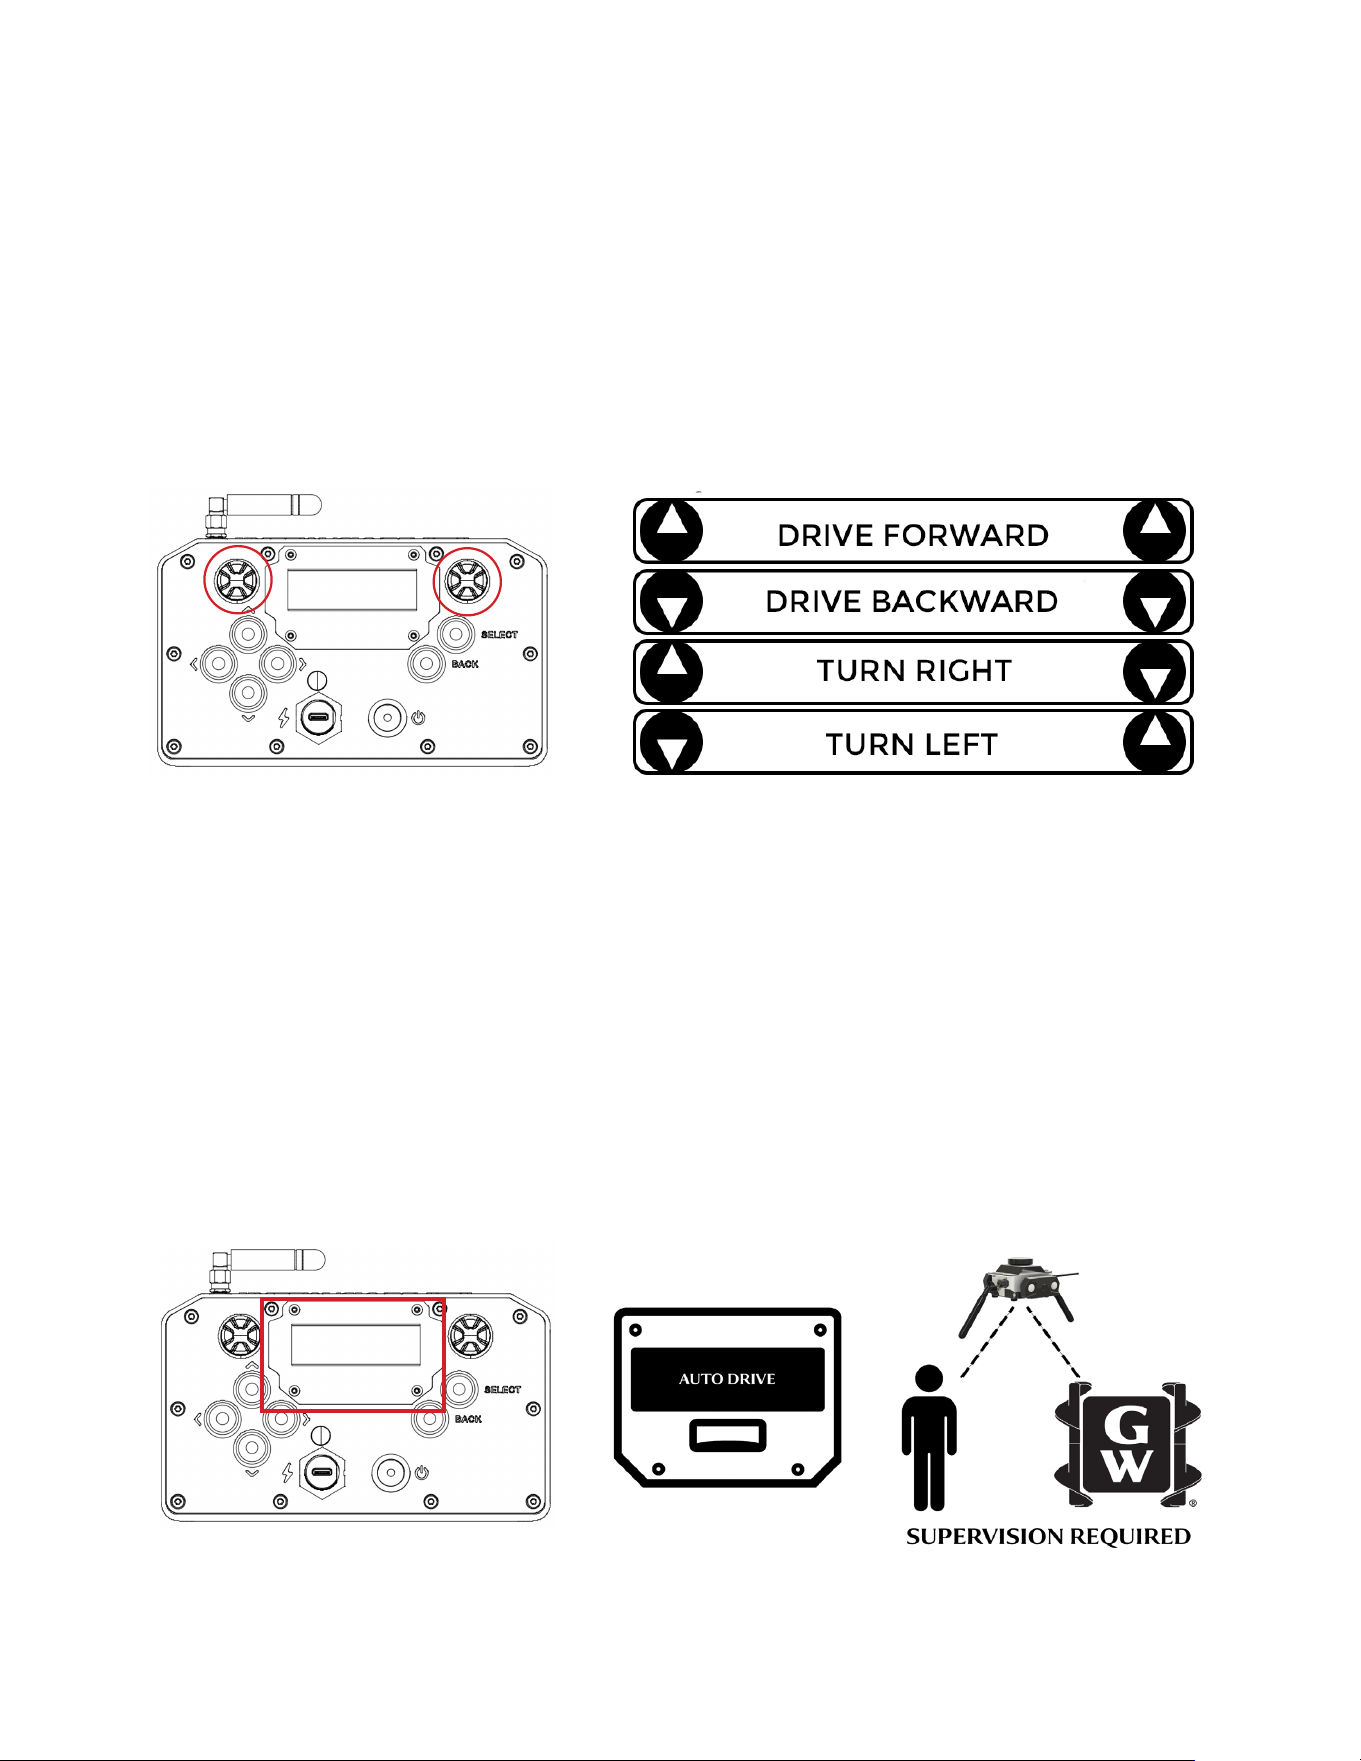
4.1.1 Manual Drive
Use the joysticks on the controller to operate the augers directly. Le joystick controls le
auger, right joystick controls right auger.
4.1.2 Semi-Autonomous Mode
Use the controller screen to access the autonomous menu and select between:
• Level with Obstacle Avoidance Mode: Start a leveling operation that can detect bin walls
to change directions
• Timer Mode: Set time intervals to alternate directions. Best used in larger grain storage.
Publication # GWP001 | May 15, 2026 | Revision 1.1
All Rights Reserved | Grain Weevil Corporation
14
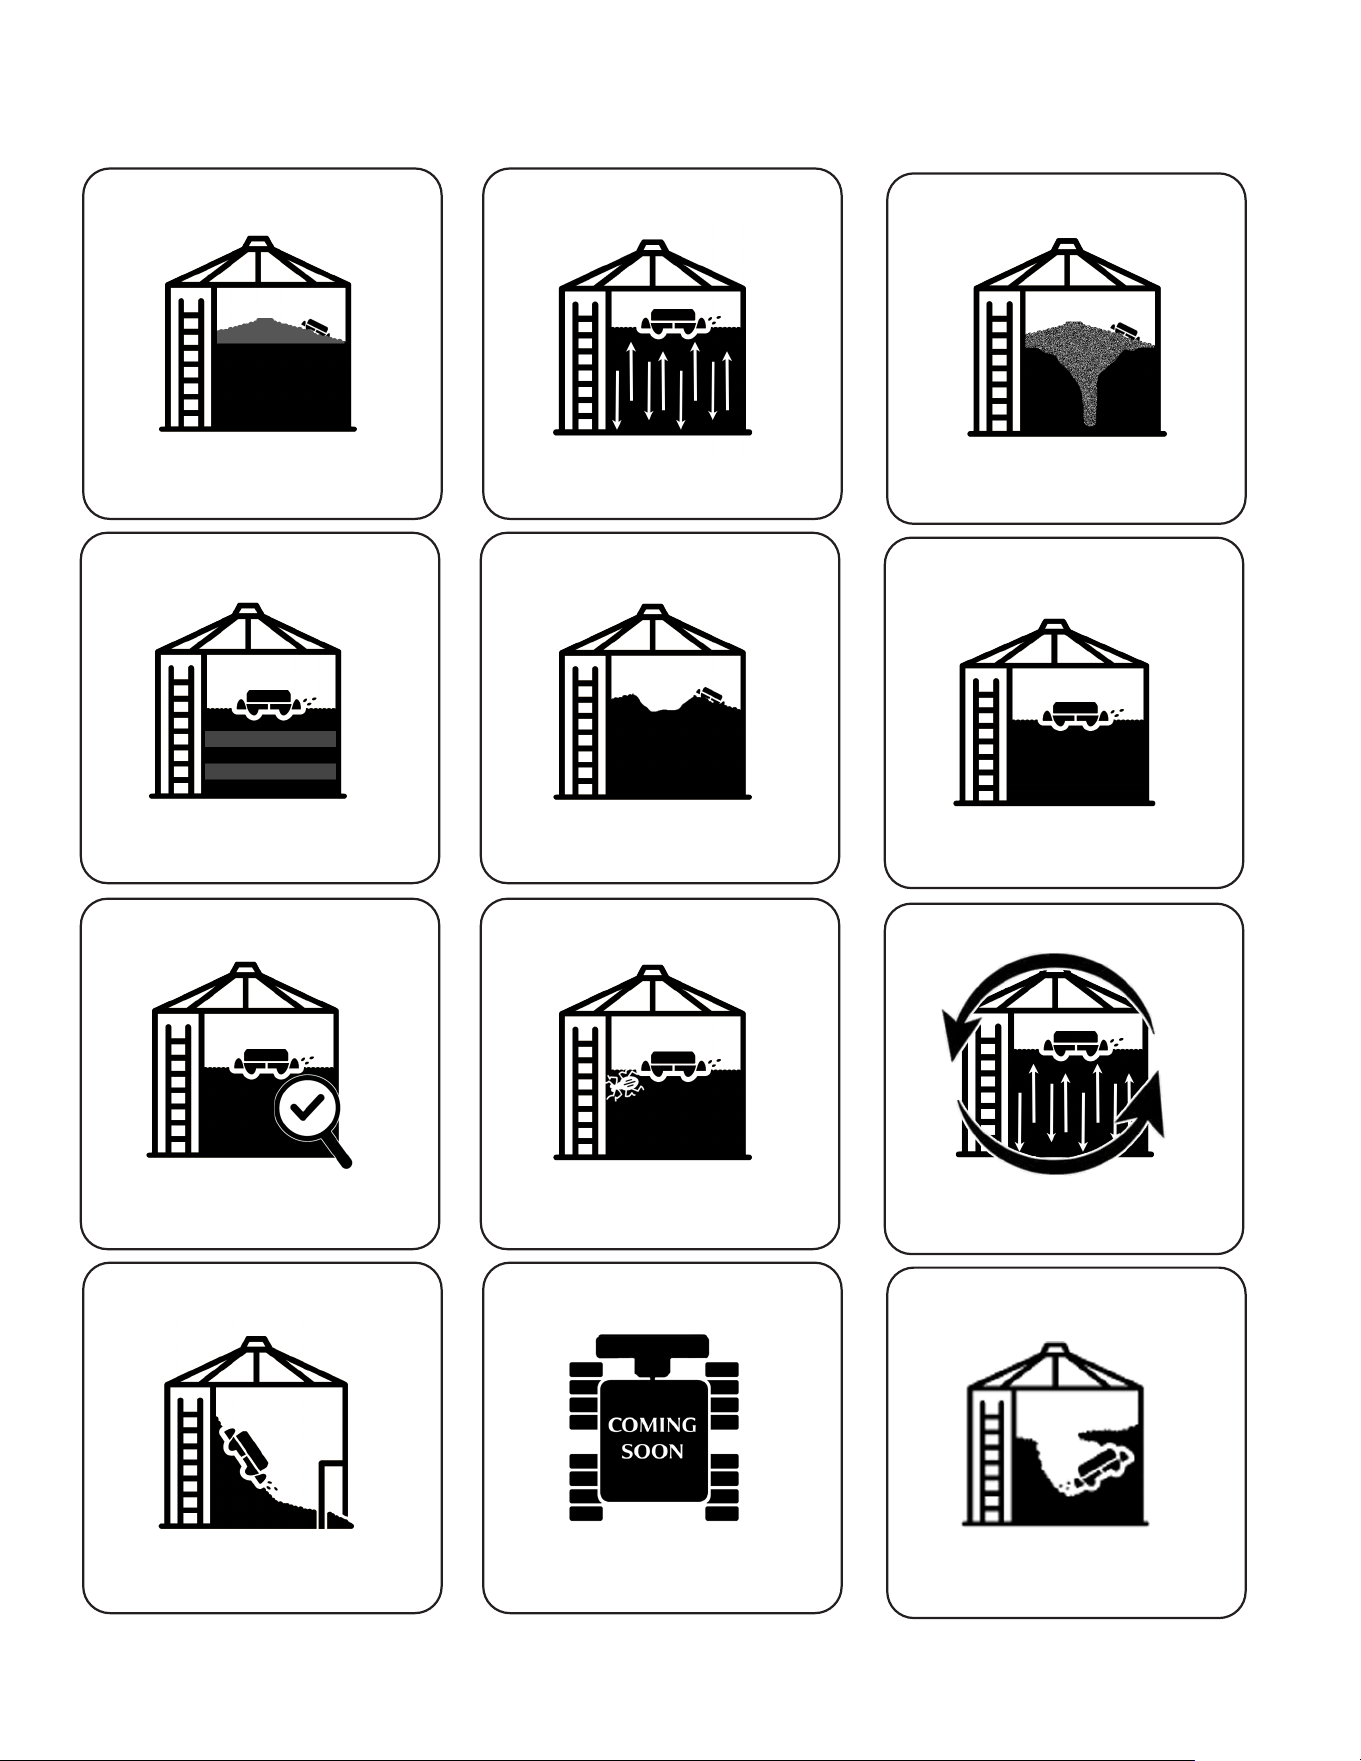
Driving Tips:
• Anti-ipping Techniques
Drive up & down slopes not across | Slow down | Aviod turning into owing grain
• Speed Adjustments
Start at 50% | Work up to 70% | Slow down in crusts
• Wet Grain Adjustments
Shorten drive times to 45-50 minutes | Use shorter patterns to improve eciency
• Bin Size Strategies
For Bins larger than 50’ in diameter - consider using multiple robots
• Leveling a Bin
Use “up and down the slope” patterns to maximize the benets of the robot shovel.
• Breaking Crusts
Remove the shovel | Work cautiously around the edges of the crust | Tether if necessary
• Grain Extraction
Always run inspection pattern before pulling out grain | Run robot periodically as you
withdraw grain, especially if grain is sticking to the bin wall | Do not run robot when
extraction augers are running
• Tethering When Necessary
Attach robot to winch with carabiner clip | Utilization: On extremely wet crust; when
pillars or clis may collapse on robot; If bridging is suspected; Any doubts that you can
safely operate without the tether
4.2 Driving Tips
Robot Recovery
DO NOT ENTER THE BIN.
Please follow the exact instructions on robot recovery found in your GRIPP app Self-
help section. Recovery can be done via the li as a tether or by contacting your local
BinAssist partner for support on recovering with a second robot.
ZERO BIN ENTRY
Follow all recommended bin entry protocols. Grain Weevil recommends zero bin
entry and has provided suggested procedures to recover a stranded robot that can
be achieved with zero entry.
Publication # GWP001 | May 15, 2026 | Revision 1.1
All Rights Reserved | Grain Weevil Corporation
15
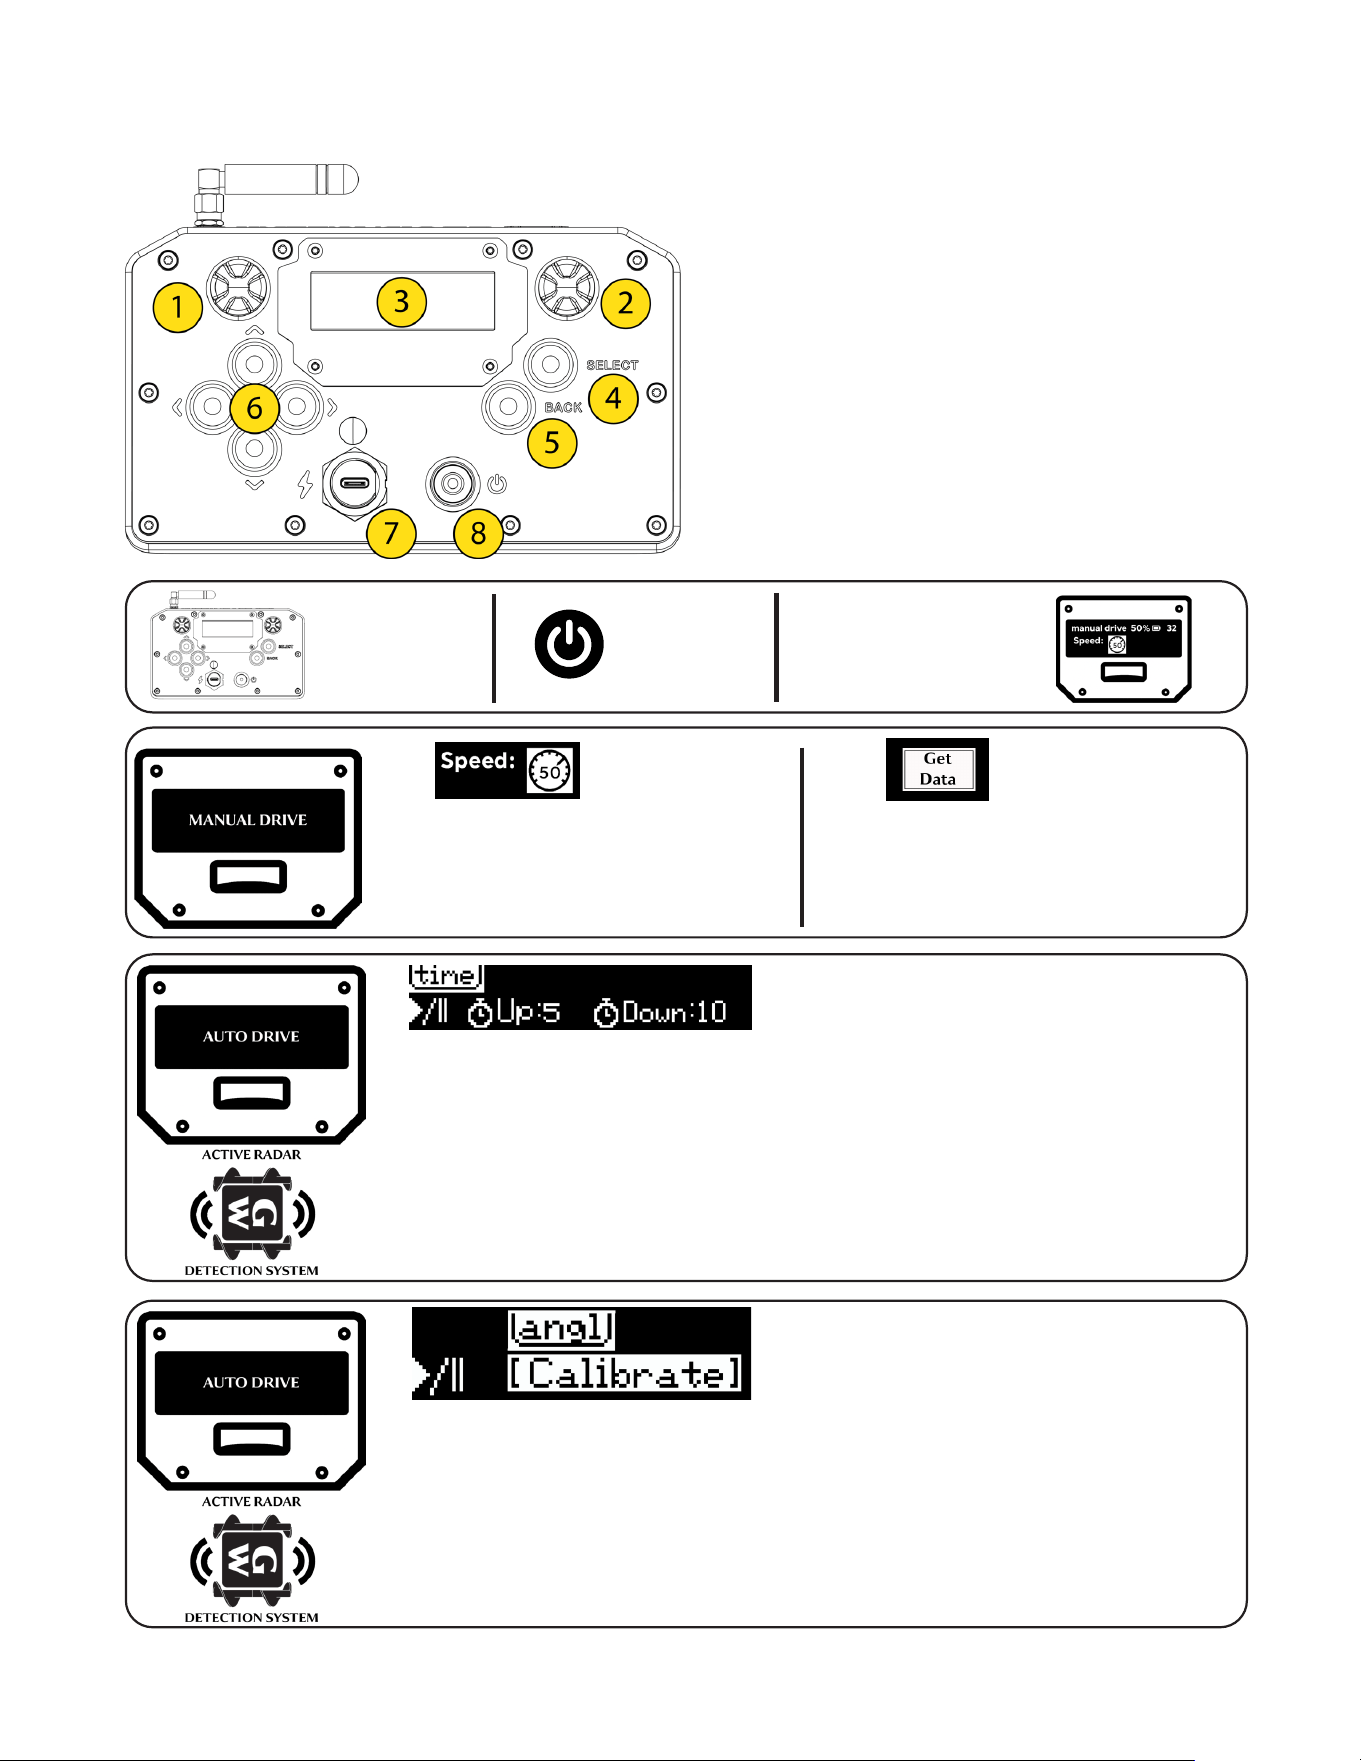
4.3 Suggested Use Cases
Harvest Drying / Cooling
Spread
Layer Coring
Level
Inspect Insect Mitigation
Condition
Clean Out Clean Up
Mitigate
Break up crusts and bridges as
well as disperse wet spots
Level grain to improve airow
uniformity - quality grain longer
Improve clean out
eciencies
Control grain quality layer by
layer to ensure maximum quality
Mitigate troubled grain as soon
as it is loaded during harvest
Reduce drying and cooling times
(and inputs)
Evenly disperse BGFM while
loading, or before unloading
Following ‘Coring’ by leveling
out the ‘W’ surface
Drive the robot where no human
should go for an upclose view
Help deploy insecticides and
fumigants | Disrupt insect habitat
Recondition grain with more
condence and control
Sweeper accessories coming
soon
Publication # GWP001 | May 15, 2026 | Revision 1.1
All Rights Reserved | Grain Weevil Corporation
16
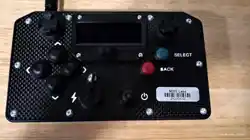
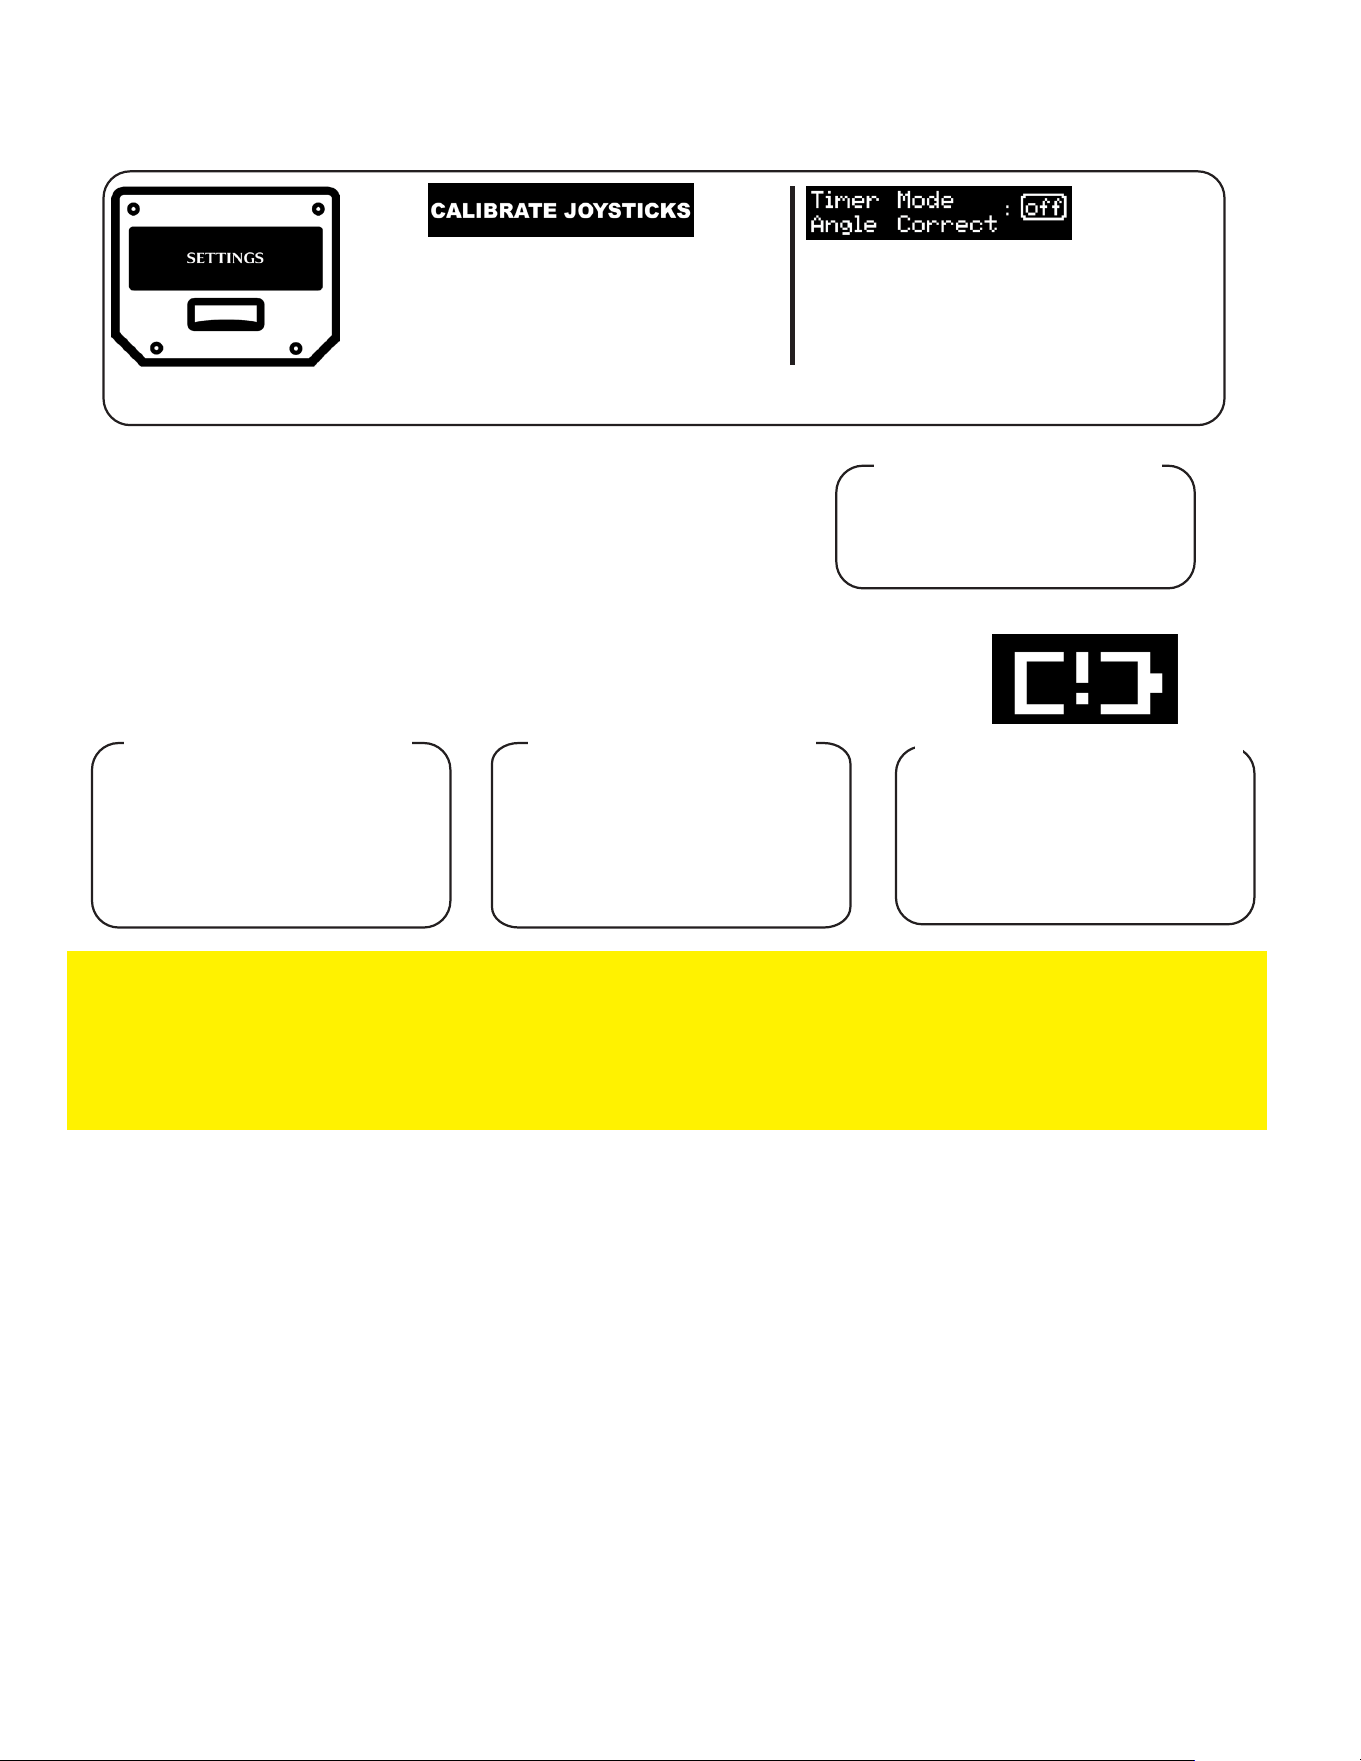
4.4 Remote Control Quick Start Guide
Essential Components
1. Le Joystick
2. Right Joystick
3. Screen
4. Select Button
5. Back Button
6. Navigation Buttons
7. Charge Port
8. On / O Switch
Charge
Your
Remote
Power
On
Select Robot ID
&
Manual Drive
1. Press ‘Select’, Icon will ash
2. Use Navigation Buttons to Set Speed
3. Press ‘Select’, Icon will Stop Flashing
1. Press ‘Select’
2. Wait 1-3 Seconds
3. Robot Data Will Display in a List
1. With ‘Time” selected - use navigation buttons to highlight ‘UP’
2. Press ‘Select’ to activate Up time - Use navigation buttons to increase or
decrease time - Press ‘Select’ to enter time
3. Repeat with ‘Down’ settings - Navigate to Start/Pause icon
4. Press ‘Select’ to start/stop autonomous driving
(using joysticks also stops autonomous)
Time Based Forward / Backward
On Repeat
1. With ‘angl” selected - use navigation buttons to highlight ‘Calibrate’
2. Drive robot to the top of the peak (or bottom of the extracted cone)
3. Press Select - Navigate to the Start/Pause icon
4. Press ‘Select’ to start/stop autonomous driving
(using joysticks also stops autonomous)
5. Repeat ‘Calibrate’ aer each charging period for the robot
Peak Finding
Leveling Pattern
Publication # GWP001 | May 15, 2026 | Revision 1.1
All Rights Reserved | Grain Weevil Corporation
17
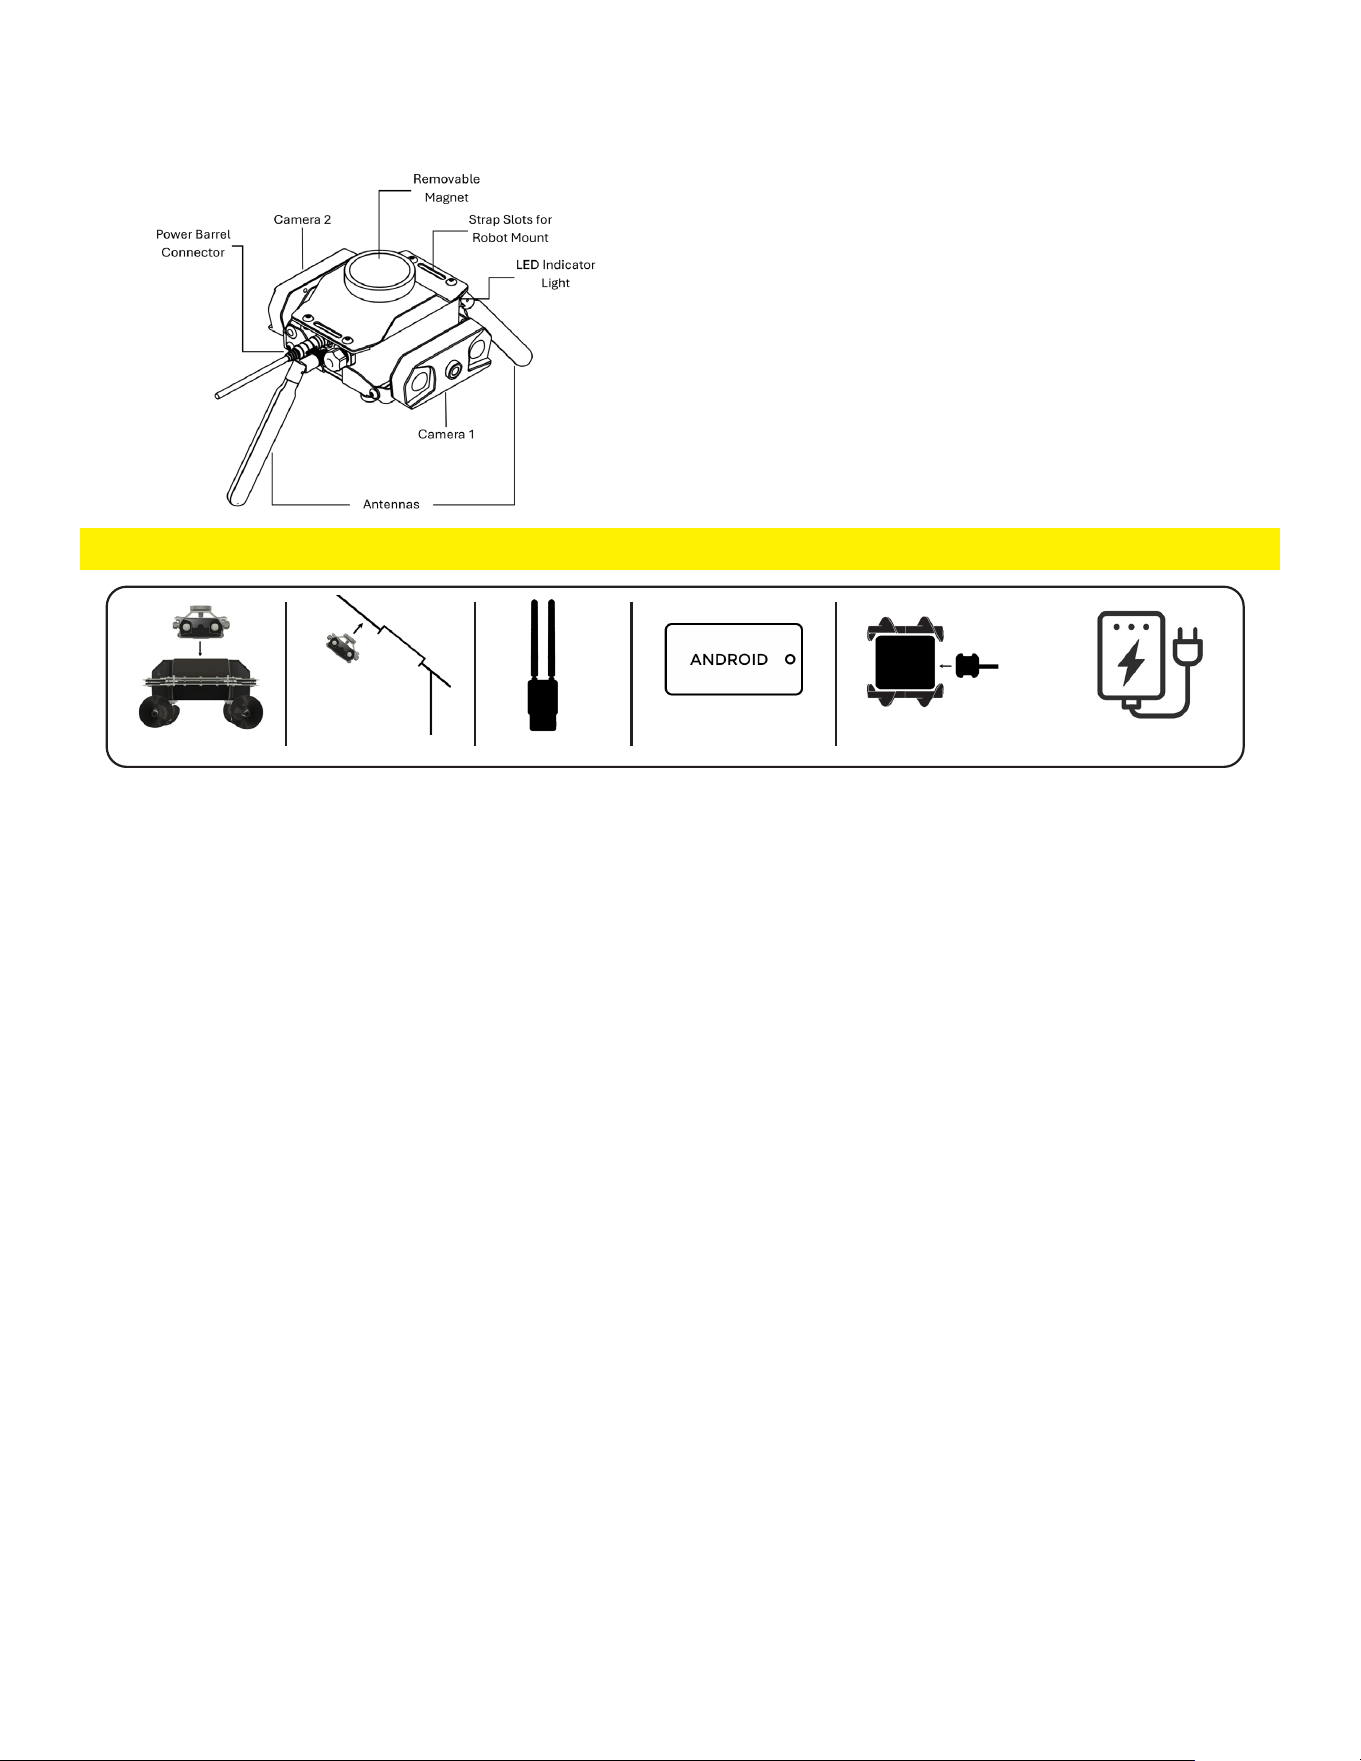
Tips & Troubleshooting
• Charge Remote Overnight
• You Must Power O Remote to Select New Robot ID
• Clean screen with micrber cloth or lens wipe
4.4 Remote Control Quick Start Guide Cont.
1. Bring joysticks into center resting
position
2. Press ‘Select’ and calibration sets to:
L: 0
R:0
‘ON’ will add peak nding feature to
Timer Autonomous Mode
‘OFF’ will drive forward/backwards
regardless of slope
‘Select’
to Swap
Stick Calibration Dirty Controller
Low Battery Levels
4.4.2 Joystick Performance Issues
You will see:
• Augers run without input
• Less ne motor control
You will see:
• Buttons not reacting
• Less ne motor control
You will see:
• Frequent disconnections
• Robot stuck on last
command (Dangerous)
LOSS OF SIGNAL STOP
A loss of signal between the remote control and the robot lasting 10 seconds or more will result in an oper-
ational pause of the robot, indicated by the LED status indicator of the robot ashing yellow for 1 second.
Once the connection has been re-established, the robot will be capable of resuming normal operation.
FCC Statement:
is device complies with Part 15 of FCC rules. Operation of this device is subject to the following two conditions:
• is device may not cause harmful interference.
• is device must accept any interference received, including interference that may cause undesired operation.
is equipment generates, uses and may radiate radio frequency energy and, if not installed and used in accordance with the instructions, may
cause harmful interference to radio communications. However, there is no guarantee that interference will not occur in a particular location. If
this equipment does cause harmful interference to radio or television reception, which can be determined by turning the equipment o and on,
the user is encouraged to try to correct the interference by one or more of the following measures:
• Reorient or relocate the receiving antenna.
• Increase the separation between the equipment and receiver.
• Connect the equipment into an outlet on a circuit dierent from that to which the receiver is connected.
• Consult the dealer or an experienced radio or television technician for help.
Changes or modications to this unit not expressly approved by the party responsible for compliance could void the user’s authority to operate the
equipment.
Keep Controller Clean
Regularly clean the
controller with air and or a
dry cloth.
Publication # GWP001 | May 15, 2026 | Revision 1.1
All Rights Reserved | Grain Weevil Corporation
18
4.5 Camera System Quick Start Guide
Included Items:
1. Camera unit
2. Camera Link unit
Kit Accessories
(camera power supply/power cord, radio
charger, robot power cord, mounting straps,
screen mount attached to remote control and
protective case)
REQUIRED: (Not included) - Tablet or Phone (must be user supplied)
Start-Up
Camera Link Unit:
1. Attach antennas and battery
2. Press the power button once, the screen will display “Press again to power on”. Then immediately press and
hold the power button for about two seconds and until the ground unit is powered on.
3. Set in a safe and secure place out of the sun near where you will be operating from
Camera Unit:
1. Attach antennas and plug in power cord. Tighten down retaining collar onto power port.
2. Adjust camera angles to estimate position for viewing work area.
3. Attach camera unit to bin via magnet, ensure mounting area is clean.
4. Plug-in camera power supply to power up camera unit. Check the green light on the housing to conrm
power is ON.
5. Make nal adjustments to camera viewing angle.
Alternate Conguration: Attach camera to robot for rst person view - use supplied robot power cord and
connect to accessory power port. Follow camera set up instructions in the full Camera User’s Manual
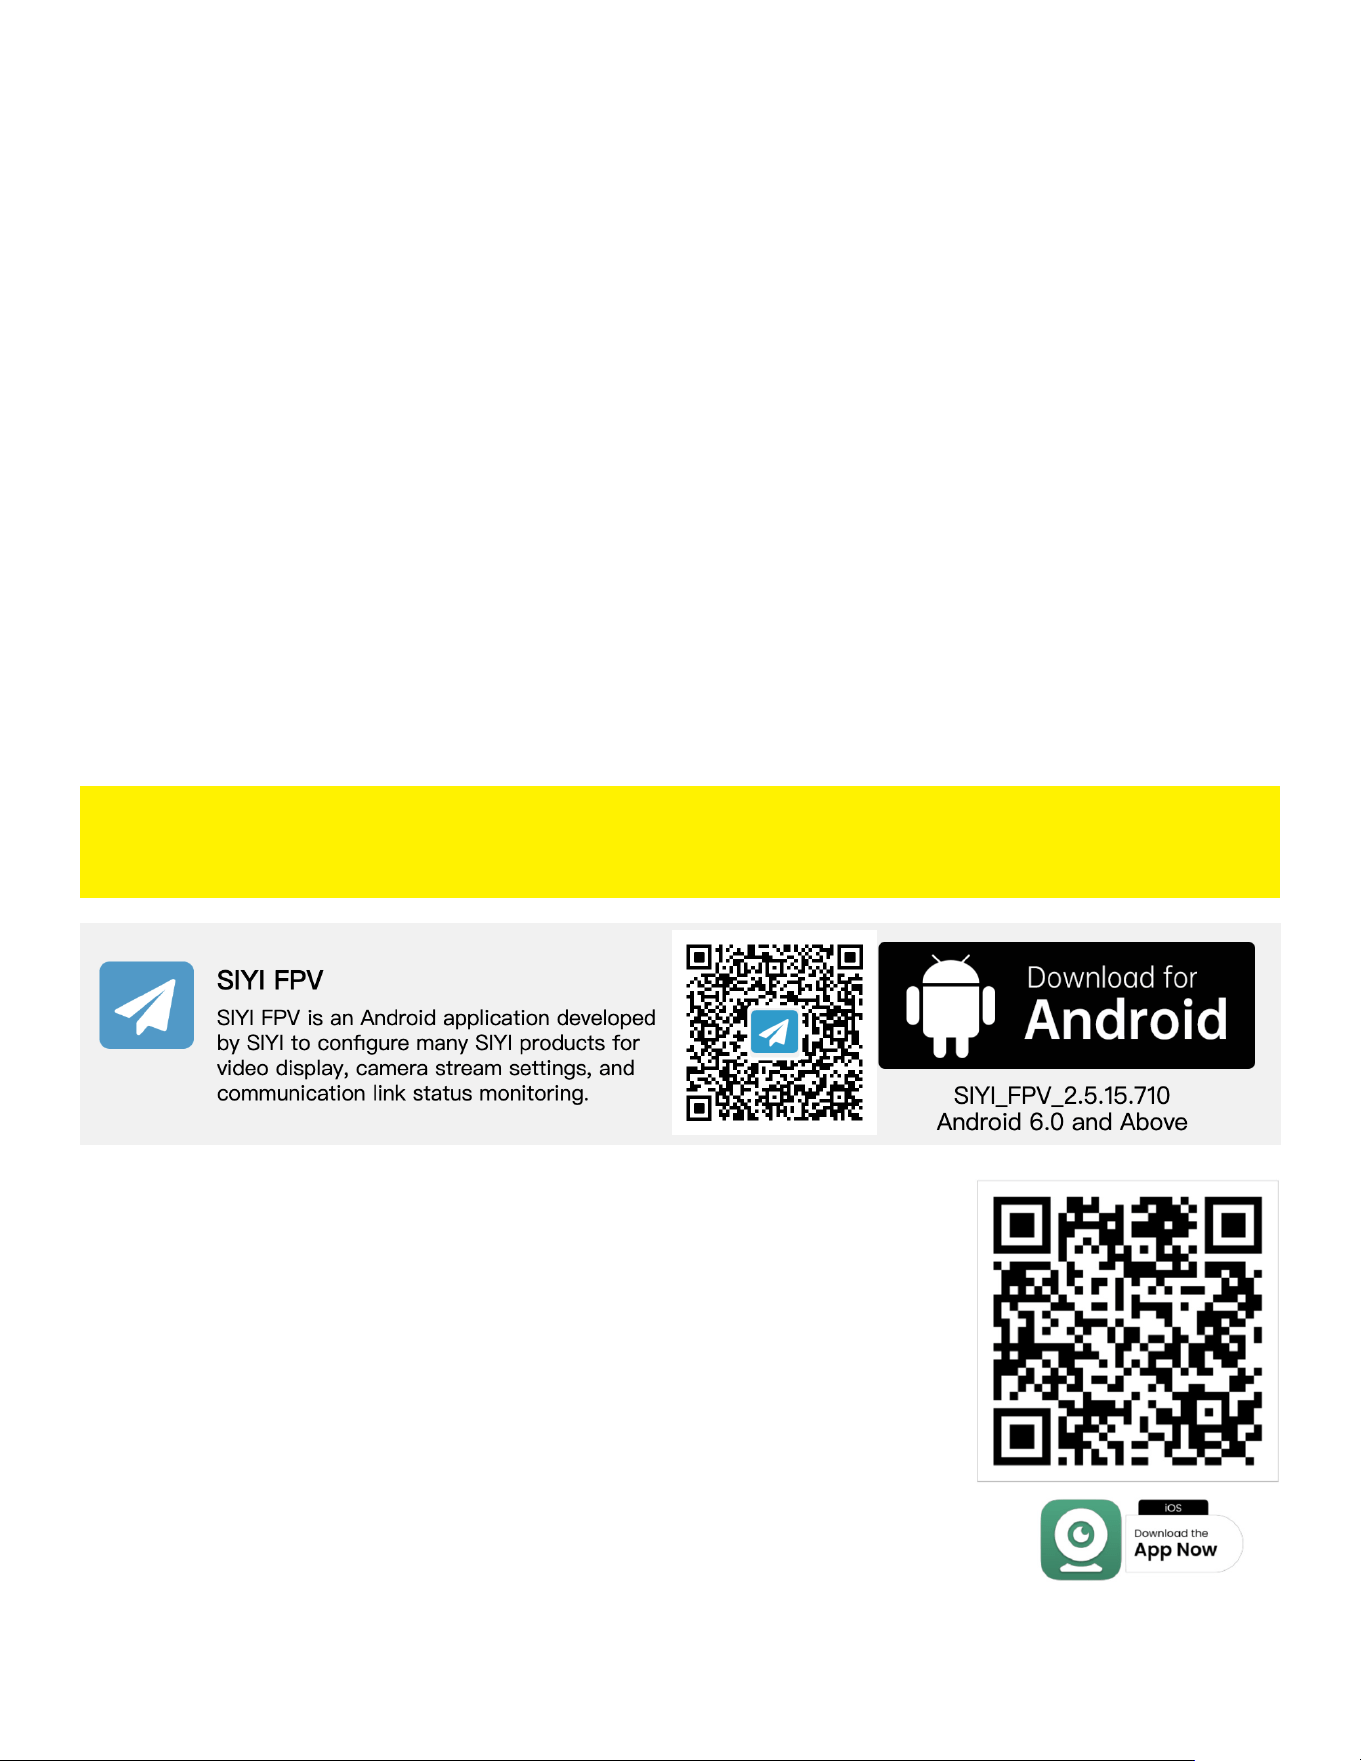
Connect Streaming Device and Open App:
1. Aer the radio is powered on and connected to camera, open Android device WiFi settings and select
“SIYI......” network.
2. Default network password: 12345678
3. Open the SIYI FPV application*.
4. Open the setting menu on top right of the screen in the app and set camera feeds and rotate images.
* SIYI App instructions on following page
Robot Mount Hatch Mount Camera Link
Tablet
(Not Included)
Power Camera Via
Accessory Port
OR
External
Power Pack
Publication # GWP001 | May 15, 2026 | Revision 1.1
All Rights Reserved | Grain Weevil Corporation
19
Downloading the Video Stream Application for Android
Application Installation Steps:
1. Ensure your android device is connected to the internet and scan the QR code to access SIYI FPV
application download.
2. Application Name: SIYI FPV (include picture of application icon)
3. Operating system requirements: Android 6.0 and above
NOTE: Since this application is not published on the Google Play Store, your device will prompt you to pro-
vide additional permissions in the device settings throughout the install process. This is normal during the
install process and please follow the following steps to complete installation.
1. Hit “Open” on the pop-up
2. When prompted with a pop up, select “Download” on your device
3. Tap “Download Anyway” on the warning pop up.
4. Once the application le has downloaded, tap “Install” on the application pop-up once prompted.
5. Once installation is complete, please select settings on the permissions pop-up as noted above.
6. Conrm the installation was successful by locating the app icon on your device.
4.5 Camera System Quick Start Guide
SIYI FPV is a 3rd party application utilized by Grain Weevil for streaming video
from the camera system. SIYI reserves the right to make upgrades that may not be
compatible with the Grain Weevil setup. Test all updates before deploying the robot.
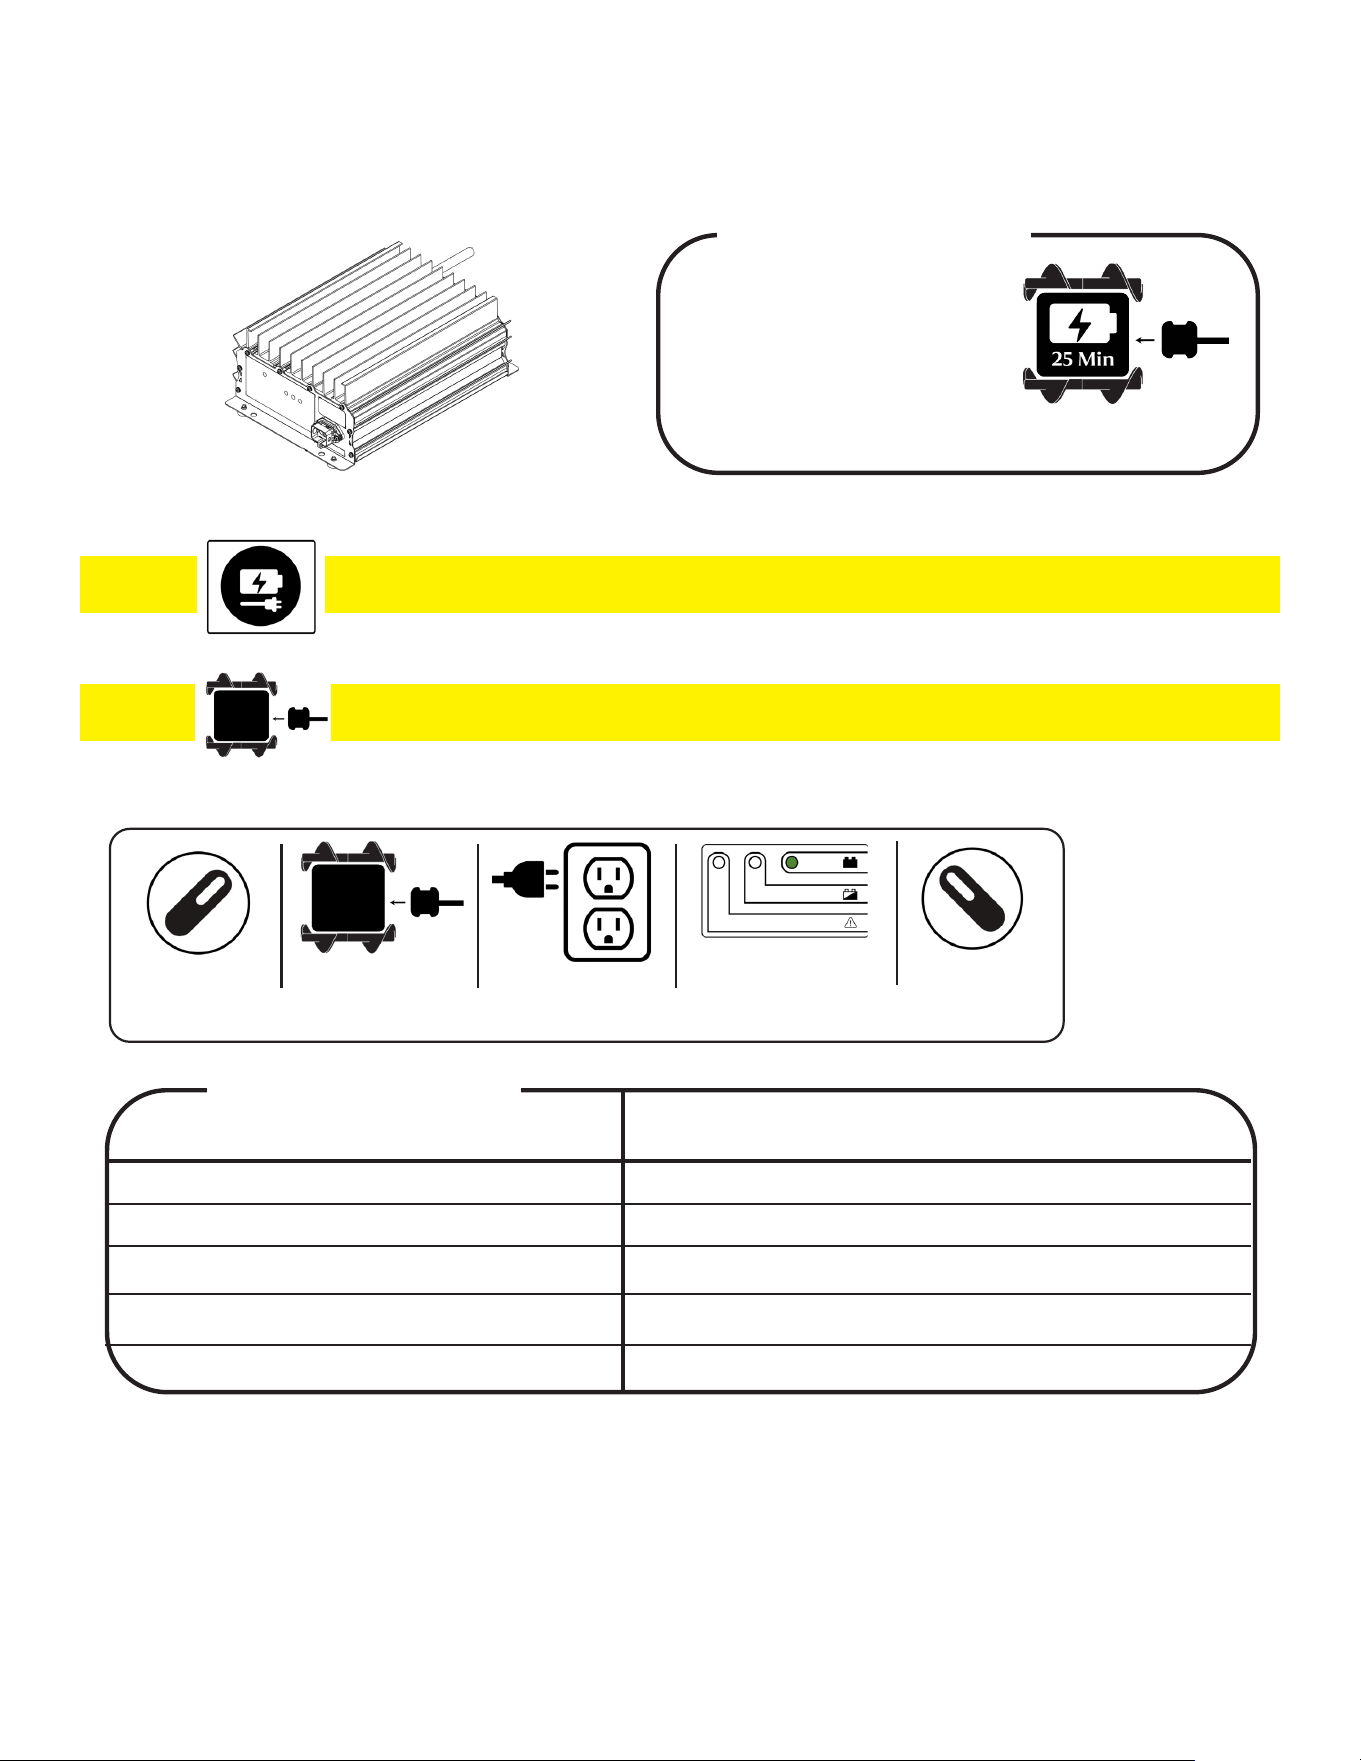
Downloading the Video Stream Application for iOS
Application Installation Steps:
1. Ensure your apple device is connected to the internet and scar the QR code to
access application download.
a. Application name: IPCams
b. Operating system requirements: iOS 15.0 and later
2. Tap “Get” to start your download
3. Conrm that the installation was successful by locating the app icon on your
device.
Publication # GWP001 | May 15, 2026 | Revision 1.1
All Rights Reserved | Grain Weevil Corporation
20
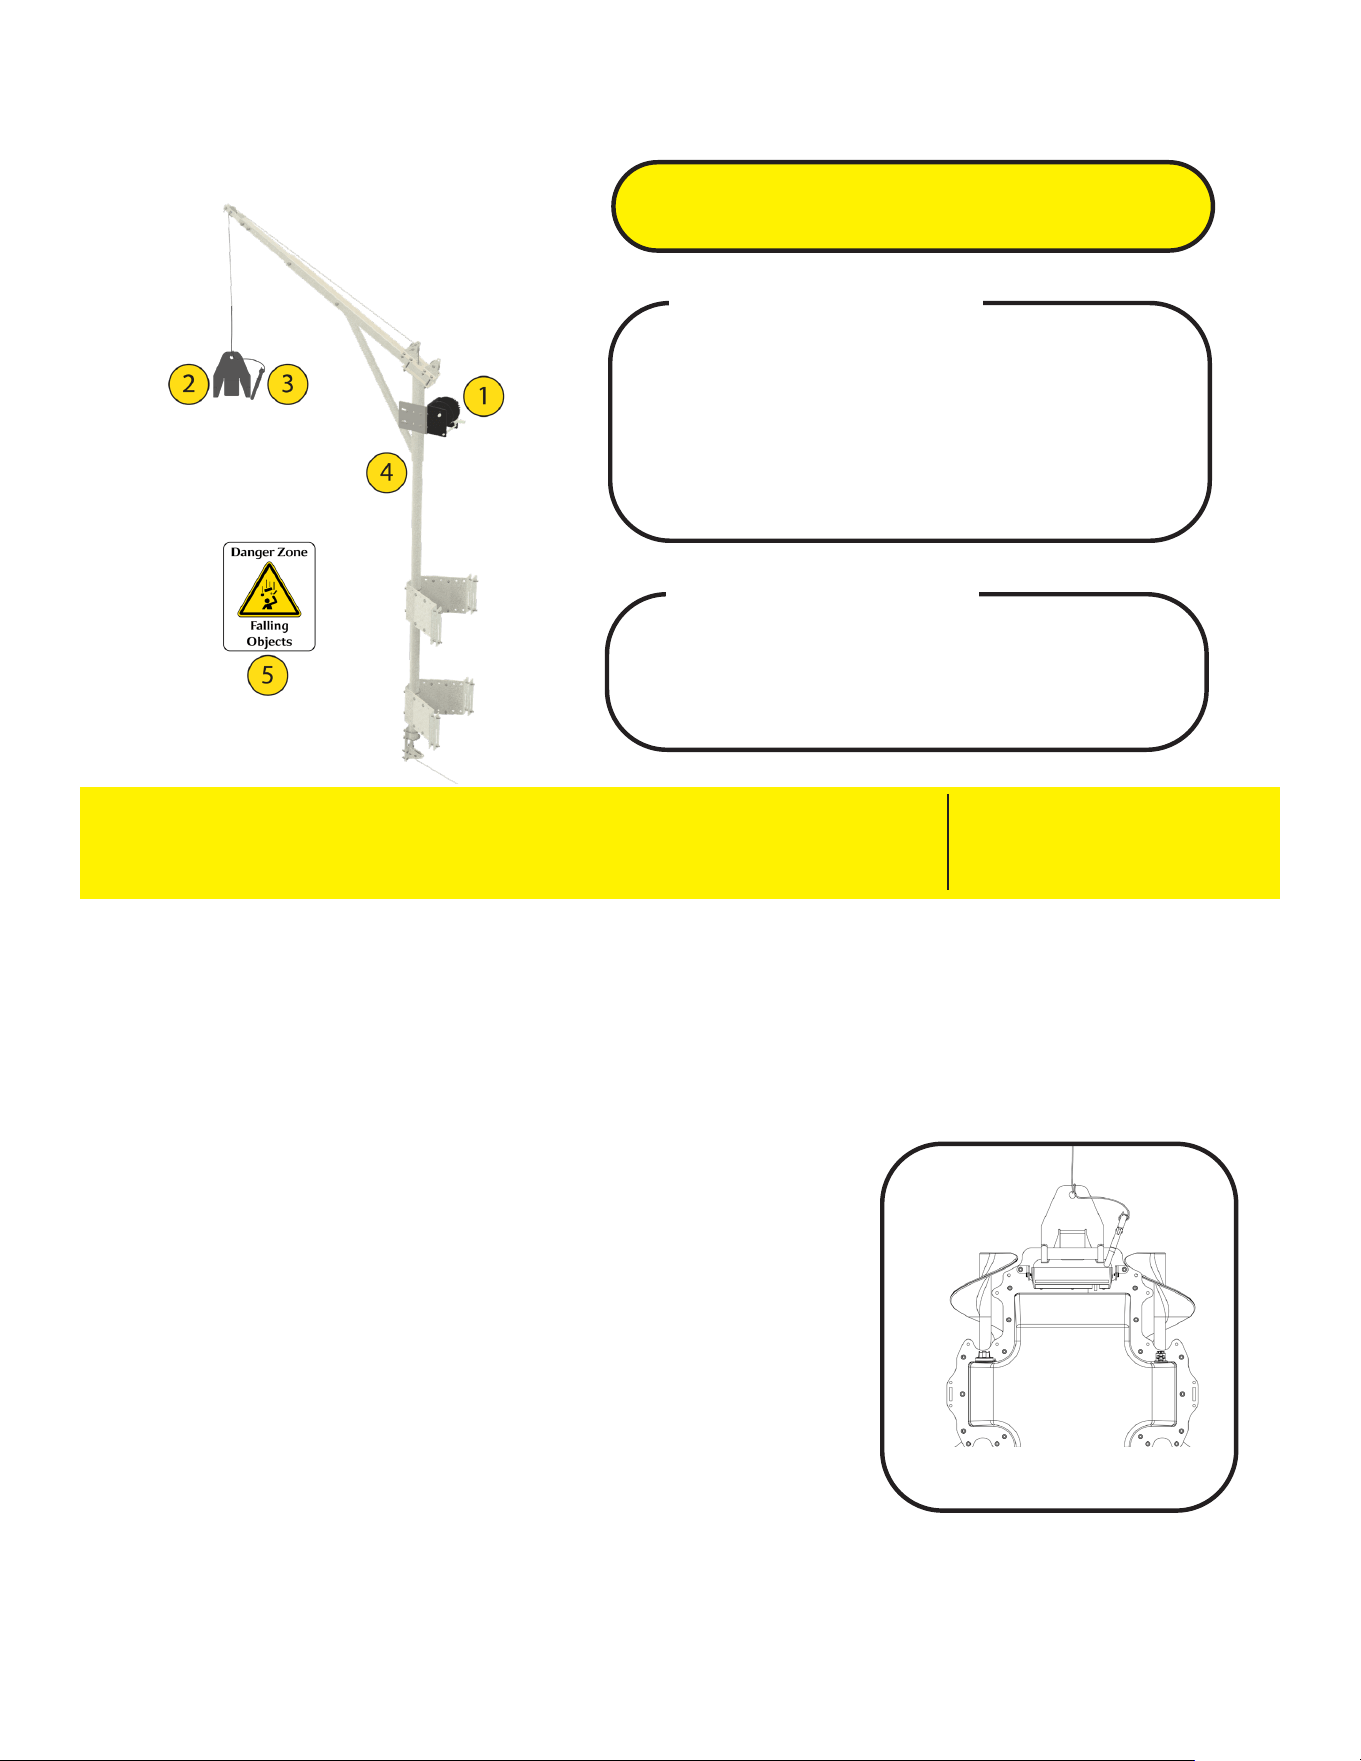
4.6 Charger Quick Start Guide
Included Standard Charger
Standard Charger Specs
Input Voltage: 120v
Input Amps: 15 A
Nominal Output Voltage: 29v
RECHARGE
DO NOT CHARGE WHILE ROBOT IS IN THE BIN
LED Light Indicator
COLOR MEANING
Solid Green
Flashing Green
Flashing Amber
Blue
No Amber or Green
Full Balanced Charge
Fully Charged for Operations
Charging
Charge Unit is Powered On
Robot is Not Connected Properly
PLUG IN
CHARGER
PLUG IN
ROBOT
ROBOT
ON
ROBOT
OFF
CHARGING
ENSURE CHARGE PORT IS CLEAR OF DEBRIS

Publication # GWP001 | May 15, 2026 | Revision 1.1
All Rights Reserved | Grain Weevil Corporation
21
Publication # GWP001 | May 15, 2026 | Revision 1.1
All Rights Reserved | Grain Weevil Corporation
22
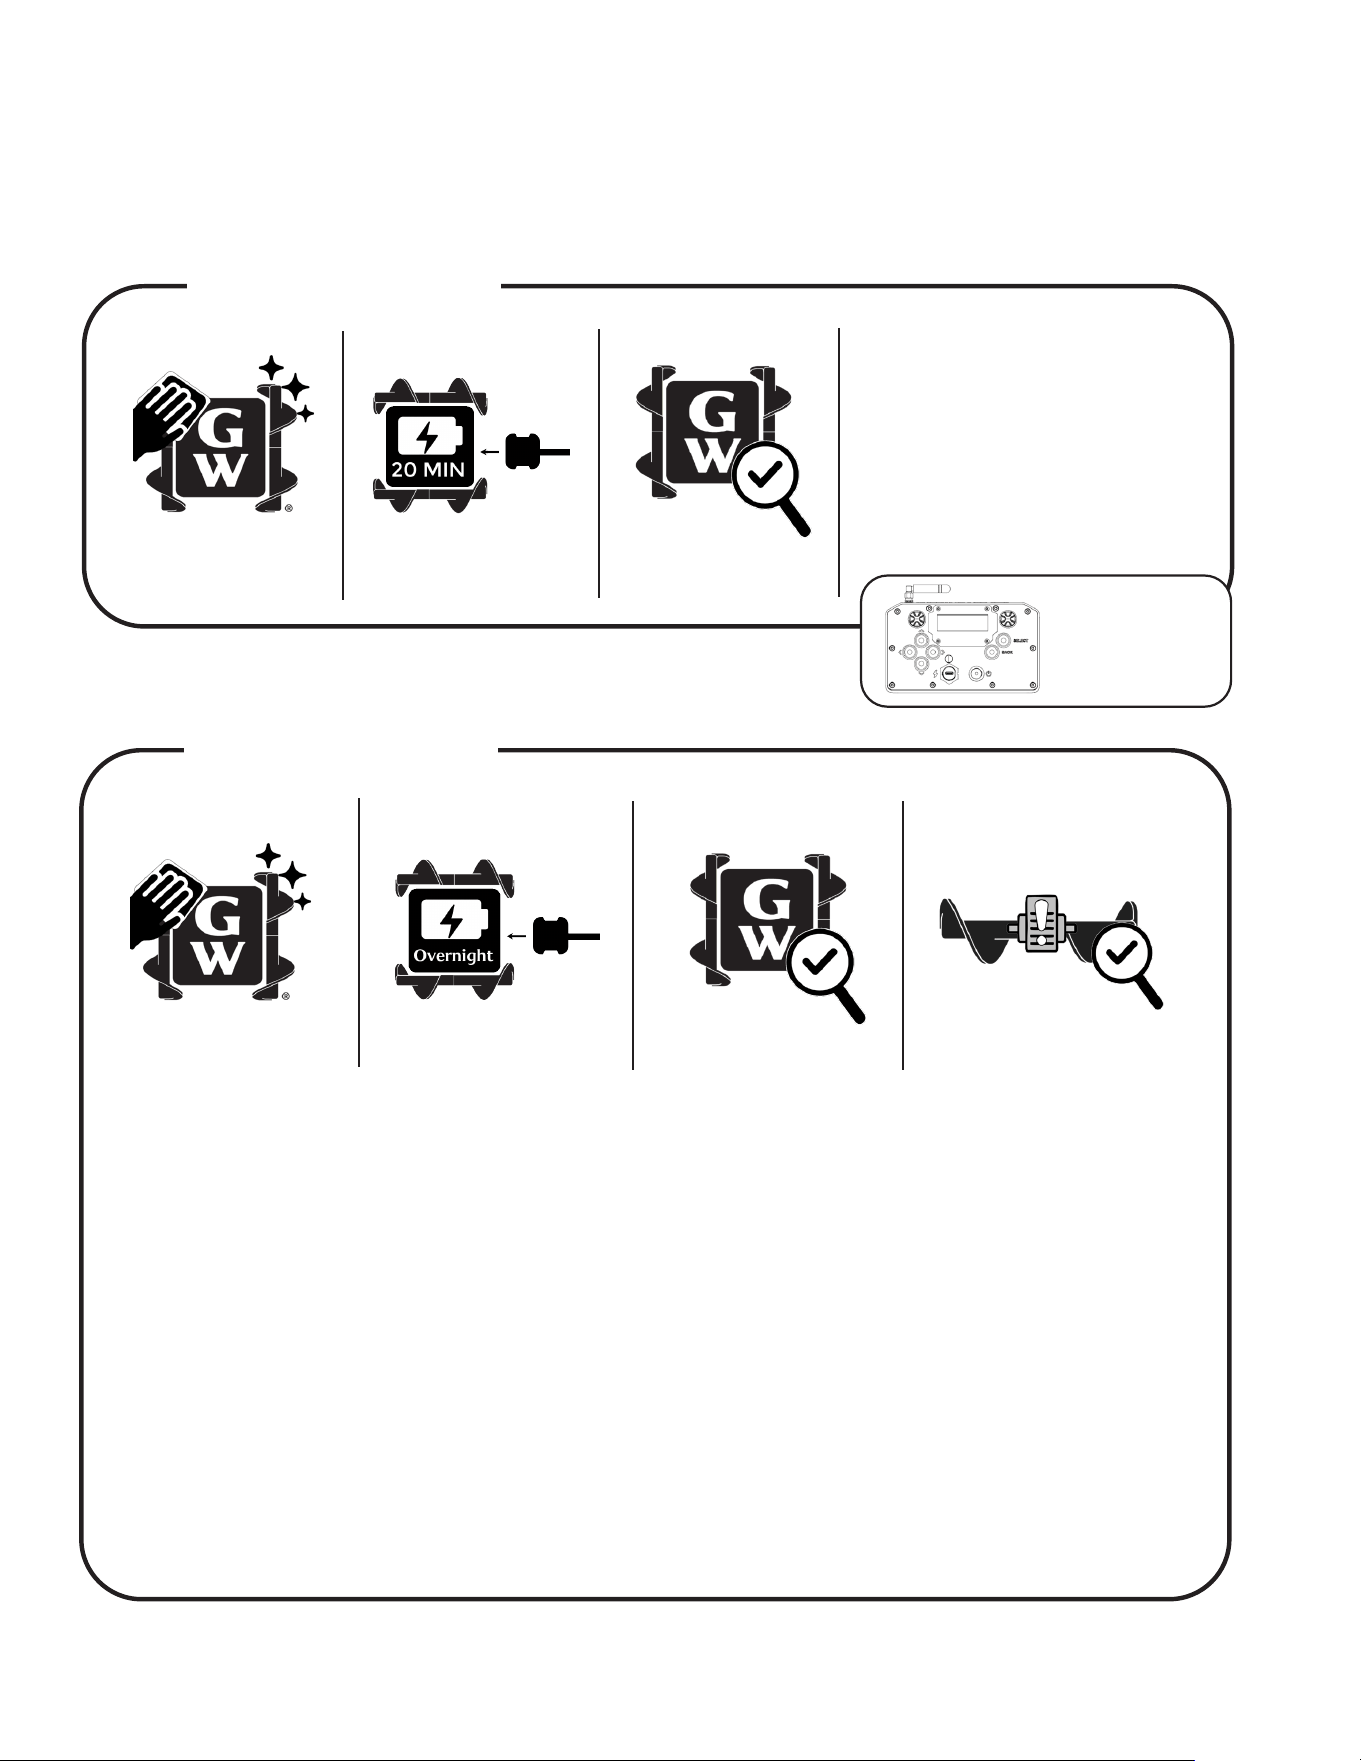
4.7 Robot Li System Quick Start Guide
1. Drill Operated Winch
2. Robot Hook
3. Safety Carabiner
4. Rotating Jib Crane
5. Danger Zone Safety Sign
Essential Components
User Provided Tools
1. Cordless Drill
(Miluakee M18 Drill Driver or Similar)
2. Gloves & Other Necessary PPE
Li must be pre-installed following instructions
in the Li Installation Guide
Only Deploy Robot When Safe to Do So
Wind Below 20mph
No Rain
No Ice
Li System Operation
Li From Ground:
1. Visually inspect the li stability, winch operations, rope condition, robot li & carabiner knots
2. Secure the robot with both the robot hook and the safety carabiner - connected to robot handle
3. Ensure no one is near the falling objects danger zone
4. Use the cordless drill to safely li the robot to the top of the bin
Transition:
1. When it is safe to do so, remove the safety carabiner from the
robot handle
2. Spin jib crane to position robot over the hatch door
3. Follow the robot deployment steps ensuring the robot is powered
on and paired with remote control
Deploy:
1. Lower robot to grain surface inside of the bin
2. Robot hook will release from robot
3. Back robot safely away from robot hook and winch rope
Reverse li operations to safely remove robot from bin and lower to the ground
Safe Connection Diagram

Publication # GWP001 | May 15, 2026 | Revision 1.1
All Rights Reserved | Grain Weevil Corporation
23
Publication # GWP001 | May 15, 2026 | Revision 1.1
All Rights Reserved | Grain Weevil Corporation
24
Maintenance, Troubleshooting & Repairs
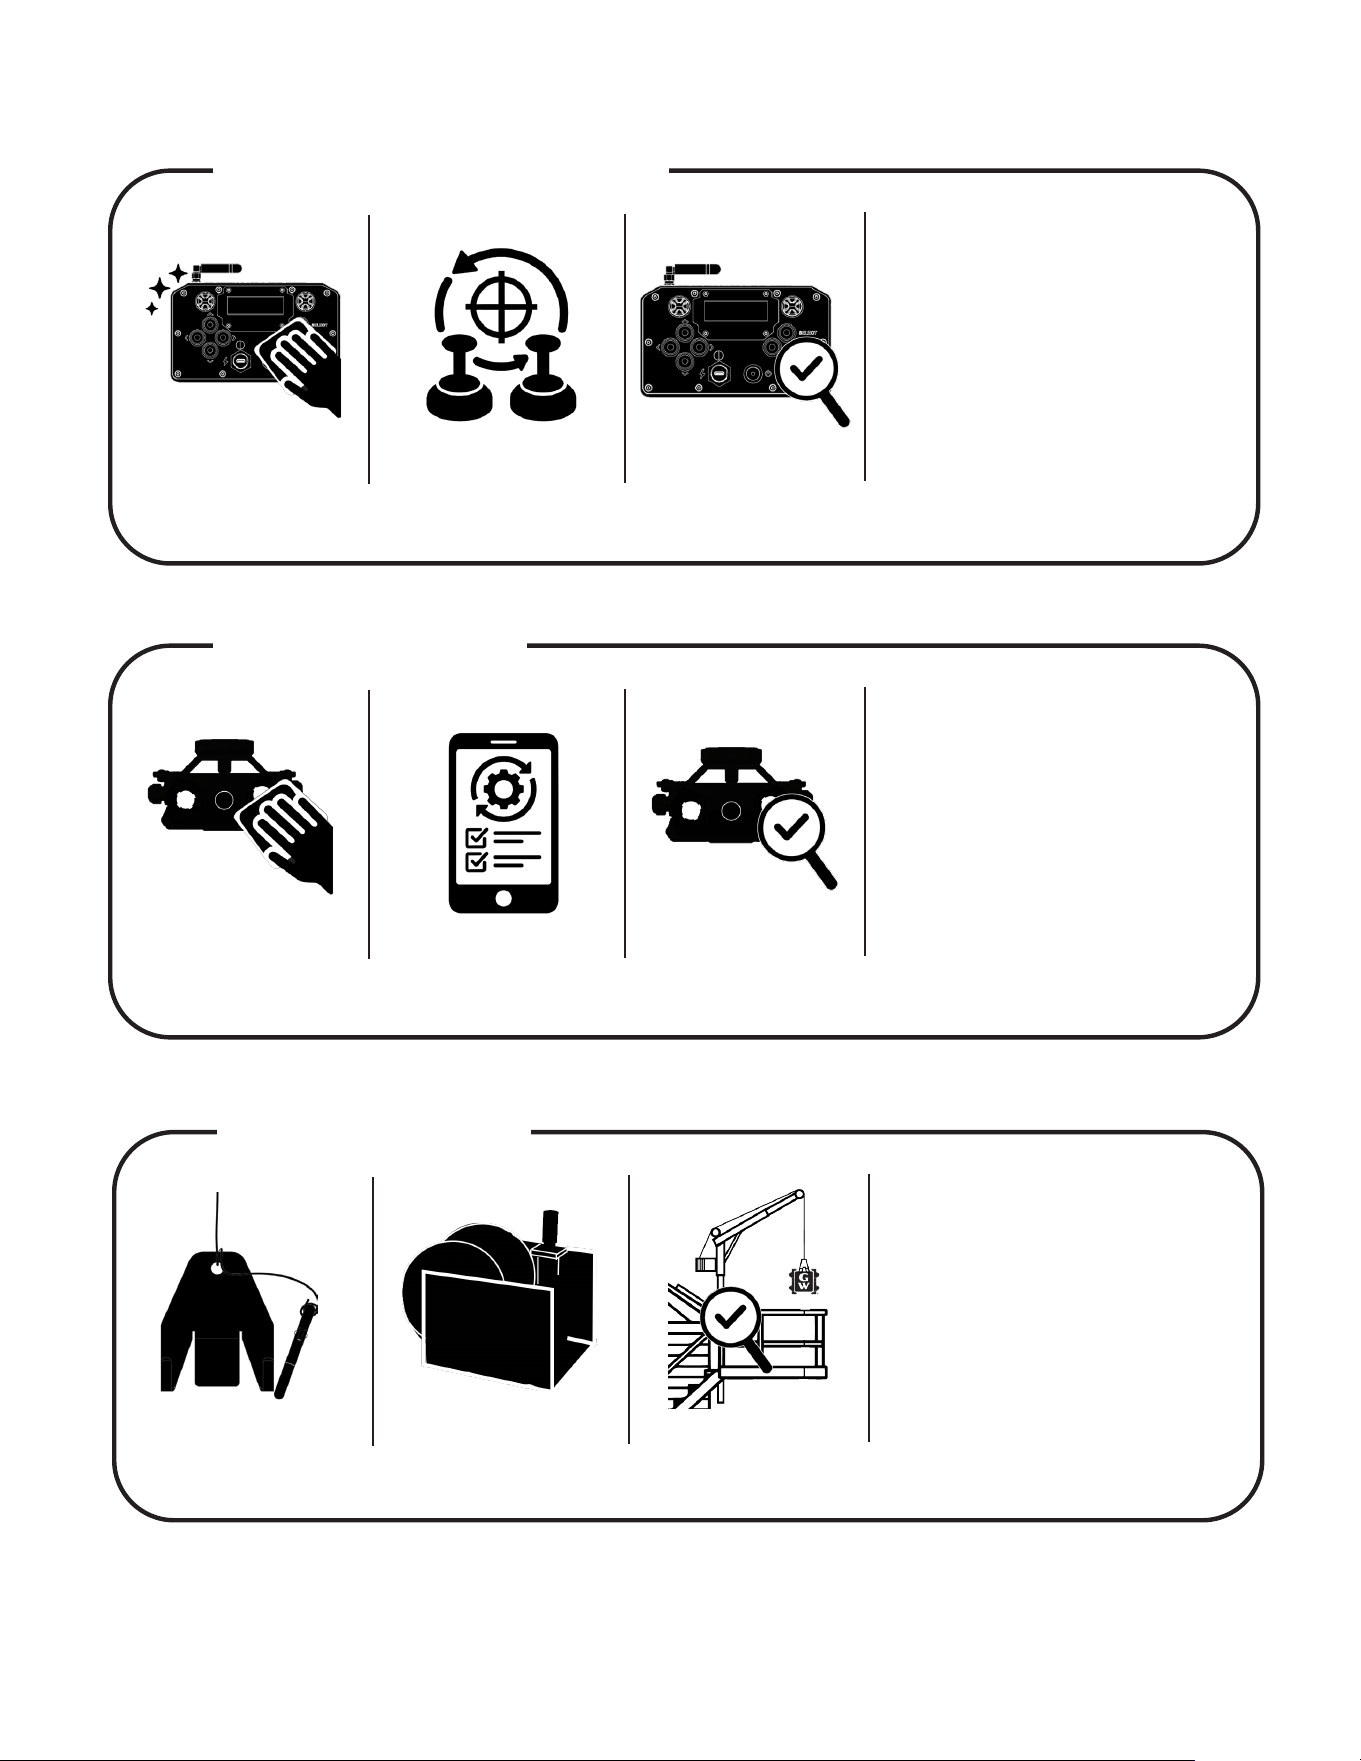
Deep Cleaning Procedures
• Always power the robot o before cleaning
• Never use a pressure washer unless specied in Grain Weevil instructions
• Use dry compressed air for delicate parts (camera, vents, connectors)
• If water or disinfectant is necessary, use only damp cloths—avoid spraying directly onto seams or
ports
• Follow PPE guidance when cleaning aer operations in dusty or treated bins
Aer Each Use
CLEAN ROBOT RECHARGE
• CLEAN: Wipe o grain dust with a
dry cloth (Deep clean if necessary)
• RECHARGE: Recharge your robot
and your remote before the next
use.
• INSPECTION: Visually inspect for
impact damage or loose hardware
Charge
Your
Remote
INSPECTION
Monthly Maintenance
CLEAN ROBOT RECHARGE
• DEEP CLEAN: Use compressed air and/or a scrub brush with soap and water to remove all dust and grime. Blow
out ports with compressed air (Less than 30psi)
• BALANCE RECHARGE: Recharge your robot overnight to prompt internal battery maintenance charge
• DEEP INSPECTION: Visually inspect for impact damage or loose hardware
• DRIVE SYSTEM CHECK: Check the robot’s drive system and augers for wear, grain accumulation, or binding
• REGULAR MAINTENANCE BULLETINS: Check your Gripp app regularly for maintenance bulletins and reminders
INSPECTION
DEEP
DEEP
BALANCE
CHECK
DRIVE SYSTEM
5.1 Routine Maintenance
Publication # GWP001 | May 15, 2026 | Revision 1.1
All Rights Reserved | Grain Weevil Corporation
25
Remote Controller Maintenance
• CLEAN: Wipe o grain dust with
a dry cloth (Use can of air if
necessary)
• CALIBRATE JOYSTICKS:
Regularly calibrate joysticks to
ensure safe operations
• INSPECTION: Visually inspect for
case damage or loose hardware
5.1 Routine Maintenance
Camera Maintenance
• CLEAN: Wipe o grain dust with
a dry cloth (Use can of air if
necessary)
• APP UPKEEP: Follow all suggested
maintenance and upkeep from
your SIYI FPV app.
• INSPECTION: Visually inspect for
case damage or loose hardware
Li Maintenance
• CHECK: Check the condition of the
robot hook and safety carabiner
including securing the knots
• GREASE: Regularly add
appropriate grease to the winch’s
worm gear mechanism
• INSPECTION: Visually inspect
for damage or loose hardware
especially note winch rope
condition
CLEAN REMOTE CALIBRATE
JOYSTICKS
INSPECT
REMOTE
CLEAN
CAMERA UNIT
INSPECT
CAMERA UNIT
KEEP ANDROID
APP UPDATED
INSPECT
ROBOT HOOK
REGULARLY
APPLY GREASE
INSPECT
LIFT UNIT
Publication # GWP001 | May 15, 2026 | Revision 1.1
All Rights Reserved | Grain Weevil Corporation
26
5.2 Performance Indicators and Diagnostics
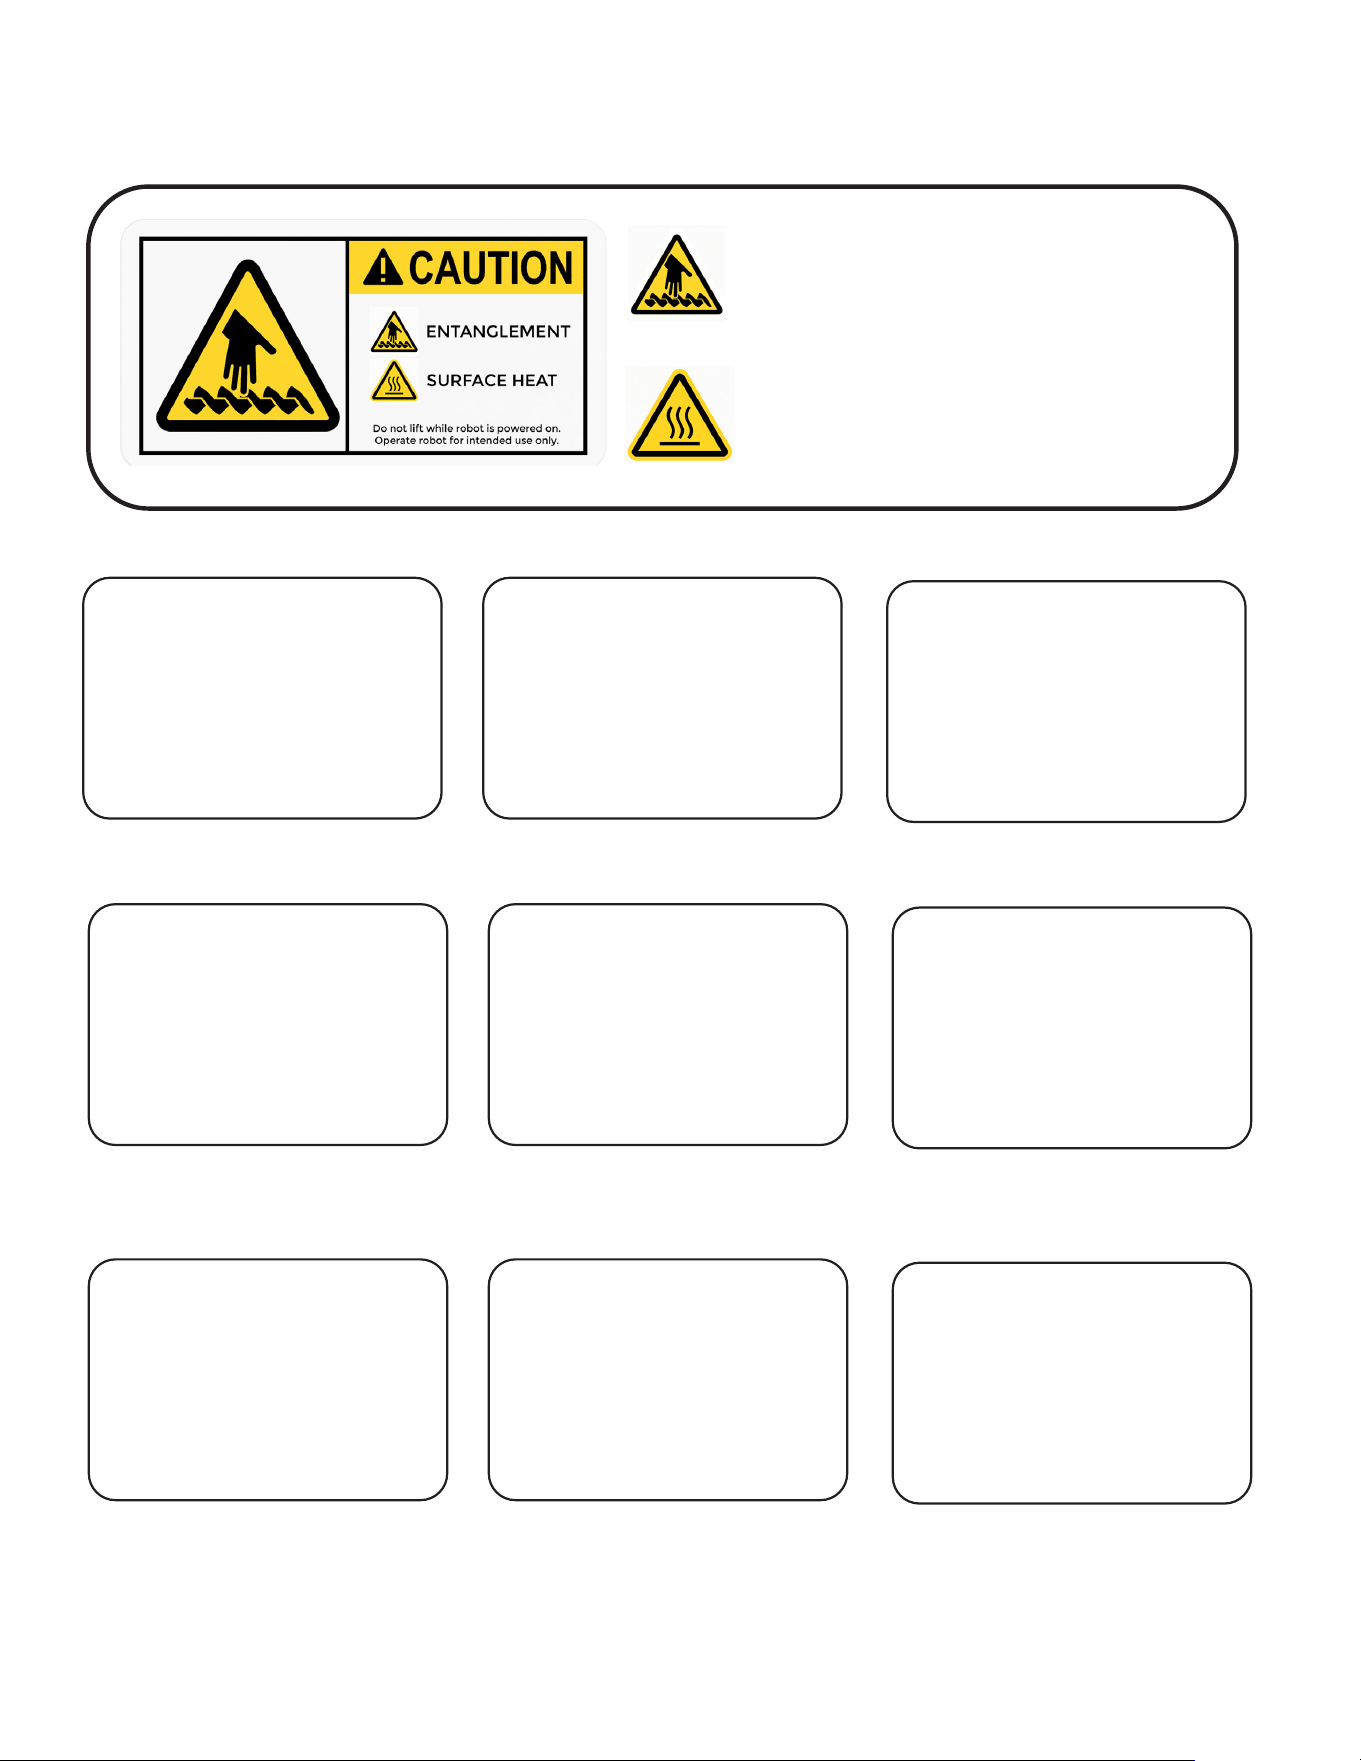
ENTANGLEMENT
Do not li or carry robot while powered on.
Pinch points and entanglement possible.
SURFACE HEAT
Gear boxes may be hot during and aer
operations.
Please follow all safety protocols when diagnosing, updating, or repairing the robot.
Battery Levels Joystick Pairing
Intentional Safety Disconnect
5.2.1 Robot Won’t Move
Stick Calibration Dirty Controller
Battery Levels
5.2.2 Joystick Lags
Check Power Location
Camera+Device Pairing
5.2.3 Camera Not Streaming
You will see:
• Augers run without input
• Less ne motor control
You will see:
• Buttons not reacting
• Less ne motor control
You will see:
• Frequent disconnections
• Robot stuck on last
command (Dangerous)
FIX: Run Joystick Calibration
in Controller Settings
FIX: ourougly clean
controller especially joysticks
FIX: Fully Charge Remote
You will see:
• Indicator light warnings
• One or both augers
slowed or not moving
FIX: Fully Charge Robot
You will see:
• No green LED light
• No response from robot
FIX: Ensure correct robot ID
is selected on remote
e robot will intentionally restart
if it does not receive a quality signal
from a remote for a period of
10 seconds. is is intentional and
should be treated as a normal opera-
tional function
e camera system requires adequate
power on the camera unit, on the
radio unit and on your viewing
device. Ensure cable connections are
secure and all required batteries are
charged
You will see:
• Frequent disconnections
• Video feed freezing
FIX: Move camera unit and
radio unit closer in proximity
You will see:
• Camera Not Available error
• No video feed on screen
FIX: Restart both devices and
follow pairing instructions
Publication # GWP001 | May 15, 2026 | Revision 1.1
All Rights Reserved | Grain Weevil Corporation
27
5.3 Getting Support
OFF
SELF-HELP
ADDRESS
SCAN
GRIPP IT
CONNECT
1. Turn o all devices including robot, remote, and camera.
2. Scan the QR Code o the back of the robot (even if support is for remote or camera).
3. Using the GRIPP asset management app - log your issue with as much detail as possible.
4. Use the search feature in the GRIPP app to nd your issue in the Self-Help materials.
5. Connect directly with your BinAssist partner and Grain Weevil right within the GRIPP app.
6. Address the issue with the following services:
• Self-Help
• Texting with BinAssist Partner
• Phone Call with BinAssist Partner
• On-Site Service Call with BinAssist Partner
• On-line Consultation with Grain Weevil Subject Matter Experts
• Warranty Work and/or Certied Grain Weevil Repair Service
Warning:
• Minor repairs on attachments, fasteners, and winch system can be per-
formed by operators.
• DO NOT Open the sealed robot enclosure without authorization - this
will result in a voided warranty.
• If the robot is dropped or damaged, remove it from services and contact
support.
• Firmware updates are performed by Grain Weevil technicians and autho-
rized partners, users are not permitted to access internal electronics or
rmware systems.
5.3.1 Contacting Support

Publication # GWP001 | May 15, 2026 | Revision 1.1
All Rights Reserved | Grain Weevil Corporation
28
Legal / Acceptable Uses
6.1 Permitted Use Environments
6.2 Restriced Use Environments
Grain Weevil Robots are approved for use in the following conditions:
• On-farm grain bins and storage structures not classied as hazardous
environments
• Commercial grain bins only if a formal site assessment has veried that
the structure is not classied as Class II Div 1 and does not present a
safety threat
• Industrial storage areas involving non-combustible materials (must
have express written consent by Grain Weevil through a special materials
license)
RESTRICTED LOCATIONS
Do not use the Grain Weevil or any of the associated equipment within a Zone
20 / Class II Div 1 Hazardous Environment without written consent from Grain
Weevil, accompanied by a company wide safety exemption.
Grain Weevil Robots are NOT approved for use in the following conditions:
• Class II Division 1 Grain Dust Environment (Zone 20)
• Any environment with know explosive dust or ammable gas hazards
• Bins with active grain ow (e.g. actively being lled or unloaded)
• Temperature Restriction: Do not operate with ambient temperatures
below ( -25 0C ) ( -13 0F )
• Temperature Restriction Do not operate with ambient temperatures
above 45 0 C ( 113 0 F )
Publication # GWP001 | May 15, 2026 | Revision 1.1
All Rights Reserved | Grain Weevil Corporation
29
6.3 Warranty Overview
6.4 Ownership, Resale, & Transfer
6.5 Soware and Data Policy
The Grain Weevil includes a limited warranty covering:
• Robot internal electronics (sealed enclosure) and gearboxes:
2 years against manufacturer defects
Robot Controller, Bin Camera System and Robot Charger:
1 year standard manufacturers warranty
• Winch, attachments, and accessories:
6 months under normal use
Warranty does not cover:
• Damage from improper handling or storage
• Unauthorized repair or modication
• Use in restricted or uncertied environments including materials not identied in your Terms &
Conditions and/or licensing agreement.
• Normal wear and tear from regular operations, including consumables like the drive augers
• Use of robot to provide for-prot services unless specically granted by Grain Weevil through an
Enterprise License agreement
• Customers may transfer ownership of the robot in on-farm settings.
• In commercial or industrial settings, ownership transfers must be validated by Grain Weevil to
maintain warranty and service eligibility.
Warranty Disclaimer
This User’s Manual does not represent the legal documents covering warranty, terms
of use, and licensing. Please see the appropriant Terms & Conditions or Licensing
Agreement
• Grain Weevil reserves the right to push soware updates to improve safety and functionality
• Robots may transmit operational and diagnostic data to Grain Weevil servers for performance
tracking
• All transmitted data is anonymized and scrubbed of personal or location-identiable metadata
• Data may be used to improve robot algorithms and service support
Privacy Disclaimer
Please see the Grain Weevil Privacy Policy in your GRIPP app (scan QR code) or by
visiting www.grainweevil.com
Publication # GWP001 | May 15, 2026 | Revision 1.1
All Rights Reserved | Grain Weevil Corporation
30
Robot & Accessory Specications
Robot: GWR 1.0
7.1 Robot Specications
7.2 Remote Control Specications
ITEM VALUE
Mass
Dimensions
Operational Temperatures
Battery
Communications Protocol
Sensor Stack
Remote: GWC 1.0
ITEM VALUE
Mass
Dimensions
Operational Temperatures
Battery
Communications Protocols
22 kg ( 48.5 LBS )
61 cm x 61 cm x 35 cm ( 24” x 24” x 14” )
-25 0C to 50 0C ( -13 0F to 122 0F )
24v - 22 Ah
LoRa ( 915 Mhz )
Accelerometer/Gyroscope, Radar
0.45 kg ( ~1 LBS )
10 cm x 18 cm x 5 cm ( 4” x 7” x 2” )
3.4v Lithium Ion
LoRa ( 915 Mhz )
Run Time / Charge Time
90 Minutes / 25 Minutes
SAFETY FEATURES
Brushless DC motors, Battery Management System, Custom
Safety Designed Electronics, Dust Ignition Proof
Run Time / Charge Time
6 Hours / 6 Hours
-25 0C to 50 0C ( -13 0F to 122 0F )
Publication # GWP001 | May 15, 2026 | Revision 1.1
All Rights Reserved | Grain Weevil Corporation
31
7.3 Camera Sustem Specications
Camera Unit: GWV 1.0
ITEM: VALUE:
Weight
Dimensions
Operational Temperatures
Power Input
Communications Protocols
1.2 kg ( 2.75 LBS )
20 cm x 18 cm x 13 cm ( 8” x 7” x 5” )
18v DC
Engineered to IP65
5 GHz Band
-25 0C to 50 0C ( -13 0F to 122 0F )
Ingress Protection
7.4 Radio Communications Table
LoRa Radio
Region: Utilize Frequencies:
US & Canada
Brazil
South America
Australia - New Zealand
902-928 MHz
902-907.5, 915-938 MHz
915-928 MHz
902-928 MHz

Publication # GWP001 | May 15, 2026 | Revision 1.1
All Rights Reserved | Grain Weevil Corporation
32