
Read this user manual with diagrams carefully before using this product and
store it properly for future reference.
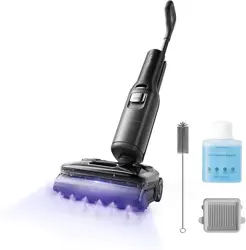
Roborock F25 Ultra
Wet and Dry Vacuum Cleaner User Manual

002002
English
003 Safety Information
003 International Symbols Explanation
004 Product Introduction
004 Product Installation
005 Connecting to the App
005 Instructions for Use
007 Routine Maintenance
008 Basic Parameters
009 Common Issues
010 EU Declaration of Conformity
010 WEEE Information
010 Warranty Information
Contents
English
English 002
Français 011
Deutsch 020
Italiano 029
Español 038
Nederlands 047
Polski 056
Norsk 065
Svenska 073
Português 082
Suomi 091
Română 099
Dansk 108

003
Usage Restrictions
•
Do not use this product outdoors or in any
commercial or industrial environments. It is
intended for home use only.
•
Do not store the product anywhere in a car to
avoid high or low temperatures affecting its
battery life.
•
The battery pack of this cleaner cannot be used
for charging or discharging in environments
with high humidity, or temperatures above 40°C
(104°F) or below 4°C (39°F).
•
Use the maintenance brush carefully to avoid
injury. Keep out of reach of children.
•
Children should be supervised to ensure that they
do not play with the appliance.
•
This appliance is not intended for use by persons
(including children) with reduced physical, sensory
or mental capabilities, or lack of experience and
knowledge, unless they have been given supervision
or instruction concerning use of the appliance by a
person responsible for their safety (CB).
•
This appliance can be used by children aged from
8 years and above and persons with reduced
physical, sensory or mental capabilities or lack
of experience and knowledge if they have been
given supervision or instruction concerning use
of the appliance in a safe way and understand the
hazards involved. Children shall not play with the
appliance. Cleaning and user maintenance shall
not be made by children without supervision (EU).
•
To satisfy RF exposure requirements, a separation
distance of 20 cm or more should be maintained
between this device and persons during device
operation. To ensure compliance, operations at
closer than this distance is not recommended.
•
The antenna used for this transmitter must not
be co-located in conjunction with any other
Safety Information
antenna or transmitter.
•
Keep hair, loose clothing, fingers, and all parts of
the body away from openings and moving parts.
•
Keep limbs and pets away from the rotating brush
heads to avoid injury.
•
Do not touch the power cord, nor operate the
product with wet hands to prevent injuries.
•
Do not vacuum any burning or smoking
substances (such as non-extinguished cigarette
butts).
•
Do not vacuum any hard or pointy objects (such
as building materials, glass, and nails).
•
This product is only to be used in areas below
3,000 meters above sea level.
•
During and after steam or hot-water self-
cleaning and drying, the temperature of
accessible surfaces of the charging dock, roller,
cleaner head and vacuum cleaner will be high.
•
To prevent burns and scalds by steam, do not
touch their surfaces or remove the clean tank.
•
Do not direct the cleaner head, especially the steam
outlets, towards equipment containing electrical
components such as the interior of ovens.
•
Do not vacuum cords or other cables to avoid danger.
•
Only use the product in accordance with the User
Manual. Any loss or damage caused by improper
use will be borne by the user.
•
Roborock and its retailers disclaim all liability for
indirect, punitive, incidental, or consequential
damages resulting from the use, misuse, or
inability to use this product. This disclaimer does
not affect any statutory rights that may not be
disclaimed under applicable law.
•
Do not charge non-rechargeable batteries.
•
This product contains batteries that are only
replaceable by skilled persons.
Battery and Charging
WARNING
•
For the purposes of recharging the battery, only
use the detachable docking station roborock
MDS27HRR provided with this product.
•
Do not use any third-party batteries, power cords
or docks.
•
To reduce the risk of injury from moving parts,
keep the power off before servicing.
•
Do not disassemble, repair or modify the battery,
power cord or the dock.
•
Do not charge the vacuum or install the dock
near heat sources or in humid areas (such as
radiators or bathrooms).
•
Do not wipe the power cord or the dock with a
wet cloth, nor touch them with wet hands.
•
If the power cord is damaged or broken,
immediately stop using and contact the after-
sales service.
•
If the product is not going to be used for an
extended period of time, fully charge it, unplug its
power supply, and place it in a cool and dry place.
•
Make sure that you recharge it once every three
months to avoid battery overdischarge.
•
Do not discard waste batteries. Leave them with a
professional recycling organization.
Transportation
•
It is recommended to transport the product in its
original packaging.
Note
•
Rinse the filter at least once a month with tap
water. For details, please refer to the Routine
Maintenance section.
International Symbols
Explanation
– For indoor use only.

004004
Product Introduction
A
Product Installation
B
A1
Vacuum Cleaner
•
Press: Start operating / Enter wait-
for-orders mode
•
Press and hold for 2 seconds when
the vacuum cleaner is waiting for
orders: Power off
•
Press: Switch to AUTO/Steam/Hot-
water/Sponge mode
•
Press and hold for 2 seconds while
charging: Switch to Quiet Drying / Fast
Drying mode
•
Press while charging: Start/Pause
self-cleaning
•
Press and hold for 2 seconds while
charging: Start/Stop drying
•
Off: WiFi disabled
•
Flashing slowly: Waiting for connection
•
Flashing quickly: Connecting
•
Steady on: WiFi connected
—Power
—Switch Mode
—Self-Clean
A1-1—Speaker
A1-2—Handle
A1-3—Handle Release Hole
A1-4—Roller Release Tab
A1-5—Adaptive Drive Wheels
A1-6—LED Screen
A1-7—Dirty Tank Release Button
A1-8—Dirty Tank Handle
A1-9—Dirty Tank
A1-10—Clean Tank Refill Port
A1-11—Clean Tank
To stop self-cleaning or drying, press the button
while charging.
Note:
A1-12—Steam Outlets
A1-13—Clean Tank Release Button
A1-14—Cleaning Solution Refill Port
A1-15—Headlight
A1-16—Roller
A2
Charging Dock
A2-1—Drying Tray
A2-2—Drying Air Outlets
A2-3—Charging Contacts
A5
Maintenance Brush
A4
Filter
A3
Power Cord
The maintenance brush can be placed in the
groove at the back of the charging dock.
Note:
A6-1—Light Stripe
A6-2—WiFi Indicator
A6-3—Battery Level
A6-4—Sponge Mode
A6-5—AUTO Mode
A6-6—Charging Indicator
A6-7—Error Indicator
A6-8—Hot-water Mode
A6-9—Steam Mode
A6
LED Screen
B2-1—Place the charging dock upside down
and plug the power cord into the
dock.
B2-2—Place the charging dock on a flat,
hard floor and plug it in.
B1-1—Connect the handle to the main body
until it clicks into place. The buttons
on the handle should face forward.
The power cord can exit from either the right or
left cord storage slot opening.
Note:
B1
Fit the Handle
B2
Plug in the Charging Dock
B1-2—To detach the handle, insert a pen-
shaped object into the handle release
hole on the back of the main body
and press. Hold the handle and pull
it out.
Notes:
•
Do not place the charging dock in humid locations or
near heat sources, such as bathrooms, kitchens, and
radiators.
•
The maintenance brush can be placed in the groove at
the back of the charging dock.

005
Search for "Roborock" in the App Store
or Google Play or scan the QR code to
download and install the app.
1. Download the App
C1-1—Grip the clean tank handle, press the
release button, and pull the clean tank
upwards at a slight angle to remove it.
Instructions for Use
C
C1
Filling the Clean Tank
Keep the machine charging or in wait-for-
orders mode with the screen on. Press and
hold the
and buttons simultaneously
until you hear the "Resetting WiFi" voice
message. The reset is completed when the
WiFi indicator flashes slowly. The vacuum
cleaner will then wait for a connection.
If you cannot connect to the vacuum cleaner due
to your router configuration, a forgotten password, or
any other reason, reset the WiFi and add your vacuum
cleaner as a new device.
Note:
2. Reset WiFi
Open the Roborock app, tap "Add Device" or
the "+" button on the homepage, and add
your device following the in-app guide.
Notes:
•
The actual process may vary due to ongoing app
updates. Follow the instructions provided in the app.
•
Only 2.4 GHz WiFi is supported.
3. Add Device
C1-2—Open the cap of the clean tank refill
port, add tap water, and then close
the cap tightly.
C1-3—Open the cap of the cleaning solution
refill port, add a moderate amount of
cleaning solution, and then close the
cap tightly.
Notes:
•
To avoid deforming the clean tank, do not use hot water.
•
To prevent corrosion or damage, do not use
any disinfectant. Only use cleaning solutions
recommended by Roborock.
•
To improve cleaning performance, we recommend
adding the cleaning solution to the cleaning solution
refill port before use. During cleaning, the machine will
automatically mix the solution with clean water based
on the preset ratio. Skip this step if floor cleaning
solutions are not needed during daily cleaning.
C1-4—Place the clean tank back to the
cleaner head. Push it down gently
until it clicks into place.
C2-1—Locked
C2-2—Unlocked
C2
Locking and Unlocking
Gently step on the cleaner head and hold the
handle. Push it to lock the vacuum cleaner,
and pull it to unlock.
Press the
button, and the machine will
enter wait-for-orders mode. Gently step
on the cleaner head and hold the handle.
Then, tilt the handle backwards to unlock the
machine. It will begin operating automatically.
C3
Starting the Vacuum Cleaner
Always keep the vacuum cleaner flat with the
buttons on the handle facing up.
Note:
C4
Lay-Flat Cleaning
Press the button to switch between
AUTO, Steam, Hot-water, and Sponge
modes. The screen will display the icon of
the current mode.
C5
Mode Switching
The vacuum cleaner can be laid flat to
clean under furniture and appliances. To
do this, lower the handle while using the
machine. The available capacity of the dirty
tank decreases during low-profile cleaning.
Therefore, we recommend you empty the
dirty tank before cleaning under furniture
and appliances.
1. When you stand the machine upright
during cleaning, it will stop operating and
enter wait-for-orders mode.
Wait for Orders and Power off
Connecting to the App
It is normal if a small amount of steam keeps
coming out after using Steam mode.
Note:

006006
2. If the vacuum cleaner remains idle for 5
minutes when it is waiting for orders, it will
automatically power off. To manually turn
it off, press and hold the
button for 2
seconds when it is waiting for orders
.
C6-1—Error indicator flashing: Error occurred
When the dirty tank is full or the clean tank
is empty during use, the vacuum cleaner
will provide audio and visual alerts. In this
case, fill the clean tank or empty the dirty
tank before resuming cleaning.
C6
Water Level Alerts
C7
Emptying the Dirty Tank
C7-1—Hold the dirty tank handle, press
the release button, and tilt the tank
backwards to remove it.
C7-2—Gently pull the handle of the tank lid
upwards to remove the lid, and then
empty the dirty tank.
C7-3—Reinstall the tank lid. Tilt the dirty
tank, insert its bottom back into
the vacuum cleaner, and then push
it gently inwards until it clicks into
place.
1. Lock the vacuum cleaner when it is
waiting for orders and place it onto the
charging dock. Charging starts when
C8
Charging and Self-Cleaning
2. Press the button to start/pause smart
self-cleaning.
3. After self-cleaning and drying are completed,
follow the voice message and empty the
dirty tank promptly to prevent odors.
Notes:
•
Make sure that the clean tank and dirty tank are
in place for optimum self-cleaning and drying
performance.
•
The product is equipped with a built-in high-
performance lithium-ion rechargeable battery pack.
To maintain battery performance, keep the product
charging during normal use.
•
Always place the vacuum cleaner back onto the
charging dock after use to prevent water stains on the
floor.
•
If the Charge & Sleep mode is disabled and the
machine is shut down, ensure the machine is on the
charging dock, press the
button to turn it on, and
then start self-cleaning.
When self-cleaning is completed, drying
will start automatically. During charging,
press and hold the
button for 2 seconds
to switch between drying modes. To start
drying directly, press and hold the
button
for 2 seconds while the machine is charging.
Drying
•
You can disable automatic drying in the app.
•
You can adjust or schedule self-cleaning and drying in
the app.
•
Self-cleaning and drying are available only when
the vacuum cleaner is charging and has a sufficient
battery level. The required battery level varies by
Notes:
After adding your vacuum cleaner in the app,
you can adjust the volume and change the
language of voice messages in the app.
Voice Message Settings
The Charge & Sleep mode is disabled by
default. To enable or disable it, press the
button for 5 seconds while charging until
you hear the voice message: "Charge &
Sleep mode enabled" or "Charge & Sleep
mode disabled."
Enable/Disable Charge & Sleep
Mode
•
WiFi not connected, with Charge & Sleep mode
disabled: Five minutes after the machine is fully
charged, it will automatically shut down. To start self-
cleaning and drying, press the
button to turn it on,
and then press the
button.
•
In other cases: After the machine has been charging
for 5 minutes without operation, the LED screen will
turn off. After the machine is fully charged, it will not
automatically shut down. To start self-cleaning and
drying, press the
button.
Notes:
you hear the voice message: "Charging
started. Please start self-cleaning."
self-cleaning and drying mode. If the vacuum cleaner
is set to steam self-cleaning or fast drying but the
battery level is low, it will automatically switch to hot-
water self-cleaning or quiet drying, respectively.
•
Stay away from the charging dock area during self-
cleaning and drying.
•
If the Charge & Sleep mode is disabled and the
machine is shut down, ensure the machine is on the
charging dock, press the
button to turn it on, and
then start drying.

007
When the vacuum cleaner is waiting for
orders, press and hold the
button and
then the
button for 5 seconds until you
hear the "Restoring factory settings" voice
message. The machine will then be restored
to factory settings.
Restoring Factory Settings
D1-1—Remove the dirty tank, pull the
handle of the tank lid upwards to
remove the lid, and remove the filter
from the tank lid. Use the provided
maintenance brush to clean the
debris on the filter. If the filter is dirty,
rinse it with cold water and shake off
the remaining water.
D1
Dirty Tank and Filter
Wipe and clean the vacuum cleaner with a
soft, dry cloth. Before cleaning, remove the
vacuum cleaner from the charging dock and
power it off.
Vacuum Cleaner
Deactivating WiFi
To disconnect the vacuum cleaner from WiFi,
press the
and buttons until you hear a
voice message. Then wait for 5 minutes and
the WiFi will be automatically deactivated.
If you want to reconnect, please follow the
related connecting instructions.
Routine Maintenance
D
If the machine is left unused for a prolonged
period of time, fully charge it, unplug it, and
store it in a cool, dry place. Do not place it in
humid locations or direct sunlight. Charge
it at least once every 3 months to avoid
overdischarge.
Product Maintenance
•
Before cleaning or maintaining the product, make sure
the vacuum cleaner is powered off or stopped and the
charging dock is unplugged.
•
The frequency of replacement may vary with actual
usage. If you notice any abnormal wear, replace the
parts immediately.
•
The filter and roller fibers have been treated with silver
ion antimicrobial agent to resist bacterial odors.
Notes:
*
Dirty tank: Clean as needed.
*
Filter: Clean or replace as needed.
Notes:
•
Leave the filter to dry completely for at least 24 hours
before reinstalling it.
•
Do not touch the filter surface with hands, brushes, or
sharp objects to avoid damaging it.
D1-2—Dry all the parts thoroughly before
installing them back in place.
D2
Solid-Liquid Separator
*
Clean as needed.
1. To remove the solid-liquid separator, grip
the snap-fit fasteners on both sides and
detach them.
2. To install the separator, ensure that it faces
the dirt inlet, align the snap-fit fasteners
properly, and press the fasteners until
D3-1—Grip the clean tank handle, press the
release button, and pull the clean tank
upwards at a slight angle to remove it.
D3
Clean Tank and Roller
D3-2—Rinse the tank bottom with clean water.
*
Clean tank: Clean every 2–4 weeks.
*
Roller: Clean as needed and replace every 3 months.
To prevent blockage, check the steam outlets for
dirt and rinse them as needed after extended use.
Note:
D3-3—Grab the roller release tab and pull
the roller out along the cleaner head.
Use the provided maintenance brush
to remove dirt from the roller, and
then rinse it with clean water.
D3-4—To replace the roller, grab the roller
cap and pull it out of the roller. Then,
install the roller cap to a new roller.
D3-5— Reinstall the roller and clean tank in
sequence.
Notes:
•
D3-6— After using Steam mode, do not touch the
positions shown in the diagram.
•
D3-7— After using Hot-water mode, do not touch the
water outlets shown in the diagram.
•
Use the maintenance brush carefully to avoid injury.
•
When you detach the roller cap, do not pull it by its
handle.
•
To prevent potential damage, keep the roller cap
attached while cleaning the roller.
Clean the adaptive drive wheels regularly.
D4
Adaptive Drive Wheels
they snap into place.
008008
Notes:
•
Do not rinse the charging dock directly with water.
•
When there is water on the surface of the charging
dock, wipe it with a soft, dry cloth and do not overturn
it to prevent damage.
*
Clean as needed.
1. Power off the vacuum cleaner, place it in
a stable position, and then remove the
dirty tank, clean tank, and roller.
D5
Cleaner Head and Dirty
Water Pathway
2. Clean the roller slot and dirty water
pathway with the provided maintenance
brush.
3. Reinstall the roller, clean tank, and dirty
tank.
Do not rinse the cleaner head directly with water.Note:
*
Clean as needed.
Unplug the charging dock and use a soft,
dry cloth to clean its surface and charging
contacts.
D6
Charging Dock
Model WD6Y3A
Rated Voltage/
Current
21.6 VDC 20 A
Battery
21.6 V/4600 mAh (TYP)
Lithium-ion battery
Vacuum Cleaner
Basic Parameters
Dock Charger
Model MDS27HRR
Rated Input
Voltage
220-240 VAC
Rated
Frequency
50-60 Hz
Rated Input
(Charging)
0.65 A
Rated Input
(Drying)
3 A
Rated Output 29 VDC 2.07 A
Charging
Battery
21.6 V/4600 mAh (TYP)
Lithium-ion battery
Service WiFi
Protocol 802.11b/g/n
Frequency
Range
2400-2483.5 MHz
Max. Output
Power
≤
20dBm
WiFi Specification
009
Common Issues
Issue Solution
There are large water stains
on the floor, the cleaner head
leaks water, or water cannot be
vacuumed from the floor.
•
Remove the roller and dirty tank, check the dirty tank pathway and the suction port inside the roller
slot for any clogging, and check whether the filter is clogged or wet. Confirm that the dirty tank and
filter are properly installed, and then try again.
The LED screen does not light up
and the vacuum cleaner cannot
start.
•
Low battery level. Charge it before use.
Unpleasant smell during use.
•
Clean the roller, dirty tank, and filter.
Cleaning creates a lot of foam.
•
Do not add any disinfectant to the clean tank or spray it on the floor. Only use cleaning solutions
recommended by Roborock, as others may cause damage to the product.
•
Do not add the cleaning solution more than the recommended amount.
The vacuum cleaner is not
charging properly, or the drying
or self-cleaning process is
interrupted.
•
Clean the charging contacts on the charging dock and the vacuum cleaner.
The LED screen is on, but
the vacuum cleaner does not
respond to button pressing.
•
Press and hold the
button for 10 seconds to force a power-off, and then restart the machine.
Unable to connect to WiFi.
•
WiFi is disabled. Reset the WiFi and try again.
•
Poor WiFi signal. Make sure that the vacuum cleaner is placed in an area with good WiFi signal.
•
Abnormal WiFi connection. Reset the WiFi, download the latest app version, and try again.
•
Unable to connect to WiFi abruptly. There may be an error with your router settings. Contact Roborock
customer service for help with troubleshooting.
Is power always being drawn
when the vacuum cleaner is on
the charging dock?
•
The vacuum cleaner will consume power while it is docked to maintain battery performance, but the
power consumption is extremely low.
No steam comes out in Steam
mode.
•
Check whether there is water in the clean tank and whether the tank is properly installed.

010010
We Shenzhen Roborock Innovation Technology Co., Ltd. hereby declare that this equipment is in compliance with the applicable Directives
and European Norms, and amendments. The full text of the EU declaration of conformity is available at the following internet address:
https://global.roborock.com/pages/compliance
EU Declaration of Conformity
Please visit the following link to view the network interfaces exposed by the product, services exposed through the network interfaces, and
external sensors information:
https://global.roborock.com/pages/compliance
We Shenzhen Roborock Innovation Technology Co., Ltd. hereby declare that the radio equipment type WD6Y3A is in compliance with Directive
2014/53/EU. The full text of the EU declaration of conformity is available at the following internet address:
https://global.roborock.com/pages/compliance
WEEE Information
Correct Disposal of this product. This marking indicates that this product should not be disposed with other
household wastes throughout the EU. To prevent possible harm to the environment or human health from
uncontrolled waste disposal, recycle it responsibly to promote the sustainable reuse of material resources. To
return your used device, please use the return and collection systems or contact the retailer where the product was
purchased. They can take this product for environmentally safe recycling.
Warranty Information
The warranty period depends on the laws of the country in which the product is sold, and the warranty is the responsibility of the seller.
The warranty only covers defects in material or workmanship.
The repairs under warranty may only be carried out by an authorized service centre. When making a claim under the warranty, the original bill
of purchase (with purchase date) must be submitted.
The warranty will not apply in cases of:
•
Normal wear and tear.
•
Incorrect use, e.g. overloading of the appliance, use of non-approved accessories, use of force.
•
Damage caused by external influences.
•
Damage caused by non-observance of the user manual, e.g. connection to an unsuitable mains supply or non-compliance with the
installation instructions.
•
Partially or completely dismantled appliances.
