Projection Distance Reference
Note: Projection size and distance are calculated according to projection ratio, which
may have a deviation and subject to actual status.
Cleaning Method
Please make sure the power plug is unplugged before cleaning.
Do not use pesticides or other volatile chemicals on the projector or lens. Do not let
rubber or vinyl products contacts the projector for a long time, which will damage the
coating and make it peeled off.
· Clean the Projector
1. Wipe with a soft, dry cotton cloth. If it’s dirtied seriously, we can wipe with soft cloth
that stuck with diluted neutral detergent, then dry with a clean and dry cloth. Please
pay more attention if used with chemical fiber cloth.
2. Don’t use thinner, benzene or any other solvents to avoid quality reduction or coating
peeling off etc.
3. A brush can be inserted into the front of the vacuum cleaner to remove dirt inside the
vents. Please don’t use vacuum cleaner with no connector, or clean with vents directly.
4. Please don’t scrape the machine with nails or any other hard objects so as to avoid
scratches.
· Lens Cleaning
1. Clean lens with the same method for camera lens: please use professional blow dryer
or cleaning paper for glasses, ensure lens are not scratched.
· Inlet and Outlet Dust Cleaning
1. Dust in the inlet and outlet will prevent ventilation and increase the internal
temperature, which will cause defect.
2. Disconnect power line after turn off the projector.
3. Clean the exterior with an electric vacuum cleaner, please install brush head adapter
on the vacuum cleaner first. Kindly take note: don’t use vacuum cleaner with no
connector or brush.
Singal Source Setting
Enter Setting interface in the main screen and select input source. Enter into
HDMI signal channel, Press "OK" " to switch input source.
Note:
If you want to return to the previous layer, please press the return key;
If you want to return to the main interface, please press the main screen key.
Customer Name: Purchase of Shop:
Customer ID : Customer Tel:
Fault Description (Please describe in detail for quick maintenance):
Warranty Card
T
h
i
s
p
r
o
d
u
c
t
h
a
s
p
a
s
s
e
d
t
h
e
i
n
s
p
e
c
t
i
o
n
Certificate
QC: 05
1. We offer "three guarantees " for this product, One year warranty for non-
artificial damaged since purchasing (subject to purchase record).
2. We will provide warranty service for any default caused by product
technical reasons during warranty period.
3. Following situations are out of the range of guarantee:
① Accessories out of the mainframe
② Unauthorized disassembly and repair without our consent.
③ Damage that caused by external force and other natural disasters.
4. Please fill this card and contact your distributor when products have quality
problem
5. This warranty is limited to product maintenance during the warranty period,
no other liability
After-Sale Service Card
Poisonous and Harmful Substance, Element Name
and Content
Part name
Shell
Optical Machine
Circuit Board
Fan
Other Wires
Remote Control
Power Supply
Hazardous substances
Lead
(Pb)
Mercury
(Hg)
Cadmium
(Cd)
Hexavalent
chromium
(Cr(VI))
Polybro
minated
Biphenyls
(PBB)
Polybro
minated
Diphenyl
Ethers
(PBDE)
O
O
O
O
X
O
O
O
O
O
O
O
O
O
O
O
O
O
O
O
O
O
O
O
O
O
O
O
O
O
O
O
O
O
O
O
O
O
O
O
O
O
O: Content of the hazardous substance in all homogeneous materials of the
component is under the limits of SJ/T11363-2006.
X: Content of the hazardous substance exceeds the limit requirements
specified by SJ/T11363-2006 in at least one homogeneous material of the
component. The components labeled "X" " have no substitutive due to
global technology development limits. Circuit board assembly *: including
printed circuit board and its components, electronic components, etc.
The number in the logo represents the normal environmental service
life of the product. (Battery Excluded)
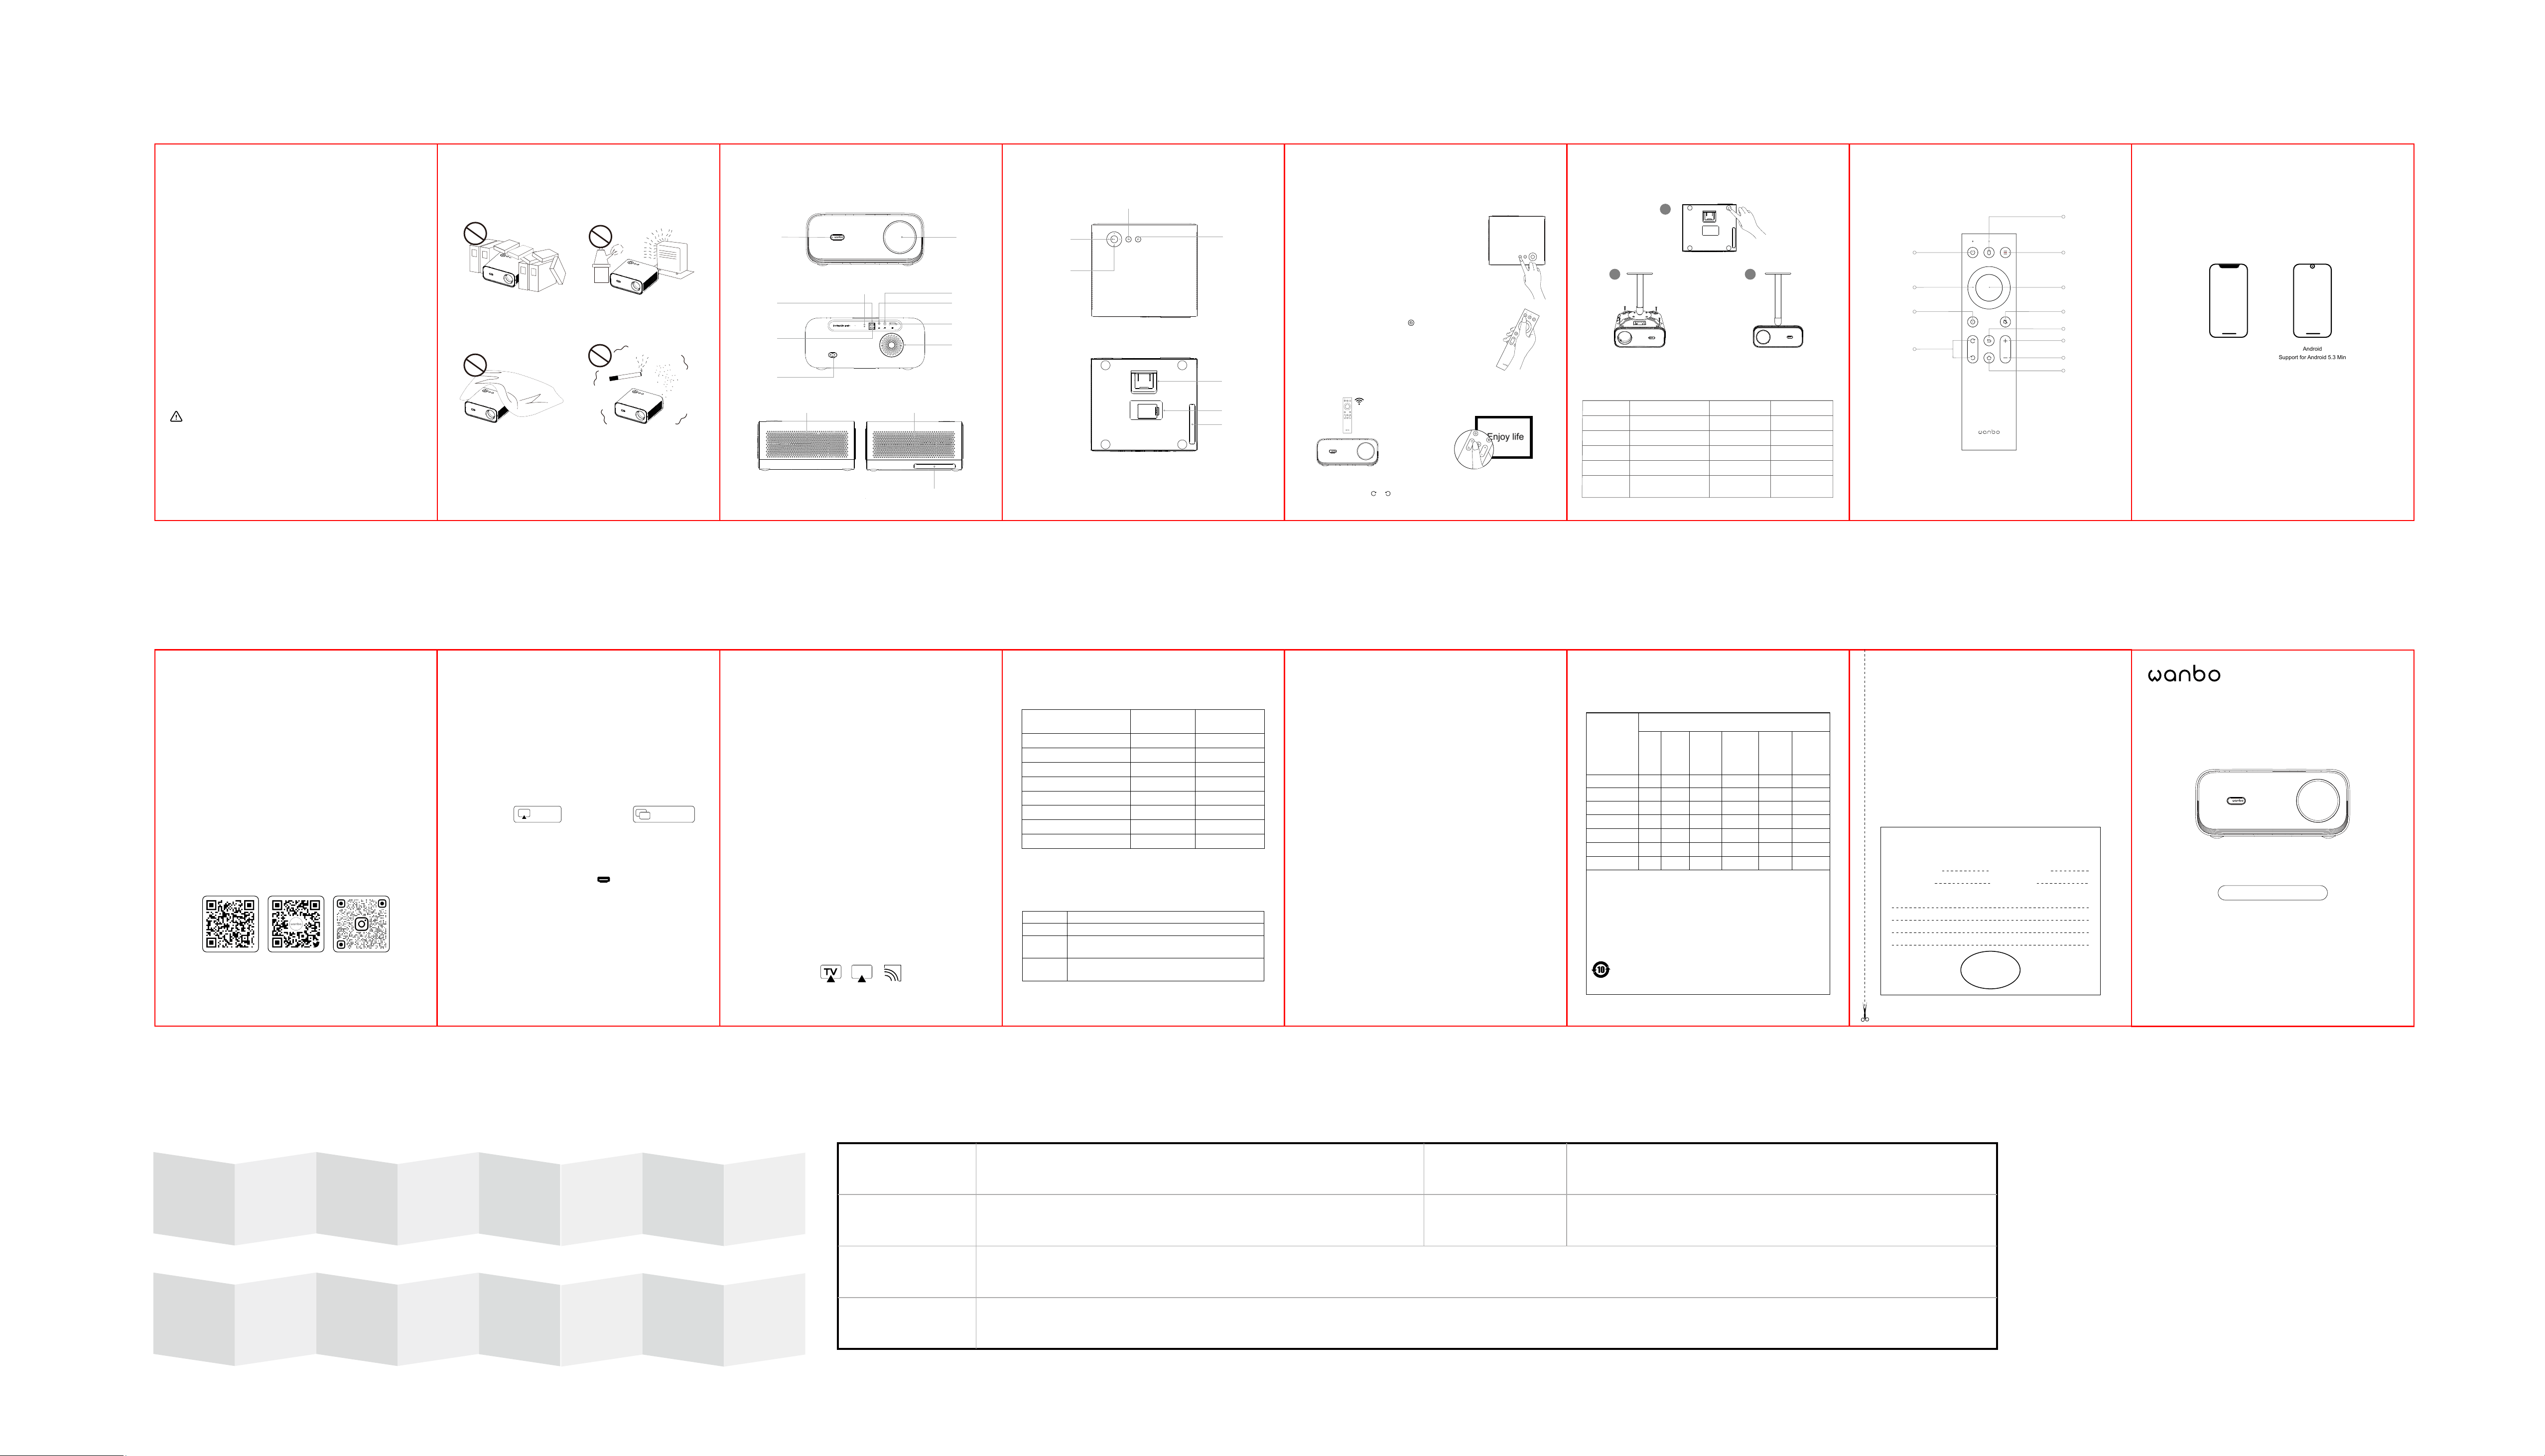
Wanbo Projector
Introduction Manual
Before using this product, please read this product manual carefully
Thank you for purchasing our products. For your safety and benefit, please read this product
manual carefully before using. If you fail to follow the product instructions or precautions, and
cause any personal injury, property or other losses, the company will not bear any responsibility.
Important Safety Precautions Projector Part Name and Function
Don’t install in places with poor ventilation Don’t install in places that hot and humid
Don’t block the vent (Inlet or Outlet) Don’t install in dusty and smoky areas
Mobile Phone with the Same Screen
The following steps can help us to display content of our mobile phone to projection
screen synchronously through wireless wifi, just enjoy with a larger picture.
Equipment requirements: support devices above IOS6 and Android 5.3 Min.
Android Devices User Instruction
1. Ensure the Phone and Projector are under the same WIFI (For Android Only).
2. Open“Eshare”of the projector.
3. Choose the device with the same name with Eshare to complete mirror.
Android
Support for Android 5.3 Min
iPhone
Support for IOS6 or Over IOS6
Important Safety Precautions
You are recommended to use the projector in a dark room to achieve
the best effect.
1. Please don’t install in places that directly blown by cold and warm air of air-conditioning,
water condensation or high temperature may lead to failure to the machine.
2. Ensure adequate ventilation and vent are not blocked to prevent heat accumulation
inside the machine.
3. Please prevent foreign matters such as nails or paper scraps from falling into the
machine. Do not insert any metals such as iron wire or screwdriver into the machine.
Please turn off the power immediately and turn to professional technician to remove
it if any foreign matters fall into the body.
4. Do not place any liquid on this machine to avoid risk of electric leakage.
5. Please use soft packaging materials to move the projector, install lens protection cover
to protect the lens from scraping, in addition, keep the projector from violent vibration.
6. Areas near the exhaust will become hot during and after we use the projector, it may
lead to scald if we touch with hand.
7. Please don’t watch lens directly when it’s on so as to protect our eyes from damage.
Note:
· Don’t open the shell to prevent electric shock, Please turn to qualified professional
maintenance personnel for the maintenance as there are no parts in the machine that
users can repair themselves.
· Don’t expose the machine to rain or moisture so as to prevent misfire or electric shock.
· The product is applicable to be used under a temperature of 0-35℃ for a safe side.
Mobile Phone with the Same Screen
IOS Devices User Instruction
1. Ensure the Phone and Projector are under the same WIFI (For IOS Only).
2. Open “Eshare” of the projector.
3. Open “AirPlay” / “Mirror” of the Phone.
4. Choose the device with the same name with Eshare to complete mirror.
Airplay
IOS Old Version
IOS New Version Screen Mirror
增加吊装支架说明
6
5
7
4
3
21
封底
1413
1211
10
9
封面
8
U Disk Support Format
File Type
Picture
Video
Audio
Note: Specific operation contents are subject to actual situation due to irregular
update of the product system.
File format supported
JPG/PNG/BMP
Support MP4,MOV,3GP,AV1,DIVX,FLV,ISO,M2TS,MKV,MPG,
RMVB,TP,TRP,TS,WMV,VOB,DAT,ASF
MP3,WMA,MP2,OGG,AAC,M4A,FLAC,3GP,WAV,AC3,M3U,
RM,WMV,DTS
Projection size (under status of
no keystone correction / Inch)
Screen length *
width (m)
Lens ~ screen (m)
40
60
80
100
120
140
160
180
0.89*0.5
1.33*0.75
1.77*1.0
2.21*1.25
2.66*1.49
3.10*1.74
3.54*1.99
3.99*2.24
1.33
2.0
2.67
3.33
4.0
4.67
5.33
6.0
Mobile Phone with the Same Screen
How to be with the same screen for iPhone under status of No Wifi
1. If there has no WIFI, firstly open 4G network of iPhone, then open WIFI hot spot in
the "Settings" interface of the phone.
2. Collect iPhone’s hot spot WIFI for the projector.
3. Open "Eshare".
4. Open "Airplay" / "Screen Mirror".
5. Find the projector and click.
Mobile Phone Projection
How to "push" contents to the projector
* Note: Advantage of push is it does not affect normal use of the mobile phone.
1. Ensure the Phone and Projector are under the same WIFI.
2. Open "Eshare".
3. Open "Airplay" / "Screen Mirror".
4. Find the projector and click.
5. Open video software of the mobile phone and finds the TV push icon in the four
corners (it’s usually on the top right or on the bottom right) (Each APPs have different
push icon design).
* Note: Not all video software have function of push.
6. Click this icon to push videos to the projector. At the same time, we can have other.
operations on the phone, it will have no conflict.
Schematic diagram of some push icons
Lens
Infrared receiving window
Camera
Power Supply Input
USB Interface1
USB Interface2
Headphone Jack
AV Interface
Horn
HDMI Input
Indicator Light
Heat Dissipation Air Inlet (Do not block)Heat Dissipation Air Outlet (Do not block)
Air Inlet Filter Screen
Short press the power button or the " " key on the remote control,
once shutdown prompt box appears, short press the power button
or the power key on the remote control again.
Installation and Adjustment
1. Device Power-On and Power-Off
Method 1: Press the power button on the projector to start.
Method 2: Point the remote control to the projector and press
the power key to turn it on.
Power-On
Power-Off
2. Adjusts Focal Length
Schematic diagram of blurred image
Focus Length: When the picture image is blurred (indicated as the right picture), adjust
the lens focus through " " " " on the remote control to achieve the best definition.
Remote Control
Multi-Function Keys
OK
Volume+
Volume -
OFF/ON
Arrow Keys
Setting Mute
Focus Key
Mouse Mode
(Android)
Return
Home
Dust Cleaning Port
Air Inlet Filter Screen
Support Frame
Arrow Keys
OFF/ON
OK
Return
Shenzhen Wanbo Technology Co., Ltd.
www.szwanbo.cn
Facebook Twitter
Instagram
Projector hanger installation steps
Remove the 4 pads
Adjust hanger angle to align with
the hole and then tighten screws
Fixed the hanger
MX5-02-003
黑白印刷
128g铜版纸 白色;8页风琴折双面
X5英文说明书
折前尺寸:720*120mm;折后尺寸:90*120mm
图纸号
材质工艺
颜色
备注
尺寸
类型
1
3
Basic Parameters
Product Name
Light Source
Operation Mode
Output Port
Net Weight
Accessory
Wanbo Projector
LED
Remote Control
Headphone Audio Output
3.02 kg
User Manual / Remote
Control / Power Cord
Display Principle
Horn
Working Environment
Input Port
Machine Size
Power
LCD
5W*2
0-35 ° C
HDMI/USB/AV IN
265*235*119 mm
135 w
2

