ENGLISH
Read these instructions carefully before using your appliance, and keep it carefully.
If you follow the instructions, your appliance will provide you with many years of good service.
MODEL NUMBER SERIES
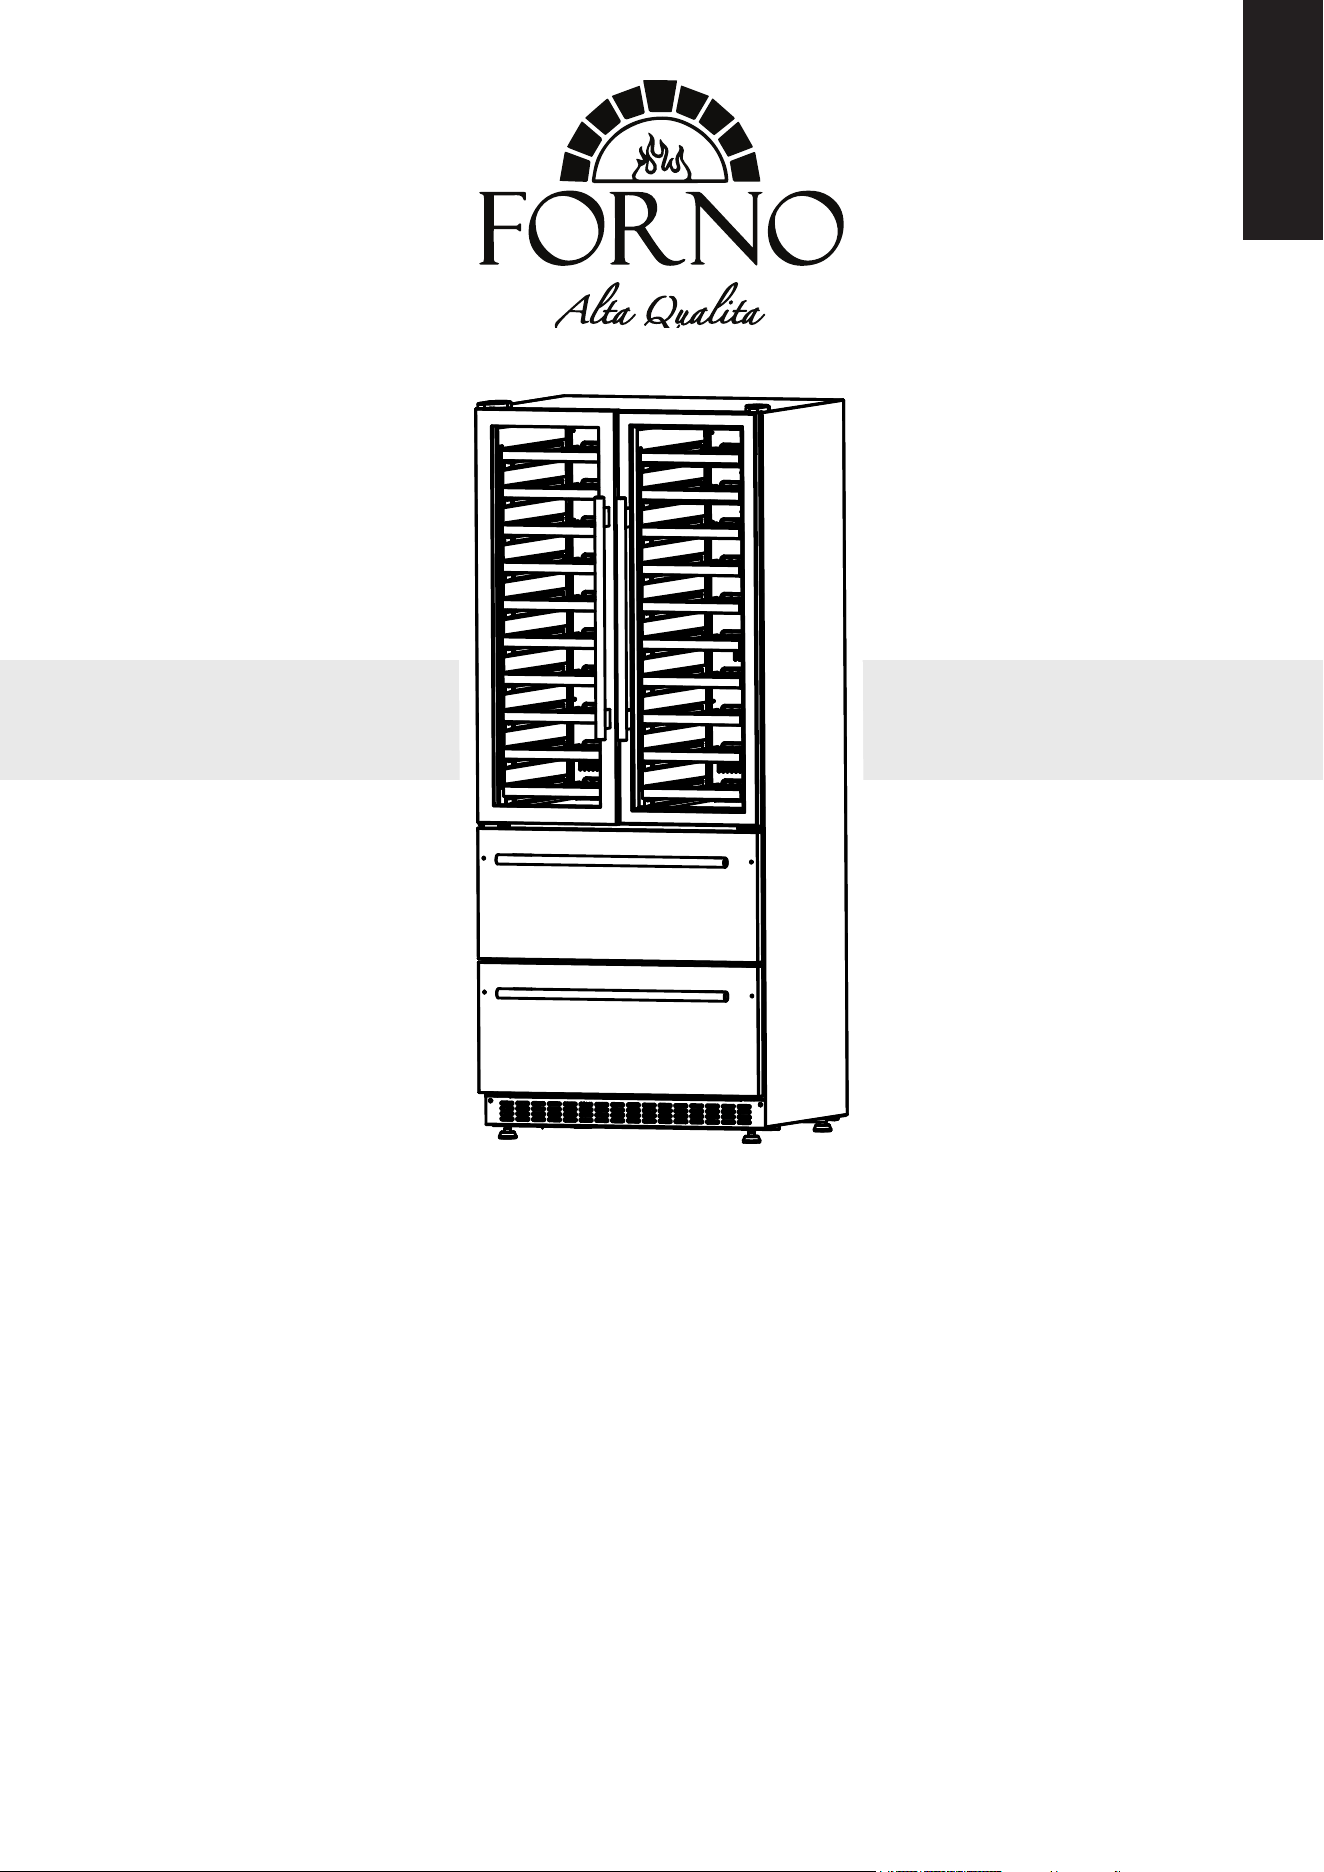
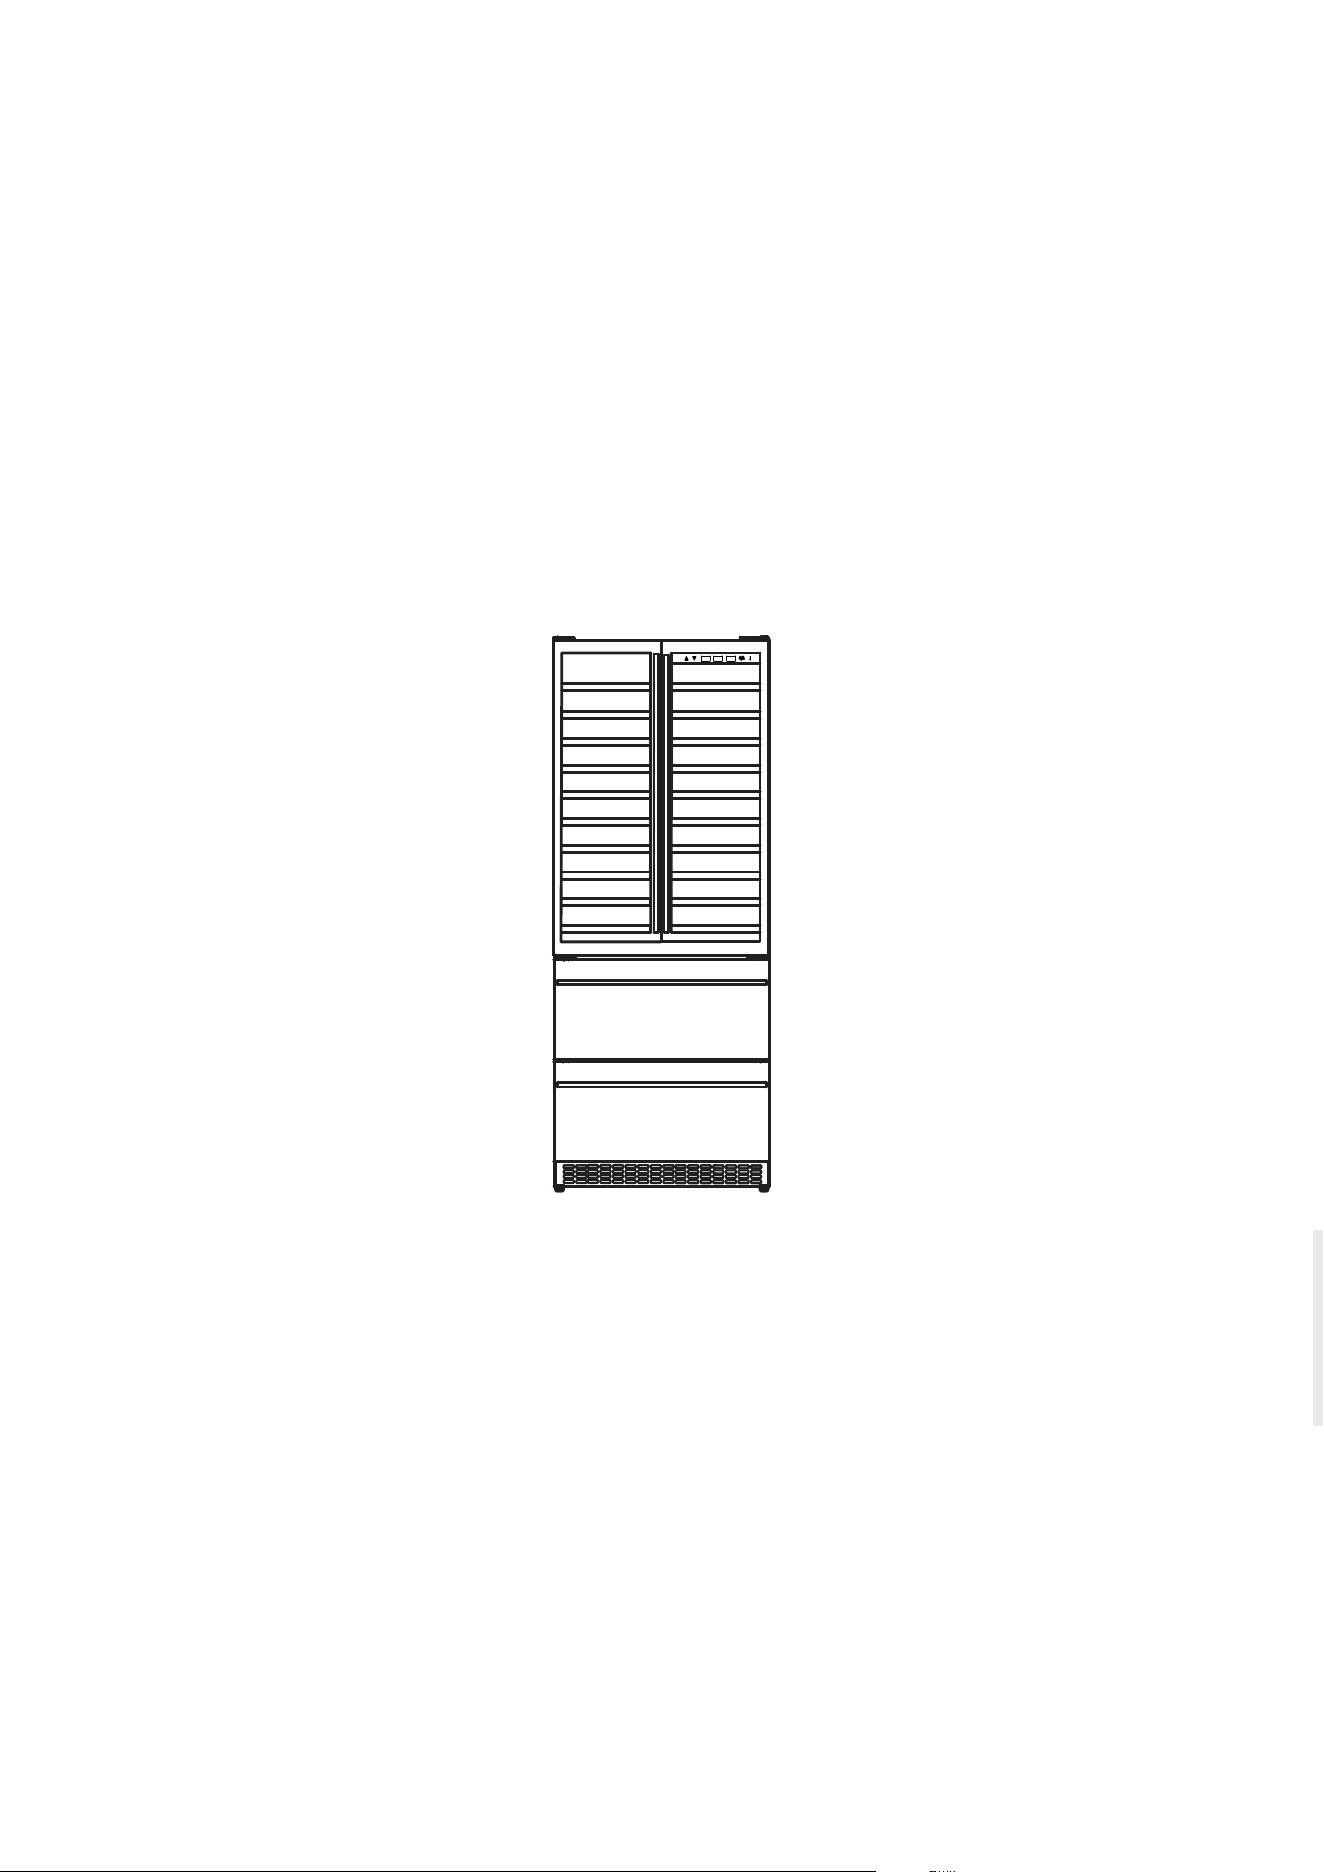
FWCDR6635-32S
INSTRUCTION MANUAL &
INSTALLATION GUIDE
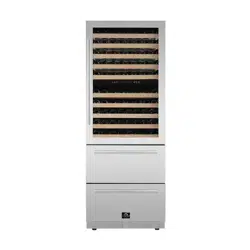
WINE & BEVERAGE CELLAR

3
TABLE OF CONTENTS
Customer Care 5
Warning 6
Important Safety 7
Product Dimension 9
Cutout 12
Names of Parts and Accessories 13
Installations:
• Anti-tip Bracket ................................................................
• Handle .............................................................................
14
15
Operating Instruction
• Adjusting the Zones Settings ...........................................
• Adjusting the Temperature Setting.....................................
16
16
Care and Maintenance
• Cleaning your cellar ..........................................................
• Moving the cellar................................................................
• Racking Configuration ......................................................
• How to Remove a Sliding Shelf and Drawer......................
17
17
17
17
Troubleshooting 18
Wire Diagram 19
Warranty 20
4
MODEL NUMBER SERIES
FWCDR6635-32S
WINE & BEVERAGE CELLAR
FELT RIGHT LOWER
5
Thank you for purchasing a Frono product. Please read the entire instruction manual before operating your new
appliance for the first time. Whether you are an occasional user or an expert, it will be beneficial to familiarize yourself
with the safety practices, features, operation and care recommendations of your appliance.
Both the model and serial number are listed inside the product. For warranty purposes, you will also need the date of
purchase .
Record this information below for future reference.
Services in Canada and Untied States
Keep the instruction manual handy to answer your questions. If you don’t understand something or need more
assistance, please visit our website for fast support. Please provide us your name, number, address,serial number
of the product that troubleshooting, proof of purchase, and a short description of the issue. A customer service
representative will contact you as soon as possible. All warranty work needs to be authorized by FORNO customer
service. All our authorized service providers are carefully selected and rigorously trained by us.
Product Information Service Information
Model Number : _________________________________________
Use these numbers in any
correspondence or services calls
concerning your product.
If you received a damaged product,
immediately contact Forno.
To save time and money, before
you call for serviced, check the
troubleshooting guide. It listed the
causes of minor operation problems
that you can correct yourself.
Serial Number : __________________________________________
Date of Purchase :________________________________________
Purchase Address And Phone : _____________________________
_______________________________________________________
____________________
Customer Care
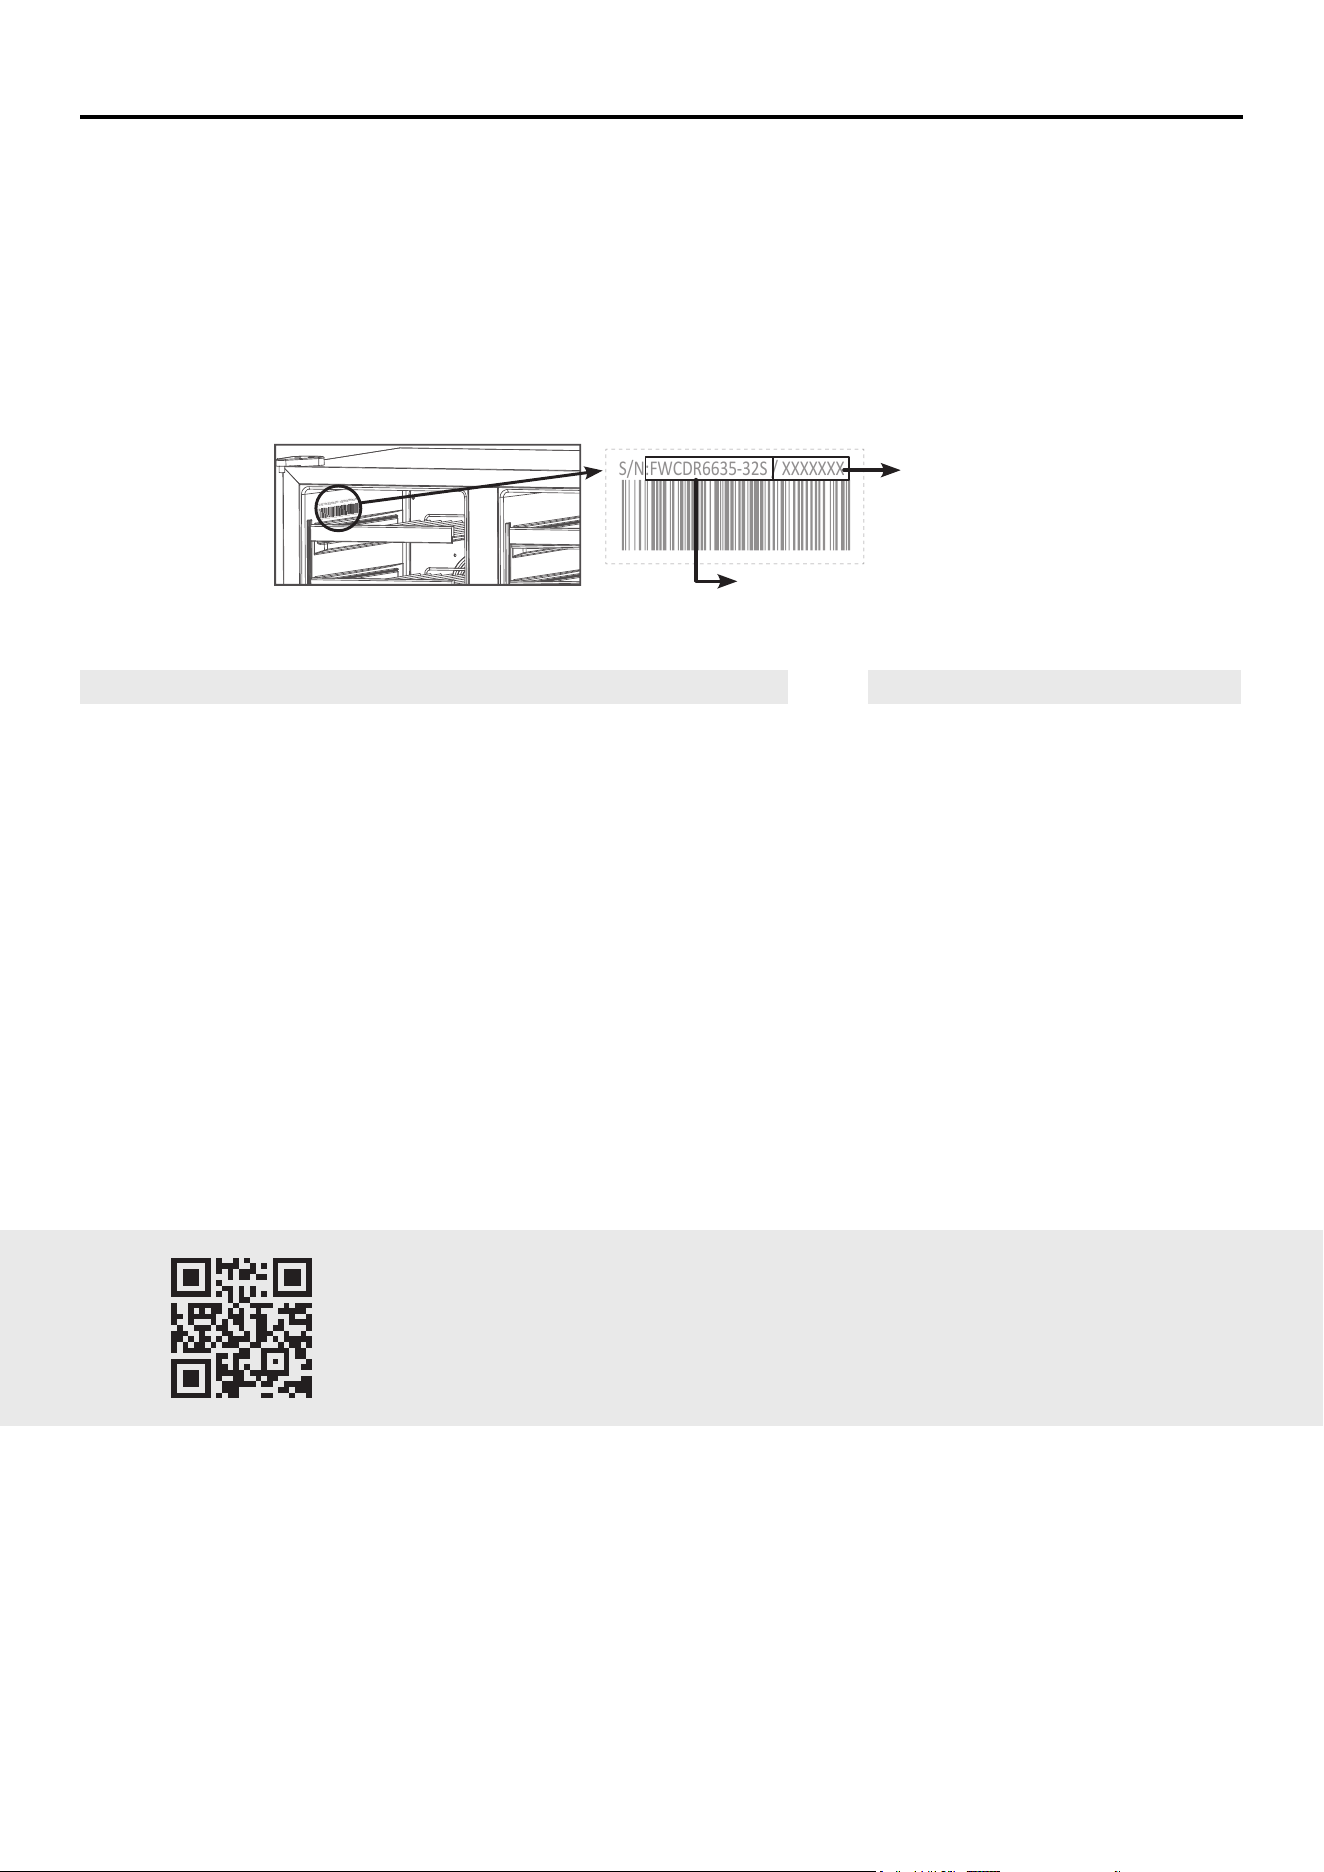
S/N:FWCDR6635-32S / XXXXXXX
S/N: XXXXXXXX - XXXXXXXXXX
Model Number
Serial Number
Model And Serial Number Location
“Need some quick help? Simply scan the qr code and get access
to our fast support form. We’re always here to assist you with any
questions or concerns you may have. So, don’t hesitate to reach out!”

6
WARNING
FOR YOUR SAFETY
Your safety and the safety of others are very important.
We have provided many important safety messages in this manual and on your appliance. Always read and obey all
safety messages.
This is the safety alert symbol. This symbol alerts you to potential hazards that can kill or hurt you
and others. Al l safety messages will follow the safety alert symbol and either the word “DANGER,”
“WARNING” or “CAUTION.” These words mean:
• You can be killed or seriously injured if you don’t immediately follow instructions.
• You can be killed or seriously injured if you don’t follow instructions.
• A potentially hazardous situation which, if not avoided, could result in minor or
moderate injury.
All safety messages will tell you what the potential hazard is, tell you how to reduce the chance of injury, and tell you
what can happen if the instructions are not followed.
DANGER
WARNING
CAUTION
WARNING : This product can expose you to chemicals including [Lead, lead
and lead compound, which is [are] known to the state of California to cause
cancer and birth defects or other reproductive harm. For more information go
to www.P65Warning.ca.gov.
WARNING
FOR YOUR SAFETY
Tip Over Hazard
• A child or adult can tip the cellar and be killed.
• Install anti-tip bracket to oor per installation instructions.
• Slide cellar back so rear is engaged in the slot of the anti-tip bracket.
• Re-engage the anti-tip bracket if cellar is moved.
• Do not operate the cellar without anti-tip bracket installed and engaged.
• Failure to follow these instructions can result in death or serious injuries to children and
adults.
7
Important Safety Instructions
• The appliance is intended to be used exclusively for storage of wine and beverage.
• Make sure the voltage/current marked on the rating label corresponds with your supply voltage. Plug into a
grounded 3-pin outlet, do not remove grounding pin, do not use an adapter, and do not use an extension cord.
• Do not connect or disconnect the electric plug when your hands are wet.
• Ensure enough peoples to move and install the appliance to avoid any damage to the appliance or injury to the
peoples.
• To ensure proper ventilation for the appliance, the front of the unit must be completely unobstructed. Locate the
unit away from direct sunlight and sources of heat (stove, heater, radiator, etc.).
• This appliance is not intended for use by young children.
• Do not use this appliance for other than its intended purpose.
• The use of attachments not recommended by the manufacturer may be hazardous.
• The symbol on the product or its packaging indicates that this product is not to be handled as normal
household waste and it is to be taken to a recycling collection point for electrical and electronic goods.
• Component parts shall be replaced with like components and that servicing shall be done by factory authorized
service personnel.
IMPORTANT SAFETY INFORMATION - DANGER! RISK OF CHILD ENTRAPMENT
Before you throw away your old appliance:
• Take off the doors.
• Leave the shelves in place so that children may not easily climb inside.
• Make sure the coolant circuit, particularly the heat exchanger at the back/bottom of the unit not be damaged.
CAUTION
To prevent a child from being entrapped, keep out of reach of children and not in the vicinity or appliance.
Refrigerants:
R600a is a kind of high performance green refrigerants, derived from natural ingredients, does not damage the ozone
layer, without the greenhouse effect. Its characteristic is the strong cooling performance, low power consumption. All
refrigeration products contain refrigerants, which under federal law must be removed prior to product disposal. If you
are getting rid of an old refrigeration product, check with a qualified disposal company for instructions.
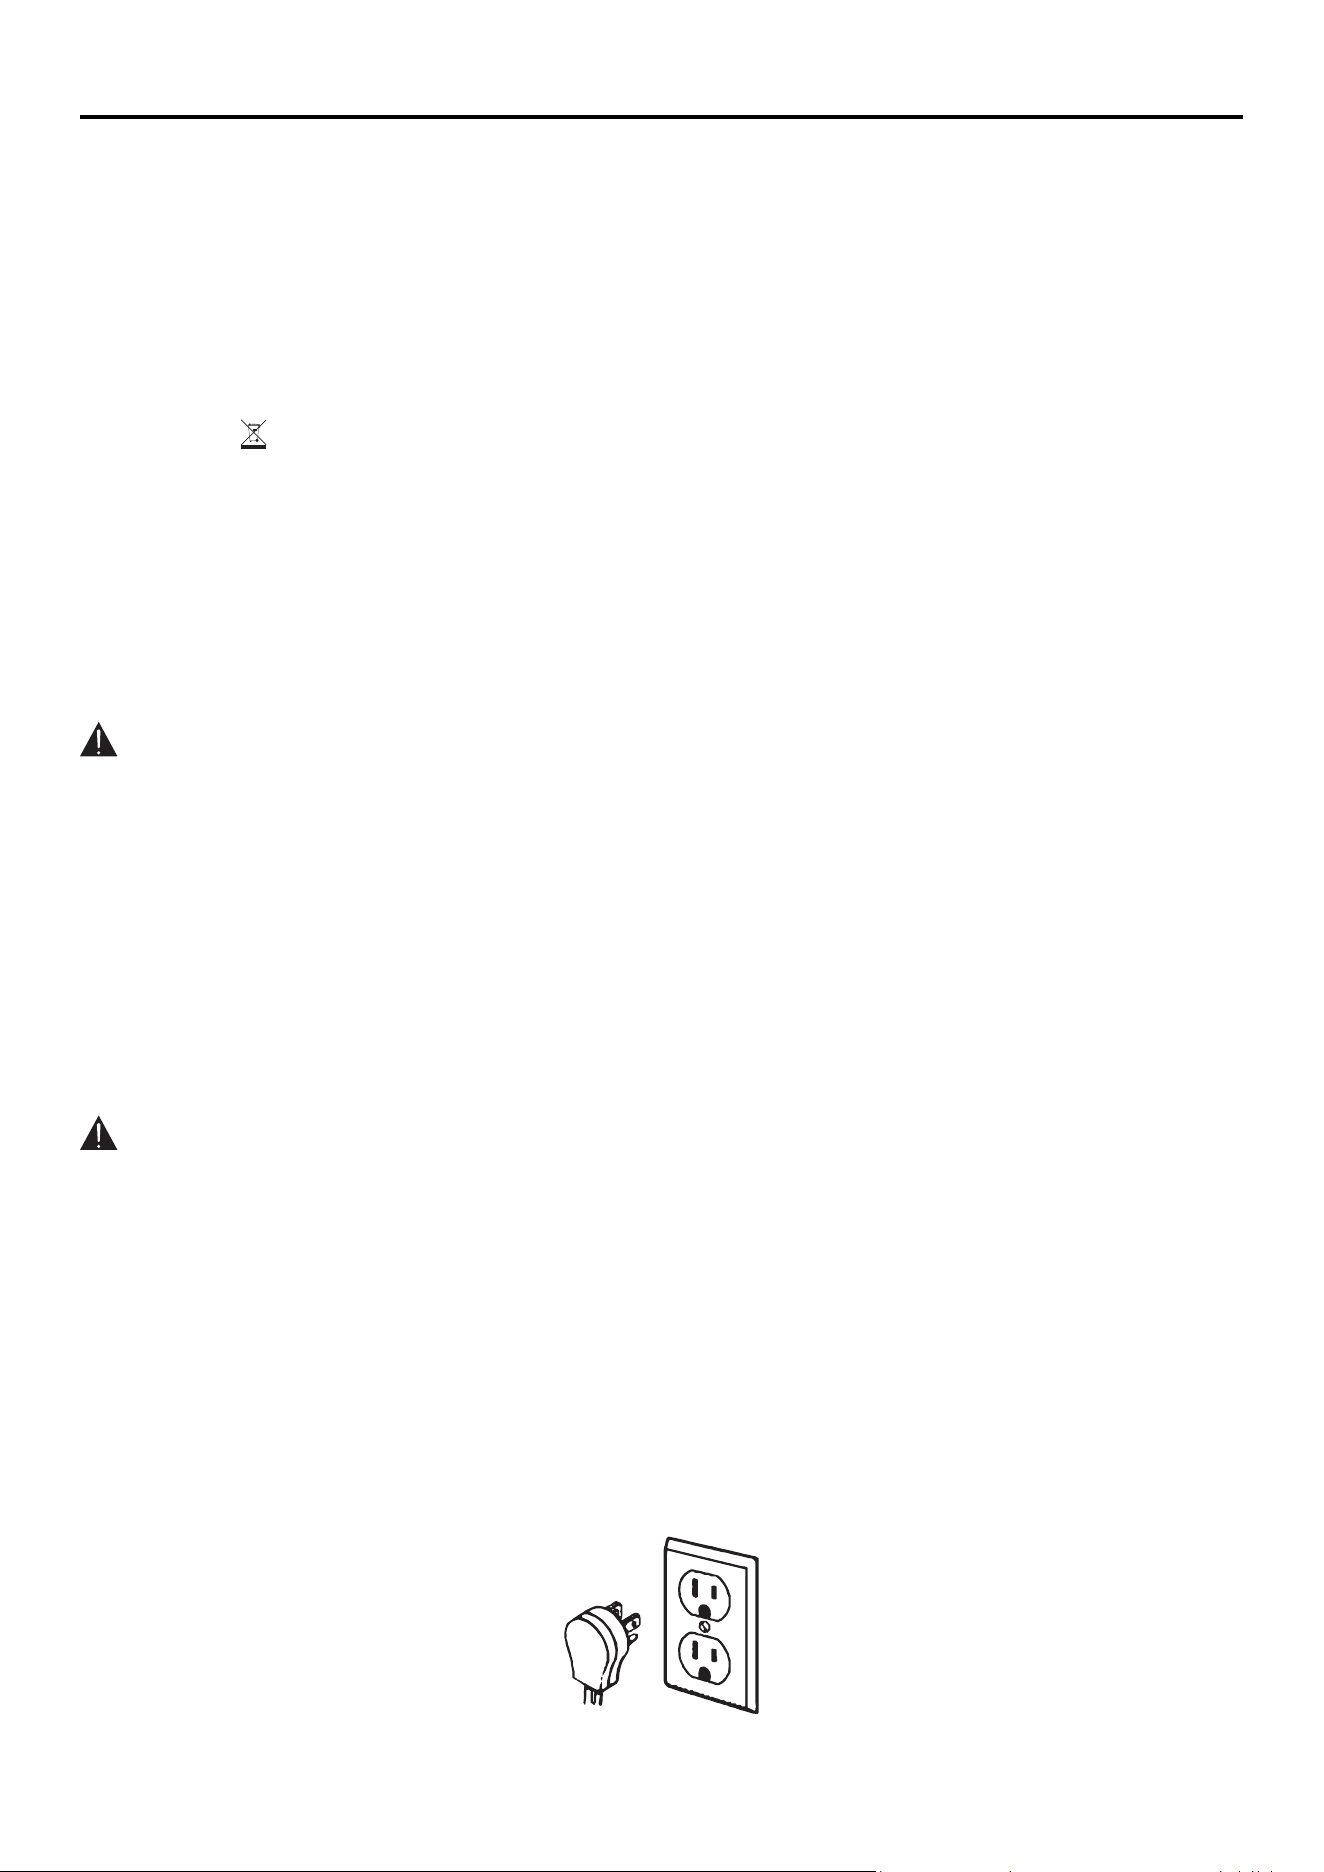
This appliance must be grounded. In the event of an electrical short circuit, grounding reduces the risk of electric
shock by providing an escape wire for the electric current. This appliance is equipped with a cord having a grounding
wire with a grounding plug. The plug must be plugged into an outlet that is properly installed and grounded.
WARNING:
Improper use of grounding can result in a risk of electric shock.
1. Consult a qualified electrician or serviceman if the grounding instructions are not completely understood or if doubt
exists as to whether the appliance is properly grounded.
2. If it is necessary to use an extension cord, use only a 3-wire extension cord that has a 3-blade grounding plug,
and a 3- slot receptacle that will accept the plug on the appliance. The marked electrical rang of the extension
cord s hall be not less than 120V, 5A.
Properly polarized and grounded outlet
Three-pronged (grounding plug)
8
Important Safety Instructions
MOVING THE APPLIANCE
1. Turn o the wine cooler and unplug from the outlet.
2. Securely tape down all loose items inside.
3. Close the door.
4. Do not lift, pull the door or door handle during transportation.
5. When moving, the appliance can not be tilted over 45 degrees as possible damage to the sealed system could
occur.
6. Take care to avoid strong vibration or impact to the appliance.
7. When moving the wine cooler, do take care and avoid to damage the refrigerant tube (which is located at the back
of the unit), risk of re or explosion.
SAFETY TIPS
Before using this appliance, it must be properly positioned and installed as described in this manual, so please read
carefully. To reduce the risk of fire, electrical shock or injury when using the appliance, follow these basic precautions.
WARNING
To ensure your safety and the longevity of your appliance, it is important to adhere to these guidelines:
• Plug your appliance into a grounded outlet. Don’t remove the third ground prong from the power cord, utilize an
adapter, or use an extension cord.
• Consider using a separate circuit that only powers your appliance. Avoid outlets that are controlled by a switch or
pull chain.
• Avoid using flammable fluids to clean your appliance parts. Do not store or use gasoline or other flammable
materials near any appliance. The fumes can create a fire hazard or explosion.
• Before cleaning or servicing your appliance, disconnect the power or unplug it. Failure to do so can result in
electrical shock or death.
• It is not recommended to repair or replace any part of your appliance unless it is specifically recommended in the
manual. Seek out the assistance of a qualified technician for any other servicing needs.
• To avoid back or other injuries, it is essential to have at least two people move and install the appliance.
• Proper ventilation is crucial for your appliance’s performance. Ensure that the front of the unit is entirely
unobstructed, and select a well-ventilated area with temperatures between 60°F (16°C) and 90°F (32°C).
• Install the appliance in an area that offers protection against the elements, such as wind, rain, water spray, or
drips.
• The appliance should not be placed near high heat sources like ovens, grills, or areas of extreme cold.
State and local codes must be followed when installing the appliance. A properly grounded electrical supply (120VAC
only, 60 Hz) in accordance with the National Electrical Code and local ordinances is required for installation.
• Do not kink or pinch the power supply cord.
• The size of the fuse (or circuit breaker) should be 15 amperes.
The appliance must be leveled properly to function correctly. You may need to adjust it several times to achieve the
correct level.
Children should never be allowed to operate, play with or crawl inside the appliance. To prevent child entrapment and
suffocation, old wine cellars should have their doors removed and the shelves left in place. Do not use solvent-based
cleansers or abrasives on the interior of the appliance as they may damage or discolor it.
To avoid potential safety hazards, it is strongly recommended that you do not use an extension cord with this
appliance.
If the appliance is going to be used in an area that is prone to power surges/outages, it is suggested that you use
a power surge protector. The surge protector must have a surge block high enough to protect the appliance it is
connected to. Damages due to power surges are not considered a manufacturer-covered defect and will void your
product warranty.
9
The power cord should be secured behind the appliance and not left exposed or dangling to prevent accidental
injury. Never unplug the appliance by pulling the power cord. Always grip the plug firmly and pull straight out from the
receptacle. Repair or replace immediately all power cords that have become frayed or otherwise damaged. Do not use
a cord with cracks or abrasion damage along its length or at either end. When moving the appliance, be careful not to
damage the power cord.
• Do not use this appliance for purposes other than its intended purpose.
• Failure to follow these safety instructions may result in extensive product damage, serious personal injury, or
death.
• Do not store explosive substances such as aerosol cans with a flammable propellant in this appliance.
This appliance is intended to be used in household and similar applications, including staff kitchen areas in shops,
offices, and other working environments; farmhouses; hotels, motels, and other residential type environments; bed
and breakfast type environments; catering and similar non-retail applications. If the supply cord is damaged, it must be
replaced by the manufacturer, its service agent, or similarly qualified persons to avoid hazards.
The following requirements shall be followed at all times when using the wine and beverage cellar.
1. Use strictly in accordance with the provisions of the wine cabinet.
2. Do not pull the plug out of the socket by holding the power cord; instead, pull it out from the wall socket by holding
the plug.
3. If the power cord is broken, please repair or replace it immediately. Do not use a cracked or aged power cord.
4. Children are not allowed to climb the cabinet to avoid damaging the cabinet and causing harm to the body.
5. Do not use power distribution.
6. Danger warning:
• This product is a food refrigerator, and it is strictly prohibited to store inflammable, explosive, corrosive, toxic,
radiation, and other dangerous goods. Please comply with the local food safety laws when storing food.
• When disposing of the old wine cabinet, please remove the cabinet door and place the cabinet shelf where
children cannot easily access it.
• Some cabinet doors are equipped with locks. Please take care of the key and install it in a place where
children cannot easily touch it.
Important Safety Instructions
WARNING
FOR YOUR SAFETY
Tip Over Hazard
• A child or adult can tip the cellar and be killed.
• Install anti-tip bracket to oor per installation instructions.
• Slide cellar back so rear is engaged in the slot of the anti-tip bracket.
• Re-engage the anti-tip bracket if cellar is moved.
• Do not operate the cellar without anti-tip bracket installed and engaged.
• Failure to follow these instructions can result in death or serious injuries to children and
adults.
10
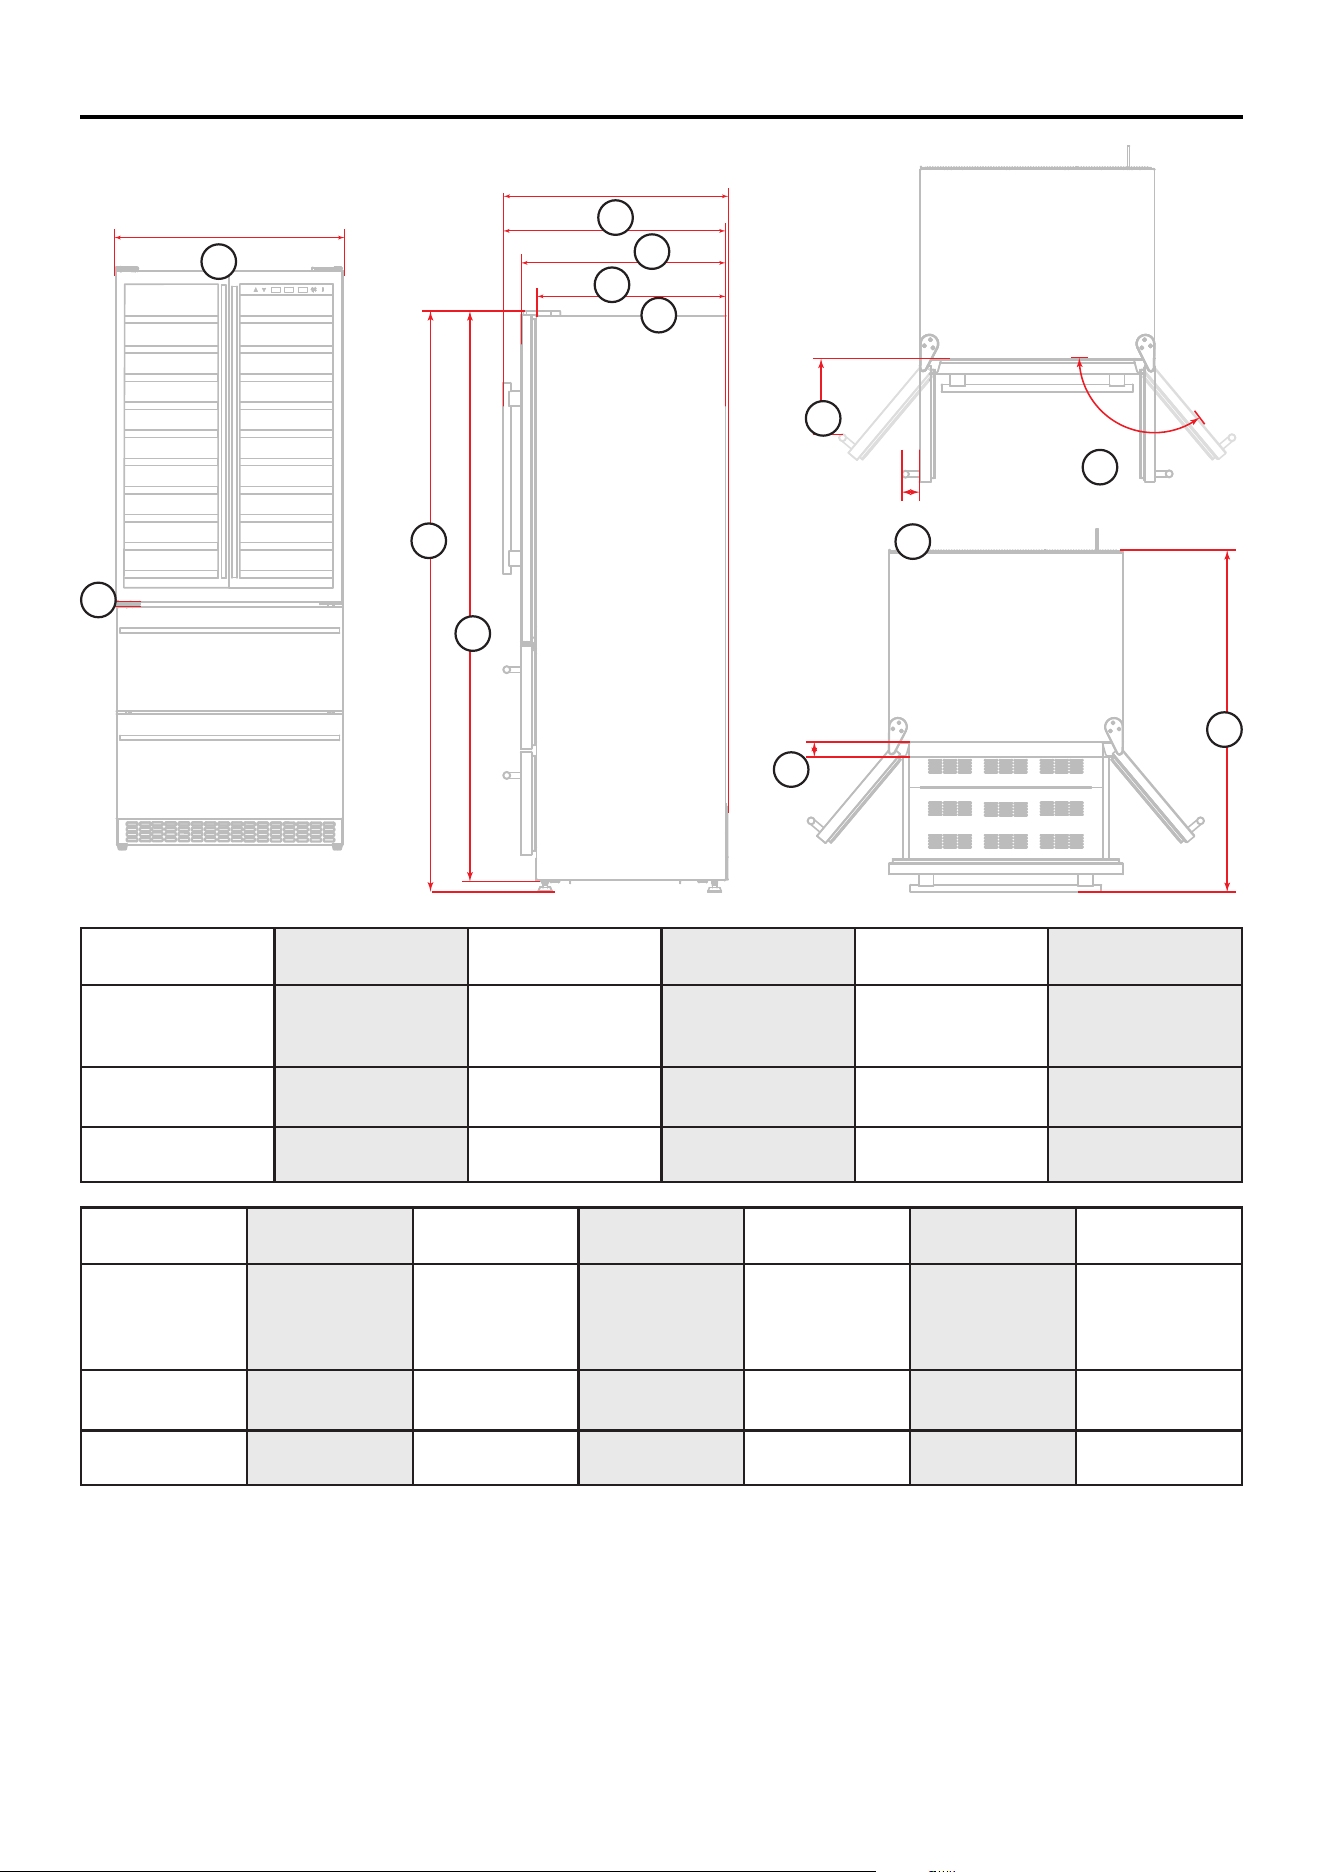
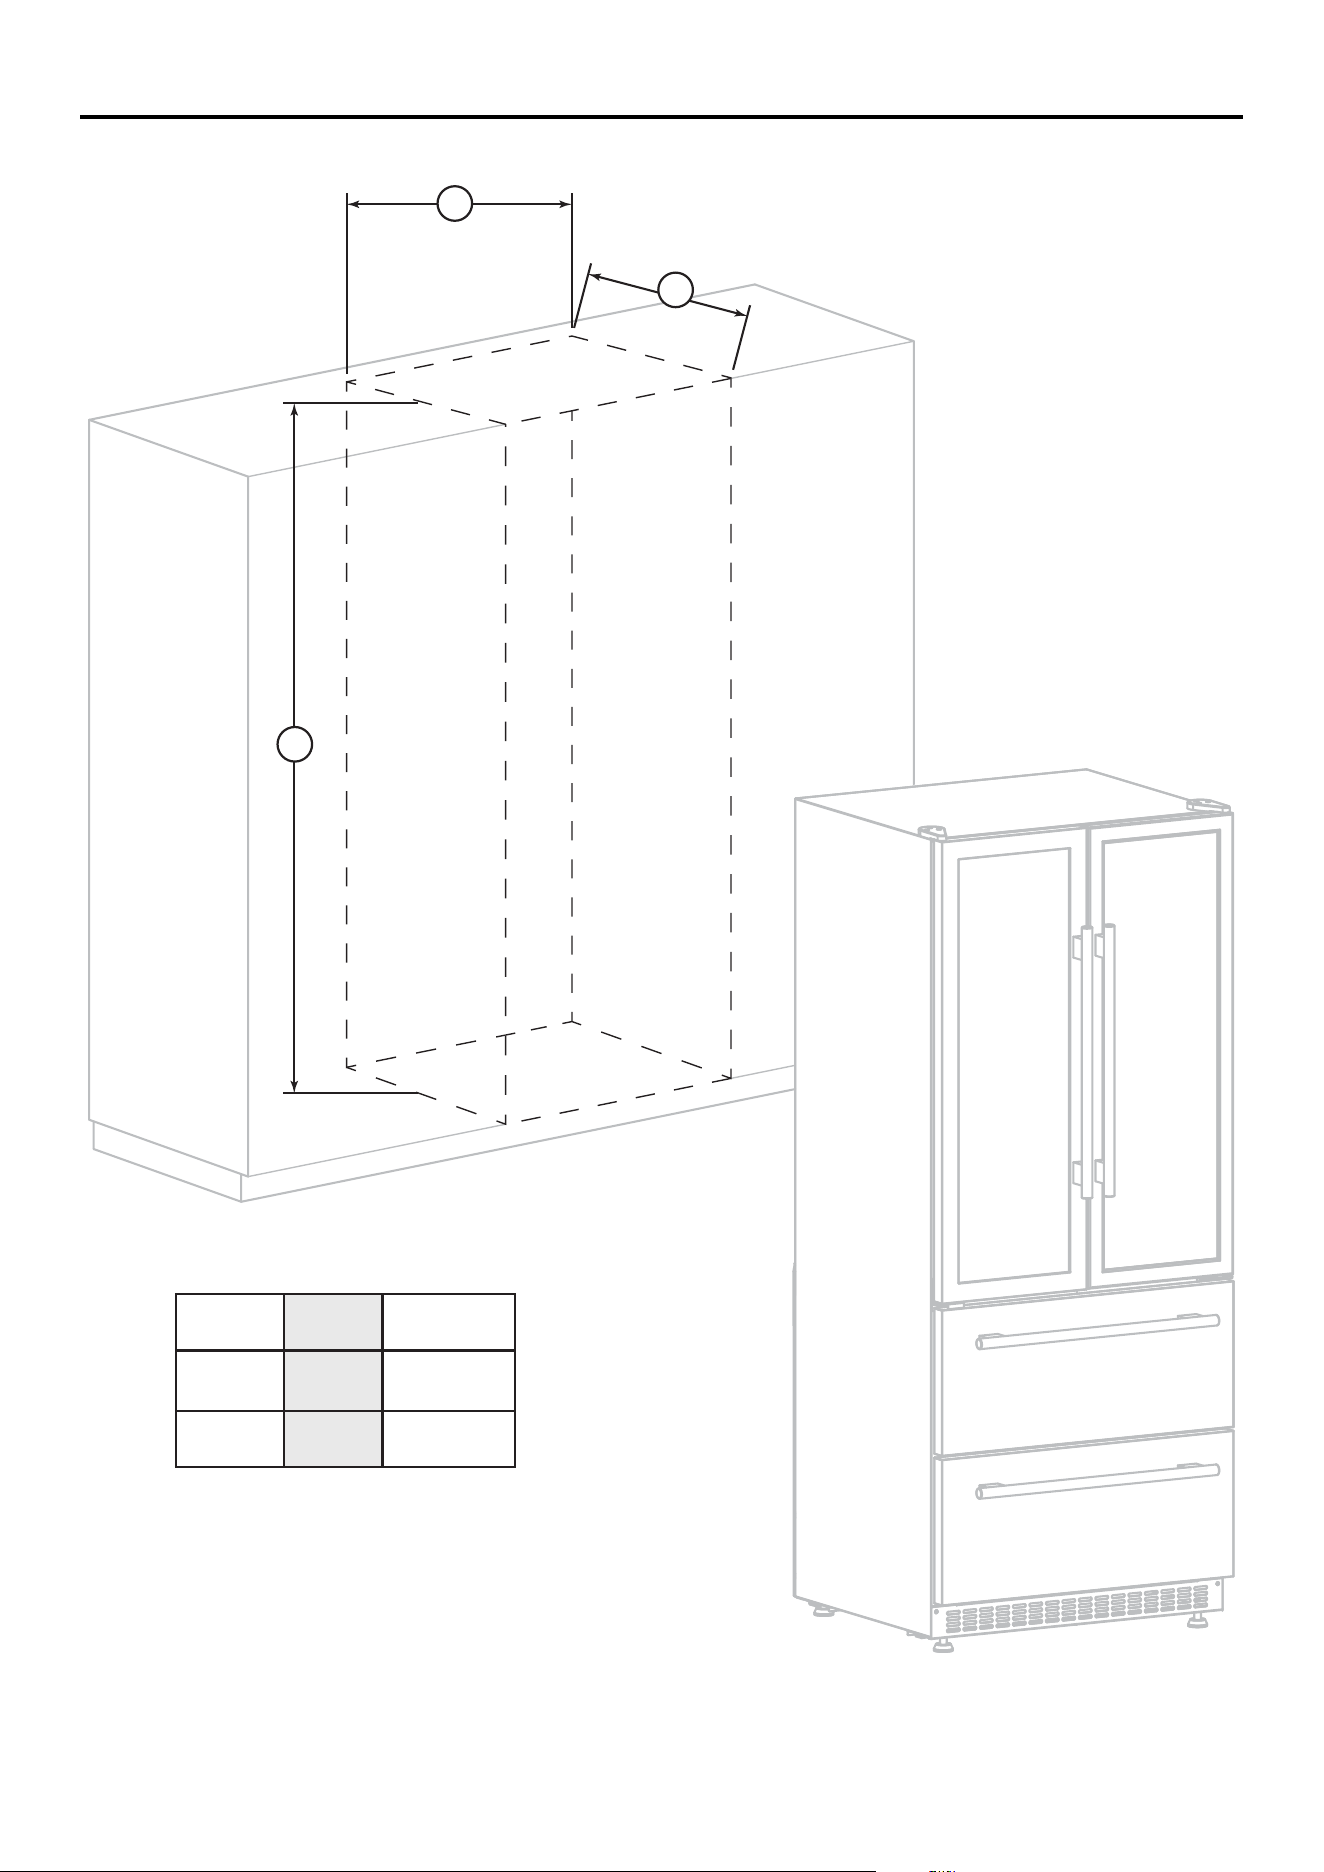
Product Dimension
FELT RIGHT LOWER
A
B
C
D
E
F
G
H
I
J
K
L
M
A B C D E F
Overall Width Gap Overall Height
Hing to foot
(on maximum)
Height
Hing to foot
(on minimum )
Overall Depth
Handle to
complete back
Depth
Handle to back
31 23/64” 5/8”
77
21/32”
76
3/16”
30
5/64”
29 49/64”
79.65cm 1.6cm 197.25cm 193.5cm 76.4cm 75.6cm
G H I J K L M
Depth
Door to back
Depth
Without door to
back
Depth
Box frame
to handle
(Open door)
Width
Handle
Opening
(Fully open
door)
Gap
Open door
Overall Depth
Fully open door
27 13/32”
25
5/16”
10 1/8”
2
27/64”
130°
2
3/64”
45
45/64”
69.6 cm 64.3cm 25.7cm 6.17cm 5.2cm 116.1cm
11
Product Dimension
6
6
6
6
6
6
6
6
6
6
C
F
°
°
LEF
T
RIG
H
T
LO
WER
C
F
°
°
SET
C
F
°
°
LEF
T
RIG
H
T
LO
WER
C
F
°
°
SET
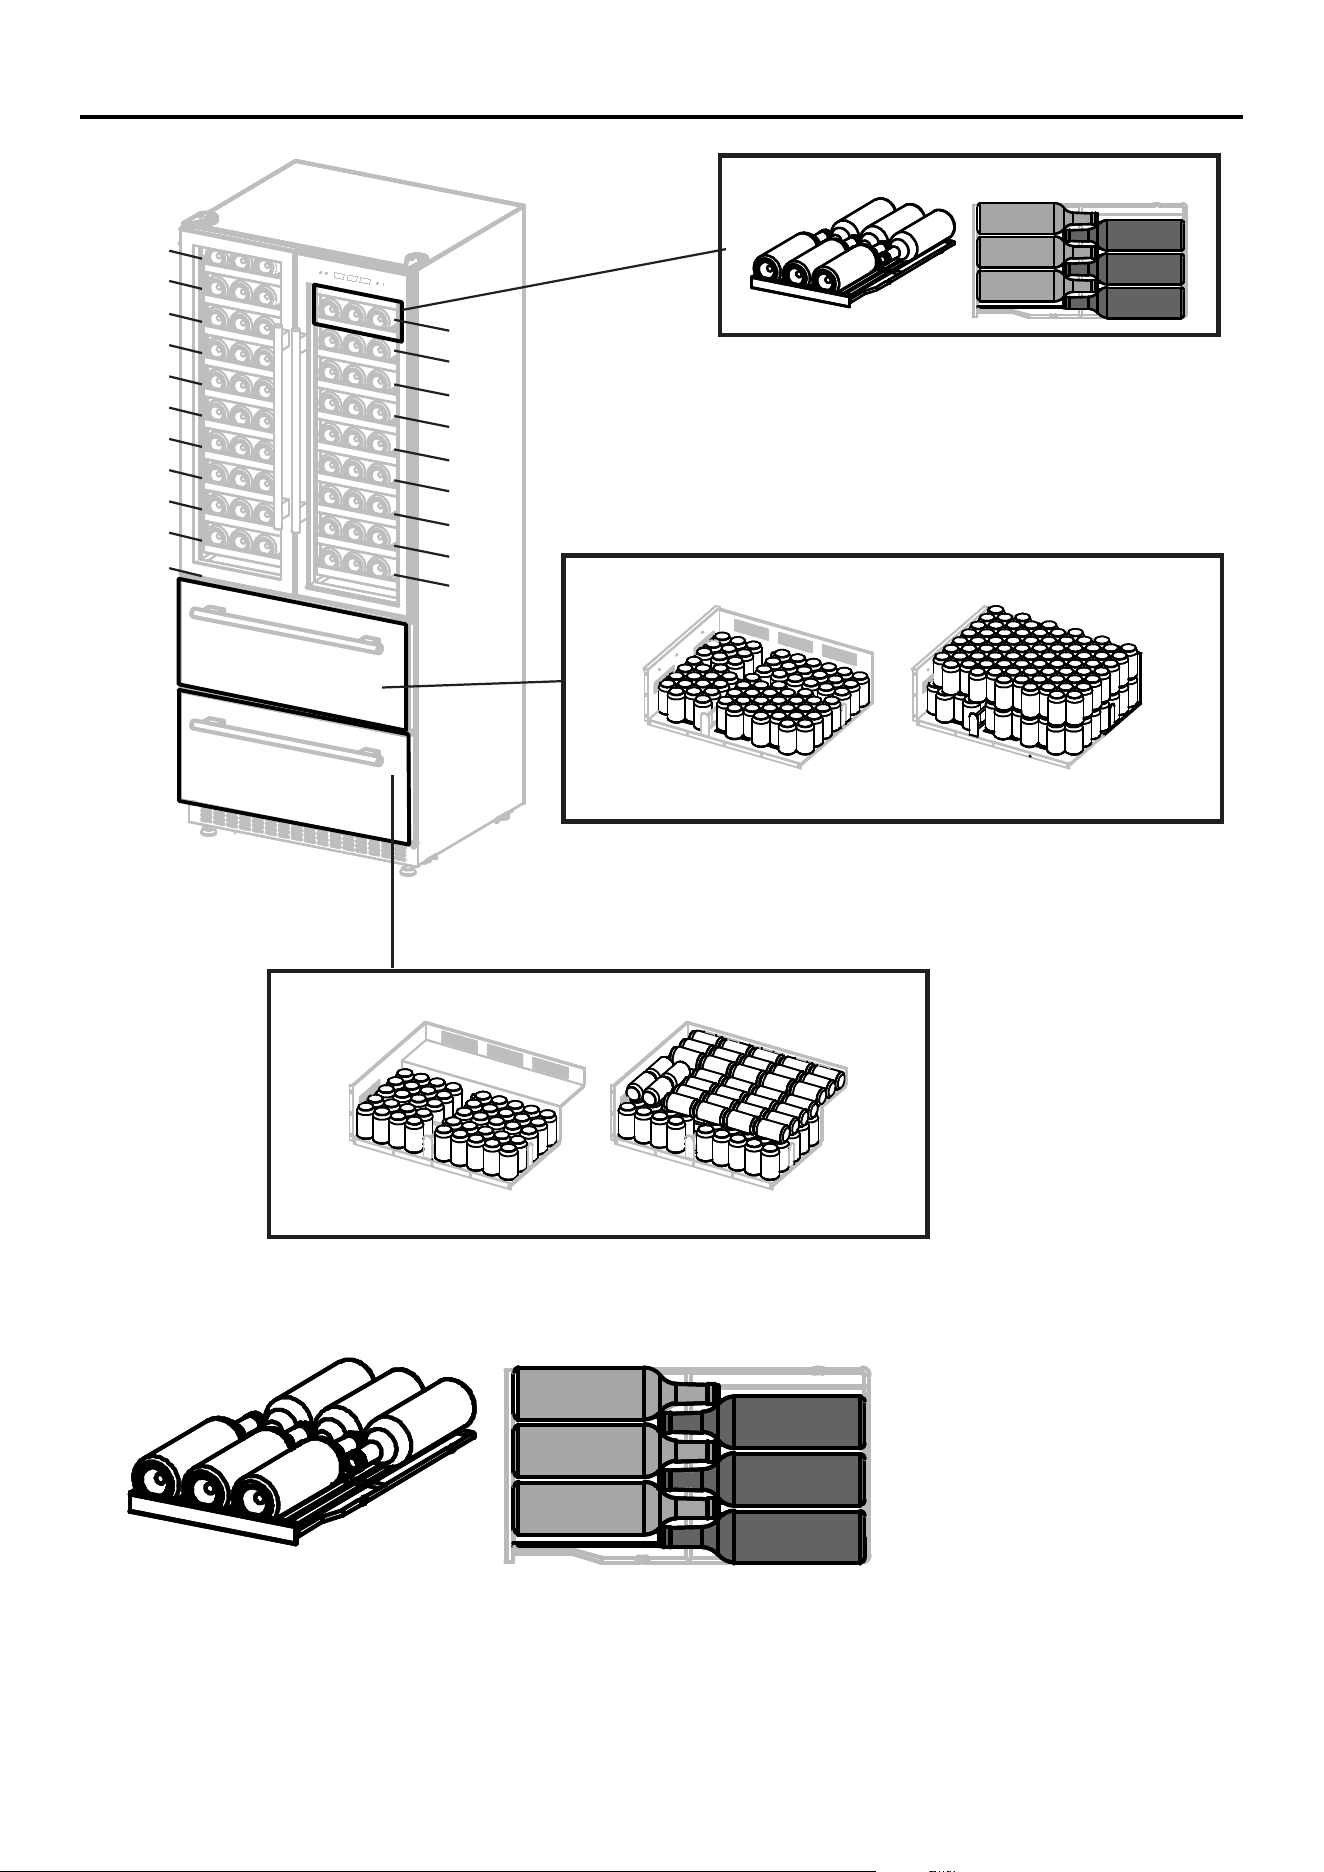
1 layer 71 cans 2 layer 77 cans
1 layer 45 cans 2 layer 35 cans
Total of 148 cans
Total of 80 cans
6
6
6
6
6
6
6
6
6
Total of 120 Bottles
To ensure proper storage, kindly follow the example provided below for placing your bottle.
12
Cutout
A
B
C
A B C
78 5/64”
31
11/16”
27 3/4”
198.3cm 80.5cm 70.5cm
13
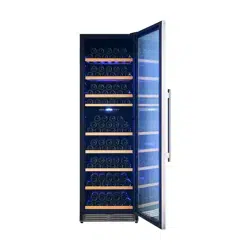
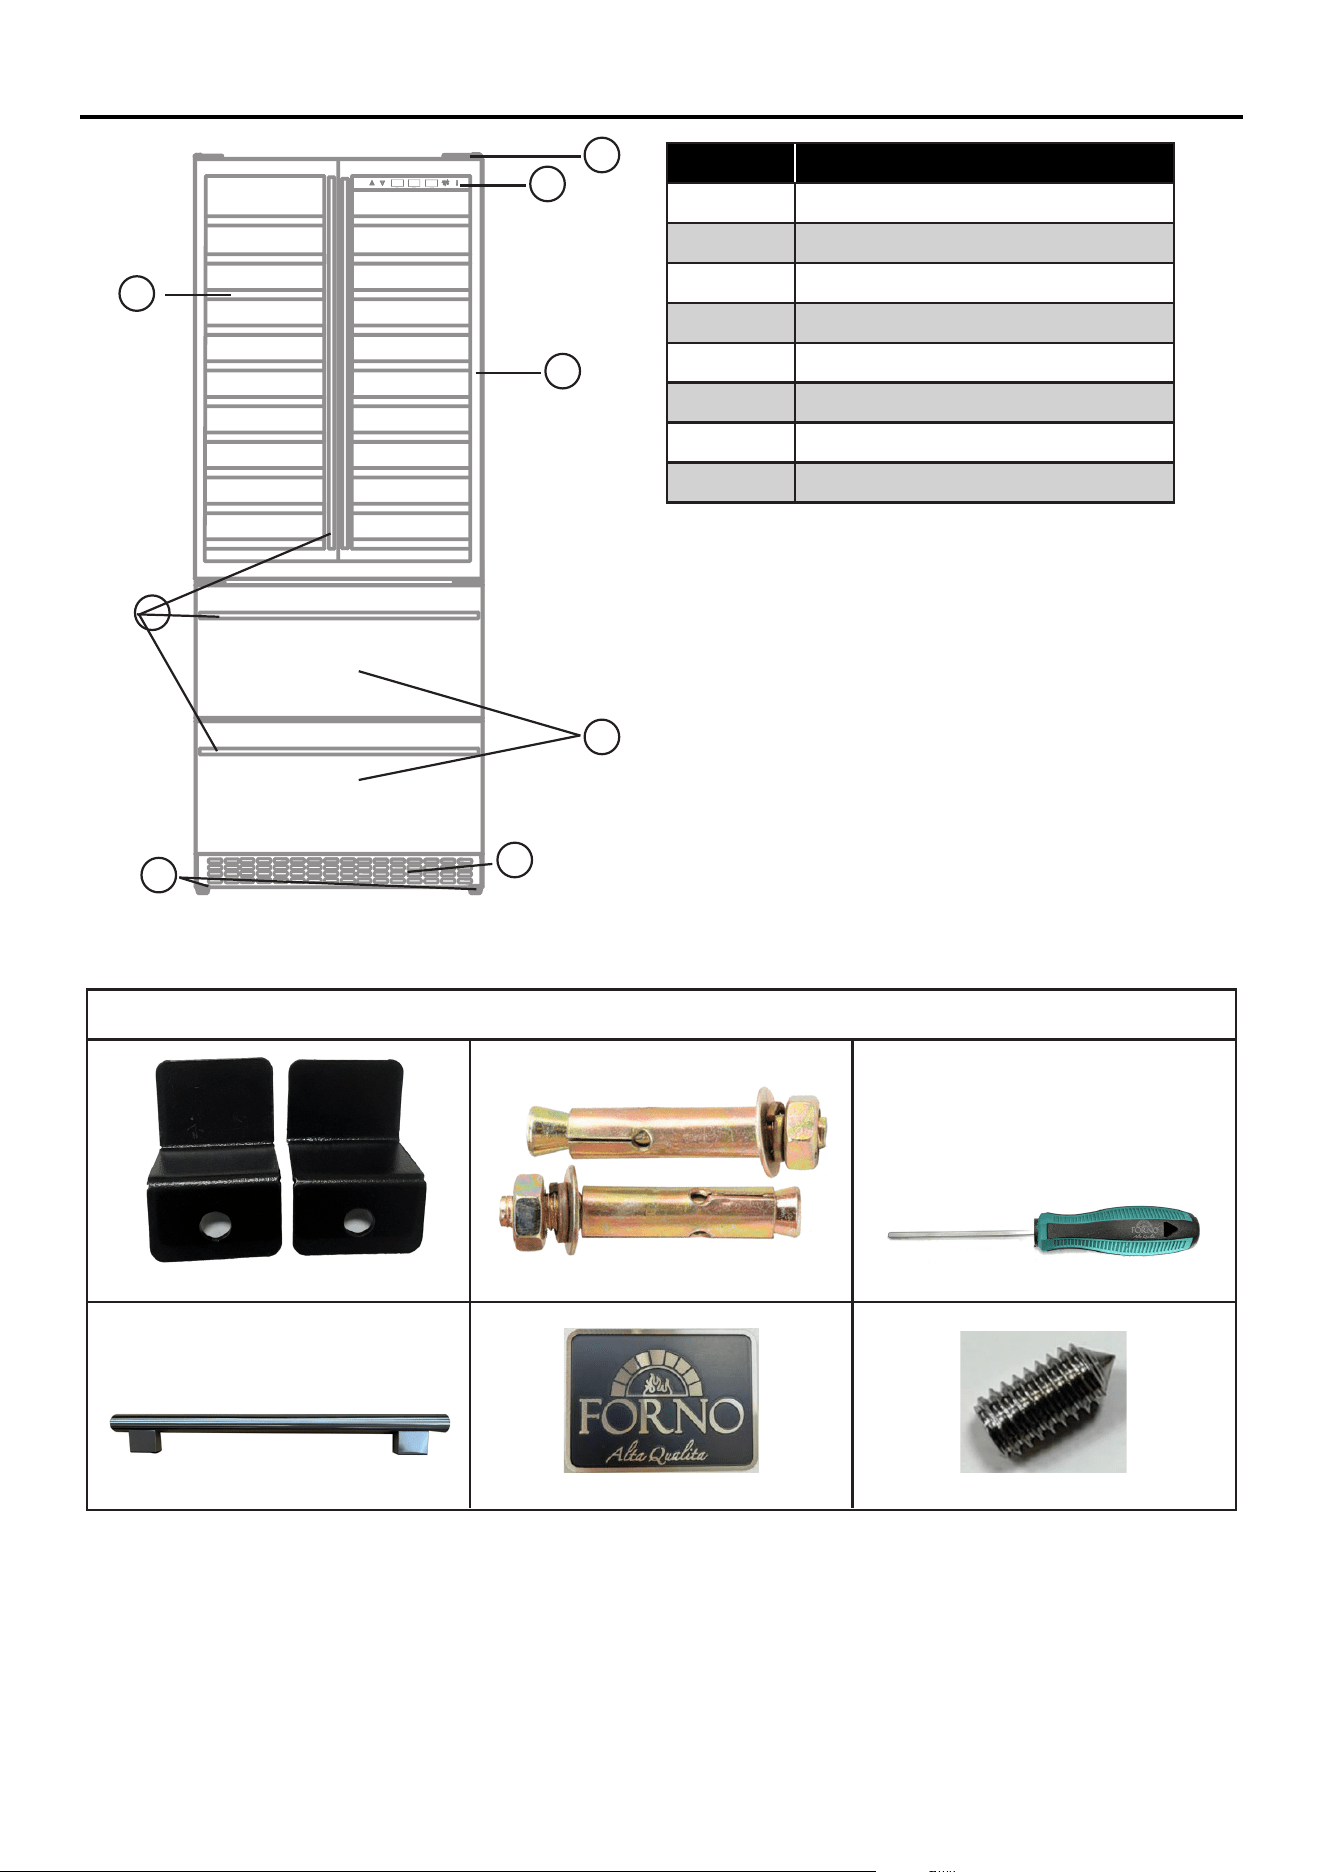
Names of Parts and Accessories
1
3
2
4
5
7
8
6
FELT RIGHT LOWER
Numbers Parts
1 Control Panel
2 Storage shelf
3 Door hing
4 Glass Doors
5 Handles
6 Drawer
7 Adjustable feet
8 Bottom Grill
Supplied Parts
2x Anti-tip bracket with hardware 2x Expansion bolt 1x Hexagon wrench
4x Handle Logo 2x Screws for the handle
14
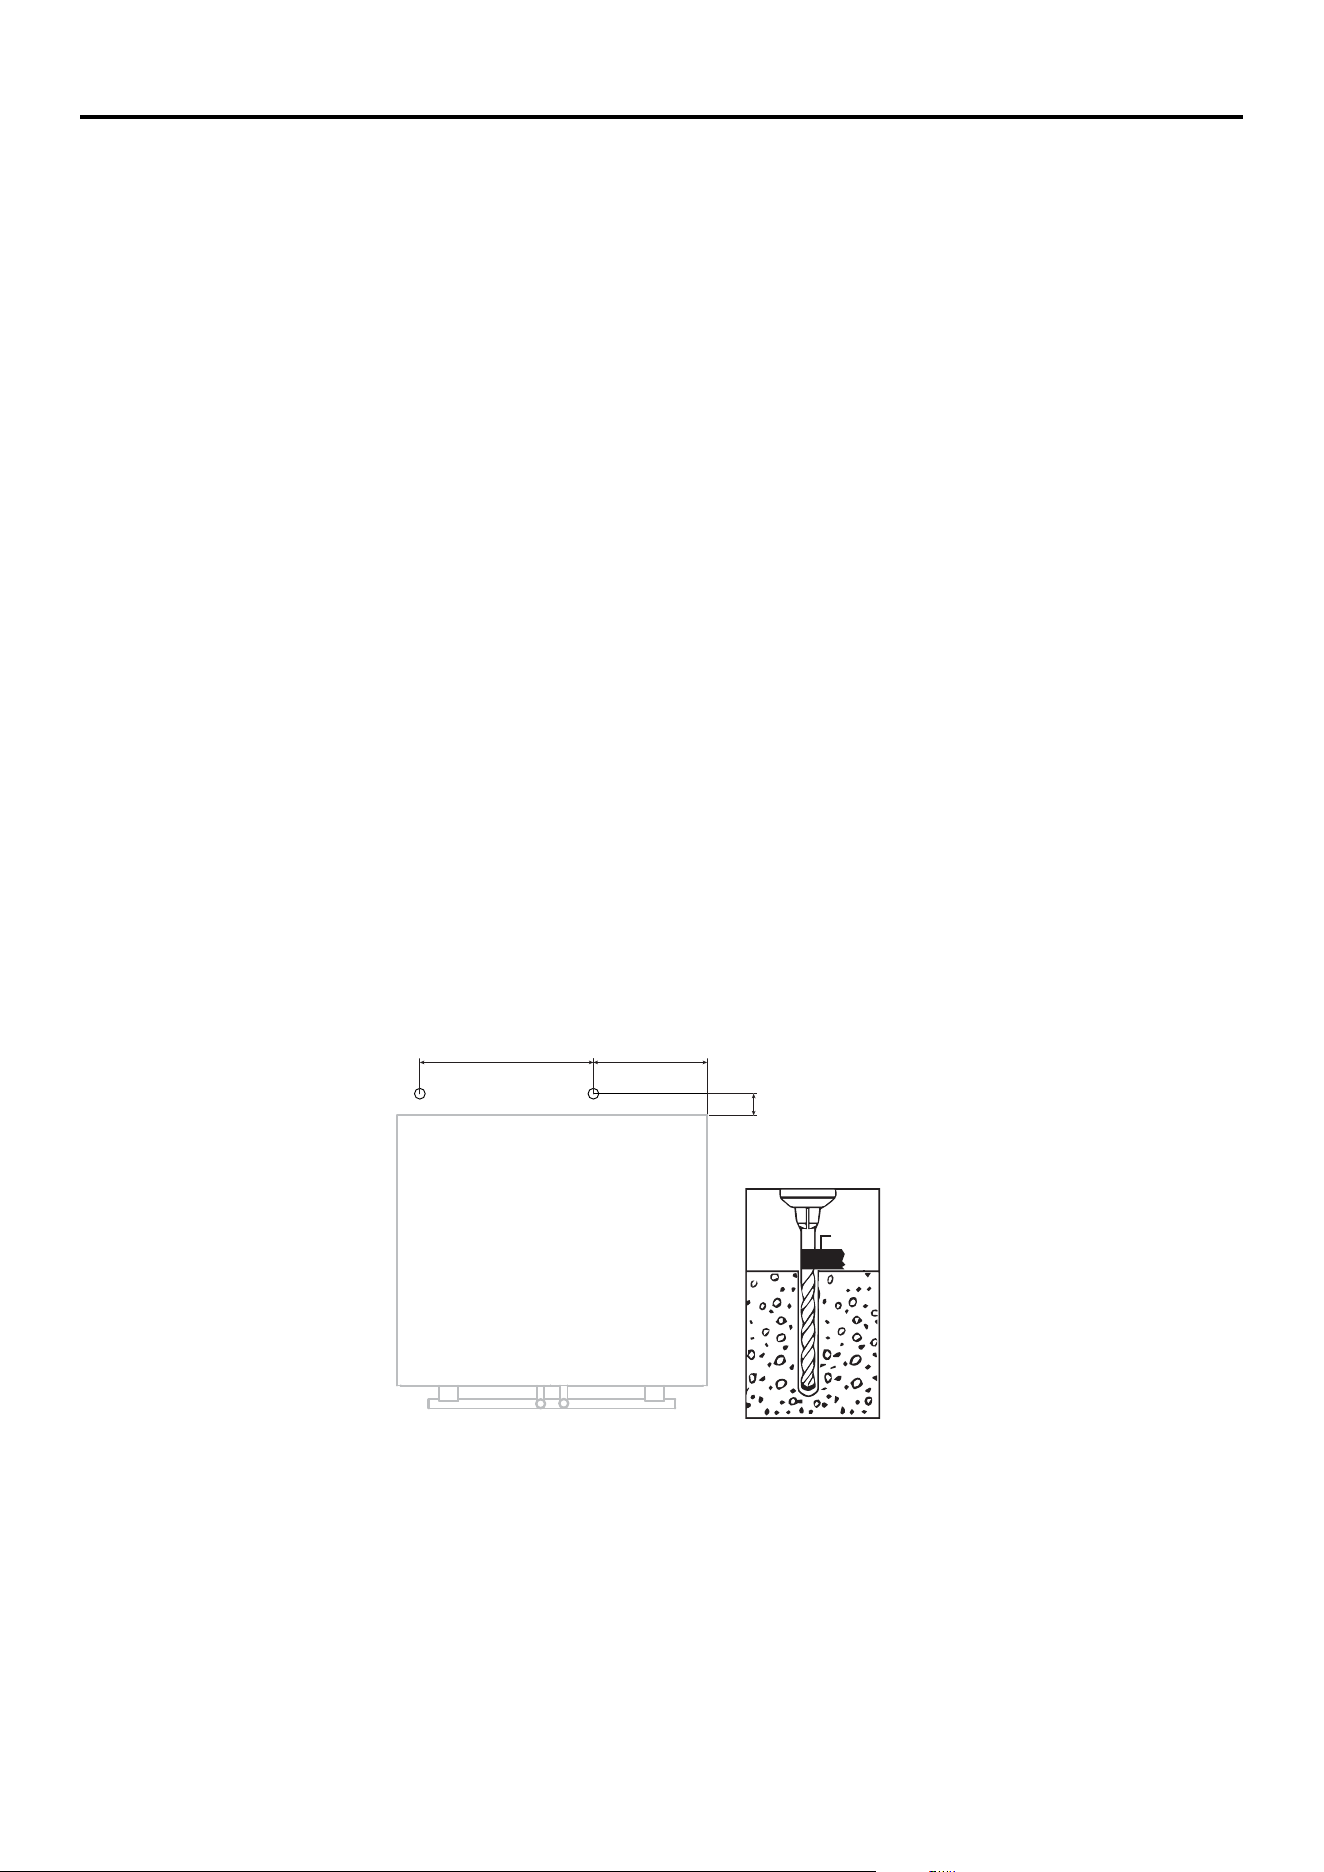
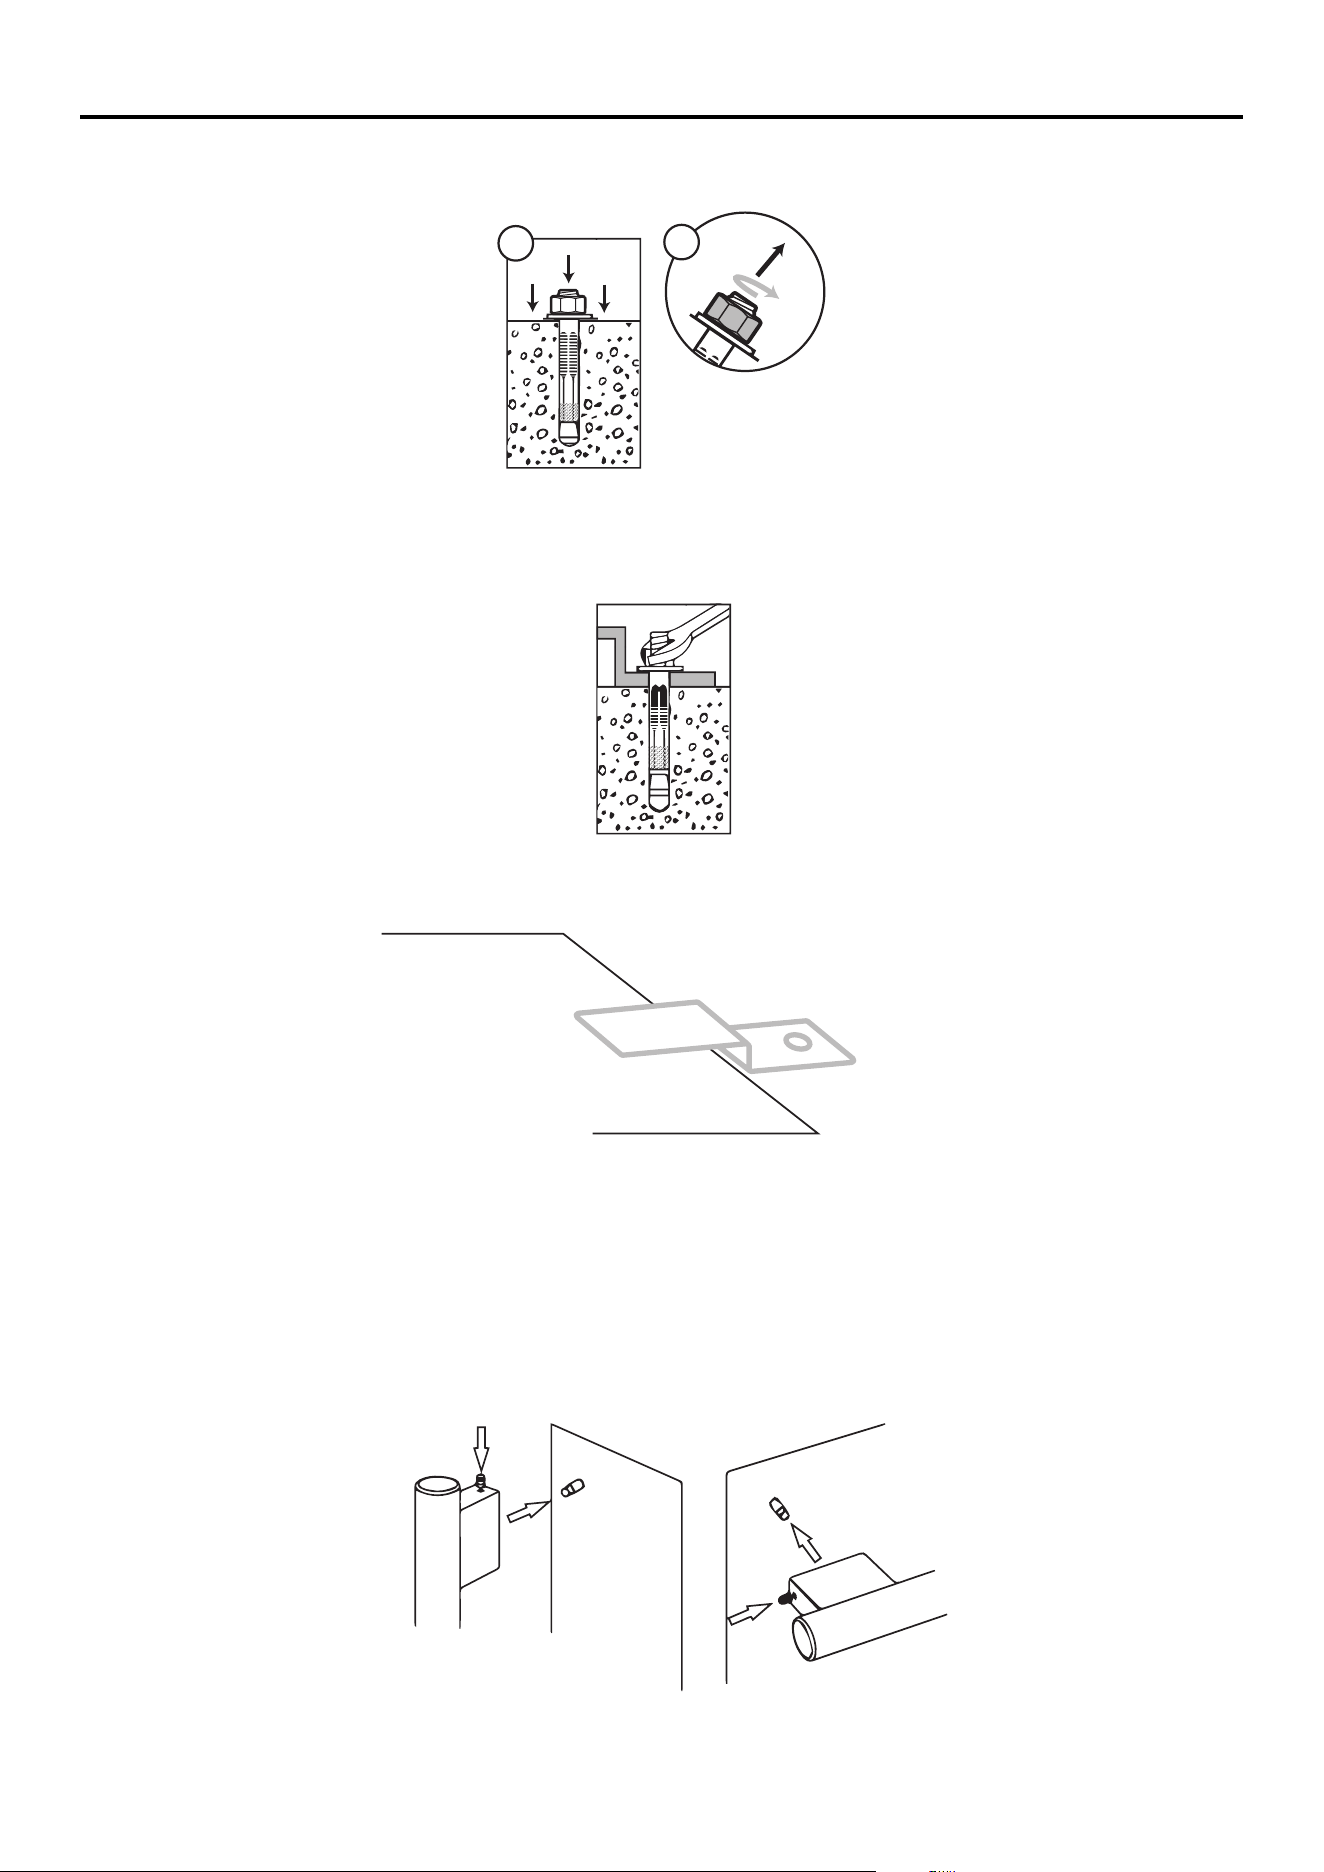
1. Take the xing brackets(2pcs) and the expansion bolts(2pcs) out of the instruction packet.
2. Drill holes into the oor according to the dimensions shown below. This will allow you to x the brackets to the
oor. According to the size and location, the holes on the oor should be Ø0.39” (10mm).
TIP: Use painter’s tape to judge how deep of a hole you are drilling. First, cut a piece of painter’s tape several inches long. Then,
place the tape on your drill bit at the depth of the expansion bolts shield to drill. Once you reach the tape, you know when to stop
drilling. Don’t drill too deep.
Min: 0.87”/22mm
Max: 1.77”/45mm
Top View
8 49/64”
(222.5mm)
18 1\2”
(470mm)
Tape
Before installing your cellar, you must do the following:
• Unpack both the exterior and interior layers of packaging. Verify the presence of all components listed in the
parts inventory, including shelves and instructional materials. Should any elements, such as shelf fragments or
support structures, become dislodged during transit, refer to the instruction manual for precise guidance on proper
installation.
• Inspect the cellar for any signs of damage or deformation. If the cellar shows no signs of issues during inspection,
place it in the designated spot.
• When moving your cellar, please do not incline it more than 45 degrees.
• Locate the appliance away from direct sunlight and sources of heat (stove, heater, radiator, etc.). Direct sunlight
may aect the acrylic coating and heat sources may increase electrical consumption. Extreme cold ambient
temperatures may also cause the unit to perform improperly. The optimal ambient temperature range is 64.4°
F(18°C) - 78.8° F(26°C) Avoid locating the unit in damp areas.
• The cellar is designed for freestanding use. Ensure that there is 5cm of air space on both sides, and 8cm in back.
Place the unit on a at, solid oor that is strong enough to support it when it is fully loaded. To level the appliance,
adjust the front leveling leg at the bottom of the unit.
• Before connecting the unit to the power source, let it stand upright for approximately 8 hours. This will reduce the
possibility of a malfunction in the cooling system from handling during transportation.
• Clean the interior surface with lukewarm water using a soft cloth.
• Plug the wine cellar into an exclusive, properly installed and grounded wall outlet. Do not under any circumstances
cut or remove the third (ground) prong from the power cord. Any questions concerning power and/or electrical
grounding should be directed to a certied electrician or authorized products service center. After plugging the
appliance into a wall outlet, allow the unit to cool down for 3 to 4 hours before placing wine bottles or beverage
cans in the cellar.
Anti-tip bracket installation
To avoid the risk of serious personal injury or damage to the appliance due to the instability of the appliance, it must
be xed to the oor with anti-tip brackets and screws(supplied). Before installing, carefully read these instructions.
Installations
15
3. (A) Next insert the expansion bolt into the drilled hole. Make sure it is ush to the oor.
(B) Unscrew the nut, washer and lock ring from the screw.
4. Next, align the bracket hole with the screw and reattach the washer and lock ring. Finally, tighten the nut with
a wrench or socket to the maximum. As you tighten the shield, it will bend outwards, creating an anchor that
provides extra security for your unit.
B
A
5. Push the appliance back into its place, Ensure that the bottom of the opening slides under the bracket, as shown
in the example below.
If the unit is not stable, pull back the appliance and repeat the previous step until the unit is stable.
NOTE: IF THE UNIT IS RELOCATED, THE BRACKET MUST BE REMOVED AND RE-INSTALLED TO ITS NEW LOCATION.
Installing The Handle
1. Locate the handle over the pins on the door panel.
2. Fix the handle by tighten the screw.
Installations (continued)
16
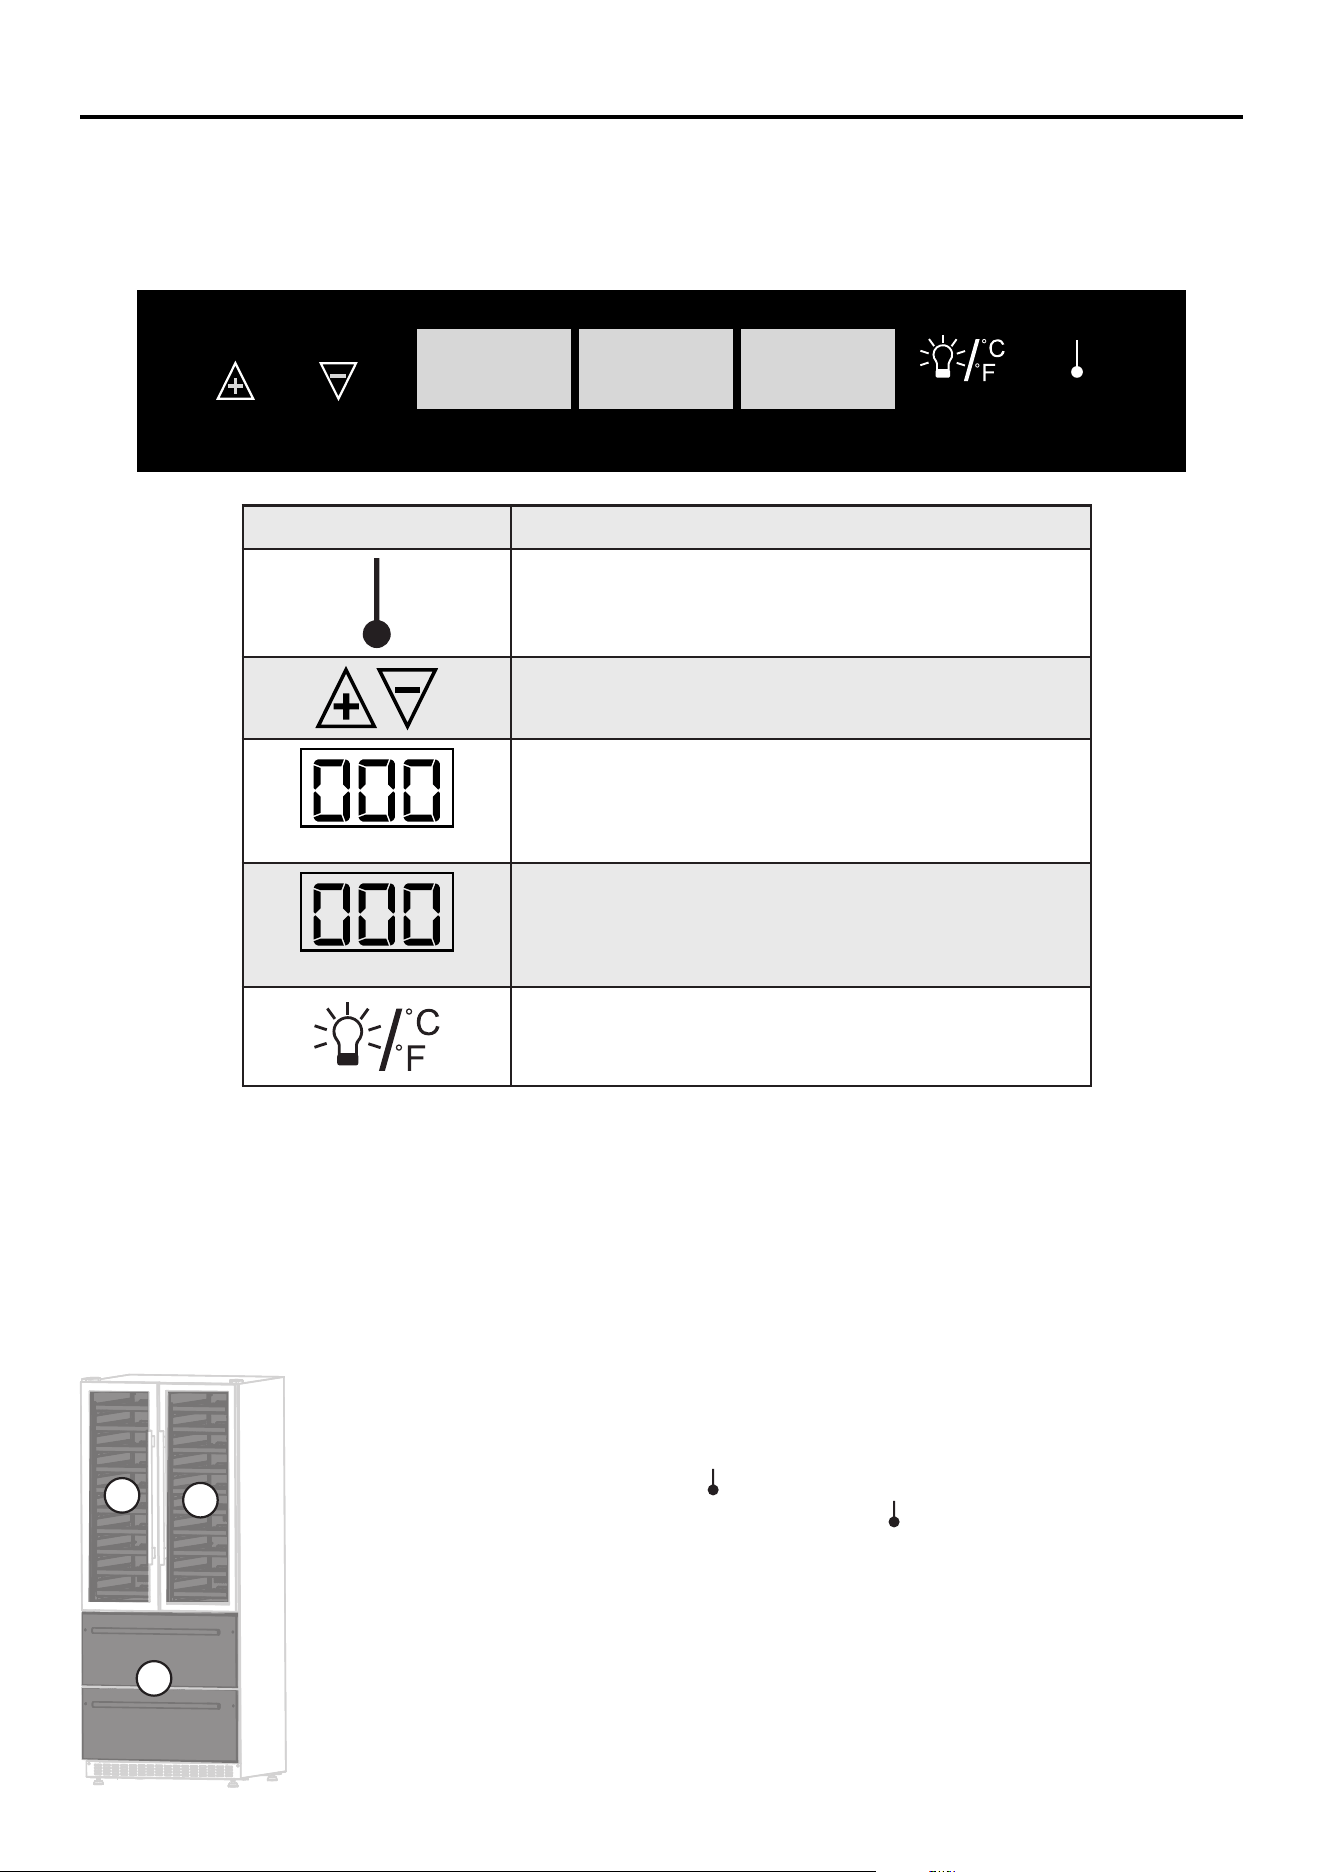
ZONES AND TEMPERATURE SETTINGS
This cellar accommodates a broad temperature range suitable for storing both red and white wines according to
your preference. Dierent types of wine require dierent temperature settings. Red wine is typically stored between
10°C (50°F) and 18°C (65°F), while white wines are kept between 4°C (40°F) and 10°C (50°F). White wine can be
temporarily stored at red wine temperatures (for less than three months) and quickly chilled before serving.
Adjusting the zones:
There are 3 zones on the cellar.
(A) Left Zone
(B) Right Zone
(C) Lower Zone ( 2 drawers).
To change the zones, simply tap the icon on the control panel. Once touched, the display will
show “000” ashing. To switch to another zone, tap the icon again.
Adjusting the temperature:
Simply touch the UP or DOWN to set it as you desire. When you press these buttons for the
rst time, the LED display will show the original temperature set at the factory. Each subsequent
button push adjusts the temperature by one degree in the desired direction. Keep in mind that
the desired temperatures may vary based on whether the interior light is ON or OFF and the
orientation of the bottles.
The cellar should be placed in an area where the ambient temperature range is between 18-26 °C (64.4° F - 78.8° F).
If the ambient temperature is above or below this range, the performance of the unit may be aected. For example,
placing your unit in extreme cold or hot conditions may cause interior temperatures to uctuate.
USING THE CONTROL PANEL
000 000 000
LEFT RIGHT LOWER
SET
Symbols Description
Tap the symbol to select the zone you want to preset,
and be sure to touch it before adjusting the temperature
Press to increase or decrease the temperature
Left & Right
Left & Right temperature range: 41°F- 72°F
Bottom
Lower drawer temperature range: 37°F- 64°F
Switch the interior light on or off. To change the
temperature display between Celsius and Fahrenheit,
press it for 3 seconds.
Operating Instruction
A
B
C

17
IMPORTANT:
• During a power interruption, all previous temperature settings are automatically saved, and each compartment
returns to its previous temperature setting.
• If the unit is unplugged, loses power, or is turned o, wait 3 to 5 minutes before restarting. Restarting before this
time may hinder the wine cellar from starting.
• When using the wine cellar for the rst time or after a prolonged shutdown, there might be a few degrees of
variance between your selected temperature and the one on the LED display for the initial hours of operation.
After a few hours, the temperature will stabilize to the displayed setting.
Care and Maintenance
CLEANING YOUR CELLAR:
For a thorough deep cleaning, adhere to the following steps:
1. Power down, unplug, and empty the appliance, removing all shelves.
2. Clean the inside with a mix of warm water and 2 tablespoons of baking soda per quart of water. Wash shelves with
mild detergent.
3. Wash shelves with a mild detergent solution.
4. Wring excess water from the sponge when cleaning controls or electrical parts.
5. When cleaning control areas or electrical parts, ensure to wring, excess the water from the sponge or cloth.
6. Dust the front grill and back of the unit twice a year, ensuring the power is o.
7. For optimal longevity, perform a thorough yearly cleaning of both the inside and outside of the unit.
MOVING THE CELLAR:
1. Remove all bottles and any other items from inside the unit.
2. Securely tape down any loose items, such as shelves, inside the appliance, and tape the door shut.
3. Turn the adjustable leg up to the base to prevent damage during transportation.
4. Ensure the appliance remains secure in the upright position during transit.
5. Protect the exterior of the appliance by covering it with a blanket or a similar protective item.
RACKING CONFIGURATION :
This cellar features sliding shelves that oer convenient access to your wine collection. The slide-out design facilitates
easy viewing and removal of bottles, enhancing accessibility. Additionally, any of the shelves can be taken out to
accommodate larger bottles.
To prevent any potential damage to the door gasket, ensure the door is fully open when pulling shelves from the rail
compartment. For optimal access to the bottles, consider pulling the shelves approximately halfway out of the rail
compartment. This practice makes retrieving and organizing your wine collection more convenient.
HOW TO REMOVE A SLIDING SHELF AND DRAWER :
• Remove all bottles from the shelf.
• Pull the shelf out as far as it will go.
• Adjust both levers on the sides of the shelf as shown (left side UP, right side DOWN), and then pull the shelf out
completely at the same time.
Follow these steps to remove the drawer as well
Operating Instruction (continued)
Shelves
(Right side)
Drawer
Shelves
(Left side)
18
Troubleshooting
There are many common issues you may experience with your wine cellar that can be solved very easily, without the
need of a service call. Try the tips below to troubleshoot your unit should you experience any problems:
PROBLEM POSSIBLE CAUSES
Cellar does not operate
Not plugged in or the appliance is turned o
The circuit breaker tripped or a fuse has blown out
Cellar is not cold enough
• Check the temperature control setting
• External environment may require a higher setting
• The door is opened too often
• The door is not closed completely
• The door gasket is not sealing properly
Cellar is turning on and o frequently
• The room temperature is hotter than normal.
• The door is opened too often.
• The door is not closed completely.
• The temperature control is not set correctly.
• The door gasket does not seal properly.
The light does not work
• Not plugged in.
• The circuit breaker tripped or a fuse has blown.
• The light bulb has burned out.
• The light button is “OFF” .
Vibrations Check to assure that the Wine cellar is on a level surface.
The wine cellar seems to make too much noise
• A faint humming noise may come from the ow of the refriger-
ant, which is normal.
• As each cycle ends, you may hear gurgling sounds caused by
the ow of refrigerator in your wine cellar.
• Contraction and expansion of the inside walls may cause pop-
ping and crackling noises.
• The wine cellar is not on a level surface.
The door will not close properly
• The wine cellar is not on a level surface.
• The gasket is dirty.
• The shelves are out of position.
Condensation forming inside of the cabinet
• Condensation occurs when too much ambient air gets into the
cabinet. Wipe off the doors and walls and leave door closed as
long as possible.
• Check that the door gasket and the charcoal filter are properly
in place.
19
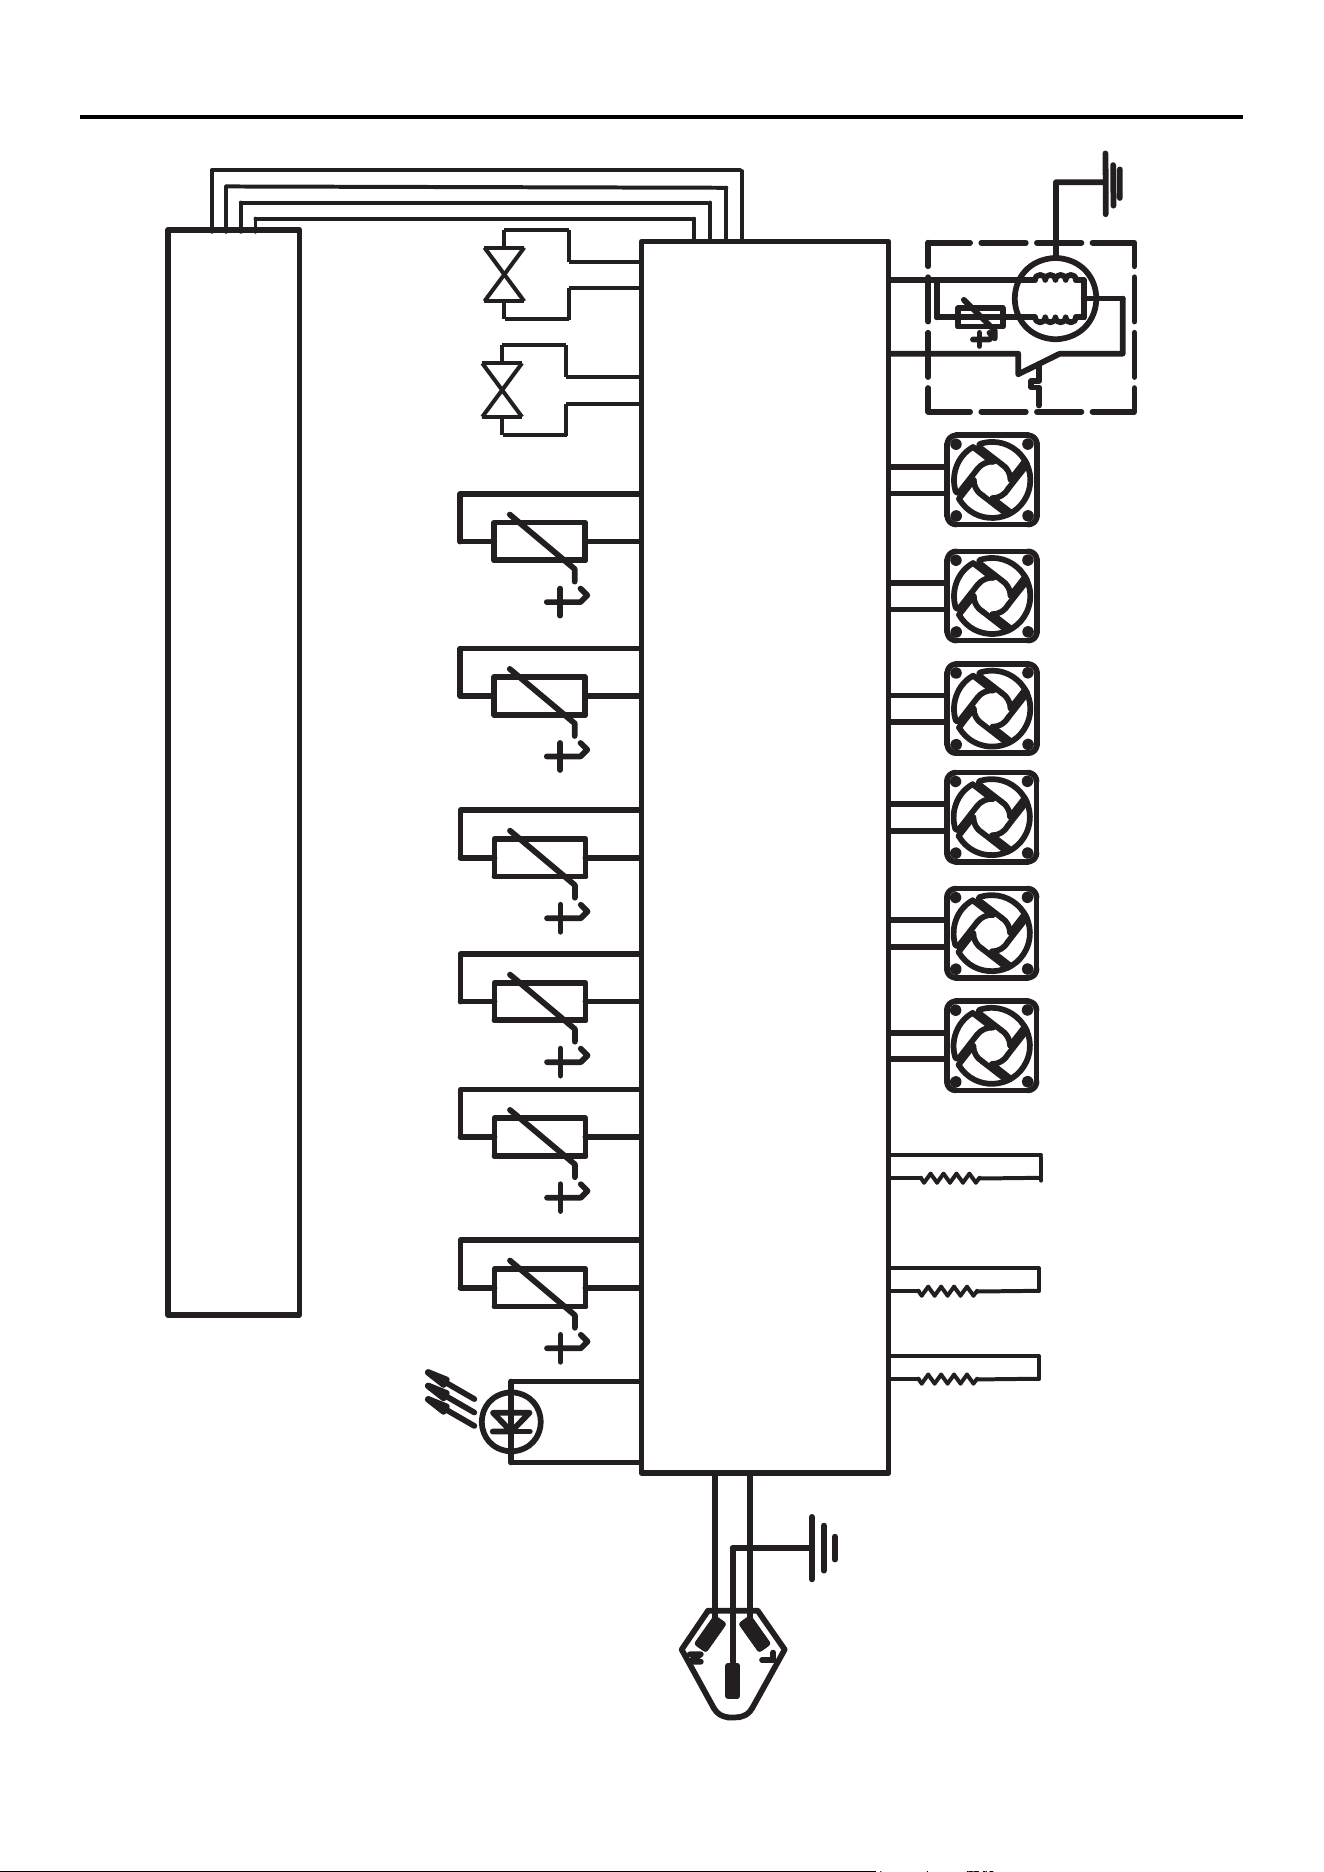
CONTROL PCB
POWER PANEL
LED LIGHT
LEFT
HEATER
RIGHT
HEATER
LOWER
HEATER
LEFT
FAN
RIGHT
FAN
LOWER FAN CONDENSER FAN
COMPRESSOR
LEFT
ROOM
RIGHT
ROOM
LOWER
ROOM
LEFT
DEFROSTING
RIGHT
DEFROSTING
LOWER
DEFROSTING
MAGNETIC
VALVE
AC115V/60Hz
Wire Diagram

20
What this limited warranty covers:
The Warranty coverage provided by Forno Appliances in
this statement applies exclusively to the original Forno
appliance (“Product”) sold to the consumer (“Purchaser”) by
an authorized Forno dealer/distributor/retailer, purchased
and installed in the United States or Canada, and which has
always remained within the original country of purchase (the
United States or Canada). Warranty coverage is activated on
the date of the Product’s original retail purchase and has a
duration of two (2) years.
Warranty coverage is non-transferable. In the event
of replacement of parts or of the entire product, the
replacement Product (or parts) shall assume the remaining
original Warranty activated with the original retail purchase
document. This Warranty shall not be extended with respect
to such replacement. Forno Appliances will repair or replace
any component/part which fails or proves defective due to
materials and/or workmanship within 2 years of the date of
the original retail purchase and under conditions of ordinary
residential, non-commercial use. Repair or replacement
will be free of charge, including labor at standard rates and
shipping expenses. Purchaser is responsible for making the
Product reasonably accessible for service. Repair service
must be performed by a Forno Authorized Service company
during normal working hours.
Important
Retain proof of original purchase to establish warranty
period. Forno’s liability on any claim of any kind, with respect
to the goods and/or services provided, shall in no event
exceed the value of the goods or service or part there of
which has given rise to the claim.
30-Day Cosmetic Warranty
The Purchaser must inspect the product at the time of
delivery. Forno warrants that the Product is free from
manufacturing defects in materials and workmanship for
a period of thirty (30) days from date of the original retail
purchase of the Product.
This coverage includes:
• Paint blemishes
• Chips
• Macroscopic finish defects
Cosmetic warranty does NOT cover:
• Issues resulting from incorrect transport, handling and/
or installation (e.g.: dents, broken, warped or deformed
structures or components, cracked or otherwise
damaged glass components);
• Slight color variations on painted/enameled components;
• Differences caused by natural or artificial lighting,
location or other analogous factors; > stains/corrosion/
discoloration caused by external substances and/
or environmental factors; > labor costs, display, floor,
B-stock, out- of-box,“as is” appliances and demo units.
How to receive service
To receive warranty services, the Purchaser must contact the
Forno Support department in order to determine the problem
and the required service procedures. Troubleshooting with
a customer service representative will be necessary before
moving forward with the service. Model number, serial
number and date of original retail purchase will be requested.
Warranty Exclusions: What Is Not Covered.
• Use of the Product in any non-residential, commercial
application.
• Use of the Product for anything other than its intended
purpose.
• Repair services provided by anyone other than a Forno
Authorized Service agency.
• Damages or repair services to correct services provided
by unauthorized parties or the use of unauthorized parts.
• Installation not in accordance with local/state/city/county
fire codes, electrical codes, gas codes, plumbing codes,
building codes, laws or regulations.
• Defects or damage due to improper storage of the
Product.
• Defects, damage or missing parts on products sold out
of the original factory packaging or from displays. >
Service calls or repairs to correct an incorrect installation
of the Product and/or related accessories.
• Replacement of parts/service calls to connect, convert
or otherwise repair the electrical wiring and/or gas line in
order to properly use the product.
• Replacement of parts/service calls to provide
instructions and information on the use of the Product.
• Replacement of parts/service calls to correct issues
arising from the product being used in a manner other
than what is normal and customary for residential use.
• Replacement of parts/service calls due to wear and tear
of components such as seals, knobs, pan supports,
shelving, cutlery baskets, buttons, touch displays,
scratched or broken ceramic-glass tops.
• Replacement of parts/service calls for lack of/improper
maintenance, including but not limited to: build up of
residues, stains, scratches, discoloration, corrosion.
• Defects and damages arising from accidents, alteration,
misuse, abuse or improper installation.
• Defects and damages arising from Product transport,
logistics and handling. Inspection of the product must
be made at time of delivery. Following receipt and
inspection, the selling dealer/delivery company must be
notified of any issues arising from handling, transport
and logistics.
• Defects and damages arising from external forces
beyond the control of Forno Appliances, including but
not limited to wind, rain, sand, fires, floods, mudslides,
freezing temperatures, excessive moisture or extended
exposure to humidity, power surges,
• Lightning, structural failures surrounding the appliance
and other acts of God.
• Products whose serial number has been altered/
damaged/tampered with. In no case shall Forno be held
liable or responsible for damage to surrounding property,
including furniture, cabinetry, flooring, panels, and other
structures surrounding the Product. Forno is neither
liable nor responsible for the Product if it is located
in a remote area or an area where certified trained
technicians are not reasonably available. Purchaser
must bear any transportation and delivery costs of the
Product to the nearest Authorized Service Center or
the additional travel expenses of a certified trained
technician
Warranty
21
THERE ARE NO EXPRESS WARRANTIES OTHER THAN THOSE LISTED AND DESCRIBED ABOVE, AND NO WARRANTIES, EITHER EXPRESS OR
IMPLIED, INCLUDING, BUT NOT LIMITED TO, ANY IMPLIED WARRANTIES OF MERCHANTABILITY OR FITNESS FOR A PARTICULAR PURPOSE THAT
SHALL APPLY AFTER THE EXPRESS WARRANTY PERIODS STATED ABOVE, AND NO OTHER EXPRESS WARRANTY OR GUARANTEE GIVEN BY
ANY PERSON, FIRM OR CORPORATION WITH RESPECT TO THIS PRODUCT SHALL BE BINDING ON FORNO. FORNO SHALL NOT BE LIABLE FOR
LOSS OF REVENUE OR PROFITS, FAILURE TO REALIZE SAVINGS OR OTHER BENEFITS, TIME AWAY FROM WORK, MEALS, LOSS OF FOOD OR
BEVERAGES, TRAVELING OR HOTEL EXPENSES, EXPENSES TO RENT OR PURCHASE APPLIANCES, REMODELING/CONSTRUCTION EXPENSES
IN EXCESS OF DIRECT DAMAGES WHICH ARE UNDENIABLY CAUSED EXCLUSIVELY BY FORNO OR ANY OTHER SPECIAL, INCIDENTAL OR
CONSEQUENTIAL DAMAGES CAUSED BY THE USE, MISUSE OR INABILITY TO USE THIS PRODUCT, REGARDLESS OF THE LEGAL THEORY ON
WHICH THE CLAIM IS BASED, AND EVEN IF FORNO HAS BEEN ADVISED OF THE POSSIBILITY OF SUCH DAMAGES. NOR SHALL RECOVERY OF
ANY KIND AGAINST FORNO BE GREATER IN AMOUNT THAN THE PURCHASE PRICE OF THE PRODUCT SOLD BY FORNO AND CAUSING THE
ALLEGED DAMAGE. WITHOUT PREJUDICE TO THE FOREGOING, PURCHASER ASSUMES ALL RISK AND LIABILITY FOR LOSS, DAMAGE OR INJURY
TO PURCHASER AND PURCHASER’S PROPERTY AND TO OTHERS AND THEIR PROPERTY ARISING FROM THE USE, MISUSE, OR INABILITY TO
USE THIS PRODUCT SOLD BY FORNO THAT IS NOT A DIRECT RESULT OF NEGLIGENCE ON THE PART OF FORNO THIS LIMITED WARRANTY SHALL
NOT EXTEND TO ANYONE OTHER THAN THE ORIGINAL PURCHASER OF THIS PRODUCT, IS NON-TRANSFERABLE, AND STATES YOUR EXCLUSIVE
REMEDY.
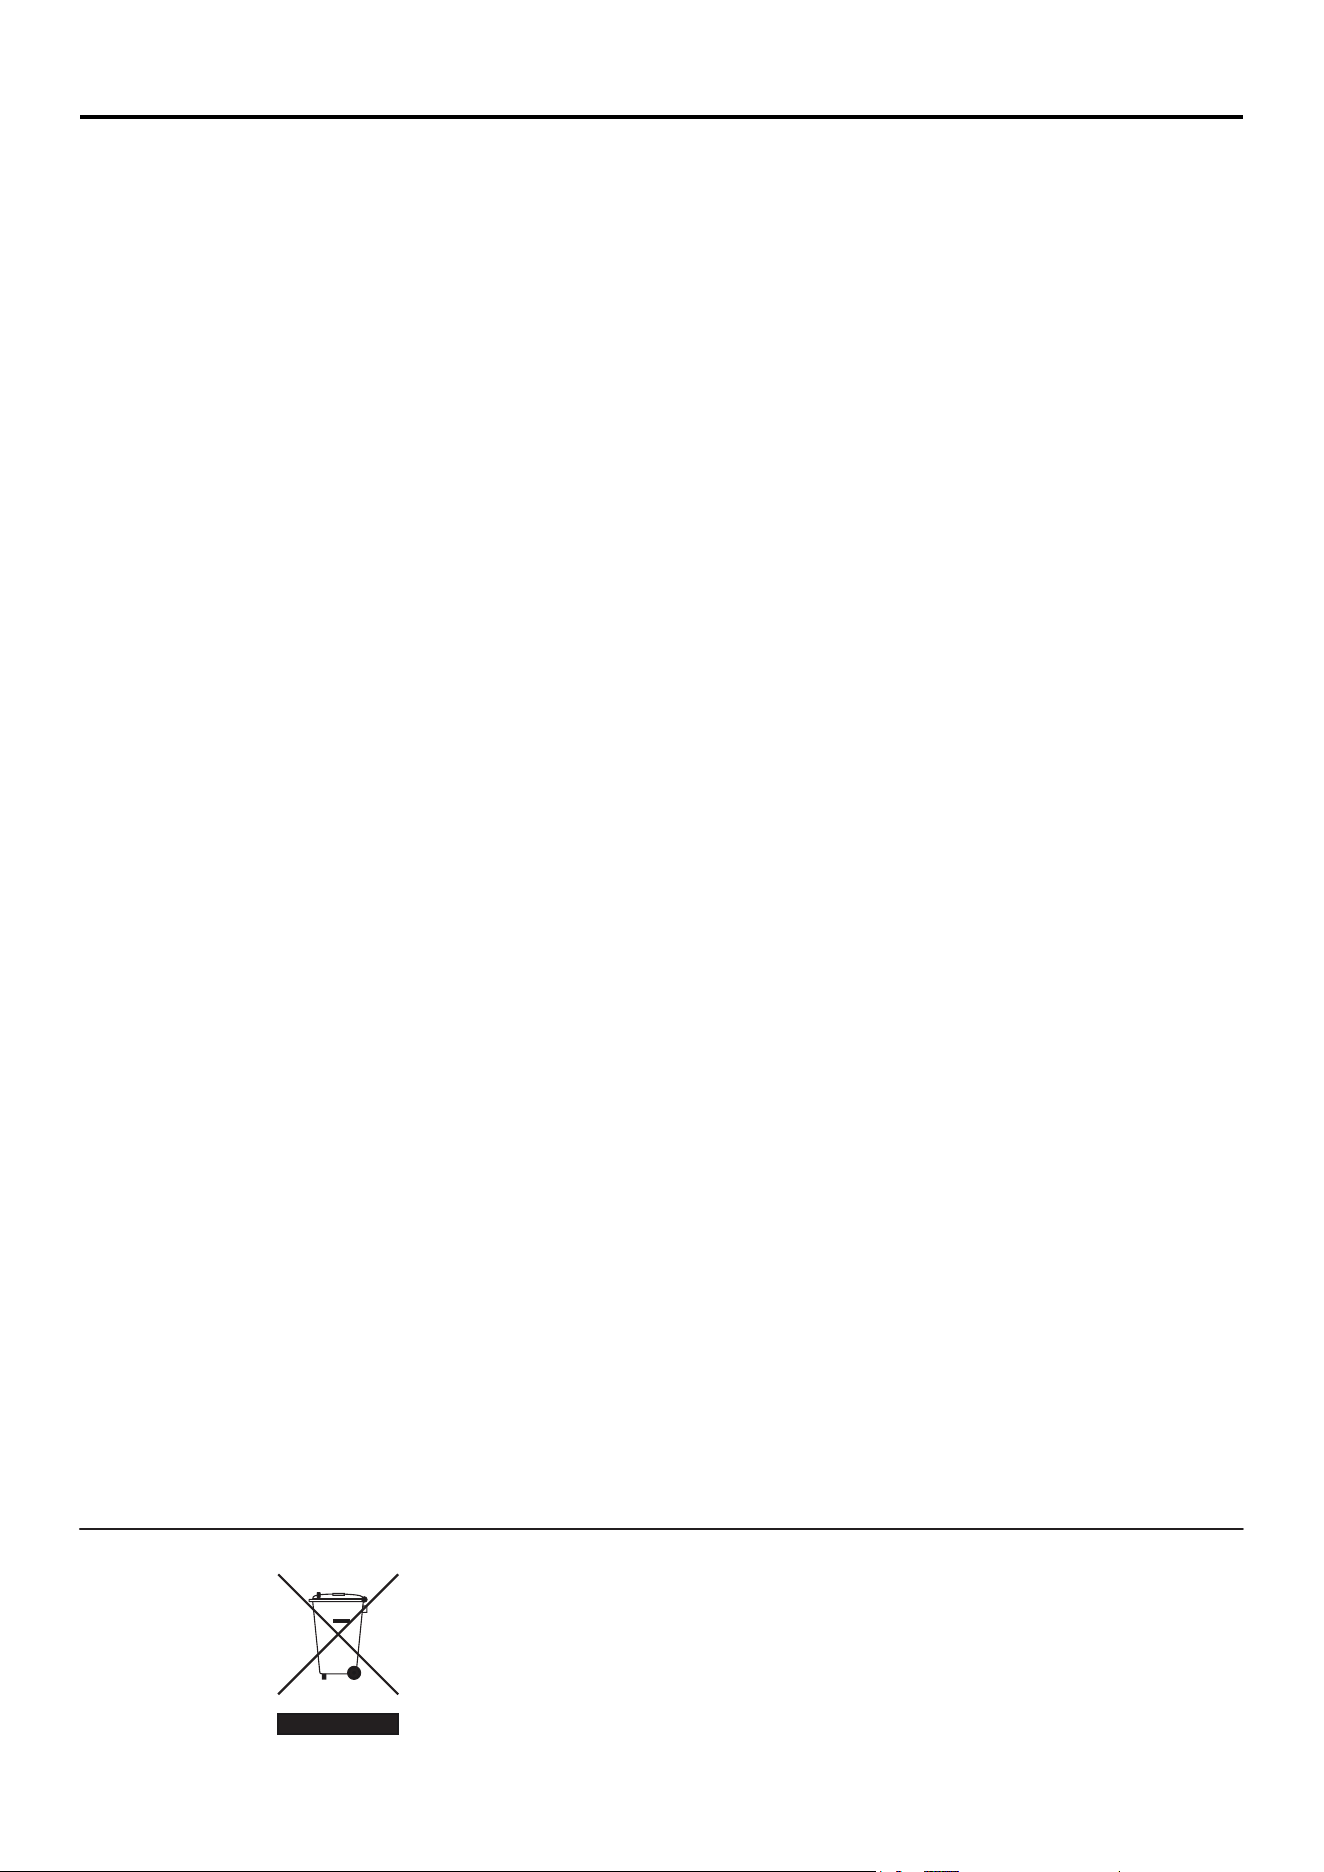
Correct Disposal of this product:
This marking indicates that this appliance should not be disposed with
other household wastes. To prevent possible harm to the environment or
human health from uncontrolled waste disposal, recycle it responsibly to
promote the sustainable reuse of material resources.
Warranty (continued)

Customer Support: Call 1-866-231-8893 or email: [email protected]