1
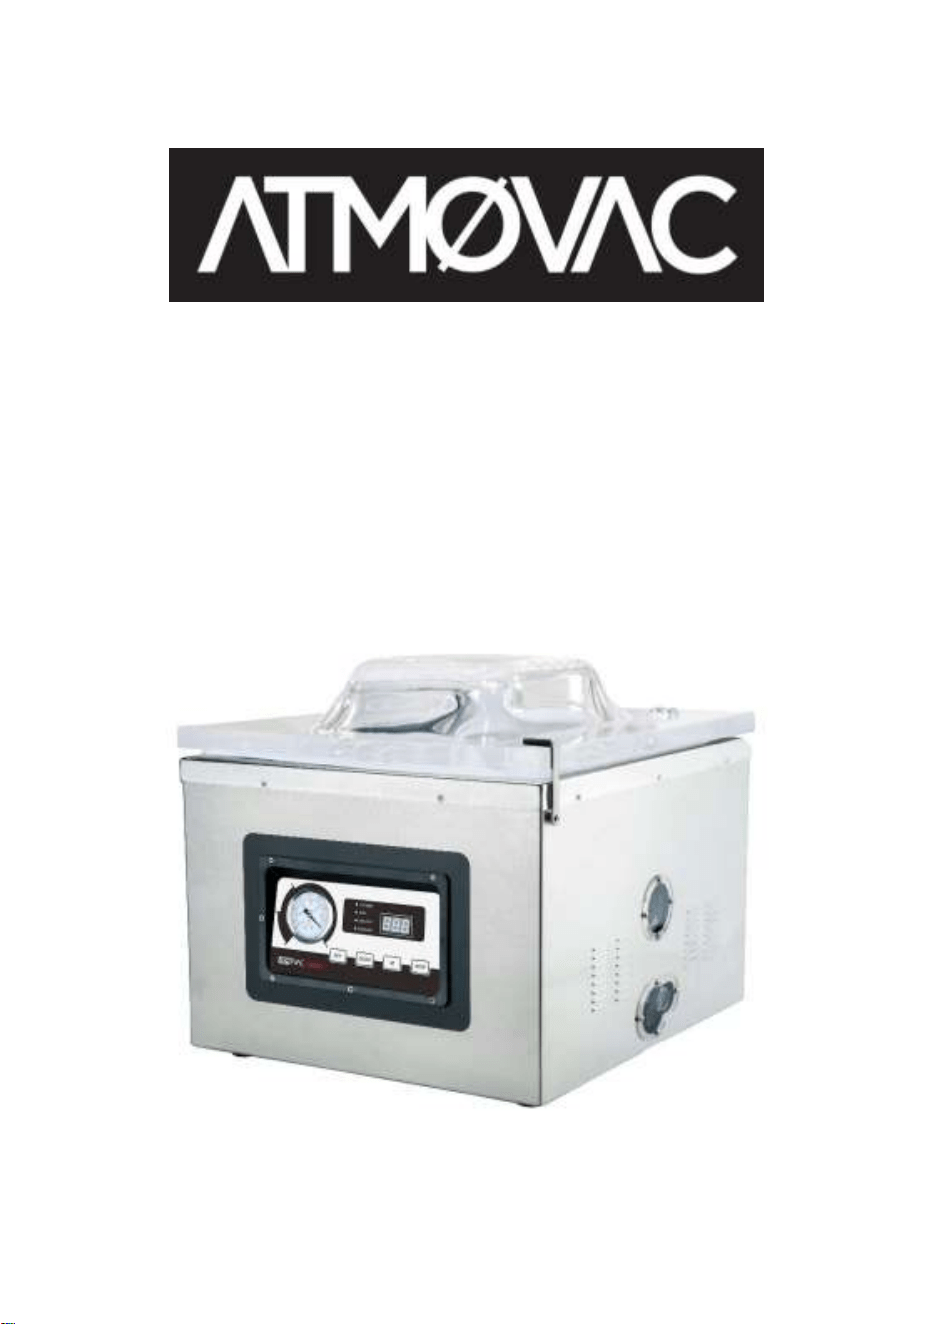
User Manual
Chamber Vacuum Sealer
Diablo17D

2
Contents
Introduction ........................................................ 3
Safety Notice ..................................................... 5
Day-to-Day Operation ...................................... 18
Technical Specifications ................................... 22
Operating Instructions ...................................... 23
Maintenance .................................................... 25
Error Codes and Troubleshooting .................... 31

3
Introduction
Thank you for choosing the Diablo20D Vacuum
Packaging Unit. We are confident that you will enjoy the
convenience of this high-quality, high-performance
appliance. To ensure that you operate the chamber
vacuum sealer correctly, please read this user manual
carefully before using the unit.
Notice:
Please ensure to read all instructions carefully before
using the appliance.
Please ensure that the person in charge, as well as
anyone else operating the unit, are familiar with the
key points of this manual.
Once you have read the manual, please store it in a
convenient location where users can easily reference
it.
If you have any questions, please contact the supplier.

4
Responsibilities:
This manual contains detailed information on how to
properly operate the vacuum sealer. The supplier will
not be held responsible for any damage or harm
caused by the incorrect operation of the unit.
The supplier will not be held responsible for damage to,
or malfunction of the unit caused by the use of
incorrect spare parts.
Spare parts codification could change without prior
notice.
5
Safety Notice
Warning Summary
This product conforms to the latest technical and safety
standards. Incorrect use of the unit is dangerous and may
cause harm to the operator or bystanders. Please see
below for the description of the various warnings:
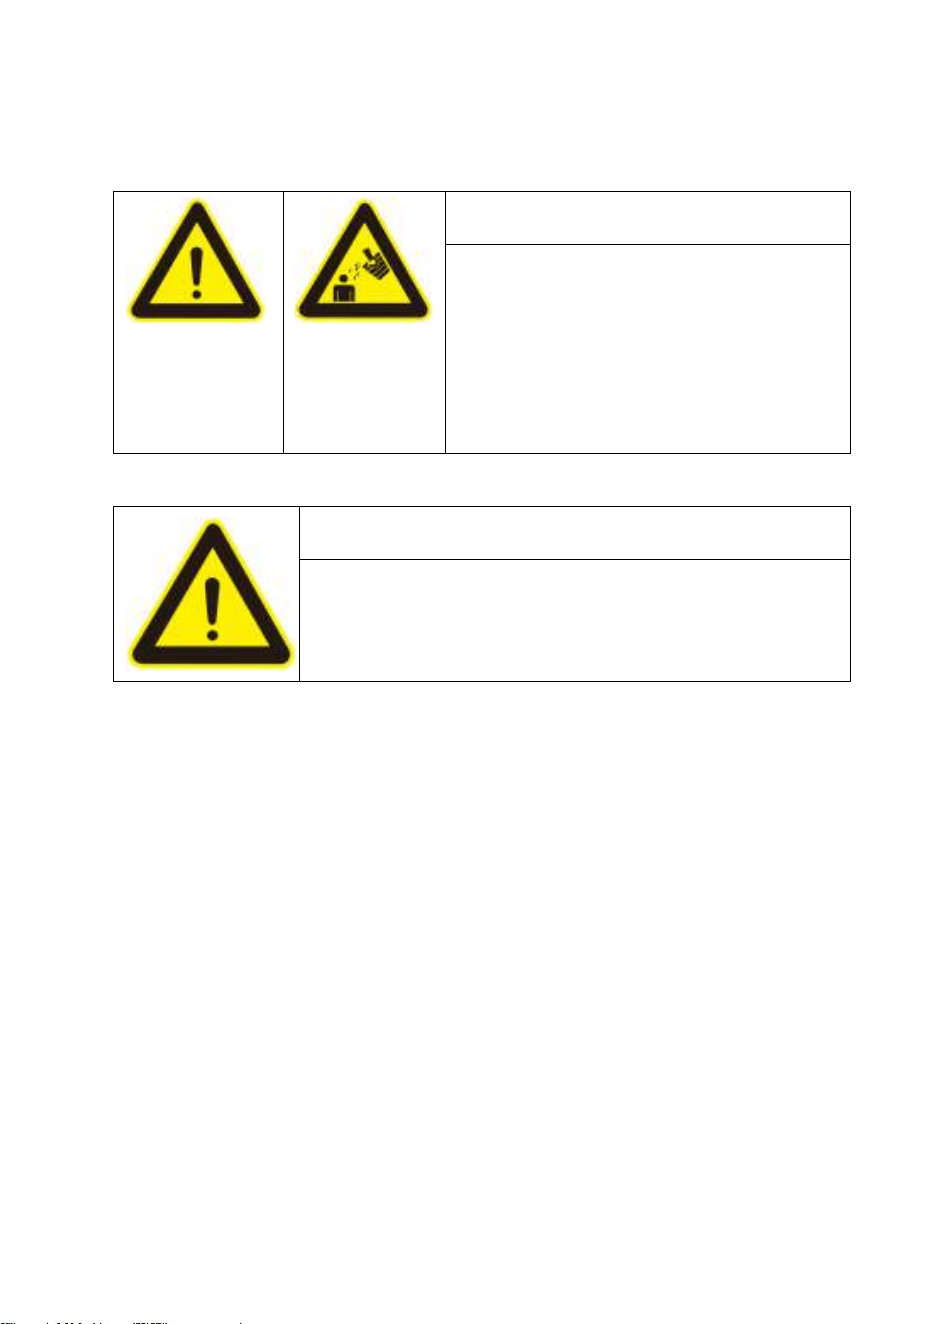
DANGER, WARNING, CAUTION.
DANGER
Ignoring this safety notice may cause death
or serious injury.
WARNING
Ignoring this safety notice may cause death
or serious injury.
CAUTION
Ignoring this safety notice may cause death
or serious injury.
6
Operation
This unit is intended to be used indoors under normal
conditions. If the unit must be used in extreme conditions
(e.g., in a caustic environment or in temperatures higher
than 40 ˚C or lower than 5 ˚C), please contact the
supplier.
When the unit is operating, the oil in the pump will be
separated to the maximum extent; however, it will not be
separated completely.
CAUTION! May cause injury!
Residual oil from the pump will be present in
the air.
Long-term inhalation of such air is harmful to
health.
The unit must be used in an environment
with adequate ventilation.
If the appliance is used in the food industry, food-safe oil
must be used.
7
Transportation and Storage
Wooden Case Packing
If a lifting device is used when setting up the unit, please
pay particular attention to the position of the center of
gravity of the unit.
Ensure that the straps can be safely attached to the
unit.
For added safety and stability, use a spreader beam.
Lift the unit with a crane.
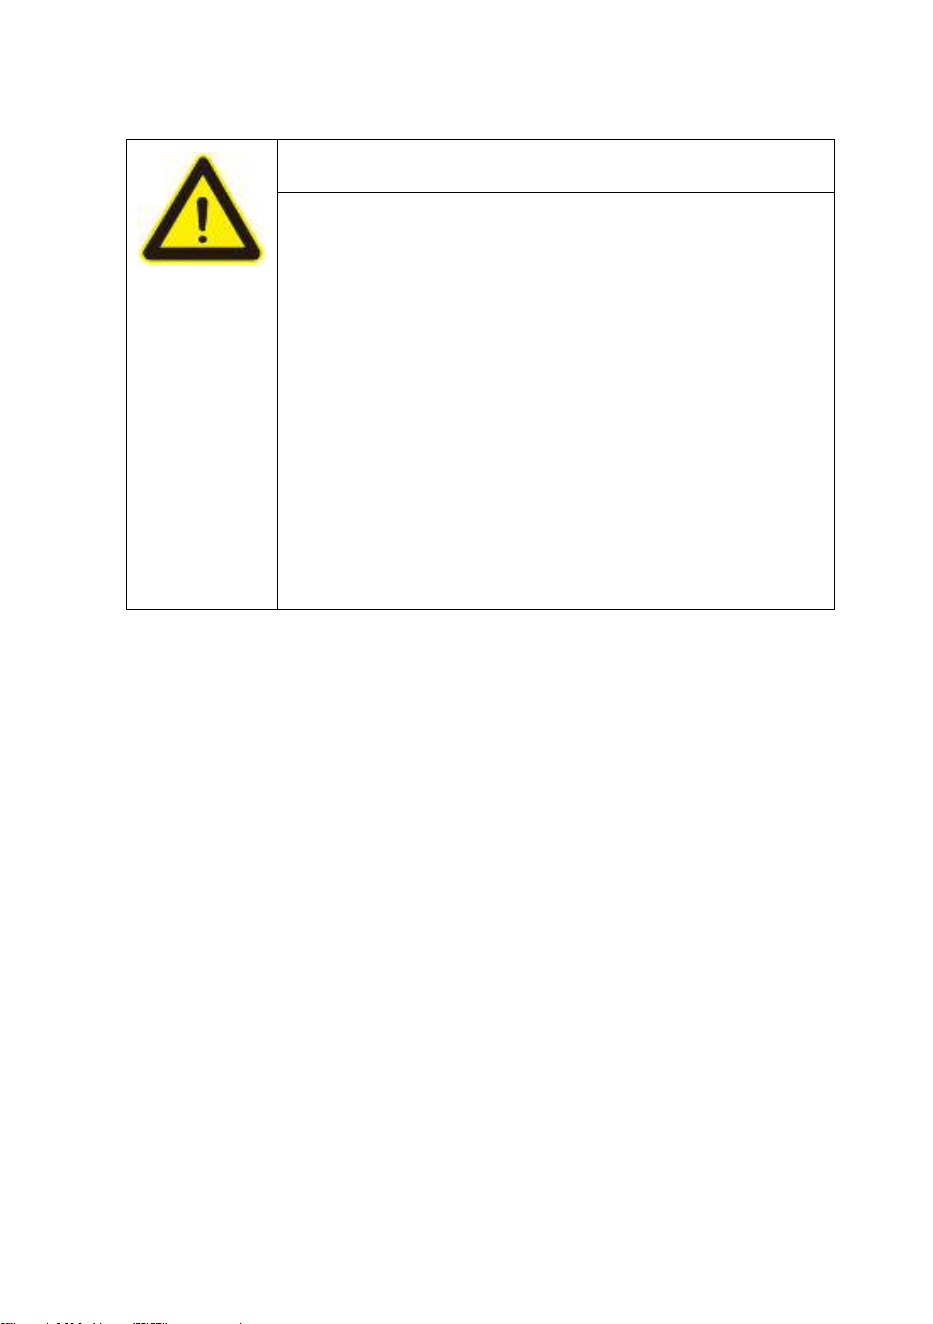
CAUTION!
Do not walk under or stay
close to the working crane or
suspended load.
Before moving the unit, please be sure to drain all oil from
the pump.
8
CAUTION! May cause damage to the unit.
Tipping over the unit when there is oil in the
pump will cause oil to enter the pump
chamber.
If there is too much oil in the chamber when
the pump is started, the pump will be
damaged.
Do not move the unit after the pump is filled
with oil.
Storing the Unit Short Term
Ensure that the appliance is turned off, unplug it, and
put away the power cord.
Close the lid and lock it using the lid lock.
Cover the appliance with a plastic bag to protect it
from dust.
Keep the machine in a dry, dust-free and shockproof
environment.

9
Storing the Unit Long Term
The inside of the unit has received an anticorrosive
treatment in the factory; therefore, it is not necessary to
use protective oil. However, in extreme storage conditions
(e.g., in a caustic environment or where temperatures are
very high or fluctuate frequently), it is necessary to
reapply oil in order to keep the unit in good condition.
Ensure that the appliance is turned off, unplug it, and
put away the power cord.
Close the lid and lock it using the lid lock.
Cover the appliance with a plastic bag to protect it
from dust.
If possible, store the appliance in its original
packaging.
If the appliance is to be moved, ensure that all oil in
the pump is drained.
Keep the machine in a dry, dust-free and shockproof
environment.
10
Set-up
CAUTION! May cause damage to the unit.
Please follow all instructions below when
setting up the machine.
Below conditions must be met during set-up
of the unit in order to avoid damage.
Be careful not to get hurt.
Please ensure to use the appliance in an environment
conforming to the safety indications.
Unit must not be operated close to flammable or
explosive gases.
Suitable temperature range: 5 ˚C to 40 ˚C. If the unit
must be used in an environment outside this range,
please contact the supplier.
Ambient pressure: standard atmospheric pressure.
Ensure that the power supply conforms to the
standard.
When moving the unit, ensure to keep it in an upright

11
position. Tipping the unit will damage the pump.
Ensure that the appliance is in a horizontal position
when in use.
Keep a distance of 10 cm between the unit and walls
or other objects to ensure adequate ventilation.
Keep the appliance away from sources of heat or
steam (such as steaming pot, dishwashers or stoves)
Ensure that you have extra oil as well as spare parts
for the more easily damageable parts on hand.
12
Filling and Draining the Oil
CAUTION! May cause damage to the unit.
Note that there is no oil in a new machine.
Operating the vacuum sealer without oil will
damage the appliance.
Before operating the machine, ensure that
the pump has been filled with oil.
Only fill the pump with oil via the filling port.
Filling oil from anywhere else may damage
the pump.
Inhaling gas emitted from the pump during
operation may have harmful long-term to
effects to health (emissions may contain
residual oil).
Only use the appliance in a well-ventilated
area.
13
When the pump is operating, the
inside of the pump chamber will
be full of oil mist; both the
temperature and pressure are
very high. If the oil-filling port is
open, harm may be caused by
the hot oil mist. The oil plug can
only be opened when the pump
stops working. When the pump is
working, the oil plug must be
screwed tight.
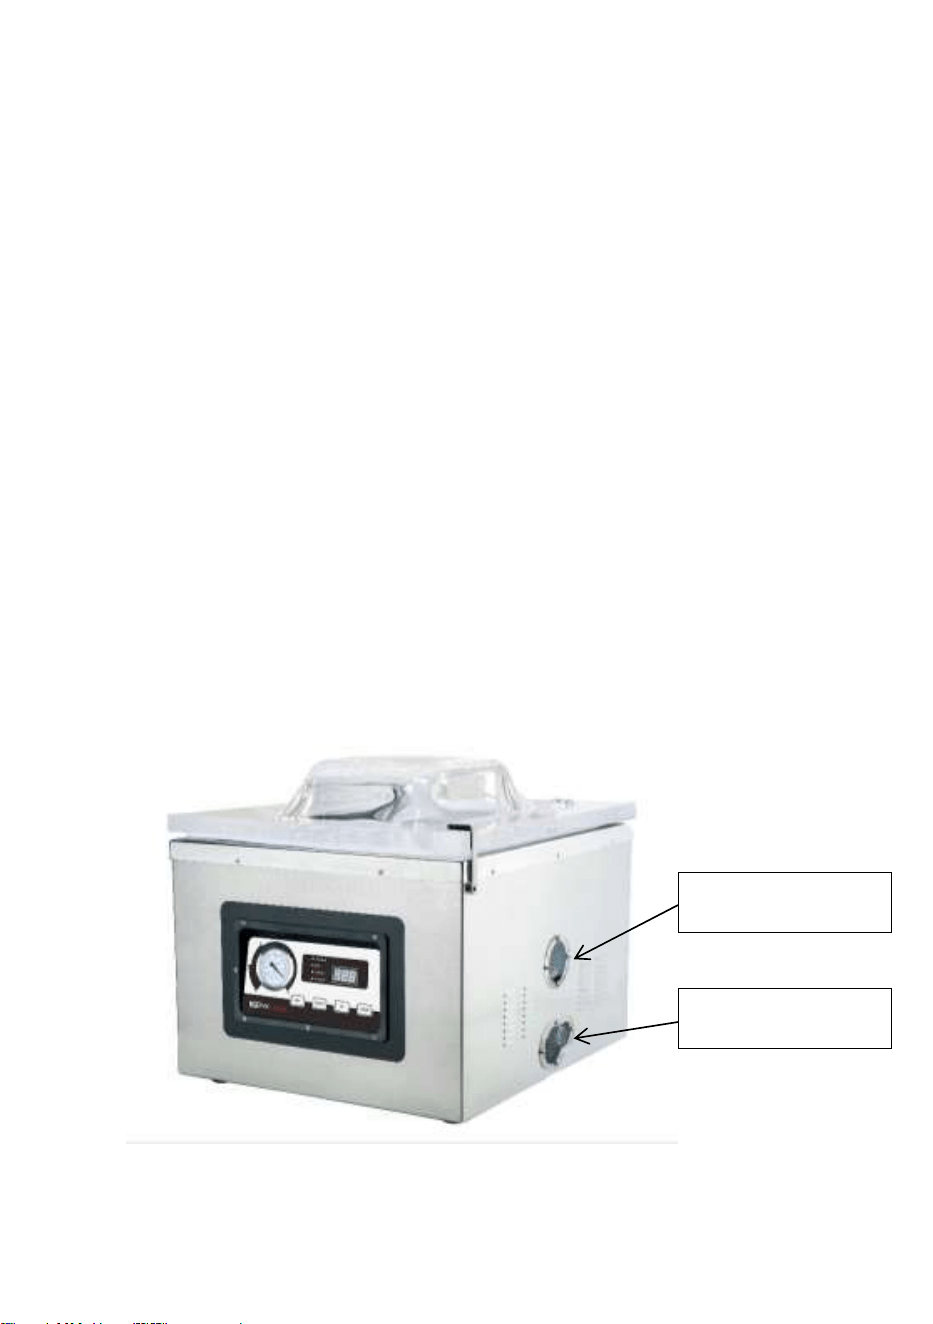
Filling the Oil
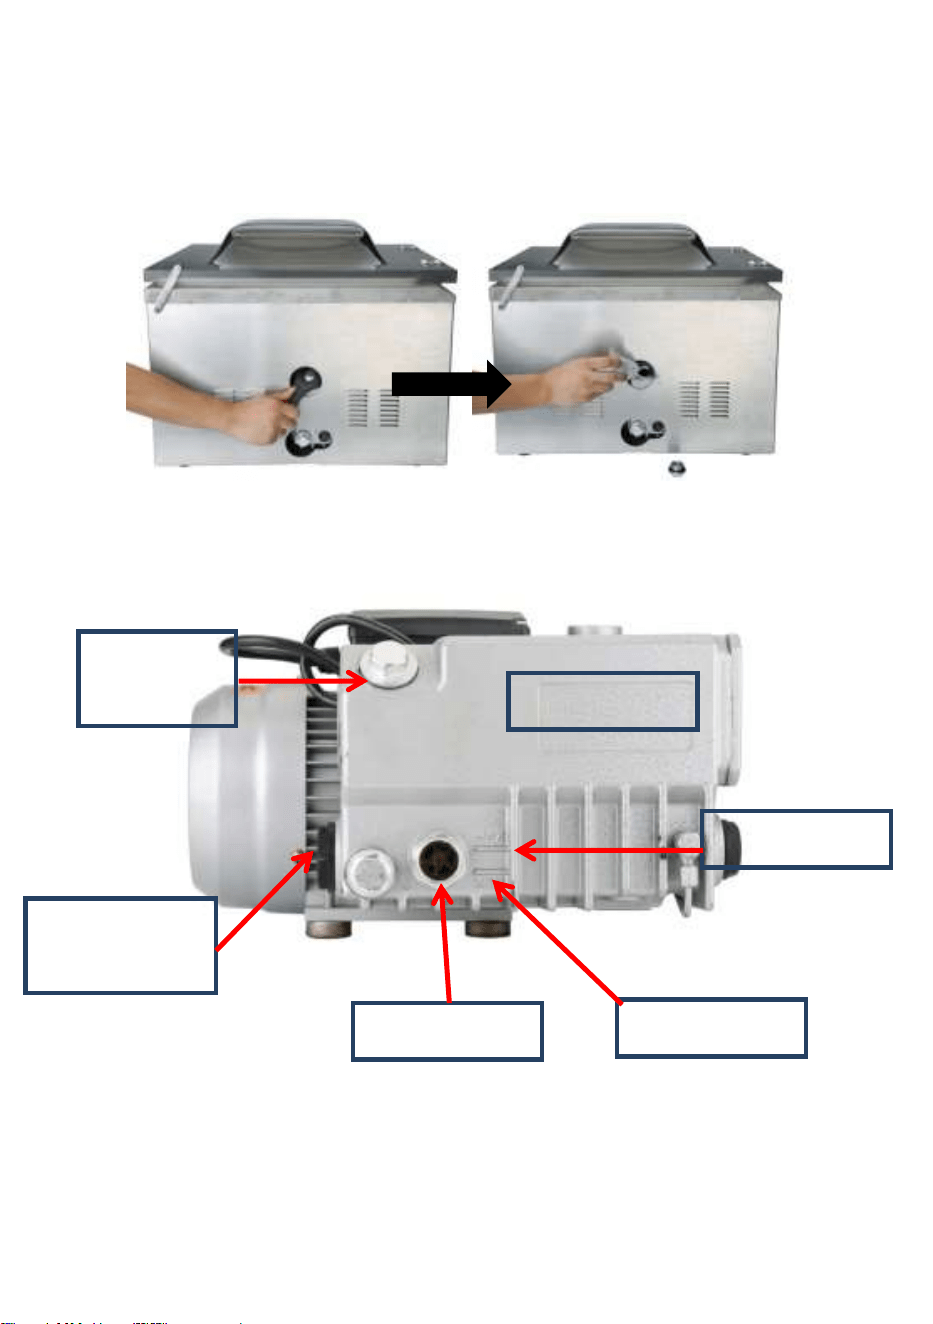
Use a screw driver to open oil window #1.
Use the spanner provided by the supplier to unscrew
the filling port cap.
Fill the pump with oil until the level of oil reaches
approximately 1/2 to 3/4, between MIN and MAX, on
the indicator.
14
Screw the cap back on tightly and reinstall the cover of
oil window #1.
Draining the Oil
Use a screw driver to open oil window #2.
Place a container directly under the oil-draining port.
Use the spanner provided by the supplier to unscrew
the cap which will allow the oil to drain.
After all the oil is drained, screw the cap on tightly and
reinstall the cover of oil window #2.
Oil window #1
Oil window #2
15
Oil pump
Oil fill port
screw cap
Oil drain port
screw cap
Oil indicator
Max level
Min level
16
Gas Inflation System (if applicable)
WARNING! Risk of explosion!
Do not use explosive gas, or
any mixed gas containing 20%
or more oxygen; otherwise, it
will cause an explosion.
CAUTION! May cause damage to the unit.
The pressure of the gas source must not be
higher than standard atmospheric pressure.
Please do not use explosive or mixed gases which
contain a large quantity of oxygen; these will cause an
explosion. The supplier will not be held responsible for
any damage or harm caused if this guideline is not
respected.
The gas bottle must be tightly closed. If the gas
inflation system will not be used, the gas bottle switch
must be well closed.

17
The pressure setting valve on the gas bottle must not
be higher than 0.1MPa; otherwise it will damage the
unit.
The diameter of the gas-filled tube is 8 mm. This
connector will be located at the side or at the back of
the unit.
18
Day-to-Day Operation
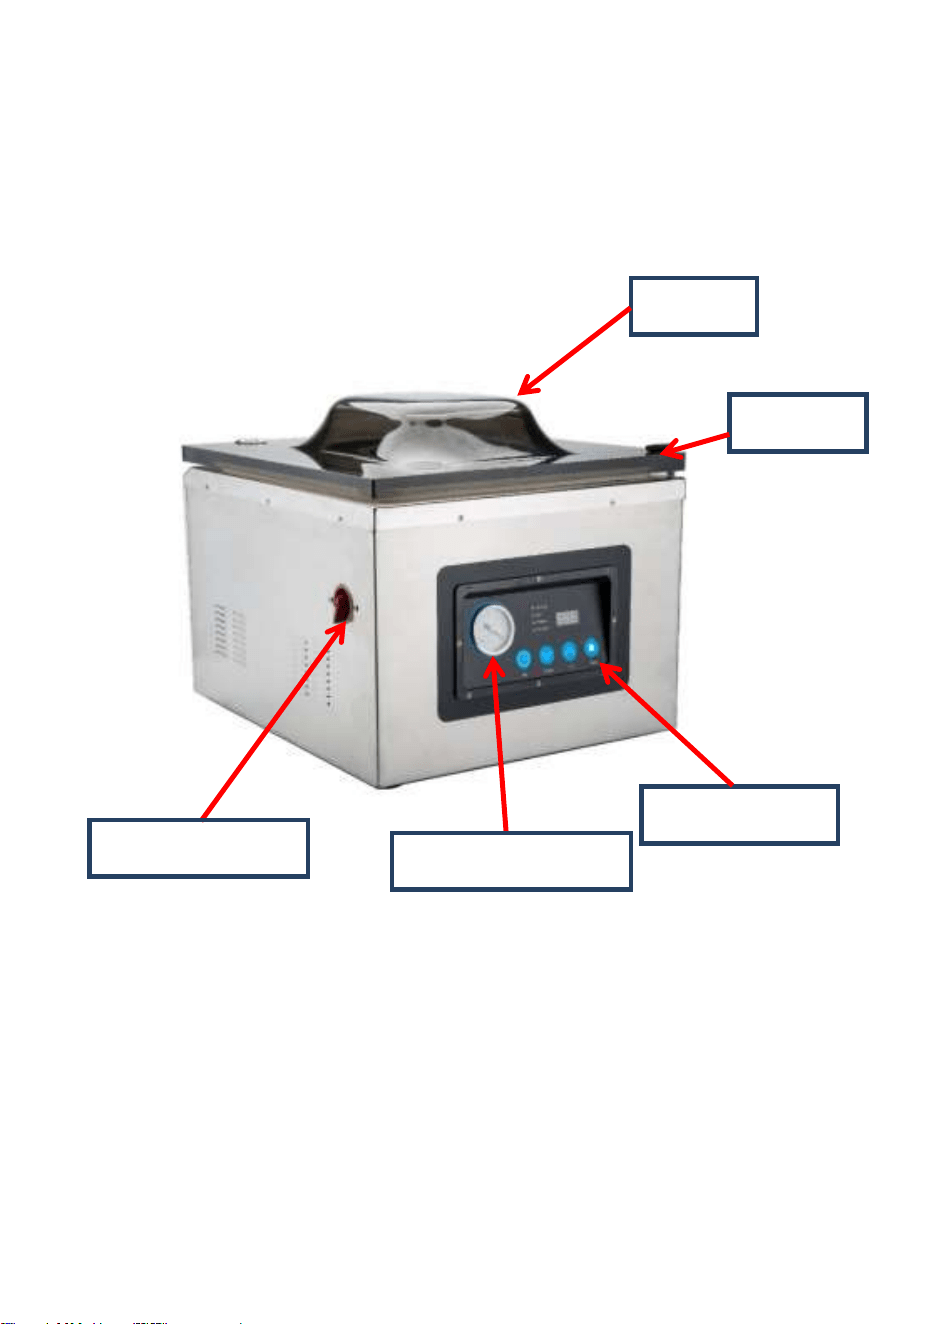
Unit
Control panel
Lid lock
Lid
Pressure gauge
Power switch
19
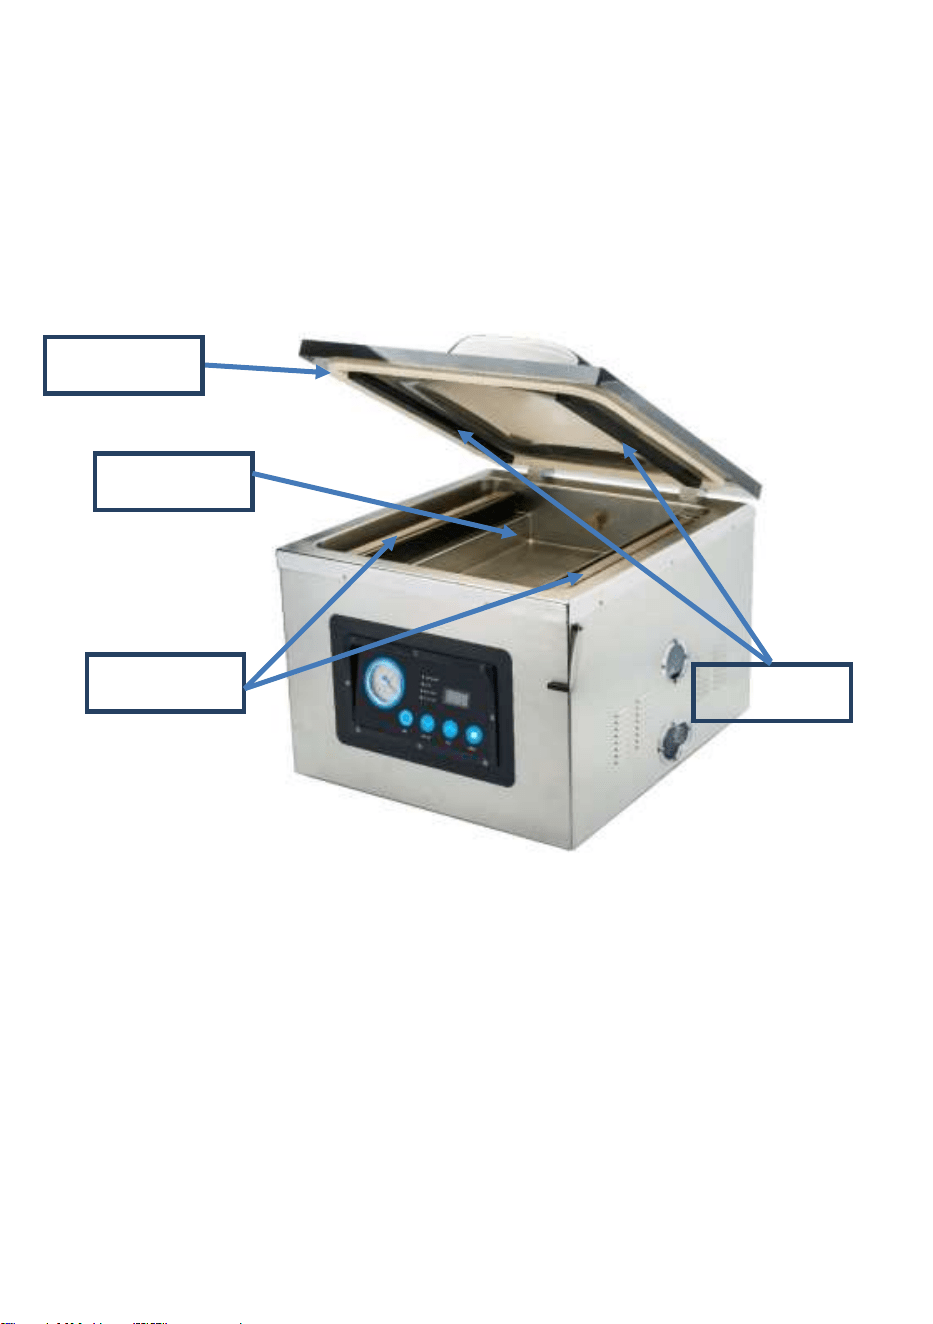
Chamber
Chamber
Seal strip
Seal bar
Gasket
20
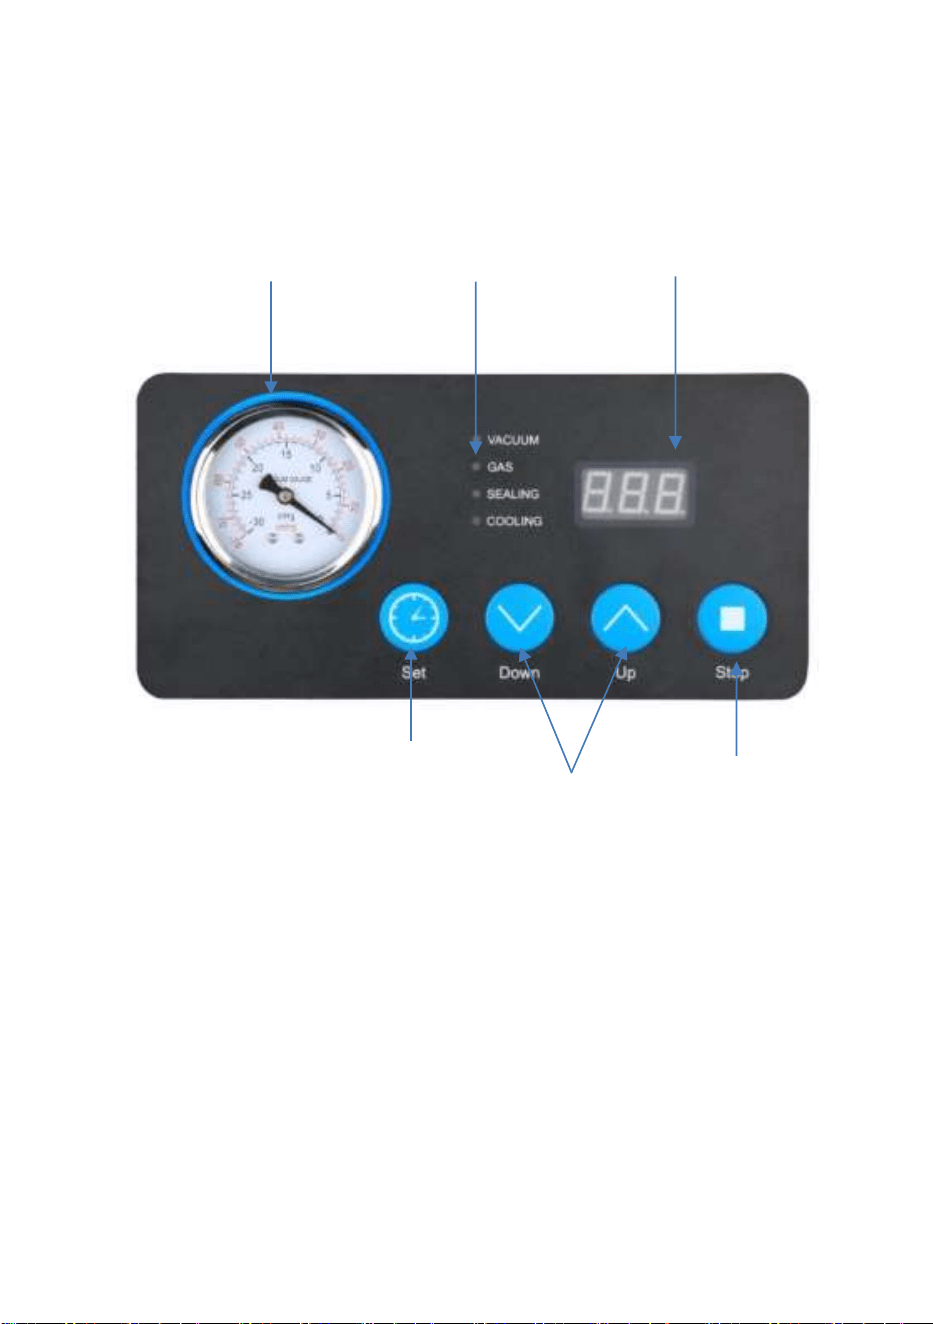
Control Panel
A. Vacuum gauge
Shows pressure in the vacuum chamber
B.Indicator light
When the light is on, the corresponding operation
mode is ready to be set.
E
A
B
C
F
D

21
When the light is flashing, the unit is functioning in
the corresponding operation mode.
C. LED Display
“OFF” indicates the unit is in standby.
“ON” or “CLO” indicates the unit is ready.
When the mode is ready to be set, the display
shows the duration of the setting.
When the unit is operating, the display shows the
time remaining.
D. Set button
Press the Set button to switch the operation mode.
Press the Down (˅) and Up (˄) buttons to adjust
the time for the relevant mode.
E. Time adjustment buttons
Press the Down (˅) and Up (˄) buttons to adjust
the time for the relevant mode.
F. Stop button
Press the Stop button to stop the appliance.

22
Technical Specifications
Voltage:
110–120Vac 50 Hz
Power:
1180W
Pump type:
Oil pump
Pressure:
-29.9”Hg/-1012 mbar (+0-3‰) - directly in
pump
-29.8”Hg/-1009 mbar (±3‰) - in vacuum
chamber
Seal wire width:
3.0 mm × 2 + 3.0 mm × 2
Seal bar:
432 mm × 2
Max bag
width:
432 mm
Dimensions:
495 × 567 × 472 mm

23
Operating Instructions
1. Select the appropriate size vacuum bag. Be sure to
allow at least one to two inches of extra space at the
top of the bag to ensure an airtight seal
2. Check that the electrical cord is plugged into a
grounded electrical socket; turn the power switch on –
CLO will appear on the display.
3. Open the lid; ON will be displayed and the unit will
remain in READY mode. Place the vacuum bag into
the chamber with the opening of the bag across the
seal bar.
4. Press the Set button and the Down (˅) and Up (˄)
buttons to set the duration for each mode.
Range of duration – vacuum: 0-90s; range of duration
- gas inflation: 0-10s; range of duration - sealing: 0-6s;
range of duration – cooling: 0-10s.
When all settings have been defined, press the Set
button again. The unit will return to READY mode and

24
ON will be displayed. (If a setting is set to 0s, it will be
skipped. The Diablo17D model does not offer the gas
inflation option; press the Set button to leave it at 0s.)
5. Close the lid; the process will start. The indicator light
shows the mode that is in progress, and the time
remaining for that mode is displayed.
6. Once the process is completed, the lid will release
automatically, and the machine will beep.
7. Open the lid and remove the bag.
Please note that although vacuum packaging slows
down the deterioration of food, it does not stop it
entirely. Vacuum packaged foods still need to be
stored in the refrigerator or freezer.
8. Restoring factory default settings
Let the machine power on. When OFF is displayed,
simultaneously press the SET button and the UP
arrow for 3s. Once the unit beeps and displays rS,
restore factory default setting has been successful.

25
Maintenance
Maintenance of your chamber vacuum sealer is
necessary in order to extend the service life of the unit. If
the unit is used frequently (more than four hours per day),
professional maintenance should be carried out every six
months. If used less than four hours per day, professional
maintenance should be carried out once per year (may
vary based on the performance of the unit).
Always unplug the unit before cleaning.
If the unit does not work properly, or if it makes strange
noises, please turn it off and contact the supplier.
Do not use a solvent-based detergent to clean the unit.
Check the lid for damage at least once a week. If the
lid is damaged, stop using the unit immediately.
Do not high-pressure wash the unit. It may severely
damage electrical or other components.
Never let water enter the vacuum port or air outlet of the
pump; this will cause irreparable damages to the pump.

26
Only a qualified specialist should carry out full
maintenance on the unit.
When moving the unit, ensure to keep it in an upright
position. Tipping the unit will damage the pump.
The unit can operate up to a maximum of eight hours
per day. The supplier will not be held responsible for
any performance issues or damages caused to the
unit if it is operated more than the maximum number of
hours.
If the user does not operate the unit according to the
specific instructions contained in this manual, the
supplier and/or the manufacturer will not be held
responsible for any performance issues or damages
caused to the unit.
Lid
Never place the unit near a source of heat as this may
damage the lid.
Never place anything hot, sharp or heavy on the lid as

27
this may damage it.
Do not use a solvent-based detergent to clean the lid
as the solvent may damage it.
Check the lid for damage at least once a week. If the
lid is damaged, stop using the unit immediately until
the lid has been replaced. Operating the unit with a
broken lid may cause an explosion which may cause
major or fatal harm. The supplier will not be held
responsible for any damage or harm caused if the unit
is used with a broken lid.
For safety reasons, please replace the lid every three
years.
Pump
Daily maintenance of the pump is necessary in order to
extend the service life of the unit and ensure that it
functions properly. If the unit is used frequently,
professional maintenance should be carried out on the
pump at least once per year. When in doubt or for any

28
advice, please contact the supplier.
New units do not have oil in the pump. Before using
your unit for the first time, please fill the pump with oil.
Please check the color of oil; it should be clear and
bright. It should not be cloudy or contain any bubbles.
If the oil appears milky when it is at rest, it is a sign that
the oil contains impurities. When the oil contains
impurities or starts turning black, it must be changed.
The service life of oil will depend on the usage of the
unit and the environment in which it is used. As a
general rule, the oil should be changed every 50
working hours, or every six months at least.
Please check the oil level in the pump at least once
per week. You can check the level through the oil
window. You must add oil if the level is lower than the
halfway mark on the indicator.

29
Seal Strip
Please check the seal strip at least once per week. If the
seal strip is broken or uneven, please replace it
immediately.
The seal strip is located in the groove of the lid and
can be removed easily.
To replace the seal strip, remove the used seal strip
from the groove of the lid.
Install the replacement seal strip into the groove.
Please ensure that the seal strip is installed evenly.
Gasket
The purpose of the gasket is to seal the chamber when
the machine is in use; it is key in allowing the unit to reach
the required vacuum pressure. The gasket may become
worn out and for this reason, it may occasionally need to
be replaced. Please check the gasket at least once per
week to ensure that it is not worn or broken.

30
The gasket is located in the groove of the lid and can
be removed easily
Check the length of the new gasket against the old
one; if it is too long or too short, the lid may not close
tightly which will cause leakage when the unit is
running.
Install the replacement gasket into the groove.
The gasket must be installed evenly but not too tightly.
Both ends of the gasket must perfectly straight and
even in order to prevent any leakage.
31
Error Codes and Troubleshooting
Error
code
Cause
Troubleshooting
E01
The unit has
been
vacuuming for
some time, the
pressure
switch doesn’t
close.
1) Check if the lid is closed
tightly.
2) Check if the gate control
switch system is working
normally or not (gate control
switch ASSY, GASI
connecting cord, micro
switch, 10P data cord)
LP
Unit loses
power while
operating
1) Check the power supply.
2) Check the unit’s power
supply (power cord, 10P data
cord).
The A-weighted sound pressure level is 73.9 dB (A).
The vibration level is 0.34 m/s
2

32
Toll-free: +1 (888) 956-6866
www.eurodib.com