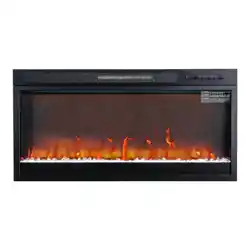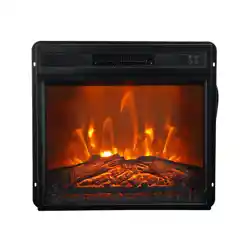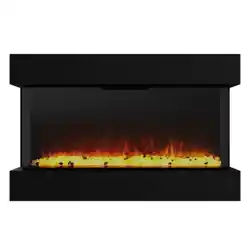
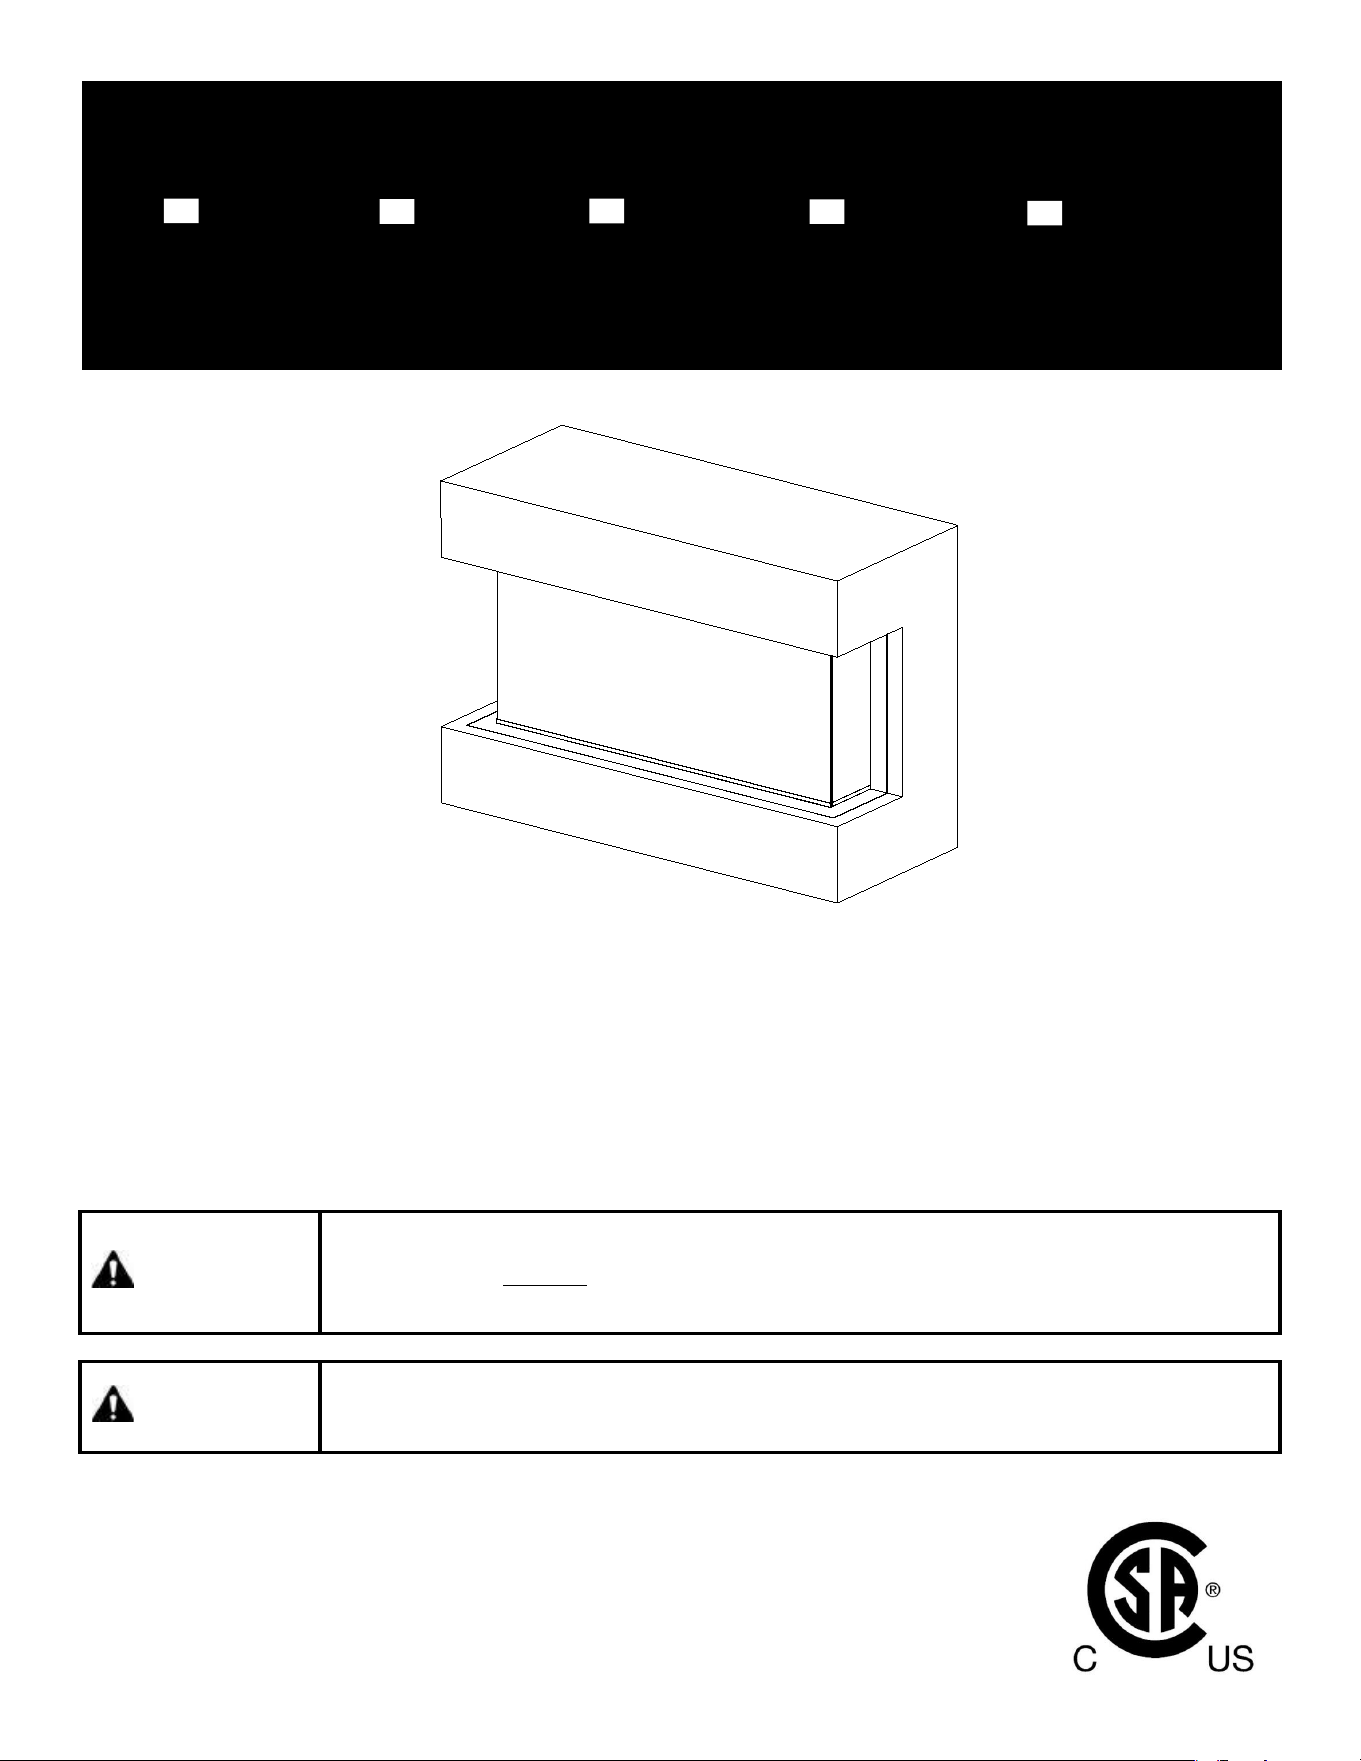
36"/42"/50"/60"/72" Recessed
Electric Fireplace
AC 110-120V 60Hz 1500W
WARNING
Read and understand this entire owner’s manual, including all safety
information, before
plugging in or using this product. Failure to do so could
result in fire, electric shock, or serious personal injury.
CAUTION
Keep this owner’s manual for future reference. If you sell or give this
product away, make sure this manual accompanies this product.
THREE SIDED ELECTRIC FIREPLACE
OWNERS MANUAL
TS36
TS50 TS60
TS72
TS42
1
IMPORTANT SAFETY INFORMATION!
WARNING
Read all instructions before using this heater!
This heater is hot when in use. To avoid burns, DO NOT let bare skin touch hot surfaces. If
provided, use handles when moving this heater. Keep combustible materials, such as
furniture, pillows, bedding, papers, clothes, and curtains at least 3 feet (0.9m) from the front of
the heater, and keep them away from the sides and rear.
Extreme caution is necessary when any heater is used by or near children or invalids and
whenever the heater is left operating and unattended.
DO NOT operate any heater with a damaged cord or plug or after the heater malfunctions,
has been dropped or damaged in any manner. Discard heater, or return to authorized service
facility for examination and/or repair.
DO NOT run power cord under carpeting. DO NOT cover power cord with throw rugs, runners,
or similar coverings. DO NOT route power cord under furniture or appliances. Arrange power
cord away from traffic area, and where it will not be tripped over.
Connect to properly grounded outlets ONLY.
DO NOT insert or allow foreign objects to enter any ventilation or exhaust opening, as
this may cause electric shock or fire, or damage the heater.
To prevent a possible fire, DO NOT block air intakes or exhaust in any manner. Doing so could
cause a fire. DO NOT use on soft surfaces, like a bed, where openings may become blocked.
A heater has hot and arcing or sparking parts inside. DO NOT use it in areas where
gasoline, paint, or flammable liquids are used or stored.
Use this heater only as described in this manual. Any other use not recommended by
the manufacturer may cause fire, electric shock, or injury to persons.
ALWAYS plug heaters directly into a wall outlet/receptacle. NEVER use with an
extension cord or relocatable power tap (outlet/power strip).
DO NOT place the heater near a bed because objects such as pillows or blankets can fall off
the bed and be ignited by the heater.
NEVER use this heater in bathrooms, laundry rooms, or any other location where the heater
could fall into a bathtub or pool, become damp, or come in contact with water.
AVOID FIRE! Regularly inspect all air vents to make sure they are free from dust, lint, or other
blockage. Unplug the unit and clean with a vacuum ONLY. DO NOT rinse or get wet.
ALWAYS mount to wall bracket before use. DO NOT set on the floor, or other surface, to use.
NEVER use a wall mount bracket from another manufacturer.
This product is not intended to be a primary heat source. It is for supplemental heat only.
INDOOR use only! NEVER use this heater outdoors! Doing so may result in electric shock!
Risk of electric shock! DO NOT OPEN! No user-serviceable parts inside!
ALWAYS turn this heater off before unplugging it from the outlet.
ALWAYS disconnect this unit from the power supply before performing any assembly or
cleaning, or before relocating the electric fireplace.
NEVER leave this heater unattended. ALWAYS unplug this heater when not in use.
ALWAYS store this heater in a dry location. NEVER use the fireplace if it has become wet.
NEVER plug this heater into an outlet that is old, cracked, or has any loose wires or
connections. Plugging this heater into a faulty outlet could result in electric arcing within the
outlet that could cause the outlet to overheat or catch fire.
ALWAYS check your heater cord and plug connections with each use!
i) MAKE SURE the plug fits tight in the outlet! Faulty wall outlet connections or loose plugs
can cause the outlet to overheat.
ii) Heaters draw more current than small appliances. Overheating may occur even if it has
not occurred with the use of other appliances.
iii) During use check frequently to see if the plug outlet or face plate is HOT!
iv) If the outlet or face plate is HOT, discontinue use immediately and have a qualified
electrician inspect and/or replace the faulty outlets.
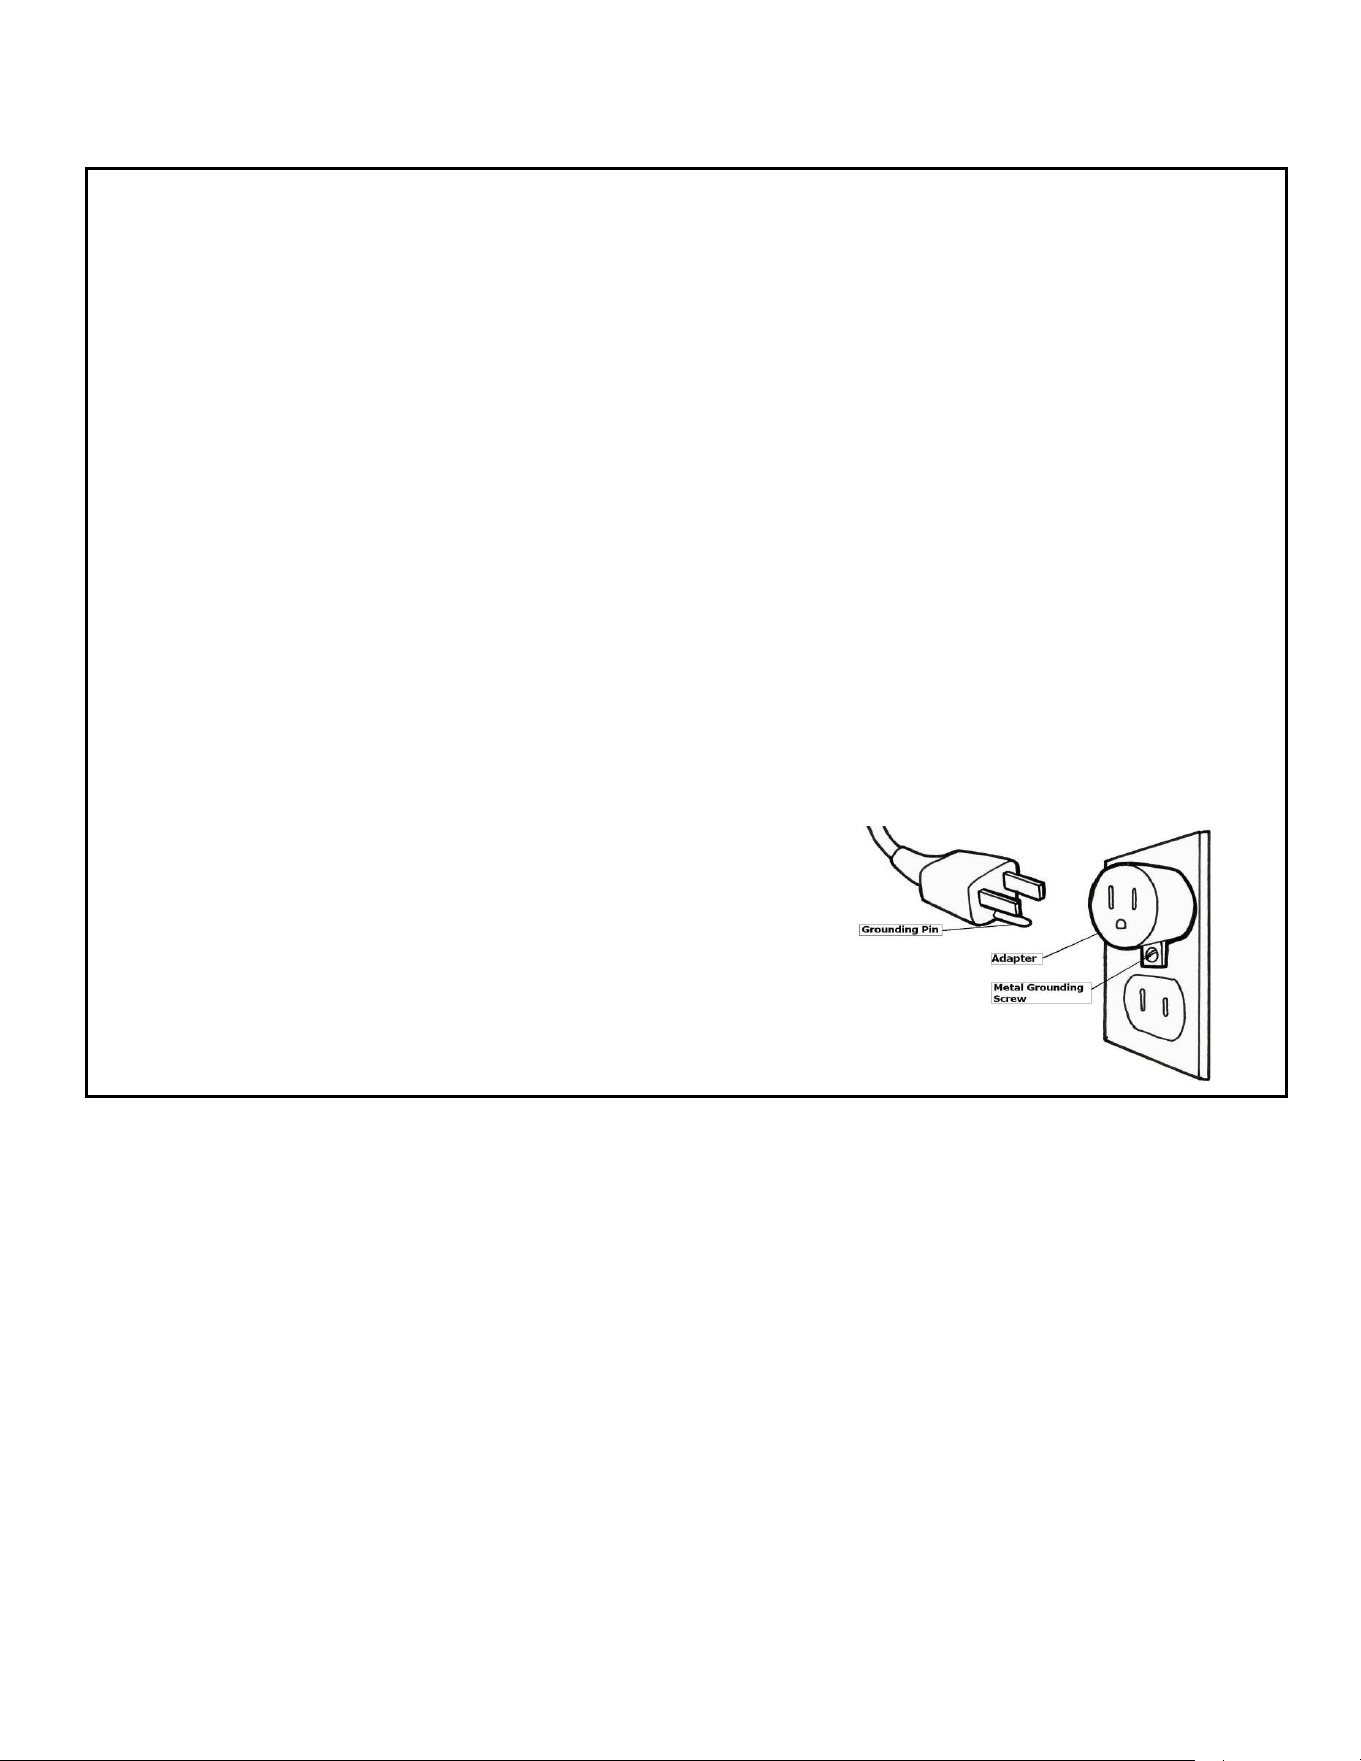
The power cord supplied with the heater has three
prongs: two flat blades (live and neutral) and one
round pin (ground). If a 3-slot receptacle is not
available, an adapter MUST be used. The adapter
MUST be properly grounded to the outlet box (see
figure at right). [NOTE: Adapter NOT INCLUDED.]
SAVE THESE INSTRUCTIONS!
2
Preparation
This product includes a GLASS panel! Always use e xtreme caution when handling
glass. Failure to do so could result in personal injury or property damage.
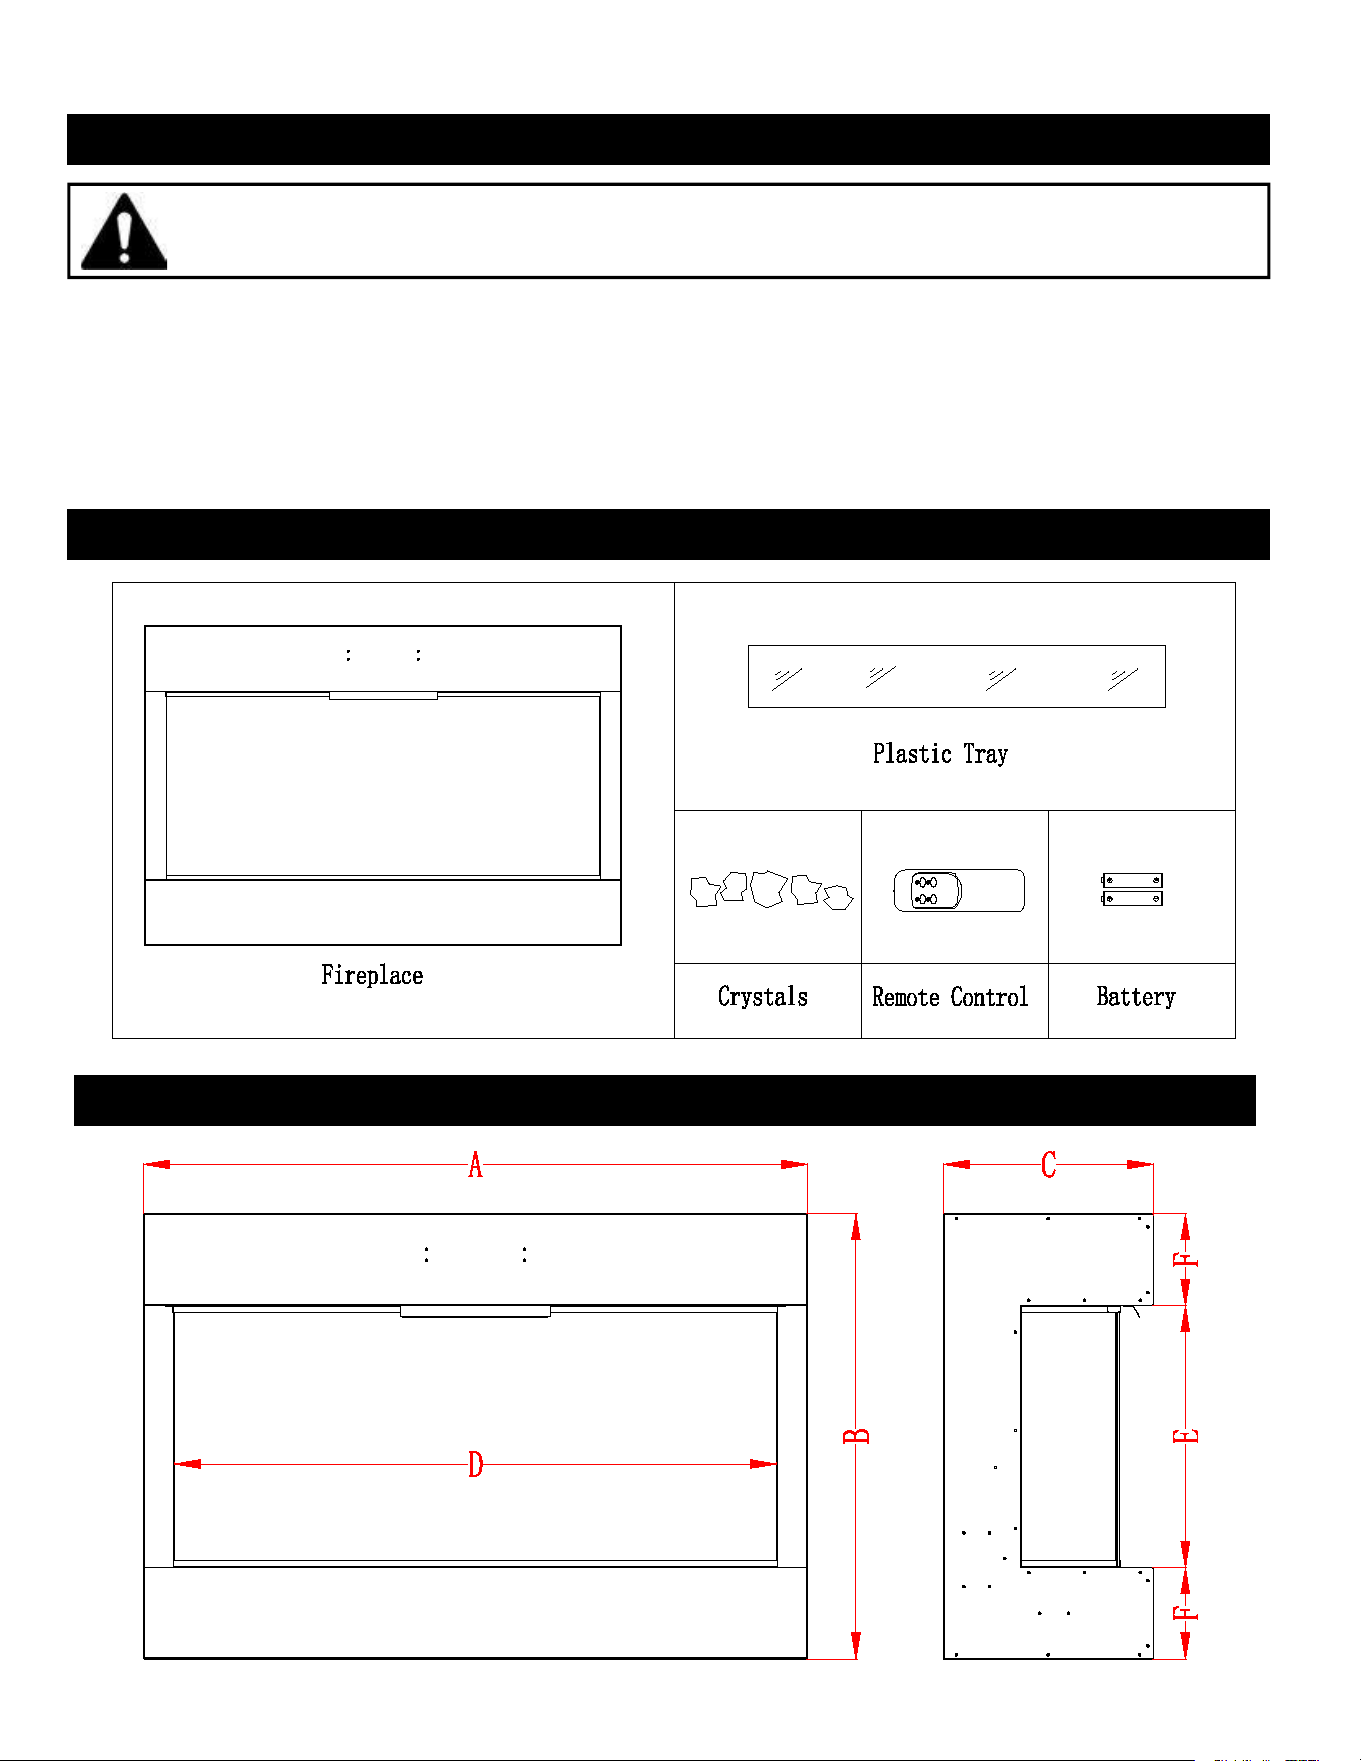
Remove all parts and hardware from the carton and place them onaclean, soft, dry surface. Parts and
assembly steps are grouped for wall-hanging or recessing use. Check the parts list to make sure
nothing is missing. Dispose of packaging materials properly. Please recycle wheneverpossible.
You will need the followi ng tools (not included): Ph illips screwd river; stud finder; level; tape measure;
electric drill; 1/4” wood drill bit, hammer.
Parts and Hardware
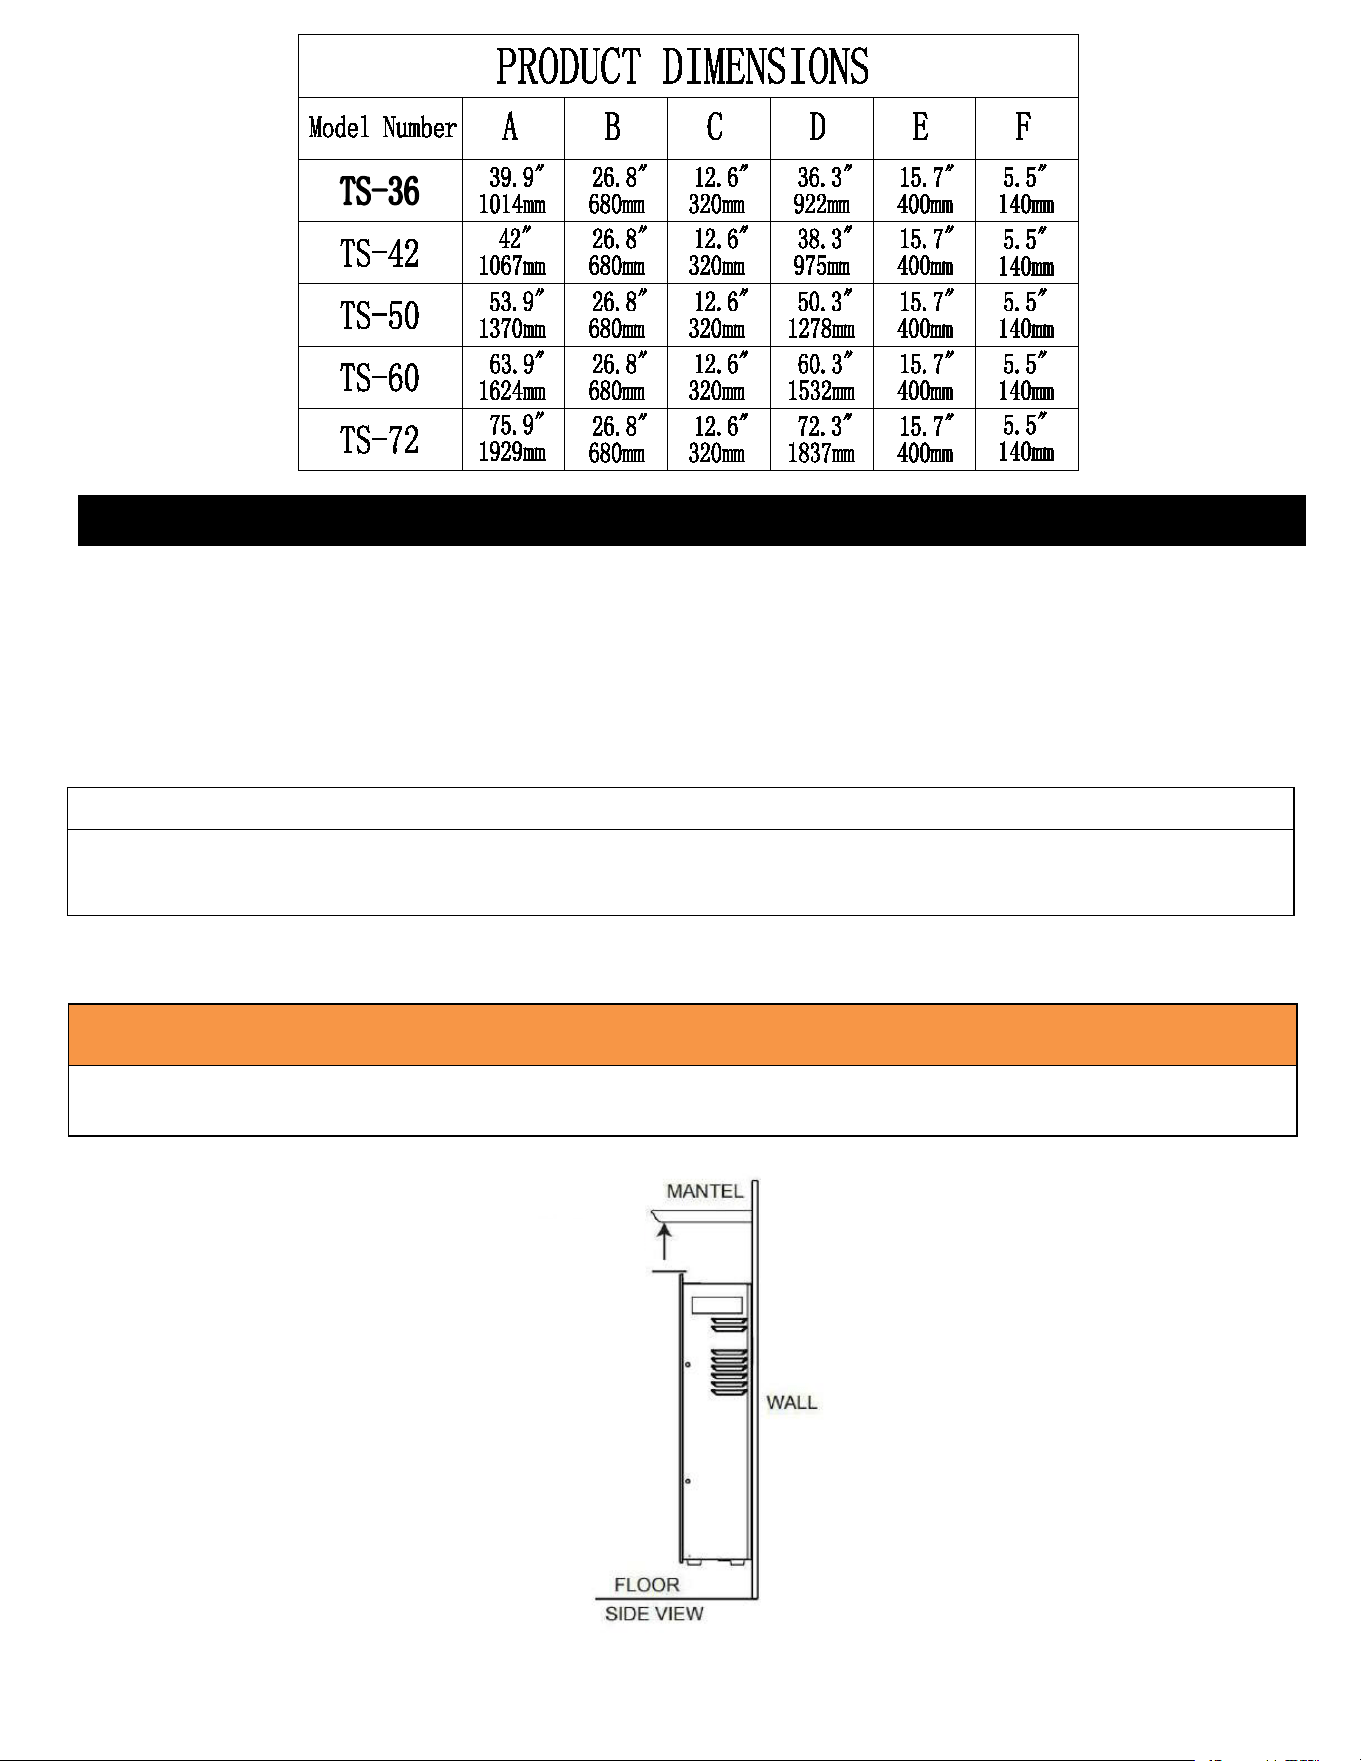
Specification and Dimension
Installation and Assembly
Your appliance is a wall-mounted, recessed and/or mantel installed appliance. Select a suitable
location that is
not susceptible to moisture and is away from drapes, furniture and high trafficareas.
NOTE: Follow all National and local electrical codes.
MINIMUM CLEARANCE TO COMBUSTIBLES
Measurements are taken from the glass front.
Bottom
0"
Top
0" to mantel
Sides
0"
Top
0" to ceiling
Back
0"
MINIMUM MANTEL CLEARANCES
WARNING
WHEN USING PAINT OR LACQUER TO FINISH THE MANTEL, THE PAINT OR LACQUER MUST BE
HEAT RESISTANT TO PR EVENT DISCOLOURATION.
0” (0 mm)
Recessed To Wall Installation
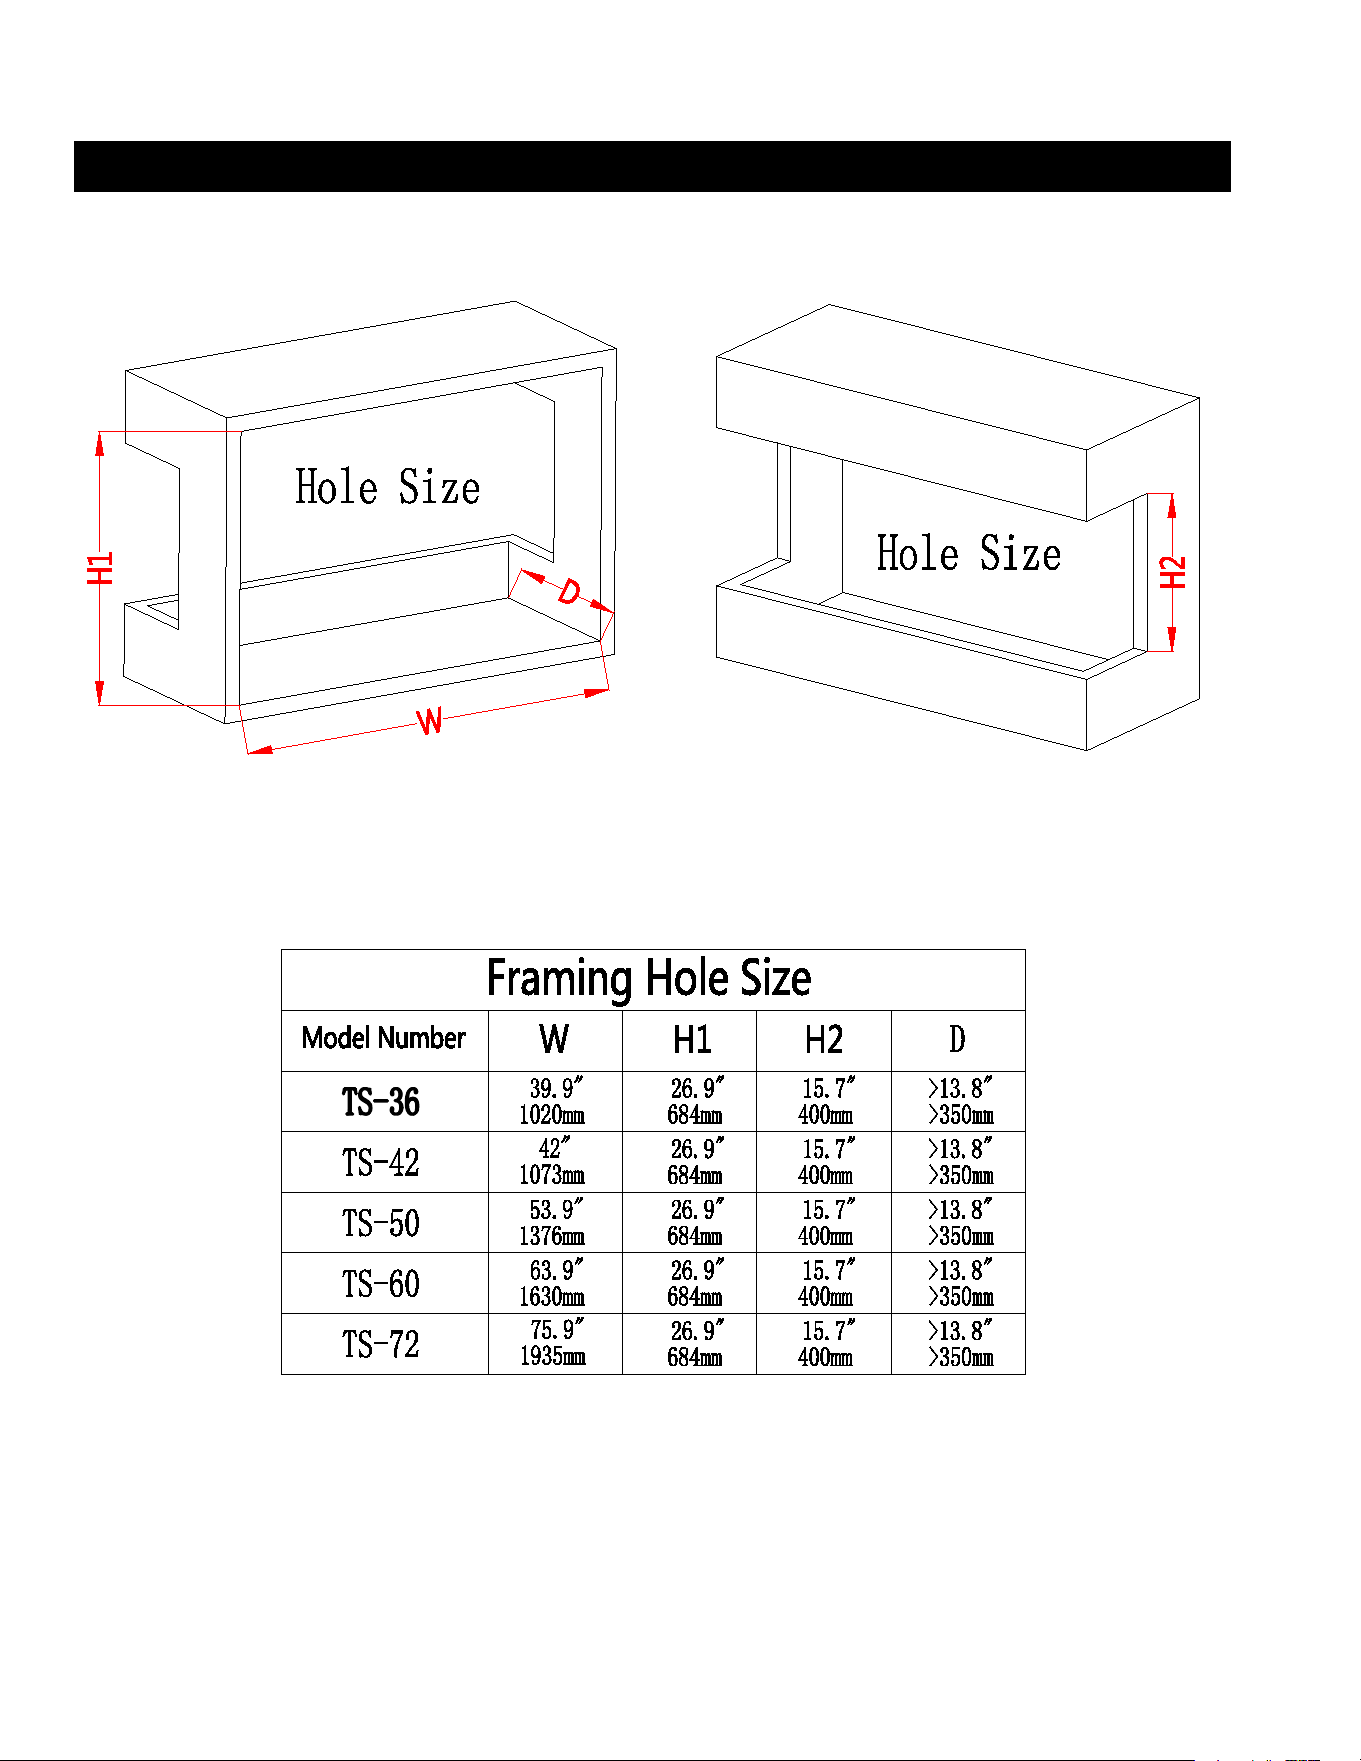
STEP A. Selection a dry wall to openahole for fireplace box. Size of hole as below chart
Figure ( A )
STEP B. Using the screw driver to take off the screws from the front Figure (B)
STEP C. Have two adult people to pull of the glass panel and take it out Figure (C)
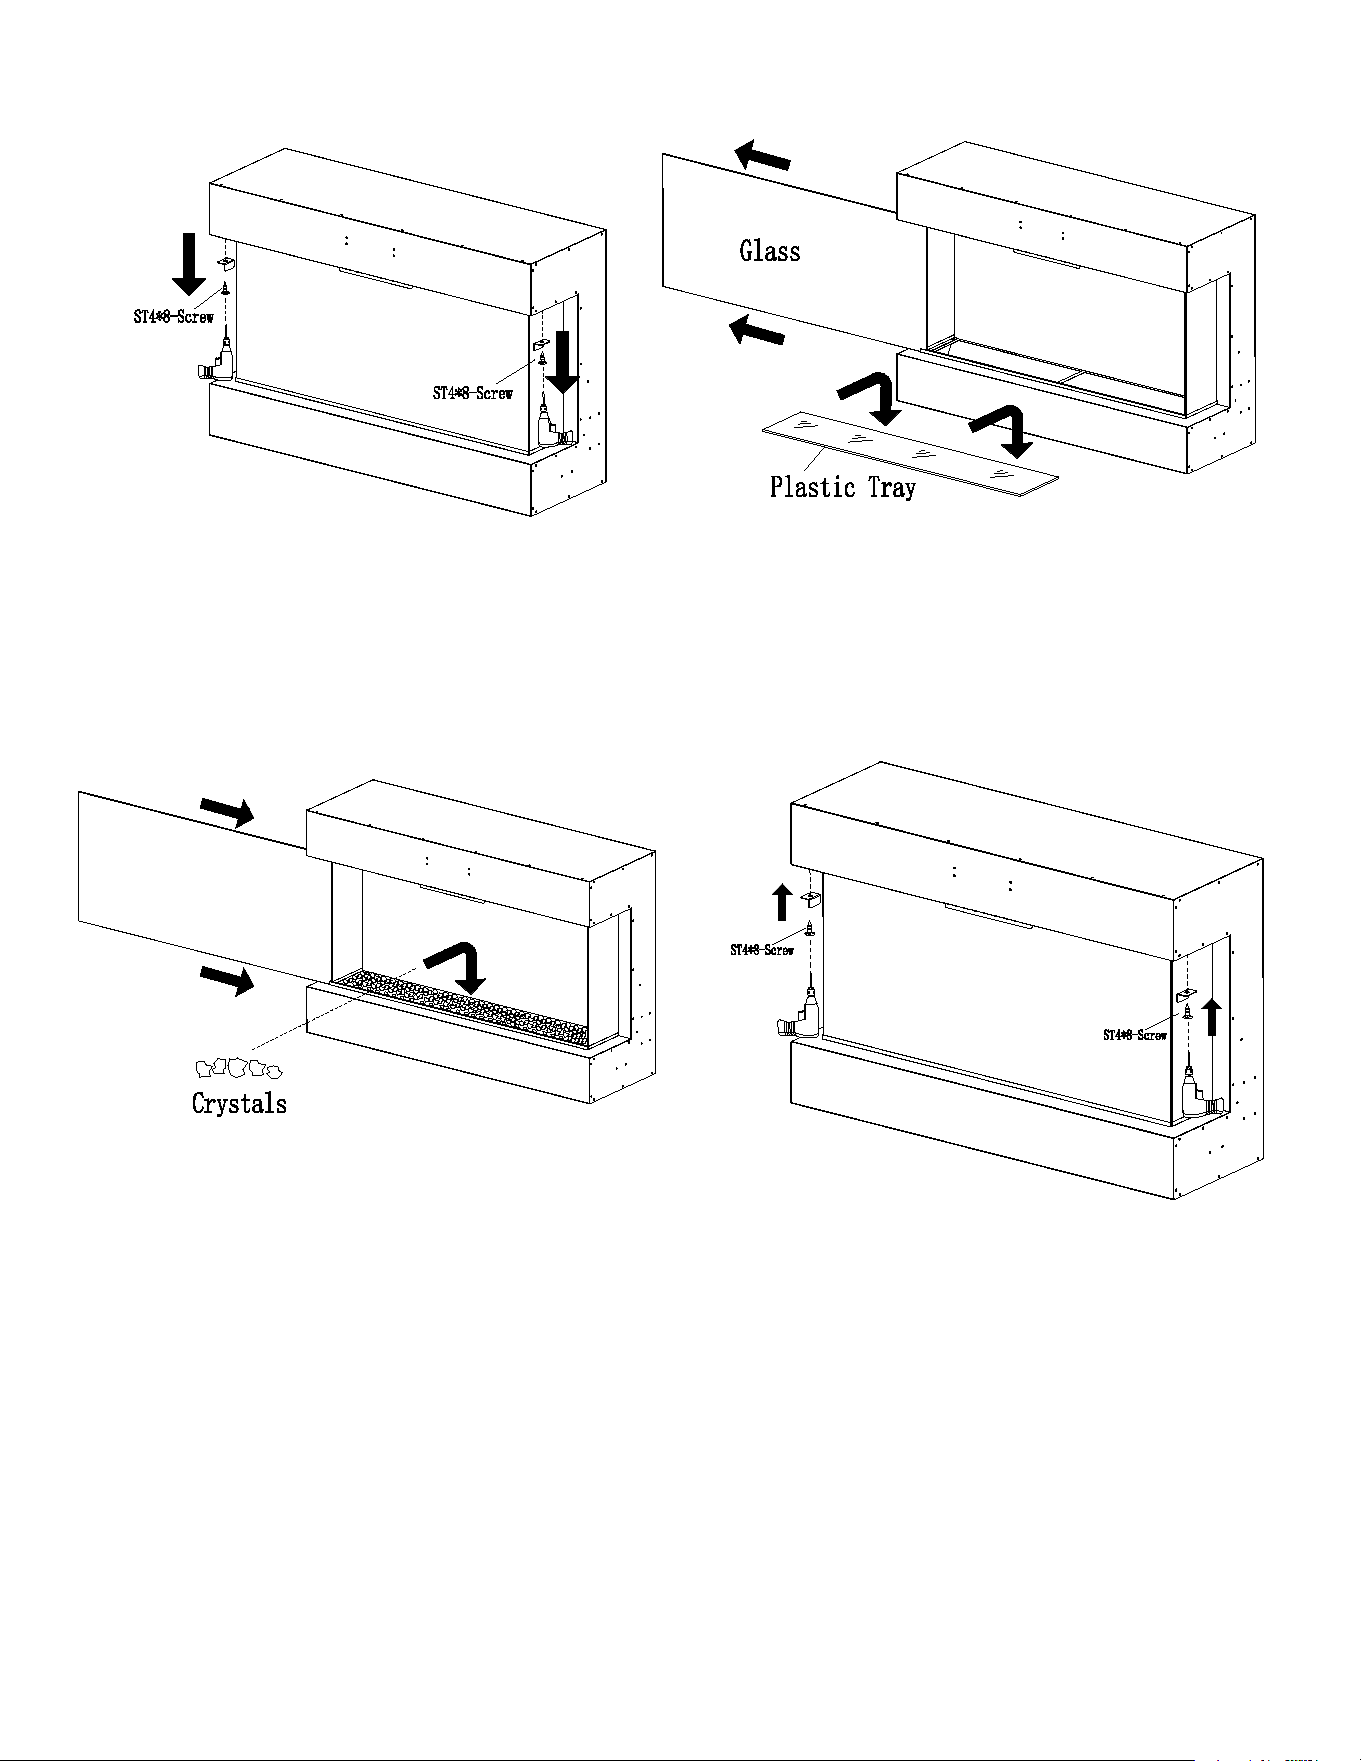
( B ) (C)
( D ) ( E )
STEP D. Fix the metal brackets to theTOP of the
fireplace box. Figure (D,E)
Installation
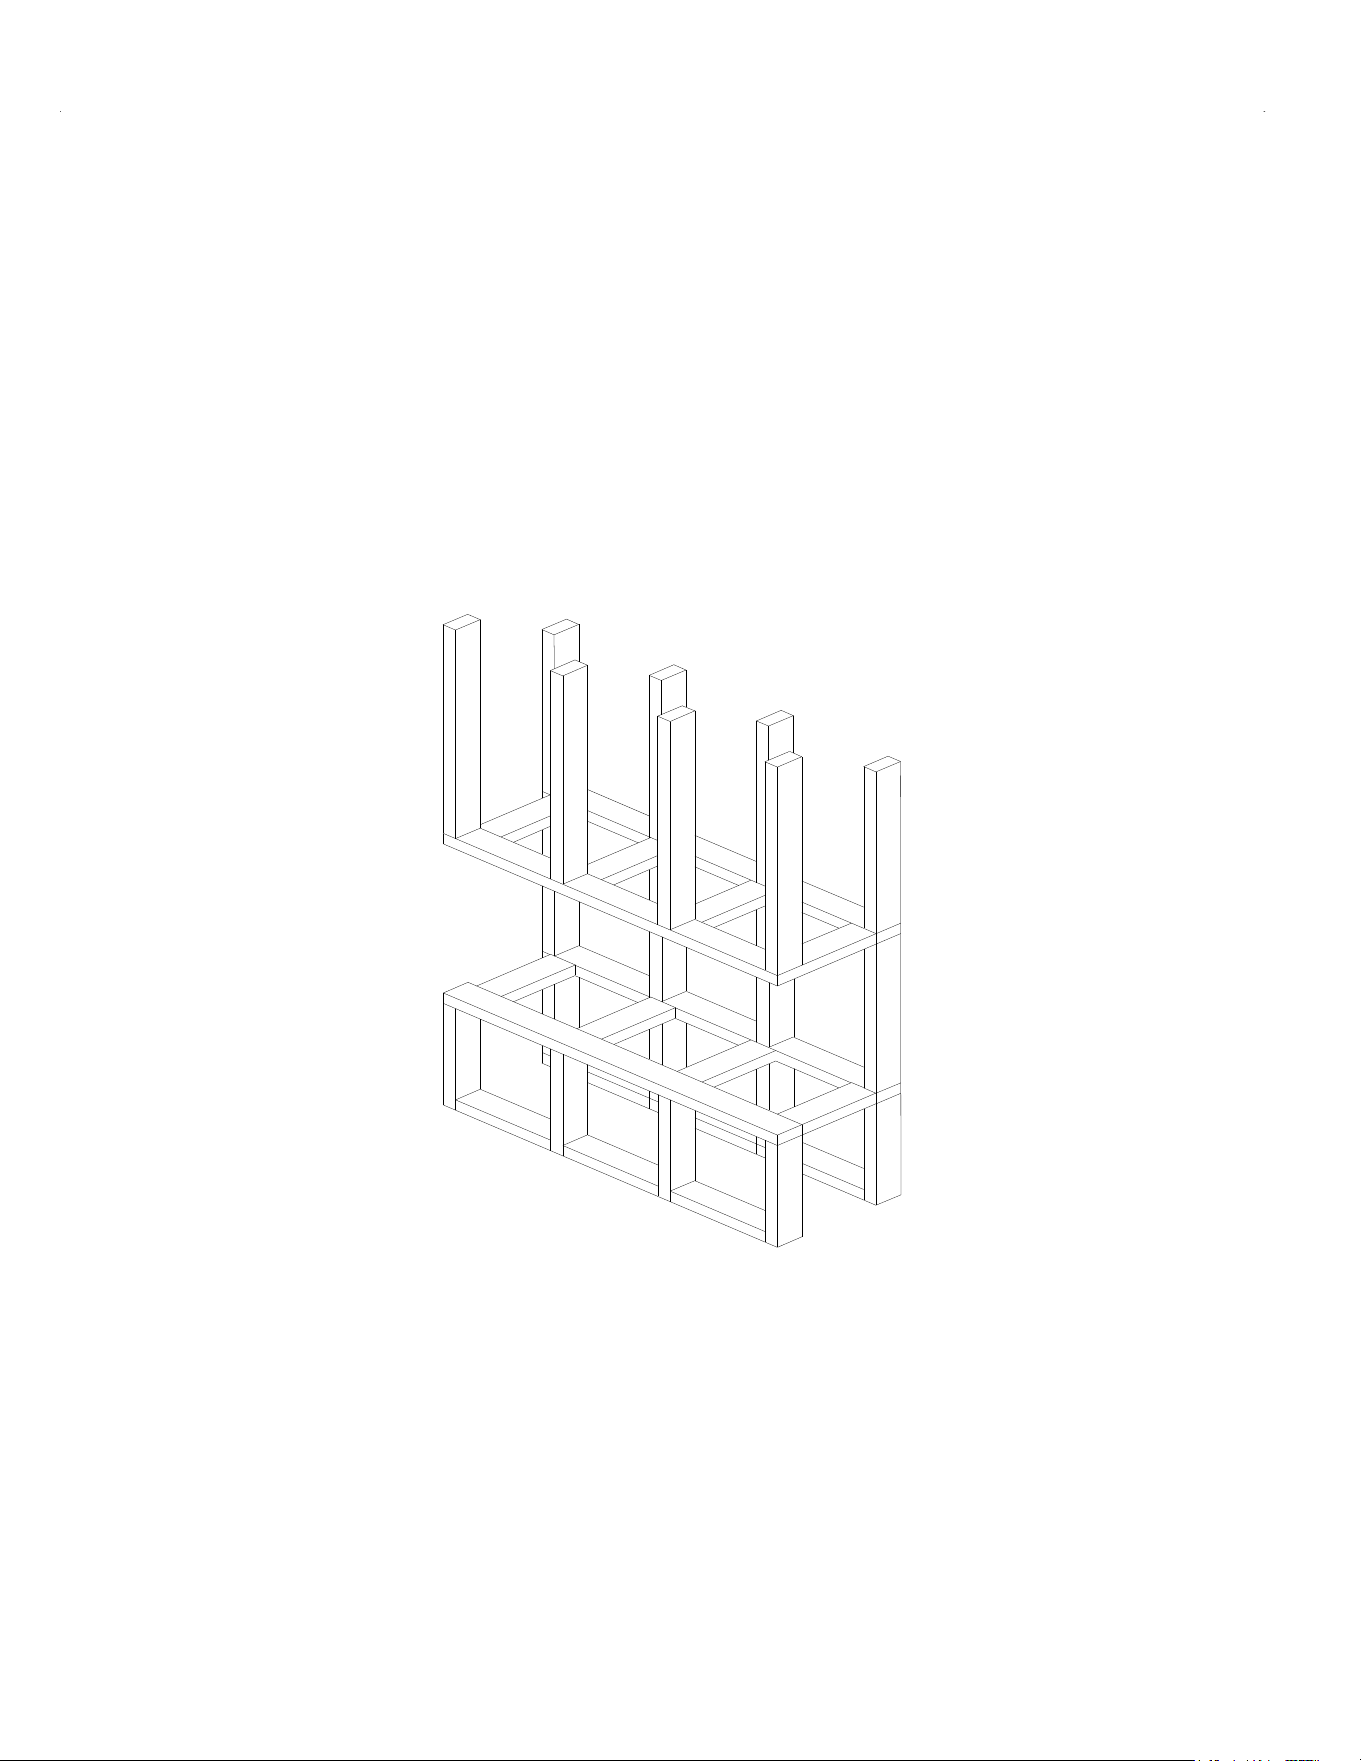
The three sided fireplace are designed to be built-in and allow for the finishing
material(drywall,stone,tile,ect) to be built right down to the glass edge.
Note:Due to the many different materials used on different walls,it is highly
recommended that you consult your local builder before you install this
appliance.
Make an opening for the fireplace according to requested measurement.
9
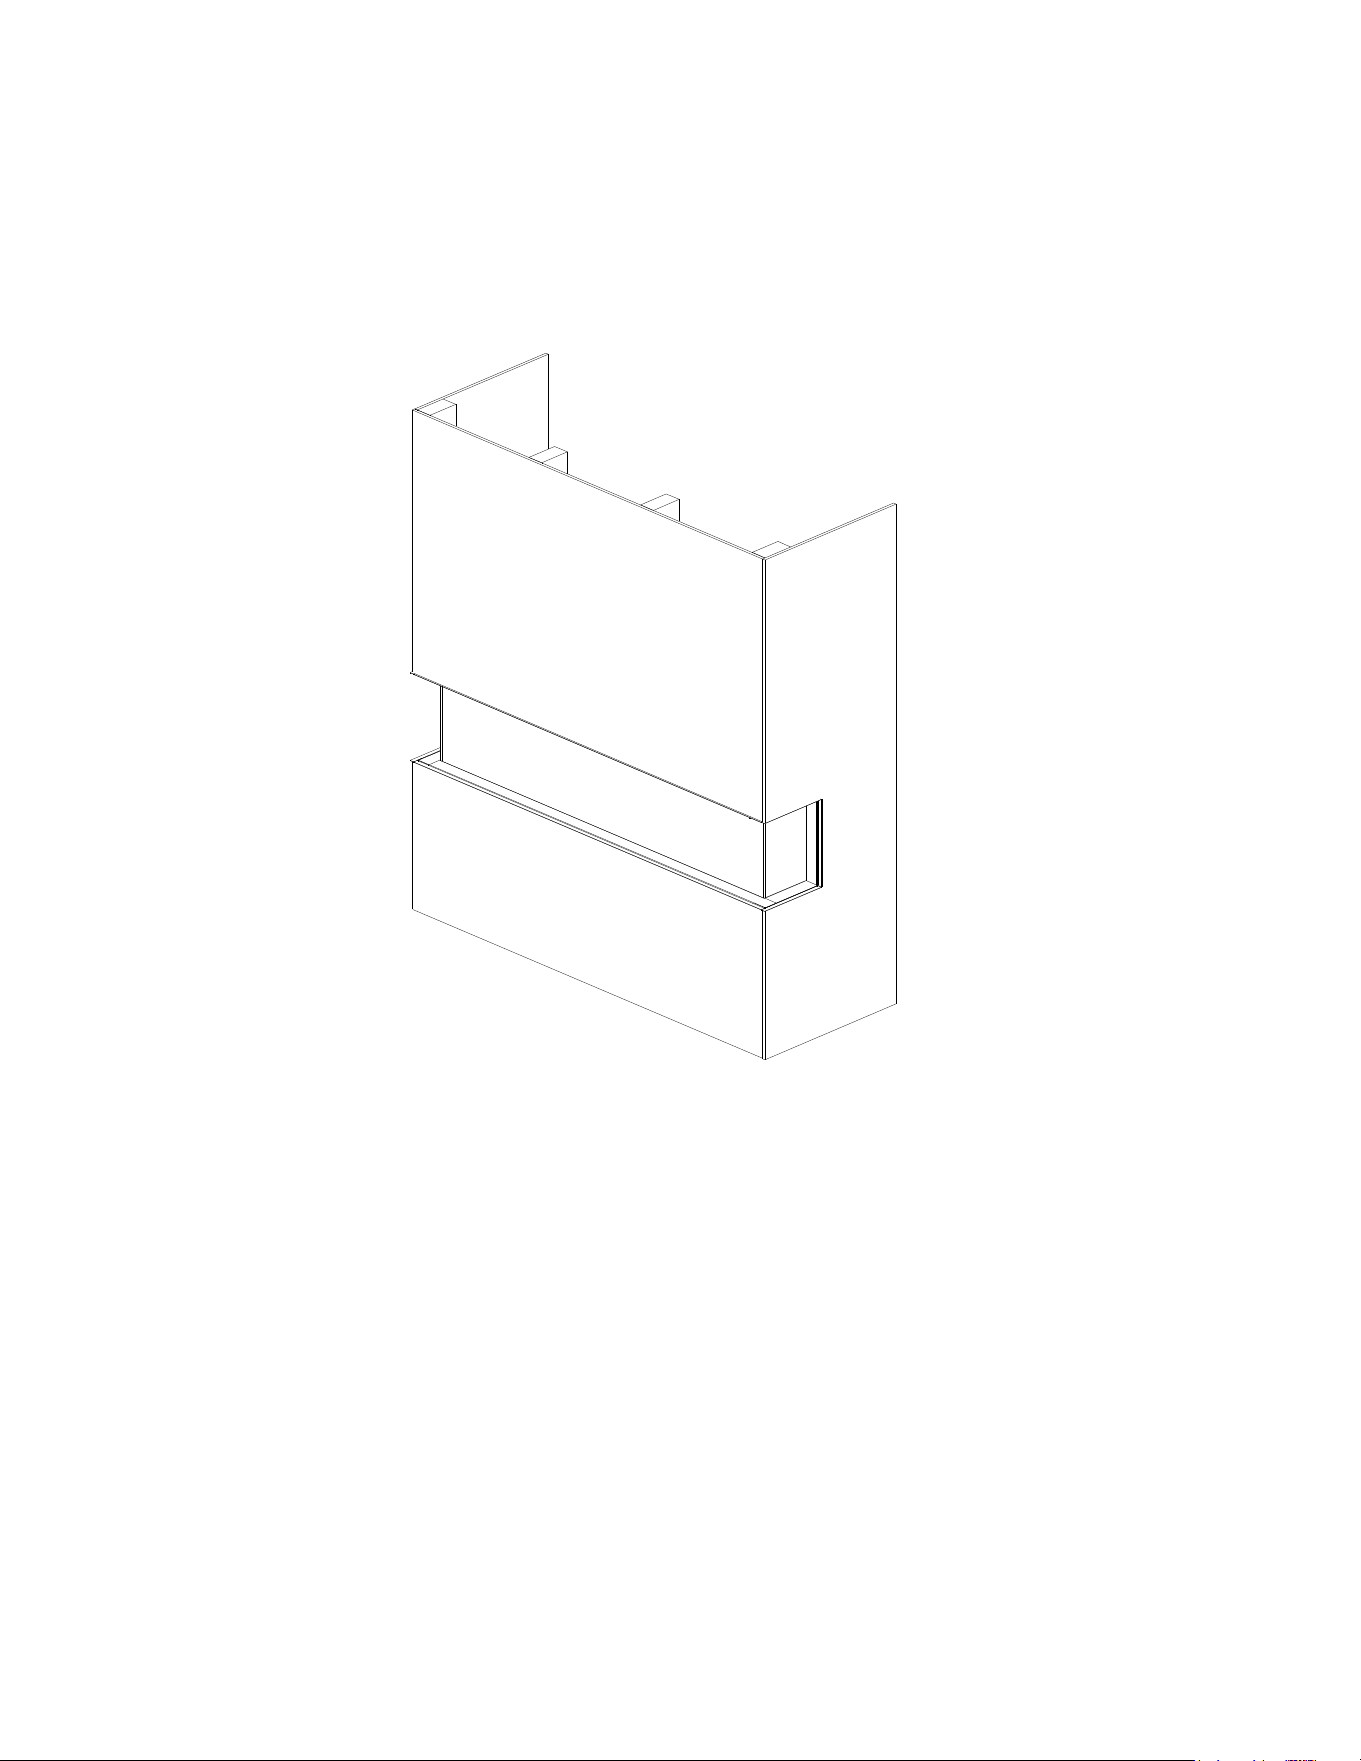
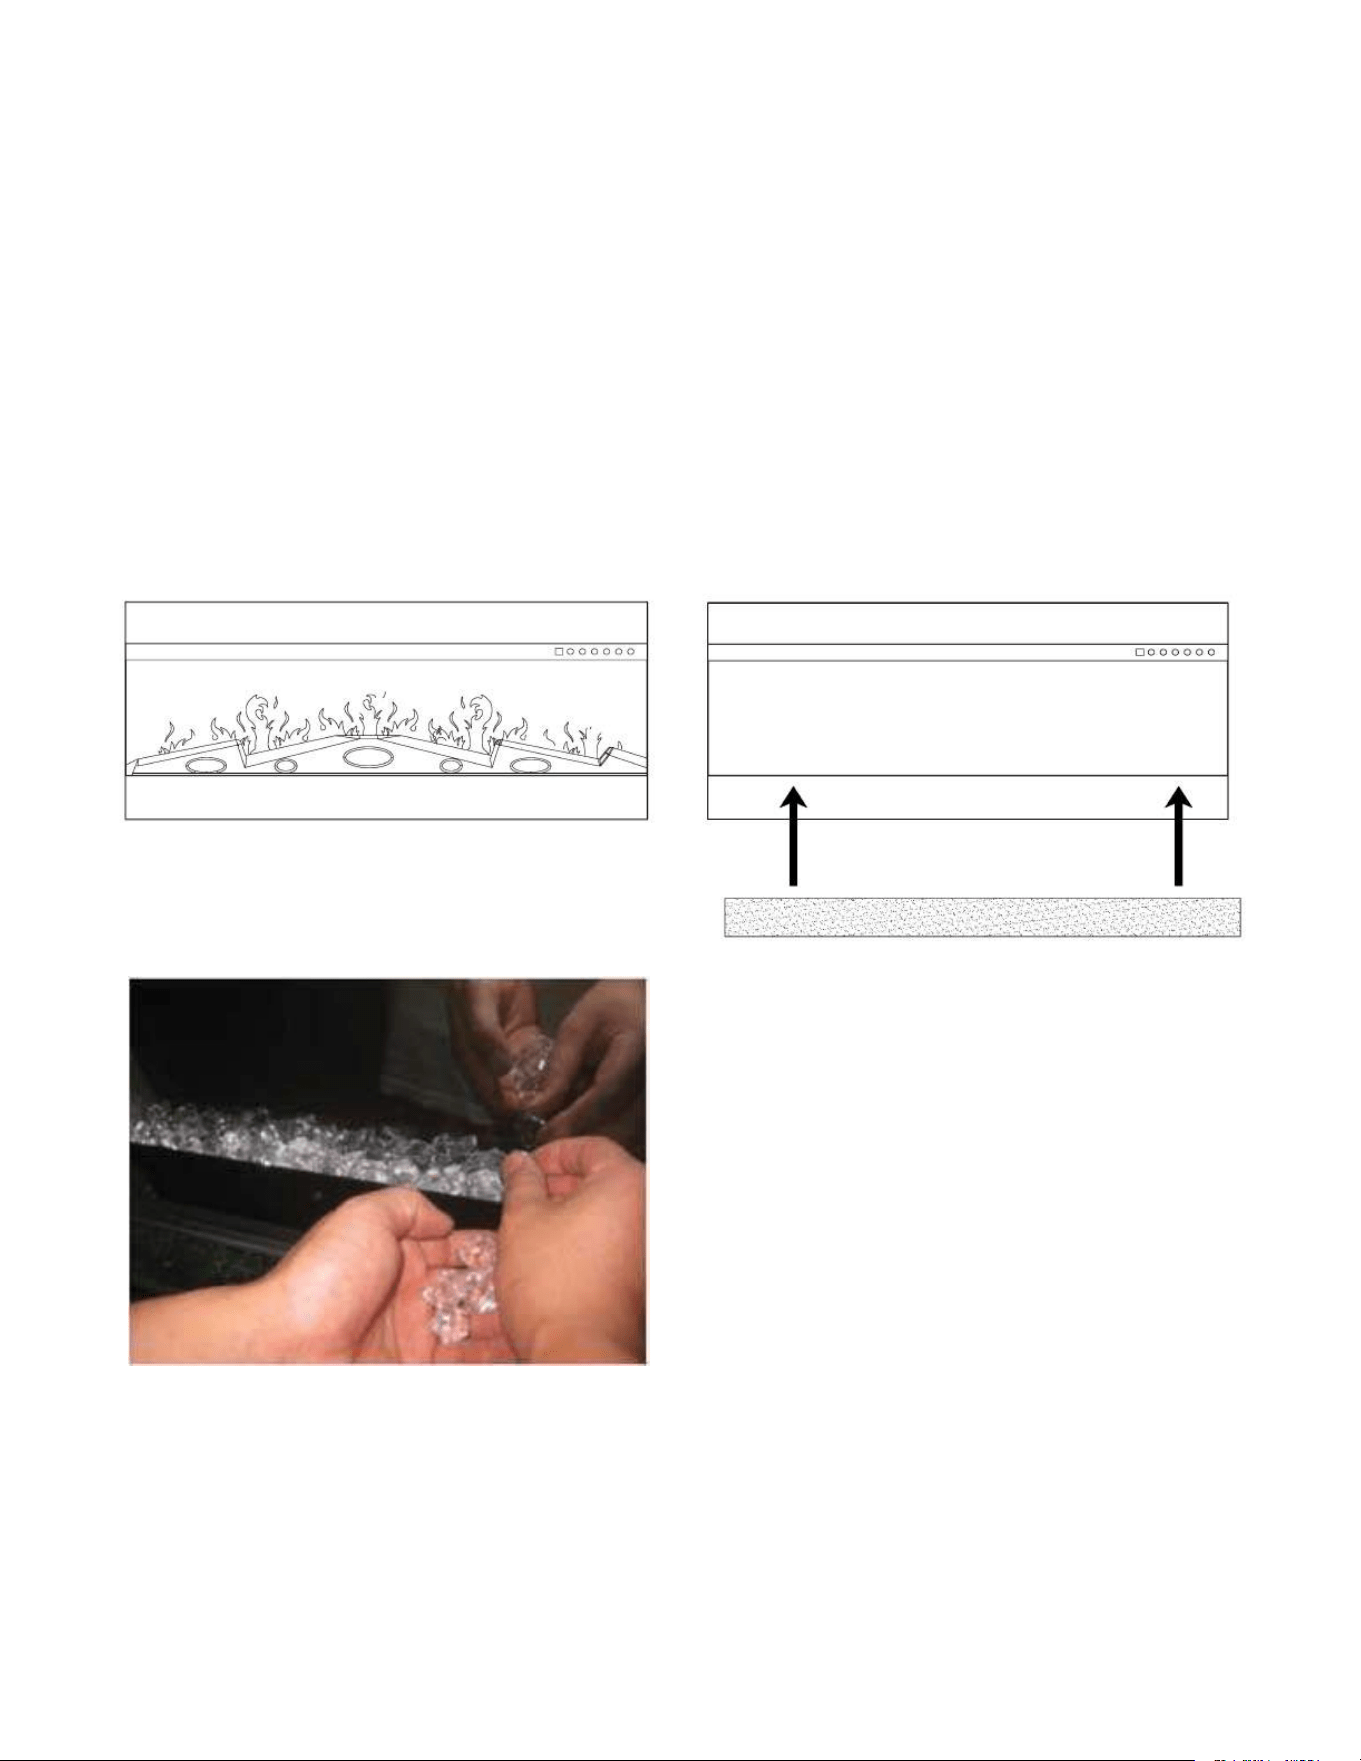
Insert the fireplace into the wall opening.Plug in and check if the fireplace
works.
10
Log-set / Crystal Ember Installation
(NOTE:Please make the installation according to the embers which you bought orselected.)
A.
Glass front must be removed and the appliance must be mounted in its final location
before the log-set / crystal /embers are installed.
B.
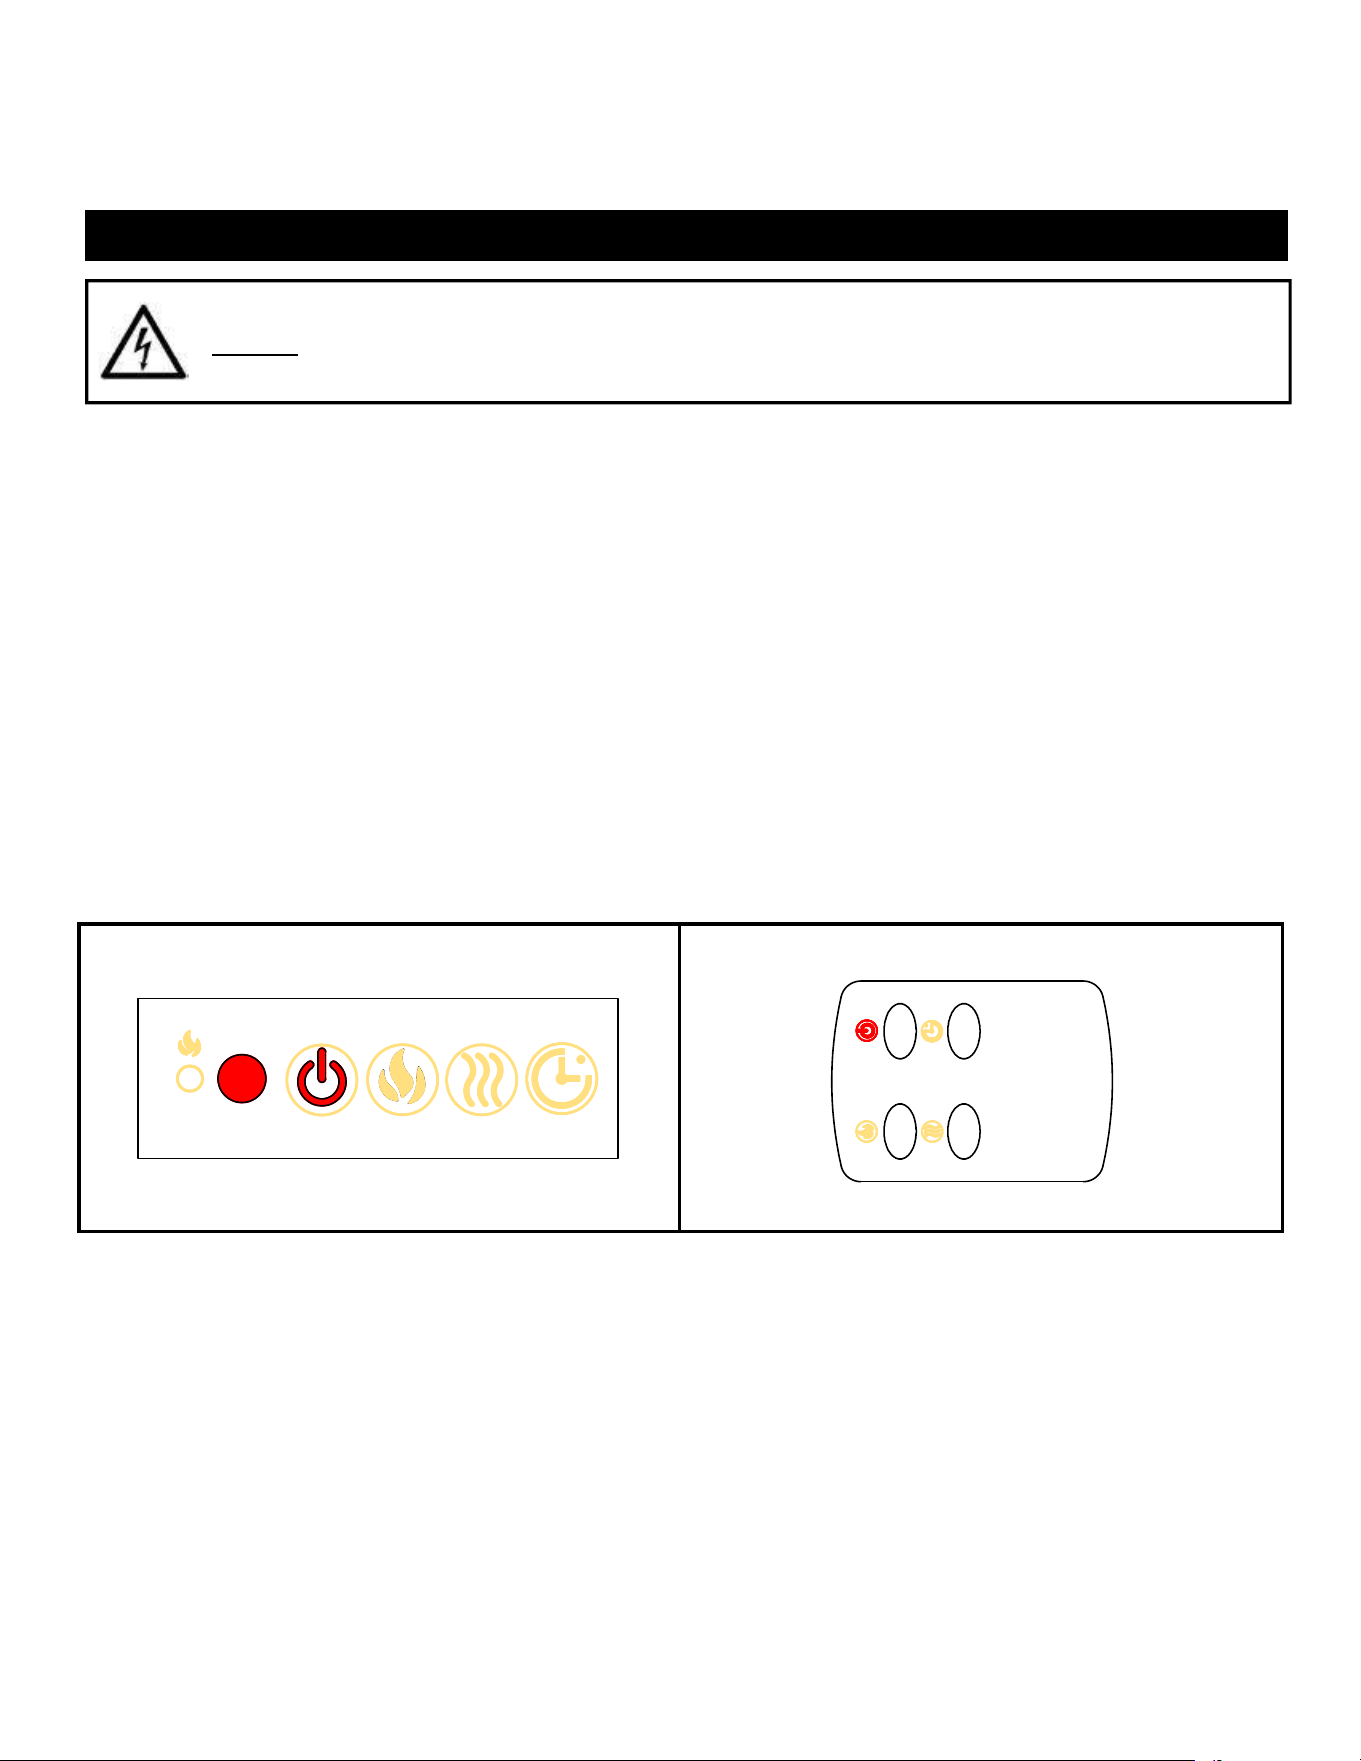
If your fireplace come with log-set, take the log-set out of the package and put it to the fireplace
media slot . Figure1.
C.
To switch to Crystals, firstly take the Log-set out of the fireplace slot, then Place the plastic tray
( J ) to the fireplace designed place.Then carefully place crystal embers into the plastic tray as
illustrated. Apply an even layer from side to side. Figure 2, Figure 3.
Figure 1
Figure 2
Figure 3. (Crystal medias)
Operation
Read and understand this entire owner’s manual, including all safety information
,
before plugging in or using this product. Failure to do so could result in electric shock
,
fire, serious injury, or death.
Power
Plug the power cord into a AC 110-120 Volt outlet (see IMPORTANT SAFETY INFORMATION on
Pages 2 and 3). Make sure the outlet is in good condition and that the plug is not loose. NEVER
exceed the maximum amperage for the circuit. DO NOT plug other appliances into the samecircuit.
Methods of Operation
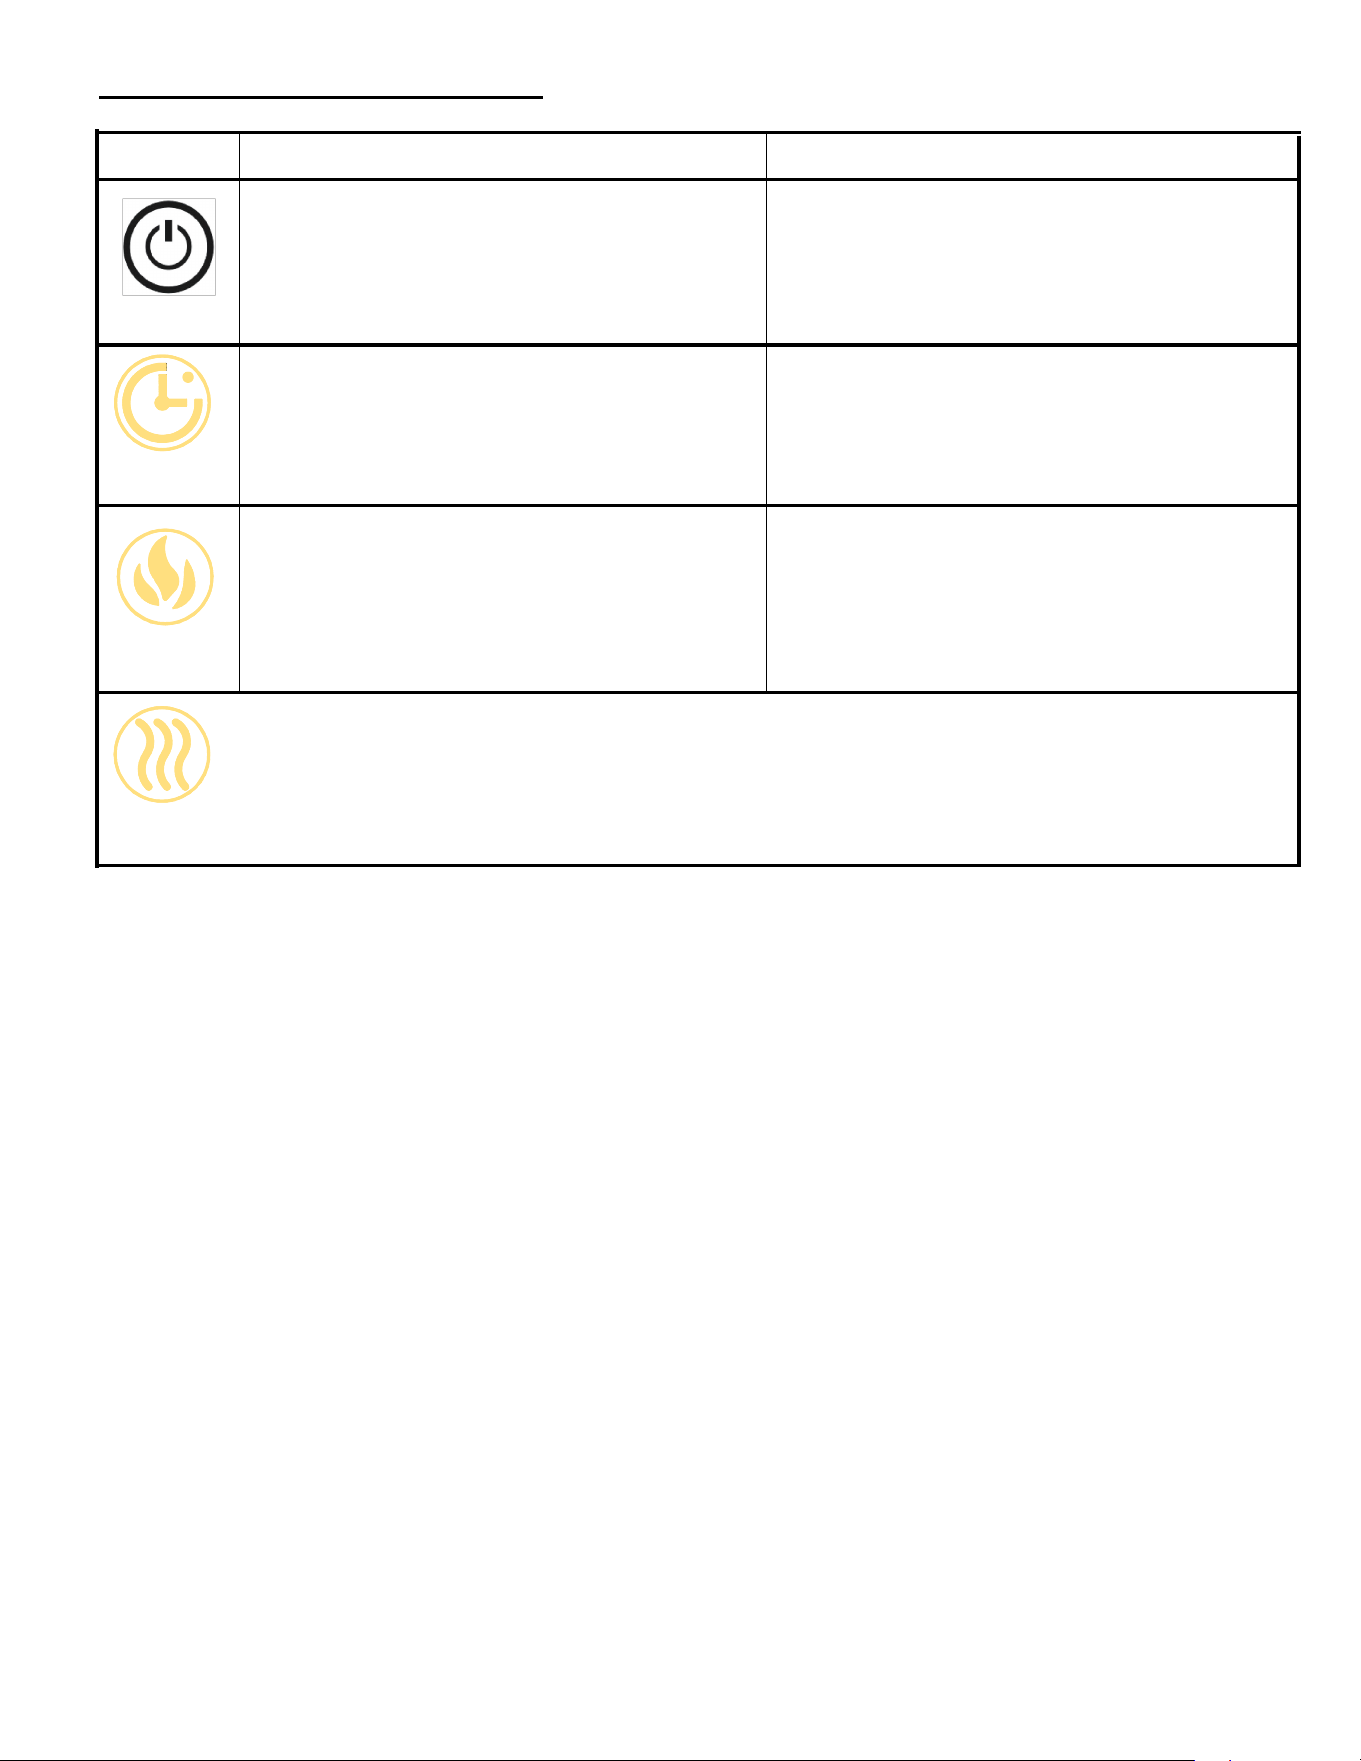
This electric fireplace can be operated by the CONTROL PANEL/TOUCH PANEL, or by the battery-
powered REMOTE CONTROL.
The operation and functions of the two methods are the same.
Before operating, plea
se review the IMPORTANT SAFETY INFORMATION on Pages 2 and 3, and
heed all warnings.
Remote Control Operation
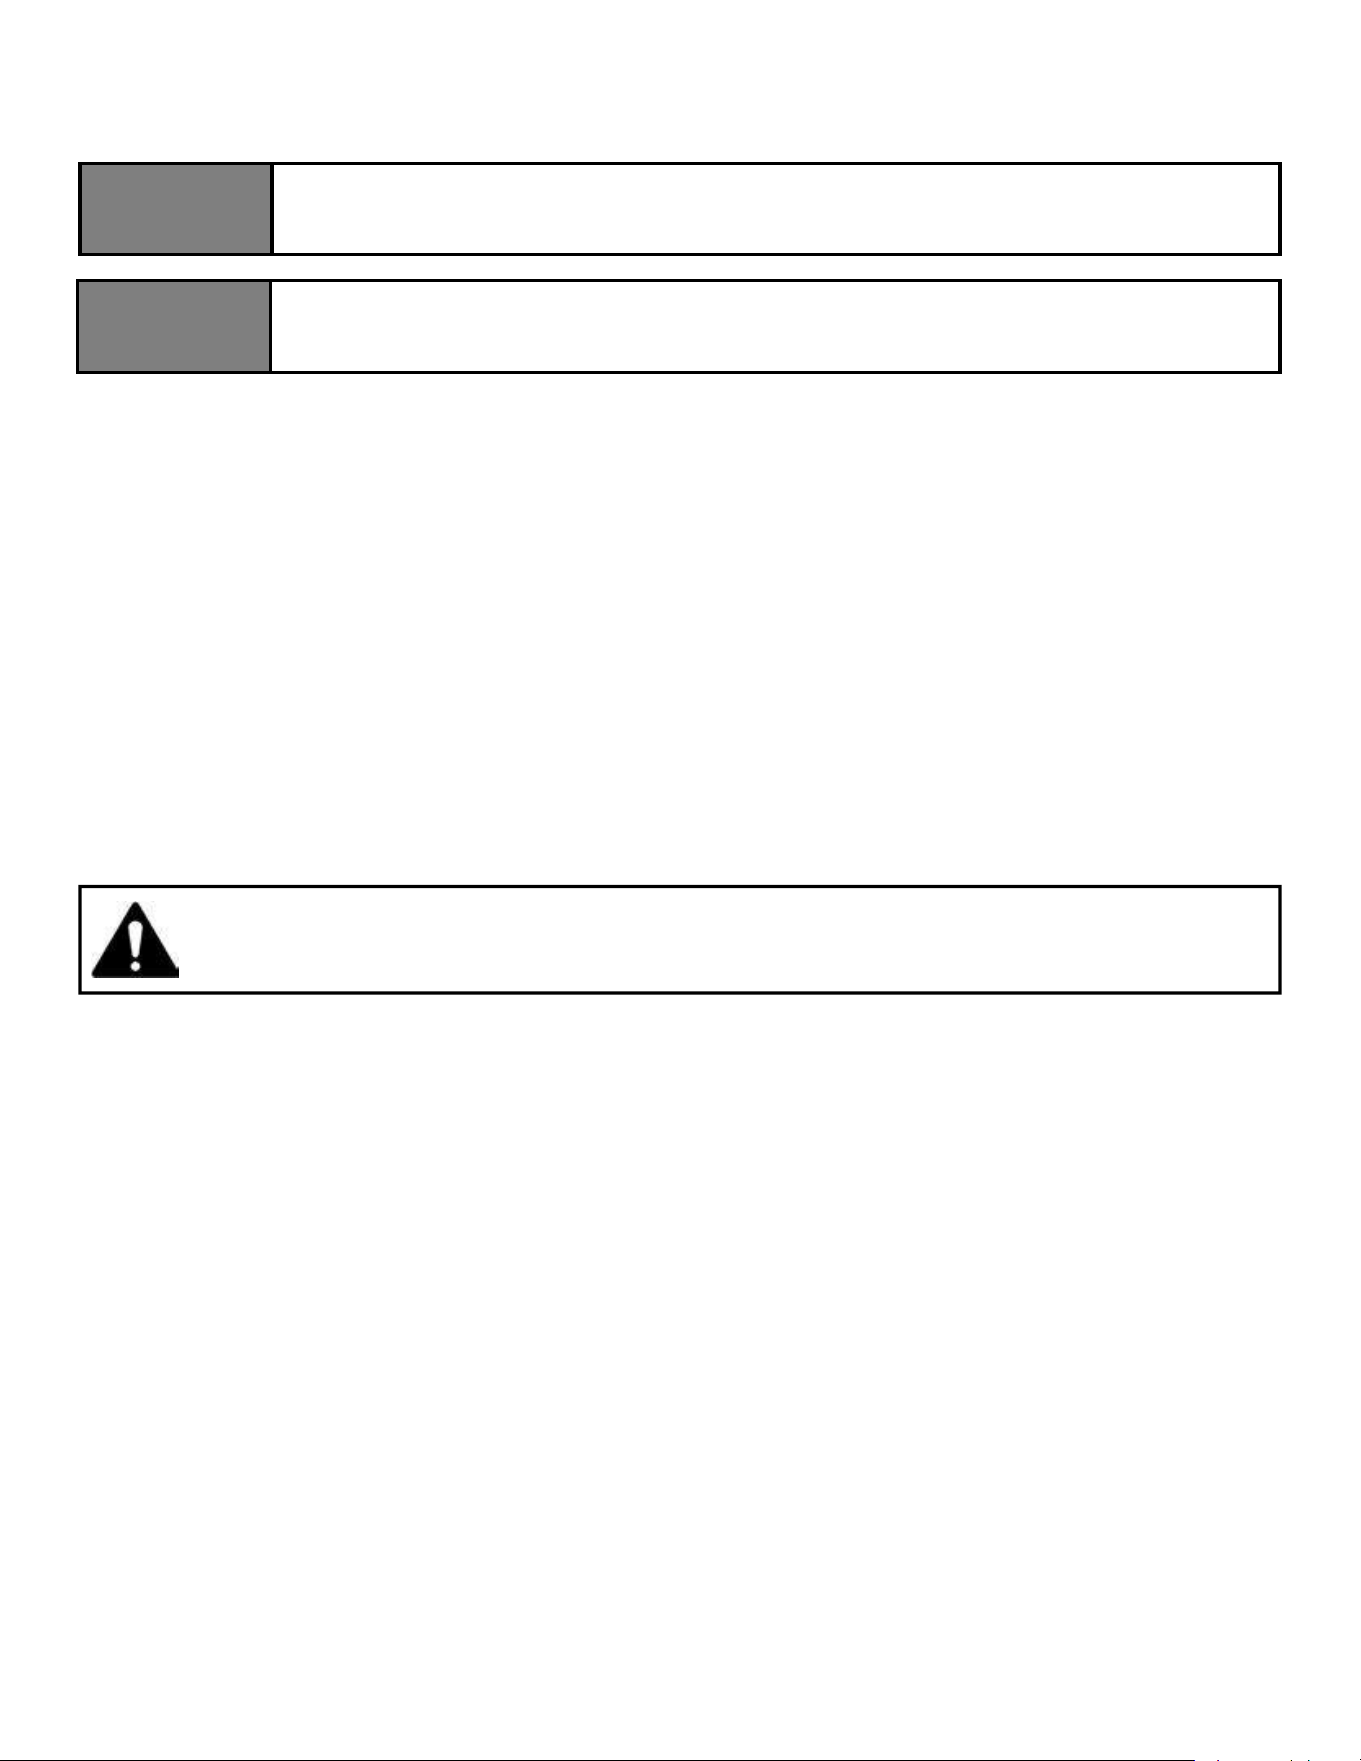
BUTTON FUNCTION ACTION&INDICATION
POWER
ON: Enables control panel functions and
remote control. Turns on flame effect.
OFF : Disables control panel functions and
remote control. Turns off flame effect.
1. Press once . Indicator light turns on.
Power turns on. All functions enabled.
2. Press again . Flame effect turns off. Unit
goes to standby. All functions turn off.
TIMER
TIMER button: Controls timer settings to
turn off fireplace at selected time.
Settings range from 1 hours to 9 hours.
1.
2.
Press once . Indicator light turns on.
Timer is set to 1 hours.
Press again until desired setting is
reached
. Indicator lights show setting.
FLAME
FLAME button : Makes flame effect
dimmer and brighter.
NOTE: Flame effect stays on until power
button is turned off. Flame effect must be
on for fireplace to turn on.
1. Press once . Flame brightness effect
gets changing.
2. Press again. until desired setting is
reached.
HEATER
HEATER button : Turns heater on and off.
NOTE: The heater only works when the flame effect is on. If the flame effect is off, the
heater will not turn on.
NOTE: To prevent overheating, the heater blows cool air for 10 se
conds
NOTICE
When the heater is first turned on, a slight odor may be present. This is normal and
should not occur again unless the heater is not used for a long period oftime.
NOTICE
To improve operation, aim the remote control at the front of the fireplace. DO NOT
press the buttons too quickly. Give the unit time to respond to each command.
Temperature Limiting Control
This heater is equipped with a Temperature Limiting Control. Should the heater reach an unsafe
temperature, the heater will automatically turn OFF. To reset:
1.
Unplug the power cord from the outlet.
2. Turn the ON/OFF switch on the CONTROL PANEL to OFF. Wait 5 minutes.
3.
Inspect the fireplace to make sure no vents are blocked, or clogged with dust or lint. If they are,
use a vacuum to clean the vent areas.
4.
With the POWER switch in the OFF position, plug the power cord back into the outlet.
5.
If the problem continues, have your outlet and wiring inspected by aprofessional.
Remote Control Battery Information
This remote control uses 2 AAA batteries.
NEVER dispose of battery in fire. Failure to observe this precaution may result in an
explosion. Dispose of batteries at your local hazardous material processingcenter.
Care and Maintenance
Cleaning
ALWAYS turn the heater OFF and unplug the power cord from the outlet befor
e
cleaning, performing maintenance, or moving this fireplace. Failure to do so could result i
n
electric shock, fire, or personal injury.
NEVER immerse in water or spray with water. Doing so could result in electric s hock,
fire, or personal injury.
Metal:
◻
Buff using a soft cloth, slightly dampened with a citrus oil-based product.
◻
DO NOT use brass polish or household cleaners as t hese p roducts will damage the metal trim.
Glass:
◻
Use a good quality glass cleaner sprayed onto the cloth or towel. Dry thoroughly with a paper
towel or lint-free cloth.
◻
NEVER use abrasive cleansers, liquid sprays, or any cleaner that could scratch the surface.
Vents:
◻
Use a vacuum or duster to remove dust and dirt from the heater and vent areas.
Plastic:
◻
Wipe gently with a slightly damp cloth andamild solu tion of dish soap and warm wa ter.
◻
NEVER use abrasive cleansers, liquid sprays, or any cleaner that could scratch the surface.
Maintenance
Risk of electric shock! DO NOT OPEN any panels ! No user-serviceable parts
inside!
ALWAYS turn the heater OFF and unplug the power cord from the outlet befor
e
cleaning, performing maintenance, or moving this fireplace. Failure to do so could result i
n
electric shock, fire, or personal injury.
Electrical and Moving Parts:
◻
The fan motors are lubricated at the factory and will not require lubrication.
◻
Electrical components are integrated in the fireplace and are not serviceable by the consumer.
Storage:
◻
Store heater in a clean dry pla ce when not in use.
WARNING! NO SERVICING of the internal or e le ctrical parts should be performed by the
consumer. Do not service the unit yourself.
Troubleshooting
DISCONNECTED THE APPLIANCE COMPLETELY AND LET COOL PRIOR TO ANY SERVICE.
ONLY A QUALIFIED SERVICE PERSON SHOULD SERVICE AND REPAIR THIS ELECTRIC APPLIANCE.
!
WARNING
Problem Possible Cause Solution
1.
Fireplace turns off 1. Fireplace has overheated
1. Reset switch by turning main
and will not turn on.
and safety devise has caused
thermal switch to disconnect
or home circuit breaker has
opened.
power switch off and waiting 10
minutes then turni ng it back on
or reset circuit breaker.
2.
Flame is not moving. 1. Loose wiring.
2.
Flame motor defective.
3.
Flame rod out of place
.
1.
Inspect wiring for loose con-
nections.
2.
Call a qualified service techni-
cian to replace flame motor.
3."Flame Rod" out of place due to
rough
transit/handling
of
the
product. This is sue can be
corrected as simple as rem oving
the glass, flipping the fireplace
upside down, removingaset of
screws
that
are
holding the
bottom frame plate and placing
the flame rod back into place.
3.
Flame is not visible. 1. Wiring is loose.
1. Disconnect from power source
and inspect wiring for loose
connections and repair or
replace if necessary.
2.Push the flame button to high
4.
Log set and/or is not
glowing.
5.
Remote control
does not work.
6.
Fireplace will not
come on when
switch is flipped to
ON.
1.Wiring is loose.
2.Ember is in off mode
1.
Low batteries.
2.
Not aiming control correctly.
3.
Defective remote control and
/or sensor.
1.
Fireplace is not plugged in to
an electrical outlet.
2.
Control failure.
3.
Breaker tripped.
1.
Disconnect from power source
and inspect wiring for loose
connections and repair or replace
if necessary.
2.
Push the ember button is high
1.
Replace batteries in
remote con trol.
2.
Aim control at sensor located
directly behind glass screen in
center of unit just above lo gs.
3.
Replace remote control and/or
sensor.
1.
Check plug.
2.
Call a qualified service techni-
cian.
3.
Reset breaker.

7.
Heater does not
provide heat when
turned on.
1.
Thermal switch has been
tripped.
2.
Wiring is loose.
3.
Heater is defective.
1.
Turn unit off and unplug unit
for 10 minutes. Plug back in and
turn unit on. If plug cannot be
reached, follow directions for
tripped circuit breaker.
2.
Disconnect from power source
and inspect wiring for loose
connections and repair or
replace if necessary.
3.
Replace heater.
CAUTION:To remove the glass, you will notice two screws on front both sides (right and left) of the
fireplace. Once the screws are removed, slide the glass up and away from the fireplace. Once the
bottom frame plate is removed, you will notice one flame motor on right side where the rod should be
in place with the rubber plugs.
Please remember to always have the unit disconnected prior to any work, always lay glass as well
as the unit on a towel or other material not to damage parts/frame.
This entire proc
ess
should not take longer than 20-30 minutes.