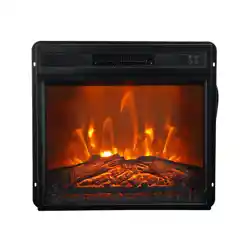
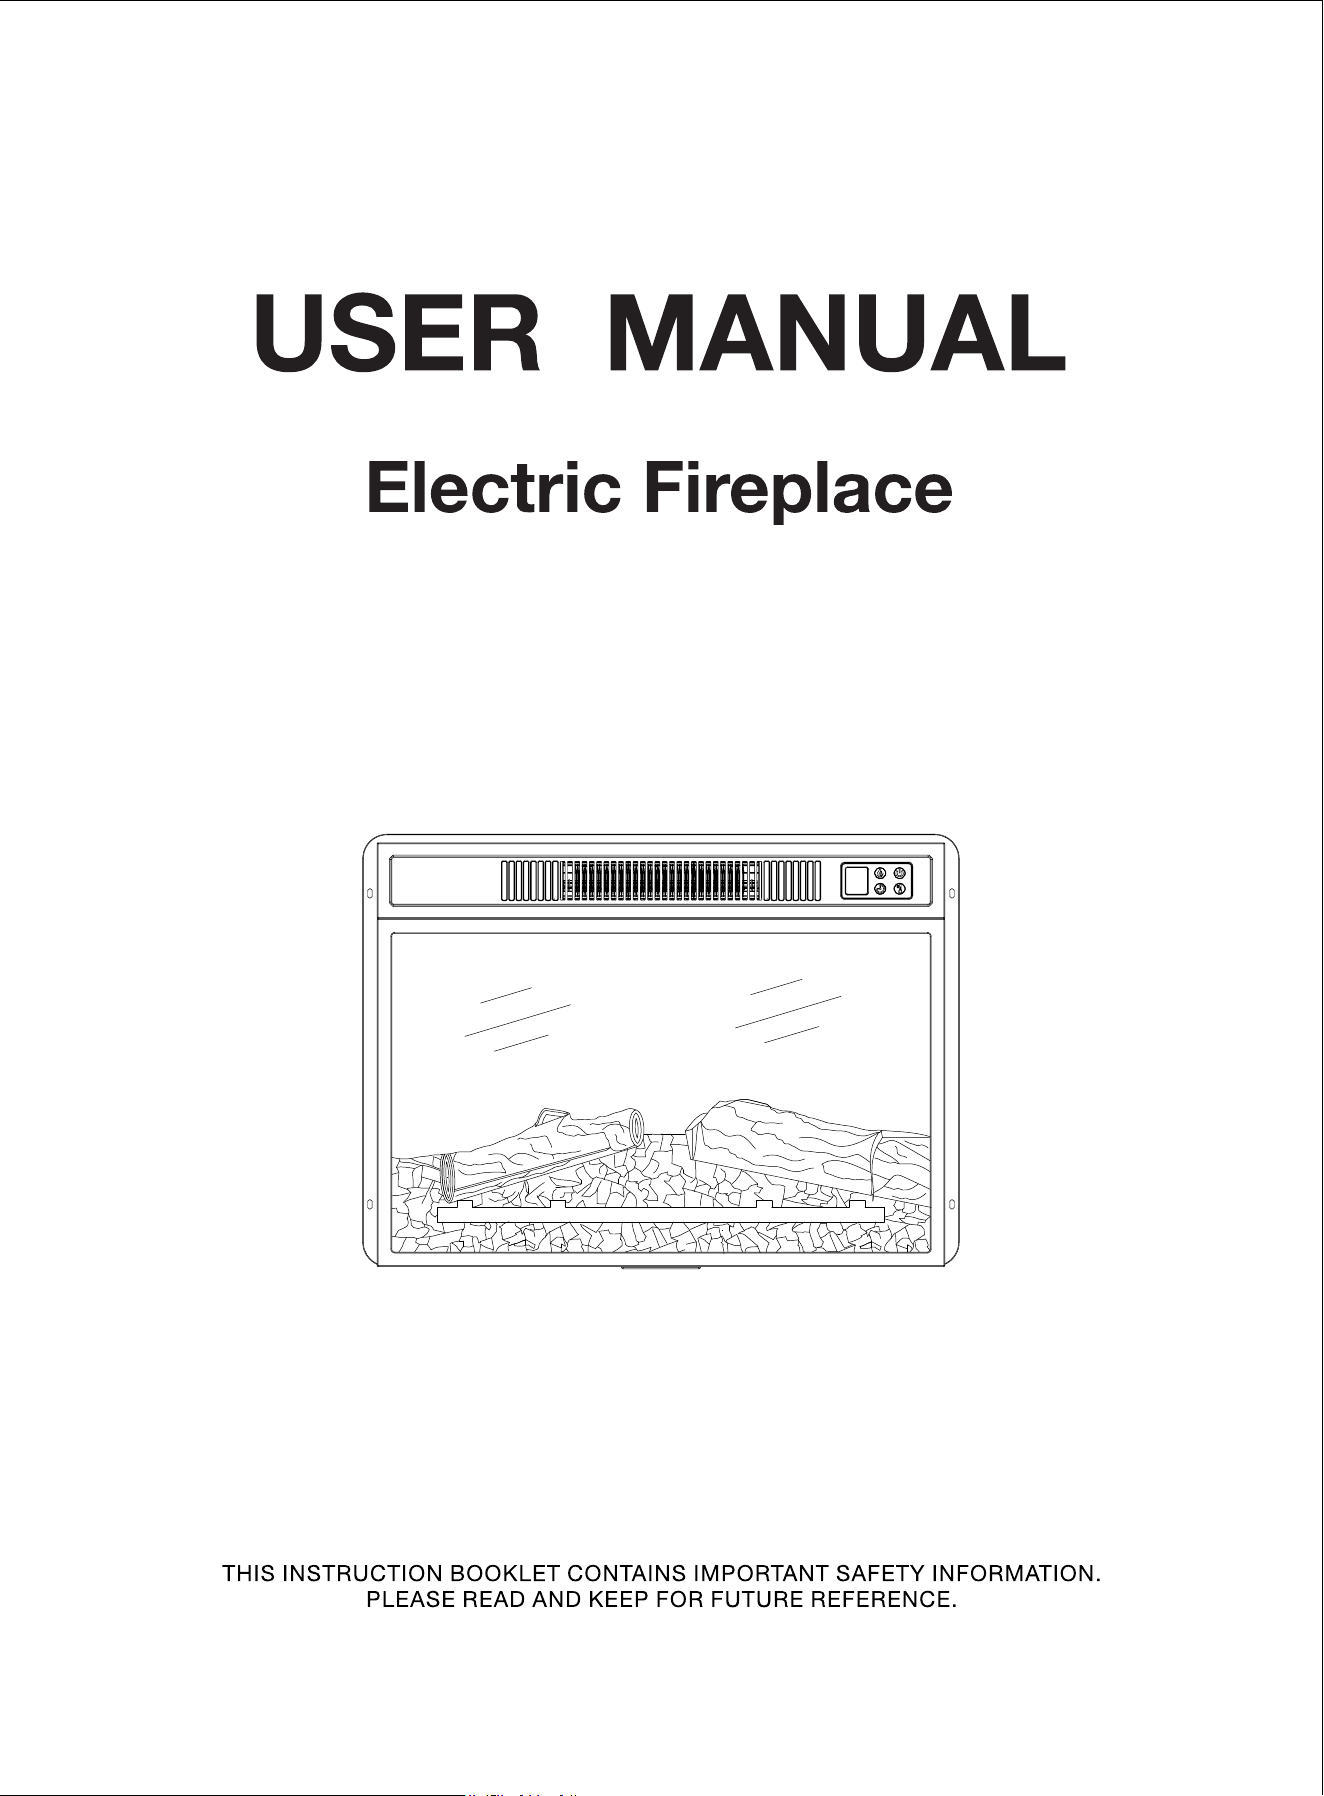
Model # SF105-18G
Model # SF105-23G

2
TableofContents
Safety Information..................................................................................3
Pre-installation.......................................................................................6
Assembly......................................................................................7
Operation.........................................................................................8
Using the Remote Control....................................................................11
Care and Maintenance..........................................................................12
Troubleshooting....................................................................................13

3
SafetyInformation
IMPORTANTSAFETYINFORMATION
PLEASEREADALLOFTHEINFORMATIONINTHISOPERATINGMANUAL,INCLUDING
ALLSAFETY,OPERATING,ANDMAINTENANCEINFORMATION.TOAVOIDTHE
POTENTIALRISKOFFIRE,ELECTRICSHOCK,ORINJURYTOPERSONS,
USERSSHOULDFOLLOWTHEDIRECTIONSANDWARNINGSINTHISMANUAL
1.Readallinstructionsbeforeusingthisheater.
2.Donotusethisheateroutdoors.
3.Thisheaterisnotintendedforuseinbathrooms,laundryareasandsimilarindoorlocations.Neverlocatethe
heaterwhereitmayfallintoabathtuborotherwatercontainer.
4.Donotrunthepowercordundercarpeting.Donotcoverthepowercordwiththrowrugs,runners,orthelike.
Arrangethepowercordawayfromtrafcareasandwhereitwillnotbetrippedover.
5.Todisconnecttheheater,turncontrolstooff,thenremovetheplugfromtheoutlet.
6.Connecttoproperlygroundedoutletsonly.Alwaysplugheatersdirectlyintoawalloutlet/receptacle.Never
usewithanextensioncordorrelocatablepowertap(outlet/powerstrip).
7.Topreventapossiblere,donotblockreboxairintakesortheexhaustinanymanner.Donotoperatethe
reboxonsoftsurfaces,likeabed,whereopeningsmaybecomeblocked.
8.Thereisathermostatlimiterinsidetheheater.Whentheinnertemperatureoverheatsorabnormalheating
occurs,thethermostatprotectivedevicecutsoffthepowersupplytoavoidreplacedamagedorriskofre.
9.Usethisheateronlyasdescribedinthismanual.Anyotherusenotrecommendedbythemanufacturermay
causere,electricalshock,orinjurytopersons.
4
SAVETHESEINSTRUCTIONS
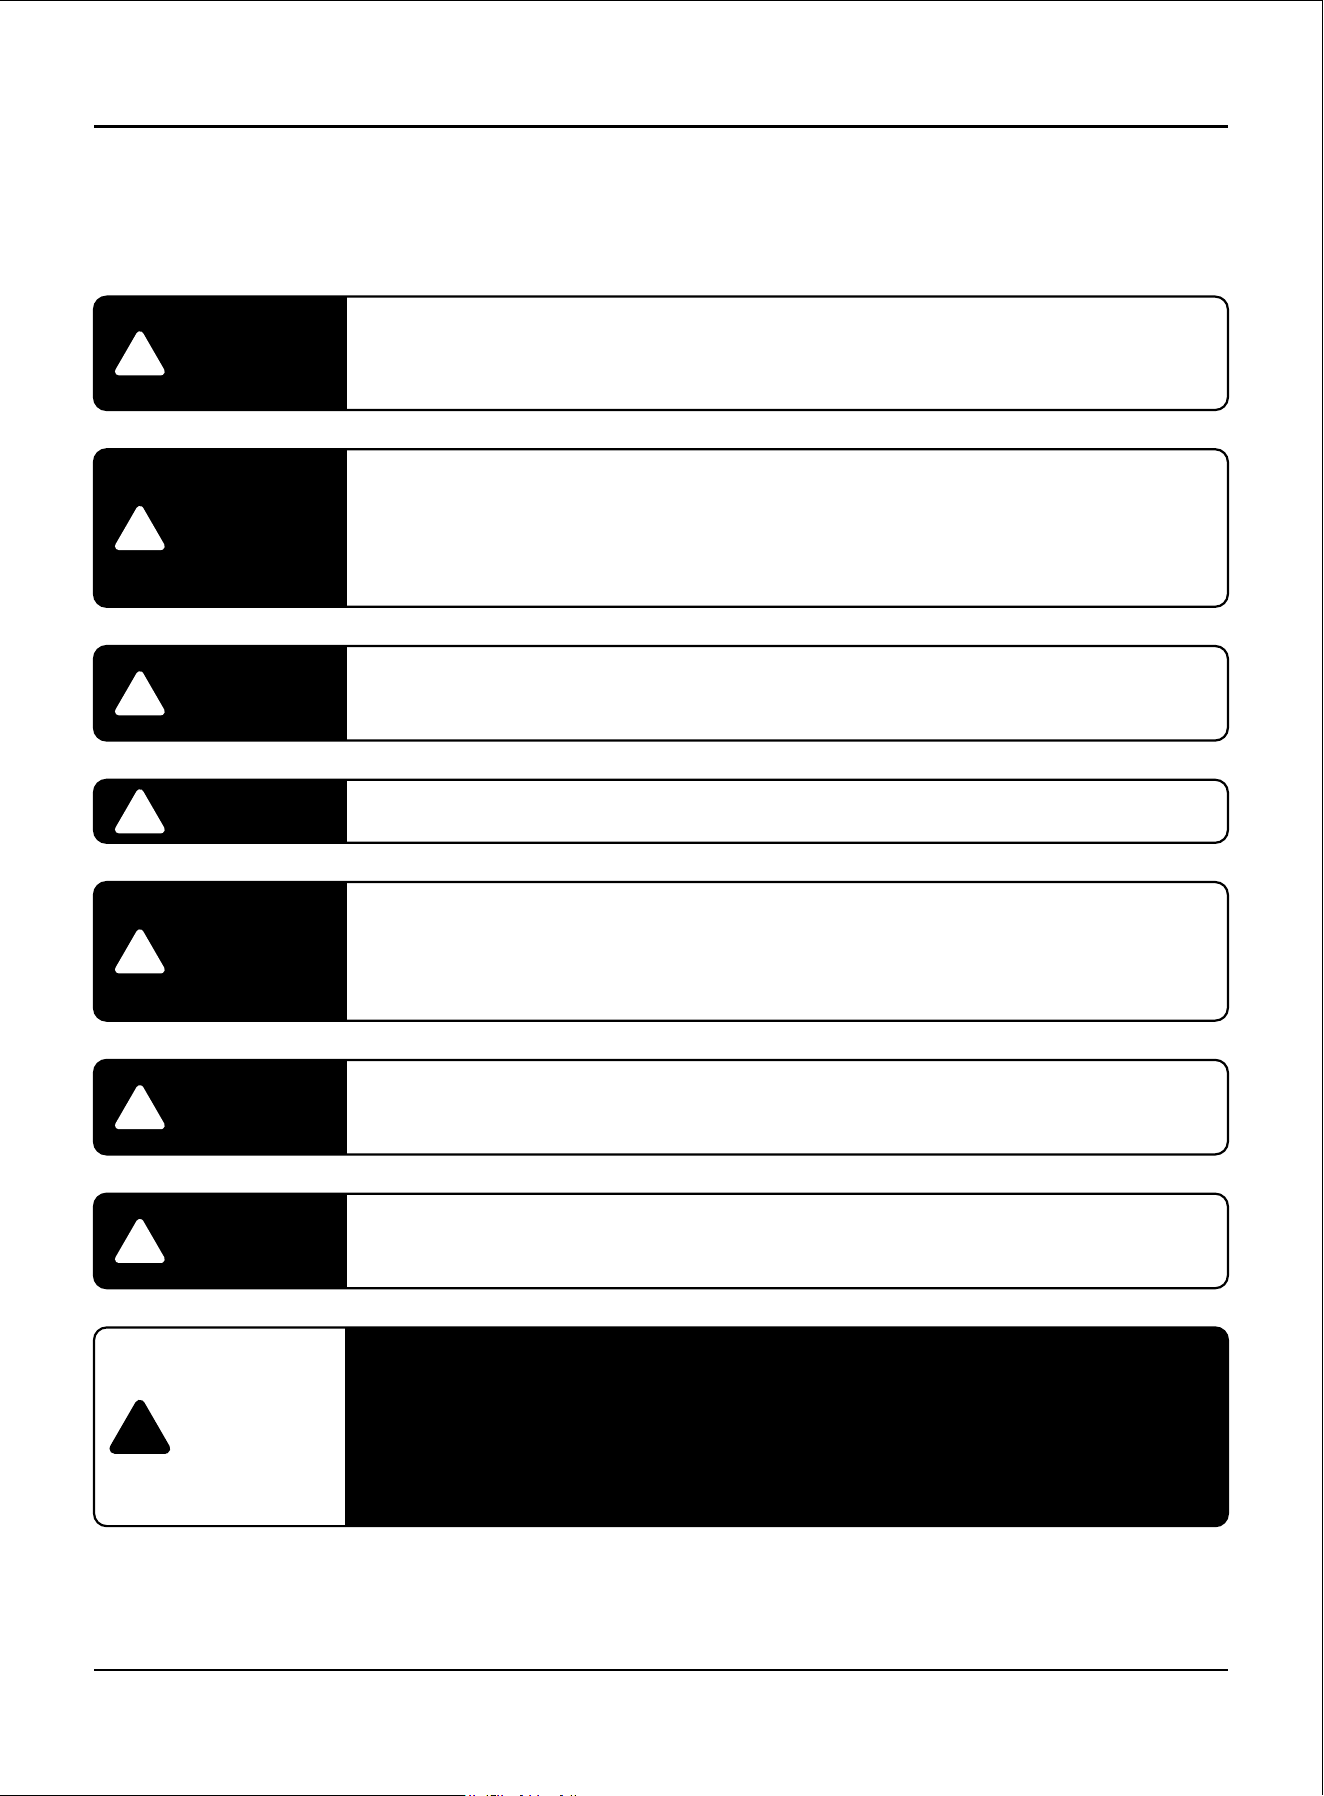
WARNING
!
Therearenouserserviceablepartsinsidethereplace/heater,
Iftheunitappearstomalfunction,
turmtheunitoffandunplugtheunitfromthewallimmediately,andcontactCustomer.
WARNING
!
Thisheaterishotwheninuse.Toavoidburns,donotletbareskintouchhotsurfaces.
Ifprovided,usehandleswhenmovingthisheater,Keepcombustiblematerial,
suchasfurniture,pillows,bedding,papers,clothesandcurtains
atleast3f.t(0.9meters)fromthefrontoftheheaterandkeepthemawayfrom
thesidesandrear.
WARNING
!
Extremecautionisnecessarywhenanyheaterisusedbyornearchildrenorinvalids
andwhenevertheheaterisleftoperatingandunattended.
WARNING
!
Alwaysunplugtheheaterwhennotinuse.
WARNING
!
Donotoperateanyheaterwithadamagedcordorplugor
aftertheheatermalfunctions,hasbeendroppedordamagedinanymanner.
Returntheheatertoanauthorizedservicefacilityforexamination,
electricalormechanicaladjustment,orrepair.
WARNING
!
Donotinsertorallowforeignobjectstoenteranyventilationorexhaustopenings
asthismaycauseanelectricshockorre,ordamagetheheater.
WARNING
!
Aheaterhashotandarchingorsparkingpartsinside.
Donotuseinareaswheregasoline,paint,orammableliquidsareusedorstored.
CAUTION
!
Whiletheheaterisinuse,thetopcenterofthereplacecangethottothetouch,
andmaycauseseriousinjuryorburns.
Alwayssupervisesmallchildrenaroundthereplace/heater.
Donotplaceanyclothordecorationsovertheheateroutletofthereplace,
orotherwiseobstructtheheateroutletofthereplace,
asthismaycauseareandseriousinjurymayresult,
5
SafetyInformation(continued)
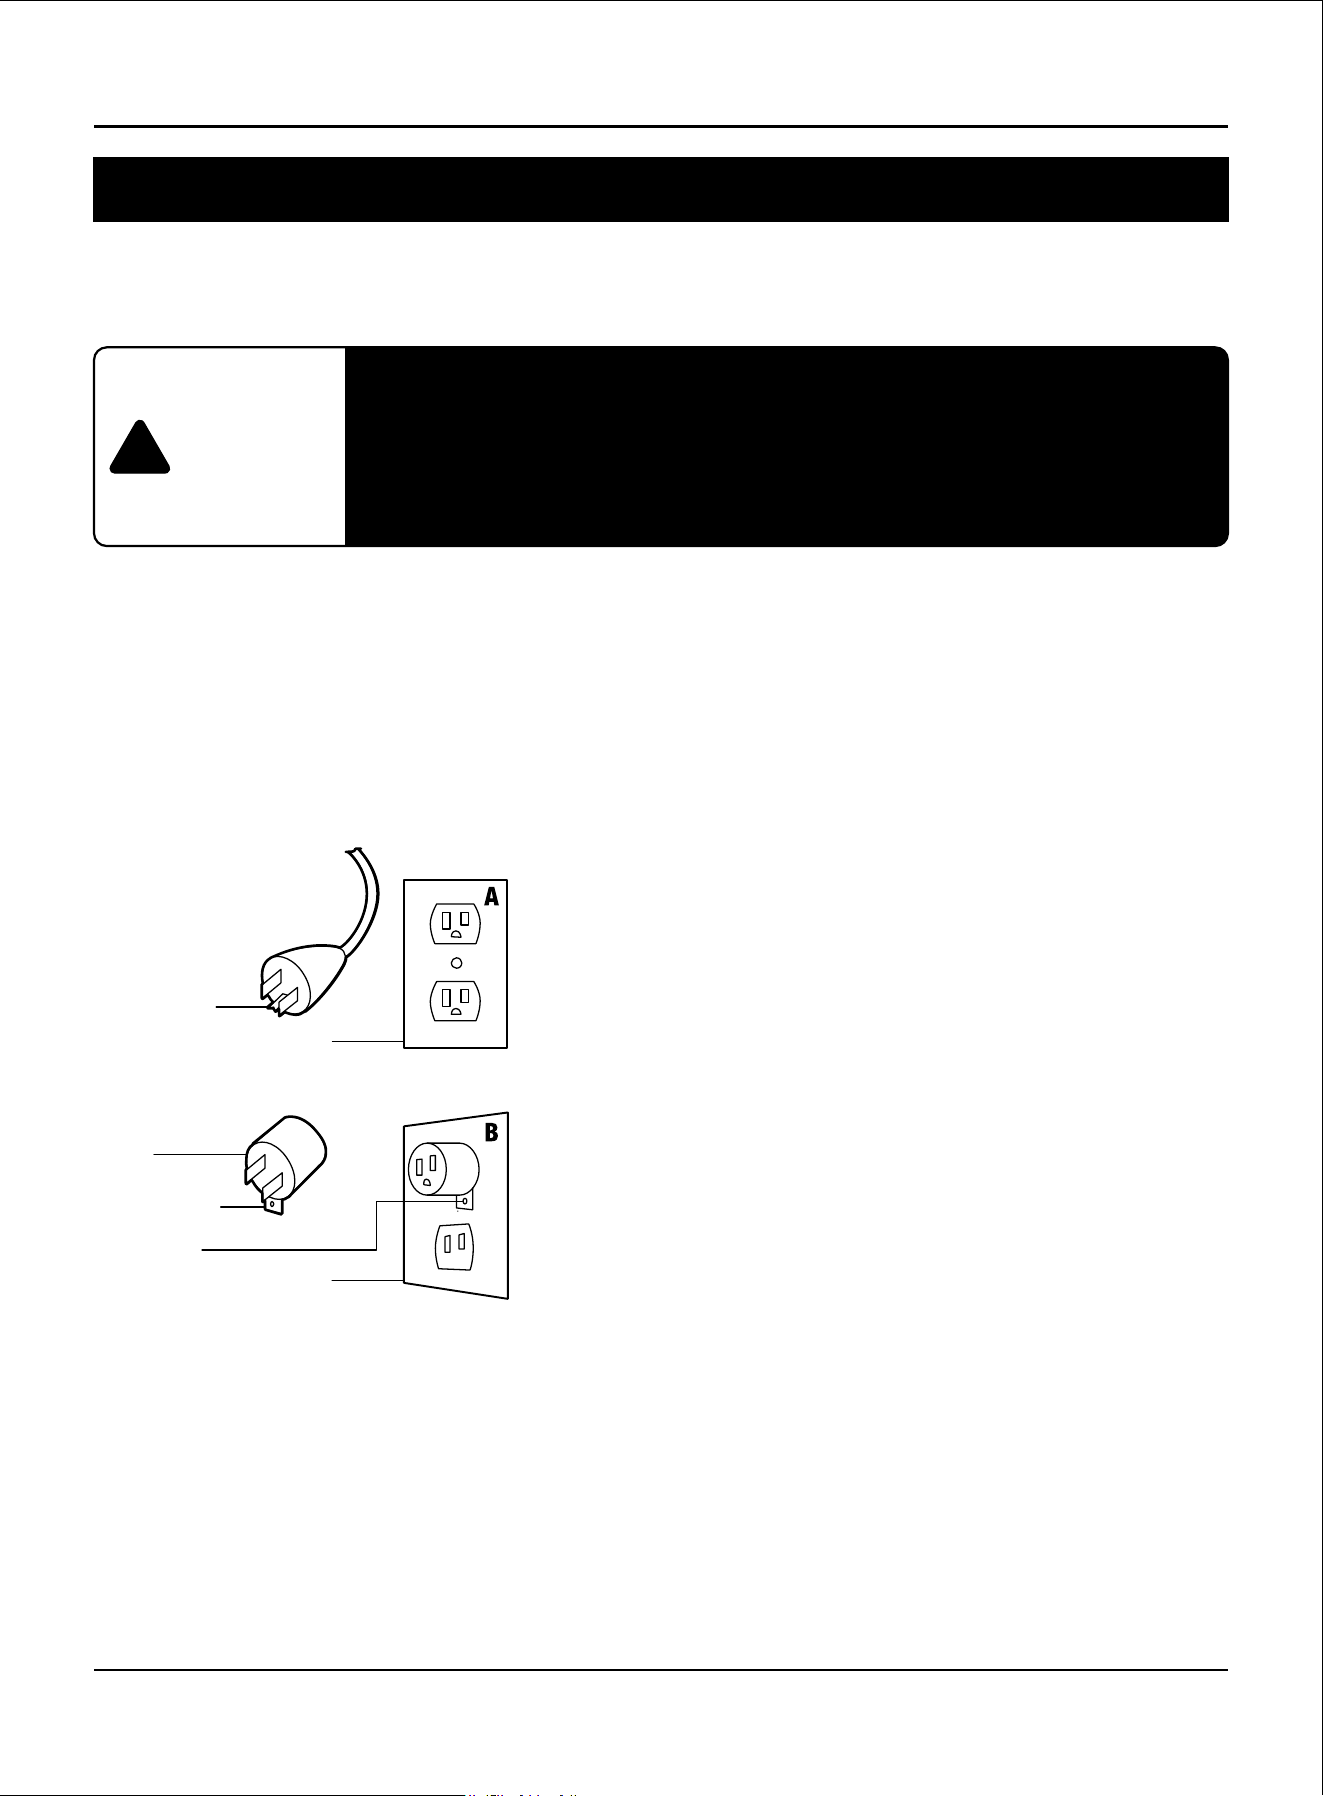
GROUNDINGINSTRUCTIONS
Thisproductmustbegrounded.Ifitshouldmalfunctionorbreakdown,groundingprovidesapathofleast
resistanceforelectriccurrenttoreducetheriskofelectricshock,Thisproductisequippedwithacordhaving
anequipment-groundingconductorandagroundingplug.Theplugmustbepluggedintoanappropriateoutlet
thatisproperlyinstalledandgroundedinaccordancewithalllocalcodesandordinances.
Thisheaterisforuseon120-voltcircuitsandhasagroundedplug.Anadapterisavailablefromyourlocal
electronicsstoreoronlinesupplierforconnectingthree-bladegrounding-typeplugstotwo-slotreceptacles.
Thegreengroundinglugextendingfromtheadaptermustbeconnectedtoapermanentground
suchasaproperlygroundedoutletbox.Theadaptershouldnotbeusedifathree-slotgroundedreceptacle
isavailable.
DANGER
!
Improperconnectionoftheequipment-groundingconductorcanresult
inariskofelectricshock.Checkwithaqualiedelectrician
orservicemanifyouareindoubtastowhethertheproductisproperlygrounded.
Donotmodifytheplugprovidedwiththeproduct.
Ifitwillnotttheoutlet,haveaproperoutletinstalledbyaqualiedelectrician.
Cover of Grounded Outlet Box
Grounding Pin
Adapter
Grounding Lug
Metal Screw
Cover of Grounded Outlet Box
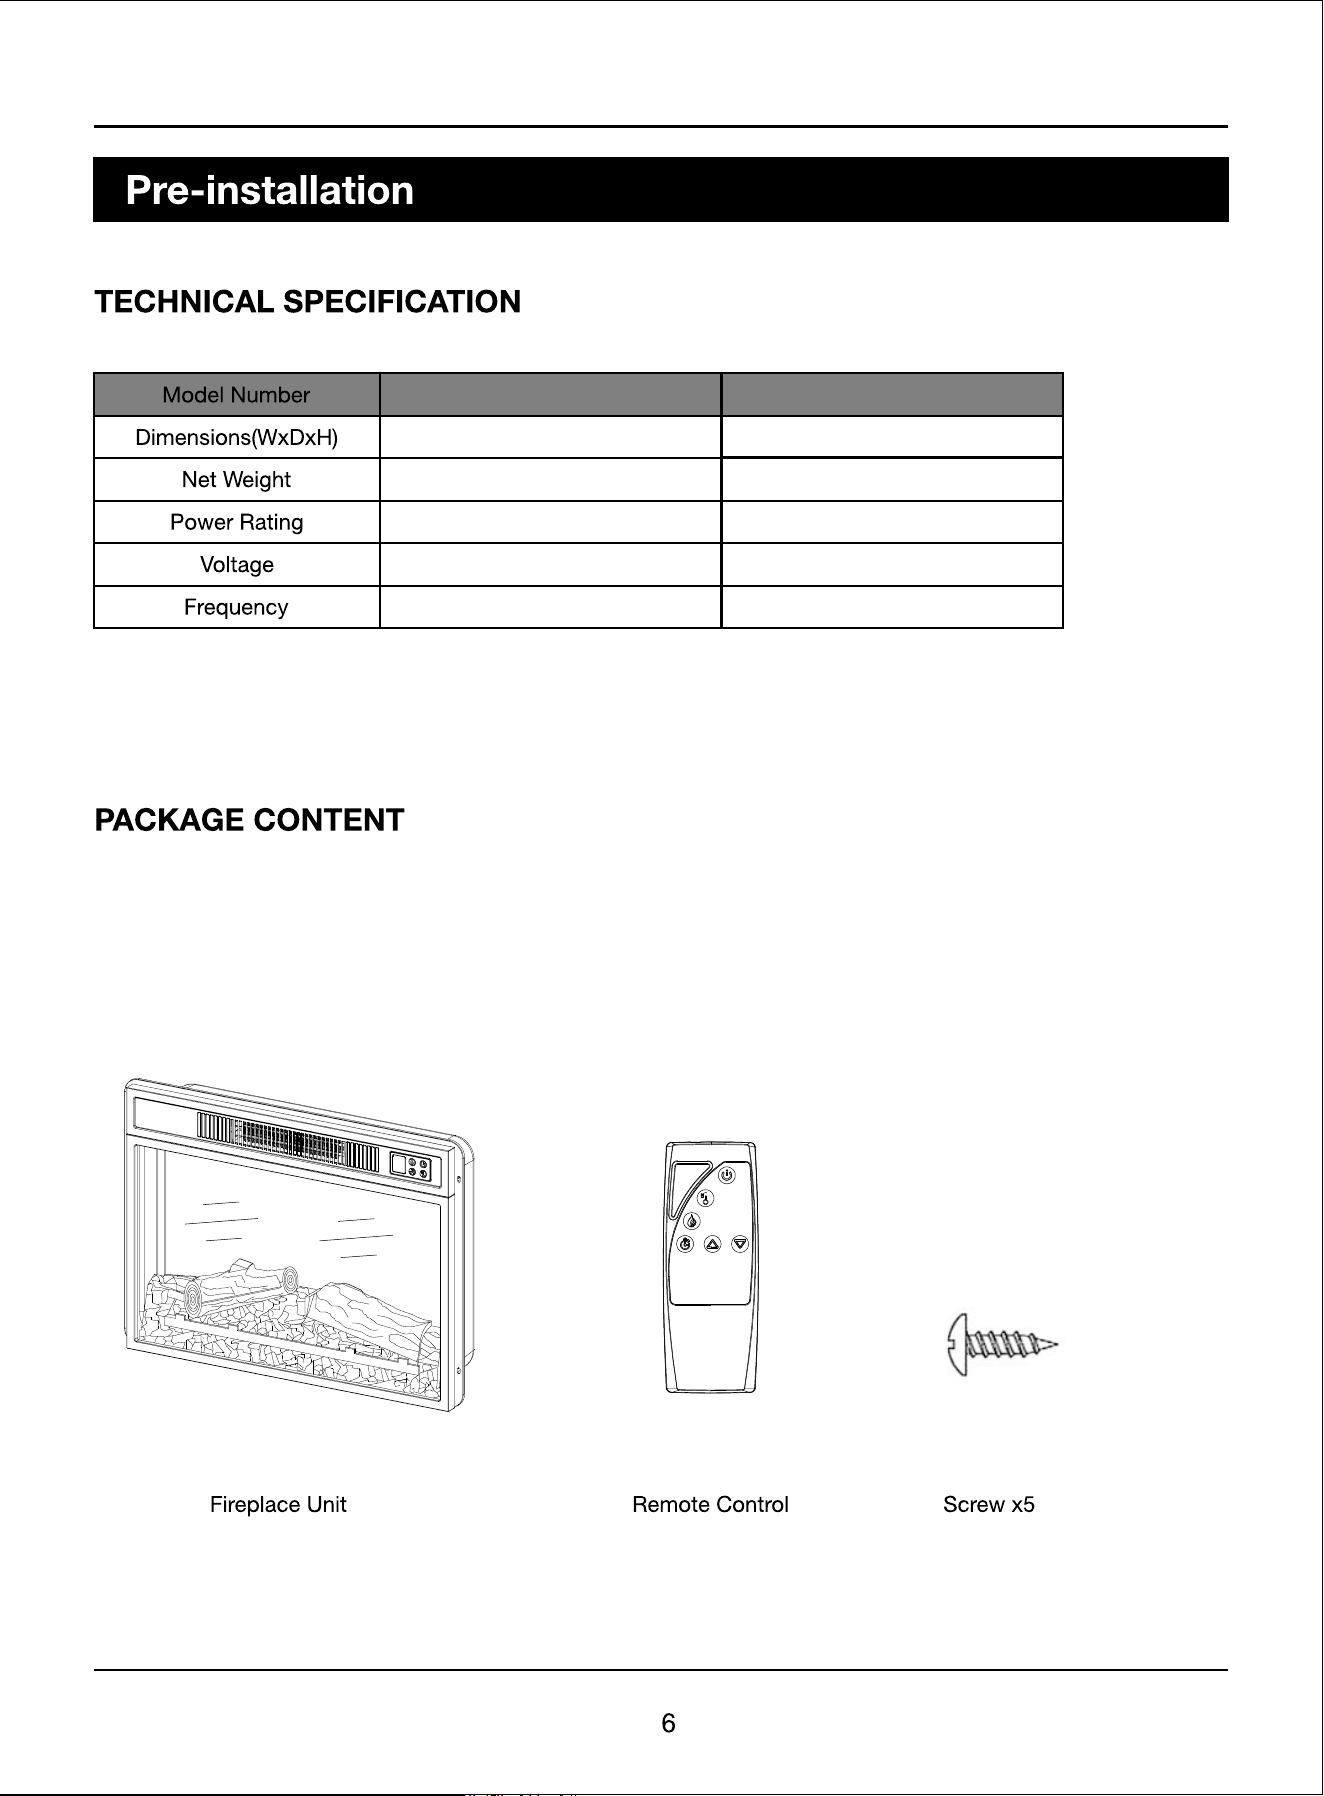
SF105-18G SF105-23G
19.17"x5.1"x17.5"
4.3KG/9.47lb
1400W
120V
60Hz
24.2"x5.1"x17.5"
5.3KG/11.68lb
1400W
120V
60Hz
7
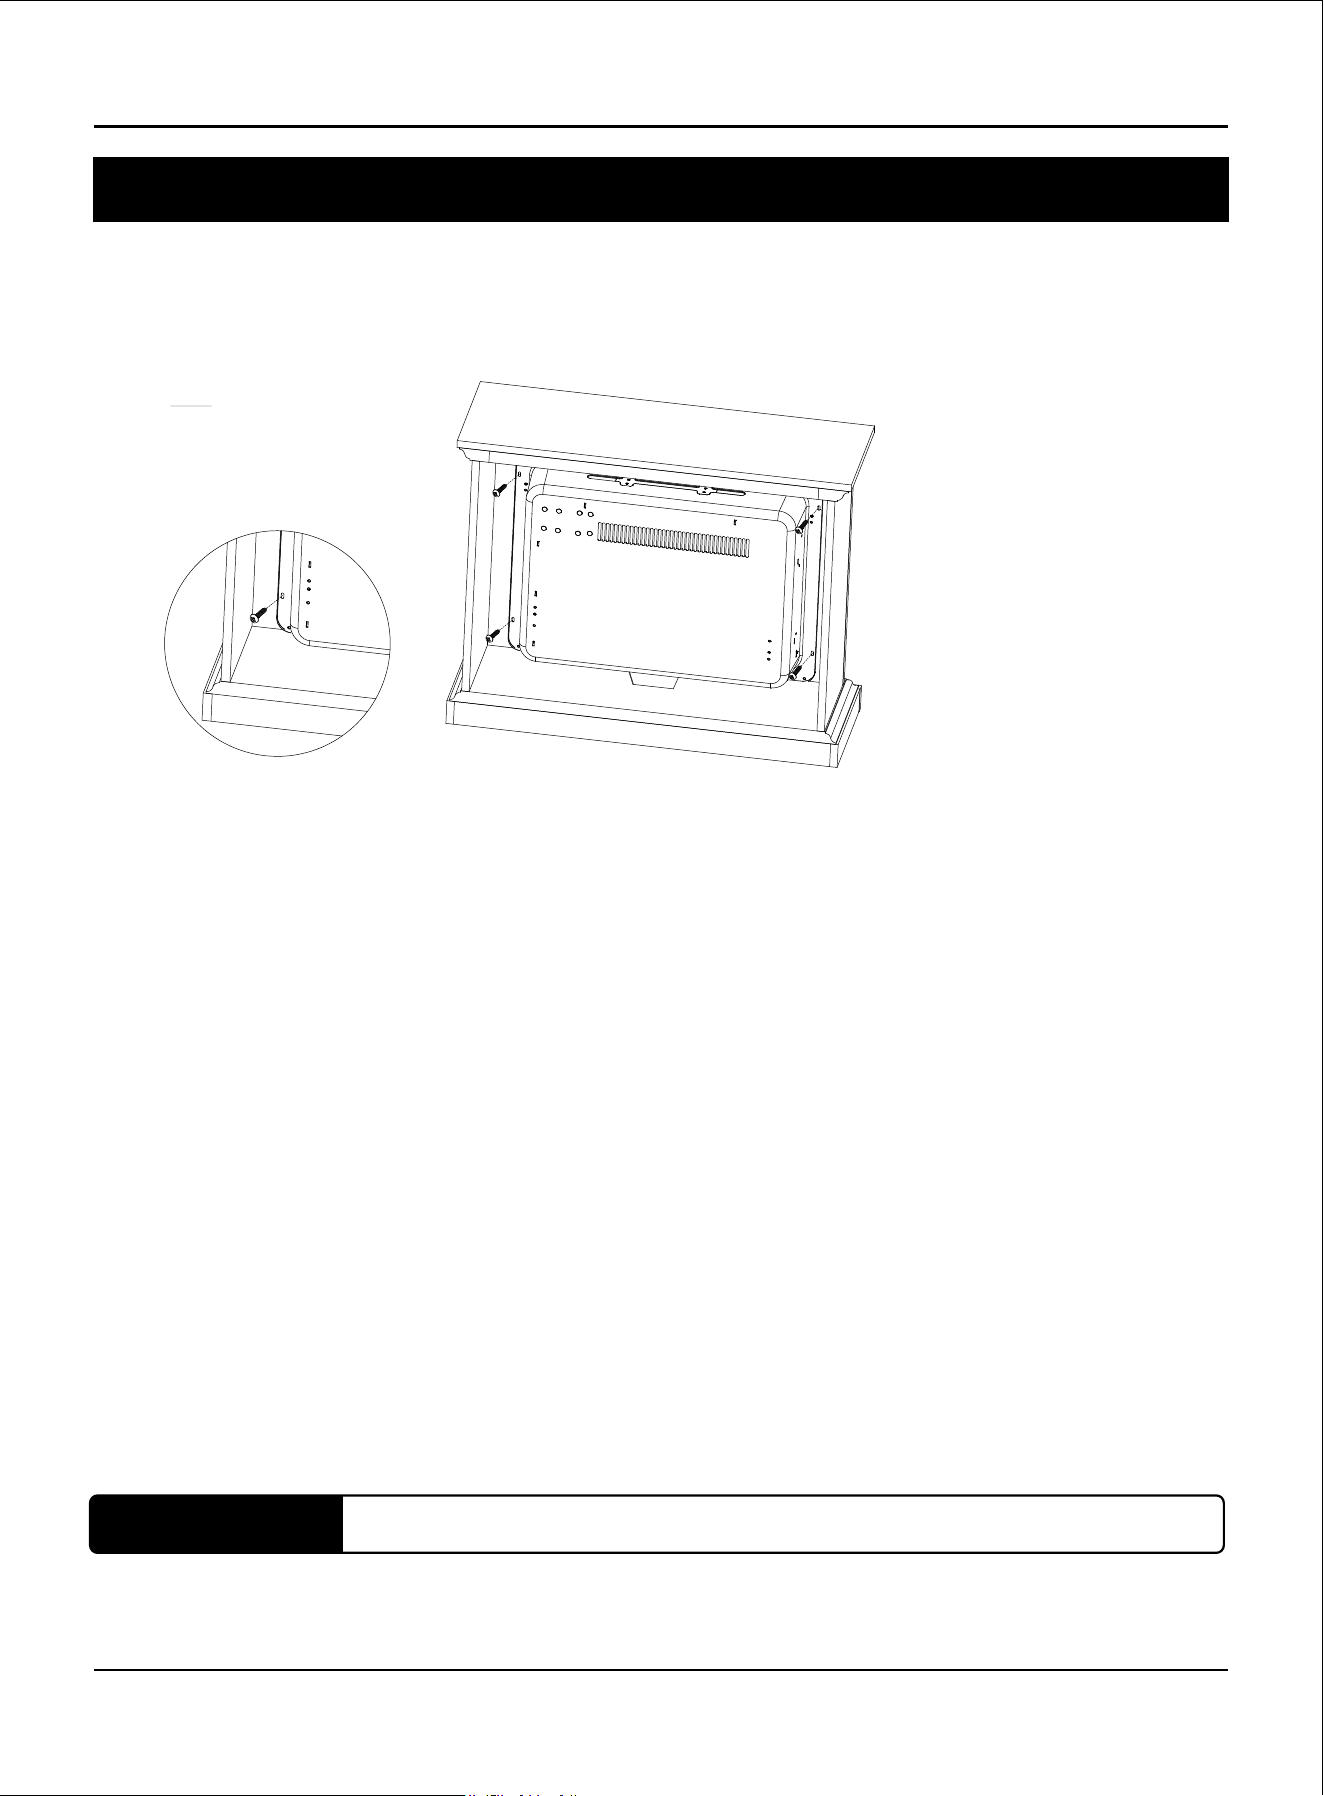
Assembly
● STEP 1
Take out the unit from the box and layout all the spare parts for easy assembly. Make sure all small items
are not left in packaging materials.
NOTE:
Do not attempt to install the unit from the front of the mantel. It will not t.
● STEP 2
Carefully set the unit from the back of the mantel and center it in the opening.
Check the alignment and attach the unit of the mantel by inserting screws through the drilled holes
on the trim of the mantel.
8
Operation
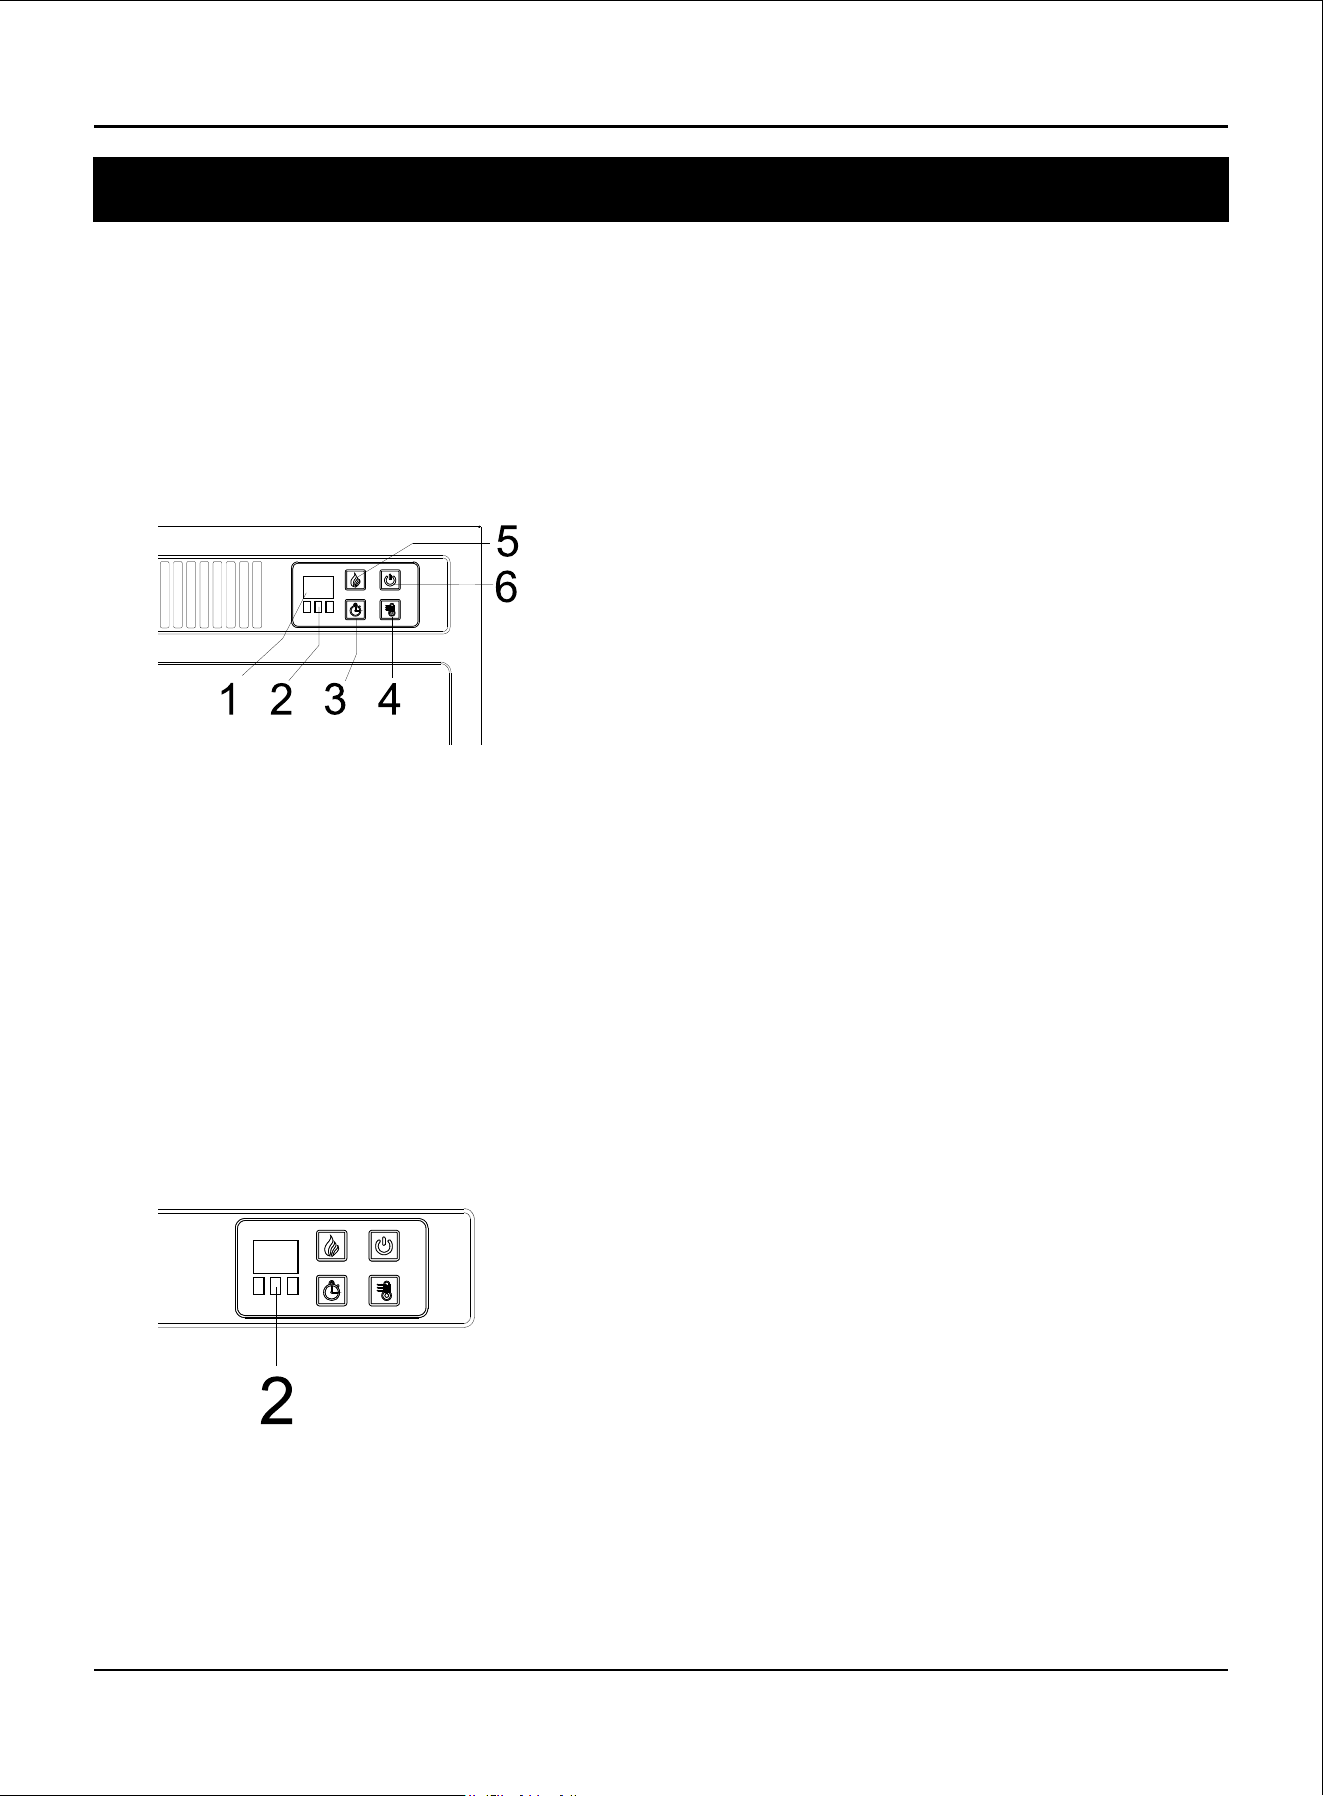
● Identifyingthecontrolpanel
•Thecontrolpanelislocatedonthetoprightcornerofthereplace/heaterunit.
•Thecontrolpanelcontainsthedisplayunit(1),functionindicator(2),timerfunction(3),heatercontrol(4),
amescontrol(5),andmainpower(6).
•Thedisplayunit(1)displaysinformationabouttheamelevel,timer,andcurrenttemperature.
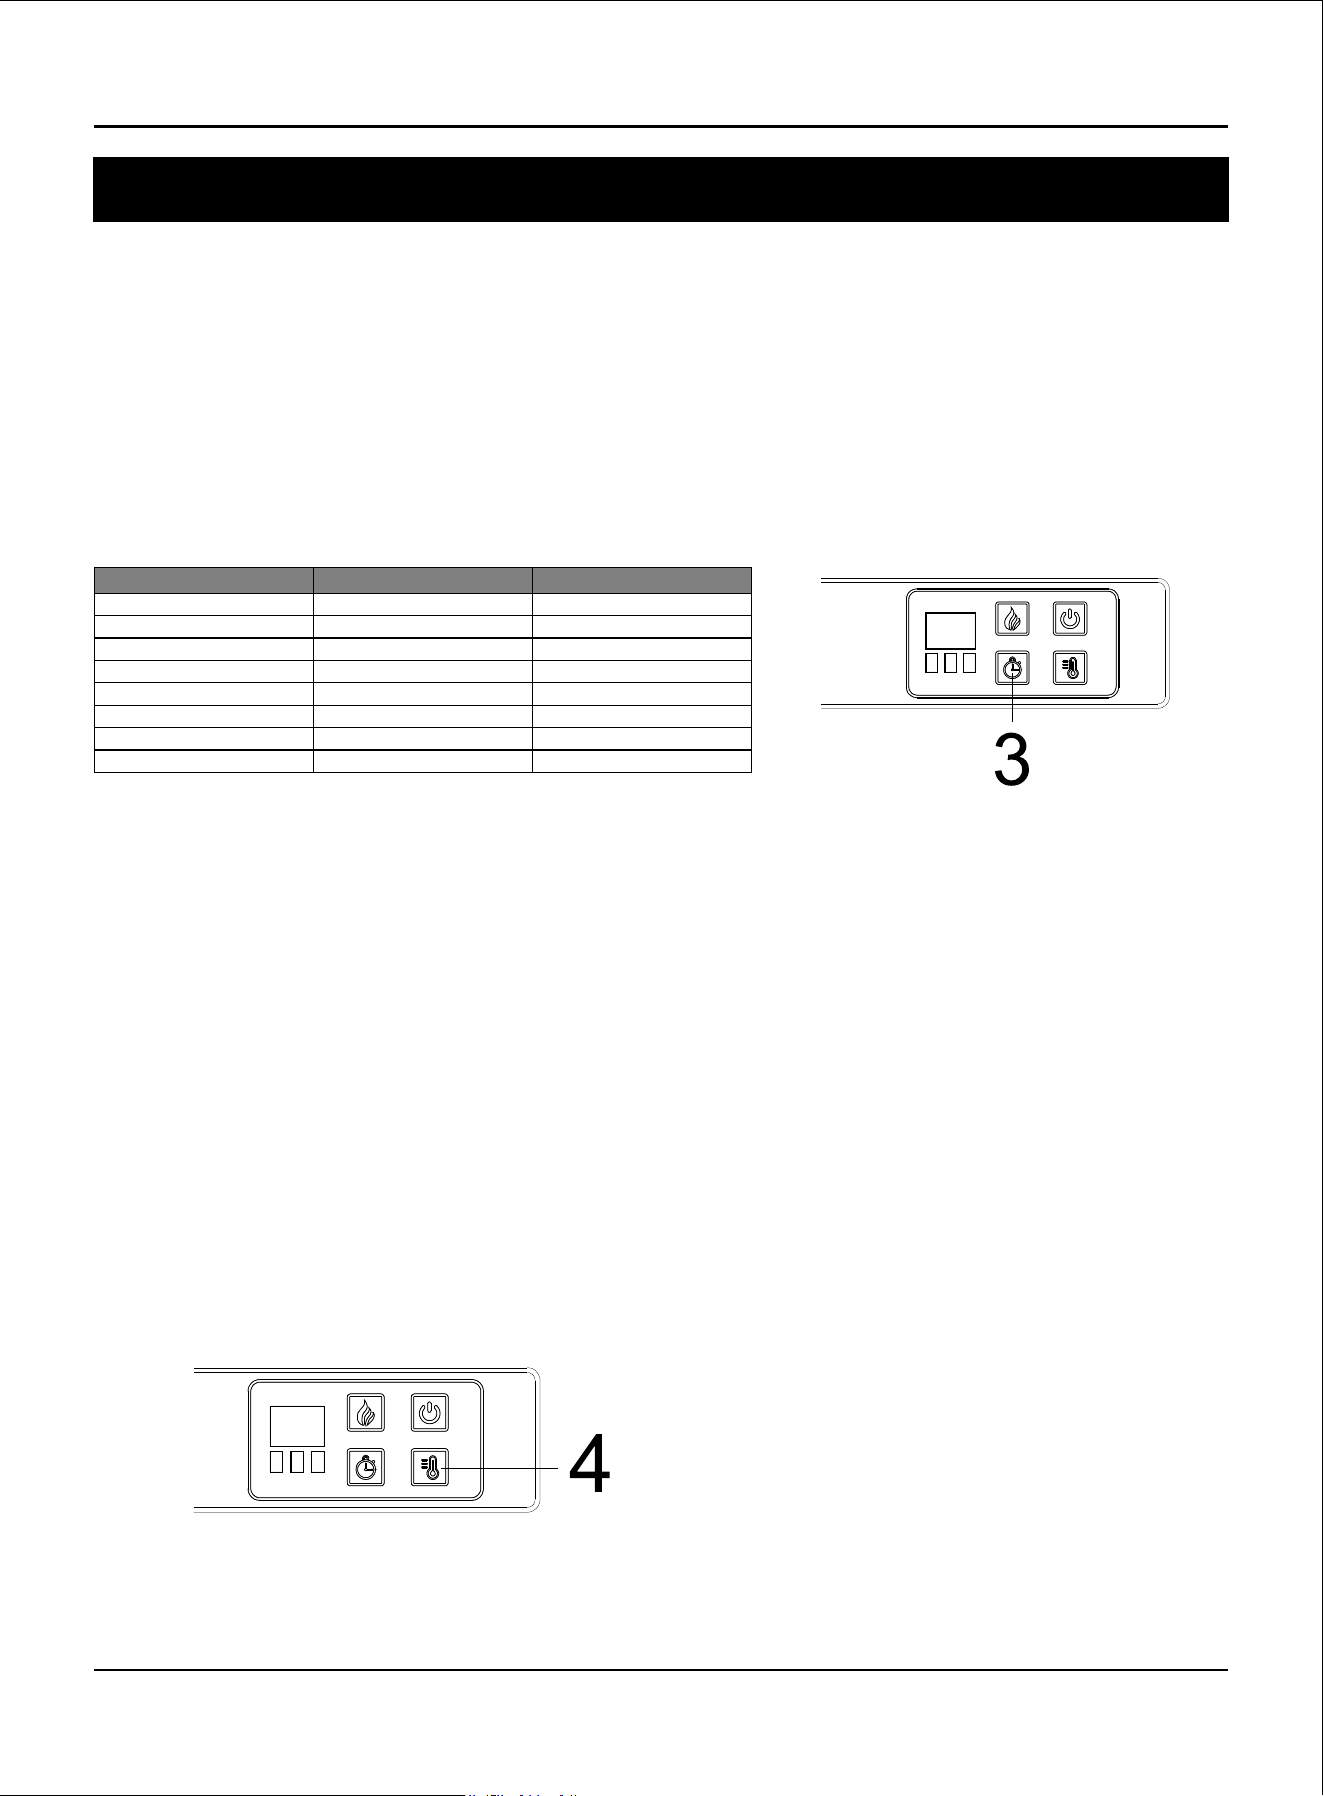
● Understandingthefunctionindicator
•Thefunctionindicator(2)hasthreesquareLEDS-red,green,andblue.TheredLEDindicatesthattheFahrenheit
temperatureheatingfunctionisrunning,thegreenLEDindicatesthattheCelsiustemperatureheatingfunction
isrunning,andtheblueLEDindicatesthatthetimerfunctionisengaged.
•TothebottomofthethreeLEDS,istheinfraredreceivermodulewhichcommunicateswiththeremotecontrol
tocontroltheheater.
9
Operation
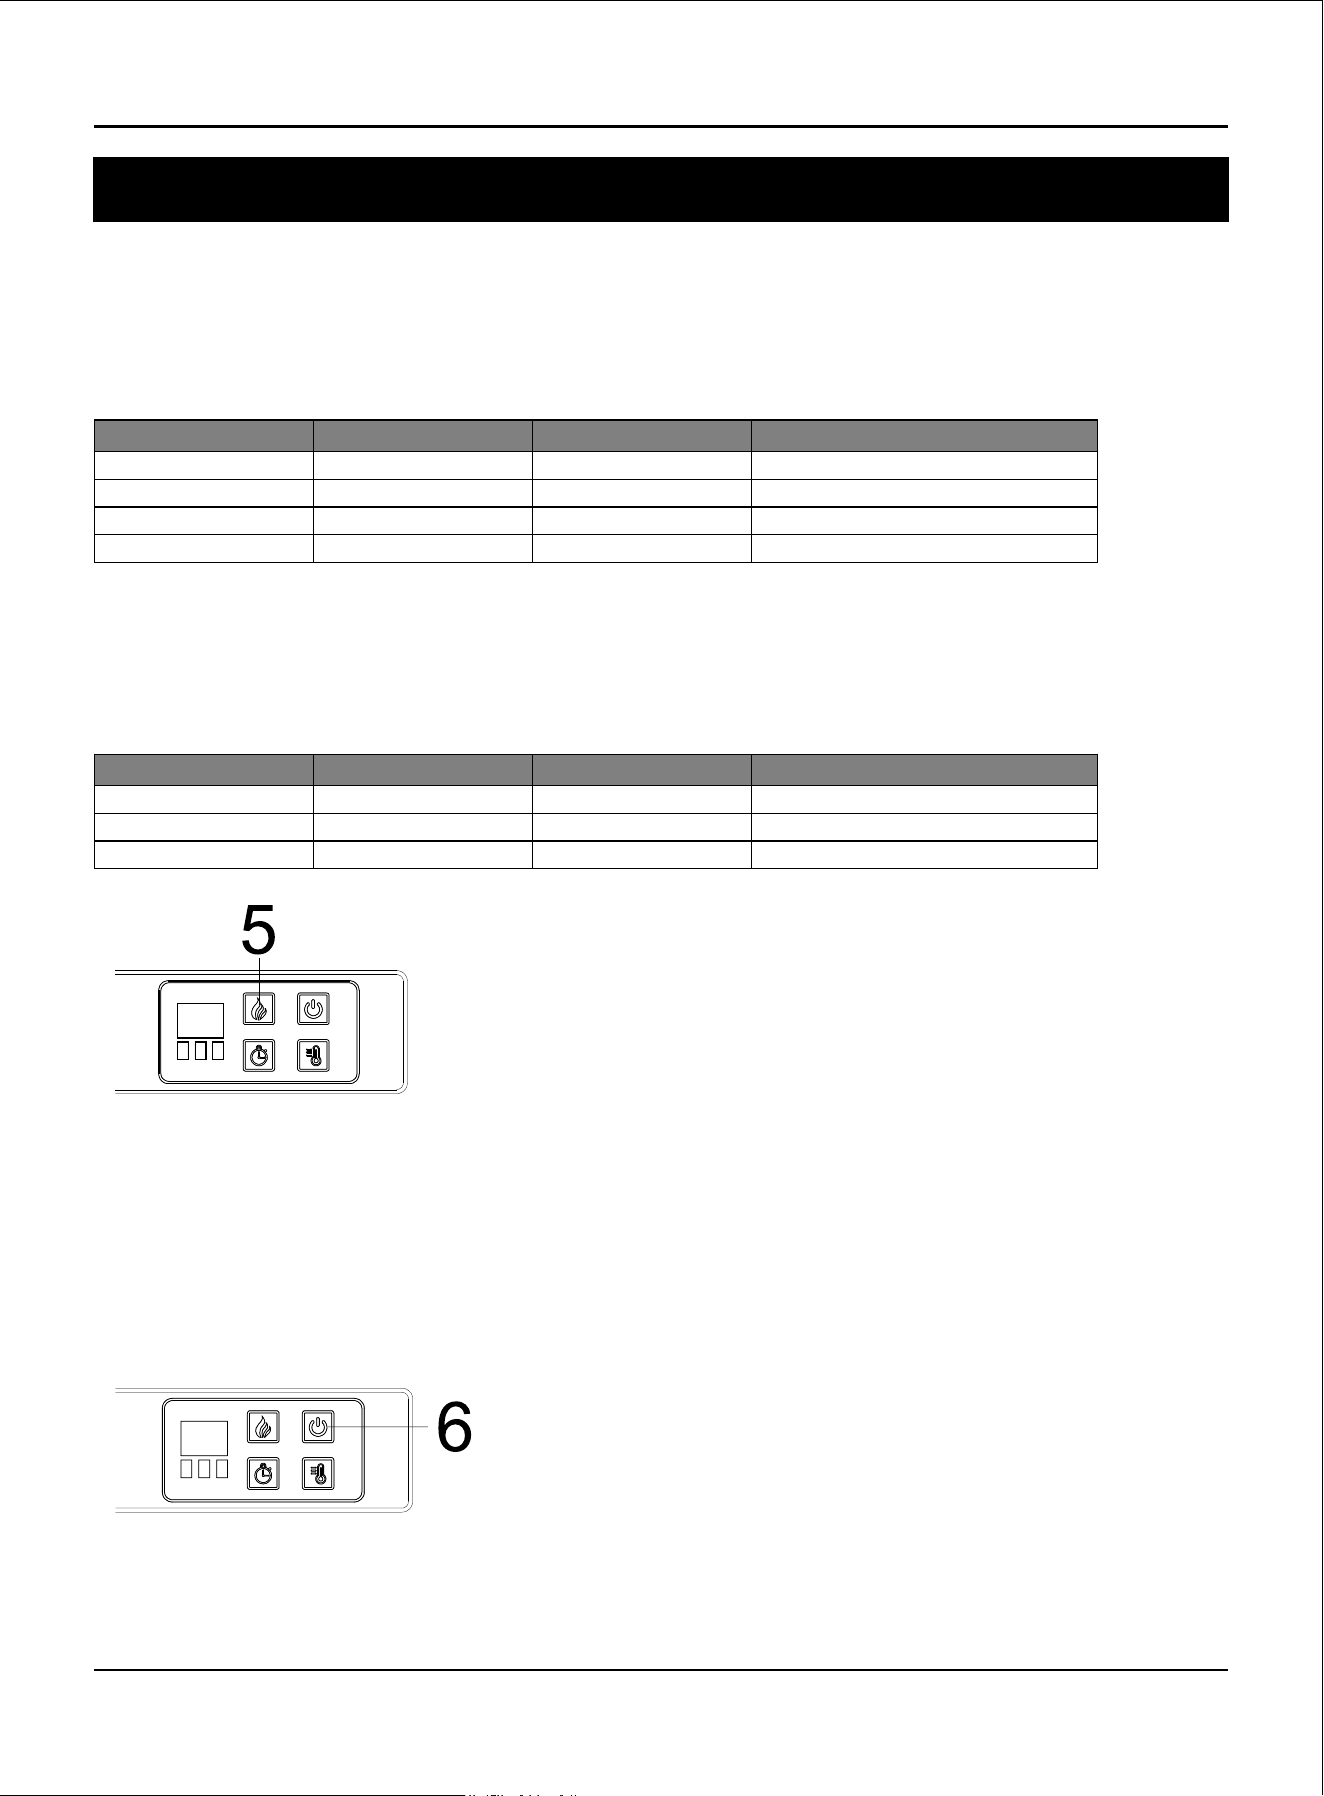
● Usingthetimerfunction
The timer button (3) allows you to set the amount of time you want the replace/heater to run.The timer button (3)
operates both the ames and the heater function. if the heater is operating when the timer is set, then the heater
is on the timer. if the ames are operating, then the timer will control the ames. if both the heater and ames are
operating with the timer set ,then the timer controls both the ames and the heater. Pressing the button in
sequence will set the timer for a set interval. This interval period is shown in the display (1). The set intervals
are displayed in this table. The timer interval is set from the time the interval is selected. There is no clock function
for turning the heater or ames on or off at a specic time.
● Usingtheheatercontrol
•The heater button (4) turns the heater on or off. There is no speed setting for the heater blower. lf you put the
heater in a standby mode(turn off by the main power button 6), the unit will hold the settings in the memory. When
the power is turned back on, the heater will turn on at the same settings.
•When the heating function turns on, press and hold the heater button (4) for ve seconds to enter temperature
adjustment mode. The LED indicator is red. In adjustment mode, the display unit (1) ashes (interval is 0.5 second).
There are 22 levels to change Fahrenheit temperature 72°F—73°F...82°F—ON—62°F—63°F ...71°F.
After this is set, the display ( 1) will ash ve times and exit from setting status.
If idle, the display turns off after 10 seconds.
•With the heater on, gently press and hold the main power button for ve seconds to enter temperature converting
mode. The LED indicator ashes ve times in red color then changes to green. In this converting mode, the display
(1) ashes (interval is 0.5 second).Press and hold the heater button (4) for ve seconds to enter temperature
adjustment mode. There are 12 levels to change Celsius temperature
22°C—23°C ...27°C—ON—17°C—18..21°C. After this is set, the display (1) ashes ve times. If idle, the display
turns off after 10 seconds. Repeat the same process to convert Celsius temperature into Fahrenheit temperature.
ButtonPress
1stpress
2ndpress
3rdpress
4th press
5th press
6th press
7th press
8th press
TimerInterval Display
30Minutes
30
1Hour
2Hours
3Hours
4Hours
5Hours
6Hours
OFF
1h
2h
3h
4h
5h
6h
None
10
Operation
● Usingtheamecontrol
•Presstheamebutton(5)tosettheamesfordifferentlevelsofameheight.Theseamelevelsareshowninthe
display(1).Theamesettingsareasfollows:
ButtonPress
1stpress
2ndpress
3rdpress
4th press
FlameLevel Displayvalue
High
L3
Medium
Low
AllOff
L2
L1
None
FireplaceAppearance
FlamesHighest,LogsGlowHighest
FlamesMedium,LogsGlowMedium
FlamesLow,LogsGlowLow
FlamesOff,Logsoff
•Regardlessofthepreviousamesetting,whenpoweredoffbythemainpowerbutton(6),
theameswillcomeoninL3mode(High)whenyouturntheheateron.
•Whentheheaterfunctionturnson,theamelevelwillcyclethroughthe3differentlevelsettingscontinuously.
ButtonPress
1stpress
2ndpress
3rdpress
FlameLevel Displayvalue
High
L3
Medium
Low
L2
L1
FireplaceAppearance
FlamesHighest,LogsGlowHighest
FlamesMedium,LogsGlowMedium
FlamesLow,LogsGlowLow
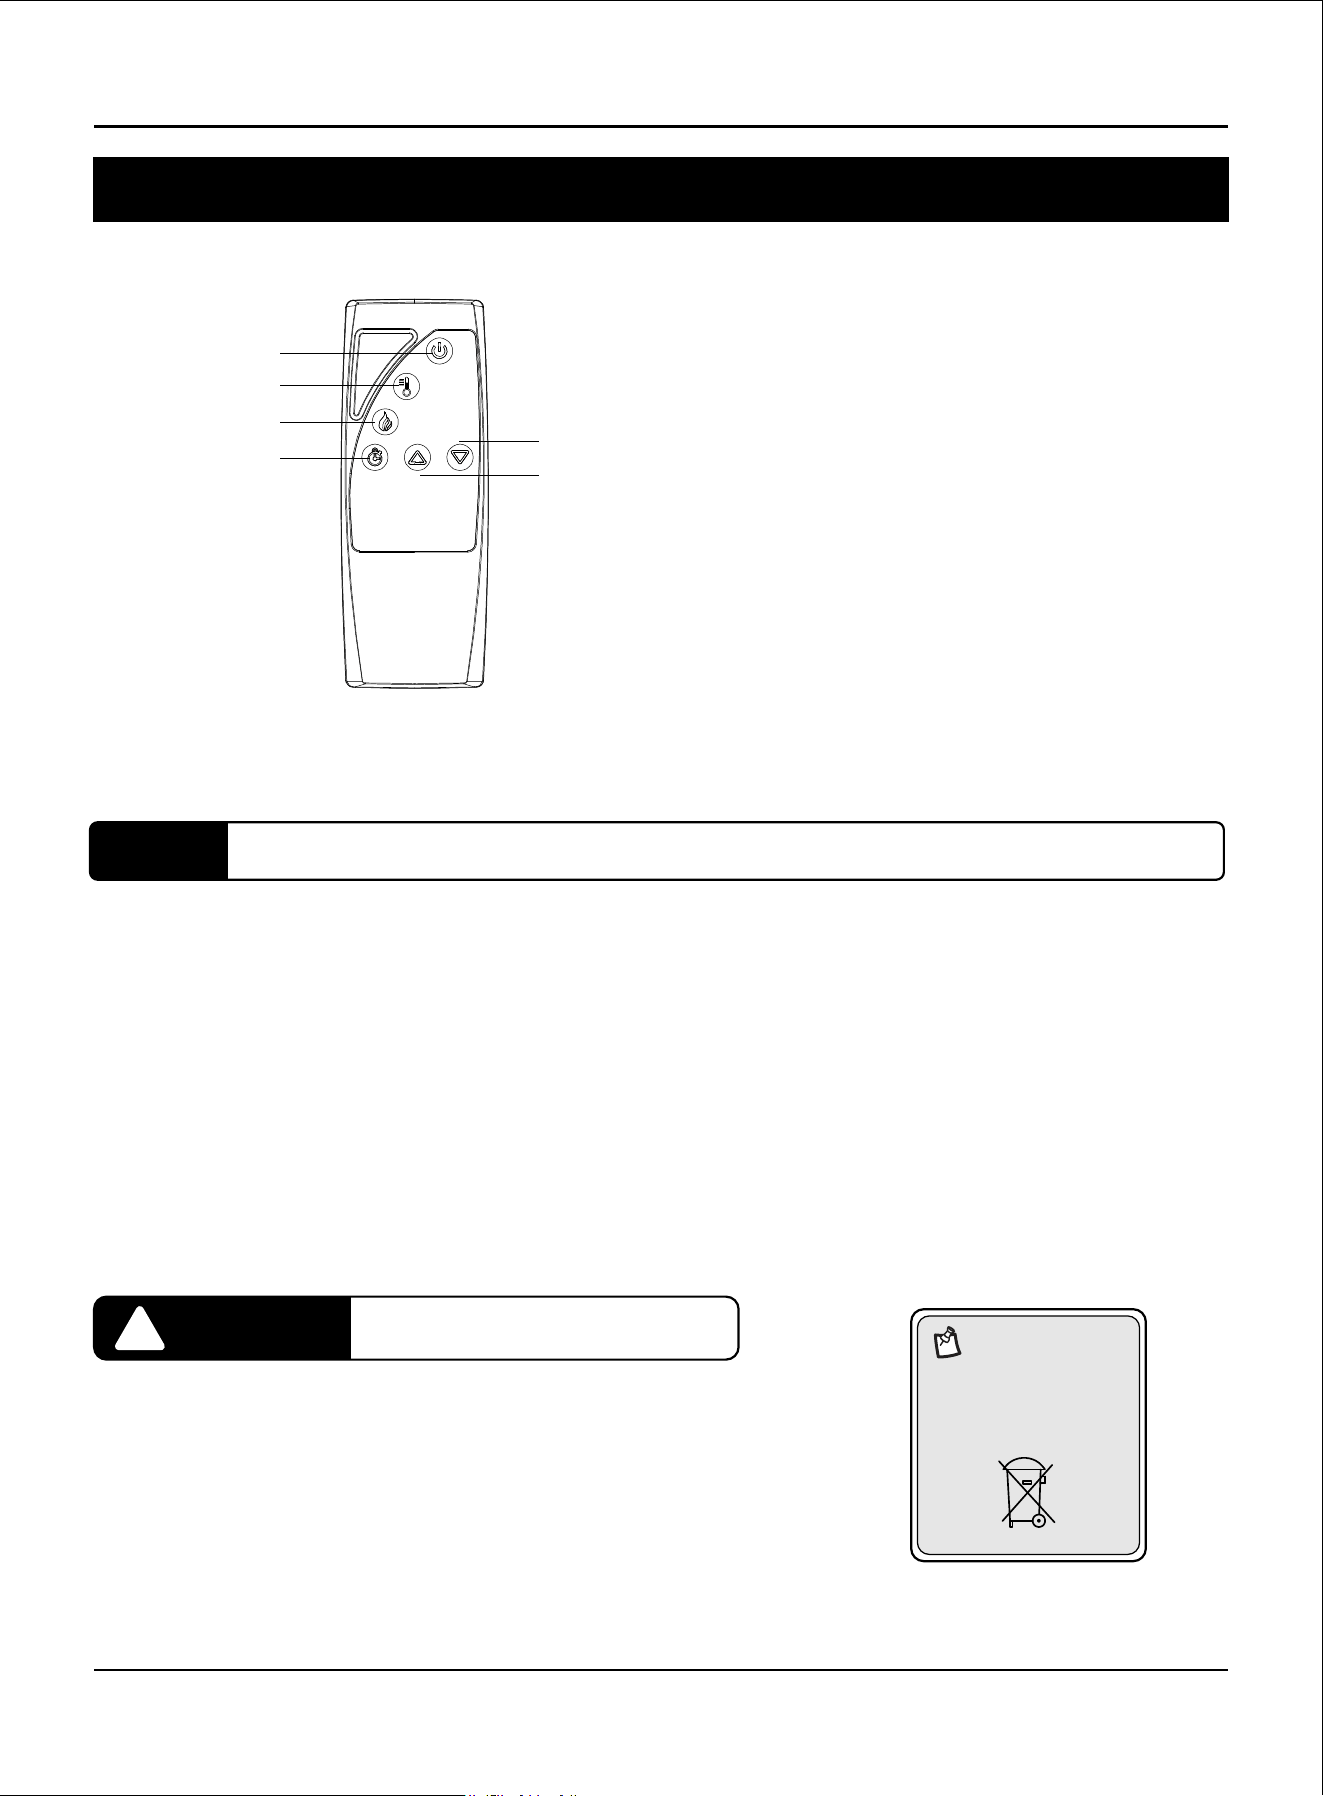
● Usingthemainpowerbutton
•Press the power button(6) to turn the replace/heater unit on and oft.
Press the power button (6) once to turn the unit on. Press again to turn the unit
off.
11
UsingtheRemoteControl
1. Non-rechargeablebatteriesarenottoberecharged.
2. Batteriesaretobeinsertedwiththecorrectpolarity.
3. Exhaustedbatteriesaretoberemovedfromtheproduct.
4. Alwayspurchasethecorrectsizeandgradeofbatterymostsuitable
fortheintendeduse.
5. Replaceallbatteriesofasetatthesametime..
6. Cleanthebatterycontactsandalsothoseofthedevicepriortobatteryinstallation.
7. Removebatteriesfromequipmentwhennotusedforanextendedperiodoftime.
WARNING
!
Donotingestbatteries.
NOTE:
Batterydisposal
Pleasealwaysdispose
ofbatteries atasuitable
recyclingpoint.
Flame Control
Heater Control
● Using the Remote control
The operation of the remote control buttons work the same as button on the control panel.
● Install the battery
For replacement batteries, use AAA batteries.
Press down and slide back cover off the battery compartment.
Insert two provided AAA batteries into the battery compartment making sure that the ends of the batteries
with the negative(-) symbols are against the springs in the battery compartment.
Replace the battery compartment cover, making sure it snaps into position.
NOTE:
The remote control can be used to switch between degree Fahrenheit and degree Celsius.
Main Power
Time Control
Heater Down
Heater Up
12
Care and Maintenance
WARNING
!
Alwaysdisconnectfromthepowersupplybeforecleaningtheheater.
Firstturnoffthemain power.
Thenremovetheelectricalplugfromthewall outlet.
WARNING
!
Donotusethisreplaceinsertifanypartof ithasbeenunderwater.
Immediatelycallaqualied servicetechniciantoinspectthereboxand
replace anypartoftheelectricalsystemwhichhasbeenunderwater.
Theblowermotorandamemotorarepre-lubricatedforadurableusingtimeandneednofurtherlubrication
ormaintenance.Toremoveanyaccumulationofdustordebris,thesoftbrushattachmentofavacuumcleaner
shouldoccasionallybeusedtocleantheoutletgrilleofthefanheater.
● Useasoft,cleancloththatwillnotscratchthesurfacewhendusting.
● Useacleansoftclothdampenedwithwarmwatertocleanthereplacesurface.
D0NOTusehouseholdorabrasive cleaners,astheseproductsmaydamagethesurface.
● Whencleaningtheglassviewingscreenuseanon-abrasivedampclothwithliquidcleanerorsoftsoap
ifnecessary;Don NOTusecleaningpowdersoranyothersubstancewithabrasives
sincethesesubstanceswillscratchglass.
● Undernocircumstancesshouldthisproductbeoperatedwithabrokenorchippedglasspanel.
● Donotstrikeorslamtheglass.
● Intheeventthatyourapplianceisstainedorotherwisedamagedduringuse,werecommendthatyoucall
aprofessionaltoit.
● Whennotinusepleaseunplugthecordfromtheoutlettopreventanydamageoraccidents.