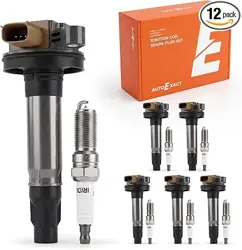

Autoexact Ignition Coil & Spark Plug Kit
Product Manual
Warning!
• Power Disconnection Protection: Before starting work, disconnect the negative
[-] battery cable to prevent personal injury caused by accidental engine start-up.
When reconnecting the battery, connect the negative cable last to avoid sparks
igniting the hydrogen gas released by the battery.
• Tool Safety: When using a wrench, do not touch both the positive and negative
battery terminals simultaneously to prevent electric shock. Use a torque wrench to
tighten spark plug and coil bolts to avoid over-tightening, which may damage the
engine block or coil mounting threads.

Part
1
Power Disconnection and Engine Bay Cleaning Preparation
Clean Key Areas of the Engine Bay
• Wipe dust, oil, and debris from around the ignition coil and spark plug mounting holes with a
clean soft cloth. Focus on cleaning the edges of the spark plug mounting holes to prevent
foreign objects from falling into the cylinder block during disassembly, which could cause
internal engine damage.
• If there is thick oil on the installation area, wipe it with a small amount of neutral detergent and
wait for it to dry before proceeding to the next step.
Disconnect the Negative Battery Terminal
• Locate the vehicle battery (usually in the engine bay; some models have it in the trunk) and
identify the negative terminal marked with "-".
• Use a wrench to loosen the fixing bolt of the negative battery cable. After removing the cable,
pull it to the side of the battery to ensure the cable connector does not touch any metal parts
or terminals.
Part2
Remove the Old Ignition Coil
Mark Coil Cables (for Multi-Cylinder Vehicles)
• Since the ignition coil cables correspond one-to-one with the engine cylinders, use a marker
to label the cable boots with numbers (e.g., "1, 2, 3"). You can number them either in left-to-
right order along the coil or according to the cylinder numbering sequence. This labeling
ensures you avoid incorrect connections when reinstalling the cables later.
Disconnect Ignition Coil Cables
• Hold the ignition cables near the coil with both hands, pinch the rubber/plastic boot (connector
part) at the end of the cable, and pull it straight out firmly to separate the cable from the coil.
• Gently pull the disconnected cables to the side of the engine bay and secure them temporarily
with cable ties (optional) to avoid interfering with coil removal.
Disconnect the Coil Electrical Connector
• Locate the electrical connector on the side of the ignition coil. Press the plastic tab on the top
of the connector and pull the connector gently backward to fully separate it from the coil.
Remove Coil Fixing Bolts
• Use a wrench (or socket) to remove the bolts (usually 1-2) that secure the ignition coil. After
removing the bolts, hold the coil body with one hand and pull the old coil straight up to remove
it.

Part3
Replace Spark Plugs
Remove the Old Spark Plugs
• After removing the ignition coil, the spark plug mounting hole will be exposed. Fit a spark plug
socket (matching the spark plug size) over the old spark plug, ensuring the socket fully
engages with the spark plug.
• Attach a wrench or ratchet wrench to the socket, turn it counterclockwise to loosen the old
spark plug, then pull it straight out.
Hand-Preinstall the New Spark Plugs
• Take the new spark plug, align it with the mounting hole, and screw it in gently clockwise by
hand until the spark plug washer is snug against the surface of the mounting hole (stop when
you feel "tight"; do not apply excessive force by hand).
Tighten with a Torque Wrench
• Fit the spark plug socket over the new spark plug and connect it to a torque wrench. Tighten
the spark plug clockwise according to the torque value specified in the vehicle maintenance
manual (refer to the vehicle maintenance manual or attached table for details). Keep the
wrench vertical during tightening to avoid thread misalignment.
Part4
Install the New Ignition Coil
Confirm Coil Installation Orientation
• Compare the interface positions and bolt hole directions of the new and old ignition coils to
ensure the new coil is installed in the same orientation as the old one (some coils have an
"UP" mark that needs to be aligned).
Secure the New Coil
• Insert the new coil straight into the mounting position. Align it with the bolt holes, then hand-
tighten the previously removed fixing bolts (pre-tighten 2-3 turns to ensure no thread
misalignment).
• Tighten the bolts with a wrench until they are "secure but not loose". Do not over-tighten to
avoid damaging the coil housing.
Part5
Reinstall Cables and Restore Power

Connect the Coil Electrical Connector
• Align the previously disconnected electrical connector with the interface of the new coil and
insert it straight in. After hearing a "click", pull the connector gently to confirm it is secure and
properly connected.
Connect Ignition Cables According to Marks
• Refer to the marks made in Step 1 of Part 2 (e.g., "Cable 1 to Port 1"), align the boot of each
ignition cable with the coil interface, and push it in firmly until you feel it "lock in place".
Reconnect the Negative Battery Terminal
• Align the negative cable with the negative terminal, fit it on, and hand-tighten the fixing bolt
(pre-tighten 2 turns). Then use a wrench to tighten the bolt to ensure the cable connector is
secure.
• Slight sparks may occur during connection, which is normal. Keep your hands away from the
connector during operation.
Part6
Start-Up Test
Start-Up Check
• Insert the car key, turn it to the "Start" position to start the engine, and observe if the engine
runs smoothly (no obvious vibration or abnormal noise).
• If the engine fails to start: Check if the negative battery terminal is tight and if the ignition coil
connector is properly seated. If the engine vibrates after starting, confirm the connection order
of the ignition cables is correct.
Post-Start Observation (Optional)
• Let the engine idle for 3-5 minutes after starting and check if the "Check Engine Light" on the
instrument panel illuminates. If the light does not come on, the replacement is generally
successful.
Notes
• Store all removed bolts and small parts separately (e.g., in a parts box) to avoid loss.
• Do not use metal tools to strike the engine block or coil interfaces during operation to prevent
component damage.
• After replacement, organize the cables in the engine bay to ensure there are no hanging or
tangled cables before closing the engine bay cover.
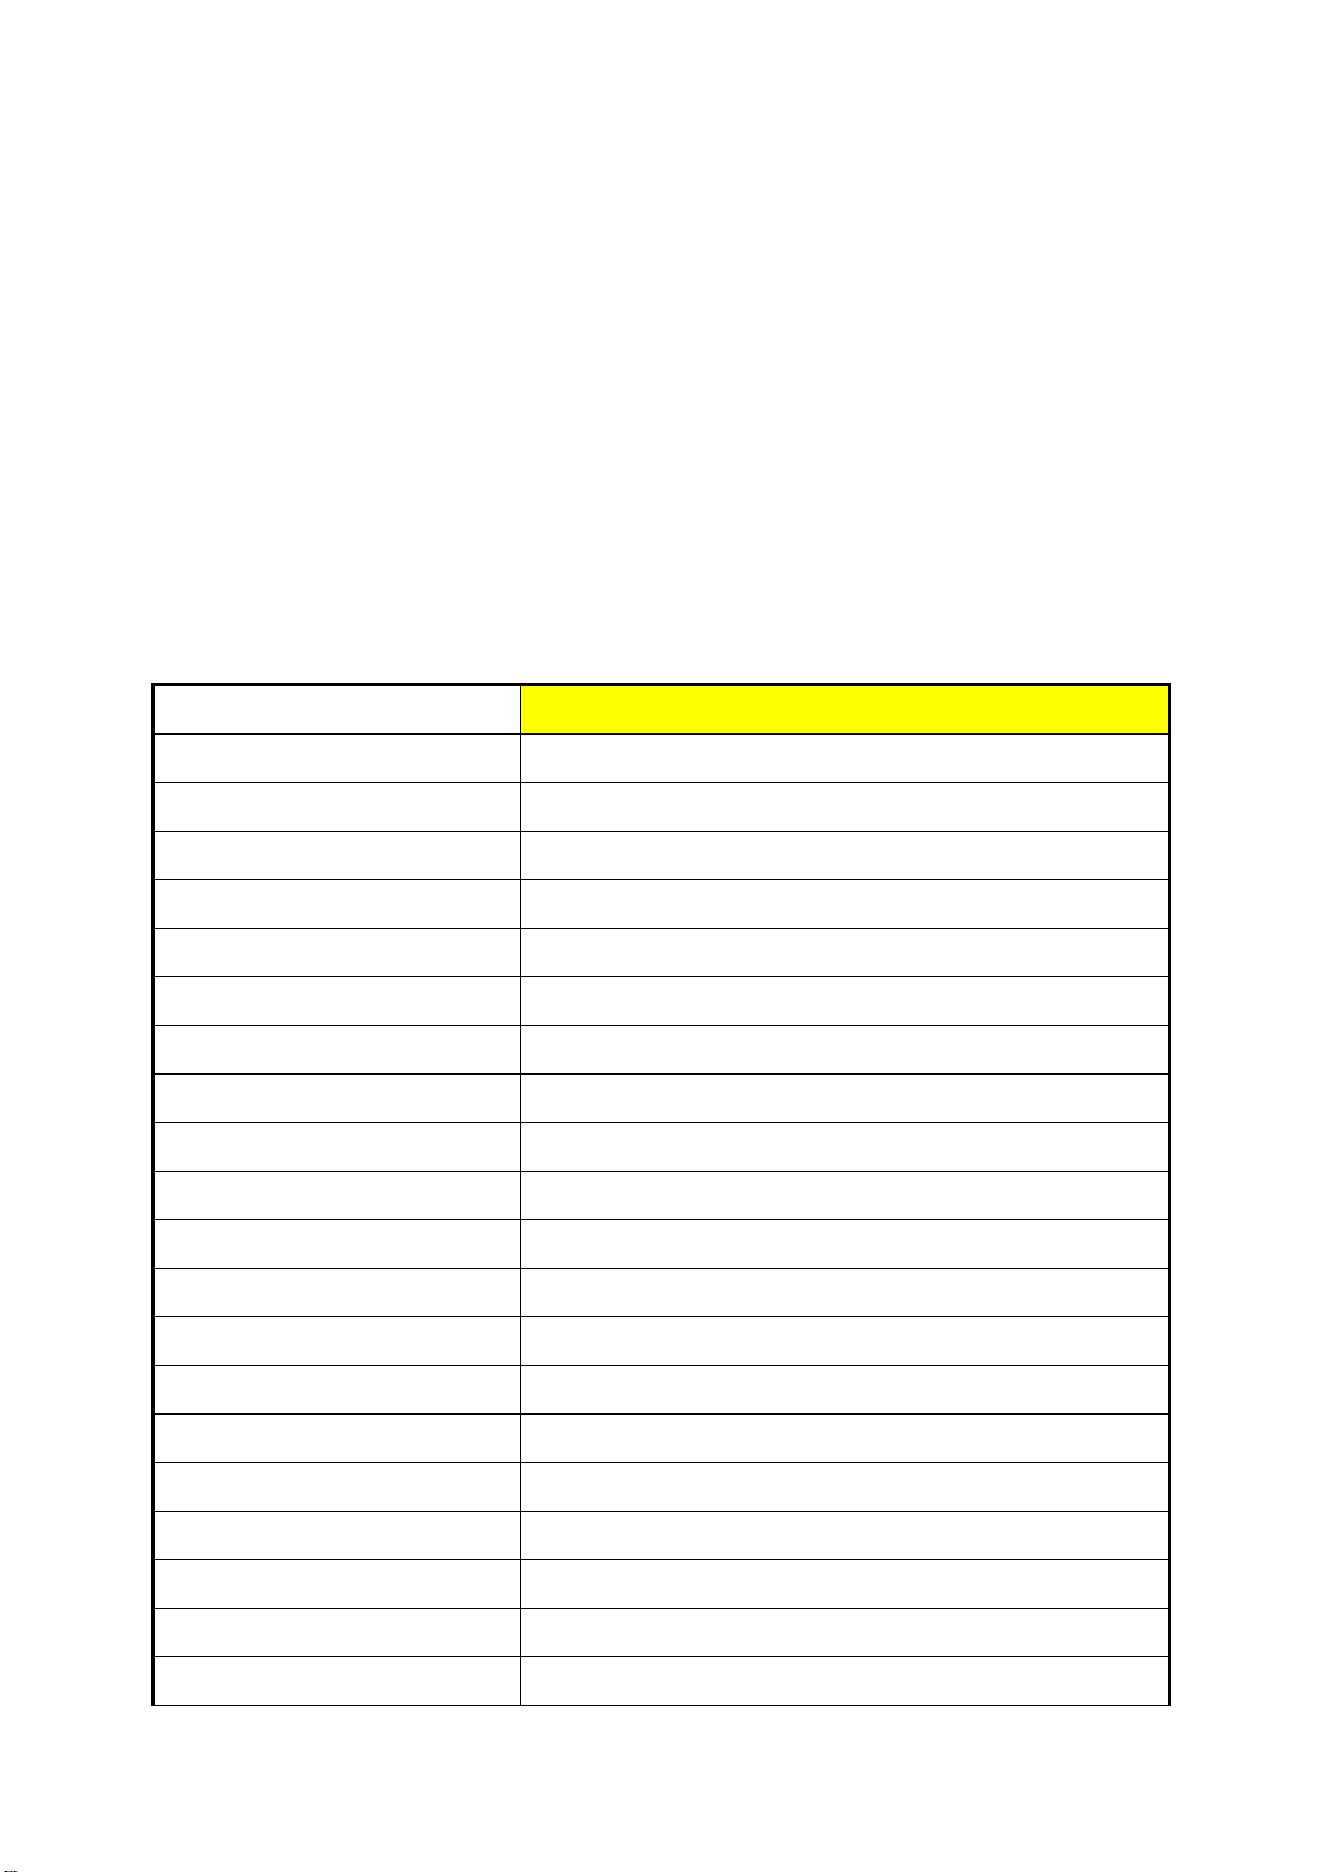
Attachment:
Autoexact Spark Plug Installation Torque Chart
SKU#
Recamanded Torque
OWIC00001
15N.m
OWIC00002
15N.m
OWIC00003
25-30N.m
OWIC00004
15N.m
OWIC00005
15-20N.m
OWIC00006
15-20N.m
OWIC00007
25-30N.m
OWIC00008
15N.m
OWIC00009
25-30N.m
OWIC00010
15-20N.m
OWIC00011
15-20N.m
OWIC00012
25-30N.m
OWIC00013
15N.m
OWIC00014
15-20N.m
OWIC00015
25-30N.m
OWIC00016
25-30N.m
OWIC00017
15N.m
OWIC00018
25-30N.m
OWIC00019
25-30N.m
OWIC00020
25-30N.m

SKU#
Recamanded Torque
OWIC00021
25-30N.m
OWIC00022
15-20N.m
OWIC00023
25-30N.m
OWIC00024
15-20N.m
OWIC00025
15-20N.m
OWIC00026
15-20N.m
OWIC00027
15-20N.m
OWIC00028
15-20N.m
OWIC00029
15-20N.m
OWIC00030
15N.m
OWIC00031
25-30N.m
OWIC00032
15N.m
OWIC00033
15N.m