Tacora Metal Tray
Kabelwanne
Cable Tray
Bandeja portacables
Chemin de câbles
Canalina per cavi
10039710 10039711

Sehr geehrter Kunde,
wir gratulieren Ihnen zum Erwerb Ihres Produktes.
Lesen Sie die folgenden Hinweise sorgfältig durch und
befolgen Sie diese, um möglichen Schäden vorzubeugen.
Für Schäden, die durch Missachtung der Hinweise und
unsachgemäßen Gebrauch entstehen, übernehmen wir
keine Haftung. Scannen Sie den folgenden QR-Code,
um Zugriff auf die aktuellste Bedienungsanleitung und
weitere Informationen rund um das Produkt zu erhalten:
Dear Customer,
Congratulations on purchasing this product. Please read
the following instructions carefully and follow them to
prevent possible damages. We assume no liability for
damage caused by disregard of the instructions and
improper use. Scan the QR code to get access to the
latest user manual and more product information.
Estimado cliente,
Le felicitamos por la adquisición de este producto.
Lea atentamente las siguientes instrucciones y sígalas
para evitar posibles daños. No asumimos ninguna
responsabilidad por los daños causados por el
incumplimiento de las instrucciones y el uso inadecuado.
Escanee el siguiente código QR para obtener acceso a
la última guía del usuario y más información sobre el
producto.
Chère cliente, cher client,
Toutes nos félicitations pour l’acquisition de ce nouveau
produit. Veuillez lire attentivement et respecter
les instructions de ce mode d’emploi an d’éviter
d’éventuels dommages. Nous ne saurions être tenus
pour responsables des dommages dus au non-respect
des consignes et à la mauvaise utilisation. Scannez le QR-
Code pour obtenir la dernière version du mode d‘emploi
et des informations supplémentaires concernant le
produit.
Gentile cliente,
La ringraziamo per aver acquistato il prodotto. La
preghiamo di leggere attentamente le seguenti istruzioni
per l’uso e di seguirle per evitare possibili danni. Non ci
assumiamo alcuna responsabilità per danni scaturiti da
una mancata osservazione delle avvertenze di sicurezza
e da un uso improprio del prodotto. Scansionare il codice
QR seguente, per accedere al manuale d’uso più attuale e
per ricevere informazioni sul prodotto.
4
DE
EN
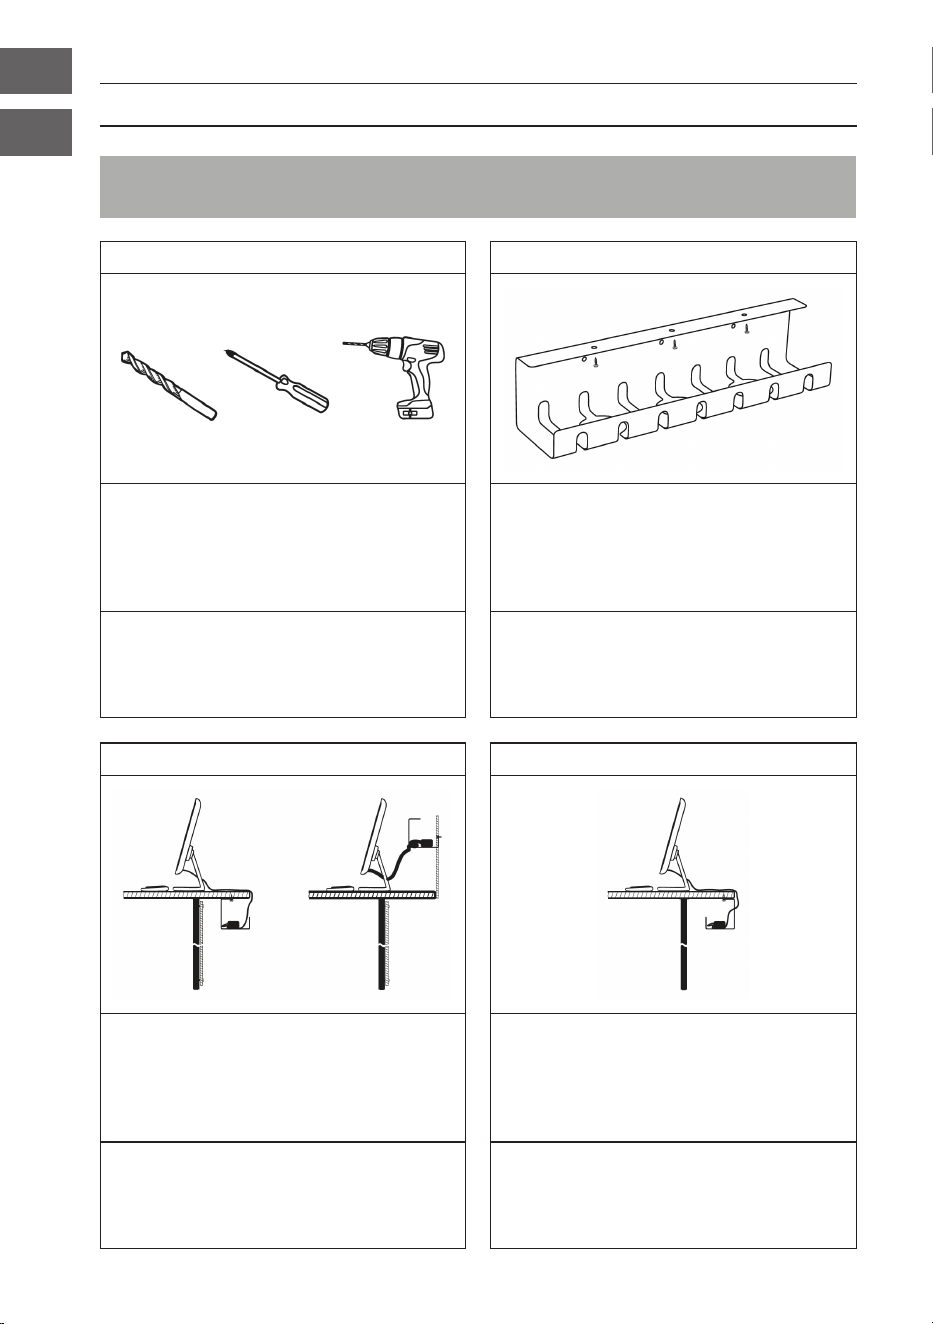
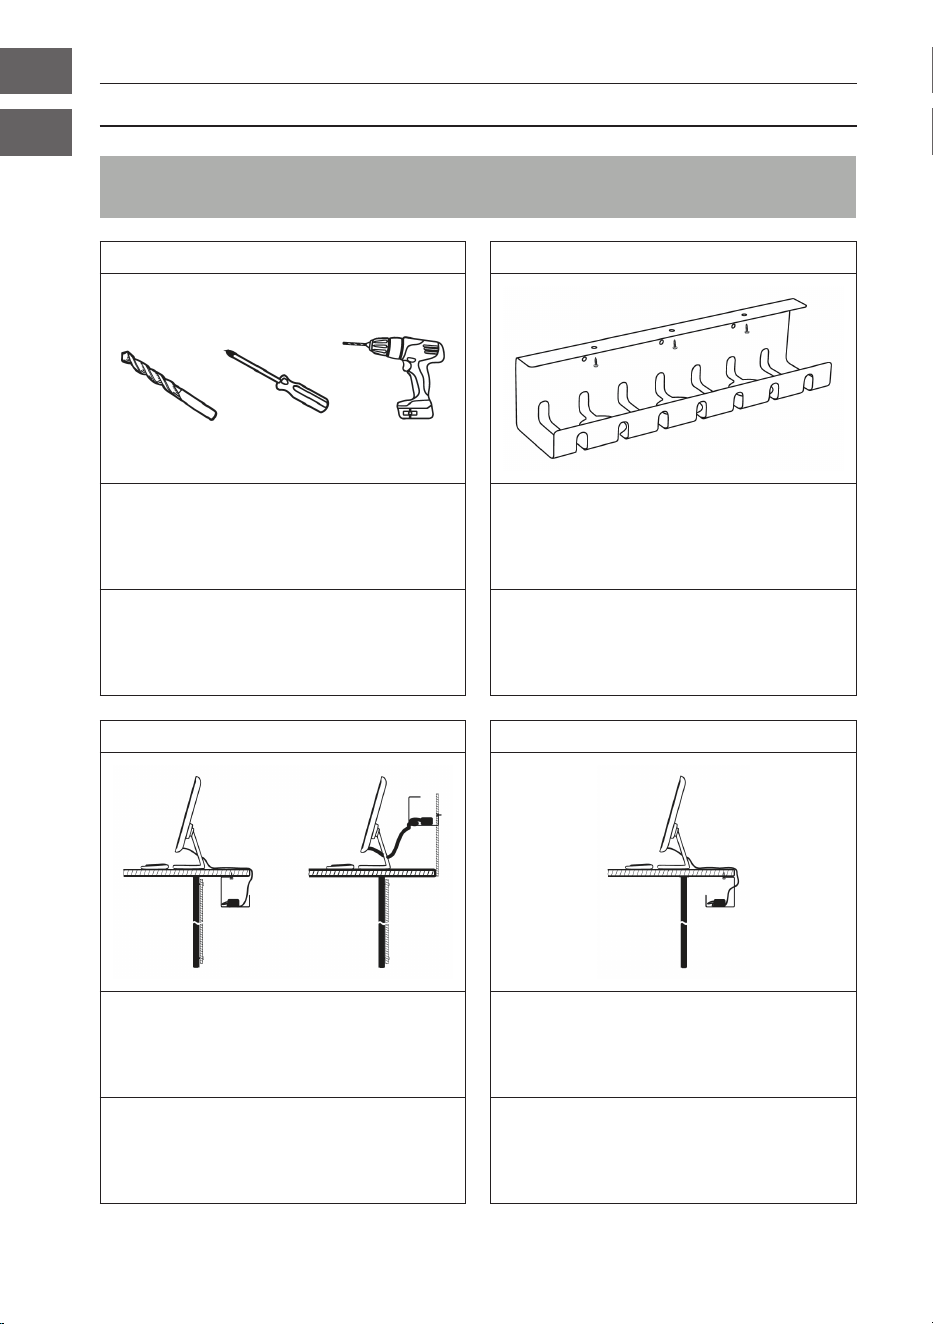
INSTALLATION
Option A: Befestigung mit Schrauben /
Option A: Install with screws
1 2
Verwenden Sie einen Akkubohrer mit
einem Ø 3-mm-Bohrer und einem Kreuz-
schlitzschraubendreher und schon kann es
losgehen. Bohren Sie Vorbohrungen, um
Probleme bei der Installation zu vermeiden.
Montieren Sie die Kabelwanne mit den
mitgelieferten Befestigungselementen.
Grab your cordless drill with a Ø 3mm drill
bit and a Phillips head screwdriver and you
are good to go. Drill pilot holes to prevent
any issues with the installation.
Mount the tray using the provided
fasteners.
3 4
Installieren Sie die Kabelwanne an einer
beliebigen vertikalen Fläche - an einem
Schreibtischteiler oder direkt an der Wand
(Dübel nicht im Lieferumfang enthalten!).
Die Kabelwanne kann je nach Art des
Schreibtisches von vorne oder von hinten
montiert werden. Verwenden Sie die
Schablone an der Seite des Kartons, um die
Vorbohrungen vorzunehmen.
Install the cable tray on any vertical surface-
desk divider screen or straight on the wall
(drywall plugs not included!).
The cable tray can be installed for front or
rear access depending on your type of desk.
Use the template on the side of the box to
pre-drill the pilot holes.
5
DE
EN
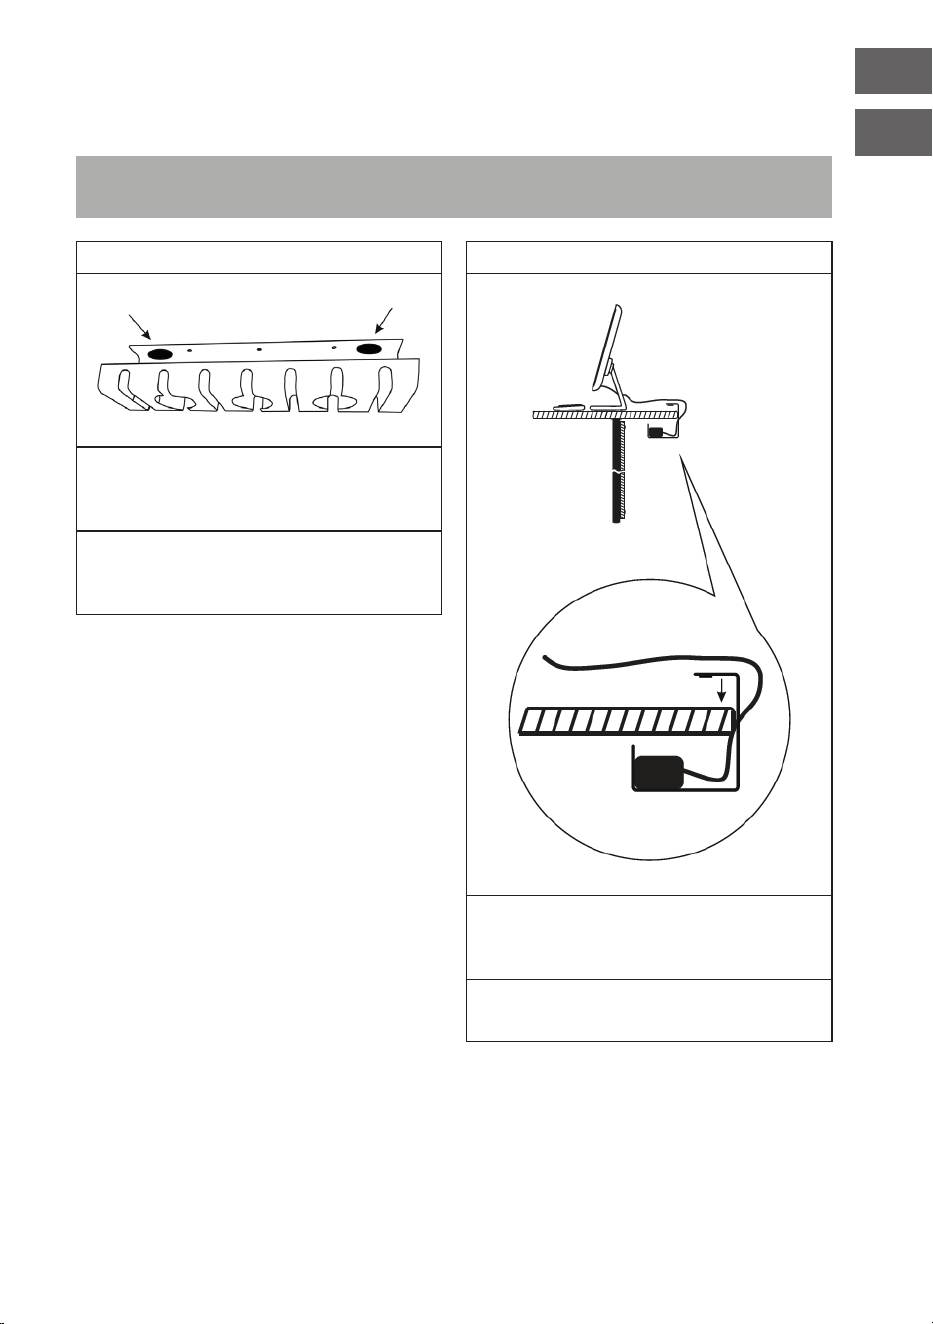
Option B: Befestigung mit doppelseitigen Klebeächen /
Option B: Install with doublesided adhesives
1 2
Suchen Sie die 2 roten doppelseitigen
Klebeächen im Inneren der Kabelwanne
und entfernen Sie die Schutzfolie.
Locate the 2 red double-sided adhesives
inside the tray and remove the protective
lm from them.
Reinigen Sie die Oberäche Ihres Schreib-
tisches und bringen Sie die Kabelwanne mit
den doppelseitigen Klebeächen an.
Clean the surface of your desk and install
the tray using the double-sided adhesives.
6
ES
FR
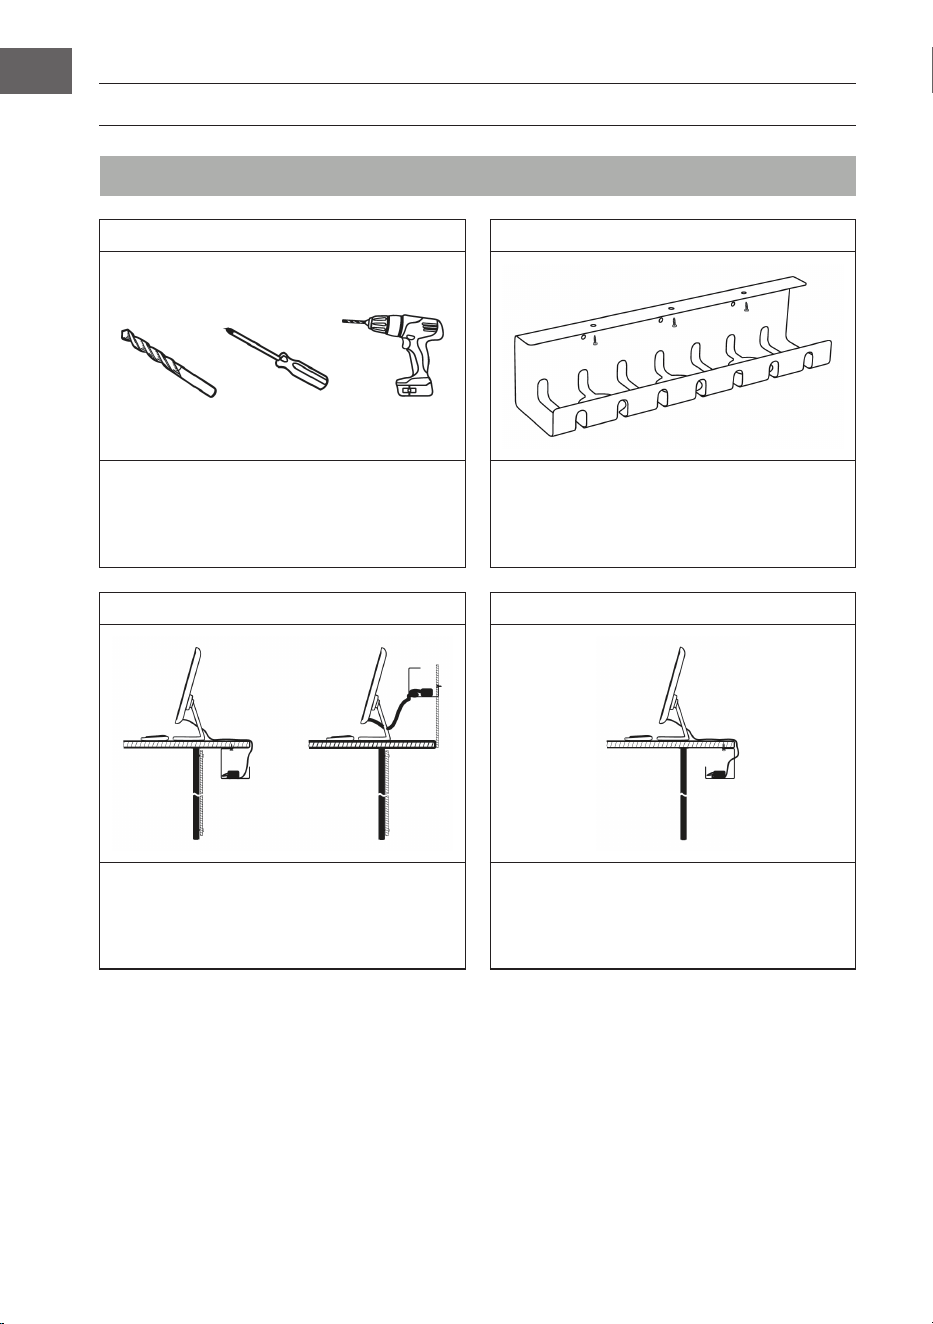
INSTALACIÓN / INSTALLATION
Opción A: atornillar /
Option A : xation avec vis
1 2
Utilice un taladro inalámbrico con una broca
de 3 mm de diámetro y un destornillador de
estrella. Taladre agujeros piloto para evitar
problemas durante la instalación.
Monte la bandeja para cables con los
elementos de sujeción suministrados.
Utilisez une perceuse sans l avec une
mèche de Ø 3 mm et un tournevis crucifor-
me. Faites des pré perçages pour éviter tout
problème lors de l‘installation.
Montez le chemin de câbles à l‘aide des
éléments de xation fournis.
3 4
Instale la bandeja portacables en cualquier
supercie vertical, como un tabique de la
mesa o directamente en la pared (¡tacos no
incluidos!).
Puede jar la bandeja por delante o por
detrás según el tipo de escritorio. Utilice
la plantilla del lateral del cartón para
preperforar los agujeros.
Installez le chemin de câbles sur n‘importe
quelle surface verticale - sur une cloison de
bureau ou directement sur le mur (chevilles
non fournies !).
Le chemin de câbles peut se xer à l‘avant
ou à l‘arrière, selon le type de bureau.
Utilisez le gabarit sur le côté de l‘emballage
pour pré-percer les trous.
7
ES
FR
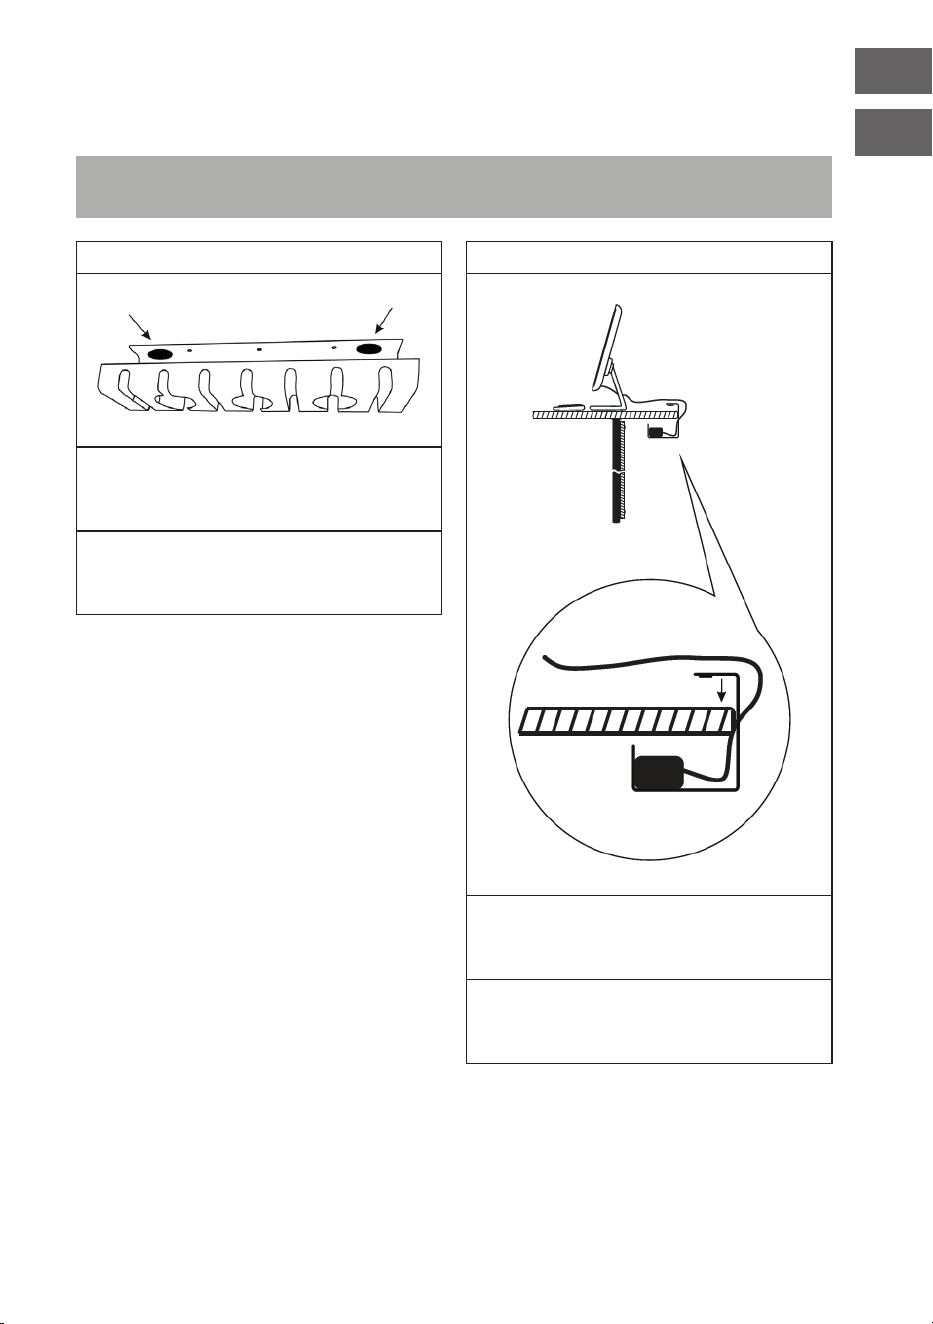
Opción B: jar con adhesivos de doble cara /
Option B : xation avec des les surfaces adhésives double face
1 2
Localice las 2 almohadillas adhesivas rojas
de doble cara en el interior de la bandeja
portacables y retire la película protectora.
Repérez les 2 surfaces adhésives doubles-
faces rouges à l‘intérieur du chemin de
câbles et retirez le lm de protection.
Limpie la supercie de su escritorio y je
la bandeja de cables con las almohadillas
adhesivas de doble cara.
Nettoyez la surface de votre bureau et xez
le chemin de câbles à l‘aide des surfaces
adhésives double face.
8
IT
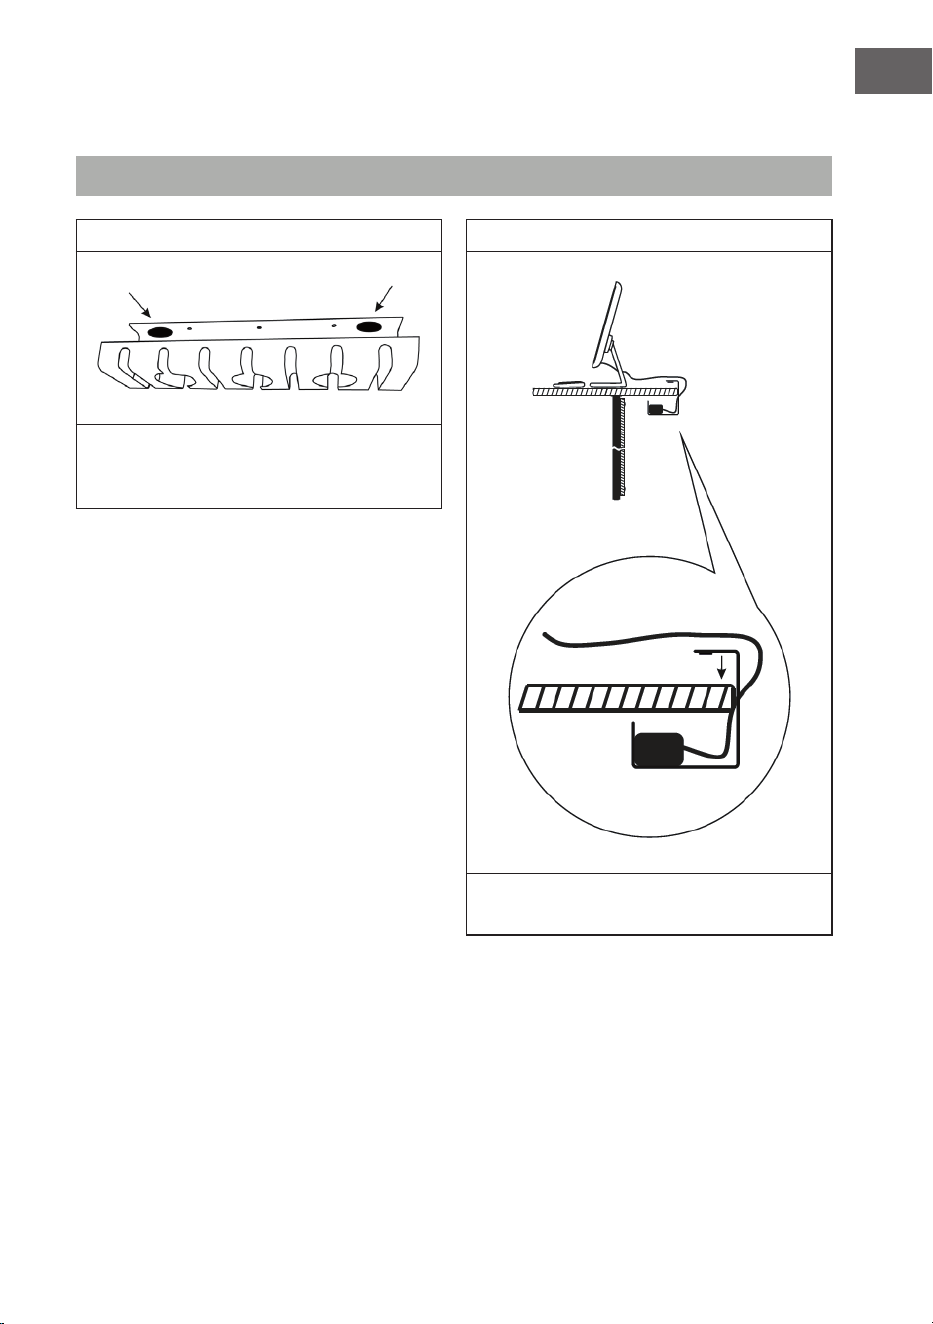
INSTALLAZIONE
Opzione A: ssaggio con viti
1 2
Utilizzare un trapano a batteria con una
punta di Ø 3 mm e un cacciavite a croce.
Praticare i fori in anticipo per evitare prob-
lemi durante l‘installazione.
Montare la canalina per cavi con gli
elementi di ssaggio in dotazione.
3 4
Installare la canalina su qualsiasi supercie
verticale, su un divisorio della scrivania o
direttamente sul muro (tasselli non inclusi!).
La canalina per cavi può essere ssata dal
lato anteriore o posteriore, a seconda del
tipo di scrivania. Usare la sagoma sul lato
del cartone per praticare i fori.
9
IT
Opzione B: Fissaggio con fogli biadesivi
1 2
Individuare i 2 fogli biadesivi rossi
all‘interno della canalina e rimuovere la
pellicola protettiva.
Pulire la supercie della scrivania e ssare il
passacavi con i fogli biadesivi.

HERSTELLER
Producer | Fabricante | Fabricant | Produttore
Chal-Tec GmbH, Wallstraße 16, 10179 Berlin, Deutschland (Germany).
IMPORTEUR FÜR GROSSBRITANNIEN
Importer for Great Britain | Importador para Gran Bretaña | Importateur
pour la Grande Bretagne | Importatore per la Gran Bretagna
Berlin Brands Group UK Ltd
PO Box 1145
Oxford, OX1 9UW
United Kingdom