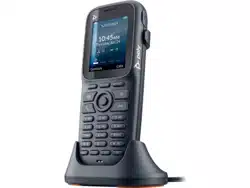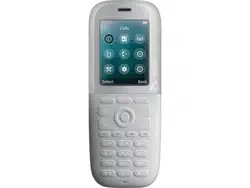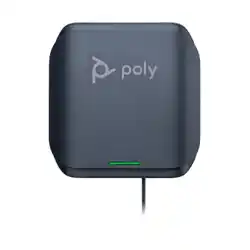

Poly Rove DECT IP Phone User Guide 8.0.12
This guide contains overview information, procedures, and references you can use to perform tasks with
your Poly Rove DECT IP phone.
Poly Rove DECT IP Phone User Guide 8.0.12 1

2

Before You Begin
This guide describes how to configure and administer Poly Rove devices with OBi Edition software.
This guide focuses on the following Poly devices:
● Poly Rove 20 wireless handset
● Poly Rove 30 wireless handset
● Poly Rove 40 wireless handset
● Poly Rove B1 base station
● Poly Rove B2 base station
● Poly Rove B4 base station
● Poly Rove R8 repeater
For information specific to using a Poly OBi device, see Poly Support. For more information about the
concepts in this guide, see the
Poly OBi Device Technical Reference
.
Related Poly and Partner Resources
Poly is now a part of HP. The joining of Poly and HP paves the way for us to create the hybrid work
experiences of the future. Information about Poly products is now transitioning from the Poly Support
site to the HP Support site.
Visit the following sites for information related to this product.
● HP Support is the entry point to online product, service, and solution support information. Find
product-specific information such as Troubleshooting information, Setup & User Guides, Product
Specifications, Warranty & Repair information, support videos, and knowledge base articles on the
product page. You can also download software for desktop and mobile platforms from Software &
Drivers and access additional services from the Account & Registration page.
● The Poly Documentation Library provides support documentation for active products, services, and
solutions. The documentation displays in responsive HTML5 format so that you can easily access
and view installation, configuration, or administration content from any online device.
● The HP Community provides additional tips and solutions from other HP product users.
● The Poly Partner Network is a program where resellers, distributors, solutions providers, and unified
communications providers deliver high-value business solutions that meet critical customer needs,
making it easy for you to communicate face-to-face using the applications and devices you use
every day.
● Poly Services help your business succeed and get the most out of your investment through the
benefits of collaboration. Enhance collaboration for your employees by accessing Poly service
solutions, including Support Services, Managed Services, Professional Services, and Training
Services.
● With Poly+ you get exclusive premium features, insights and management tools necessary to keep
employee devices up, running, and ready for action.
Before You Begin
3

● Poly Lens enables better collaboration for every user in every workspace. It is designed to
spotlight the health and efficiency of your spaces and devices by providing actionable insights
and simplifying device management. You can also download current software for your products
directly from the Poly Lens portal.
Privacy Policy
Poly complies with applicable data privacy and protection laws and regulations.
Poly products and services process customer data in a manner consistent with the Poly Privacy Policy.
Please direct comments or questions to privacy@poly.com.
4 Before You Begin

Getting Started
Poly Rove DECT IP phones are standalone IP-based wireless systems that consist of the following
devices: three wireless handset models, single/dual-cell and multicell base stations, repeaters, chargers,
and multihandset charging stations.
Getting Started 5

Overview of HP Poly Rove DECT IP Phones
Review the following information for an overview of Poly Rove DECT IP phones.
Poly Rove phones include the following features and functionality:
● Signal range up to 50 m (165 ft) indoors and 300 m (980 ft) outdoors
● Support for standard SIP-based IP PBX and ITSPs/VSPs
● High-quality voice encoding using G.711, G.722, G.726, and Opus codecs
● VoIP network management for endpoint devices and applications
● Cloud management enabled via the PDMS-SP service with both a user portal and an ITSP partner
portal
● Recursive digit maps and associated call routing (outbound and inbound)
● Support for large scale deployments with up to 254 Rove B4 base stations
Poly Rove wireless handsets
Poly Rove wireless handsets enable voice communication and some system interaction for controlling
features on a Poly Rove base station.
There are multiple models of Poly Rove wireless handsets:
● Poly Rove 20 wireless handset
● Poly Rove 30 wireless handset
● Poly Rove 40 wireless handset
Overview of Poly Rove 20 Wireless Handsets
Poly Rove 20 wireless handsets support the following features and functionalities:
● Four programmable line keys for speed dials or features
● Wideband audio support for the G.722 and Opus audio codecs
● 5.08 cm (2 in.) color screen
● Lithium ion battery with up to 400 standby hours and 35 talk hours
● 3.5 mm headset port
Overview of Poly Rove 30 Wireless Handsets
Poly Rove 30 wireless handsets support the following features and functionalities:
● Antimicrobial coating to make cleaning and sanitizing handsets easier
● Four programmable line keys for speed dials or features
● Wideband audio support for the G.722 and Opus audio codecs
● 6 cm (2.4 in.) rugged color screen with a IP65 rating
● Lithium ion battery with up to 300 standby hours and 18 talk hours
6
Getting Started

Overview of Poly Rove 40 Wireless Handsets
Poly Rove 40 wireless handsets support the following features and functionalities:
● Antimicrobial coating to make cleaning and sanitizing handsets easier
● Four programmable line keys for speed dials or features
● Wideband audio support for the G.722 and Opus audio codecs
● 6 cm (2.4 in.) rugged color screen with a IP65 rating
● Lithium ion battery with up to 300 standby hours and 18 talk hours
● Programmable emergency button
● Bluetooth device pairing for up to four devices
Poly Rove Base Stations
Rove DECT IP phone systems support up to 254 base stations on the same network and can support up
to 1000 registered handsets, depending on the number of paired base stations.
There are multiple models of Poly Rove base stations:
● Poly Rove B1 single-cell base station
● Poly Rove B2 single/dual-cell base station
● Poly Rove B4 multicell base station
NOTE: You can pair only the same model base stations. For example, you can’t pair Poly Rove B2 base
stations with Rove B4 base stations.
Overview of Poly Rove B1 Single-Cell Base Stations
The following features are supported for each Rove B1 base station:
● Support for up to 10 SIP registrations
● Support for up to 10 registered handsets
● Support for up to 10 concurrent narrowband calls and 5 concurrent wideband calls
● Support for 1 base station per system
● Support for up to 3 paired Rove R8 repeaters per base station
● High-quality voice encoding
● Cloud management via the PDMS-SP service with both a user portal and an ITSP partner portal
Overview of Poly Rove B2 Single/Dual-Cell Base Stations
The following features are supported for each Rove B2 base station:
● Support for up to 20 SIP registrations
● Support for up to 20 registered handsets
Poly Rove Base Stations
7

● Support for up to 10 concurrent narrowband calls and 5 concurrent wideband calls
● Support for up to 2 paired base stations
● Support for up to 6 paired Rove R8 repeaters per base station
● High-quality voice encoding
● Dual DECT base station solution for wider coverage, higher concurrent call volume, and redundancy
● Cloud management via the PDMS-SP service with both a user portal and an ITSP partner portal
Overview of Poly Rove B4 Multicell Base Stations
The following features are supported for each Rove B4 base station:
● Support for up to 1000 SIP registrations
● Support for up to 30 registered handsets per base station and 1000 handsets in a multicell system
● Support for up to 10 concurrent calls per station and 1000 concurrent calls in a multicell system
● Support for up to 254 paired base stations in large-scale DECT deployments
● Support for up to 3 paired Rove R8 repeaters per base station
● High-quality voice encoding
● Multicell base station solution for wider coverage, higher concurrent call volume and redundancy
● Cloud management via the PDMS-SP service with both a user portal and an ITSP partner portal
Poly Rove repeaters
Poly Rove R8 repeaters enable you to increase the signal coverage between Poly Rove wireless
handsets and base stations. This ensures that your users have the best signal coverage for managing
calls.
Poly Rove R8 repeaters extend the signal range between base stations and wireless handsets by 50 m
(165 ft) indoors and up to 300 m (980 ft) outdoors. You can pair a maximum of six repeaters to one base
station and daisy-chain up to three repeaters.
Overview of Poly Rove R8 Repeaters
Poly Rove R8 repeaters support the following features and functionalities:
● Pairing up to three repeaters for each Poly Rove B1 base station
● Pairing up to six repeaters for each Poly Rove B2 base station
● Pairing up to three repeaters for each Poly Rove B4 base station
● Encrypted daisy-chaining (cascade) for up to three repeaters
● Two simultaneous wideband calls and five narrowband calls per repeater
● High-level DECT encryption
● DECT recovery
● Automatically hand-off calls between repeaters
8
Overview of HP Poly Rove DECT IP Phones

Poly Rove Status Indicators
Poly Rove DECT IP phones have LED indicators that indicate the status of the different phone
components.
NOTE: You can program the LED indicators on the wireless handset if you want to change them from
the default settings.
The following tables provide information on the LED indicators and the default system states for each of
the DECT IP phone components.
Table 1 Poly Rove Wireless Handset Status Indicators
LED indicator Default status
Green Voice message
Yellow Low battery
Red Missed call
Flashing red and green Software update
Table 2 Poly Rove base station status indicators
LED indicator Status
No indicator Powered off
Solid green Registered; good quality signal
Blinking green Searching for nearby base stations, or handset or repeater
registration
Solid red Powered on, but has an error or no signal
Blinking red Firmware update or factory reset in progress
Slow blink red SIP registration failure
Solid orange Powered on, but has poor signal quality
Blinking orange Searching for IP address
Poly Rove repeaters have two states of LED indicators:
● Not registered to a base station or repeater
● Registered to a base station or repeater
Table 3
Poly Rove repeater status indicators - not registered
LED indicator Status
No indicator Powered off
Blinking green Unlocked; searching for base station
Flashing green Registration/subscription mode and searching for open base
station; registering procedure
Solid green Locked to base station and ready for use; idle
Poly Rove Status Indicators 9

Table 3 Poly Rove repeater status indicators - not registered (continued)
LED indicator Status
n
Blinking red
n
handset relayed by repeater
Solid red Registration procedure timed out after 5 minutes
NOTE: When you press a key, the LED lights up in 2 seconds
to indicate that releasing the key deletes the registration. The
LED turns off after 4 more seconds.
Blinking red and green Recovery mode – the repeater locks to a base station or
repeater without repeater mode activated
● Sync: source base station/repeater not found (Manual
mode)
● Timeout during Radio fixed Part Number (RPN) allocation
because of a busy base station or repeater
Table 4 Poly Rove repeater status indicators - registered
LED indicator Status
No indicator Powered off
Solid red Error condition; unacceptable Received Signal Strength
Indicator (RSSI), below -90dBm; critical error
Solid green Ethernet connection available; normal operation with good
RSSI, equal to or better than -75dBm
Blinking green Searching for base stations and handset/repeater registration
Blinking red Ethernet connection not available or handset de/registration
failed
Slow blinking red SIP registration error
Solid orange Normal operation with pure RSSI, from -90dBm to -75dBm
Table 5 Poly Rove multicharger status indicators
LED indicator Status
Red Charging
Green Charged
Supported Audio Codecs and Concurrent Calls
Poly Rove base stations and R8 repeaters support several narrow and wideband audio codecs. For each
base station, the number of concurrent calls that are supported varies according to the codec used.
IMPORTANT: If the Push-to-Talk feature is in use, it uses two of the DECT channels and reduces the
number of concurrent calls supported by two. For example, using PTT in a Rove B2 single cell system
using the G.711 codec with SRTP reduces the number of supported concurrent calls from 10 to eight. To
enable the feature, see the Poly Rove DECT IP Phone User Guide.
10
Overview of HP Poly Rove DECT IP Phones

Poly Rove Base Stations - Supported Audio Codecs and Concurrent Calls
The information in the following table describes the number of concurrent calls supported for an audio
codec for a Rove B1, a single-cell Rove B2 or a Rove B4 base station. If you have deployed a single-cell
or dual-cell B2 or B4, or a multicell B4 base station, use the following examples to determine how many
concurrent calls are supported for each codec.
● Using the G.711 codec with SRTP, a single-cell B2 device supports 10 concurrent calls.
● Using the G.711 codec with SRTP, a dual-cell device supports 20 concurrent calls, or
2 x 10
. You can
use this formula:
n x c
where
n
is the number of cells and
c
is the number of calls supported for a single cell device. As this
is a dual -cell device, the value for
n
is always two.
● Using the G.711 codec with SRTP, a single-cell B4 device supports 8 concurrent calls.
● Using the G.711 codec with SRTP, a dual-cell device supports 16 concurrent calls, or
2 x 8
. You can use
the formula introduced earlier:
n x c
where
n
is the number of cells and
c
is the number of calls supported for a single-cell device.
● Using the G.711 codec with SRTP, you can work out how many concurrent calls a multicell device
supports by using the same formula:
n x c
where
n
is the number of cells in the multicell Rove B4, and
c
is the number of calls supported for a
single-cell Rove B4. For this codec example,
n
x 8 concurrent calls, where
n
is the number of cells.
Table 6
Poly Rove Base Stations: Supported Audio Codecs and Concurrent Calls
Functionality Rove B1 Rove B2 Rove B4
Number of SIP extensions
per system
10 20 30
Number of DECT
registrations per system
10 20 30
G.711 number of concurrent
calls per device with SRTP
10 10 8
G.711 number of concurrent
calls per device without
SRTP
10 10 10
G.722 number of
concurrent calls per device
with SRTP
5 5 5
G.722 number of
concurrent calls per device
without SRTP
5 5 5
Supported Audio Codecs and Concurrent Calls 11

Table 6 Poly Rove Base Stations: Supported Audio Codecs and Concurrent Calls (continued)
Functionality Rove B1 Rove B2 Rove B4
Number of concurrent calls
per device with or without
SRTP and with G.722 in the
codec list
9 9 9
G.729 number of
concurrent calls per device
with SRTP
4 4 8
G.729 number of
concurrent calls per device
without SRTP
4 4 10
Opus number of
concurrent calls per device
with SRTP
2 2 4
Opus number of
concurrent calls per device
without SRTP
2 2 4
Poly Rove R8 Repeaters - Supported Audio Codecs and Concurrent Calls
The information in the following table describes the number of Rove R8 repeaters and concurrent calls
supported for audio codecs for a single-cell Rove B1, B2 or Rove B4 base station, a dual-cell Rove B2 or
Rove B4, and a multicell Rove B4 base station.
IMPORTANT: The base station determines the number of concurrent calls supported. Repeaters only
extend the call range.
Table 7
Poly R8 Repeaters Supported Audio Codecs and Concurrent Calls
Functionality Single Cell Dual Cell Multicell
Rove B1/B2 Rove B4 Rove B2 Rove B4 Rove B4
Number of Rove
R8 repeaters
supported
3/6 3 12 6 100
NOTE: The
maximum number of
repeaters allowed in
a multicell system is
100.
Number of
concurrent calls
per system -
Narrowband
5 5 5 5
n
x
c
NOTE:
n
is the
number of cells in the
multicell Rove B4,
and
c
is the number
of calls supported
for a single-cell Rove
B4.
Number of
concurrent calls
per system -
Wideband
2 2 2 2
n
x
c
12 Overview of HP Poly Rove DECT IP Phones

Table 7 Poly R8 Repeaters Supported Audio Codecs and Concurrent Calls (continued)
Functionality Single Cell Dual Cell Multicell
Rove B1/B2 Rove B4 Rove B2 Rove B4 Rove B4
Number of
concurrent calls
per system with
daisy-chaining
repeaters -
Narrowband
NOTE: Daisy-
chaining
repeaters
reduces the
number of
concurrent calls
by one,
regardless of the
number of
repeaters
chained together.
4 4 4 4
n
x
c
Number of
concurrent calls
per system with
daisy-chaining
repeaters -
Wideband
NOTE: Daisy-
chaining
repeaters
reduces the
number of
concurrent calls
by one,
regardless of the
number of
repeaters
chained together.
2 2 2 2
n
x
c
Supported Audio Codecs and Concurrent Calls 13

Configuration Options
Poly offers different methods to configure your Poly Rove system.
Use the following options to configure and manage your Poly Rove system:
● System web interface
● Remote provisioning
● Interactive voice response (IVR) system
Access the system web interface
Access the Poly Rove system web interface from a computer using a web browser.
Although all popular browsers are tested for compatibility with the system web interface, some
inconsistencies may arise from time to time. Contact HP Support if you have any questions about
the system web interface and how it appears in your browser window.
IMPORTANT: When you change settings on the system web interface, you must submit every
configuration page after you make changes. If you don’t save the changes, the system discards them
once you go to another page.
Many changes also require you to reboot the system for them to take effect. However, you can reboot
the unit just once after you complete all the changes.
1. On the wireless handset, press Menu , then select Info .
The base station’s IP address displays.
2. Enter the IP address in a web browser on your computer.
3. When prompted, enter the username and password.
The default username is admin, and the default password is admin.
NOTE: When you log in for the first time, you must change the password from the default.
Remote provisioning
Manage the local interface and network interaction on Poly Rove systems directly from the PDMS-SP
service or using your own remote provisioning server.
For more information on remote provisioning your Poly Rove system, review the Poly Rove Parameter
Reference Guide and the OBi Edition Provisioning Guide at the Poly Documentation Library.
14
Getting Started

Audio Calls
Poly Rove DECT™ IP phone DECT IP phones support up to seven concurrent calls per base station and
can make or answer a maximum of two calls.
Audio Calls 15

Placing Calls
You can place a call using the default line or an alternate line.
Place a Call Using the Default Line
Unless you choose an alternate line, the phone uses your default line when you place a call.
1. Do one of the following:
● Enter your contact’s number.
● Select a contact from a directory.
● Select a contact from the recent calls list.
● Select a message from the Messages list.
2. Press Call .
Place a Call Using an Alternate Line
You can choose to use an alternate line before placing a call.
1. Press Lines and select a line.
2. Do one of the following:
● Enter your contact’s number.
● Select a contact from a directory.
● Select a contact from the recent calls list.
3. Select OK.
4. Press Call .
Place a New Call During an Active Call
You can place new calls to contacts during active calls.
1. While in an active call, press New Call.
2. Enter a contact’s number or choose a contact from the directory or recent calls.
3. Do one of the following:
● Press Call.
● If the called handset has multiple lines, choose a line and press Call.
Call a Contact from a Directory
You can call any contact stored in the contact directory on the wireless handset.
1. Do one of the following:
● From the
Home
screen, select Contacts.
16
Audio Calls

● Press Menu > Contacts .
2. Choose a contact and select Call.
Call a Contact Using Speed Dial
You can quickly call contacts from the wireless handset using speed dial.
Save the contact as a speed dial entry.
■
Do one of the following:
● Press and hold the number key for your speed dial entry.
● If programmed for speed dials, press a function key for your speed dial entry.
The phone dials the contact saved for that entry.
Call a Recent Contact
The wireless handset stores a record of all calls placed on the handset, and you can place calls from the
Calls list.
1. On the
Home
screen, select Calls.
By default, the
All calls
screen displays.
2. Do one of the following:
● Choose a contact in the All Calls list and then select Call.
● Use the navigation keys to view the Received calls, Dialed calls, or Missed calls lists, then select
a contact and select Call.
Access Voicemail Messages
You can access and listen to new voicemail messages from the wireless handset.
1. Go to Menu > Messages.
2. Select Message Center.
3. Choose a line, then press Select.
The wireless handset accesses the message center, and you can listen to new voicemail
messages.
Placing Intercom Calls
Intercom calls enable you to place a call to a contact that the contact’s phone answers automatically as
long as the contact isn’t in an active call.
If the contact is in an active call, the contact can choose to answer the intercom call, or the phone
answers the intercom call automatically after the active call ends.
Place an Intercom Call
You can place an intercom call to quickly relay a message to a contact.
Call a Contact Using Speed Dial
17

1. Go to Menu > Intercom, then choose the wireless handset you want to connect with.
2. Do one of the following:
● Press the Speakerphone button.
● Select Call.
● Select OK.
3. When you’re done with your message, select End .
Place an Intercom Call During a Call
Place an intercom call to another contact during an active call.
1. During a call, go to Options > Hold.
2. Select New Call > Intercom, then choose the wireless handset you want to connect with.
3. When you’re done with your message, select End .
4. Resume the held call.
18
Placing Intercom Calls

Answering Calls
When you get an incoming call on a Poly Rove DECT™ IP phone DECT IP phone, you can choose to answer
the call in various ways.
Answer an Incoming Call
Answer an incoming call from the wireless handset.
■
Do one of the following:
● Press the Call button.
● Press the Speakerphone button.
● Select the Answer softkey.
Answer an Incoming Call During a Call
A tone plays when you receive an incoming call during an active call.
■
Do one of the following:
● Select Call .
● Press the Speakerphone button.
The first call goes on hold automatically.
Answering Calls
19

Holding and Resuming Calls
When you are in a call, you can place an active audio call on hold and resume the call.
Hold a Call
You can place up to two active calls on hold at any time.
■
During a call, select Options > Hold.
Resume a Call
You can resume any held call on the wireless handset.
■
Select Options > Resume.
Switch Between Calls
You can switch between calls when you have at least one active call and one held call on the wireless
handset.
■
With one active call and a held call, press Swap.
End a Call
You can end an active call at any time.
■
Do one of the following:
● Select End .
● Place the wireless handset in its cradle or the charging cradle.
20
Audio Calls

Transferring Calls
You can transfer a call to another wireless handset, to a directory contact, or to a designated number.
Transfer a Call to Another Wireless Handset
You can transfer a call on your wireless handset to another contact to enable someone else to take the
call or to resume the call on another handset.
1. During a call, select Options > Transfer.
2. Enter a number or select a contact from a directory or the recent calls list.
3. Select Call.
4. Talk with your contact, then select Options > Transfer again to complete the transfer.
Blind Transfer a Call to a Contact
Blind transferring a call sends the call to another contact without your speaking to the contact first.
1. During a call, select Options > Blind Transfer.
2. Enter a number or select a contact from a directory or the recent calls list.
3. Select Transfer.
The phone transfers the call when the contact answers the call.
Transferring Calls
21

Parking Calls
When you park a call, you can put the call on hold and resume it on another wireless handset.
You can park a call locally on the Poly Rove base station or in a parking lot on your service provider’s
network, if available. You can retrieve a parked call on a wireless handset by entering a dedicated
retrieval code. This feature is only available for lines registered with a service that supports call park.
Park a Call on a Extension
You can park active calls from your wireless handset directly onto a contact’s line extension.
When you park a call on an extension, the call is moved from the handset’s line, and the phone notifies
the contact that a call is parked.
1. During the call, go to Options > Call Park.
2. Enter the extension where you want to park the call.
For example, enter 6889.
3. Select Park.
Retrieve a Call Parked on an Extension
You can retrieve a parked call from any phone or wireless handset on the network.
You must have the retrieval code for the parked call. The retrieval code is set when parking a call.
1. Enter the retrieval code, then enter the extension where you parked the call, followed by a pound
sign (#).
For example, enter *88, then enter 6889#.
2. Press Call .
Enhanced Call Park
Enhanced Call Park is a feature that enables line keys on the phone to park a call and retrieve a parked
call. Check with your system administrator about this feature in your company's deployment.
Park a Call with a Line Key
● During the call, press a L1-L4 line key that is solid green.
Solid green indicates that the park extension is available for parking a call.
View Parked Call Details
If your administrator has enabled enhanced call park, you can view the details of all calls parked in any
parking lot your wireless handset is configured to monitor.
TIP: You can resume a parked call from the
Parked Calls
screen.
1. Do one of the following:
● Select Pick Up and then select Parked Calls.
● Select Menu and then select Parked Calls.
22
Audio Calls

2. Choose a parked call from the list and press the Info softkey.
3. Press the Down Arrow Key to view more details.
Retrieve a Call with a Line Key
■
Do one of the following:
● Press the L1-L4 line key to view the parked call details, then press the L1-L4 line key again or the
Pick Up softkey to retrieve the call.
● Press the middle softkey P and then press the Pick Up softkey to retrieve the call.
Retrieve a Call with a Line Key 23

Rejecting Incoming Calls
You can reject incoming calls manually via the handset, or automatically by enabling Do Not Disturb
(DND).
Reject an Incoming Call
You can reject rather than answer incoming calls on the wireless handset.
■
Press End .
Set an Incoming Call to Silent
You can set an incoming call to silent if you don't want to answer a particular call.
● When the phone is ringing, press the Silence softkey.
The phone stops ringing but the display continues to flash until the caller hangs up or the call goes
to voicemail. The phone rings when the next call is received.
Rejecting Calls with Do Not Disturb
Do Not Disturb (DND) enables you to set your phone to automatically reject calls when you don’t want to
be interrupted.
Enable Do Not Disturb
Do Not Disturb (DND) enables you to set your phone to automatically reject calls when you don’t want to
be interrupted.
1. On the wireless handset, go to Menu > Do Not Disturb.
2. Select Enable.
The handset doesn't ring for any calls until you disable Do Not Disturb.
24
Audio Calls

Forwarding Calls
You can enable call forwarding for any private lines registered on the wireless handset, and you can
choose to forward an incoming call to the handset.
You can’t enable call forwarding or forward incoming calls on shared lines or lines registered on multiple
phones.
Enable Call Forward
You can enable your wireless handset to forward all incoming calls or forward calls based on the status
of the handset.
1. Go to Menu > Call Forward.
2. Choose one of the following options:
● Always
● No answer
● Busy
3. Select On, then enter the number for your forwarding contact.
4. Optional: If you select No answer as your forwarding option, set the time in seconds when to
forward the call.
5. Select Back to return to the
Home
screen.
Forwarding Calls
25

Quickly Place an Emergency Call
Depending on how your administrator configures the handset, the button may also sound an alarm
when pressed or there may be a slight delay before the call is placed. Check with your administrator for
the exact feature configurations.
■
Press and hold the Emergency button for 5 seconds.
Cancel an Emergency Call or Alarm
You can cancel an emergency call or an alarm if you accidentally press the button or if the call is no
longer needed.
If configured by your system administrator, a warning displays on screen when you press the Emergency
button, and you have the option to cancel the alarm before the action is initiated.
■
Press Cancel.
26
Audio Calls

Conference Calls
You can initiate audio conference calls with various contacts on Poly phones. When you initiate a
conference call, you can manage conference participants, join calls into a conference, or split your
conference into individual calls.
Initiate a Conference Call
Initiate a conference call with up to two contacts.
1. Call your first contact.
2. During the call, go to Options > Conference.
The first call is placed on hold.
3. Enter a number or select a contact from a directory or the recent calls list.
4. Go to Options > Conference.
The two calls are joined into a conference call.
Join Calls to Create a Conference Call
Join one active call and one held call into a conference call.
1. When you have an active call and a held call, go to Options > Conference.
2. Select Select.
The phone joins the calls into a conference call. If you have multiple held calls, the other held calls
on the line remain held.
Split a Conference Call
When you split a conference, you end the conference call and place the other two people on hold.
After you split a conference call, you can resume one of the held calls.
■
During a conference call, select Split.
The conference call ends, and phone places the two participants on hold in two separate calls.
Conference Calls
27

Shared Lines
If there’s a shared line for more than one wireless handset, any of the handsets can receive an incoming
call on the line, barge in on other calls, and pick up a held call.
This feature is only available for lines registered with services that support shared lines.
Barge In
You can barge in on an active call on another wireless handset on the shared line.
1. During an active call, select Lines.
2. Choose the shared line that contains the active call.
3. Go to Options > Barge In.
Pick Up Held Calls
When you place a call on hold on a shared line, you can pick up and resume the call from your wireless
handset.
1. On the wireless handset, select Lines.
2. Choose the shared line that contains the held call.
3. Go to Options > Resume.
28

Group paging
Group paging enables you to broadcast one-way audio announcements to users who are subscribed to
a specific page group. Group paging is available on all Poly Rove phones.
Use the group paging feature to message users using the following Poly phones in addition to users on
Poly Rove devices:
● Poly VVX Series phones
● Poly CCX Series phones
● Poly Trio phones
● Poly Edge E Series phones
The following limitations apply when using group paging on Poly Rove phones:
● Enabling group paging on Poly Rove decreases the number of concurrent calls allowed on the
system by two.
● Only one group page can be active on the Poly Rove system at one time. If there is an active page
and a user tries to send a group page from a Poly Rove handset, the handset displays an error.
● There are 25 UC Software page groups users can subscribe to, but you can configure only up to 8
page groups on Poly Rove. By default, the phone selects page groups 1 to 6, as well as the priority
(24) and emergency (25) groups.
While Poly Rove can send and receive group pages for the priority and emergency groups, there is
no special handling of those groups. Poly Rove treats them the same as the other page groups.
● The audio codec used for group paging must match all other devices and phones on the network
that support the multicast group paging feature.
For example, if you configure Poly Rove to use G722 for the group paging codec, then you must also
configure all UCS phones on the network to use the G722 codec for multicast group paging.
● Group pages are only broadcast on handsets registered to base stations located on the group page
originator's broadcast subnet unless Poly Rove B2 and Poly Rove B4 systems are comprised of base
stations on multiple network subnets, however, group pages will only be broadcast on handsets
registered to base stations that are located on the group page originator's broadcast subnet unless
the local network switching infrastructure permits cross-subnet multicast traffic.
● The caller ID used in outgoing group pages from Poly Rove use the SIP display name
(X_DisplayNumber) configured for the lowest SPx service that the handset is assigned to. If there
is no configured SIP display name, then the phone uses the IPEI of the handset sending the group
page as the caller ID.
Group paging
29

Using group paging on Poly Rove
Use the Group Paging feature to make an announcement over a group of phones.
If group paging is configured on your phone, you do the following:
● Subscribe to a paging group.
● Change the default paging group used for sending pages using the Push-To-Talk (PTT) method on
the Poly Rove handset.
● Send a page to a group by selecting a group from the paging menu.
● Send a page using the PTT action.
Subscribe to a paging group
Group paging allows users to subscribe to up to 8 paging groups.
IMPORTANT: Changing the subscription from the handset will override the
PageGroupReceiveMask setting on the Rove base station. Resetting the settings on the handset will
revert the settings on the handset to match PageGroupReceiveMask.
1. On the phone’s local interface, go to Menu > Settings > Group Subscribe.
2. Scroll to the group you want to subscribe to.
3. Toggle to enable the subscription.
4. Press Back to save your changes.
Changing the default paging group
Change the default paging group that the handset sends to when the PTT key is pressed and held.
IMPORTANT: Changing the default paging group from the handset will override the
PageGroupPushToTalk setting on the Rove base station. Resetting the settings on the handset will
revert the settings on the handset to match
PageGroupPushToTalk.
1. On the phone’s local interface, go to Menu > Settings > Default Group.
2. Use the up and down arrow keys to highlight the desired default paging group.
3. Press Select to save your changes.
Paging a group
Send an outgoing group page by selecting a group from the menu.
1. On the phone’s idle screen, select the Speaker key.
2. Scroll and highlight the desired group.
3. Press Call and wait a few seconds.
Your phone sends a preamble.
4. Begin speaking.
5. Press the End key when you have finished your message.
30
Group paging

Push-To-Talk
The Push-To-Talk (PTT) feature enables you to transmit audio and listen to replies much like a walkie-
talkie.
IMPORTANT: The PTT feature is implemented at the handset level only on Poly Rove phones. It's
independent of any service providers' PTT features.
Enable Push-To-Talk
Enable the PTT feature to send or listen to PTT audio on your device.
1. Go to Menu > Settings.
2. Select Push to Talk.
3. Select On.
4. Select Back.
5. Select Default Group.
6. Scroll down and select Push to Talk.
Send Push-To-Talk Audio
You can speak and listen to messages from your PTT group similar to using a walkie-talkie.
1. Do one of the following:
● On your Rove 20 wireless handset, press and hold the Center navigation button.
● On your Rove 30 or Rove 40 handset, press and hold the Mute button.
2. On your Rove handset, press and hold the Mute button.
3. Speak into the handset’s microphone. Release the button when done.
All the handsets that have enabled PTT receive your message.
Disable Push-To-Talk
Disable the PTT feature to stop sending or listening to PTT audio on your device.
1. Go to Menu > Settings.
2. Select Push to Talk.
3. Select Off.
Push-To-Talk
31

Call Lists and Directories
You can access your contact directory, enterprise directory, and call lists on your wireless handset.
32

Call Lists
Call lists maintain a log of incoming and outgoing calls on the handset.
Poly Rove wireless handsets store up to 50 call entries in the call lists.
You can view the following types of call entries in the call lists:
● Missed calls: Record of calls you missed
● Received calls: Record of calls you received
● Dialed calls: Record of calls you made or dialed
● Recent calls All calls: Mixed record of the calls you missed, received, and dialed
View Call Entry Details
View information for the call list entries on your phone.
1. On the wireless handsets, do one of the following:
● Select Calls.
● Select Menu > Calls .
2. Go to the desired entry.
3. Select Options > View Details.
Delete a Call List Entry
Delete call list entries on your phone.
1. On the wireless handsets, do one of the following:
● Select Calls.
● Select Menu > Calls .
2. Go to the desired entry.
3. Select Options > Delete.
4. Select Yes.
Delete All Call Entries
Delete all entries in a call list at one time.
1. On the wireless handsets, do one of the following:
● Select Calls.
● Select Menu > Calls .
Call Lists
33

2. Select Options > Delete All.
34 Call Lists

Speed Dial
You can assign a directory entry to a speed dial entry to quickly call a contact from the wireless handset.
Add a Speed Dial Entry
You can add up to eight contacts as speed dial entries on the wireless handset. If you aren't using the
line keys for other features such as enhanced call park, you can also use them as speed dial keys.
1. Do one of the following:
● From the
Home
screen, select Contacts.
● Press Menu > Contacts .
2. Select a contact, then select Options .
3. Select Speed Dial, then choose an index number.
4. Select Add to save the entry.
Speed Dial
35

Contact Directory
You can call, view, delete, save, or edit contact information for any contact in the contact directory.
Adding Contacts
Add contacts by manually entering information directly into the contact directory or by using one of the
call lists.
Add a Contact to the Contact Directory
You can add up to 250 contacts to the directory on the wireless handset to quickly place calls to
frequent contacts.
1. Do one of the following:
● From the
Home
screen, select Contacts.
● Press Menu > Contacts .
2. On the
Contacts
screen, go to Options > Add contact.
3. Enter your contact’s information, then select Save.
Add a Contact to the Directory from a Call List
You can add a new contact to the contact directory from a call list.
1. On the wireless handsets, do one of the following:
● Select Calls.
● Select Menu > Calls .
2. Choose a contact and select Options .
3. Select Save as contact, and select a phone number category.
4. Enter your contact’s information, then select Save.
Add Additional Contact Details from a Call List
You can append additional contact details from a call list to an existing contact in the directory.
1. On the wireless handsets, do one of the following:
● Select Calls.
● Select Menu > Calls .
2. Choose a contact and select Options .
3. Select Append to contact, then choose an existing contact.
4. Choose a category for the number, select Save, and select Yes.
36
Call Lists and Directories

Edit a Contact in the Contact Directory
After you add a contact to the contact directory, update the contact’s information.
1. Do one of the following:
● From the
Home
screen, select Contacts.
● Press Menu > Contacts .
2. Select a contact, then select Edit contact.
3. Select a contact entry field and make your edits.
4. Select Save.
Delete a Contact from the Contact Directory
Delete any contact from the contact directory.
1. Do one of the following:
● From the
Home
screen, select Contacts.
● Press Menu > Contacts .
2. Choose a contact and select Options .
3. Select Delete contact.
4. Select Yes.
Edit a Contact in the Contact Directory
37

Central Directory
You can access central and enterprise directories on your wireless handset. Enterprise directories are
a Cisco BroadWorks or LDAP feature that enables you to access network directories on your handset.
Check with your system administrator about this feature in your company's deployment.
Find a Contact in the Central Directory
You can search for a contact in the central and enterprise directories on your wireless handset.
Once you find a contact, you can then call them from the central directory.
1. Do one of the following:
● From the
Home
screen, select Contacts.
● Press Menu > Contacts .
2. Select Central Directory.
3. Optional: If your system is configured for Cisco BroadWorks directories, select the desired Cisco
BroadWorks directory.
The default BroadWorks options include the following directories, but your service provider might
use different names:
● Enterprise
● Enterprisecommon
● Group
● Groupcommon
● Personal
4. To find a contact in the directory, do one of the following:
● Press the center navigation key to scroll through the contacts until you find the one that you
want, or, if a list of contacts is already displayed on the handset, simply scroll through the
contacts.
● Follow the search prompt displayed on the handset, or, if there's no prompt, press the Search
softkey and enter a search string. Then press the Search softkey.
5. Optional: To call a contact in the directory, once you have found the desired contact press the Call
key.
38
Call Lists and Directories

Connecting Bluetooth Devices
You can connect up to four Bluetooth devices, including Bluetooth headsets and smartphones, to a Poly
Rove 40 wireless handset.
Poly Rove 30 wireless handsets do not have Bluetooth capabilities.
Connect a Bluetooth Headset
You can connect any Bluetooth-capable headset to the Poly Rove 40 wireless handset.
You can connect up to four Bluetooth devices to the wireless handset.
1. Enable Bluetooth.
a. Go to Settings > Bluetooth.
b. Highlight Enable Bluetooth and press the Toggle softkey.
The Enable Bluetooth status changes to On.
2. Select Search for Devices.
3. Select your Bluetooth headset in the list of devices and select Pair.
Edit the Name of a Paired Bluetooth Device
You can modify the default name for your Bluetooth device paired with the Poly Rove 40 wireless
handset.
1. Go to Settings > Bluetooth.
2. Select Paired Devices then select your Bluetooth device.
3. Select Options > Change Name.
4. Press the Clear softkey to delete the current device name, then use the dialpad to enter a new
device name.
5. Select Save.
View Information for Paired Bluetooth Devices
You can view the status, name, and MAC address for your paired bluetooth devices on the Poly Rove 40
wireless handset.
1. Go to Settings > Bluetooth.
2. Select Paired Devices, then select your Bluetooth device.
3. Select Options > Info.
Connecting Bluetooth Devices
39

Remove Bluetooth Devices
You can remove a Bluetooth device to make room for a new device or remove all paired Bluetooth
devices.
1. Go to Settings > Bluetooth.
2. Select Paired Devices.
3. Do one of the following:
● Select a Bluetooth device, then select Options > Delete.
● Select Options > Delete All, then select Yes.
40
Connecting Bluetooth Devices

DECT IP Phone Settings
You can configure phone settings and personalize your wireless handset.
Set the Time and Date Format
You can choose how the time and date display on the wireless handset.
1. Select Menu > Preferences.
2. Select Time & Date.
3. Do one of the following:
● Select Time > Options and choose a time format.
● Select Date > Options and choose a date format.
4. Select Save.
Set the Display Language
The wireless handsets have a standard set of languages available that you can choose to set for the
display.
Check with your system administrator to find out which languages your phone supports.
1. Select Menu > Preferences.
2. Select Language, then choose a language from the list.
Assign LED Indicators
You can choose which LED indicators display for certain features and alerts on the wireless handset.
1. Select Menu > Preferences.
2. Select LED signal.
3. Select an LED color, then choose one of the following:
● Off
● Missed call
● Voice message
● Low battery
4. Select Back to return to the
Home
screen.
Set Timeout for Power-Saving Mode
You can set when the wireless handset screen turns off after a period of inactivity to conserve energy
when the handset isn’t in the charging cradle.
DECT IP Phone Settings
41

By default, the wireless handset goes into power-saving mode after 60 seconds.
1. Select Menu > Preferences.
2. Select Power save, then select a time option from 5 seconds to 60 seconds.
3. Select Back to return to the
Home
screen.
Set the Screen Saver Display
You can choose which screen displays when the wireless handset is idle.
The screen saver automatically starts when your phone is idle for a specified amount of time. You can
stop the screen saver by pressing any key or touching the screen.
1. Select Menu > Preferences.
2. Select Screen Saver.
3. Choose one of the following:
● Off
● Idle clock
● Start-up image
● Cradle screen
42
DECT IP Phone Settings

Audio Adjustments
You can control many audio functions on the handset, including using the speakerphone or earpiece,
adjusting the volume, or muting the microphone.
Enable Silent Mode
You can enable silent mode to turn off the ringer on your handset.
● On the wireless handset, press and hold the key.
The message Silent: Enabled displays and the handset ringer doesn't ring for any calls until you
disable silent mode by repeating the action.
Adjust the Ringer and Alert Volume
You can increase or decrease the volume of the ringtone and audio alerts on your Poly Rove handset.
1. Select Menu > Preferences.
2. Select Audio Settings.
3. Select one of the following options:
● Ring volume
● Alert volume
4. To increase or decrease the volume on your Rove handset, use the navigation keys.
You can also use the volume keys to increase or decrease the volume.
5. Select OK to confirm your setting or select Back to cancel your changes.
Change Ringtone
You can change the ringtone on your Rove handset.
1. Select Menu > Preferences.
2. Select Audio Settings > Ring Melody.
3. Use the Up and Down navigation keys to view the list of ringtones.
4. Press the Play softkey to listen to a ringtone and press the Stop softkey to stop or use the
navigation keys to move to another ringtone.
5. Press the Select softkey to choose your preferred ringtone.
6. Press the Back softkey to return to the Home screen.
Change Alert Tone
You can change the alert tone on your Rove handset.
1. Select Menu > Preferences.
2. Select Audio Settings > Alert Tone.
Audio Adjustments
43

3. Use the Up and Down navigation keys to view the list of alert tones.
4. Press the Play softkey to listen to an alert tone and press the Stop softkey to stop or use the
navigation keys to move to another tone.
5. Press the Select softkey to choose your preferred alert tone.
6. Press the Back softkey to return to the Home screen.
Set the Phone to Vibrate
You can set your Rove handset to vibrate.
1. Select Menu > Preferences.
2. Select Audio Settings > Vibrate.
3. Select one of the following options:
● Off
● Vibrate then Ring
● Vibrate Only
● Vibrate and Ring
4. Press the Select softkey to choose your preferred vibration option.
5. Press the Back softkey to return to the Home screen.
Switch Between the Earpiece and the Speakerphone
At any point in a call, you can switch between listening to audio on the speakerphone and the earpiece.
■
During a call, press the Speakerphone button.
Mute or Unmute the Microphone
You can mute the microphone so other parties cannot hear you.
■
During a call, select one of the following options:
● To mute or unmute the microphone on a Rove 20 handset, press and hold the Mute softkey.
● To mute or unmute the microphone on a Rove 30 or a Rove 40 handset, press and hold the
Mute button on the side of the phone.
Change the Key Sound
You can change the key sound on your Rove handset.
1. Select Menu > Preferences.
2. Select Audio Settings > Key Sound.
3. Select one of the following options:
● Silent
44
Audio Adjustments

● Click
● Tone
4. Press the Select softkey to choose your preferred alert tone.
5. Press the Back softkey to return to the Home screen.
Enable and Disable Confirmation Sound
You can turn on or off the confirmation audio setting on your Rove handset. The confirmation sounds
when you try to complete an action on your phone.
1. Select Menu > Preferences.
2. Select Audio Settings > Confirmation Sound.
3. Use the Toggle softkey to enable or disable the confirmation sound.
4. Press the Back softkey to return to the Home screen.
Enable and Disable Coverage Warning
You can turn on or off the alert that sounds when your Rove handset is out of range of the base station.
1. Select Menu > Preferences.
2. Select Audio Settings > Coverage Warning.
3. Use the Toggle softkey to enable or disable the coverage warning sound.
4. Press the Back softkey to return to the Home screen.
Enable and Disable Charger Warning
You can turn on or off the audio that sounds when you place the Rove handset correctly on the charger.
1. Select Menu > Preferences.
2. Select Audio Settings > Charger Warning.
3. Use the Toggle softkey to enable or disable the charger warning sound.
4. Press the Back softkey to return to the Home screen.
Change Noise Reduction Settings
You can change the noise reduction settings on your Rove handset to suit your environment.
1. Select Menu > Preferences.
2. Select Audio Settings > Noise Reduction.
3. Select one of the following options:
● Off
● Low
Enable and Disable Confirmation Sound
45

● High
4. Press the Select softkey to choose your preferred option.
5. Press the Back softkey to return to the Home screen.
Connect and Configure a Wired Headset
Optimize the audio settings for a wired headset.
1. Connect a wired headset to the 3.5 mm port on your Rove handset.
The handset recognizes the headset and uses it for audio on calls.
2. Optional: If your headset is one of the following Poly devices, then you can optimize the audio for
your handset.
● Poly Blackwire 3300
● Poly Blackwire 5200
● Poly Encore Pro 3.5 mm
a. Select Menu > Preferences > > Audio Settings.
b. Select Headset Select.
c. Select one of the Poly headsets.
d. Select Back to return to the Home screen.
46
Audio Adjustments

Line Keys
There are four line keys on Poly Rove handsets that you can program for speed dials or shortcuts.
If enabled by your system administrator, you can assign key functions, reset pre-programmed functions,
and disable the keys.
Assign a Shortcut to a Line Key
You can assign shortcuts to a line key to quickly send a message, view the status of the wireless
handset, or access settings.
Check with your system administrator to make sure you can reprogram the line keys. The keys may have
functions already programmed.
1. On the wireless handset, press the desired line key.
2. Select Yes to continue to assign a key function.
3. Select Shortcuts, then choose a function.
4. Select Back to return to the
Home
screen.
Assign a Speed Dial Entry to a Line Key
You can assign a speed dial entry to a line key to quickly call a contact.
To assign a speed dial entry to a line key, you must have the contact already assigned to a speed dial
entry.
1. On the wireless handset, press the desired line key.
2. Select Speed Dial, then select a contact from the list.
3. Select Back to return to the
Home
screen.
Reset a Line Key
You can reset a line key to add a new function or remove a shortcut.
1. Go to Menu > Settings.
2. Select Line Keys, then select a line key option.
3. Select Toggle.
4. Optional: Select Back if you want to reset any other line keys.
5. Select Back to return to the
Home
screen.
Disable a Line Key
You can deactivate a line key if you don’t want to program functions or if you want to prevent others from
programming functions for that key.
1. On the wireless handset, press the desired line key.
2. Select Yes to continue to assign a key function.
Line Keys
47

3. Select Ignore key press, then select On.
The phone now does nothing when you press the line key.
4. Select Back to return to the
Home
screen.
48 Line Keys

Lock and Unlock the Phone
Locking your phone prevents accidental use of the handset. If you set a PIN, it can prevent unauthorized
people from placing or answering calls. It also prevents anyone from viewing or changing phone
information, such as your directory, call lists, or speed dial assignments.
Set a Phone Lock PIN
Set a PIN for your phone so that when you lock your handset, it can prevent unauthorized people from
using the phone.
1. Go to Menu > Settings > Security.
2. Select Phone Lock.
3. Enter a four-digit PIN and select OK.
Make sure you remember your PIN so that you can use it to unlock your phone.
4. Select Back to return to the
Home
screen.
Lock the Phone
Lock your phone to prevent unauthorized people from placing or answering calls.
■
To lock your phone, on the handset, press and hold the key.
The message Keypad locked displays and the keypad is disabled until you unlock the phone by
repeating the action.
Unlock the Phone
Unlock your phone to place calls.
1. To unlock your phone, on the handset, press and hold the key.
The message Enter PIN displays.
2. Enter your four-digit PIN and select OK.
The phone unlocks and the returns to the
Home
screen.
Lock and Unlock the Phone
49

Maintaining DECT IP Phones
When the phone isn’t operating properly, you can investigate or troubleshoot issues along with other
tasks your administrator may ask you to perform.
View Information for the DECT IP Phone
You can view information for the wireless handset and paired base station, including the software and
hardware version, IP address, MAC address, battery level, and product name.
■
On the wireless handset, go to Menu > Info .
All the available handset information displays.
Enable Sanitized Mode
You can enable sanitized mode to facilitate cleaning of your handset. Sanitized mode is only available on
Rove 30 and Rove 40 handsets.
When you enable sanitized mode on a handset, the keypad is locked and the screen displays a 30-
second countdown timer. This helps to prevent you from making any unwanted calls and also gives you a
clear indication of how much time is remaining for you to finish cleaning.
■
Press and hold the center navigation key for five seconds.
The keypad is locked to prevent you from making any unwanted calls or changes to your settings. The
screen shows a 30-second countdown timer. When the 30 seconds are up, the handset shows a green
LED and displays the Handset Sanitized message on the home screen. Pressing any key or moving the
phone on or off the cradle will remove the message.
Clean Your System Components
When cleaning your DECT IP phone—handsets, base station, or chargers—be careful to not let any of the
disinfecting solution seep into the phone or accessory.
To effectively clean your system components, use the following items:
● Cotton balls
● Cotton swabs
● 70:30 solution of isopropyl alcohol and water
CAUTION: Be careful not to wipe ports or cable connections.
1. Unplug all cables from the phone and accessories.
2. For a Rove 30 or Rove 40, enable the sanitizing timer. See Enable Sanitized Mode on page 50.
3. Dip a cotton ball into the alcohol/water solution and squeeze out any excess liquid.
4. Wipe all hardware surfaces.
5. Dip a cotton swab into the alcohol/water solution and clean around the buttons.
6. Let the phone and accessories air-dry completely before reconnecting any cables.
50

On a Rove 30 or Rove 40 handset, when the time on the sanitizing timer is up, the handset shows a green
LED. The message Handset Sanitized is displayed on the home screen. Pressing any key or moving the
phone on or off the cradle will remove the message.
Restart a Wireless Handset
Your system administrator may ask you to restart the phone if it malfunctions or to assist in
troubleshooting.
■
Remove and then reinsert the handset battery.
The wireless handset restarts and restores connection with the base station.
Reset Wireless Handset Settings
You can return the wireless handset to its default settings.
Contact your system administrator before resetting your handset.
1. Select Menu > Settings .
2. Select Reset Settings, then select Yes.
Restart a Wireless Handset
51

Troubleshooting
Refer to the following topics to help you diagnose and fix issues with your system.
Find the phone's serial number
Use the handset serial number to help technical support troubleshoot issues with your Poly Rove phone.
1. Remove the battery from the phone.
The serial number is on the label under the battery.
2. Make a note of the number.
3. Replace the battery.
Find the base station’s or repeater's serial number
Use the base station’s or repeater's serial number to help technical support troubleshoot issues with
your device. You can find the serial number for the base stations in different ways.
■
Do one of the following:
● For Poly Rove B1, Poly Rove B2 or Poly Rove B4 base stations or Poly Rove R8 repeaters, locate
the serial number on the label on the rear of the device. The label is behind the power socket.
● For poly Rove B1, Poly Rove B2 or Poly Rove B4 base stations, in the system web interface, go
to Status > System Status. The serial number for the base station in the Product Information
section.
Test the radio signal strength
The Poly Rove wireless handsets can connect with any nearby Poly Rove base stations in different areas
to get general information, such as IP address and signal strength, before you register the handsets to a
base station.
The signal strength varies depending on if the Poly Rove phone is set up outside or inside a building. The
following table provides a general reference of possible signal strengths.
Table 8
Signal quality
RSSI Signal quality
0 dBm to -30 dBm Excellent
-31 dBm to -50 dBm Good
-51 dBm to -70 dBm Fair
-71 dBm to -80 dBm Weak
-81 dBm to -95 dBm Poor
-96 dBm and higher Disconnected
1. Place a few Poly Rove base stations and wireless handsets in the areas where you are planning to
set them up.
2. Power on the devices and connect the LAN cable to the base stations.
52
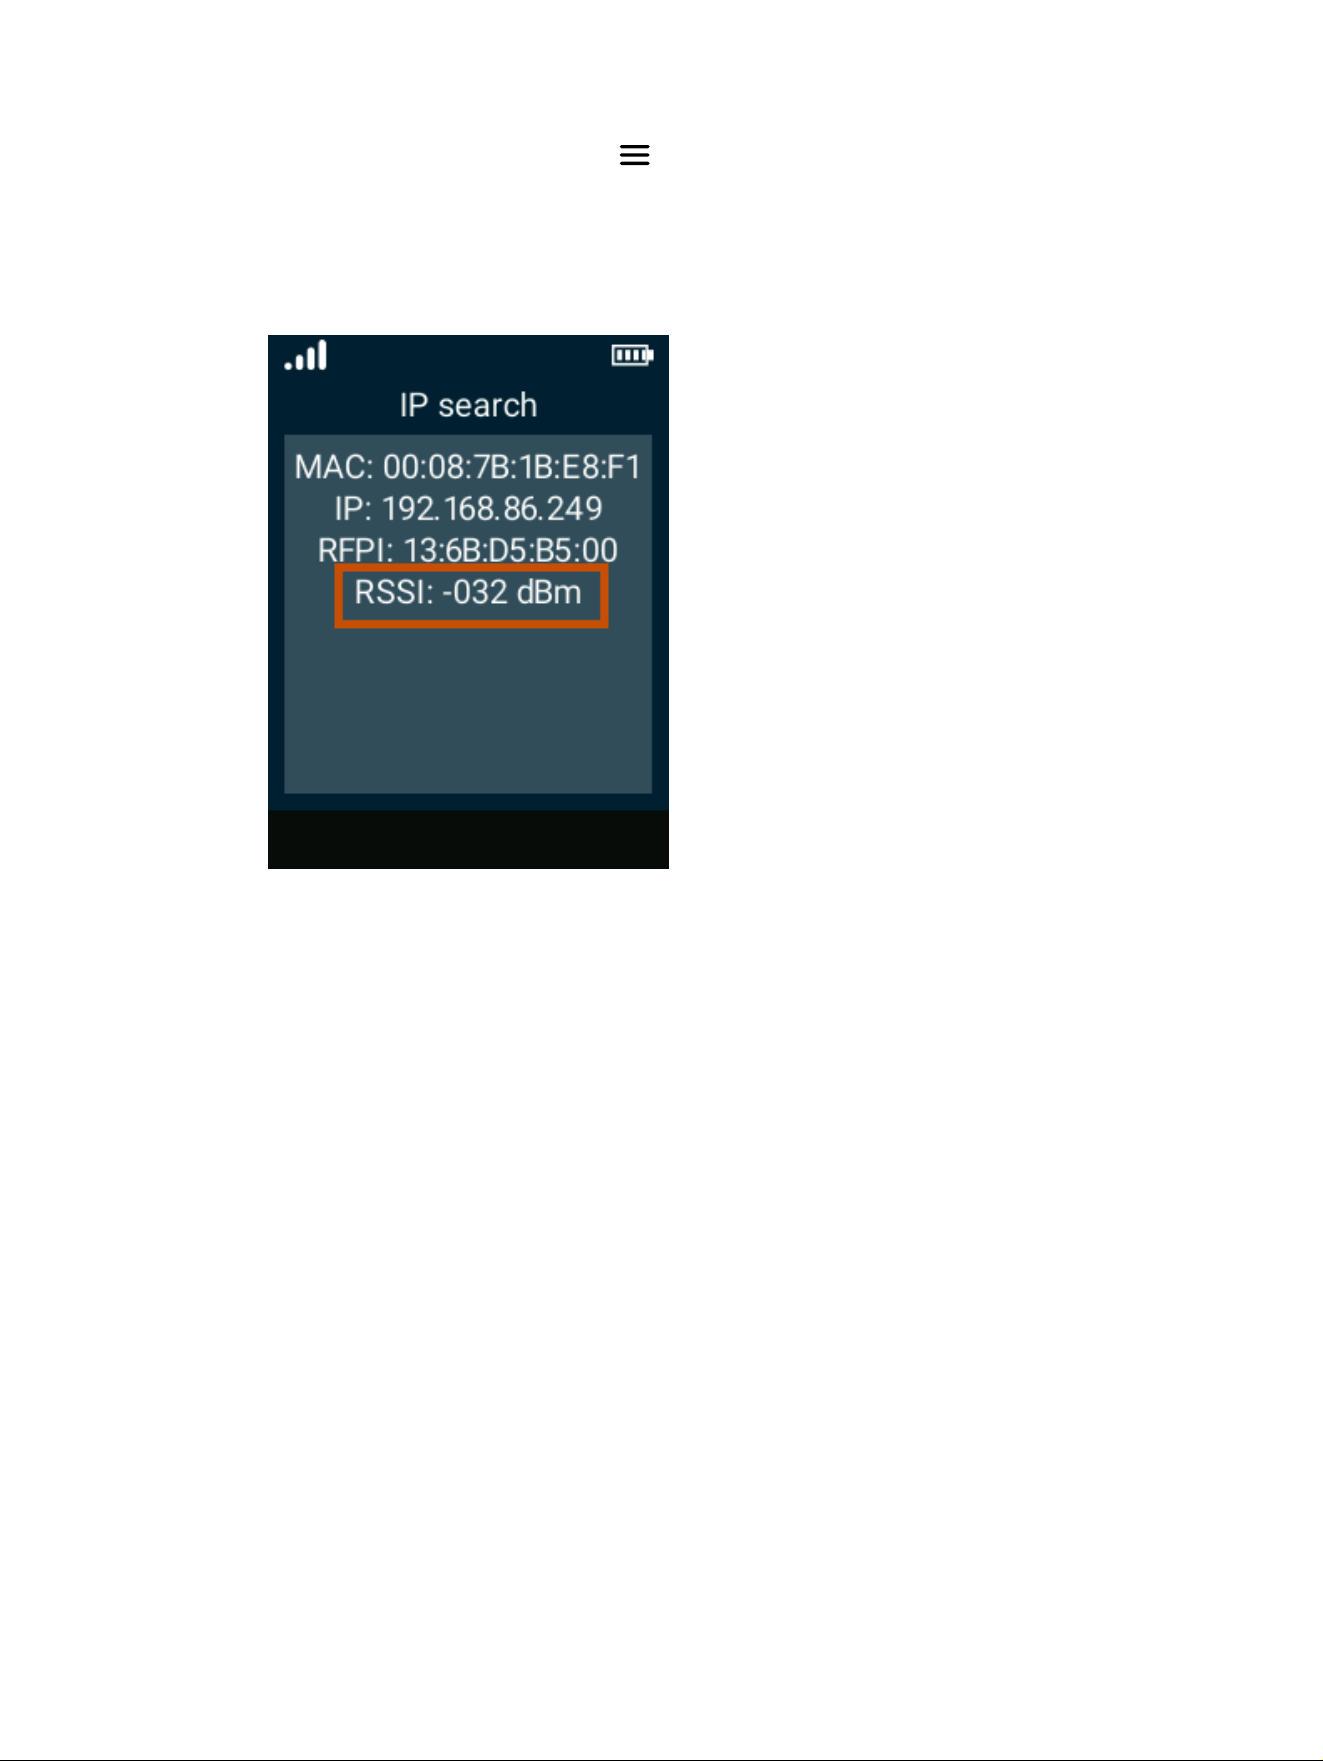
3. On a wireless handset, select Menu , then enter *47* on the keypad.
The IP search screen displays with a list of all the nearby base stations.
4. Select a base station from the list.
The signal strength displays next to RSSI.
As you walk around with the wireless handset, the RSSI automatically updates onscreen with the signal
strength for that area.
Test the radio signal strength
53

System Logs
Capture system logs to help troubleshoot your DECT IP phone.
To capture syslog messages, you must run a syslog server application at an IPv4 address that your
DECT IP phone can reach.
Activate Syslog Messaging
Enable your Poly Rove DECT™ IP phone system to send syslog messages for troubleshooting.
1. In the system web interface, go to System Management > Device Admin > Syslog.
2. In the Default column, clear the check boxes for Server, Port, and any Level settings you want to
modify.
3. In the Value column, enter the hostname, FQDN, or IP address for your syslog server for Server.
4. Set the Port to 514.
5. Optional: For the Level
X
settings, choose options from the drop-down menus for the reporting
levels you require.
6. Optional: For the Reporting
X
settings, configure the options to enable the system to periodically
upload buffered syslog files to a web server.
7. Select Submit.
8. Optional: To enable SIP messages to be sent to the syslog server, go to Voice Services > SP
n
Service.
a. Under Debug Options, in the Default column, clear the check box for X_SipDebugOption.
b. In the Value column, select Log All Messages.
c. Select Submit.
9. Restart your system when you complete your changes.
View and Export the System Syslog
View the syslog for the system and export it for troubleshooting help.
1. In the system web interface, go to Platform.
2. Select Syslog.
The syslog for the system’s current state displays.
3. Select Export.
View and Export the SIP Log
View an active log of SIP server messages in the system web interface.
1. In the system web interface, go to Platform.
2. Select SIP Log.
The SIP messages for the system’s current state displays.
54
Troubleshooting

3. Select Export.
The log downloads as a text file titled SipDebug.txt.
View and Export the SIP Log 55

System Diagnostics
The system web interface provides diagnostic information on Poly Rove devices to help you assess
issues with the system.
View base station diagnostics
View basic diagnostic information for your Poly Rove base station.
1. In the system web interface, go to Platform.
2. Select Diagnostics > Base Stations.
The following information displays:
Table 9
Rove Base Station diagnostics
Field Description
Base Station Name Displays the name and IP address for all connected base
stations. If there is only one base station, then only the
summary (Sum) row displays.
Active DECT Ext (Mm/Ciss/CcOut/CcIn) Displays the number of active connections to extensions
registered on the base station.
● Mm—Mobility Management
● Ciss—Call Independent Supplementary Service
● CcOut—Call Control Out
● CcIn—Call Control In
Active DECT Rep (Mm/Ciss/CcOut/CcIn) Displays number of connections to repeaters paired with
the base station.
● Mm—Mobility Management
● Ciss—Call Independent Supplementary Service
● CcOut—Call Control Out
● CcIn—Call Control In
Active RTP (Lcl/Rx BC) Displays the number of active RTP streams.
● Lcl—local RTP stream
● Rx BC—broadcast receive RTP stream
Active Relay RTP (Lcl/Remote) Displays the number of active relay streams.
● Lcl—Local RTP relay stream
● Remote—remote RTP relay stream
Latency [ms] (Avg.Min/Average/Avg.Max) Displays the latency of ping between the base station.
View wireless handset extensions diagnostics
View diagnostic information on the wireless handsets registered to the base station.
1. In the system web interface, go to Platform.
56
Troubleshooting

2. Select Diagnostics > Extensions.
The following information displays:
Table 10 Rove Handset Extensions Diagnostics
Column Description
Idx The index number for the wireless handset
No of HS Restarts The total number of times the wireless handset restarted
Last HS restart The previous date when the wireless handset restarted
View wireless handset extensions diagnostics 57

Packet Capture
Poly Rove includes a built-in packet capture (PCAP) tool to troubleshoot issues.
Enable Packet Capture
Enable the packet capture tool to start a packet capture from a Poly Rove base station.
1. In the system web interface, go to Platform.
2. Select Diagnostics > Logging.
3. Under PCAP internal tracing, select the desired packet trace options.
4. Select Save.
Download Packet Capture
Download the packet capture from the Poly Rove base station.
1. In the system web interface, go to Platform.
2. Select Diagnostics > Logging.
3. Under Download tracing from, select the desired option:
Option Description
Current Basestation Downloads the captured logging information from the current base station
All Basestations Downloads the captured logging information from all base stations
Packet capture files are compressed and downloaded to your Downloads directory.
Disable Packet Capture
Once you have completed troubleshooting, disable the packet capture tool.
1. In the system web interface, go to Platform.
2. Select Diagnostics > Logging.
3. Under PCAP internal tracing, clear all check boxes for the packet trace options.
4. Select Save.
Onboard the base station to PDMS-SP
You can onboard the Rove base station to Poly Device Management Service for Service Providers
(PDMS-SP) using a code. Refer to the "Add a Poly OBi Device" topic in the PDMS-SP Administrator Guide
for instructions to obtain the code.
1. In the system web interface, go to System Management > Device Maintenance.
2. Under Add Device to PDMS-SP, enter the code obtained from the PDMS-SP portal.
3. Select Join.
If successful, the base station reboots.
58
Troubleshooting

Getting help
Poly is now a part of HP. The joining of Poly and HP paves the way for us to create the hybrid work
experiences of the future. Information about Poly products has transitioned from the Poly Support site
to the HP Support site.
The Poly Documentation Library is continuing to host the installation, configuration/administration, and
user guides for Poly products in HTML and PDF format. In addition, the Poly Documentation Library
provides Poly customers with information about the transition of Poly content from Poly Support to HP
Support.
The HP Community provides additional tips and solutions from other HP product users.
HP Inc. addresses
Contact HP at the following office locations.
HP US
HP Inc.
1501 Page Mill Road
Palo Alto, CA 94304
United States
Phone:+ 1 650-857-1501
HP Germany
HP Deutschland GmbH
HP HQ-TRE
71025 Boeblingen, Germany
HP Spain
HP Printing and Computing Solutions, S.L.U.
Cami de Can Graells 1-21 (Bldg BCN01)
Sant Cugat del Valles
Spain, 08174
902 02 70 20
HP UK
HP Inc UK Ltd
Regulatory Enquiries, Earley West
300 Thames Valley Park Drive
Reading, RG6 1PT
United Kingdom
Document information
Review the following document information.
Model ID: Poly Rove 20 wireless handset, Poly Rove 30 wireless handset, Poly Rove 40 wireless handset,
Poly Rove B1 base station, Poly Rove B2 base station, Poly Rove B4 base station, Poly Rove R8 repeater
Document part number: 3725-86863-005A
Last update: July 2025
Email us at documentation.feedback@hp.com with queries or suggestions related to this document.
Getting help
59