1
OPERATION AND
MAINTENANCE
MANUAL
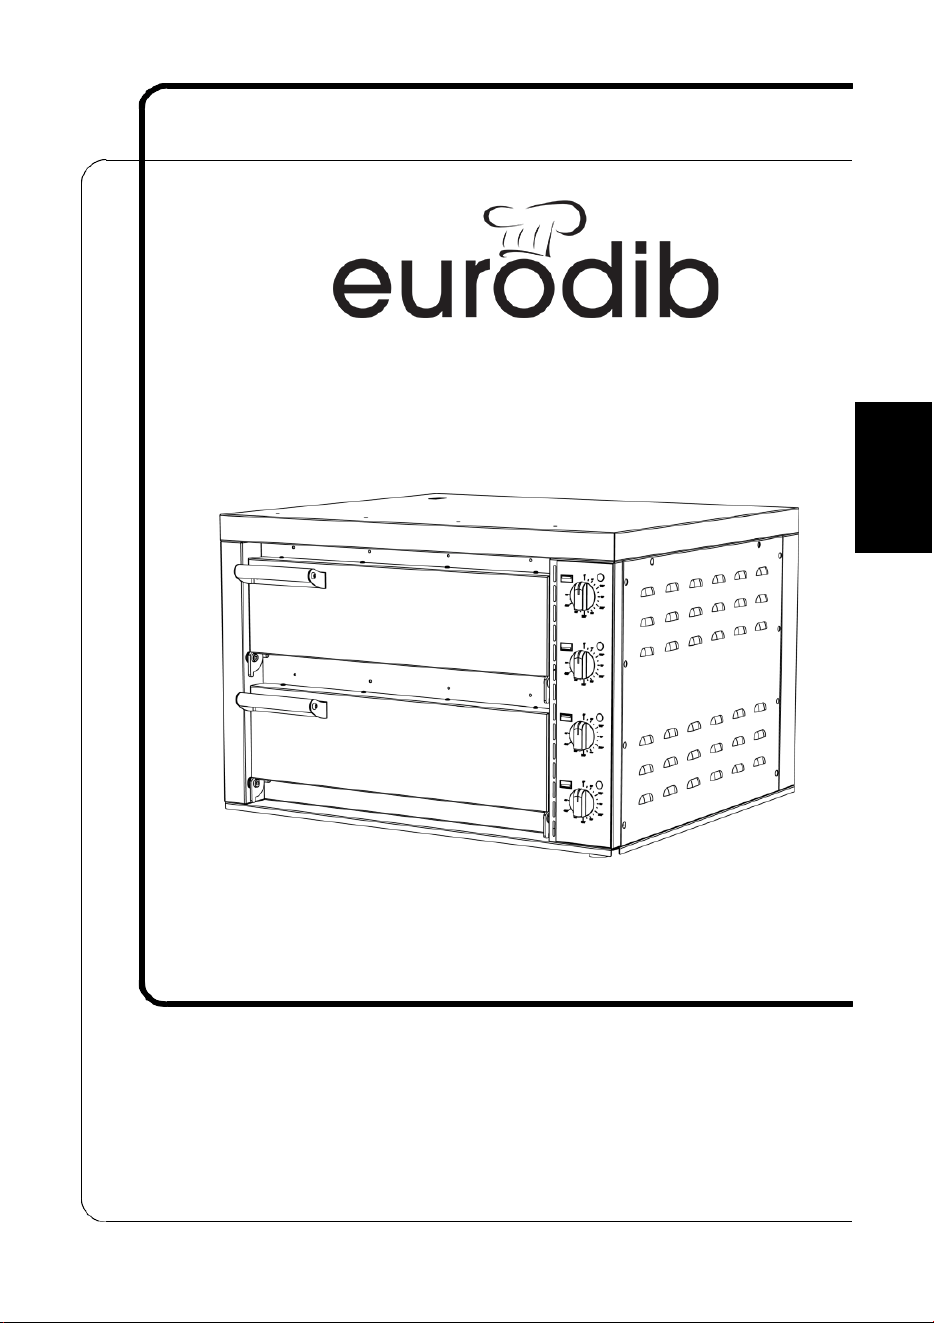
Pizza Ovens
NUOVO
Ed. 09/2022
- ver. 002
English

2

3
FOREWORD
-
This manual has been designed to provide the customer with all the information and
safety standards necessary for the use of the oven, as well as the operating and
maintenance instructions which will guarantee the correct operation of the appliance and
its optimum performance over time.
-
This manual must be given to the users of the oven and to those responsible for its
maintenance.
CONTENTS
CHAP.
1.1
1 - INFORMATION ON THE OVEN
- GENERAL SAFETY PRECAUTIONS
page 4
1.2
- DESCRIPTION OF THE OVEN
1.2.1
- General description
1.2.2
- Construction features
1.2.3
- Oven parts
CHAP.
2.1
2 - TECHNICAL INFORMATION
- OVERALL DIMENSIONS, WEIGHT, FEATURES…
page 5
CHAP.
3 – OVEN DELIVERY
page 6
3.1
- SHIPPING OF THE OVEN
3.2
- INSPECTION PACKAGING UPON DELIVERY
3.3
- PACKAGING PROCESS
CHAP.
4 - INSTALLATION
page 7
4.1
- OVEN SET-UP
4.2
- ELECTRICAL CONNECTION
4.2.1
- ELECTRICAL CONNECTION OF THE OVEN
4.3
- OPERATIONAL CHECK
CHAP.
5 - OPERATING THE OVEN
page 8
5.1
- CONTROLS
5.2
- LOADING AND COOKING THE PRODUCT
CHAP.
6 - ROUTINE CLEANING
page 9
6.1
- GENERAL
6.2
- OVEN CLEANING PROCEDURE
CHAP.
7 - MAINTENANCE
page 9
7.1
- GENERAL
7.2
- POWER SUPPLY CABLE
7.3
- TROUBLESHOOTING
CHAP.
8 - DISMANTLING
page 10
8.1
- PUTTING THE OVEN OUT OF SERVICE
8.2
- WEEE Waste Electrical and Electronic Equipment
CHAP.
9.1
9 - ELECTRICAL DIAGRAM
- OVEN - 1ph or 3ph 208V / 220V.
page 11
English

4
CHAP. 1 - INFORMATION ON THE OVEN
1.1 - GENERAL PRECAUTIONS
• The oven may only be operated by specialists who are fully aware of the safety
standards described in this manual.
• In case of a personnel turnover, training is to be provided in advance.
• Before any cleaning or maintenance operation, disconnect the unit from the power
supply.
• Residual risks must be carefully assessed when cleaning and maintaining the oven.
• Remain focused during cleaning and maintenance operations.
• Regularly check the condition of the power cord; a worn or damaged cord represents a
serious electrical hazard.
• If the oven shows any signs or indications of malfunction, we recommend that you do
not use the appliance and do not carry out repairs directly but contact the “After Sales
Service”.
• Do not use the oven for frozen food or non-food products.
• The manufacturer is not liable for damage to objects or persons in the event of an
incident:
if unauthorized persons have repaired or modified the oven.
if any parts have been replaced by non-original parts.
if the instructions in this manual have not been carefully followed.
if the oven surface has been treated with unsuitable products.
1.2 - DESCRIPTION OF THE OVEN
1.2.1 - general description
The oven has been designed and manufactured by our company with the specific aim of
guaranteeing:
- maximum safety during use, cleaning and maintenance;
- maximum hygiene, thanks to the careful selection of materials in contact with food;
- robust and stable components;
- sturdiness and stability of all components;
- excellent visibility and handling.
This oven has been designed for baking pizzas, focaccias, piadinas, etc. It must not be used
for cooking other foods (meat, vegetables, etc.).
1.2.2 - Construction Features
This appliance is is built entirely from the following materials:
- Internal and external structure in stainless steel, aluminized steel, and pre-painted steel.
- Baking surface in refractory stone.
5
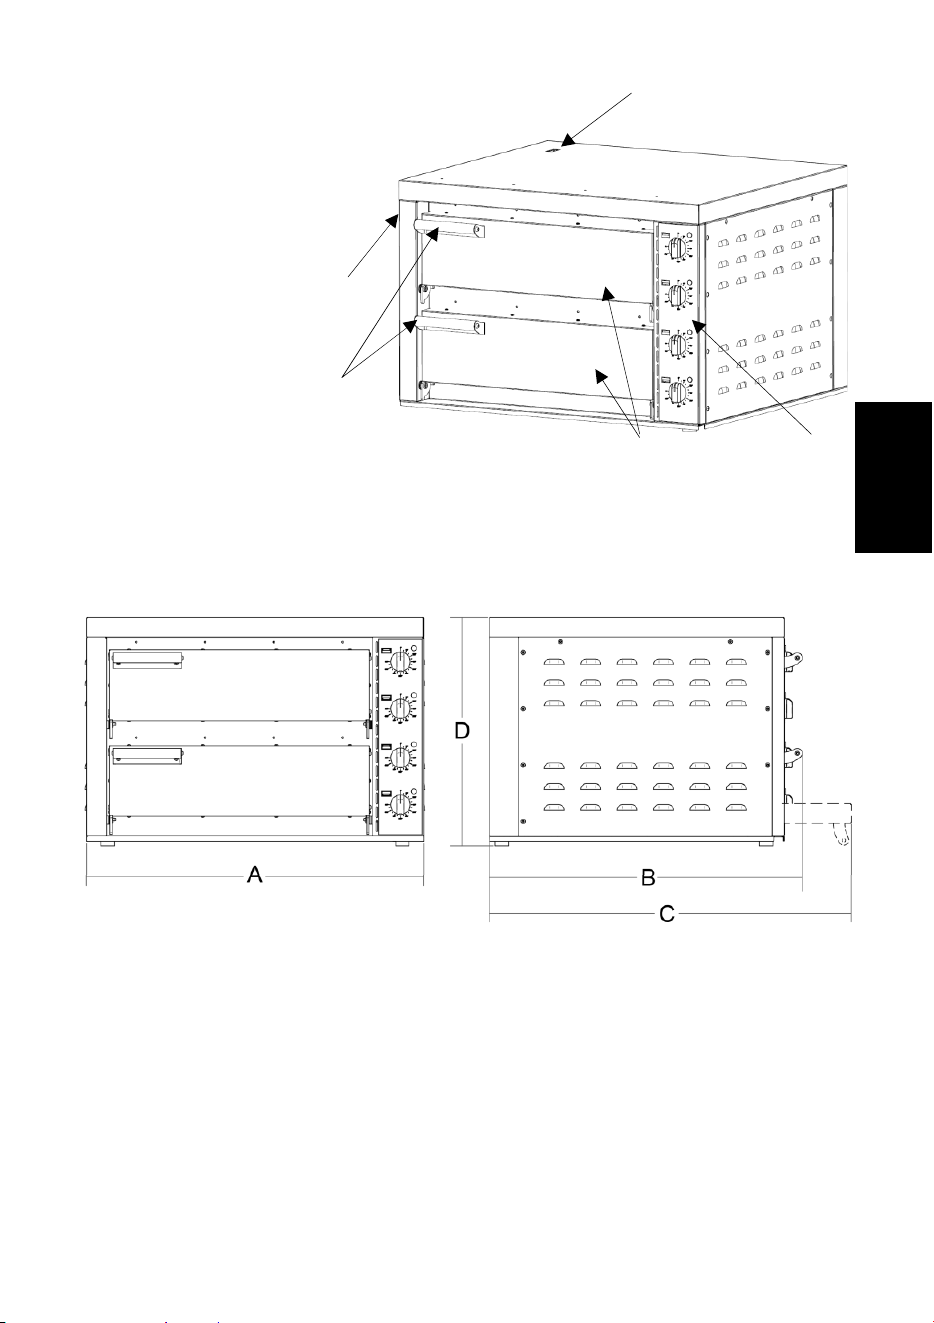
1.2.3 - Oven parts
5
FIG. n°1 - Main view of the oven
REFERENCES:
1. External structure
2. Door handle
3. Door
1
4. Controls
5. Smoke
extraction
chimney
2
4
3
CHAP. 2 - TECHNICAL INFORMATION
2.1 - OVERALL DIMENSIONS, WEIGHT, FEATURES...
English

6
TAB. n°1 - OVERALL DIMENSIONS AND TECHNICAL SPECIFICATIONS
Model
NUOVO
Power
watts
6.400
Power supply
208V / 220V 60 Hz 1Ph or 3Ph
Temperature
°C
°F
50 - 450°C
120 - 840°F
Inside dimensions
mm
in
(W) 500 x (L) 520 (H)115 (x2)
(W)21.6" x (L)19.6" x (H) 4.5"
A x B x D
mm
in
(W) 780 x (L) 720 x (H) 600
(W) 30.7" x (L) 28.3” x (H) 20.8"
C
mm
in
810
31.8"
Net weight
kg
lbs
70 kg
154.3 lbs
Shipping weight
kg
lbs
83 kg
183lbs
WARNING: Oven electrical specifications are indicated on the rating plate affixed to the
side of the oven; before connecting to power supply, please read chap. 4.2.
7
CHAP. 3 – OVEN DELIVERY
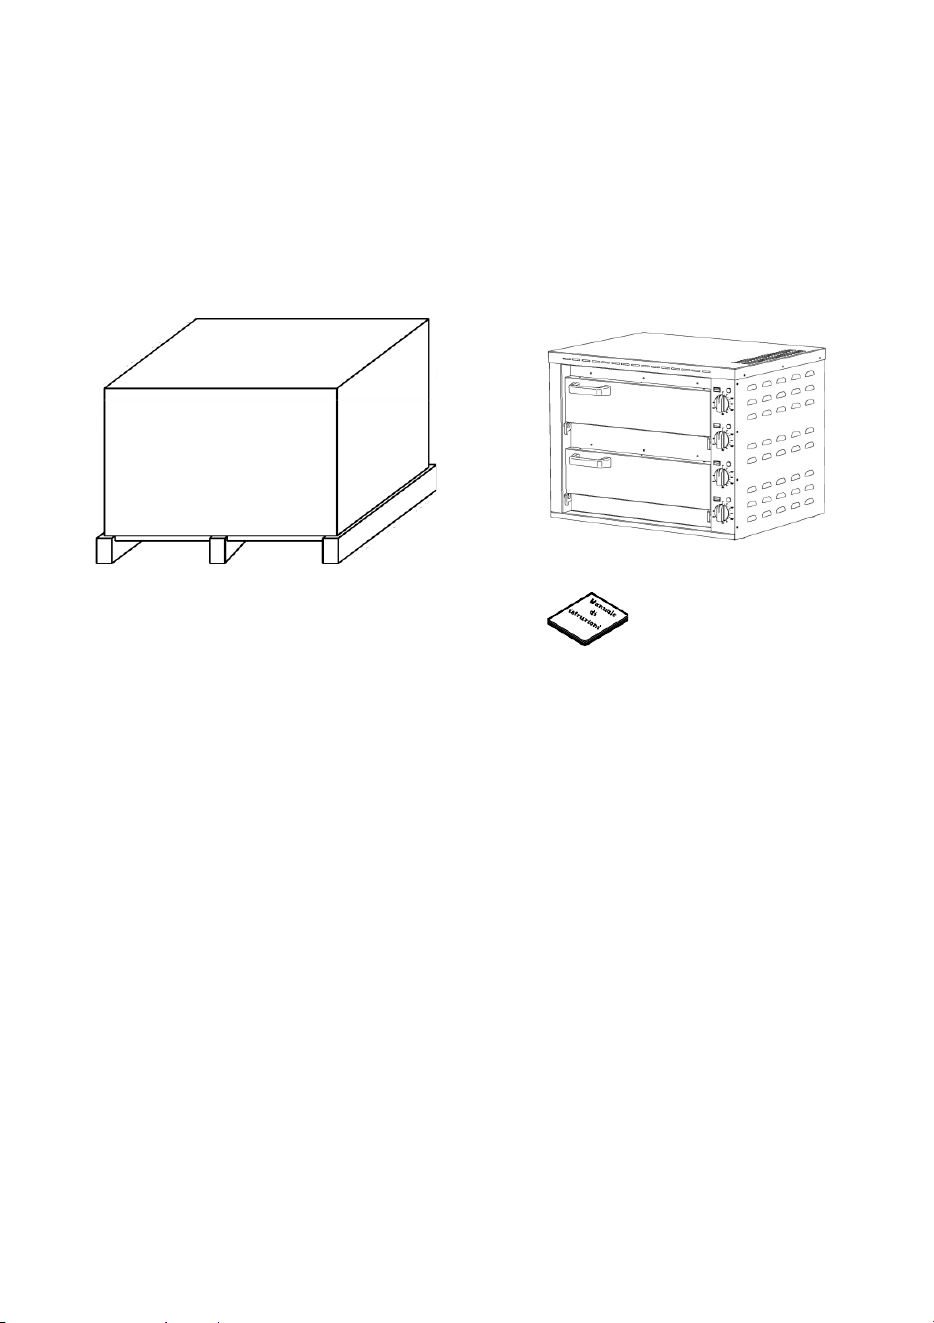
3.1 - SHIPPING OF THE OVEN (see FIG. n°3)
The oven is carefully packed and shipped from our warehouse.
The package includes:
a) a sturdy cardboard box on a pallet;
b) the oven;
c) this manual.
a)
b)
FIG. n°3 - Package description
3.2 - INSPECTION PACKAGING UPON RECEIPT
Upon receipt of the appliance if the external packaging shows no signs of damage, open and
check that there are no missing parts. If upon receipt of the appliance, the packaging shows
signs of damage or seems to have been dropped or hit, inform the carrier of the damage and
within three days of the date of delivery provided in the transport document, send a report
detailing the damage to the appliance.
3.3 - PACKAGING PROCESS
The packaging components (cardboard, pallet, plastic straps and polyurethane foam) are
solid urban waste and therefore they can be easily disposed of.
If the oven is to be installed in countries with specific regulations, the packaging must be
disposed of in accordance with these regulations.
c)
8
CHAP. 4 - INSTALLATION
4.1 - OVEN SET-UP
Once the oven has been removed from its packaging, remove the protective adhesive film
from the outer casing. This film must always be removed before using the oven (check
that no plastic film remains on the appliance, and do not use abrasive substances to
remove the plastic film). Check that the work surface on which the unit is to be placed is
sufficiently large (see technical specifications), flat, sturdy, dry, stable and resistant to high
temperatures.
Place the oven at least 10 cm away from walls, which must be able to withstand high
temperatures, and in a suitable room equipped to evacuate the heat generated by the
oven.
4.2 - ELECTRICAL CONNECTION
4.2.1 - Electrical connection of the oven
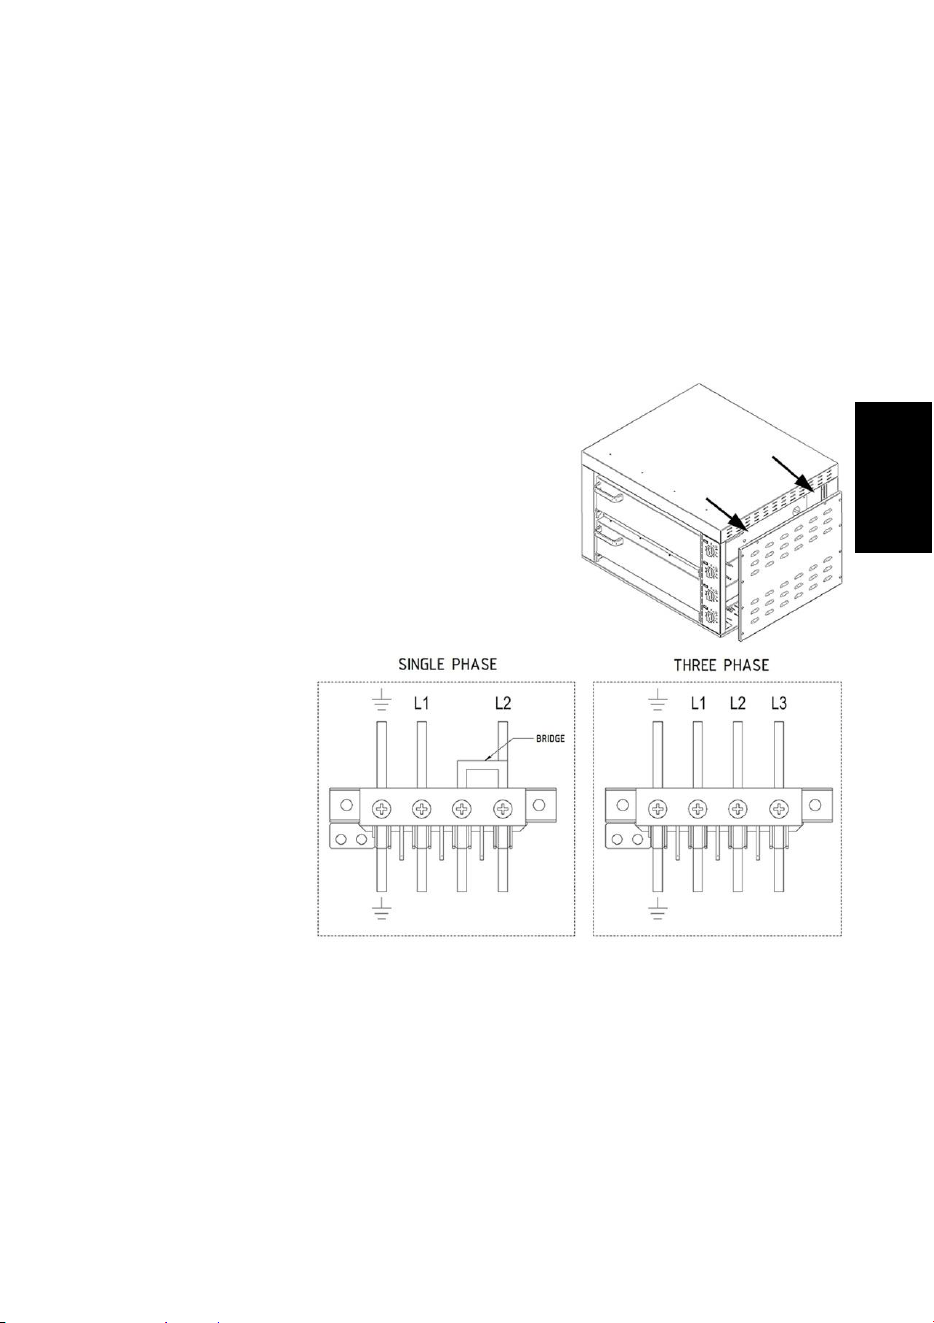
The appliance is supplied without power cable or plug:
these must be installed by qualified personnel. The
cable must be of the type indicated, and the plug must
be suitable for the power consumption and the
connection of the oven to the mains.
The appliance must be connected to a power supply with
a minimum 10AWG cable (supplied by the installer). To
carry out this operation, remove the oven's right-side
panel (FIG. n°4),
connect the cable to the
terminal board and
secure it using the
relative cable gland
located on the back of
the appliance itself
(FIG. n°5).
Connect the oven to
208/220 Volt 60 Hz 1 or
3 phase, by interposing
a differential
thermomagnetic switch
35A, ∆ I = 0.03A.
4.3 - OPERATIONAL CHECK
FIG. n°4
FIG. n°5
Before testing the appliance, make sure the plug is securely plugged into the power socket,
then test the unit by following each step of the procedure below:
1. Start the oven by turning the thermostat knob to switch on the heating elements.
2. With the oven running, set the temperature to 200°C.
3. Once the set temperature has been reached, operate the oven empty under the
supervision of an operator for at least 2 hours, occasionally opening the front doors. In
addition to checking that the oven is working properly, this operation allows any residue
from processing and moisture from the firing stones to evaporate.
4. Switch off the oven’s heating elements by turning the knob back to its initial position.
English
9
CHAP. 5 - OPERATING THE OVEN
5.1 - CONTROLS
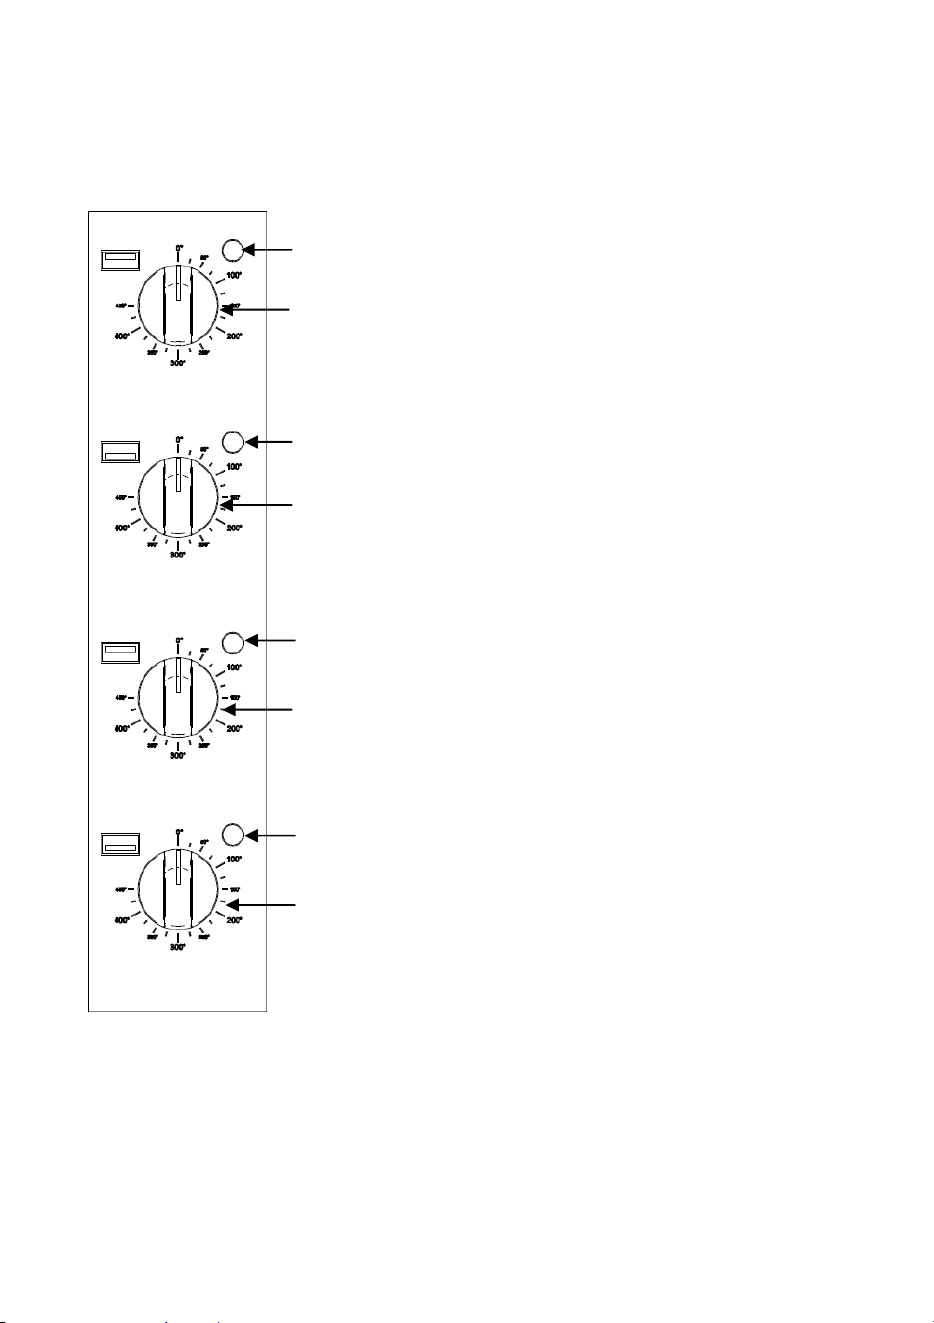
The controls are located on the right front of the oven, as shown in the figure below.
1
1. Resistance intervention indicator
2. Upper heating element temperature control thermostat
3. Lower heating element temperature control thermostat
The two chambers can be switched on separately or
simultaneously.
3
FIG. n°6
5.2 - LOADING AND COOKING THE PRODUCT
(refer to Fig.n°6)
1
To cook proceed as follows:
1. Start the oven by setting the thermostat to the
1
desired temperature (Ref. 2 - 3).
2. Once the oven has reached the desired cooking
temperature place the food to be cooked inside the
oven. Always use the handle to open the oven door.
3. When the work cycle is complete, turn the knob
1
back to its initial position (Ref. 2 - 3).
4. WARNING! During cooking, the outer surface of the
oven reaches very high temperatures. Avoid getting
2
too close.
5. WARNING! Wait until the oven has cooled down
completely before coming into direct contact with it, and
always use the door handle to open the door.
6. During cooking, you can remove cooking residuals from
the worktop with a fireproof brush.

10
CHAP. 6 - ROUTINE CLEANING
6.1 - GENERAL
-
The oven should be cleaned at least once a day, or more frequently if necessary.
-
All parts of the oven in direct or indirect contact with the food to be cooked must be
scrupulously cleaned.
-
The oven must not be cleaned with hydro-cleaners or water jets (to avoid infiltrations that
could damage the oven interior); no utensils or brushes should be used to clean the oven
exterior surface.
Before starting cleaning operations, it is necessary to:
1. Set the switch to its initial 0° position (Fig. 6 - Ref. 2 - 3).
2. Disconnect the oven plug from the mains supply.
6.2 - OVEN CLEANING PROCEDURE
N.B. Do not clean the appliance until it has cooled down completely. To avoid burns, we
recommend using anti-scald gloves when cleaning.
To clean the unit, proceed as follows:
1. Open the oven door using the handle.
2. Brush the refractory stone floor.
3. WARNING! DO NOT pour cold water or any other substance onto the refractory cooking
stone to clean it. ONLY use a oven brush to remove any food waste.
4. Use a damp cloth and neutral detergent to clean the glass and the door.
5. After cleaning the inner cooking chamber and outer casing make sure that all parts of
the oven are completely dry.
CHAP. 7 - MAINTENANCE
7.1 - GENERAL
Before carrying any maintenance operation, it is necessary to:
1. Set the switch to its initial 0° position (Fig. 6 - Ref. 2 - 3).
2. Disconnect the mains plug from the power supply.
7.2 - POWER SUPPLY CABLE
Periodically check power cable for wear. If the power cable shows signs of wear or
deterioration, call the "SERVICE CENTER" for replacement.
7.3 - TROUBLESHOOTING
In the event of a breakdown or malfunction, contact your "LOCAL SERVICE CENTER".
English
11
CHAP. 8 - DISMANTLING
8.1 - PUTTING THE OVEN OUT OF SERVICE
If, for any reason, you decide to put the oven out of service, make sure no one else can use
it: unplug it and disconnect the electrical connections.
8.2 - WEEE Waste Electrical and Electronic Equipment
The crossed-out wheeled-bin symbol on the equipment or its packaging indicates that, at end-
of-life, the product must be collected separately from other waste. Selective sorting of end-of-
life equipment is organized and managed by the producer. Users wishing to dispose of their
equipment must therefore contact the producer and follow the instructions adopted by the latter
to enable selective sorting of the enclosed equipment at end-of-life.
Appropriate selective sorting for recycling, treatment and environmentally-friendly disposal of
end-of-life equipment helps to avoid possible negative effects on the environment and health,
and promotes the reuse and/or recycling of the materials of which the equipment is composed.
Incorrect disposal of the product by the holder will result in the application of the administrative
penalties provided for by the applicable regulations.
12
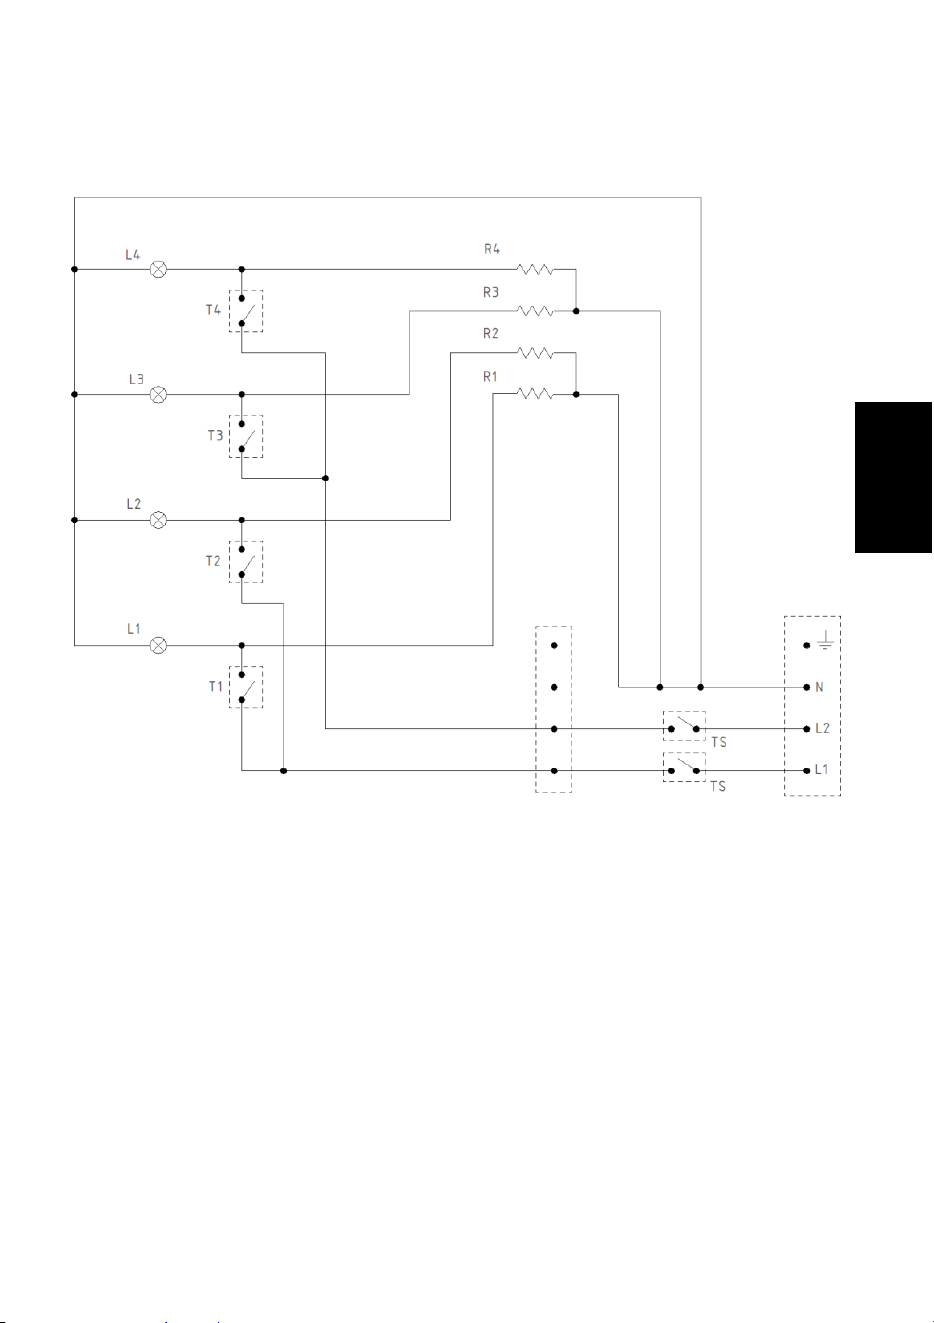
CHAP. 9 - ELECTRICAL DIAGRAM
9.1 - OVEN - 1ph or 3ph 208V / 220V.
FIG. n°7
English

12
SERVICE CENTRE
AUTHORISED DEALER
Eurodib Corp.
Mailing address:
334 Cornelia St. #272
Plattsburgh, NY, 12901
USA
Office:
401 Penbrooke Dr., Suite 3R
Penfield, NY, 14526
USA
J
4
B
2
X
7
J
4
B
2
X
7
Eurodib Inc.
Address: 120 de la Barre
Boucherville
QC J4B 2X7
CANADA
Tél: 1-888-956-6866
www.eurodib.com
customerservice@eurodib.com
J
4
B
2
X
7
J
4
B
2
X
7