"Connection Mode" → "P4" (see Figure 11) → "Reconnect".
1.3.3 Once paired successfully, the display will return to the main interface.
2. Wireless Reconnection
2.1 Set the 「connection toggle switch 」 to wireless position and power on the device .
2.2 Rotate the encoder clockwise, then navigate:
"Connection Mode" → "P4" → "Reconnect".
2.3 The screen will display "Reconnecting…", and upon success, it will return to the main interface.
Important Notes
• Initial wireless pairing requires wired initialization—otherwise, the PS4 won’t recognize the
device.
• For daily use, simply use Wireless Reconnect for quick pairing.
• If reconnection fails, restart your PS4 or repeat the pairing process.
• Keep the device within 3 meters of the PS4 for stable wireless performance.
PC-Windows 系统连接指南
一、接收器模式
首次连接:
1.1 将 2.4G 接收器(位于产品底部)插入 PC 或安卓电视 USB 接口,长按接
收器配对键3秒至 LED 灯快闪。
1.2 将连接拨动开关调至无线档位(如图1所示),开机后进入主界面。
1.3 顺时针旋转 编码器 进入下一级界面(如图2所示), 按此顺序
「连接模式」
→「Dongle」( 如图3所示)→「配对」
选择并确认(下压编码器)进入配对状态,
屏幕显示
「配对中」
;
1.4 配对成功后接收器 LED 灯常亮 , 连接成功,屏幕自动返回主界面。
回连操作:
2.1 将拨动开关调至无线档位(如图1所示),开机进入主界面。
2.2 顺时针旋转编码器进入下一级界面(如图2所示),按此顺序
「连接模式」
→「Dongle」( 如图3所示)→「回连」
,选择并确认(下压编码器)进入顺
连状态,屏幕显示
「回连中」
。
2.3 连接成功后,屏幕自动返回主界面。
二、有线模式
1.1 使用附赠 USB 数据线连接PC的USB-A 接口,将拨动开关调至有线档位(如
图4所示)。
1.2 几秒后台杆自动连接 PC,主界面显示
「PC 有线连接」
(默认 X-INPUT 模式)。
切换输入模式:长按 SELECT+START键5秒,可从 X-INPUT 切换至 D-INPUT
模式。
三、蓝牙模式
首次配对
1.1 将拨动开关调至无线档位(如图1所示),开机进入主界面。
1.2 顺时针旋转编码器进入界面,按此顺序
「连接模式」→「PC」(如图5所示)
→「配对」
,选择并确认(下压编码器)进入配对状态,屏幕显示
「配对中」
。
1.3 在 PC 端开启蓝牙功能,扫描并连接
「Xbox Wireless Controller」
,配对
成功后屏幕返回主界面。
回连操作:
2.1 将拨动开关调至无线档位(如图1所示),开机进入主界面。
1.2 顺时针旋转编码器进入界面,按此顺序
「连接模式」→「PC」→ " 回连」
,
选择并确认(下压编码器)进入回连状态,确认后屏幕显示
「回连中」
。
2.2 连接成功后自动返回主界面。
O F F
图 1
图 2
图 3
O F F
图 4
注意事项:
* 确保设备蓝牙/接收器功能已启用。
* 模式切换需在开机前调整拨动开关。
* 配对失败时请重启设备或重复步骤。
图 5
Nintendo Switch 连接指南
1. 蓝牙模式(首次配对)
。式模对配入进机主,」序顺/法握改更「→」柄手「 入进 → 机主hctiwS开打 1.1
1.2 将台杆的拨动开关调至无线档位(如图6所示),开机后显示屏进入主界面。
1.3 顺时针旋转编码器进入下一级菜单界面(如图 7 所示),按此顺序选择
「连
接模式」→「SW」(如图8所示)→「配对」
并确认(下压编码器)进入配对
状态 ,屏幕显示
「配对中」
。
1.4 配对成功后,显示屏自动返回主界面。
2. 回连模式
2.1 打开 Switch 主机,将台杆拨动开关调至无线档位,台杆开机后进入主界面。
2.2 顺时针旋转编码器进入下级界面,按此顺序选择
「连接模式」→「SW」
(
如
图8所示)→「回连」
并确认(下压编码器)进入回连状态,屏幕显示
「回连中」
。
2.3 连接成功后,显示屏自动返回主界面。
3. 有线模式
3.1 将台杆的拨动开关调至有线档位(如图9所示),使用附赠的 USB 线连
接至 Switch 底座。
3.2 Switch 主机开机后会自动识别设备,主界面将显示
「Switch 有线连接」
。
图 8
O F F
图 6
图 7
O F F
图 9
PS4 游戏模式连接指南
注意事项
* 蓝牙配对时,请确保 Switch 未连接其他手柄。
* 有线模式需通过 底座 USB 接口 连接,直接连接主机可能无效。
* 若回连失败,请重启台杆或重复配对流程。
1. 首次连接(无线模式配对)
1.1 有线初始化
1.1.1 将台杆拨动开关调至 有线档位(如图11所示),使用附赠的 USB 线连接台杆与 PS4 主机。
1.1.2 等待数秒后,台杆自动连接 PS4,短按 HOME键1秒进入 PS4 有线模式。
1.2 切换至无线模式
将拨动开关调至无线档位 (如图12所示)并拔掉 USB 线。
1.3 完成无线配对
1.3.1 台杆开机进入主界面后,顺时针旋转编码器进入下一级菜单界面。
1.3.2 按此顺序选择 「
连接模式」→「P4」
(如图 13 所示)
→「回连」
并确认(下
压编码器) ,屏幕显示
「配对中」
。
1.3.3 配对成功后,显示屏自动返回主界面。
2. 无线回连
2.1 将拨动开关调至无线档位,台杆开机进入主界面。
2.2 顺时针旋转编码器进入下级界面,按此顺序选择
「连接模式」→「P4」→「回
连」
并确认(下压编码器)。
2.3 屏幕显示
「回连中」
,成功后自动返回主界面。
O F F
图 11
Android/iOS 设备连接指南
注意事项
* 首次无线配对必须通过有线模式初始化,否则无法识别。
* 日常使用时,只需通过 无线回连 快速连接。
* 若回连失败,请重启 PS4 或重复配对流程。
1. 首次蓝牙配对
1.1 将台杆的拨动开关调至无线档位(如图6所示),开机后显示屏进入主界面。
1.2 顺时针旋转编码器进入下一级菜单界面(如图7所示),按此顺序选择
「连接模式」→「Phone」(如图 10 所示)→「配对」
并确认(下压编码器)
进入配对状态 ,屏幕显示
「配对中」
。
1.3 开启手机蓝牙,搜索并选择对应设备名称:
- iOS 设备:DUALSHOCK 4 Wireless Controller
- Android 设备:Wireless Controller
1.4 点击配对,连接成功后显示屏自动返回主界面。
2. 快速回连(日常使用)
2.1 将台杆的拨动开关调至无线档位(如图6所示),开机后显示屏进入主界面。
2.2 顺时针旋转编码器进入下一级菜单界面(如图7所示),按此顺序选择
「连
接模式」→「Phone」(如图 10 所示)→「回连」
并确认(下压编码器)进入回连状态 ,屏幕
显示 “回连中”。
2.3 连接成功后,显示屏自动返回主界面。
注意事项
* 首次配对需在手机蓝牙设置中手动选择设备,后续回连可自动完成。
* 如回连失败,请重启台杆或手机蓝牙后重试。
* iOS 设备 需确保系统版本支持外接手柄(iOS 13+)。
图 10
图 13
设备开关机与充电指南
1. 开机操作
无线/有线开机:
将 连接拨动开关 调至对应档位(无线/有线),设备自动启动。
通过 编码器 选择 「连接模式 」进行设备连接。
2. 关机操作
手动关机:将 拨动开关 2 拨至 OFF 状态。
低电关机:当电池电压 低于 3.5V 时,设备自动关闭。
主机休眠同步:当主机进入休眠时,设备同步进入 待机模式(主界面显示“待机中”)。
长时间不用建议拨动开关至 OFF 彻底关机。
3. 低电量提示
报警阈值:电池电压 ≤ 3.6V 时,电量指示区亮红灯,提示需充电。
功能限制:仅 开机状态 下可触发低电检测。
强制关机:电压 ≤ 3.5V 时自动关机,防止电池过放。
4. 充电说明
接口:Type-C USB(通用),输入电压 5V/400mA。
充电状态:
充电中:电量区显示 绿色电池图标 + 闪电标志(时长≤ 3.5 小时)。
充满:闪电标志熄灭,电池图标满格绿色。
兼容性:支持任何 USB 供电设备(如充电头/电脑 USB 口)。
TURBO 特殊功能设置
TURBO 功能可设置的火力键:
A、B、X、Y、L、R、L2、R2 键位
TURBO 功能设置:
TURBO+ 火力键一次,开 TURBO 功能;TURBO+ 火力键二次,关闭 TURBO 功能;
* 按住 TURBO 键+方向键上递增档位:调节成功,显示屏显示
* 按住 TURBO 键+方向键下递减档位:调节成功,显示屏显示
* 快速约 16次/秒、中速约8次/秒、慢速4次/秒
使用前请务注阅读本注意事项
· 内含互换零件,请务必放在3岁以下儿童触及不到的地方。
· 请勿靠近火源使用产品。
· 请勿将产品暴露于阳光直射或高温的环境中。
· 请勿将产品置于潮湿或多尘的环境中。
· 请勿撞击产品或使其跌落。
· 请勿直接接触 USB 端口,否则可能会导致故障。
· 请勿用力弯曲或拉扯线缆。
· 请使用柔软的干布清洗。
· 请勿使用汽油或稀释剂等化学品。
· 请勿自行拆卸、修理、或改装。
· 请勿将产品用于原本设计用途以外的用途。用于非原本用途而造成的事故或损坏,我们概不负责。
· 请勿直视光束。它可能会伤害你的眼睛。
产品信息
产品型号: STK-T01
产品名称: 多功能游戏台杆
产品执行标准:GB4943.1-2011
制造商:深圳市赛太克电子科技有限公司
地址:深圳市宝安区西乡固戍东山岗1号科技园
网址:www.saitake.com
联系电话:0755- 27366466
多功能游戏台杆
说明书
Fighting Joystick
User Manual
CN / EN
PC-Windows System Connection Guide
I. Receiver Mode
First-time Connection:
1.1 Insert the 2.4G receiver (located at the bottom of the product) into a USB
port on your PC or Android TV. Press and hold the match button on receiver
1.2 Set the
「
connection toggle switch
」
to the wireless position (as shown
in Figure 1). After powering on, the function display screen will enter the main
interface.
1.3 Rotate the encoder clockwise to proceed to the next-level interface (as
shown in Figure 2). Follow this sequence:
」elgnoD「 → 」edoM noitcennoC「
(as shown in
Figure 3
)
→ 「Pairing」
down the encoder) to enter pairing mode. The screen will display
「Pairing…」.
1.4 Once paired successfully, the receiver’s LED will stay lit, indicating a
successful connection. The screen will automatically return to the main
interface.
Reconnection:
2.1 Set the
「
connection toggle switch
」
to the wireless position (as shown in
Figure 1) and power on to enter the main interface.
2.2 Rotate the encoder clockwise to proceed to the next-level interface (as
shown in Figure 2). Follow this sequence:
」elgnoD「 → 」edoM noitcennoC「
(as shown in Figure 3) → 「Reconnect」
down the encoder) to enter reconnection mode. The screen will display
「Reconnecting…」
.
2.3 Once connected successfully, the function display screen will automatically
return to the main interface.
II. Wired Mode
1.1 Connect the included USB cable to a USB-A port on your PC and set the
「
connection toggle switch
」
to the wired position (as shown in Figure 4 ).
III. Bluetooth Mode
First-Time Pairing:
1.1 Set the
「
connection toggle switch
」
to the wireless position (as shown in Figure 1) and power on
to enter the main interface.
1.2 Rotate the encoder clockwise to navigate the menu in this order:
「Connection Mode」 → 「PC」
(
as shown in
Figure 5
)
→ 「Pairing」
mode. The screen will display
「Pairing…」
.
1.3 On your PC, enable Bluetooth, scan for and connect to
「Xbox Wireless Controller」
. Once
paired successfully, the screen will return to the main interface.
Reconnection:
2.1 Set the
「
connection toggle switch
」
to the wireless position (as shown in Figure 1) and power on
to enter the main interface.
O F F
Figure1
Figure2
O F F
Important Notes:
• Ensure the device’s Bluetooth/receiver function is enabled.
• Mode switching must be done by adjusting the lever switch before powering on.
• If pairing fails, restart the device or repeat the steps.
Nintendo Switch Connection Guide
1. Bluetooth Mode (First-Time Pairing)
1.1 Turn on your Nintendo Switch → Go to
「Controllers」 → 「Change
Grip/Order」
to enter pairing mode.
1.2 Set the
「connection toggle switch 」
on the device to Wireless Mode (see
Figure 6) .After powering on, the function display screen will enter the main
interface.
1.3 Rotate the encoder clockwise to navigate the menu in this order:
「Connection Mode」 → 「SW」 (see Figure 7) → 「Pairing」
by pressing down the encoder to enter pairing mode. The screen will display
「Pairing…」.
1.4 Once successfully paired, the function display screen will automatically
return to the main interface.
2. Reconnection Mode
2.1 Turn on your Nintendo Switch, set the
「connection toggle switch 」
to
Wireless Mode, After powering on, the function display screen will enter the
main interface.
2.2 Rotate the encoder clockwise and navigate in this order:
「Connection
Mode」 → 「SW」 → 「Reconnect」.
to enter reconnection mode. The screen will display
「Reconnecting…」.
2.3 Once connected, the display will automatically return to the main interface.
3. Wired Mode
3.1 Set the
「connection toggle switch 」
to Wired Mode (see Figure 8) and
the Switch Dock using the included USB cable.
3.2 After powering on the Nintendo Switch, the device will be automatically
interface will display
「Switch Wired Connection」.
Figure7
O F F
Figure
6
O F F
Figure8
PS4 Gaming Mode Connection Guide
1. First-Time Connection (Wireless Pairing)
1.1 Wired Initialization
1.1.1 Set the 「connection toggle switch 」 to Wired Mode (see Figure 9) and connect the device
to your PS4 console using the included USB cable.
second) to enter PS4 Wired Mode.
1.2 Switch to Wireless Mode
Set the 「connection toggle switch 」 to Wireless Mode (see Figure 10) and
disconnect the USB cable.
1.3 Complete Wireless Pairing
1.3.1 Power on the device to enter the main interface, then rotate the encoder
clockwise to access the submenu.
1.3.2 Navigate in this order:
O F F
图 10
Android/iOS Device Connection Guide
Figure13
图 11
Device Power & Charging Guide
1. Power On Operation
Wireless/Wired Startup:
Set Toggle Switch 2 to the corresponding mode (Wireless/Wired) → The device will power on
automatically.
Use the Encoder to select
《
Connection Mode
》
for device pairing.
Manual Shutdown: Set Toggle Switch 2 to OFF.
.
Sleep Mode Sync: When the host console enters sleep mode, the device switches to Standby Mode
(displays "Standby" on the main interface).
Long-Term Storage: For extended non-use, set the toggle switch to OFF for complete shutdown.
TURBO Special Function Settings
1. TURBO-Enabled Buttons
You can assign TURBO to the following buttons: A / B / X / Y / L / R / L2 / R2
2. Enabling & Disabling TURBO
3. Adjusting TURBO Speed
Increase Speed: Hold TURBO + D-Pad Up (displays current speed level).
Decrease Speed: Hold TURBO + D-Pad Down (displays current speed level).
4. Preset Speed Modes
Fast Mode: ~16 presses/second
Medium Mode: ~8 presses/second
Slow Mode: ~4 presses/second
Figure3
Figure4
Figure5
1.2 After a few seconds, the device will automatically connect to the PC, and the function display screen
interface will display
「PC Wired Connection」
(default: X-INPUT mode).
Switching Input Modes: Press and hold
SELECT + START
for 5 seconds to switch from X-INPUT to
D-INPUT mode.
Note:
• Ensure the Switch Dock is properly connected to power and the console.
• For wireless connections, keep the device within a reasonable range of the console.
• If pairing fails, restart the device and repeat the steps.
• For Bluetooth Pairing: Ensure no other controllers are connected to the Switch during pairing.
• For Wired Mode: Connect only through the Dock’s USB port—direct connection to the console
may not work.
• If Reconnection Fails: Restart the device or repeat the pairing process.
2.2 Rotate the encoder clockwise and navigate in this order:
「Connection Mode」 → 「PC」 →
「Reconnect」
.Confirm the selection (press down the encoder) to enter reconnection mode. The
screen will display
「Reconnecting…」
.
2.3 Once connected successfully, the device will automatically return to the main interface.
3. Low Battery Warning
Alert Threshold: When battery voltage ≤3.6V, the power indicator turns red (charging required).
Function Limit: Low-battery detection only works when powered on.
1. First-Time Bluetooth Pairing
1.1 Set the 「connection toggle switch 」 to Wireless Mode (see Figure 12) and power on the
device to enter the main interface.
1.2 Rotate the encoder clockwise to access the submenu , then navigate:
"Connection Mode" → "Phone" (see Figure 13) → "Pairing".
1.3 Enable Bluetooth on your phone and search for:
- iOS: "DUALSHOCK 4 Wireless Controller"
- Android: "Wireless Controller"
1.4 Select the device to pair. Upon success, the display returns to the main
interface.
2. Quick Reconnection (Daily Use)
2.1 Set the lever switch to Wireless Mode and power on the device to enter the main interface.
2.2 Rotate the encoder clockwise, then navigate:
"Connection Mode" → "Phone" → "Reconnect".
2.3 Once connected, the display returns to the main interface.
Important Notes
• First-time pairing requires manual selection in your phone’s Bluetooth settings. Subsequent
reconnections are automatic.
• If reconnection fails, restart the device or your phone’s Bluetooth and retry.
• iOS devices must run iOS 13 or later for controller support.
• For Android, ensure Bluetooth permissions are enabled if pairing fails.
4. Charging Instructions
Port: Type-C USB (universal), input: 5V/400mA.
Charging Status:
Charging: Displays green battery icon + lightning symbol (full charge takes ≤3.5 hours).
Fully Charged: Lightning symbol disappears, battery icon shows solid green.
Compatibility: Works with any USB power source (e.g., wall adapter/computer USB port).
9
部件介绍
1. 功能显示屏
2. TURBO 键
3. SELECT 键
4. START 键
5. HOME 键
6. 充电口
7. 无线/有线/关机 连接
开关
8. 触摸板
9. 耳机/关麦/关耳机 拨
动开关
10. LSB 键
11. RSB 键
12. 编码器
13. LS/DP/RS 拨动开关
14. Y 键
15. X 键
16. RGB 发光圈
17. A 键
18. MACRO 键
19. 摇杆
20. 耳机孔位
21. 内置接收器
22. RB 键
23. LB 键
24. RT 键
25. LT 键
26. B 键
9
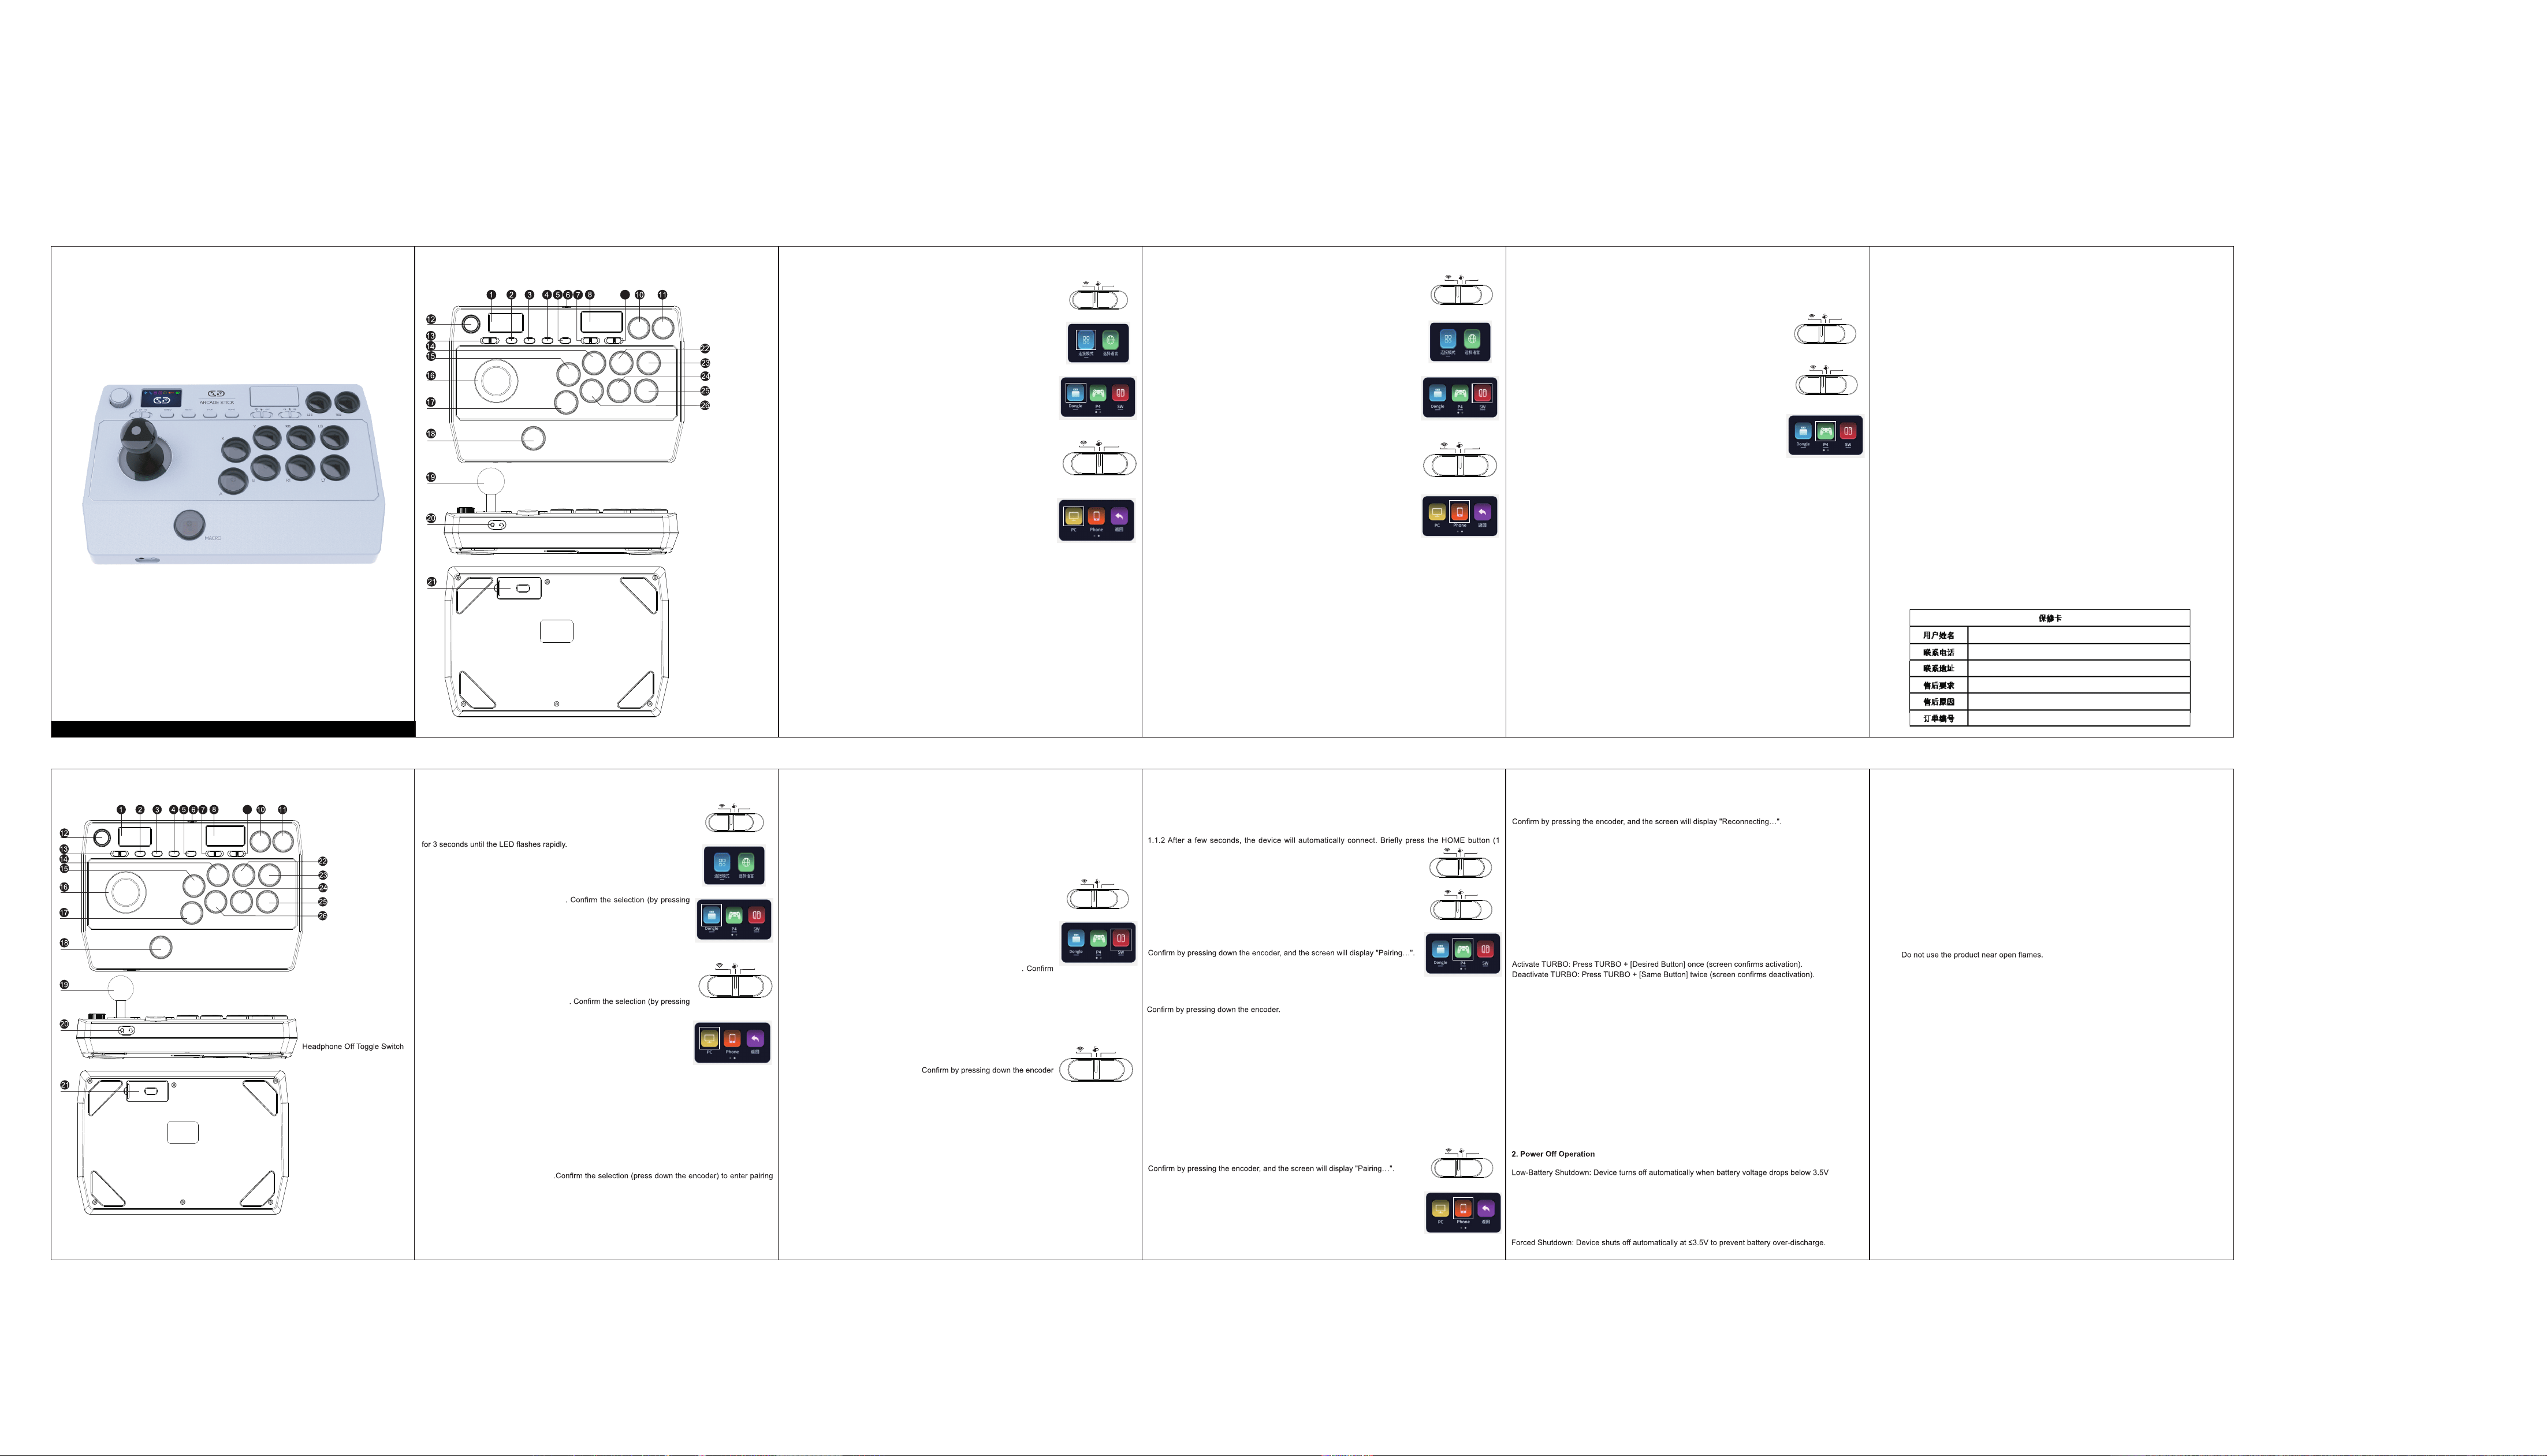
Component
1. Function Display Screen
2. TURBO Button
3. SELECT Button
4. START Button
5. HOME Button
6. Charging Port
7. Wireless/Wired/Of f
Connection Toggle Switch
8. Touchpad
9. Headphone/ Mic Mut e /
10. LSB Button (Left Stick
Button)
11. RSB Button (Right Stick
Button)
12. Encoder (Rotary Dial)
13. LS/DP/RS Toggle Switch
(Left Stick / D-Pad / Right
Stick)
14. Y Button
15. X Button
16. RGB Light Ring
17. A Button
18. MACRO Button
19. Joystick
20. Headphone Jack
21. Built-in Receiver
22. RB Button (Right Bumper)
23. LB Button (Left Bumper)
24. RT Button (Right Trigger)
25. LT Button (Left Trigger)
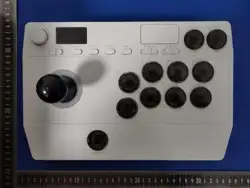
26. B Button
Please read the following precautions before use:
• This product contains interchangeable parts. Keep out of reach of children under 3 years old.
•
• Do not expose the product to direct sunlight or high temperatures.
• Do not place the product in humid or dusty environments.
• Do not drop or subject the product to strong impacts.
• Do not touch the USB port directly, as it may cause malfunction.
• Do not forcibly bend or pull the cable.
• Clean with a soft, dry cloth.
• Do not use gasoline, thinner, or other chemical solvents.
• Do not disassemble, repair, or modify the product yourself.
• Do not use the product for purposes other than its intended use. We are not responsible for any
accidents or damage caused by misuse.
• Do not look directly into the light beam. It may harm your eyes.
Product Information:
• Model Number: STK-T01
• Product Name: Multi-Function Fighting Joystick
• Connection Type: Wireless / Wired
• Product Dimensions: 285 × 210 × 110 mm
• Product Weight: 3550g appr
• Power Supply: Built-in 1000mAh battery or USB host-powered
• Charging Current: 5V 400mA
• Charging Time: 2.5–3.0 hours
O F F
图 12
connect the device to
detected, and the main
O F F
图 9
FCC Warning
This device complies with Part 15 of the FCC Rules. Operation is subject to the following two conditions:
(1) This device may not cause harmful interference, and (2) this device must accept any interference received, including
interference that may cause undesired operation.
NOTE 1: This equipment has been tested and found to comply with the limits for a Class B digital device, pursuant to part 15
of the FCC Rules. These limits are designed to provide reasonable protection against harmful interference in a residential
installation. This equipment generates, uses and can radiate radio frequency energy and, if not installed and used in
accordance with the instructions, may cause harmful interference to radio communications. However, there is no guarantee
that interference will not occur in a particular installation. If this equipment does cause harmful interference to radio or
television reception, which can be determined by turning the equipment off and on, the user is encouraged to try to correct
the interference by one or more of the following measures:
- Reorient or relocate the receiving antenna.
- Increase the separation between the equipment and receiver.
-Connect the equipment into an outlet on a circuit different from that to which the receiver is connected.
-Consult the dealer or an experienced radio/TV technician for help.
NOTE 2: Any changes or modifications to this unit not expressly approved by the party responsible for compliance could void
the user's authority to operate the equipment.
The device has been evaluated to meet general RF exposure requirement. The device can be used in portable exposure
condition without restriction.
O F F
Figure12