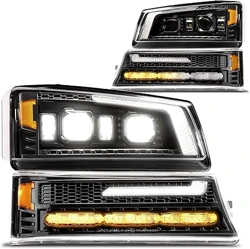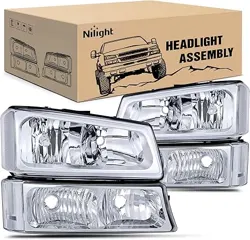
HOW TO ADJUST YOUR CAR’S HEADLIGHTS
1. LEVEL THE VEHICLE
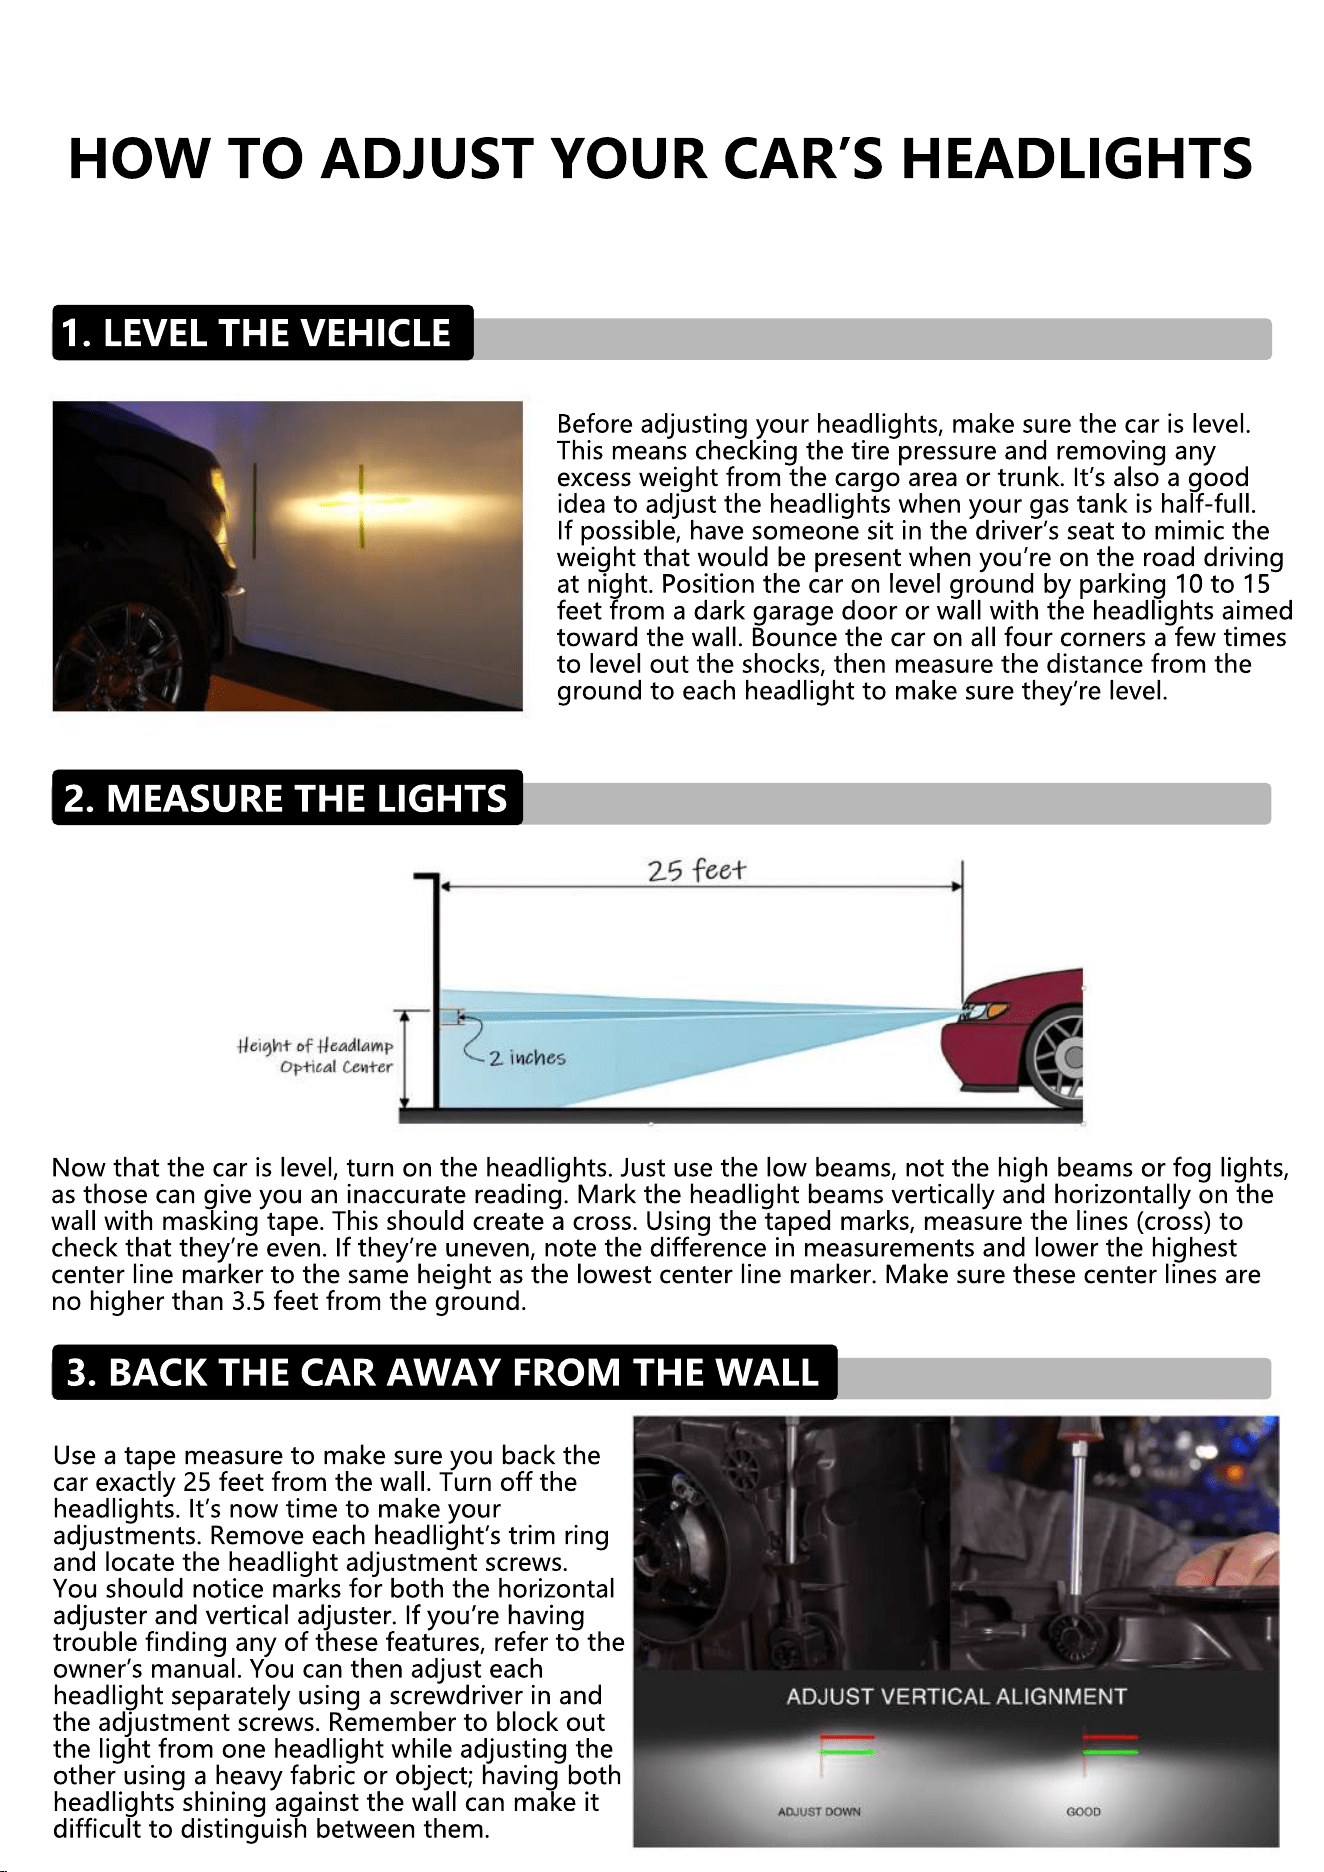
Before adjusting your headlights, make sure the car is level.
This means checking the tire pressure and removing any
excess weight from the cargo area or trunk. It’s also a good
idea to adjust the headlights when your gas tank is half-full.
If possible, have someone sit in the driver’s seat to mimic the
weight that would be present when you’re on the road driving
at night. Position the car on level ground by parking 10 to 15
at night. Position the car on level ground by parking 10 to 15
feet from a dark garage door or wall with the headlights aimed
toward the wall. Bounce the car on all four corners a few times
to level out the shocks, then measure the distance from the
ground to each headlight to make sure they’re level.
2. MEASURE THE LIGHTS
Now that the car is level, turn on the headlights. Just use the low beams, not the high beams or fog lights,
as those can give you an inaccurate reading. Mark the headlight beams vertically and horizontally on the
wall with masking tape. This should create a cross. Using the taped marks, measure the lines (cross) to
check that they’re even. If they’re uneven, note the difference in measurements and lower the highest
center line marker to the same height as the lowest center line marker. Make sure these center lines are
no higher than 3.5 feet from the ground.
3. BACK THE CAR AWAY FROM THE WALL
Use a tape measure to make sure you back the
car exactly 25 feet from the wall. Turn off the
headlights. It’s now time to make your
adjustments. Remove each headlight’s trim ring
and locate the headlight adjustment screws.
You should notice marks for both the horizontal
adjuster and vertical adjuster. If you’re having
adjuster and vertical adjuster. If you’re having
trouble finding any of these features, refer to the
owner’s manual. You can then adjust each
headlight separately using a screwdriver in and
the adjustment screws. Remember to block out
the light from one headlight while adjusting the
other using a heavy fabric or object; having both
headlights shining against the wall can make it
headlights shining against the wall can make it
difficult to distinguish between them.
4. ADJUST THE VERTICAL FIELD
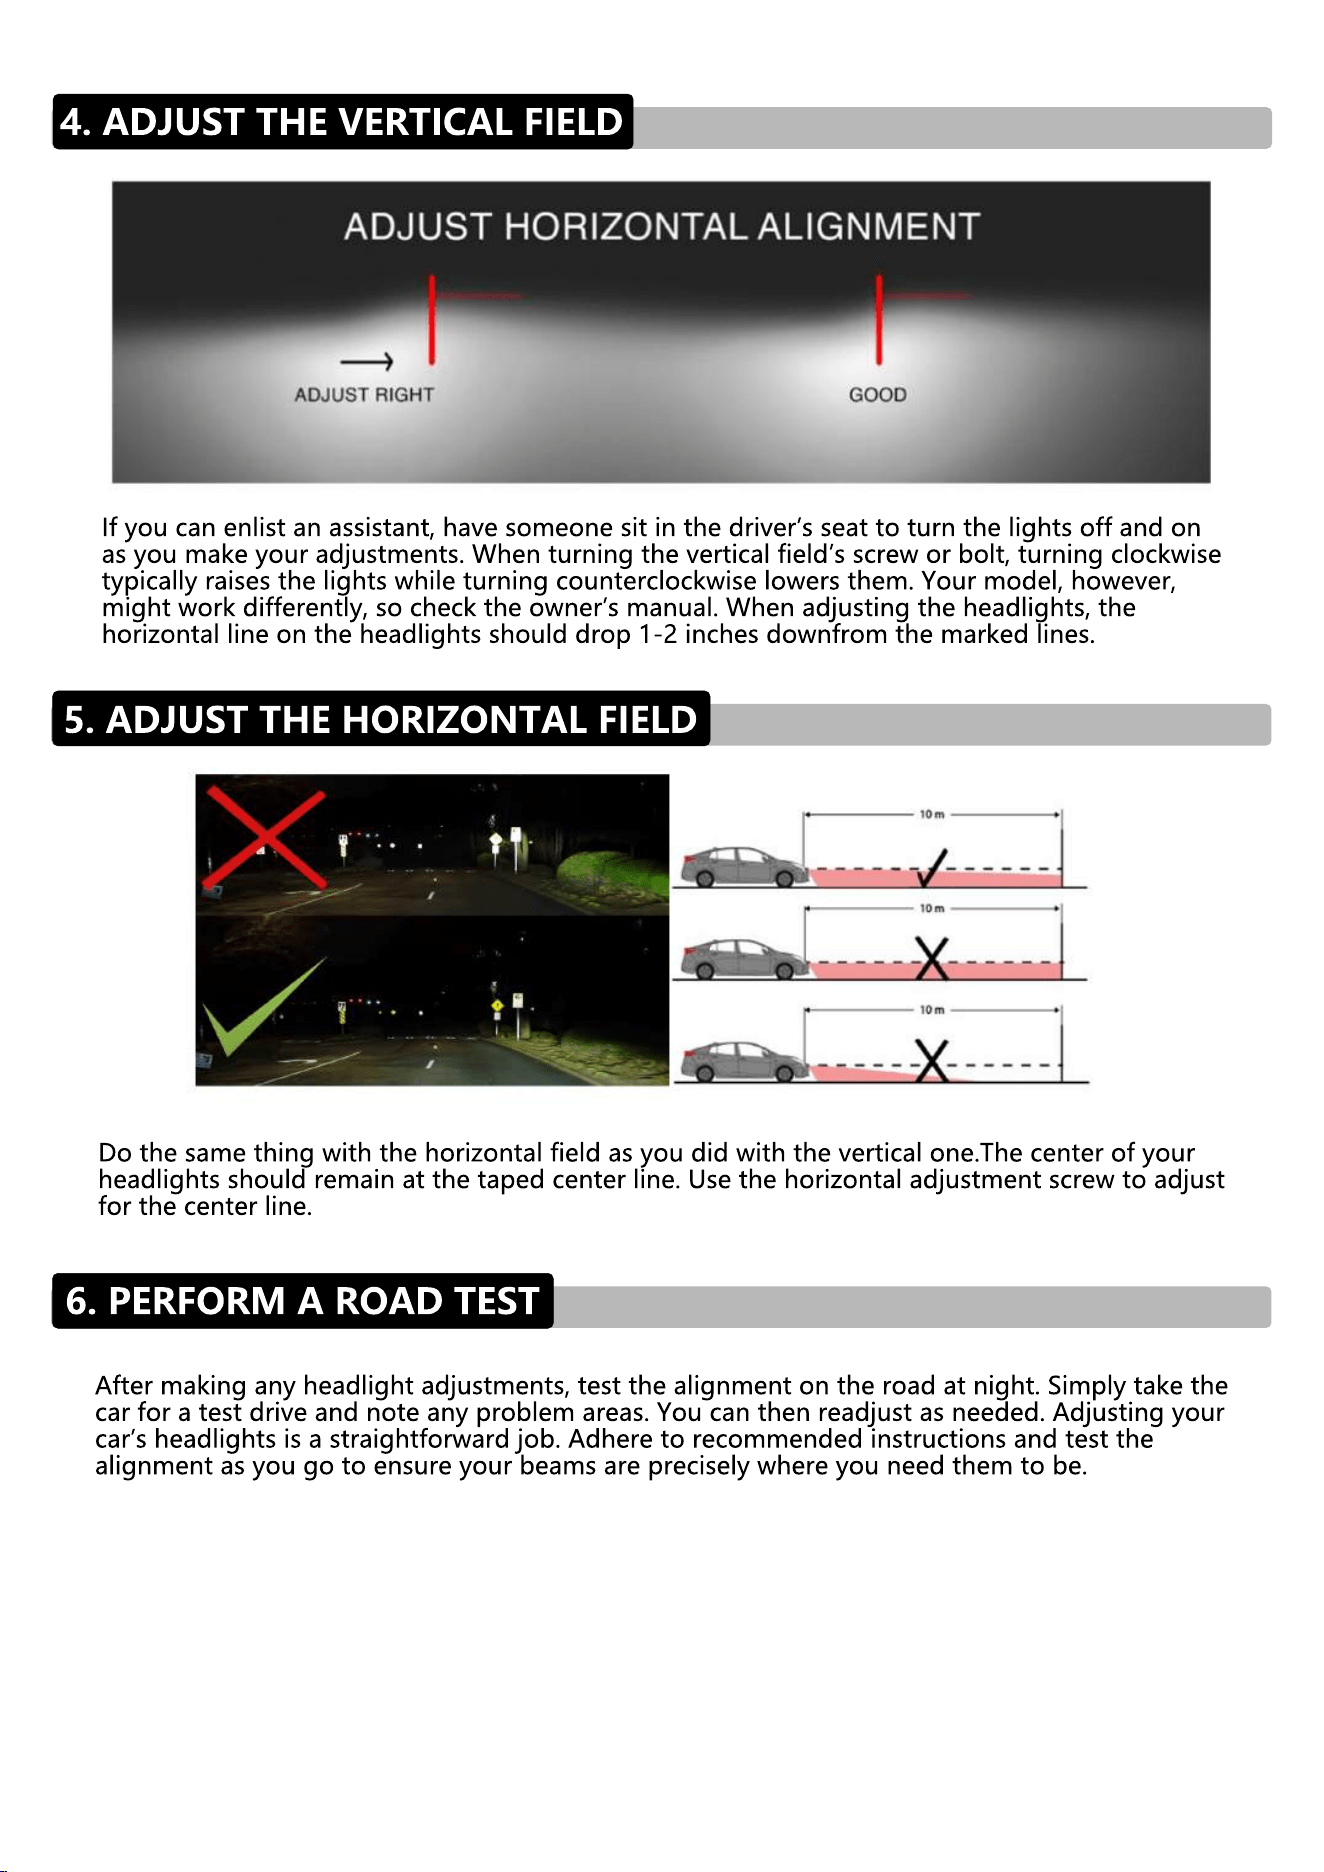
If you can enlist an assistant, have someone sit in the driver’s seat to turn the lights off and on
as you make your adjustments. When turning the vertical field’s screw or bolt, turning clockwise
typically raises the lights while turning counterclockwise lowers them. Your model, however,
might work differently, so check the owner’s manual. When adjusting the headlights, the
horizontal line on the headlights should drop 1-2 inches downfrom the marked lines.
5. ADJUST THE HORIZONTAL FIELD
Do the same thing with the horizontal field as you did with the vertical one.The center of your
headlights should remain at the taped center line. Use the horizontal adjustment screw to adjust
for the center line.
6. PERFORM A ROAD TEST
After making any headlight adjustments, test the alignment on the road at night. Simply take the
car for a test drive and note any problem areas. You can then readjust as needed. Adjusting your
car’s headlights is a straightforward job. Adhere to recommended instructions and test the
alignment as you go to ensure your beams are precisely where you need them to be.
Q1
A1
Question 01
Answer 01
Tips for installing the bulbs?
Ensure the dust cover is securely fastened (press down firmly to make it fit
tightly with the back of the housing) to prevent moisture from entering
through the rear during rain.
Q2
A2
Question 02
Answer 02
How to know if my headlights need adjustment?
Turn the headlights high beams on. Mark a plus (+) sign on the light shape
on the wall using tape or a pencil. Adjust the plus signs to be the same
height. Back your car up so it's about 25 feet from the wall. If the middle
of your headlights still falls within your markings, then you don't need
to make any adjustments.
Q3
A3
Question 03
Answer 03
How to adjust the beams?
Pop the hood and look for adjustment screws. Adjust them with a screwdriver.
Please do not over-adjust to avoid damaging the adjuster. When the adjuster
does not seem to be working, you can make a few more turns until you can no
longer turn it.
Q&A
Q4
A4
Question 04
Answer 04
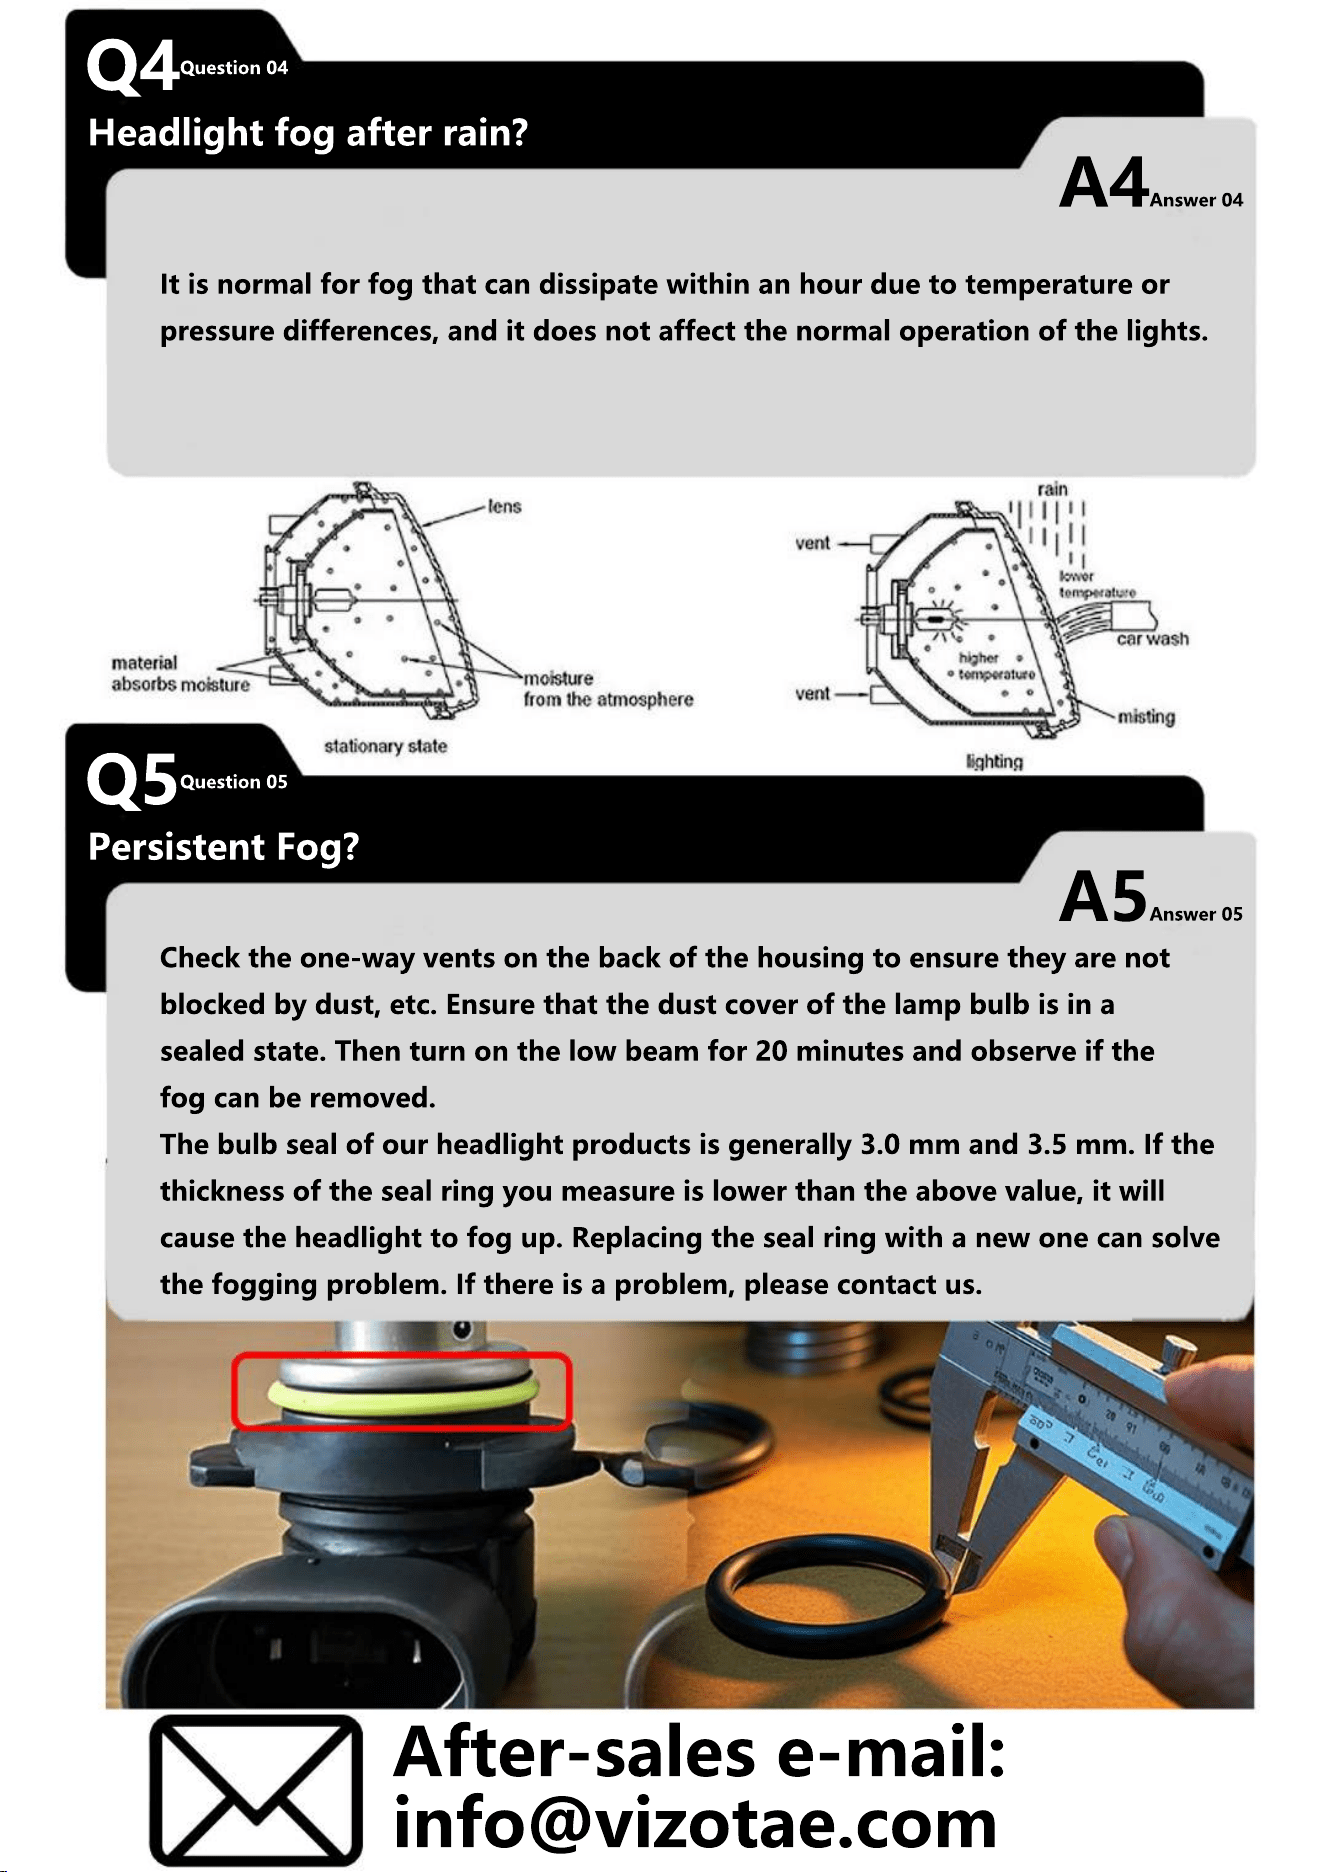
Headlight fog after rain?
It is normal for fog that can dissipate within an hour due to temperature or
pressure differences, and it does not affect the normal operation of the lights.
Q5
A5
Question 05
Answer 05
Persistent Fog?
Check the one-way vents on the back of the housing to ensure they are not
blocked by dust, etc. Ensure that the dust cover of the lamp bulb is in a
sealed state. Then turn on the low beam for 20 minutes and observe if the
fog can be removed.
The bulb seal of our headlight products is generally 3.0 mm and 3.5 mm. If the
thickness of the seal ring you measure is lower than the above value, it will
cause the headlight to fog up. Replacing the seal ring with a new one can solvecause the headlight to fog up. Replacing the seal ring with a new one can solve
the fogging problem. If there is a problem, please contact us.
After-sales e-mail:
info@vizotae.com