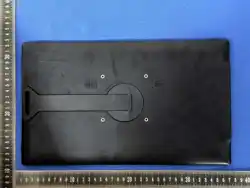
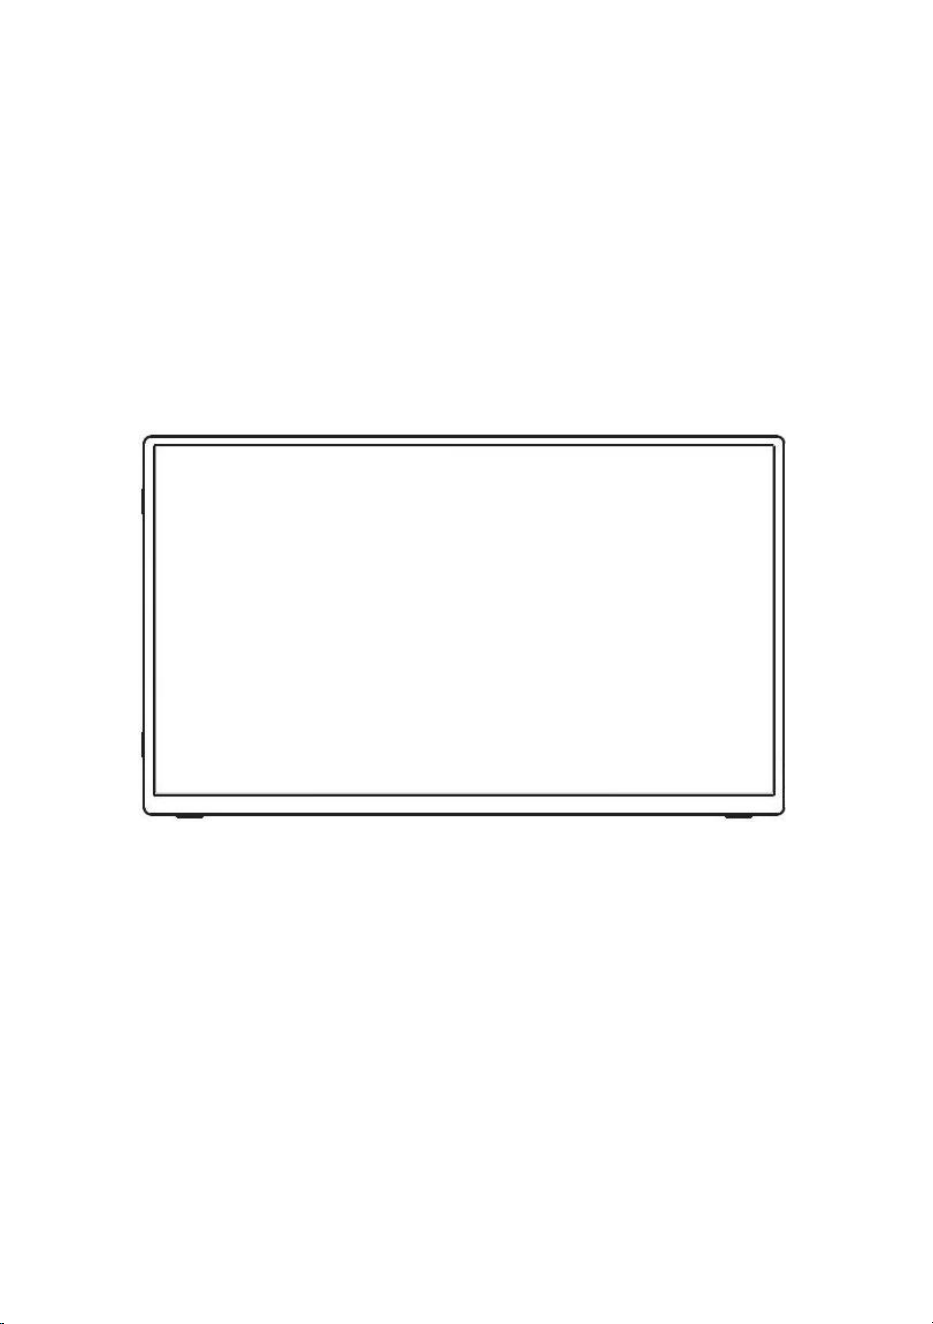
User Manual
portable monitor
This is a plug-and-play monitor and does not
require any driver setup
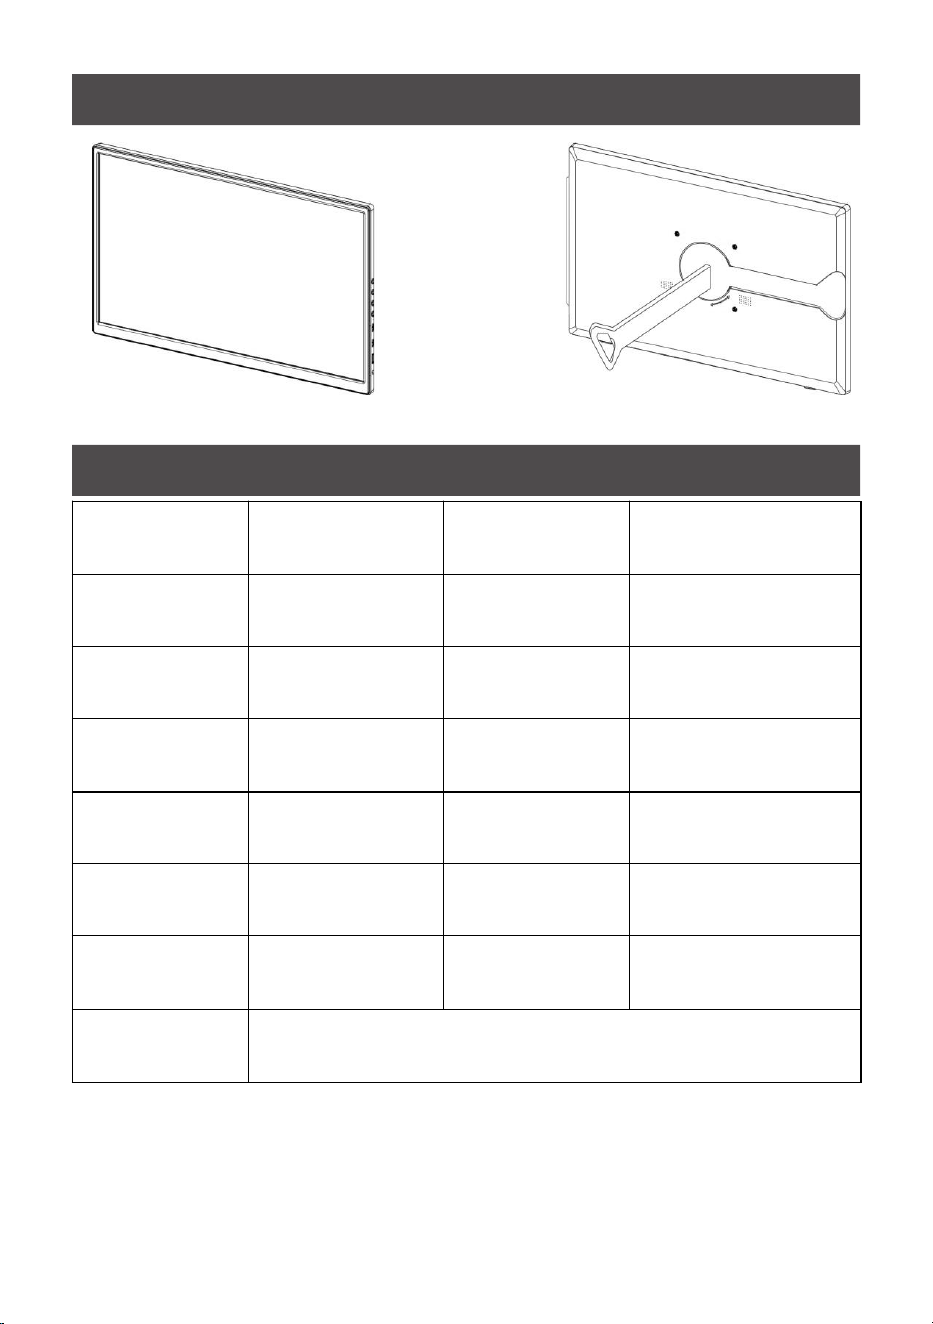
Product Appearance
Product Name
portable monitor
Product Size
357×213×14mm
Screen size
15.6 inch
Resolution
1920*1080
Product weight
0.9Kg
Refresh frequency
60Hz
Is it touching
NO
Brightness
220cd/m²~260cd/m²
Viewing angle
170°
Contrast
1000:1
Fuselage Material
ABS
Speakers
8Ω/1W*2
Output port
3.5mm headphone
jack
Input port
miniHDMI,Type-C×2
Packing List
miniHDMI to HDMI cable *1, USB to Type-C cable *1, USB power
adapter *1, manual *1
*Note: The above data are related to the measurement tools, environment,
personnel and other objective factors, there may be errors, such as error is normal,
please take the actual measurement shall prevail. If there are updates and changes
to the hardware parameters and the above parameter information has not been
updated in a timely manner, please refer to the actual product received.
Product Information
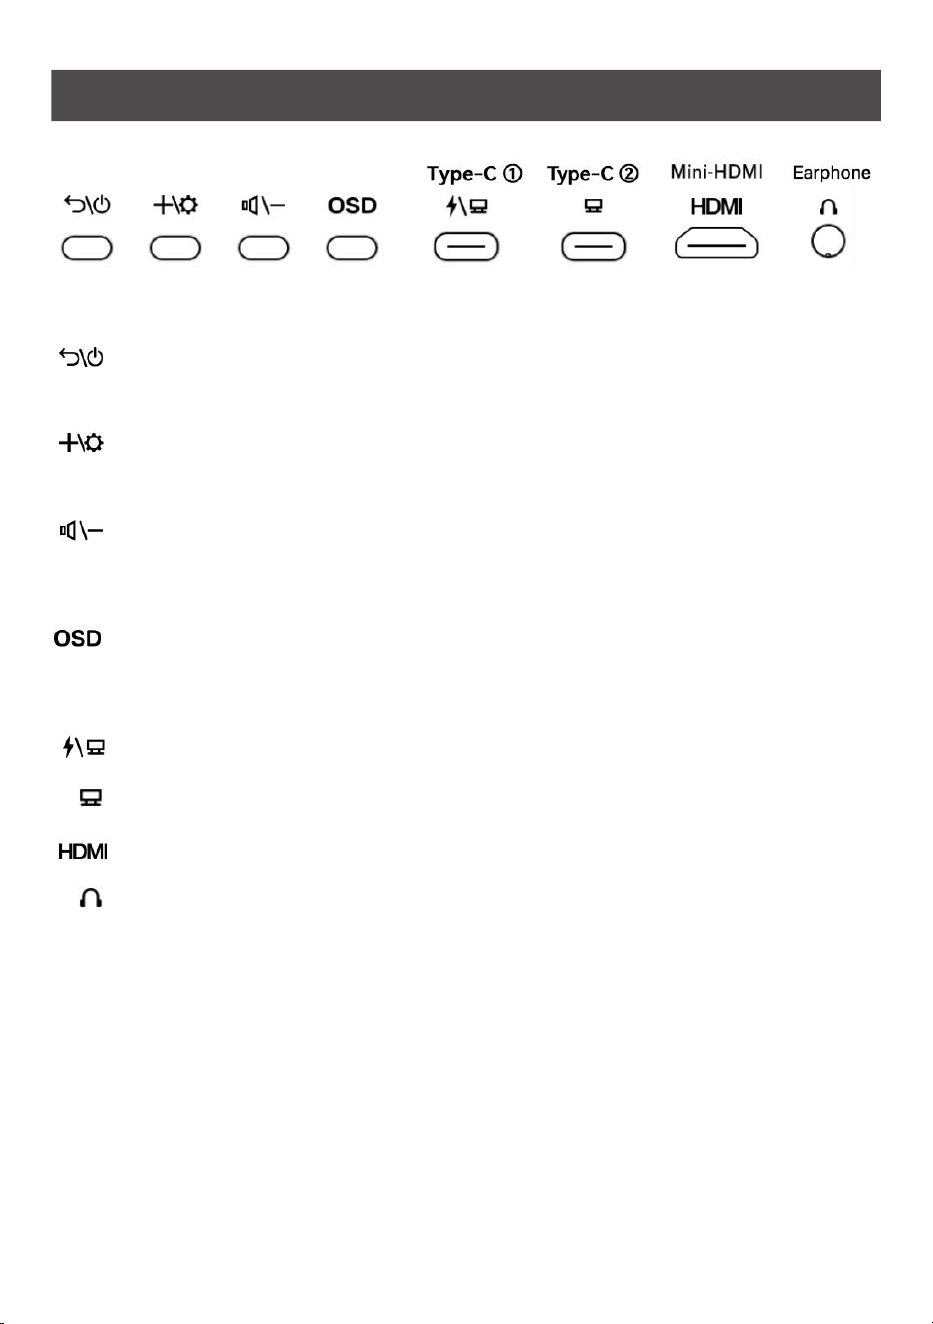
Interface & Button
Introduction
Button and Interface Descriptions
:
Return/Power Button,Long press: Power on/off;Short press: Toggle
projection source; Serves as return key when OSD menu is displayed
:
Brightness/Increase Button,Press once: Displays brightness adjustment menu,
Press again: Increases brightness; Adjusts volume up when volume menu is active
: Volume/Decrease Button,Press once: Displays volume adjustment menu,
Press again: Decreases volume; Adjusts brightness down when brightness menu is
active
: Short press: Displays settings menu (brightness, volume, aspect ratio, auto-
rotate, language)
Long press: Toggles wireless projection mode (CM-A/CM-B)
: Type-C ①:Power supply port (supports fast charging)
: Type-C ②:Data transfer port,Wired projection interface (support PD protocol)
: Mini-HDMI:Wired projection interface
: Earphone:3.5mm headphone jack
CM-A/CM-B Mode
:
Default mode: CM-A For regions where wireless projection is unavailable, long-press
OSD to switch to CM-B mode.
Projection Source Switching
Upon startup, the device defaults to the wireless projection display.
Short-press the Power button to switch to HDMI wired projection.
Basic operation of device connection
Press and hold the device's Back/Power button for more than 3 seconds to
turn it on. The device has a built-in battery, so no external power supply is required
unless the battery is too low.
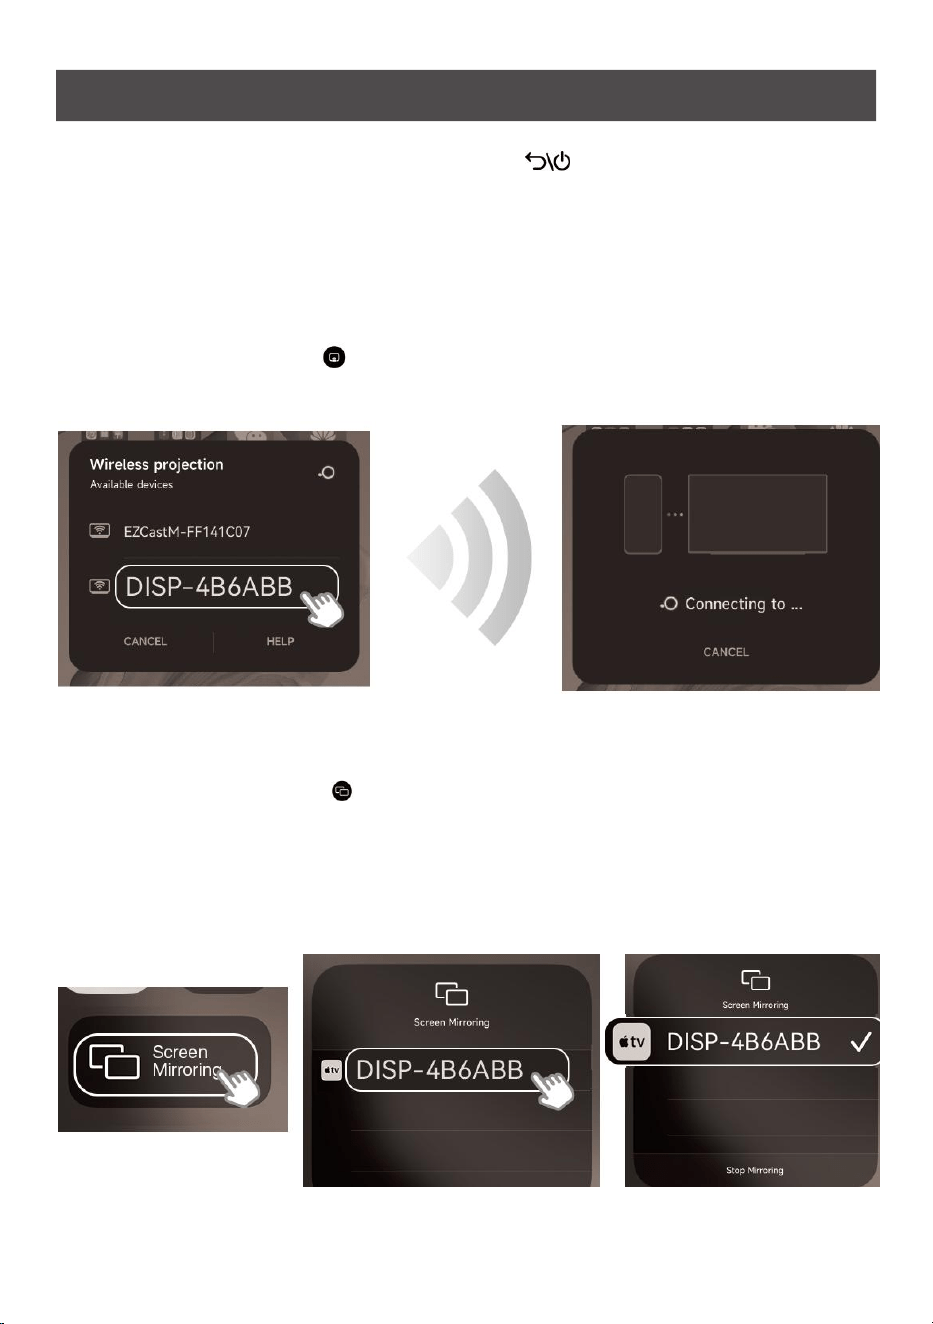
1. Mobile phone wireless screen projection to equipment:
1.1. Android mobile phone wireless screen to the device:
Turn on the "wireless screen" function of the mobile phone, wait for the DISP-4B6ABB
device to be found, then click on it, wait for a few seconds, and you can use it after the
connection is successful. As shown in the figure below.
1.2. iPhone or iPad wireless screen to device:
Turn on the "screen mirroring" function of the iPhone or iPad, wait for the DISP-4B6ABB
device to be found, then click on it, and finally enter the password: 1234, wait a few seconds,
and you can use it after the connection is successful. as shown in the following figure.
※ Note: The password is only required when the iPhone or iPad is used to wirelessly project
the screen to the P2P device for the first time. If the password is not prompted during the
screen projection process, there is no need to worry.
2. laptop wireless projection screen to the device:
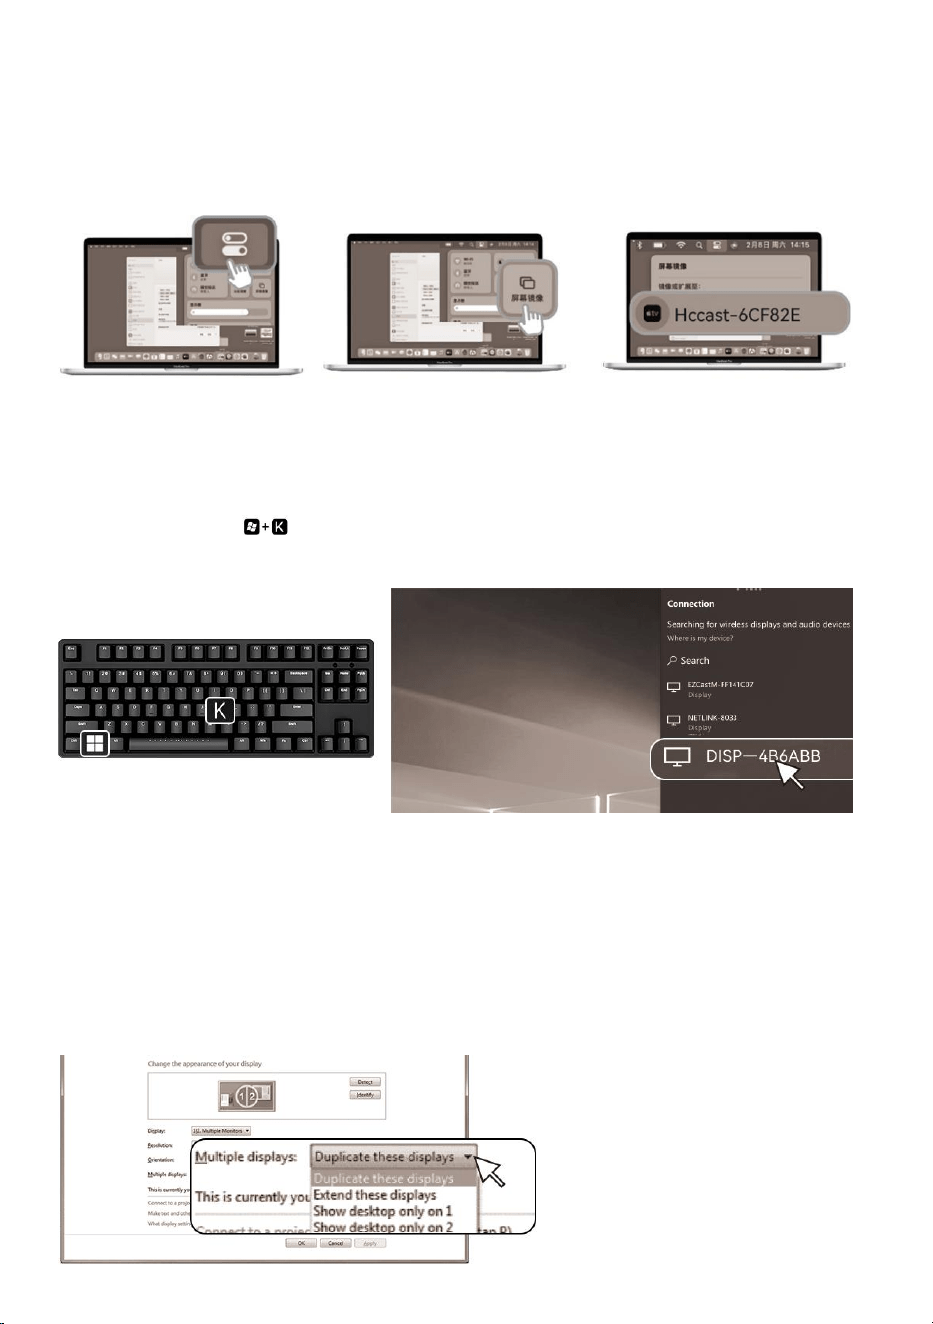
2.1. The notebook computer of mocOS system wirelessly projects the screen
(screen mirroring) to the device, and the specific operation is shown in the
following figure:
2.2. Windows system laptop wireless screen to the device:
Press the Win + K ( )key on the laptop keyboard, wait for the DISP-4B6ABB device to
be found, then click on it, and you can use it after the connection is successful. as shown in the
following figure .
After the connection is successful, the computer can be set to expand the display, as shown
in the following figure:
1. Right-click the laptop desktop and select the screen resolution or display settings;
2. Screen Rotation Settings: Click on the Orientation drop-down list and select Horizontal or
portrait ;
3. Duplicate and Extended Mode Settings: Click on the Multiple Displays drop-down list and
select Extend/Duplicate these displays.
※ Note: If you fail to see the additional monitor, simply click "Detect". If the additional monitor
still does not appear, restart the computer and perform the steps again.
Note:If you can't find the
orientation option, check if
your laptop supports this
feature.
First of all, click on "Control
Centre" in the top right corner
of your desktop;
Next, select
"Screen Mirroring";
Finally, select the same
device name as the SSID
on the monitor screen.
Basic operation of wired connections
After the device is turned on, press the "back/power button ( )" to switch to the wired
screen mode page. Use a Type-C cable to connect the monitor to a device equipped with a
full-featured Type-C port; or use a Mini-HDMI-to-HDMI cable to connect the monitor to a
device equipped with an HDMI port.
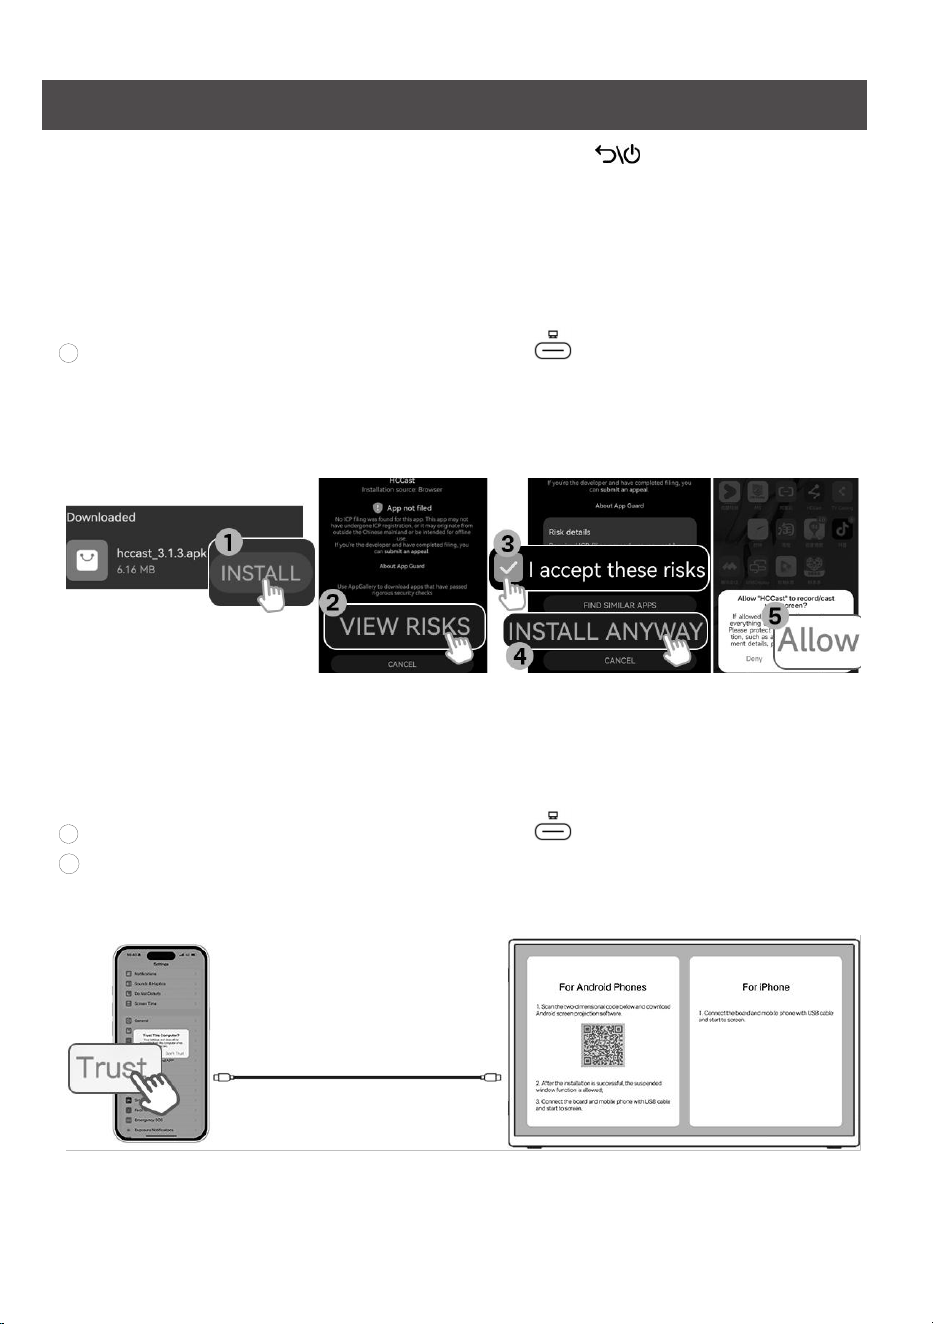
1. Connect to your smartphone with a Type-C cable:
1.1. Connect to a Android phone or tablet with a full-featured Type-C port:
1
Connect the mobile phone to the Type-C ② port ( ) of the device with a Type-C line;
② The ID address for downloading HCCast will pop up on the mobile phone, and click to
download and install the HCCast application;
③ After success, open the HCCast application and allow the screen to start projection. The
steps are shown in the figure below.
※ Note: If the download address does not pop up after inserting the mobile phone, you can use
the scan 1 scan function on the browser to download HCCast's two-dimensional code scan code
download on the device page.
1.2. Connect to iPhone or iPad
1
Connect the mobile phone to the Type-C ② port ( ) of the device with a Type-C line;
2
The trust interface will pop up on the iPhone. Click the "Trust" option to project. as shown
in the following figure.
※ Note: If your iPhone is lightning, please connect it with a Type-C-to-lightning cable.
Type-C to Type-C Cable
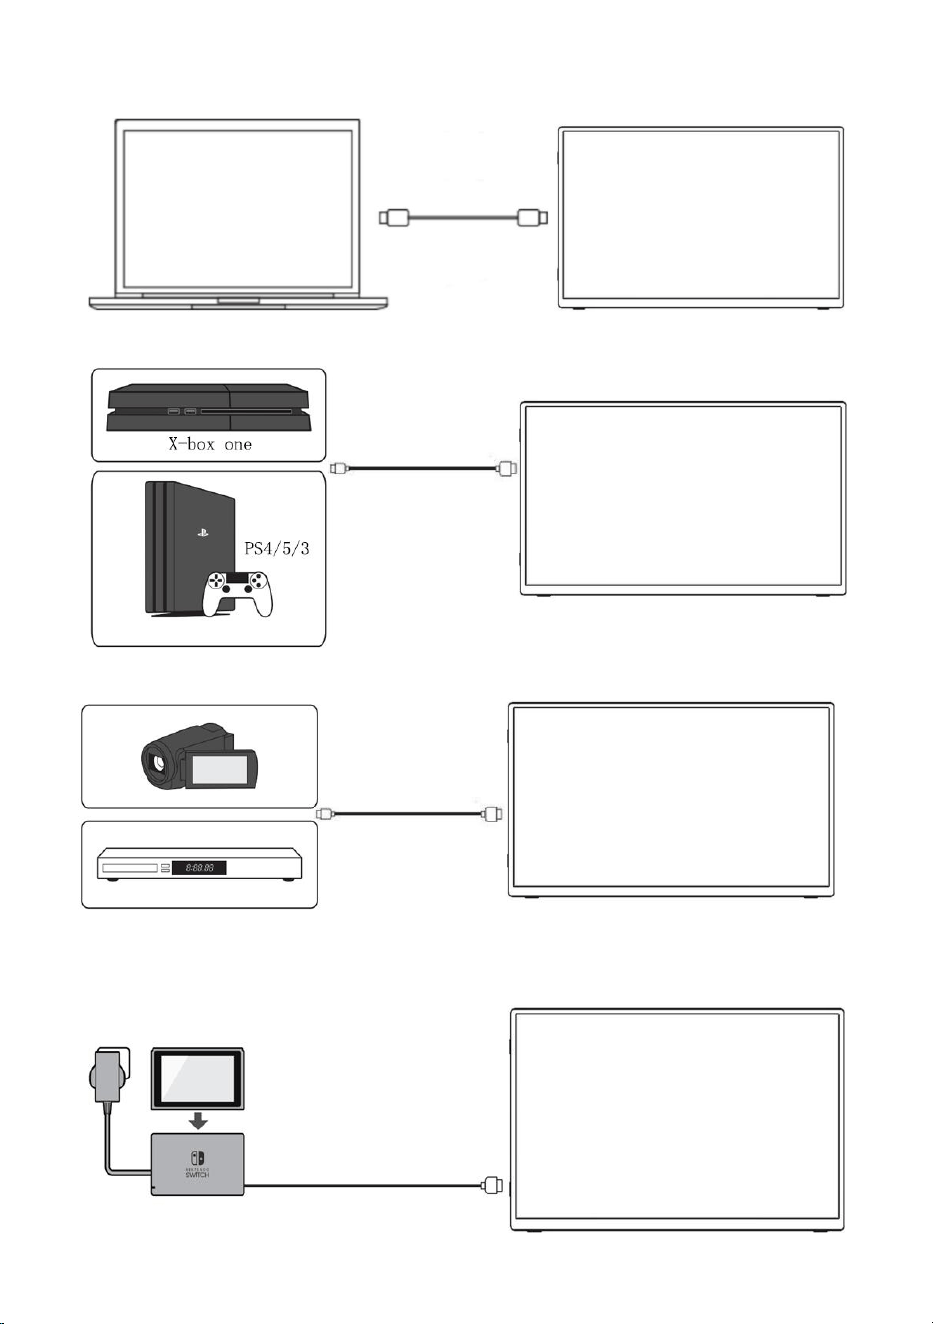
HDMI to Mini-
HDMI Cable
2. Connect to laptop or desktop PC.
3. Connect to a gaming device equipped with an HDMI port.
4. Connect to other devices equipped with HDMI port.
5. Connected to a Nintendo game console.
5.1. Connect to the Switch Dock with an HDMI cable.
HDMI to Mini-
HDMI Cable
HDMI to Mini-
HDMI Cable
HDMI to Mini-HDMI
Cable
About after-sales and shipping
An y quali ty pr obl ems ca use d by ext ern al fo rce s wil l not be retur ned or
exc han ged. Suc h as: dro p, hit, touch, disass emble th e machine to change or
accident.
We do not co ver the shippi ng cost fo r returns or exchanges that are not
of quali ty; if th ere is a qu ali ty pr obl em , we cover the st andard shipping .cost
About Warranty
The warranty only covers the main body of the product. Software, accessories,
consumables, etc. stored in the product or connected products are not covered by
the warranty.
Warranty is not covered if.
1) Due to fire, earthquake, lightning, gas damage and other natural disasters,
pollution or abnormal voltage and other extern al Malfunctions and damages caused by
the environment.
2) Improper such as falling after pu rchase and transport ation, or impact during
movement. Failure or damag e caused by operation
3) Operation failure and damage caused by im proper use.
4) Modify, adjust, and replace parts for this product.
5) The of the light source LED backlight is a consumable item and is not covered by
the warranty.

