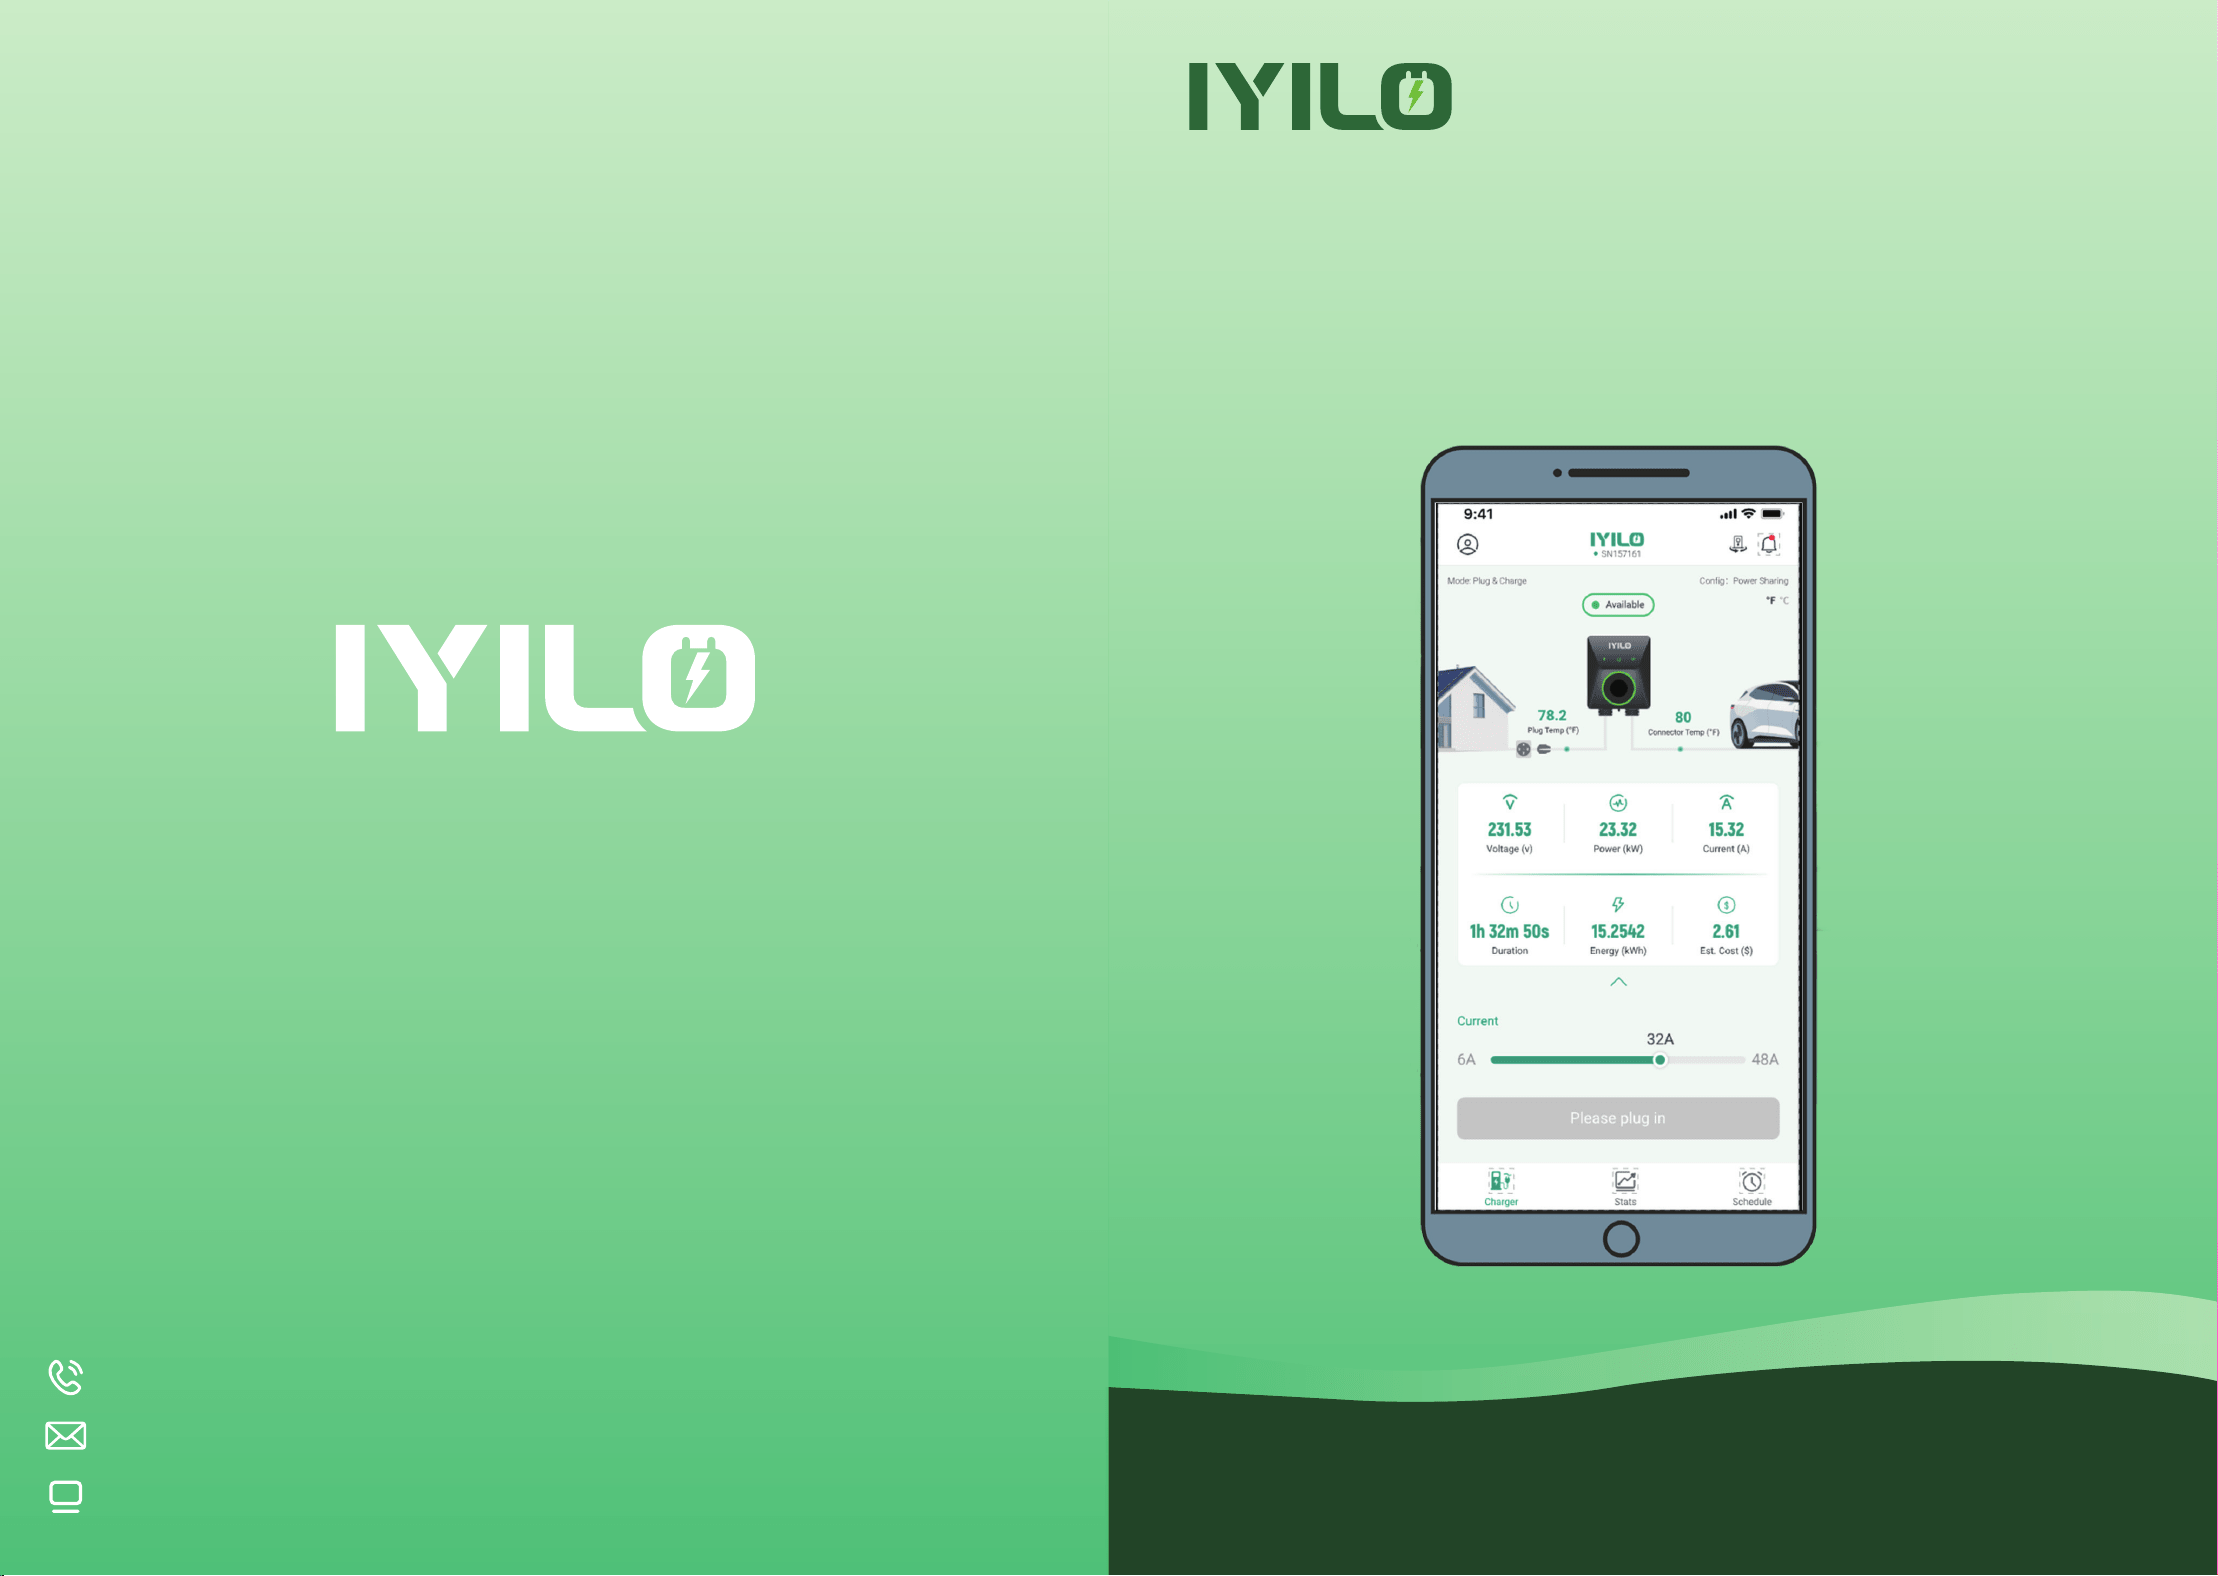
IYILO APP User Manual
Enjoy your Journey
www.evra.shop
www.IYILO.shop
+1(626) 888-3872
EMAIL: SUPPORT@IYILO.SHOP
WEBSITE: WWW.IYILO.SHOP/CONTACT
Electrify your Journey
. Ensure your EV charger is installed and operating properly before using the App
. Ensure you have validate Email address and phone number for APP registration
.Make sure your mobile device has a stable internet connection for proper App functionality
.Do not operate the App while driving.
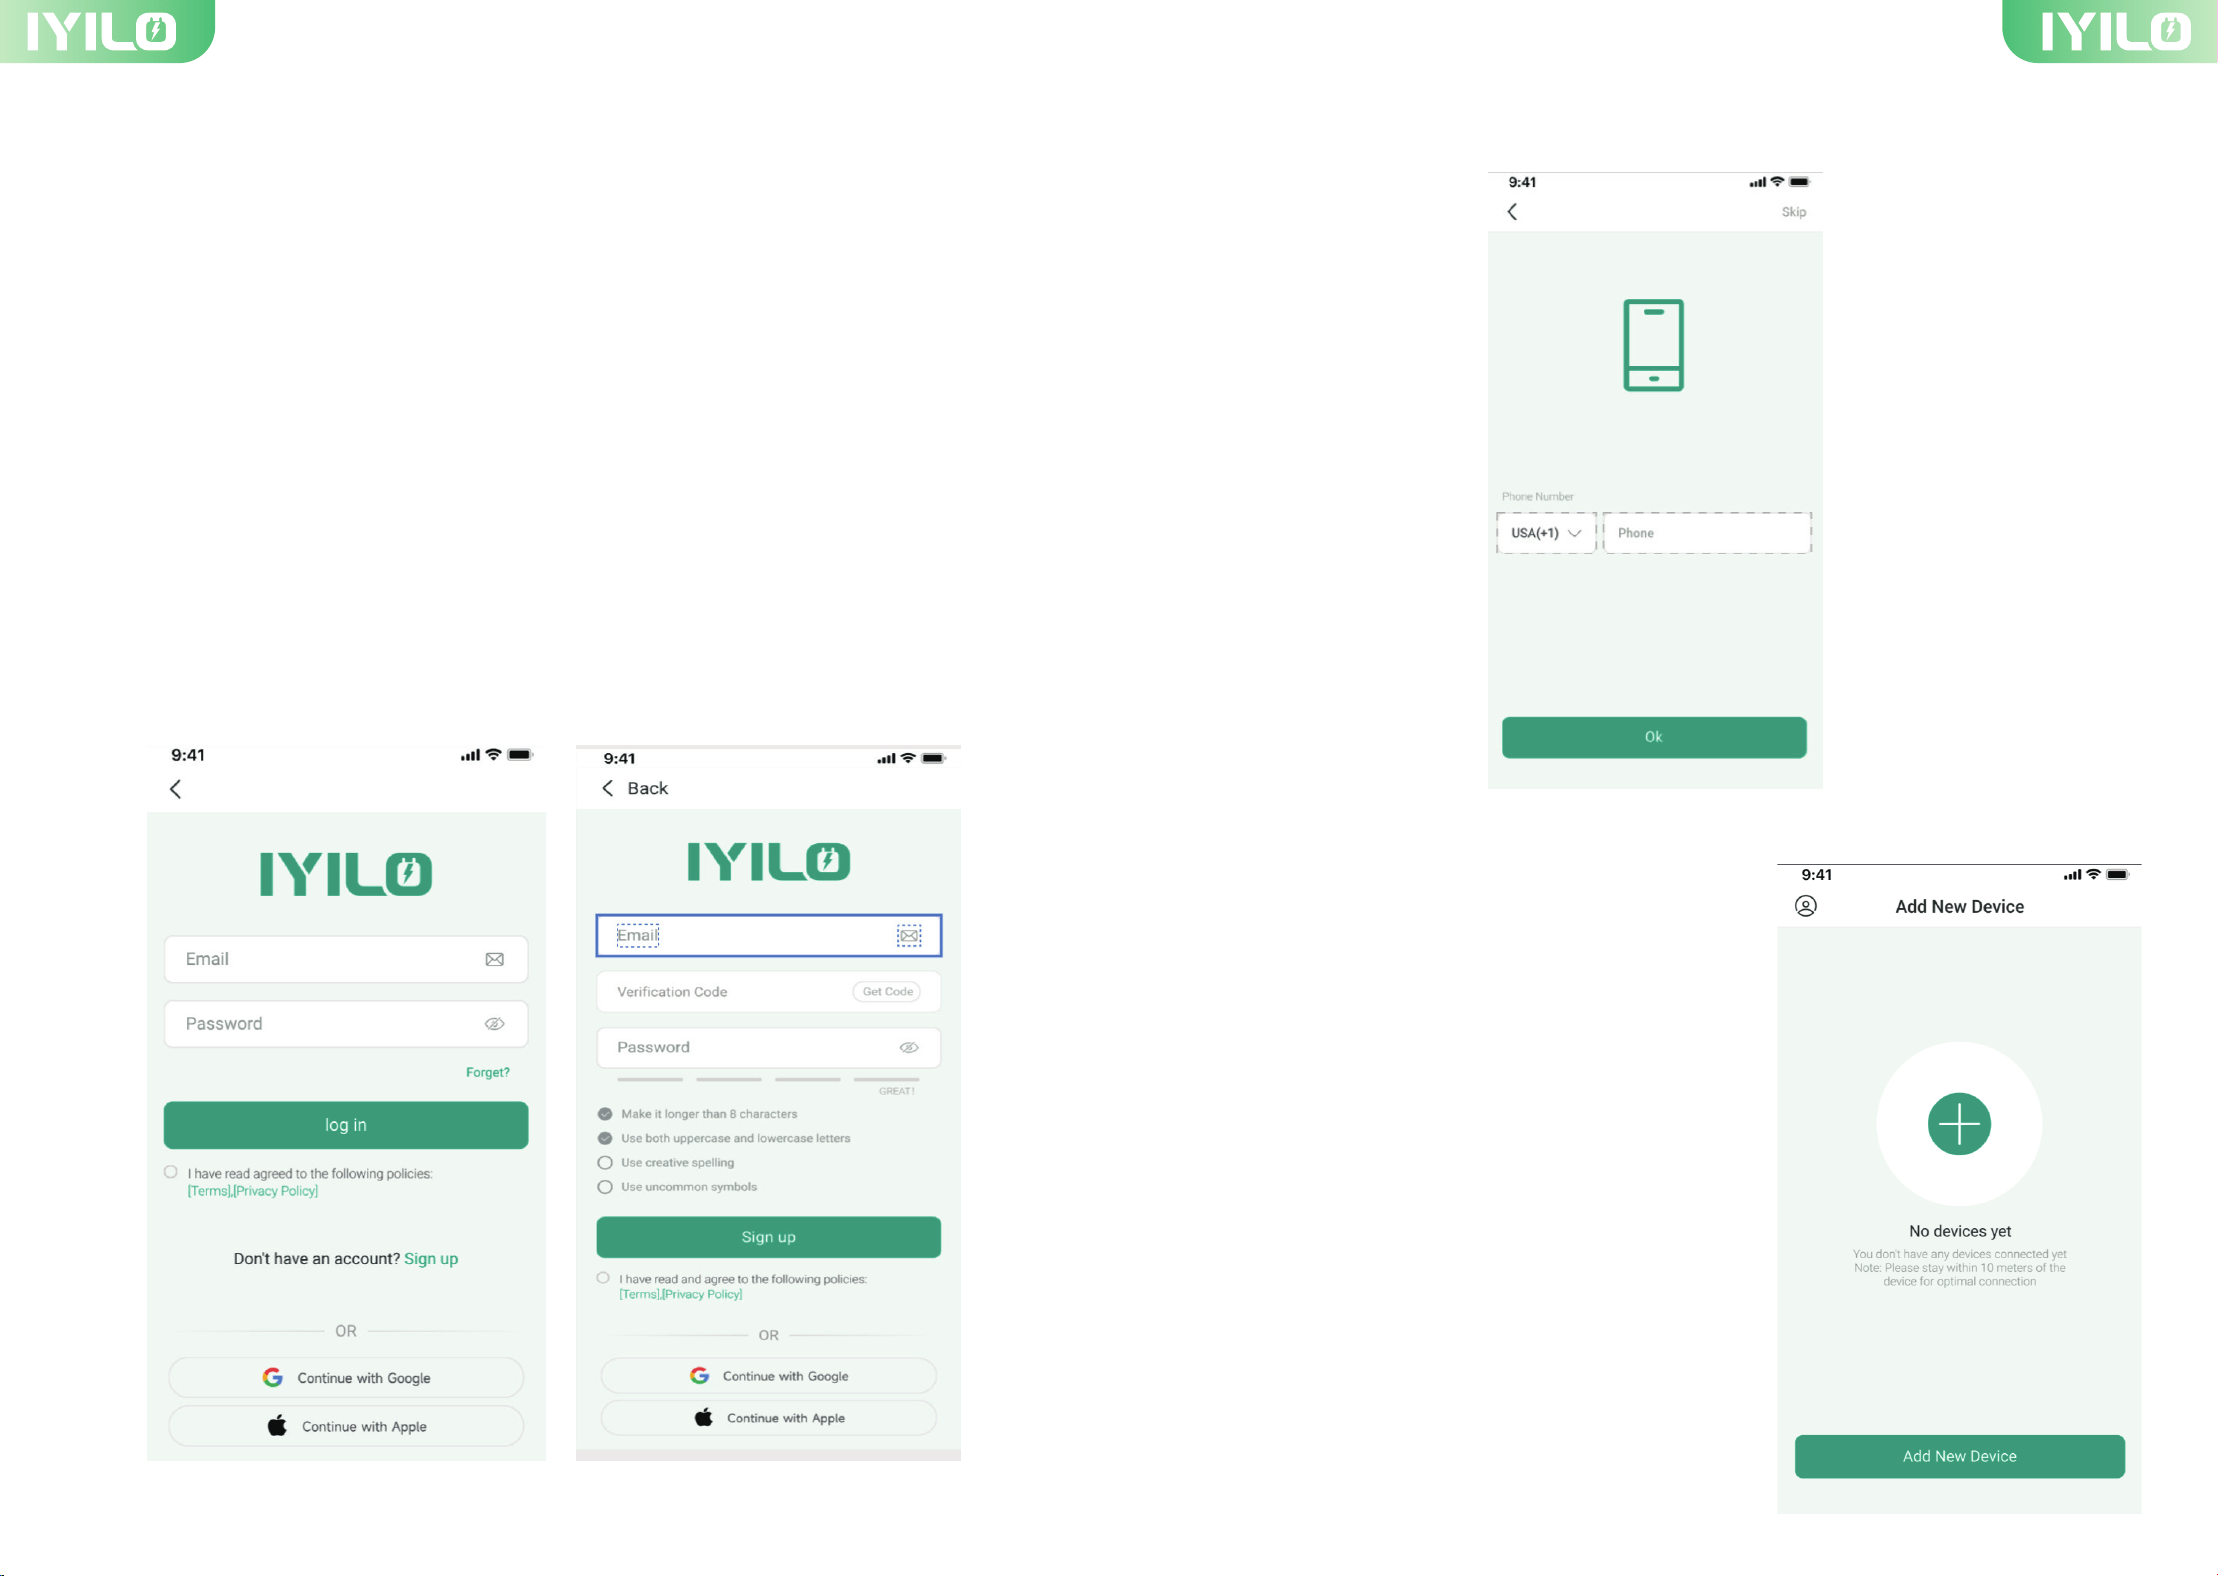
Please Sign Up IYILO APP with your validate Email account and Password. Or Log In if you
have one.
You can either enter your phone number or skip to the next step.
IYILO APP User Manual
1 2
1.Log In/ Sign Up
2-1 Once you have signed in to your account, please
click the “+” in the middle of the page or click the
“Add New Device” button directly to add your EV
charger.
2.Add new device
IYILO APP User Guide
1.Please place your phone within 32 ft of the EV charger for optimal connection.
2.Please make sure that the IYILO EV Charger stays powered on while adding a new
device
Note
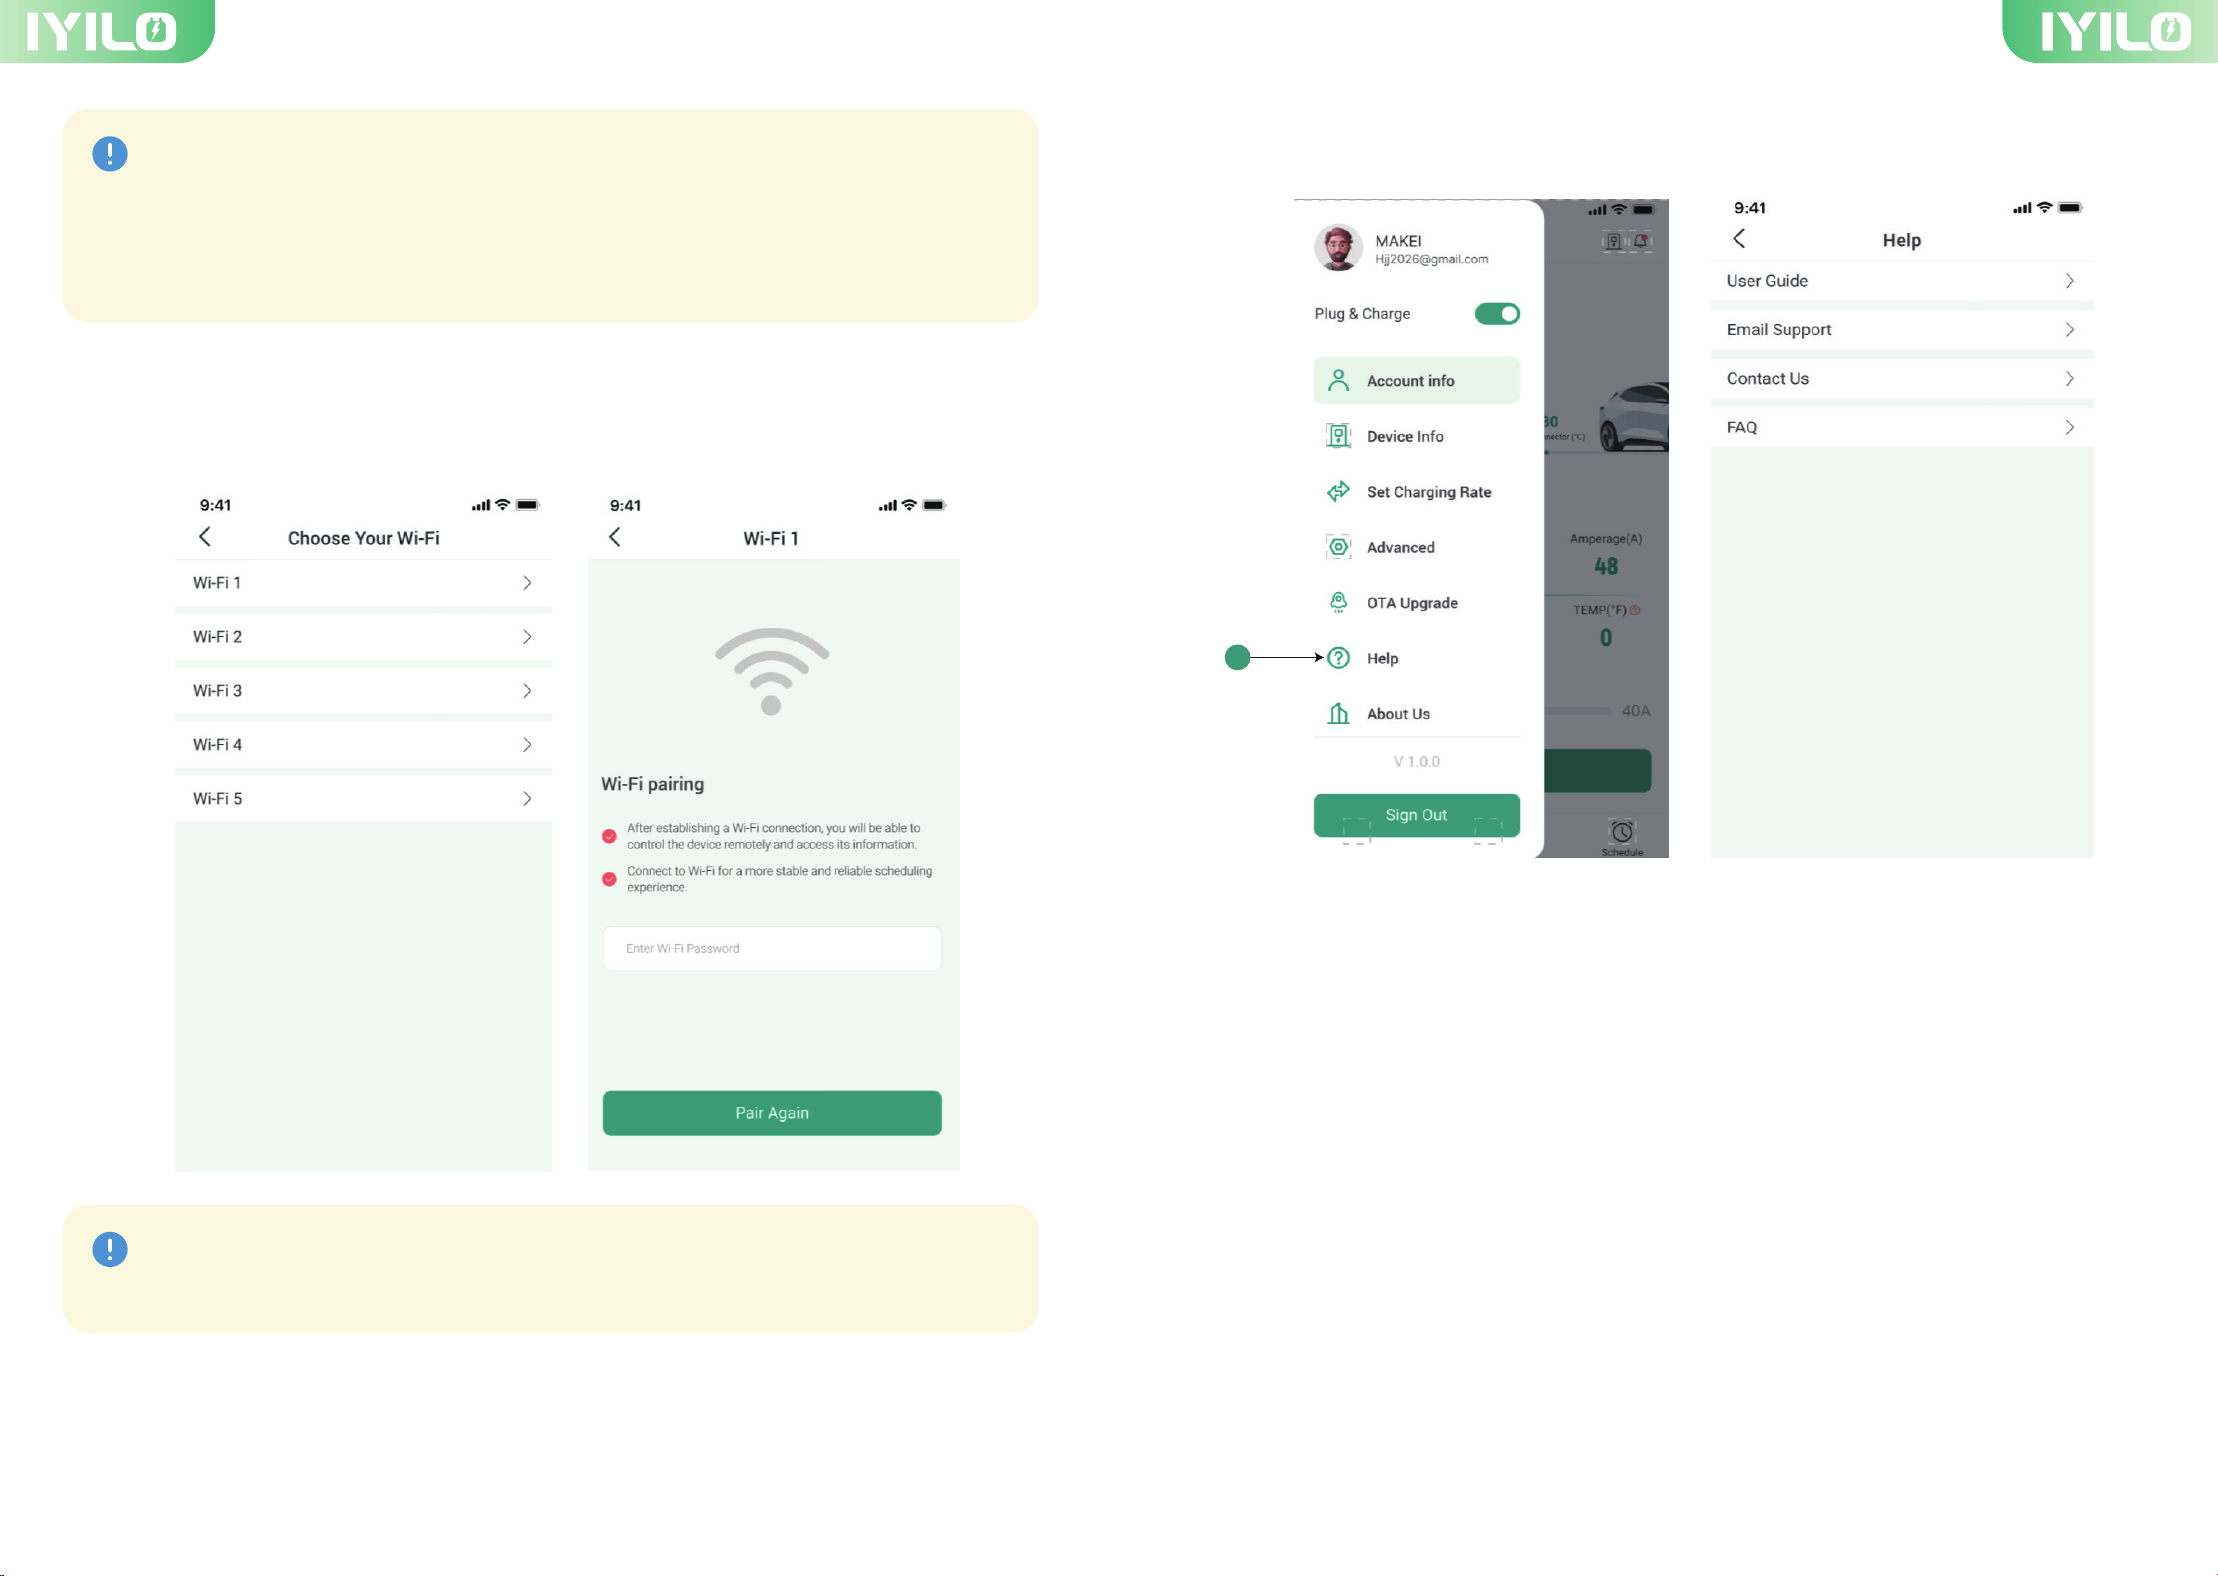
IYILO EV Charger supports 2.4GHz only, please connect to the proper Wi-Fi Signal.
Note
3 4
3. Contact Us
2-2 After the Bluetooth pairing is successful, please select your Wi-Fi network and enter
the Wi-Fi password
1. Click the avatar icon in the top-left corner.
2. Click help ① in the sidebar.
3. There you’ll find the EV Charger User Guide, Email Support, and Contact Us to contact
our team directly.
1
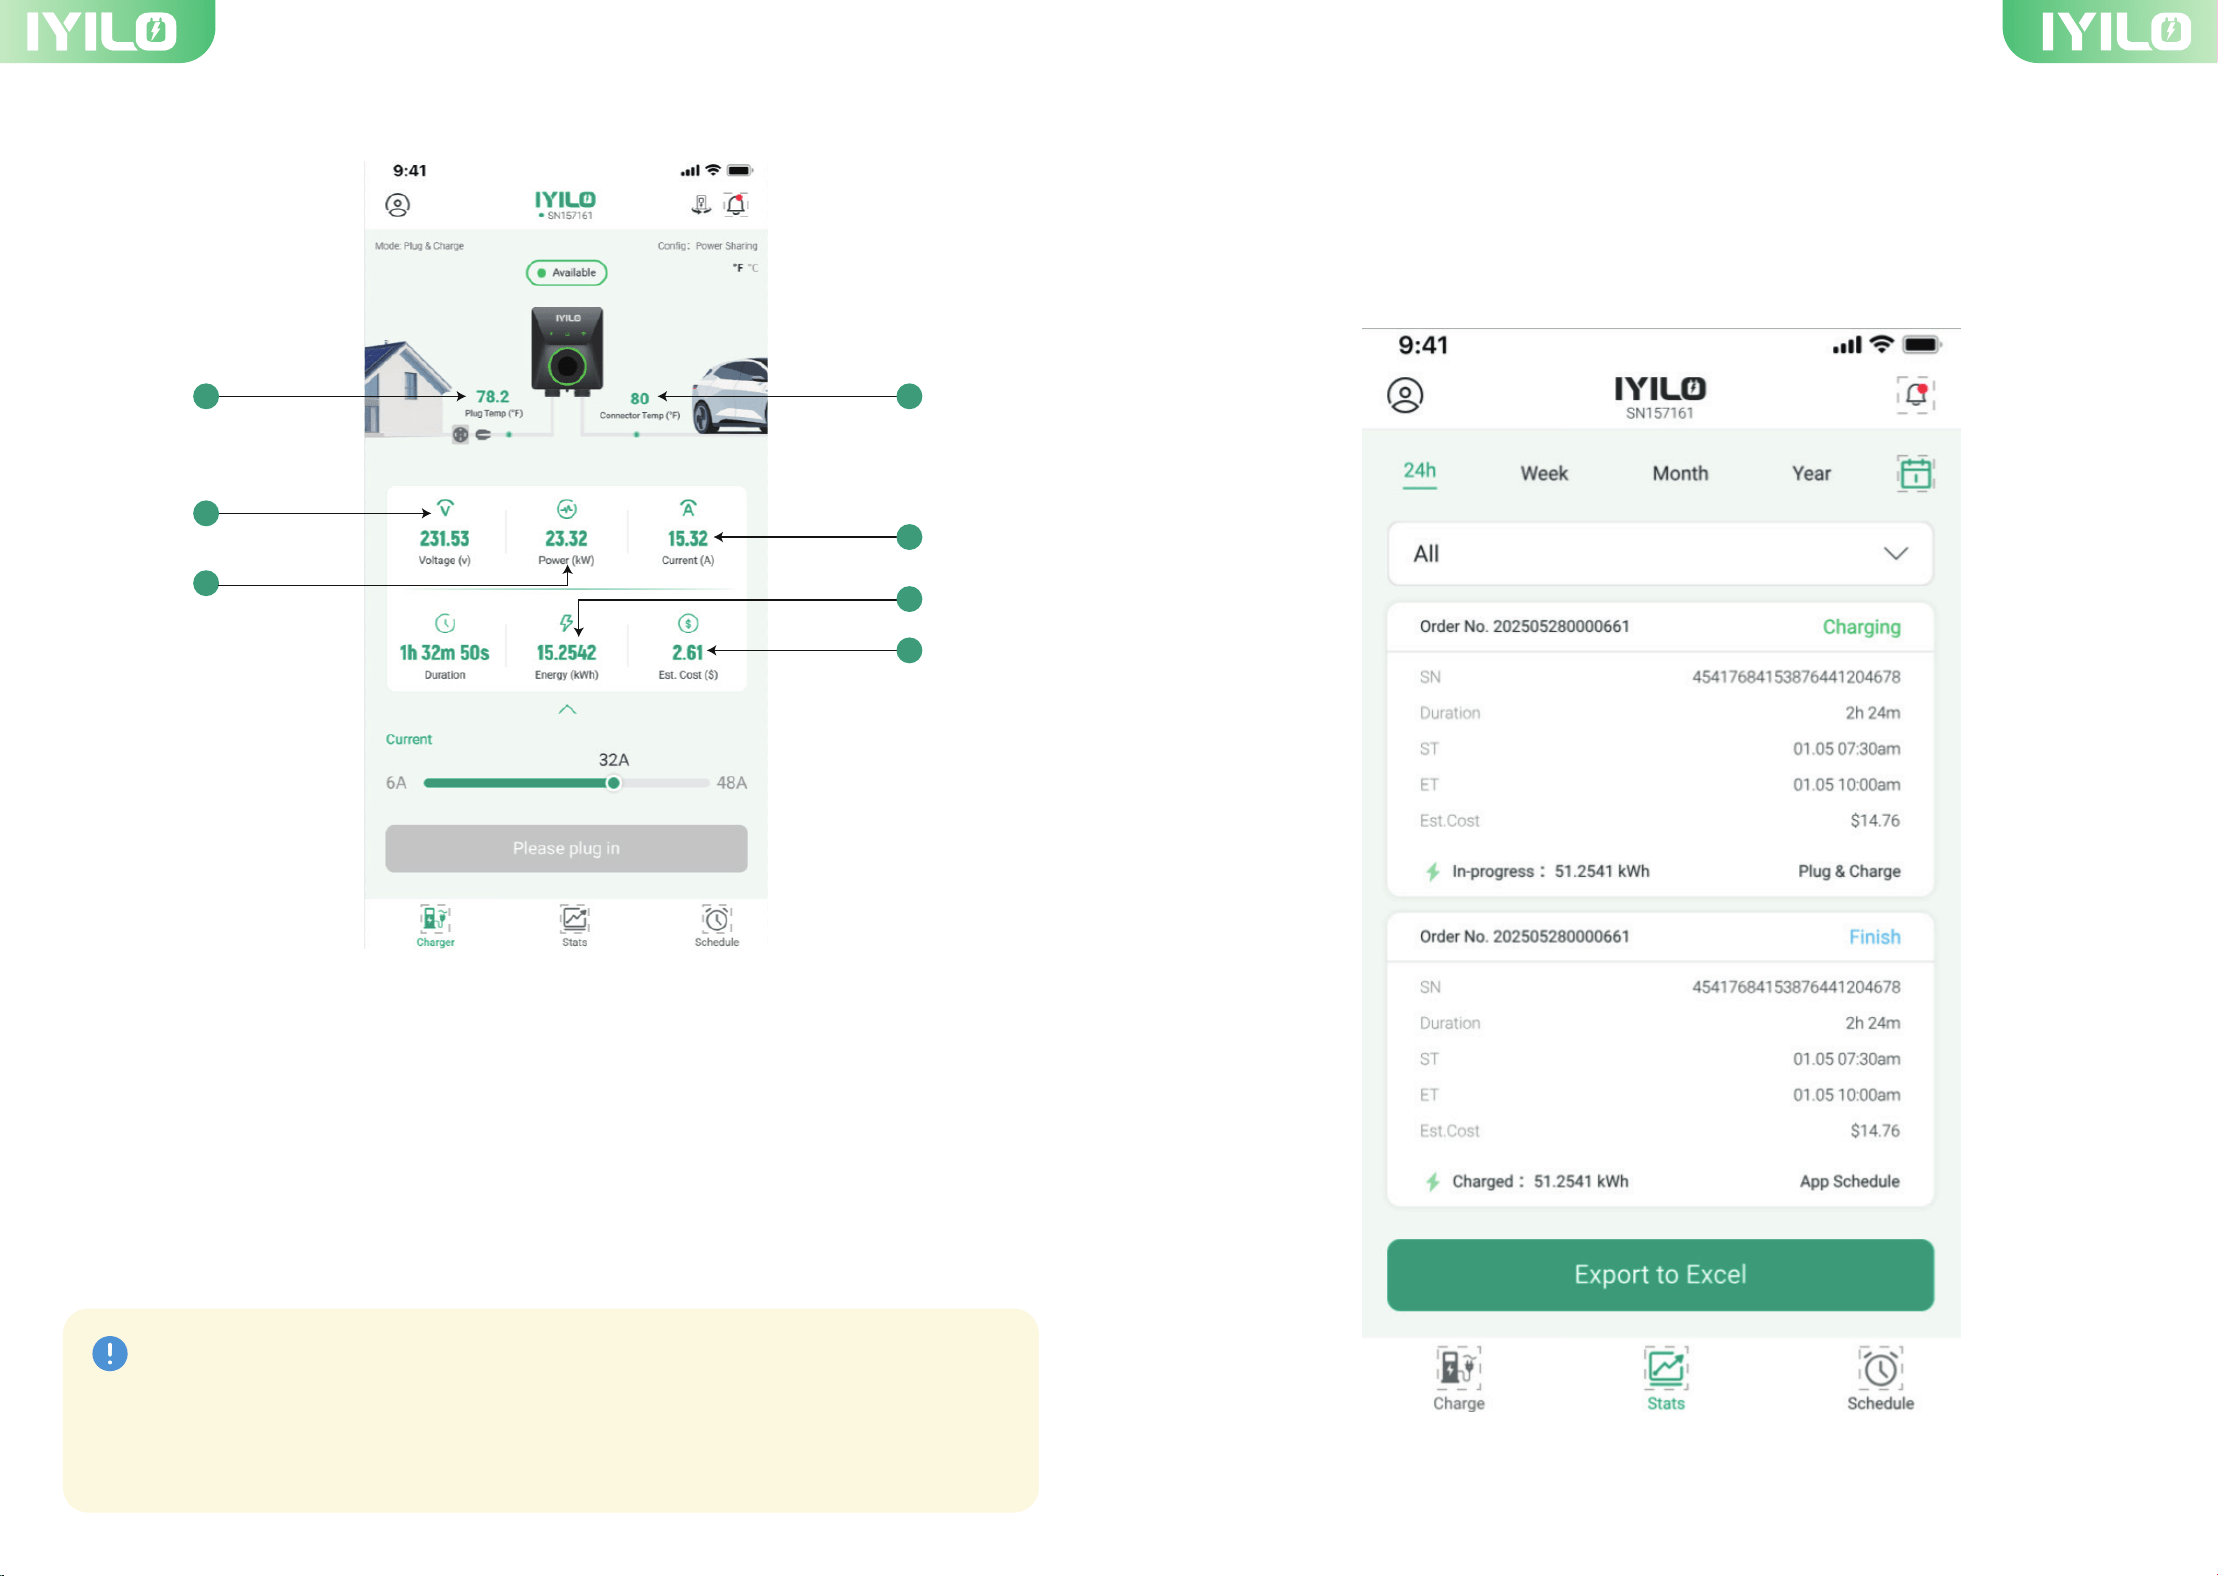
NTC sensors monitor and display real-time temperatures. Once the
temperature exceeds 185°F, the EV charger will automatically reduce the current
accordingly until it returns to a safe temperature range.
Note
5 6
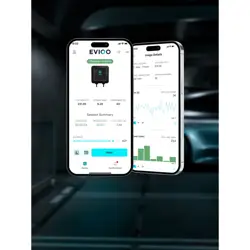
4. Status Display on Charger page 5. APP Function
5-1. Look up and export charging data
The IYILO App records your daily charging sessions and syncs them to the cloud. You can
also export your charging records as an Excel file and share them with others.
1.NTC (Temperature Sensor) NEMA14-50P-End
2.NTC (Temperature Sensor) Connector-End
3.Real-time Voltage
4.Real-time power
5.Real-time current
6.Accumulated energy (kWh)
7.Estimated electricity cost (Set basic price to display charge)
8.Charging duration
1
3
4
2
5
6
4
1.The Plug & Charge function is automati-
cally enabled right out of the box. As long
as it’s enabled, you can charge your EV
even if the charger is offline.
2.The Plug & Charge button is located at
the top of the sidebar. When the Plug &
Charge function is enabled, the scheduling
feature will be disabled, and vice versa.
Note
7 8
6. Charging Mode
6-1. Plug & Charge:
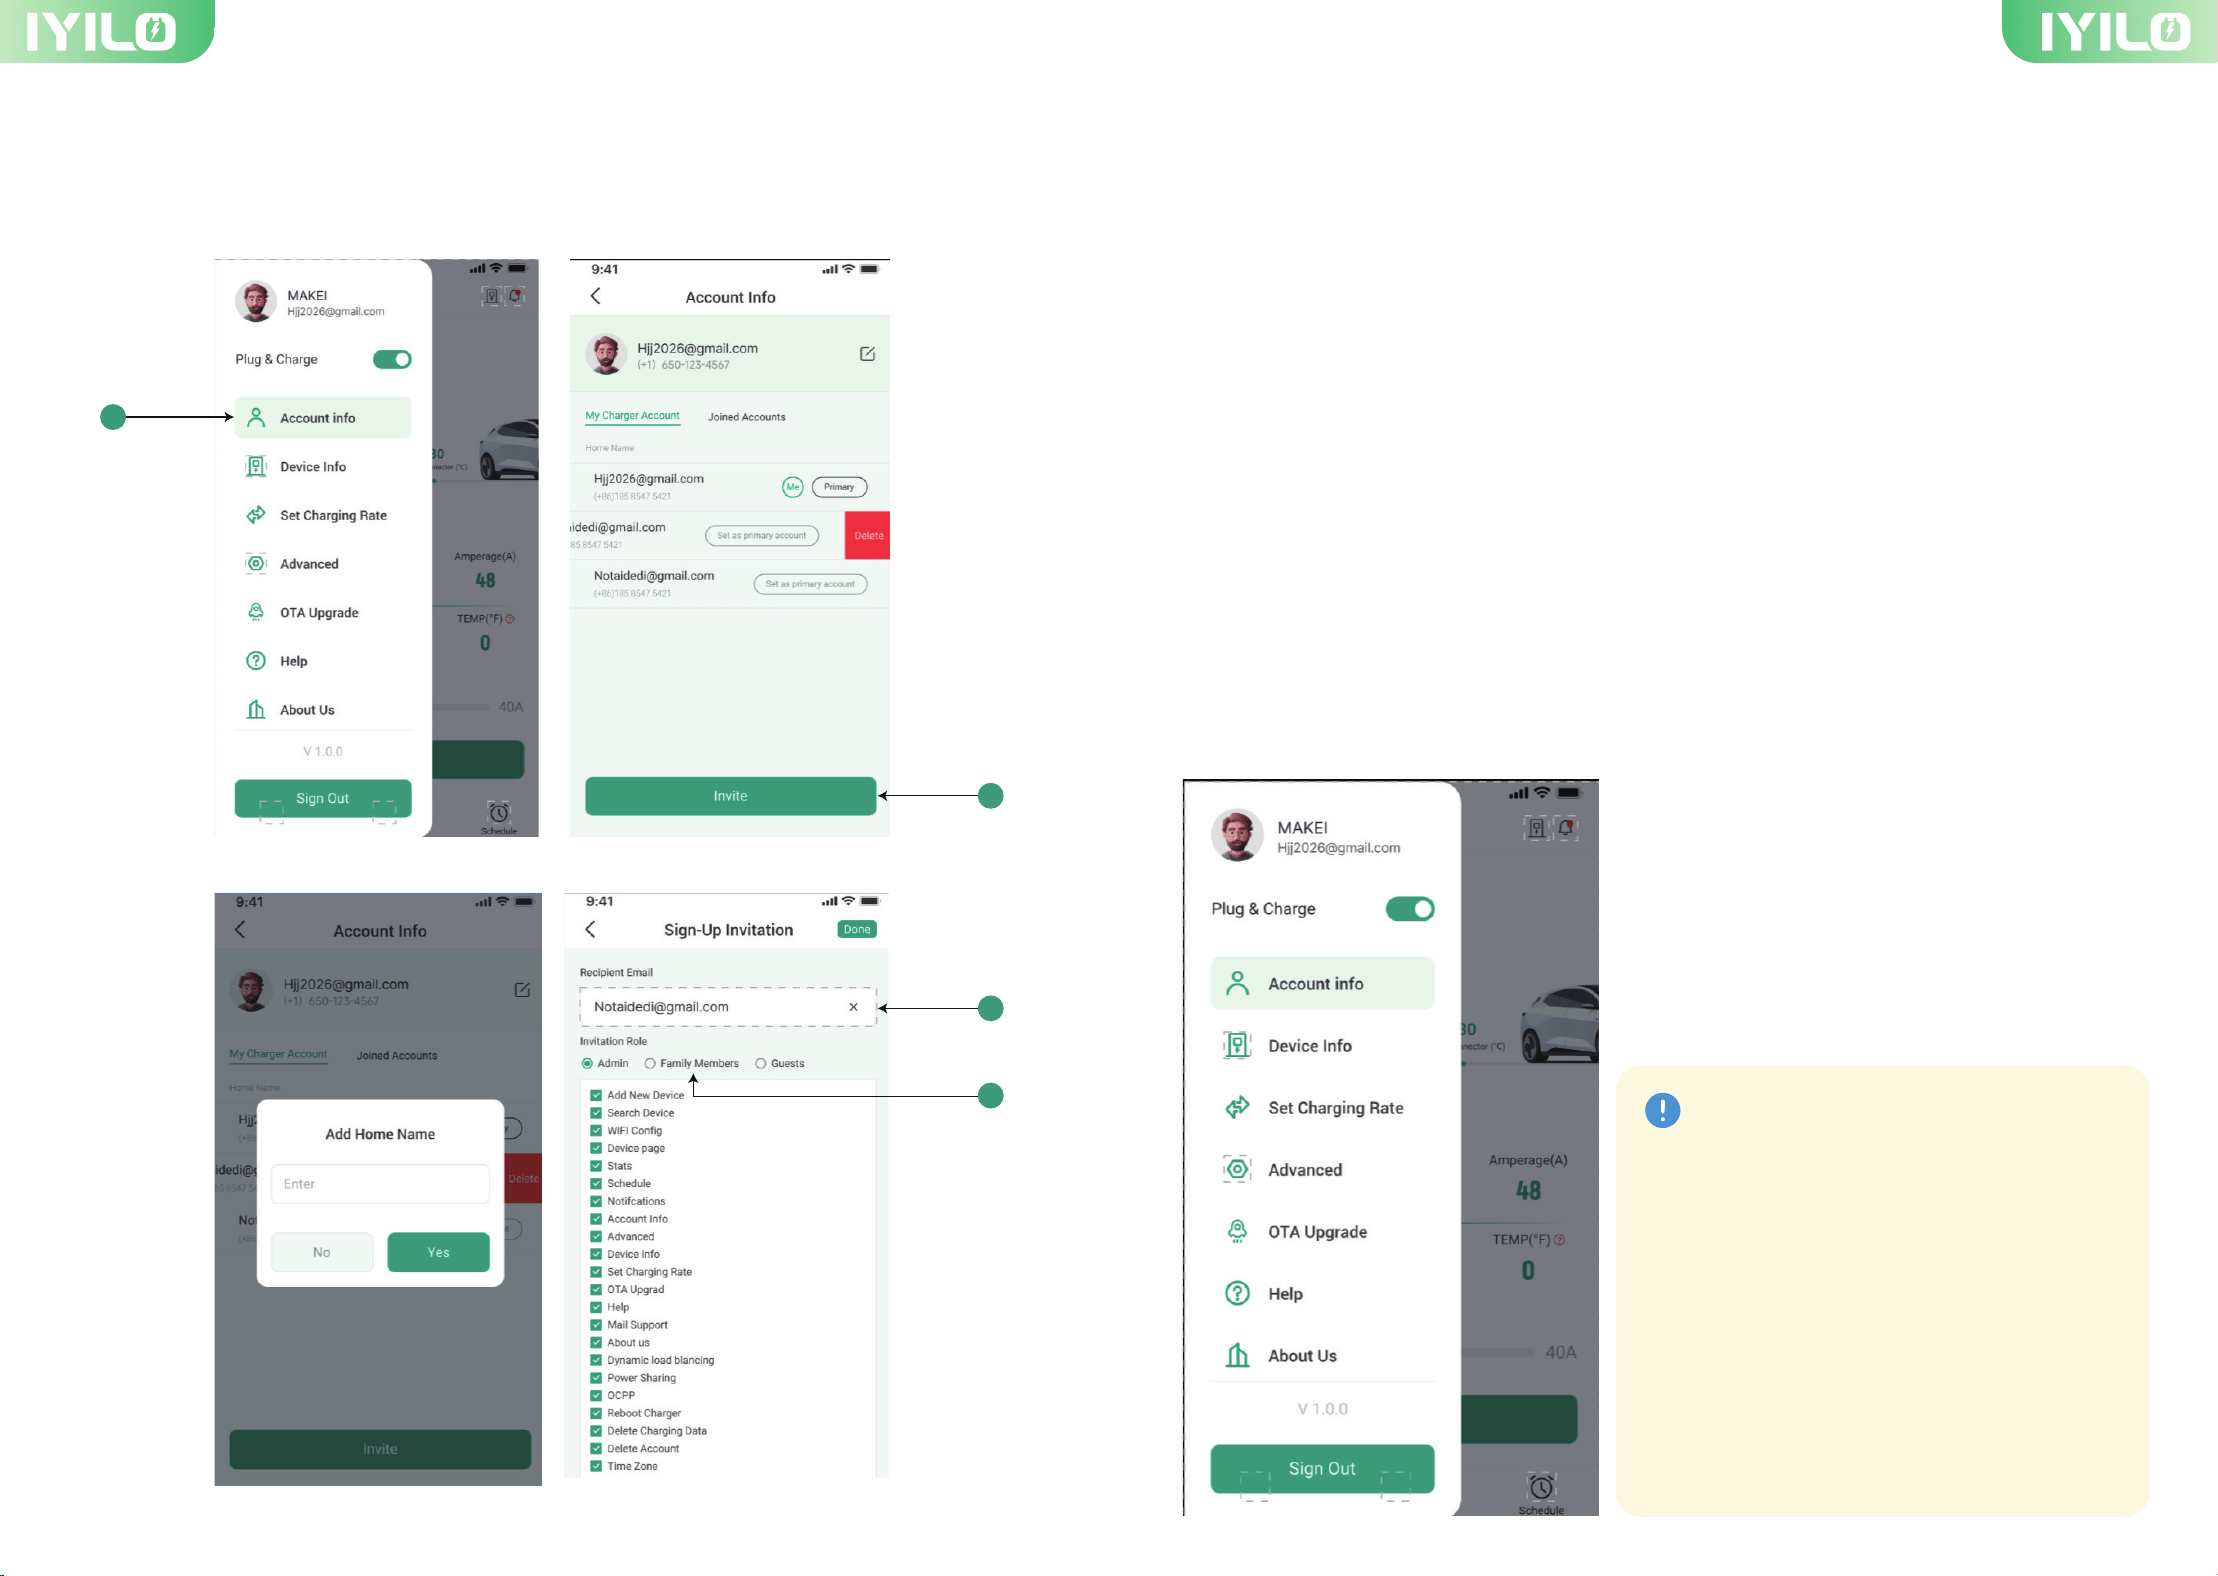
5-2. Multi-account management
The IYILO app allows the account owner to create sub-accounts for others. To do this,
simply follow the steps outlined below:
1.Click “Account Info” ①
2.Click “Invite” ②
3.Add your “Home Name” and click “Yes”
4.Enter the invitee's email address. ③
5.Select the Invitation Role to “Family Member” or “Guests” ④
6.Click “Done”
After completing the above steps, an invitation email will be sent to the invited member’s
email address. Ask the user to activate the sub-account by clicking the activation button in
the email.
The IYILO Charger comes with a preset Plug & Charge mode, allowing you to start charging
immediately after installation.
1
2
3
4
9 10
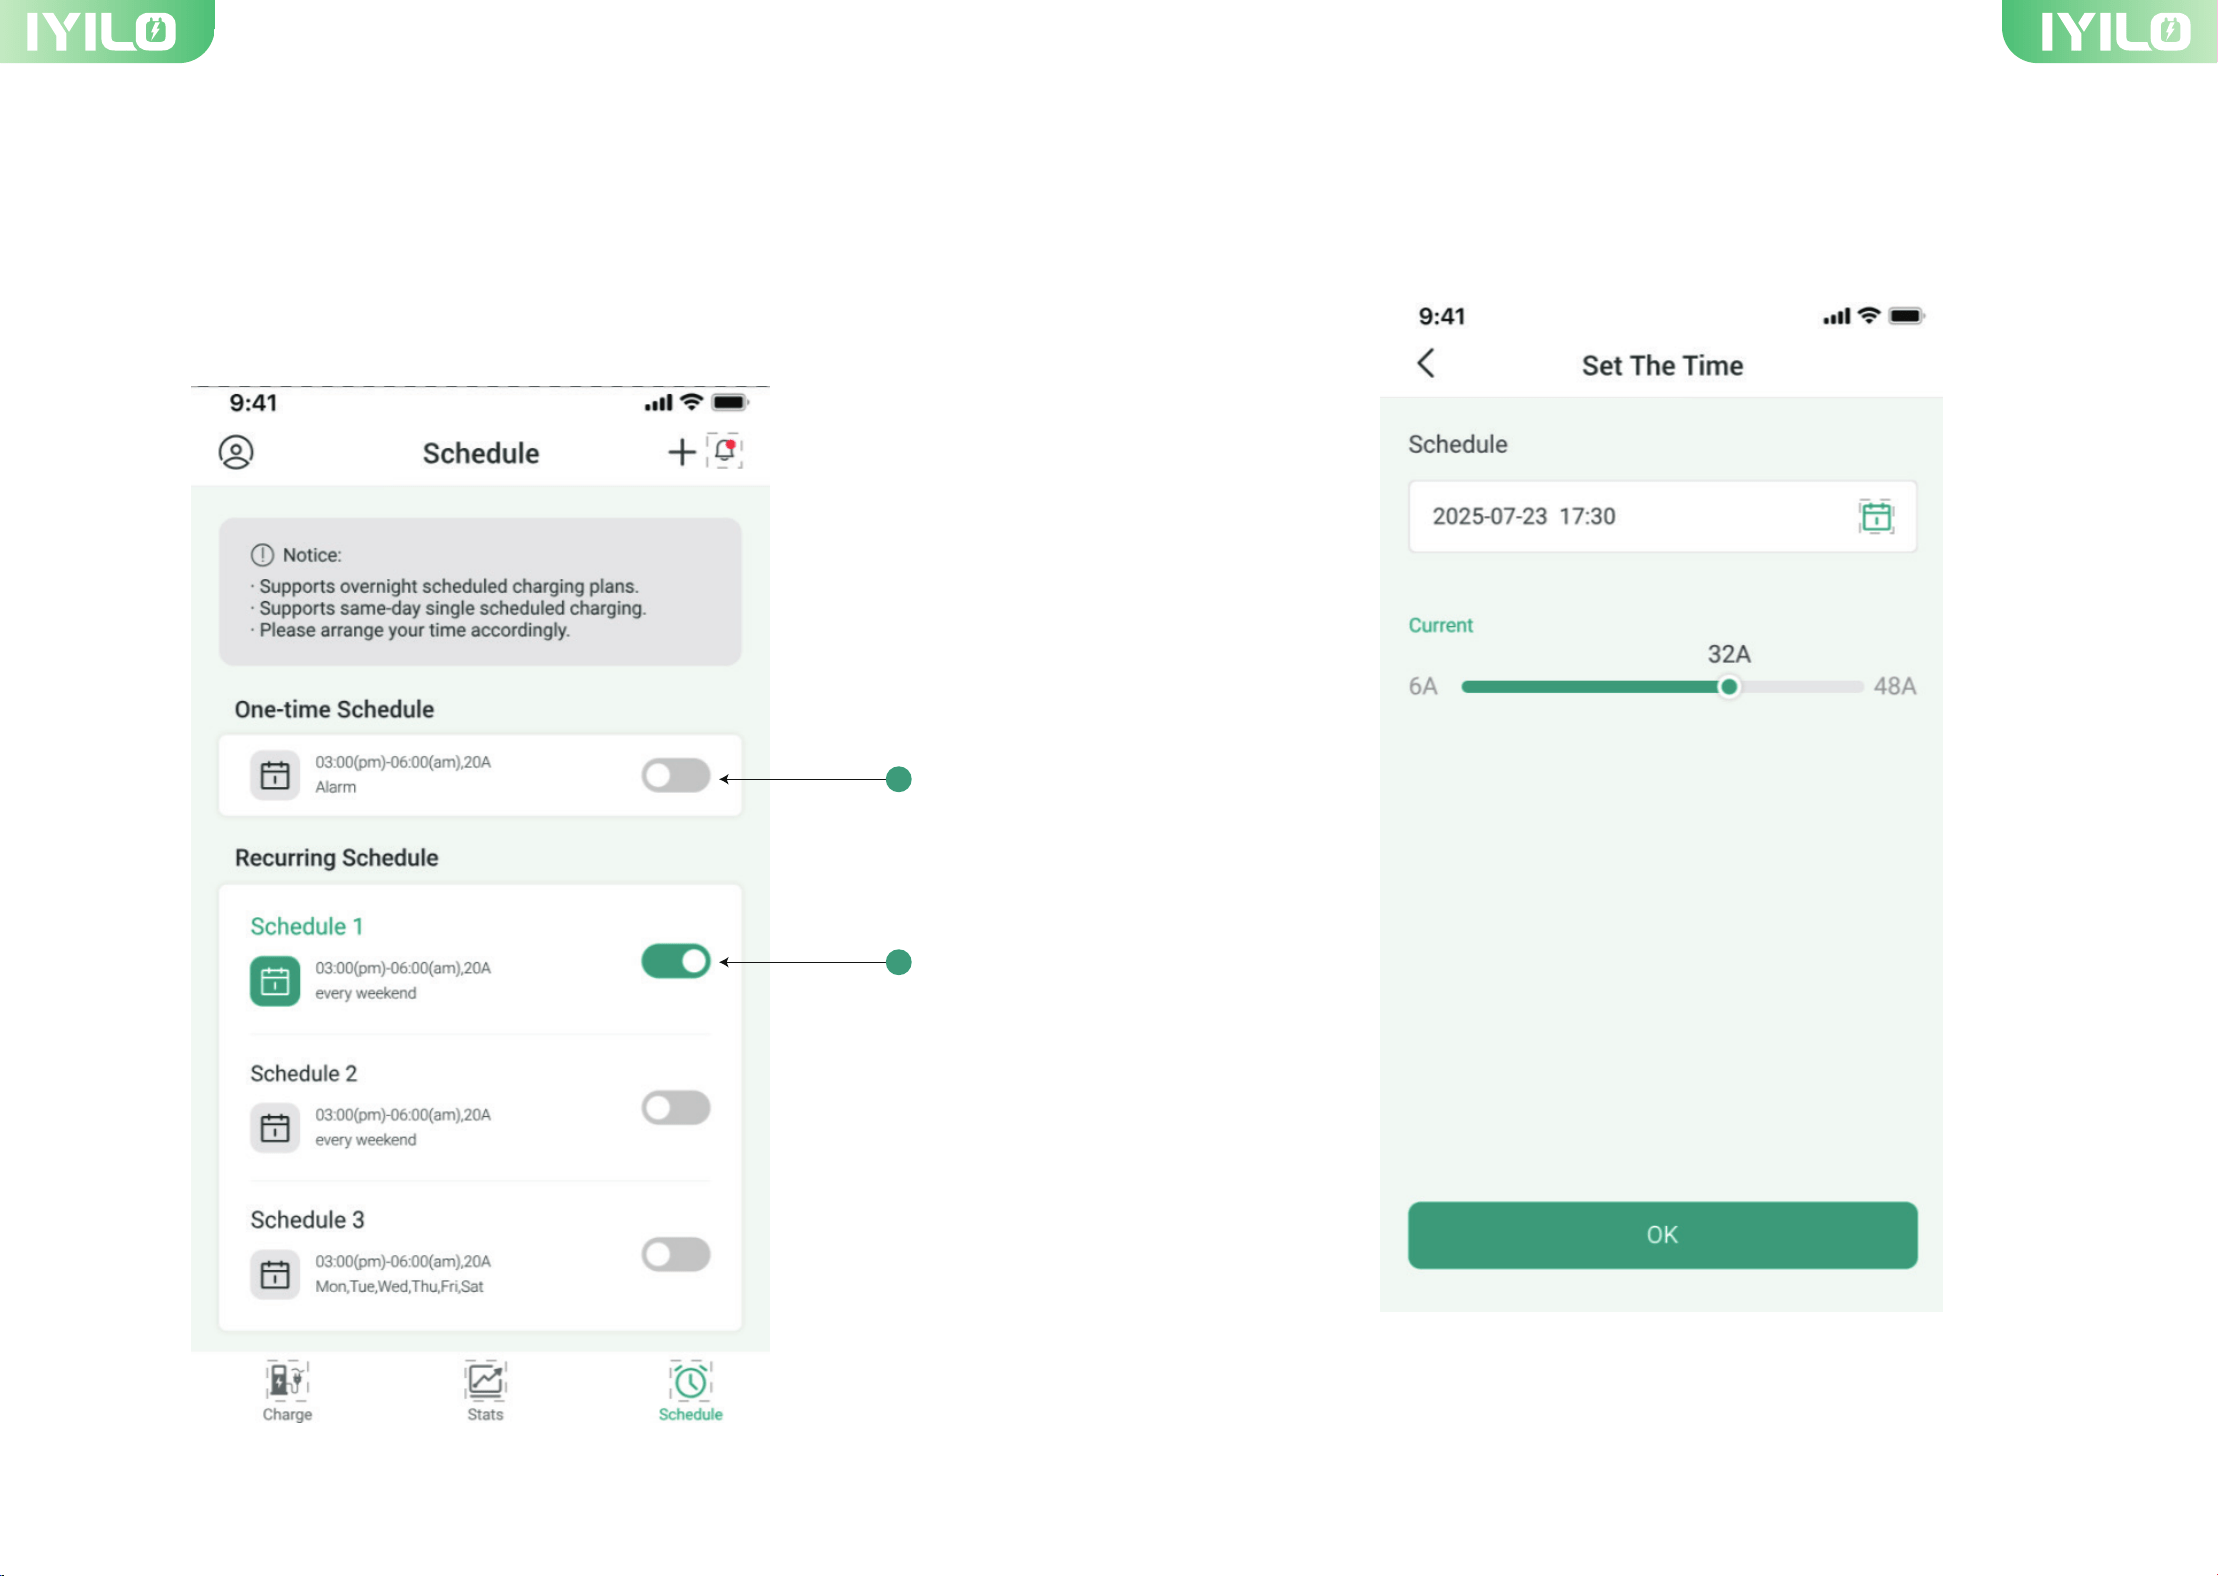
6-2. Schedule Charging
① You can find the scheduling feature on the Schedule Charging page.
② One-Time Schedule lets you set a single schedule, which must fall within the current
month.
③The scheduling feature lets you create one or more recurring schedules.
6-2 (1) One-time Schedule
When One-Time Schedule is enabled, you can set a specific date and start time, and no
end time is required.
2
3
11 12
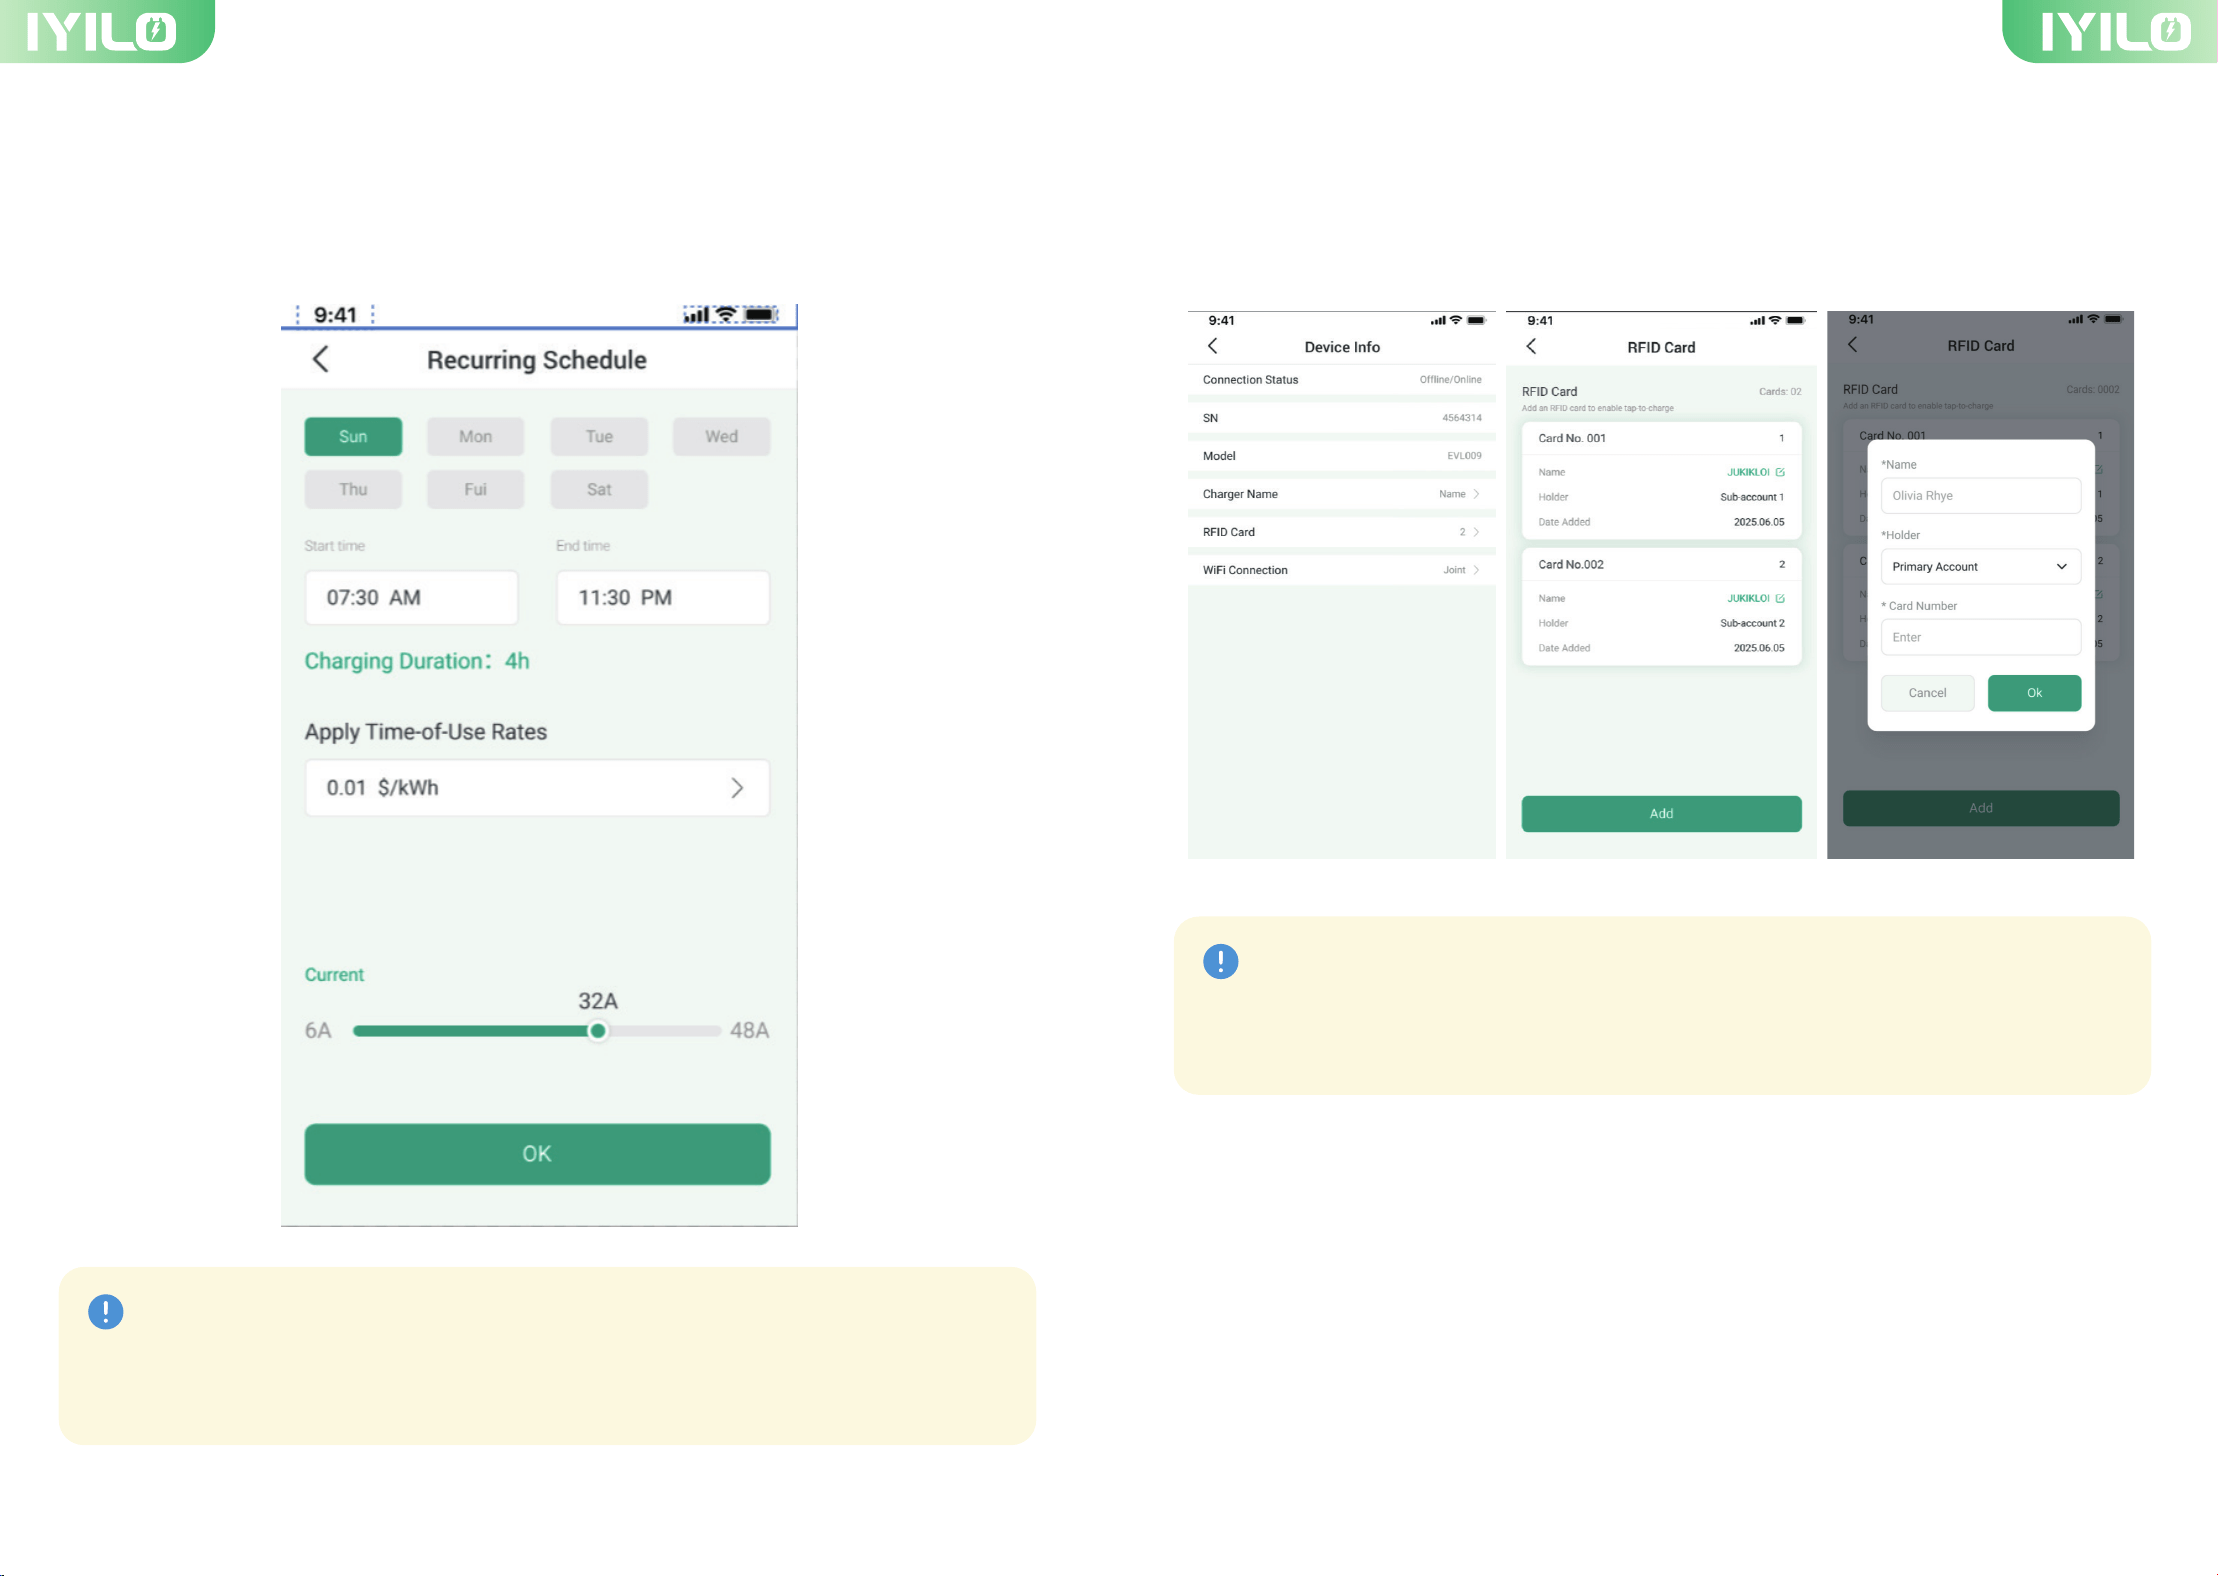
6-2 (2) Recurring Schedule
You can add up to five schedules. When Recurring Schedule is enabled, select the
weekdays and charging duration for automatic repeated charging.
Scheduled charging cannot be used when Plug & Charge is enabled. Please disable
Plug & Charge before setting a schedule.
Note
6-3 RFID Cards
RFID cards must be activated before use.
Go to Device Info → RFID Card → tap Add → enter the card name and number → tap OK.
Once your RFID card is configured in the app, you can start charging by tapping the
card on the charger’s tap zone.
Note
13 14
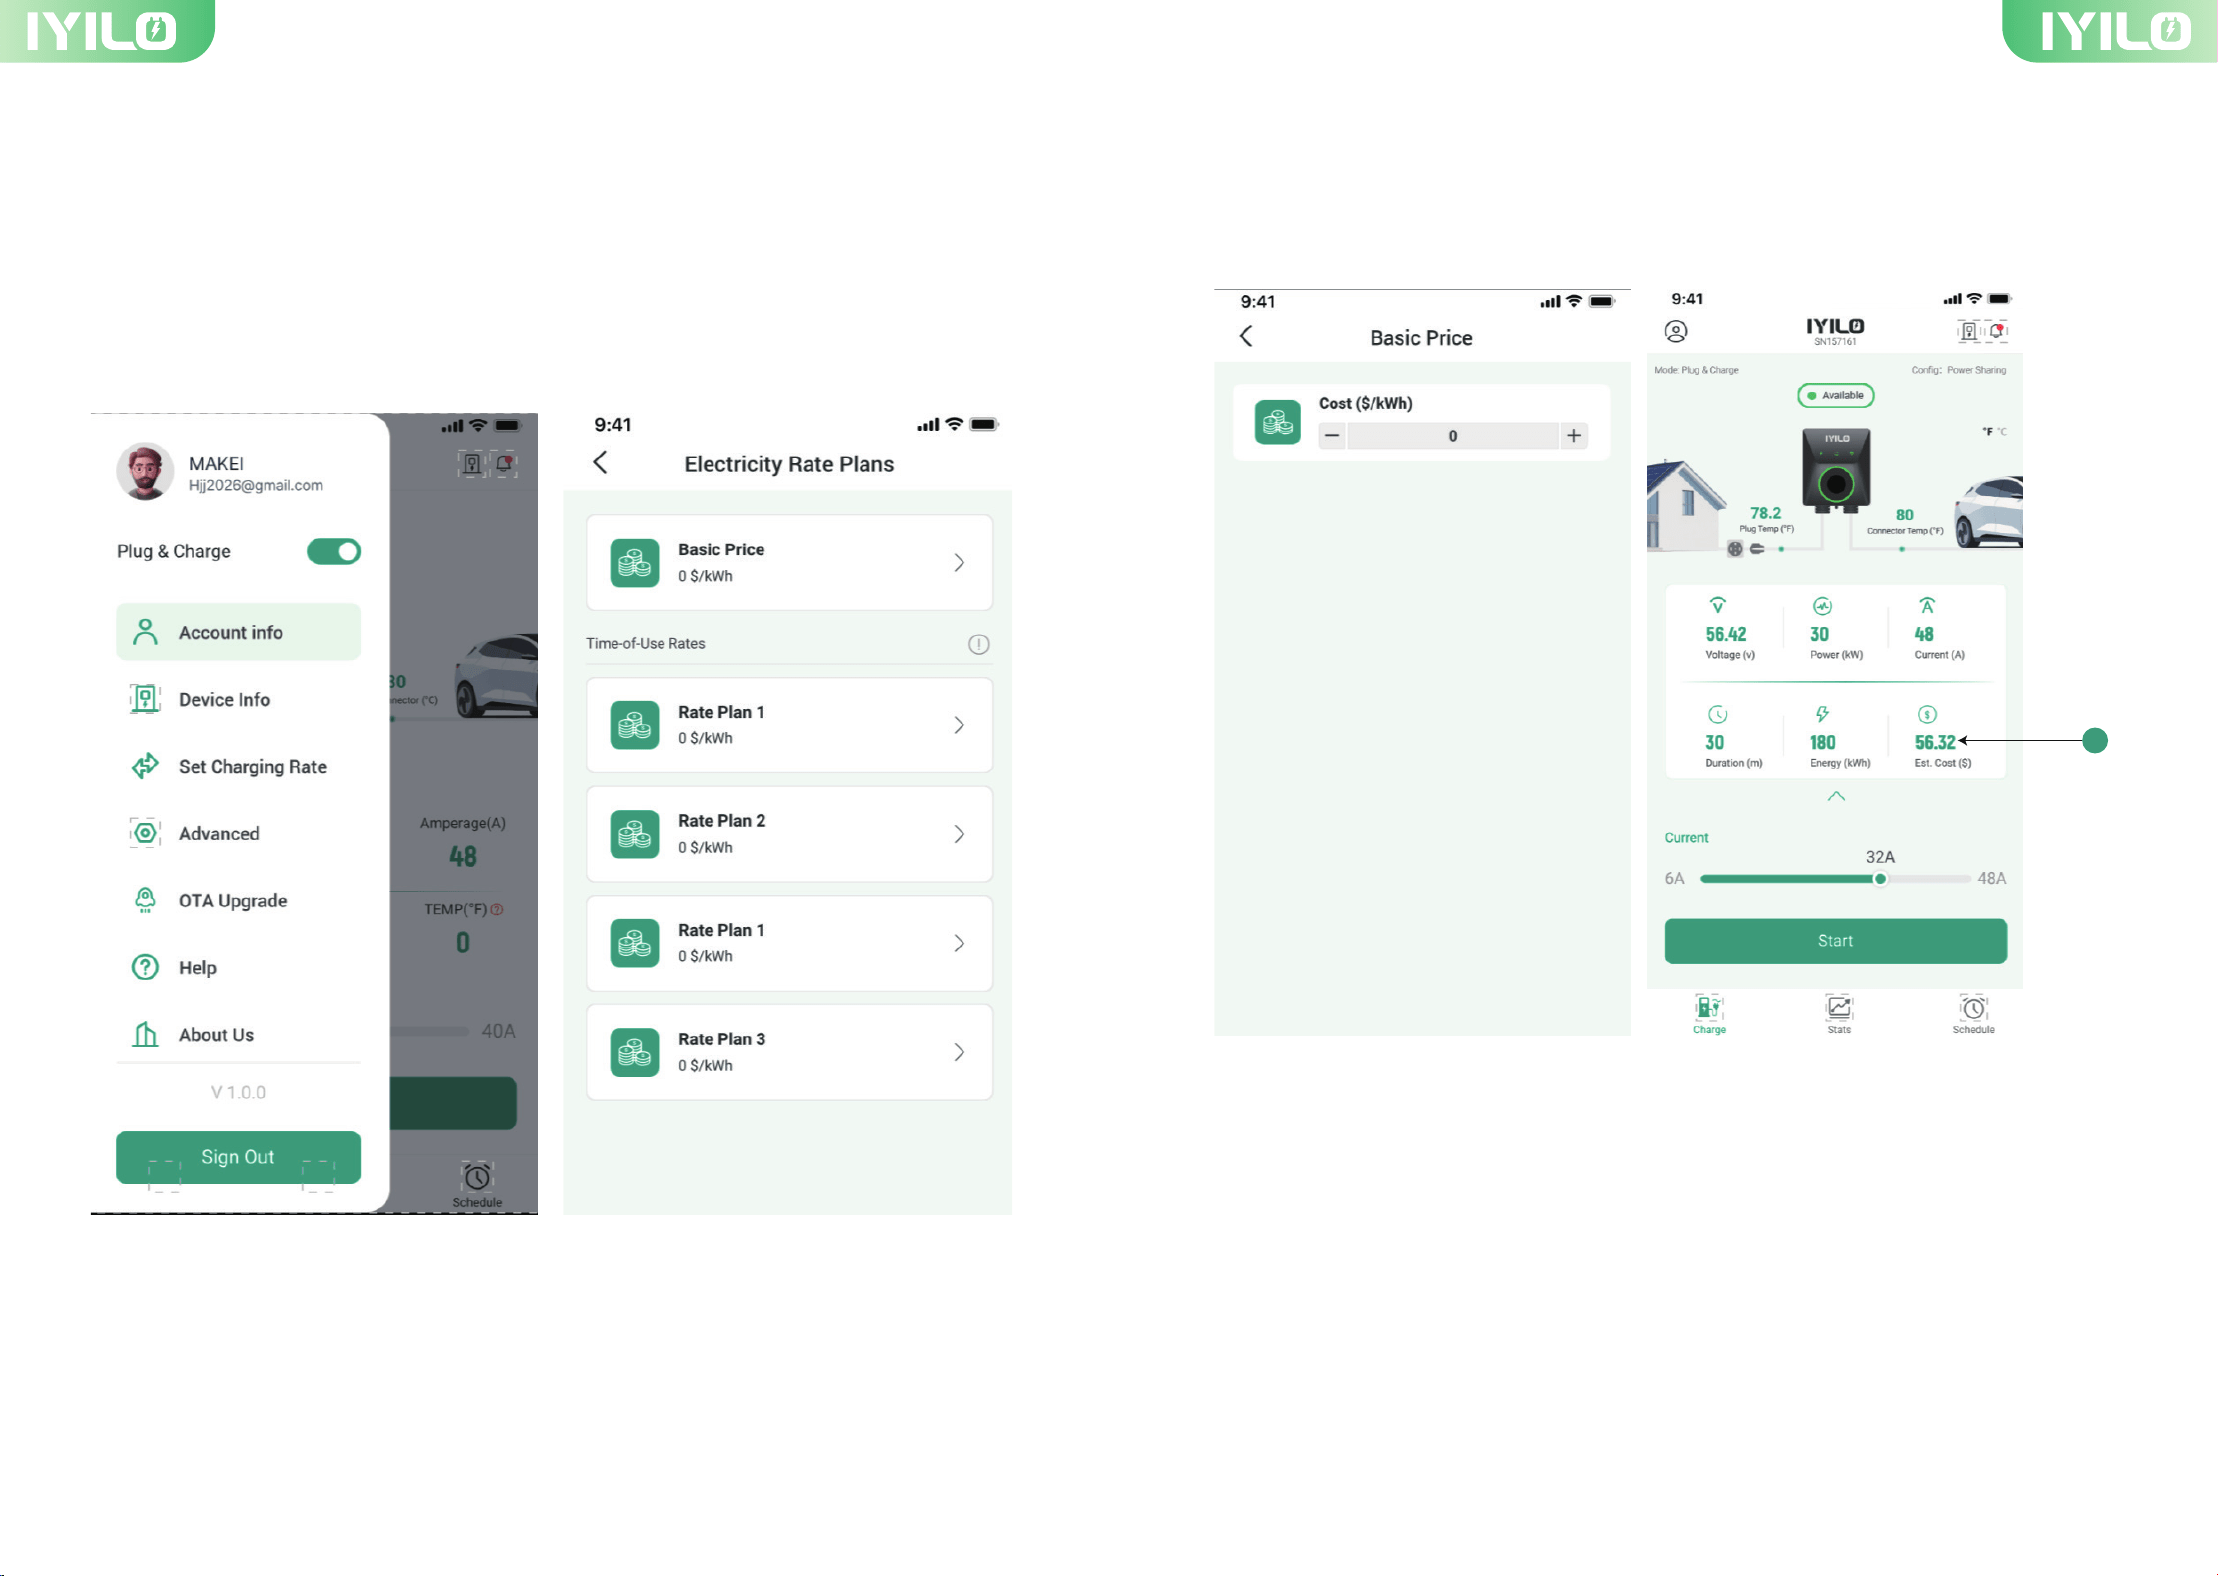
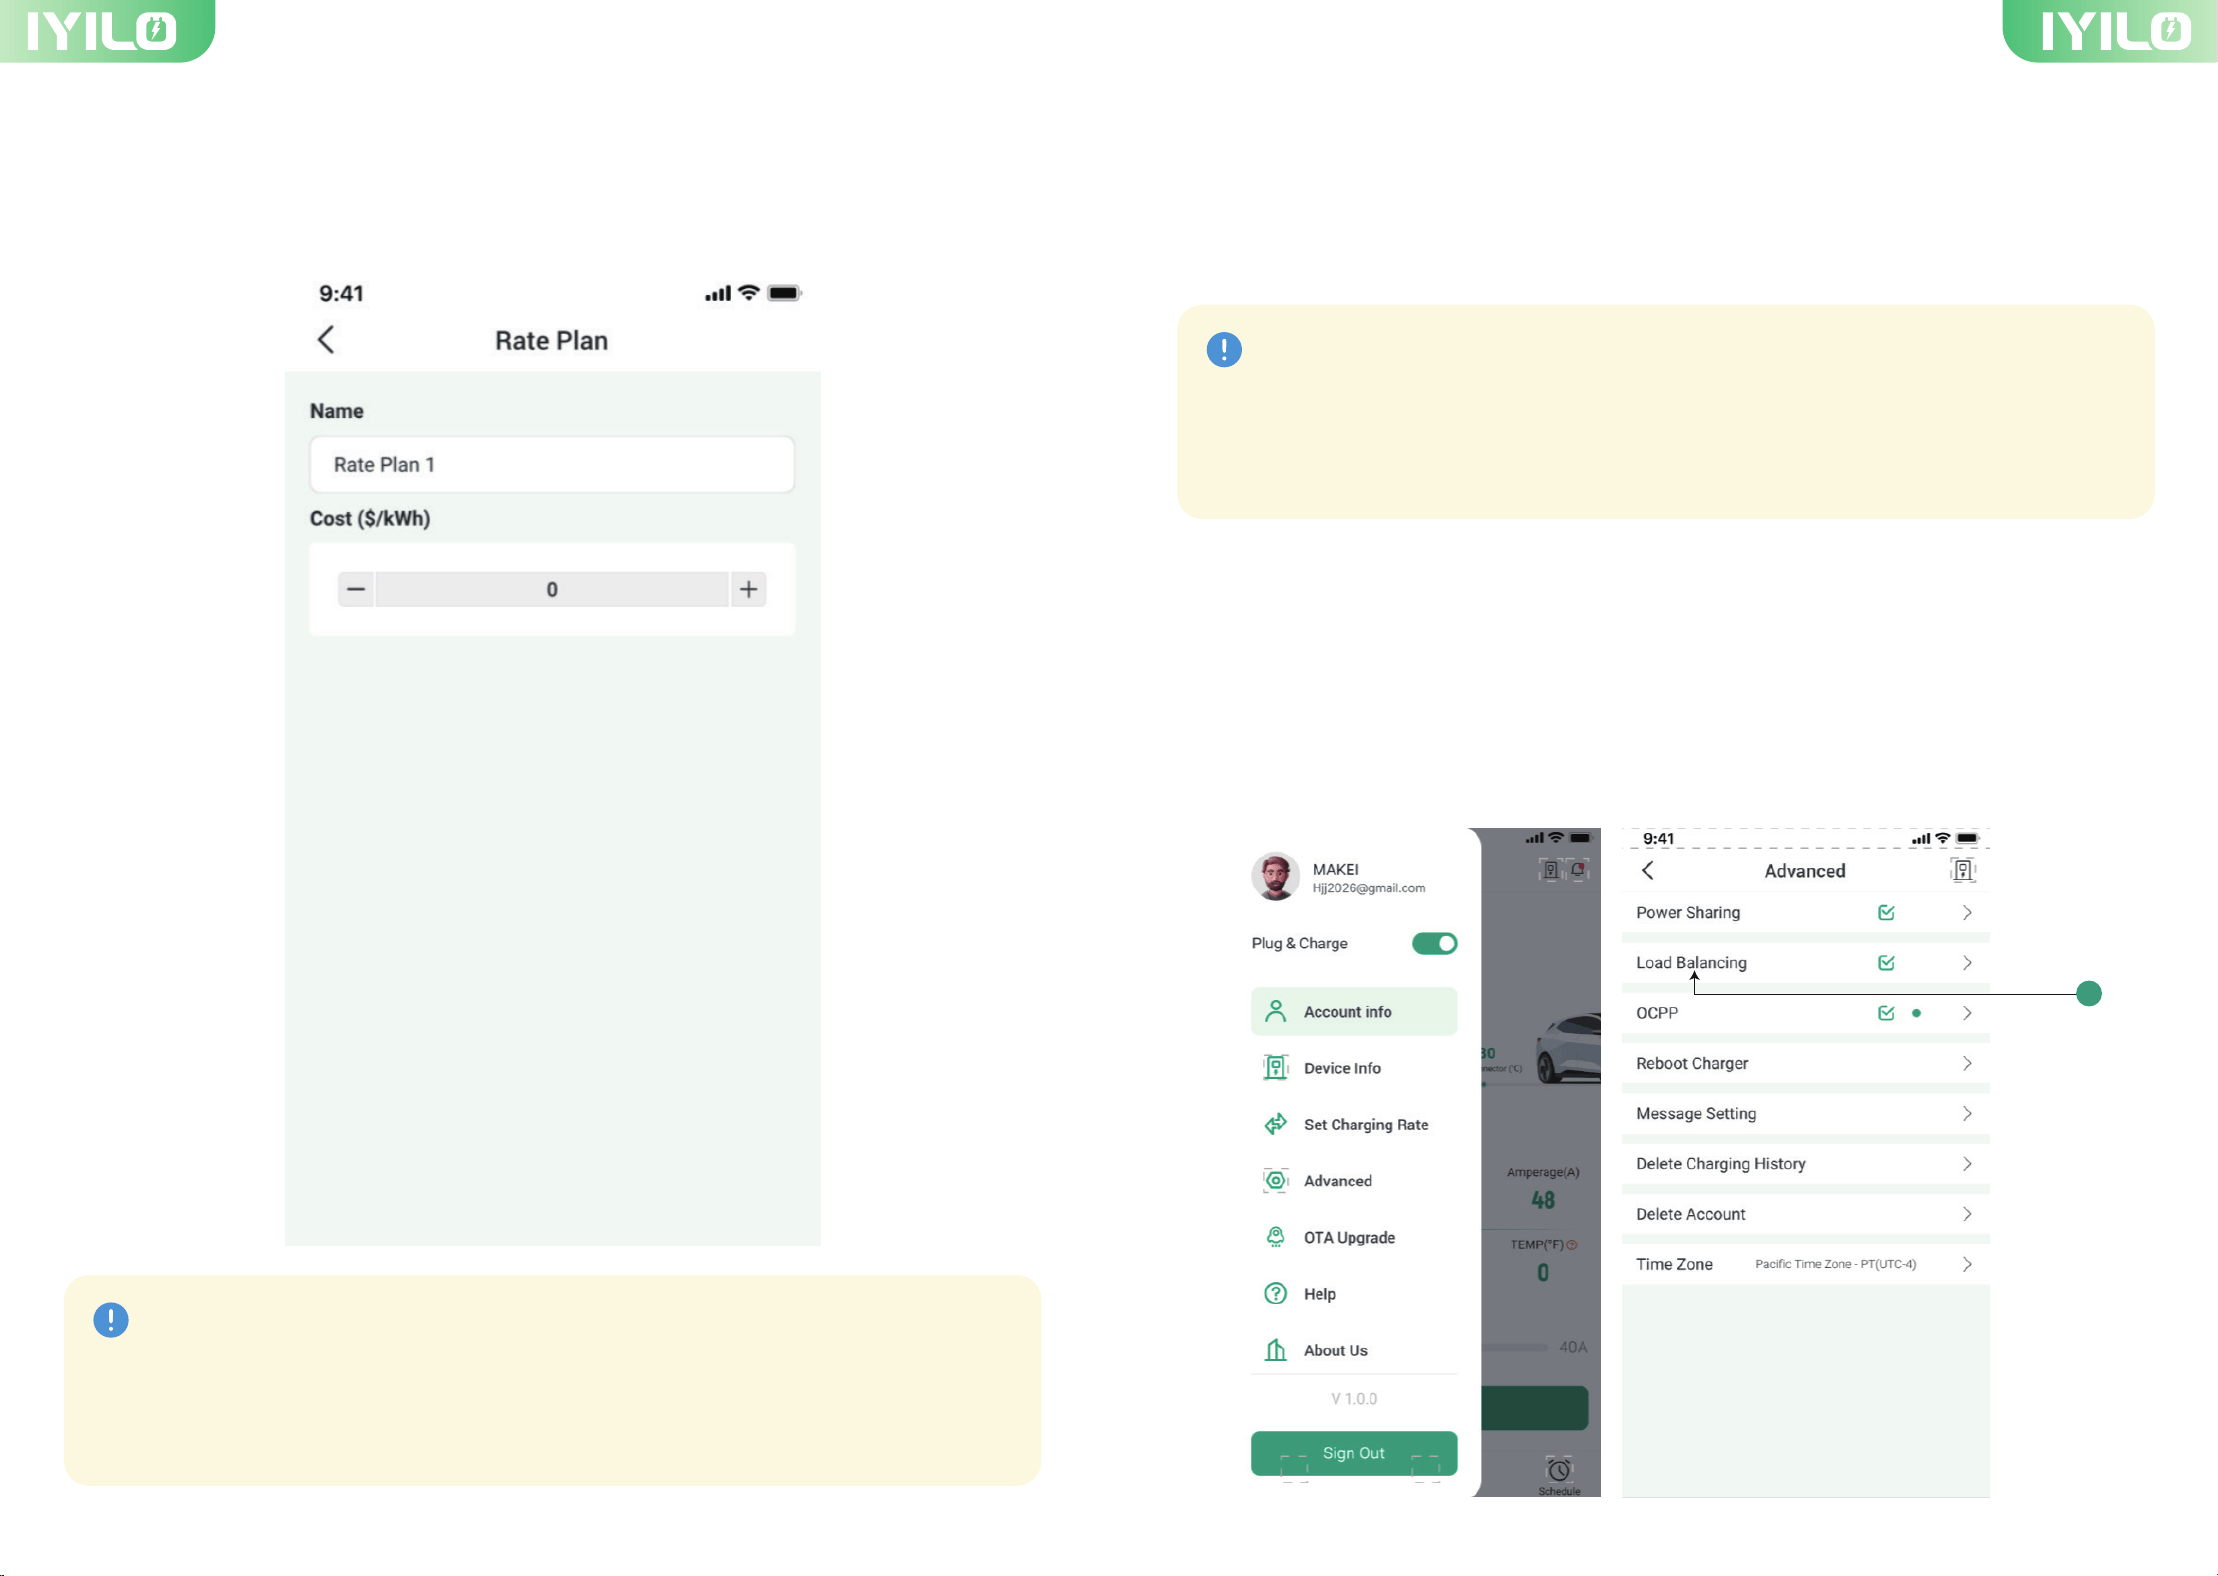
7-1 Basic Price
When you enter the basic price, the estimated cost will appear on the charging page as ①
'Estimated Cost'.
7. Set Charging Rate
Set Charging Rate lets you calculate your charging cost and apply it to scheduled charging
for Time-of-Use (TOU) statistics
To set your charging rate, go to Set Charging Rate in the sidebar. Two types of electricity
rates are available: Basic Price and TOU Rate
1
15 16
8. Advance Setting
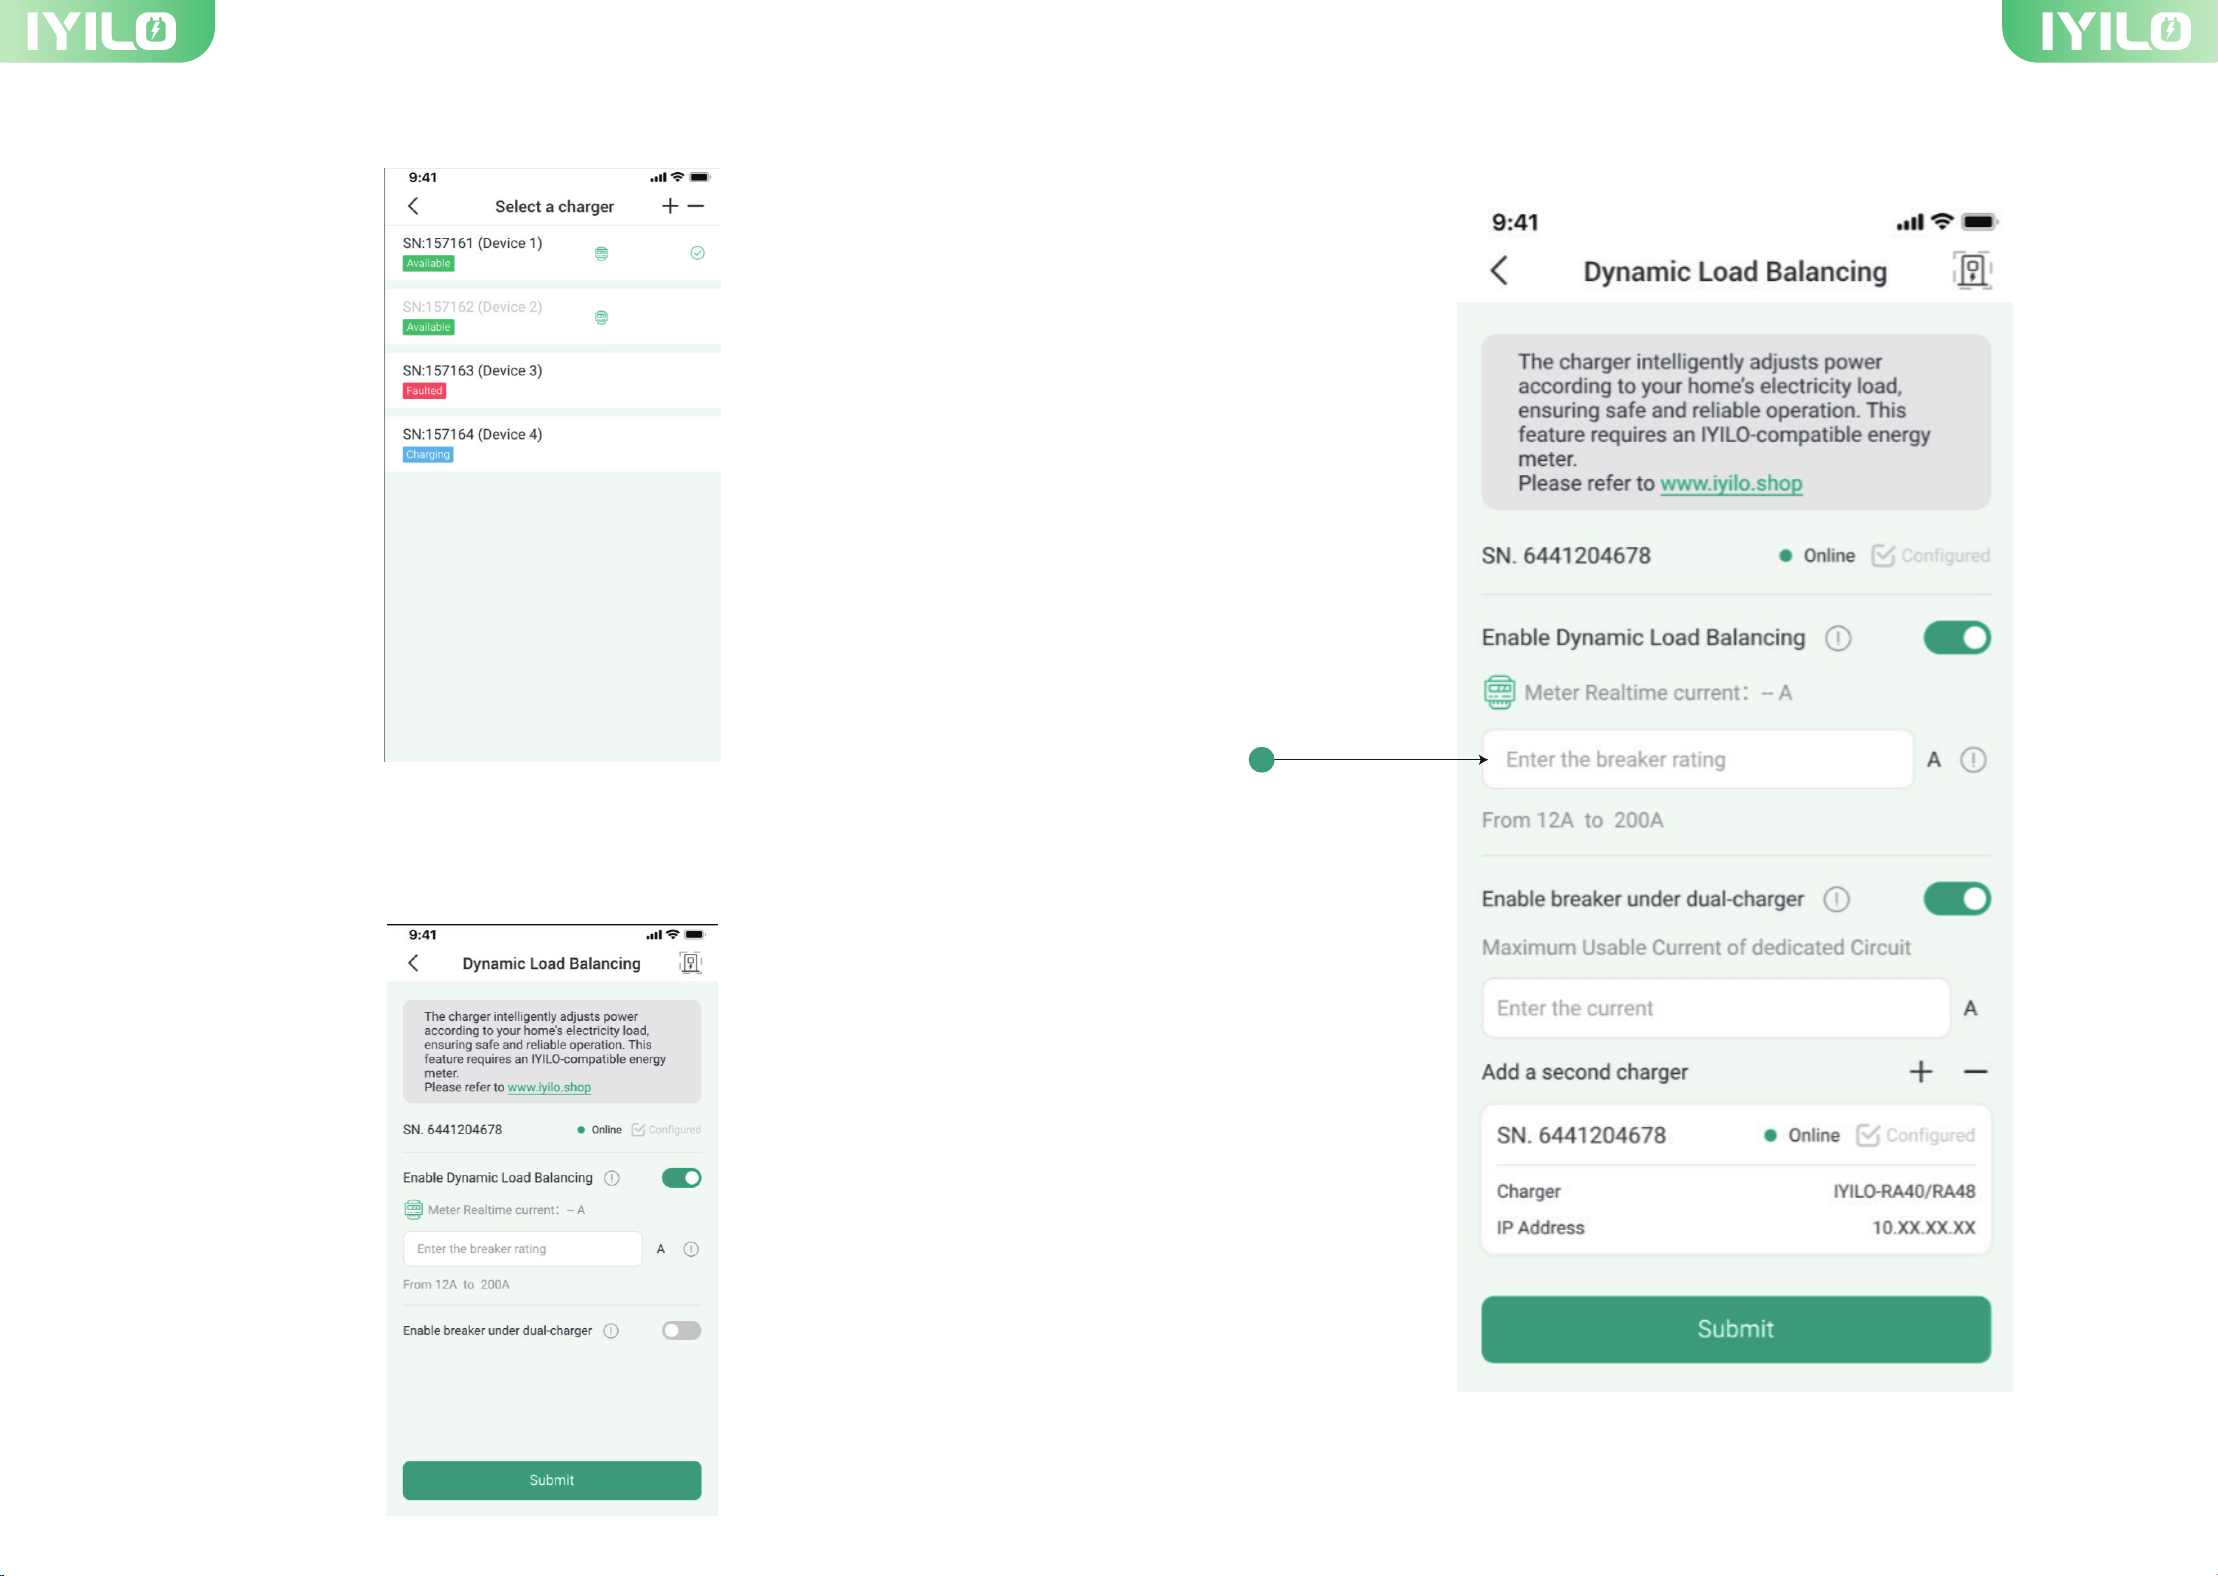
8.1 Dynamic loading balancing
The IYILO app features advanced settings to meet the diverse needs of our customers.
7-2 TOU Rate
For the best scheduled charging experience, enter your Time-of-Use (TOU) rate to better
track and understand electricity costs.
Step 1. Please set up your IYILO EV Charger and Energy Meter using the proper installation
method.
Step 2. Open your “IYILO” APP and click “Advanced” on the sidebar. Then select the “load
balancing ①”.
1.The “Estimate cost” on the charging page only displays the basic price if it has been
entered. Otherwise, it will show “0.”
2.The Time-of-Use (TOU) rate is only applicable when scheduling your charging.
Note
Caution: The dynamic load balancing function can only be configured with an
IYILO-owned or licensed energy meter.
Important: Make sure the IYILO EV Charger has a stable Wi-Fi connection.
Note
1
17 18
Step 3. Select the charger you want to use if your account has multiple chargers.
Step 5. Enter the rating of the breaker ① protecting the panel where the CT(s) are installed.
Step 4. Dynamic Load Balancing will automatically measure the current once the charger
and energy meter are properly installed on the electrical panel and a stable Wi-Fi
connection is available.
1
19 20
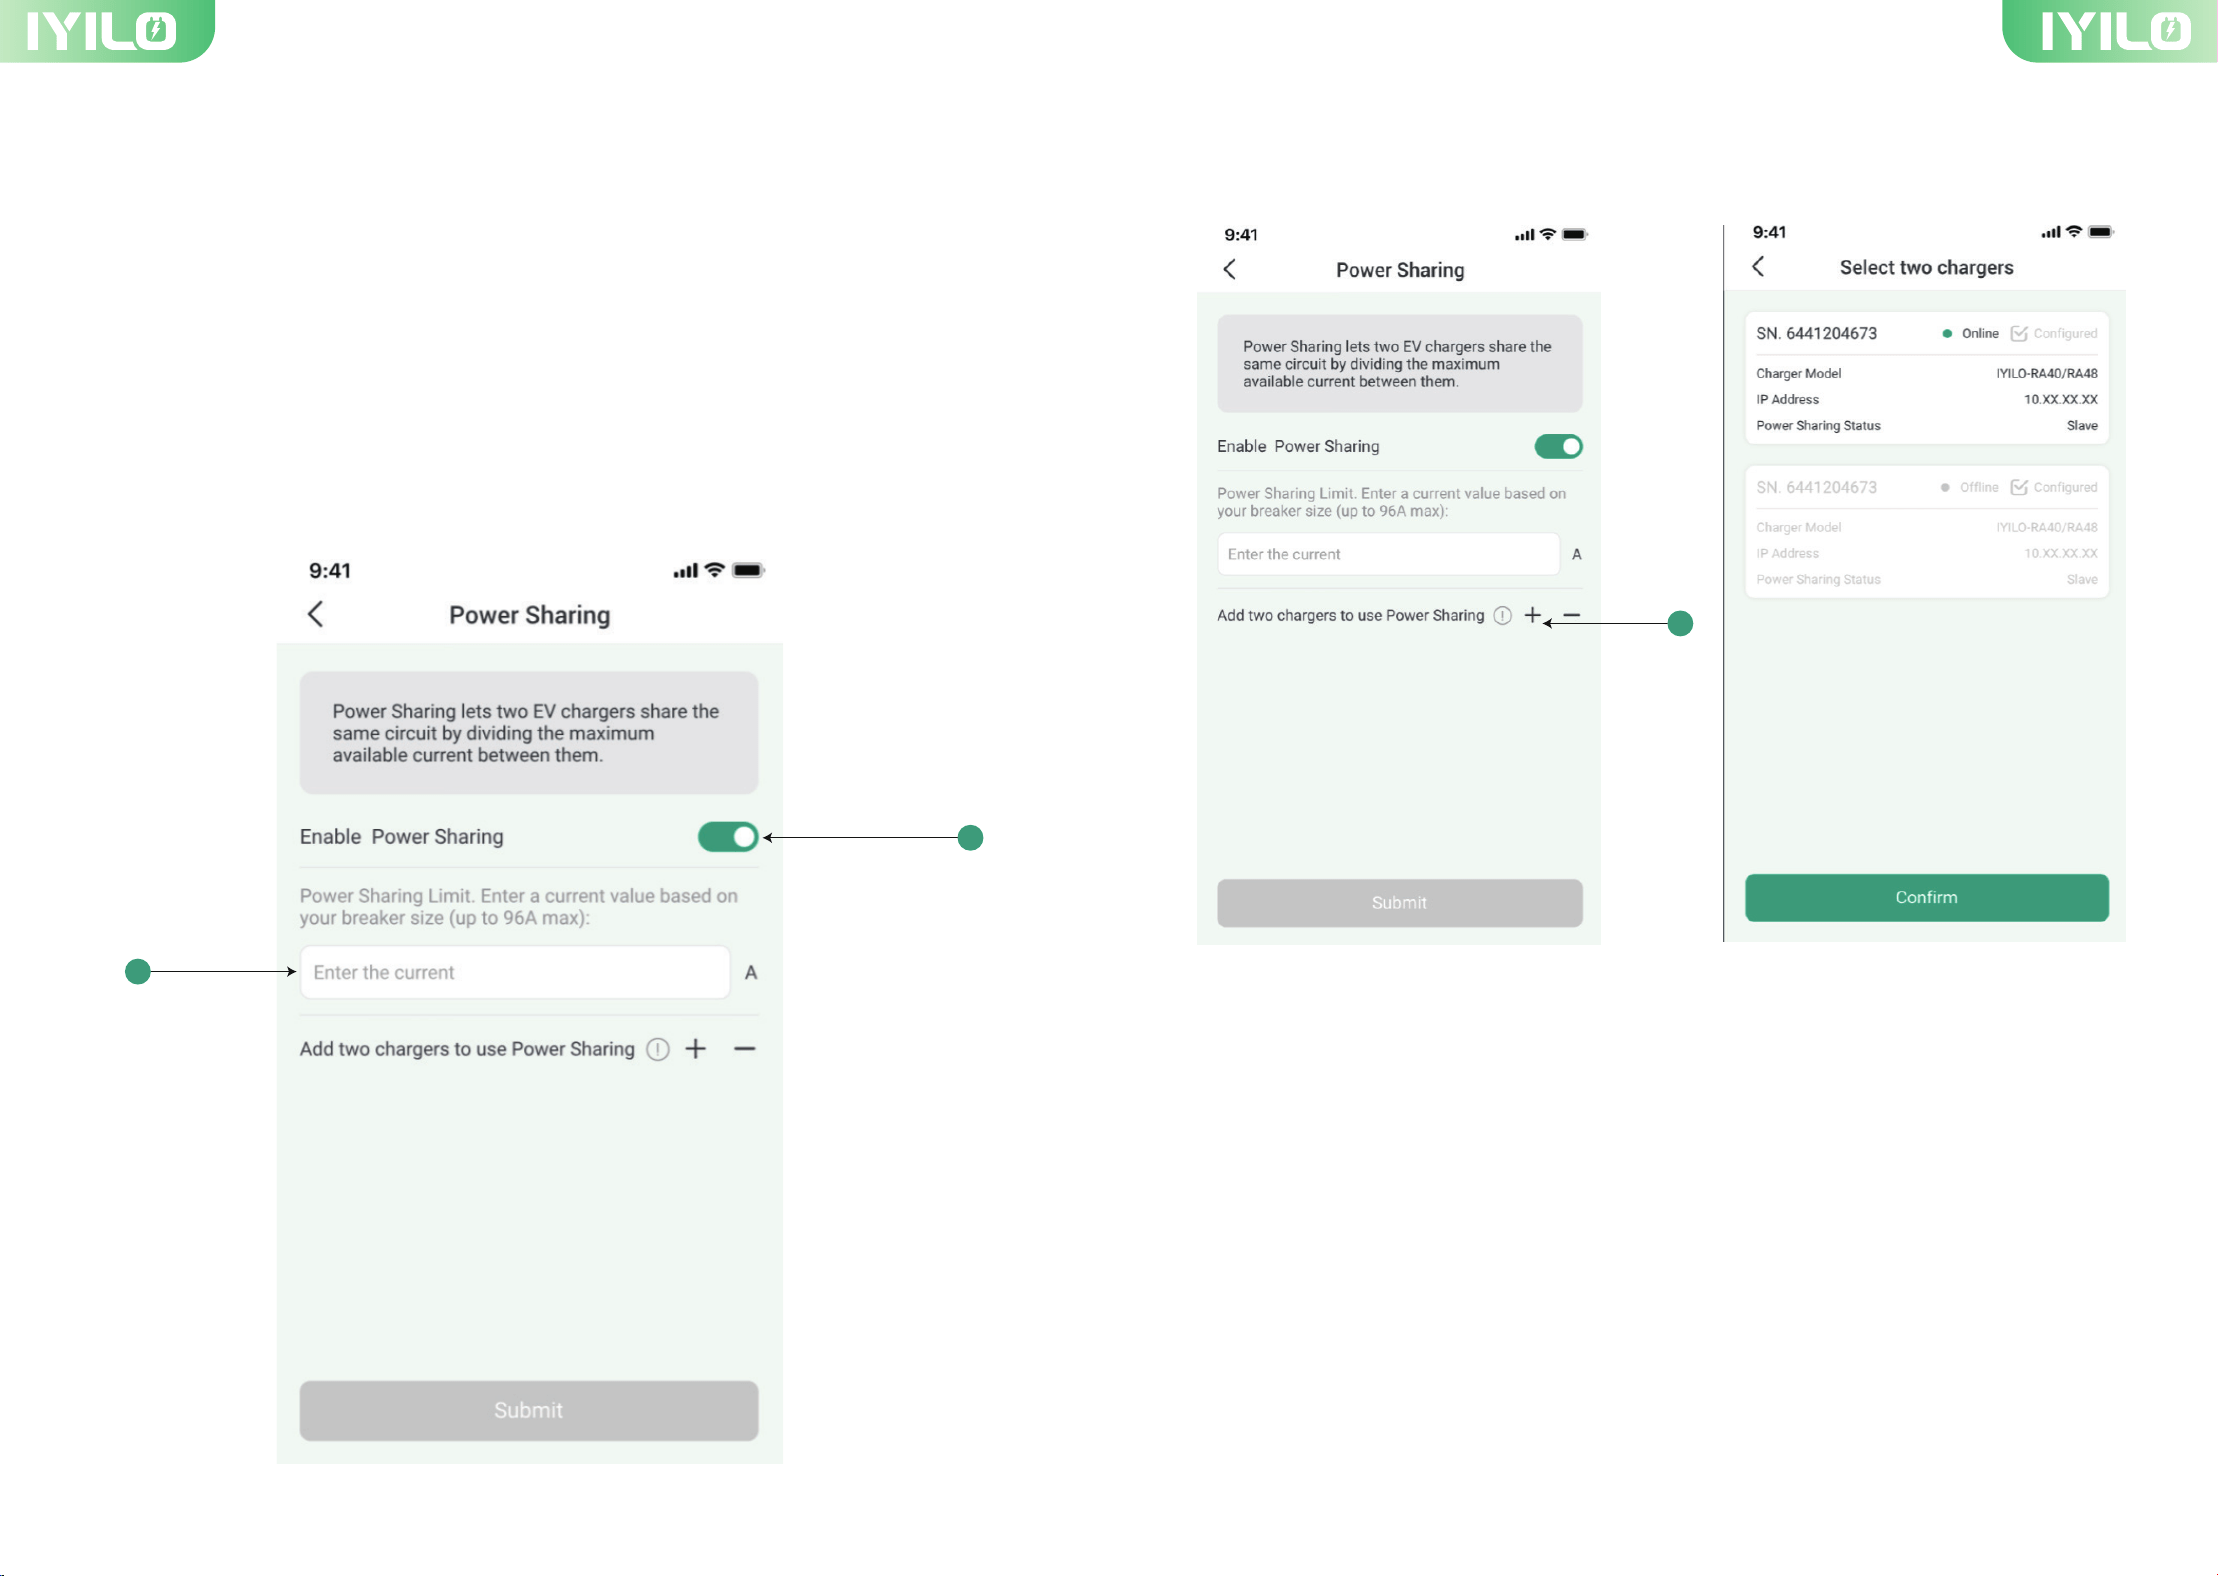
8.2 Power Sharing
Power Sharing lets two EV chargers share the same circuit by dividing the maximum
available current between them.
Step 1. Please install two IYILO chargers onto a dedicated circuit breaker (refer to the
Installation Guide).
Step 2. Enter the Power Sharing interface and enable the power sharing button①.
Step 3. Enter the Circuit Breaker Current Value ②(eg:60A for 48A Maximum Current)
Step 4. Click the “+” to add your two chargers.
(Step 2&3)
1
2
1
21 22
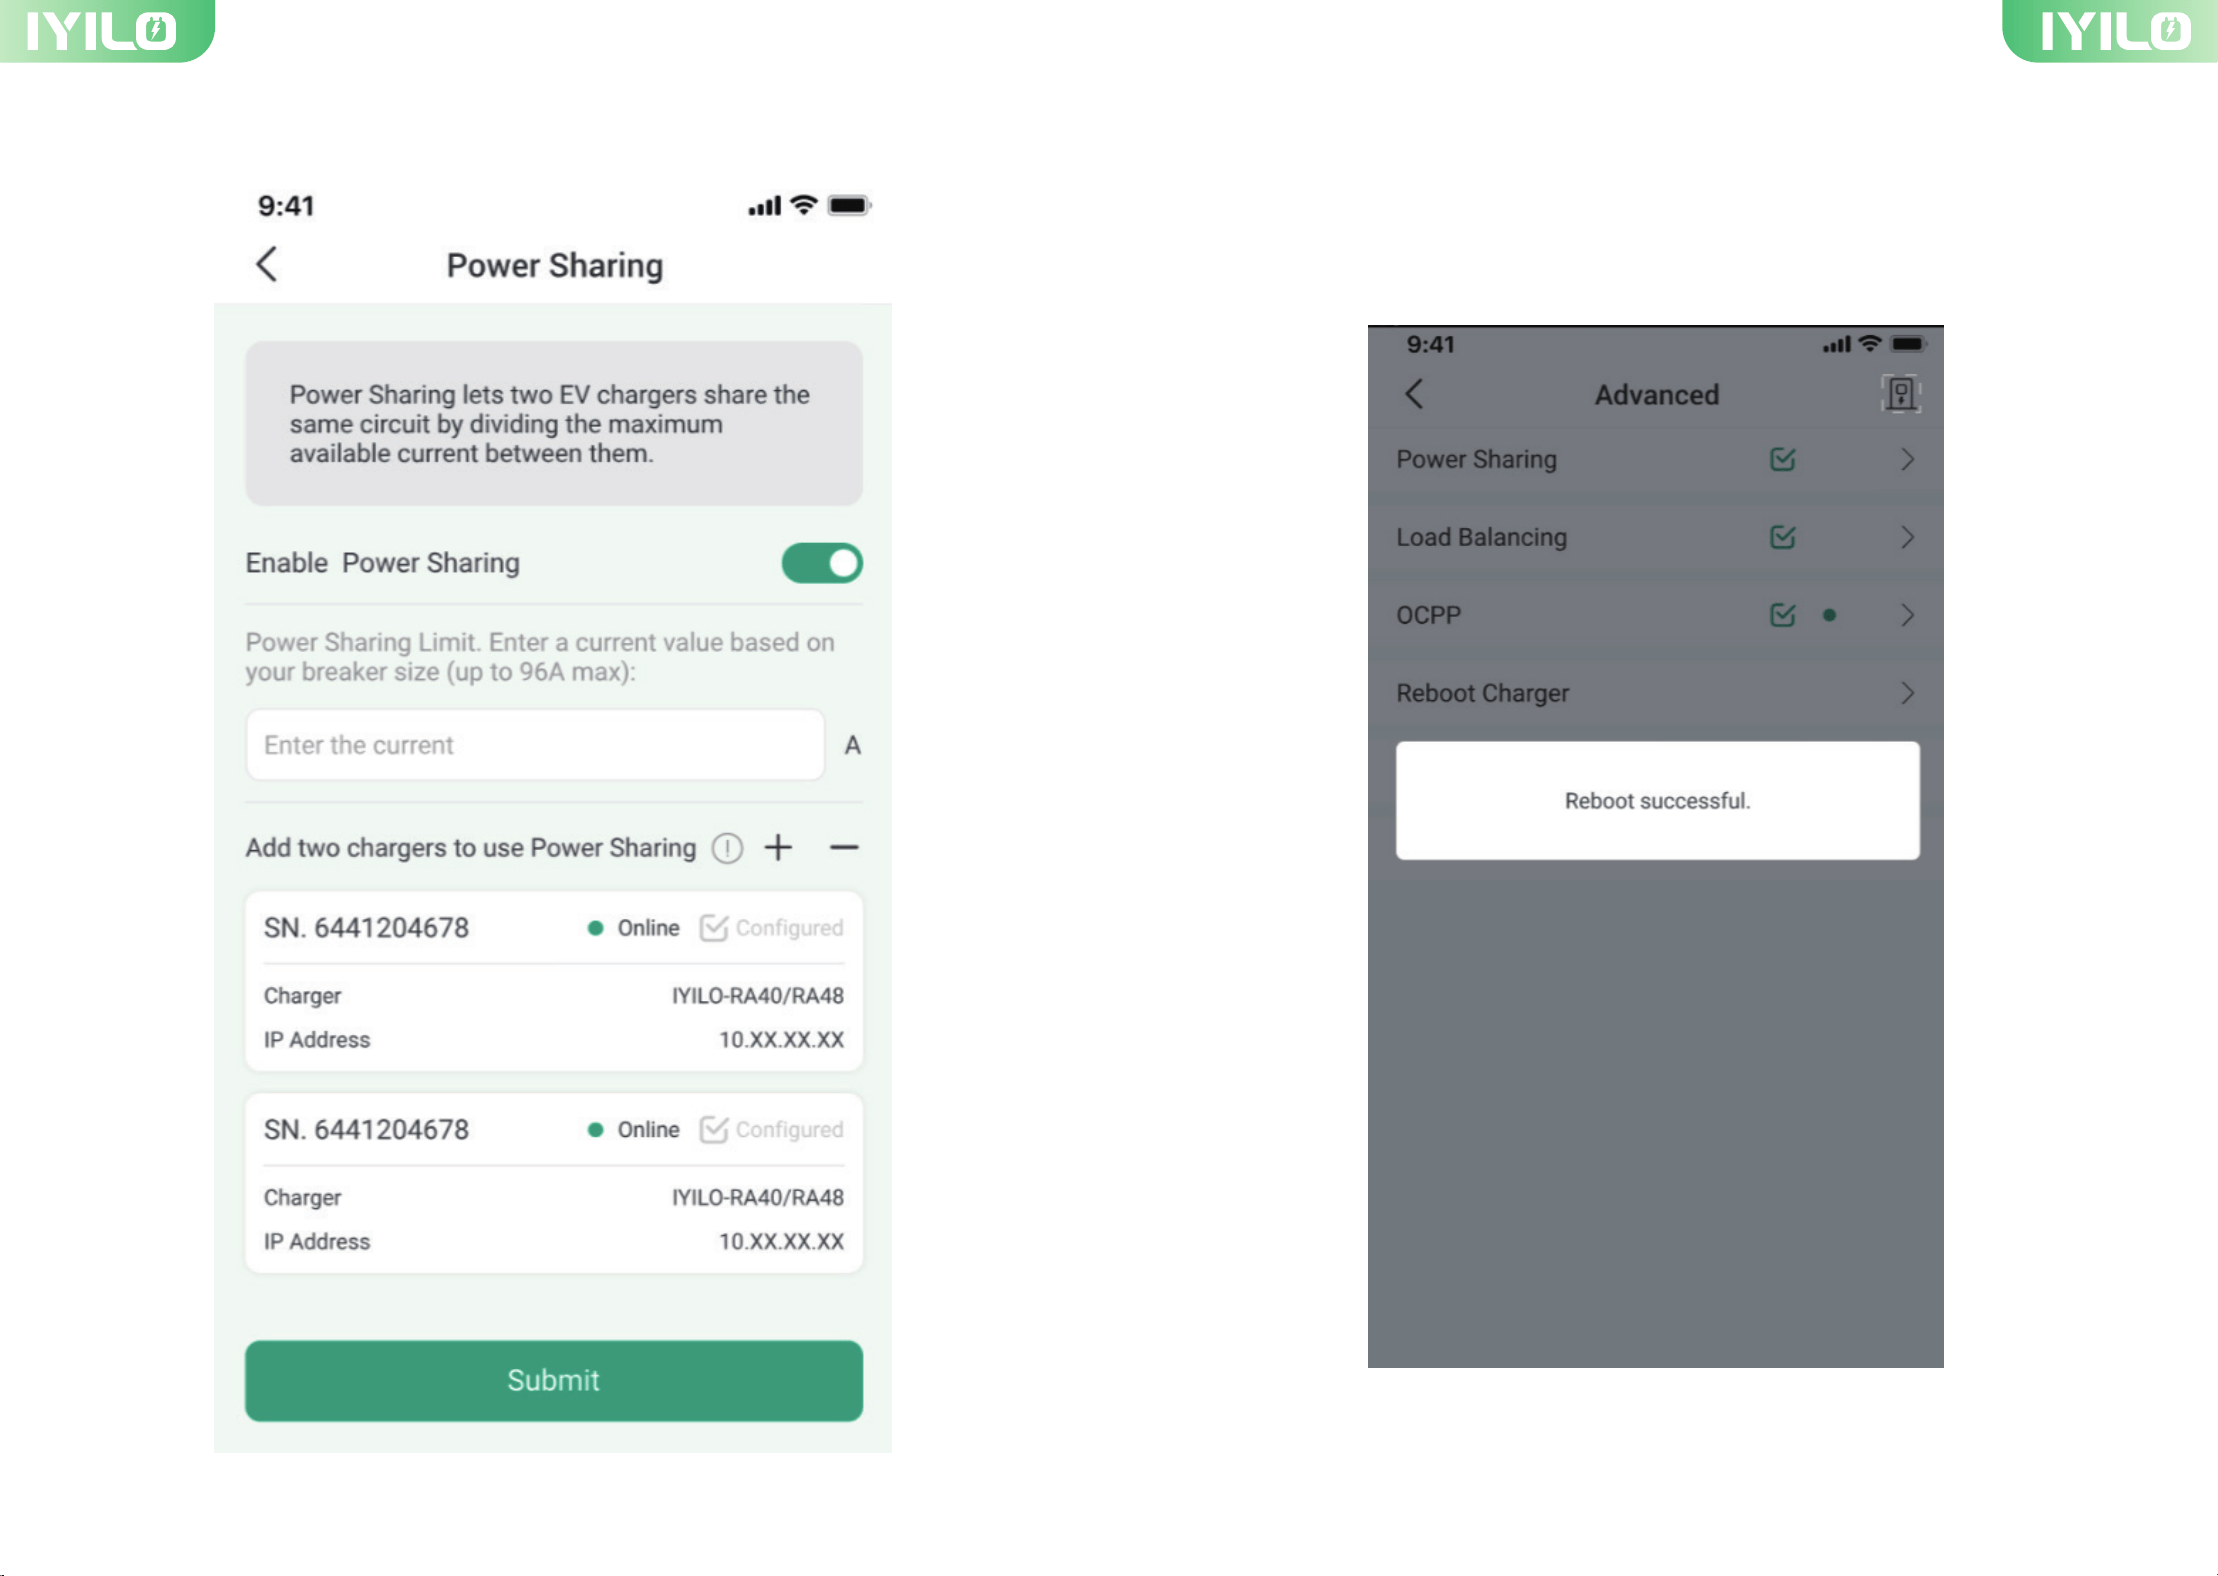
Step 5. After selecting the chargers, click 'Submit'.
9. Reboot Charger
You can find the 'Reboot Charger' button in the Advanced menu to restart the charger.
Note that the charger can only be rebooted when it is not in use. It cannot be rebooted
while charging.