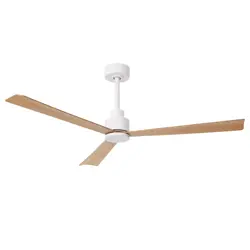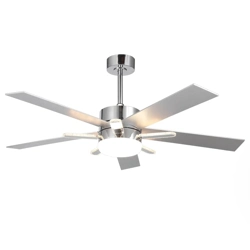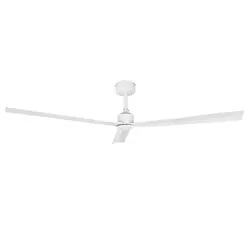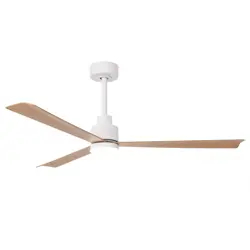
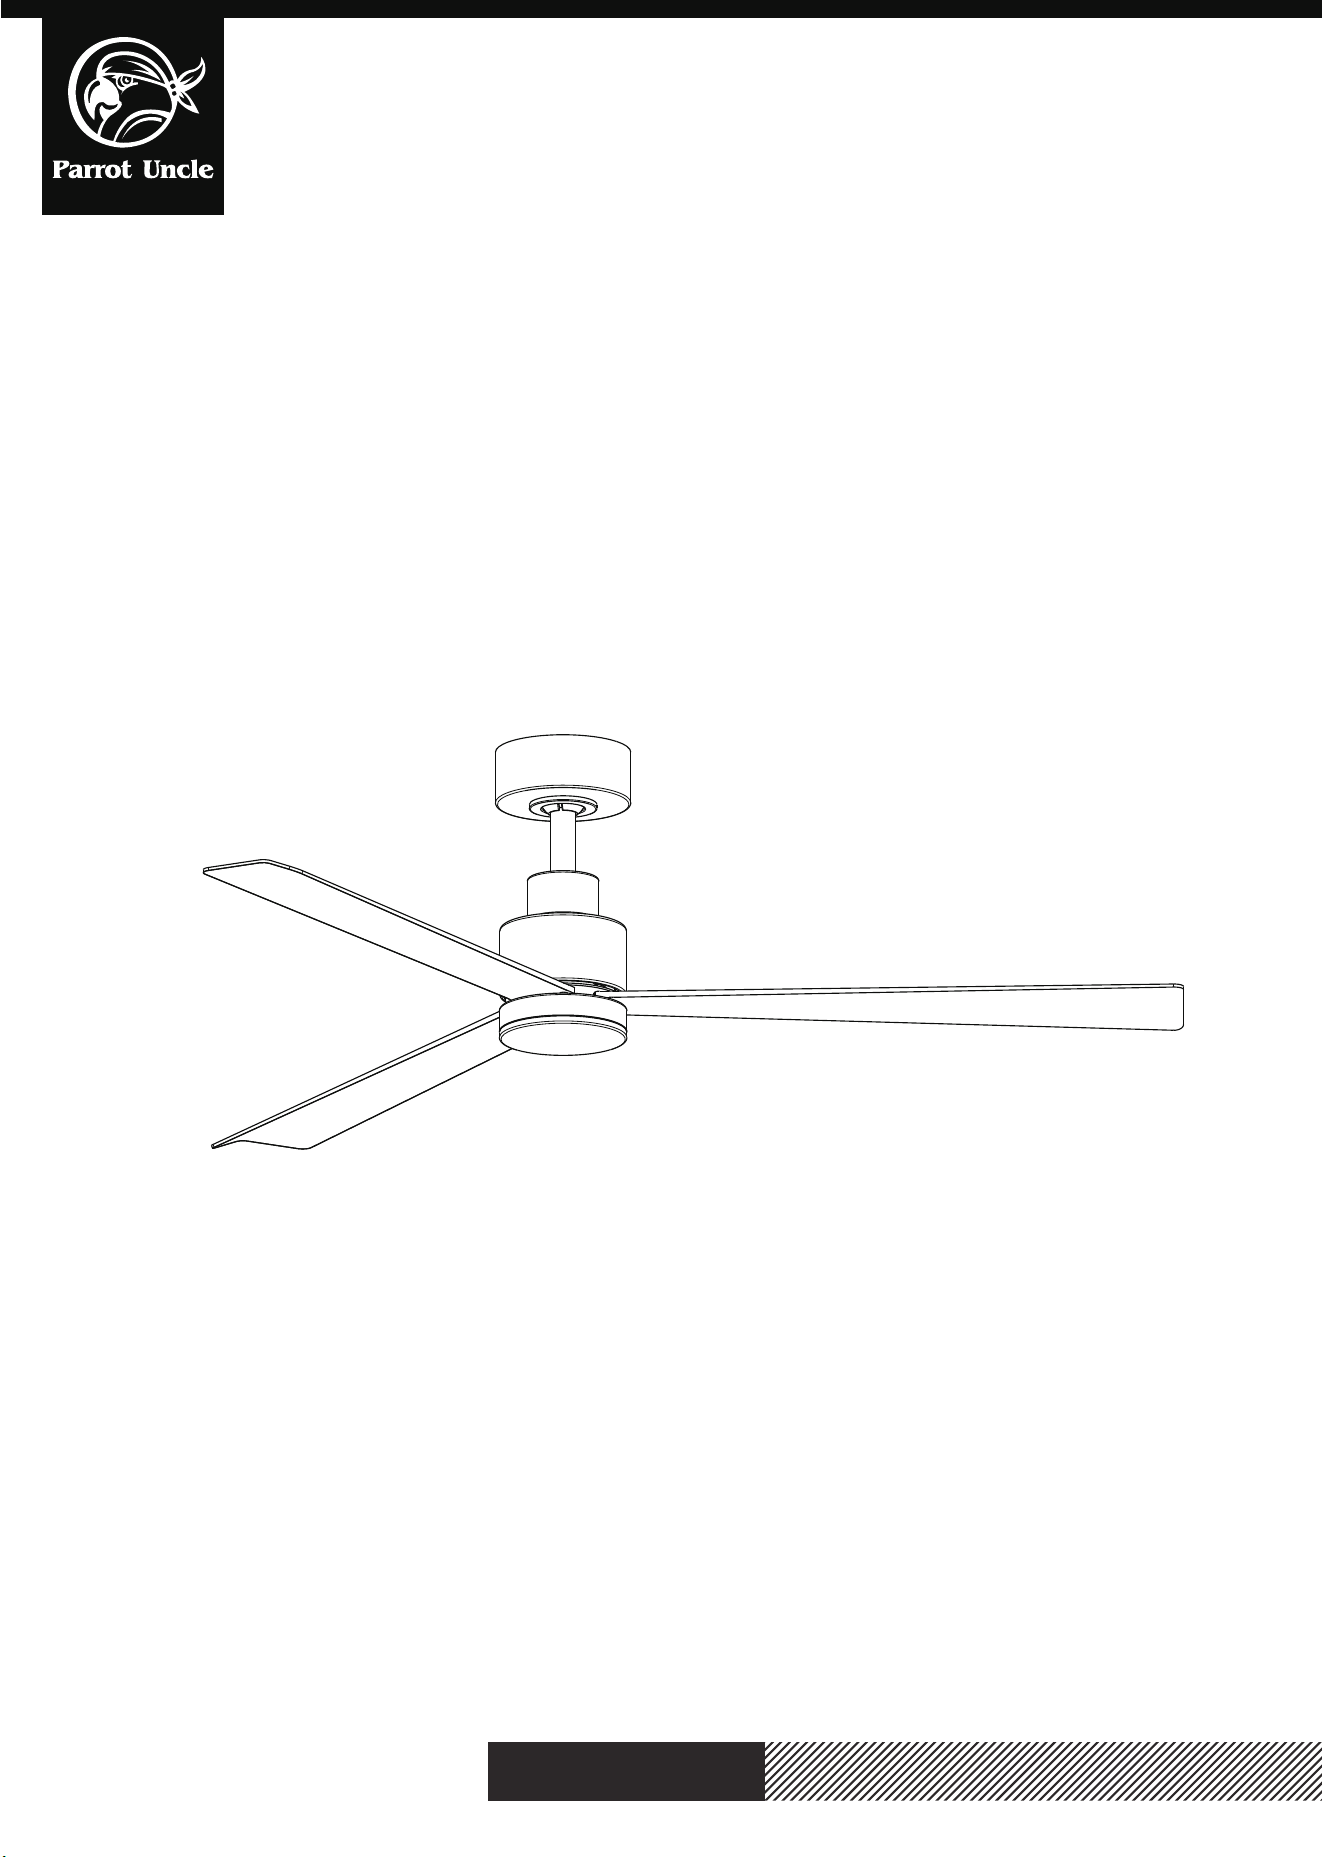
F6014
www.parrotuncle.com
F6014
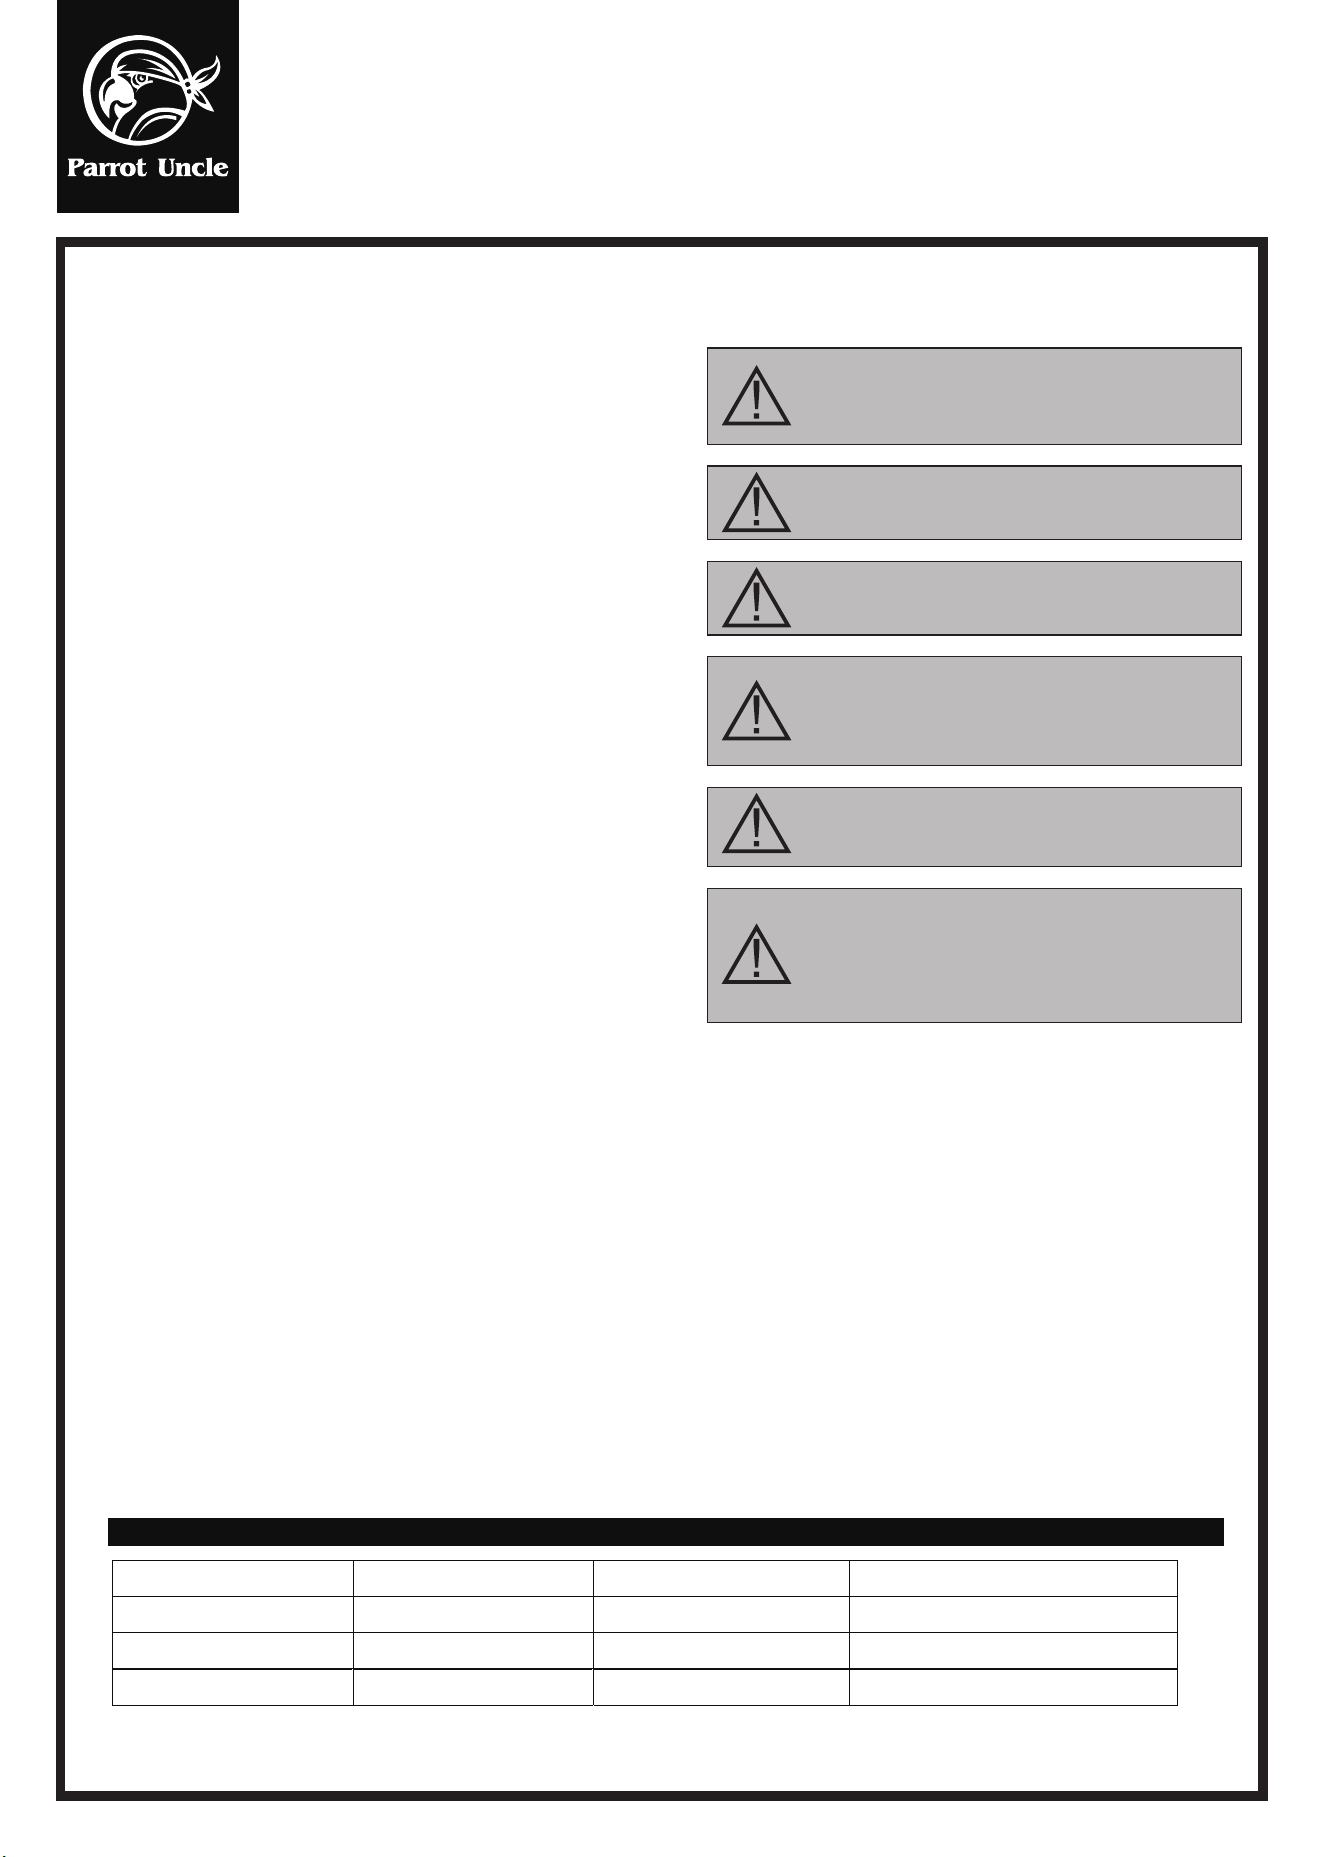
WARNING: SHUT POWER OFF AT FUSE OR CIRCUIT BREAKER
Safety Information
1.To reduce the risk of an electrical blow, electricity on the
protective switch or the safety box went out before starting.
2.All wiring must correspond to the NASI/NFPA 70-1999
National Electric Code and local electrical regulations. The
electrical installation must be carried out by a qualified and
approved electrician.
3.The connection box and support construction must be
assembled safely and 35 pounds (15.9 kilos) must be able
to transport reliably. Use only output boxes listed with
labeling
"Accepted for fans with a weight of 35 lbs (15.9 kg) or less."
4.The fan must be installed with a minimum distance of 2.1 m
(7 feet) from the posterior edge of the wings to the floor.
5.Do not operate the reverse switch if the fan wings are
moving. You have to turn off the fan and stop the wings
before reverse the direction of the wing.
6.Do not place objects on the road to wings.
7.To avoid lesions or damage to the fan and other objects, be
careful if you work on the fan or clean it.
8.Electrical diagrams only serve as a reference. The lighting
rates that are not delivered with the fan must be listed and
marked with the valve model that will be installed for use.
The switches must be general use switches UL. Take into
account the instructions for the appropriate installation
included in the lighting rates and the switches.
9.After the electrical connections have been made, the size
staircase must be turned up and carefully push to the plug
box. The cables must be distributed in such a way that the
ground connected driver and the device head are next to
the socket.
All fixing screws must be verified before installation and, if
necessary, followed.
installation or after installation. Do not put any object on
the path of wings.
WARNING:Remove rubber motor attacks at the
bottom of the fan before mounting the wings or try
the engine.
WARNING:To avoid the risk of a fire or an electrical
blow, this fan should not be used with a semiconductor
speed controller.
WARNING:To avoid a possible electric shock, turn off
the current in the main security box before wiring. If
you feel that you do not have enough knowledge or
experience in electrical wiring, communicate with a
license electrician.
WARNING:Electrical diagrams only serve as a
reference. The optional use of a lighting rate must
be on the list and marked with this fan for use.
WARNING:To reduce the risk of fires, electrical
discharges, or injuries, assemble the device in a
socket that with the inscription is accepted for fans
with a weight of 35 lbs (15.9 kg) or less. It is marked
and use the screws supplied with the plug.
TECHNICAL INFORMATION
SKU
Nominal voltage
F6014WH
110V AC
31W
18W (included)
Nominal output (motor) Light
WARNING:To reduce the risk of injury, knife supports
(also known as flanges) cannot be folded during
Installation & Operating Instructions for the
Parrotuncle Owner's Installation, Manual
.
F6014BK
110V AC
31W
18W (included)
F6014SN
110V AC
31W
18W (included)
WARNING: SHUT POWER OFF AT FUSE OR CIRCUIT BREAKER
Installation & Operating Instructions for the
Parrotuncle Owner's Installation, Manual
Please check whether above accessories are completed or not? Yes, and install.
YELLOW
GREY
RED
AC IN L
AC IN N
GROUND
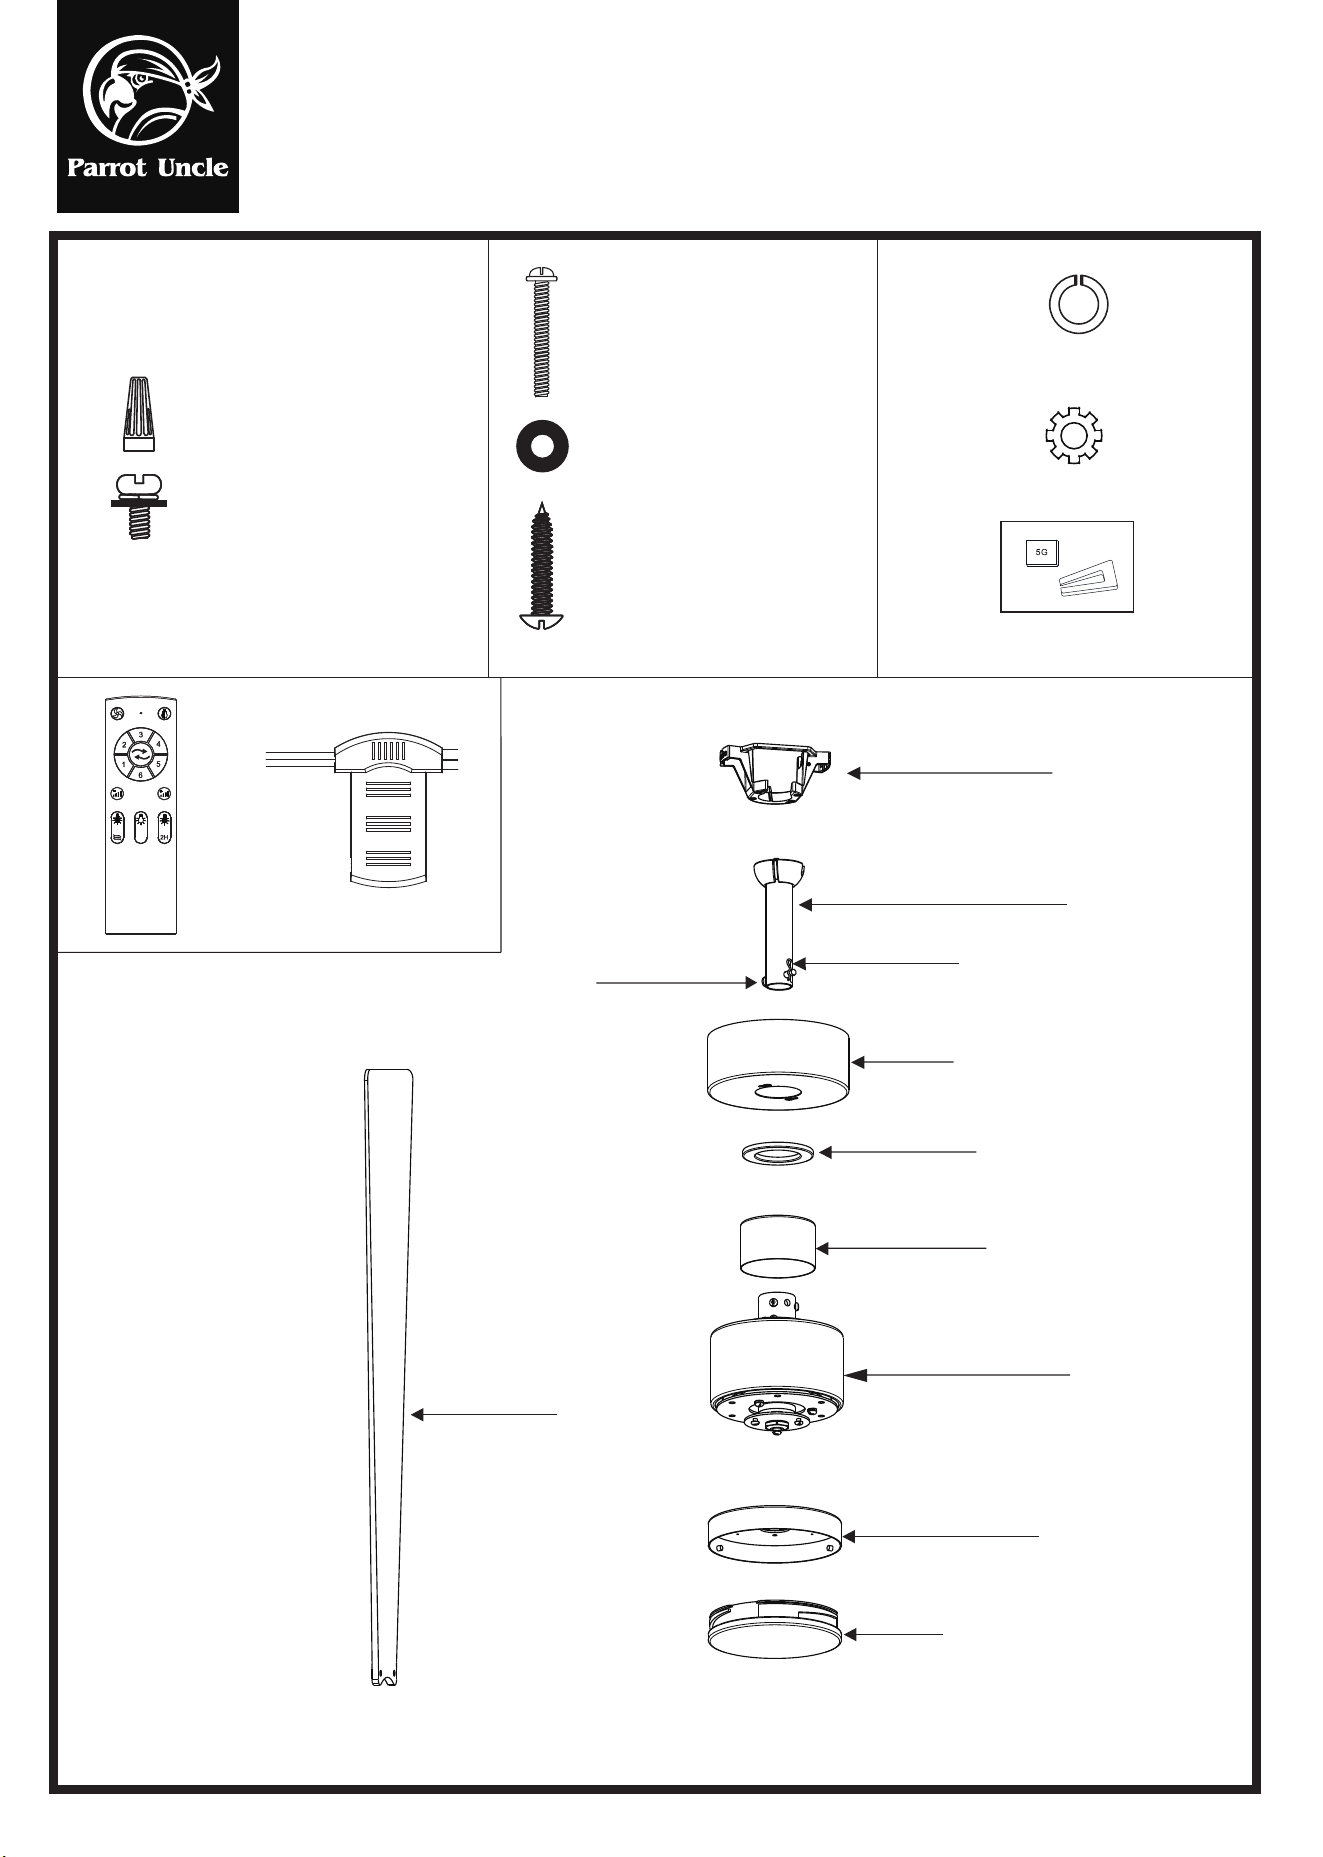
Wood screw (4PCS)
Spring sasher (4PCS)
Star washer(4PCS)
Plastic wire nut (8PCS)
Blade arm screw (7PCS)
Mounting screw (2PCS)
Balanced parts package(1PCS)
Washer (4PCS)
30'30'
Mounting bracket
5"ball/downrod assembly
10"downrod (Standby)
Hanging Pin
"R"Locking Pin
Canopy
Canopy cover
Coupling cover
Fan-motor assembly
LED light assembly
Diffuser
Blade(3PCS)
F6014
F6014
WARNING: SHUT POWER OFF AT FUSE OR CIRCUIT BREAKER
Installation & Operating Instructions for the
Parrotuncle Owner's Installation, Manual
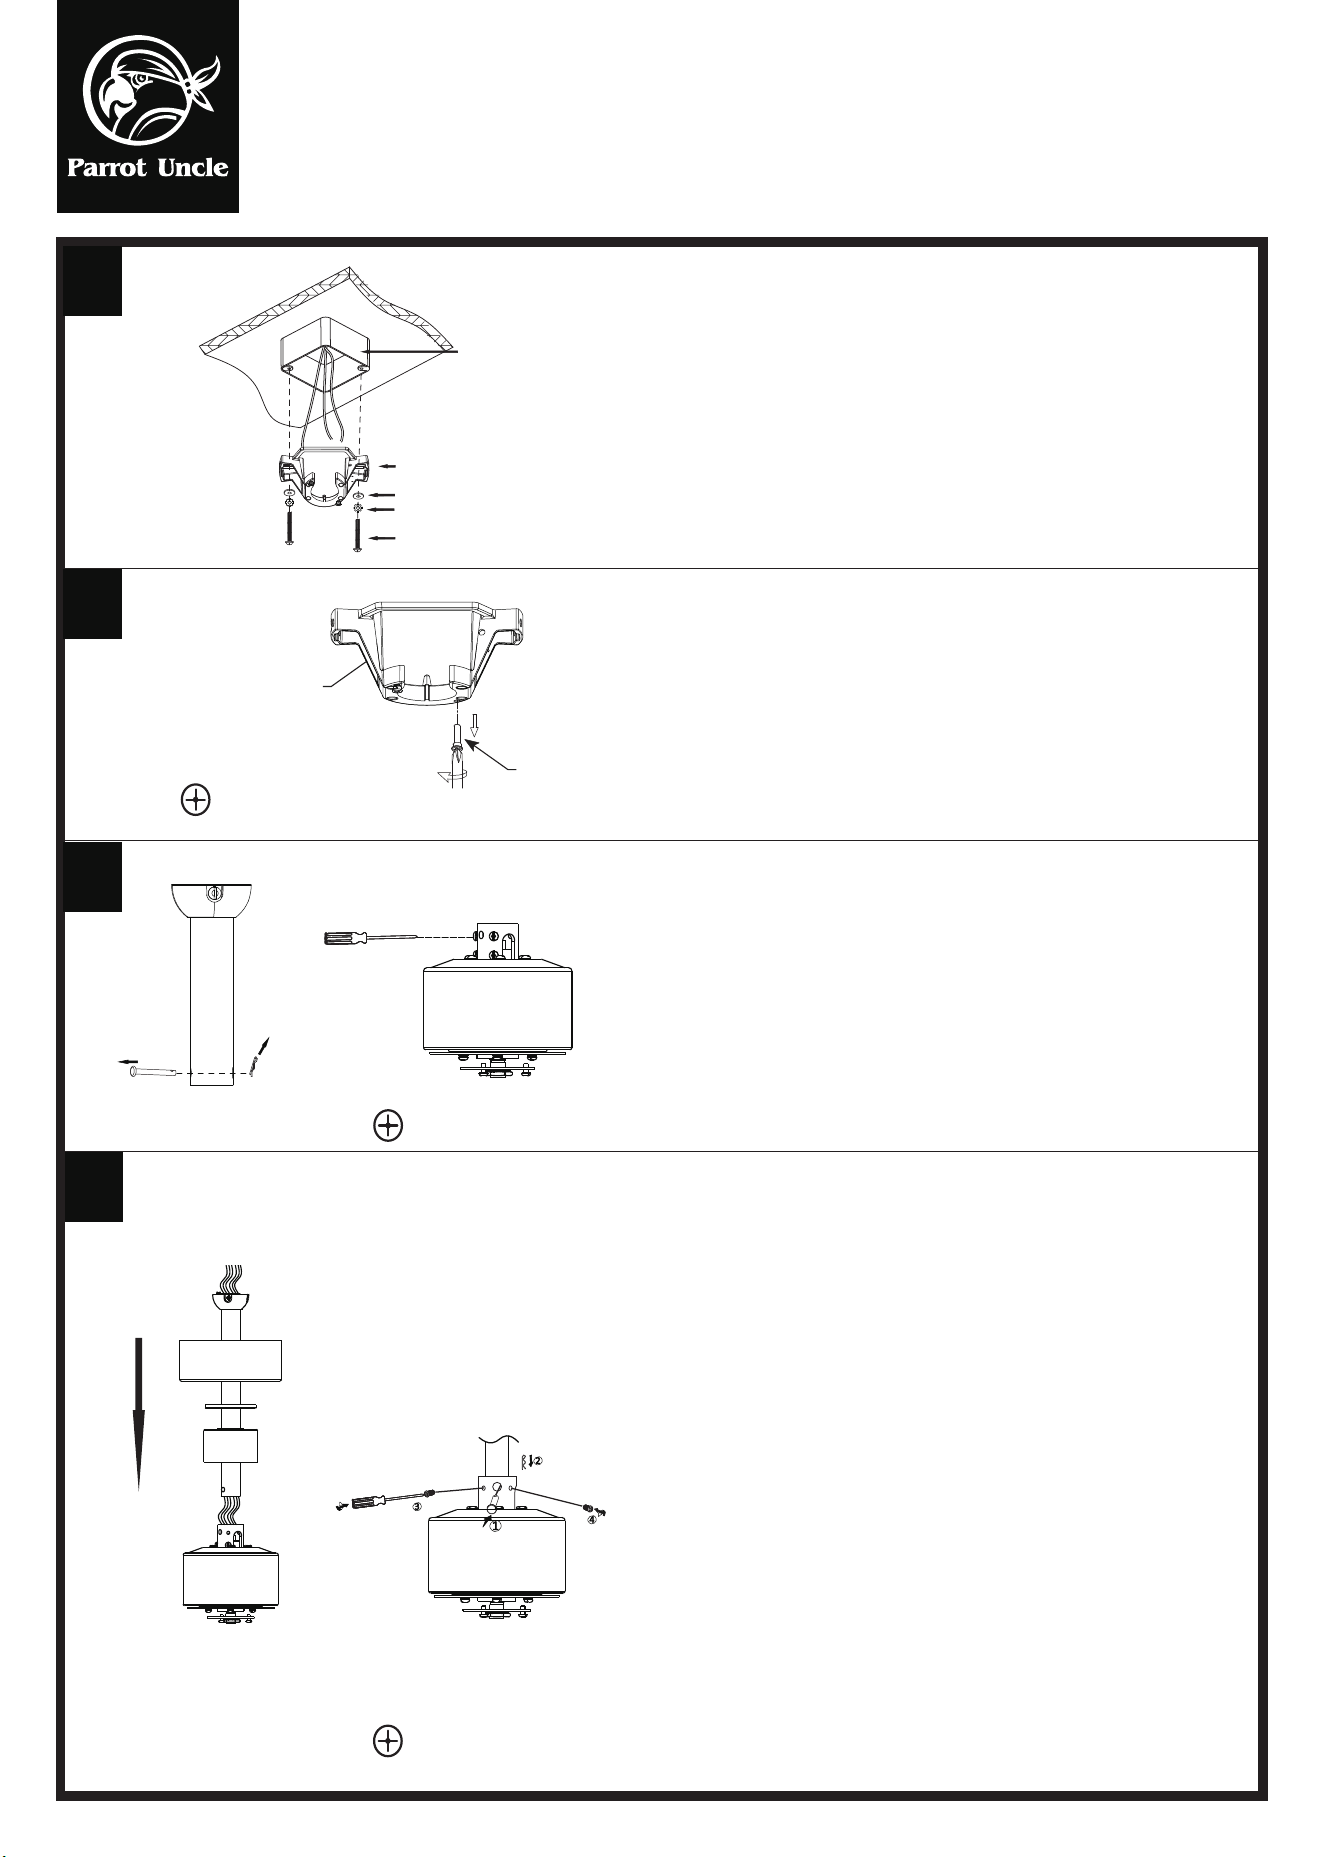
Mount the mounting bracket to the
outletbox using two self tapping screws,
two star washers and two washers.
Phillips
screwdriver
Phillips
screwdriver
1
2
3
4
Outlet box
Mounting Bracket
Washers
Self tapping screw
Star washers
Remove the hanging pin and "R" locking
pin from the downrod.
Loosen the two screws at the top of the
fan-motor assembly.
Mounting Bracket
Shoulder
screw
Phillips
screwdriver
Pass the downrod assembly through the
canopy, canopy cover, coupling cover.
Run the wires of the fan-motor assembly
through the downrod assembly.
Thread the hanging pin through the
fan-motor assembly and insert the
"R" locking pin. Lock the two screws.
Remove the shoulder screws from
the mounting bracket.
F6014
WARNING: SHUT POWER OFF AT FUSE OR CIRCUIT BREAKER
Installation & Operating Instructions for the
Parrotuncle Owner's Installation, Manual
5
OK
NO
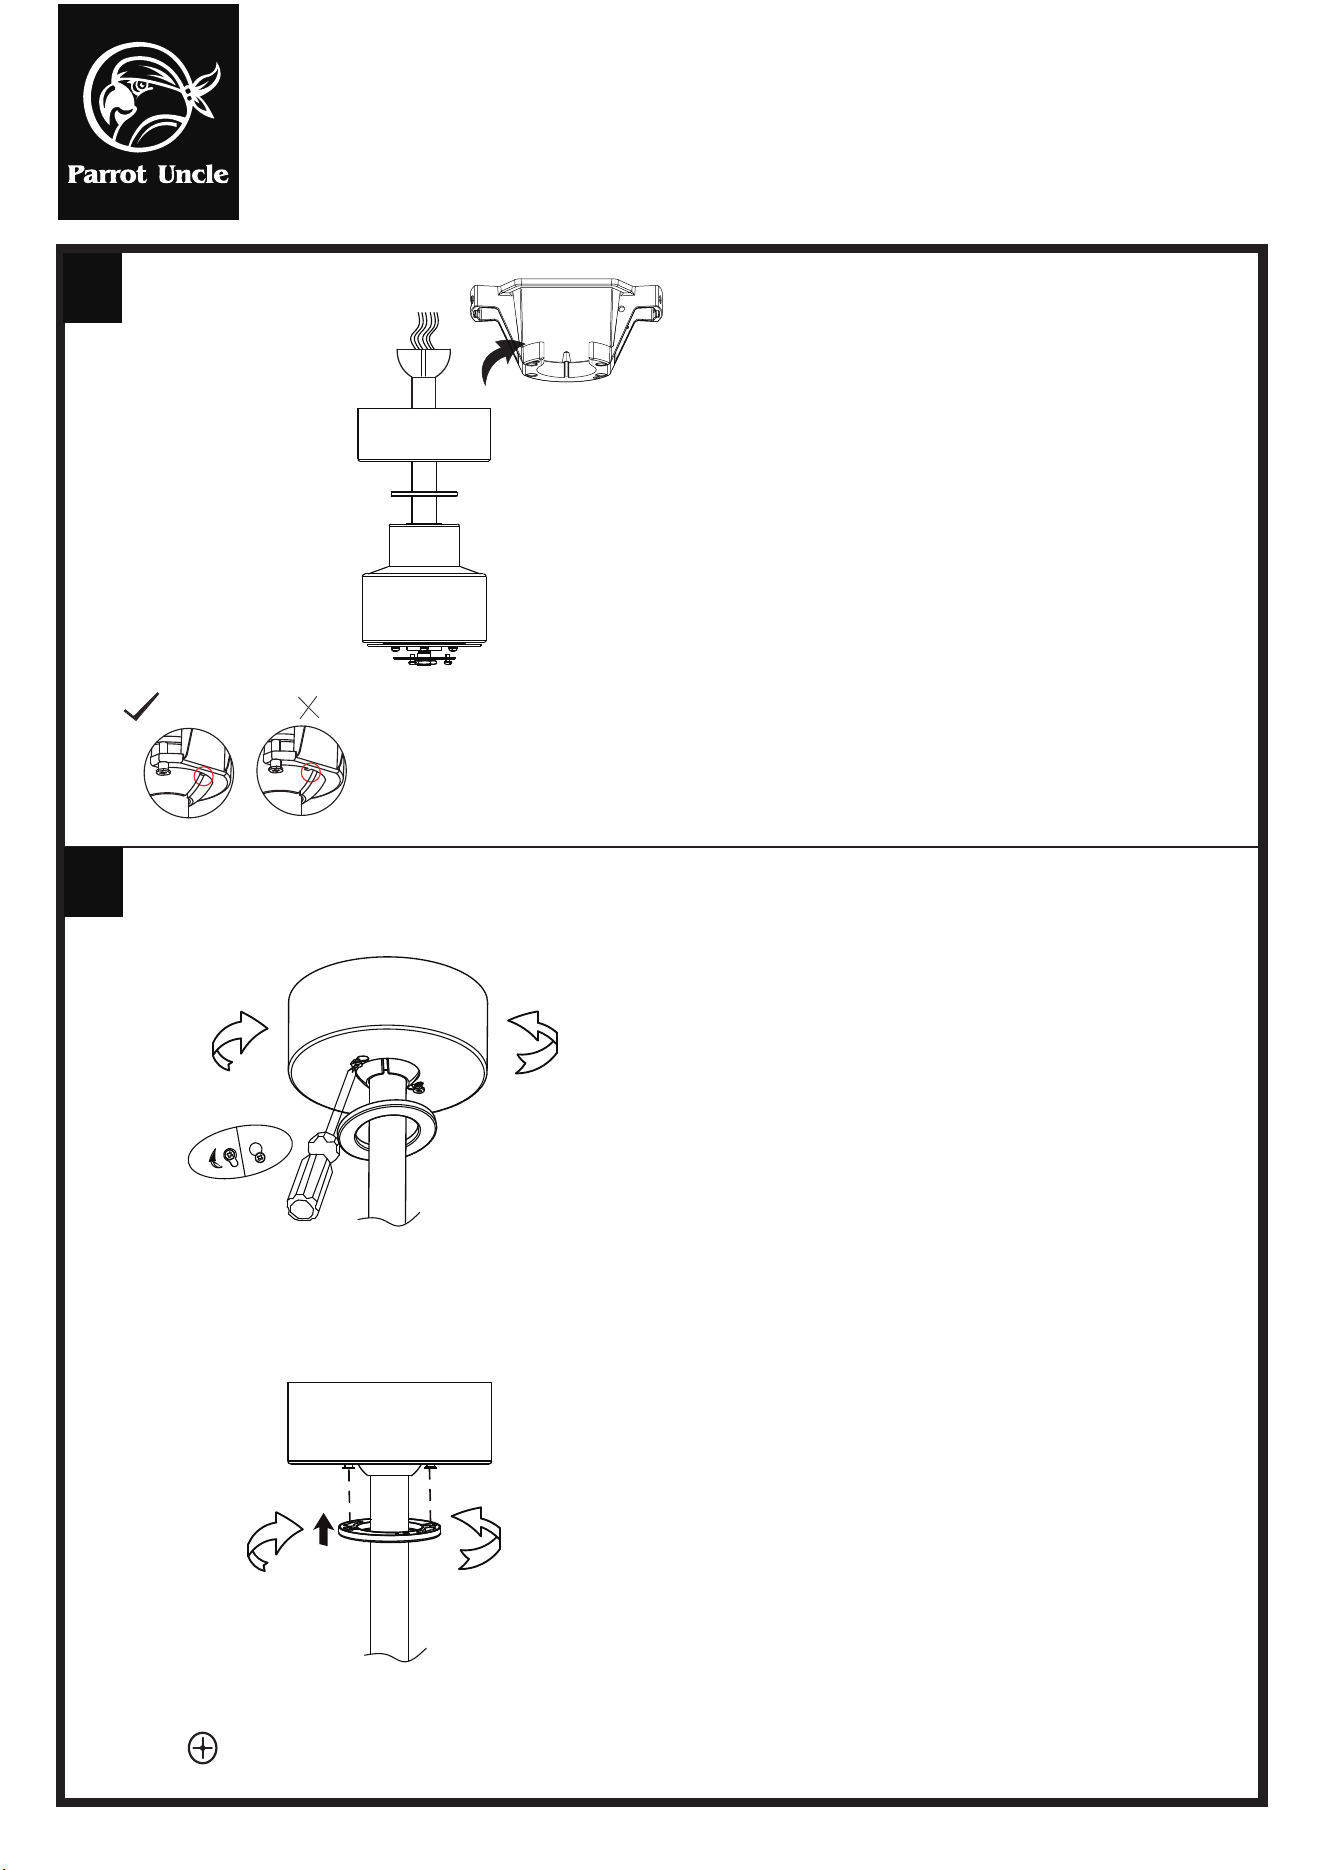
Install the fan-motor assembly into the
mountingbracket, taking care to install
it in place.
Phillips
screwdriver
Securely attach and tighten the canopy
cover over the shoulder screw heads in
the mounting bracket utilising the key
slot twistlock feature.
Use the shoulder screw to lock the canopy
to the mounting bracket.
6
F6014
WARNING: SHUT POWER OFF AT FUSE OR CIRCUIT BREAKER
Installation & Operating Instructions for the
Parrotuncle Owner's Installation, Manual
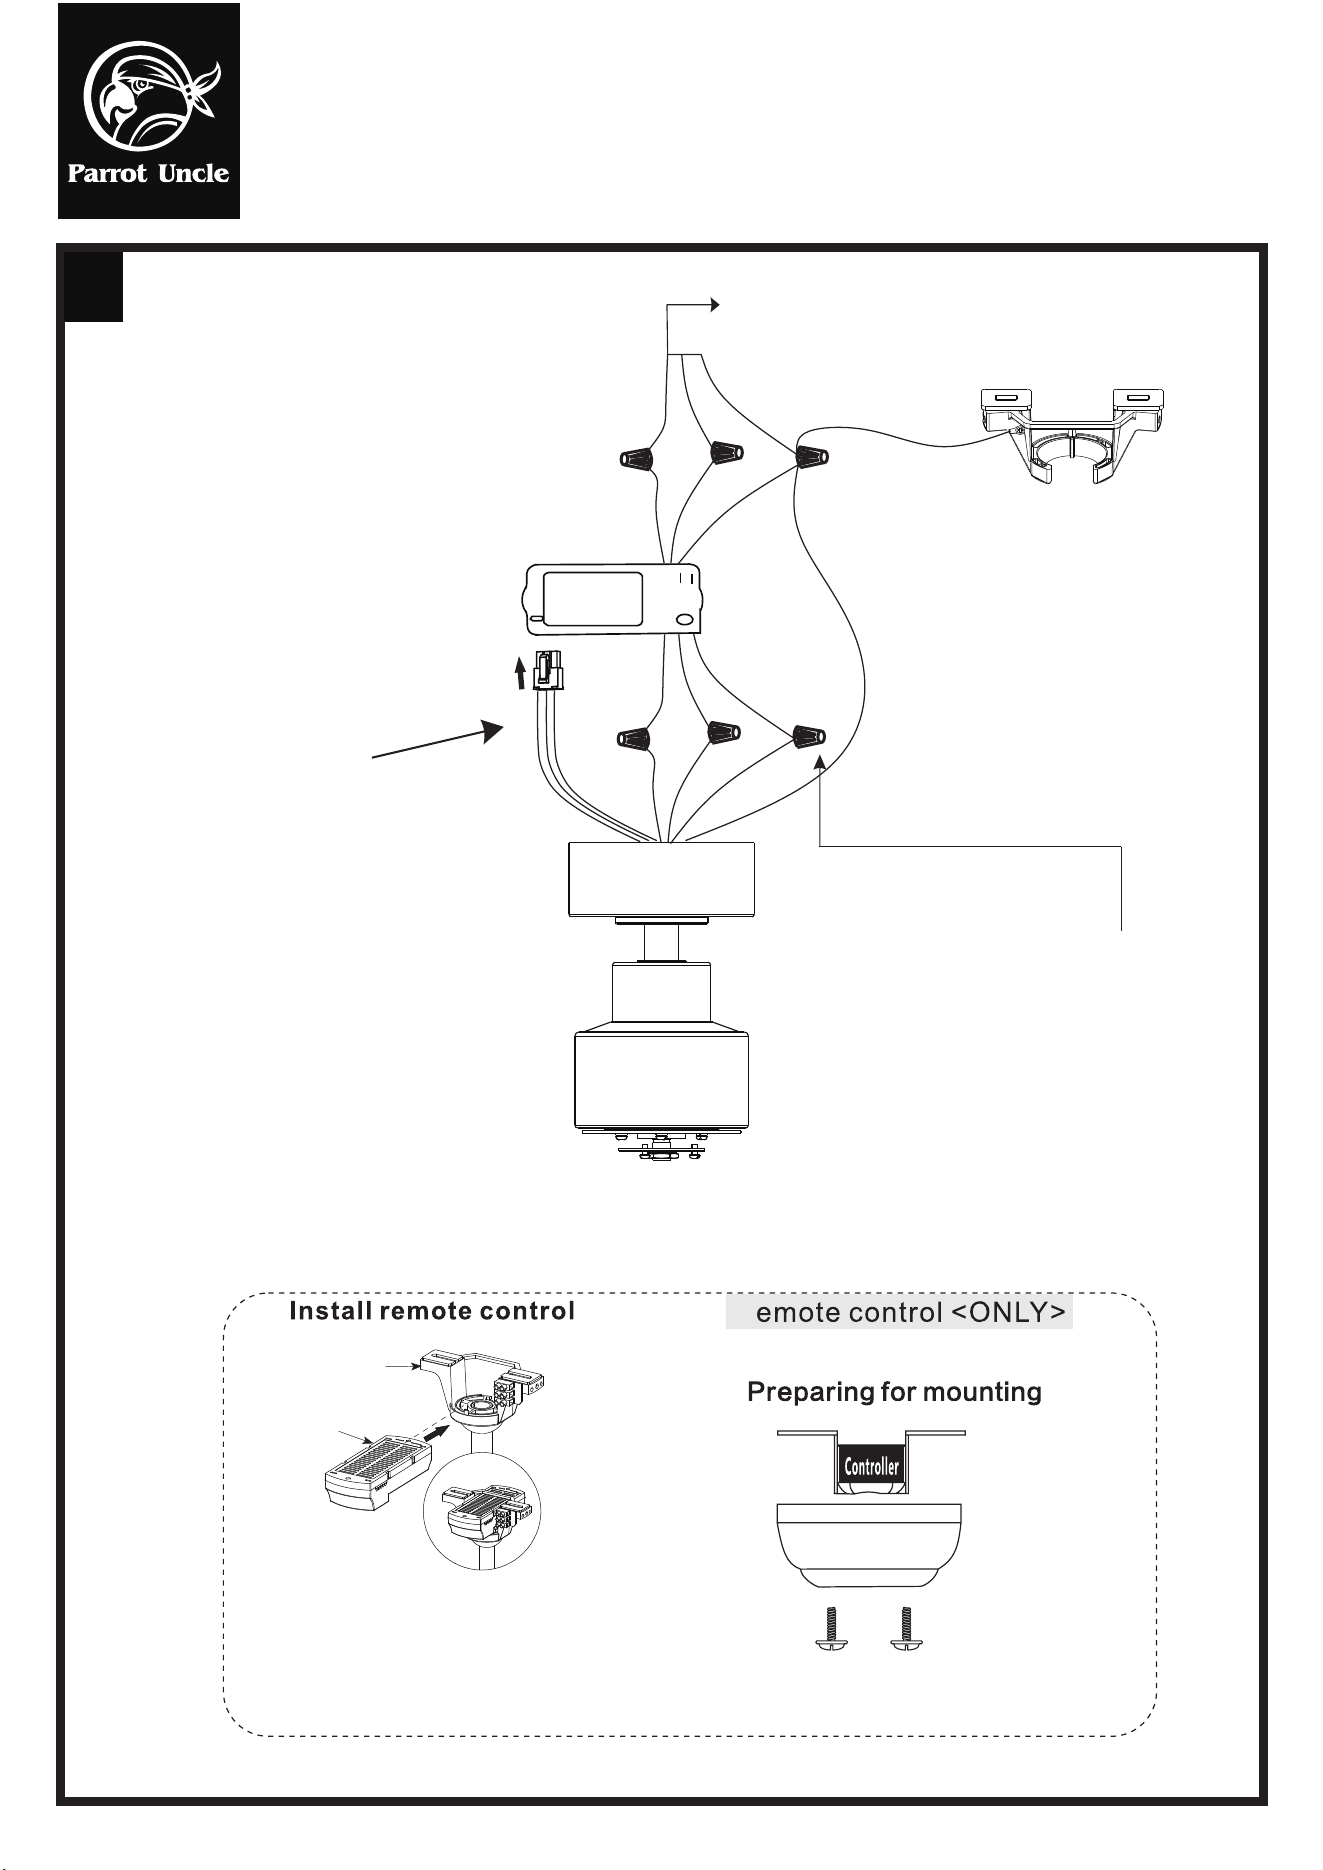
2.Remove and save the two canopy screws in the round holes.
This will enable you to remover the mounting bracket.
1.Remove the mounting bracket from the canopy by
loosening the two canopy screws located in the L shaped slots.
Mounting bracket
Receiver
NOTEWires omitted for clarity:
Use wire connecting nuts supplied with the fan
FROM POWER SOURCE
AC 110- 120 VOLT 60Hz
3.5AMPS.
OUTPUT
RECEIVER
WIRE NUT
Use wire connecting nuts
supplied with the remote
controller.
RED
RED
GREY
GREY
YELLOW
YELLOW
Light wire installation:
After the receiver is installed on
the mouting bracket, install the light
wire onto the receiver
INPUT
WHITE
WHITE
BLACK
BLACK
GREEN
GREEN
GREEN
GREEN
Monnting bracket
7
R
2.Push the canopy ring to the bottom of the canopy,
slide the inner holes aligned to the two prominent screws
on the mounting bracket again, and turn the canopy ring
clockwise until tight.
1.Carefully push the canopy to the bottom of the mounting
bracket, make two sliding holes aligned to the two prominent
screws on the mounting bracket, and the turn clockwise until
tight.
F6014
WARNING: SHUT POWER OFF AT FUSE OR CIRCUIT BREAKER
Installation & Operating Instructions for the
Parrotuncle Owner's Installation, Manual
X
3
8
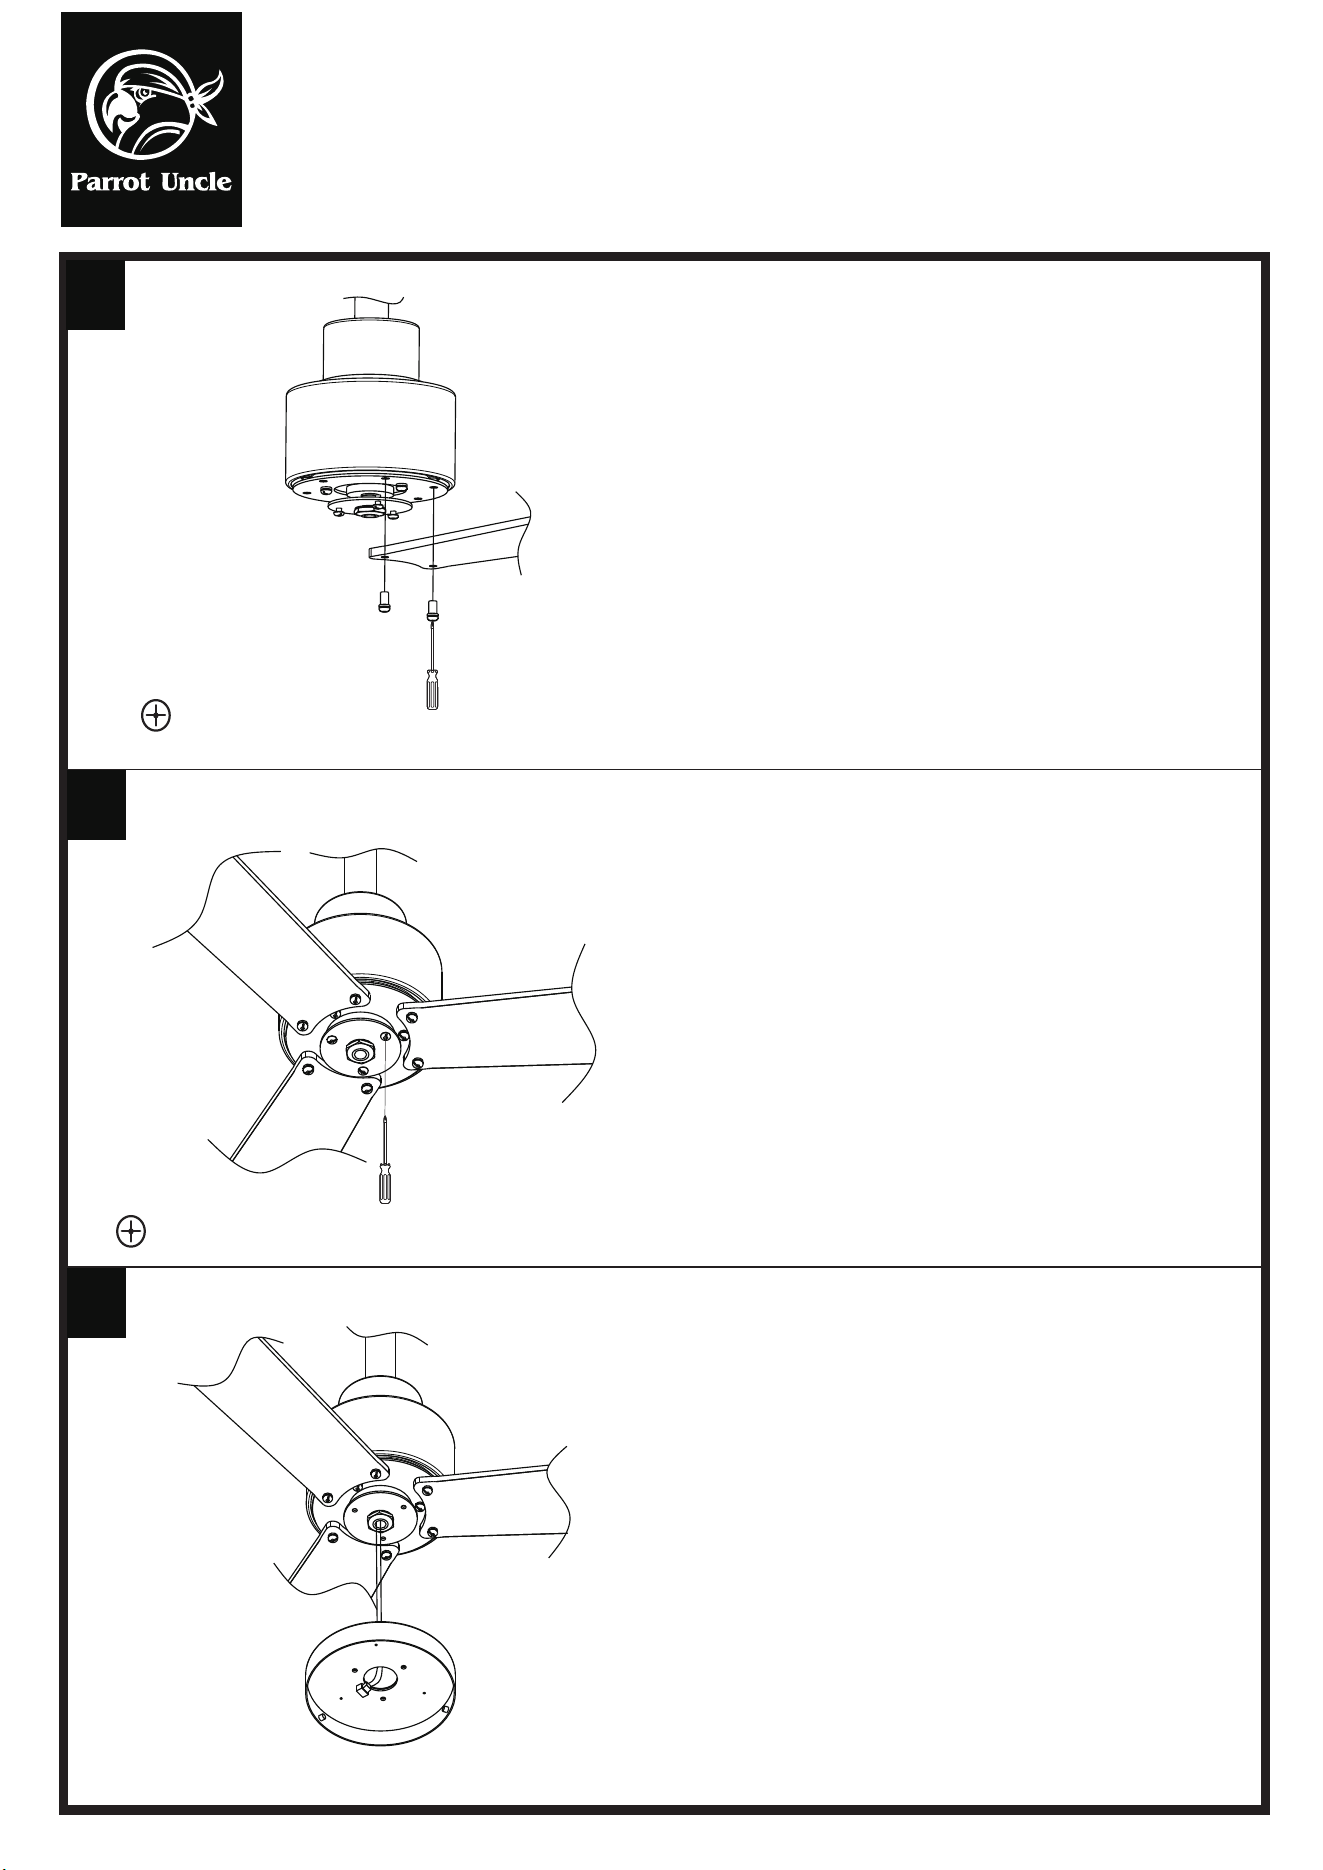
Lock the blade to the fan-motor assmebly
with two blade screws. Repeat this step
two times.
Phillips
screwdriver
Phillips
screwdriver
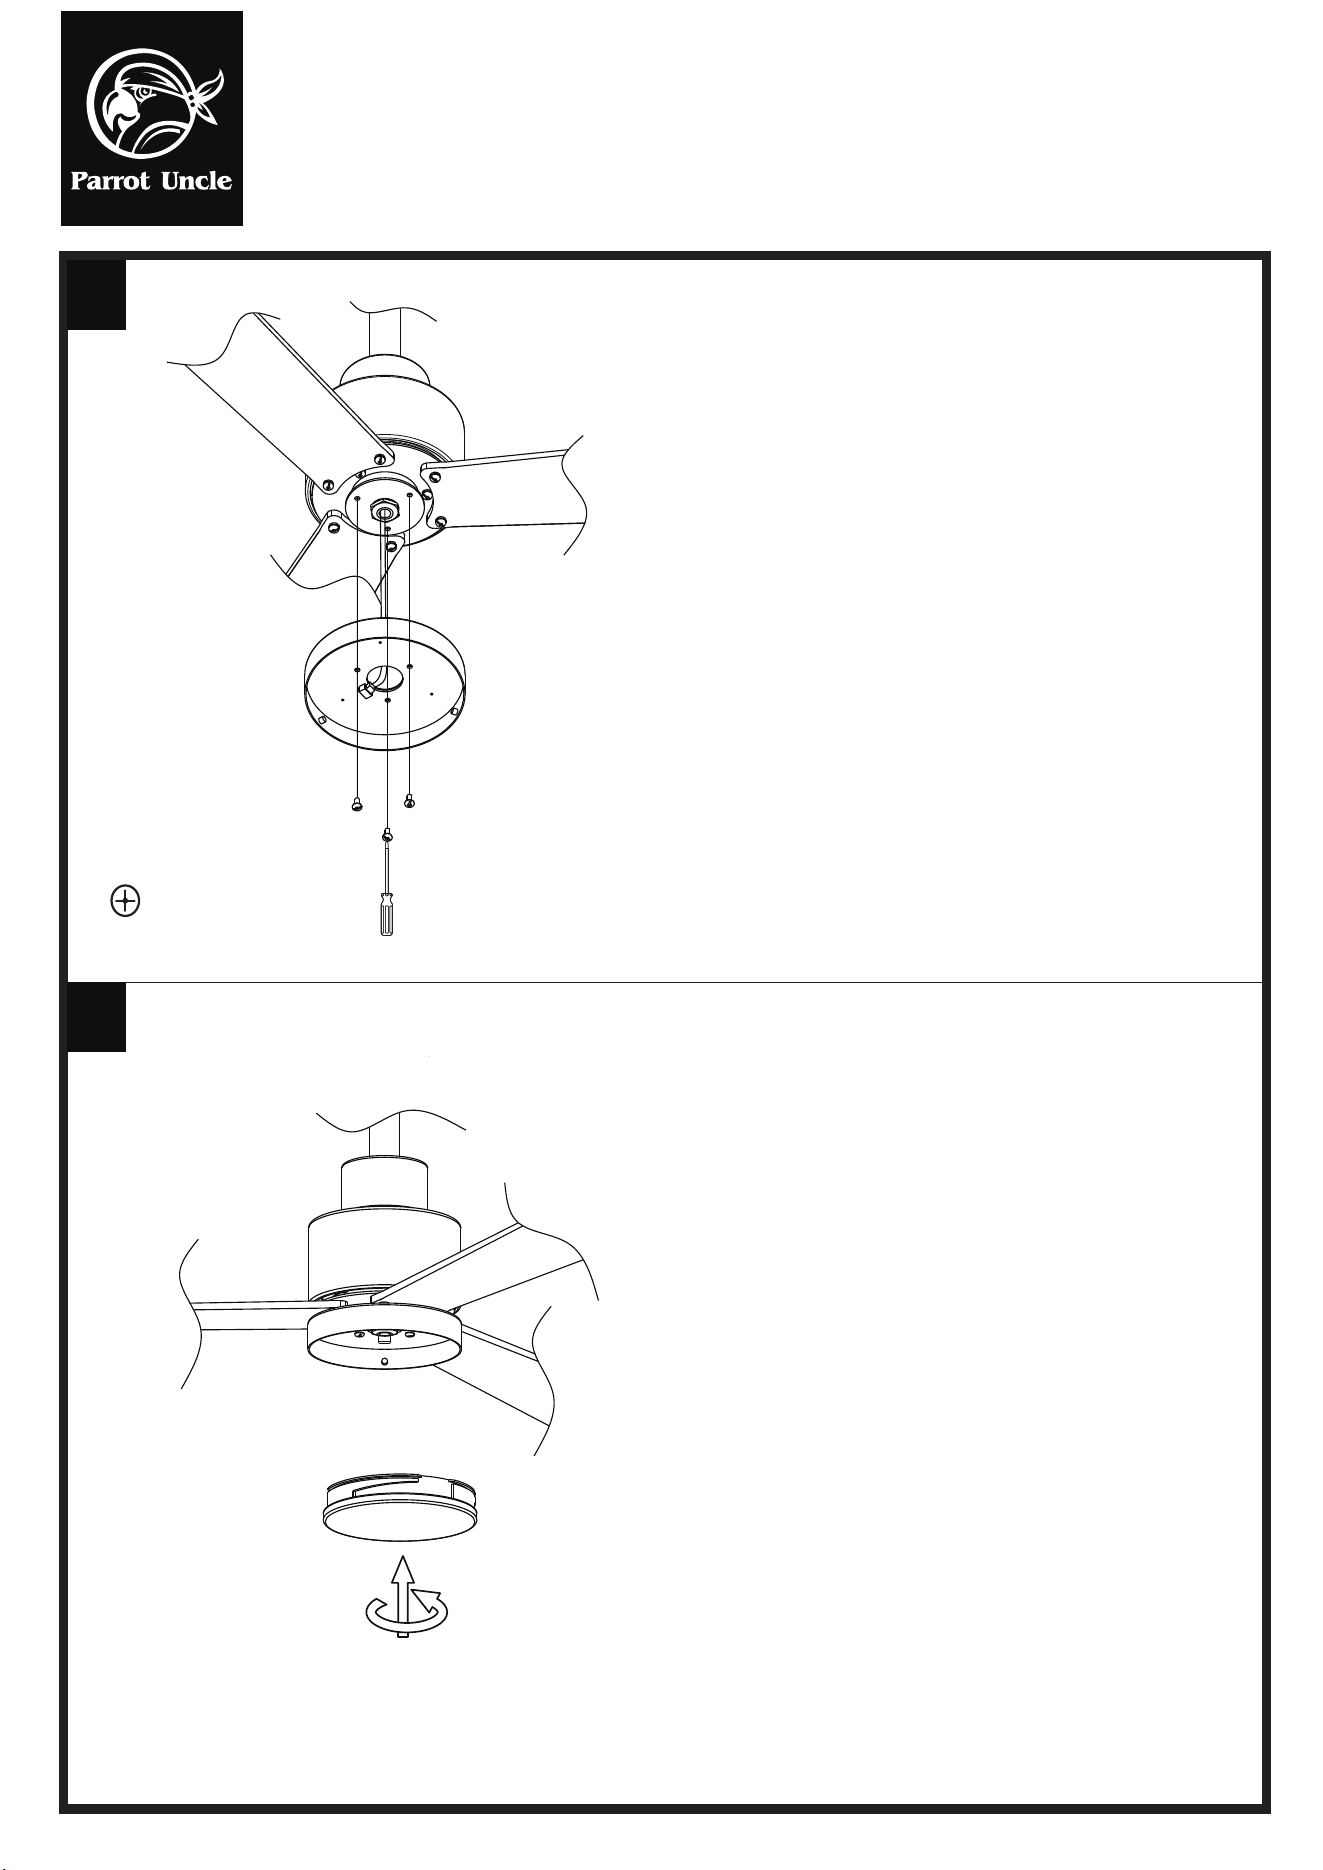
9
10
Loosen three screws from the fan-motor
assmebly.
Connect the WIRE CONNECTOR to the
LED light assembly.
F6014
WARNING: SHUT POWER OFF AT FUSE OR CIRCUIT BREAKER
Installation & Operating Instructions for the
Parrotuncle Owner's Installation, Manual
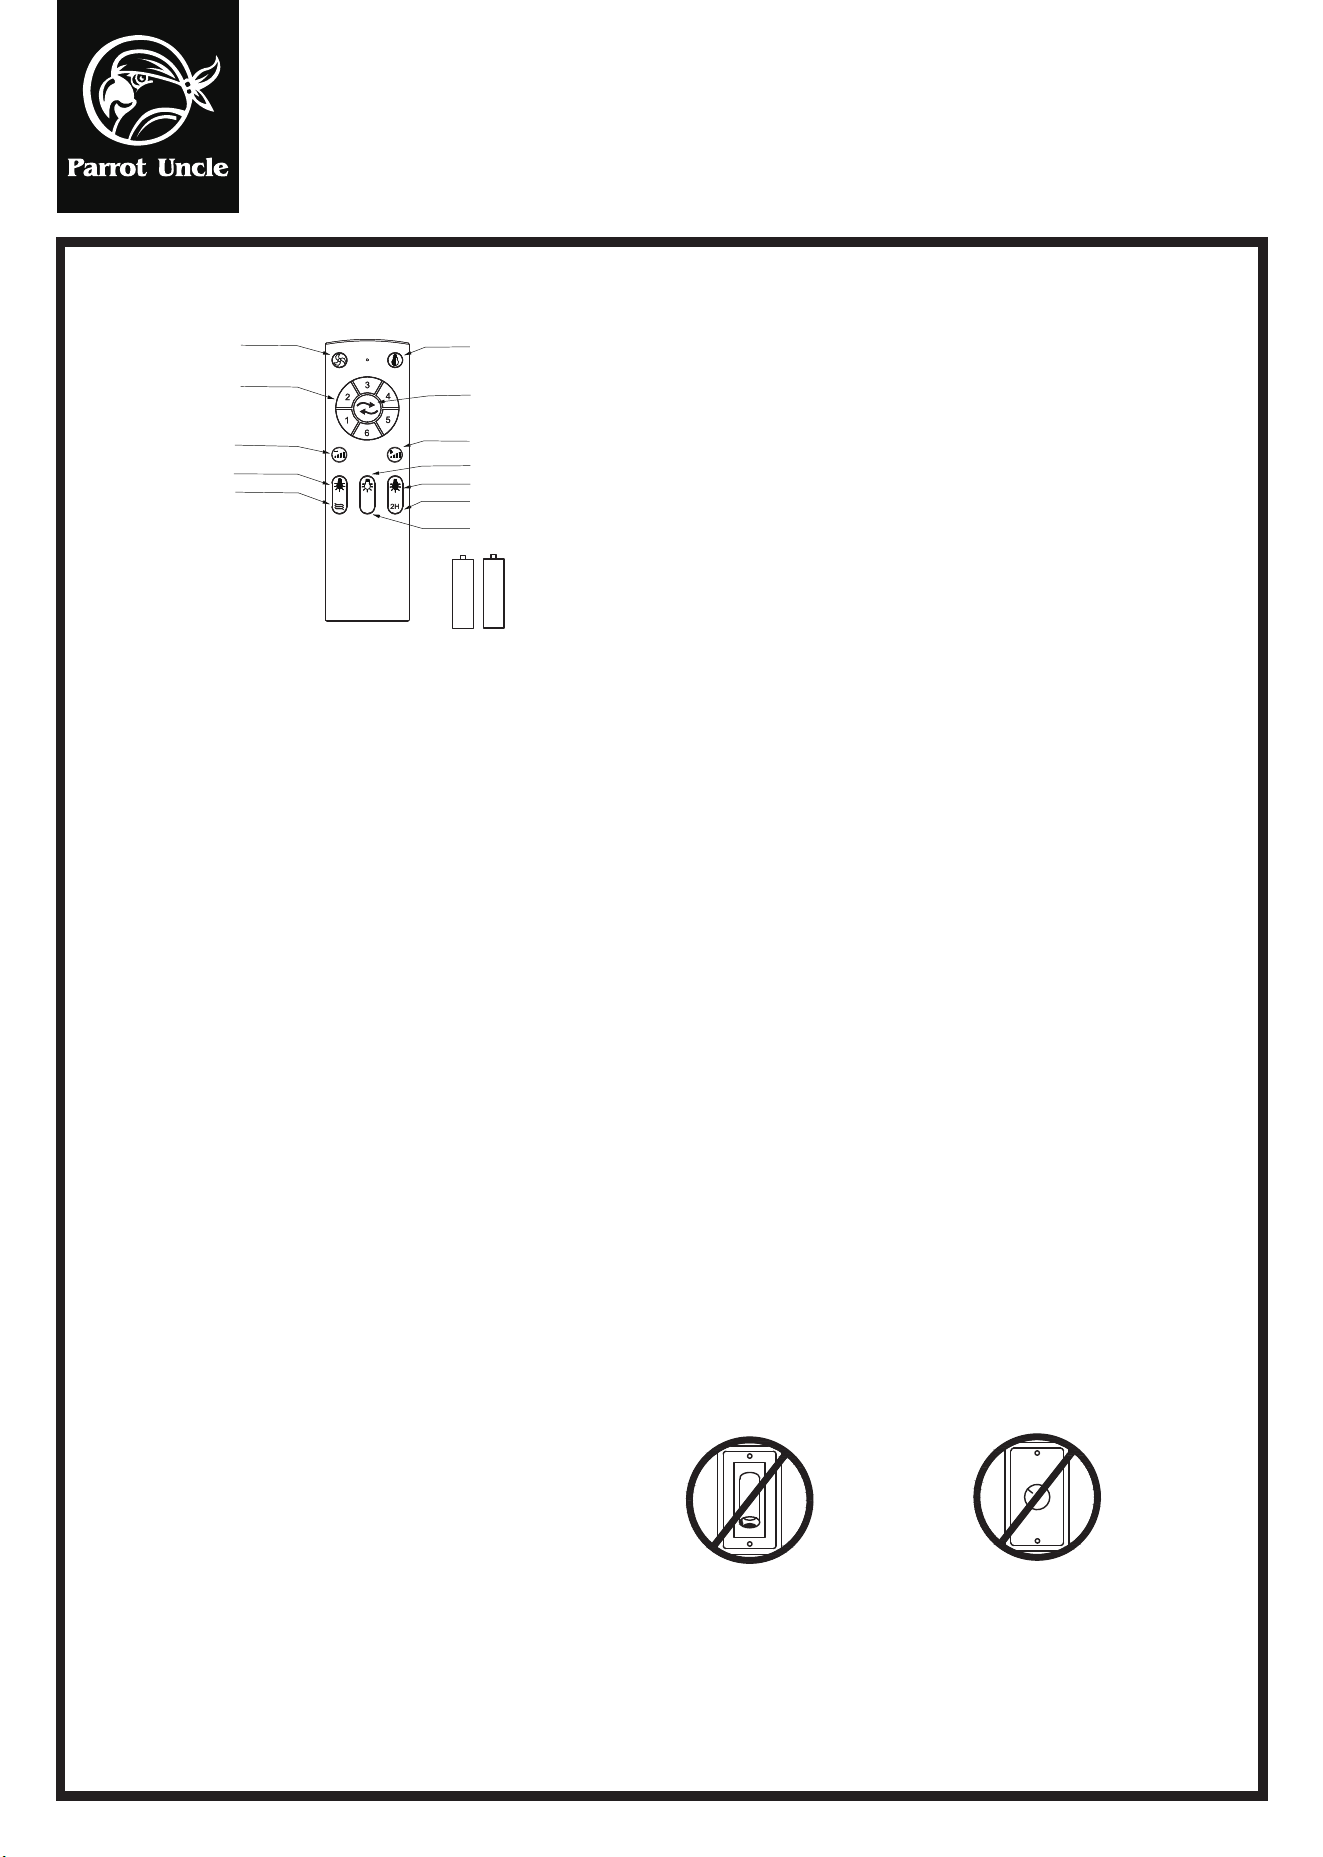
Lock the LED light assembly to the
fan-motor assembly with 3 screws.
Phillips
screwdriver
11
12
Attach the diffuser to the LED light
assembly fixture by gently turning the
cover anti-clockwise until it is fixed firmly
in place.
F6014
WARNING: SHUT POWER OFF AT FUSE OR CIRCUIT BREAKER
Installation & Operating Instructions for the
Parrotuncle Owner's Installation, Manual
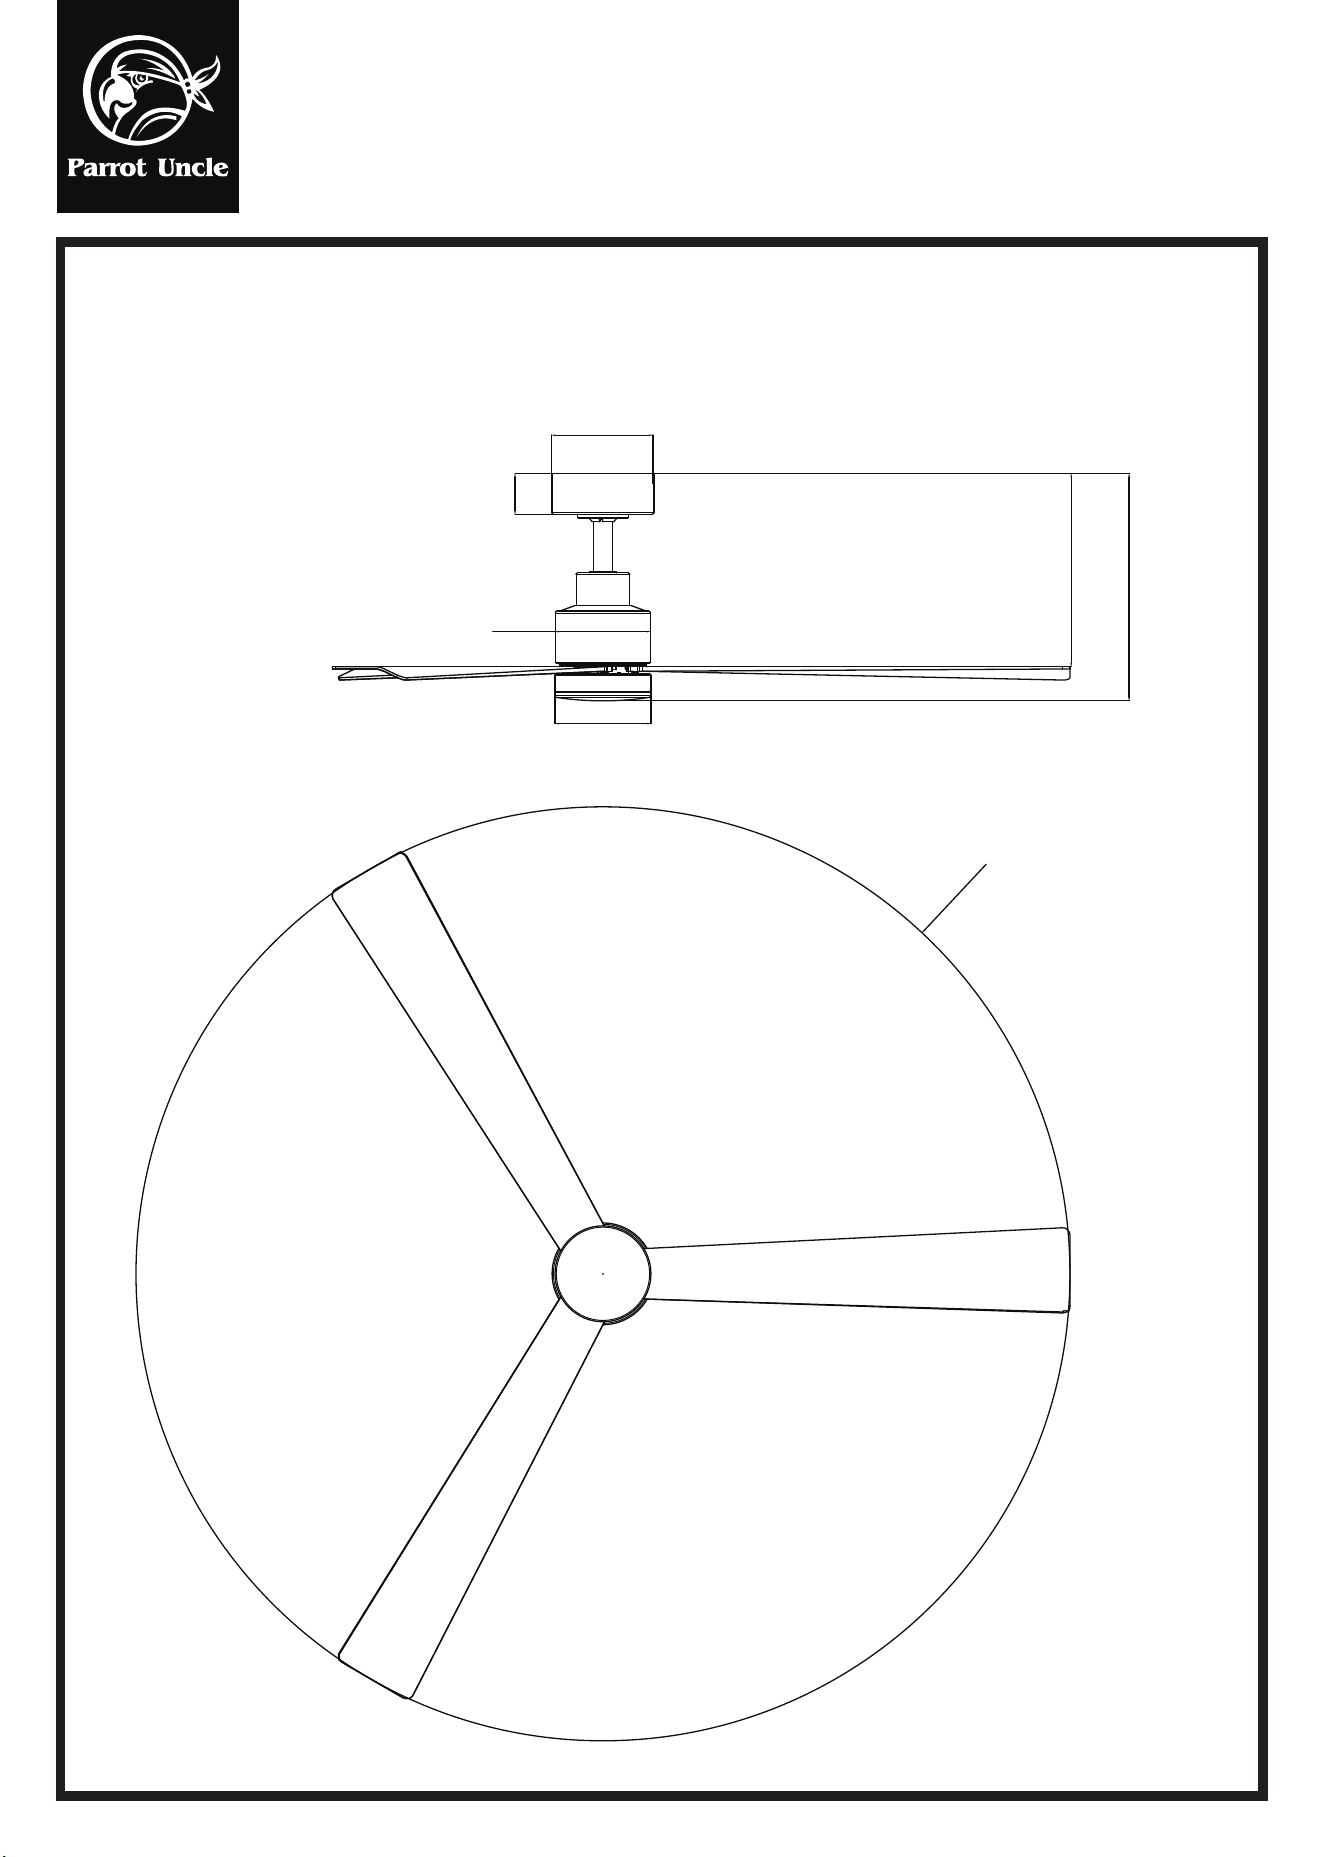
MODEL:M-17
OPERATION DISTANCE 20 FEET
30'30'
Fan ON/OFF Light ON/OFF
Fan Speed 1-6
Foward/Reverse
Light Dimmer-
Light Dimmer+
Warm white
Natual wind
Time 30 min.
Time 2 hour
Pure white
Natual white
LR03 1.5V AAA
LR03 1.5V AAA
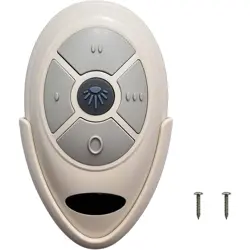
Learning code matching mode is used between REMOTE
CONTROL and receiver. Turn on the supply power within 5
seconds and press the REMOTE CONTROL “FAN ON/OFF”
button for 3 seconds, it can load normally after hearing a long
sound “bee”, which means learning successfully and it can
works normally.(PS: Learning mode is not accepted after
turn “ON” the supply power for 5 seconds.
OPERATING TRANSMITTER:
A. Install LR03/AAA1.5V*2 volt battery
(included). (To prevent damage to
transmitter, remove the battery if not used
for a long time).
B. Store the transmitter away from
excessive heat or humidity.
C. Operating the buttons on the panel of
the transmitter.
D. Setting the codes on the receiver:
FCC Statement:
This device complies with Part 15 of the FCC Rules. Operation is subject to the following two conditions.
This device may not cause harmful interference.
This device must accept any interference received, including interference that may cause undesired operation.
Changes or modifications not expressly approved by the party responsible for compliance could void the user's
authority to operate the equipment.
NOTE: This equipment has been tested and found to comply with the limits for a Class B digital, pursuant to Part 15 or the FCC
Rules. These limits are designed to provide reasonable protection against harmful interference in a residential installation. This equipment
generates, uses and can radiate radio frequency energy and, if not installed and used in accordance with the
instructions, may casue harmful interference to radio communications,
However, there is no guarantee that interference will not occur in a particular installation. If the equipment does cause harmful interference to
radio or television reception, which can be determined by turning the equipment off and on, the user is
encouraged to try to correct the interference by one or more of the following measures:
--- Reorient or relocate the receiving antenna.
--- Increase the separation between the equipment and receiver.
--- Connect the equipment into an outlet on a circuit different from that to which the receiver is connected.
--- Consult the dealer or an experienced radio/ TV technician for help.
WARNING:
Do NOT install this fan with variable speed wall
control or wall-mounted dimmer switch. It will
permanently damage the fan's remote control
and cause the fan's function to fail.
NO Variable speed wall control
NO Dimmer switch
If there are two or more ceiling fans installed in the same house, in order to prevent your ceiling fans from being affected by the
remote control of the adjacent ceiling fans.
(Power-off means you need to use a wall switch to shut down the power of the ceiling fan, if you do not have a
wall switch, please power off the whole room from the air circuit-breaker for each room)
After installing the remote control receiver on the ceiling fan
1: Turn on the power of the 1# ceiling fan receiver (the power of the 2# receiver is kept in a power-off state),Turn on the supply
power within 5 seconds and press the REMOTE CONTROL “FAN ON/OFF” button for 3 seconds, it can load normally after hearing
a long sound “bee”, which means learning successfully and it can works normally.
2: Turn on the power of the 2# ceiling fan receiver (the power of the 1# receiver is kept in a power-off state),Turn on the supply
power within 5 seconds and press the REMOTE CONTROL “FAN ON/OFF” button for 3 seconds, it can load normally after hearing
a long sound “bee”, which means learning successfully and it can works normally.
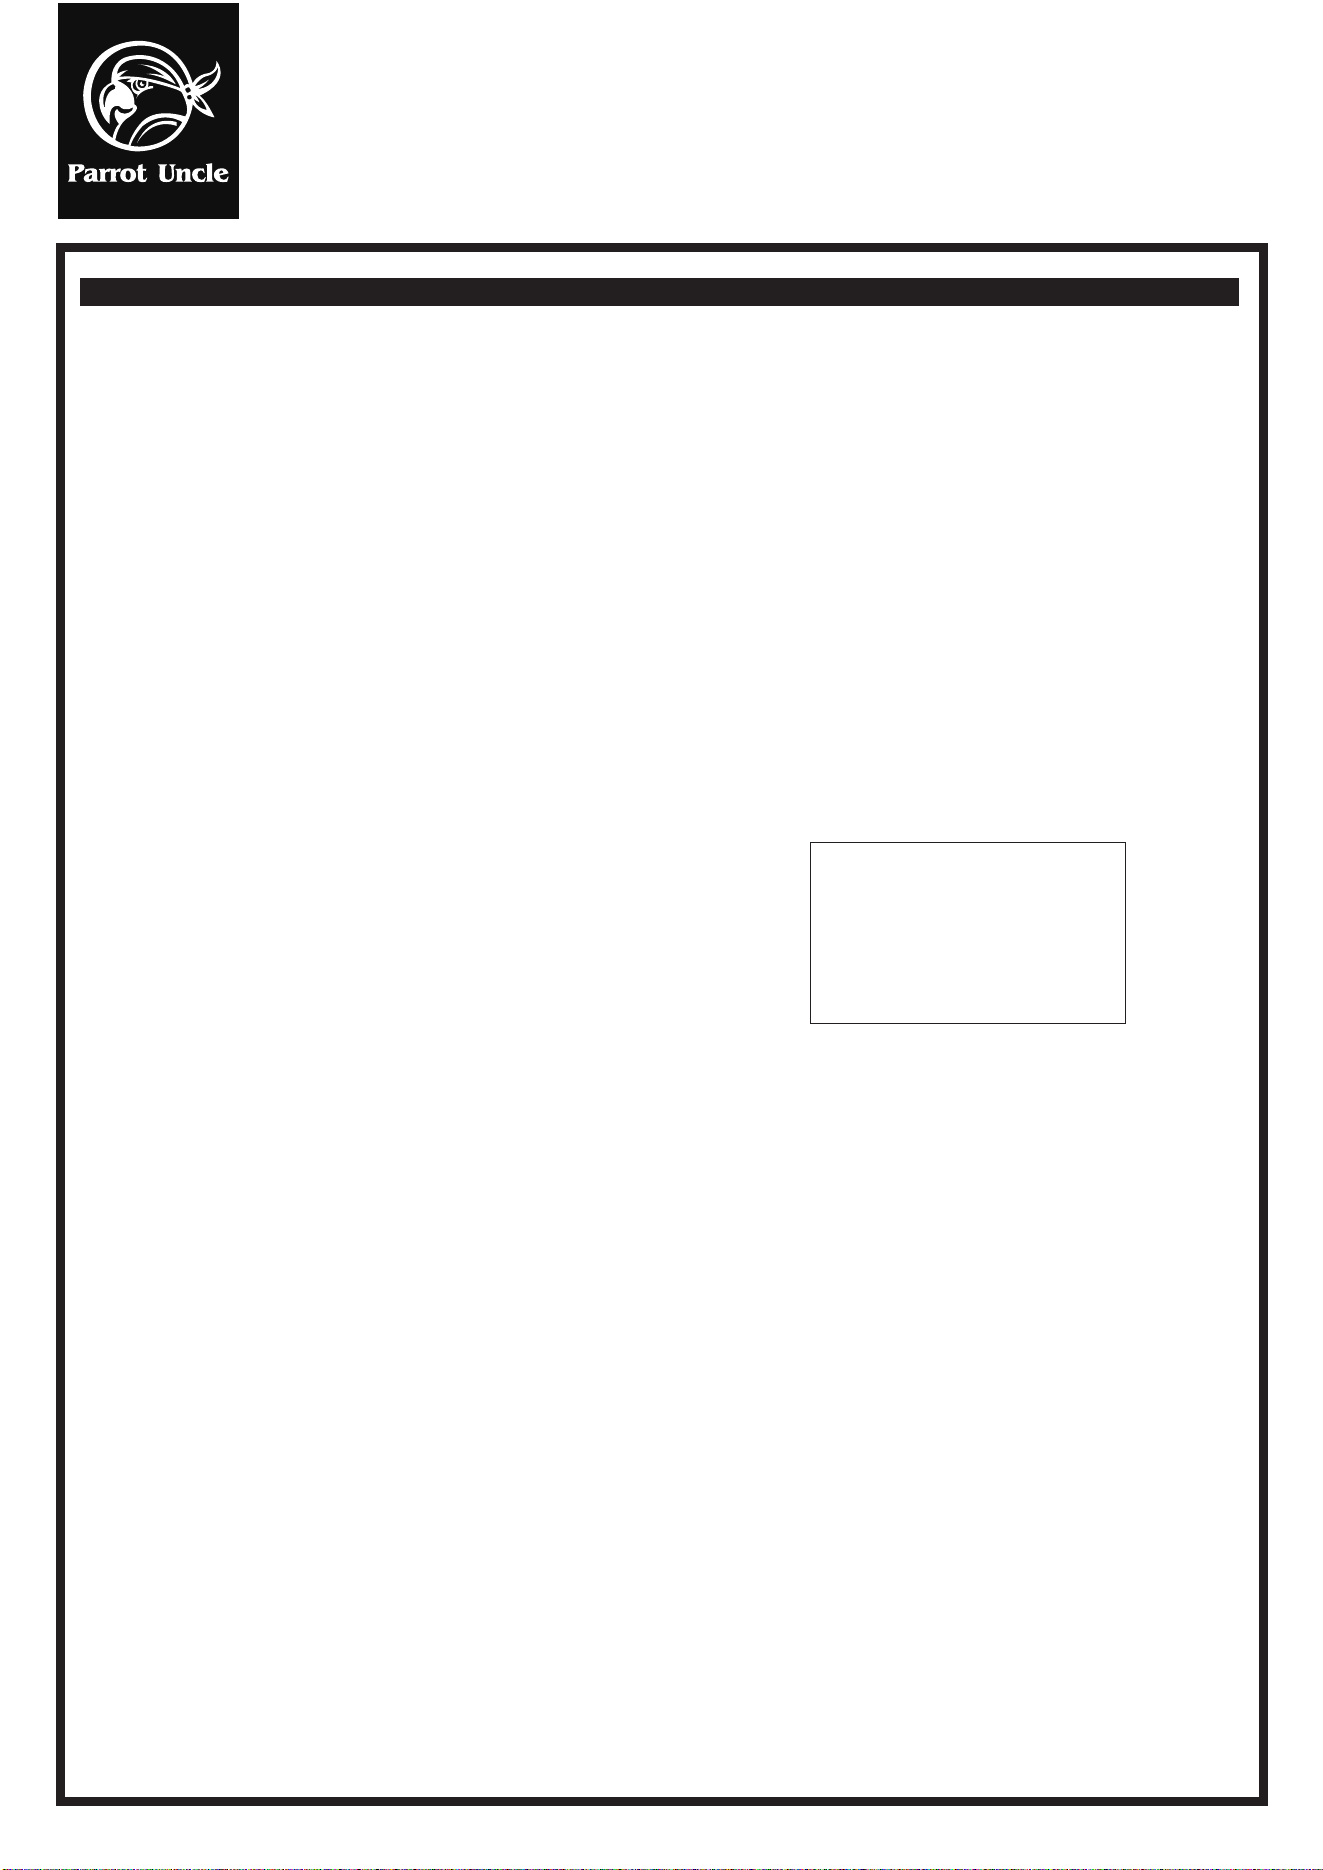
12.3In
10.5In
Ø5.5In
2.2In
Ø5.1In
Ø5.2In
Ø52In
F6014
WARNING: SHUT POWER OFF AT FUSE OR CIRCUIT BREAKER
Installation & Operating Instructions for the
Parrotuncle Owner's Installation, Manual
Size of product
F6014
WARNING: SHUT POWER OFF AT FUSE OR CIRCUIT BREAKER
Installation & Operating Instructions for the
Parrotuncle Owner's Installation, Manual
AFTER INSTALLATION
WOBBLE
The fan blades have been adjusted in the factory to minimize any wobble.
NOTE: CEILING FANS TEND TO MOVE DURING OPERATION DUE TO THE FACT THAT THEY ARE
MOUNTED ON A . IF THE FAN WAS MOUNTED RIGIDLY TO THE CEILING, IT MOUNTING BRACKET
WOULD CAUSE EXCESS VIBRATION. MOVEMENT OF A FEW CENTIMETERS
IS QUITE ACCEPTABLE AND DOES NOT SUGGEST ANY PROBLEM.
TO REDUCE THE FAN WOBBLE: PLEASE CHECK THAT ALL SCREWS WHICH SECURED THE
MOUNTING BRACKET AND DOWNROD ARE SECURE.
BALANCING A WOBBLING CEILING FAN:
1.Check that all blade and blade arm screws are secure.
2.Most fan wobbling problems are caused when blade levels are unequal. Check this level by selecting a
point on the ceiling above the tip of one of the blades. Measure this distance.Rotate the fan until the next blade
is positioned for measurement. Repeat for each blade. The distance deviation should be equal within / "( . cm).18 032
3.If the blade wobble is still noticeable, interchanging
two adjacent (side by side) blades can redistribute the
weight and possibly result in smoother operation.
WARNING: TO REDUCE THE RI
SK OF PERSONAL
INJURY, DO NOT BEND THE
BLADE ARM WHILE INSTALLING, BALANCING THE BLADES, OR
CLEANING THE FAN. DO
NOT INSERT FOREIGN OBJECTS BETWEEN ROTATING FAN BLADES.
NOISE
Ckeck Bulb to make sure it is installed correctly.
This is normal. Please allow a 24 -
hour “breaking-in” period, most noises associated with a new fan disappear during the time.
CARE AND CLEANING
1.Periodic cleaning of your ceiling fan is the only maintenance required. Use a soft brush or lint free cloth to
avoid scratching the paint finish. Please make sure to turn off electricity power before you clean your fan.
2.Do not use water when cleaning your ceiling fan. It could damage the motor or the blades and create the
possibility of an electrical shock.
3.Motor has permanently lubricated ball bearing. Do not need to oil fan.
NOTE: MAKE SURE THE POWER IS OFF AT THE ELECTRICAL PANEL BOX BEFORE YOU ATTEMPT
ANY CLEANING OR REPAIRS.
LIGHT IS NOT WORKING
When it is quiet (especially at night) you may hear occasional small noises.
Remove non-working bulb and replace with a bulb that is known to be a good working bulb.
To reset the remote control:Turn off power to fan using the wall switch or circuit breaker,remover batteries from
remote,wait 10 seconds,replace batteries and turn power on.