OPT08-V2
Thank you for choosing our product!
Customer Service Contact
To ensure proper installation and safe use of your smart toilet, please read this manual carefully.
If you encounter any missing or damaged parts, please contact our customer service team.
Be sure to include your Order ID for faster service.
Email: support-cs@hkfoam.com
Response Time: Within 24 hours

Remote control instructions
Instructions for using the knob on the side of the toilet
Safety directory
Hardware lists
Component name
Safety cautions
Safety and prohibited matters
Initial inspection before use
Important safety warning – regular testing
of the leakage protection switch
Catalogue
For any questions or support, please email: [ support-cs@hkfoam.com ]
02
Please be sure to observe the following
Daily cleaning and maintenance
Foot sensor user guide
Common fault diagnosis
Installation steps for smart toilet
Battery replacement and installation
Product standard
02
03
03
04
04
05
07
08
08
09
10
12
14
18
19
Turn the bowl pre-wetting and auto flush-on-leave functions on or off
09
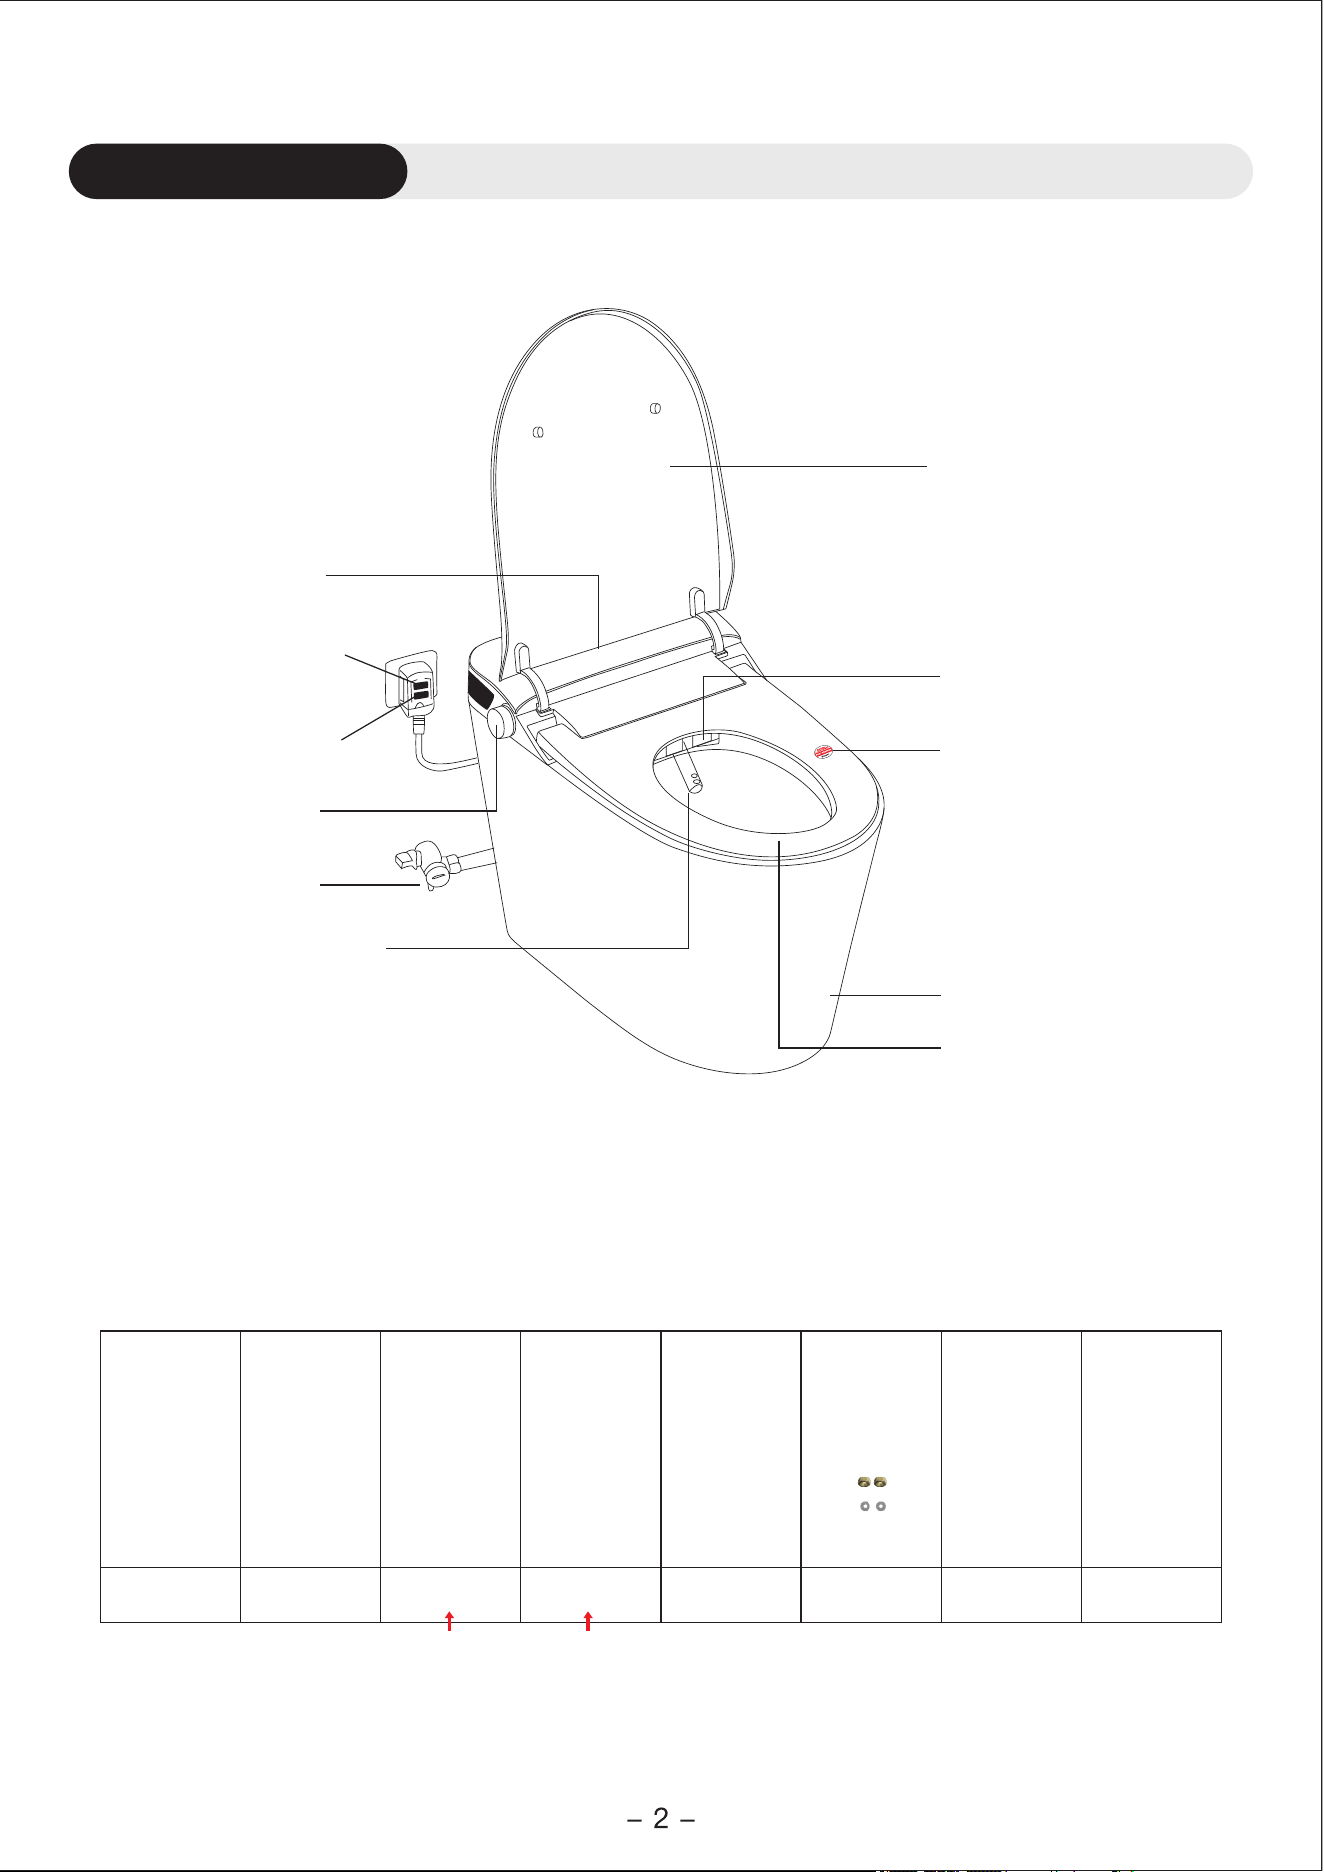
Component name
Please check if all accessories listed below have been received.
One Click Knob
Human Body Sensor
Angle Valve
The Power On
Button On The Plug
The Power Off
Button On The Plug
Indicator
Cleaning Nozzle
Toilet Lid
Dryer
Hardware Lists
1pc
flange ring
A
1pc
instruction
B
1set
angle valve
C
1set
D
1pc
E
fixed disk
screws
1set
F
fixed disk
1set
G
Power Outage
Flushing Battery
remote control
battery
3/8" female x
3/4" male adapter
H
1pc
The C angle valve (1/2") fits 1/2" non-threaded copper pipes (water pipes).
The D adapter fits 3/8" angle valves. Use whichever one matches your installation; both are not required.
This is the seat sensor area. Please
do not remove this label.
Important: Before using the feminine
wash, rear wash, or drying functions,
you must be seated within the sensor
area on the toilet seat. While these
functions are in use, do not lift your
hips from the sensor area, or the
functions will stop immediately.
Foot Sensor
Toilet Seat
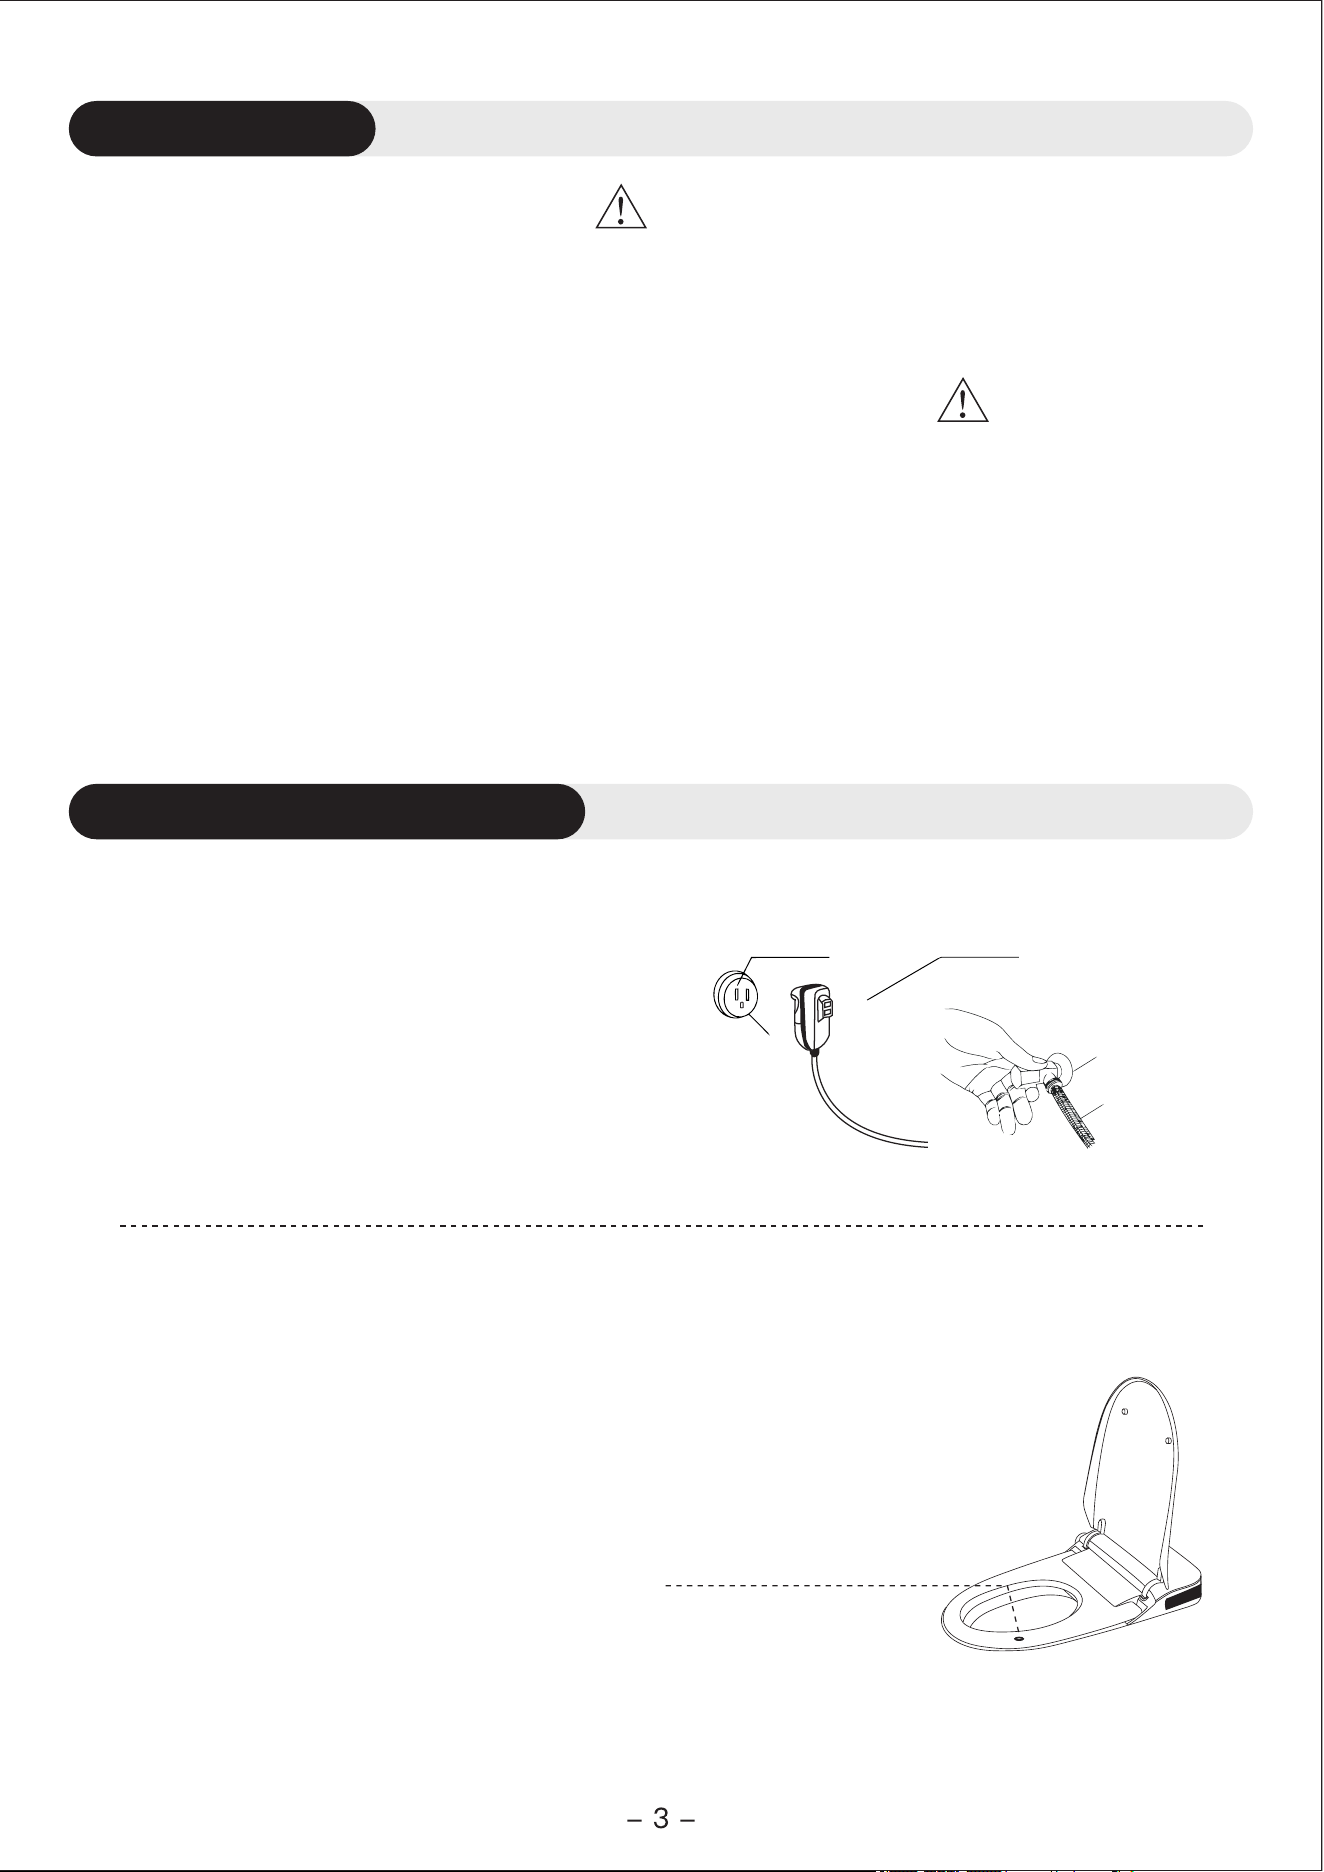
Initial inspection before use
Power plug
with ground wire
Safety directory
1. Do not place the product in damp or wet locations.
2. Do not drop the remote control into water.
3. Do not spray water onto the product or into the power outlet.
Please cautiously read before installing and using.
Warning: To avoid electric shock
1. Young children and users insensitive to temperature should be accompanied by others
when using this product. Turn off or lower the seat temperature when necessary.
2. Use this product only as described in the manual. Do not connect other equipment.
3. Do not continue to use the product if it is malfunctioning, damaged, or has been exposed
to water. Send it to an authorized service center for repair.
4. Ensure that the power cord and wires are not damaged or exposed to heat.
5. Do not use this product under the influence of alcohol, medication, or in an unstable condition.
6. Do not plug or unplug the product or hoses while in use.
7. Do not use outdoors.
Warning: To prevent burns, electric shock, fire, or injury
Note: To ensure the normal use of the product,
please follow the instructions to text.
1. Insert the power plug into a 110V AC outlet.
2. Check that the indicator on the digital display
panel is illuminated.
3. Check that the inlet valve is turned on.
4. Ensure that the hose between the wall angle
valve and the toilet inlet valve is properly installed.
110V socket
Angle valve
Water inlet hose
Caution: Items to Check Before Use
1. Check for water pipe leaks by wiping all connections with absorbent paper.
2. Press the seat near the seat sensor and check for a response sound.
3. Check that the damping structure operates normally.
4. Verify that both the seat detection and foot detection functions are enabled.
Seating sensing position
Safety cautions
Note: please cautiously read before using
This product is an electrical appliance. Do not install it in locations where it may be splashed with water
or exposed to high humidity. When used in a bathroom, ensure proper ventilation by installing a vent.
The power outlet should be installed as follows:
• The outlet must be positioned at least 11.8 in above the floor.
• Keep the outlet as far away from the bathtub as possible.
• The outlet circuit must be equipped with a high-sensitivity, fast-acting leakage protection switch (rated
operating current ≤ 15 mA), or be protected by an insulated transformer with a capacity of 1.5–3 kVA.
Please read carefully before using. The cautions listed here are
related to safety and please follow.
This product uses a three-prong plug (with ground wire).
Risk of electric shock may occur in case of fault or electrical leakage.
If the wall outlet does not provide a ground connection, contact a licensed electrician.
Use only AC 110V power supply, and ensure wiring complies with relevant regulations.
Warning - Be sure to firmly connect ground wires
Proper grounding of this product is required.
Without grounding, there is a risk of electric shock.
Note: Proper grounding means that the grounding resistance must be below 100 Ω, and the grounding
wires of the switchboard must be copper wires with a diameter of at least 1.6 mm.
When installing in a bathroom, ensure that the power plug is sealed with silica gel for waterproofing.
*Using the wrong power supply may cause a fire.*
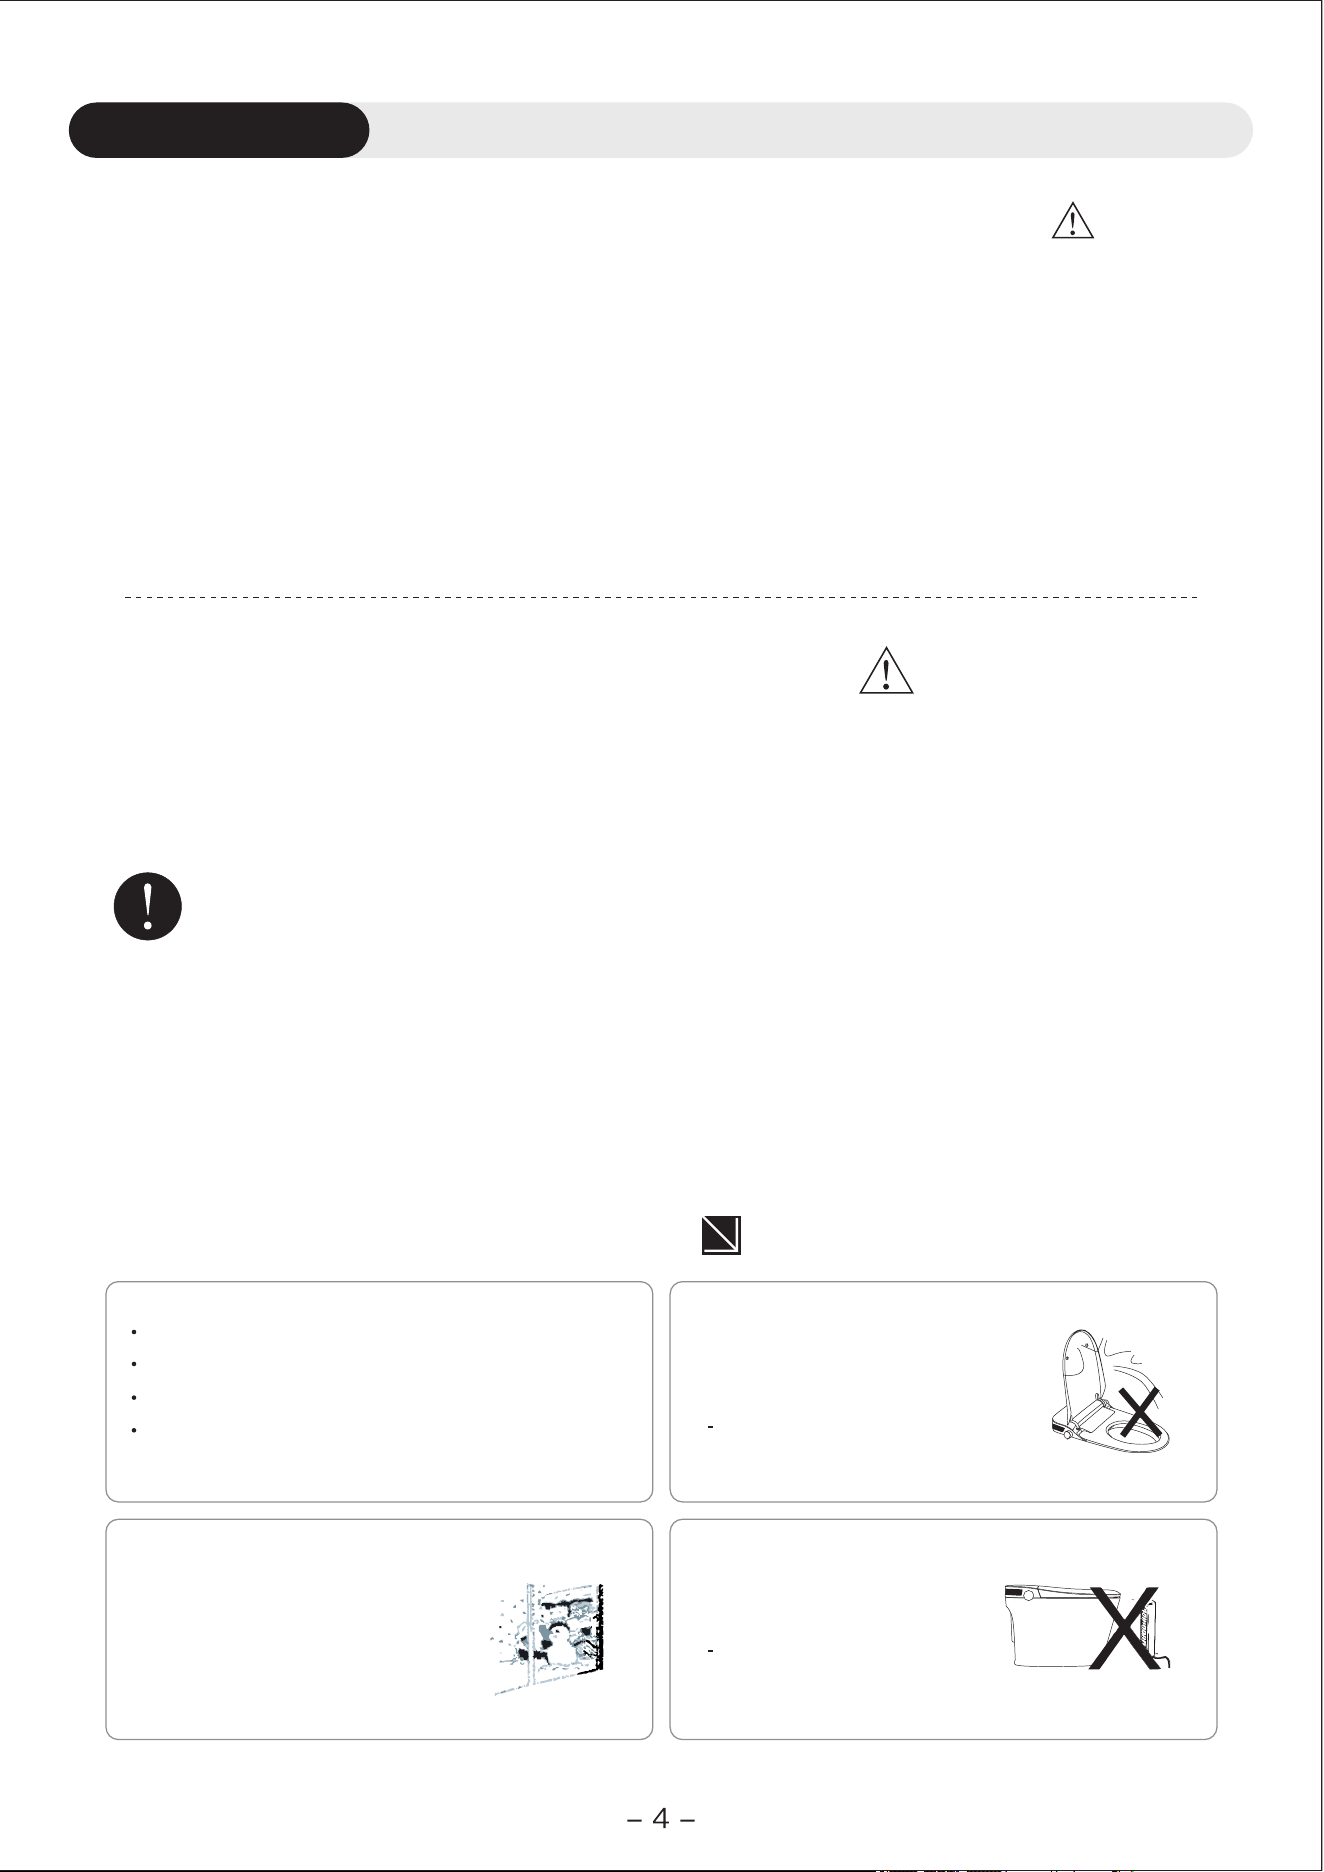
Please be sure to observe the following
Do not allow urine to splash onto the nozzle.
Unplug the unit during thunderstorms.
Do not flush the unit directly with water.
Do not wipe the seat or cover with rough cloth
or toilet paper. Use a soft damp cloth instead.
Please do not open the seat
ring or cover violently.
May cause cracking or malfunction.
Please take antifreeze
measures by freezing.
Please do not put heaters
near this product.
Discoloration or malfunction
will occur.
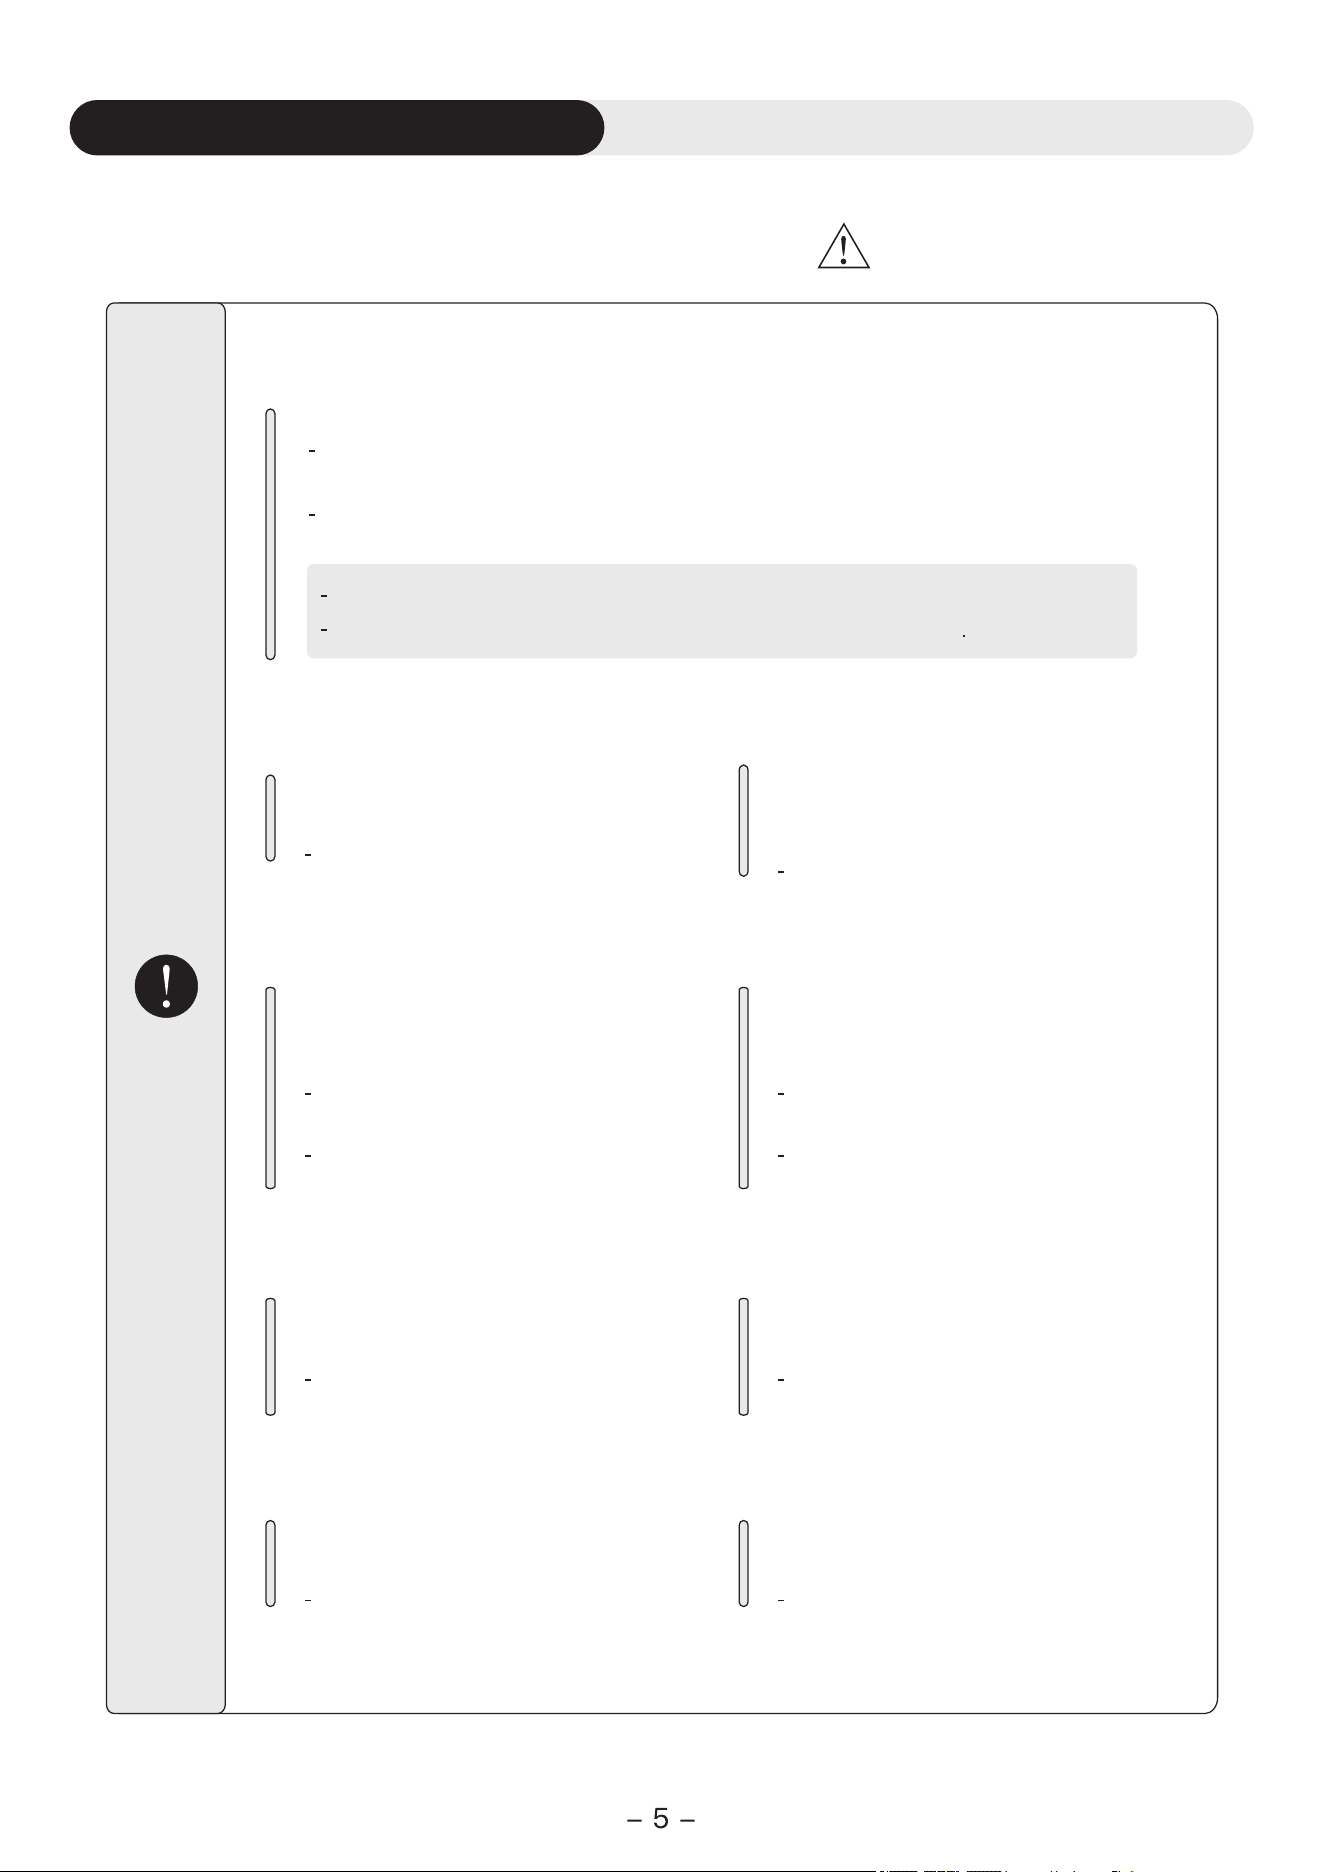
Safety and prohibited matters
Note: please cautiously read before using
Please read carefully before using.
The cautions listed here are related to safety and please follow.
Notice heat burn
Please turn the seat temperature down or off when sitting on the toilet for
a long time.
Please set the temperature to room temperature when the following persons
use the seat to dry gently.
Children, the elderly, the sick, the disabled, etc.
People who take sleeping pills, get drunk and get overtired.
Do not use any power source
other than AC 110V
It may start a fire
Keep cigarettes and other
flammable objects away from
the product
It may start a fire
Please don't sprinkle water or
rinse on product essence or the
power plug
May arouse a fire or get an electric
shock
May cause toilet break, damage or
indoor seepage.
When long time didn't use, please
pull out the power plug.
For safety, please pull out the power
plug
For re-use, please drain water for
one minute before use
Please do not flush other items
except for urine and feces
May cause then block, sewage
outside over flows
Do not unplug the power plug
with wet hands
It may cause electric shock
Do not distort or damage the
water inlet
It may cause a leak
Do not use loose and unstable
power sockets
It may cause fire or electric shock
Must obey
Prohibit
Do not continue to use the
product when it breaks down
When the following occurs, please
unplug the power plug, close the
inlet angle valve stop the inlet.
Ceramic WC is leaking
Cracks appear
Abnormal sound and smell
Fume-off
Abnormal heating
The toilet is clogged
lf continued under the condition of
failure, it may cause fire, electric
shock or indoor seepage problems
Do not damage the power cord
or toilet seat cable
Don't pull
Don't process
Don't heat
Don't forcibly bent
Do not place heavy objects on the
power cord and toilet seat connection
line
May cause fire, electric shock or
short circuit. lf the power supply is
damaged, please contact a
professional for repair
Do not disassemble, repair or
transform the product without
permission
It may cause a fire or electric shock
Do not use extension wires.
Otherwise, it may cause a fire or
electric shock
Do not connect wires or use extension
cords, which may cause fire and
electric shock.
Do not use unhealthy water
May cause skin irritation and other
problems
Do not install the power adapter
/control unit in wet areas of the
bathroom (such as the shower
or sink)
This may result in fire or electric
shock
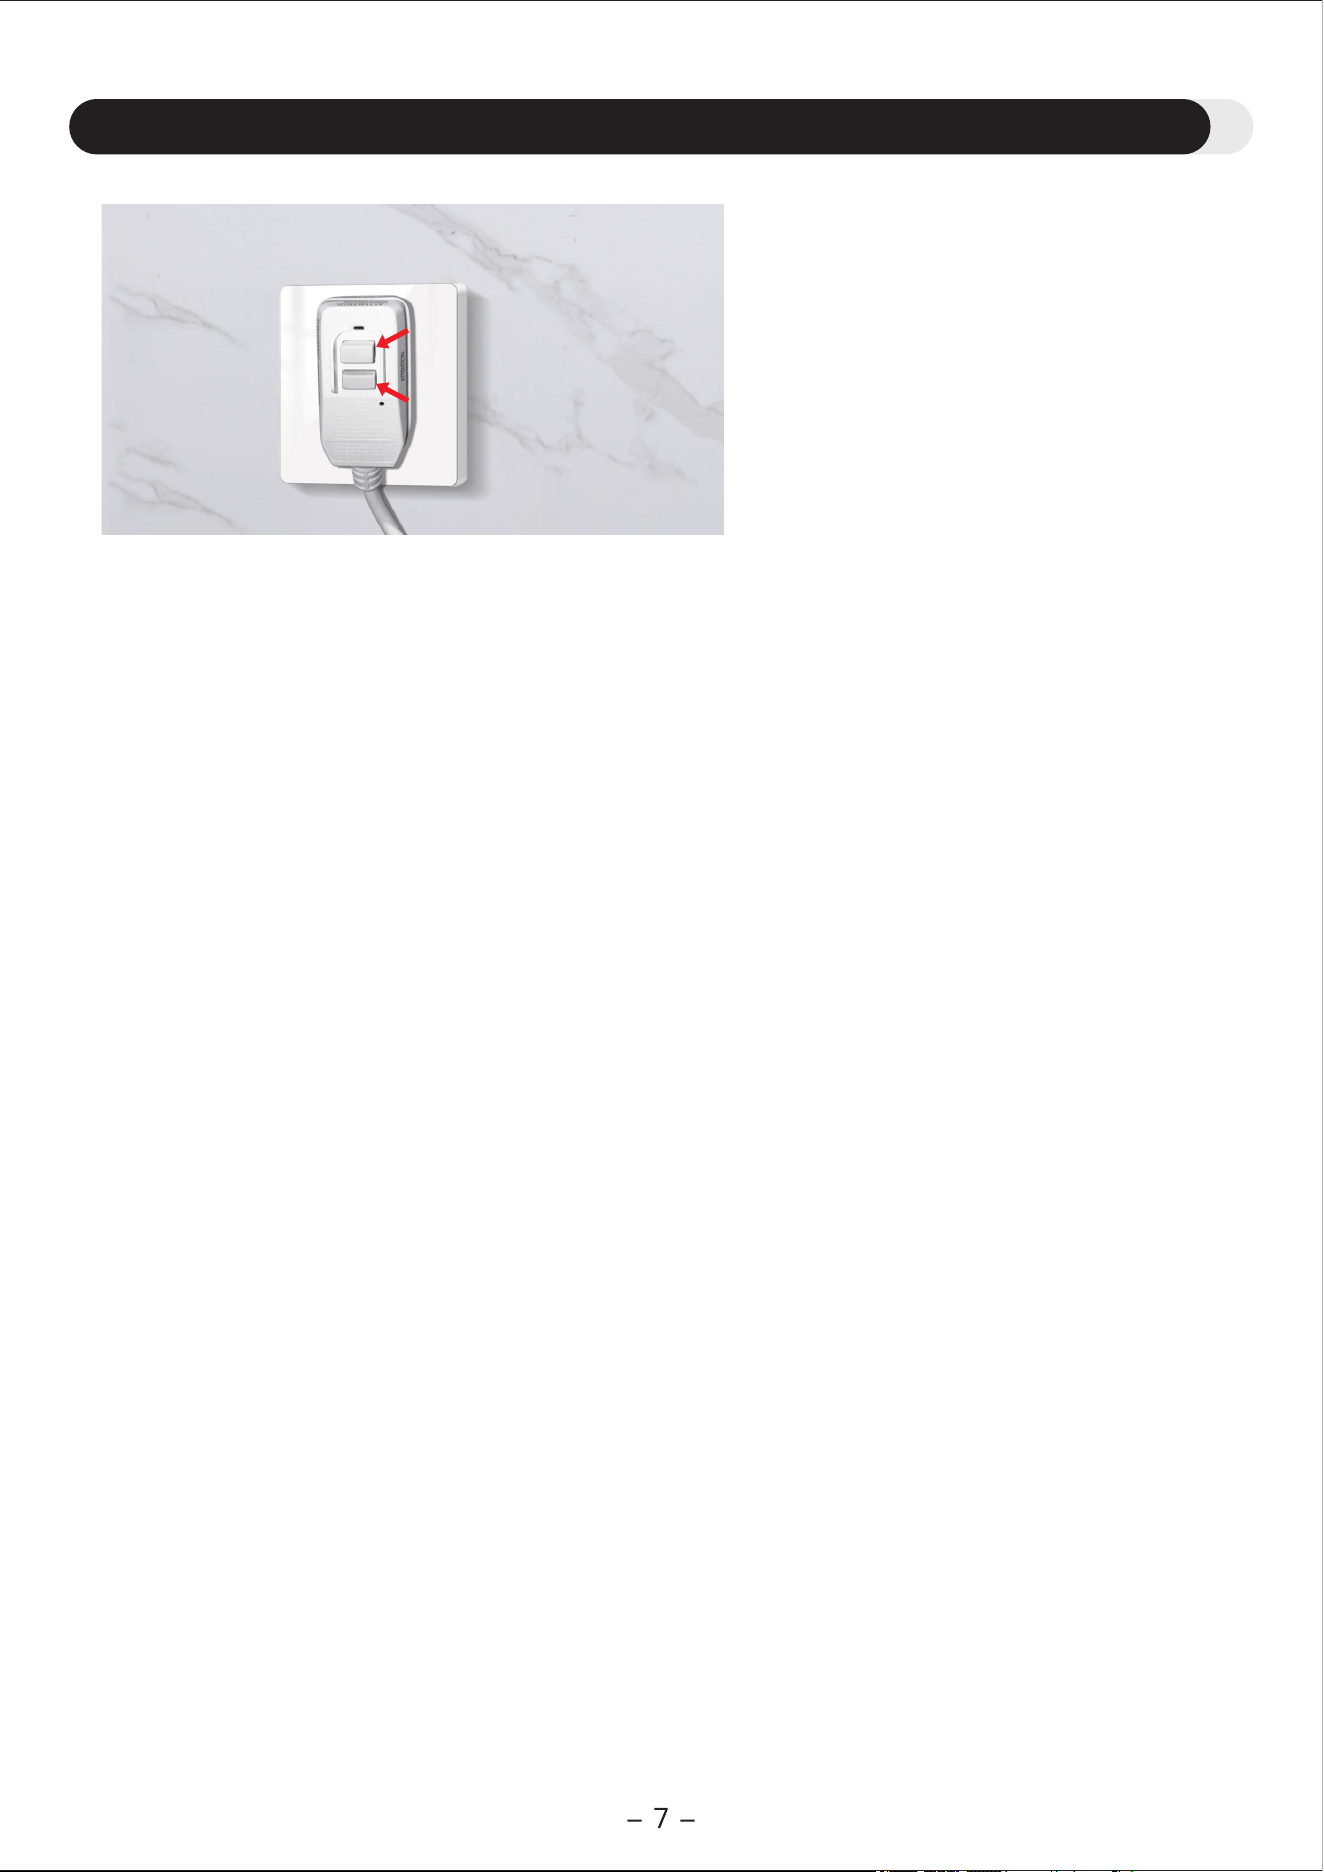
2. How to Test — Please follow these simple steps:
Make sure the plug is connected to the power supply (plugged into an outlet and powered), but the unit
does not need to be turned on.
①
Firmly press the RESET button on the plug to connect the power.②
Firmly press the TEST button on the plug. You should hear a clear “click,” and the switch’s trip
mechanism will immediately activate, cutting off the power (the RESET button will pop out to the “OFF”
position).
③
3. How to Interpret the Results
If the switch trips normally: The leakage protection function is working correctly. After the test, press the
RESET button again to restore normal power supply.
①
If pressing the TEST button does nothing and power is not cut off: Stop using this product immediately!
This indicates that the leakage protection function has failed, and continued use poses a risk of electric
shock. Disconnect the appliance from the power supply at once and contact our after-sales service
center or a licensed electrician for inspection or replacement.
②
4. Notes
This test takes only a few seconds—please make it a regular habit.①
The test simulates a leakage scenario (such as electric shock) to verify the switch function. It will not
damage the appliance.
②
This test allows users to confirm that the switch is working, but it does not replace a professional safety
inspection by a qualified electrician.
③
Important safety warning – regular testing of the leakage protection switch
The RESET button
The TEST button
1. Importance of Testing
To ensure your safety, the leakage protection switch (hereinafter referred to as the “protection switch”)
equipped with this product must always remain in proper working condition. Regular testing is the only
way to verify that it functions effectively. We strongly recommend testing it at least once a month.
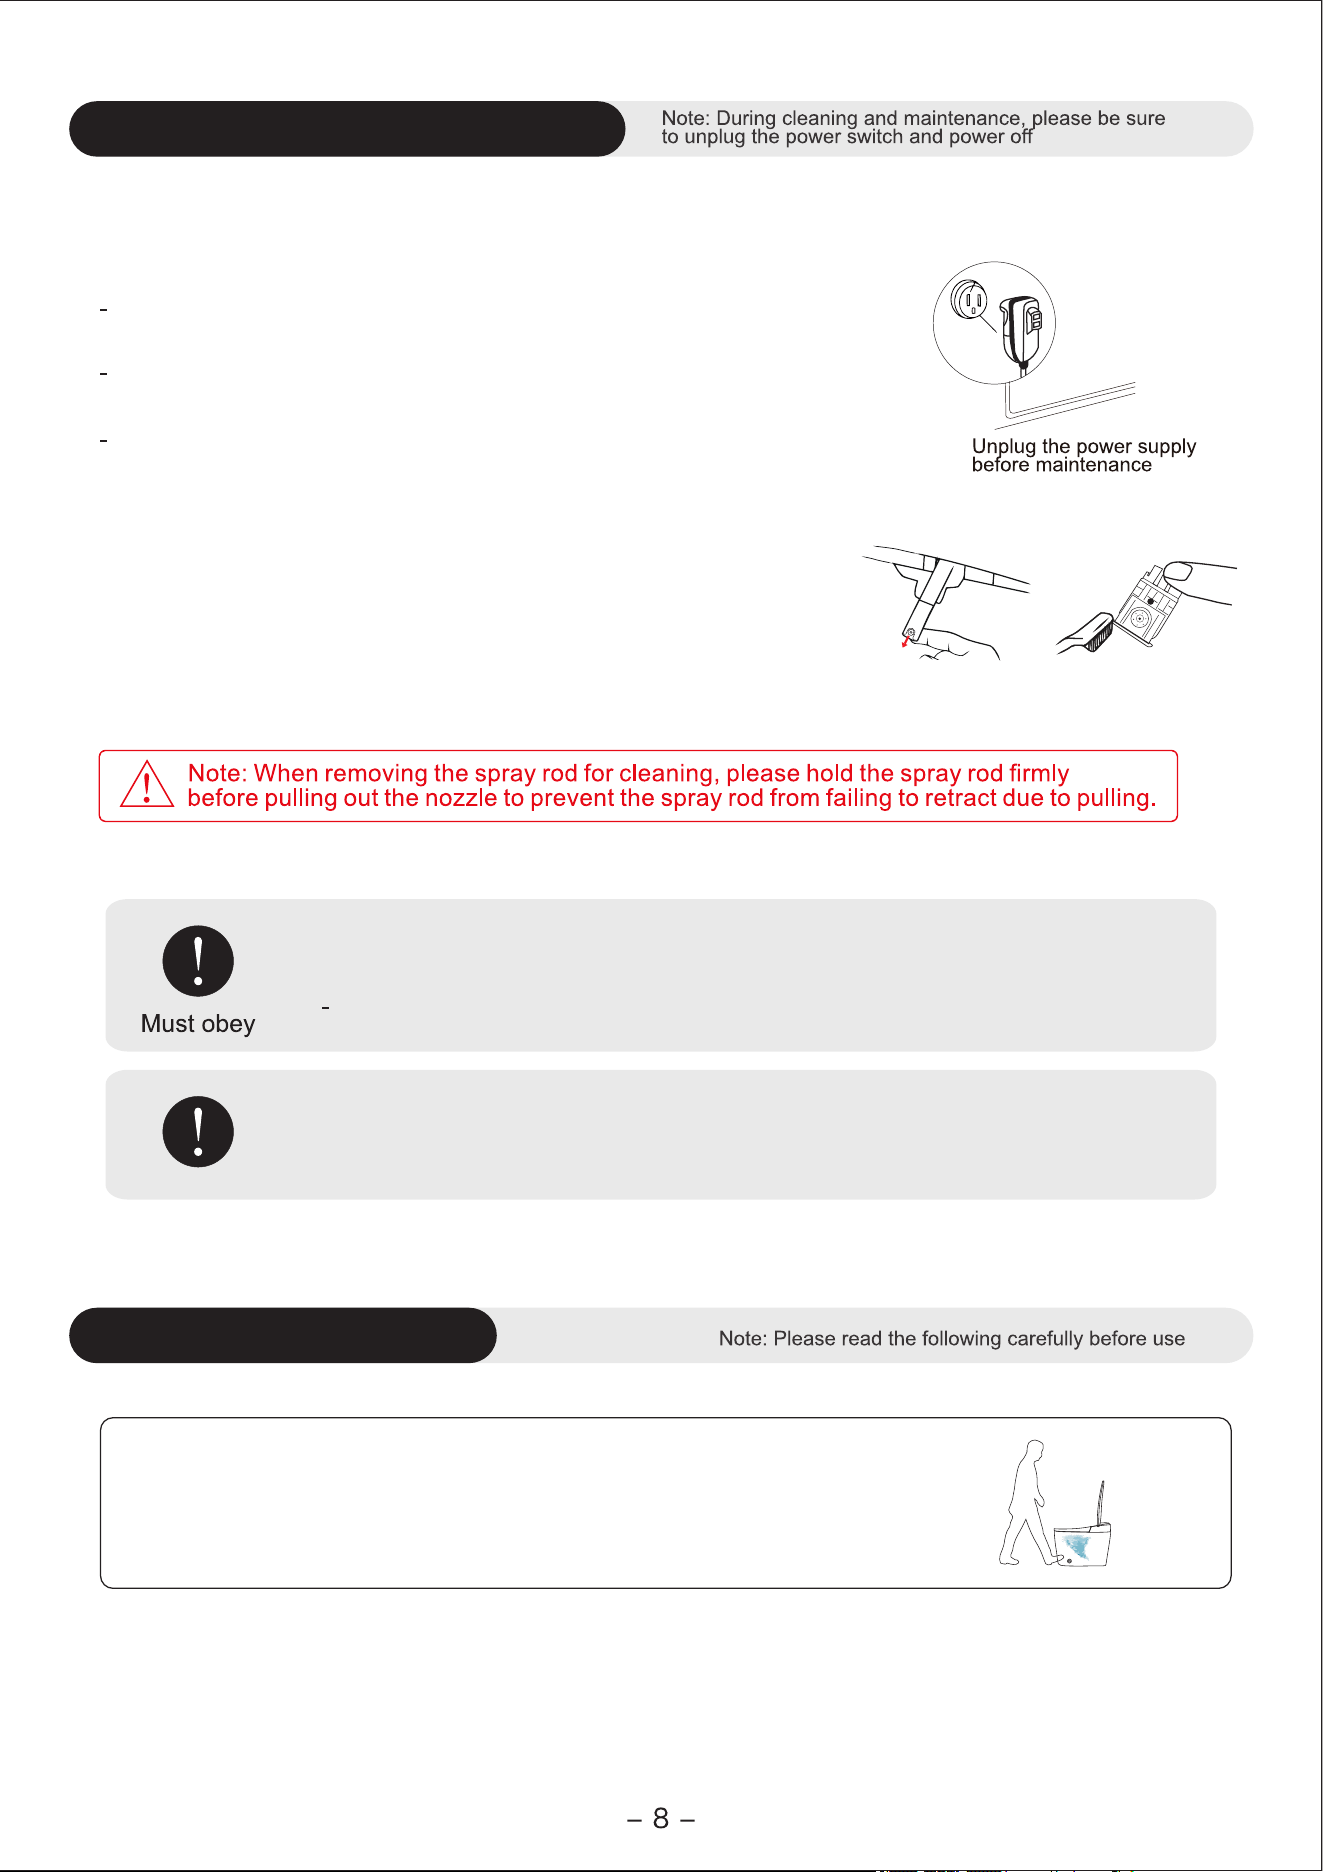
Daily cleaning and maintenance
Smart toilet cleaning and maintenance methods
Please wipe it with a soft cloth dampened with water
If the dirt is not removed in time, it will become difficult to clean,
please wipe with water sometimes.
Static electricity will absorb dust, resulting in the product black,
dirty, water wipe can prevent the generation of static electricity.
The ceramic body can be removed from the toilet seat to facilitate
cleaning between the toilet seat and the ceramic body.
Cleaning and maintenance of spray head
1. If there is dirt on the nozzle, please press the (Self-Cleaning)
button on the remote control. After extending the spray rod, pull out
the nozzle.
2. Clean the nozzle with a small brush (such as a toothbrush). After
cleaning, reinstall the nozzle.
① ②
Clean the dust on the power plug regularly
When cleaning, remove the power plug and wipe with a dry cleaning cloth.
Poor insulation may cause a fire.
Must obey
Hip washing, women's washing, and drying require seating before use
Foot sensor user guide
Flushing by foot sensor
Put you foot close to the foot sensor to activate the flushing
(Manual Seat Version)

Instructions for using the knob on the side of the toilet
1. Pre-rinse function (wet wall) - on/off setting instructions:
The “Pre-Rinse” function means that when someone sits on the toilet seat, the toilet will automatically
release a small amount of water once to pre-rinse the inner surface of the bowl, helping to prevent waste
from sticking. This function is disabled by default at the factory. If you want to activate this function, please
follow the steps below:Press the (POWER) button on the remote control to turn off the toilet. Within 3
seconds after the toilet shuts down, press the (Front Cleansing) button on the remote control. When you
hear two beeps (di, di), it indicates that the pre-rinse function has been activated. Press the (POWER)
button again to restore the toilet to the power-on state. Repeat the same operation, when you hear one
beep (di), the Pre-Rinse function is disabled.
Turn the bowl pre-wetting and auto flush-on-leave functions on or off.
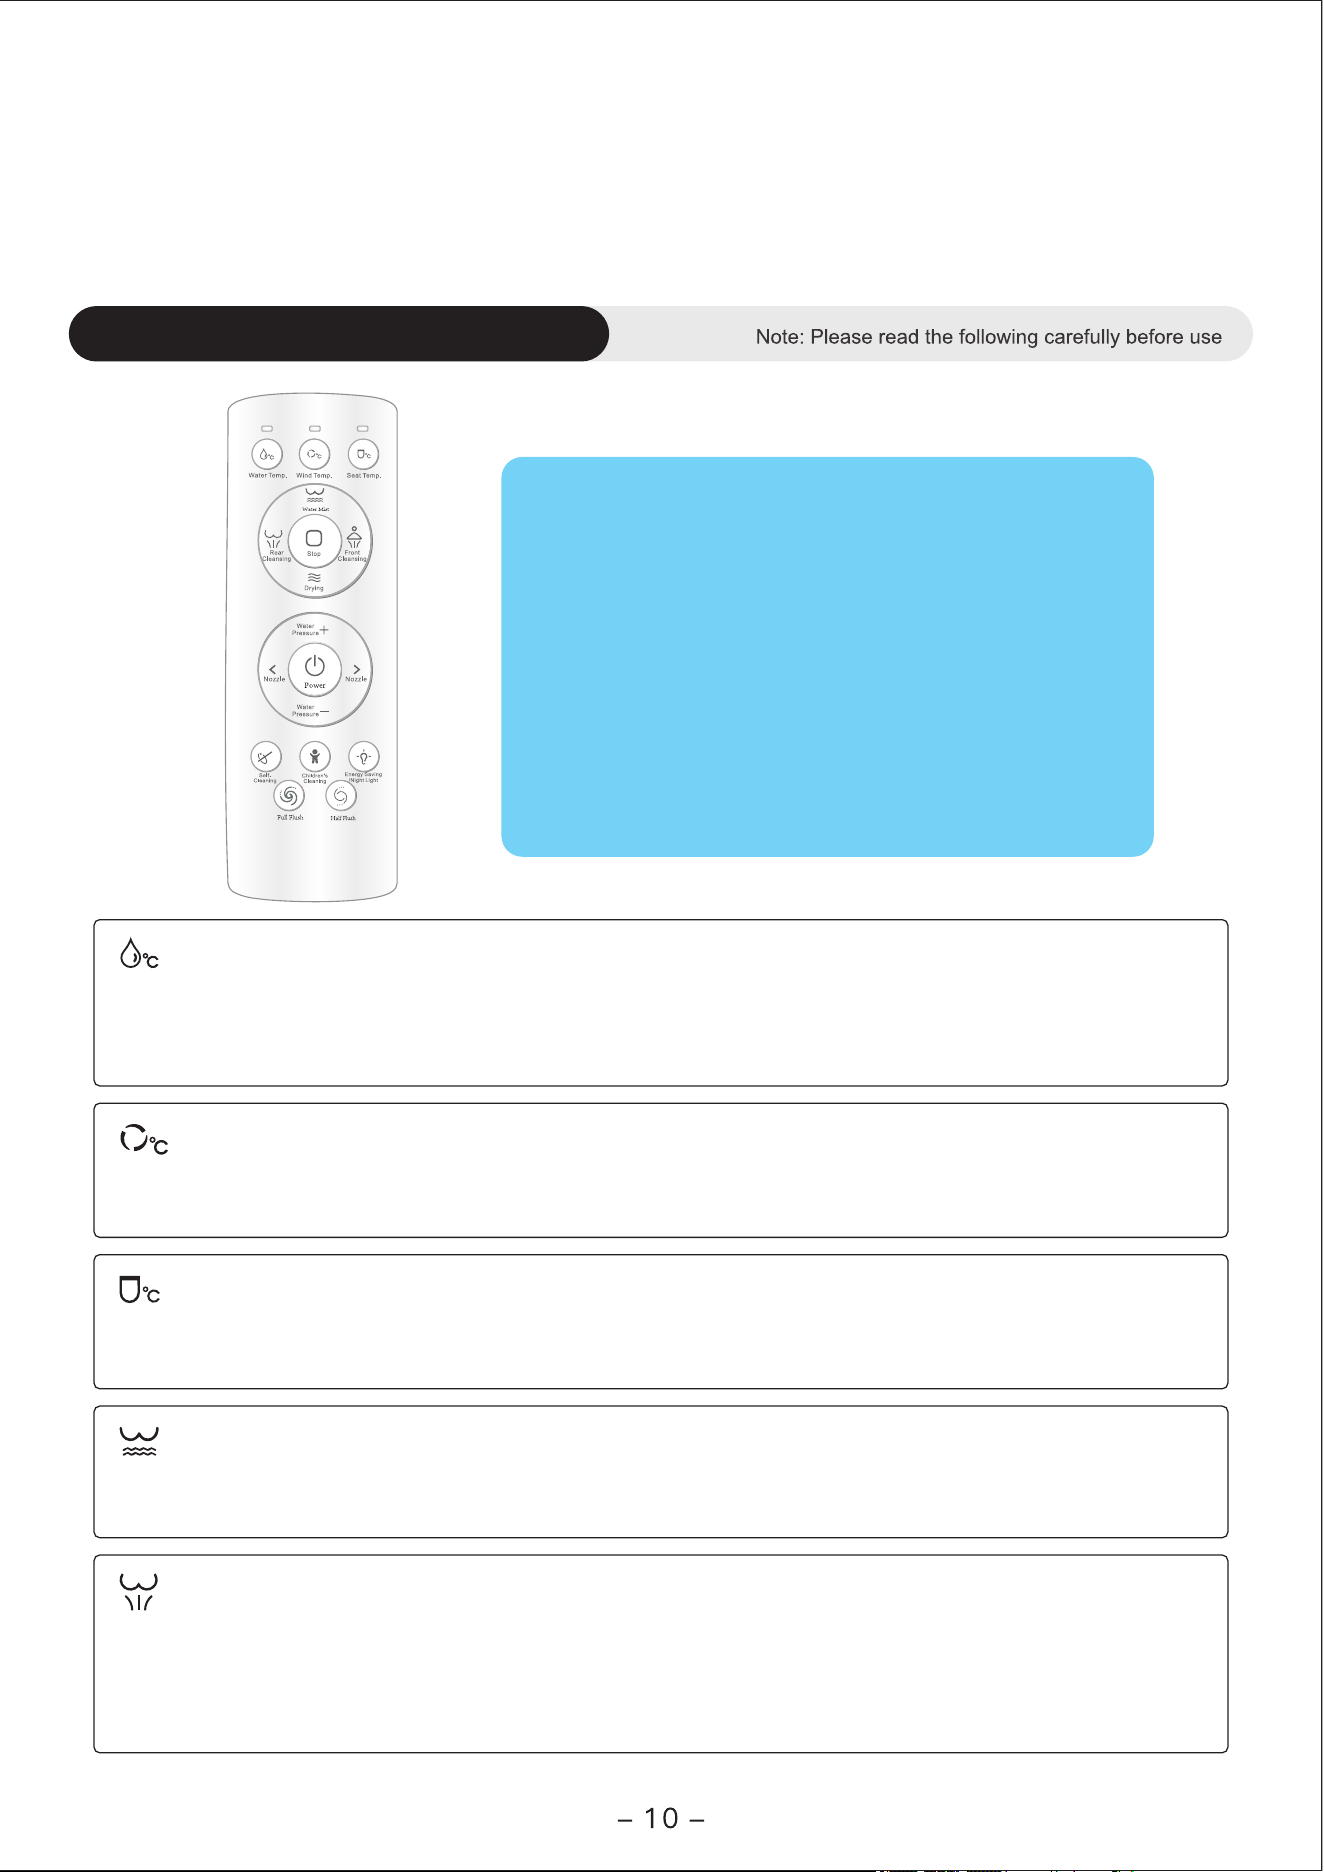
Remote control instructions
2. Auto-flush when leaving the seat - on/off setting instructions:
Auto flush on seat departure means that after you sit on the toilet seat and finish using it, the toilet will
automatically flush when you leave the seat. If you do not want to use this feature, you can disable it by
pressing and holding the (Full Flush) button on the remote control. When you hear one ( di ) sound, the
auto flush is turned off; when you hear two ( di,di ) sounds, the auto flush is turned on.
During the process of using the drying function, press the (Wind Temp) button to adjust the drying
temperature, which can be adjusted to first gear, second gear, third gear, and fourth gear.
Wind Temp
During the cleaning process of buttocks and female, press the (Water Temp.) button to adjust the water
temperature of (Cleaning Nozzle). There are 4 levels of water temperature adjustment, the first level is
normal temperature, the second level is 93℉, the third level is 99℉, and the fourth level is 104℉.
Water Temp
Press the (Seat Temp) button to adjust the temperature of the toilet seat. There are four settings in total.
The first one is for normal temperature, the second for 93℉, the third for 99℉, and the fourth for 104℉.
Seat Temp
When using the feminine wash function, press the (Water Mist) button to activate the mist cleaning
function.
Water Mist
If the remote control does not respond the first time
you use it, you will need to code the remote control
to the toilet. First, press the (TEST) button on the
plug to turn off the power, then press the (RESET)
button on the plug to turn on the power, within 5
seconds after turning on the power, Rotate the knob
counterclockwise for 5 seconds within 3 seconds.
After hearing ( di ), press any button on the remote
control. If you hear ( di ) again, it indicates that the
remote control has been successfully paired normally.
Remote Control Code:
This function requires you to sit on the toilet seat, press the (Rear Cleansing) button, the (Cleaning
Nozzle) will move out to clean the buttocks. Press the (Rear Cleansing) button again, and the
(Cleaning Nozzle) to start moving and cleaning, After 120 seconds, hip cleaning will automatically stop,
or press the (Stop) button.
Rear Cleansing
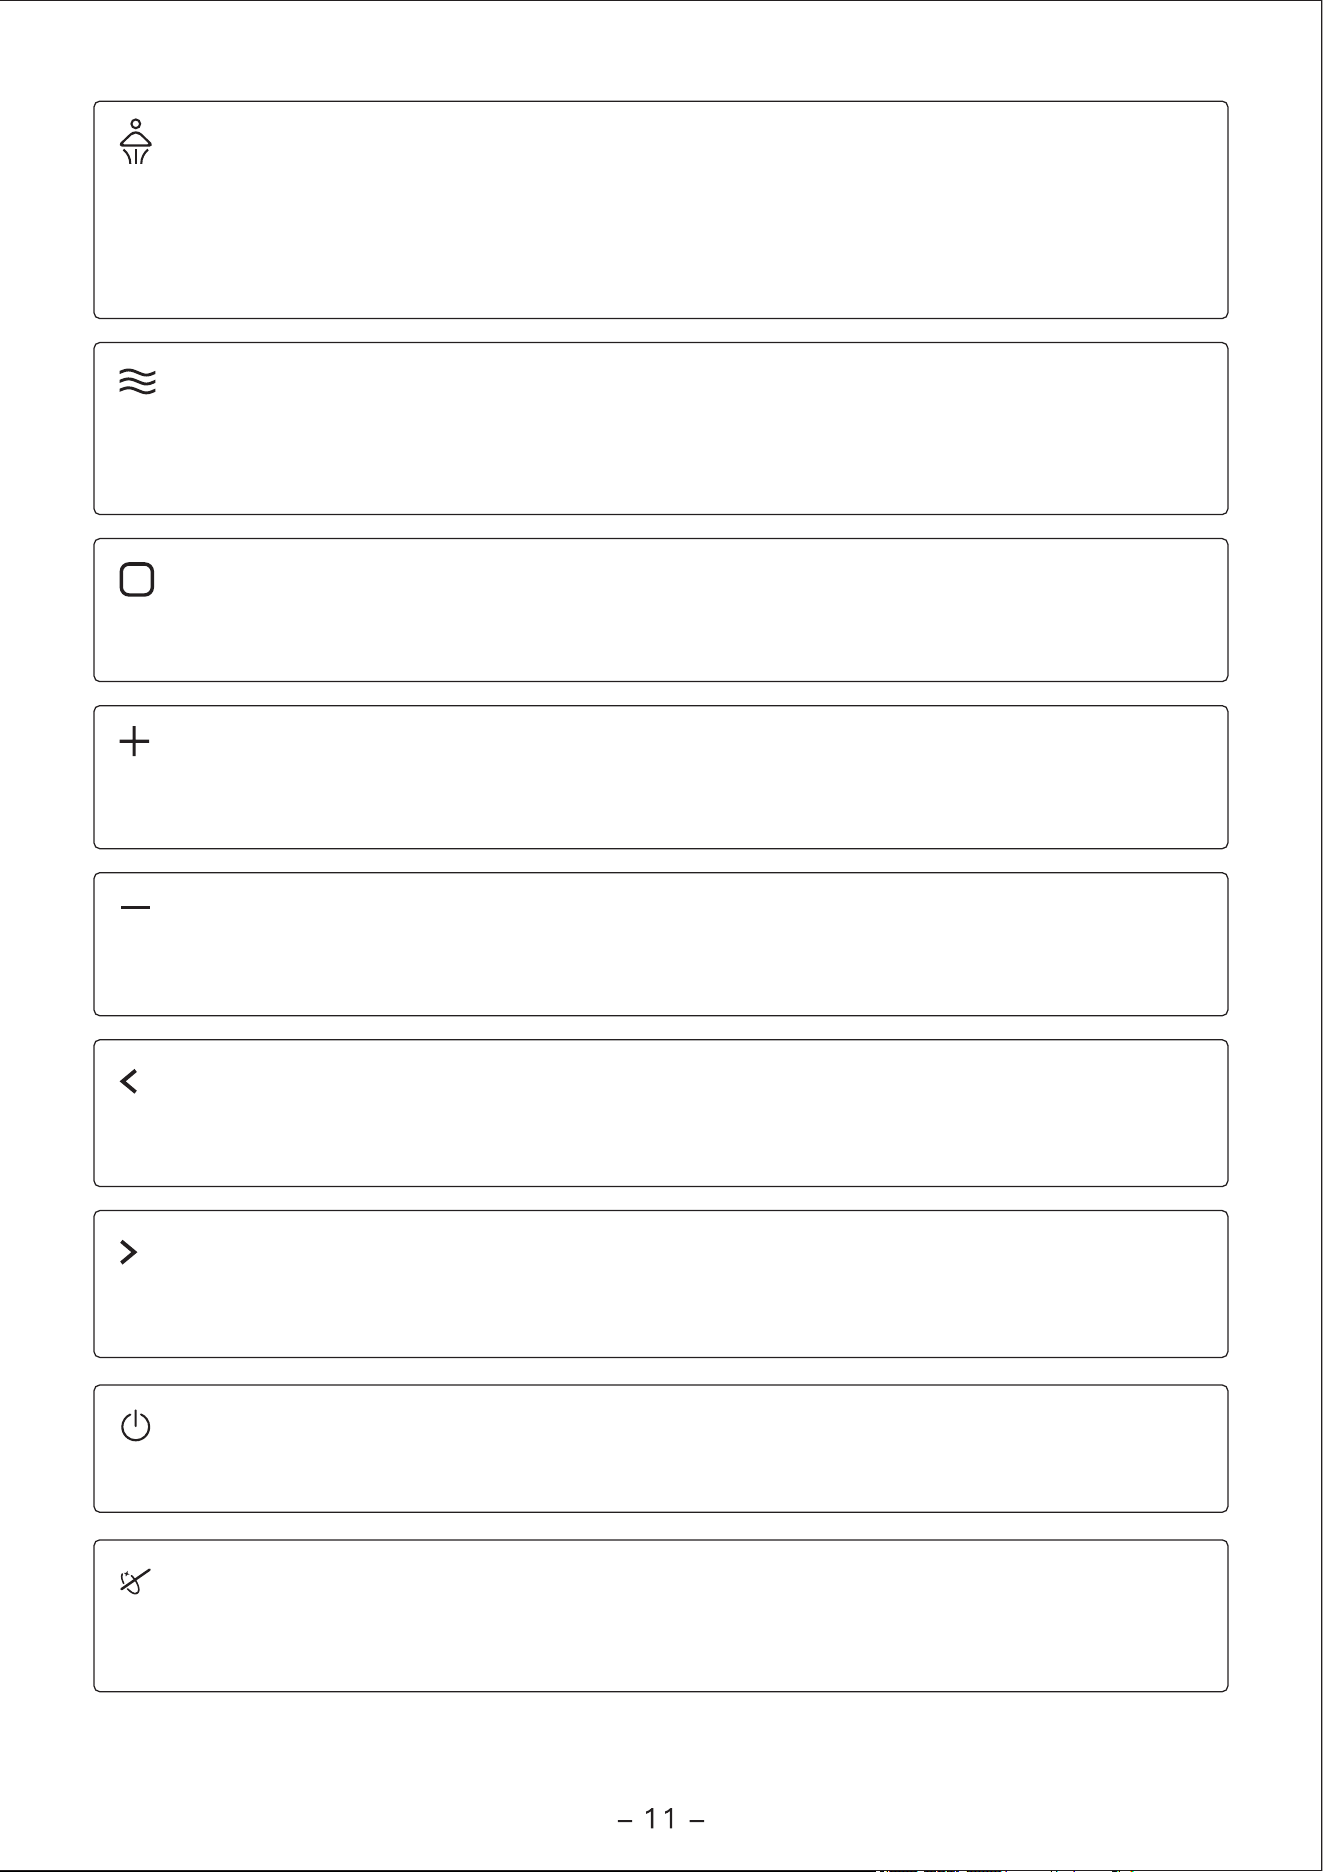
This function requires you to sit on the toilet seat, press the (Front Cleansing) button, (Cleaning
Nozzle) will move out to start female cleaning, press the (Front Cleansing) button again, (Cleaning
Nozzle) will move to clean, and then automatically stop female cleaning after 120 seconds or press the
(Stop) button.
Front Cleansing
This function requires you to sit on the toilet seat, press the (Drying) button, and the toilet will
automatically flush once, and then start the drying function. After 180 seconds, drying will automatically
stop, or press the (Stop) button.
Drying
During the cleaning process of buttocks or female, press the (+) button to increase the water pressure
of (Cleaning Nozzle), and it can be adjusted to weak, medium, strong, and strongest.
Water Pressure
During the cleaning process of buttocks or female, press the (-) button to reduce the water pressure of
(Cleaning Nozzle), and it can be adjusted strongest, strong, medium and weak.
Water Pressure
Pressing the (Stop) button can stop the operation of functions such as female cleaning, buttock
cleaning and drying.
Stop
During the buttocks or female cleaning process, press this button to adjust the position of the
(Cleaning Nozzle) forward. (repeatedly press the button to move the nozzle forward)
Nozzle
During the buttocks or female cleaning process, press this button to adjust the position of the
(Cleaning Nozzle) backward. (repeatedly press the button to move the nozzle backward)
Nozzle
Press the (Power) button to turn off the power of the toilet. Press the (Power) button to turn on the toilet.
Power
Press the (Self-Cleaning) button, (Cleaning Nozzle) will move out and water will come out for cleaning,
and then you can use a brush or rag to clean (Cleaning Nozzle).
Self-Cleaning
This feature requires Children to sit properly and press the (Children’s Cleaning) button, then press the
(Front Cleansing) button again to start the cleaning for "90 seconds", or press the(Rear Cleansing)
button to start the cleaning for "90 seconds" After the cleaning is completed, the toilet will automatically
flush and activate the warm air drying function for "90 seconds"
Note: Within 5 minutes of using child mode, only rear wash, feminine wash, or drying functions can be
used. To use other functions, press the (Children’s Cleaning) button again to exit child mode.
Children's Cleaning
When not seated, press the (Energy Saving/Night Light) button to turn on or off the night light inside
the toilet.
When you sit on the toilet seat, press the (Energy Saving/Night Light) button to turn on or off the
ambient light on the toilet cover.
Press and hold (Energy Saving/Night Light) for 5 seconds to activate the toilet's energy-saving mode.
Energy Saving/Night Light
Full Flush
Press the (Full Flush) button to activate the full flush function of the toilet.
Half Flush
Press the (Half Flush) button to activate the half-flush function of the toilet.
Common fault diagnosis
Fault phenomenon
Product unavailable
Fault analysis Fault handling
Check to see if the power/socket
is loose
Please check the circuit
Whether there is leakage (the
display light of leakage protection
plug is not on)
Remove the power plug from the socket
and replug it later. Press the reset switch of
the leakage protection plug. lf the toilet still
cannot be operated, please unplug the
power plug and entrust the repair.
No water with spray
Check if water is cut off
Pending resumption of water supply
Check that the angle valve is
closed
Check if the inlet filter is blocked
Check the inlet pipe for bends
Open the angle valve
Clean or replace the filter
Exclude the intake bend
Cleaning insufficient
rigidity
Check whether the cleaning
pressure is at the lowest level
Refer to the instruction manual for
regulating the water pressure
Check if the inlet filter is blocked
Clean or replace the filter
Spray water disorderly
Abnormal operation
Unplug the plug for one minute and then
switch it back on
Water temperature
is not enough
Check whether the water
temperature is set low
Adjust the water temperature according to
the instructions
The washer
often drips water
Solenoid valve failure
Please get professional maintenance
technicians
Misoperation of
remote control
Check whether the battery level
of the remote control is too low
Please replace the battery
Drying/seat temperature
too low/no heating
Check whether the temperature
is set at low or normal temperature
Adjust the temperature according to the
instruction
Check whether the unit is in
energy-saving mode
Please refer to the manual to adjust the
drying/seat temperature using the remote
control.
Seat/cover falling
too fast
Failure of damping drop function
Please get professional maintenance
technicians
The cleaning
function can not be
used normally
Whether the area under the seat
is clear of any objects
Remove the hard objects
Whether the body's sensing area
is covered
Whether the power supply is
restored during the power failure
Whether your skin is in full contact
with the seat's sensor area
Adjust the body sensing area of the seat
cover
Unplug the plug for one minute and then
switch it back on
Sensor failure, please get professional
maintenance technicians
Failure of automatic damping
function
1. Disconnect the plug for one minute and
switch it back on
2. The above treatment is invalid, please
ask professional personnel for maintenance
Low water pressure
does not flush clean
Filter mist blocking
Clean the filter according to the instruction
Seat/cover cannot be
opened or closed
Only for automatic
flip machines
Pipe bending
Observe whether the connection line bends
and keep the water supply line smooth
No siphon flushing is
not clean when water
pressure is norma
Air escapes from the sewage
outlet
Please get professional maintenance
technicians
The S-bend is blocked
Please buy water pipe dredger in the
market for dredging
Poor flush
performance with
normal water pressure
Flush valve failure
Ask professionals for maintenance
3.94in
3.94in
1
1.02in
1
1.81in
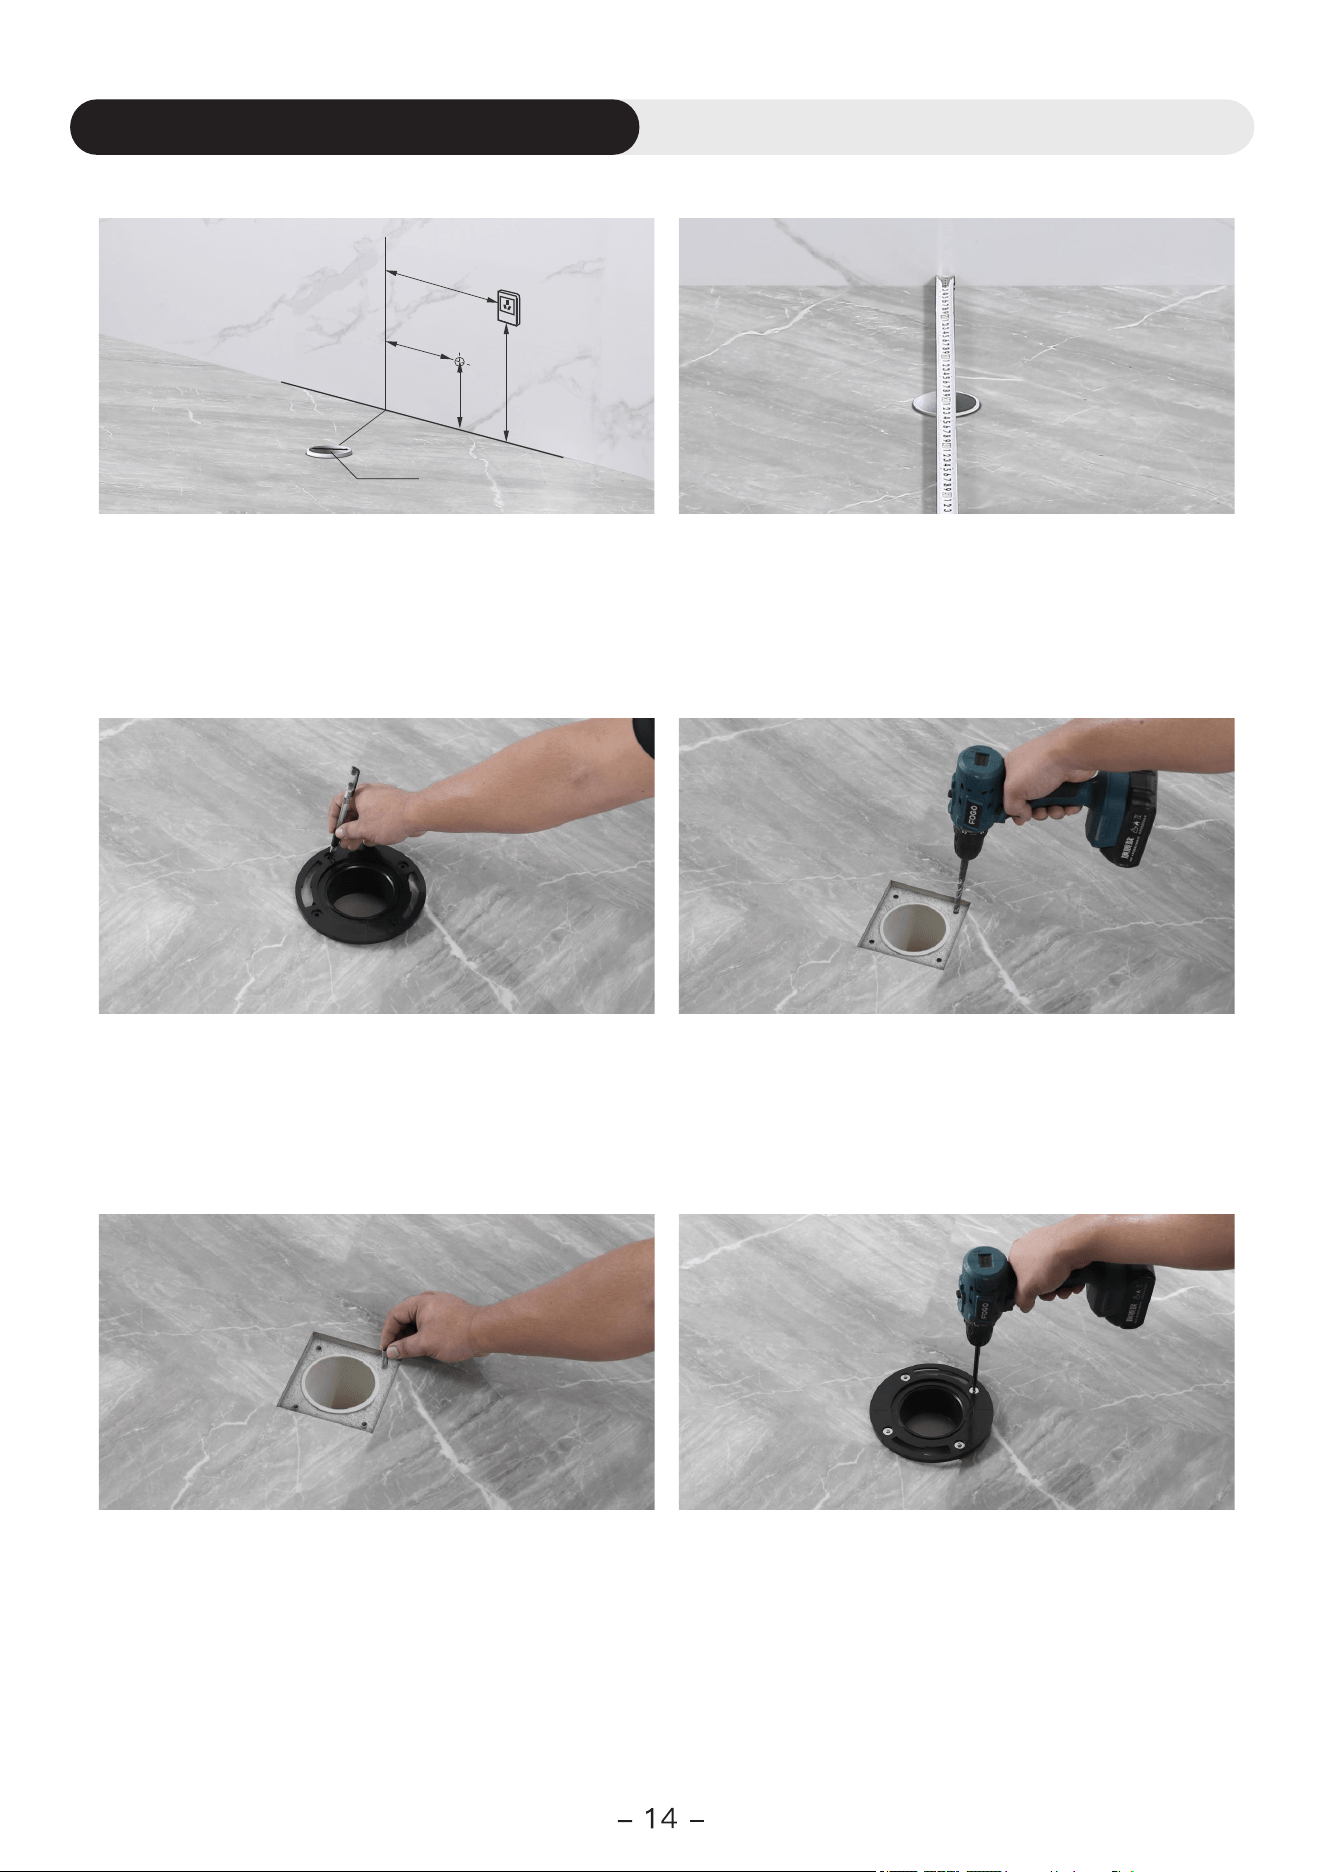
11.81in
Drain outlet
2. Place the fixed disk into the drain outlet and mark
the screw hole positions.
3. Take off the fixed disk and drill four holes for
screws.
1. The confirmation of the installation environment:
The measurement distance is 11.81 in or greater.
The confirmation of the installation environment.
Installation steps for smart toilet
4. Put the screws into the holes.
Corresponding to the following
accessories/quantities:
5. Place the fixed disk into the drain outlet and
tighten the screws to secure it.
Corresponding to the following
accessories/quantities:
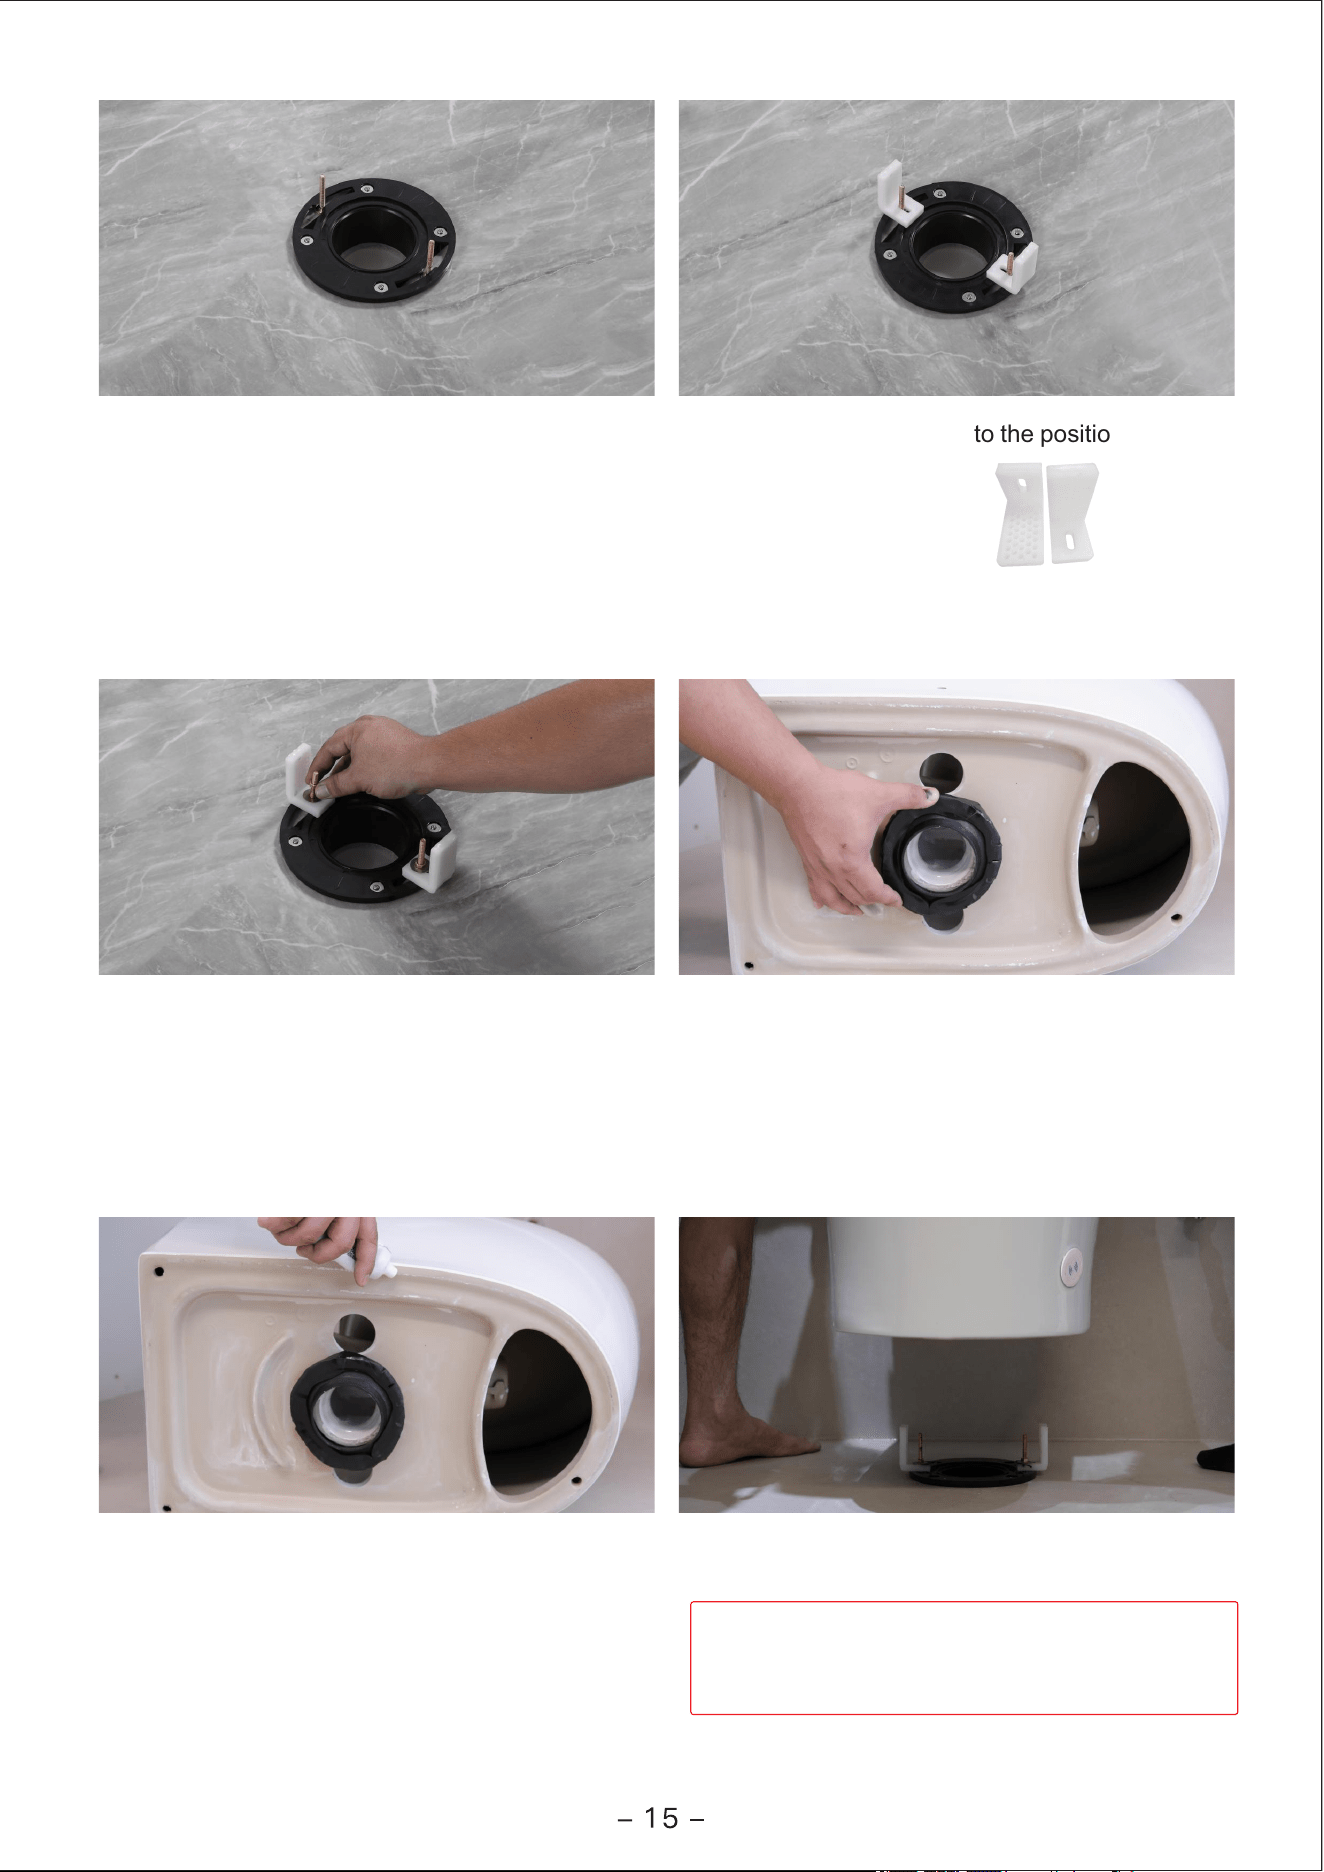
6. Install two long screws as shown in the picture
below.
7. Install the white snap onto the positioning screw.
8. Lock the gasket screws.
9. Gently turn the toilet over to access the base
and install the flange ring.
Corresponding to the following
accessories/quantities:
Corresponding to the following
accessories/quantities:
Corresponding to the following
accessories/quantities:
11. Move the toilet to the location where it will be
installed.
10. Apply a layer of silicone sealant to the base of
the toilet. ( The silicone sealant adhesive in the
picture needs to be purchased by oneself. )
Important: When installing the flange ring, make
sure it is properly installed and aligned; otherwise,
leakage may occur.
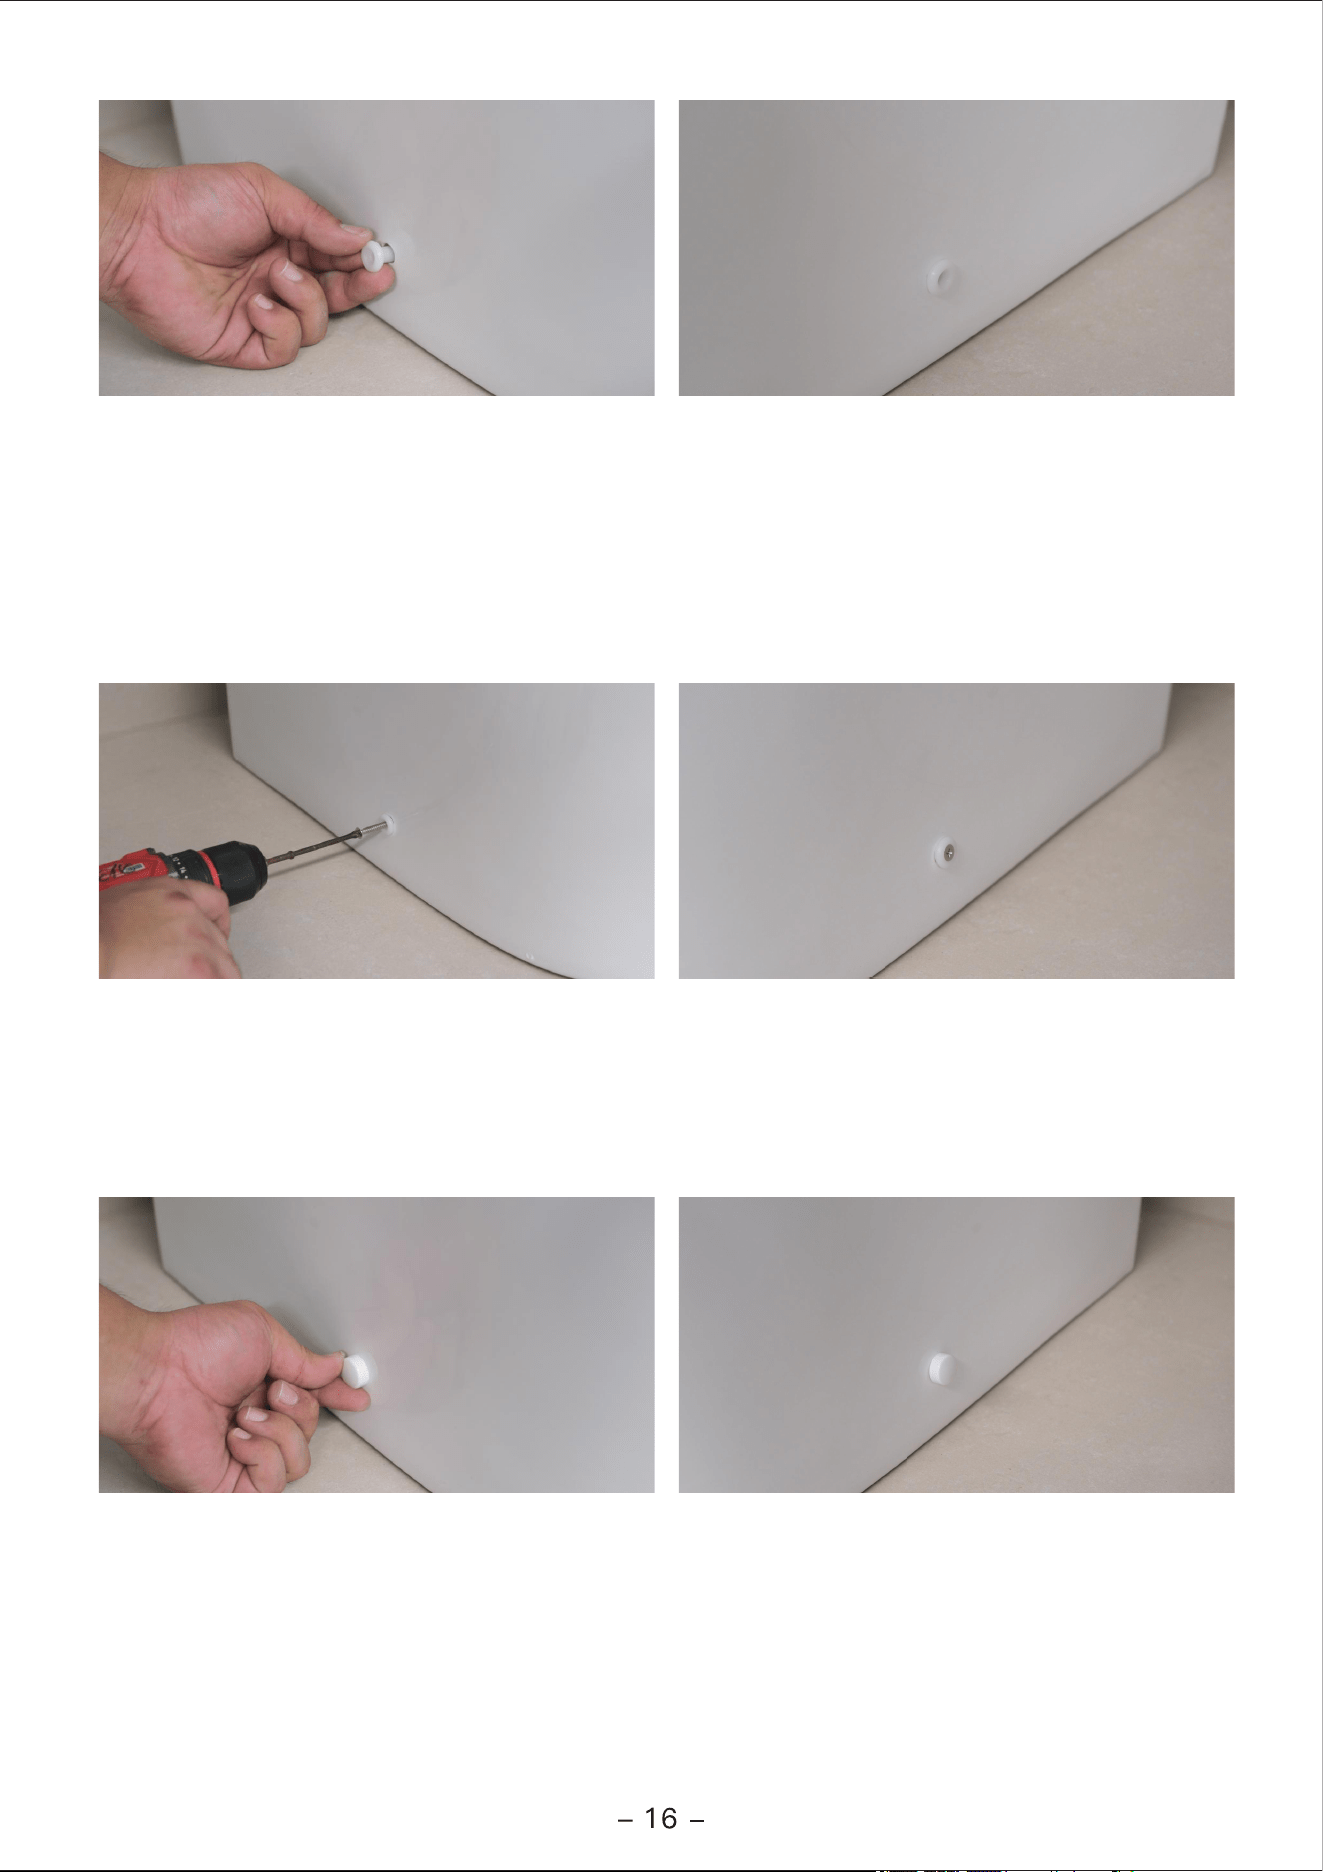
12. Fix the white screws into the screw holes on both sides of the ceramic.
Corresponding to the following accessories/quantities:
13. Lock the silver fixing screws on both sides.
Corresponding to the following accessories/quantities:
14. After the screws are tightened, install the white decorative cover.
Corresponding to the following accessories/quantities:
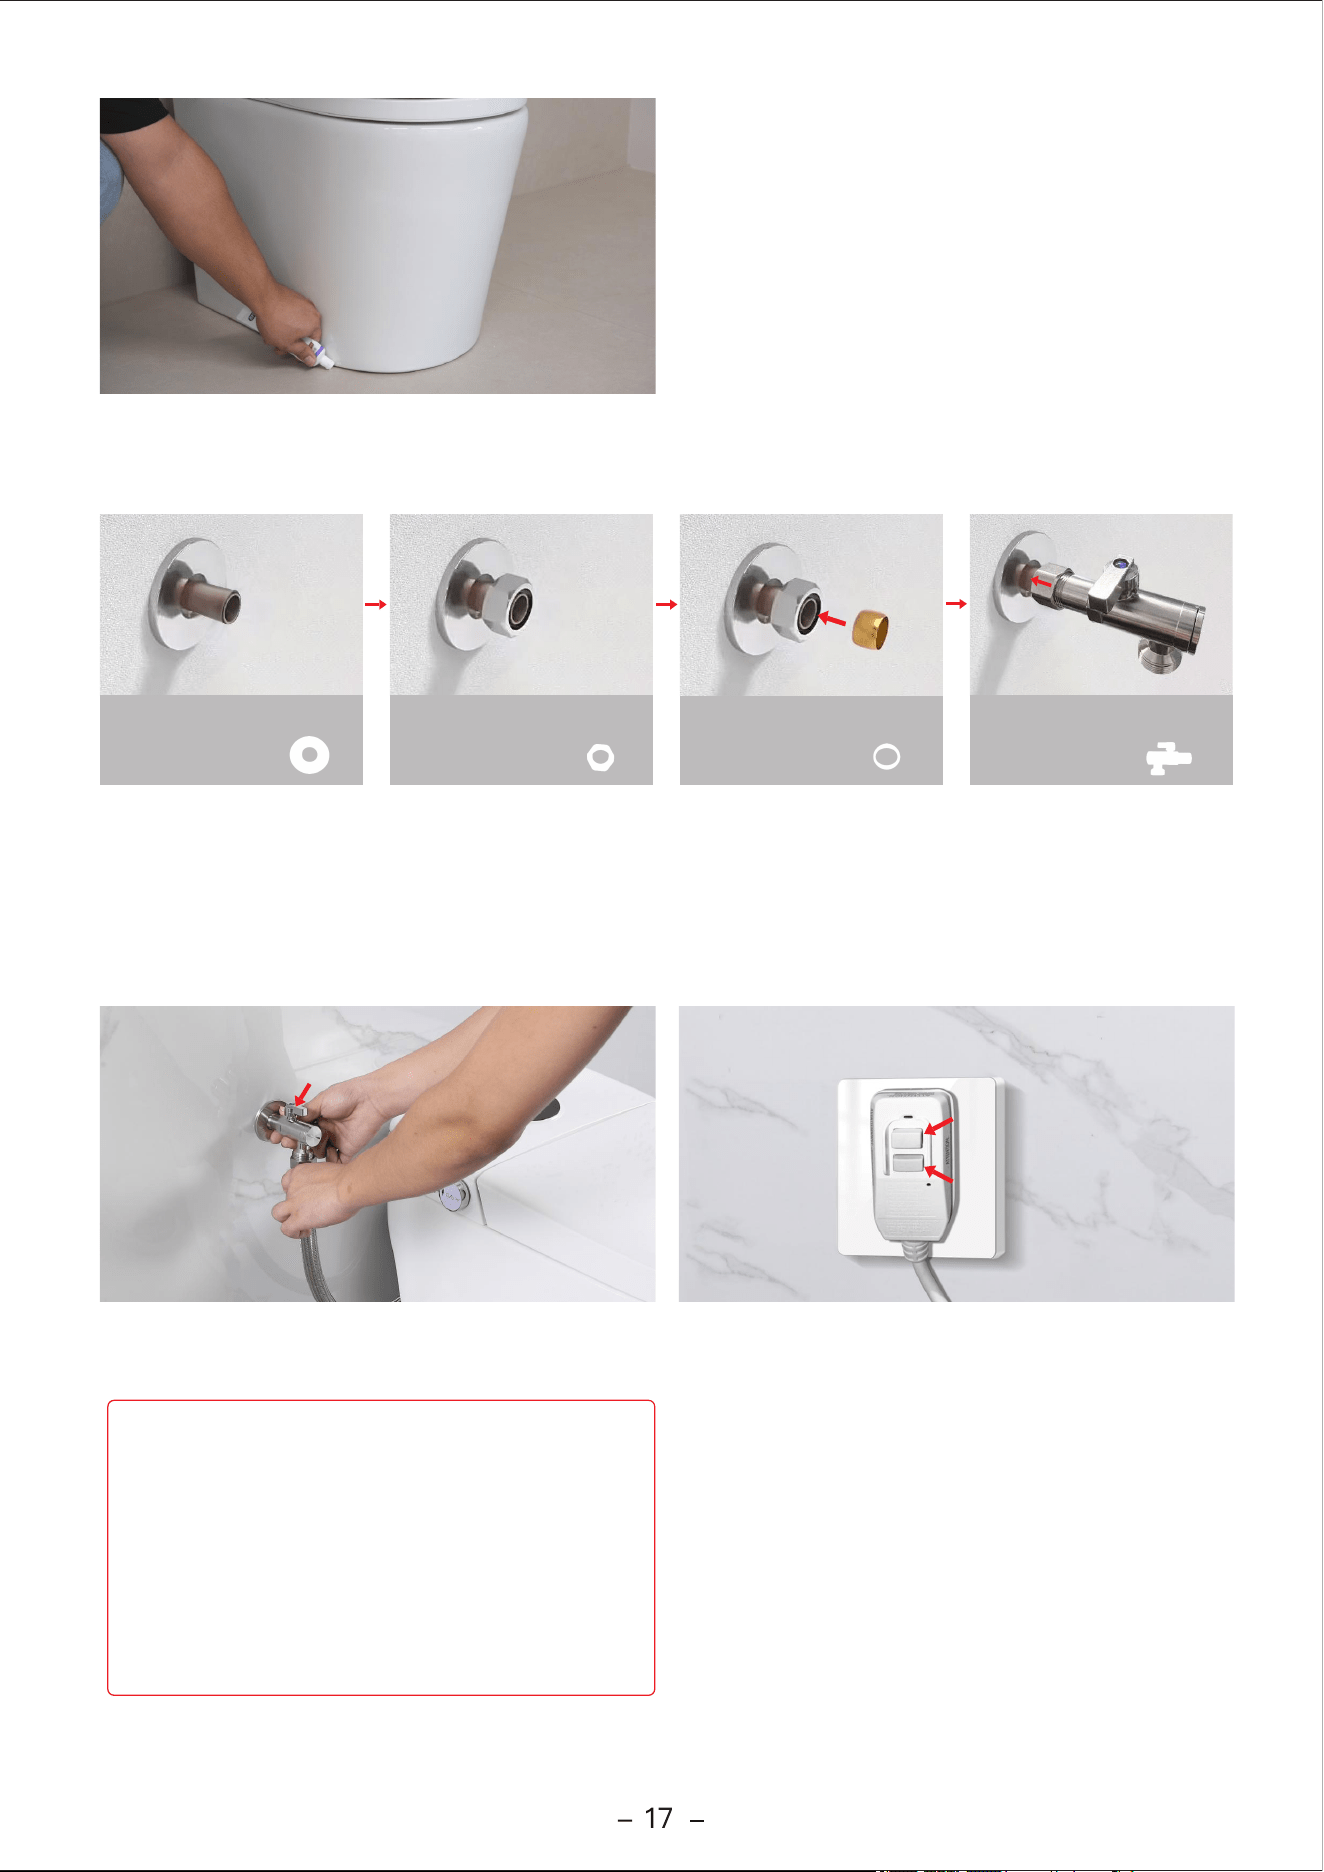
16. Finally connecting the flexible tube to the inlet
angle valve and turn on the angle valve switch.
17. Plug in the power supply, press the (RESET)
button forcefully. Release the button when you
hear a (di) sound. If the toilet display remains
constantly on, it indicates that the power has been
successfully turned on. Press the (TEST) button to
turn off the power.
The RESET button
The TEST button
③
Install the gold accessory
inside the silver one
Install a silver base on the
water pipe
①
Install silver nuts on the
water pipe
② ④
Connect the angle valve to the
installed accessory and tighten it
Corresponding to the following
accessories/quantities:
Corresponding to the following
accessories/quantities:
Corresponding to the following
accessories/quantities:
Corresponding to the following
accessories/quantities:
Angle valve open status
Our supplied four-piece angle valve kit is suitable for 1/2" non-threaded copper pipe (water pipe).
If you have already installed your own angle valve and its connection size is 3/8" male thread, please
install the included 3/8" female x 3/4" male adapter. For the installation method, please refer to the
separate angle valve installation manual.
Important:
1. If the angle valve leaks after installation, tighten
it again. If necessary, wrap several turns of PTFE
tape around the threads to prevent leakage (PTFE
tape is not included and must be purchased
separately).
2. If the water pressure is too high and water
splashes over the toilet seat when flushing, slightly
close the angle valve to reduce the water flow.
15. Apply some silicone sealant to fix the toilet and
insulate the outside dirt from entering.
( The silicone sealant adhesive in the picture needs
to be purchased by oneself. )
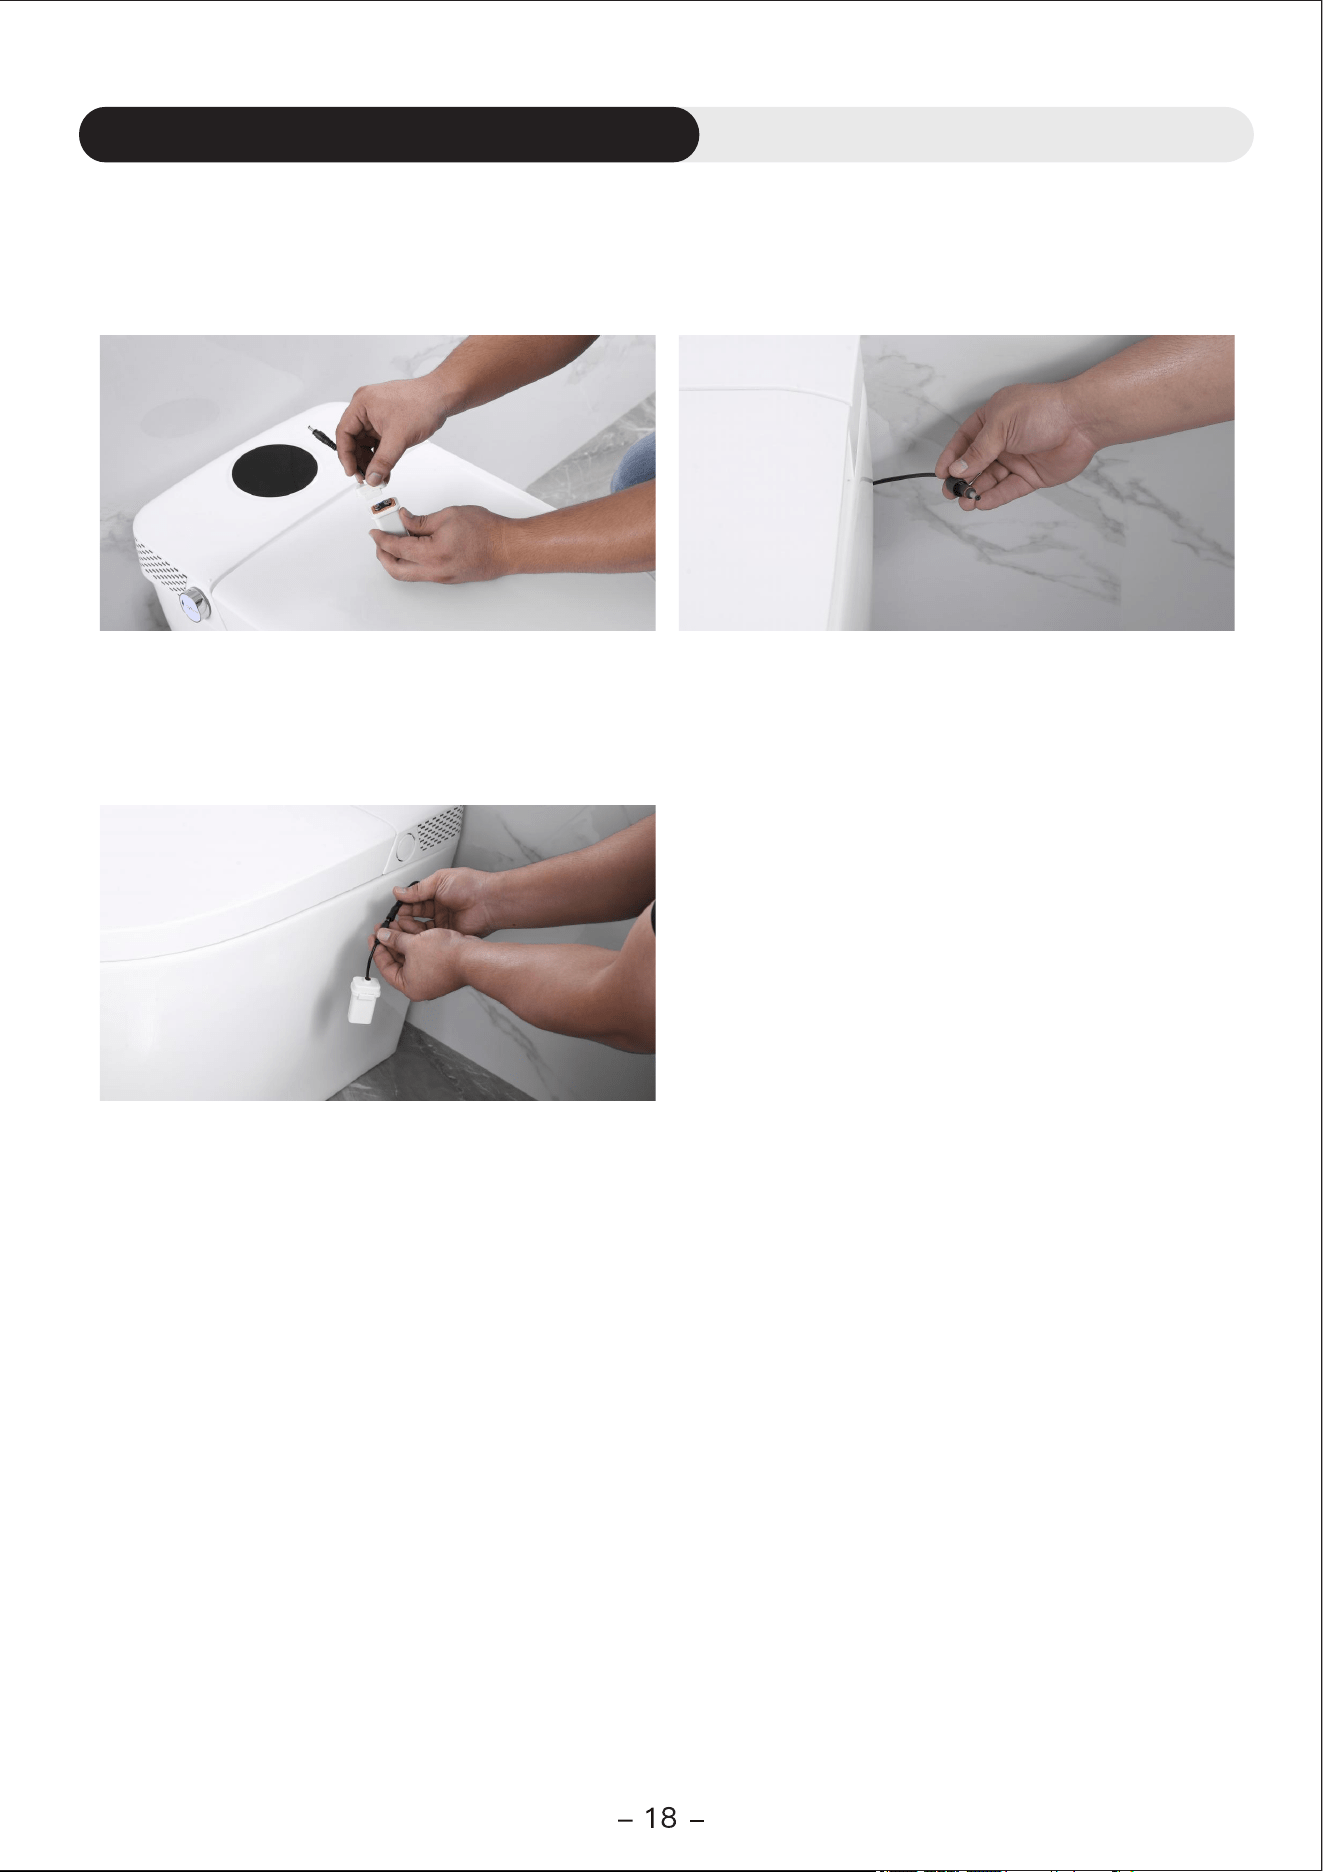
Step 1. Put the 9-volt battery into the battery
box.
Step 3. Connect the 9V spare battery to the toilet's
connection cable and place the battery in a dry
area behind the toilet.
Note: When there is a power outage, please install
the battery of the device for flushing. Press and hold
the knob on the side of the toilet for 3 seconds to flush.
Step 2. Locate the spare battery interface and
remove the protective cover.
If the equipment is powered off, you can install a spare battery and discharge it. Note: If the spare battery
runs out, you can purchase a 9-volt battery and replace it by following the installation steps below.
( When installing the toilet for the first time, a spare battery needs to be installed.)
Battery replacement and installation
For any questions or support, please email: [ support-cs@hkfoam.com ]
Normal temperature, and 93°F/99°F/104°F(4 levels)
68*40*45.5CM
Dimensions
Water pressure requirements: 0.15-0.75Mpa (static
pressure), that is, filling 5L of water in 15 seconds
means that the water pressure is sufficient.
Product standard
Alternating voltage 110V±10%, 60HZ
Water inlet temperature: 59°F Outlet water temperature: 104°F
Water discharge: 750ml/min Power: 1350W
Rated voltage
Rated power
Cleaning
Water
outlet
Hip cleaning
Female cleaning
About 700 ml/min
About 700 ml/min
Outlet water
temperature
Instant water heater
Water heating
Heater power
Water inlet temperature: 59°F
Outlet water temperature: 104°F
Water discharge: 750ml/min Power: 1350W
Normal temperature, and 93°F/99°F/104°F(4 levels)
Seat temperature
45W
Seat heating
Heater power
Normal temperature, and 113°F/122°F/131°F(4 levels)
Wind temperature
Warm drying
Adjustable fore and aft
Spray position
41~104°F
Water temperature
Water pressure ( without water tank )
FCC Requirement
changes or modifications not expressly approved by the party responsible for compliance could
void the user's authority to operate the equipment. This device complies with Part 15 of the FCC Rules. Operation is subject to the following two
conditions:
(1)this device may not cause harmful interference,and
(2)this device must accept any interference received,including interference that may cause
undesired operation.
§ 15.105 Information to the user.
Note: This equipment has been tested and found to comply with the limits for a Class B digital device, pursuant to part 15 of the FCC Rules. These limits are
designed to provide reasonable protection against harmful interference in a residential installation.
This equipment generates uses and can radiate radio frequency energy and, if not installed and used in accordance with the instructions, may cause harmful
interference to radio communications. However, there is no guarantee that interference will not occur in a particular installation.
If this equipment does cause harmful interference to radio or television reception, which can be determined by turning the equipment off and on, the user is encouraged to
try to correct the interference by one or more of the following
measures:
-Reorient or relocate the receiving antenna.
-Increase the separation between the equipment and receiver.
-Connect the equipment into an outlet on a circuit different from that to which the receiver is connected.
-Consult the dealer or an experienced radio/TV technician for help.