Getting Started
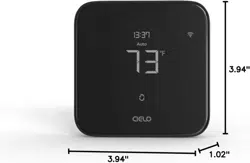
Cielo Breez Max can be mounted on a wall using the backplate, or
placed on a table using the table stand (both included in the box).
Before finalizing the placement, it is recommended to first power
up, register and test the device to ensure signals can easily reach
the AC.
Special Note: It is strongly advised that whenever there
is a need to use the remote control for AC/heat pump,
point it towards Breez Max while performing any action.
This way, your AC/heat pump and Cielo Home app will
always be in sync.
For optimal placement and control:
Make sure Breez Max is in the line of sight of your air
conditioner or heat pump.
To avoid deviated sensor readings, do not place
Breez Max where it may be exposed to excessive
sunlight or other heat sources.
○
○
1
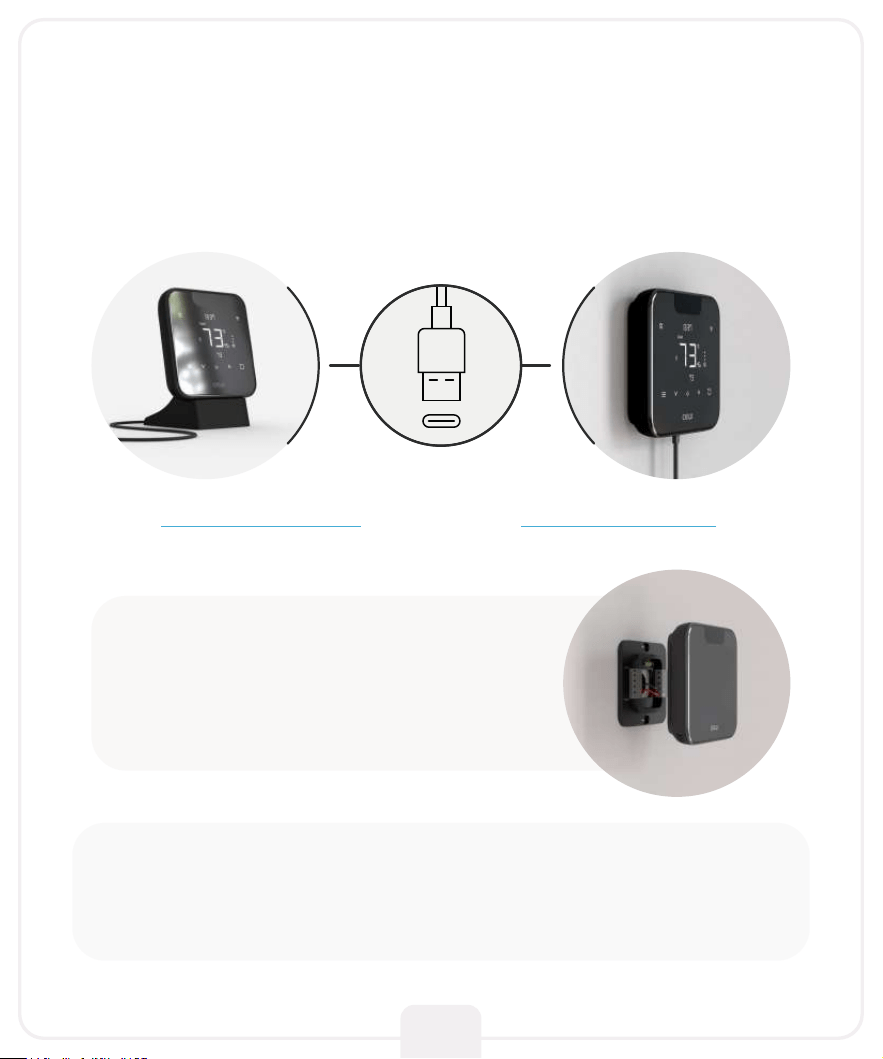
Powering Up Options
Breez Max can be powered up using a 5V adapter (always use the
provided power adapter and USB cable for optimal results).
Through wired connection
options of 24V or 12V.
Please DO NOT use any other voltage level to power up
Breez Max. Please choose ONLY ONE power-up option
i.e., either 5V OR 24/12V.
2
OR

Step 1: Switch off power by using the circuit breaker. This is very
important for your safety.
Step 2: Find a point where 24V or 12V is available (In case of
non-availability of 24V/12V point, you can either DIY or
consult a professional installer). Ensure that chosen point
is also in the line of sight of your AC.
Please DO NOT use any other voltage level to power up Breez Max.
Step 3: Take out the wires through the hole in the middle of the
backplate. Screw in the backplate using the provided pair
of drywall anchors and screws.
Instructions for Wired Connection
3
C
R
C
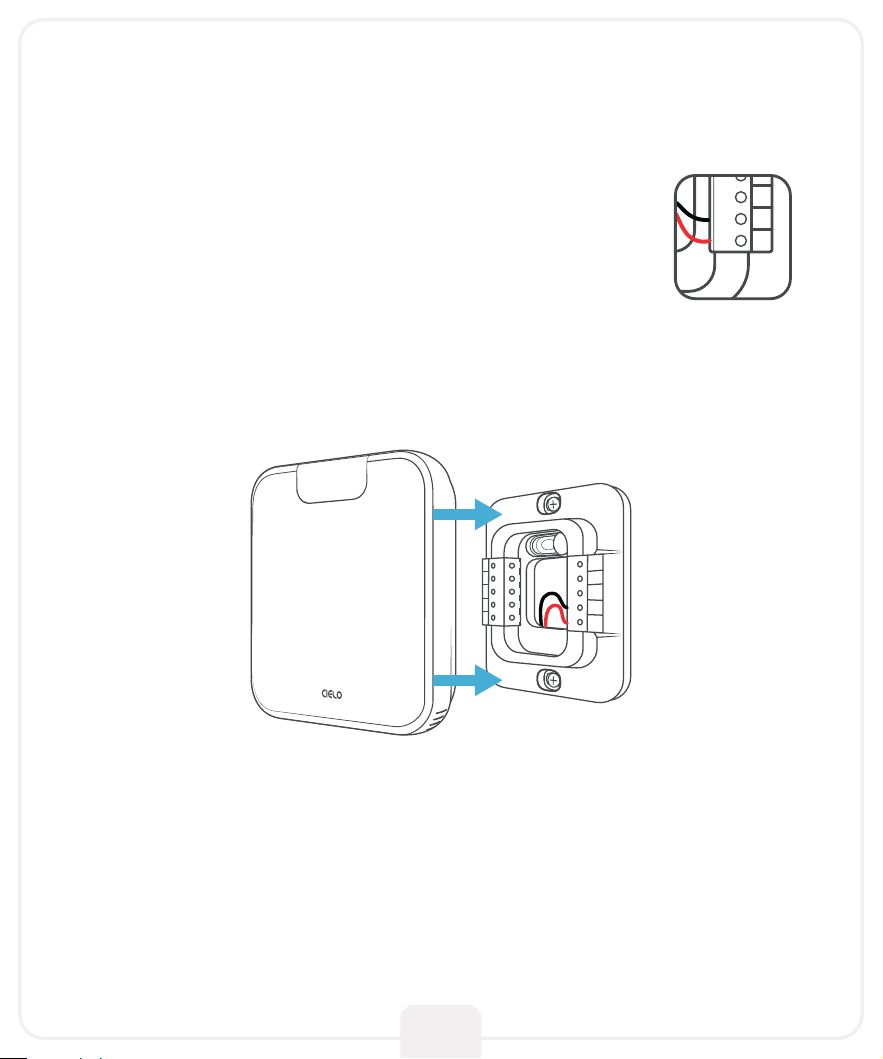
Step 4: Cielo Breez Max has two terminals marked
as Rc and C on its backplate. Insert red wire
into Rc and black wire into C from the side
(press the terminal block buttons for ease of
insertion).
Step 5: Align your Cielo Breez Max with the backplate and press
gently to fix it properly.
Your installation is complete.
Please switch on power from the circuit breaker.
Instructions for Wired Connection
4
C
R
C
C
R
C
5
Getting Help
Visit our website: cielowigle.com
and select support to access user guides.
No long queues, no bots, no delays.
We answer 98% calls in less than 2 minutes and
guarantee that you will talk to a REAL person.
Email us at: support@cielowigle.com
Call us at : (+1) 425-529-5775
9:00AM - 9:00PM ET, Mon-Fri
6
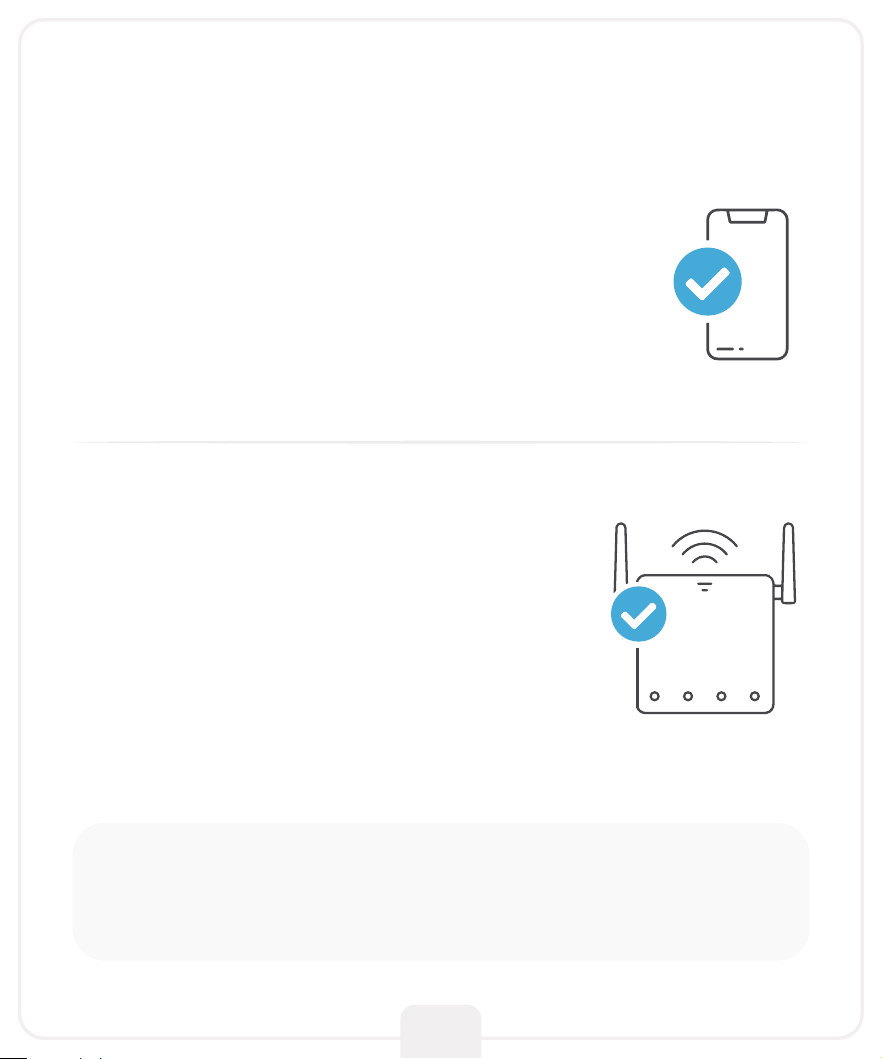
Make sure you have a working internet
connection on your Wi-Fi router.
Make sure there is no proxy server or
authentication server configured on your
internet connection.
Make sure there is no captive portal on
your Wi-Fi router.
○
○
○
Make sure your smartphone’s Bluetooth
is turned ON.
Make sure your smartphone’s Wi-Fi is turned ON.
Make sure your smartphone has internet access.
○
○
○
Prior to App Installation
Important:
Make sure IP isolation or client isolation is turned OFF
on your Wi-Fi router.

7
Install the ‘Cielo Home’ app from the App Store/Play Store.
Search for the Cielo Home app or scan the QR code provided below.
Log in to the app if you already have an account; otherwise,
create one using the sign-up option.
App Installation & Registration
iOS / Android
Device registration process connects Breez Max to your home
Wi-Fi network through the Cielo Home app.
Notes for iOS users:
For iOS 13.0 & above, location permission is required to
complete the registration process. You may disable it later.
○
Note for Android users:
For Android OS 8.1 & above, location permission is required
to complete the registration process. You may disable it later.
○
Device Registration
iOS / Android
8
9
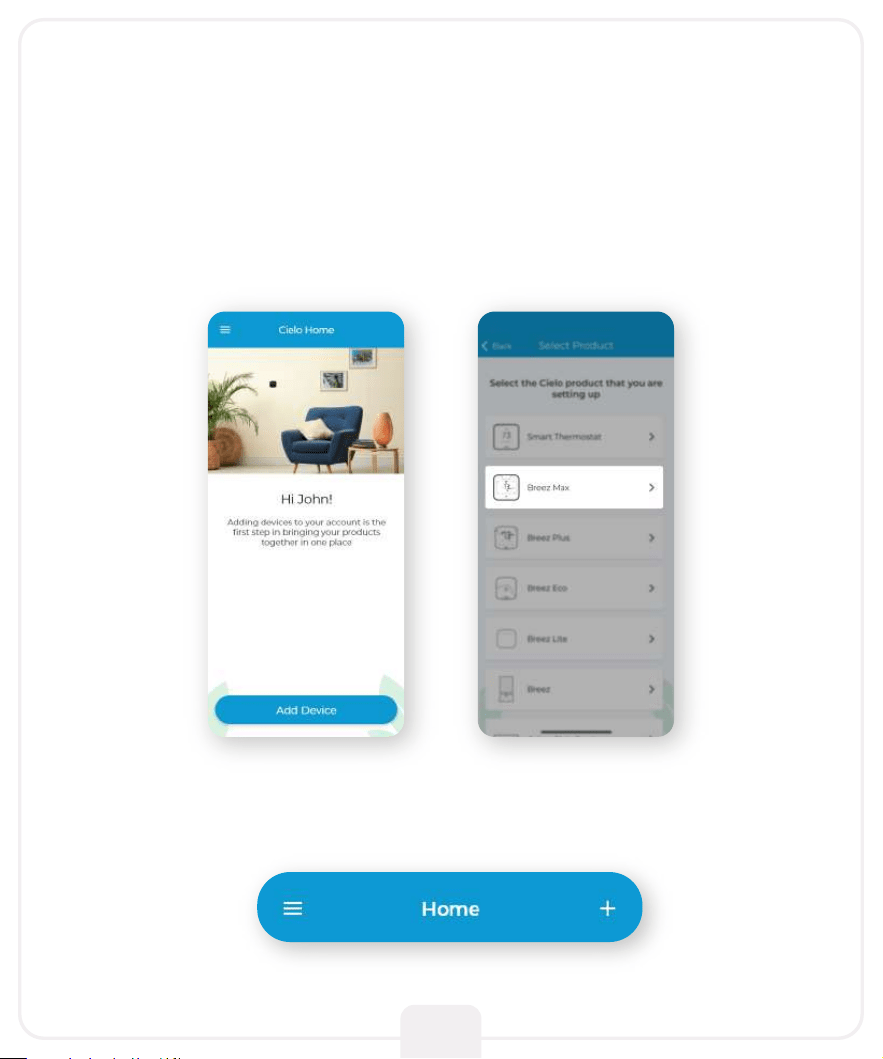
Open the Cielo Home app, tap ‘Add Device’ on the home screen,
and select Breez Max from the list of devices.
Device Registration
iOS / Android
If you are already using a Cielo device, tap ‘+’ on
the home screen to add this one.

10
Step 1:
Make sure your Breez Max is powered on.
Step 2:
Make sure your phone’s Bluetooth is turned on.
Tap ‘Next’.
Follow the steps to successfully pair your Breez Max
with your phone.
11
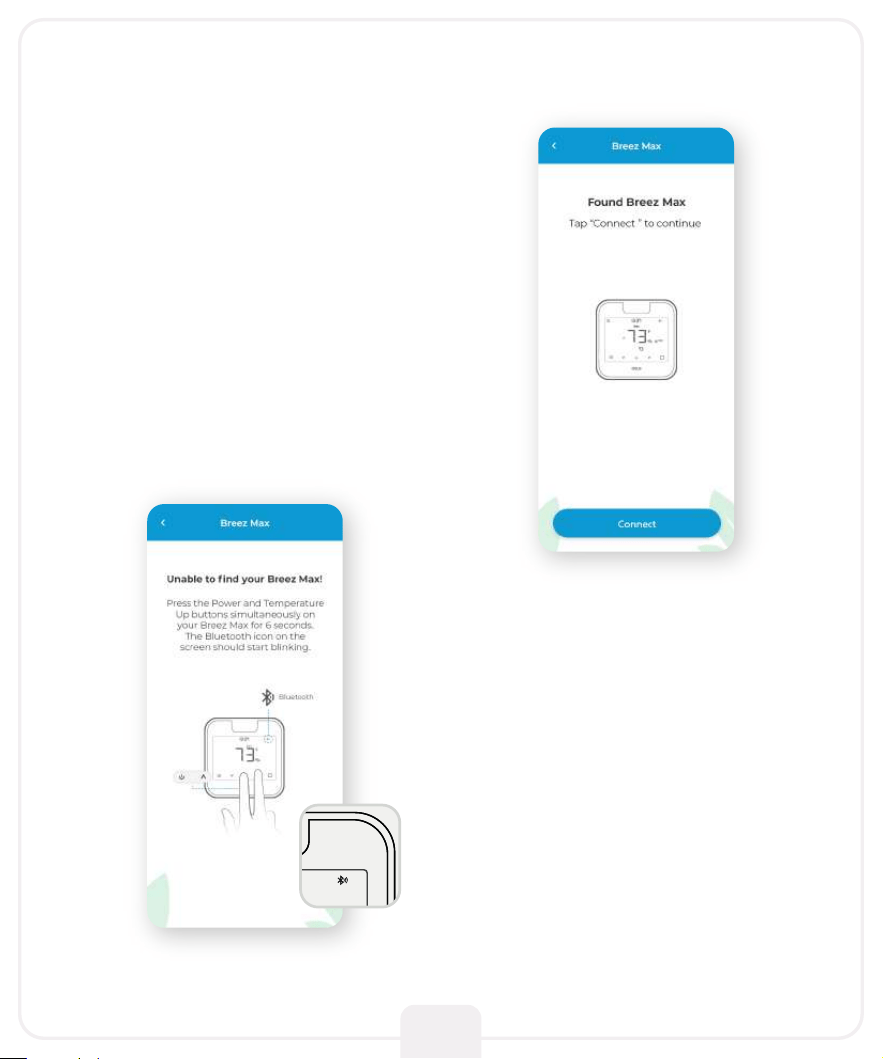
Step 3:
Wait for Cielo Breez Max
to appear on the screen.
Then, tap ‘Connect’.
Note:
In case Breez Max does not appear,
touch and hold the Power and
Temperature Up buttons
simultaneously for 6 seconds.
The Bluetooth icon on the screen
should start blinking and the app
will automatically move
to the next screen.
73
70.8
Cooling to
45%
Heating to
13:37
AM
PM
f
DR
Off
Heat
Aux
Fan
Auto
Cool
Dry
Following
Schedule
Permanent
Hold
Temporary
Hold
Cancel
Hold
Sensor
Linked
Auto
Quiet
Fan
On
Fan
Circ
Fan On
Aux Heat On
73
70.8
Cooling to
45%
Heating to
13:37
AM
PM
f
DR
Off
Heat
Aux
Fan
Auto
Cool
Dry
Following
Schedule
Permanent
Hold
Temporary
Hold
Cancel
Hold
Sensor
Linked
Auto
Quiet
Fan
On
Fan
Circ
Fan On
Aux Heat On
12
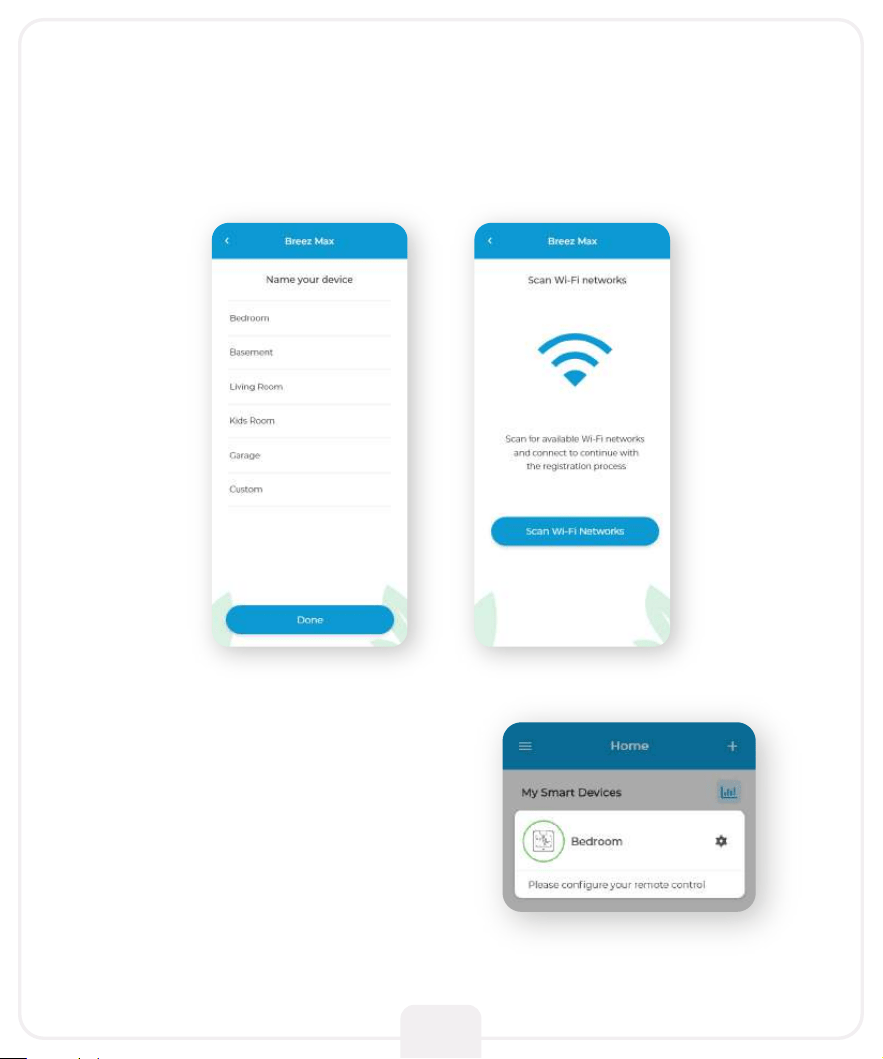
Step 4:
Your device is now successfully paired with Bluetooth.
Name your device and connect it to a Wi-Fi network.
Step 5:
After Wi-Fi configuration,
your device will appear on the
home screen.
Tap the device to start the
remote configuration process.
13
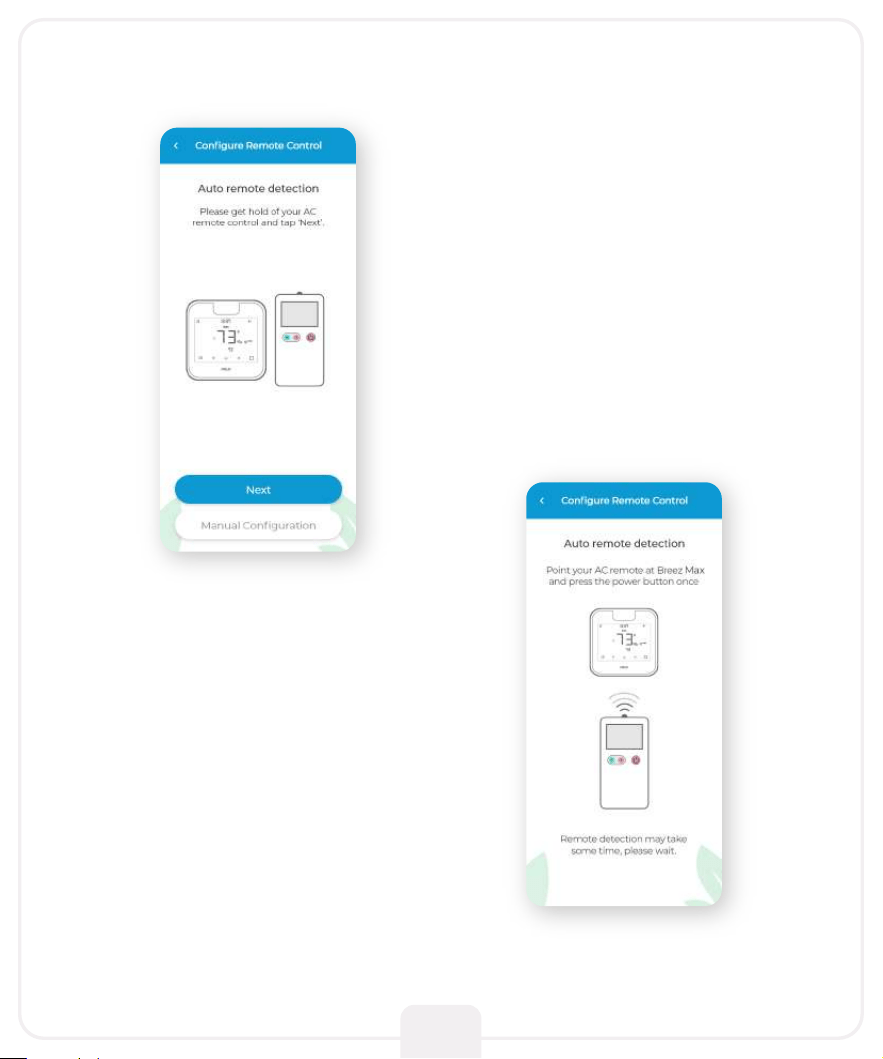
Step 6:
Get hold of your AC remote
and tap ‘Next’.
Step 7:
Point your AC remote at
Breez Max and press the
remote’s ‘Power button’
once. It will start the
configuration process.
14
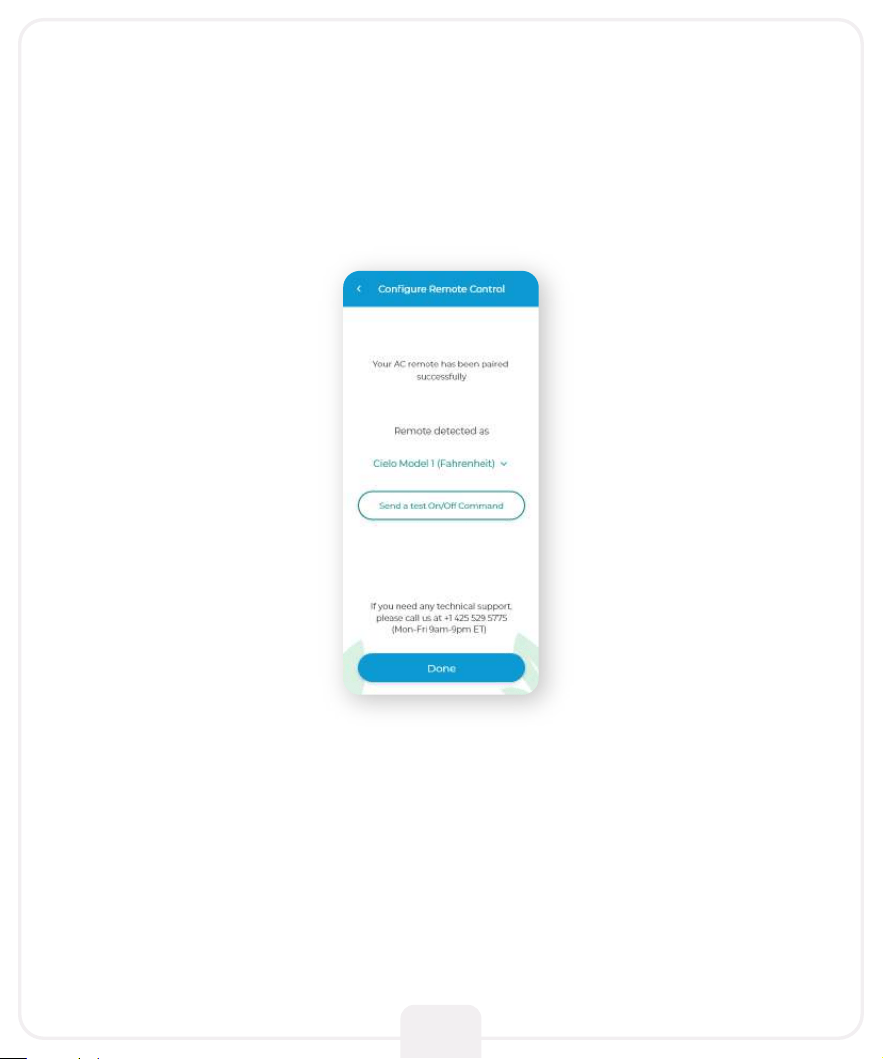
Step 8:
The configuration screen will display your detected
remote control. Tap ‘Send a test On/Off Command’.
Your AC will switch on/off.
Your remote is now successfully
paired with Breez Max.
The registration process is complete.
Enjoy your smart air conditioning!
15
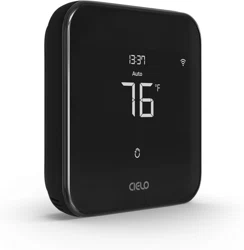
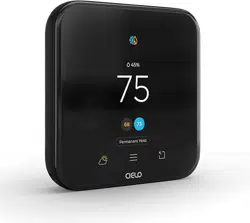
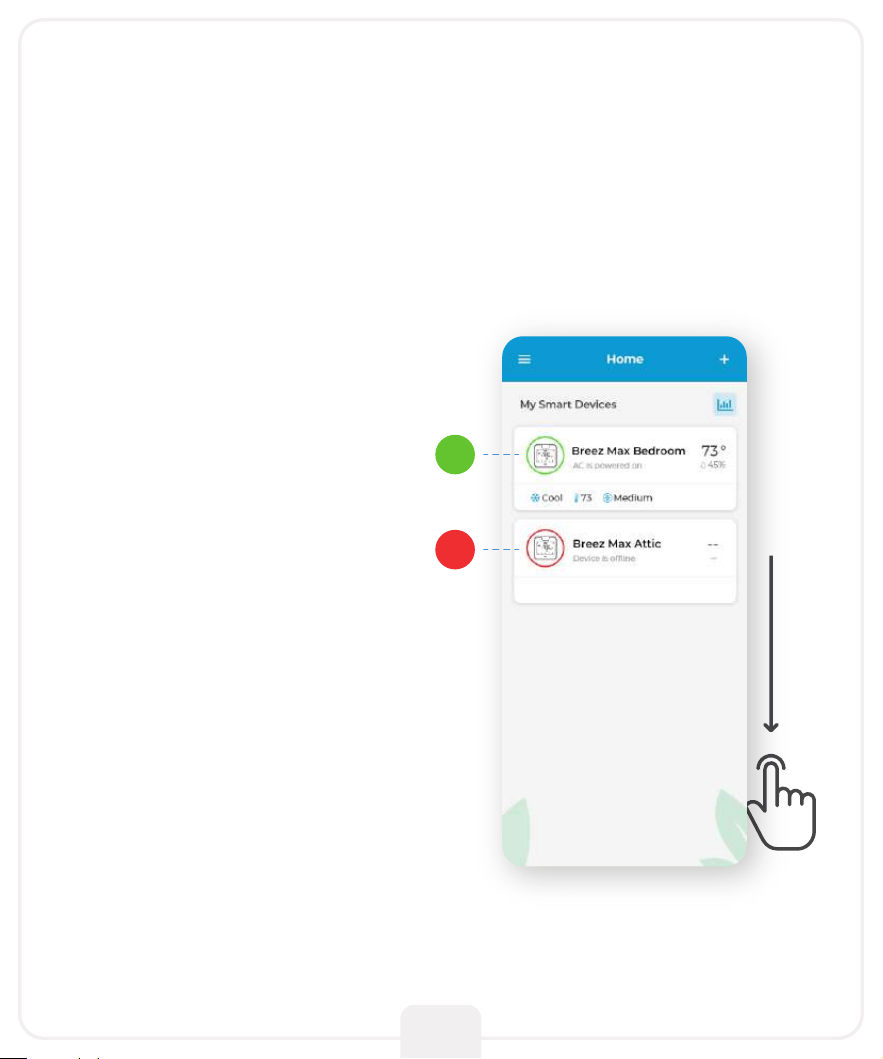
Your Home Screen
Your home screen shows the real-time status of all your
Cielo devices. A registered Cielo device can show either of
the 2 statuses outlined in circles:
Green - Device is online.
You’re good to go!
Red - Device is offline.
Ensure your phone/device
is connected to a working
internet connection.
Refresh the home screen
by swiping downwards
(pull-to-refresh).
1
2
16
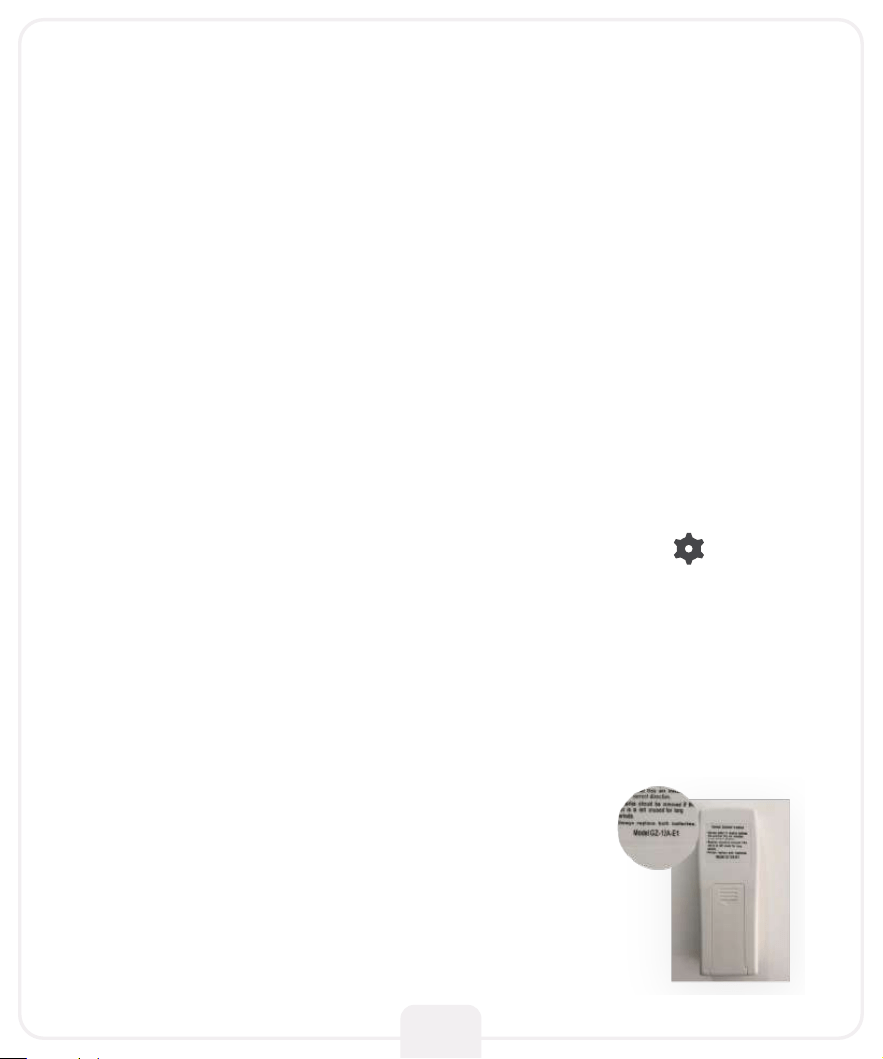
Breez Max auto-detects the relevant remote control for your
AC during the registration process. You can also configure your
AC remote manually.
In case, you need any further assistance, please contact
Cielo Support for help at (+1) 425-529-5775 or visit our website:
cielowigle.com and select support to access user guides.
Quick Tip: Remote control model number is
usually found on the back side of the remote
control, as shown in the image.
Configuring the Right
Remote Control for Your AC
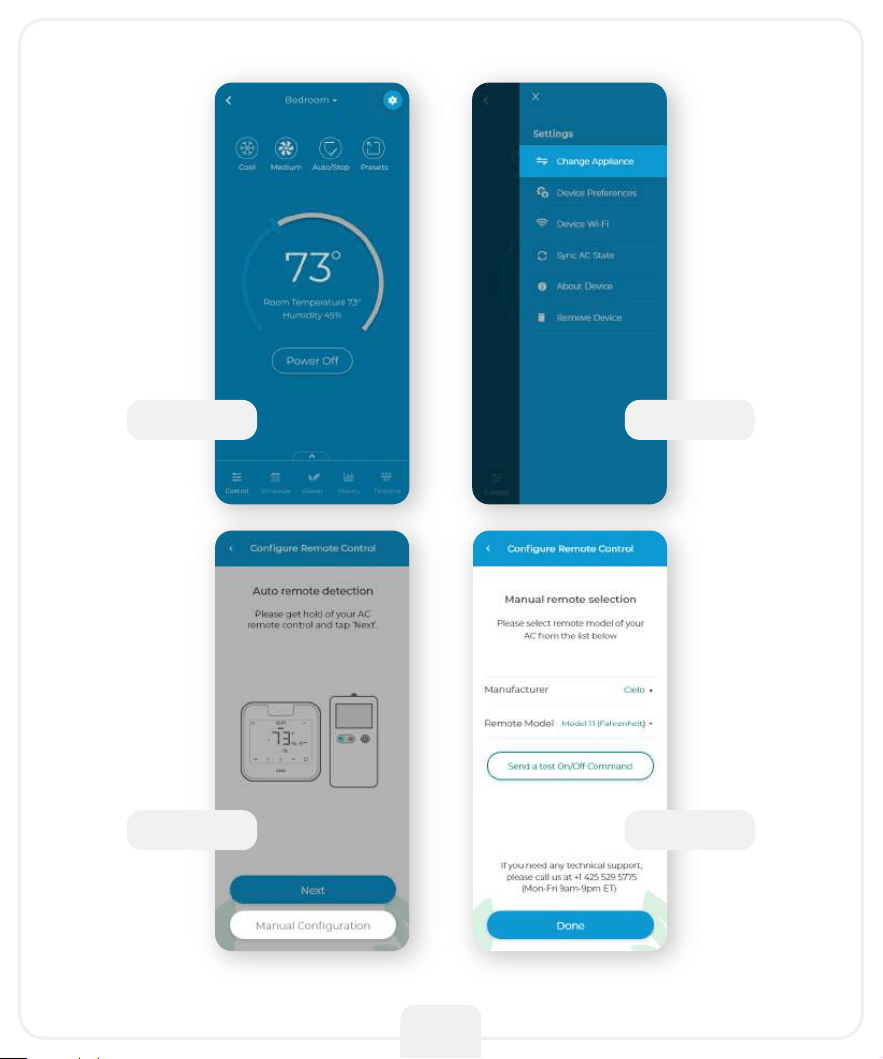
For manual selection, follow these steps:
Screen A: Go to settings by tapping the ‘Settings’ icon on the
control screen
Screen B: Select ‘Change Appliance’
Screen C: Select ‘Manual Configuration’
Screen D: Select the ‘Manufacturer’ & ‘Remote Model’ from the
drop-down list and tap ‘Done’
17
Screen A Screen B
Screen C Screen D
18
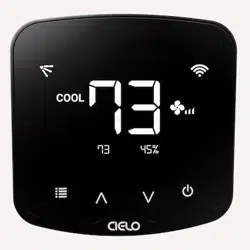
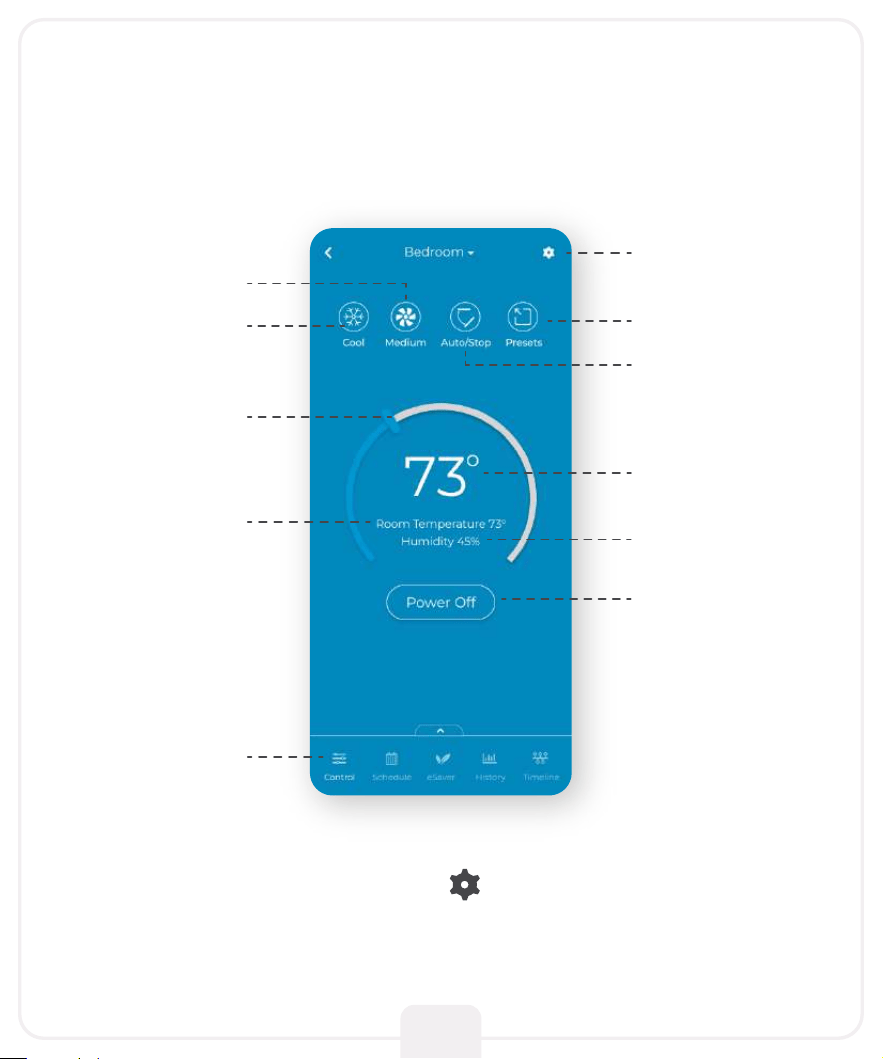
Tap the settings icon for more options
Enjoy Unlimited Functionalities
Mode
Swing Position
Set Point
Room Humidity
Power
Settings
Presets
Temperature
Control
Room
Temperature
Navigation Bar
Fan Speed
Wi-Fi Indicator
No Internet Access
Know Your Breez Max
19
73
70.8
Cooling to
45%
Heating to
13:37
AM
PM
f
DR
Off
Heat
Aux
Fan
Auto
Cool
Dry
Following
Schedule
Permanent
Hold
Temporary
Hold
Cancel
Hold
Sensor
Linked
Auto
Quiet
Fan
On
Fan
Circ
Fan On
Aux Heat On
Adjusting the temperature of your AC:
Use the up or down button to set the temperature of your choice.
Changing the mode of your AC:
Touch the menu button once. The AC modes will start blinking. Use the up or down
button to select the mode (e.g. Cool, Heat etc.).
Changing the fan speed:
Touch the menu button twice. The fan speed icon will start blinking. Use the up or down
button to change the fan speed.
Adjusting the swing position:
Touch the menu button thrice. The swing position icon will start blinking. Use the up or
down button to select the swing position.
Changing multiple settings:
You can set mode, swing position & fan speed. Touch the menu button once and select
the mode of your choice. Touch the menu button again and adjust the fan speed. Touch
the menu button again and select the swing position.
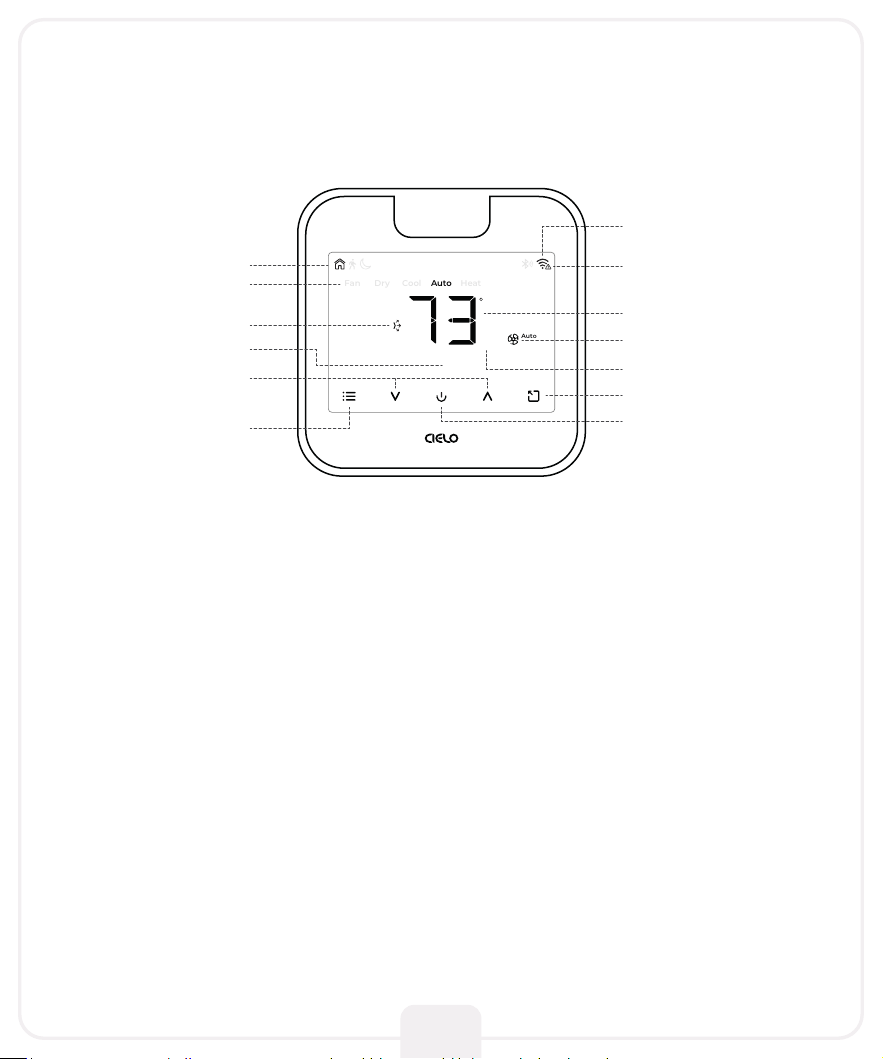
Modes
Presets Icons
Swing Position
Fan Speed
Room Temperature
Set-Point Temperature
Room Humidity
Presets
Power On/Off
Temperature
Up & Down
Menu
Know Your Breez Max
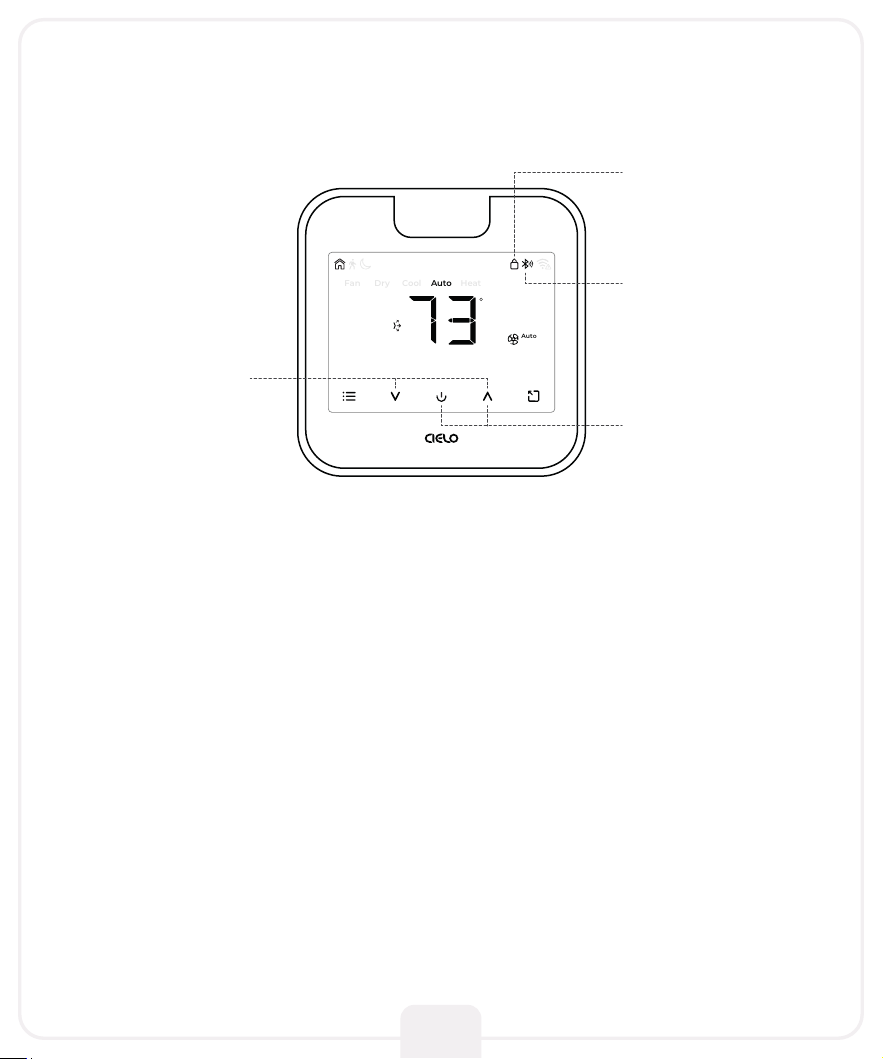
Locking/Unlocking the display interface:
Touch and hold the Temperature Up and Down buttons simultaneously until the lock
icon on the top right of the screen turns solid/disappears.
Resetting the Wi-Fi of Breez Max:
Touch and hold the Temperature Up and Power buttons simultaneously until the Wi-Fi
icon disappears and the Bluetooth icon starts blinking.
Wi-Fi Icon:
Case 1:-
Stable Wi-Fi icon - Device is connected to the internet, showing Wi-Fi strength.
Case 2:-
Wi-Fi icon with small triangle - Device is connected to the router but has no internet
access. Please ensure you have a working internet connection and restart the device.
Bluetooth Icon:
Blinking Bluetooth icon - Device is in broadcast (AP) mode. Please complete the registration
process.
73
70.8
Cooling to
45%
Heating to
13:37
AM
PM
f
DR
Off
Heat
Aux
Fan
Auto
Cool
Dry
Following
Schedule
Permanent
Hold
Temporary
Hold
Cancel
Hold
Sensor
Linked
Auto
Quiet
Fan
On
Fan
Circ
Fan On
Aux Heat On
20
Locking/Unlocking
Display Interface
Resetting Wi-Fi
Bluetooth Indicator
Screen Lock/Unlock
Indicator

21
If you are the original purchaser of the Product and you are not satisfied with this Product, you
may return it in its original condition within thirty (30) days of the original purchase and receive a
full refund.
2. RETURN POLICY
Before making a claim under this Limited Warranty, the owner of the Product must (a) visit
support.cielowigle.com during the Warranty Period to provide notice of your warranty claim and
describe the alleged failure, and (b) comply with Cielo’s (or its authorized distributor's) return
shipping instructions. Cielo will have no warranty obligations with respect to a returned Product
if it determines, in its reasonable discretion after examination of the returned Product, that the
Product is an Ineligible Product (defined below).
3. WARRANTY CONDITIONS
Cielo WiGle, Inc. (“Cielo”), warrants to the owner of the Cielo product contained in this box (the
“Product”) that the Product will be free from defects in materials and workmanship for a period
of one year from the date of delivery following the original retail purchase (the “Warranty Period”).
If the Product fails to conform to this Limited Warranty during the Warranty Period, Cielo will, at
its sole discretion, either (a) repair or replace the defective Product or component; or (b) accept
the return of the Product and refund the money actually paid by the original purchaser for the
Product. Repair or replacement may be made with a new or refurbished product or components,
at Cielo’s sole discretion. If the Product or a component incorporated within it is no longer availa-
ble, Cielo may, at Cielo’s sole discretion, replace the Product with a similar product having similar
functions. This is your sole and exclusive remedy for breach of this Limited Warranty. Any
Product that has either been repaired or replaced under this Limited Warranty will be covered by
the terms of this Limited Warranty for the longer of (a) ninety (90) days from the date of delivery
of the repaired Product or replacement Product, or (b) the remaining Warranty Period. This
Limited Warranty is transferable from the original purchaser to subsequent owners, but the
Warranty Period will not be extended in duration or expanded in coverage for any such transfer.
LIMITED WARRANTY &
END USER LICENSE AGREEMENT
1. WHAT IS COVERED?
4. WHAT THIS LIMITED WARRANTY DOES NOT COVER
This Limited Warranty does not cover the following (collectively “Ineligible Products”): (i)
Products marked as “sample” or “Not for Sale”, or sold “AS IS”; (ii) Products that have been subject
to: (a) modifications, alterations, tampering, or improper maintenance or repairs, except if
performed by Cielo; (b) handling, storage, installation, testing, or use not in accordance with any

For detailed information on warranty, please visit:
cielowigle.com/legal
22
EXCEPT AS STATED ABOVE IN THIS LIMITED WARRANTY, AND TO THE MAXIMUM EXTENT
PERMITTED BY APPLICABLE LAW, CIELO DISCLAIMS ALL EXPRESS, IMPLIED, AND STATUTORY
WARRANTIES AND CONDITIONS WITH RESPECT TO THE PRODUCT, INCLUDING THE IMPLIED
WARRANTIES OF MERCHANTABILITY AND FITNESS FOR A PARTICULAR PURPOSE. TO THE
MAXIMUM EXTENT PERMITTED BY APPLICABLE LAW, CIELO ALSO LIMITS THE DURATION OF
ANY APPLICABLE IMPLIED WARRANTIES OR CONDITIONS TO THE DURATION OF THIS LIMITED
WARRANTY.
5. DISCLAIMER OF WARRANTIES AND CONDITIONS
IN NO EVENT WILL CIELO BE LIABLE FOR ANY CONSEQUENTIAL, INCIDENTAL, EXEMPLARY,
OR SPECIAL DAMAGES, INCLUDING ANY DAMAGES FOR LOST DATA OR LOST PROFITS,
ARISING FROM OR RELATING TO THIS LIMITED WARRANTY OR THE PRODUCT. CIELO’S TOTAL
CUMULATIVE LIABILITY ARISING FROM OR RELATED TO THIS LIMITED WARRANTY OR THE
PRODUCT WILL NOT EXCEED THE AMOUNT ACTUALLY PAID FOR THE PRODUCT BY THE
ORIGINAL PURCHASER.
6. LIMITATION OF DAMAGES
User’s Guide, Placement Guidelines, or other instructions provided by Cielo; (c) abuse or misuse
of the Product; (d) breakdowns, fluctuations, or interruptions in electric power or the telecommu-
nications network; or (e) Acts of God, including but not limited to lightning, flood, tornado,
earthquake, or hurricane; or (iii) any non- Cielo branded hardware products, even if packaged or
sold with Cielo hardware. This Limited Warranty does not cover consumable parts, including
batteries, unless damage is due to defects in materials or workmanship of the Product, or
software (even if packaged or sold with the product). Cielo recommends that you use only
authorized service providers for maintenance or repair. Unauthorized use of the Product or
software can impair the Product’s performance and may invalidate this Limited Warranty.
For any queries visit:
cielowigle.com
OR
Call: (+1) 425-529-5775
Email: support@cielowigle.com
Cielo WiGle, Inc. Redmond, WA, USA
All rights reserved.