YoLink SpeakerHub
YS1604-UC
Set-up & User Guide
Rev 1.3
July 27, 2022

This user guide is also available in video format, on our
website and YouTube channel. See part N of this guide
for more info.
TABLE OF CONTENTS
SECTION TOPIC PAGE
A Thank you! 1
BIntroduction 2
C Before You Begin 3
D What’s in the Box? 4
E Get to Know Your SpeakerHub 5
F Install the YoLink App 6
G Open the App 7
H Add Your SpeakerHub to the App 8
I Power Up the SpeakerHub 10
J Mobile Device Settings 11
K Connect Hub to WiFi 13
L Introduction to the App 18
M SpeakerHub Device Settings 19
N Advanced Settings 25
OFirmware Updates 26
P Factory Reset 27
Q CE Mark Warning 28
R Warranty 29
S Warning 29
T Contact Us / Support 30
Thank you for purchasing YoLink products!
Whether you are adding additional hubs to expand your
system's range or if this is your first YoLink system, we
appreciate you trusting YoLink for your smart home &
automation needs. Your 100% satisfaction is our goal. If
you experience any problems with your installation, with
our products or if you have any questions that this manual
does not answer, please contact us right away. See the
Contact Us section for more info.
Thank you!
Eric Vanzo
Customer Experience Manager
Thank you!
A
User Guide Conventions
To assure your satisfaction with your purchase, please
read this user guide we have prepared just for you.
The following icons are used to convey specific types of
information:
Very important information (can save you time!)
1
Good to know info but may not apply to you
Troubleshooting tips
Mostly unimportant (it’s ok to breeze past it!)
Introduction
B
YoLink Hubs are the gateway to the internet for your YoLink
devices. As opposed to many smart home systems, the
individual devices are
not
on your network or WiFI and are
not directly connected to the internet. Instead, your devices
communicate with the Hub, which connects to the internet,
the cloud server and the app.
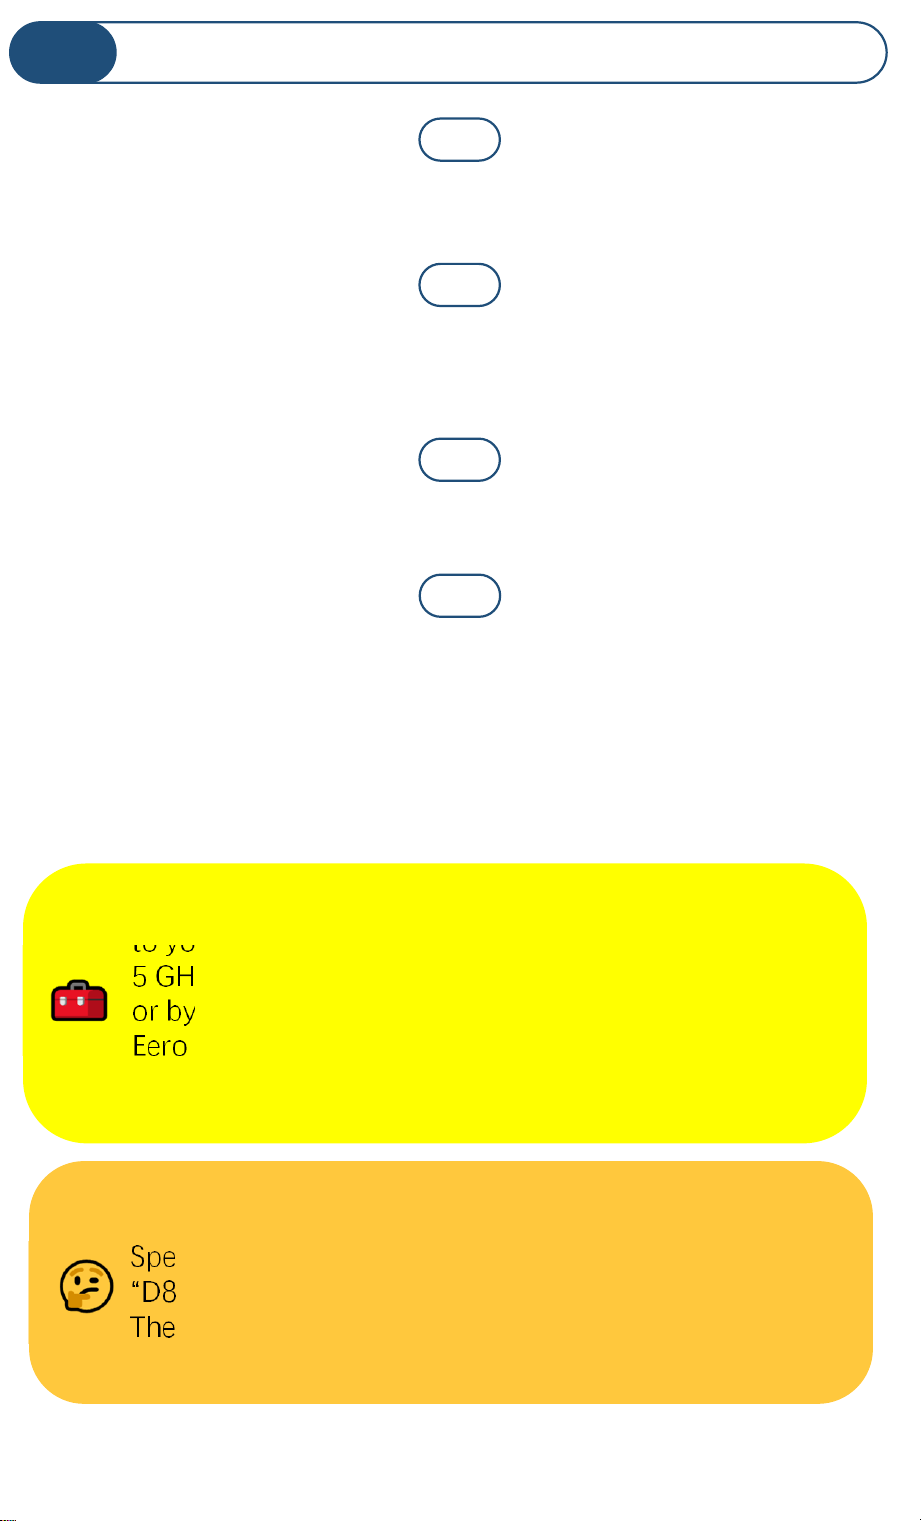
Your SpeakerHub can only connect to the internet via a 2.4
GHz band provided by your WiFi network Like most IoT and
home automation devices, your SpeakerHub connects only to
the 2.4 GHz WiFi band. Nearly all residential WiFi routers have
a 5
and
a 2.4 GHz band. But your router may or may not
display SSIDs for
both
bands or they may both have the
same
name
. If you know which SSID is your 2.4 GHz band, this is the
one your Hub will connect to. With some exceptions, your
router and the SpeakerHub will connect automatically via 2.4
GHz. Some routers may attempt to connect your Hub to 5
GHz. Additional support may be needed, for example,
changing your router settings.
“5 GHz” should not be confused with “5G”
cell phone service
Multi-step authentication networks, such as
hotels and airports, are not compatible!
You can have multiple hubs, including a combination of our
original Hub and your new SpeakerHub. While the YoLink
wireless network has a ¼ mile open-air range, additional
hubs may be required in large buildings, such as high-rises,
and/or to support thousands of devices
2
Before You Begin
C
Do not allow your SpeakerHub to get wet
…
or eat after midnight
Find a suitable place for your SpeakerHub to live. SpeakerHub
wants to be indoors, clean and dry.
SpeakerHub is not designed for wall-mounting.
Place your SpeakerHub at a location where you can hear the
speaker clearly, at a moderate volume level.
Avoid placing your SpeakerHub inside a cabinet, or on or near
metal, magnets, or sources of radio or electromagnetic energy
or interference, such as radio transmitters, as well as other
WiFi equipment.
Do not place your SpeakerHub on or near sources of heat or
intense direct sunlight, such as a space heater.
An outlet will be required for the power adapter for your
SpeakerHub. Ensure it can have a dedicated outlet; it will not
work if it is unplugged; SpeakerHub does
not
have an internal
battery.
You do not need to re-scan your existing
devices if you are adding or replacing a Hub
3
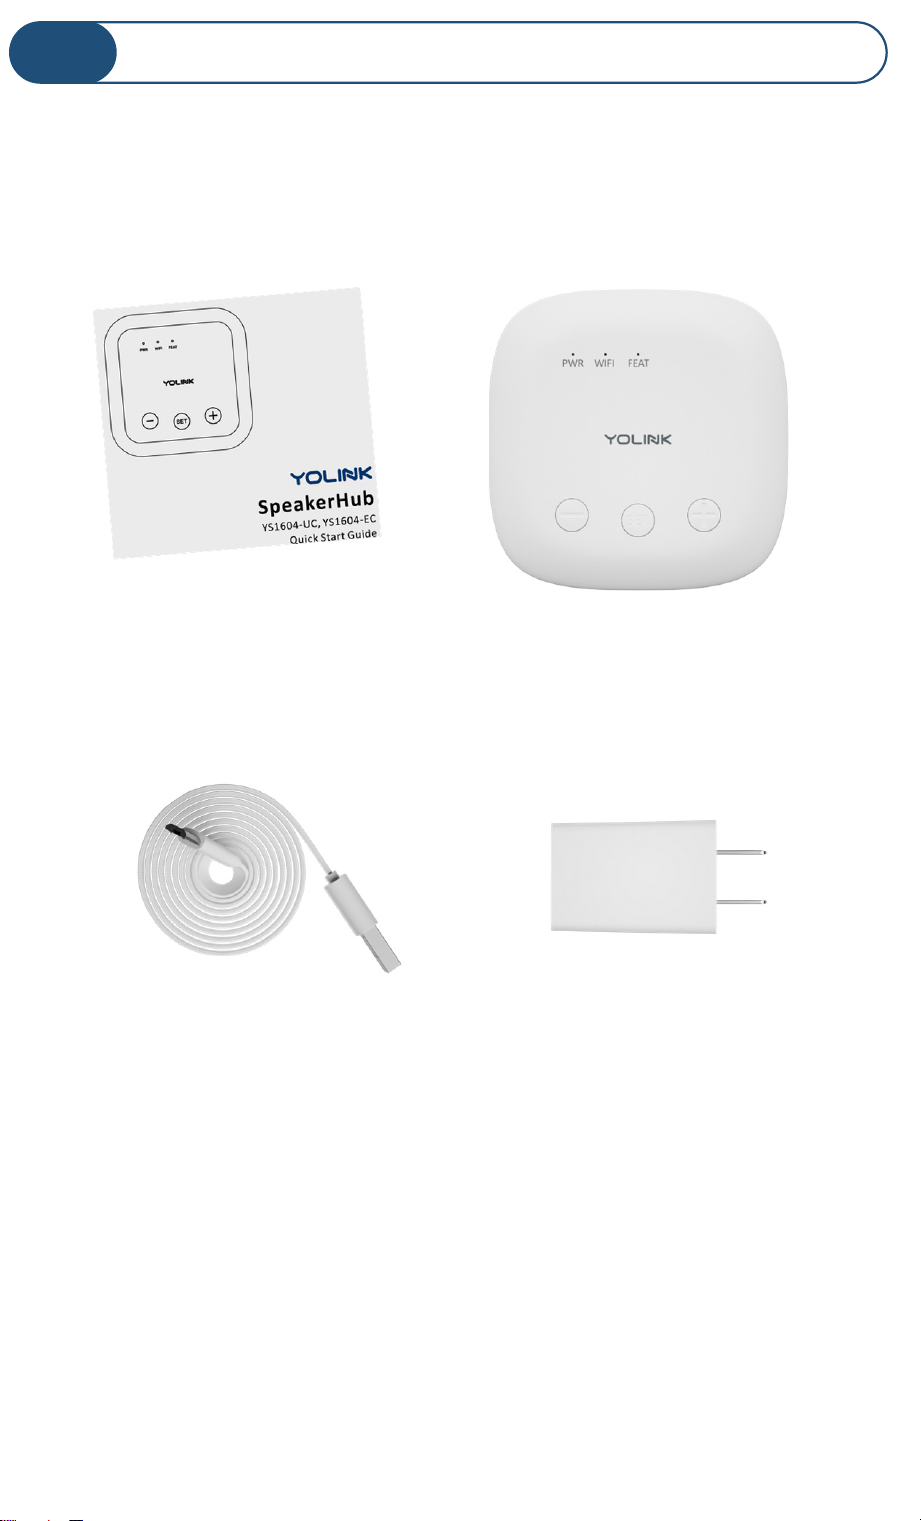
What’s in the Box?
D
SpeakerHub
Quick Start Guide
USB Cable
(“Micro B”)
AC Adapter
Power Supply
4
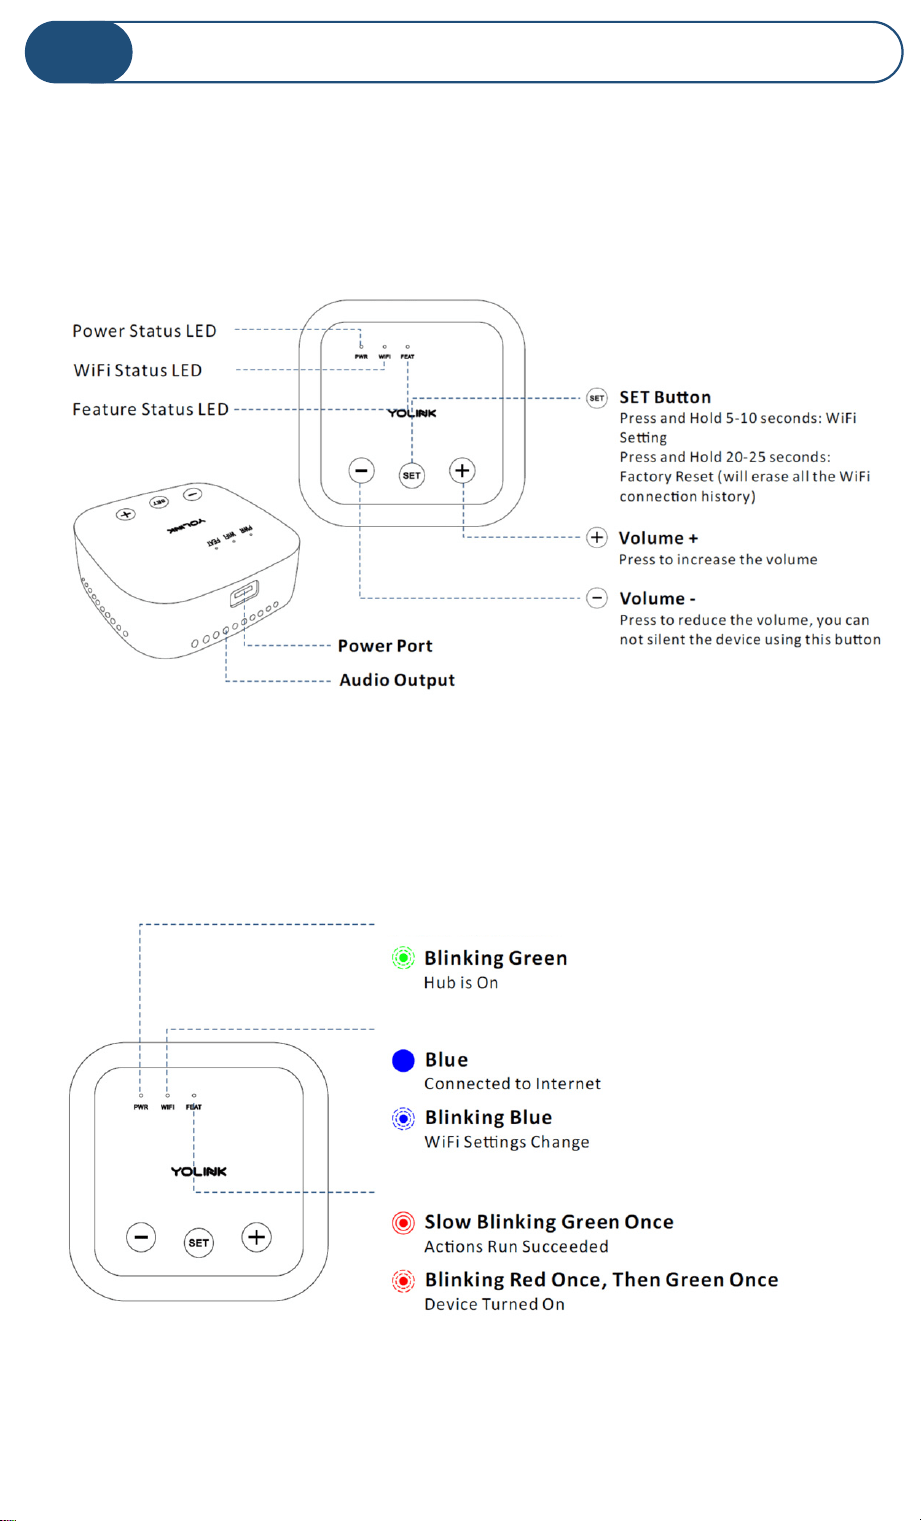
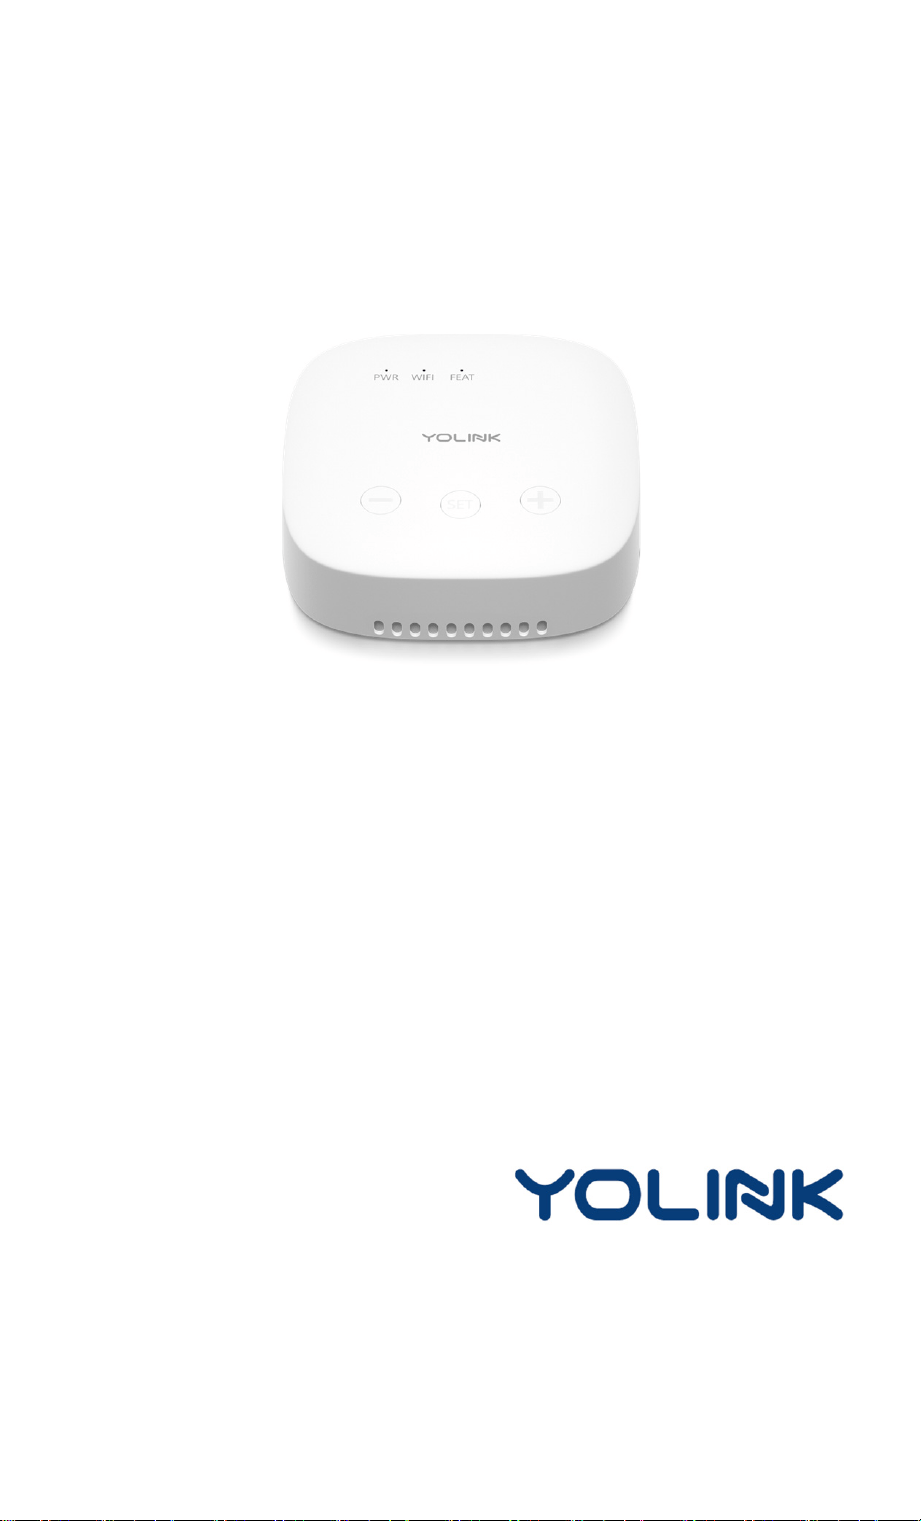
Get to Know Your SpeakerHub
E
Please take a moment to familiarize yourself with your new
SpeakerHub, in particular the LED behaviors and SET button
functions.
LED Behavior explanations
Feature Status LED
WiFi Status LED
Power Status LED
5
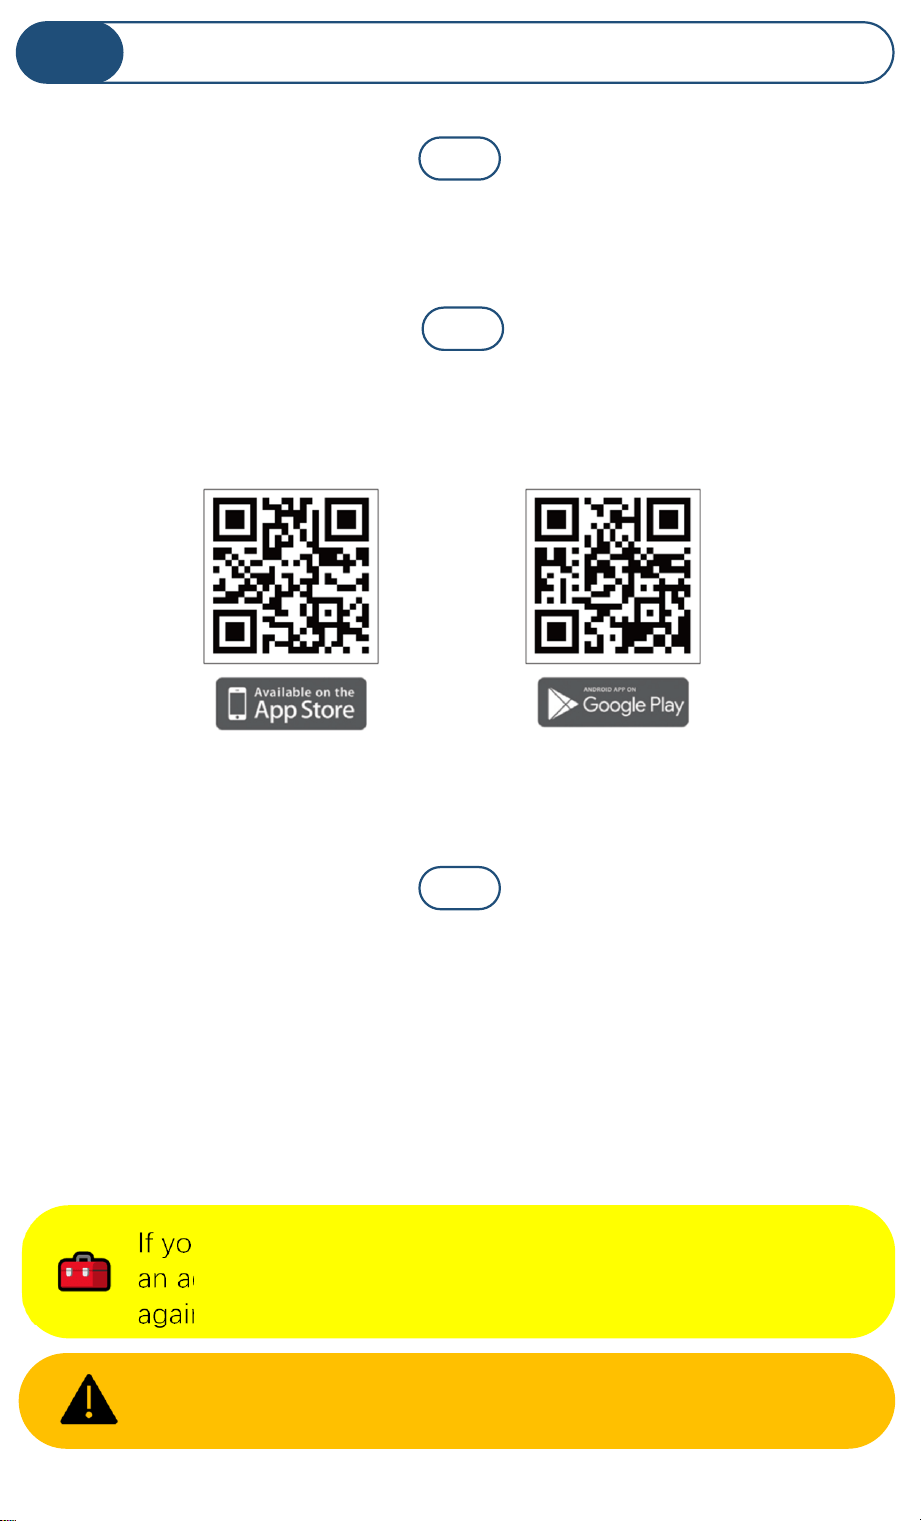
If you are new to YoLink, please install the app on your phone or
tablet, if you have not already. Otherwise, please proceed to part
H.
Scan the appropriate QR code below or find the “YoLink app” on
the appropriate app store.
Open the app and tap Sign up for an account. You will be
required to provide a username and a password. Follow the
instructions, to set up a new account. Allow notifications, when
prompted.
Install the YoLink App
F
Retain your username and password in a secure location
If you encounter an error message attempting to create
an account, disconnect your phone from WiFi, and try
again, connected only to the cellular network
Apple phone/tablet
iOS 9.0 or higher
Android phone/tablet
4.4 or higher
1
2
3
6
Open the App
G
You will immediately receive a welcome email from no-reply@
yosmart.com with some helpful information. Please mark the
yosmart.com domain as safe, to ensure you receive important
messages in the future.
Log in to the app using
your new username and
password
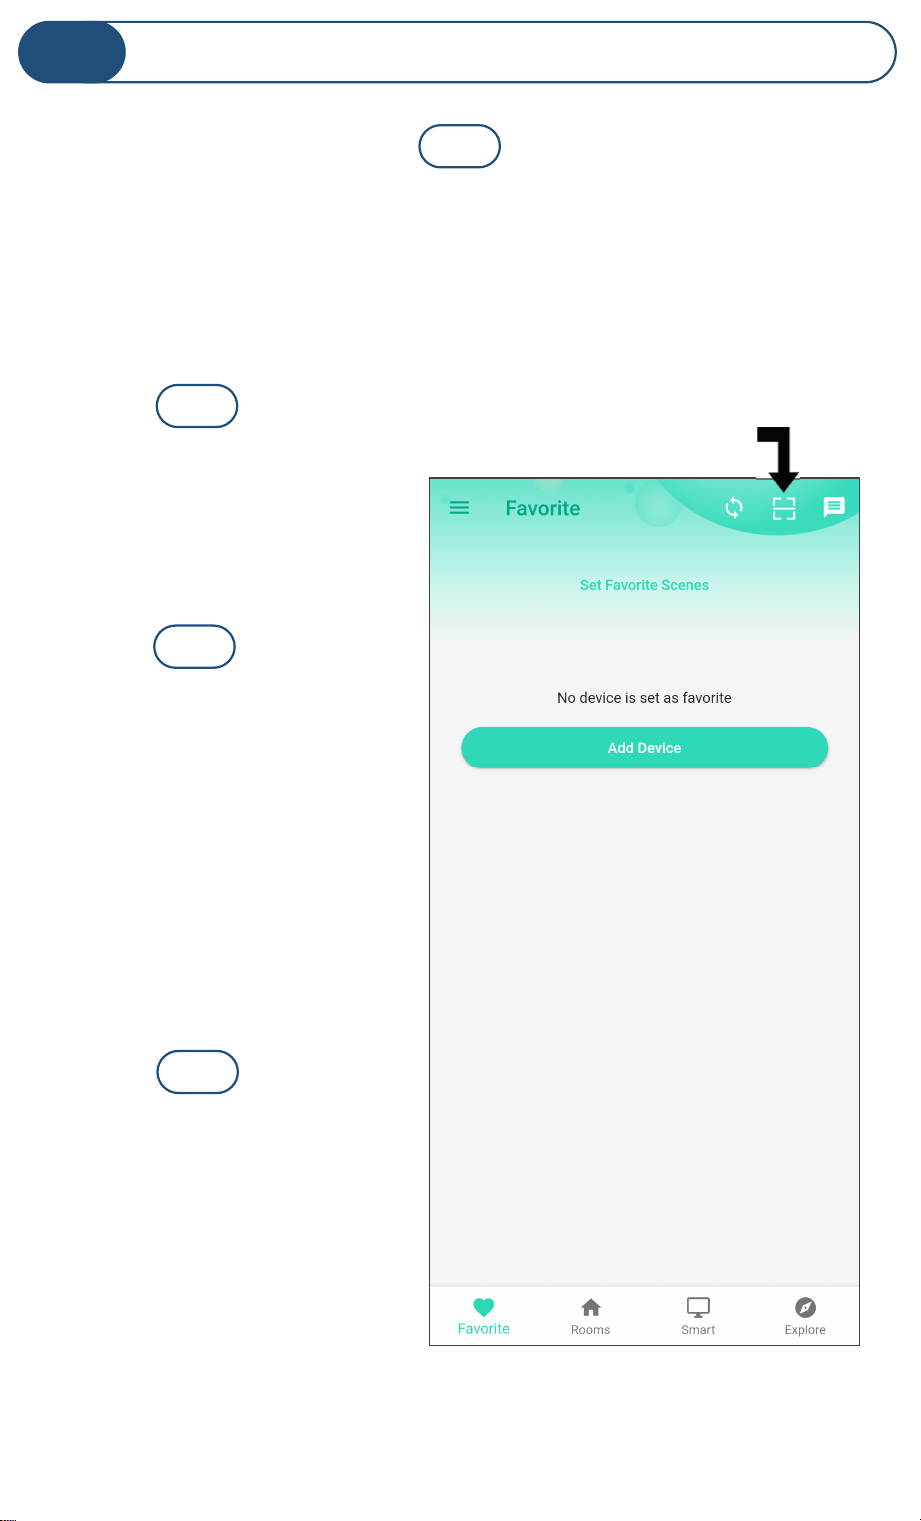
The app opens to the
Favorite screen, as shown.
This is where your favorite
devices will be shown. You
can organize your devices
by room, in the Rooms
screen, later.
Tap Add Device (if shown)
or tap the scanner icon
Scanner icon
1
2
3
4
7

Approve access to your phone’s camera, if requested. A
viewfinder will be shown on the app.
Hold the phone over the QR code (on the underside of the hub)
so that the code appears in the viewfinder. If successful, the Add
Device screen will be displayed
Add Your SpeakerHub to the App
H
If you experience difficulties scanning in a new device,
ensure the code is not dirty or smudged, and that the
camera has adequate lighting. If you are still unable to scan
a device, please make a note of the serial number for our
customer support staff. This is the number right below the
QR code, a long number preceded by “S/N:”
1
2
8
Add Your SpeakerHub to the App, Cont.
H
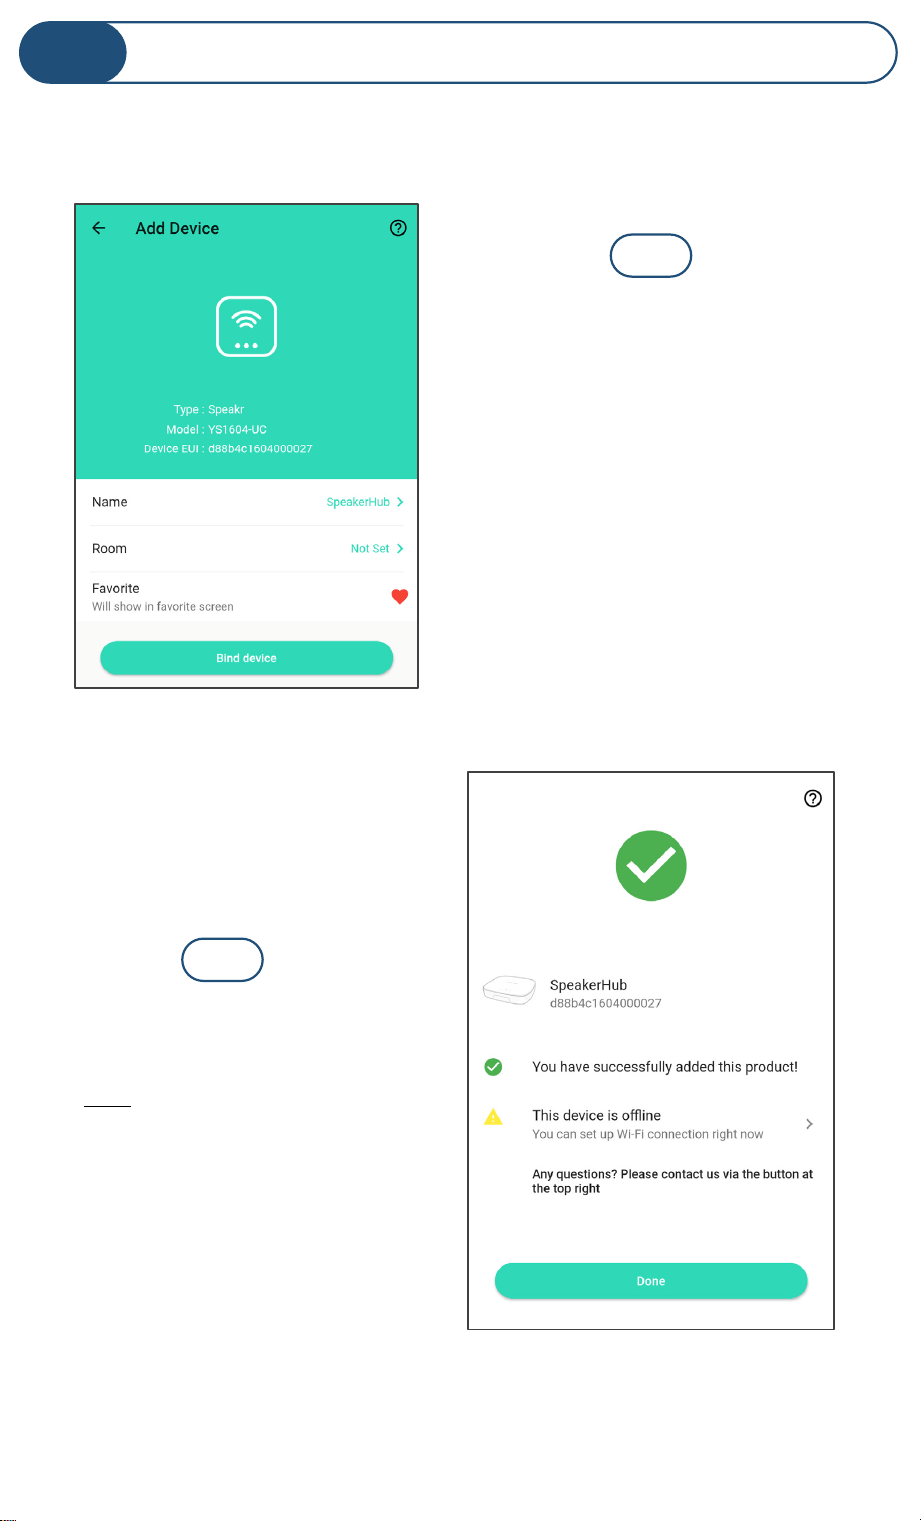
You can change the device
name and assign it to a room
later. Ensure that the Favorite
icon is selected as shown (red
heart). Tap Bind device
If successful, the screen will
appear as shown. Tap Done
(do not tap “set up WiFi
connection” at this time)
3
4
9
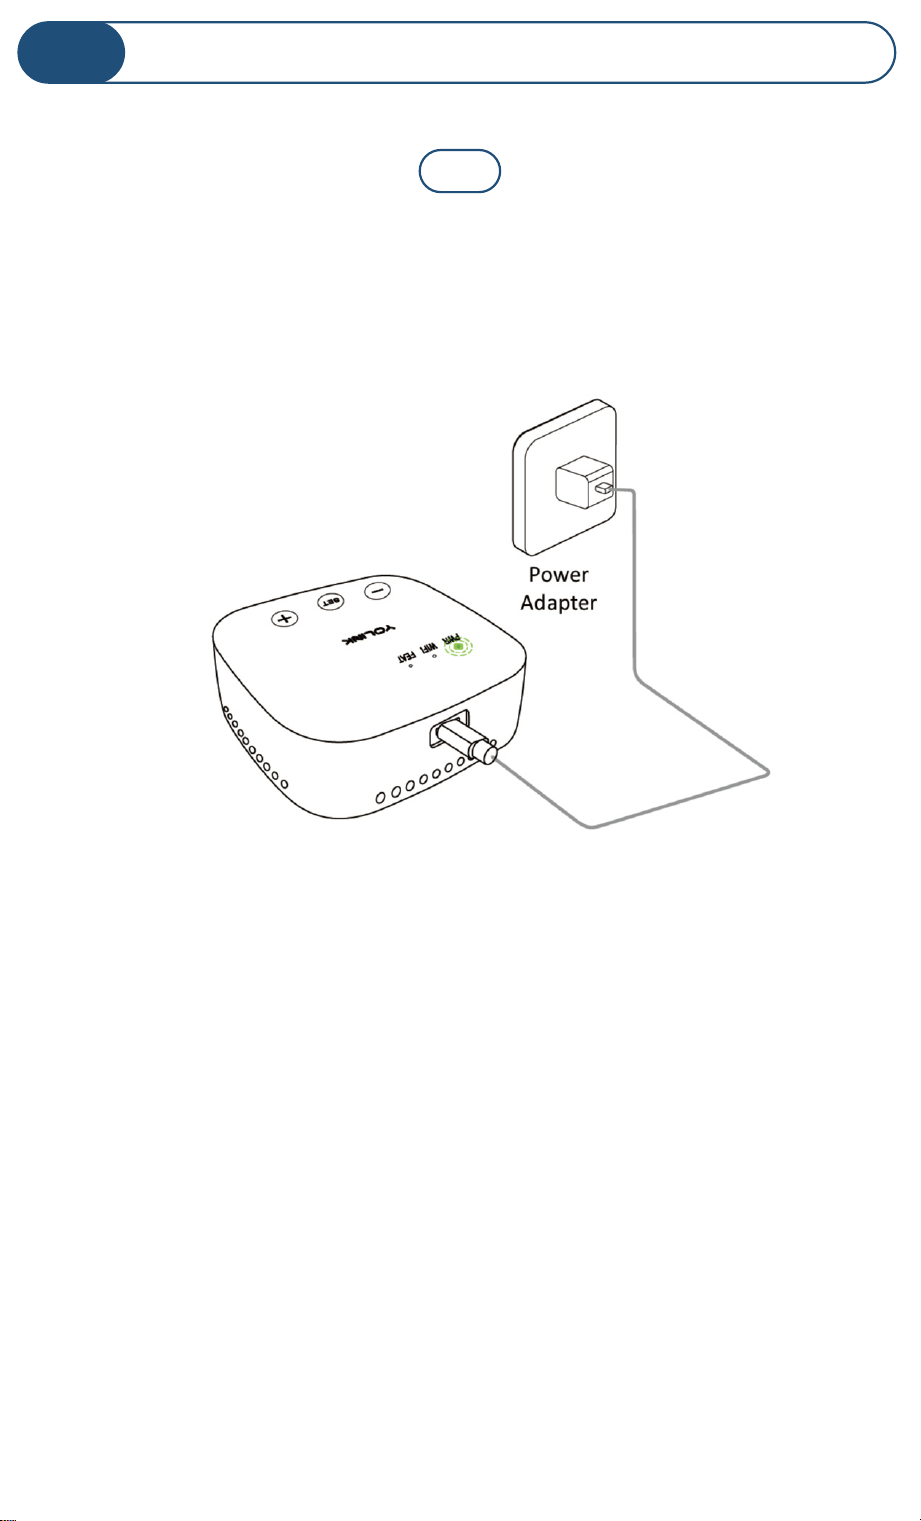
Connect the supplied USB cable to the hub and to the power
adapter as shown.
Plug in the adapter. Observe the green power (PWR) LED is
blinking
Power up the SpeakerHub
I
1
10
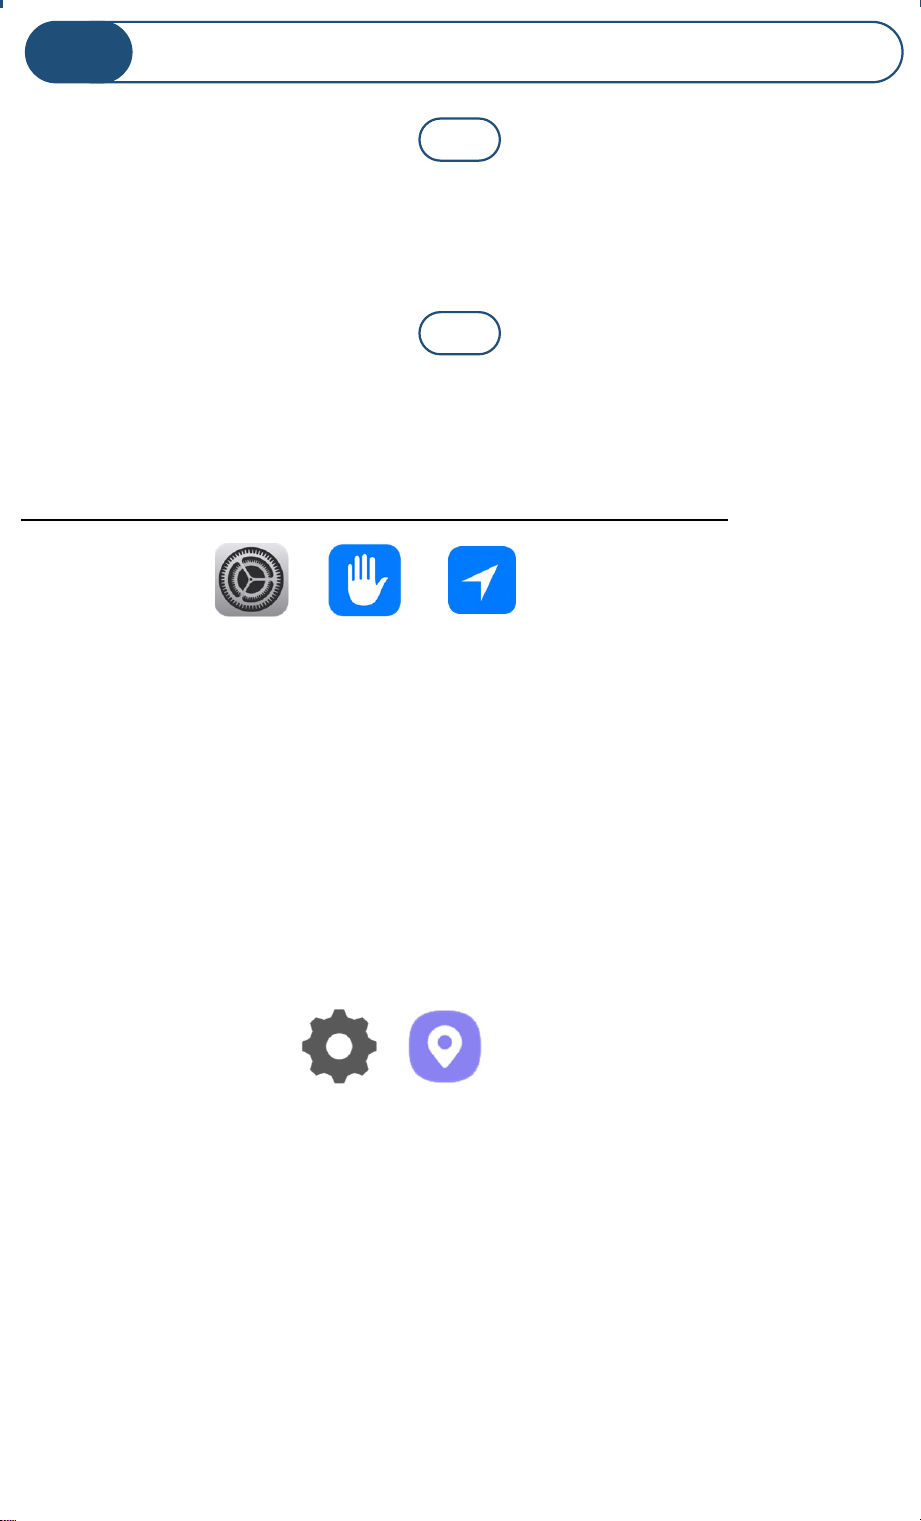
iOS phones only: if prompted, enable Local Network Access.
(Search “iOS location services” for more information)
To check or edit Location Services on your phone:
iOS:
Go to Settings, tap Privacy, tap Location Services
Ensure Location Services is on/enabled.
Scroll down to and tap the YoLink app
Select While Using the App
Enable Precise Location
Android:
Go to Settings, tap Location.
Ensure Location is On.
Tap App Permissions. Scroll down to and
tap the YoLink app, then set permission to
Allowed Only While in Use
Mobile Device Settings
J
If prompted, grant access to your location. Tap Allow Once.
This is required for the next steps.
1
2
11
In your phone, open WiFi settings (Settings, WiFi)
Identify your 2.4 GHz network, if possible. If there is only one
SSID (network ID) you recognize, you will use that one
If your SSID is hidden, you must manually log into it on your
phone, by selecting “Other...” in Other Networks or Choose a
Network
Select the appropriate network and log-in, if needed
Mobile Device Settings, Continued
J
Some routers allow you to “white list” a device based on
its MAC address. The MAC address for your
SpeakerHub can be determined by combining
“D88B4C04” with the last four digits of the EUI number.
The EUI number can be found in the device settings
screen.
If you experience difficulties connecting the SpeakerHub
to your WiFi, try temporarily disabling or turning off your
5 GHz band. Check for this option in your router’s app,
or by using a browser interface. For example, for the
Eero router, in the app, go to Settings, Troubleshooting,
“My device won’t connect”, then tap “Temporarily pause
5 GHz”
1
2
3
4
12
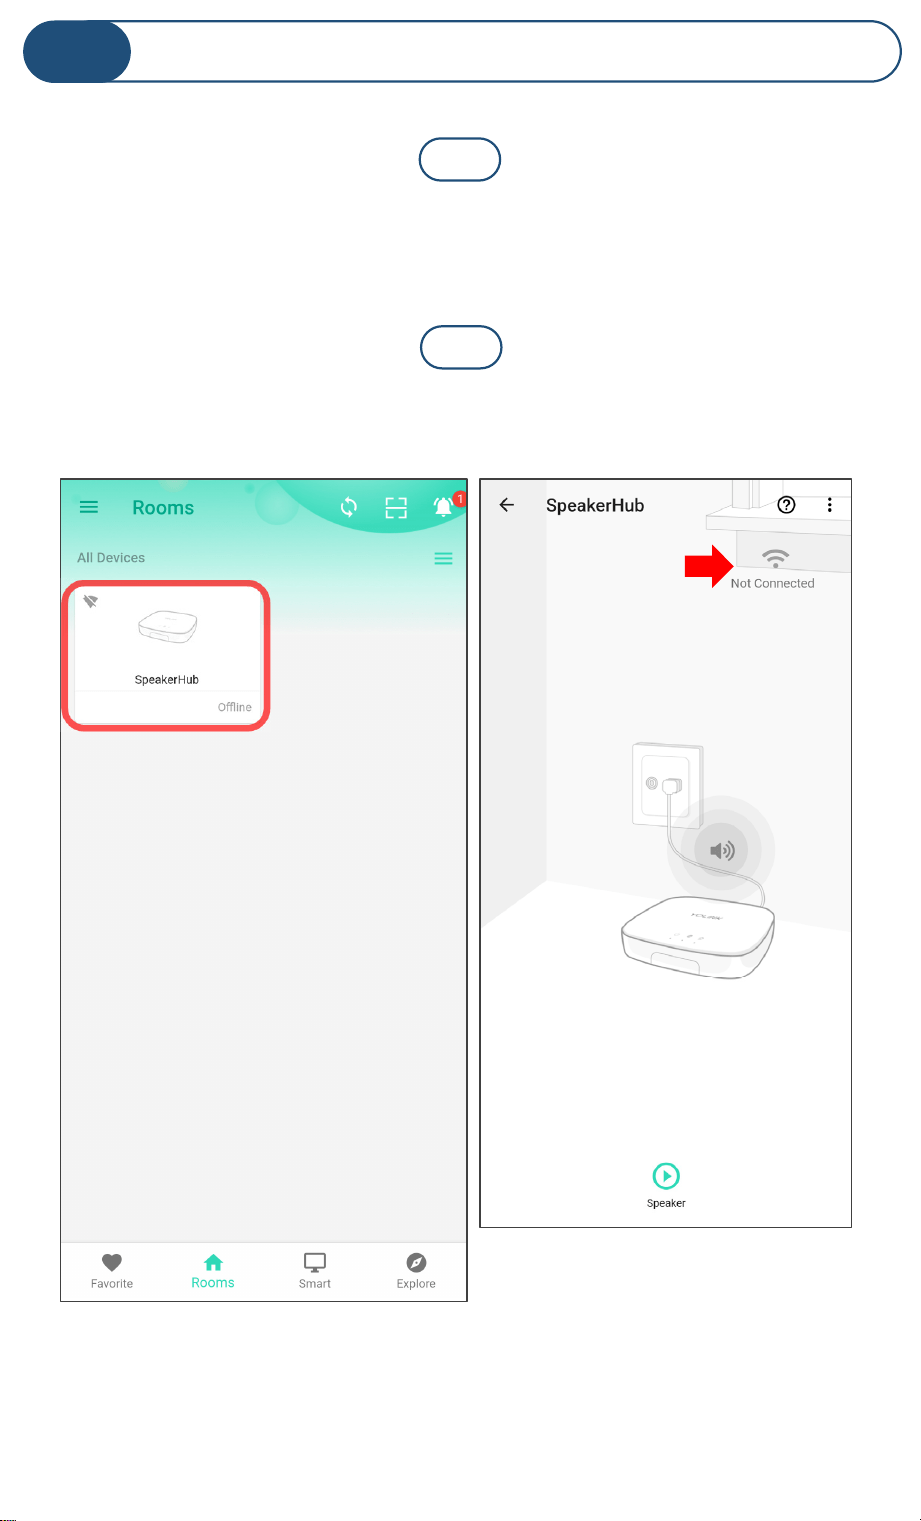
From the Rooms or Favorites screen, tap on the SpeakerHub
icon, as shown in the left figure
Connect Hub to WiFi
K
Tap on the WiFi icon as shown on the right figure
1
2
13
Connect Hub to WiFi, Continued
K
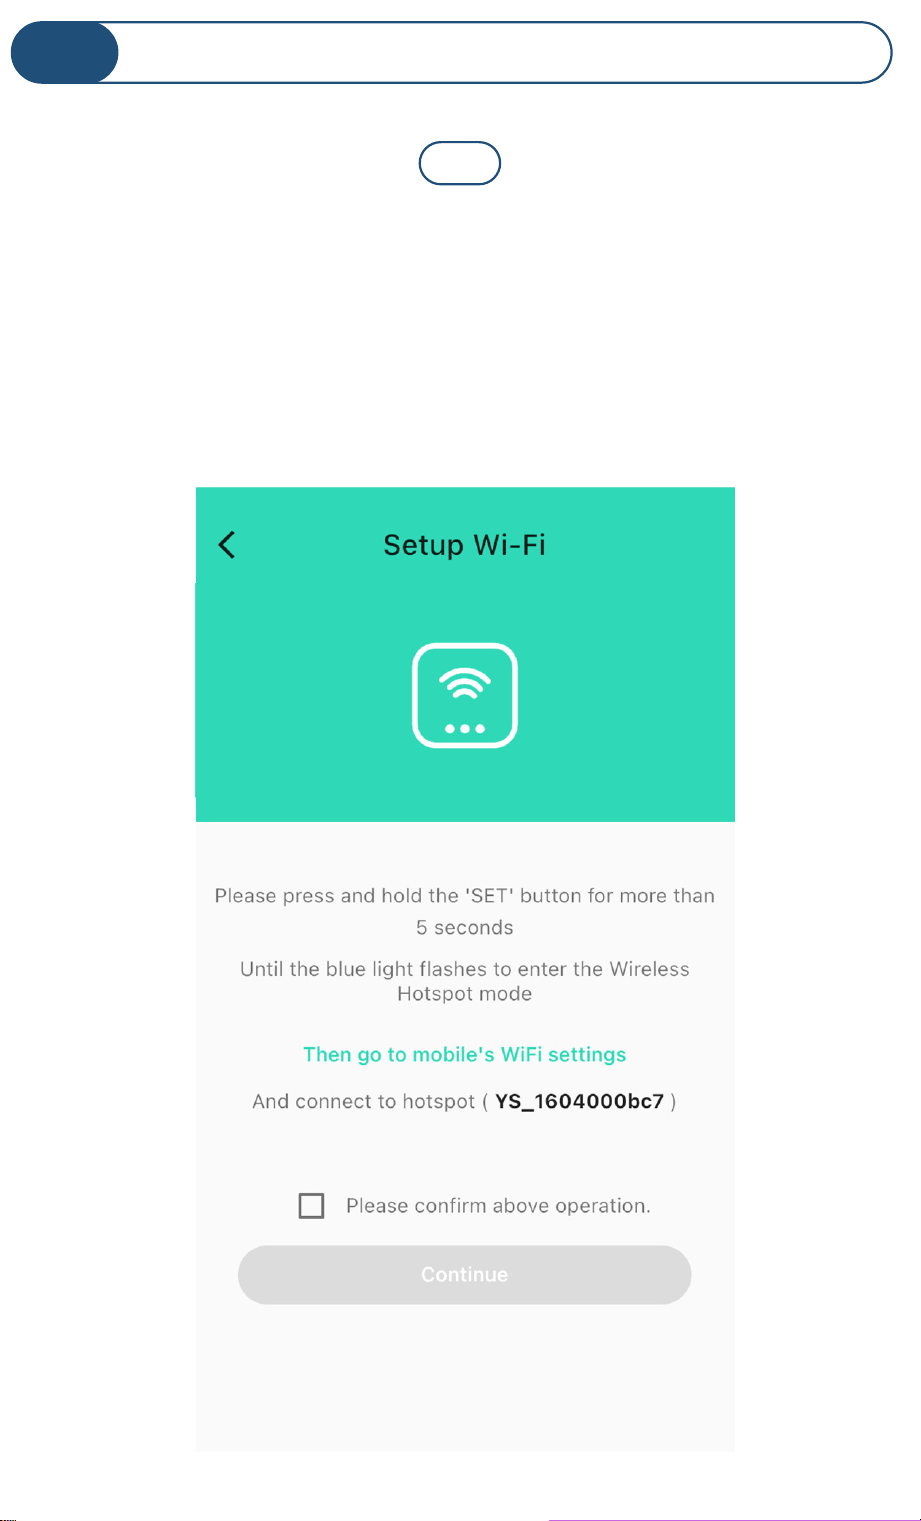
Please review the instructions on the Setup Wi-Fi screen.
After pressing the SET button on the SpeakerHub, you will
then log into the SpeakerHub’s hotspot on your phone. This
will need to be done with no delays between steps, otherwise
the Hub will exit hotspot mode (in 5 minutes).
3
14

Log-in to the SpeakerHub hotspot. It is identified as
YS_1604000bc7. Disregard any messages about no internet
connection. If requested, approve “Once” or “This Time Only”
As directed in the app, press the hub’s SET button for
5
seconds or until the WiFi LED flashes rapidly
Connect Hub to WiFi, Continued
K
If you get an error message as shown below, or if requested,
grant access to your phone’s location data, also known as
“Location Services”
(As noted in Part J). Tap Allow Once, if applicable.
4
6
7
15

Connect Hub to WiFi, Continued
K
Return to the app. Check the “Please confirm the
above operation” checkbox. Tap Continue. The
Enter WiFi Password screen appears as shown
In the Choose a WiFi box, select or enter your 2.4
GHz SSID (unless it is hidden, it should appear in the
list, when you tap in this area). Enter your WiFi
password, then tap Continue
8
9
MyWiFi
If you see a “connect to device timeout” message,
tap Close
7
16
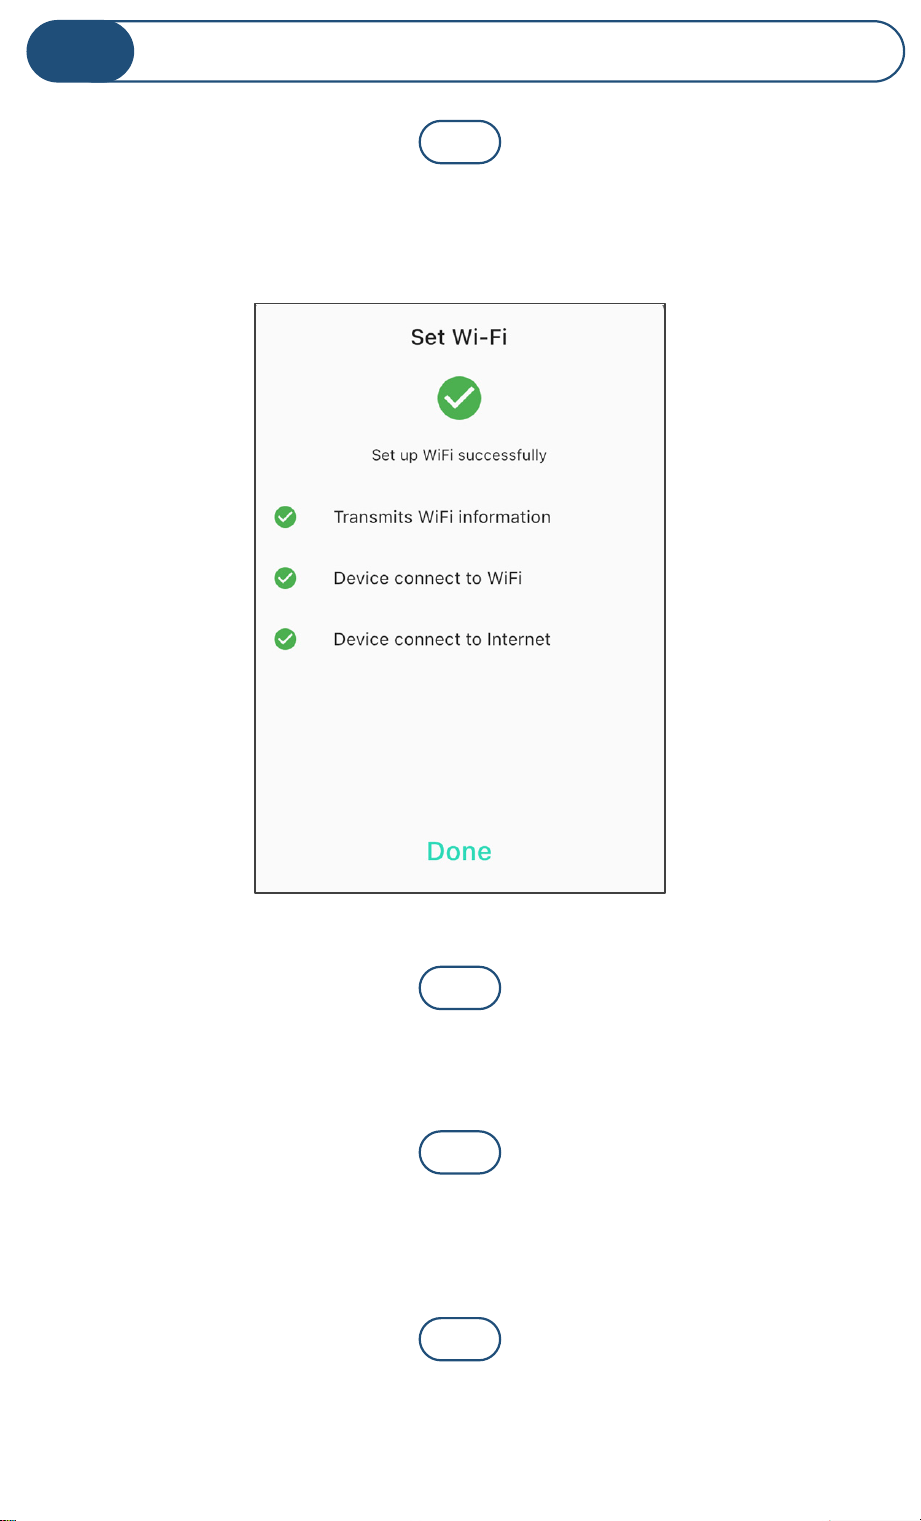
The “Set up WiFi successfully” message should appear on the
screen as shown. Tap Done
The SpeakerHub’s blue internet status LED should be on,
indicating an internet connection is established
Connect Hub to WiFi, Continued
K
At first, in the app, your SpeakerHub may appear offline. Tap
the Refresh icon or swipe down on the screen to refresh the
screen.
If your SpeakerHub indicates Online as shown, you can
proceed to part L
10
11
12
13
17

New to the YoLink app? Please visit our SpeakerHub support
page, for additional support information and resources for
your SpeakerHub, as well as for the YoLink app. Take a look
around the SpeakerHub area, then, click YoLink Academy for
documents and videos that will explain the features of the
app and show you how to change notification settings, and
how to set up scenes and automations, etc.
Scan the QR code or click the link to visit our SpeakerHub
support page on yosmart.com
The YoLink App
L
https://shop.yosmart.com/pages/speakerhub-
product-support
18
SpeakerHub Device Settings
M
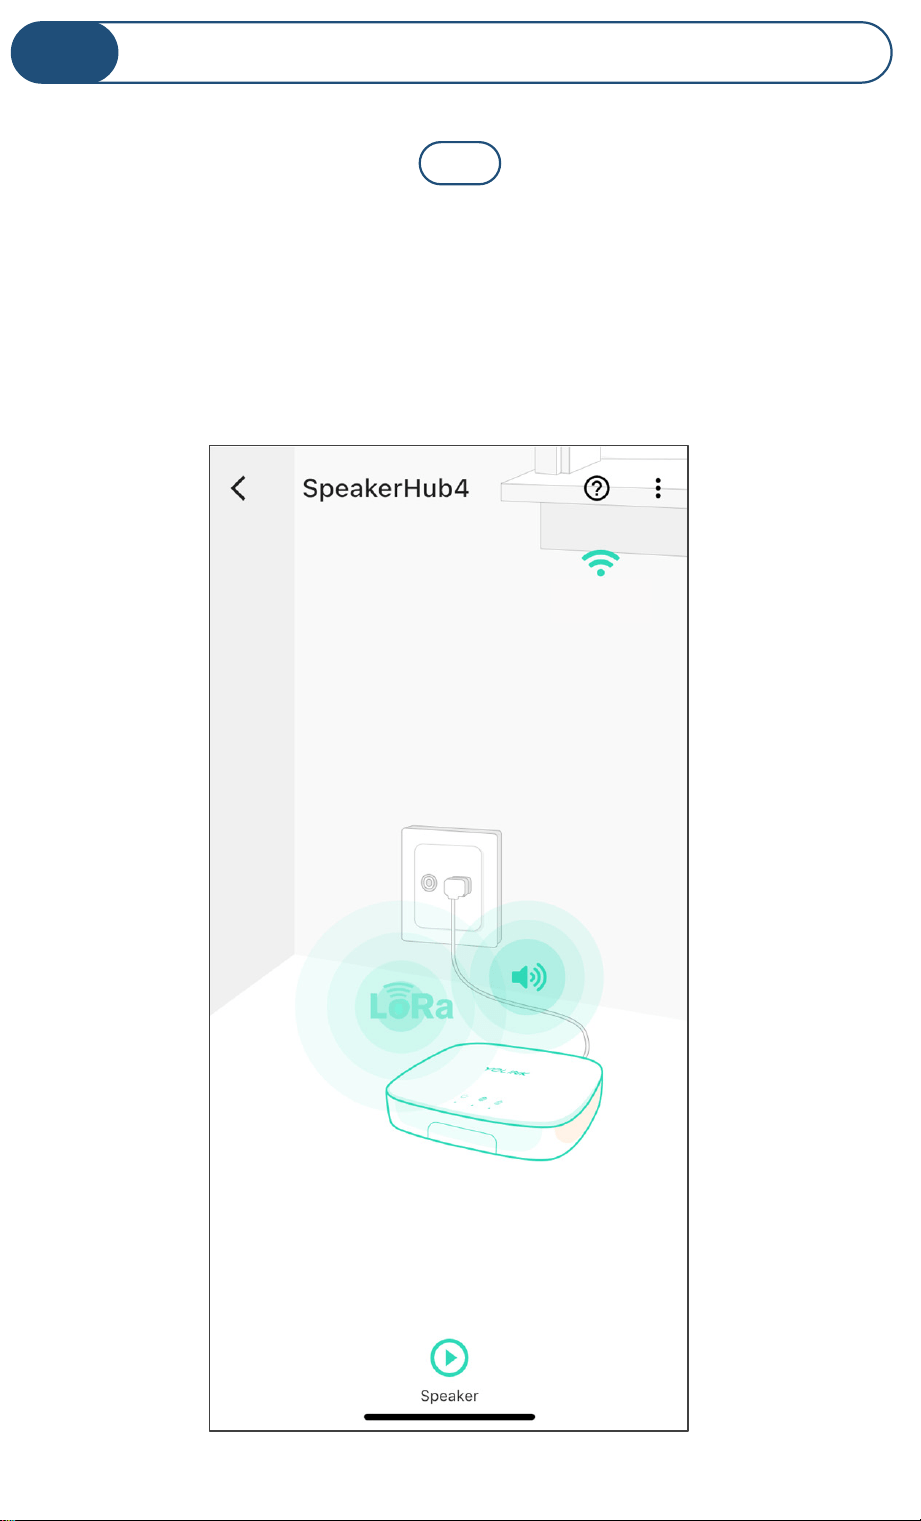
From the Rooms screen, tap the SpeakerHub icon.
Please review the image before tapping the three dots
(“more”) icon.
Indicates internet connection
Your WiFi SSID
Tap to disable
the speaker
Tap to view
or edit
device
settings
MyWiFi
Tap to create a manual
speaker broadcast
1
19
SpeakerHub Device Settings, Continued
M
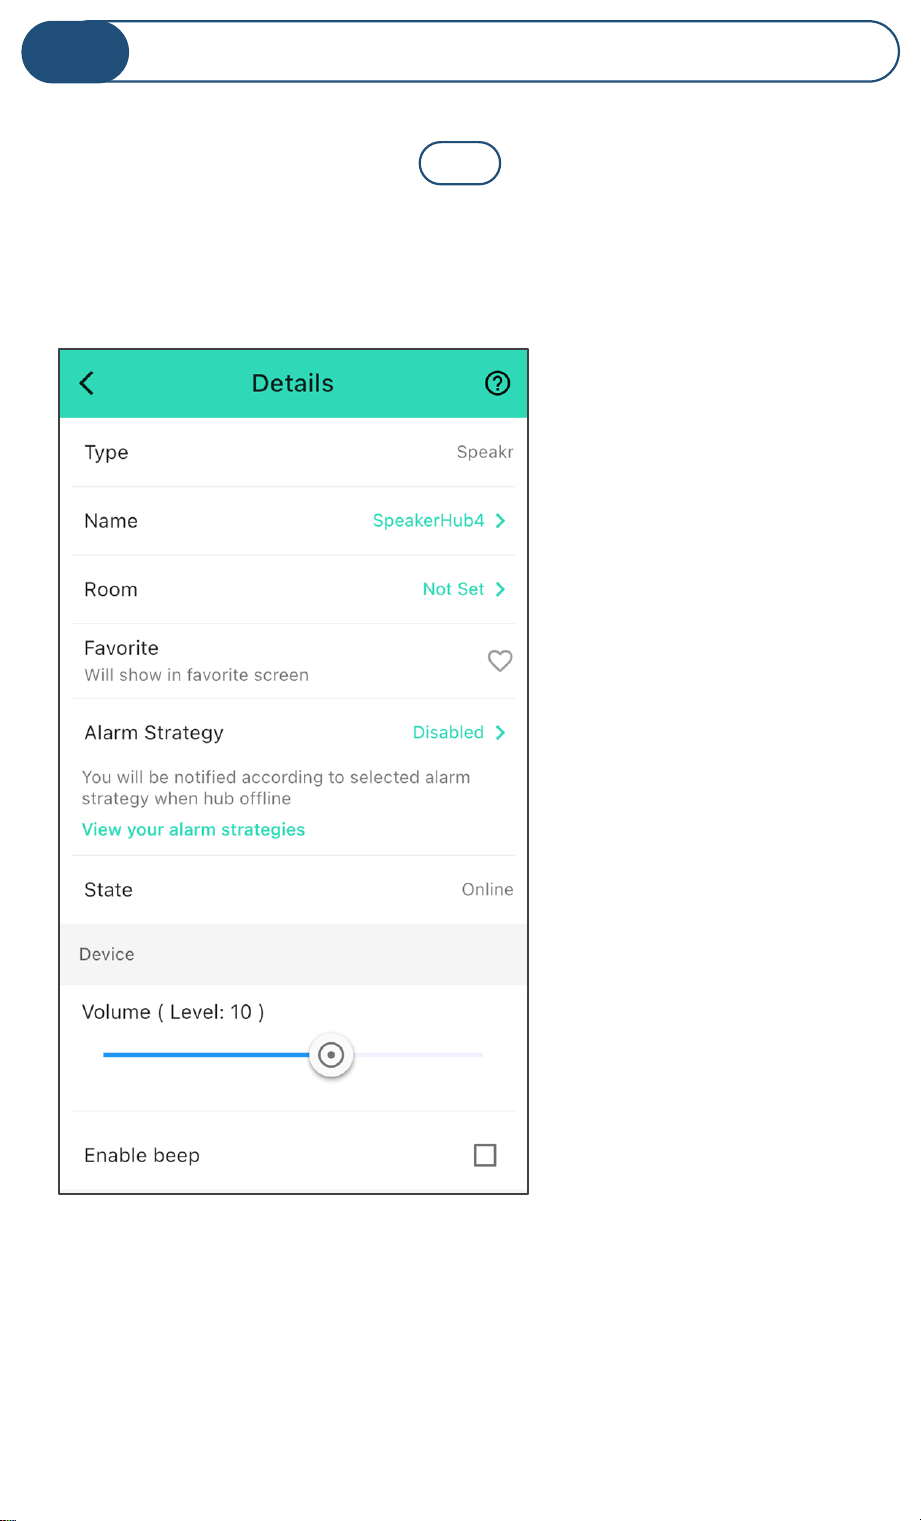
Please review the summary of the SpeakerHub device details
screen before proceeding to the next step.
Device type
Device name
Device room
Favorite icon (select to
add the device to your
Favorites screen)
Alarm strategy for this
device
Device online/offline
state
Speaker volume level
(1 minimum, 16 max.)
Enable speaker beep
(enables feedback
beep as well as other
device sounds, such as
start-up sound)
2
20
SpeakerHub Device Settings, Continued
M
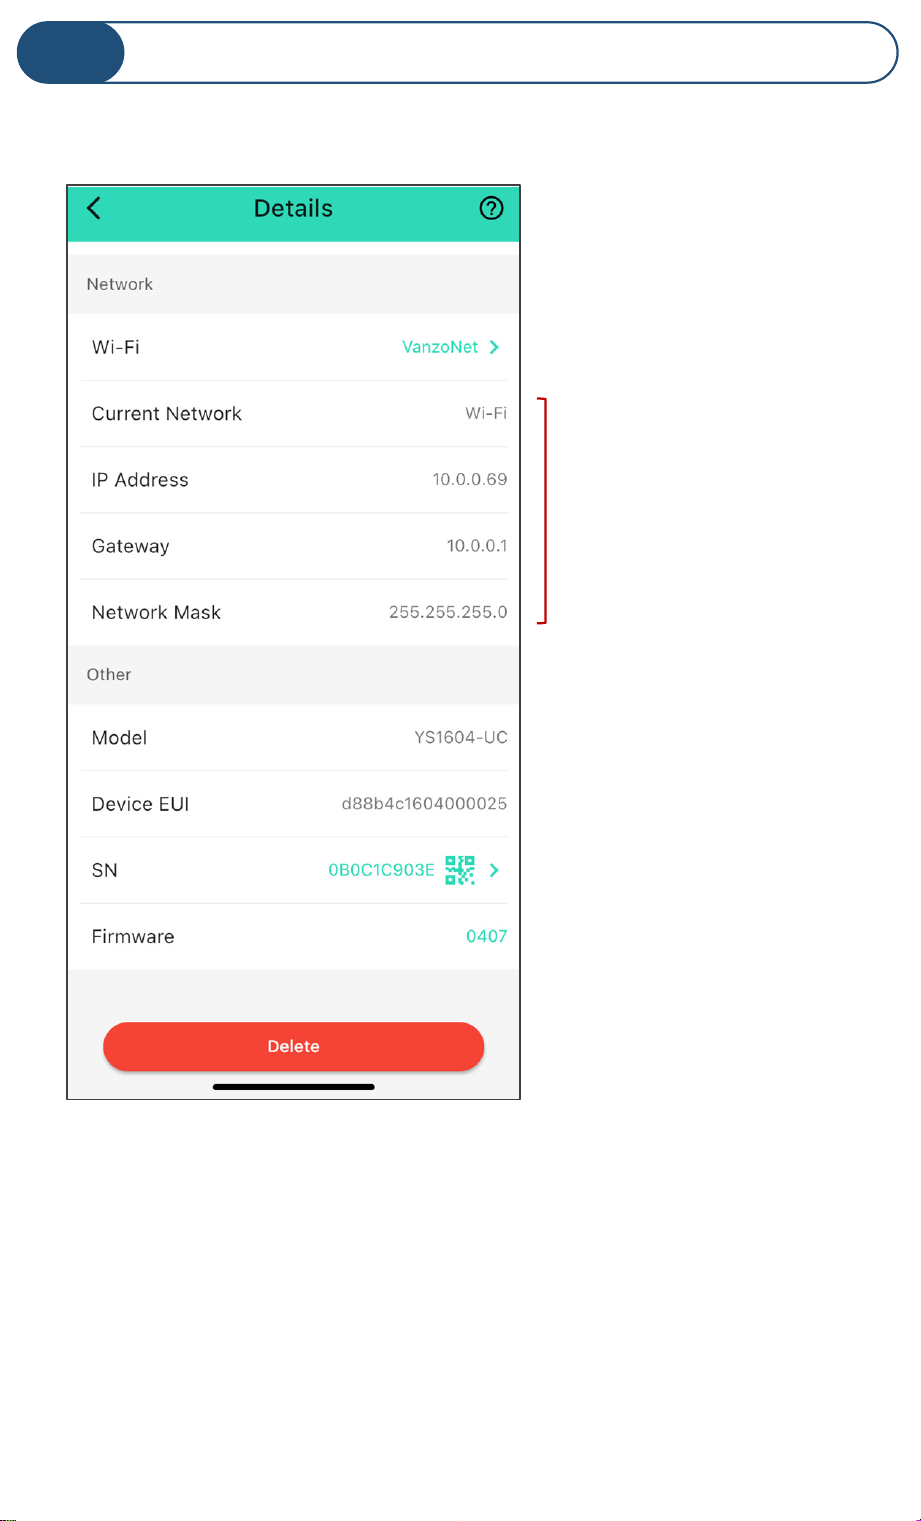
Your WiFi network name
IP Address info
Device model number
Device EUI (ID) number
Device serial number
Device firmware version
(see part P)
Tap to delete the device
from your account
21
SpeakerHub Device Settings, Continued
M
Your SpeakerHub can broadcast a message via the following
methods:
• Manually, from the device screen
• Automatically per your Alarm Strategy settings
• As part of a scene, triggered from a strategy,
manually triggered by the user in the app, manually
triggered by an AlarmFob or FlexFob activation
• As part of an automation, triggered by a device
changing state or by schedule
The easiest way to start using your SpeakerHub is with it
configured as a “trigger action” of an alarm strategy. An alarm
strategy is just a fancy name for the checklist of things you
want to happen when one of your devices alerts. As an
example of an alert, when a leak sensor detects water. And as
an example of a checklist: send me a text message and
activate the SpeakerHub.
The easiest way to familiarize yourself with SpeakerHub’s
audio capabilities is to manually broadcast a message directly
from the Device screen.
Do not panic if half of these terms are Greek to
you. We will get you bilingual soon enough!
22
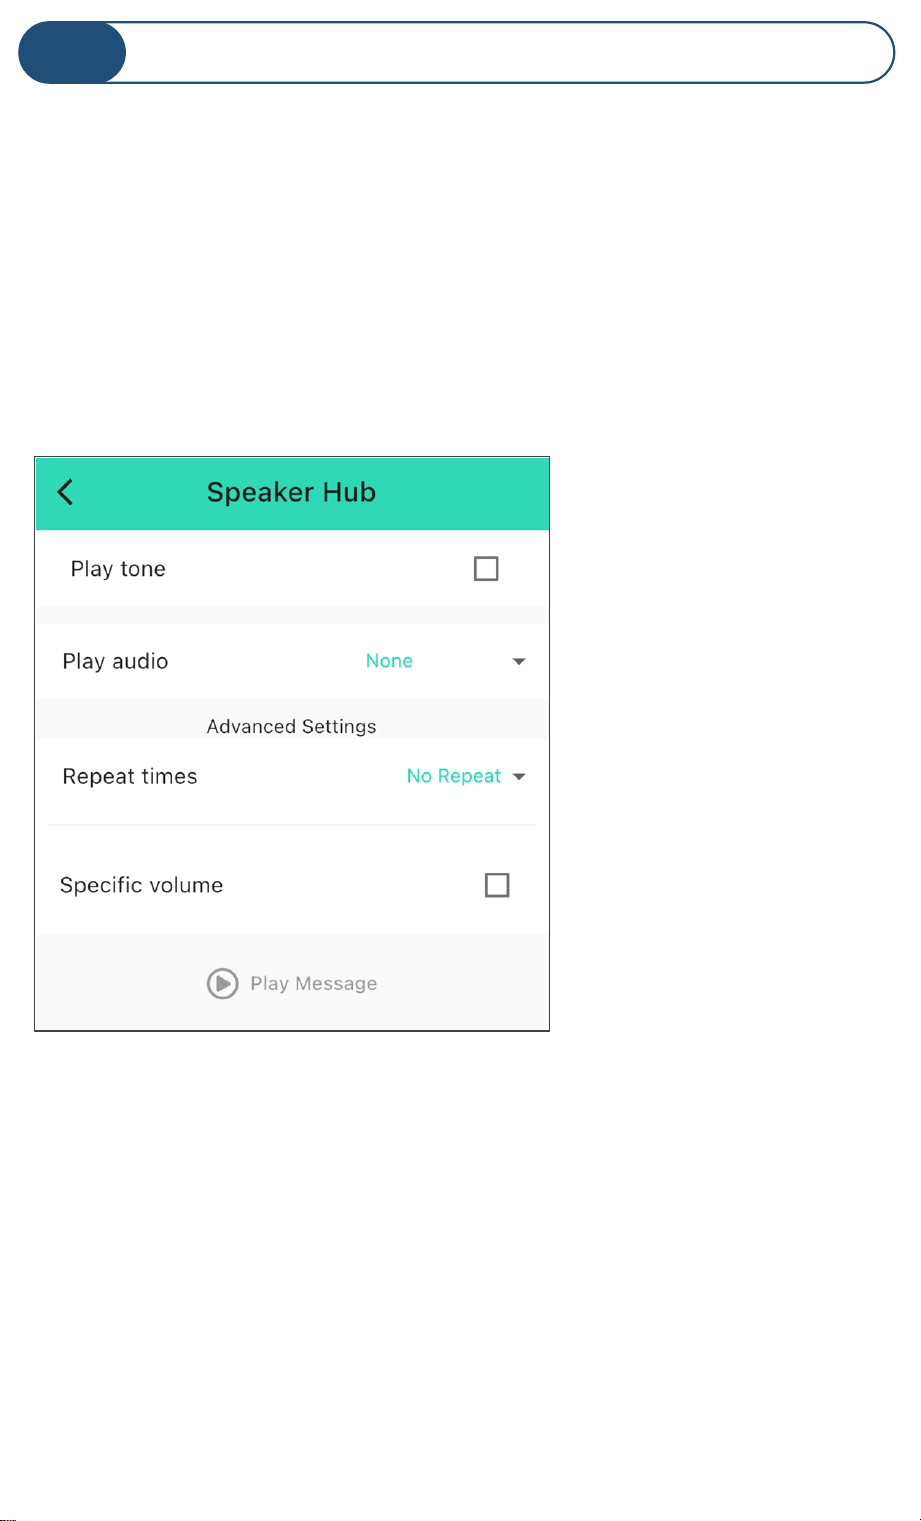
Tap the back arrow to return to the main SpeakerHub screen
shown in step 1. Tap the “play” icon (triangle)
This screen is used to create a one-time broadcast over the
SpeakerHub. It is also good for testing your messages before
adding them to a scene or automation.
SpeakerHub Device Settings, Continued
M
Tap to play your custom message
Check this box if you want
a sound played before your
spoken message
Tap for the voice message
settings
You can repeat the message
up to 3 times
Check this box to set a
specific volume level
23
s
SpeakerHub Device Settings, Continued
M
Here is an example message:
Tone: Customer Source: ARPEGGIO.MP3
Message: “Garage door one is still open”
“Play Tone” include a Notification Tones and a Customer
Source sub-list of tones and sounds. Customer Source
includes customer-supplied audio files. Audio file uploading
is not available at the date of user guide publication (this
feature will be added soon).
Additional Customer Source audio files have been factory-
installed in the SpeakerHub.
Type your desired spoken message into the Message box.
You can test your message by tapping the Play Message
button. Some words may not be pronounced as desired.
Phonetically spelling the word may help.
Messages you configure here are not saved. This
is for testing a message or sending a one-time
broadcast. Configure custom messages in Scenes
or Automation. See our YoLink Academy tutorials
for more information!
24

Advanced Settings
N
Do you want to get the most out of your SpeakerHub?
We know you didn’t buy a SpeakerHub just because it would
look good on your nightstand. You have plans for it, like for
it to inform you of a water leak, or of a high temperature
alert in the freezer or of motion being detected in the back
yard (or all of the above!). Visit the SpeakerHub product
support page, as well as the YoLink Academy page, to learn
how to configure custom alert messages, and automations,
to tailor SpeakerHub to your application and your
requirements. See the links on the last page of this manual.
25

Your YoLink products are constantly being improved, with new
features added. It is periodically necessary to make changes to
your device's firmware. For optimal performance of your
system, and to give you access to all available features for
your devices, these firmware updates should be installed when
they become available
Firmware Updates
O
In the Detail screen of each device, at the bottom, you will
see the Firmware section, as shown in the image below. A
firmware update is available for your device if it says “####
ready now”
Tap in this area to start the update
The device will update automatically, indicating progress by
percentage complete. You may use your device during the
update, as the update is performed “in the background”. The
FEAT (feature) indicating light will slowly blink red during the
update, and the update may continue for several minutes
beyond the light turning off
26

Factory Reset
P
Factory reset will erase device settings and restore it to
factory defaults. Doing a factory reset will remove the device
from your account and it will not harm the device and will
lose any data or require you to re-do your automations, etc.
Instructions:
Hold the SET button down for 20-25 seconds until the FEAT
(feature) LED blinks red. Release the button as soon as it
blinks red, as holding the button longer than 25 seconds will
abort the factory reset operation.
Factory reset will be complete when the status light stops
blinking
Only deleting a device from the app will remove it
from your account
27
CE Mark Warning
Q
The host manufacturer has the responsibility that the host device
should be compliance with all essential requirement of RER. This
restriction will be applied in all member states. The simplified UK
declaration of conformity referred shall be provided as follows: Hereby,
YoSmart Inc. declare that the radio equipment type YoLink SpeakerHub
is in compliance with Directive UK Radio Equipment Regulations (SI
2017/1206); UK Electrical Equipment (Safety) Regulation (SI 2016/1101);
and UK Electromagnetic Compatibility Regulations (SI 2016/1091).
PRODUCT NAME: RESPONSIBLE PARTY: TELEPHONE:
YOLINK SPEAKERHUB YOSMART, INC. (949) 825-5958
MODEL NUMBER: ADDRESS: EMAIL:
YS1604, YS1604-EA 15375 BARRANCA PKWY
SUITE J-107, IRVINE, CA 92618 USA
Y
w
o
w
a
Y
c
o
o
c
f
T
e
f
A
28
2-Year Limited Electrical Warranty
R
YoSmart warrants to the original residential user of this product that it will
be free from defects in materials and workmanship, under normal use, for 2
years from the date of purchase. User must provide a copy of original
purchase receipt. This warranty does not cover abuse or misused products
or products used in commercial applications. This warranty does not apply
to YoLink devices that have been improperly installed, modified, put to a
use other than designed, or subjected to acts of God (such as floods,
lightning, earthquakes, etc.). This warranty is limited to repair or
replacement of the YoLink device only at YoSmart's sole discretion.
YoSmart will NOT be liable for the cost of installing, removing, nor
reinstalling this product, nor direct, indirect, or consequential damages to
persons or property resulting from the use of this product. This warranty
only covers the cost of replacement parts or replacement units, it does not
cover shipping & handling fees. Please contact us, to implement this
warranty (see Customer Support, below, for contact information)
Warnings
S
Power the Hub with the provided adapter, only
The hub is designed and intended for indoor use and is not waterproof. Install
indoors, avoiding subjecting the Hub to water or damp conditions
Do not install the hub inside or near metals, ferromagnetism or any other
environment which may interface with the signal
Do not install the Hub near flames/fire or expose to high temperatures
Please do not use strong chemicals or cleaning agents to clean the hub. Please
use a clean, dry cloth to wipe the hub to avoid dust and other foreign elements
entering the Hub and affecting the operation of the Hub
Avoid allowing the hub to be exposed to strong impacts or vibration, which may
damage the device, causing malfunctions or failure
29
Contact Us / Customer Support
T
We are here for you, if you ever need any assistance installing,
setting up or using a YoLink app or product! Need help or
have questions? Please email us 24/7 at [email protected]
For additional SpeakerHub support resources, visit our
SpeakerHub support page at:
www.yosmart.com/speakerhub-product-support
You can also find additional support and ways to contact us
at:
www.yosmart.com/support-and-service
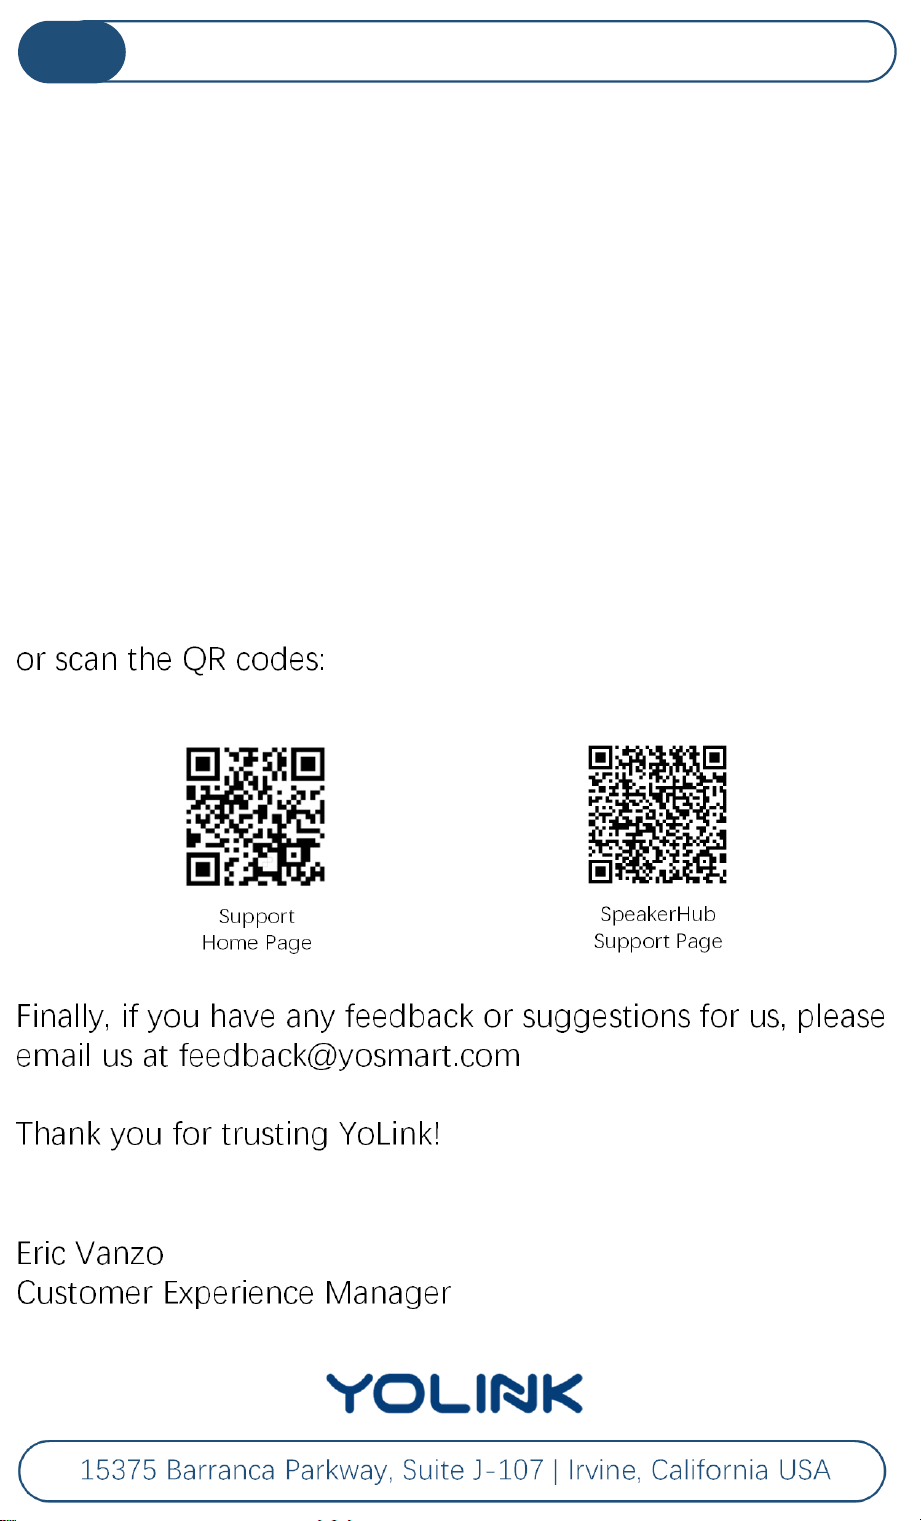
or scan the QR codes:
Finally, if you have any feedback or suggestions for us, please
Thank you for trusting YoLink!
Eric Vanzo
Customer Experience Manager
15375 Barranca Parkway, Suite J-107 | Irvine, California USA
SpeakerHub
Support Page
Support
Home Page