1 of 11
Owner’s Manual
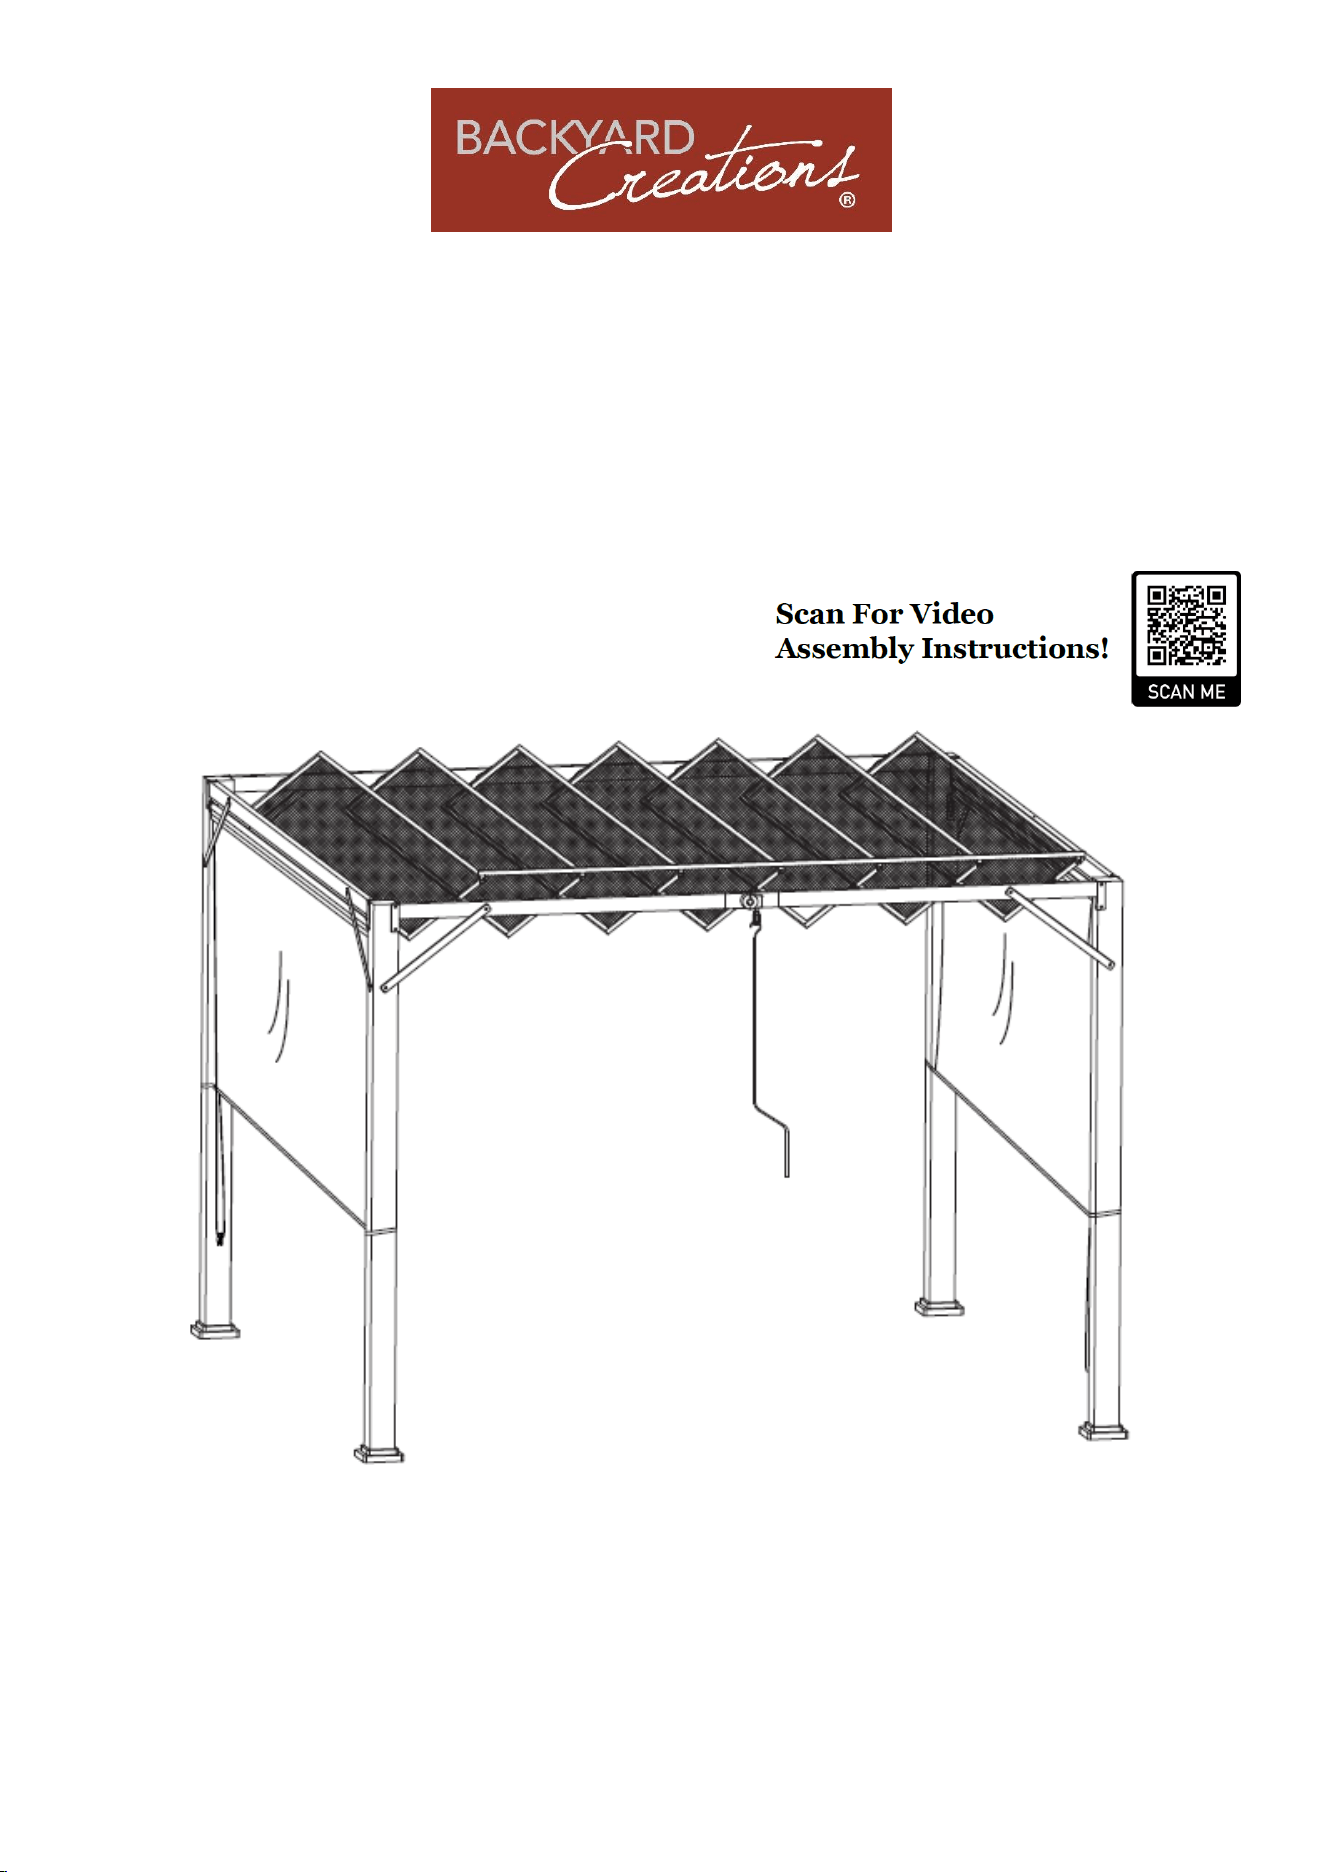
Brunson 10’ x 10’ Pergola
Model Number: PERG-1111
SKU Number: 272-1153
Note: This pergola frame is designed to be used as a permanent fixture on level surface.
2 of 11
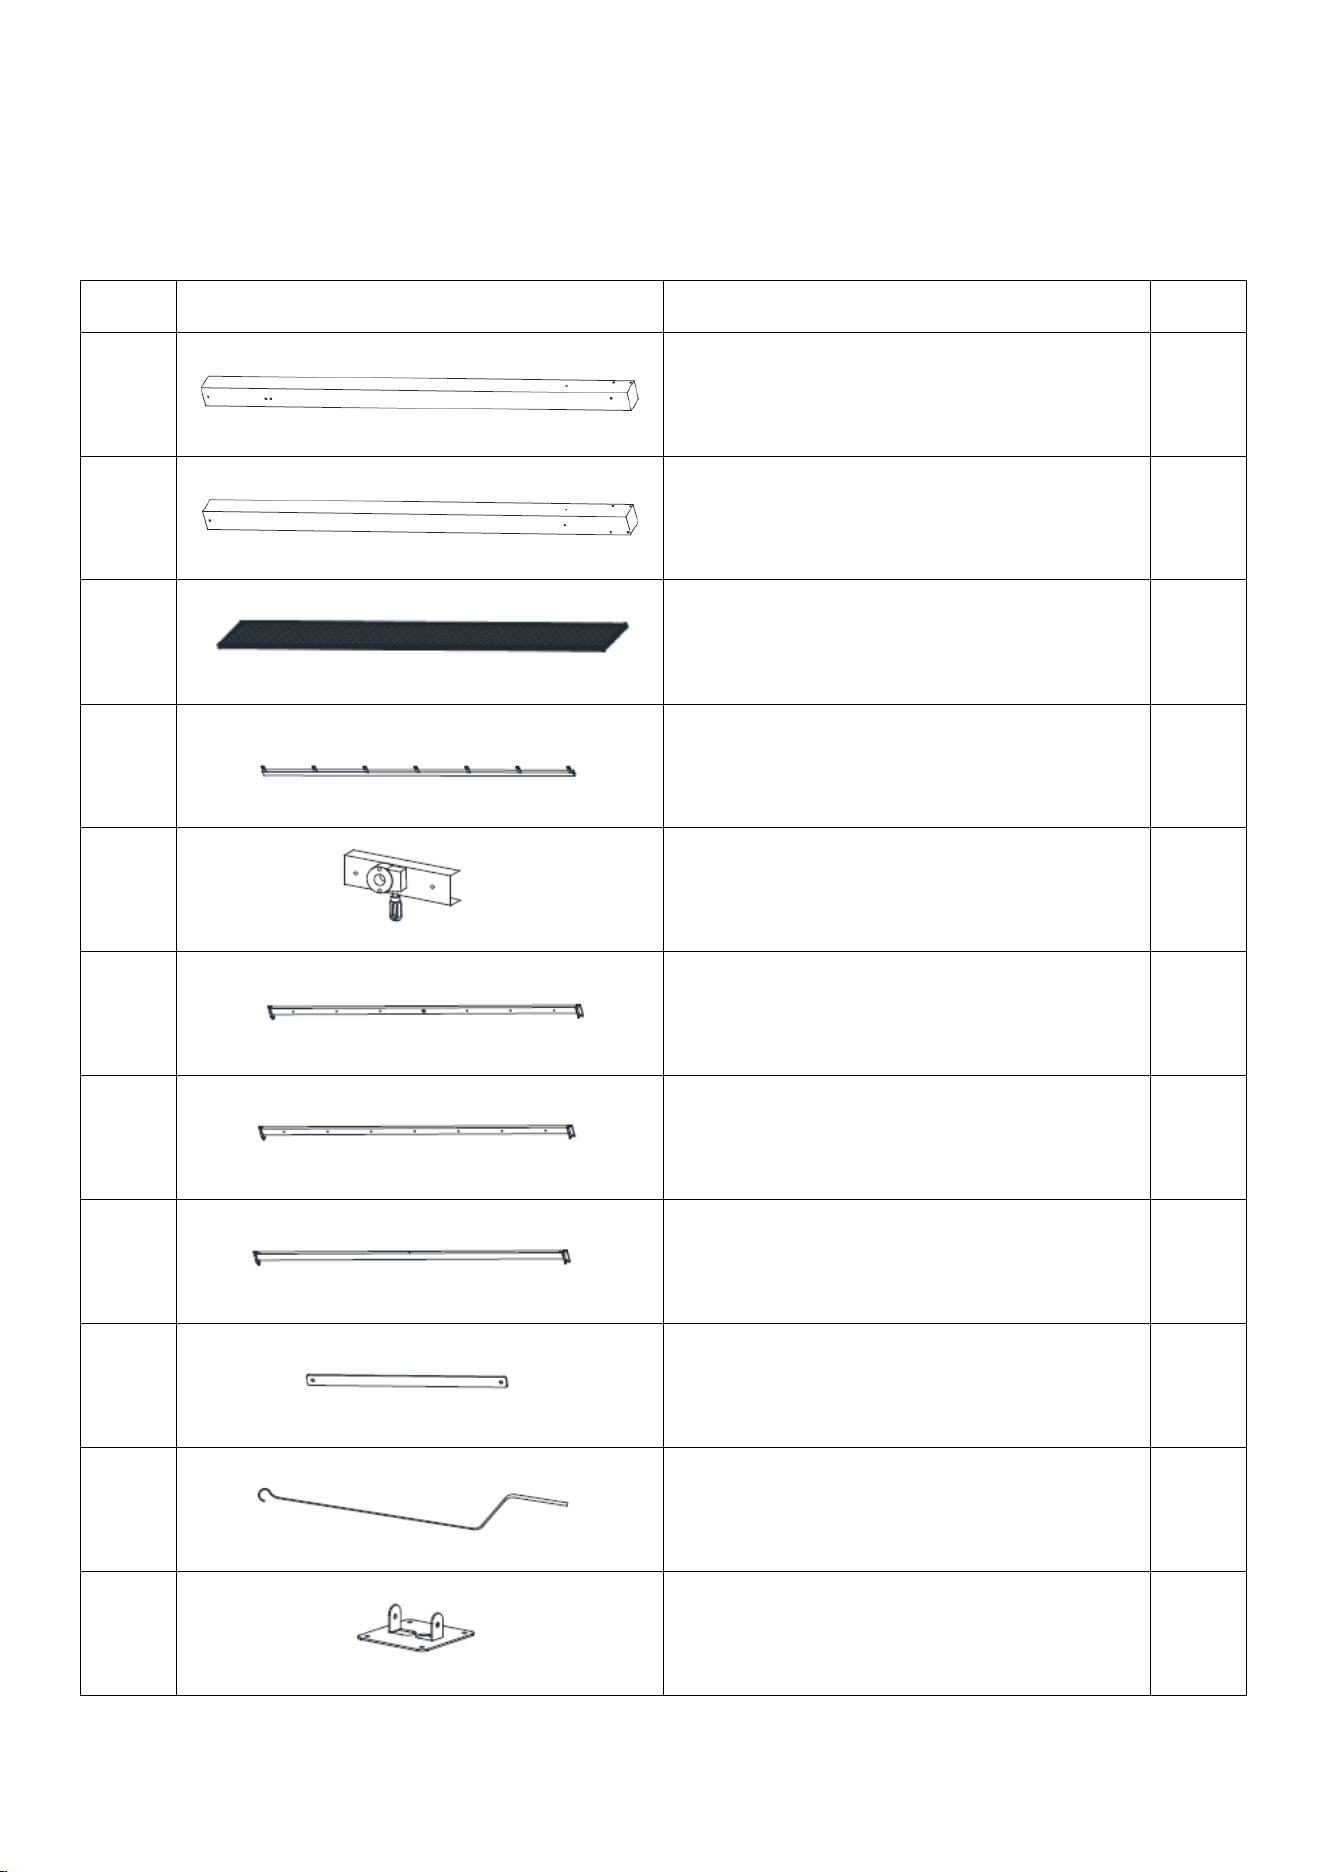
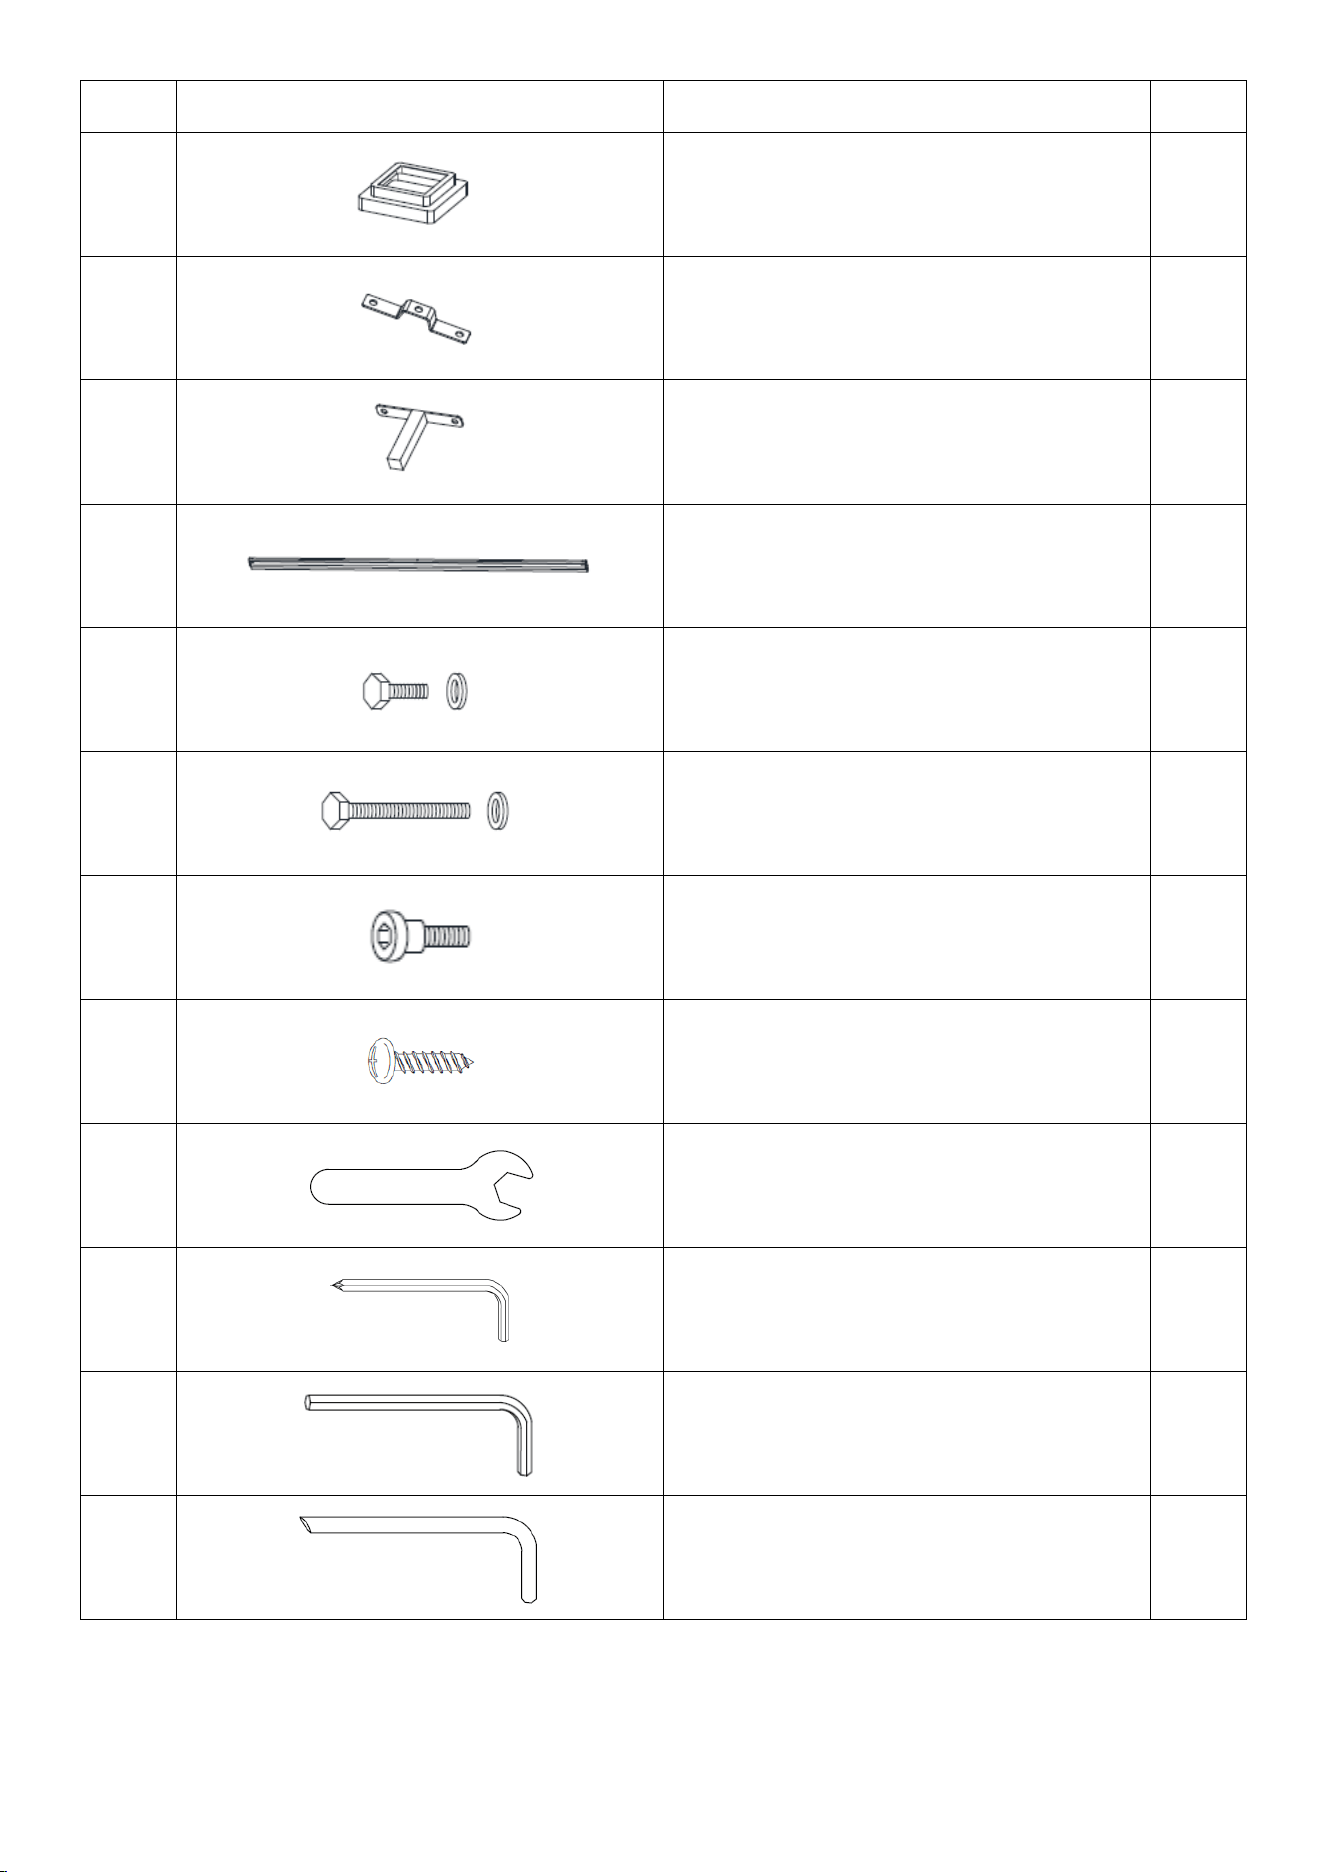
Parts List
Brunson 10’ x 10’ Pergola
Letter
Illustration
Description
Qty.
A1
Corner Post
2
A2
Corner Post
2
B
Roof Panel
7
C1
Panel Connecting Rod
1
C2
Rotating Device
1
D
Lintel w/Rotating Device
1
D1
Front Lintel
1
E
Side Lintel
2
F
Corner Post Brace
8
G
Roof Adjustment Pole
1
H
Base Plate
4
3 of 11
Letter
Illustration
Description
Qty.
I
Base Cover
4
J
Roof Panel Connectors
13
K
Rotating Device Connector
1
L
Pull-Down Screen
2
M
M6 x 15mm Bolt with Washer
78
N
M6 x 75mm Bolt with Washer
8
O
M6 x 15mm Bolt
20
P
Self-Tapping Screw
4
Q
M6 Open Wrench
1
R
Allen Wrench
1
S
Allen Wrench
1
T
Ground Stake
16
4 of 11
Assembly Instructions
Brunson 10’ x 10’ Pergola
Note: For video instructions please visit:
https://shadenshelters.com/10-x-10-brunson-pergola
Important:
⚫ Read all the instructions before assembly. Failure to do so may result in faulty assembly and
potential injury.
⚫ Before assembling the product, remove all protective materials, hardware kit(s), and identify all
parts packed in the carton are present. (Note: If any part is missing or damaged, do not attempt to
assemble). Contact Shade N’ Shelter Customer Support. See page 11.
⚫ Assemble on a stable level surface to avoid damage to gazebo and possible injury.
⚫ Two people are required to assemble this product.
⚫ Pergola dimensions are measured from the end of corner post base covers.
DO NOT TIGHTEN BOLTS UNTIL NOTED AFTER EACH STEP
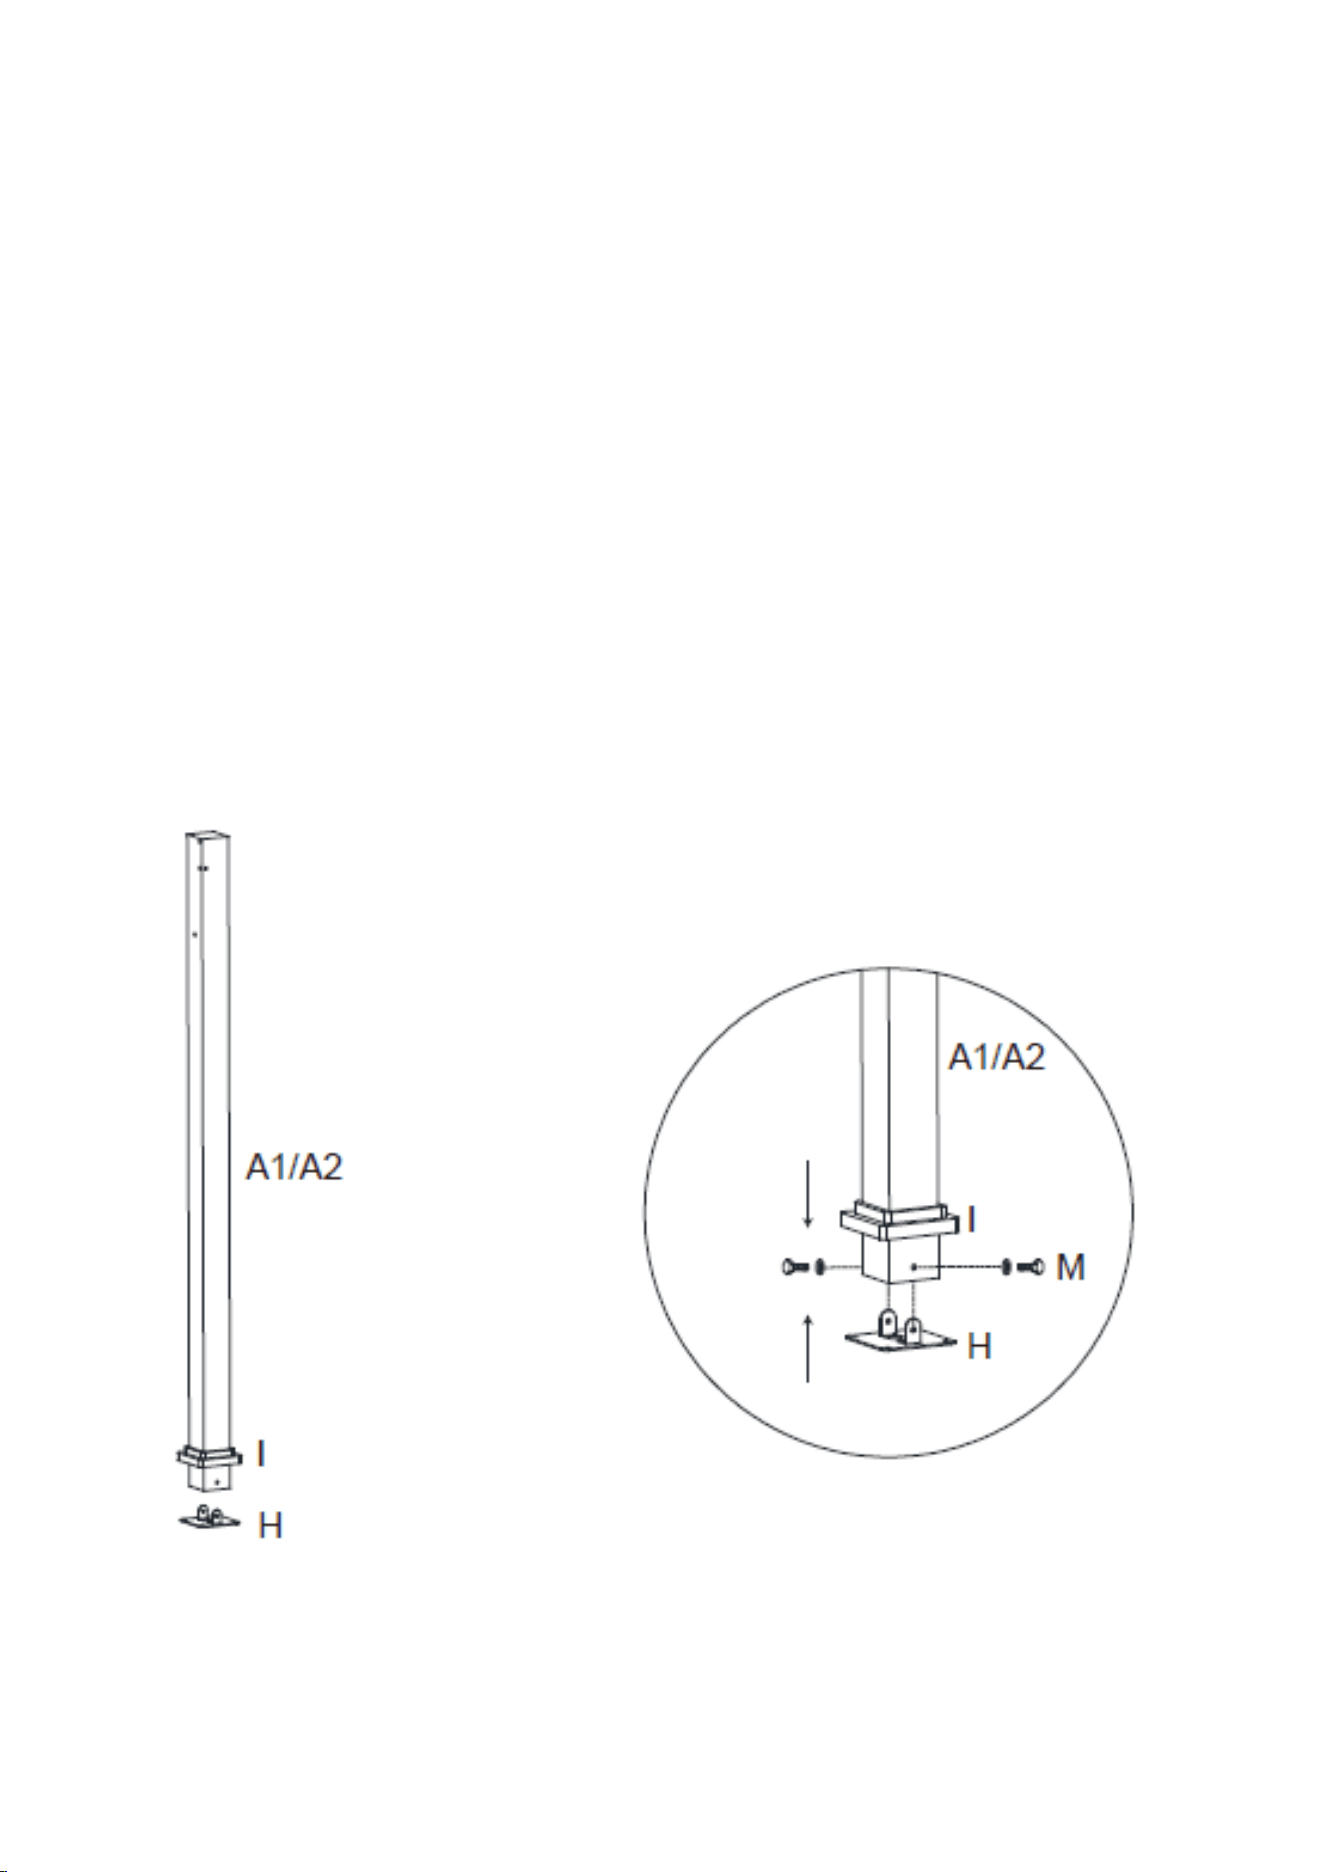
Step 1: Insert Corner Posts (A1 & A2) into Base Cover (I). Attach Base Plate (H) to Corner Posts (A1 & A2)
using Bolt (M). See Figure 1.
Figure 1

5 of 11
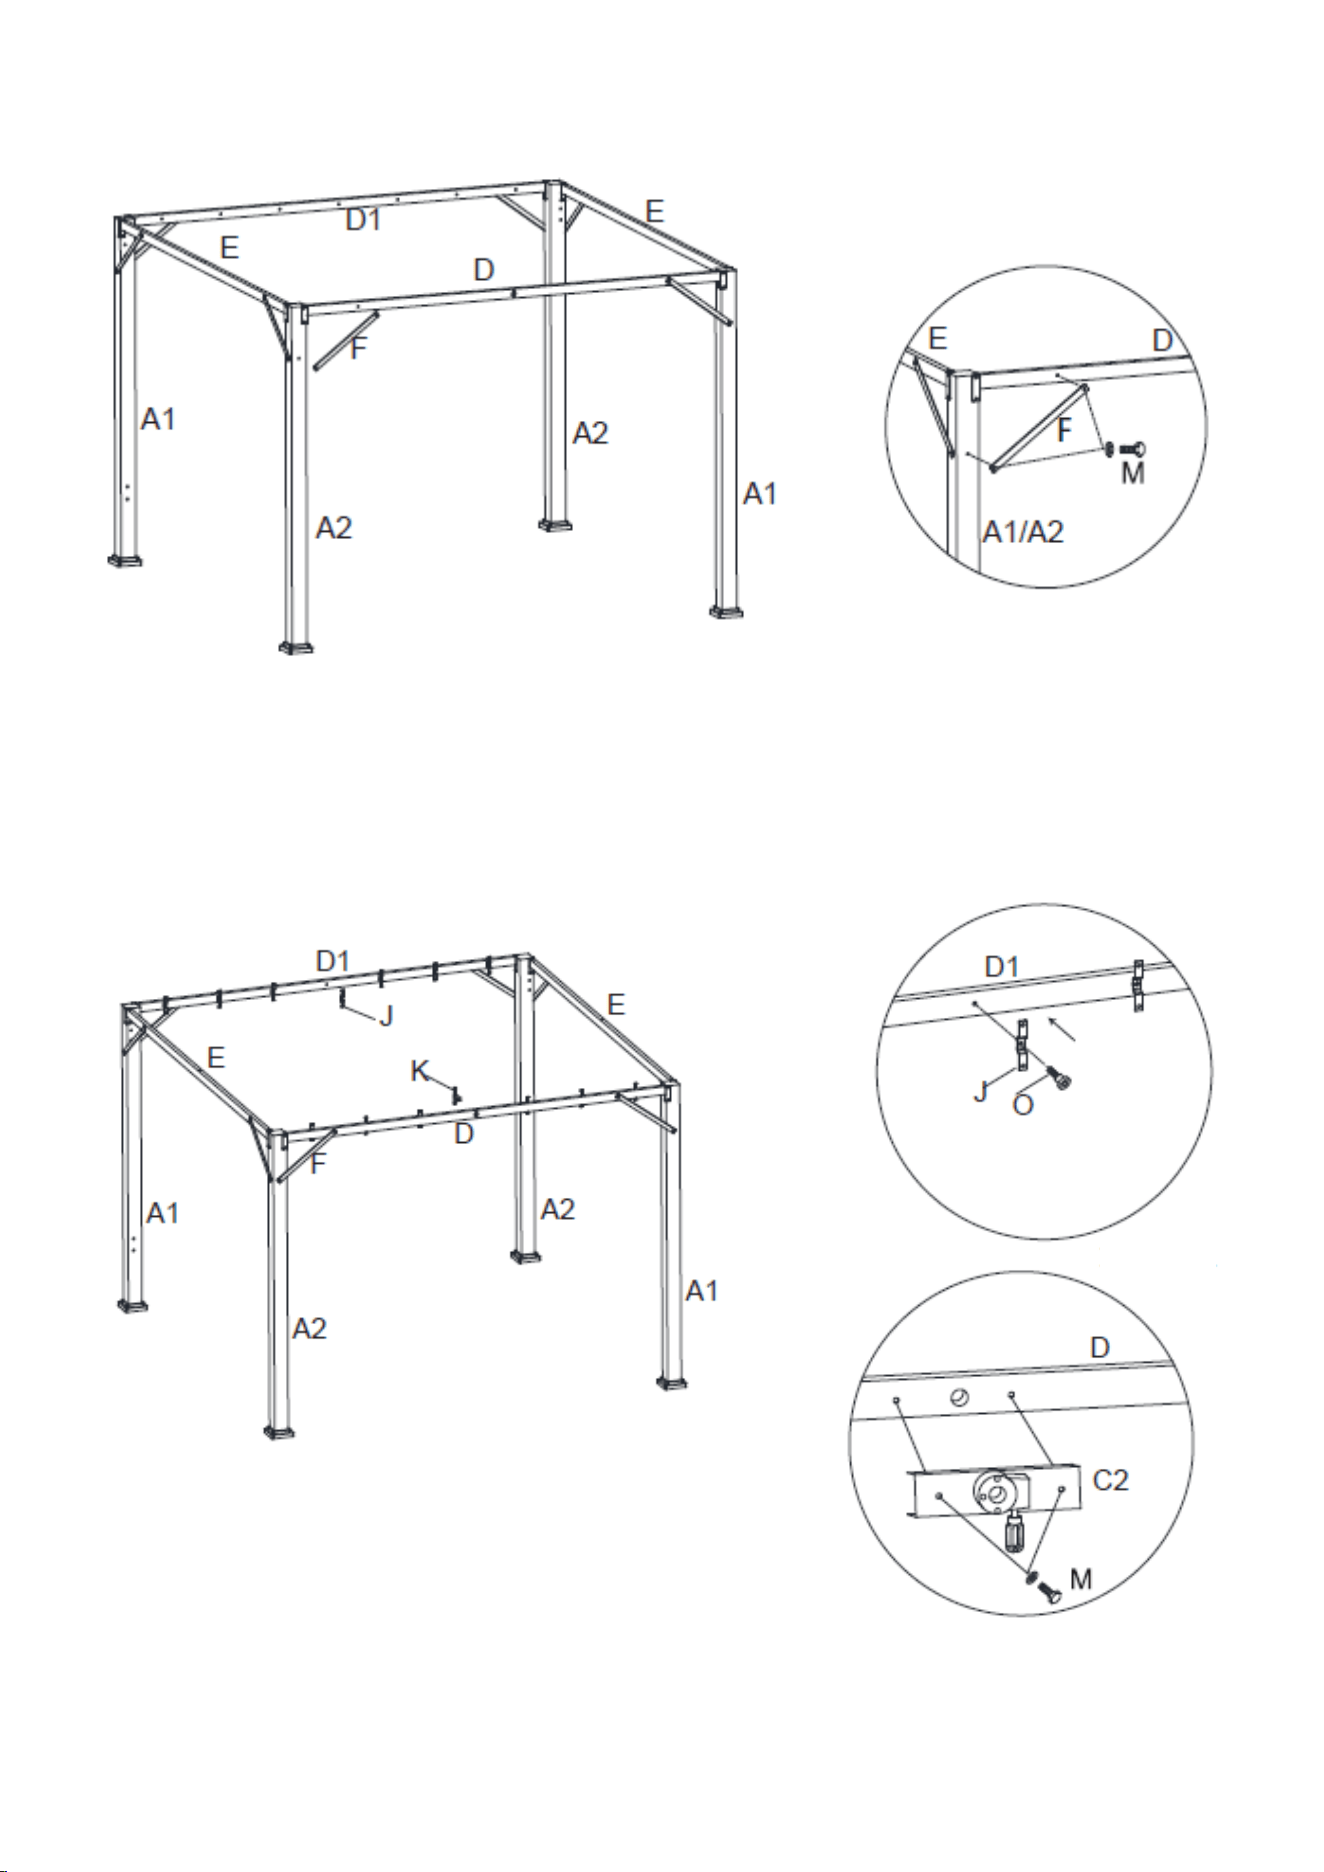
Step 2: Attach Side Lintel (E) and Front Lintel (D and D1) to the Corner Posts (A1 & A2) using Bolt (M).
See Figure 2.
Note: Make sure the holes on the Front Lintel (D and D1) are facing inwards.
Figure 2
6 of 11
Step 3: Attach all Corner Post Braces (F) to the Corner Posts (A1 & A2) and the Lintels (D/D1/E) using
Bolts (M). See Figure 3.
Figure 3
Step 4: Attach Roof Panel Connectors (J) to the interior of the Front Lintel (D1) and Lintel with Rotating
Device (D) using Bolts (O). See Figure 4-1.
Attached Rotating Device (C2) to exterior of Lintel with Rotating Device (D) with Bolts (M). See
Figure 4-2.
Figure 4-1
Figure 4-2
7 of 11
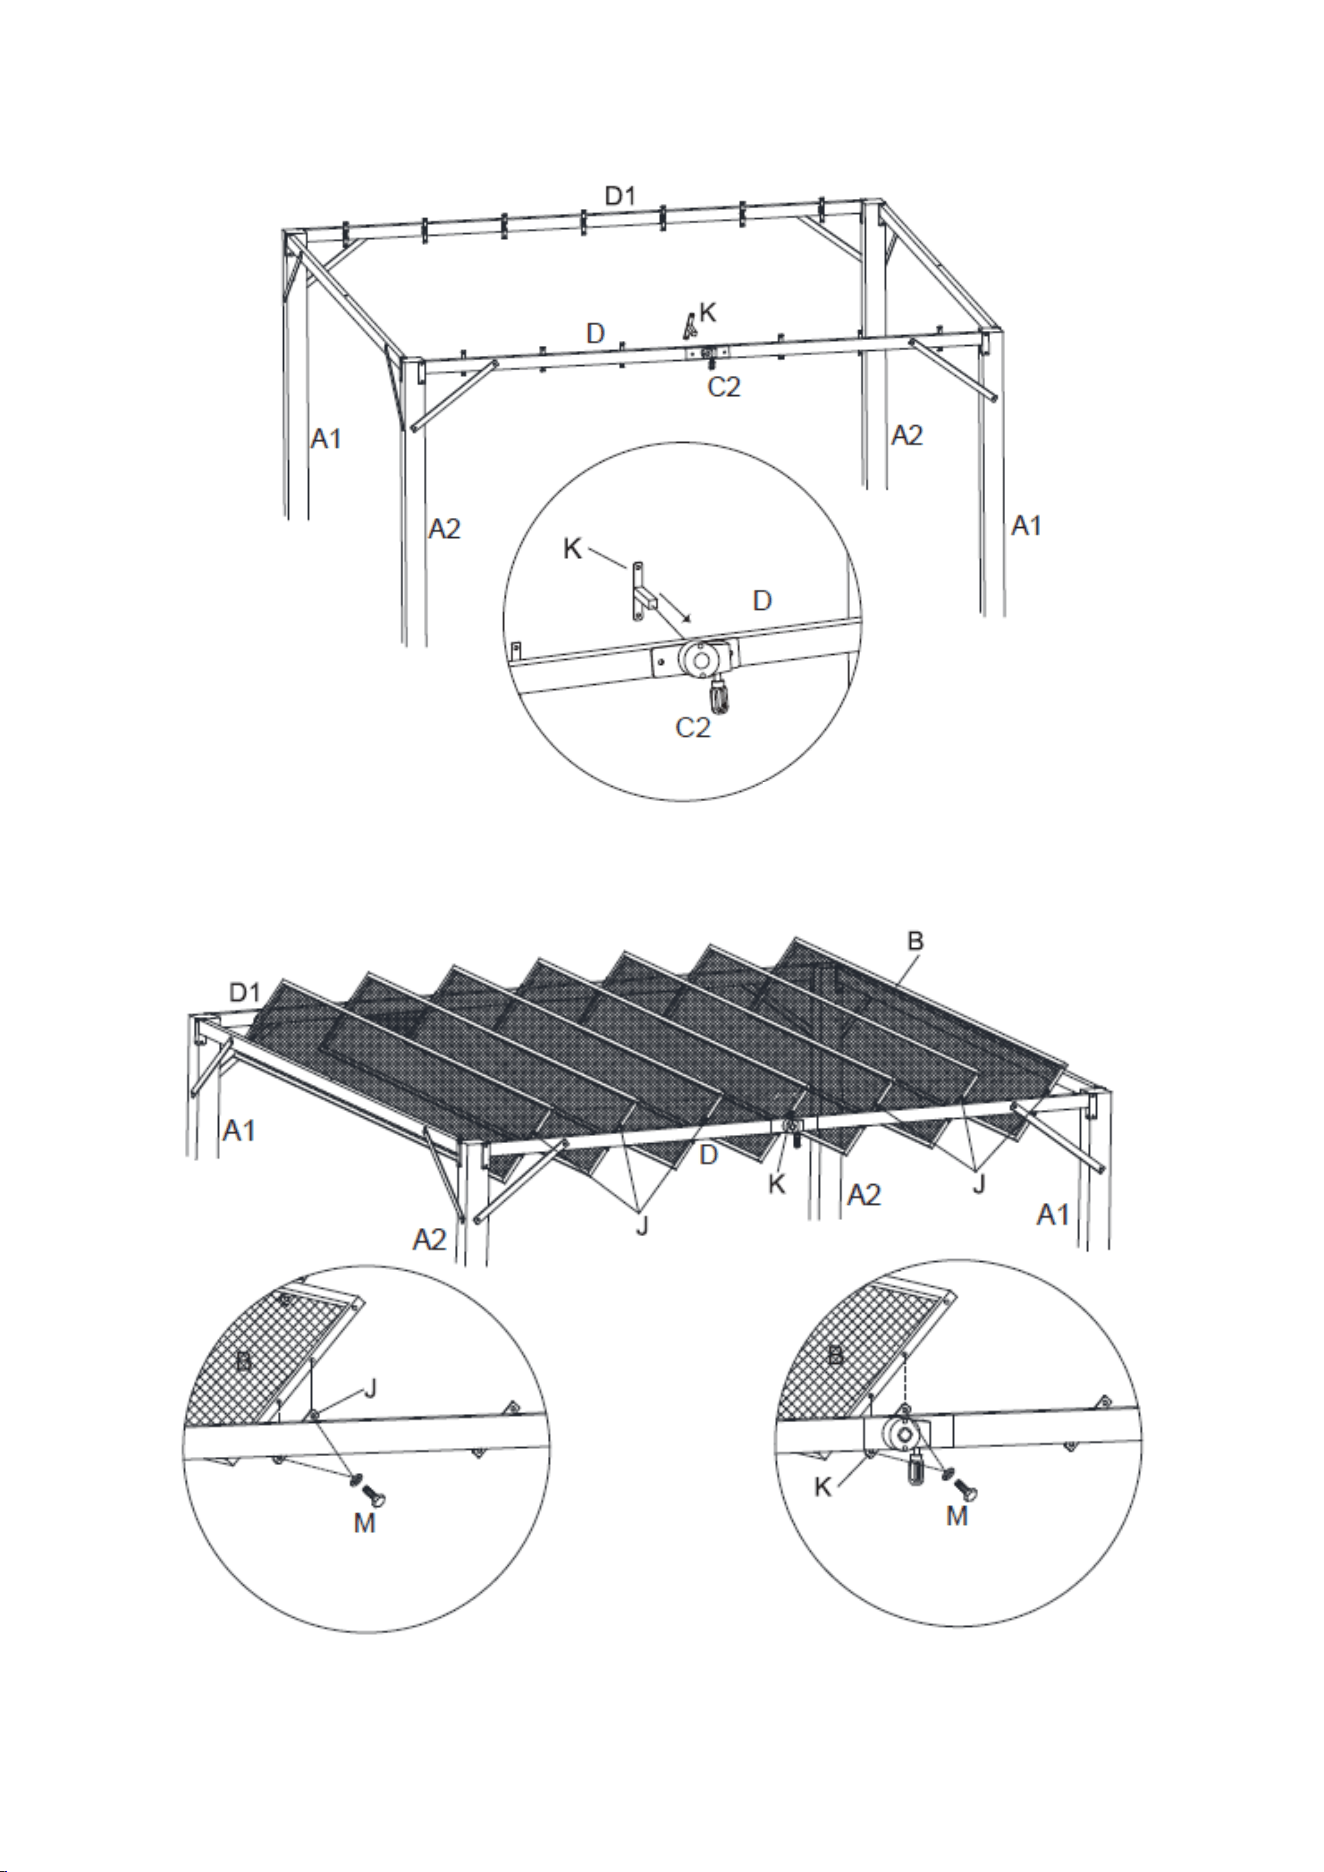
Step 5: Insert Rotating Device Connector (K) into the middle hole of Lintel with Rotating Device (D). See
Figure 5.
Step 6: Attach Roof Panels (B) to the Roof Panel Connectors (J) using Bolts (M). See Figure 6-1. Attach
Rotating Device Connector (K) to Roof Panel (B) using Bolts (M). See Figure 6-2.
Figure 5
Figure 6-1
Figure 6-2
8 of 11
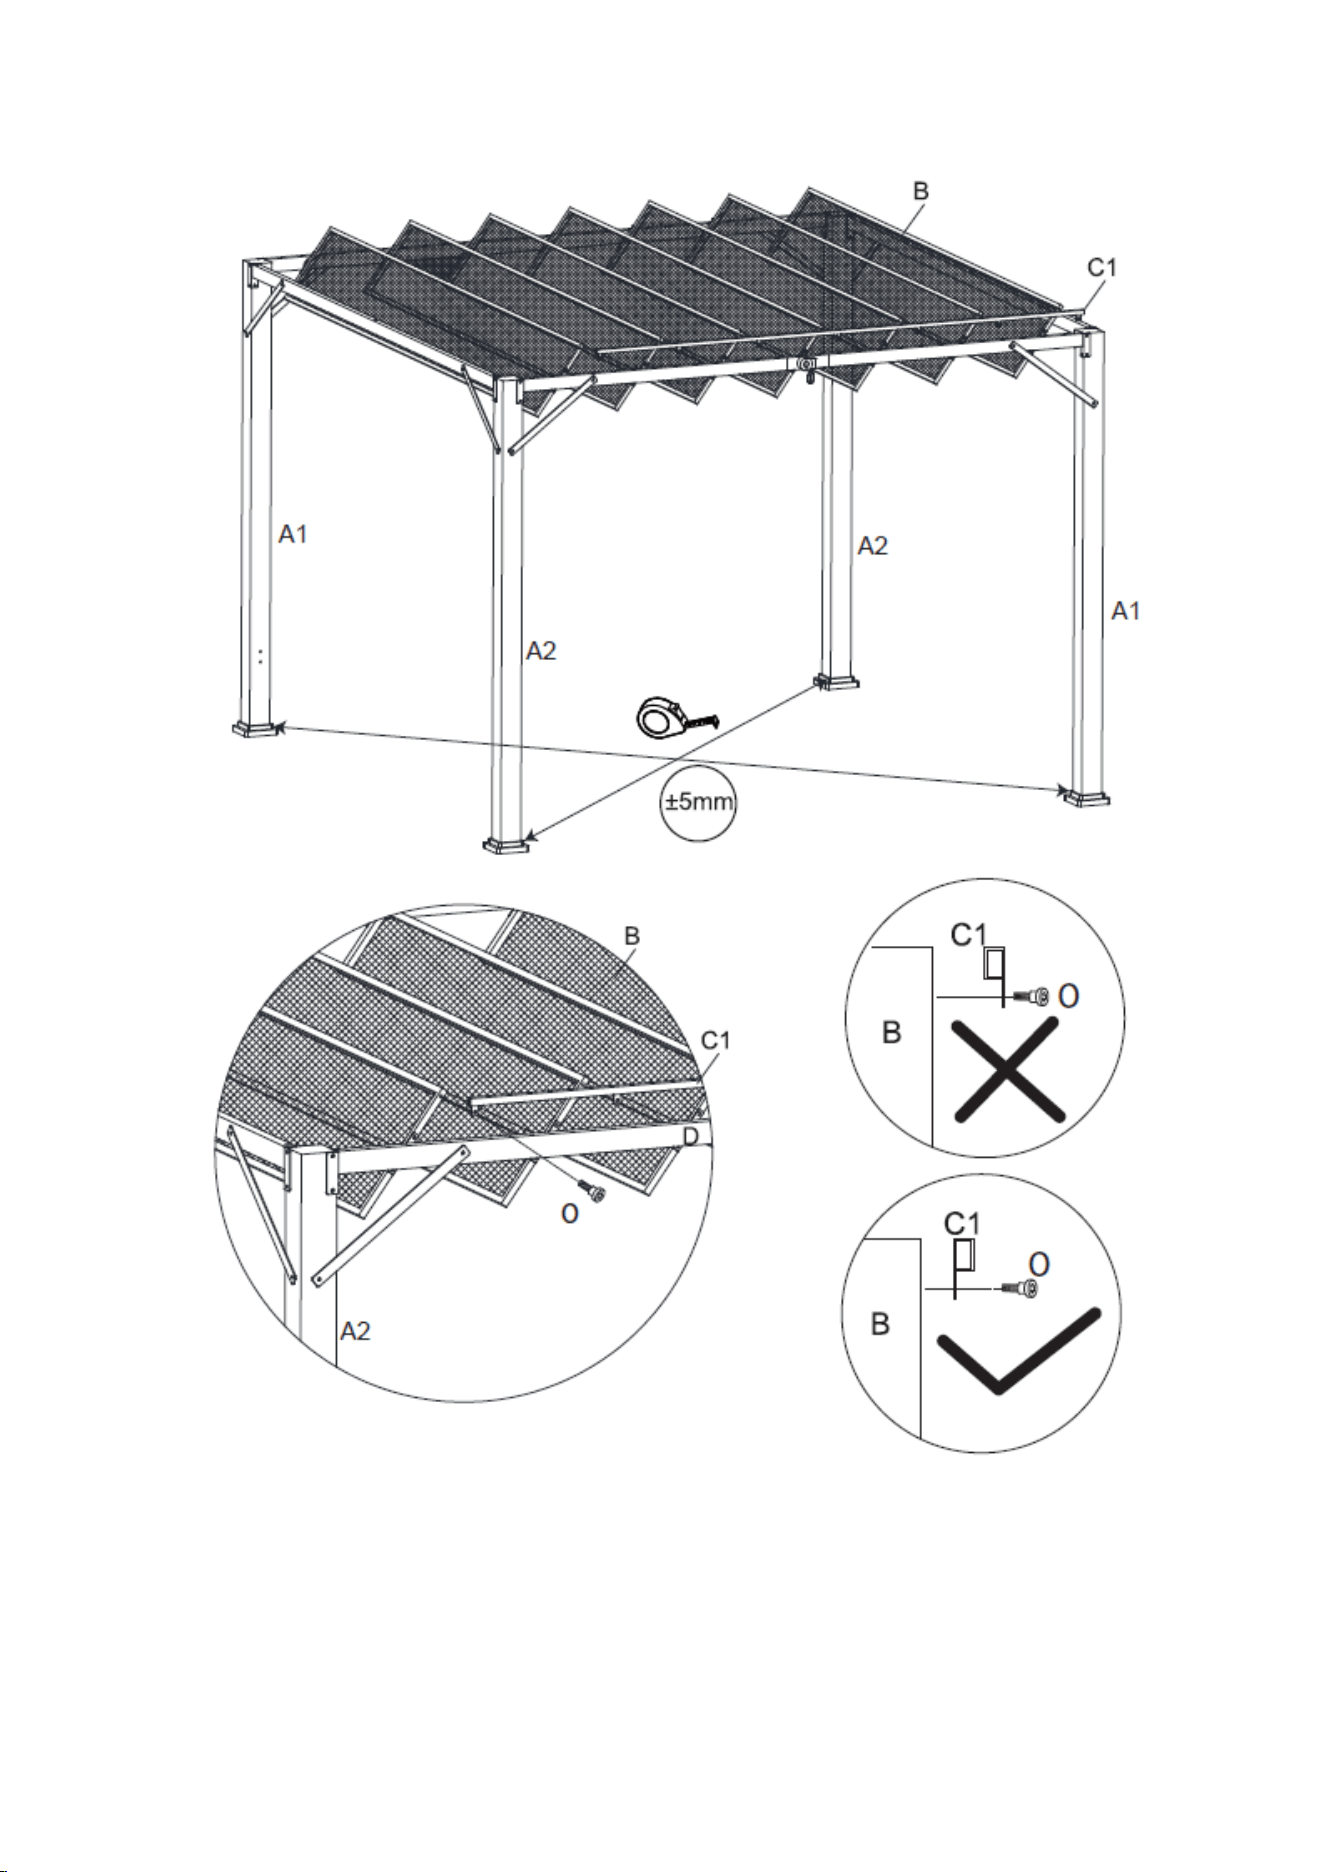
Step 7: Connect the Panel Connecting Rod (C1) to each Roof Panel (B) using Bolts (O). See Figure 7.
Figure 7
9 of 11
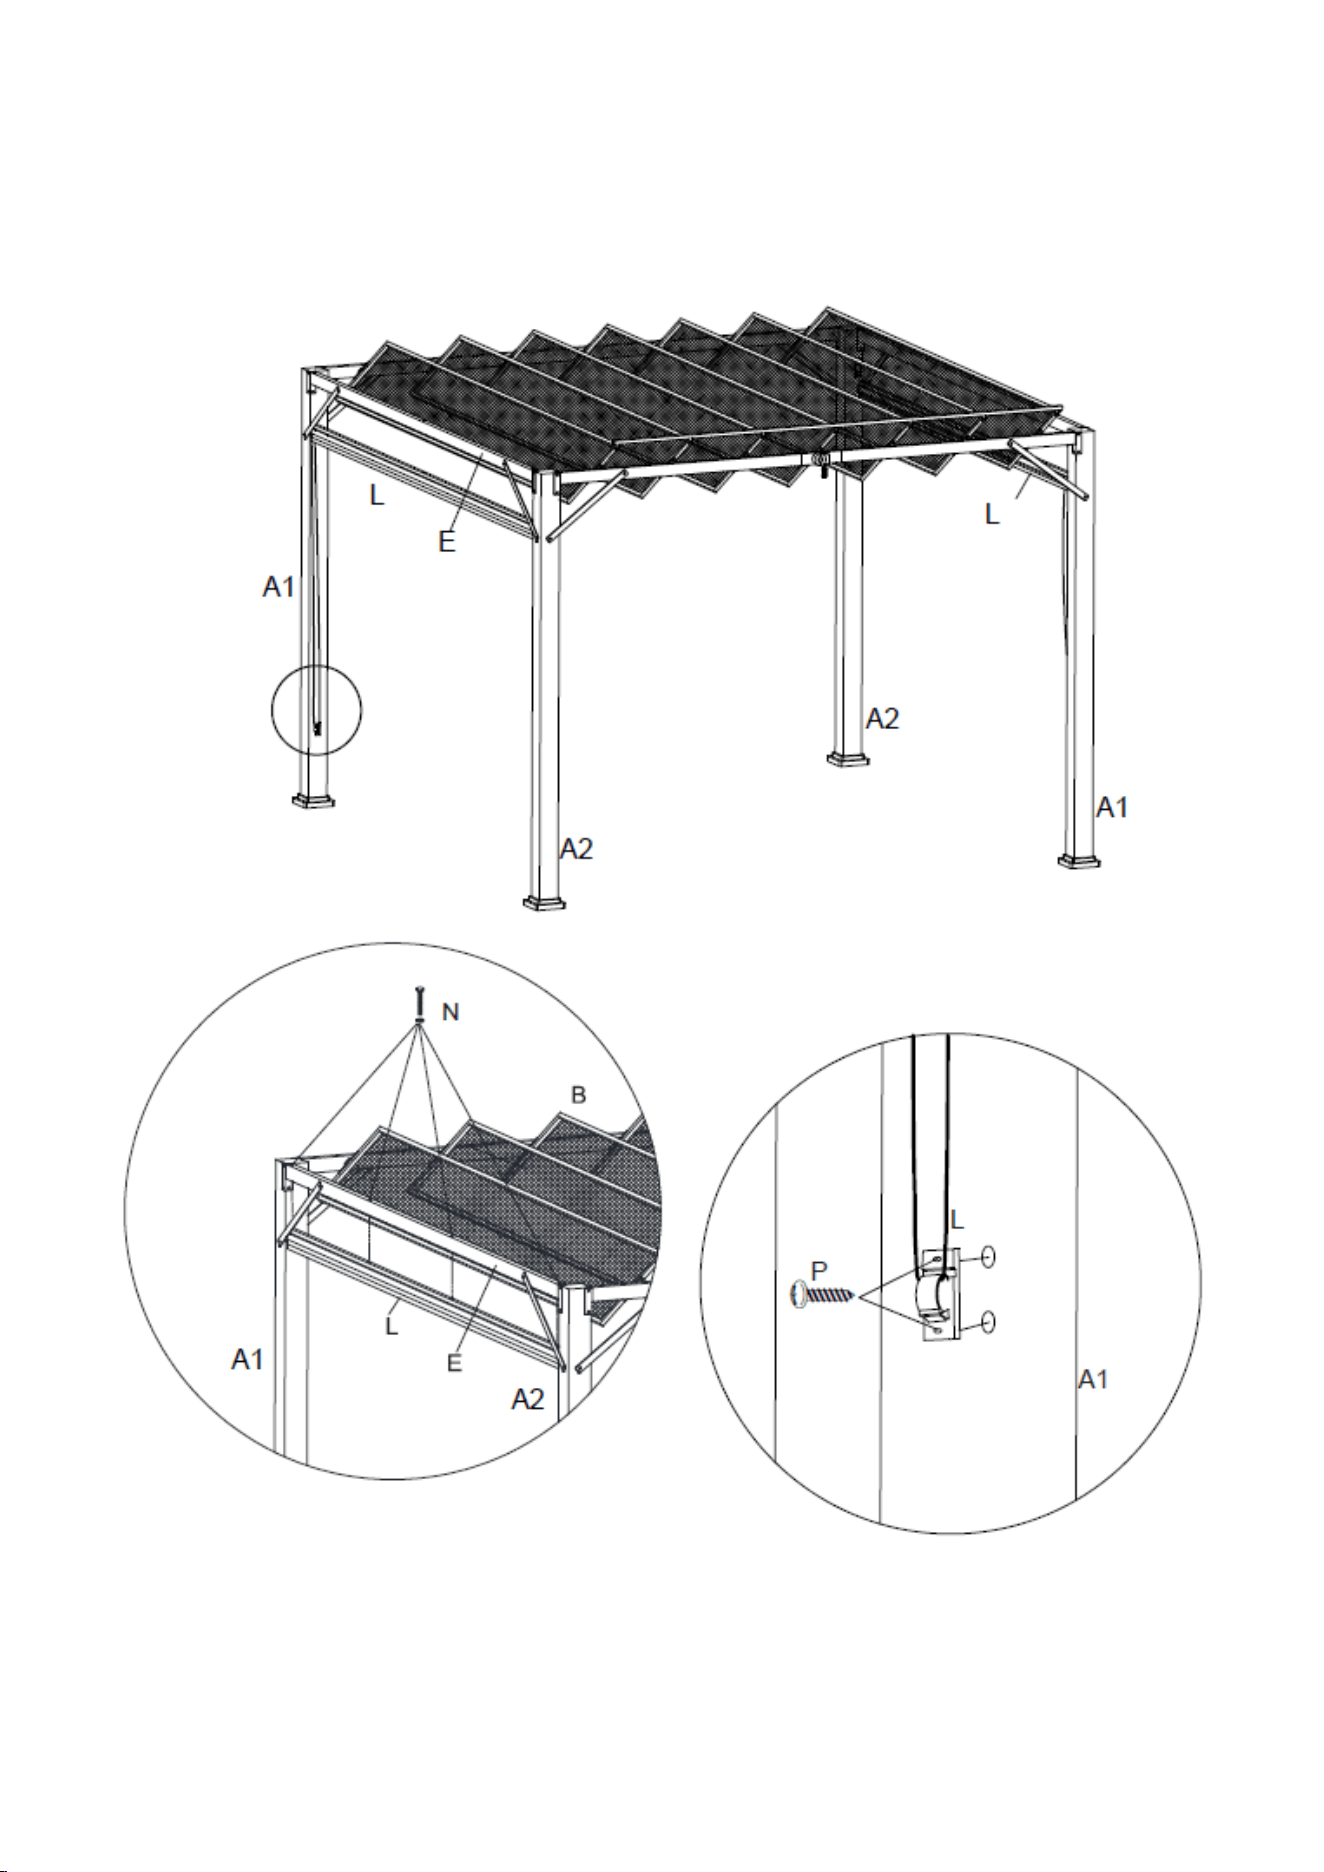
Step 8: Attach Pull-Down Screen (L) to the Side Lintel (E) using Bolts (N). Repeat for opposite side. See
Figure 8-1.
Attached the plastic anchor on the Pull-Down Screen (L) to the Post (A1) by Self-Tapping Screw
(P). See Figure 8.2.
Figure 8-1
Figure 8-2
10 of 11
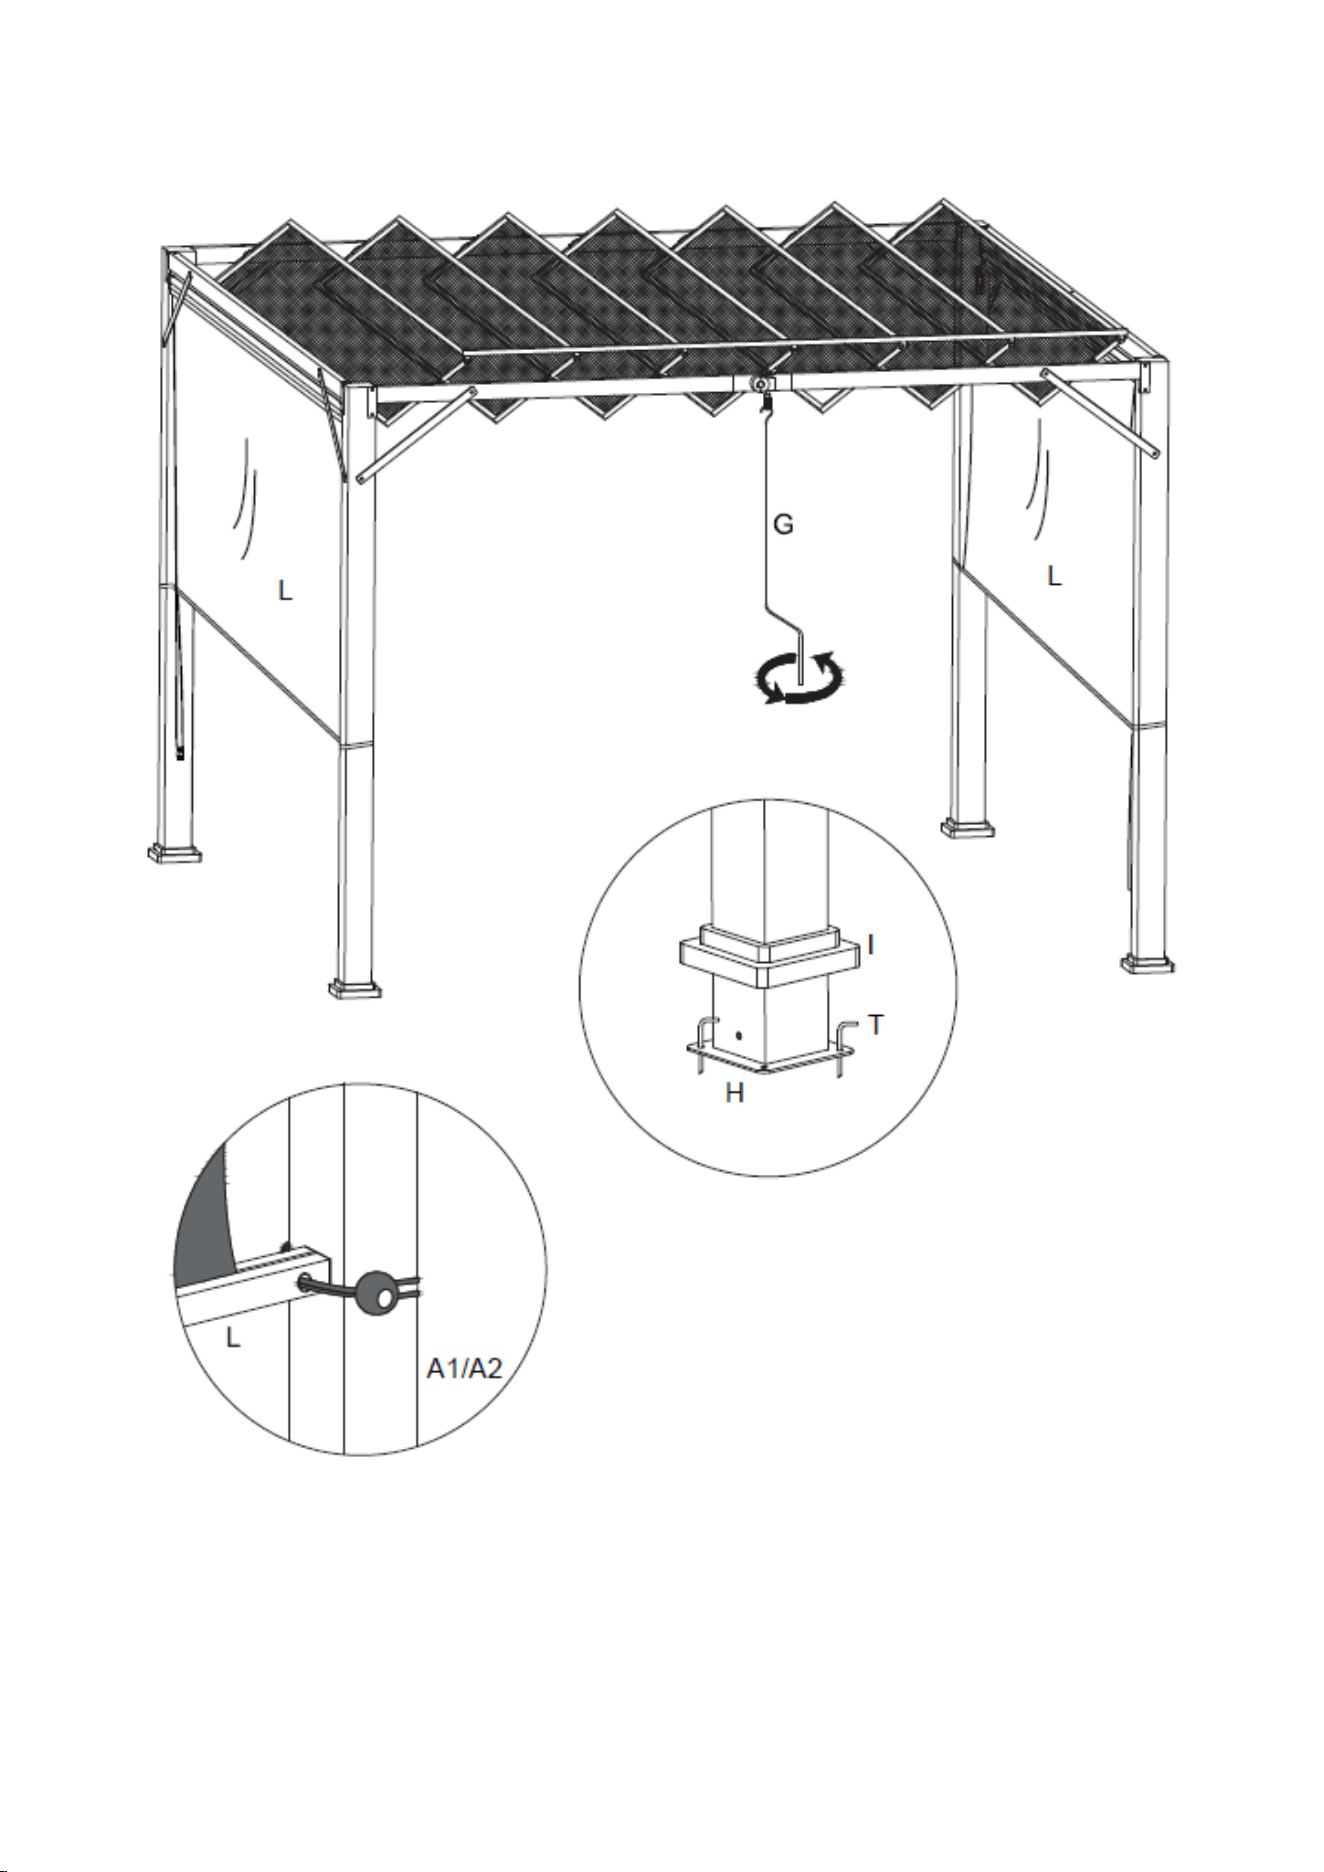
Step 9: Secure Pull-Down Screen (L) to Corner Posts (A1 & A2). See Figure 9. Insert the Stake (T) into
the ground through Base Plate (H) to fix the pergola. See Figure 10.
Note: Please see our video for additional assembly assistance:
https://shadenshelters.com/10-x-10-brunson-pergola
Figure 9
Figure 10

11 of 11
Maintenance & Care
Maintenance is required for all outdoor gazebo/pergola/pavilion. Inspect hardware thoroughly before use
and during the season to make sure bolts are securely fastened. Remove fabric canopy from soft top gazebo
and store out of the elements when not in use or during hazardous weather conditions (wind, rain, snow, etc.).
Remove all snow from the hard top gazebo/pavilion. Failure to maintain the gazebo/pergola/pavilion will
void warranty.
Steel/Aluminum Frame: Clean frames with a mild soap and warm water. Do not use abrasive materials,
cleaners or bleach. Rinse with clean water and dry thoroughly.
Wood Frame: The wood contains a water sealant. Over time direct sunlight and outdoor elements will
dry and potentially create slight cracks in the wood. A stain or water sealant must be applied
annually to extend the life of the wood frame and for warranty.
Fabric: Clean fabric by hand with a mild solution of soap and water. Rinse thoroughly and allow to drip dry.
Do not machine wash or tumble dry, as fabric may shrink. Do not use bleach or solvents on fabric.
Warranty
LIMITED 1 YEAR WARRANTY: The manufacturer will replace any part found to be defective in material
or workmanship within 30 days of purchase date. The purchaser must contact the manufacturer’s customer
service department. After 30 days of purchase date the warranty is limited. The manufacturer, at its option,
will repair or replace the defective parts. Proof of purchase (dated register receipt) and photos are required
for all warranty claims. It remains the customer's responsibility to pay for freight and packaging charges to
and from the service center. The warranty is to the original purchaser and is non-transferable. Any
replacement or warranted items will be in the original style and color, or similar style and color if the original
is unavailable or has been discontinued. Please contact our Customer Service for assembly
assistance or replacement parts. Do not return to the store without authorization.
EXCLUSIONS: Gazebos/Pergolas/Pavilions used for commercial, contract, or other non-residential
purposes are excluded. Damage due to acts of nature, misuse, improper assembly or maintenance, collapse,
settling of ground or base structure. Discoloration, fading, mildew, corrosion and rusting are excluded
LIABILITY: Inside Out Intl LLC, Shade N Shelters LLC, and Retailer disclaim any and all liability for
personal injury, property damage or loss resulting from the incorrect attachment, improper use, inadequate
maintenance, unapproved modification, or neglect of this product.
Accessories
Privacy Curtains, Winter Covers, Winter Support Poles, and Replacement Mosquito Netting are available for
select items. Please visit your retailer’s website or contact service@shadenshelters.com for more information.
Customer Service Contact Information
Hours: Monday - Friday 8:00 a.m. - 5:00 p.m. Central Time (CT)
Phone: 1-888-607-4417
Email: service@shadenshelters.com