Instruction
& Recipe
Booklet
For your safety and continued enjoyment of this product,
always read the instruction book carefully before using.
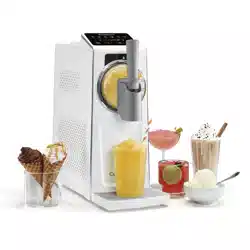
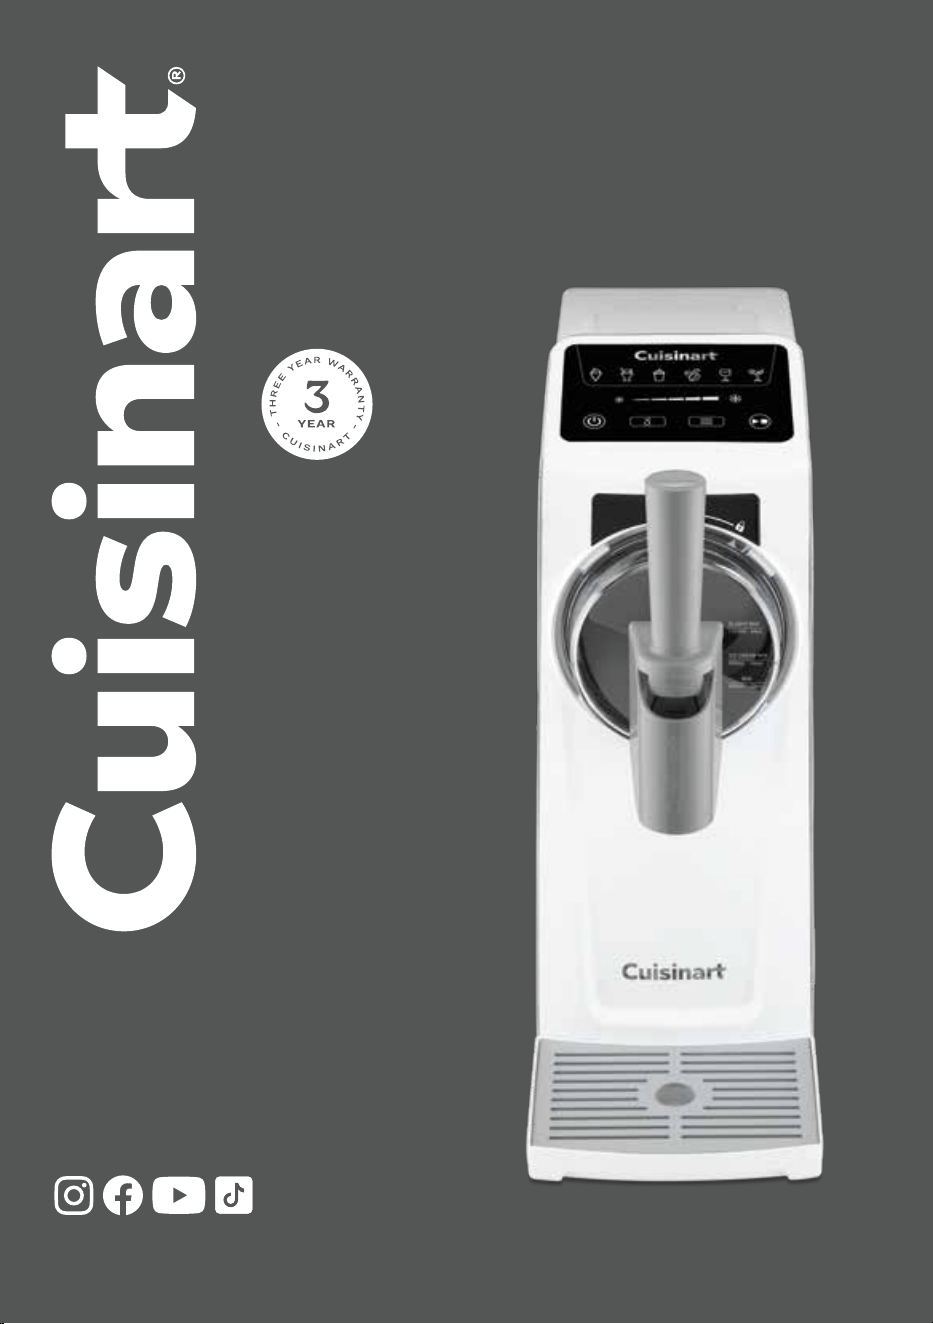
Frost Fusion
6-in-1 Slushy
& Soft Serve
ICE-200XA
Follow us @cuisinart_au
www.cuisinart.com.au

2
Contents
Important Safeguards..................2
Before First Use ......................4
Parts and Features ....................4
Operating Instructions .................5
Cleaning, Storage, and Maintenance ......7
Troubleshooting ...................... 7
Recipes .............................11
Warranty ............................14
IMPORTANT
SAFEGUARDS
When using an electrical appliance,
basic safety precautions should always
be followed to reduce the risk of fire,
electric shock, and/or injury, including
the following:
1. READ ALL INSTRUCTIONS BEFORE
USING.
2. Always unplug from outlet when not
in use, before putting on or taking
off parts, and before cleaning.
3. To protect against risk of electric
shock, do not place cord, plug, or
base of appliance in water or any
other liquid.
4. This appliance is not intended for
use by persons (including children)
with reduced physical, sensory or
mental capabilities, or lack of
experience and knowledge, unless
they have been given supervision or
instruction concerning use of the
appliance by a person responsible
for their safety. Children should be
supervised to ensure that they do
not play with the appliance.
5.Avoidcontactwithmovingparts.
Keep hands, hair and clothing as
well as spatulas and other utensils
away from unit during operation to
reduce the risk of injury and/or
damage to the appliance.
6. Do not operate any appliance with a
damaged cord or plug, or after the
appliance malfunctions or is
dropped or damaged in any manner.
7. The use of attachments not
recommended by Cuisinart
may cause fire, electric shock, or
risk of injuries.
8. Do not use outdoors.
9. Do not let cord hang over edge of
table or counter, or touch hot
surfaces.
10.Keephandsandutensilsoutof
vessel while in use to reduce the
risk of injury to persons or to the
appliance itself. DO NOT USE SHARP
OBJECTS OR UTENSILS INSIDE THE
VESSEL! Sharp objects will scratch
and damage the inside of the
vessel.Arubberspatulaorwooden
spoon may be used when the
appliance is turned OFF.
11. This appliance is for indoor,
domestic use only and is not
intended to be used in applications
such as: staff kitchen areas in
shops, offices and other working
environments; farmhouses; by
customers in hotels, motels and
other residential type environments;
bed and breakfast type
establishments.
12.Alwaysinspecttheappliancebefore
use for noticeable signs of damage.
Do not use if damaged, or if the
appliance has been dropped. In the
event of damage, or if the appliance
develops a fault, contact Cuisinart
Customer Service.
13. Do not operate your appliance in an
appliance cupboard or under a wall
cabinet. When storing in an
appliance cupboard, always unplug
the unit from the electrical outlet.
Not doing so could create a risk of
fire, especially if the appliance
touches the walls of the cupboard
or the door touches the unit as it
closes.
14.Keeptheapplianceatleast10cm
from other objects to ensure motor
ventilation.
15. Do not upend this product or incline
itovera45˚angle.
16. Do not use the appliance near an
open flame, hot plate, or stove.
17. WARNING: Keep ventilation
openings, in the appliance enclosure
or in the built-in structure, clear of
obstruction.
18. WARNING: Do not use mechanical
devices or other means to
accelerate the defrosting process,
other than those recommended by
the manufacturer.
3
SAVE THESE
INSTRUCTIONS
FOR HOUSEHOLD
USE ONLY
Special Cord Set
Instructions
Ashortpower-supplycordisprovidedto
reduce the risks resulting from becoming
entangled in or tripping over a longer cord.
Longer extension cords may be used if care is
exercised in their use.
Caution
Thisapplianceisforhouseholduse.Any
servicing other than cleaning and user
maintenance should be performed by an
authorised service representative.
• Do not immerse the compressor base in
water.
• To reduce the risk of fire or electric
shock, do not disassemble the base.
NOTE: The base does not contain any
user-serviceable parts.
• Repairs should be made only by
authorised personnel.
• Check voltage to be sure that the voltage
indicated on the name plate agrees with
your voltage.
• Never clean with scouring powders or
hard implements.
• The appliance should remain upright at all
times. If the appliance is turned on its
side or upside down, you will need to put
it in upright position and wait 4 hours
before using.
•
THISISANATTENDEDAPPLIANCE.Donot
leave unattended during use, unplug after
each use. Never leave the appliance
unattended when switched on or plugged in.
• The appliance is not intended to be
operated by means of an external timer or
separate remote control system.
• Alwaysdisconnecttheappliancefromthe
electric supply, if it is left unattended and
before assembling, disassembling or
cleaning.
• Never pull the plug out of the mains
socket by the supply cord.
• Alwaysensurethatyourhandsaredry
before touching the supply cord or
removing the plug from the mains socket.
•
Ensure all packaging materials and any
promotional labels or stickers are removed
from the appliance before first use.
• Position on a stable, level surface, near a
power socket.
• Do not place the appliance on or near a
hot gas or electric burner.
• Do not use accessories or attachments
with this appliance, other than those
recommended by Cuisinart.
• Periodically check all parts before use. If
any part is damaged DO NOT USE.
• To avoid injury or possible fire, do not
cover the appliance when in use.
• DO NOT add hot ingredients to the
appliance.
• DO NOT add frozen fruits or vegetables to
the appliance.
Warning
Danger
Extremely
Flammable
Gas
ThisproductusesR290asa
refrigerant gas.
R290hashigherefficiencyand
lower environmental impacts,
compared to Fluorinated gases.
The gas is flammable, but
under normal operating
conditions this poses no risk to
the user as it is safely contained in a sealed
system within the product. If the product is
dropped or damaged it is possible for the gas
to escape. In such circumstances the gas
could ignite if exposed to sources of ignition
such as naked flames.
When transporting this product take care to
ensure that the product is not dropped or
damaged.
If the refrigerant gas escapes or leaks are
suspected:
Immediately ventilate the room by opening
doors and windows for several minutes.
Avoidnakedflamesandotherpotential
ignition sources.
Do NOT use the product if you suspect a leak
of the refrigerant gas.
Do Not dispose of this product in household
waste.
4
Instead it should be handed over to an
appropriate collection point for the recycling
of electrical and electronic equipment.
WARNING: Polythene bags over
the product or packaging may
be dangerous. To avoid danger
of suffocation, keep away from
babies and children. These bags
are not toys.
Before First Use
DO NOT immerse the compressor base in
water. Wipe it with a moist cloth. Wash the
dispenser assembly, dispensing cover, auger,
drip tray, removable ingredient funnel
assembly as well as star tip, in warm, soapy
water to remove any dust or residue from the
manufacturing and shipping process. DO NOT
clean any of the parts with abrasive cleaners
or hard implements. Place the base in
location to be used in upright position and
let it rest for 4 hours before use.
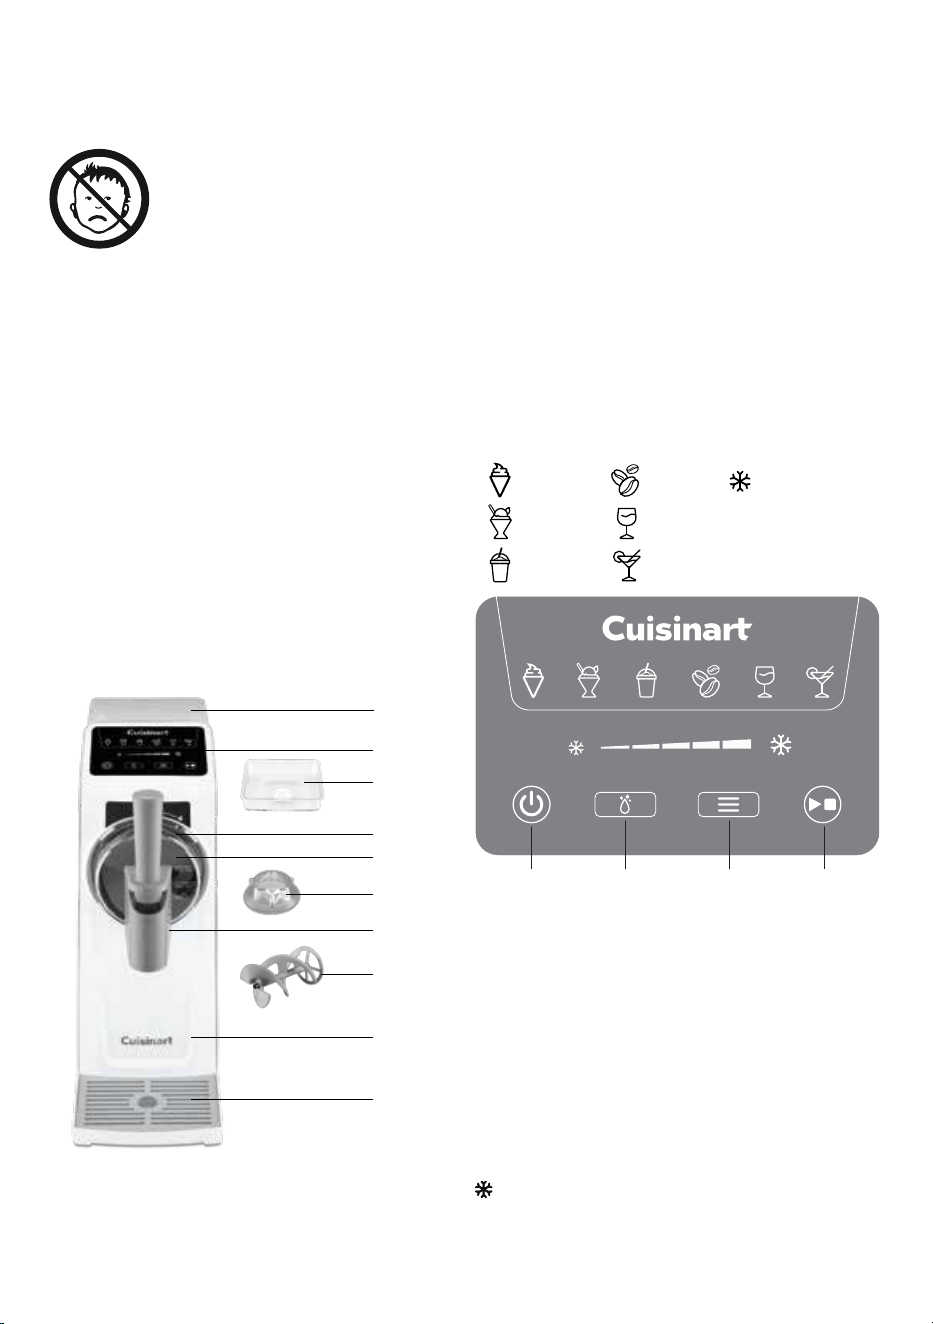
Parts and Features
1.
2.
3.
4.
5.
6.
7.
8.
9.
10.
1. Ingredient funnel cover
2. Control panel
3. Ingredient funnel tray
4. Silicone seal
5. Dispensing assembly
6. Star tip
7. Dispenser cover
8. Auger
9. Compressor base
10. Drip Tray
Control Panel
Cocktail
Frozen treats
firmness
selection /
progress bar
Wine
Frappe
Power button
Rinse
function
Start / Stop
Function
selection
Ice cream
Sorbet
Slushy
Power Button-presstoturnpoweronando
Rinse Function - This cycle agitates the appliance
without cooling to rinse the appliance.
Function Selection - Press this to cycle through
the 6 pre-sets for ice cream (soft serve), sorbet,
slushy, frappe, wine or cocktails. The icon selected
will illuminate.
Start / Stop - Press to start and stop churning /
cooling
- Press to adjust the temperature for your
perfect drink texture.

5
Operating Instructions
1. Position the drip tray at the bottom front
of the unit.
2.Installtheingredient funnel tray and cover
securely onto the top of the unit.
3.InserttheaugerwiththeX-shapedring
facing inside the vessel.
4.
Ensure the silicone seal is fitted around the
entrance to the cooling barrel before fitting
the dispenser assembly. Position the
dispenser assembly onto the vessel,
ensuring the handle is facing upward and
tilted to the left. Turn the dispenser
assembly clockwise until it locks securely
in place, ensuring the handle is upright.
Follow the markings on the front housing.
Use2handstoturntheassemblyinto
place and avoid using the handle.
NOTE: Check to make sure there are no
gaps at the bottom of the dispenser
assembly where it meets the housing –
this may indicate the dispenser it is not
properly in place and result in leaking.
5. Press the dispensing cover onto the
dispenser assembly to snap it into place.
6.
Prepare the ingredients (refer to page 6 and
insert the star tip if required for recipe).
NOTE: Only use the star tip for dispensing
soft serve or frozen yoghurt. For other
frozen treats, remove the star tip to avoid
the mixture clogging when dispensing.
7. Press the power button
to turn the unit
on. The LCD display will illuminate.
8. Pour your mixed ingredients or drink mix
into the ingredient funnel tray, ensuring
to fill past the MIN fill line, but not to
exceedtheMAXfilllineonthedispenser
assembly. Take note to follow the MIN /
MAXmarkingsfoundonthefrontofthe
dispenser assembly. Ensure the ingredient
funnel is closed and remains closed
during operation.
9. Select the desired preset by pressing the
function selection button on the
touchscreen
. Keep pressing until
your desired pre-set icon lights up.
a. Soft Serve Ice Cream or
Frozen Yoghurt
- No firmness
selection available for this preset.
NOTE: Place the star tip inside the
dispenser cover, then press the star tip
until you hear the sound “click”, the
installation is completed.
Please avoid dispensing ice-cream or
frozen yoghurt until the appliance
signals it is ready with 3 ‘beeps’.
b. Sorbet
- No firmness selection
available for this preset.
c. Slushy
- Firmness selection available.
For drinks with under 5g sugar per
100ml,usesettings1-3.Fordrinksover
5gofsugarper100mlusesettings4-5.
We recommended to start with the
lower setting and adjusting up as
needed to prevent over-freezing.
NOTE: Avoid using any sugar-free
mixture, as it can cause an ice layer to
form on the wall of the vessel,
potentially damaging the unit.
For the best experience when
dispensing slushy ensure the appliance
is running. If the slushy is not
dispensing well, decrease the
temperature level by pressing the small
snowflake symbol. The more sippable
the frozen drink is, the smoother it will
dispense.
d. Frappe
- Firmness selection
available. For low sugar recipes, use
firmness setting 1. We recommended to
start with the lower setting and
adjusting up as needed to prevent
over-freezing.
e. Wine
-
Firmness selection available.
Select your firmness level based on
preference. We recommend starting
withlevel2-3andadjustingtopersonal
preference.Alcoholisrequiredforthis
setting.
f. Cocktail
- Firmness selection
available. Select your firmness level
based on preference. We recommend
startingwithlevel2-3andadjustingto
personalpreference.Alcoholisrequired
for this setting.

6
g. Rinse function
i. To activate the rinse feature, pour
warm water into the ingredient
funnel,totheSlushyMAXfillline.
Then, press the rinse button.
ii. Press Start/Stop
.
iii. Pull down the handle to dispense
the dirty water from the vessel.
iv. Repeat as many times with clean,
warm water as you need. Do not use
water over 40°C.
10.Onceyouhaveselectedyourpre-set,to
adjust the firmness of frozen treats
(slushy, frappe, wine, and cocktail only),
press the frozen treats firmness selection
button
.
11. Once ready, press the Start/Stop button
to begin the selected preset cycle.
12.Whiletheapplianceismakingtreats,the
progress bar will blink in the display. It
will be solid when the treat is ready.
13. When the selected preset cycle is
complete, the appliance will ‘beep’ 3
times and automatically activate the Keep
Coolfeaturefor30minutesforicecream,
2hoursforfrappe,and16hoursfor
sorbet,slushy,wine,andcocktail.Avoid
dispensing ice-cream or frozen treats
until the appliance signals it is ready.
To dispense frozen treats from the unit
1. Once frozen treats are ready, position
your ice cream cone, cup, or bowl
beneath the dispenser. Pull down the
handle to start dispensing. For soft serve
ice cream or frozen yoghurt, gently rotate
the cone or bowl to create a swirl pattern.
Some liquid may come out of the
dispensing assembly when the handle is
first pulled down. Ice cream may take up
to20secondstodispense,iflonger,pull
and release dispensing handle slowly
several times.
NOTE: To dispense correctly, grasp the
handle with your entire hand.
NOTE: This machine features a Smart
Dispense System. There may be a slight
delay when dispensing; the machine
needs to push the mixture to the front of
the vessel. If the frozen treat becomes
stuck in the dispenser nozzle, gently
move the handle up and down to
dislodge.
2.Whenyou’vefilledtheconeorbowlto
your liking, slowly release the handle,
guiding it back to the vertical position to
stop the flow of frozen treats.
NOTE: For Ice Cream only, the unit will
beep 3 times after Keep Cool has been
runningfor25minutestosignalthat5
minutes remain before the machine
automatically shuts off.
3. Once the selected preset cycle is
complete, be sure to dispense all frozen
ingredients remaining inside the vessel
and run the rinse cycle a few times.
NOTE: Ensure the vessel is emptied
before removing the dispenser assembly
from the unit.
4. Turn off the appliance by pressing the
Power button
. Remove the dispenser
assembly by turning it counterclockwise
to unlock it and pull the auger out of the
vessel.
NOTE: Please press the button under the
dispenser assembly to release, and use both
hands to remove the cover.
NOTE: When making consecutive batches of
frozen treats, be sure to allow extra time for
the compressor to adjust to cooling.
TIP:Unplugunitandletitrestfor10
minutes to allow the motor to cool before
making a second batch.
Keep Cool Setting
When the selected preset cycle is complete,
the unit will automatically activate the Keep
Cool feature for 30minutesforicecream,
and2hoursforfrappe,and16hoursfor
sorbet, slushy, wine, and cocktail.
NOTE: Unit will still be running in the keep
cool mode, not off.
Treats are best enjoyed as soon as churning
is complete. Frozen treats may soften slightly
during the keep cool program.
7
Cleaning, Storage and
Maintenance
Cleaning
Clean the dispenser assembly, dispensing cover,
auger, drip tray, removable ingredient funnel
assembly as well as star tip in warm soapy water.
For a more thorough clean, use a sponge or
damp cloth to wipe the inside of the vessel.
DO NOT CLEAN WITH ABRASIVE CLEANSERS
OR IMPLEMENTS. Wipe the unit base clean
with damp cloth. Dry all parts thoroughly.
Remove the silicone seal from the dispenser
assembly and rinse it with clean water.
Ensure it is correctly reinstalled before next
use. Using the appliance without the seal in
place may cause leaks.
Storage
Be sure to store your unit in an upright
position. Do not store anything inside the
vessel other than the auger. Transfer frozen
treats to a freezer-safe, airtight container for
longer storage in the freezer.
If the appliance has been moved or tilted,
allow it to rest in an upright position for at
least 4 hours before use.
Do not store the appliance in areas prone to
high heat, as high temperatures can affect the
performanceoftheR290refrigerantsystem.
Maintenance
Anyotherservicingshouldbeperformedby
an authorised service representative.
Troubleshooting
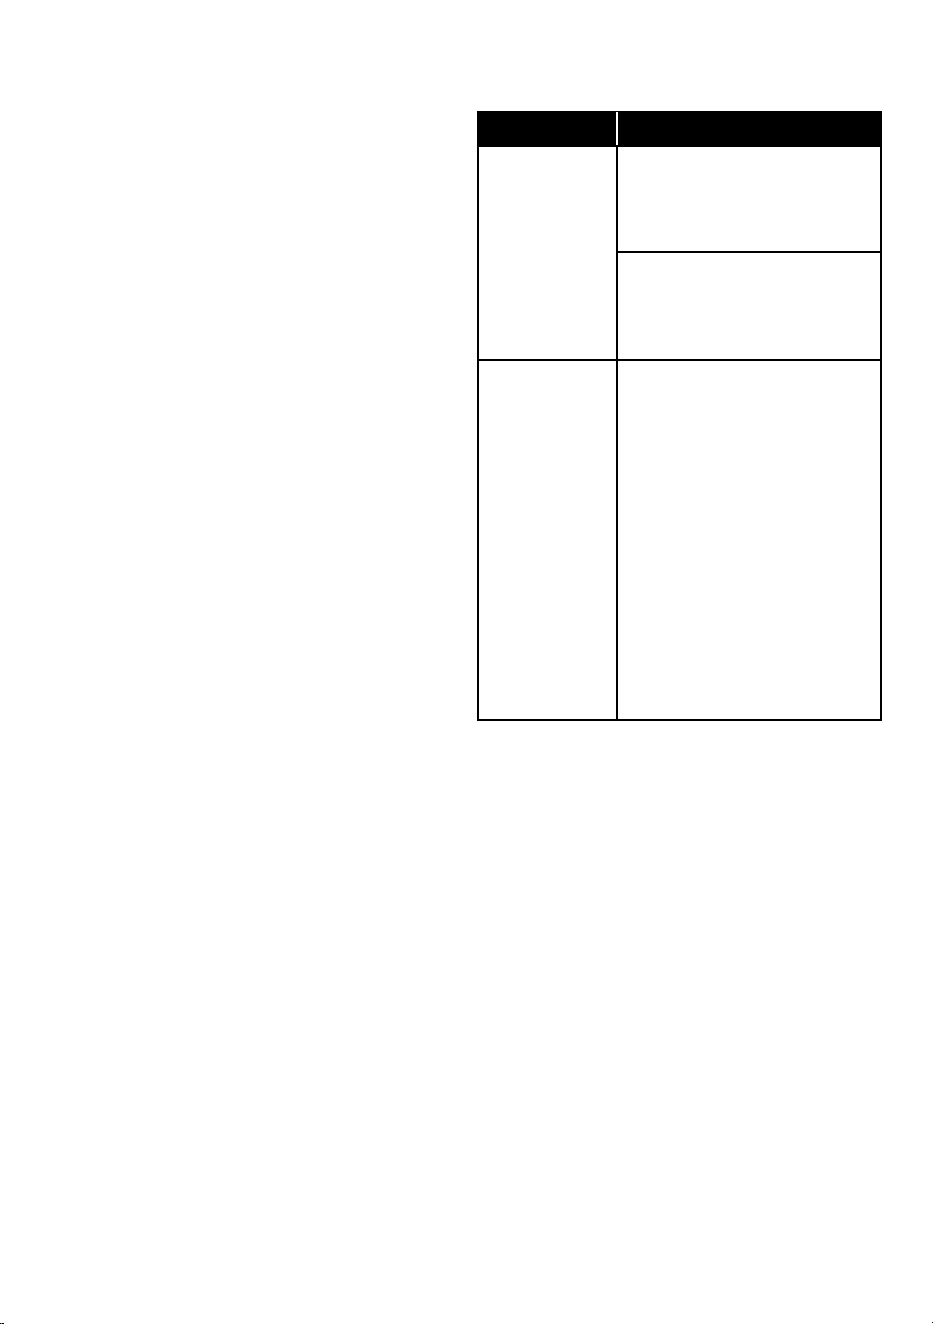
Problem Solution
Unitturnso
sooner than the
time set.
The overload safety feature has
been activated. Let unit rest for a
few minutes before continuing
making the frozen dessert.
If not the reason above, unplug
theunitandletitrestfor2hours.
Power unit on and begin making
your frozen dessert.
The dispensing
assembly
develop orange
or yellow
discoloration
Highly pigmented ingredients
such as mango and citrus contain
natural dyes that can bind to the
dispensing assembly during
freezing.Thisisacosmeticeect
only, not a manufacturing defect,
and it does not impact hygiene or
performance.
To minimise staining, use the
rinse function immediately after
use. For deeper stains, soak
overnight in a 1:1 vinegar and
water solution or clean with
baking soda on a damp sponge.
Avoidabrasivecleanersandlimit
use of strongly coloured drinks
where possible.

8
Recipe Tips
The recipes that follow offer you a variety of
options for delicious frozen treats.
You may create or use recipes of your own,
aslongasbasesdonotexceedtheMAXfill
line.
Be sure the dispenser assembly is properly
attached before adding contents to the
dispenser funnel. The assembly should be
completely flush with the unit when
correctly attached.
1. The minimum amount of treat mixture to
addtothemachineis2½cups.
2.Themaximumamountoficecreamor
frozen yogurt base to add to the machine
is 3¾ cups. You can also use the
maximum line for ice cream on the front
of the dispensing assembly as your guide.
3. The maximum amount of sorbet/slushy/
frappe/wine/cocktail mixture to add to
themachineis5½cups.Youcanusethe
maximum line for slushy on the front of
the dispensing assembly as your guide.
4.Anyliquidbeingpouredintothe
appliance should be smooth and well
blended to ensure easy dispensing. DO
NOT pour hot liquid into the appliance.
5. If liquid dispensed is still a bit too loose,
increase the freeze setting on the display
screen and continue to freeze until
desired consistency. (Does not apply for
ice cream and sorbet functions)
6.
Homemade bases must contain sugar to
ensure your mixture does not freeze solid.
* Sugar gives a base the proper
consistency to dispense - bases with
no to little sugar will freeze to the point
where it will be unable to dispense.
* Some brands offer sugar-free slushy
syrups which are made to prevent
over-freezing. Results may vary if using
pre-mix powders in ingredients.
7. Cold ingredients will reduce freezing time.
8. To clean, run warm water through the
unit while on the rinsecycle1to2times.
Once rinsed out, the unit can be
disassembled and cleaned with warm
soapy water.
9. Please note that any mix-ins, such as
chips, nuts, sprinkles, etc., must be
added after dispensing. They cannot be
added to the mixtures in the unit.
10.Generalfreezingtimesrangeperrecipe.
Mosttreatswillbereadyin20to40
minutes.
NOTE: Insert the star shaped tip into the
dispensing cover when dispensing ice
cream. Remove the star shaped tip when
dispensing any other frozen treats, as it
may clog the dispenser.
Soft Serve
(ice cream or frozen yoghurt)
The base recipes from Cuisinart were
created specifically for this unit. These
recipes were calculated to include the
appropriate percentages of liquid fat, sugar,
and protein to create the best soft-serve
ice cream. While other recipes exist for ice
cream, soft serve requires very specific
formulas. Flavours can be adjusted using
different extracts, such as almond or
peppermint, but in order to achieve the
most successful soft serve the dairy and
sugar amounts should remain the same.
Thicker mixtures should be added to
ingredient funnel a little at a time so not to
overflow.
Ingredients Matter
Use full-fat dairy: Cream and whole milk
give the smoothest, richest texture.
Low-fat versions will create icier textures
that also will not firm up as well as full fat
varieties.
Balance Sugar: Sugar doesn’t just sweeten
– it lowers the freezing point, keeping the
ice cream the perfect texture for
dispensing. If you use too little sugar, the
ice cream can become too firm to dispense
and potentially damage the unit.
Prep & Chilling
Chilling ice cream, frozen yogurt, and sorbet
bases create a firmer frozen product. While
it is not required, the texture of the frozen
treat will be smoother and more stable
when chilled for a minimum of 4 hours and
up to overnight.
Mixtures should be whisked well, ensuring
that the sugars are dissolved into the milk
before adding the cream. If the mixture was
chilled, always re-whisk before adding to
the unit to freeze.
Mixtures should always be completely
smooth before adding to the unit. If there
are lumps in the ice cream, or seeds

9
present, they will not dispense properly and
potentially damage the unit. If using
powders, always sift before adding to
mixtures.
Achieving the Best Ice Cream Texture and
Firmness: Alotgoesintoformulatinga
soft-serve ice cream recipe. Unlike other ice
cream machines, in order to dispense from
a compressor soft serve machine the
mixture must be a very specific composition
of fat (from dairy), sugar, flavouring, and
salt. The proper combination of these
ingredients produce an ice cream that is
cold, smooth, and firm enough to hold in an
ice cream cone.
Commercial soft serve ice creams include a
variety of stabilizers and emulsifiers that
are not readily available in all markets, or
ingredients that are not desirable for an
everyday home use. The beauty of making
your own ice cream at home is the ability to
use the freshest ingredients and to really
know what goes into your frozen treat. We
created recipes that include ingredients that
can be found at your neighbourhood grocery
stores to avoid hunting in specialty shops or
hunting online.
Slushy:
• For easy slushies, many store-bought
beverages can simply be added to the
unit. Some examples are soda, sweetened
iced tea, lemonade, sports or energy
drinks, kombucha, and fruit punch.
• Be sure the sugar content of the mixture
is at least 4% of the total mixture.
Without enough sugar, the resulting
mixture will be too frozen to dispense.
Alcoholic beverages:
• Since alcohol inhibits freezing, a mixture
with too high alcoholic content will not
freeze well.
10
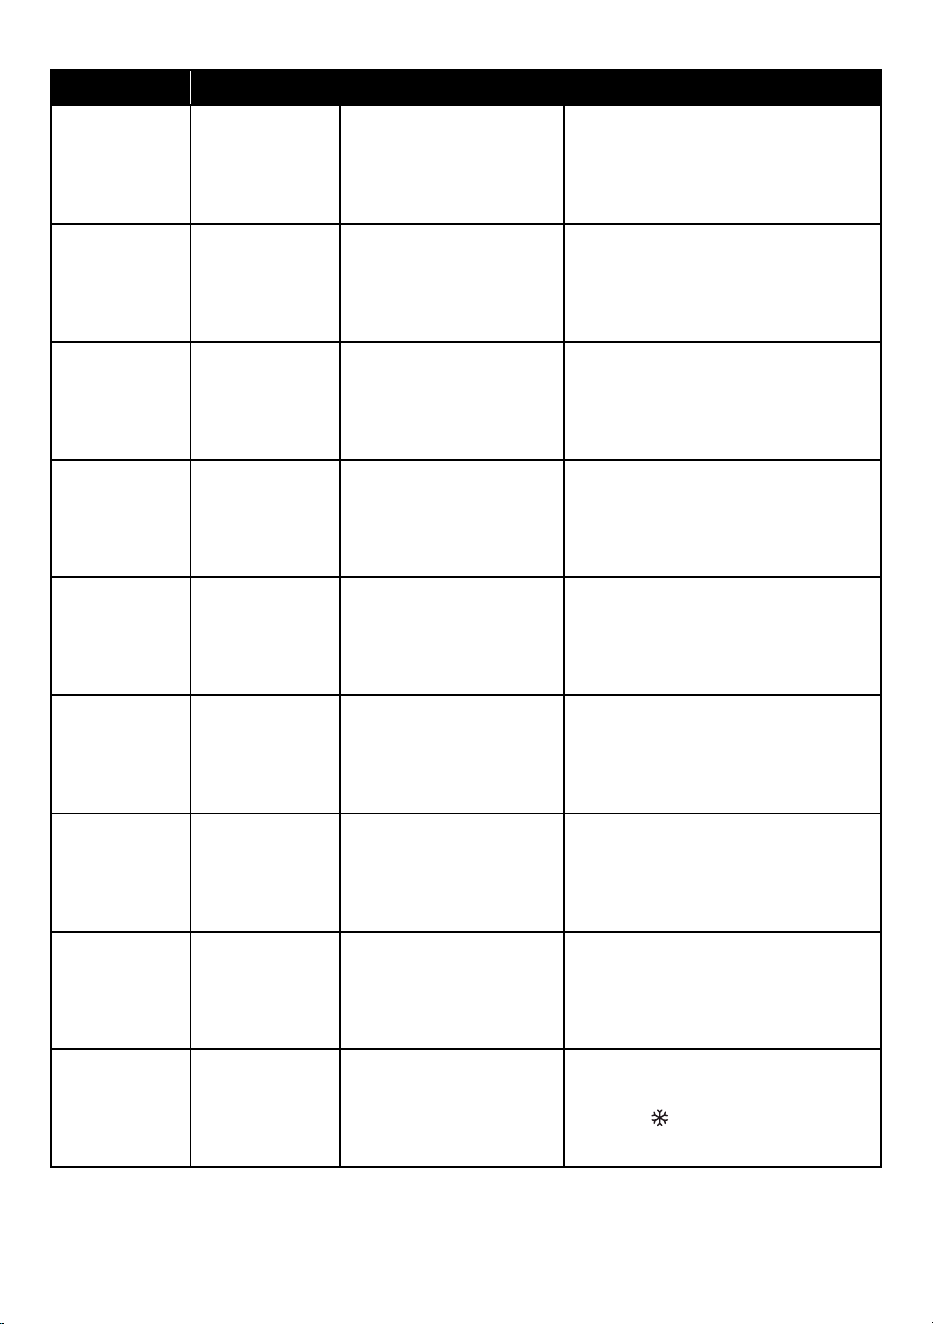
Issue Type of Recipe Likely Cause Quick Fix
Too Soft Ice Cream Too much sugar
Reduce sugar in the base recipe;
Chill overnight before churning
Too Firm Ice Cream Not enough sugar or fat
Addadditionalsugar;besurethat
theratioofMilktoCreamis2:1in
the base recipe
Icy Texture Ice Cream Not enough fat
Be sure to use full fat milk and
cream in recipes; Chill overnight
before churning
Ingredients
not going into
funnel
All Mixture is too thick
Addgraduallytotheingredient
funnel
Mixture will
not dispense
Ice Cream Mixturetoorm See above note
Mixture will
not dispense
Sorbet and
Beverages
Star Tip is being used
Only use the star tip to dispense Ice
Cream
Mixture will
not freeze
Cocktail, Wine
Alcoholcontentistoo
high
Increase non-alcoholic ingredients
in the mixture
Mixture frozen
in unit
All Not enough sugar
Turnotheunitimmediatelyto
protect the motor, allow mixture to
thaw, dispense fully
Mixture not
frozen enough
Slushy, Frappe,
Wine, Cocktail
only
Firmness selection too
low
Increasethermnessselectionby
pressing (
) button

11
Recipes
The recipes that follow are designed to get
you started on your frozen creations. But
there is more inspiration waiting for you to
try. Scan the QR code at the back of this
booklet to access additional recipes. Or
visit the product section of our website at
www.cuisinart.com.au
Ice cream
Vanilla Soft Serve ................... 11
Sorbet
Peach Sorbet ......................12
Slushy
Pink Lemonade Slushy ...............12
Frappé
Frozen Sweet Latte .................12
Pistachio Matcha Frappe .............12
Wine
Strawberry Frosé ...................13
Cocktail
Classic Frozen Margarita .............13
Vanilla Soft Serve
Makesabout10servings.
450ml Full Cream Milk
250ml Pure Cream
120g Caster Sugar
14ml Vanilla Essence
1g Salt
1. In a bowl, mix together caster sugar and
salt.Addmilkandstiruntilthesugaris
completely dissolved.
2.Addthepurecreamandvanillaessence
and mix.
3. Set the Frost Fusion to the “Soft Serve”
program, add the mixture to the unit and
then press the Start / Stop button to
activate.
4. The soft serve mixture should be ready in
around30minutes,atwhichtimetheunit
will “beep” 3 times and the keep cool
modewillactivateforanother30minutes.
NOTE: The texture of homemade soft serve
maydierfromcommerciallyproducedsoft
serve, as it is made using fresh ingredients
with fewer additives and stabilisers.

12
Peach Sorbet
Makesabout10servings.
600g diced peaches, fresh or frozen,
thawed
230ml sugar syrup (1:1 sugar water ratio:
dissolved and gently simmered
for 3 minutes. Leave to cool
before use)
½ teaspoon ground cinnamon
½ teaspoon pure vanilla extract
Pinch salt
1. Put all ingredients into a blender jar and
blend on High until smooth. Refrigerate
until ready to use.
2.Whenready,assemblethe6-in-1Slushy&
Soft-Serve. Pour the sorbet base into the
ingredient funnel. Select Sorbet and press
Start.
3. When sorbet is ready to dispense, the
unit will signal before going into Keep
Cool mode.
4. Dispense into cones or cups to serve.
Pink Lemonade Slushy
Makesabout12servings.
650ml water
150g caster sugar
170ml fresh lemon juice
100ml cranberry juice
1. Put the water and sugar into a small
saucepan and bring to a boil. Once boiling
and sugar is dissolved, remove from heat
and allow to cool to room temperature.
2.Whencooled,stirtheremaining2cupsof
water, and cranberry juice into the sugar
syrup. Refrigerate until ready to use.
3. When ready, assemble the 6-in-1 Slushy &
Soft-Serve Maker. Pour the slushy base
into the ingredient funnel. Select Slushy
and press Start.
4. When slushy is ready to dispense, the
unit will signal before going into Keep
Cool mode.
5. Dispense into cups when ready.
Frozen Sweet Latte
Makes about 8 servings.
2 double espresso
(100ml strong coee)
500ml full cream milk
8 teaspoon sugar
1. In a large measuring cup, stir together all
the ingredients. When ready, assemble the
6-in-1 Slushy & Soft-Serve Maker. Pour the
frappé ingredients into the ingredient
funnel. Select Frappé and press Start.
2.Whenreadytodispense,theunitwill
signal before going into Keep Cool mode.
3. Dispense into cups to serve.
Pistachio Matcha Frappe
Makes10servings.
900ml extra-creamy oat milk
2 tablespoons matcha powder
100ml prepared pistachio syrup
(may substitute sugar syrup)
1. Put ingredients into a blender jar and
blend on high until smooth. Refrigerate
until ready to use.
2.Whenready,assemblethe6-in-1Slushy&
Soft-Serve. Pour the frappé base into the
ingredient funnel. Select Frappé and
press Start.
3. When ready to dispense, the unit will
signal before going into Keep Cool mode.
4. Dispense into cups to serve.

13
Strawberry Frosé
Makes12servings.
400g strawberries, hulled and halved
1 750ml bottle rosé
60ml sugar syrup (1:1 sugar water ratio:
dissolved and gently simmered
for 3 minutes. Leave to cool
before use)
1. Blend ingredients together in a blender on
High in batches until smooth. Refrigerate
until ready to use.
2.Whenready,assemblethe6-in-1Slushy&
Soft-Serve Maker. Pour the base into the
ingredient funnel. Select Wine and press
Start.
3. When ready to dispense, the unit will
signal before going into Keep Cool mode.
4. Dispense into cups to serve.
Classic Frozen Margarita
Makes10servings.
230ml light agave nectar
470ml fresh lime juice
100ml premium tequila
100ml premium orange liqueur
1. In a large measuring cup, stir together the
agave syrup, lime juice, tequila, and
liqueur. When ready, assemble the 6-in-1
Slushy & Soft-Serve Maker.
Stir the ingredients together and pour into
the ingredient funnel. Select Cocktail and
press Start.
2.Whenreadytodispense,theunitwill
signal before going into Keep Cool mode.
3. Dispense into cups to serve

14
WARRANTY
Cuisinart warrants that, in the unlikely
event that this product develops any
malfunction within 36 months of purchase
of the product used for household or
domestic use (or within 3 months of
purchase of the product used for
commercial use) due to faulty
workmanship, materials or manufacture,
we will either (at our discretion) repair or
replace it for you.
This warranty applies for a period of 36
months for products purchased for
household or domestic use (and 3 months
for products purchased for commercial
use) from the date of purchase of the
product after which time the warranty
expires and has no further force of effect.
Should you experience any operating
difficultiesrefertotheFAQinthisbooklet
or contact Customer Service for advice on
1800 566 567 in Australia or 0800 456 546
in New Zealand.
Please retain your Purchase Receipt as
proof of purchase in order for your
warrantyentitlementtobevalid.This
document must be presented in the event
of making a claim under the terms of the
Cuisinart Warranty Policy.
During the warranty period Cuisinart will
repair or replace (at our discretion) any
defective product. However, if the product
includes a number of accessories, only the
defective part or relevant accessory will
be replaced. Cuisinart reserves the right to
make minor adjustments to fix any defect
instead of replacing the entire product or
accessory. Packaging, instructions, recipe
books etc. will not be replaced unless
faulty.Aproductpresentedforrepairmay
be replaced by a refurbished product of
the same type rather than being repaired.
Refurbished parts may be used to repair
the product.
If a spare part is required under warranty
it will be shipped to the customer or
retailer at No Charge.
In the event of a product or accessory
being replaced during the warranty period,
the guarantee on the replacement product
or accessory will expire 36 months for
household or domestic use (or 3 months
for commercial use) from the original
purchase date.
This warranty does not include or cover
the following:
• Defects caused by the product not being
used in accordance with instructions;
• Defects caused by accidental damage;
• Defects caused by misuse or negligent
handling of the product;
• Defects caused by the product not being
maintained or cleaned according to
instructions;
• Defects caused by being tampered with
by unauthorised persons;
• Defects which are normal or fair wear
and tear;
• Freight or any other costs incurred in
making a claim;
• Consumable items or accessories that by
their nature and limited lifespan require
periodic renewal (such as filters, seals,
blades or related accessories, such as
trays, racks or utensils);
• Products serviced or modified other than
by Cuisinart or an authorised Cuisinart
representative;
•Toanyclaimsmadebeyond12monthsif
the filament of the light bulb breaks i.e.
the light bulb has burned out;
• Exposure of the product to abnormally
corrosive conditions;
•Anyproductwhichhasitsserialnumber
or appliance plate removed or defaced;
• To any claims made beyond 3 months
from the date of purchase if the product
is used in commercial, industrial,
educational or rental applications; or
• To any claims made beyond 36 months
from the date of purchase if the product
is used in household or domestic
applications.
• Products purchased from any person
who is not a retailer serviced by Conair’s
authorised distributors, overseas
retailers, parallel importers or purchased
second hand.

15
The benefits given to you by our warranty
are in addition to other rights and remedies
under the Australian Consumer Law.
In Australia our goods come with
guarantees that cannot be excluded under
the Australian Consumer Law. You are
entitled to a replacement or refund for a
major failure and for compensation for any
other reasonably foreseeable loss or
damage. You are also entitled to have the
goods repaired or replaced if the goods fail
to be of acceptable quality and the failure
does not amount to a major failure.
Our goods also come with guarantees that
cannot be excluded under the New Zealand
Guarantees Act.
To make a warranty claim or spare part,
contact our customer service agents:
Cuisinart Australia
Ph: 1800 566 567
PO Box 146, Terrey Hills
NSW2084AUSTRALIA
Cuisinart New Zealand
Ph: 0800 456 546
YOU MUST provide your full name, address,
emailandphonedetails.Acopyofyour
proof of purchase must be supplied.
You can contact Cuisinart Australia/New
Zealand via email at aus_cuisinart@conair.
com or through the “Contact Us” option on
the Cuisinart website www.cuisinart.com.
au
The warranty contained in this document is
provided by:
ConairAustraliaPtyLtd(ACN068492044)
(Cuisinart)
18 Rodborough Rd,
FrenchsForest,NSW2086
Australia
16
Scan to get started with
your new frozen treat maker.
www.cuisinart.com.au
IB-25/386B