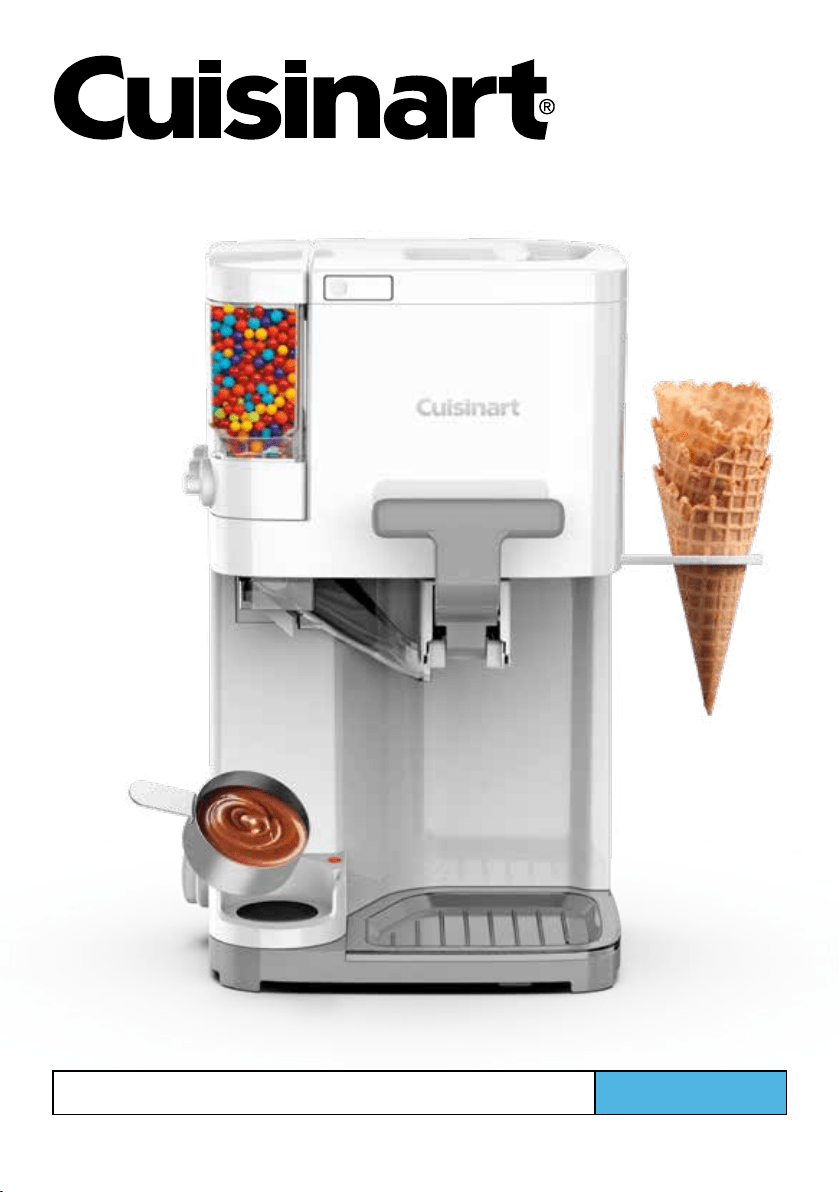
Mix It In
™
Soft Serve Ice Cream Maker
INSTRUCTION AND
RECIPE BOOKLET
For your safety and continued enjoyment of this product, always read the instruction book carefully before using.
ICE-48 Series

2
IMPORTANT
SAFEGUARDS
When using an electrical appliance, basic safety
precautions should always be taken to reduce
the risk of fire, electric shock, and/or injury,
including the following:
1. READ ALL INSTRUCTIONS
BEFORE USING.
2. To protect against risk of electric shock, do
not place cord, plug, or base of appliance in
water or any other liquids.
3. This appliance is not intended for use by
persons (including children) with reduced
physical, sensory, or mental capabilities, or
lack of experience and knowledge, unless
they are closely supervised and instructed
concerning use of the appliance by a person
responsible for their safety. Close
supervision is necessary when any
appliance is used by or near children.
Children should be supervised to ensure
that they do not play with the appliance.
4. Turn the appliance OFF, then unplug from
the outlet when not in use, before
assembling or disassembling parts, and
before cleaning. To unplug, grasp the plug
and pull from the outlet. Never pull from the
power cord. Make sure appliance is OFF
when not in use, before putting on or taking
off parts, and before cleaning.
5. Avoid contact with moving parts. Keep
hands, hair, clothing, as well as spatulas
and other utensils away from appliance
during operation to reduce the risk of injury
and/or damage to the appliance.
6. Do not operate any appliance with a
damaged cord or plug, or after the appliance
malfunctions or is dropped or damaged in
any manner. Contact the manufacturer for
information on examination, repair, or
adjustment.
7. The use of attachments other than those
made by Cuisinart may cause fire, electric
shock or risk of injuries.
8. Do not use outdoors.
9. Do not let cord hang over edge of table or
counter, or touch hot surfaces.
10. Keep hands and utensils out of freezer bowl
while in use to reduce the risk of injury to
persons or damage to the appliance.
DO NOT USE SHARP OBJECTS OR
UTENSILS INSIDE THE FREEZER BOWL!
Sharp objects will scratch and damage the
inside of the freezer bowl. A rubber spatula
or wooden spoon may be used when the
appliance is in the OFF position.
11. This appliance is for household use.
Any servicing other than cleaning and user
maintenance should be done only by
authorized Cuisinart repair personnel.
12. Do not use the freezer bowl on flames,
hot plates or stoves. Do not expose to heat
source. Do not wash in dish washer; doing
so may cause risk of fire, electric shock
or injury.
13. Close supervision is necessary when any
appliance is used by or near children.
14. Do not use appliance for other than its
intended use.
SAVE THESE
INSTRUCTIONS
FOR HOUSEHOLD
USE ONLY
SPECIAL CORD SET
INSTRUCTIONS
A short power supply cord is provided to
reduce the risks resulting from becoming
entangled in or tripping over a longer cord.
Longer extension cords are available and may
be used if care is exercised in their use.
If a long extension cord is used, the marked
electrical rating of the extension cord should be
at least as great as the electrical rating of the
appliance. The longer cord should be arranged
so that it will not drape over the countertop or
tabletop where it can be pulled on by children
or animals, or tripped over.

3
NOTICE
This appliance has a polarized plug (one blade
is wider than the other). To reduce the risk of
electric shock, this plug will fit in a polarized
outlet only one way. If the plug does not fit fully
in the outlet, reverse the plug. If it still does not
fit, contact a qualified electrician. Do not
attempt to defeat this safety feature.
CAUTION
This appliance is for household use. Any servic-
ing other than cleaning and user maintenance
should be performed by an authorized service
representative.
• Do not immerse base in water.
• To reduce the risk of fire or electric shock,
do not disassemble the base. NOTE:
The base does not contain any
user-serviceable parts.
• Repairs should be made only by authorized
personnel.
• Check voltage to be sure that the voltage
indicated on the nameplate agrees with
your voltage.
• Never clean with scouring powders or
hard implements.
CONTENTS
Important Safeguards . . . . . . . . . . . . . . . . . . . .2
Before First Use.........................3
Freezing Time and Bowl Preparation ........3
Features and Benefits ....................4
Assembly ..............................5
Making Soft Serve Ice Cream
and Frozen Desserts .....................5
Recommended Mix-ins ...................6
Suggested Liquid Toppings ...............6
Disassembling for Cleaning ...............6
Cleaning ...............................6
Storage................................6
Troubleshooting .........................7
Warranty...............................8
Recipes ...............................9
BEFORE FIRST USE
DO NOT immerse this product in water. Wipe it
with a damp cloth. Wash the lid, freezer bowl,
mixing arm, topping containers, topping chute,
and drip tray in warm, soapy water to remove
any dust or residue from the manufacturing
and shipping process. DO NOT clean any of
the parts with abrasive cleaners or hard
implements.
FREEZING TIME AND BOWL
PREPARATION
The freezer bowl must be completely frozen
before you begin your recipe. Before freezing,
wash and dry the bowl. Wrap it in a plastic bag
to prevent freezer burn. We recommend that
you place the freezer bowl in the back of your
freezer where it is coldest. Be sure to place
the freezer bowl on a flat surface in its
upright position for even freezing. The length
of time needed for the bowl to freeze complete-
ly depends on how cold your freezer is. For the
most convenient frozen desserts, leave the bowl
in the freezer at all times. You can take it out
any time for immediate use. In general,
freezing time should be a minimum of 24 hours.
To determine whether the bowl is completely
frozen, shake it. If you do not hear liquid
moving, the cooling liquid is frozen.
Reminder: Your freezer should be set to 0°F to
ensure proper freezing.
REFERENCE CARD
If you lose the paper instruction booklet, there
is a QR code to access the online instruction
booklet and recipes. Pull the “INFO” tray on the
side of the drip tray (part #12 on page 4) and
scan the QR code.
15
1
4
2
3
5
9
10
8
14
12
13
6
7
11
4
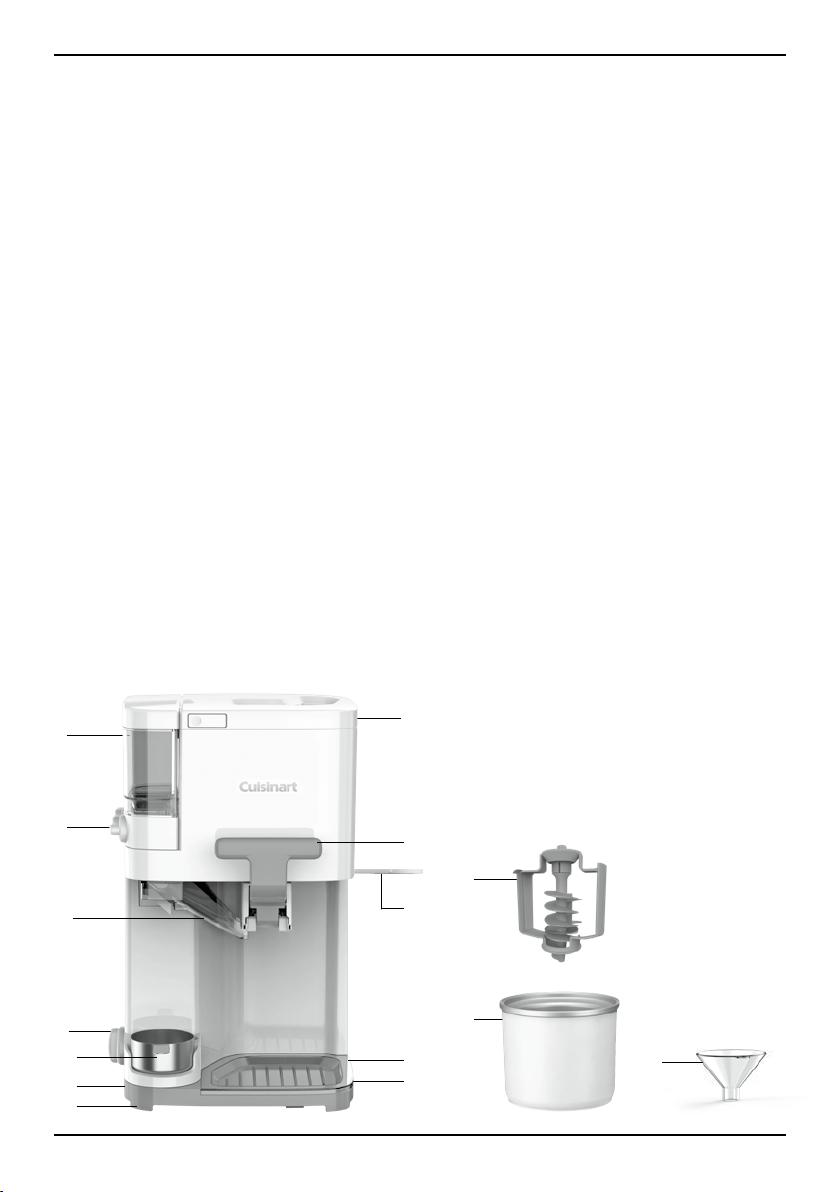
FEATURES AND BENEFITS
1. Easy-Lock Lid with Opening –
Lid is
designed to remove and lock easily.
An ingredient opening allows you to pour
ingredients directly through the top and
watch the freezing process.
2. Mixing Paddle –
Mixes and aerates
ingredients in freezer bowl to create smooth,
soft ice cream.
3. 1½-Quart Freezer Bowl –
Contains cooling
liquid within a double-insulated wall to create
fast and even freezing. Double wall keeps the
bowl cool and at an even temperature.
4. Three Topping Containers –
Dispense the
mix-ins of your choice. The three topping
containers dispense mix-ins such as
sprinkles, mini chocolate chips, hard-shelled
candies, and many more. The topping
containers can dispense and mix add-ins
into the ice cream or they can be taken off
the machine to add toppings onto ice cream
right at the table.
5. Topping Dispensing Knobs –
Turn one of
three knobs to dispense the mix-ins of your
choice into your soft ice cream.
6. Topping Chute –
Mix-ins are dispensed
from the chute into your ice cream cone or
bowl while you dispense ice cream.
Removable for easy cleaning.
7. Dispensing Handle Assembly –
Dispenses
soft ice cream when handle is pulled down.
Removable for easy cleaning.
8. Base –
Contains heavy-duty motor strong
enough to make and dispense ice cream.
9. Power Control Knob
10. 4 oz. Keep Warm Cup and
Heating Plate –
Keep liquid toppings warm.
11. Cone Holder –
Conveniently holds a stack
of ice cream cones. Can hold both wafer-
style and sugar cones.
12. Removable Drip Tray –
Can be removed
for easy cleaning.
13. Mix-in Gauge –
Check the size of mix-ins by
dropping them through. Mix-ins that do not
fit through will clog the ice cream maker.
14. Rubber Feet –
Nonslip feet keep base
stationary during use.
15. Removable Quick Reference Card
(Not Shown)

5
ASSEMBLY
1. Insert the topping containers into the indent
on the top left side of the Cuisinart
®
Mix It
In
™
Soft Serve Ice Cream Maker so that they
are firmly in place. The topping containers
with the rounded edge should be inserted
into the front and rear spaces.
2. Place the cover over each of the
topping containers.
3. Attach the dispensing handle assembly by
inserting the round opening under the top
part of the unit, aligning the handle with
“LOCK” on the side of the unit, then rotating
the assembly clockwise until it locks into
place (the Dispensing Handle should be in
the center of the front of the unit).
4. Slide the topping chute into the space
provided under the topping containers. Be
sure to slide it all the way in until it snaps in
place (the Dispensing Handle must be in the
upright position).
5. Place the drip tray on the base under the
dispensing handle.
6. Place the keep warm cup on the warming
plate, if heating up toppings.
MAKING SOFT SERVE ICE
CREAM AND FROZEN
DESSERTS
1. Fill the topping containers with the desired
mix-ins using the mix-in gauge.
2. Do not place liquid toppings in toppings
containers. Liquid toppings should be
placed in keep warm cup over the heater.
Do not exceed 4 oz. of liquid toppings in
keep warm cup.
NOTE: keep warm cup should only be used
to keep liquid toppings warm.
3. Use Cuisinart’s recipes from the pages that
follow. Do not fill the freezer bowl higher
than ½ inch from the top, as the frozen
dessert base will increase in volume during
the freezing process. For best results,
prepare frozen dessert base in a container
from which it is easy to pour.
4. Push the upper part of the mixing paddle
into the hole on the bottom of the lid.
5. Remove the freezer bowl from the freezer.
(Remove plastic bag if you have wrapped
freezer bowl.) Lift the lid and place freezer
bowl inside the base.
NOTE: Bowl will begin to defrost quickly
once it has been removed from freezer.
Use immediately after removing from freezer.
6. Place lid with mixing paddle on base and
push down until it locks into place.
7. Turn the power control knob to "Ice Cream,"
if only preparing ice cream. Turn the dial to
"Ice Cream + Warm," if preparing ice cream
and warming a liquid topping. Mixing paddle
will begin to turn and the warming heater
will start if selected.
8. Add frozen dessert base to the freezer bowl
by pouring through the opening in the lid.
9. Soft ice cream will be finished in as little as
30 minutes. The time will depend on the
recipe and volume of the dessert you are
making. Frozen dessert base should be
refrigerated to reduce mixing time.
NOTE: Ensure optimal soft serve
consistency by checking ice cream at
least 5 minutes before specified finish time.
If it does become too hard to dispense,
simply remove the freezer bowl, scoop,
serve, and enjoy!
10. Hold an ice cream cone or bowl 1 inch
below the ice cream chute and pull down
the handle to dispense the ice cream.
Turn cone or bowl as you dispense to swirl
ice cream.
11. Turn desired knob(s) to add toppings of your
choice to soft serve ice cream or dessert.
12. When finished filling the cone or bowl,
push the handle back up to stop the flow of
ice cream.
NOTES: Some liquid may initially come out
of the dispensing handle assembly when
first pulled down. Use a cup to collect this
liquid, pour liquid back into bowl, then
proceed with filling the first bowl or cone.
Do not store frozen desserts in the freezer
bowl. Desserts will stick to the side of the

6
freezer bowl and may damage the bowl.
Transfer to an airtight container.
Ice cream will lose its soft consistency and
harden after it is stored in the freezer.
13. If you want to use the Keep Warm Cup,
make sure the unit is turned to "Ice Cream
+ Warm."
NOTE: The Keep Warm feature is intended
to keep only prepared toppings soft enough
to pour over ice cream (hot fudge, caramel,
and butterscotch).
RECOMMENDED MIX-INS
These items can be found in most well-stocked
grocery stores.
Mini candy-coated chocolates
Mini chocolate chips
Confetti sprinkles
Chocolate sprinkles
Caramel sprinkles
Praline crunch
Decorative Crunch Bits
Finely Chopped Nuts
NOTE: Always use the mix-in gauge; some mix-
ins may be too large to dispense and will need
to be chopped.
SUGGESTED LIQUID
TOPPINGS
Chocolate syrup
Prepared hot fudge
Prepared caramel sauce
Prepared fruit sauce, such as
strawberry, blueberry, or raspberry
Butterscotch sauce
DISASSEMBLING
FOR CLEANING
1. Turn the unit OFF and unplug.
2. Remove the lid by pushing in and lifting
the two side tabs. Disconnect the
mixing paddle.
3. Lift the freezer bowl up and out of the base.
Make sure all ice cream has been dispensed
before removing.
4. Remove the topping chute by pulling it
toward you.
5. Remove the dispensing handle assembly by
turning counterclockwise to unlock. Once
unlocked, it can be lowered from the unit.
CLEANING
1. Follow section on disassembling.
2. Base: Wipe with a damp cloth and dry.
Never use abrasives or immerse in water.
3. Freezer Bowl and Lid: Wash by hand
in warm, soapy water and dry thoroughly.
DO NOT PUT IN THE DISHWASHER. DO
NOT CLEAN WITH ABRASIVE CLEANSERS.
4. Dispensing Handle Assembly: Wash
thoroughly by hand in warm, soapy water.
Be sure to eliminate all ice cream residue by
cleaning it while it is opened (with the
handle pushed down) and closed (with
handle up).
5. Mixing Paddle, Topping Containers,
Topping Chute, Keep Warm Cup and Drip
Tray: Hand-wash in warm, soapy water and
dry thoroughly. These items are also top
rack dishwasher safe.
STORAGE
DO NOT put freezer bowl in freezer if bowl is
wet. DO NOT store lid, mixing paddle, base,
drip tray, or topping containers in the freezer.
You may store the freezer bowl in the freezer, in
its upright position, for convenient, immediate
use. We recommend, before freezing, wrap the
bowl in a plastic bag to prevent freezer burn.
DO NOT store frozen desserts in the freezer
bowl. Transfer desserts to an airtight container
for longer storage in the freezer. When filled
topping containers are not in use, store in a
cool, dark place. Empty containers if not used
within a week.
NOTE: Ice cream will lose its soft consistency
and harden after it is stored in the freezer.

7
TROUBLESHOOTING
Problem: Ice cream is not ready in recommended time.
Solution:
• Check the ice cream base consistency as it is churning. If it is thick and cold, more churning might be
necessary to get to the right consistency for dispensing.
• Should the correct consistency still not be achieved, it could be attributed to the temperature of the
ice cream bowl. It is important for the freezer to be at 0°F and for the freezer bowl to be in the freezer for
24 hours before using.
• Ice cream base ingredients may not have been cold enough. Be sure to fully chill ice cream base prior to
making ice cream for best results.
• Be sure to have your ice cream maker all set up with dispensing assembly in place and paddle attached to lid
before removing ice cream bowl from the freezer.
Problem:
Ice cream is not dispensing.
Solution:
• Correct consistency is key to dispensing. Begin checking consistency at least 5 minutes before specified
finish time.
• Once ice cream gets too thick, it will not be able to be dispensed. Should this happen, simply scoop ice cream
right from the ice cream bowl.
• When checking to see if consistency is correct for dispensing, test by dispensing once base starts getting thick.
If base is too soft or liquid, simply pour it back into the mix.
•
Once ice cream does get to correct consistency, continue to dispense cups or cones until ice cream is
completely dispensed.
Problem:
Motor stalls.
Solution:
• Ice cream may be too thick.
• Turn off ice cream maker. Freezer bowl will need to be emptied, washed and refrozen before starting
the process again.
Problem:
Mix-ins are not dispensing.
Solution:
• Check topping chute to make sure that mix-ins are not stuck.
• Be sure that the topping dispenser is completely dry before adding any toppings. If wet, toppings can melt and
stick together.
• Be sure that the mix-in chute is also thoroughly dry.
• Mix-ins may be too large. Use the mix-in gauge to determine the correct size for mix-ins.
Problem:
Ice cream paddle is not turning.
Solution:
• Check to make sure there is no ice in the freezer bowl.

8
WARRANTY
Limited Three-Year Warranty
This warranty is available to U.S. consumers
who purchase products directly from Cuisinart
or an authorized Cuisinart
®
reseller only. You are
the consumer if you own a Cuisinart
®
Mix It In
™
Soft Serve Ice Cream Maker that was purchased
at retail for personal, family or household use.
Except as otherwise required under applicable
law, this warranty is not available to retailers
or other commercial purchasers or owners or
consumers who purchase from unauthorized
Cuisinart
®
resellers. We warrant that your
Cuisinart
®
Mix It In
™
Soft Serve Ice Cream
Maker will be free of defects in materials and
workmanship under normal home use for 3 years
from the date of original purchase.
We recommend that you visit
https://cuisinart.
registria.com
for a fast, efficient way to
complete your product registration. However,
product registration does not eliminate the need
for the consumer to maintain the original proof
of purchase in order to obtain the warranty
benefits. In the event that you do not have proof
of purchase date, the purchase date for purposes
of this warranty will be the date of manufacture.
CALIFORNIA RESIDENTS ONLY
California law provides that for In-Warranty
Service, California residents have the option
of returning a nonconforming product (A) to
the store where it was purchased or (B) to
another retail store that sells Cuisinart products
of the same type. The retail store shall then,
according to its preference, either repair the
product, refer the consumer to an independent
repair facility, replace the product, or refund
the purchase price less the amount directly
attributable to the consumer’s prior usage of
the product. If neither of the above two options
results in the appropriate relief to the consumer,
the consumer may then take the product to an
independent repair facility, if service or repair
can be economically accomplished. Cuisinart
and not the consumer will be responsible for
the reasonable cost of such service, repair,
replacement, or refund for nonconforming
products under warranty. California residents
may also, according to their preference, return
nonconforming products directly to Cuisinart for
repair or, if necessary, replacement by calling
our Consumer Service Center toll-free at
1-800-
726-0190.
Cuisinart will be responsible for the
cost of the repair, replacement, and shipping and
handling for such nonconforming products
under warranty.
H
assle-Free Replacement Warranty
Your ultimate satisfaction in Cuisinart products
is our goal, so if your Cuisinart
®
Mix It In
™
Soft
Serve Ice Cream Maker should fail within the
generous warranty period, we will repair it or,
if necessary, replace it at no cost to you.
To obtain a return shipping label, visit us at
https://
www.cuisinart.com/customer-care/
product-assistance/product-inquiry/. Or call
our Consumer Service Center toll-free at
1-800-726-0190
to speak with a representative.
Your Cuisinart
®
Mix It In
™
Soft Serve Ice
Cream Maker has been manufactured to the
strictest specifications and has been designed
for use only in 120-volt outlets and only with
authorized accessories and replacement parts.
This warranty expressly excludes any defects
or damages caused by attempted use of
this unit with a converter, as well as use with
accessories, replacement parts or repair service
other than those authorized by Cuisinart. This
warranty does not cover any damage caused
by accident, misuse, shipment or other than
ordinary household use. This warranty excludes
all incidental or consequential damages. Some
states do not allow the exclusion or limitation
of these damages, so these exclusions may not
apply to you. You may also have other rights,
which vary from state to state.
Important: If the nonconforming product is to
be serviced by someone other than Cuisinart’s
Authorized Service Center, please remind the
servicer to call our Consumer Service Center at
1-800-726-0190
to ensure that the problem is
properly diagnosed, to confirm that the product
is serviced with the correct parts, and to ensure
that the product is still under warranty.
©2022 Cuisinart
Glendale, AZ 85307
Printed in China
22CE082573
IB-17576-ESP

Máquina de helado suave Mix It In
™
MANUAL DE
INSTRUCCIONES
Y LIBRO DE RECETAS
Para su seguridad y para disfrutar plenamente de este producto, siempre lea atentamente las instrucciones antes del uso.
Serie ICE-48

2
MEDIDAS DE
SEGURIDAD
IMPORTANTES
Al usar aparatos eléctricos, siempre se deben tomar
precauciones básicas de seguridad para reducir el
riesgo de incendio, descarga eléctrica o lesiones, entre
ellas las siguientes:
1. LEA TODAS LAS INSTRUCCIONES
ANTES DEL USO.
2. Para reducir el riesgo de descarga eléctrica,
no sumerja el cable, el enchufe ni la base del
aparato en agua u otros líquidos.
3. Los niños o las personas que carezcan de la
experiencia o de los conocimientos necesarios
para manipular el aparato, o aquellas cuyas
capacidades físicas, sensoriales, o mentales estén
limitadas, no deben usar el aparato sin la
supervisión o la dirección de una persona
responsable por su seguridad. Supervise el uso de
este aparato con cuidado cuando sea usado por o
cerca de niños. No permita que los niños jueguen
con este aparato.
4. Apague y desenchufe el aparato cuando no esté
en uso, antes de instalar/sacar piezas y antes de
limpiarlo. Para desenchufar, agarre el enchufe y
jálelo de la toma de corriente. Nunca jale el cable.
Compruebe que el aparato está desenchufado
cuando no esté en uso, antes de instalar/sacar
piezas y antes de limpiarlo.
5. Evite el contacto con las piezas móviles. Para
reducir el riesgo de lesiones personales o daños al
aparato, mantenga los dedos, cabello, ropa,
espátulas y otros utensilios lejos del mismo
durante el funcionamiento.
6. No use este aparato si el cable o el enchufe están
dañados, después de un mal funcionamiento,
después de una caída, o si está dañado; contacte
a nuestro centro de atención al cliente para
devolverlo para su revisión, reparación o ajuste.
7. El uso de accesorios no fabricados por Cuisinart
presenta un riesgo de incendio, descarga eléctrica
o lesiones personales.
8. No lo use en exteriores.
9. No permita que el cable cuelgue del borde de la
encimera o de la mesa, ni que tenga contacto con
superficies calientes.
10. Para reducir el riesgo de lesiones personales o
daños al aparato, mantenga las manos y utensilios
fuera del tazón congelador durante el
funcionamiento. NUNCA INTRODUZCA
OBJETOS O UTENSILIOS PUNZANTES EN EL
TAZÓN CONGELADOR; esto puede rayar y dañar
el interior del tazón. Puede usar una espátula de
goma o una cuchara de madera, siempre que el
aparato esté apagado (“OFF”).
11. Para uso doméstico solamente. Toda operación de
mantenimiento, excepto la limpieza y el
mantenimiento por parte del usuario, debe ser
llevada a cabo por personal de servicio autorizado.
12. No coloque el tazón congelador sobre un
quemador a gas o eléctrico caliente, ni en un
horno caliente. No los exponga a ninguna fuente
de calor. No lo lave en el lavavajillas; esto presenta
un riesgo de incendio, descarga eléctrica o
lesiones personales.
13. Supervise el uso de este aparato con cuidado
cuando sea usado por o cerca de niños.
14. Solo use este aparato para el uso previsto.
GUARDE ESTAS
INSTRUCCIONES
PARA USO
DOMÉSTICO
SOLAMENTE
INSTRUCCIONES ESPECIALES
ACERCA DEL CABLE
El cable provisto con este aparato es corto, para
reducir el riesgo de que alguien se enganche o tropiece
con un cable más largo.
Se puede usar un cable alargador/de extensión, pero
con cuidado.
Si usa un cable alargador/de extensión aprobado, la
clasificación nominal del mismo debe ser por lo menos
igual a la del aparato. El cable más largo debe ser
acomodado de tal manera que no cuelgue de la
encimera/mesa, donde puede ser jalado por niños o
causar tropiezos.

3
AVISO:
El cable de este aparato cuenta con un enchufe
polarizado (una pata es más ancha que la otra). Como
medida de seguridad, aquel enchufe se podrá enchufar
de una sola manera en las tomas de corriente
polarizadas. Si no entra en la toma de corriente,
inviértalo. Si aun así no entra completamente,
comuníquese con un electricista. No intente modificar
esta función de seguridad.
PRECAUCIÓN
Para uso doméstico solamente. Toda operación de
mantenimiento, excepto la limpieza y el mantenimiento
por parte del usuario, debe ser llevada a cabo por
personal de servicio autorizado.
• No sumerja la base en agua.
• Para reducir el riesgo de incendio o descarga
eléctrica, no desarme la base. NOTA: La base no
contiene ninguna pieza que pueda ser reparada/
reemplazada por el usuario.
• Las reparaciones deben ser realizadas únicamente
por personal autorizado.
• Compruebe que el voltaje indicado en la placa de
especificaciones técnicas del aparato corresponde
con el voltaje de su casa.
• Nunca limpie el aparato con productos/materiales
abrasivos o utensilios duros.
ÍNDICE
Medidas de seguridad importantes ............... 2
Antes del primer uso ..........................3
Preparación/congelamiento del tazón ............. 3
Piezas y características ........................4
Ensamblaje..................................5
Funcionamiento: Cómo hacer helado suave
y otros postres helados ........................5
Ingredientes secos recomendados ...............6
Coberturas líquidas sugeridas ................... 6
Cómo desensamblar
la máquina para limpiarla .......................6
Limpieza .................................... 6
Almacenamiento.............................. 6
Resolución de problemas ......................7
Garantía ....................................8
Recetas ....................................9
ANTES DEL PRIMER USO
NO sumerja este aparato en agua. Limpie la superficie
con un paño húmedo. Lave la tapa, el tazón
congelador, la paleta mezcladora, los recipientes para
ingredientes secos, el conducto de salida de los
ingredientes secos y la bandeja de goteo en agua ,
jabonosa tibia para quitar el polvo o cualquier residuo
que se hayan acumulado durante el proceso de
fabricación y el envío. NO limpie ninguna de las piezas
del aparato con limpiadores/materiales abrasivos o
utensilios duros.
PREPARACIÓN/
CONGELAMIENTO DEL TAZÓN
Compruebe que el tazón está completamente
congelado antes de empezar a preparar la receta.
Lave y seque el tazón antes de congelarlo. Envuélvalo
en una bolsa plástica para evitar la quemadura por
congelación. Se recomienda colocar el tazón en el
fondo del congelador, donde es más frío. Para un
congelamiento uniforme, cerciórese de colocar el
tazón congelador sobre una superficie plana, en
posición vertical. El tiempo necesario para congelar
completamente el tazón depende de qué tan frío esté
su congelador. Para que el tazón siempre esté listo, se
recomienda guardarlo en el congelador; así podrá
usarlo inmediatamente en cualquier momento.
Por lo general, el tazón debe congelarse por un mínimo
de 24 horas. Para saber si el tazón está completamente
congelado, agítelo. Si no escucha ningún movimiento
de líquido, entonces el tazón está listo.
NOTA: Su congelador debe estar a una temperatura de
0 °F (-20 °C) para asegurar el congelamiento adecuado.
TARJETA DE
REFERENCIA RÁPIDA
Si pierde este manual de instrucciones, hay un código
QR para acceder a las instrucciones y las recetas en
línea. Abra el compartimento marcado “INFO” situado
debajo de la bandeja de goteo (pieza n.° 12 en la
página 4) y escanee el código QR impreso en la tarjeta
de referencia rápida ubicada en el compartimento.

4
15
1
4
2
3
5
9
10
8
14
12
13
6
7
11
PIEZAS Y CARACTERÍSTICAS
1. Tapa fácil de cerrar con abertura
Especialmente diseñada para instalarse/retirarse
fácilmente. La abertura permite agregar los
ingredientes del helado y vigilar el proceso
de congelación.
2. Paleta mezcladora –
Mezcla los ingredientes e
incorpora aire para crear helado suave y cremoso.
3. Tazón congelador de 1½ cuartos
de galón (1.4 L) –
Contiene un líquido congelante
en una pared con doble aislamiento, para un
congelamiento uniforme y rápido. La pared con
doble aislamiento mantiene el tazón frío, a una
temperatura constante.
4. Tres recipientes para ingredientes secos
Para guardar y servir los ingredientes secos de su
elección, p.ej., granas, mini chispas de chocolate,
caramelitos duros, nueces picadas, etc.
Los recipientes pueden mezclar los ingredientes
secos directamente al helado al servir este,
o pueden retirarse de la máquina para agregar
al helado en la mesa.
5. Perillas para servir los ingredientes secos
Gire la perilla correspondiente al ingrediente seco
deseado para que se mezcle con el helado.
6. Conducto de salida de los ingredientes secos
Sirve los ingredientes secos al mismo tiempo que la
máquina sirve el helado. Es removible, para una
fácil limpieza
7. Palanca para servir helado –
Bájela para
servir helado. Es removible, para una fácil limpieza.
8. Base –
Equipada con un motor de servicio pesado,
lo suficientemente potente como para preparar
y servir el helado.
9. Perilla de control
10. Taza de 4 onzas (120 ml) y placa calentadora
Mantiene las coberturas líquidas tibias.
11. Portaconos –
Sostiene varios conos, para mayor
comodidad. Compatible con conos de barquillo
o de azúcar.
12. Bandeja de goteo –
Removible para una
fácil limpieza.
13. Embudo calibrador –
Permite llenar los
recipientes para ingredientes secos y al mismo
tiempo comprobar su tamaño. Los ingredientes que
no quepan por la punta del embudo son demasiado
grandes para usarse en la máquina (atascarían el
conducto de salida).
14. Pies de goma antideslizantes –
Mantienen el
aparato estable durante el funcionamiento.
15. Guía de referencia rápida removible
(no ilustrada)

5
ENSAMBLAJE
1. Instale los recipientes para ingredientes secos,
introduciéndolos en las ranuras en el costado
de la máquina y presionando hasta que encajen
y queden firmes en su sitio. NOTA: Los recipientes
de esquina redondeada son los recipientes trasero
y delantero.
2. Tape cada recipiente con su tapa respectiva.
3. Instale el conjunto de la palanca para servir
helado, insertando la abertura redonda debajo de
la parte superior del aparato, alineando la palanca
con la palabra “LOCK” (impresa en el costado
derecho del aparato), y girando el conjunto hacia
la izquierda hasta que se bloquee. NOTA: La
palanca para servir helado se encontrará en el
centro del frente de la máquina.
4. Deslice el conducto de salida de los
ingredientes secos en el espacio debajo de los
recipientes, cerciorándose de empujar hasta que
llegue al fondo. NOTA: Para hacer esto, la palanca
para servir helado debe estar levantada.
5. Coloque la bandeja de goteo en la base, debajo
de la palanca para servir helado.
6. Colque la taza para coberturas líquidas en la placa
calentadora (si desea usarla).
FUNCIONAMIENTO
Cómo hacer helado suave y otros postres helados
1. Llene los recipientes para ingredientes secos
con los ingredientes de su elección, usando el
embudo calibrador.
2. No llene los recipientes con coberturas líquidas.
Coloque hasta un máximo de 4 onzas (115 ml) de
la cobertura líquida de su elección en la taza,
sobre la placa calentadora.
NOTA: Solo use la taza para mantener las
coberturas líquidas tibias.
3. Siga las recetas incluidas en nuestro libro de
recetas. No llene el tazón congelador hasta más
de ½ in (1.5 cm) de la orilla, ya que los
ingredientes se expanden durante el
congelamiento. Para mejores resultados, prepare
los ingredientes de la base del postre helado en un
recipiente del que sea fácil verter.
4. Introduzca la parte superior de la paleta
mezcladora en el agujero debajo de la tapa.
5. Saque el tazón congelador del congelador (quite la
bolsa plástica, si la usó). Quite la tapa de la
máquina y coloque el tazón congelador en la base.
NOTA: El tazón comenzará a descongelarse
rápidamente después de sacarlo del congelador;
úselo inmediatamente.
6. Coloque la tapa (con la paleta mezcladora fijada)
sobre el tazón congelador y presione hasta que
quede segura.
7. Ponga la perilla de control en “ICE CREAM”
si va a preparar helado solamente. Póngala en
“ICE CREAM + WARM” si va a preparar helado
y calentar alguna cobertura líquida también.
La paleta mezcladora empezará a girar, y, si ha
activado la función de calentamiento, la placa
calentadora se encenderá.
8. Agregue los ingredientes de la base del helado por
la abertura en la tapa.
9. La mayoría de los helados suaves estarán listos en
tan solo 30 minutos. NOTA: El tiempo de
preparación depende de la receta y de la cantidad
preparada. Para reducir el tiempo de preparación,
se recomienda refrigerar la base del helado antes
de verterla en el tazón congelador.
NOTA: Para garantizar una consistencia óptima,
chequee el helado al menos 5 minutos antes del
tiempo especificado para su finalización. Si el
helado se pone demasiado duro para servir con la
palanca para servir, simplemente retire el tazón
congelador, sírvalo con una cuchara y disfrute.
10. Coloque un cono para helado o un bol aprox.
1 in (2.5 cm) bajo la boca de salida del helado,
y baje la palanca para servir. Gire el cono/bol
mientras sirve el helado.
11. Gire la(s) perilla(s) correspondiendo a los
ingredientes secos deseados para servirlos al
mismo tiempo como el helado.
12. Después de servir el helado, levante la palanca
para detener el flujo de helado.
NOTAS: Puede que un poco de líquido salga de la
boca de salida al bajar la palanca para servir el
primer helado. Se recomienda usar una taza para
recoger este líquido antes de servir el helado.
No guarde los postres helados en el tazón
congelador; los ingredientes pegarán a las paredes
del tazón, lo que puede dañarlo. Guarde el helado
en un recipiente hermético.
NOTA: El helado perderá su consistencia cremosa
y se pondrá duro al congelarse.
13. Si desea usar cobertura tibia, cerciórese de poner
la perilla de control en “ICE CREAM + WARM”.
NOTA: La función de calentamiento ha sido
diseñada para mantener las coberturas líquidas
(p.ej., salsa de chocolate, caramelo, dulce de
azúcar y mantequilla) lo suficientemente blandas
como para poder verterlas sobre el helado.

6
INGREDIENTES SECOS
RECOMENDADOS
Estos artículos están disponibles en la mayoría de los
supermercados grandes.
Mini chocolates recubiertos de caramelo
Mini chispas de chocolate
Granas multicolor
Granas de chocolate
Granas de caramelo
“Praline crunch” (trocitos de nueces/almendras
cubiertos con azúcar caramelizada)
Dulces tipo “Crunch Bits”
Nueces finamente picadas
NOTA: Siempre use el embudo calibrador para
asegurarse que los ingredientes secos sean lo
suficientemente pequeños para servirse con el helado.
COBERTURAS
LÍQUIDAS SUGERIDAS
Jarabe de chocolate
Salsa de chocolate caliente
Salsa de caramelo
Salsa de fruta, p. ej., fresas, arándanos azules o
frambuesas
Salsa de mantequilla y azúcar
CÓMO DESENSAMBLAR
LA MÁQUINA PARA LIMPIARLA
1. Apague (“OFF”) y desenchufe el aparato.
2. Quite la tapa, presionando y levantando las patas
laterales. Retire la paleta mezcladora de la tapa.
3. Retire el tazón congelador de la base.
NOTA: Cerciórese que el tazón está vacío
antes de retirarlo.
4. Retire el conducto de salida de los ingredientes
secos, jalándolo hacia su cuerpo.
5. Retire el conjunto de la palanca para servir
helado, girándolo hacia la derecha para liberarlo,
y luego bajándolo.
LIMPIEZA
1. Desmonte el aparato como se indicó en la sección
“Cómo desensamblar la máquina para limpiarla”.
2. BASE: Limpie la carcasa del aparato con un paño
húmedo, y luego séquela bien. Nunca use
limpiadores/materiales abrasivos, ni sumerja el
aparato en agua.
3. Tazón congelador y tapa: Lávelos a mano, en
agua jabonosa tibia, y séquelos bien.
NO LOS META EN EL LAVAVAJILLAS. NO USE
LIMPIADORES ABRASIVOS.
4. Conjunto de la palanca para servir helado:
Lávelo a mano, en agua jabonosa tibia. Cerciórese
de eliminar los residuos de helado mientras la
boca de salida está abierta (palanca abajo) y
cerrada (palanca arriba).
5. Paleta mezcladora, recipientes para
ingredientes secos, conducto de salida, taza y
bandeja de goteo: Lávelos en agua jabonosa
tibia, luego enjuáguelos y permita que se sequen
por completo. NOTA: Estas piezas también son
aptas para lavavajillas (bandeja superior
solamente).
ALMACENAMIENTO
NO guarde el tazón congelador en el congelador si está
mojado. NO guarde la tapa, la paleta mezcladora, la
base, la bandeja de goteo ni los recipientes para
ingredientes secos en el congelador. Guarde el tazón
en el congelador, en posición vertical, para que siempre
esté listo cuando lo necesite. Antes de colocarlo en el
congelador, se recomienda envolverlo en una bolsa
plástica para evitar las quemaduras por congelación.
NO guarde los postres helados en el tazón congelador;
guárdelos en un recipiente hermético. Guarde los
recipientes para ingredientes secos llenos en un lugar
fresco y oscuro. Tire los ingredientes secos no usados
después de una semana.
NOTA: El helado perderá su consistencia cremosa y se
pondrá duro al congelarse.
7
RESOLUCIÓN DE PROBLEMAS
Problema: El helado no está listo dentro del tiempo recomendado.
Solución:
• Chequee la consistencia del helado mientras se está congelando. Si está espeso, puede que necesite más
tiempo para adquirir la consistencia necesaria para servirse.
• Si el helado no adquiere la consistencia correcta, puede que sea debido a la temperatura del tazón
congelador. Es importante mantener el tazón congelador en 0 °F (-20 °C) durante 24 horas antes de usarlo.
• Puede que los ingredientes del helado no sean lo suficientemente fríos. Para conseguir resultados óptimos,
cerciórese de bien enfriar la mezcla antes de empezar a preparar helado.
• Cerciórese de ensamblar completamente la máquina antes de retirar el tazón del congelador.
Problema:
El mecanismo para servir el helado no funciona.
Solución:
• Es imprescindible que el helado tenga la consistencia correcta para poder servirlo. Empiece a chequear la
consistencia del helado al menos 5 minutos antes del tiempo especificado para su finalización.
• Si el helado se pone demasiado espeso, será imposible servirlo. En caso de que esto suceda, retire el tazón de la
máquina y sirva el helado con una cuchara.
• Para chequear la consistencia, intente servir helado cuando la mezcla empiece a espesarse. Si la mezcla está
demasiado blanda o líquida, vuelva a verterla en el tazón congelador.
• Cuando el helado alcance la consistencia correcta, sírvalo en conos o tazas hasta que ya no quede helado en el
tazón congelador.
Problema:
El motor está haciendo fuerza.
Solución:
• Puede que el helado sea demasiado espeso.
• Apague la máquina. Vacíe el tazón, lávelo y vuelva a congelarlo antes de empezar de nuevo.
Problema:
Los ingredientes secos no salen de la boca de salida.
Solución:
• Compruebe que el conducto de salida de los ingredientes secos no esté atascado.
• Compruebe que los recipientes para alimentos secos estén completamente secos antes de llenarlos. Cualquier
rastro de humedad puede hacer que los ingredientes se derritan y se peguen.
• Compruebe que el conducto de salida de los ingredientes secos esté completamente seco.
• Puede que los ingredientes secos sean demasiado grandes. Use el embudo calibrador para determinar
el tamaño correcto.
Problema:
La paleta mezcladora no gira.
Solución:
• Compruebe que no hay hielo en el tazón congelador.

8
GARANTÍA
Garantía limitada de tres años
Esta garantía es válida solo en los Estados Unidos,
para los consumidores que hayan comprado este
producto directamente a Cuisinart o a un revendedor
autorizado de Cuisinart. Usted es un consumidor si
posee una máquina de helado suave Mix It In
™
de
Cuisinart
®
que haya sido comprada en una tienda para
uso personal, familiar o casero. A menos que la ley
aplicable exija lo contrario, esta garantía no es para los
minoristas u otros consumidores/compradores
comerciales, ni propietarios/consumidores que hayan
comprado este producto a revendedores no
autorizados por Cuisinart. Cuisinart garantiza este
producto contra todo defecto de materiales o
fabricación durante 3 años después de la fecha de
compra original, siempre que haya sido usado para uso
doméstico y de acuerdo con las instrucciones.
Se recomienda llenar el formulario de registro
disponible en https://cuisinart.registria.com a fin de
facilitar la verificación de la fecha de compra original de
este producto. Sin embargo, no es necesario registrar
el producto para recibir servicio bajo esta garantía.
En ausencia de prueba de la fecha de compra, el
período de garantía será calculado a partir de la fecha
de fabricación del producto.
RESIDENTES DE CALIFORNIA
La ley del estado de California ofrece dos opciones
bajo el período de garantía. Los residentes del estado
de California pueden devolver el producto defectuoso
(A) a la tienda donde lo compraron o (B) a otra tienda
que venda productos Cuisinart
®
de este tipo. La tienda
podrá, a su elección, reparar el producto, referir al
consumidor a un centro de servicio independiente,
sustituir el producto, o reembolsar al consumidor el
precio de compra menos la cantidad directamente
atribuible al uso anterior del producto por el
consumidor. Si estas dos opciones no satisfacen al
consumidor, podrá llevar el aparato a un centro de
servicio independiente, siempre que se pueda
arreglar o reparar el aparato de manera económica.
Cuisinart (no el consumidor) será responsable por
los gastos de servicio, reparación, sustitución o
reembolso de los productos defectuosos bajo garantía.
Los residentes de California también pueden, si lo
desean, mandar el producto defectuoso directamente a
Cuisinart para que sea reparado o sustituido. Para esto,
se debe llamar a nuestro servicio de atención al cliente
al 1-800-726-0190. Cuisinart será responsable por los
gastos de reparación, reemplazo, manejo y envío de los
productos defectuosos durante el período de garantía.
Garantía de reemplazo sin dificultades
Su máxima satisfacción es nuestra prioridad, así que si
este producto Cuisinart
®
falla dentro del generoso
período de garantía, lo repararemos o, de ser necesario,
lo reemplazaremos, sin costo alguno para usted. Para
obtener una etiqueta de devolución, visite: https://
www.cuisinart.com/customer-care/product-inquiry.
O llame a nuestro servicio de atención al cliente, al
1-800-726-0190, para hablar con un representante.
Este producto satisface las más altas exigencias de
fabricación y ha sido diseñado para funcionar con 120
V, usando accesorios y repuestos autorizados
solamente. Esta garantía excluye expresamente los
defectos o daños causados por accesorios, piezas o
reparaciones no autorizados por Cuisinart, así como los
defectos o daños causados por el uso de un
convertidor de voltaje. Esta garantía no cubre el uso
comercial o industrial del producto, y no es válida en
caso de daños causados por mal uso, negligencia o
accidente. Esta garantía excluye todos los daños
incidentales o consecuentes. Algunos Estados no
permiten la exclusión o limitación de daños incidentales
o consecuentes, de modo que las limitaciones
mencionadas pueden no regir para usted. Usted puede
tener otros derechos que varían de un Estado a otro.
Importante: Si debe llevar el producto defectuoso
a un centro de servicio no autorizado, por favor
informe al personal del centro de servicio que deben
llamar al servicio de atención al cliente de Cuisinart,
al 1-800-726-0190, a fin de diagnosticar el problema
correctamente, usar las piezas correctas para repararlo
y comprobar que el producto aún está bajo garantía.
©2022 Cuisinart
Glendale, AZ 85307
Impreso en China
22CE082573
IB-17576-ESP