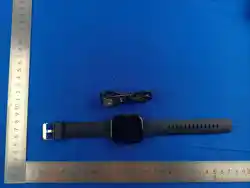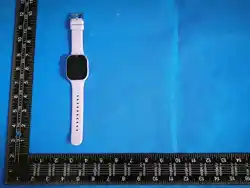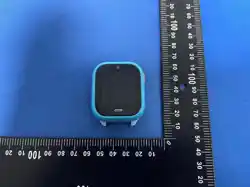
User Manual
Carefully review this manual before operating the product.
Retain this manual for future reference after reviewing.
Product images in this manual are for reference purposes only.
While this product is designed for safe use, improper usage may lead
to accidents. Adhere to all warnings and cautions for optimal safety.
All information in this document is accurate as of the issue date,
subject to change without prior notice.
1.Getting started
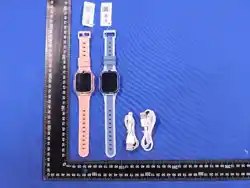
1. Check that the device is the correct model and all accessories are in the box.
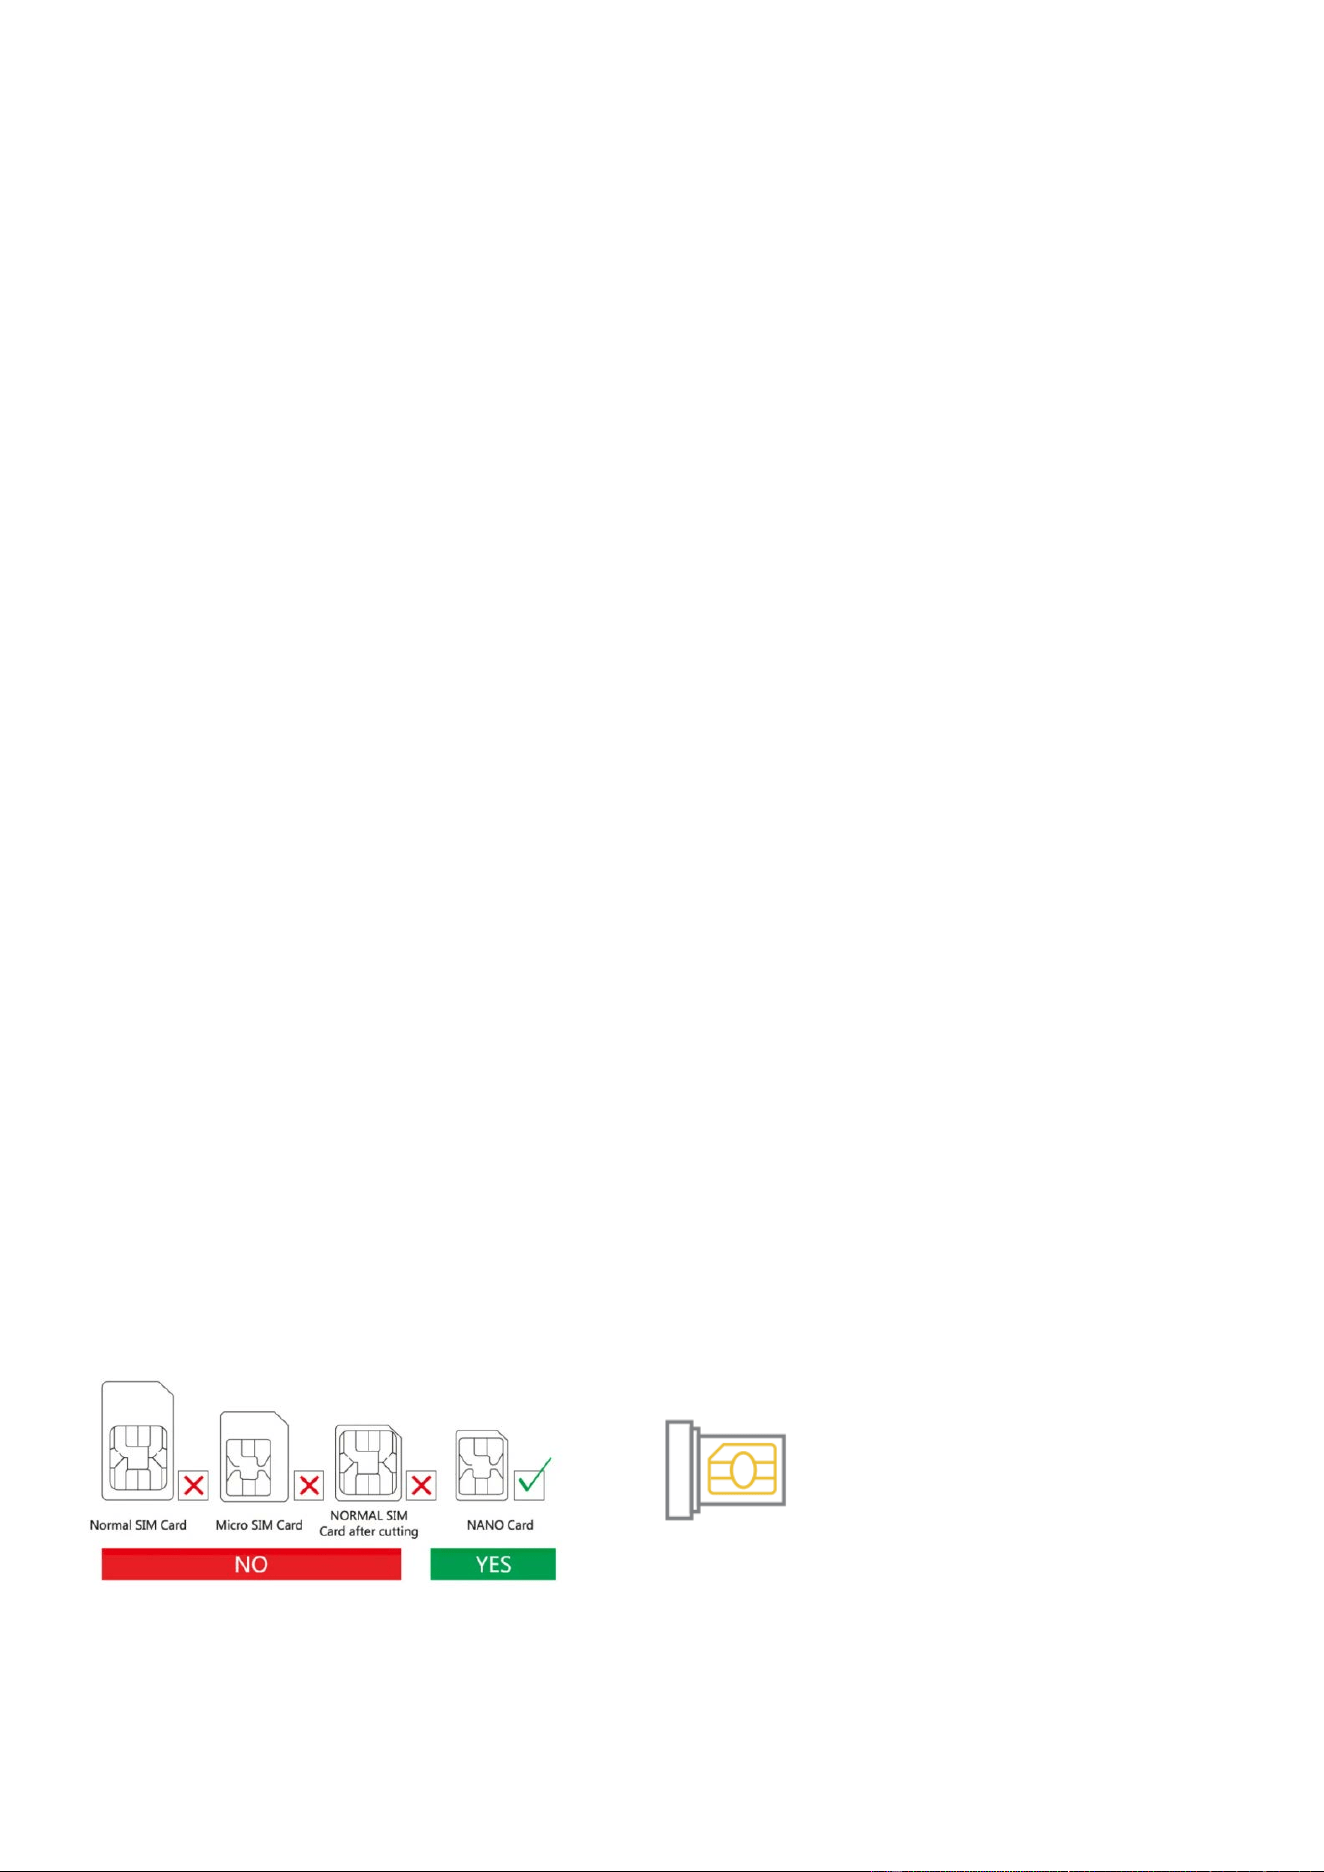
2. Prepare a 4G LTE Nano SIM card, can ask for your dealer if have any questions.
3. Necessary to activate data flow, GPRS and caller ID functions.
2.Insert a SIM card.
1. Please turn off the watch before inserting the SIM Card. The type of card is Nano size.
2. Remove the SIM card protective cover. Use the provided tool to take the SIM tray out.
3. Put the Nano-SIM card in the holder and make sure that the card's angle corner fixes the
holder. Then gently insert the holder back into device.
(If your model does not have a SIM tray, just insert the SIM card into the slot and make sure
that the SIM card is in the direction which is shown on the screen protector of device.)
3.Switch on and off
Switch on
:
If the device is off the power, long press the power button for 3~5 seconds to turn on.
Switch off
:
1: Enter the settings of device, choose the power off option.
2: When the device is crashed, you can use remote shut down on the PC or Mobile client.
3: When there is not a SIM card, long press the power button to turn the device.
4.Charging the device
1. When you receive the low battery notification from device or the phone app, please charge
the device in time.
2. When battery is under 15%, device will turn into the power saving mode and functions are
restricted except the incoming call answer.
3. During charging, the device will turn into restricted mode and please do not use.
Charging
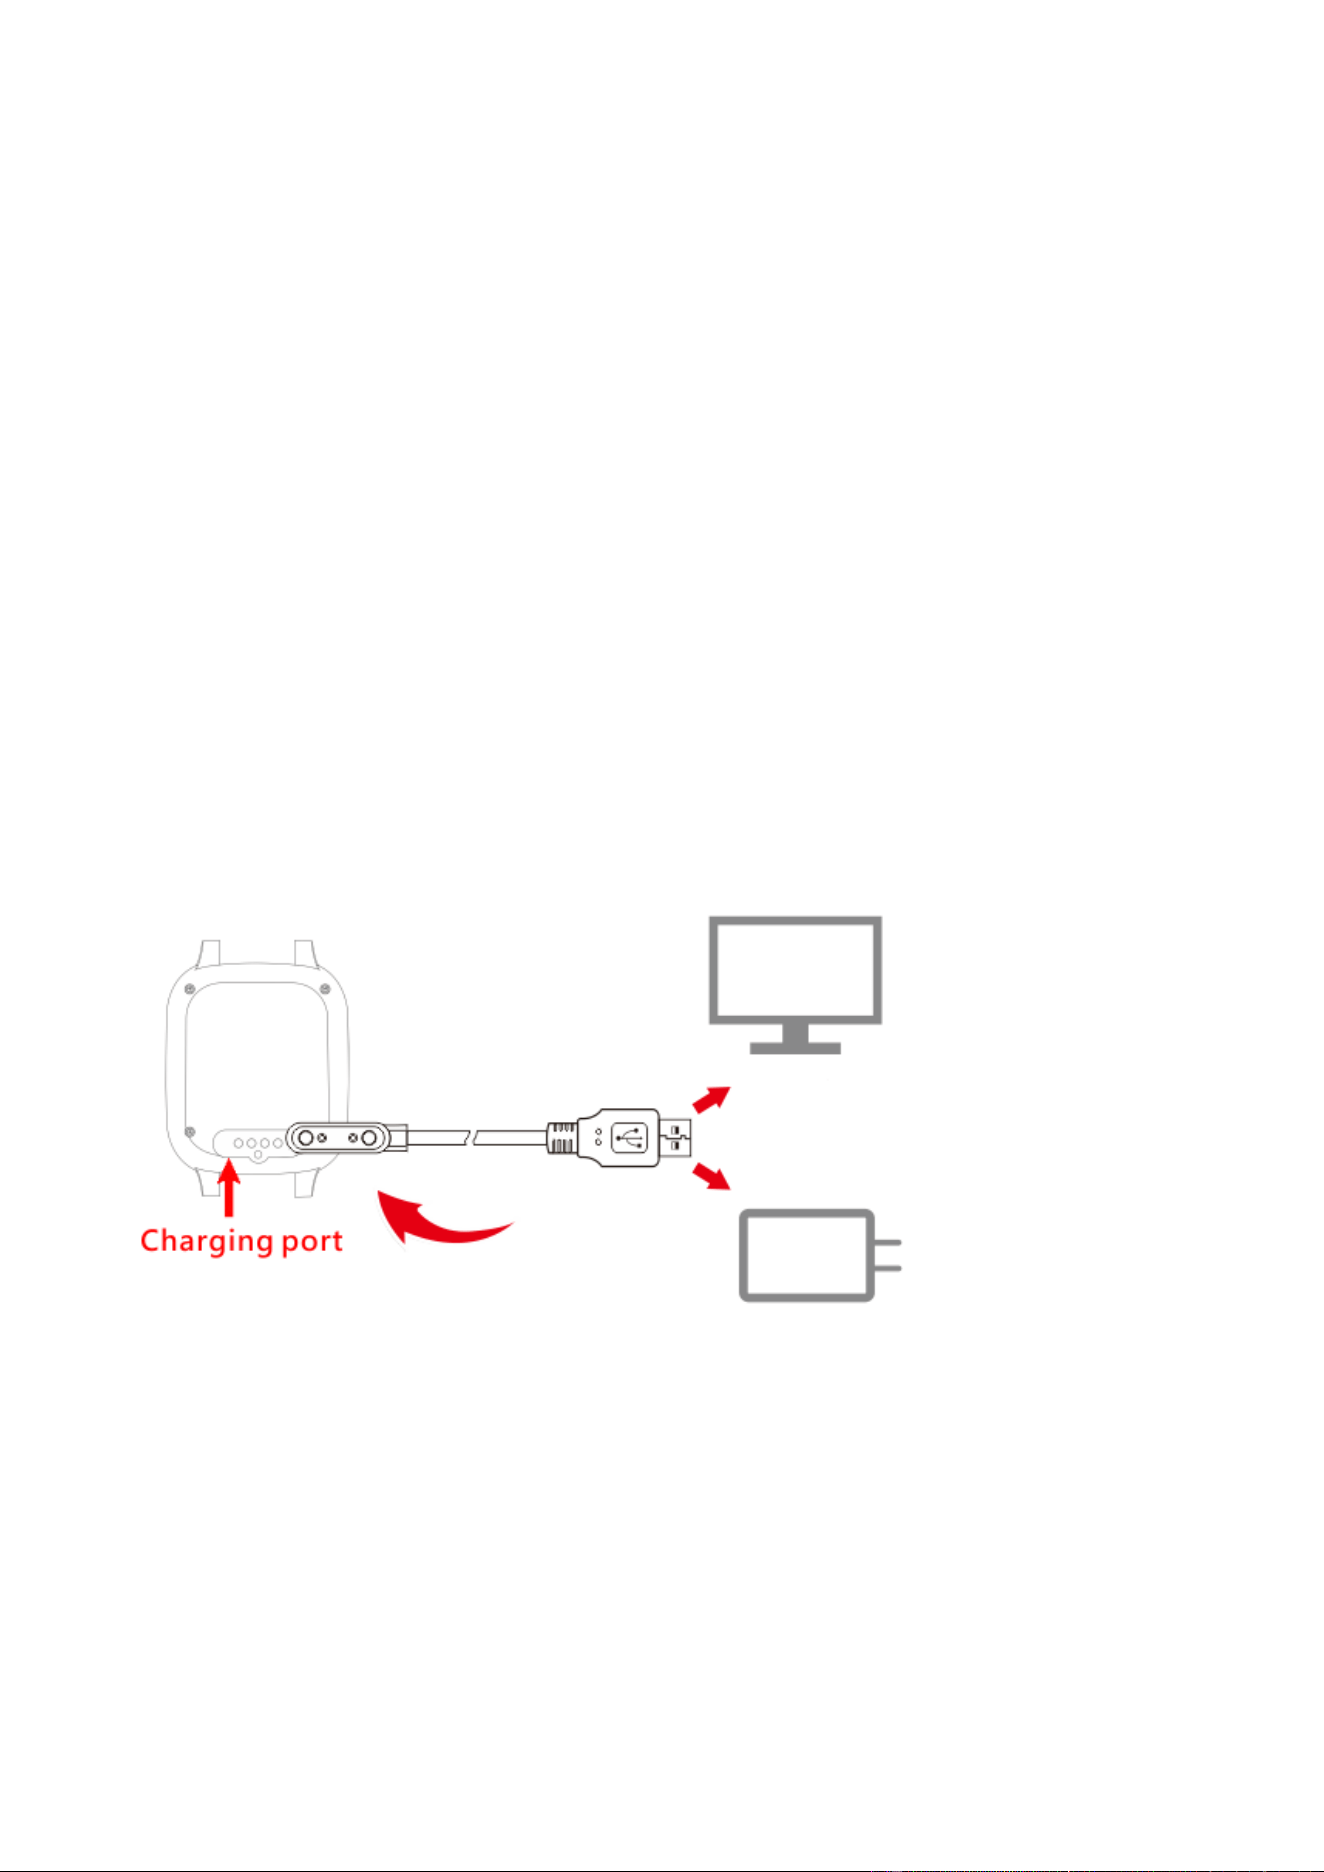
Connect the metal contacts on the charging port to those on the back of the device, then put them
on a flat surface. Connect the charging cradle to a power supply, the device's screen will light up
and display the process of charging.
CAUTION: The metal contacts and charging port is magnetic. Please keep it away from other
metal in avoid of accidental short circuit.
• The charging dock is not water resistant. Wipe the port, metal contacts,
and the device dry during charging.
• Long press the power button over 20s to active the battery when the
device is fully charged after not used for longtime.
5.Product diagram
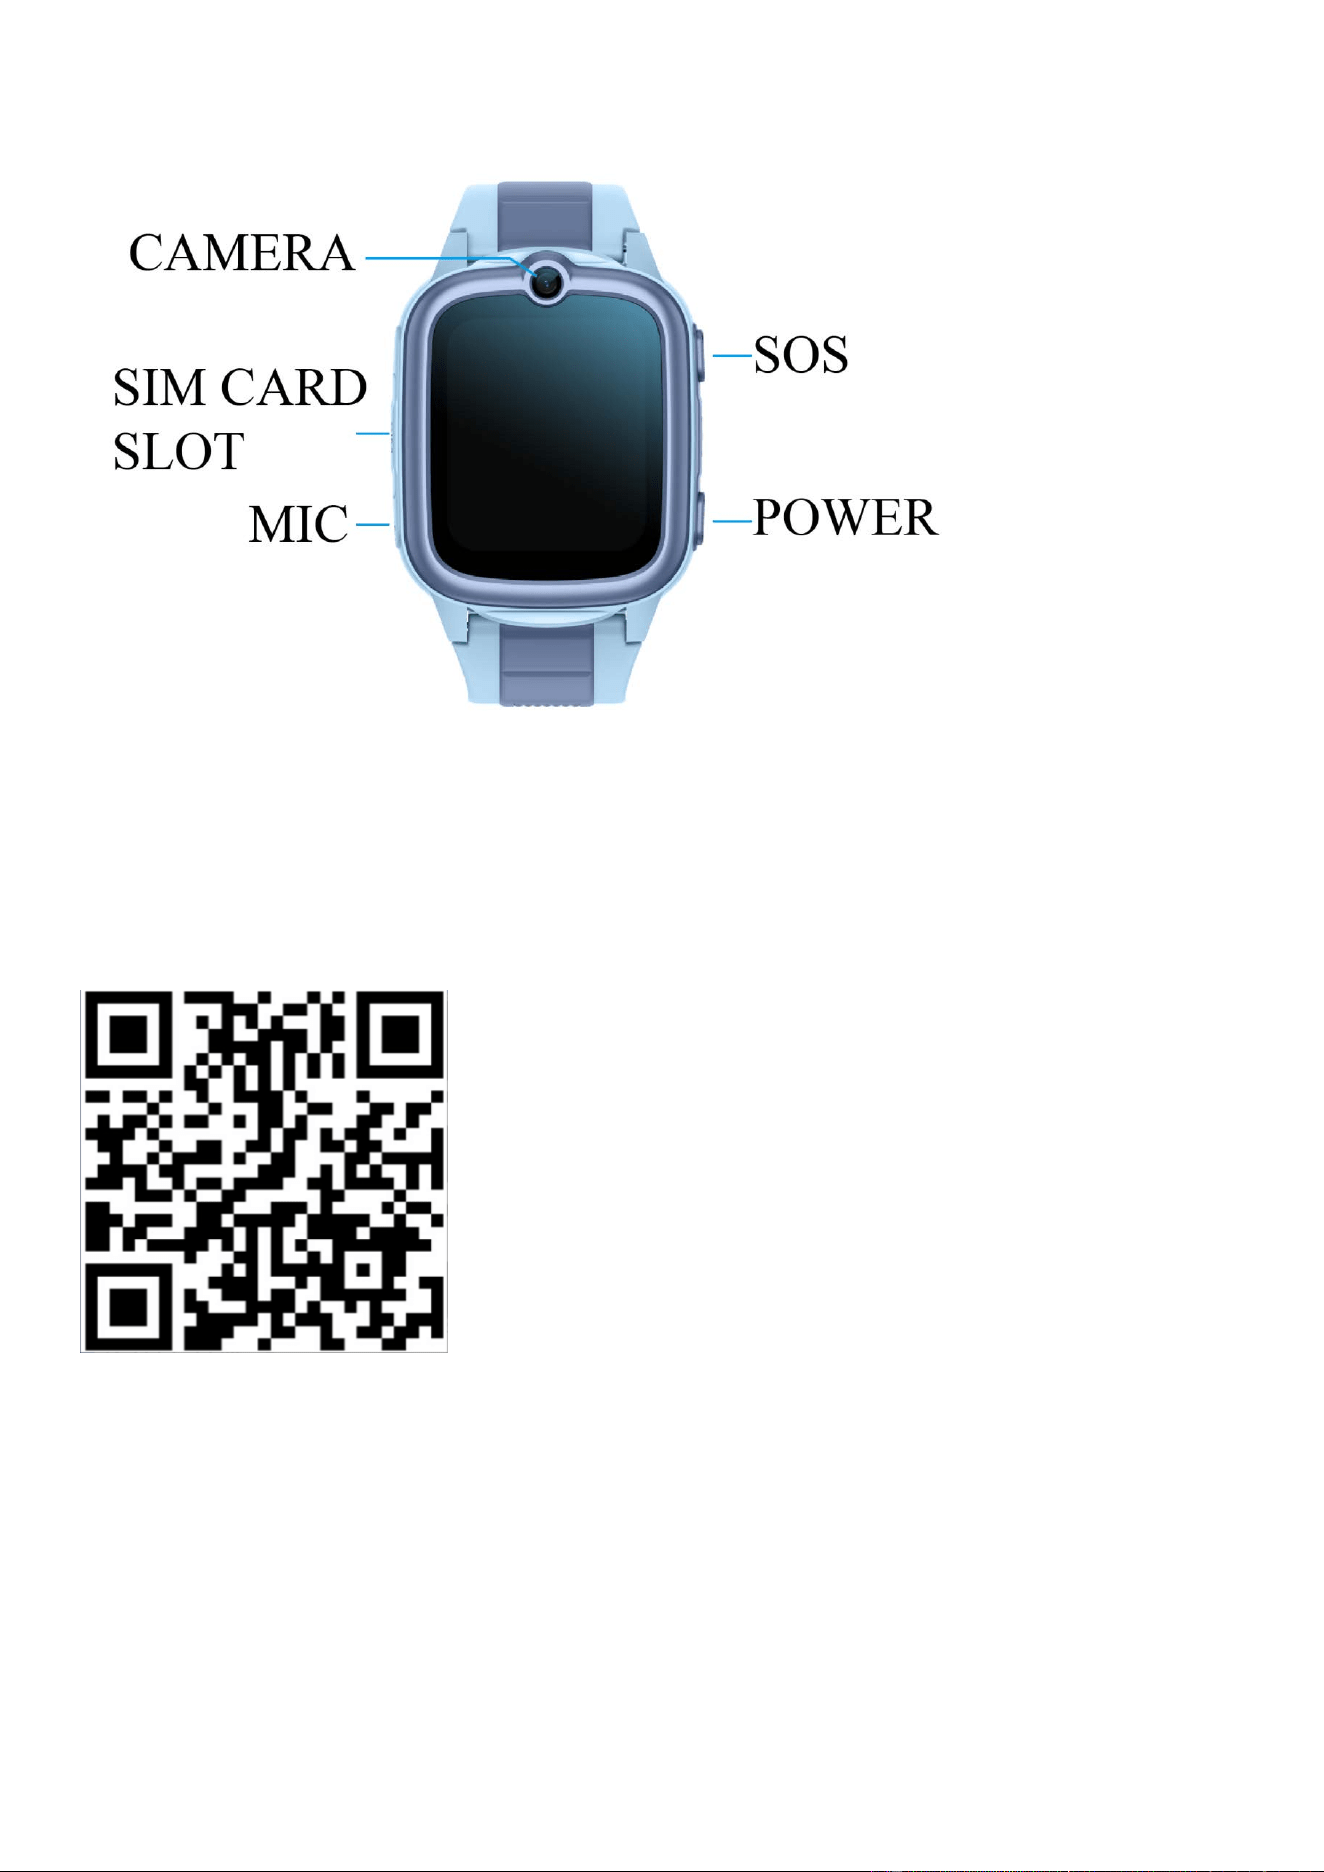
6.APP USING
6.1 Get the app
Scan the QR code below to download the APP or tap the device information on the watch menu
and find the download QR code to scan and download.
6.2 Register and login in.
Please follow the steps in the APP to register and login in.
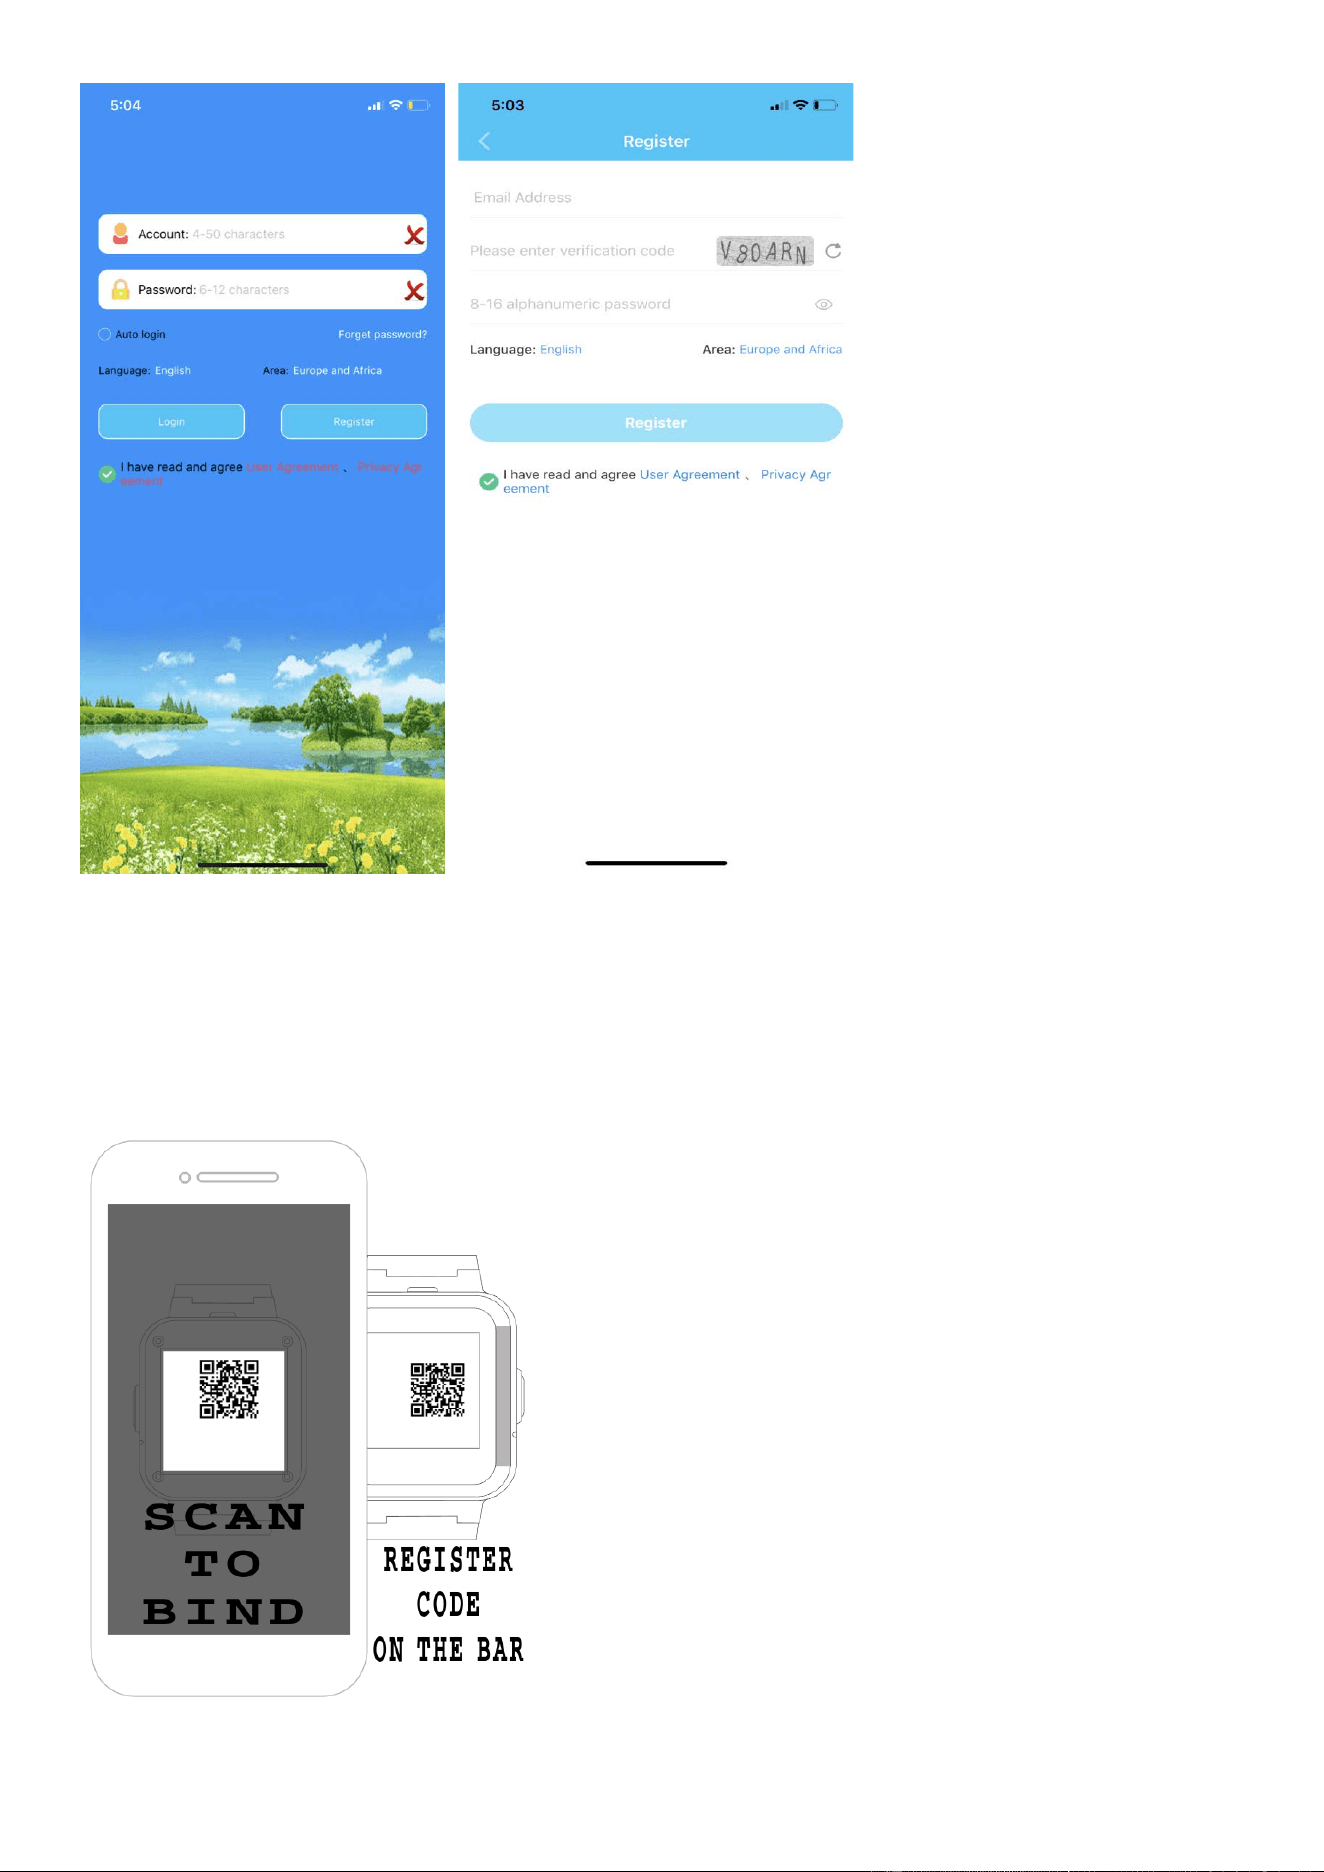
6.3Bind with the device.
Login in the APP and find the correct device. The correct device type is SMART WATCH. Enter the
registration code to bind with device.
About the registration code:
(1)Scan the QR code on the back of device or manually enter the 15 numbers length code
(2)Enter the device information page and find the registration code, scan or manual input.
6.4Account bind and management
• Upon initial binding with the device, the associated account is automatically designated as

the admin.
• For guest accounts seeking to bind with and manage the device, admin approval is required.
• Admins can review and approve guest requests by receiving notifications on the pairing
page of the phone app.
7.Functions
Location: GPS +AGPS+ LBS +WIFI Location real time on Map.
Trace: Find the trace in APP.
Safety area: Set fence(safety area) in the device(Max 3 fences),And notify you in APP when watch
wearer reach or out of the appointed area.
Contact: Setting up maximum 15 members of your friends or relative in APP.
Dial interface: Dial interface is supported. You can turn on or off this function in switch settings of
APP.
SOS: 3 emergency contacts can be set. Press the SOS BUTTON(The button on some models is
the power button) for 3 more seconds and it will make an emergency call to the appointed contacts
in turns. If there is no one answering, it will continue to dial twice in turns and stop.
Message notification: Notify you when the device turns on or off the SOS function in SMS.(The
fees of SMS are calculated according to your local carrier)
Alarms: Set 3 alarm clocks.
Camera: Take a photo.
Gallery: Save the photos, and you can delete in it or upload photos to the APP.
Micro chat: Real time chat between the device and the APP. APP can text or send 15s voice
message to the device. And device can read one unread message each time and only send voice
message.
Video call
:
Make a video call with the bind account on Mobile or another device.
Do not disturb: Set 4 periods in one time. Block all calls and keep silent mode in this appointed
period.
Setting: Change UI(Some model is not adapted), Volume(Medium, Ringtone, Alarms, Power on
and off), Brightness, Date and time, Volte, Power off, About device(Model, Version, IMEI)
What is in Device Information:
1. Registration code: Scan it to register device.
2. Official account: Scan it to follow us to get more information.
3. APP download: Download the Setracker APP
Quick math
:
Game for kids. With 3 levels for challenging
Stopwatch
:
For time measuring
Calculator
:
For usual math calculating
Members: Show the account of family members who is bind with the device.
Watch faces: Long press on the idle screen to switch different style of watch faces(some models
may not support)
Scenarios: 3 modes(Normal,Battery saving, Follow),the default is Normal mode.
Love heart: You can set this in the APP. And the Love heart can be only shown on the interface of
watch.
Remote shut down: Remote shutting down order to the watch when it is power on.
Remote restart
:
Send a remote restarting message to the watch. And restart the device.
8.Problems fixing

If the device cannot connect to the server in your first time of using, and in the APP shows the
device is off line. Please check the following conditions:
1. Your SIM card is 4G and network is normal or not.
2. Data flow is activated and the service is normal or not.
3. The Ip and port, or the IMEI is correct or not. The IMEI code on the device shall be same as
the factory code. You can get the code by send message pw,123456,ts# to the watch.(The
watch has a SIM card. And the message is texted in ENGLISH).
4. If there is still not working, please ask the seller for more details and help.
If you cannot register account, generally there are 2 problems :
1. The code of device does not exist or it has registered before, you can ask for your seller for
help.
2. Account has registered before. Under this condition, you just create another account is OK.
Dial and incoming call answer function does not work:
1. Check your SIM card(4G Nano SIM card with activated data flow, GPRS, and caller ID
functions)
2. If you switch on the whitelist or reject unknown numbers, please add the phone numbers you
need in the phone book or whitelist.
3. Check the IPN of your phone numbers fixes the device or not.
Charging failure:
1. If you cannot switch on the device, please long press the power button for 3-5 seconds or
the device is in extreme low battery, please charge the device.
2. Check if there are oxidation, corrosion, rusting, or damaged on the charging dock and cable.
Keep the connecting pin dry and clean.
3. Check the direction of magnetic 2 pin cable is the same as the charging dock. Make sure the
two parts are fully connected.
4. If the battery is in extreme low status, the screen will not light up at the beginning of charging.
Wait 1 hour continuous charging, you can start the device normally.
Working time of device is short:
1. Overtime using(We advise a balance using of device according to your personal health)
2. The watch does not get a full charge.
3. The signal is poor and causes a high consumption of battery capacity
Positioning accurate is not good:
1. Check if the device has a normal data flow.
2. It is normal for LBS positioning has a localization deviation(LBS depends on the
distribution density of bases)
3. Device’s mode of positioning is default off for the first time of using and it will not update the
location information.
Why device automatically switches on or off
1. Installing SIM card for the first time or change different cards
2. Unbind the device or after a network reset
3. You set the autostart or shut down on the phone app.
The quality of calling is poor:
1. The signal of compunction is poor
2. The device is too close to the phone during calling.
9.Safety warnings
Please read this chapter carefully and before using device.
1.When the device encounters faults or performances a factory reset, if you do not back up your
files in advance, you cannot be able to take a recovery of your previous data.
2.It is normal for the device to get a bit heat during long time using or too many programs working.
3.If you install a screen protector or surface of your hand is wet or dirty, the screen may response
slowly or not work. If the screen is broken, please contact with your local
4.This device may contain small parts that may be a choking hazard to children under 3 years.
Keep small parts away from children.
Please follow these notes in avoid of damage of body and device:
1.It is not allowed for children or pets to put any parts of the device and accessories in mouth.
2.It is not allowed to poke any body parts with device.
3.Do not expose device in extreme hot or cold environment. The working temperatures of device is
-5℃~40℃.
4.Keep device away from any microwave equipment.
6.Do not use device fiercely(strike, scratch or drop the device)
7.It is not allowed to use device during thunderstorm or lighting outdoor.
8.Keep the surface of device dry and clean.
9.It is not allowed for wearer to use device during any vehicles’ operating.
10.It is not allowed to use the device during charging.
WARNING
1.In avoid of hearing damage or loss, please do not overtime use device at high dB levels.
2.In avoid of visual damage or loss, please adjust the brightness of screen to a suitable range.
3.The device has a built-in speaker. Do not put magnetic objects or magnetic-avoiding objects
close to the device to avoid damage.
4.If the device is part or whole broken, do not touch or remove the broken part, stop using it
immediately and contact your seller.
5.Consumer must choose and use a power adapter which obtains the legal standard certificates
and meets the parameters below:
Input: AC 100-240V~, 50/60Hz, 0.3A
Output: 5V 1A
WARNING
Please follow these notes in avoid of damage of body and device:
1.Do not disassemble, hit, crush, or burn the battery. In case of deformation, stop using the battery
immediately.
2.Do not short circuit the battery to avoid overheating, burns, or other personal injuries.
3.Do not place the battery in the high-temperature environments. Overheating may cause
explosion.
4.If any part of device is broken or the device is overheating, stop using immediately.
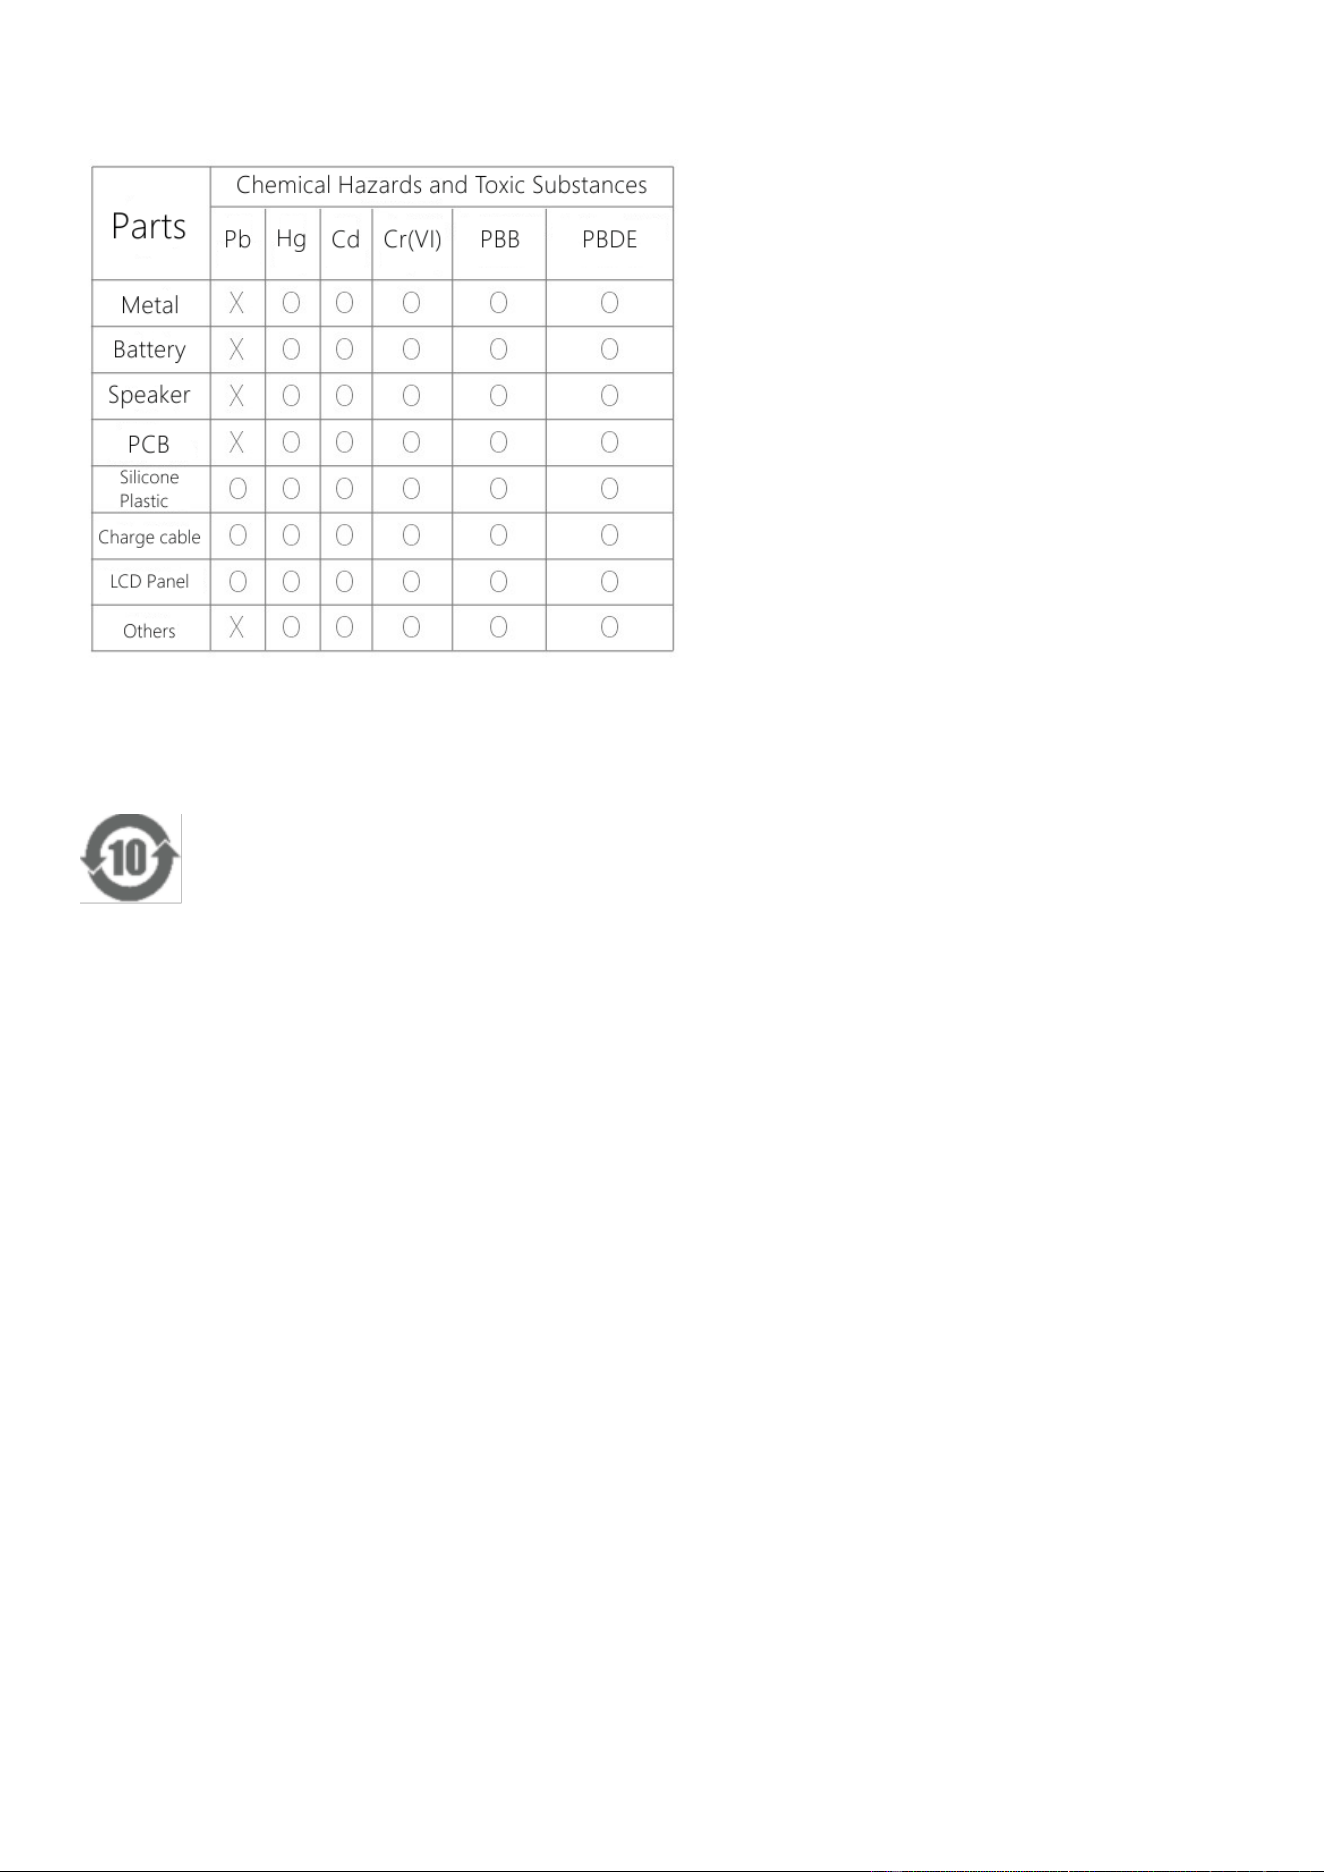
O: stands for the Chemical Hazards and Toxic Substances is under the legal standards.
X: stands for the Chemical Hazards and Toxic Substances is beyond the legal standards.
Note: The X options under current industrial limitations cannot realize 0 Pb using.
The number stands for the eco-friendly using years of device under normal conditions.
THIS DOCUMENT IS FOR INFORMATION PURPOSE ONLY, AND DOES NOT CONSTITUTE
ANY KIND OF WARRANTIES.

NOTE: This equipment has been tested and found to comply with the limits for a Class B digital
device, pursuant to part 15 of the FCC Rules. These limits are
designed to provide reasonable protection against harmful interference in a
residential installation. This equipment generates, uses and can radiate radio
frequency energy and, if not installed and used in accordance with the instructions, may cause
harmful interference to radio communications. However, there is no guarantee that interference will
not occur in a particular installation. If this equipment does cause harmful interference to radio or
television reception, which can be determined by turning the equipment off and on, the user is
encouraged to try to correct the interference by one or more of the following measures:
- Reorient or relocate the receiving antenna.
- Increase the separation between the equipment and receiver.
-Connect the equipment into an outlet on a circuit different from that to which the receiver is
connected.
-Consult the dealer or an experienced radio/TV technician for help.
Changes or modifications not expressly approved by the party responsible for compliance could
void the user's authority to operate the equipment.
This device complies with Part 15 of the FCC Rules. Operation is subject to the following two
conditions:
(1) this device may not cause harmful interference, and (2) this device must accept any interference
received, including interference that may cause undesired operation.
FCC RF Exposure Warning Statement:
This equipment has been tested for SAR compliance. This equipment should be installed and
operated with minimum distance 10 mm between the radiator and next to mouth, 0 mm between
the radiator and your wrist. This transmitter must not be collocated or operating in conjunction with
any other antenna or transmitter.