READ AND SAVE THESE
INSTRUCTIONS
Attention:
Pictures in the IM are for reference only.
USER
MANUAL
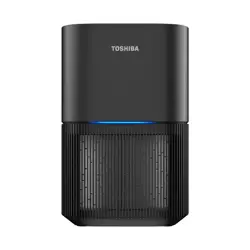
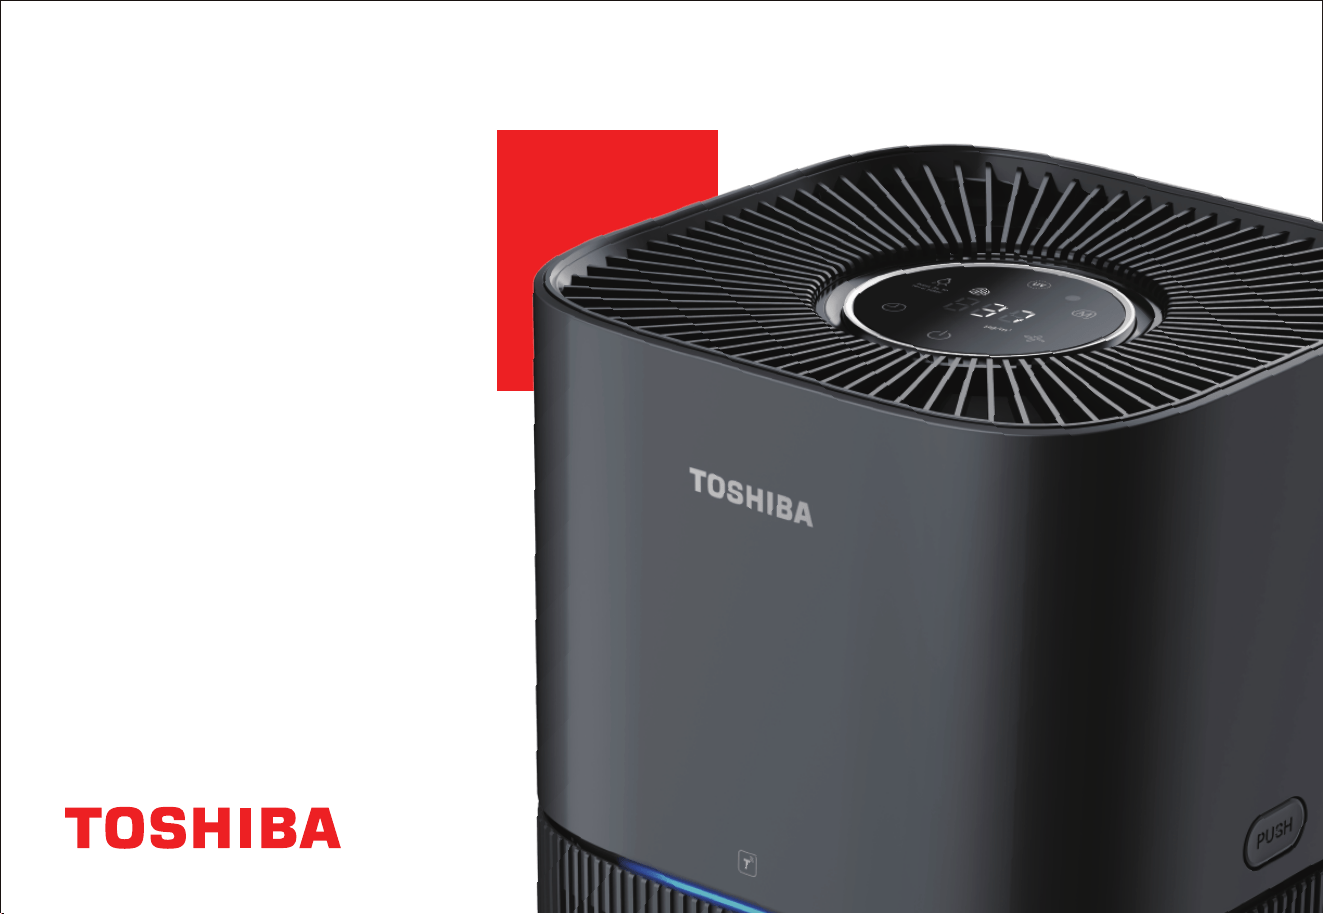
AIR PURIFIER
CAF-A400HK(H)

With the technological innovation and improvement of the product, the manual contents of the
same model as this product may be changed, and the updated part will not further notify.
BEFORE OPERATING THIS PRODUCT, READ, UNDERSTAND, AND FOLLOW THESE
INSTRUCTIONS. BE SURE TO SAVE THIS BOOKLIST FOR FUTURE REFERENCE.
STATEMENT
NOTE
1
All the illustrations shown in
this manual are for illustrative purposes only.
Due to product improvement, some of the parameters may be changed. The changed parameters
have no retroactive effect on this product. Please refer to the product nameplate parameters.
If there is any change in the content of this manual, our company will make announcement through
the off icial website of the company without further notice, and there is stated in the notice of
announcement, the changed content shall not be retroactive to this product in principle.
purposes only.
IMPORTANT SAFETY INSTRUCTIONS
(a) The performance parameters in the table are measured before delivery and for reference only.
(b) The applicable area is according to the theoretical value calculated by (0.07 ~ 0.12) x CADR
particulate matter. With the use of different environments or outdoor pollution and other
factors, the applicable area will also be changed.
(c) Purifying principle: The air purif ier blows air into the machine and f ilters the air through the
built-in f ilter core. It can mainly play the role of f iltering dust (such as PM2.5), odor and others.
TECHNICAL PARAMETERS
V
Model CAF-A400HK(H)
(
)
24
22
Noise (dB)
≤
55
Rated voltage
Rated power (W)
2
Adapter cablet
(GM42-240150-D)
IMPORTANT SAFETY INSTRUCTIONS
All instructions described should be carefully read and followed.
These instructions are precautions to prevent the risks of serious injury or death of the user, and
any damages to property.
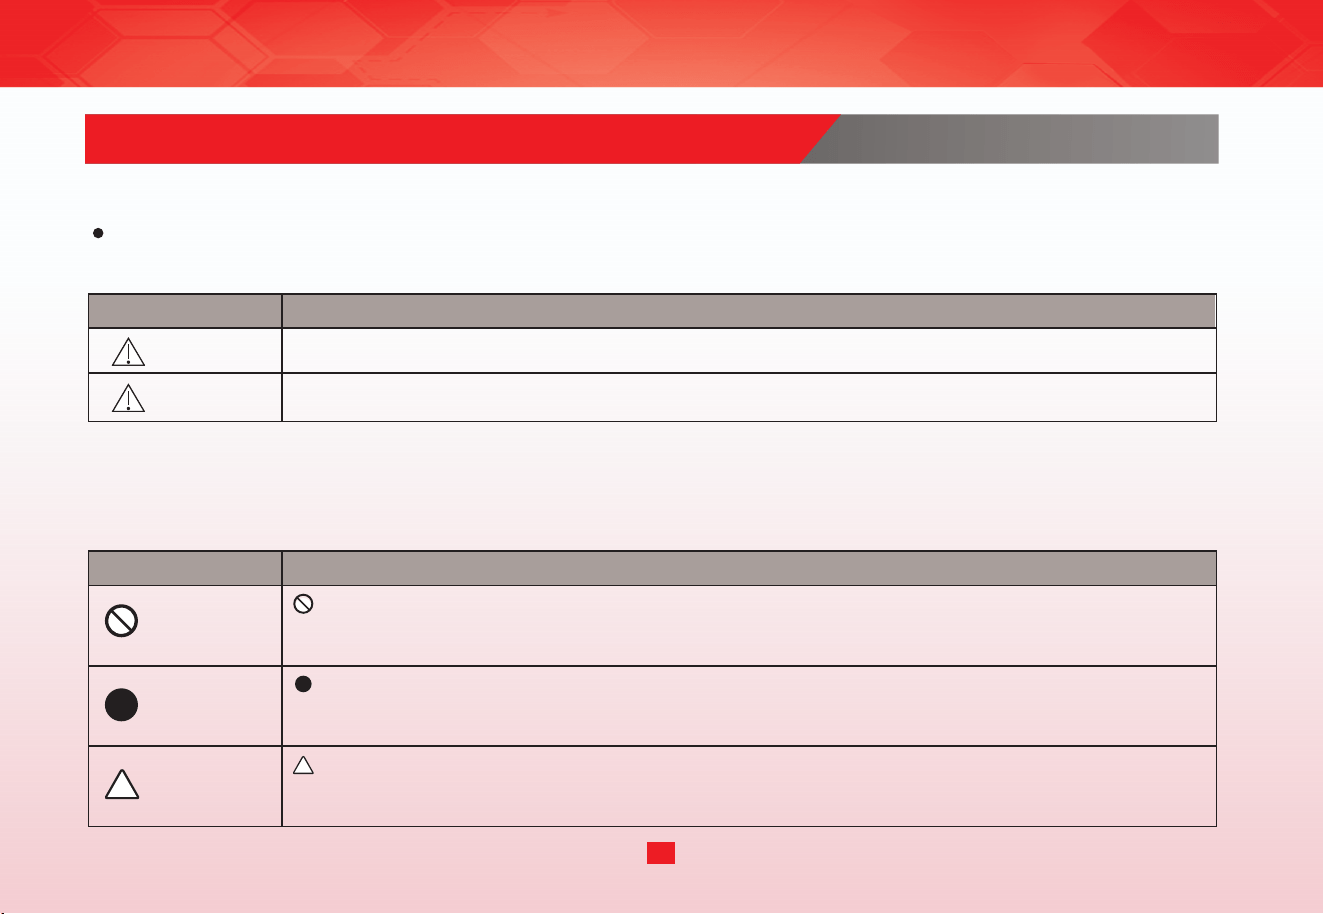
MARKINGS
WARNING indicates high possibility of serious injury (*1) or death of the user.
CAUTION indicates high possibility of injury (*2) or property loss (*3).
WARNING
CAUTION
(*1) Serious injury - injury which requires hospitalization, lengthy treatment, or blindness, hot and cold skin burn, electric
shock, broken bones or poisoning.
(*2) Injury - injury, skin burn or electric shock which does not require hospitalization or lengthy treatment.
(*3) Property loss - extended loss of houses, furniture, domestic animals or pets.
SYMBOLS
PROHIBITED!
IMPORTANT
CAUTION
PROHIBITED! Indicates prohibited actions.
Detailed instructions would be indicated on the inside of the circle or around the symbol in
f igures or in writing.
IMPORTANT Indicates mandatory actions.
Detailed instructions would be indicated on the inside of the circle or around the symbol in
f igures or in writing.
CAUTION Recommends to take precautions.
Detailed instructions would be indicated on the inside of the triangle or around the symbol in
f igures or in writing.
3
IMPORTANT SAFETY INSTRUCTIONS
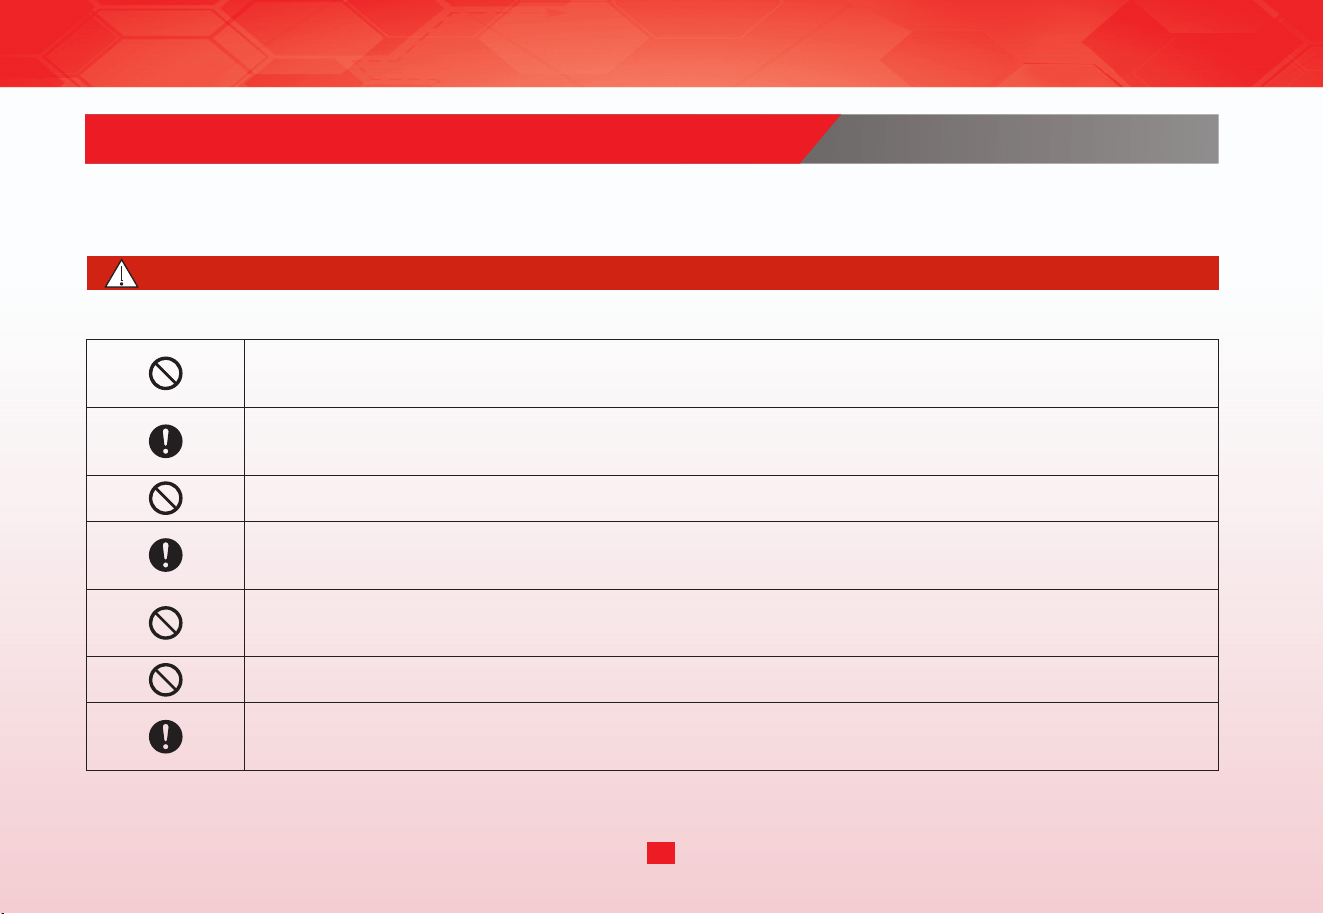
This manual provides instructions that must be observed when using the fan in order to prevent
danger to the user, other persons, and property.
WARNING
Do not block the air inlets/outlets of the appliance with any item.
Do not place other items on top of the appliance, and forbid sitting or standing
on this appliance.
Do not insert the f ingers or objects into the air inlets or air outlets to prevent
physical damages or malfunction.
This appliance cannot replace natural ventilation and other appliances like the
vacuum cleaner, cooker hood, etc.
Do not disassemble or modify this appliance without authorization to
avoid accidents.
To minimize the risk of f ire or electric shock, do not use this air purif ier with any
solid-state speed control device.
Do not pull the adapter cable to move the appliance.
Operation and handling
4
IMPORTANT SAFETY INSTRUCTIONS
This appliance is not intended for use by people (including children) with
reduced physical, sensory or mental capabilities, or lack of experience and
knowledge, unless they have been given supervision or instruction concerning
use of the appliance by a person responsible for their safety.
Children shall be supervised not to play with the appliance.
Unintended use of the appliance or damage to the housing may result in the
escape of dangerous UV-C radiation. UV-C radiation may, even in little doses,
cause harm to the eyes and skin.
This appliance contains a UV-C emitter.
The replacement of the UV-C emitter by the user is not allowed.
Correct Disposal of this product
This marking indicates that this product should not be disposed with other
household wastes throughout the EU. To prevent potential harm to the
environment or human health from uncontrolled waste disposal, recycle it
responsibly to promote the sustainable reuse of material resources. To return
your used device, please use the return and collection systems or contact the
retailer where the product was purchased. They can take this product for
environmental safe recycling.
5
IMPORTANT SAFETY INSTRUCTIONS
This product complies with the maximum allowable concentration of ozone
of 0.050 parts per million by volume (ppmv) in a 24-hour period.
Indoor and household use only.
Usage environment
Power plug or cord
CAUTION
Please unplug the power cord immediately and contact the service center in
time when the appliance gives off abnormal sound or burnt smell or smoke.
To protect against the risk of electrical shock, do not immerse the unit, cord or
plug in water or other liquid.
Please use the original f ilter provided by the factory. In case of other f ilters, the
best results cannot be achieved.
This appliance is only to be used with the power supply unit provided.
Appliances that are obviously damaged must not be operated.
6
IMPORTANT SAFETY INSTRUCTIONS
Do not spray flammable substances near the appliance; Do not spray water
directly on the appliance or use chemical cleaners like alcohol or hydrochloric
acid, etc.; Do not place water containers, medicines, or flammable materials on
the appliance.
Do not put it in a place with direct sunlight.
To prevent electromagnetic disturbance, the appliance must keep a certain
distance from the TV, radio, microwave oven and others.
Do not run cord under carpeting. Do not cover cord with throw rugs, runners, or
similar coverings.
Do not route
cord under furniture or appliances.
When the appliance is not in use and before cleaning, unplug the appliance from
the outlet.
Cleaning
When the appliance is working, it must be placed on a dry, spacious and stable
floor, with at least 30cm space reserved around it.
The mist produced by the ultrasonic humidifer may affect the PM2.5 detection
of this appliance, and both should maintain a certain distance.
7
PRODUCT INTRODUCTION
The pictures contained in the Manual are for reference only, and please be subject to the physical
product in the packing box.
NOTE
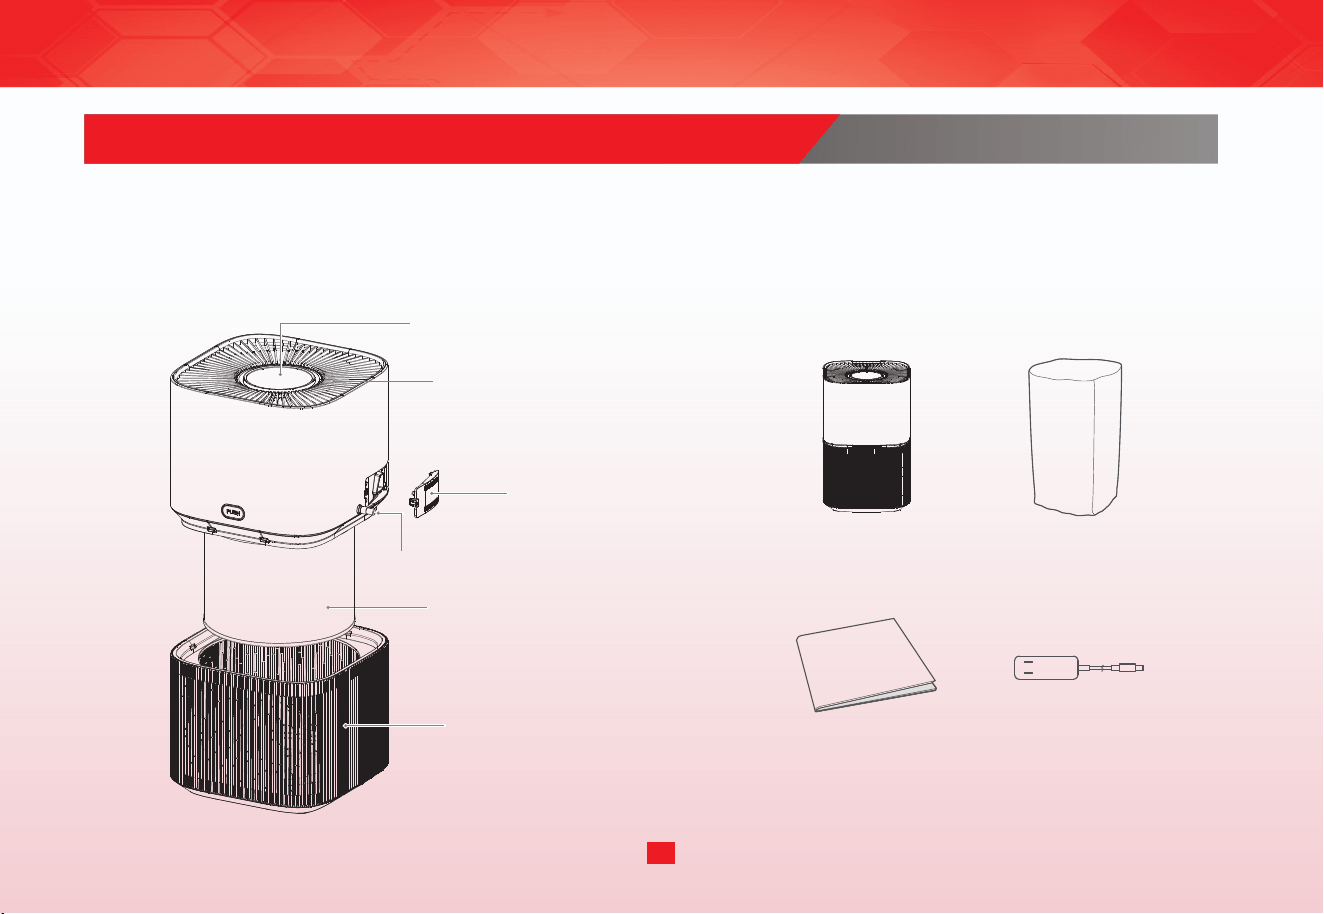
Manual
Protective bag Host
Control panel/Display screen
Air outlet
Adapter cablet
Back cover plate
Air inlet
HEPA f ilter
Adapter cablet
8
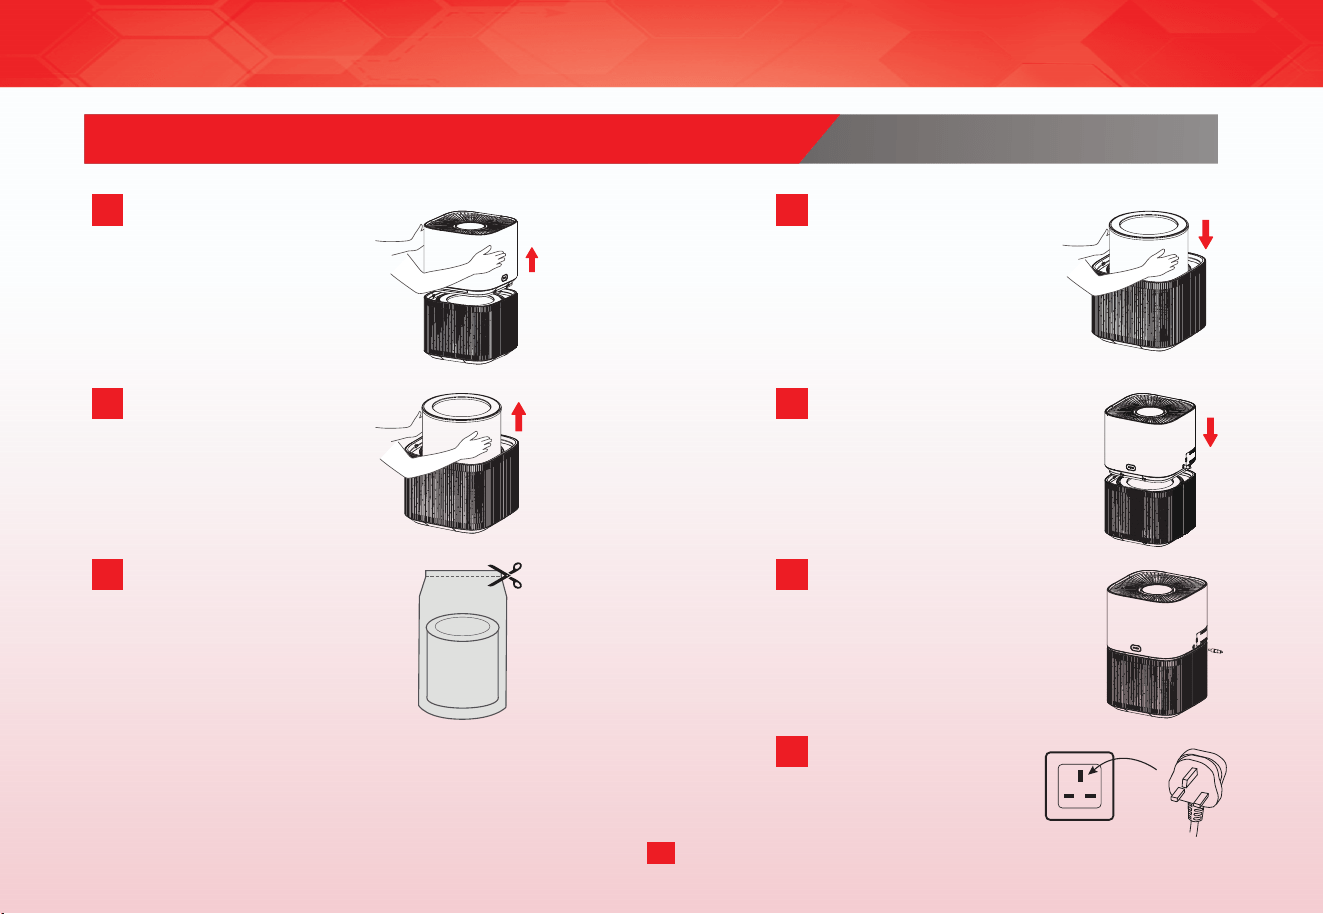
INSTALLATION INSTRUCTIONS
1
Remove the base plate.
3
Remove the protective
bag of the f ilter assembly.
4
Install the HEPA f ilter.
2
Take out the HEPA f ilter.
5
Install the base plate.
6
Plug in adapter cablet.
7
Connect power.
9
INSTRUCTIONS
10
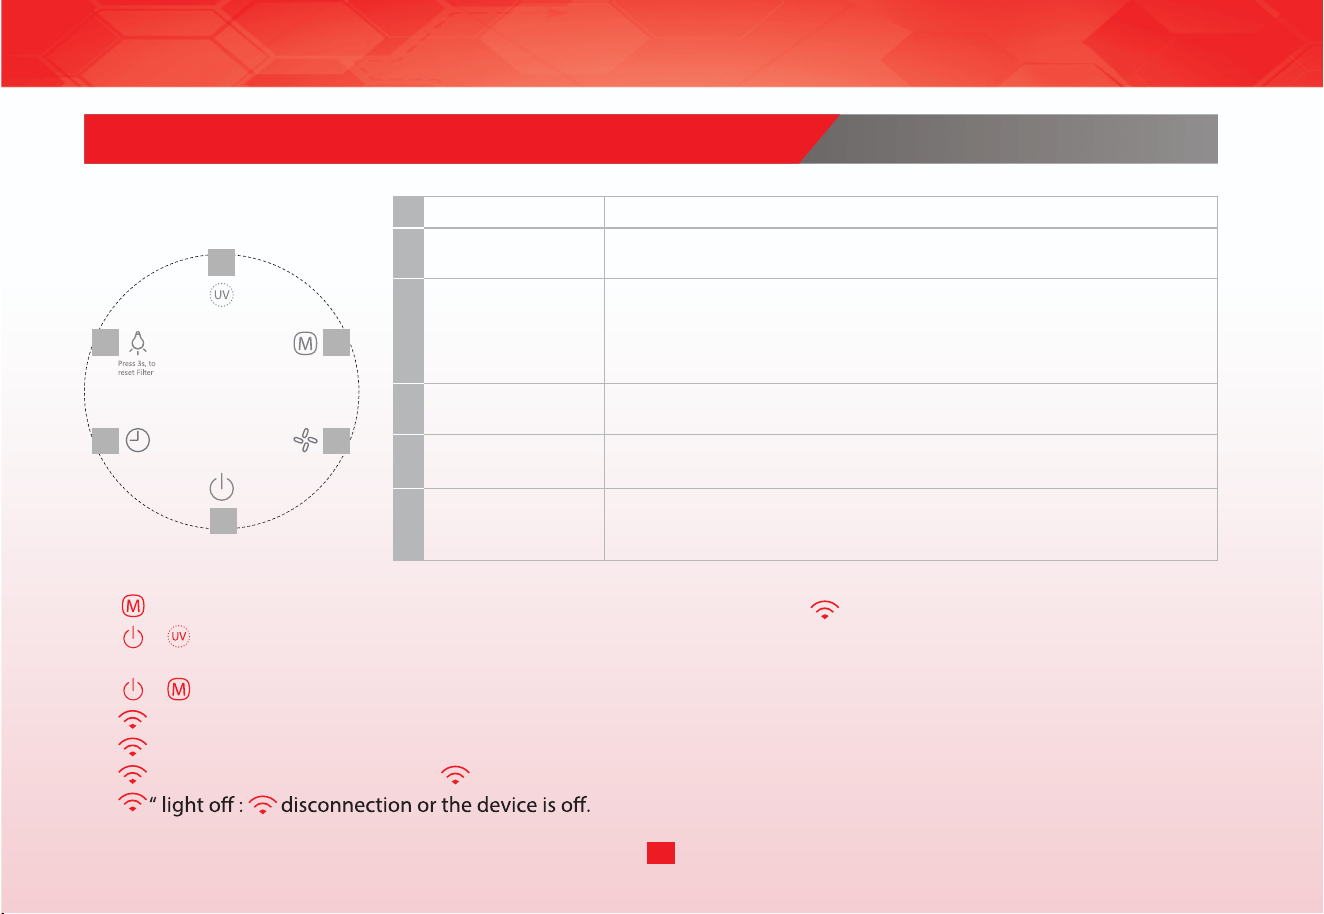
CONTROL PANEL
Other functions
“
“
“ light flashing : Waiting or in network conf iguration state.
“ light on : Device connected to .
“
Further explanations can be found in network connection instructions.
1. “ “ Mode button: long press the mode button for 3 seconds to connect to .
+ ”Combination button: long press the combination button for 3 seconds to reset settings to default.
(Default setting: the unit is in the unconnected state and unused state when leaving the factor)
+ ”Combination button: long press the combination button for 3 seconds to unbind the device.
4. “ “ light :
2. “
3. “
1 ON/OFF button Power on/off
:
:
:
2
Total 12 fan speed setting. Press this button to rise the speed.
1 – minimum speed; 12 – maximum speed.
Speed button
3
Mode button
4
UV button
Activate UV function, make use of UV light to have antibacterial
action in the air.
5
Light adjustment
button
Provide 3 sections of brightness selection of display screen.
Press this button to adjust brightness.
Use to select shut down time. After running the selected time,
air purif ier will stop operating automatically. Timer is up to 12
hours in 2 hours increments.
6
Timer button
• Auto mode Automatically adjust the fan speed according to
air quality.
• Sleep mode Adjust the fan speed to minimum.
• Turbo mode Adjust the fan speed to maximum.
4
5
3
6 2
1
INSTRUCTIONS
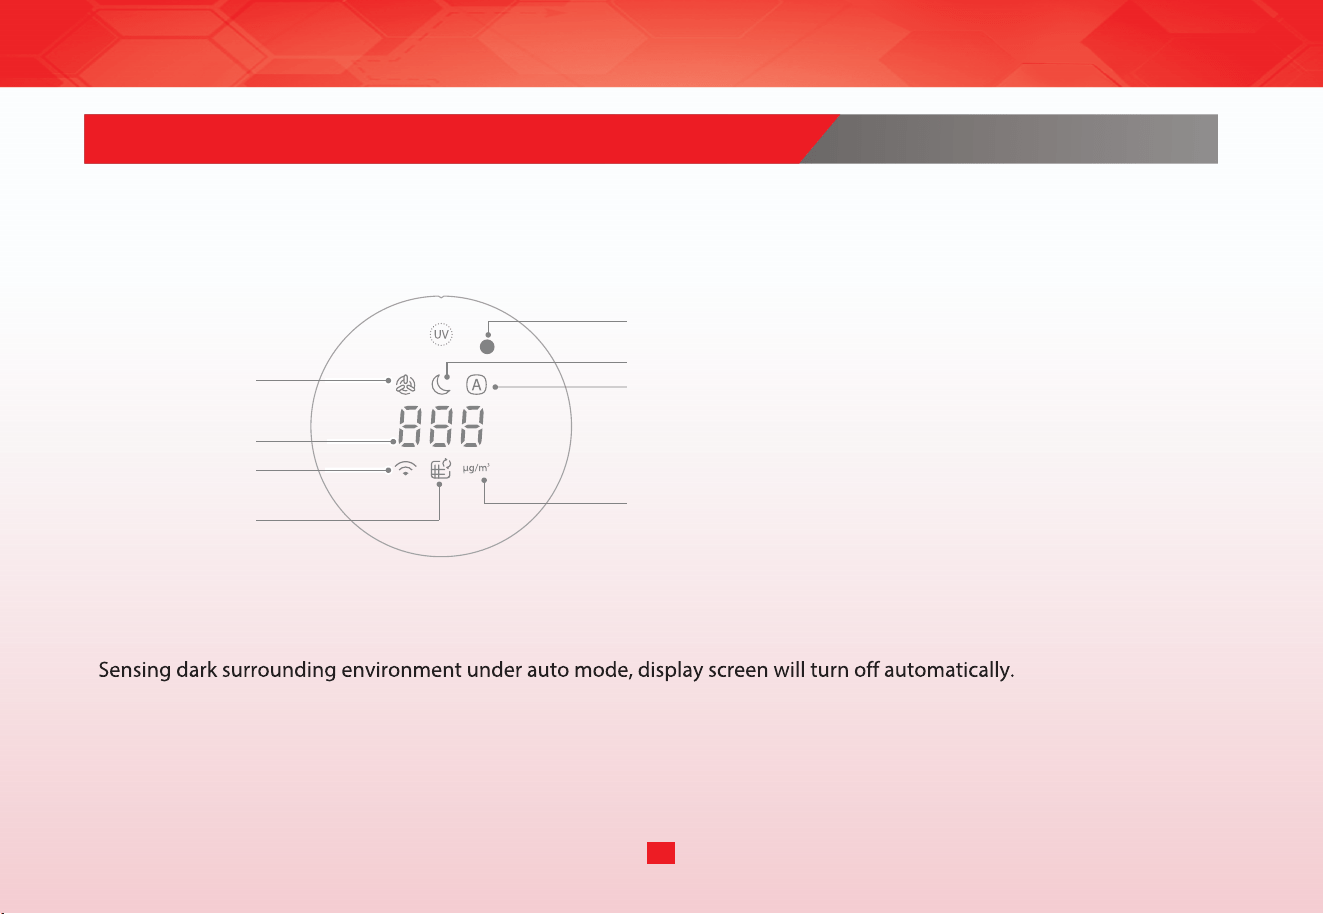
DISPLAY SCREEN
NOTE
•
• In case of continuous electricity, the appliance enters the working mode before the standby state when power on each time.
• The appliance is connected to the power again after unexpected power outage (when the power is off or the power cord is
unplugged during normal operation), and then restores to the working state before the power outage.
11
Light perception
Sleep mode
Turbo mode
Auto mode
PM2.5 value display
Wireless connection
PM2.5 value unit
HEPA f ilter
replacement indicator
INSTRUCTIONS
12
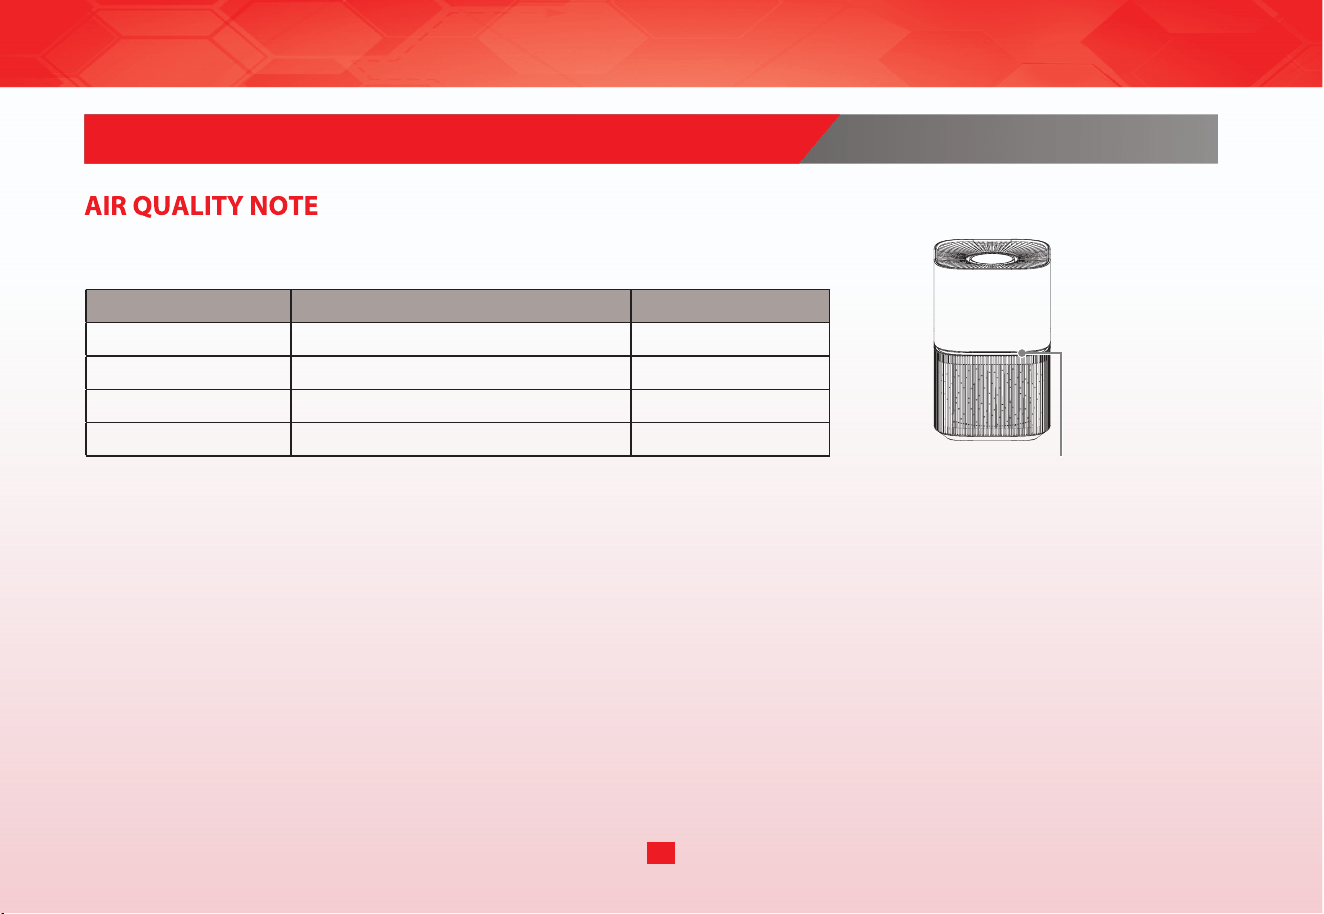
Air quality indicator
PM2.5 Value Colour of the air quality indicator Air Quality Levels
Blue
Green
115-164
Orange
>164
Red
Excellent
Good
Medium
Poor
0-64
65-114
The color of the air quality indicator corresponds to the air quality environment.
INSTRUCTIONS
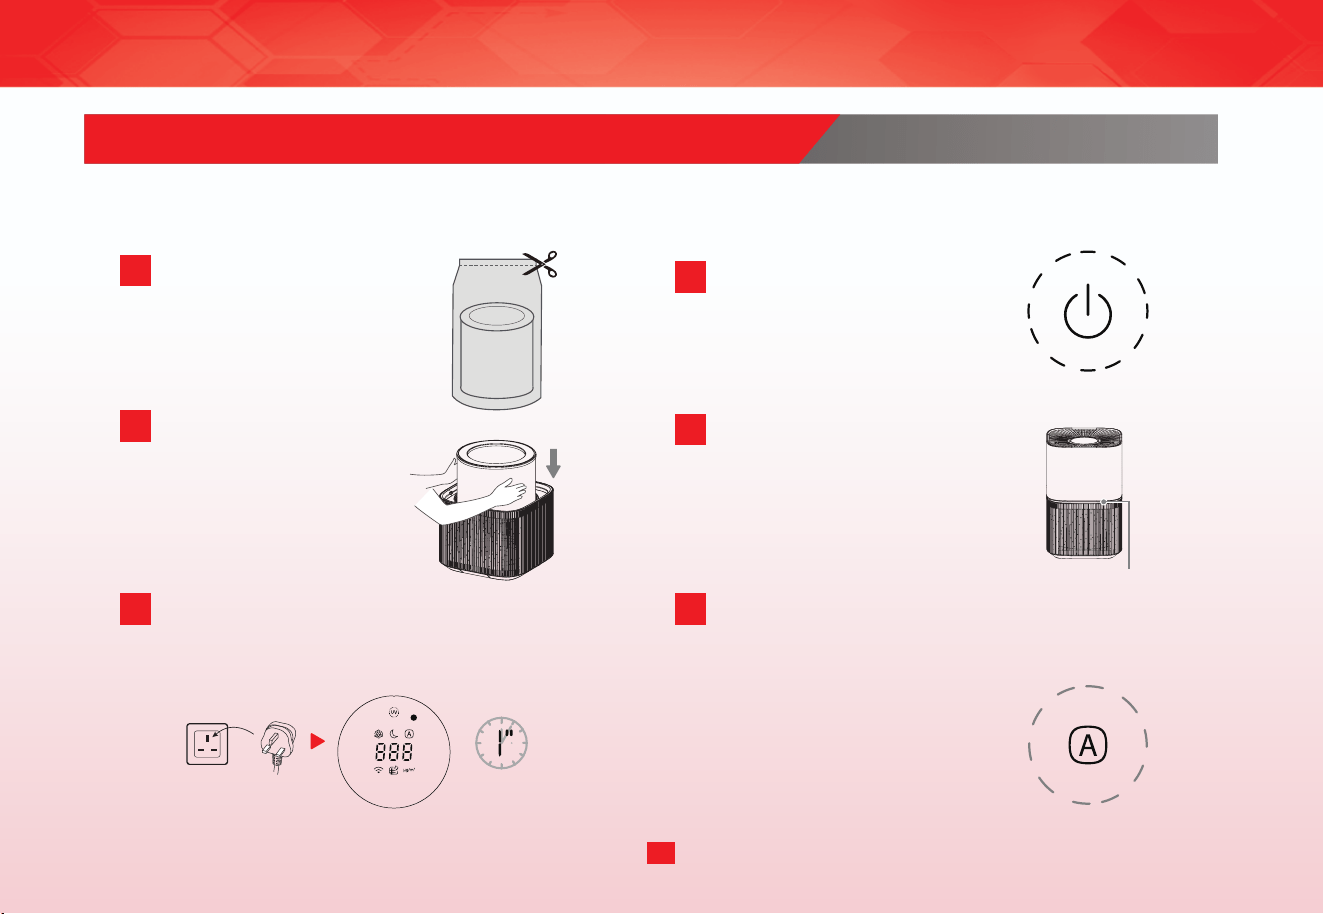
FILTER INSTALLATION
1
Remove the protective bag
of the f ilter assembly.
2
Install the f ilter.
3
Preparation
Power on for the f irst time, the display panel flashes
for 1 s, and then the screen is turned off. The whole
appliance is the standby state.
4
On/standby
Press swtich on/off button.
Flash for 1s
5
Warm up
When the particulate matter
sensor enters the warm-up state,
air quality indicator will flash 3s
then restore to normal state.
Air quality indicator
Work
6
The purif ier is powered on for the f irst time and
then enters the auto mode.
13
CLEANING AND MAINTENANCE
NOTE
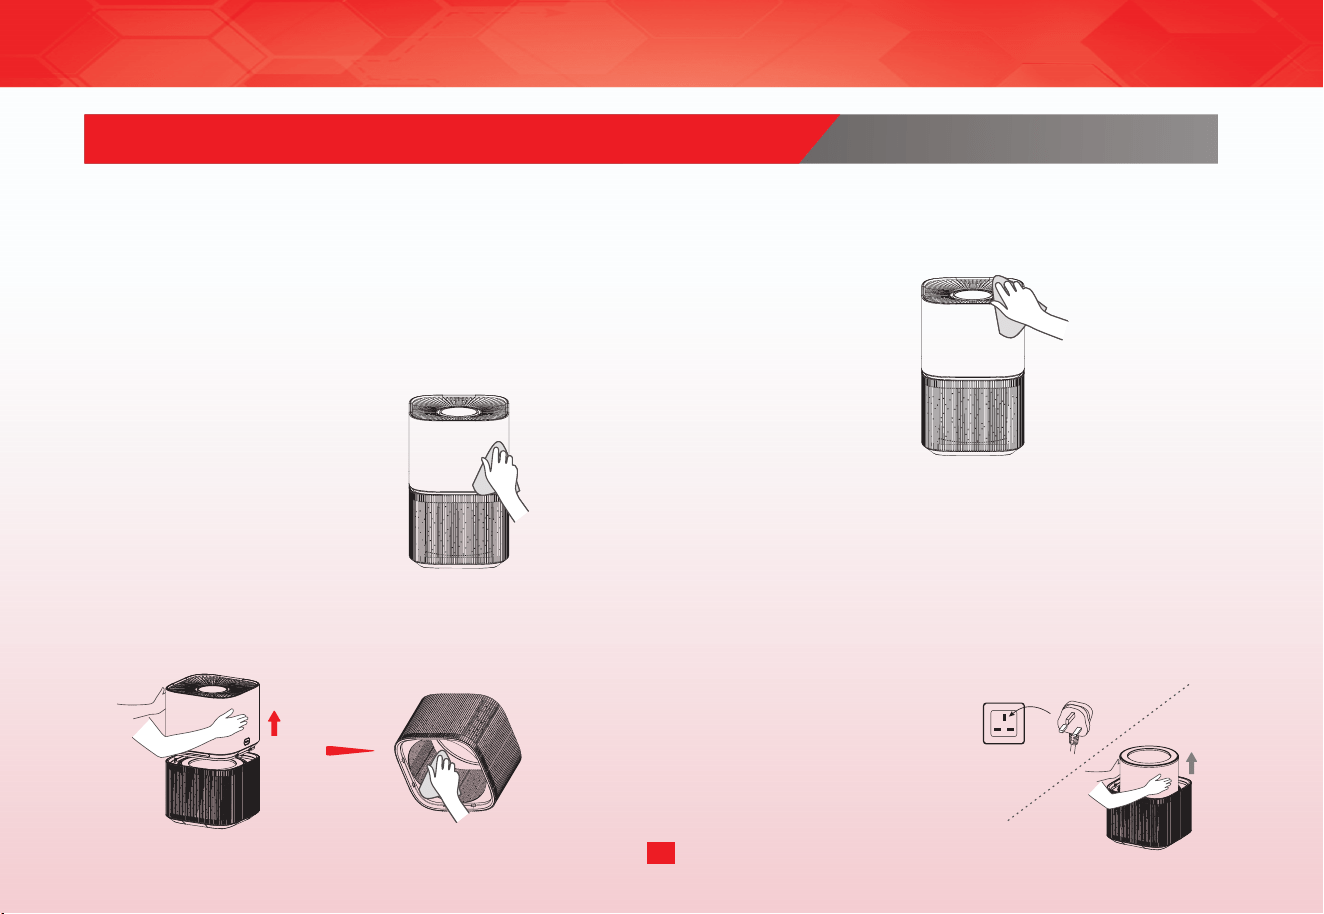
Make sure to turn it off before any maintenance, and
cut off power.
BODY CLEANING
Host
Wipe the body with a soft towel.
Inside the machine
Open the base plate, vacuum up dust with a vacuum
cleaner or wipe it with a cloth.
Air outlet
Vacuum up dust with a vacuum cleaner or wipe it with a
cloth.
CLEANING OF THE HEPA-FILTER
It is recommended to clean the f ilter at least once every
two weeks. The cleaning cycle can be based on the
usage environment and time, seriously polluted environ-
ment should be cleaned frequently.
1. Cut off the power, and take out
the f ilter.
14
CLEANING AND MAINTENANCE
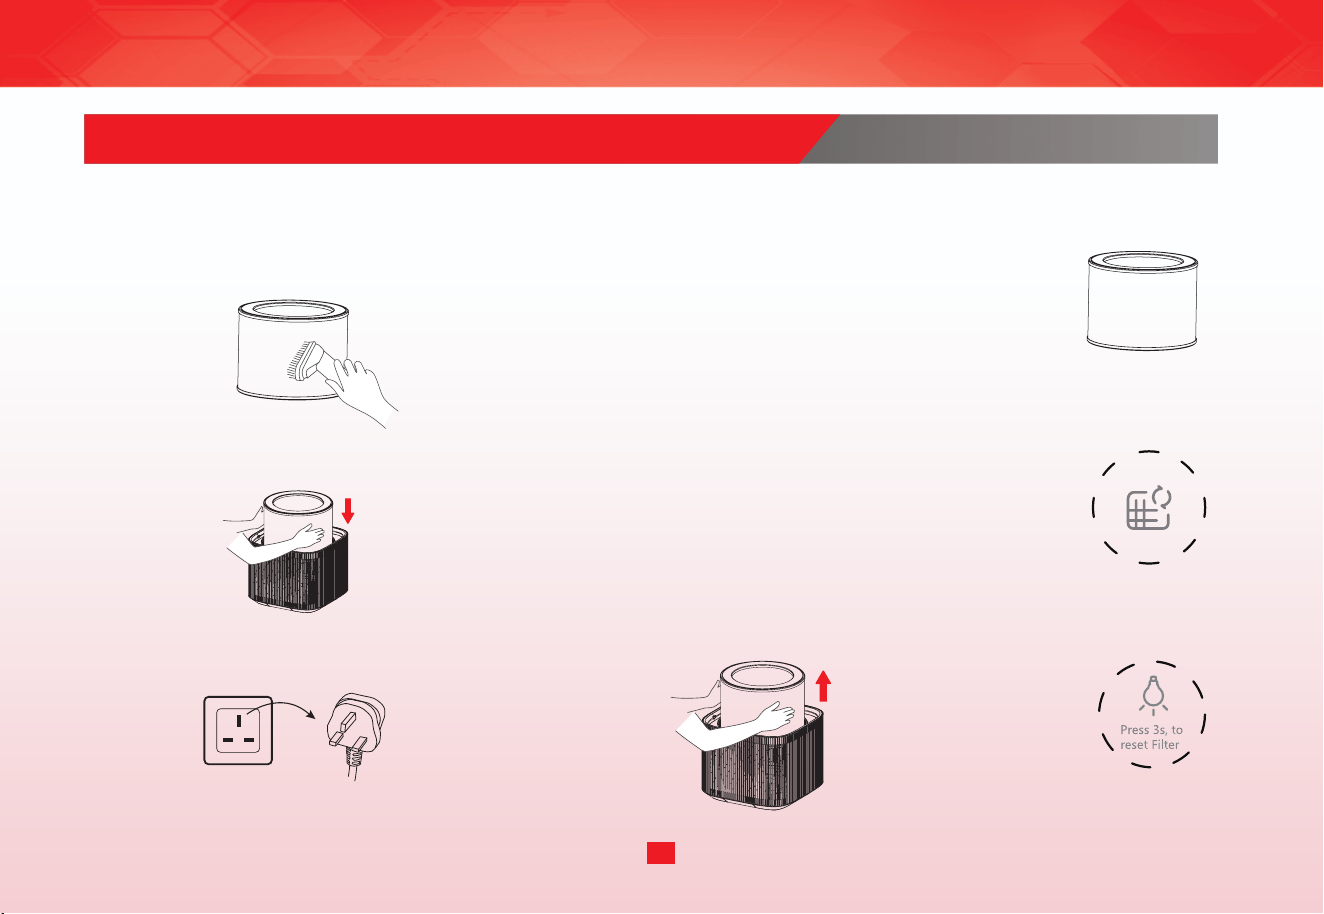
CLEANING OF THE HEPA-FILTER
2. Vacuum the dust or wipe it with a dry cloth or
vacuum.
3. Assemble the f ilter.
4. Plug in the appliance, and switch on.
REPLACEMENT OF THE FILTER
1. Filter model : CAF-A400HK(H)FS
(include 1)
press for 3s
2. When the f ilter replacement light is on, it reminds user of
replacing new HEPA f ilter. If it is not replaced in time, the
indicator will flash every startup.
3. Replace a new f ilter. 4. Press light button for 3s to
reset the f ilter.
15
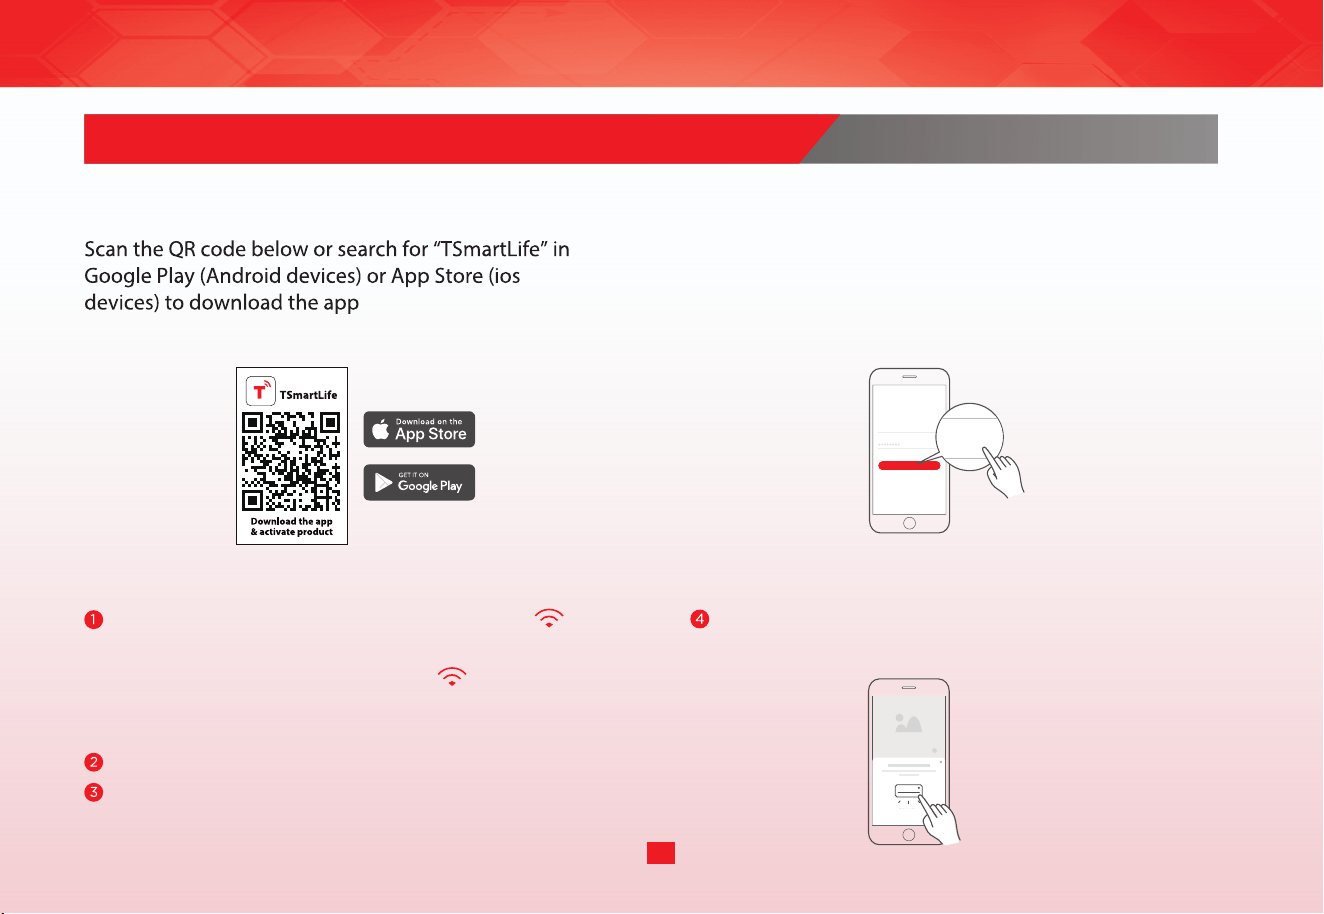
CONNECTION WITH TSMARTLIFE APP
1. Download the TSmartLife app
.
2. Register or login account
Open the app, and create a new account (you can
also register through a third-party account). If you
already have one, just log in.
XXX XXXX XX
Enter email
Enter password
Login
Login
Login
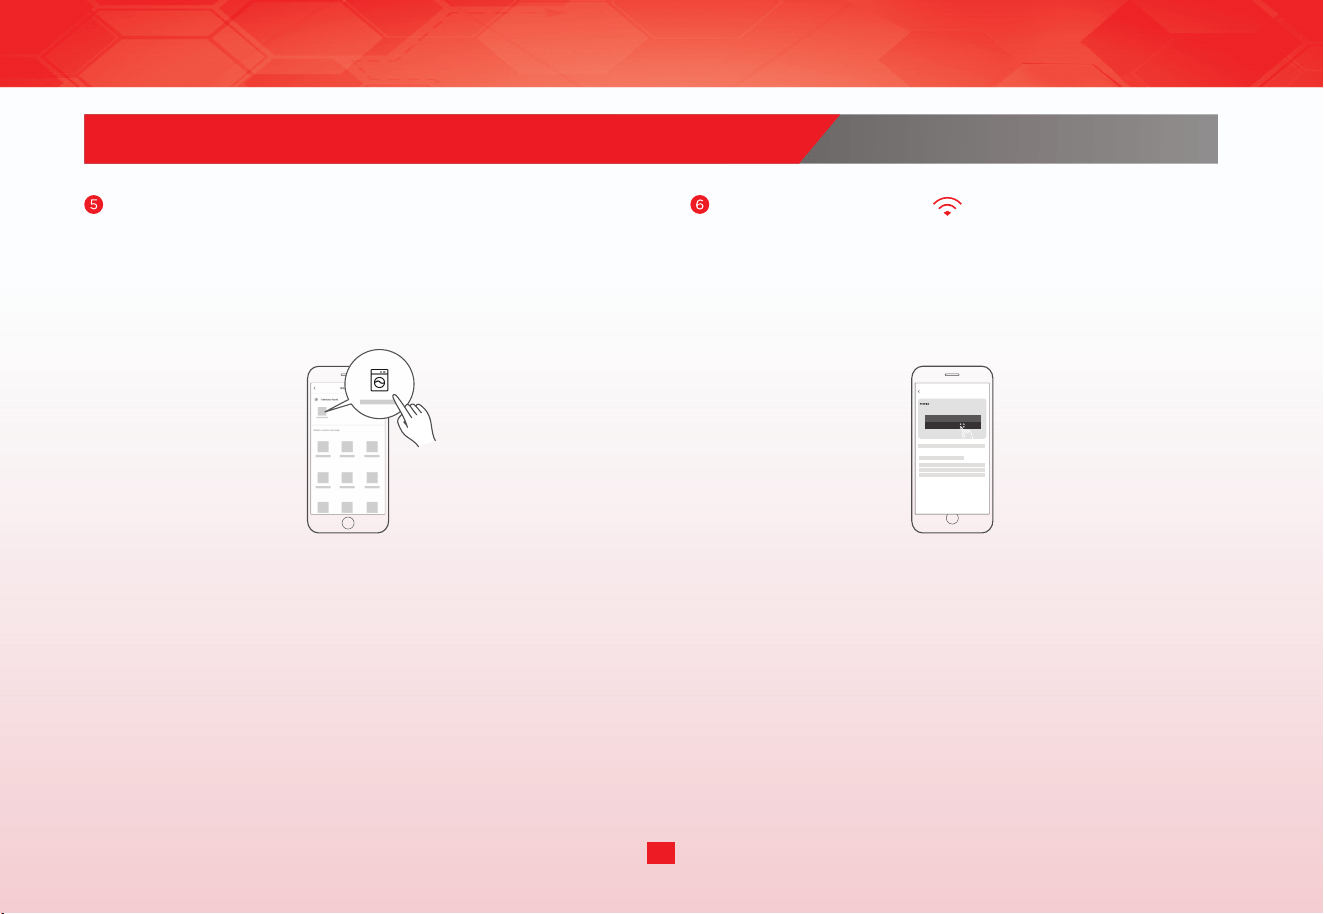
3. Connect your devices to TSmartLife
Washing machine
...
If a message of "Smart devices discovered
nearby" appears, click to add.
Make sure your mobile phone is connected to
.
If not, go to Settings and turn on the wireless
connection, select and connect to a . Also please
turn on the Bluetooth on your phone. If not,
go to Settings and turn it on.
Please switch on your devices.
Open TSmartLife app on your phone.
16
CONNECTION WITH TSMARTLIFE APP
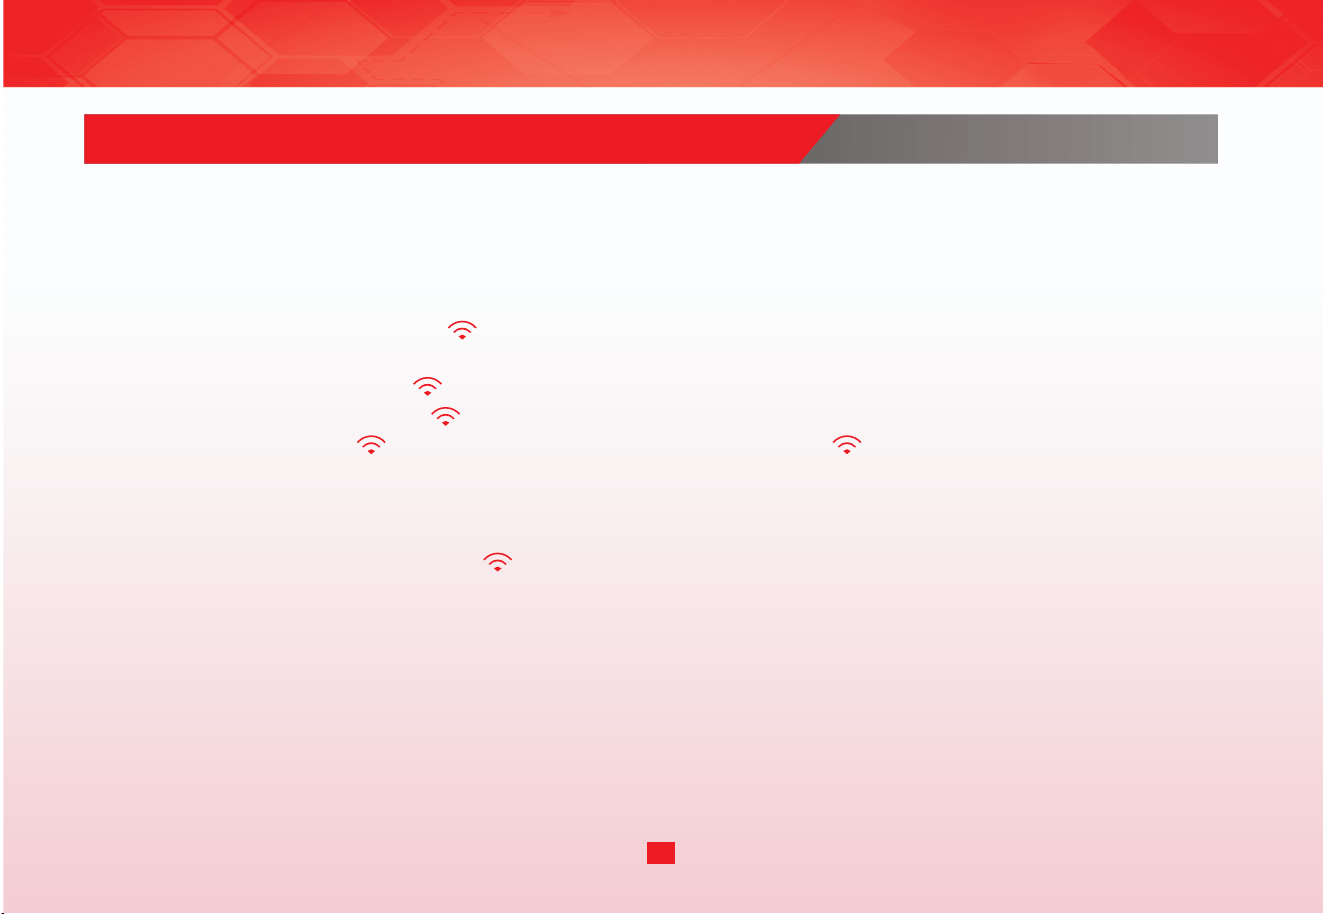
Add device
8:88
Connect your device to according to the instruc-
tions on app. If the connection fails, please follow the
instructions provided by the app to continue.
If no message appears, select "+" button and select
your device in the list of nearby devices available.
If your device is not listed, please add your device
manually by the device category and device model.
17
CONNECTION WITH TSMARTLIFE APP
NOTE
• Make sure your devices are powered on.
• Keep your mobile phone close enough to your device when you are connecting network.
• Connect your mobile phone to the wireless network at home.
• Check if your router supports 2.4 GHz band and turn it on. If you are not sure whether the router supports 2.4 GHz
•
•
band, please contact the router manufacturer.
The device cannot connect to the that requires authentication, and it usually appears in public area such as hotels,
restaurants, etc. Please connect to a that does not require authentication.
It is recommended to use a name that only contains letters and numbers. If name contains special characters,
please modify it in the router.
• Turn off the WLAN+ (Android) or WLAN Assistant (iOS) function of your mobile phone when connecting network to your
devices.
• In the case that your device connected to before but it needs to reconnect, please click "+" in Home page on app
add your device again by the device category and model according to the instructions on app.
18
TSMARTLIFE APP TROUBLESHOOTING
Background :
Offering dual-band support provides choices and maximum flexibility of the product to have successful experience on
home network.
A. 2.4GHz only … e.g. older model router
o In this case dual band radio will automatically operate at 2.4GHz
B. 5GHz only … some people may choose to turn off older 2.4GHz band due to conflicting interference
o In this case dual band radio will automatically operate at 5GHz
C. 2.4GHz and 5GHz sharing same SSID name … e.g. Johns
o In this case the router and dual-band radio will negotiate the best frequency to use
D. 2.4GHz and 5GHz with different SSID names … e.g. Johns _2G and Johns _5G
o In only this case is there a choice which band to use.
Having a dual band radio in the appliance means it is not necessary to change routers or router configuration unless
problems are experienced, in which case knowing what router configuration you have (see above A, B, C or D) is
important to know and understand.
If unable to join network at the f irst time
• Cannot see home SSID network :
o Weak signal … Since appliance radio is dual-band this means neither 2.4GHz nor 5GHz signal is being received by
the appliance. Just because the signal can be seen by the phone doesn’t necessarily mean that the appliance
radio can see it if the signal is marginal. Long distance between router and appliance or encountering too many
19
TSMARTLIFE APP TROUBLESHOOTING
barriers can reduce the signal level too much. Reorienting the router may improve the situation slightly. A better
solution would be a repeater or a higher quality router. Recognize that all routers transmit power is
limited by federal regulations, but a higher quality router can do a better job of transmitting the signal equally in all
directions, have more sensitive receivers to better handle weak signals, and have higher quality software to
minimize the dropping of connections.
• SSID network seen but cannot join:
o Networks requiring authentication …often used with public networks at restaurants or hotels. Products cannot
accept the legal agreement required to join the network. Please switch to a network that does not require
authentication.
o Insufficient encryption … for cybersecurity reasons Toshiba does not recommend products to join non-encrypted or
insufficiently encrypted networks (e.g. WEP encryption).
o Password length … for cybersecurity reasons Toshiba recommends networks to have strong passwords, but the
maximum password length supported is 32 characters
o Incorrect password … If trying to join a different network than the one the phone is currently using, then it is always
possible that the network password in the phone is no longer correct. In this case, new credentials will need to be
provided.
o Illegal SSID name … TSmartLife App accepts any SSID name, but the App may issue warning when attempting to
join network with certain non-alphanumeric or foreign language characters.
• WLAN+ (Android) or WLAN Assistant (iOS) functions are turned on, please turn off and reconnect to the Internet.
If can join network but the connection is unstable
For conf iguration modes A, B and C, follow the instructions provided by your router manufacturer to make the
20
TSMARTLIFE APP TROUBLESHOOTING
indicated router conf iguration changes :
• In case of router conf iguration A (see above), Toshiba recommends enabling 5GHz band if it is disabled in your router
and choosing a distinct SSID name for the 5GHz band (e.g. SSIDname_5G). Then follow the normal joining instructions to
join the 5GHz network. If your router is an older 2.4GHz only router, Toshiba recommends upgrading to a newer
dual-band router.
• In case of router conf iguration B (see above), Toshiba recommends enabling 2.4GHz band (all routers that offer 5GHz also
support 2.4GHz), and choose a distinct SSID name for the 2.4GHz band (e.g. SSIDname_2G). Then follow the normal
joining instructions to join the 2.4GHz network.
• In case of router conf iguration C (see above), Toshiba recommends assigning distinct SSID names for the 2.4GHz and
5GHz bands. Then follow the normal joining instructions to one of the networks, and subsequently follow the trouble
shooting instructions for mode D.
For these steps router configuration changes are not required:
• In case of router conf iguration D (see above), then it is worthwhile to try operation on the other band before making
changes to the router conf iguration or upgrading the router. In other words, if unstable connection using 2.4GHz then
try 5GHz instead. Or if unstable connection using 5GHz then try 2.4GHz instead. Follow the instructions below “How to
set the network to 2.4GHz or 5GHz.”
• WLAN+ (Android) or WLAN Assistant (IOS) functions are turned on, please turn off and reconnect to the Internet.
If your Device of f line, check your connection status. Please conf irm that
• Whether the device is properly powered.
• Whether the network signal is stable.
• Whether the name or password has been changed, if so, please add the device again.
21

#DetailsMatter