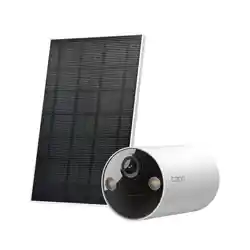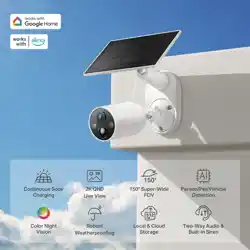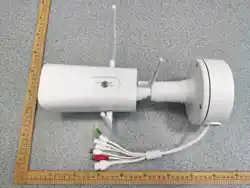

4G Solar-Powered
Quick Start Guide
Battery Camera
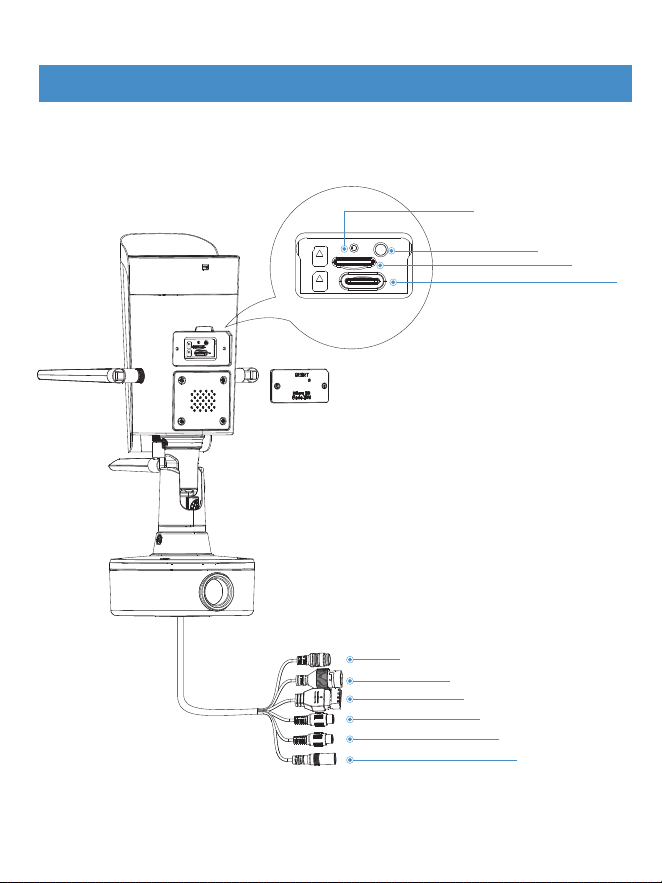
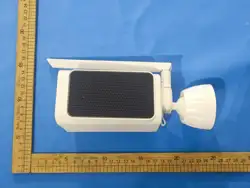
Status indicator light
Reset button
SD card slot
4G card slot
Solar power cable connector
Network cable connector
IO alarm connector
Audio input
Audio output
DC power connector
Equipment installation
1
Step 1:Open the battery compartment cover, insert the batteries, and
close the cover.
2

Step 2:Install the bracket clamp, select a suitable pole to secure the
bracket, and tighten the screws.
3
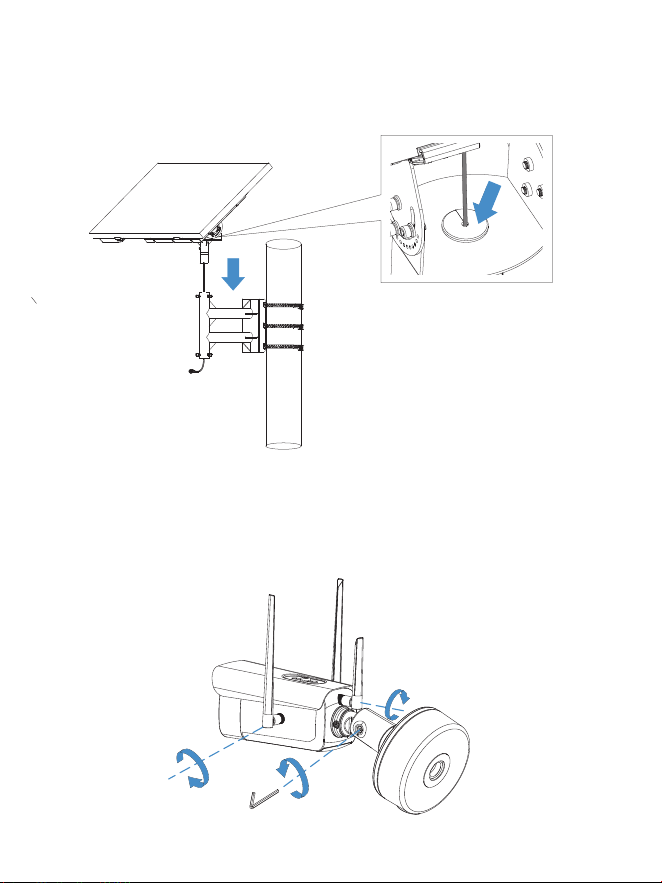
Step 3:Secure the connection cable with a rubber plug, install the
solar panel facing downwards on the bracket, and tighten the screws.
Step 4:Use a hex wrench to loosen the connecting rod screws, install
the three antennas on the camera, and then tighten the loosened
connecting rod screws.
4

Step 5:Unscrew the four screws on the base of the camera, remove the
base of the cable box, place it on the base mounting plate, and secure it
with screws.
Step 6:Secure the connection cable with a rubber plug, attach the base
mounting plate to the bracket facing upward, and tighten the screws.
5
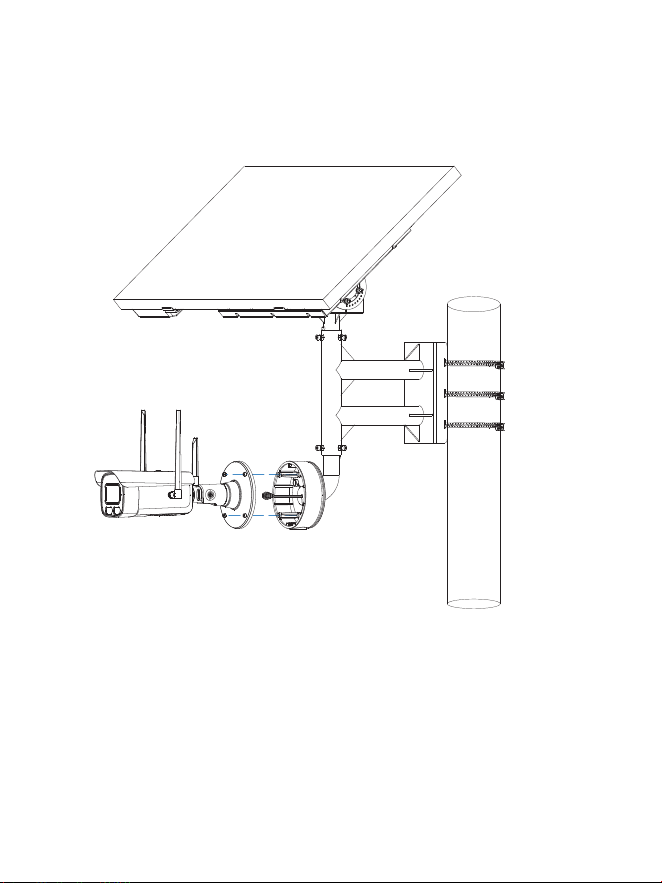
Step 7:Connect the cable, secure the camera to the cable box base,
and tighten the screws.
6
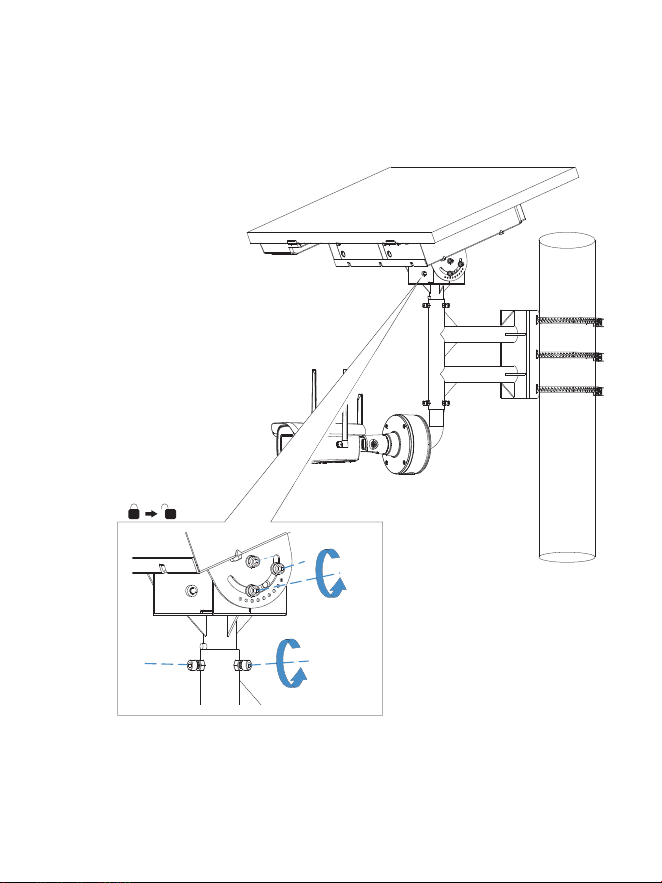
Step 8:Loosen the fixing screws to adjust the horizontal and vertical
angles of the solar panel. Once the angles are set, tighten the fixing
screws.
7
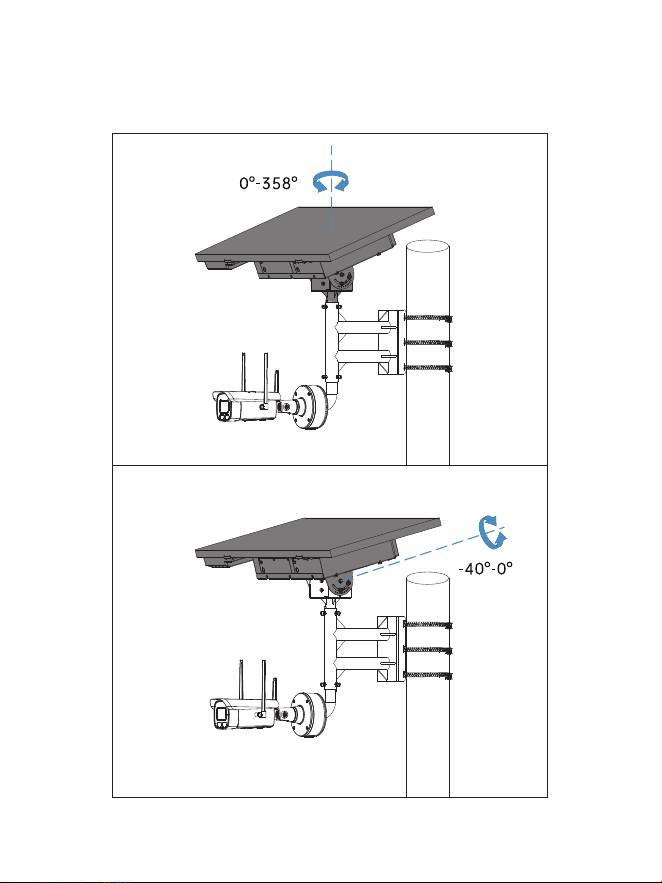
Step 9:Solar panel horizontal adjustment angle: 0°-358°, vertical
adjustment angle: -40°-0°
8

APP Installation
9
●
Download the app from the App Store(IOS devices) or Google Play
(Android devices).
Download the APP
●
Scan the QR code below to download the APP
For IOS For Android
10
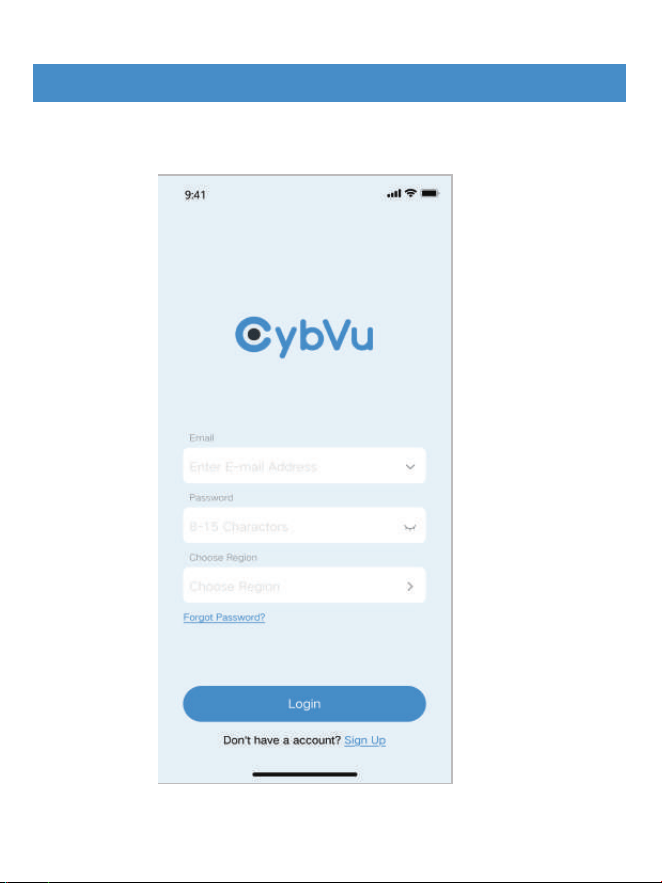
Run the APP, input user name and password,Choose Region, then tap
<Login>.
The method of adding a 4G card
11
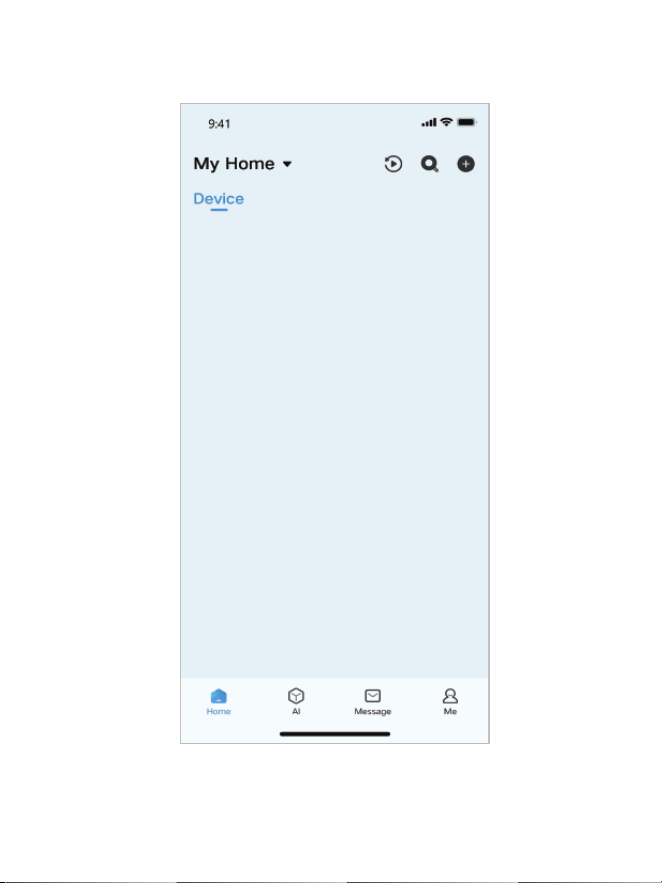
After tap <Login> will reach the Home menu.
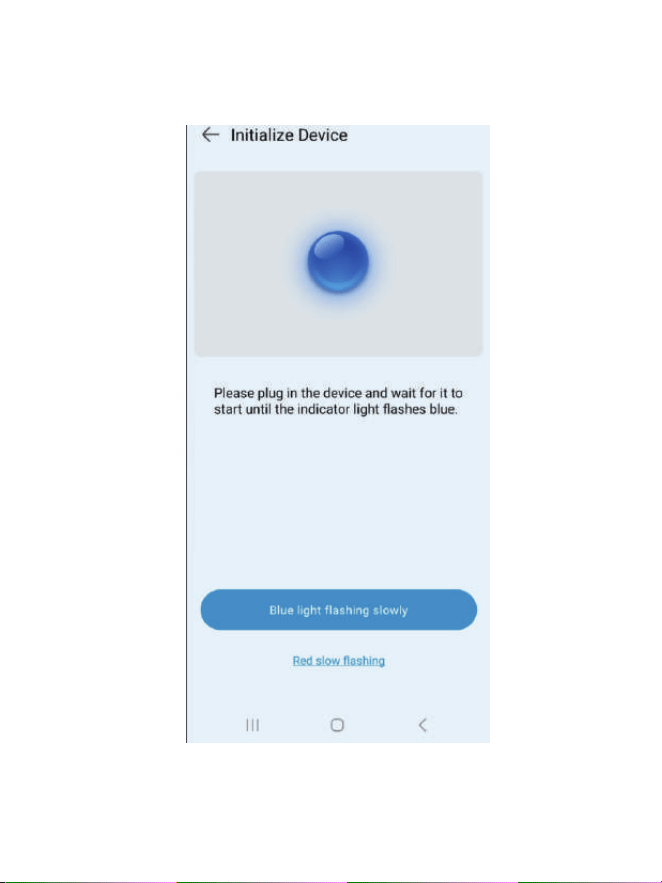
Open the App, scan the QR code on the device, and enter this page.
12
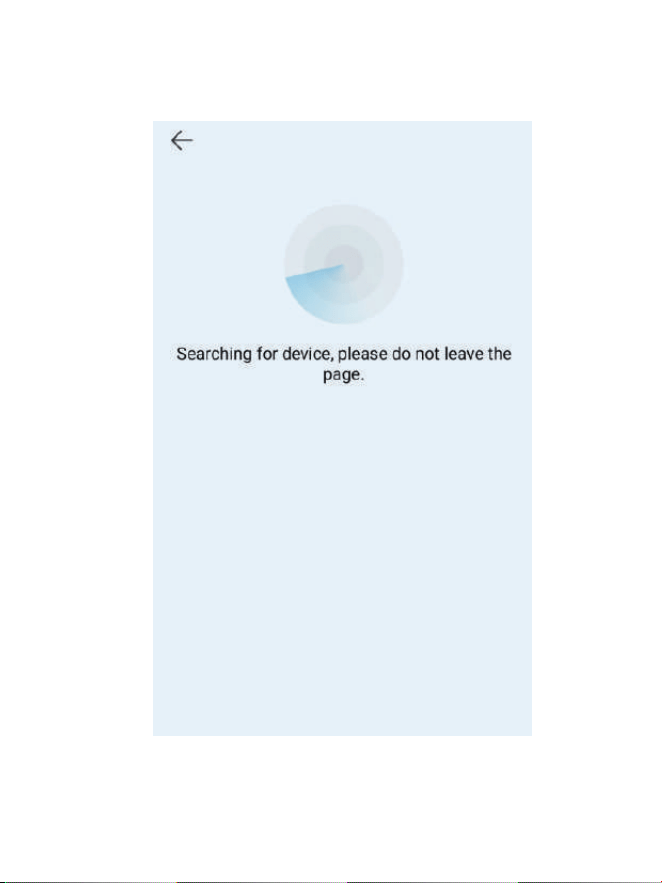
Click "Blue light flashing slowly" to enter the search page.
13
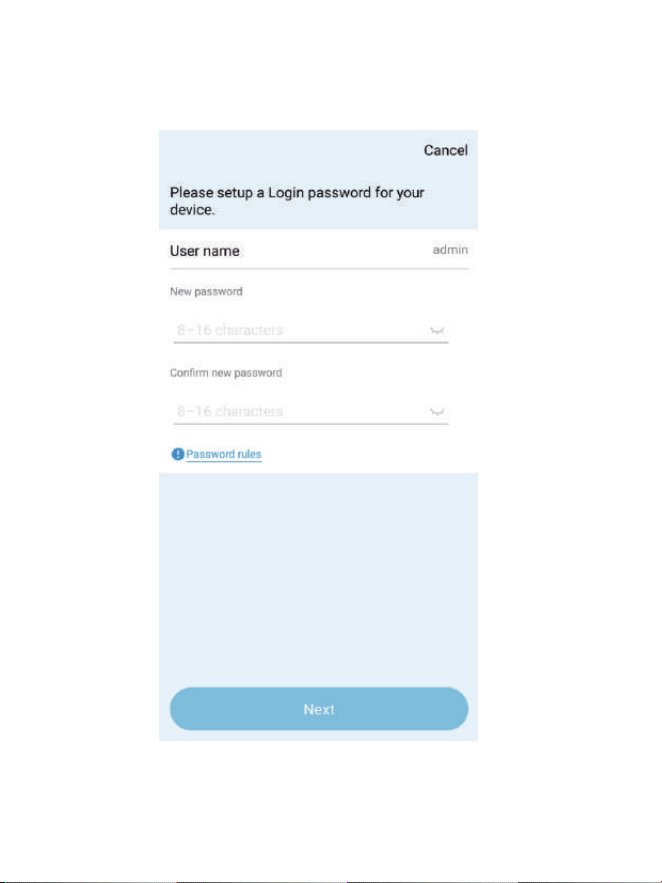
14
After the search is completed, enter the device activation page and set
the activation password.
15
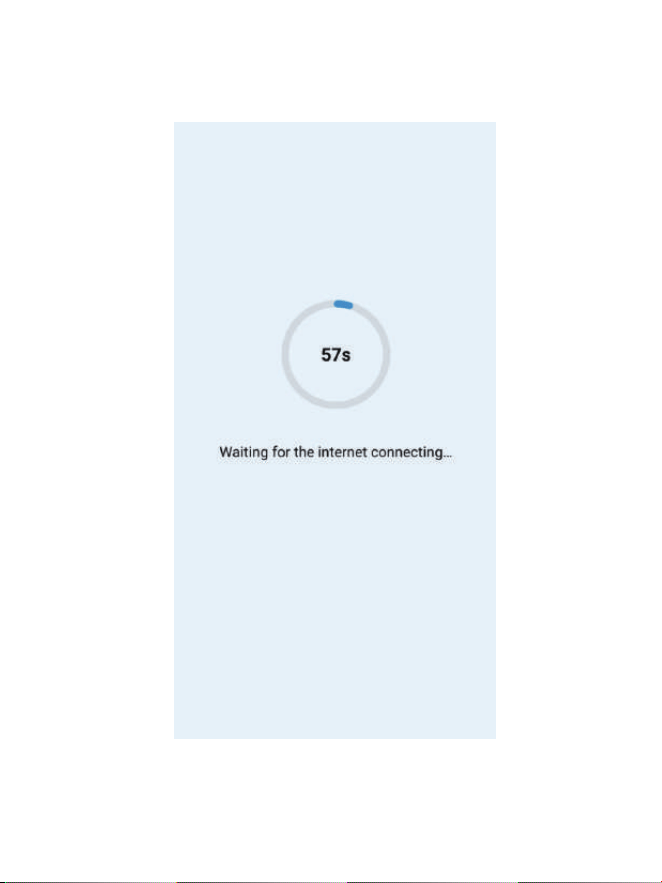
After setting the password, click "Next" to enter the pairing page. You
need to wait for 10 to 20 seconds for the pairing to be successful.
16
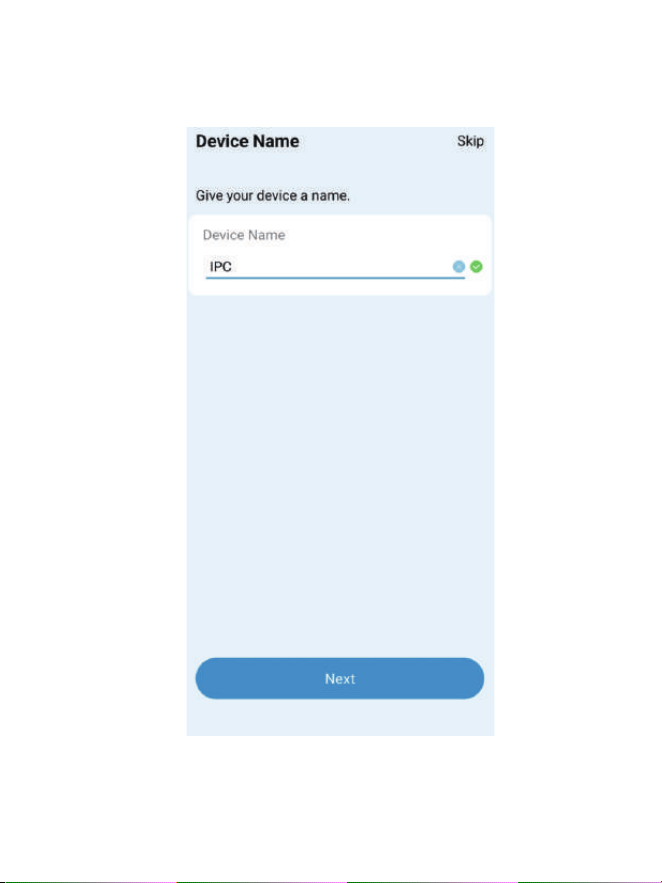
After a successful pairing, you will be redirected to the "Name Device"
page and click "Next".
17
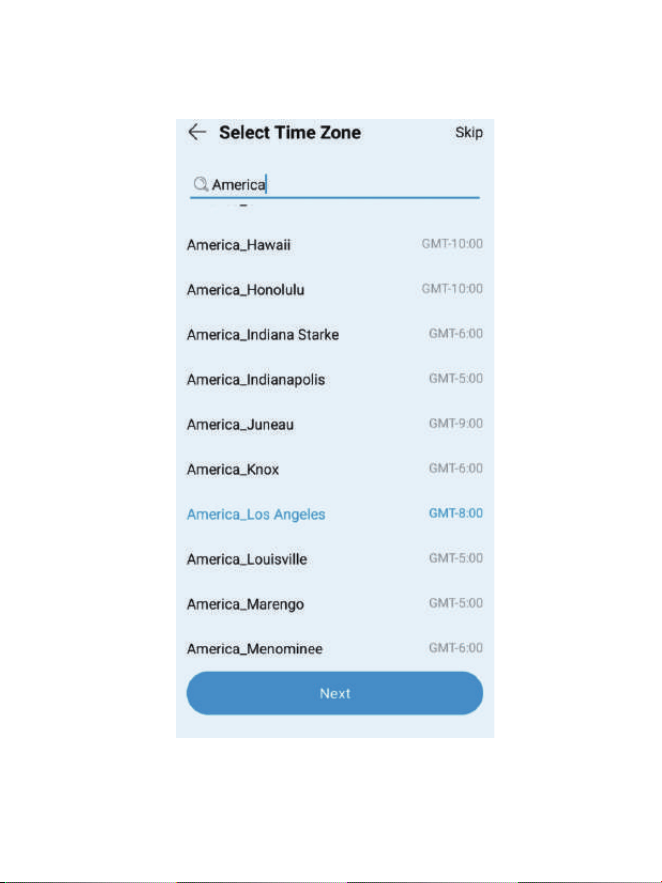
Enter the "Time Zone Settings" page, set the time zone, and click Next.
18
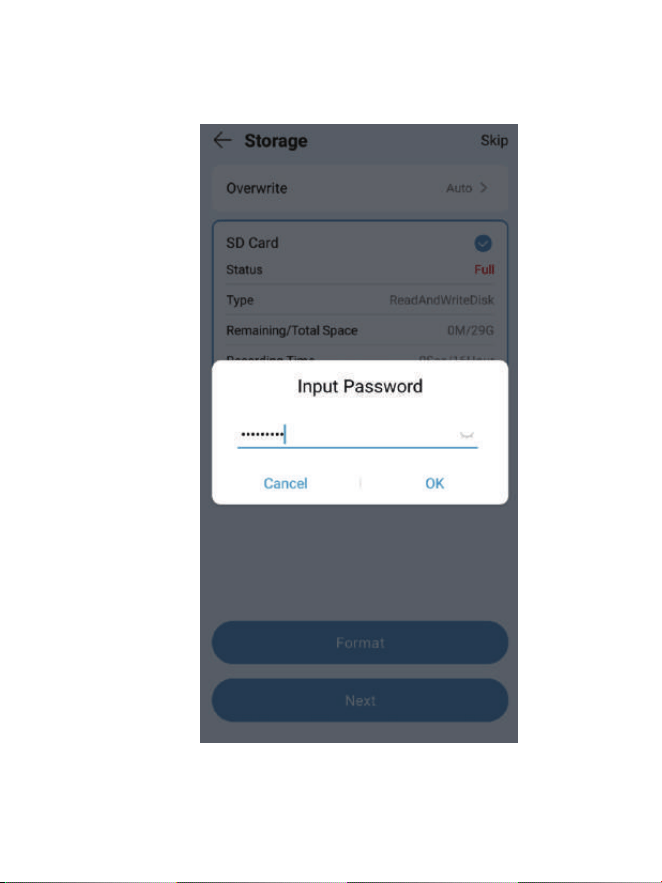
Enter the "SD Card Formatting "page, select the SD card and enter the
activation password, then click Next.
19
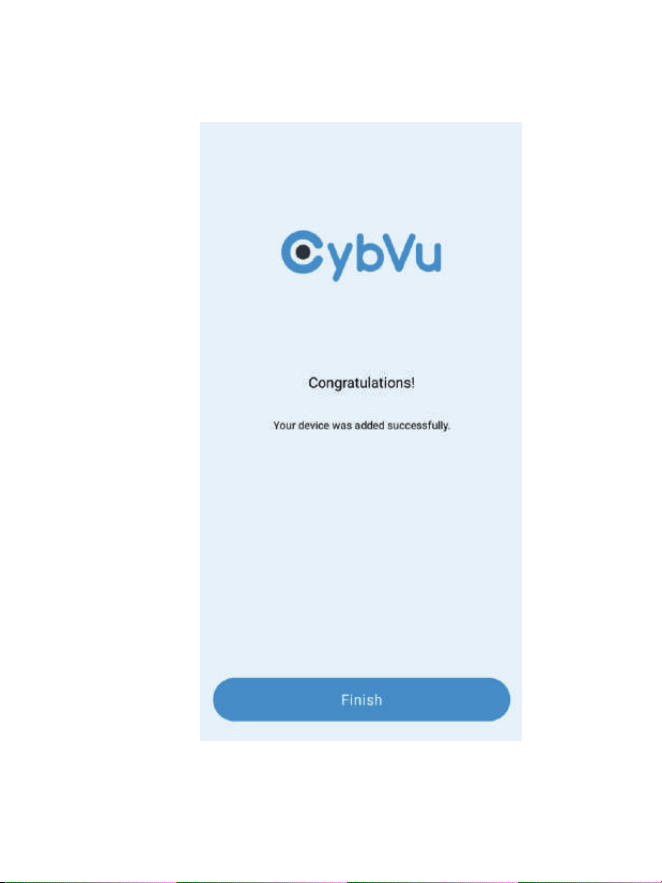
Jump to the "Add Successful" page and click "Finish" to enter the APP's
home page.
20
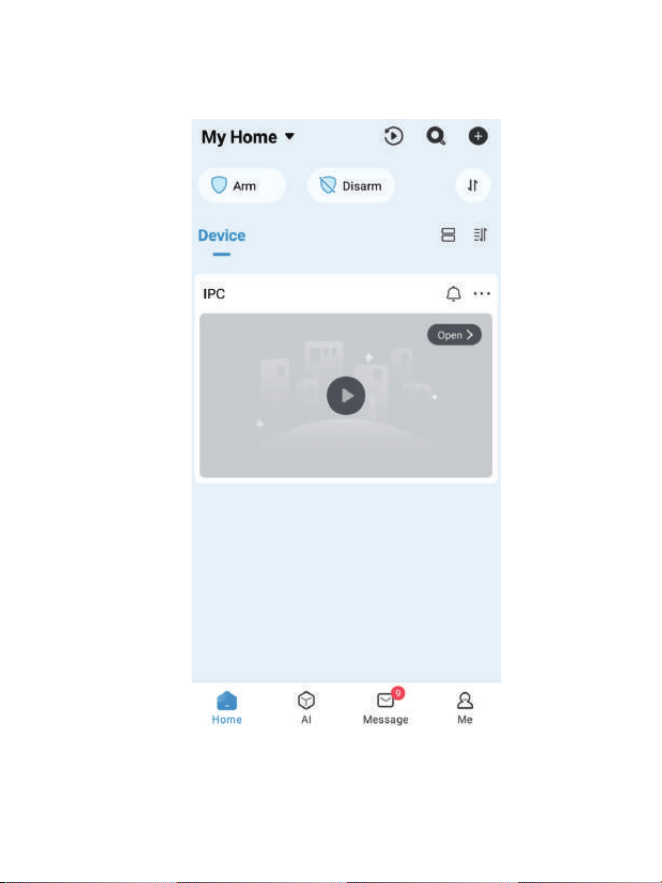
Enter the home page of the APP to view the IPCs that have been
successfully added.

21
This device contains licence-exempt transmitter(s)/receiver(s) that comply with Part 15 of the FCC
Rules. Operation is subject to the following two conditions:
This equipment complies with FCC radiation exposure limits set forth for an uncontrolled
environment. This equipment should be installed and operated with a minimum distance of 20cm
between the radiator and your body.This transmitter must not be co-located or operating in
conjunction with any other antenna or transmitter.
(1) This device may not cause interference.
(2) This device must accept any interference, including interference that may cause undesired
operation of the device.
Caution: The user is cautioned that changes or modifications not expressly approved by the party
responsible for compliance could void the user's authority to operate the equipment.
NOTE: This equipment has been tested and found to comply with the limits for a Class B digital
device, pursuant to Part 15 of the FCC Rules. These limits are designed to provide reasonable
protection against harmful interference in a residential installation. This equipment generates, uses
and can radiate radio frequency energy and, if not installed and used in accordance with the
instructions, may cause harmful interference to radio communications. However, there is no
guarantee that interference will not occur in a particular installation.
If this equipment does cause harmful interference to radio or television reception, which can be
determined by turning the equipment off and on, the user is encouraged to try to correct the
interference by one or more of the following measures:
-- Reorient or relocate the receiving antenna.
-- Increase the separation between the equipment and receiver.
-- Connect the equipment into an outlet on a circuit different from that to which the receiver is
connected.
-- Consult the dealer or an experienced radio/TV technician for help.
Compliance Statement
FCC Radiation Exposure Statement:
22
SmartCam View declares that this device is in compliance with the essential requirements and
other relevant provision of Directive ETSI EN 300 328,ETSI EN 301 511,ETSI EN 301 908-1,ETSI EN
301 908-2,ETSI TS 134 121-1 ,ETSI EN 301 908-13,ETSI TS 136 521-1,EN IEC 62311,EN 50665,ETSI EN
301 489-1,ETSI EN 301 489-17,ETSI EN 301 489-52,EN 55032,EN 55035,EN IEC 61000-3-2,EN
61000-3-3,EN IEC 62368-1.
Simplified EU Declaration of Conformity
This marking indicates that this product should not be disposed with other household wastes
throughout the EU. To prevent possible harm to the environment or human health from
uncontrolled waste disposal, recycle it responsibly to promote the sustainable reuse of material
resources. To return your used device, please use the return and collection systems or contact the
retailer where the product was purchased. They can take this product for environment safe
recycling.
Correct Disposal of This Product
Please recycle this product responsibly to promote the sustainable reuse of material resources
and avoid potential harm to the environment.
Correct Disposal of This Product