Charge Air Cooler (CAC)
Boost Leak Tester
User Manual
V20241016
Read Carefully Before Use
Keep for Future Reference

Disclaimer
Read this disclaimer completely and carefully before proceeding with the rest of the manual content.
1.
As-Is
This Orion Motor Tech product is sold 'as is' and without any express or implied warranties,
including but not limited to the implied warranties of merchantability and fitness for a
particular purpose.
2.
Product Modications
Any modications or alterations to Orion Motor Tech products void any warranties and may
result in damage or injury. Orion Motor Tech shall not be liable for any damages resulting
from such modications or alterations.
3.
Compliance with Laws
Customers shall be liable for ensuring that the use of Orion Motor Tech products complies
with all applicable laws and regulations in their respective jurisdictions. Orion Motor Tech
assumes no responsibility for any violations of laws or regulations resulting from the use of
Orion Motor Tech products.
4.
Correct Use
Always use Orion Motor Tech products only as directed in the accompanying manuals.
Failure to follow instructions may result in injury or damage.
Always ensure the assembly, installation, operation, maintenance, or repair of Orion Motor
Tech products is carried out by a competent person.
Always make maintenance regularly throughout Orion Motor Tech products’ lifecycles; you
have the liability to keep the products operating as intended.
Always wear appropriate protective gear.
5.
Third-Party Products
Orion Motor Tech shall not be liable for any damages or losses resulting from the use of
third-party products in conjunction with Orion Motor Tech products. Customers shall refer to
the third-party's guidelines or/and warranties (if any) for any third-party products used.
6.
Limitation of Liability
Orion Motor Tech shall not be liable for any direct, indirect, punitive, incidental, special, or
consequential damages to property or life, whatsoever arising out of or connected with the
use or misuse of Orion Motor Tech products. In no event shall Orion Motor Tech’s liability
exceed the value of the products sold.
This disclaimer states the entire obligation of Orion Motor Tech with respect to Orion Motor Tech
products. If any part of this disclaimer is determined to be void, invalid, unenforceable, or illegal,
including but not limited to the warranty disclaimers, liability disclaimers, and liability limitations
set forth above, the invalid or unenforceable provision will be deemed superseded by a valid
and enforceable provision that most closely matches the intent of the original provision and the
remainder of the agreement shall remain in full force and eect.

3
Safety Information
• The instructions provided herein are only for general information.
• ALWAYS perform all repairs in full compliance with your vehicle’s service manual. Failure to do
so may result in vehicle failure, serious property damage, and severe personal injury.
• DO NOT allow use by children, persons unfamiliar with this product and its compatible vehicle
systems, or persons whose mental or physical condition precludes safe use.
• DO NOT use while under the inuence of alcohol, drugs, or any medication that negatively
aects your judgment or reexes. Keep children and bystanders away during use.
• Keep your work site clean and well-lit. Cluttered and dark work areas invite accidents.
• ALWAYS use personal protective equipment (PPE) suitable for your task. ALWAYS wear ANSI-
approved eye and hand protection while using this product. Nonslip footwear is also highly
recommended. Other protective equipment for your ears, head, and body may be necessary,
depending on your work and environment.
• Dress properly for automotive servicing. DO NOT wear loose clothing or jewelry and keep hair,
clothing, gloves, hoses, and tools away from any moving parts during use.
• ALWAYS know and understand the specic safety warnings and instructions for your machinery
before using this kit. Use the correct uids, pressures, etc. for your machinery. Make sure the
machinery is fully supported and parked before beginning any work. Take care to NEVER touch
any heated surface with exposed skin.
• ALWAYS release the pressure from the gauge before disconnecting the quick-release coupling.
• Before servicing your machinery, turn o its engine and refer to its manufacturer's service and
repair manual for instructions on how to safely secure the machinery in place.
• In case of an accident or injury, have a rst aid kit and a communication device (e.g., a phone)
readily available. Know the location of emergency medical facilities.
• Maintain this product. Check for misalignment, binding, wear, or other damage before use. If
any damage is detected, repair or replace the problematic components before further use. In
a large shop, mark such tools using the correct pressures, etc. for your machinery. Make sure
the machinery is fully supported and parked before beginning any work.
• ALWAYS wait till the engine and turbo have cooled to ambient temperature BEFORE tting the
billet end cap.
• ALWAYS follow the protocols for using a workshop airline or other sources of compressed air.
• Machinery repair is inherently dangerous. This manual and the separate machinery service
manual cannot cover all possible situations. ALWAYS exercise discretion and good judgment.
Seek training if needed.
4
Specications
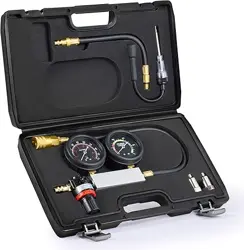
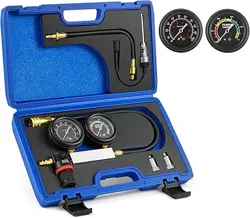
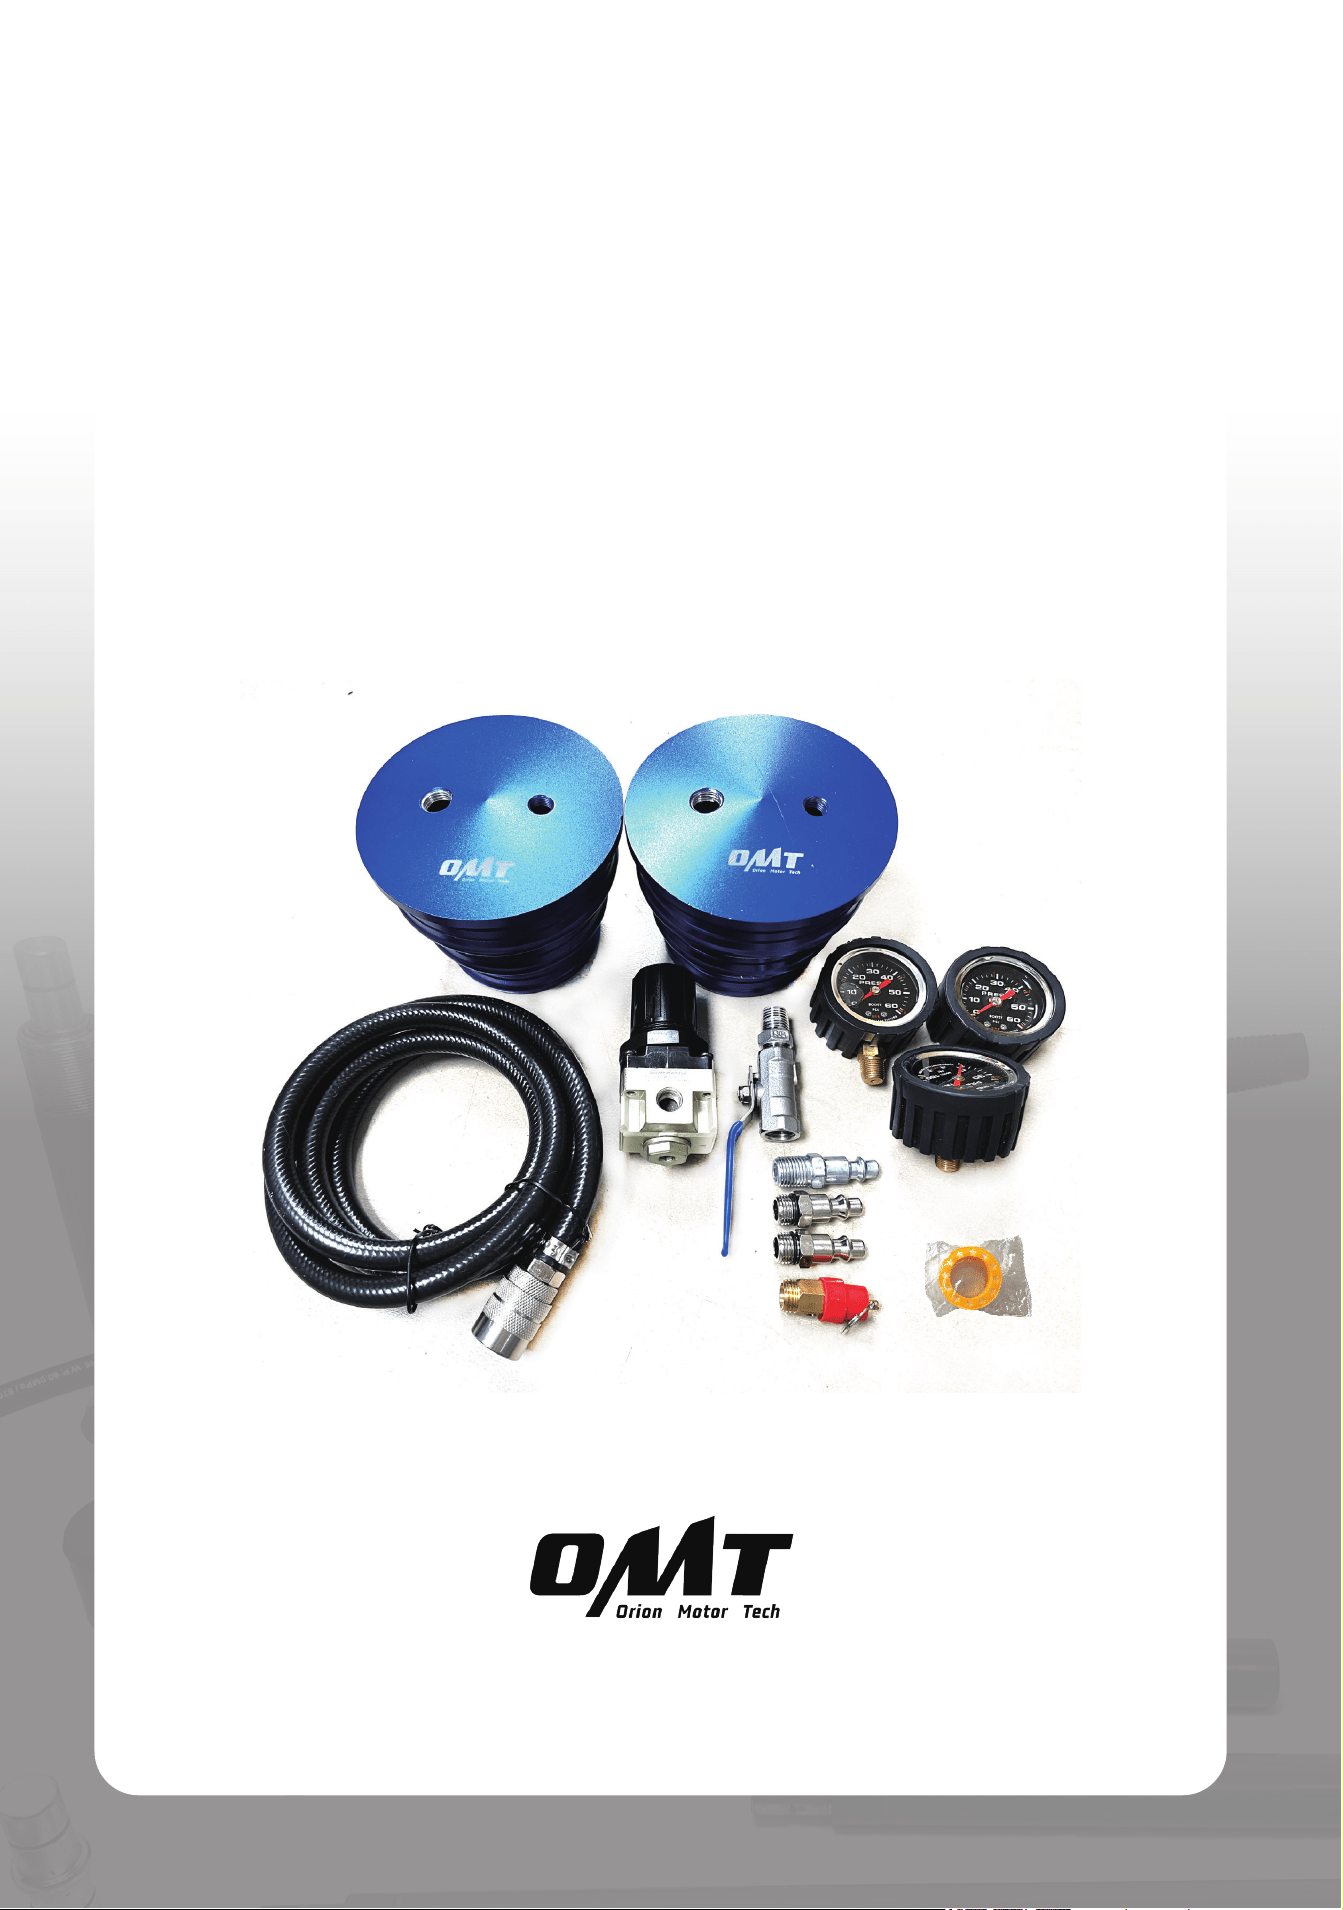
Package List
Max. Pressure
Pressure Gauge
150 psi 10.34 Bar
Boost Gauge
60 psi 4.14 Bar
Billet End Cap OD.
101.6, 88.93 & 76.2 (mm) 4, 3.5 & 3 (in.)
Billet End Cap Material
Aluminum Alloy
Extension Hose Length
1.5 m 59 in.
Item Name Qty.
A Billet End Caps 2
B Pressure Gauge 1
C Boost Gauges 2
D Pressure Regulator 1
E Ball Valve 1
A
B
C
D E
F
G
H
I
J
Item Name Qty.
F EU Standard Air Inlet 1
G US Standard Air Inlets 2
H Pressure Relief Valve 1
I Rubber Hose with Quick Coupler 1
J Thread Seal Tape 1
5
D
E
I
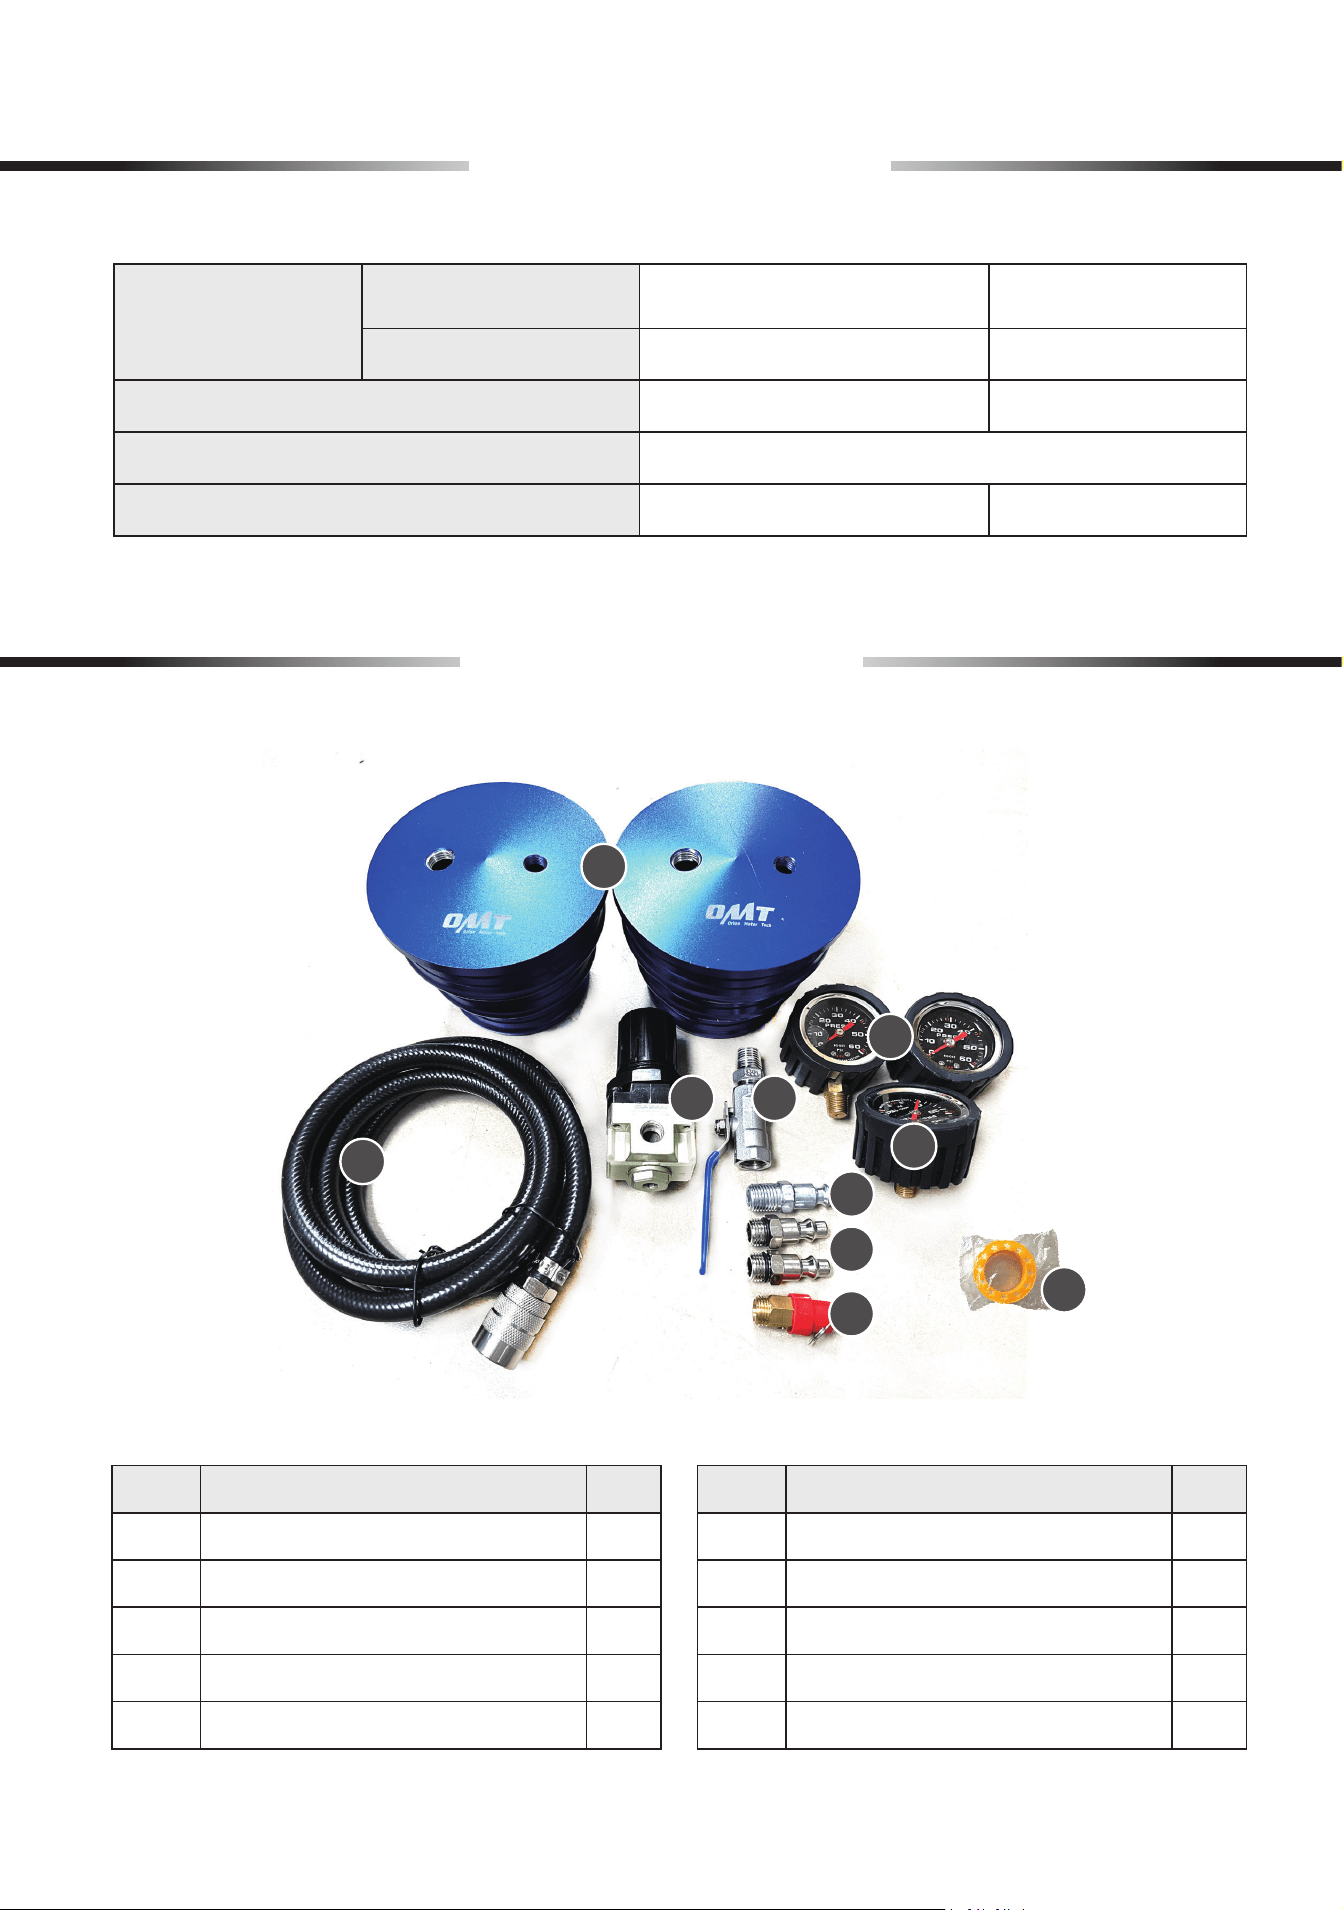
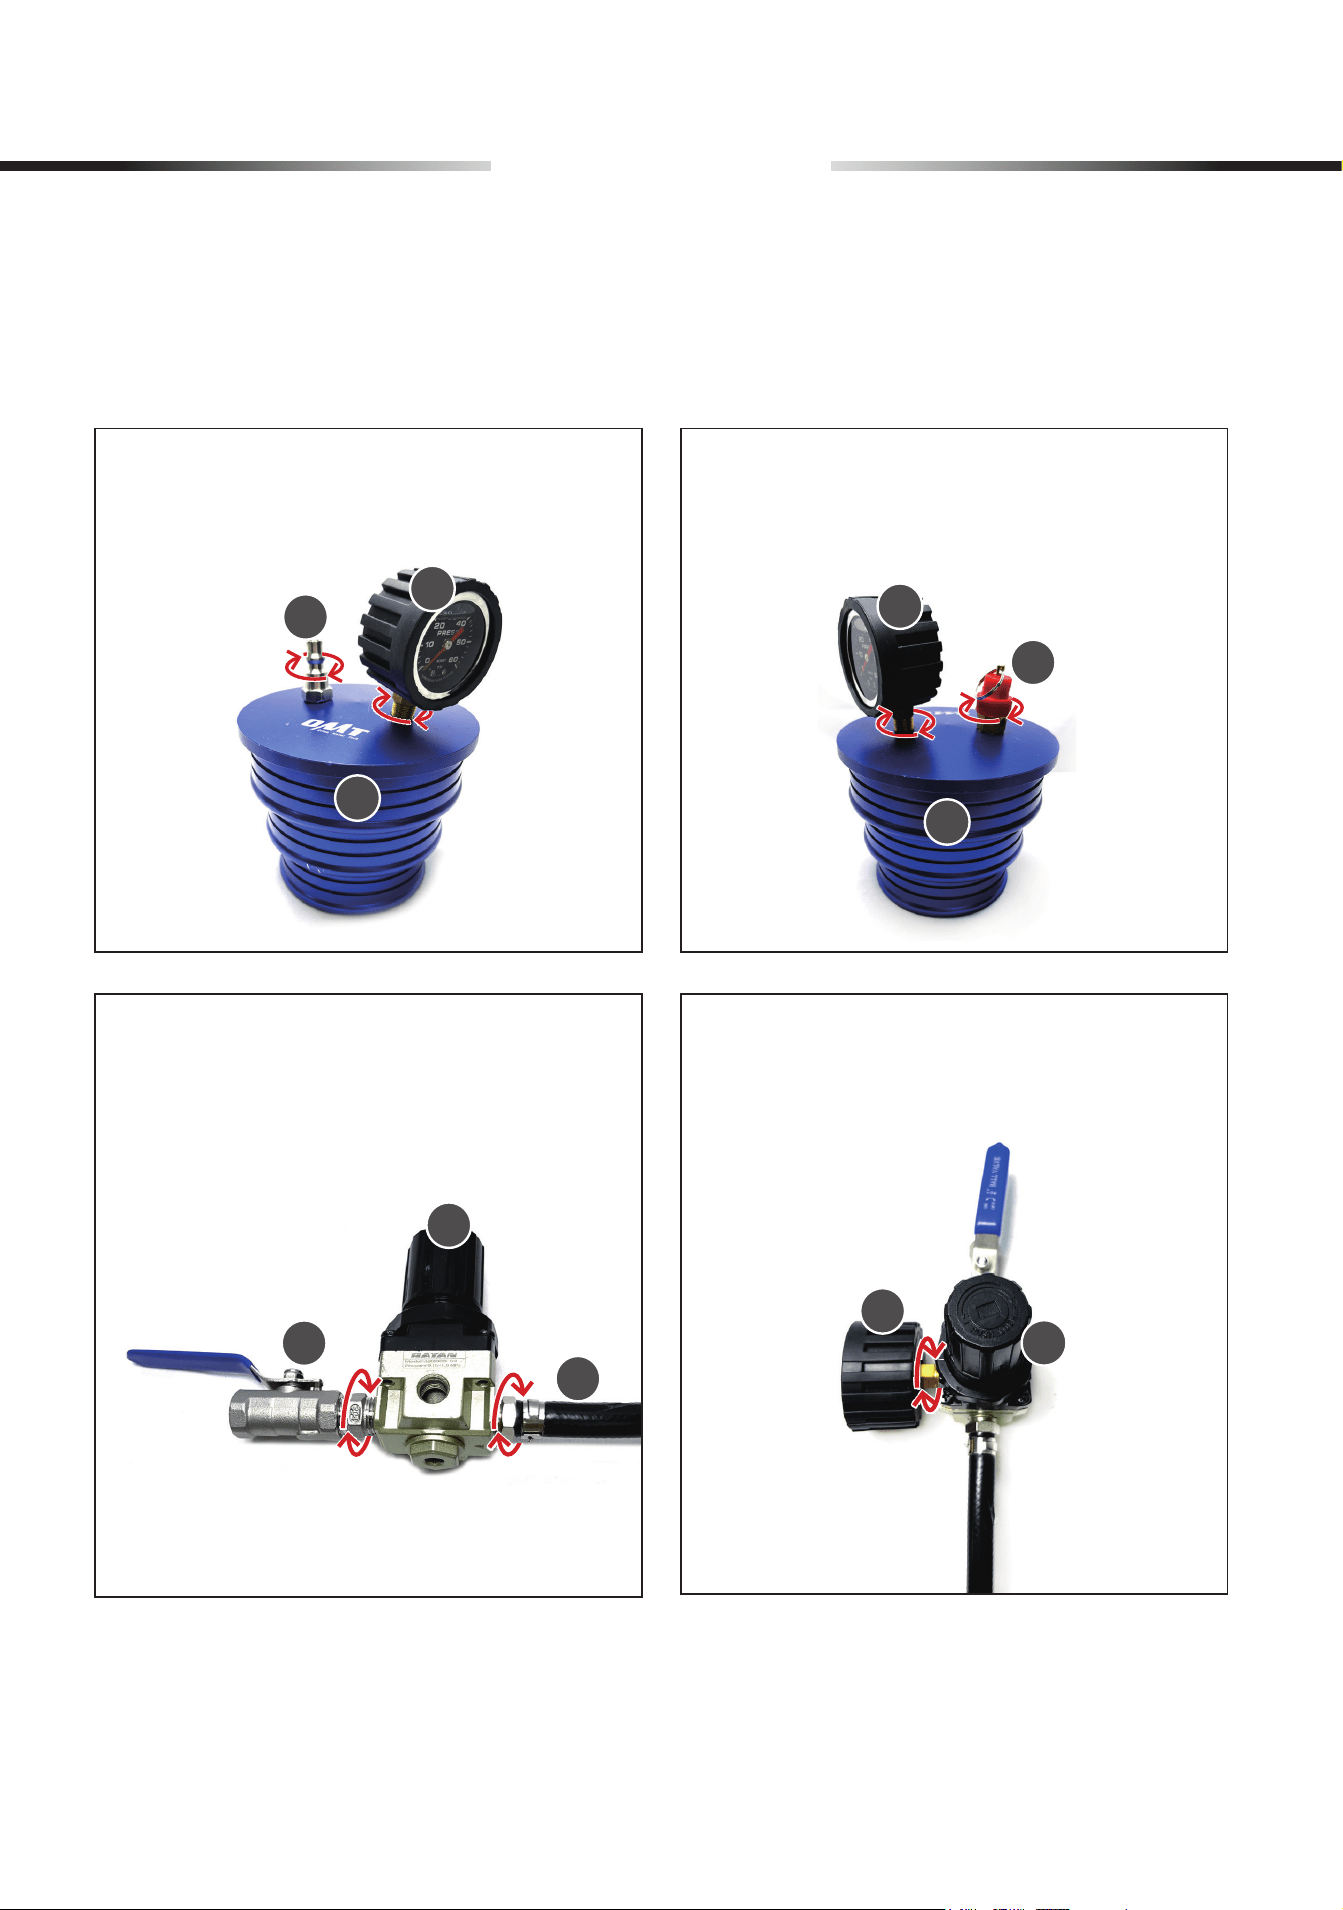
3. Connect the ball valve (E) and rubber hose
(I) to the pressure regulator (D).
B
D
Assembly
1. Screw the air inlet (G) and boost gauge (C)
clockwise onto the billet end cap (A).
2. Screw the pressure relief valve (H) and
boost gauge (C) clockwise onto the other
billet end cap (A).
4. Mount the pressure gauge (B) onto the
pressure regulator (D).
C
G
A
C
A
H
Note:
We recommend wrapping thread seal tape (J) around the threads of B, C, E, F, and G to
improve sealing and prevent leaks.
6
Operation
• Make sure your surroundings are safe. Avoid operating in crowded or unstable areas to reduce
the risk of accidents during operation.
• Use correct tools and personal protective equipment (PPE) before any operation. Be extremely
careful with possible pinching points, moving parts, or parts that may suddenly spring out.
• Ensuretheworkareaiscleanandclearofanyclutterordirtthatmayaectoperations.
• For optimal safety, we recommend you take training before using these tools. Serious injury
could happen due to a lack of training.
1. Turn the engine o and wait till it has cooled to room temperature.
2. Locate a test point where it is easily accessible to attach billet end caps.
3. Fit the billet end caps (A) into the tubes to be checked.
•
Before inserting billet end caps into the inlet or outlet of the charge air cooler, ensure that
both the inlet and outlet are completely dry and free of any debris.
•
It is recommended to use a clamp to secure billet end caps, to prevent them from
accidentally popping out.
4. Before connecting the pressure regulator assembly, ensure the regulator knob is fully closed
to zero and the lever on the gauge is turned to its o position.
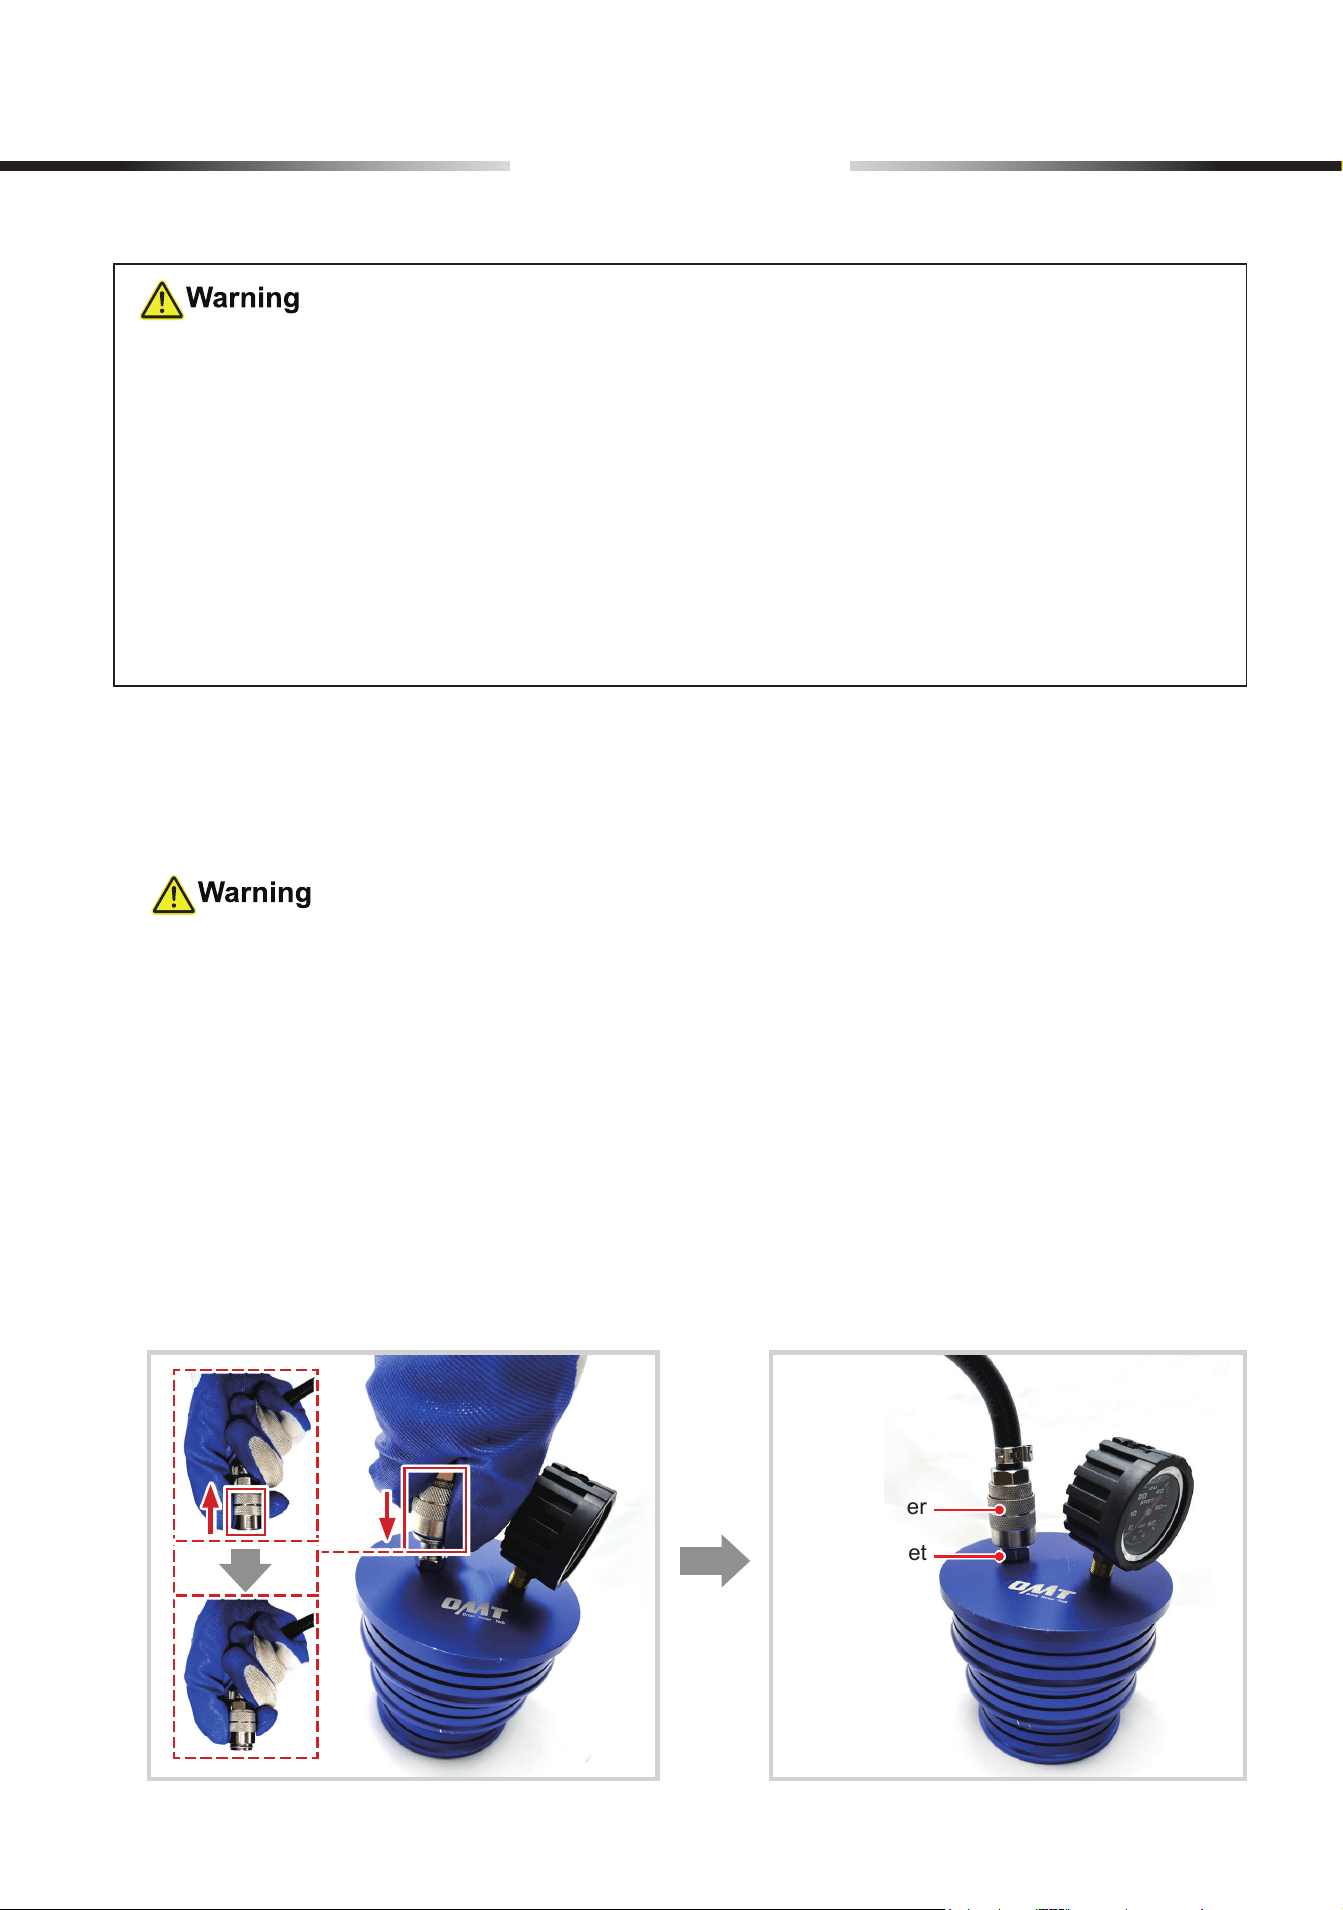
5. Connect the pressure regulator assembly to the billet end cap (A) with the air inlet.
a. Retract the sleeve on the rubber hose’s quick coupler.
b. Push downward and release the sleeves to connect the quick coupler to the air inlet (G).
Quick Coupler
Air Inlet
aa
bb
7
Operation
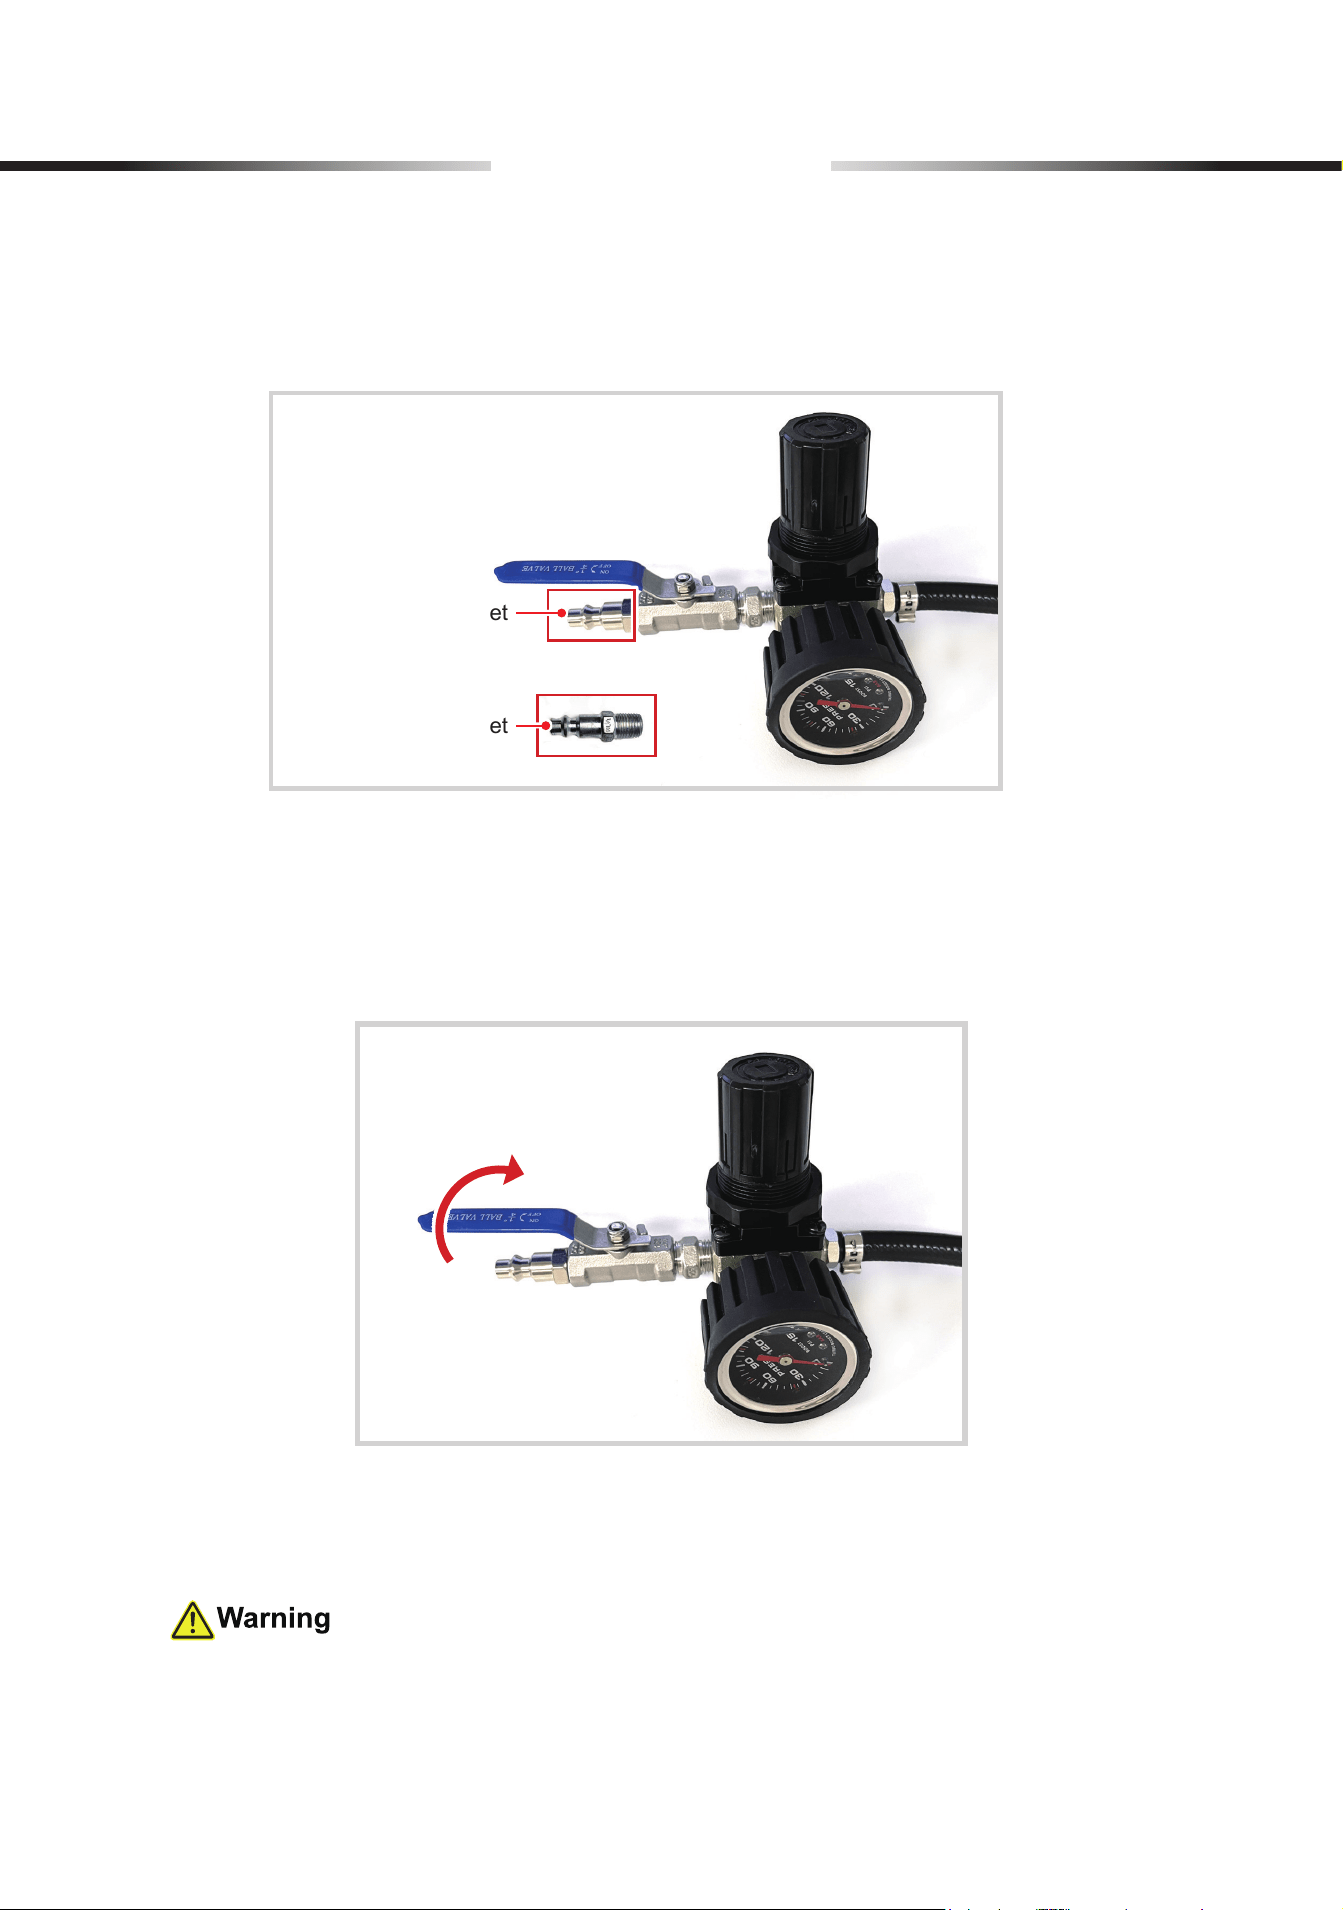
6. Connect the pressure regulator assembly to your workshop airline or other compressed air
outlet. Use the provided US or EU standard air inlet as needed.
7. Slowly pressurize to test.
a. Slowly turn open the ball valve lever.
b. Pull up the knob and rotate it to set the desired pressure as stated in your vehicle’s
specications.
It is recommended to set 30 psi air pressure.
DO NOT
set over 30 psi, or the pressure
relief valve (H) should release the excess pressure.
US standard Air Inlet
EU standard Air Inlet
or
8
Operation
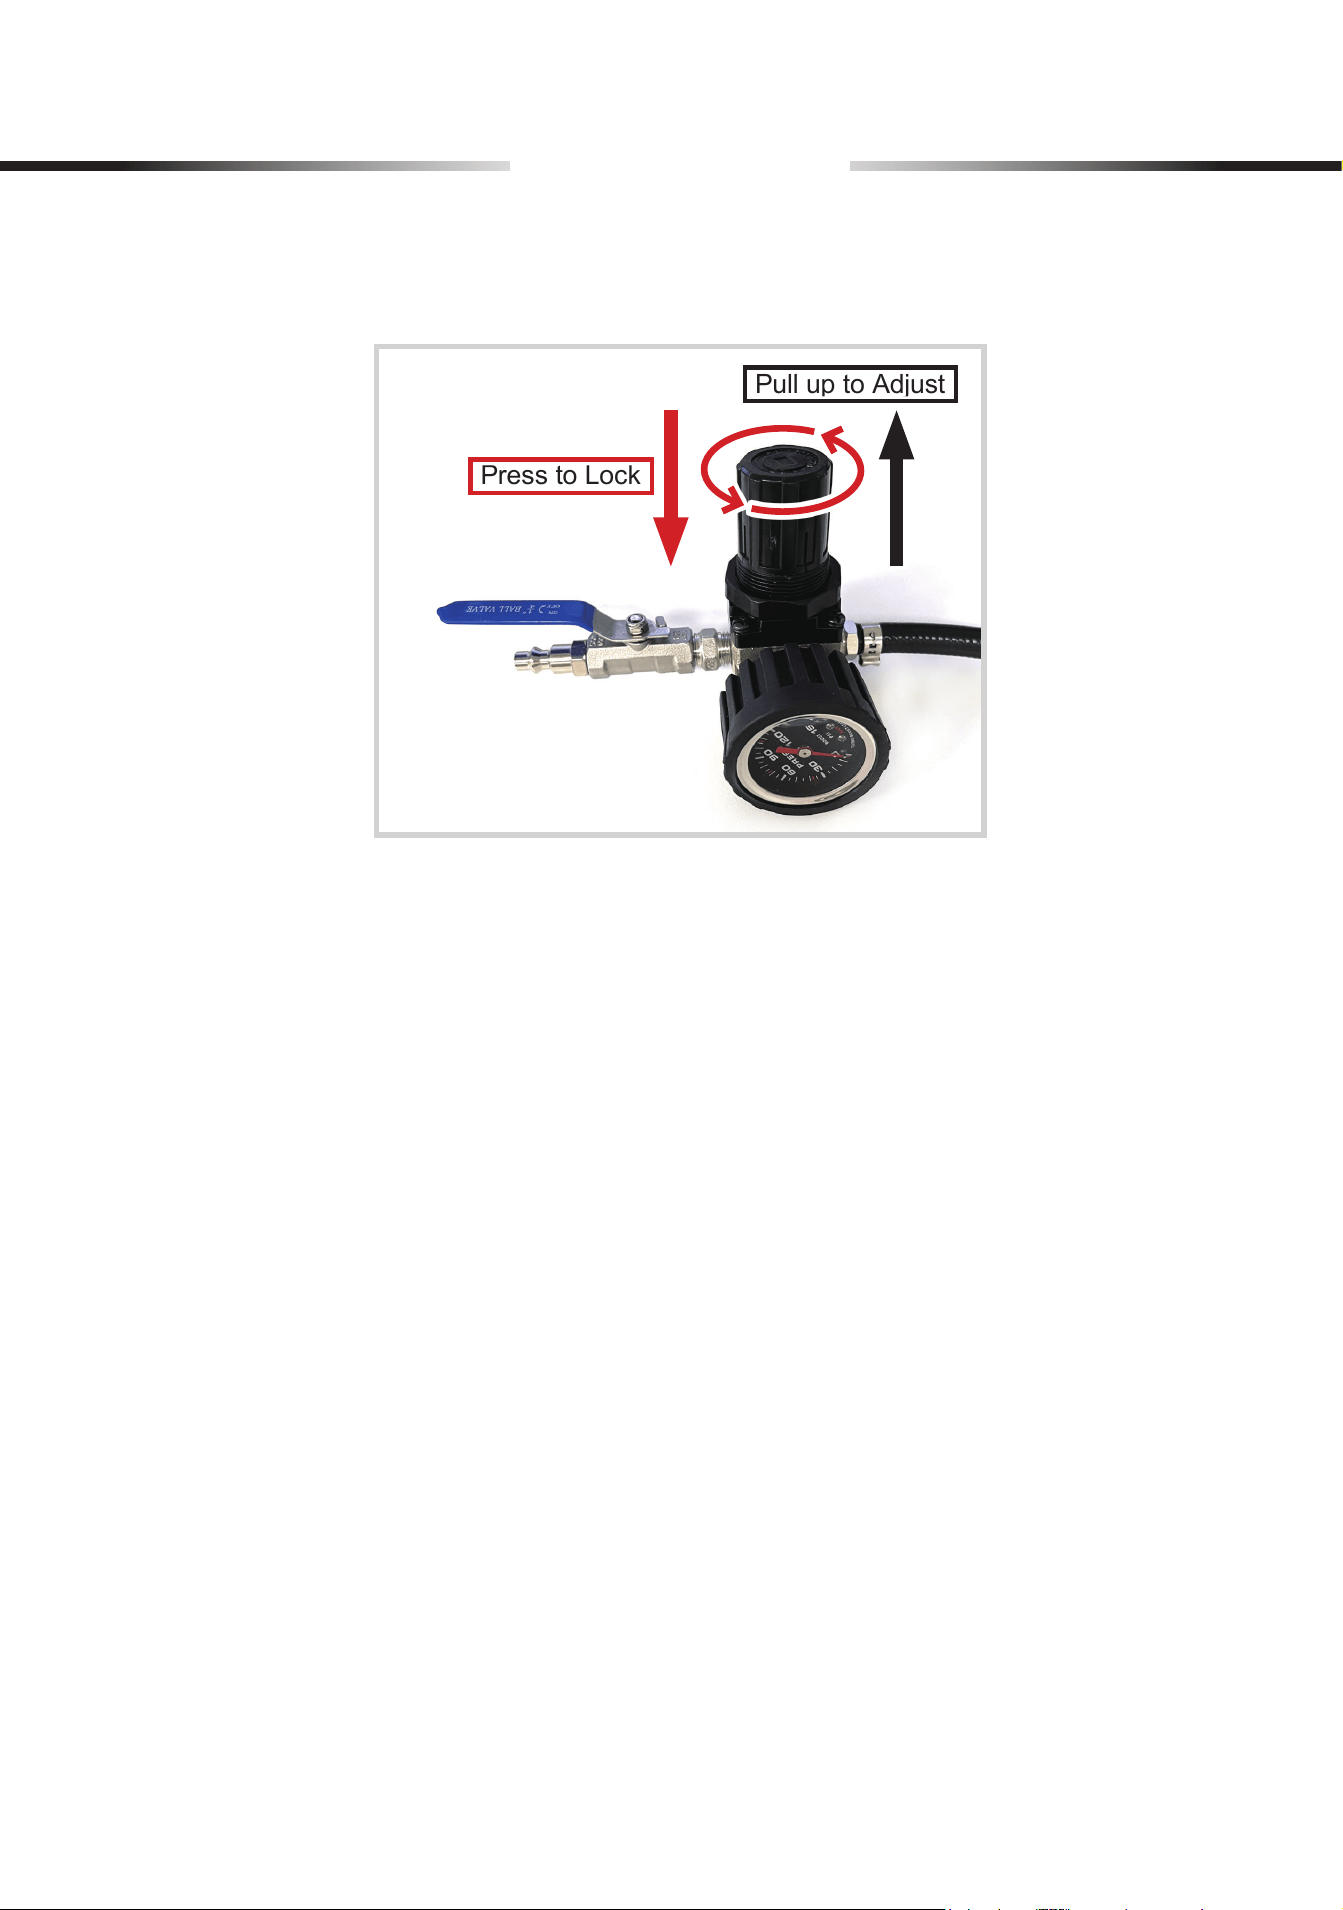
c. Press to lock the knob when the desired pressure has been reached.
Pull up to Adjust
Press to Lock
8. Carefully listen to air escaping throughout the charge air cooler. If no audible leaks are
detected, apply soapy water to joints or connections. A leak will cause the soapy water to
bubble. If there are any bubbles, follow the steps for further tests:
a. Use a marker or tape to mark the exact location of the leak.
b. Inspect clamps, hoses, and joints around the marked area. Ensure that all connections
are securely tightened and free from damage.
c. Apply appropriate sealants or replace any damaged parts as necessary.
d. After repairs or adjustments, repeat the pressure test to conrm that the leak has been
successfully sealed.
9. If no bubble has been formed and the reading of the pressure gauge (B) remains stable for
one minute, the system is functioning properly. You can then disassemble the whole test kit:
a. Pull unlock and turn the knob to its closed position.
b. Remove the workshop airline from the pressure regulator assembly.
c. Disconnect the rubber hose from the billet end cap.
d. Remove billet end caps from your vehicle and stow everything away.

9
Maintenance
• Periodically check this product for any wear or damage.Replace any problematic items
before further use.
• If this product is not to be used for an extended period of time, place all items in the provided
case before storing everything in a cool dry location inaccessible to children or pets, against
unauthorized use, and well protected from the elements.
• Clean this product using a dry brush or cloth after each use.If a damp cloth is necessary,
remember to dry completely after cleaning.
•
DO NOT
use harsh abrasives or caustic chemicals.
•
DO NOT
soak in
ANY
cleaninguid.
CLT-AL01-00
Rev. 16 Oct. 2024
Thank you for choosing our products! If you have any questions
or comments, contact us at
support@orionmotortech.com
and we'll resolve your issue ASAP!
For a .pdf copy of the latest version of these instructions, use the
appropriate app on your smartphone to scan the QR code to the
right.
Contact Us