

Parking Monitoring
Intelligent Hardwire Kit
User Manual
Scan the QR code for tutorial video

Contents
1. Safety Instructions................................................................................................................................. 1
2. Specifications......................................................................................................................................... 2
3. Installation..............................................................................................................................................3
4. Function Introduction............................................................................................................................ 7
1. Set the minimum safe voltage............................................................................................................... 7
2. Set the parking monitoring duration..................................................................................................... 8
3. Set the parking monitoring mode.......................................................................................................... 8

1
1. Safety Instructions
Please read all safety precautions and operating instructions carefully before
using this product to ensure proper and safe usage.
It is recommended to have the installation performed by a qualified technician
or professional installation service. The manufacturer shall not be held
responsible for any damage to the vehicle’s power system, battery, or interior
caused by improper installation. Losses caused by incorrect installation rather
than product quality issues are not covered by the manufacturer.
The performance of this product may be affected by the condition of the
vehicle’s power supply, battery, or the main device. The manufacturer is not
responsible for any malfunction of this product resulting from such external
factors.
Please use this product in compliance with local laws and regulations.
2
2. Specifications
Name: Intelligent Hardwire Kit
Model: DC002
Power Input: Below DC 12V/2A
Power Output: DC 5V/3A
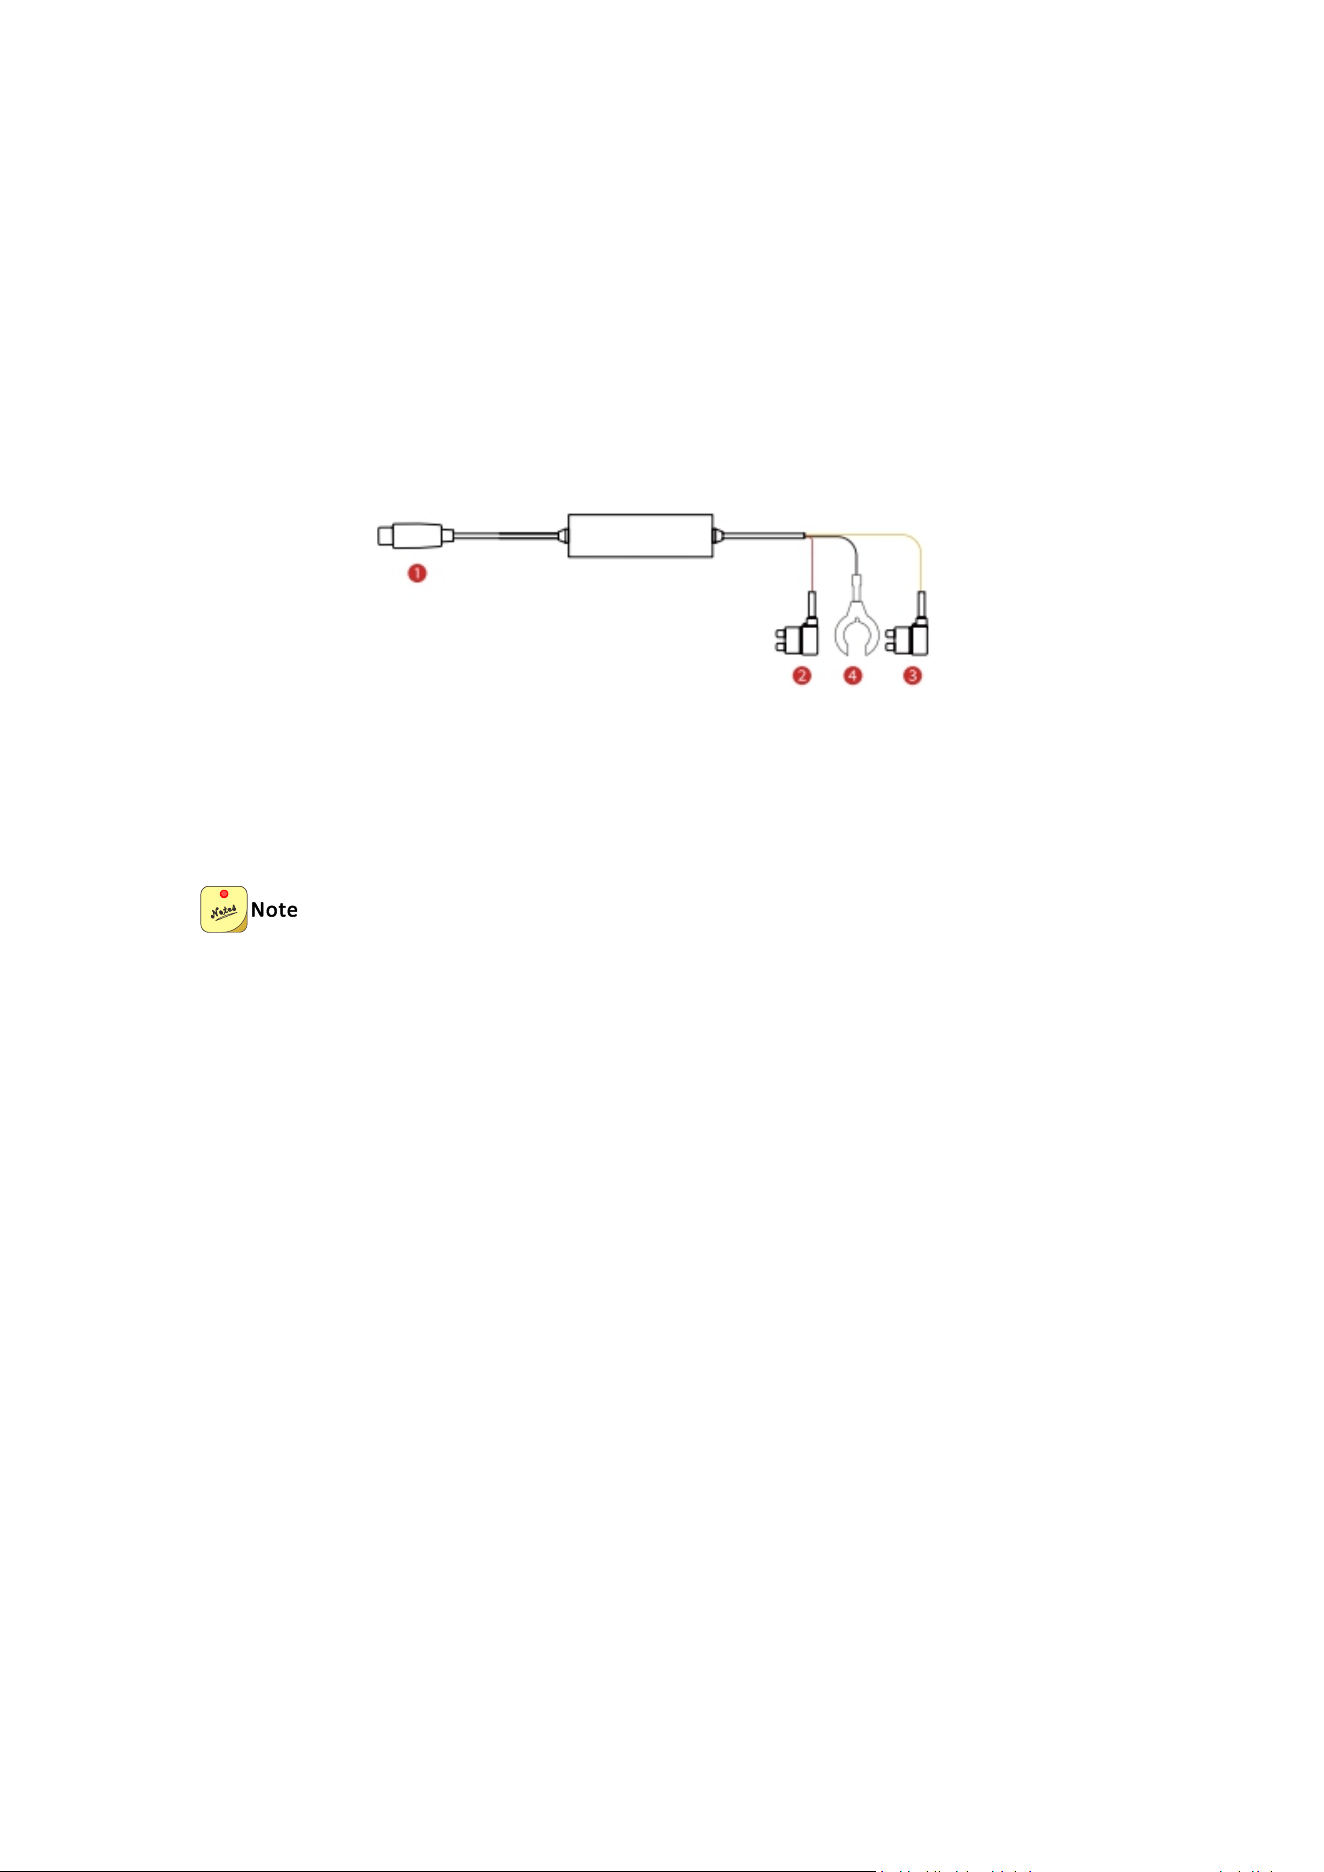
① Type-C connector
② Red ACC terminal
③ Yellow VCC terminal (+)
④ Black GND terminal (-)
The default low-voltage protection threshold of this parking hardwire kit is set to
12V.

3
Images of the product, accessories, and user interface in this manual are for
illustrative purposes only. Actual products and features may differ due to ongoing
improvements.
3. Installation
To avoid any vehicle damage caused by misoperation, it is recommended that
you install hardwire kits in professional automobile service centers.
A hardwire kit needs to be connected to the vehicle’s fuse box for installation.
Turn off the vehicle engine and ensure personal safety before performing the
installation.
When looking for the ACC fuse position in a fuse box, follow this principle in
general: The fuse position of non-critical automobile equipment can be used, but
electrical appliances must not be connected to any fuse position of critical
automobile equipment.
Non-critical automobile equipment includes the radio, power window,
automobile skylight, air conditioner, cigarette lighter, and loudspeaker. Critical
automobile equipment includes the fuel pump, windscreen wiper, generator, and
starter. Do not connect electrical appliances to any fuse position of critical
automobile equipment.
Scientific and reasonable power cable connection to the fuse is very practical. Do
not use a large current without scientific cable connection, which must be
strictly prohibited or such cable connection must be dismantled immediately.
1. Open the fuse box in the cab
Open the fuse box in the cab. The location of the fuse box varies with vehicle models.
In general, the fuse box is located at the lower left of the steering wheel and the left
interior cover, as shown in the following figure:
(Fuse box)
2. Measure the power supply in the vehicle
Use a multimeter to measure the power of the fuse box (12V DC output always

4
available after the vehicle engine is turned off) and the ACC interface (12V DC output
always unavailable after the vehicle engine is turned off, 12 V DC output available
after car ignition).
5
3. Remove the Original Vehicle Fuses
(1) Use tweezers to remove the constant power fuse from the fuse box. This will be
connected to the VCC wire of the hardwire kit.
(2) Use tweezers to remove the ACC (ignition-controlled) fuse. This will be
connected to the ACC wire of the hardwire kit.
When removing the original vehicle fuses, be sure to select a fuse labeled "5(A)".
Using fuses with other ratings may result in a short circuit risk.
4. Connect the terminals
(1) Connect the black ground wire to an unpainted metal bolt in the vehicle. If there
is no such ground point, you need to connect the wire inside the car fuse box;
(2) Connect the red wire (ACC) connector of the hardwire kit to the ACC interface in
the fuse box (12VDC power supply controlled by the car start);
(3) Connect the yellow wire (VCC) connector of the hardwire kit to the VCC interface
in the fuse box (this power supply is 12VDC and is always powered on and not
controlled by the ignition).
If the ACC and VCC terminals on the hardwire kit do not match the original fuse
slots on your vehicle, you can do the following:
To avoid damage to the hardwire kit caused by misoperation, it is recommended to
seek help from professionals for the following operations.
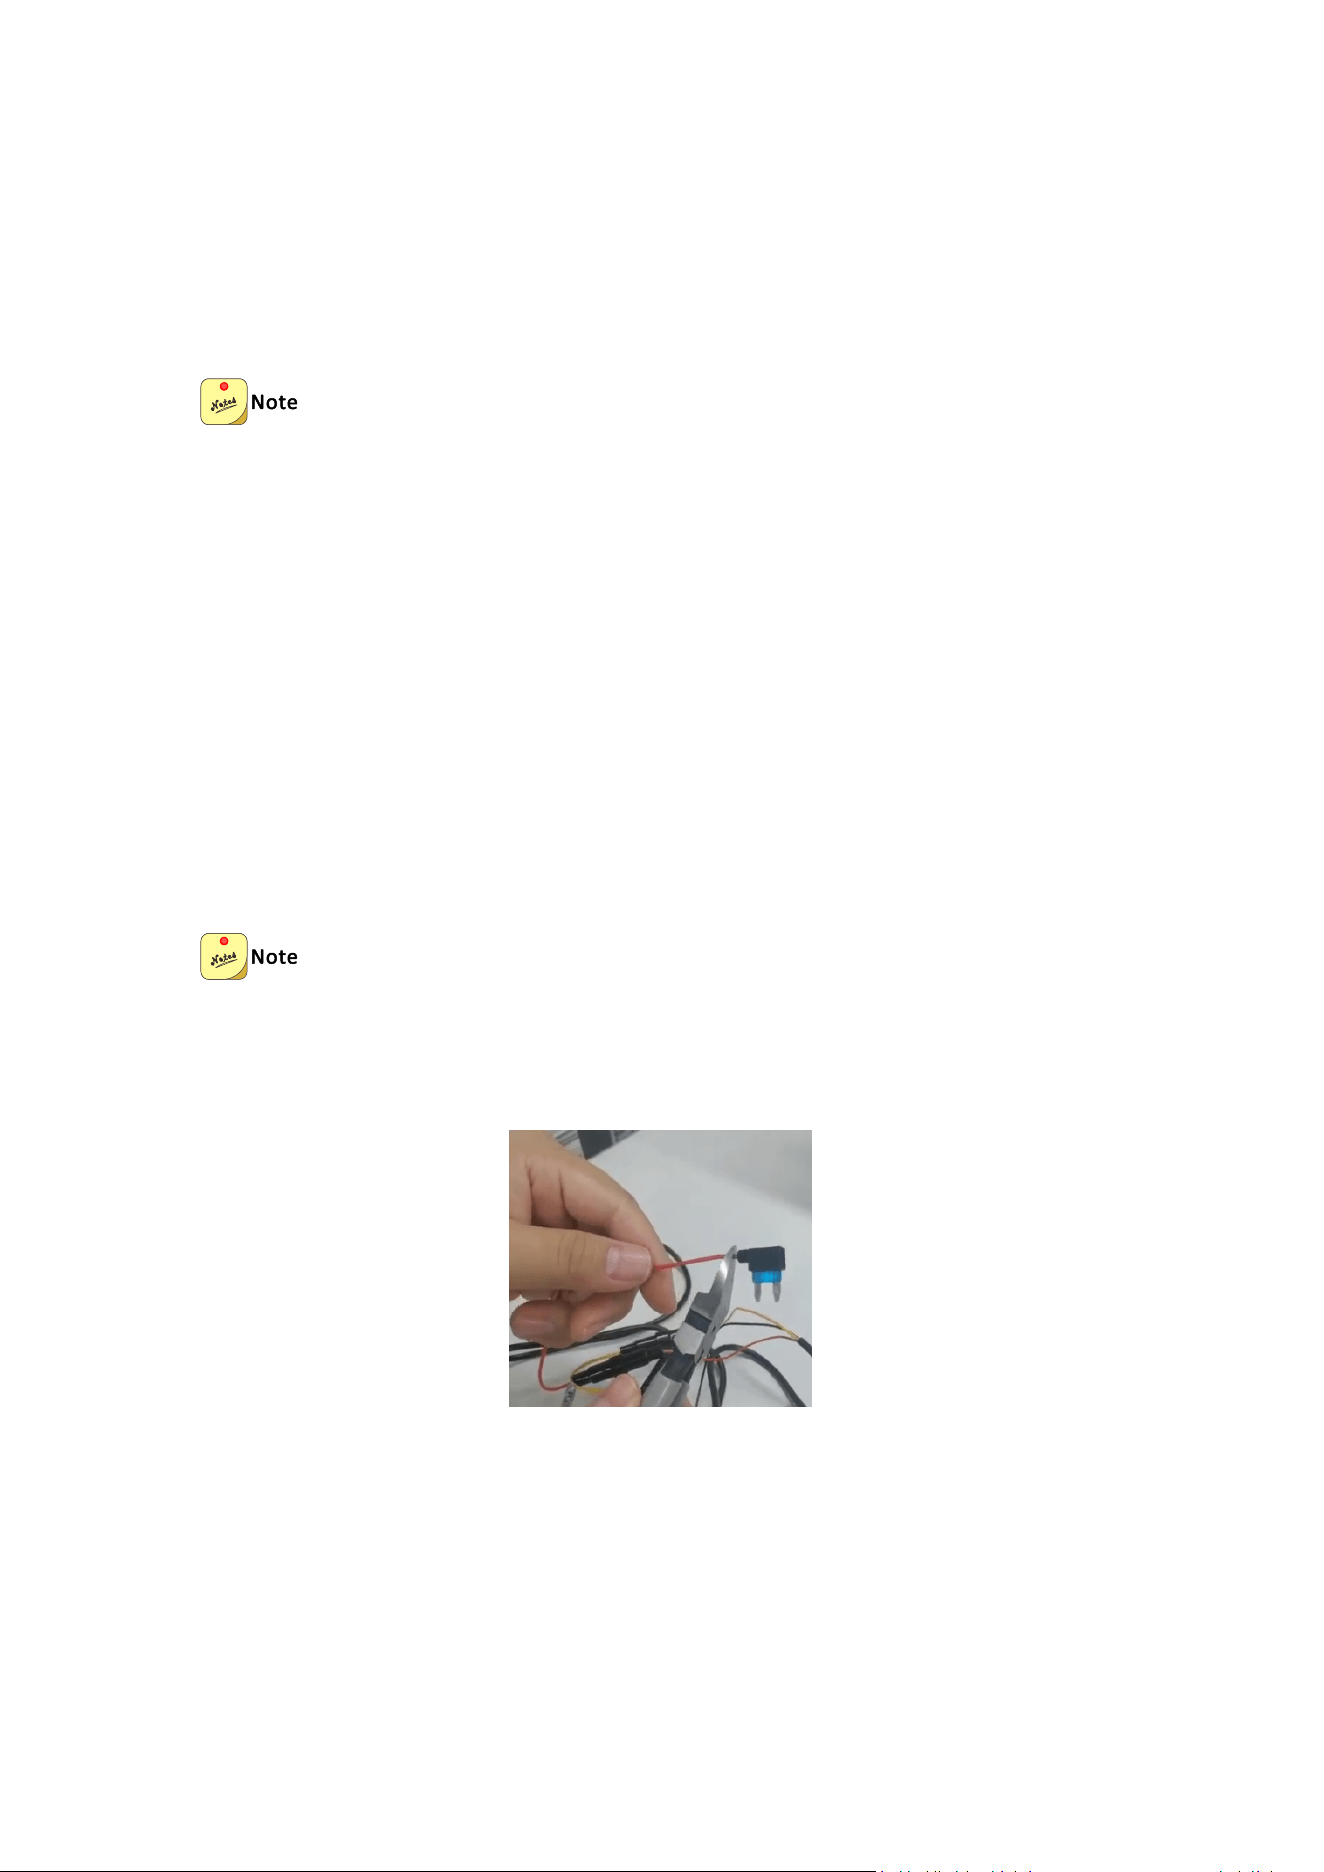
(1) Cut off the ACC and VCC terminals on the hardwire kit..
(2) Strip off the insulation of the ACC and VCC cables, keep the internal copper wire,
and twist the copper wire into a single piece with your fingers.
6
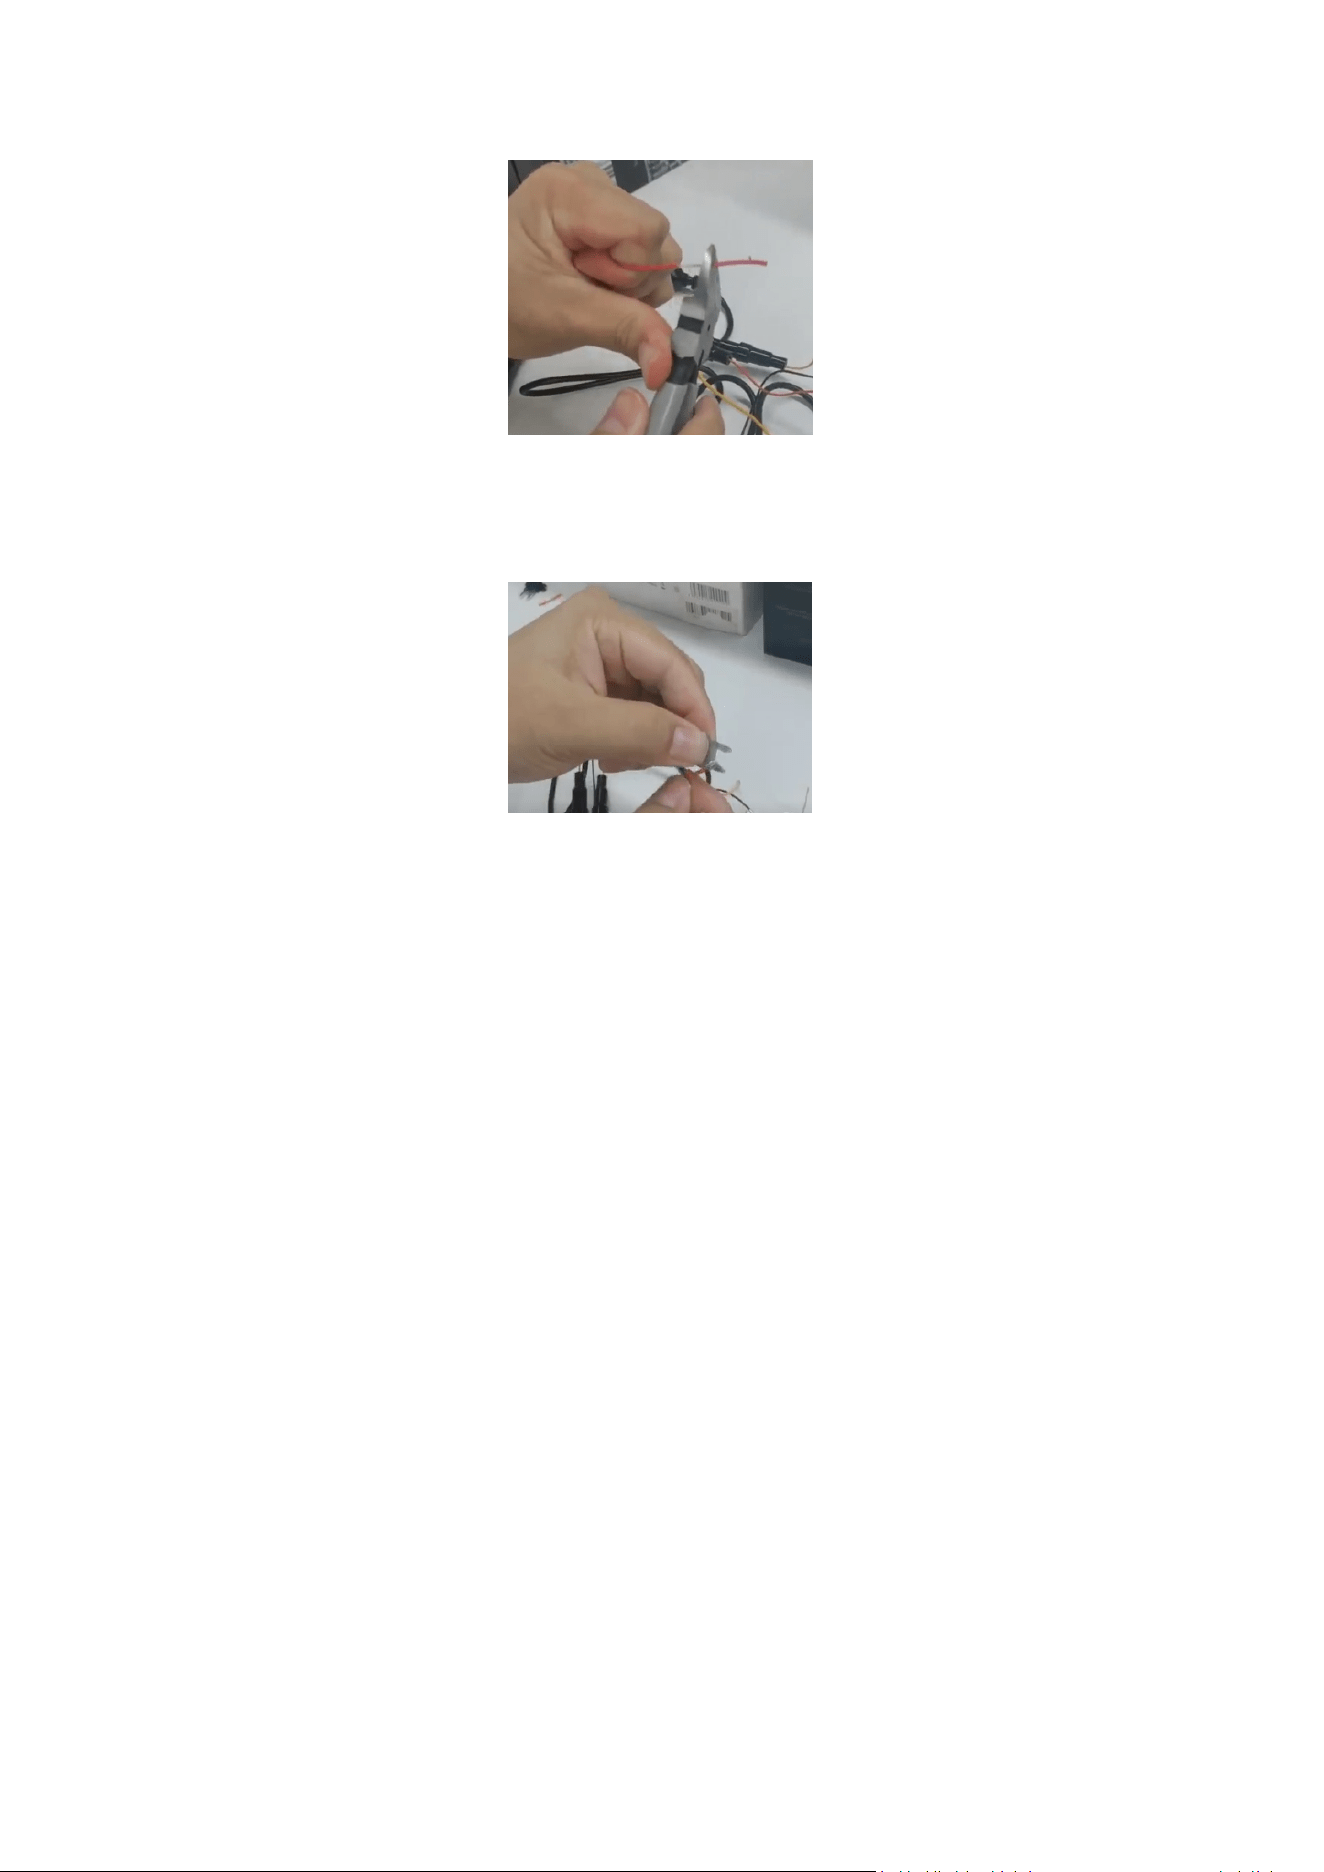
(3) Connect the VCC line (yellow) of the hardwire kit with the constant power fuse
(output voltage is 12V) just removed from the original car fuse box; connect the ACC
line (red) of the hardwire kit with the ACC fuse (ignition switch control) just removed
from the original car fuse box.
(4) Finally, insert the 12V normal power fuse and ACC power fuse back to the
corresponding fuse positions of the original car.
5. Connect the hardwire kit to the device for power supply
Insert the Type-C interface at the tail end of the hardwire kit into the power interface
of the device, and start the car. After the device is powered on, it will automatically
start up and play a startup prompt tone.
6. Adjust the installation angle of the device
After the device is started, connect to the device through the DDPAl app. Confirm the
fixed position of the device through the video on your mobile phone, Then adjust the
lens angle.
7. Lay out the cables of the device
Insert the power cord of the device into the interior of the top of the vehicle, and
lead the wire slowly to the fuse box. The extra cable can be fixed on the frame. After
cable layout, close the removed fuse box cover and interior cover.
7
4. Function Introduction
After the intelligent hardwire kit is connected to the automobile battery, the battery
can realize around-the-clock uninterrupted power supply to the dash cam, After the
dash cam is connected to the DDPAl app, the low-voltage protection value, parking
monitoring, duration, and parking monitoring mode can be set on the app, thus
realizing a safe and reliable parking monitoring solution.
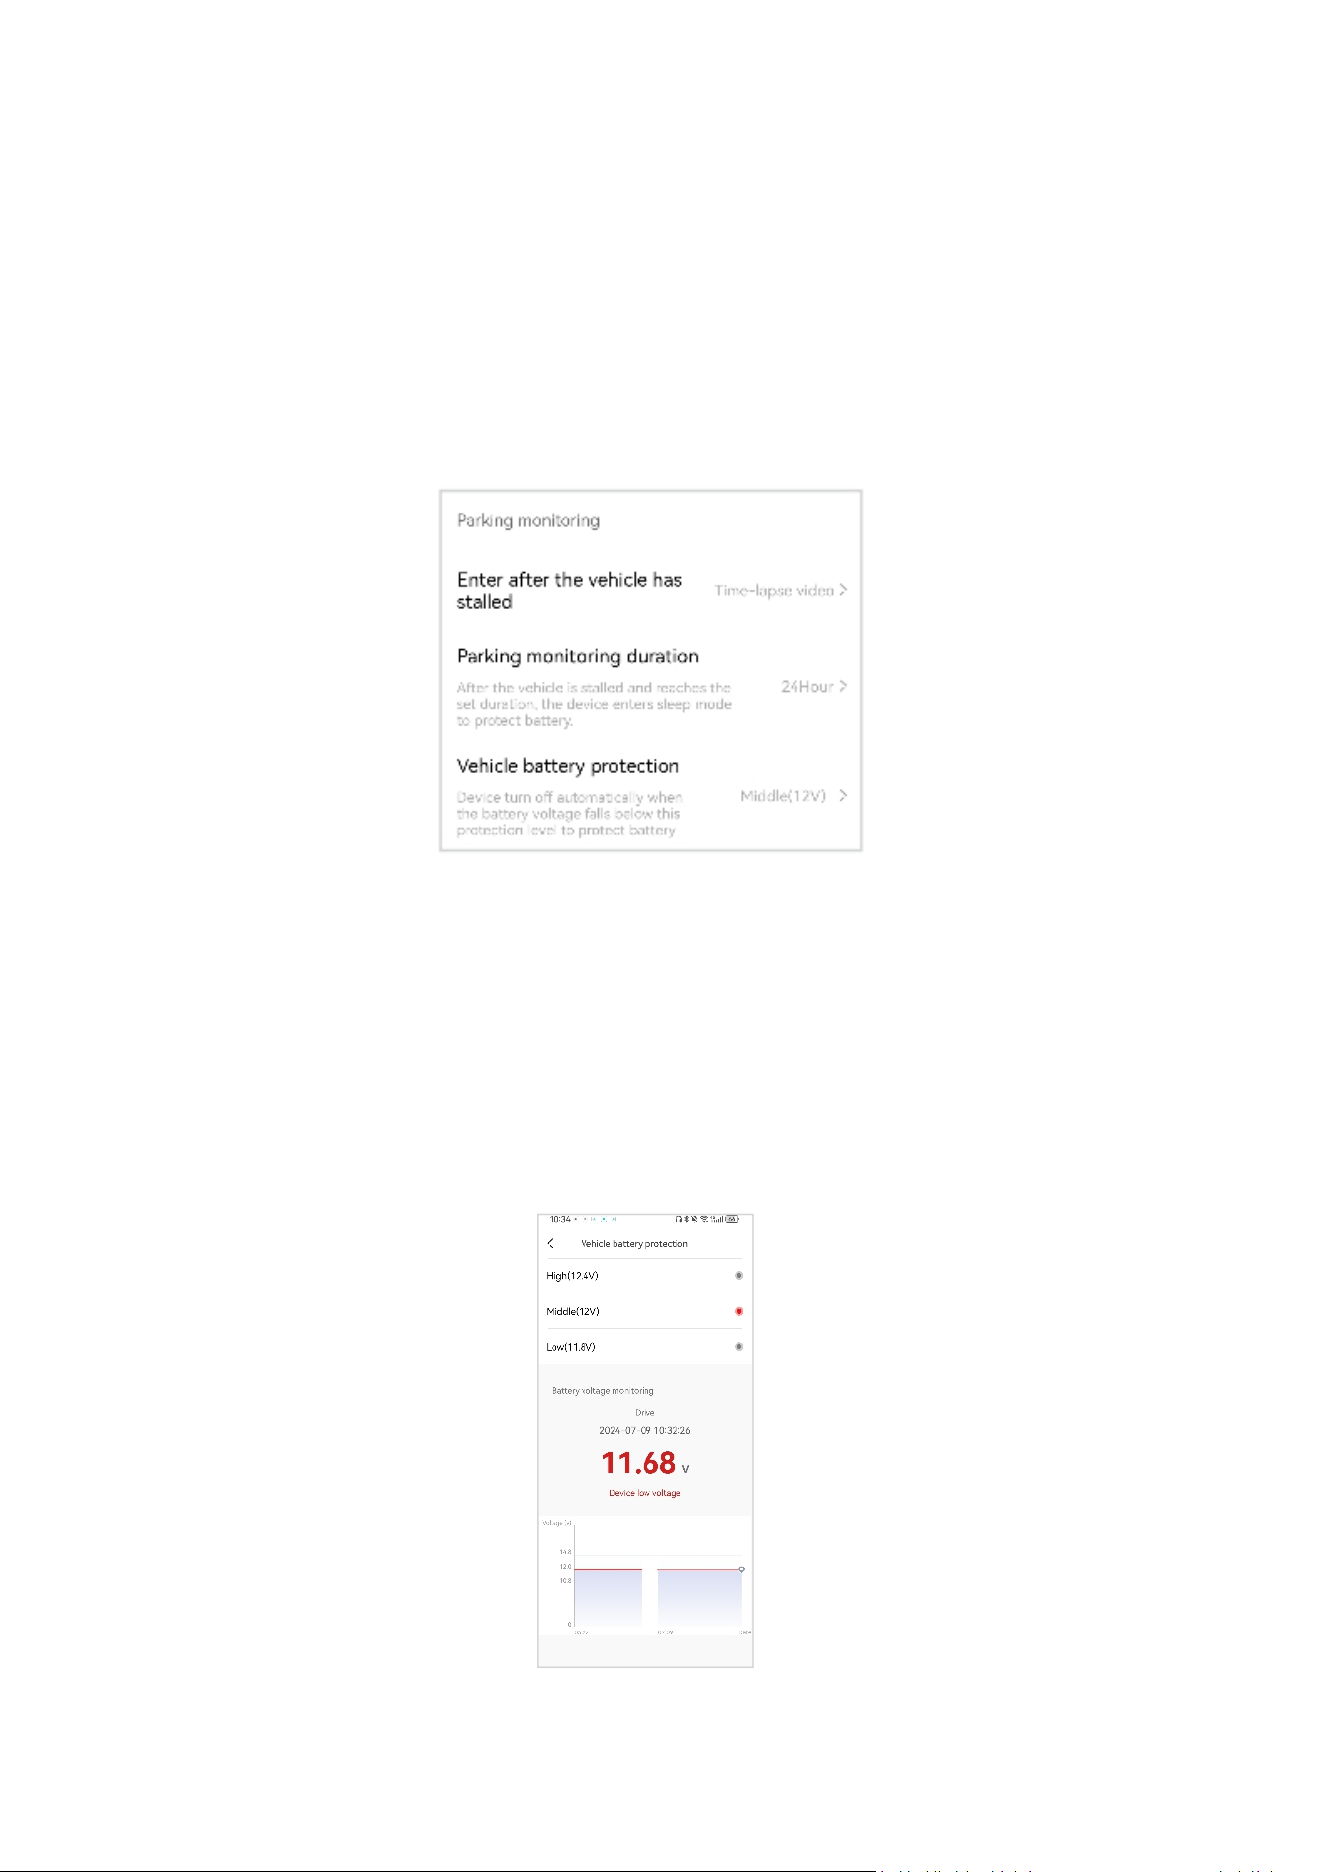
1. Set the minimum safe voltage
The intelligent hardwire kit adopts the self-developed IPS power management
technology. After the dash cam is connected to the DDPAl app, the low-voltage
protection value (12V by default] can be set on the app. When the battery voltage is
detected to be lower than the preset safe voltage, the dash cam will be automatically
powered off and shut down to avoid continuous power loss of the battery and
protect the vehicle battery. You can also view the battery voltage detected in real
time on the following interface:
8
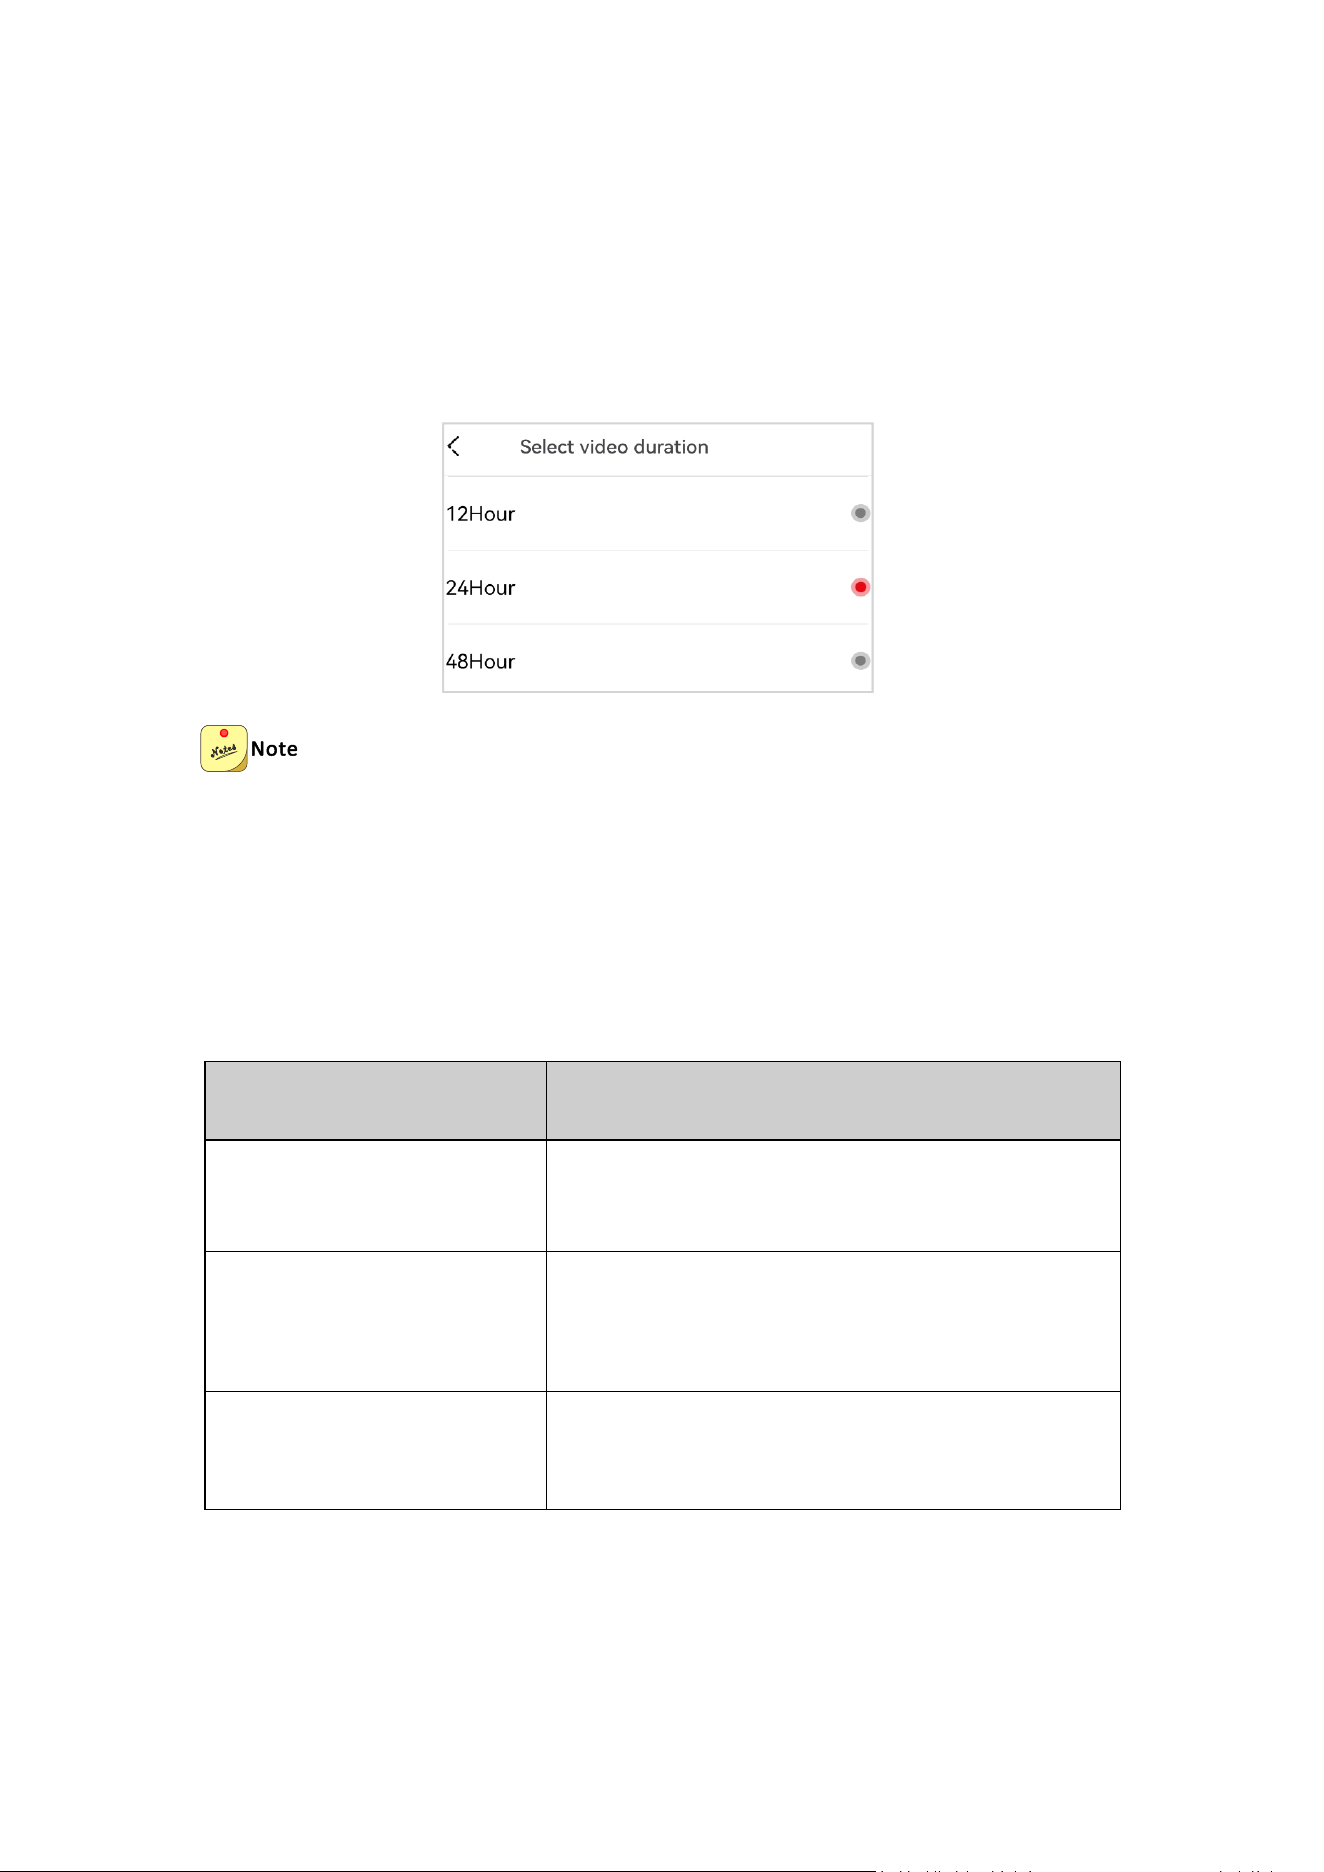
2. Set the parking monitoring duration
After the intelligent hardwire kit is connected to the automobile battery, the battery
can realize around-the-clock uninterrupted power is supply to the dash cam.
After the dash cam is connected to the DDPAl app, the parking monitoring duration
can be set on the app. When the vehicle is stalled and the set duration is reached,
the dash cam will enter sleep mode to protect the battery.
When setting this timing option, consider the monitoring duration in advance to
avoid the risk of battery power loss and the vehicle start-up failure.
3. Set the parking monitoring mode
After the dash cam is connected to the DDPAl app, different parking monitoring
modes can be set on the app, and a safe and reliable parking monitoring, solution
can be realized with the help of the time lapse video recording technology.
Mode
Description
Time-lapse video recording
It will significantly save the storage space of your
device, and the viewing speed will be accelerated.
Normal video recording
When the storage space for video recording is fully
occupied, it will be overwritten in a cyclical
manner.
Sleep
The device is in the sleep mode, and will wake up
in case of emergency.

9