
This manual contains important safety, performance and maintenance
information. Read the manual before taking your first ride on your
new bicycle, and keep the manual handy for future reference.
Electric
Bicycle
Owner’s
Manual

Electric Bicycle
Owner’s Manual
First Edition-B, 2023First Edition-B, 2023
Copyright, PeopleForBikes Coalition 2023Copyright, PeopleForBikes Coalition 2023
This manual meets EN ISO-4210, 16 CFR 1512 and EN 15194 Standards
IMPORTANT:
This manual contains important safety, performance and service information.
Read it before you take the rst ride on your new electric bicycle (e-bike), and
keep it for reference.
Additional safety, performance and service information for specic components
such as suspension or pedals on your e-bike, or for accessories such as
helmets or lights that you purchase, may also be available. Make sure that
your authorized retailer has given you all the manufacturers’ literature that
was included with your e-bike or accessories. In case of a conict between
the instructions in this manual and information provided by a component
manufacturer, always follow the component manufacturer’s instructions.
If you have any questions or do not understand something, take responsibility for
your safety and consult with your authorized retailer or the e-bike’s manufacturer.
NOTE: This manual is not intended as a comprehensive use, service, repair
or maintenance manual.
A01258
060525

GENERAL WARNING:
Like any sport, bicycling involves risk of injury and damage. By choosing to
ride an e-bike, you assume the responsibility for that risk, so you need to know —
and to practice — the rules of safe and responsible riding and of proper use and
maintenance. Proper use and maintenance of your e-bike reduces risk of injury.
This manual contains many “Warnings” and “Cautions” concerning the
consequences of failure to maintain or inspect your e-bike and of failure to follow
safe cycling practices.
• The combination of the safety alert symbol and the word WARNING
indicates a potentially hazardous situation which, if not avoided, could result in
serious injury or death.
• The combination of the re hazard alert symbol and the word
WARNING indicates a potentially hazardous situation which, if not avoided, could
cause a sudden and severe re, which could result in serious injury or death.
• The combination of the trip hazard alert symbol and the word
WARNING indicates a potentially hazardous situation which, if not avoided, could
result in serious injury or death.
• The combination of the safety alert symbol and the word CAUTION
indicates a potentially hazardous situation which, if not avoided, could result in
minor or moderate injury, or is an alert against unsafe practices.
• The combination of the hot surface alert symbol and the word
CAUTION indicates a potentially hazardous situation which, if not avoided, could
result in burns.
• The word CAUTION used without the safety alert symbol indicates a
situation which, if not avoided, could result in serious damage to the e-bike or the
voiding of your warranty.
Many of the Warnings and Cautions say, “You may lose control and fall”.
Because any fall can result in serious injury or even death, we do not always
repeat the warning of possible injury or death.
Because it is impossible to anticipate every situation or condition that can
occur while riding, this Manual makes no representation about the safe use
of the e-bike under all conditions. There are risks associated with the use
of any e-bike which cannot be predicted or avoided, and which are the sole
responsibility of the rider.

Contents
1. Introduction 1
2. Safety Must Always Be First 1
A. How Is an E-bike Different from a Bicycle? 2
3. General Lithium-Ion Battery Safety 3
4. E-Bikes and Children: Attention Parents 4
A. How Old Should a Child Be to Operate an E-bike? 4
5. E-Bike Features and Functions 6
A. Electric Drive Systems 6
B. How Are E-bikes Classied and Regulated? 8
C. How Does an E-bike Provide Power? 9
D. Where Can I Ride My E-bike? 10
6. E-Bike Battery Safety 10
A. General Battery Knowledge and Safety 10
1. What is an e-bike battery? 11
B. Charging Your Battery 14
1. Before charging your battery 14
2. Recommended conditions for charging your battery 16
3. How to charge your battery 16
4. Storing your battery (long-term storage) 18
C. Transporting Your E-bike and Battery 19
1. Transporting on a car rack 20
2. Transporting on public transit 20
3. Transporting on an airplane 20
4. Shipping a battery 20
5. Disposing of your battery (end-of-life) 21
7. Safely Operating Your E-bike 22
A. Safety First 22
B. Mechanical Safety Check 22
C. Before Your First Ride 25
D. Before Every Ride 26
E. General E-bike Safety 27
F. Lighting and Night Riding 29
G. General Bicycle Safety 30
H. Riding Safety 31
I. Off-Road Safety 32
J. Wet-Weather Riding 32
K. Extreme, Stunt or Competition Riding 33
L. Changing Components or Adding Accessories 34
M. Walk-assist Mode 35
N. Getting the Most Out of Your E-bike 35

8. Best Practices for Riding and Carrying Passengers and Cargo 37
A. Riding with Passengers 38
B. Transporting Youth or Children 40
C. Transporting Cargo 41
1. Cargo e-bikes 41
D. Using a Trailer 42
9. Drive Systems 42
A. General Information About Your Drive System 42
10. Fit 43
A. Standover Height 44
1. Diamond-frame e-bikes 44
2. Step-through frame e-bikes 44
B. Saddle Position 44
C. Handlebar Height and Angle 46
D. Control Position Adjustments 48
E. Brake Reach 48
11. Tech 48
A. Wheels 48
1. Front wheel secondary retention devices 50
2. Wheels with cam-action systems 50
3. Thru-axle wheel mounting system 51
4. Removing and installing wheels 52
B. Seat Post Cam-action Clamp 56
C. Brakes 57
1. Brake controls and features 58
2. How brakes work 58
D. Shifting Gears 59
1. How a derailleur drivetrain works 59
2. How an internal gear hub drivetrain works 61
E. Pedals 61
F. Bicycle Suspension 62
G. Tires and Tubes 63
1. Tires 63
2. Tubeless rims and tires 64
3. Tire and rim width/diameter 65
4. Tire clearance 66
5. Tire valves 67
12. Maintaining and Servicing Your E-bike 68
A. Servicing the Electrical Drive System 68
B. Servicing the Mechanical Parts of Your E-bike 69
C. Service Intervals 70
D. If Your E-bike Sustains an Impact 71
Appendix A: Intended Use of Your Bicycle 73
Appendix B: The Lifespan of Your Bike and its Components 78
Appendix C: Lithium-Ion Battery Safety Manual 84
1
1. Introduction
IMPORTANT: We strongly urge you to read this Manual in its entirety before your
rst ride. This Manual is intended to be an instructional Manual for youth and
adult e-bikes. An e-bike is a bicycle or tricycle that may be powered by the rider
AND a drive system, which includes an electric motor, battery, controls, sensors,
connective wiring and typically one or more displays.
In the United States, e-bikes have drive systems of less than 750 watts and a
top assisted speed of not more than 28 mph/45 km/h. In other markets, e-bike (or
pedelec) drive systems may be limited to 250 watts and pedal-assisted speed of
no more than 15 mph/25 km/h. Please note that not all e-bikes have all of the
features described in this Manual. Ask your authorized retailer to point out
the features of your e-bike.
An e-bike has many of the mechanical features of an unpowered bicycle,
with the addition of an electrical drive system. This manual addresses both the
mechanical and electrical aspects of e-bikes, and the user needs to understand
both aspects of their e-bike to use it safely.
WARNING: Ownership, operation, charging and maintenance of an
e-bike involve certain risks and hazards, which can be minimized by
following safe practices addressed in this Manual. Your knowledge of and
adherence to those practices are essential to your safety, the safety of
others, and the protection of property, including your e-bike.
Carefully read the information in this Manual and the model-specic
manuals included with your e-bike, in order to learn how to properly
operate and maintain your e-bike, as well as avoid damage to your
e-bike. Proper and safe operation of your e-bike is your responsibility.
2. Safety Must Always Be First
WARNING: Read all instructions in this Manual, as well as the
model-specic instructions and documents provided with your e-bike.
Failure to read and follow the instructions and warnings provided in this
Manual and by the manufacturer may result in electric shock, re or a crash
resulting in serious personal injury or death.
WARNING: It is not recommended to ride an e-bike if the rider is too
young to do so safely, or has any mental or physical impairments
(seizures or any impairments related to cognitive or physical, vision,
hearing or speaking) or other limitations that may prevent the safe
operation of the e-bike. Parents and guardians should carefully review
Page 4,
Section 4: “E-bike and Children: Attention Parents”
of this
Manual before allowing any minor child to operate an e-bike. If unsure,
consult your physician.
WARNING: Never loan your e-bike to another person or let another
person operate your e-bike unless they are familiar with the

2
instructions and warnings in this Manual and competent to operate an
e-bike. Allowing a person to operate an e-bike who lacks the knowledge or
ability to safely do so may result in electric shock, re or a crash, resulting
in serious personal injury or death.
A. How Is an E-bike Different from a Bicycle?
The addition of a motor and electric drive system means e-bikes are
very different from regular bicycles in several ways, and have different risks
associated with their use. When riding an e-bike for the rst time, be sure to
familiarize yourself with your e-bike by reading all product documentation and
reviewing the features. Following are the major differences between an e-bike
and a regular bicycle:
• General Battery Safety and Fire Risks: E-bikes are equipped with an
electric drive system, battery and charger, which pose a risk of electrical
and re hazards. Please refer to Page 3, Section 3: “General
Lithium-Ion Battery Safety” and Page 10, Section 6: “E-bike Battery
Safety” for additional information.
• Children and Age Requirements: Use of e-bikes by children and youth
may present additional risks. Age restrictions for operating or being a
passenger on an e-bike vary depending on the type of e-bike and on the
country or region where the e-bike is located. Operation may be limited by
the age of the rider, and local jurisdictions may have other requirements
for e-bike operation such as the use of helmets. Please refer to Page
4, Section 4: “E-bike and Children: Attention Parents” for additional
information.
• Features, Functions and Restrictions on Use: The addition of an
electric drive system means e-bikes are different from regular bicycles,
and you need to familiarize yourself with these differences. E-bikes are
also regulated differently depending on their speed and power settings,
and may have restrictions regarding where each type of e-bike can be
ridden. These regulations and restrictions vary depending on your country
or region. You must inform yourself of all applicable laws, requirements
and restrictions. Please refer to Page 6, Section 5: “Features and
Functions of your E-bike” for additional information on e-bike features, and
Page 10, Section 5(D): for additional information on e-bike laws and
where you can ride your e-bike.
• Charging your E-bike: Using proper charging practices and taking care of
your e-bike and its battery will maximize your use and enjoyment of your
e-bike. Please read all manufacturer instructions specic to your e-bike’s
battery and charger, and also refer to Page 10, Section 6: “E-bike
Battery Safety” for additional information.
• Safely Operating your E-bike: E-bikes are heavier, accelerate faster,
can achieve higher speeds more quickly and maintain those speeds for
longer periods of time compared to regular bicycles. These features can
dramatically affect the handling, braking and cornering of your e-bike, which
means you must exercise more caution around other people and when
cornering, accelerating and slowing down. It is recommended that you get to
know the functionality and intricacies of accelerating and decelerating your
e-bike in an area away from people and cars/trafc. Please refer to Page
22, Section 7: “Safely Operating your E-bike” for additional information.
3
• Riding with Passengers, Cargo and Trailers: Many e-bikes are designed
to carry cargo or passengers. Riding with the additional weight from
cargo or passengers requires practice and particular attention to your
surroundings when riding. Please refer to Page 37, Section 8: “Best
Practices for Riding and Carrying Passengers and Cargo” for additional
information.
• Drive Systems: The drive system on your e-bike is a sophisticated
electronic system that requires special care and maintenance. Any service
to the drive system should be performed by a qualied technician. Please
refer to Page 42, Section 9: “Drive Systems” for additional information.
3. General Lithium-Ion Battery Safety
WARNING: Before charging or using your e-bike, you must carefully
read, understand and follow all information contained in Page 10,
Section 6: “E-Bike Battery Safety” of this Manual about safety, handling,
charging, transportation, storing and disposing of your e-bike battery. It is
recommended that you periodically review this information to ensure you
are following all recommendations for safe use of this product. Failure to
read, understand and follow all battery safety warnings and instructions can
cause a re, leading to serious personal injury, death or property damage.
WARNING: Lithium-Ion batteries are powerful and store a tremendous
amount of energy. While they are generally designed with safety
features to protect the battery and the user, they must be handled with special
care. When damaged, improperly charged or misused, Lithium-Ion batteries
are susceptible to an uncontrollable energy release resulting in a sudden and
severe re. A Lithium-Ion battery re generally cannot be put out until the
energy contained therein is exhausted. Therefore, proper use, charging,
discharging, care, maintenance, storage and transportation are all critical to
the long-term use of the battery and the safety of the user and others.
WARNING: Do not leave a battery unattended while charging,
especially overnight. Once the charge cycle is complete, immediately
disconnect the charger plug from the battery. Do not leave the battery
connected to the charger for an extended period of time after it has reached
full charge. If a battery fails while left to charge unattended, the failure can
get progressively worse, and can result in re or explosion resulting in
serious personal injury, death, or property damage.
WARNING: NEVER open a Lithium-Ion battery pack or modify the
wiring or any electrical components of any product powered by a
Lithium-Ion battery. Opening the battery or modifying the wiring or
components can result in electric shock and can cause a re leading to
serious personal injury, death, or property damage.

4
General Safety Guidelines for All Lithium-Ion Batteries:
ALWAYS: Purchase and use devices and batteries certied by an accredited
testing laboratory.
ALWAYS: Follow the manufacturer’s instructions for charging and storage.
ALWAYS: Use the correct battery, charger and cord.
ALWAYS: Plug directly into an electrical outlet for charging.
ALWAYS: Keep batteries and devices at room temperature.
ALWAYS: Store and charge batteries away from anything ammable.
ALWAYS: Keep batteries away from heat sources.
ALWAYS: Use proper methods for recycling old or damaged batteries.
NEVER: Use aftermarket or generic batteries or chargers.
NEVER: Plug into a power strip or overload an outlet.
NEVER: Overcharge or leave a battery charging overnight.
NEVER: Charge a battery or device on or close to any ammable material.
NEVER: Leave an e-bike or battery unattended while charging.
NEVER: Block your primary way in or out of a room or space.
NEVER: Place batteries in a trash or recycling bin.
4. E-Bikes and Children: Attention Parents
A. How Old Should a Child Be to Operate an E-bike?
This Manual covers e-bikes that may be used by both adults and older
youth. The manufacturer of an e-bike cannot determine whether a particular child
should or should not operate an e-bike. While e-bikes have a lot in common with
regular bicycles, e-bikes also have a motor and battery, which means e-bikes
weigh signicantly more and can achieve signicantly higher speeds, with much
faster acceleration. A signicant amount of strength and skill is required to safely
control an e-bike. As a parent, you should read this Manual, as well as review
its warnings and the e-bike’s functions and operating procedures with your child
before letting your child ride the e-bike.
While it is up to a parent or guardian to make the determination of whether
their child can safely operate an e-bike, you should be aware of these general
guidelines. According to the United States Consumer Product Safety Commission
(CPSC), motorized bicycles require cognitive skills and motor skills that usually
develop after age 12.
The CPSC’s Age Determination Guidelines are available on their website at
www.cpsc.gov.
Any youth or child riding an e-bike must have the necessary physical, mental
and emotional capacity to ride the e-bike, as well as adequate bicycle riding
experience and reaction time. They must also adhere to local laws, know how to
manage different/changing road conditions, how to navigate trafc, and how to
react quickly to unexpected situations.
NOTE: Local laws may vary regarding how old a child must be and what type of
e-bike they can operate. It is up to the parents and child to conform to local laws.

5
WARNING: A child should never ride an e-bike that is too big for them.
While some e-bikes have step-through frames (see g. 2) that may
allow a child to mount an e-bike, that does not mean the e-bike is the right
size for them to operate safely. An e-bike that is too big for a child may lead
to a loss of control and fall, resulting in serious personal injury or death.
WARNING: Some e-bikes may not be suitable for some children.
Consult the documentation provided by the manufacturer of your
e-bike for any information about age recommendations or restrictions.
Parents must ultimately be responsible to determine whether their child is
physically, mentally and emotionally capable of safely operating an e-bike,
including understanding and following all warnings and instructions in this
Manual. Allowing a child who lacks the capability to safely operate an e-bike
to do so may lead to a crash resulting in serious personal injury or death.
WARNING: Some states have age restrictions for transporting
passengers. A child must be of age to ride an e-bike independently, or
be of age as specied by the manufacturer to be a passenger on an e-bike,
unless the child is in an approved child carrier that has been properly tted.
Transporting a child that does not meet the age/physical requirements to be
a passenger and/or is not in an approved child carrier can result in serious
personal injury or death.
Read all relevant passenger-related information provided with your e-bike,
and consult with Pacic Cycle Consumer Care for any additional information.
Assessing the passenger’s ability and safety is the parent’s responsibility. If
you’re unsure, consult with your physician.
NOTE: For additional information regarding transporting passengers, please refer
to Page 37, Section 8: ‘Best Practices for Riding and Carrying Passengers
and Cargo”.
WARNING: A person must have the physical and mental ability to
manage an e-bike in trafc, when facing varying road conditions or
when in unexpected situations. They must also respect the laws of the road
as they apply to bicycles. Failure to follow this warning could result in a
crash leading to serious personal injury or death.
As a parent or guardian, you are responsible for the activities and safety of
your minor child, including making sure that:
• your child wears a well-tting and approved helmet at all times while
operating or riding on the e-bike
• the e-bike is properly sized and tted to your child
• the e-bike is in good repair and safe operating condition
• you and your child have learned and understand the safe operation of the
e-bike as described in this Manual, and
• you and your child have learned, understand and obey not only the
applicable local motor vehicle, e-bike and trafc laws, but also the
common-sense rules of safe and responsible bicycling.

6
WARNING: Make sure that your child always wears an approved bicycle
helmet when riding. Also make sure that your child understands that a
bicycle helmet is for riding only, and must be removed when not riding. A
helmet must not be worn while playing, in play areas, on playground
equipment, while climbing trees or at any time while not riding. Failure to
follow this warning could result in serious personal injury or death.
WARNING: Whether a child can safely operate an e-bike also depends
on where the e-bike is being operated and the conditions present.
Steep hills, wet or poor quality roads or trails, motor vehicle trafc,
inclement weather, carrying passengers or cargo or other conditions may
suddenly present risks that a child may lack the ability to respond to. The
risks of operating an e-bike on public roads are different from operating an
e-bike on natural-surface trails. Please read this Manual for more
information on these risks and how to avoid them. Failure to follow this
warning could lead to a crash resulting in serious personal injury or death.
5. E-Bike Features and Functions
E-bikes are manufactured by multiple companies and brands, each of which
uses a variety of drive systems. These systems each have their own features
and functions like motor and battery location, power output, battery capacity and
maximum speed, as well as methods for charging and storing your battery and
starting and operating the system. As such, you must familiarize yourself with the
unique features and functions of your e-bike.
The e-bike-specic information included in this Manual covers universal
topics shared by all e-bikes. For information that is specic to your e-bike, please
refer to the model-specic manuals provided by your e-bike manufacturer.
Please refer to the manufacturer for any questions about e-bike functions,
local laws and regulations, parts compatibility, service intervals, as well as rider,
cargo and passenger weight limits.
A. Electric Drive Systems
E-bikes differ from regular bikes with the addition of sophisticated components,
engineered specically for use on e-bikes. These components include:
• Battery: A sophisticated, high-performance, large-capacity Lithium-Ion
battery, designed to safely contain a signicant amount of energy and
efciently release it to the motor in order to supplement the rider’s power
output for long distances.
• Motor: Provides power assistance to the rider when the pedals are engaged.
Certain types of e-bike are also equipped with a throttle to engage the power.
• Controls: Buttons located on the display, handlebar, battery and/or frame
that allow the rider to choose the level of motor assistance while pedaling.
• Sensors: Detect forces being applied to the pedals or rotation of the
pedals, provide information to the system to control power output.
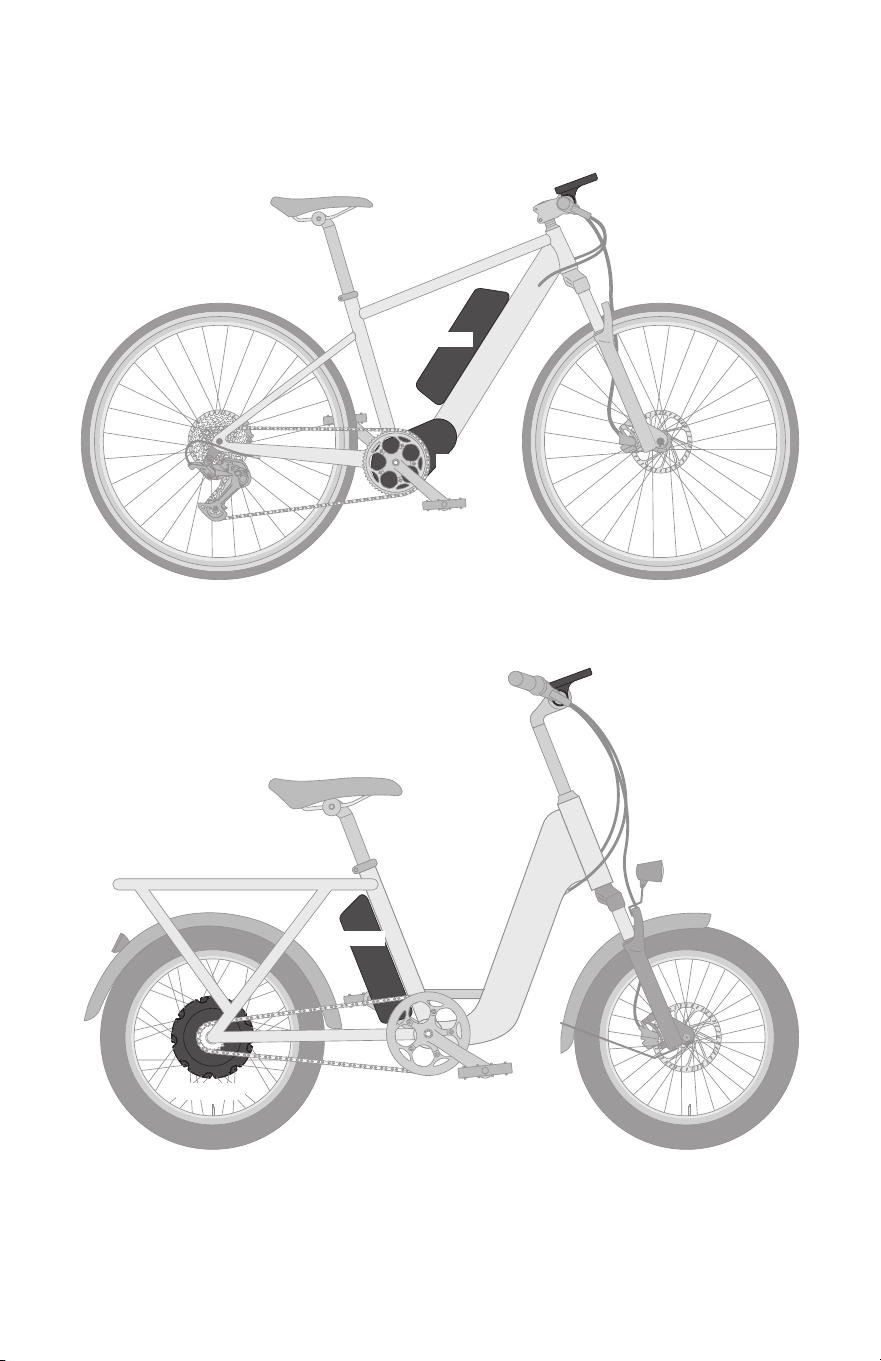
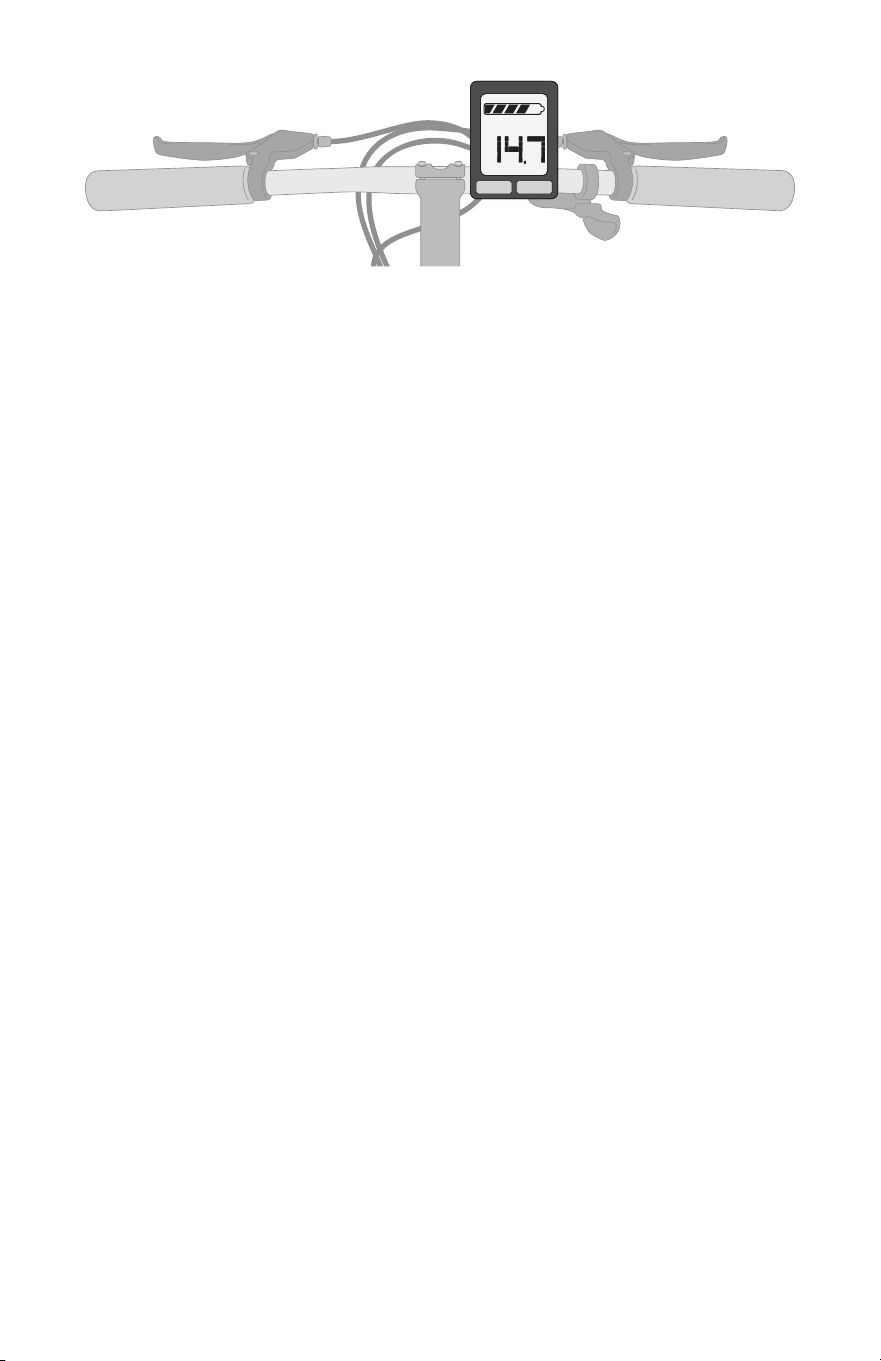
• Display(s): Provide the rider with relevant information about the ride, such
as speed, distance, power output, and battery charge (g. 1).
• Wiring system: Connects the drive system components.
The addition of an integrated drive system means your e-bike is different
7
from a regular bicycle. These differences mean you must follow all instructions
in your manuals, and you should not treat your e-bike the same as a regular
bicycle. This Manual will address how to handle and properly use an e-bike
equipped with these unique components.
g. 1
Typical mid-drive e-bike
BATTERY
DISPLAY
MOTOR
g. 2
Typical hub drive e-bike
MOTOR
BATTERY
DISPLAY
8
g. 3
E-bike display
DISPLAY
B. How Are E-bikes Classied and Regulated?
NOTE: The speed settings for your e-bike may be set according to the country or
region where the e-bike is sold. Follow all national, regional and local regulations
related to your e-bike. Following are some examples for how e-bikes are dened
by country:
United States: Most states have dened three e-bike classes and regulate them
within the state’s motor vehicle code. This gives riders similar rights and duties to
that of regular bicycles. However, a few states regulate e-bikes in the same way
as mopeds or a motor vehicle such as a car or motorcycle. Be sure to familiarize
yourself with the laws relevant to your e-bike in your country and region.
• Class 1: Bicycle equipped with a motor that provides assistance only
when the rider is pedaling, and that ceases to provide assistance when the
electric bicycles reaches 20 mph (g. 1).
• Class 2: Bicycle equipped with a throttle-actuated motor, that ceases to
provide assistance when the electric bicycle reaches 20 mph (g. 2).
• Class 3: Bicycle equipped with a motor that provides assistance only
when the rider is pedaling, and that ceases to provide assistance when the
electric bicycle reaches 28 mph.
NOTE: The speed settings for your e-bike may be set according to the region
where the e-bike is sold. Follow all local/regional regulations related to your e-bike.
E-bike specications can also include wattage (how much work a motor can
do), torque (how much force the motor can apply) and battery watt hours (how
long the battery will last or the typical range of the e-bike).
Europe: Under European regulations, an e-bike drive system only provides power
when the pedals are engaged. This type of e-bike is typically referred to as an
EPAC (Electronically Power Assisted Cycles or Electrically Power Assisted Cycles),
EAPC (Electrically Assisted Pedal Cycles), or Pedelec (Pedal Electric Cycle).
Europe also recognizes a category of higher power and speed e-bikes known
as the “Speed Pedelec”, or “S-Pedelec”. These e-bikes also provide power only
when the rider is pedaling, but may have motor power up to 4000 watts and a
top speed of up to 28 mph/45 km/h. European regulations for Speed Pedelecs
require that certain components must be replaced with identical components,
meaning ones that have been manufactured or approved by the manufacturer.
Speed Pedelecs are sometimes classied as motor vehicles, depending
on local laws. This means that in those places some or all of the following
may be required:

9
• A rear-view mirror
• A license plate
• Liability insurance, operating license or EU-type approval with insurance
markings attached
• A minimum tire tread depth of 1 mm
• Tires replaced when worn with an identical (or approved) tire
When using a Speed Pedelec, the rider must be familiar with the local laws for
riding on:
• Cycling paths
• Road lanes marked for moped access
• Cycling paths that allow mopeds
• Off-road trails
• Lanes that are closed to mopeds, motor vehicles or motorcycles
• Public roads, as well as on private property with permission by owner
• Pedestrian areas where regular bikes are allowed
• Parking in areas for regular bikes
As e-bike regulations are constantly being updated, it is your responsibility
to stay up-to-date on the latest regulations (helmet use, age restrictions,
requirements for license and insurance), as well as any restrictions for where you
can ride your e-bike (roads, paths, parks or other facilities).
WARNING: Do not modify or alter your e-bike, or install additional
equipment with the intention of increasing the performance and/or top
speed of the e-bike. Modifying an e-bike to increase its performance or
speed may be unlawful and can result in component failure or a loss of
control, leading to a crash resulting in serious personal injury or death.
NOTE: A modied e-bike may no longer be regulated as an e-bike, placing the
operator at risk of personal liability and criminal prosecution in the event of a
crash. Any alterations can negatively affect the lifespan of the e-bike and its
components, and can result in damage to the drive system. It can also void the
warranty of the e-bike.
C. How Does an E-bike Provide Power?
Pedal-assist is the power provided by the drive system to the rear wheel.
For Class 1 and Class 3 e-bikes and Pedelecs, the drive system is designed so
the power provided by the motor is dependent on pedal force being applied by
the rider. The amount of power provided by the motor is determined by how hard
or easy the rider is pedaling (the harder the rider pedals the more power the
motor provides) in combination with the power-assist mode chosen by the rider,
up to the maximum speed determined by the classication of the e-bike and the
regulations put in place by the country where the e-bike is sold.
For Class 2 e-bikes, the pedal force and/or the throttle may determine the
amount of power supplied by the drive motor to the rear wheel.
NOTE: This Manual is only for e-bikes that are manufactured as complete
e-bikes and designed to apply power through the rear wheel, with either a
“mid-drive” motor (g. 1) or motor contained in the rear hub (g. 2). This Manual
does not cover other types of e-bikes, including front-wheel drive, conversion kits,
or “add-on” electric motors of any kind.

10
D. Where Can I Ride My E-bike?
The Three-Class Approach
In the United States, state and local governments have the authority to determine
where e-bikes can be operated, including restricting their use. It is recommended to
check the rules and regulations for your e-bike class that apply where you live and/or
ride. In most states, e-bikes are regulated using a three-class approach:
• Class 1 e-bikes, when regulated in the same way as regular bikes, can
generally be used in the same places as regular bikes, including but not
limited to bike paths, lanes, routes and protected lanes.
• Class 2 e-bikes, while often similar to Class 1 e-bikes, also include the
addition of a throttle which allows the use of the e-bike without pedaling.
This fundamental difference can impact and/or limit where a Class 2 e-bike
can be ridden.
• Class 3 e-bikes may have greater limitations due to their higher
power-assisted speed. Use on bike paths, lanes, routes and protected
lanes may not be allowed.
NOTE: In Canada, Europe and other countries, national, regional and local laws
determine which types of e-bikes are allowed and where an e-bike of each type
may be operated. As these laws can be subject to frequent changes, you should
consult and comply with your local laws.
Off-Road Respect
Additionally, off-road trail access is sometimes restricted to use only on
trails that allow for motorized vehicle use. Off-road e-bikes, often referred to as
eMTBs, may not be permitted for use on your local trails, or only Class 1 e-bikes
may be allowed. As local land use rules change frequently, be sure to consult
with your local land manager.
Obey the local laws regulating where and how you can ride off-road, and
respect private property. You may be sharing the trail with others — hikers,
trail runners, equestrians and other cyclists. Respect their rights. Stay on the
designated trail. Don’t contribute to erosion by riding in mud or with unnecessary
sliding or skidding. Don’t disturb the ecosystem by cutting your own trail or
shortcut through vegetation or streams. It is your responsibility to minimize your
impact on the environment. Leave things as you found them; and always take out
everything you brought in.
6. E-Bike Battery Safety
A. General Battery Knowledge and Safety
WARNING: Carefully read this section and Page 3, Section 3:
“General Lithium-Ion Battery Safety” before using your e-bike or
charging the battery. Improper use, storage or charging of the battery can
cause thermal runaway leading to a sudden and severe re resulting in
property damage, serious personal injury or death.

11
1. What is an e-bike battery?
An e-bike battery consists of a series of Lithium-Ion cells designed to contain
electric energy. The charge and release of energy in the cells is managed and
controlled by internal circuitry. The cells and circuitry are contained in a housing
or shell, also known as a battery pack, which is designed to protect the cells and
internal circuitry and interface with a mounting mechanism on your e-bike.
E-bike batteries store a tremendous amount of energy for their small size and
light weight. While batteries are generally designed with safety features to protect
the battery and its user and failure is therefore unlikely, it’s not impossible so they
must be handled with special care.
When damaged or improperly used, Lithium-Ion batteries are susceptible
to an uncontrollable energy release. This means there is a risk of a sudden and
severe re, and a Lithium-Ion battery re generally cannot be put out until the
energy contained therein is exhausted. Therefore, proper use, charge/discharge,
care, maintenance, storage and transportation are critical to the long-term use of
the battery and the safety of the user.
WARNING: Batteries and chargers are designed to be safe and reliable
for their intended use. Failure to read and follow these instructions
and use your battery as intended by the manufacturer can result in thermal
runaway, resulting in a sudden and severe re and serious personal injury
or death, as well as signicant property damage. Please follow the
guidelines below to minimize the risk of battery pack failure:
• Only use the battery supplied with your e-bike, or a replacement battery
that is designed specically for use with your e-bike.
• Only use a charger that is supplied with your battery, or that is conrmed
as compatible by the battery or e-bike manufacturer. Do not use other
chargers or power supplies to charge your battery pack.
• Do not leave the battery unattended while charging, especially overnight.
Once the battery is fully charged, disconnect the charger from the battery.
• Do not charge or store the battery in direct sunlight, or in an environment
that is outside the temperature range specied by the battery manufacturer.
• Do not expose the battery to excessive heat from a ame or other heat
source, or extended exposure to the sun.
• Do not expose the battery internals to water by submersion or strong
water spray.
• Do not subject the battery to excessive weight from objects placed on the
battery.
• Do not subject the battery to severe impact or shock from being dropped
or struck by another heavy object.
• Do not subject the battery to excessive vibration.
• Do not use or attempt to charge a battery that has been dropped,
damaged, or submersed in water.
• Do not open or deform the battery housing and/or perform any
modications or service to the battery. There are no user-serviceable
components in the battery pack. Opening a Lithium-Ion battery may result
in a hazardous condition that could lead to an explosion and/or re, and
will void the warranty.
• Do not short-circuit the battery terminals through contact with metal
objects (e.g., nails, keys or screws).

12
• Do not touch severely corroded battery terminals.
• Do not apply solder to the terminals.
The following is a list of signs of battery damage, which can result in electric
shock, short-circuit, re and/or explosion:
• External battery casing damage (chips, cracks)
• Battery casing deformation (bulging)
• Battery casing or terminal discoloration
• Signs of corrosive (rust) damage from water entering the battery
• Plug connector damage or deformation
• Sounds, odors, smoke and/or ames emanating from the battery
• Battery uid leak
WARNING: A battery should not exhibit any heat, ames, noises,
odors, smoke, swelling, leaks, discoloration, deformation or other
abnormalities. If a battery exhibits any of these symptoms and is failing
catastrophically, evacuate all people from the area immediately and
summon re authorities (in the United States, call 911). Only if it is possible
to do so safely and quickly should you attempt to move the battery
outdoors and away from people or ammable materials.
WARNING: If the battery is leaking, do not touch this liquid. Battery
liquid can cause irritation or burns. If there is contact with battery
liquid, rinse immediately with water. If the contact is with the eyes, seek
medical attention immediately after rinsing.
WARNING: If the battery is emitting any smoke or fumes, move to a
place with proper ventilation. Fumes can irritate the respiratory
system. If anyone is exposed to any smoke or fumes and experiencing
negative effects, seek medical attention.
WARNING: If your battery experiences a fault or error during use,
charge or discharge, immediately stop using or charging the battery,
check the manual provided by your manufacturer, and have the battery
inspected and if necessary, replaced by a qualied e-bike mechanic.
CAUTION: Due to the natural process of transferring electricity and storing
it inside the battery cells, the battery and charger housings can get hot
while charging. Use caution when touching the battery and charger while
charging. Additionally, the battery housing can get warm during use.
WARNING: Do not install the battery on the e-bike if the following
circumstances are present:
• The battery is not original to the e-bike or an exact replacement
battery from the e-bike manufacturer that is fully compatible with
the e-bike.
• The battery is damaged in any way.
• The battery has been exposed to excessive water or submersion.
Failure to follow these warnings may cause a re resulting in property
damage, serious personal injury or death.
13
NOTE: Ensure the battery contacts (connecting terminals or pins) that interface
with the e-bike are clean. A dirty/contaminated interface can result in difculty
installing/removing the battery, or the battery getting stuck. Dirty or corroded
battery terminals can cause a signicant increase in resistance to current ow
between the battery and the e-bike, resulting in signicant heat build-up which
will compromise range and may damage the battery and e-bike.
Clean the battery and electrical contacts using a soft, dry or lightly damp
cloth to keep the battery free of dirt and debris. Do not expose the battery to
harsh chemical cleaners or products. Do not use alkali- or acid-based solvents
(e.g., rust cleaners).
If the charge port has a cover, close the cover after charging to keep the
charge port terminals clean and dry.
WARNING: Keep the battery and charger away from children and animals.
Unless supervised or instructed on proper/responsible use, children or
people who lack the necessary experience or understanding to operate the
battery and charger safely should not be left unattended with the battery and
charger. There is a signicant risk of personal injury and/or damage.
WARNING: Turn the battery and e-bike off before installing or removing
the battery. For information on battery installation and removal, please
refer to the manufacturer’s instructions for your e-bike model.
WARNING: Do not attempt to install or remove the battery while riding.
WARNING: Before transporting, storing or performing any work on
your e-bike, remove the battery, or turn it off if the battery cannot be
removed. A drive system with a battery installed can turn on unexpectedly,
which can cause serious injury.
WARNING: If installing components or accessories that require wiring
or servicing your e-bike, it is recommended to remove the battery
before performing the installation or service to avoid the risk of shock.
WARNING: Do not pressure-wash your e-bike or battery with a hose or
other pressure-washing device. If the battery is removable, remove
the battery when cleaning your e-bike.
WARNING: When handling components (especially the battery),
handle with both hands. Failure to do so may result in dropping
the component, which can result in personal injury and/or damage to
the component.
CAUTION: When using rack-mounted batteries, unless designed
specically for this purpose and approved by the manufacturer, do not use
the rack or battery as a handle to lift the e-bike. This can result in damage
to the battery.
Always make sure the battery is securely installed. If there’s a lock, engage it
and remove the key.

14
If your battery has a key, take note of the manufacturer and number of the
key. In the event of a lost key, please contact Pacic Cycle Consumer Care.
Familiarize yourself with the charge level indicator lights on your e-bike system,
to know when it is at capacity, as well as if your battery is in danger of shutting off
during use due to lack of battery power.
CAUTION: Do not discharge your battery completely (deep discharge) as
this can damage the battery or shorten its useful life. A battery that runs out
of power during a ride is functionally depleted. If it is left for an extended
period of time (days) after being functionally depleted, it will naturally
lose more power while not being used, which can lead to a state of deep
discharge. This state of deep discharge can damage a battery resulting
in signicantly reduced energy capacity, and it can make it difcult to
properly recharge, or worse, render it unserviceable, even with help from a
qualied technician. After use and once cooled down, it is recommended to
fully charge the battery in preparation for your next ride.
Pay particular attention to the specic charging habits, as well as the
operating and storage temperatures recommended by the e-bike manufacturer.
Lithium-Ion batteries have an ideal operating temperature range to maximize
efciency and performance. Exposure to extreme temperatures outside the
manufacturer’s specied range during charging, use or storage may negatively
impact the efciency, performance and lifespan of the battery, as well as
damage to the drive system components. Lithium-Ion batteries are especially
vulnerable to cold temperatures. The colder a battery is, the lower the energy
capacity and range.
Unless explicitly stated by the manufacturer, Lithium-Ion batteries do
not require a break-in period. They can also be turned off and connected or
disconnected from the charger at any time regardless of the state of charge
without damaging the battery.
If the battery will not be used for longer than a few days, if possible,
disconnect the battery and remove it from the e-bike. This can help prevent a
parasitic power drain.
WARNING: E-bike batteries are intended only as a power supply for
approved e-bikes. Do not use e-bike batteries for any other
applications. Use of an e-bike battery for other applications may create a
risk of re or electric shock.
B. Charging Your Battery
WARNING: Carefully read, understand and follow all warnings and
instructions for charging your battery. Failure to do so can lead to an
electrical shock or sudden and severe re, resulting in serious personal
injury or death.
1. Before charging your battery
Before using your e-bike or charging your battery for the rst time, read all
the instructions in this Manual and any product documentation included with your

15
e-bike. Turn the battery power on according to the manufacturer’s instructions.
This will help determine if the battery is charged, needs charging or is damaged.
Batteries are generally shipped from the manufacturer with a partial charge. It is
recommended to charge the battery to full capacity before your rst use.
WARNING: Charging the battery when any of the conditions listed
below are present can result in electric shock, serious personal
injury, or damage to the battery or property. Do not connect the charger
to the battery and charge the battery if any of the following
circumstances are present:
• The battery charge port terminals and/or the charger plug are
contaminated. Repeatedly connecting contaminated terminals can
result in worn and damaged terminals. Clean thoroughly before
connecting the charger.
• The battery, battery charge port, charger or charger plug ends have
been submerged or are wet. Additionally, do not handle the battery,
charger or any charge port terminals with wet hands. Dry everything
thoroughly before connecting the charger.
• The battery is in an area exposed to explosive materials (e.g., a fueling
station), or is exposed to chemicals or other ammable particles in the air.
• The battery has been dropped, noticeably scratched or damaged in
any way.
• The charger shows any signs of damage. Inspect before each use.
WARNING: Unless explicitly stated by the manufacturer, only use the
charger indoors. Do not expose the e-bike, battery or charger to the
rain and wind while charging. Exposure to water while charging may create
a risk of electric shock or re, resulting in serious personal injury, death or
property damage.
WARNING: Only use Original Equipment (OE) batteries and chargers
that are compatible with each other, and have been specied and
approved by the manufacturer for use with each other and with your e-bike.
The charger, charge cord and power output cable must be specied for use
with your battery. Use of an unapproved or counterfeit battery or charger
can result in serious damage to the battery and/or components and can
result in a sudden and severe re or explosion resulting in serious bodily
injury or death.
WARNING: Do not modify or open the charger. Opening or modifying
the charger can result in electric shock or damage to the internal
circuitry that is designed to reduce the risk of thermal runaway, leading to a
re resulting in serious personal injury, death or property damage.
WARNING: Do not touch the terminals of the battery or charger during
an electrical storm in case of a lightning strike.
WARNING: Handle the charger and power cables with care. Do not
tightly bundle, apply excessive tension (pull force) or carry by the
cables. Do not wash the charger.

16
2. Recommended conditions for charging your battery
WARNING: Carefully read, understand and follow all manufacturer
warnings and instructions for charging your battery. Batteries are
sophisticated devices that require proper charging conditions. When
charging a battery, ensure all the conditions below are present. Failure to
do so can lead to an electrical shock or sudden and severe re, resulting in
serious personal injury or death.
• The battery and charger are compatible with each other and the e-bike.
• The battery is being charged during daylight hours and where it can be
observed in case of any indication of odor, smoke, fumes or re.
• The charging area is protected from the elements, dry, well-ventilated, and
has a smoke detector. If you charge your battery indoors, do not do it in a
bedroom or any place blocking egress from the area. A charging battery
cannot be left unattended and must be observed at all times while charging.
• The battery is on a clean, dry and at, non-ammable surface, preferably
metal, ceramic or glass.
• The battery and the charge port connectors (terminals or pins) are dry,
clean and free of debris.
• The battery and charger have no items covering or placed on top impeding
airow around these components.
• The battery is not exposed to ammable materials or an open ame.
• The ambient temperature around the battery and charger is in the charging
temperature range specied by the manufacturer.
• The rated voltage capacity from the power source (electrical outlet)
matches the charger.
• The charger’s outlet plug and battery connector plug are both fully inserted
into the electrical outlet and the battery’s charge port.
• The charger’s fan vent is unobstructed (chargers with built-in fans).
• Do not use a power converter, for example to convert 220 volts to 110 volts.
3. How to charge your battery
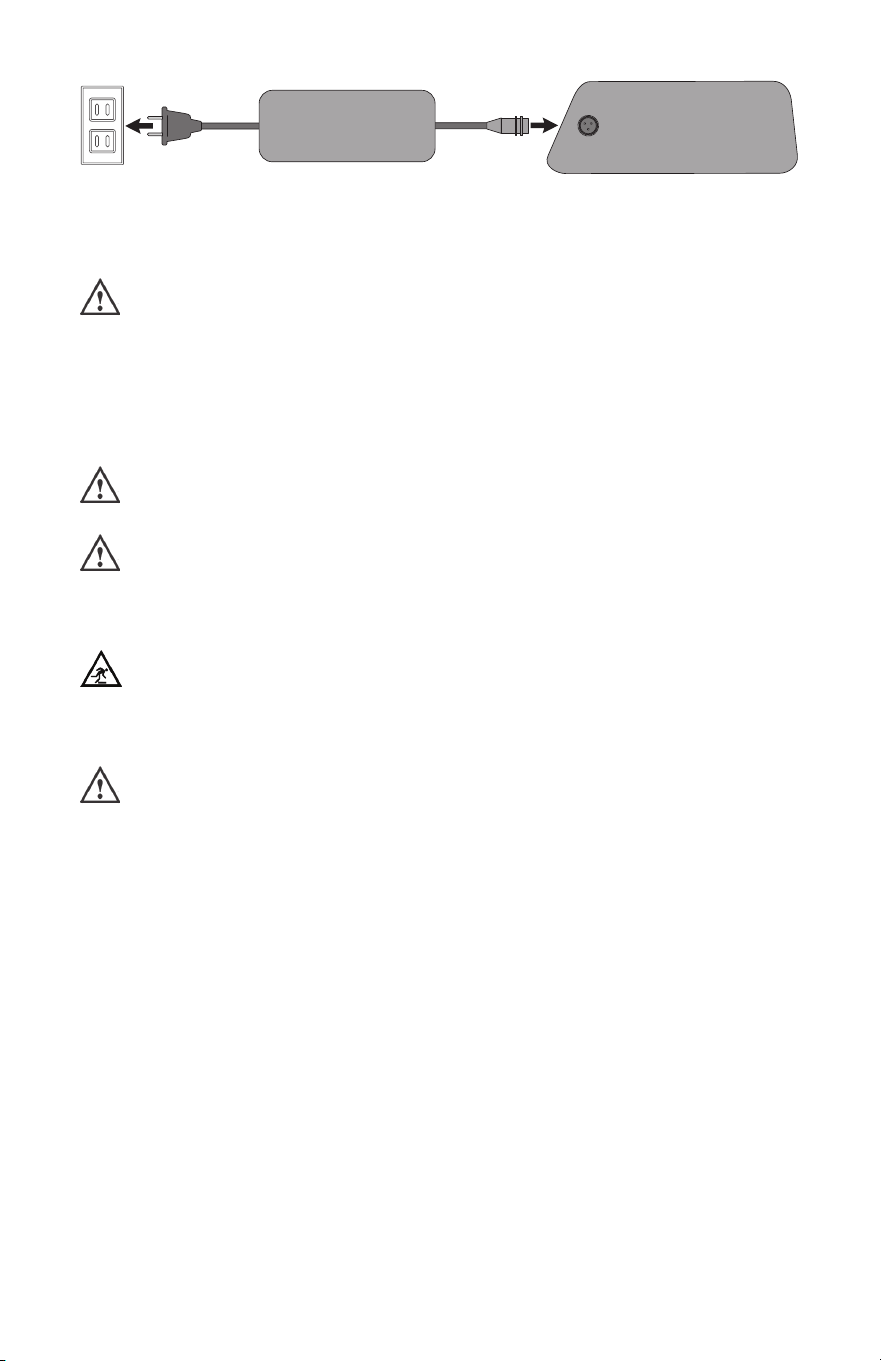
Follow the order of operations for connecting the charger and charging the
battery (g. 4) as outlined by your e-bike manufacturer. An improperly connected
charger can result in damage to the drive system components.
• Remove the charge port cover (if present).
• Connect the charger to the battery and the power outlet, in the order
specied by the manufacturer.
• Once charging begins, periodically refer to the indicator lights on the
charger and e-bike’s charge level display for power level information.
• Once the indicator lights indicate a full charge, immediately disconnect the
charger from the power outlet and the battery, in the order specied by the
manufacturer.
• Replace the charge port cover (if present).
• If the battery will not be used right away, store the battery as outlined on
Page 18, Section 6: “E-bike Battery Safety”, subsection B.4: “Storing
Your Battery”.
17
BATTERYCHARGER
ELECTRICAL
OUTLET
g. 4
Charger and battery
WARNING: Do not leave a battery unattended while charging,
especially overnight. Once the charge cycle is complete, immediately
disconnect the charger plug from the battery. Do not leave the battery
connected to the charger for an extended period of time after it has
reached full charge. If a battery fails while left to charge unattended, the
failure can get progressively worse, and can result in re or explosion
resulting in serious personal injury, death, or property damage.
WARNING: Do not ride the e-bike with the charger plugged into the
battery.
WARNING: Do not move the e-bike or allow it to fall while it’s charging.
Make sure the e-bike is stable and cannot move easily. If the plug
comes loose during the charging process, it can cause an electrical spark
leading to a re, resulting in serious personal injury or property damage.
WARNING: TRIP HAZARD! When charging, be aware of the location of
the charger cable. Tripping over the charger cable can result in a fall,
leading to personal injury or cause the e-bike to fall over, resulting in
property damage.
WARNING: Do not use a power inverter to charge the battery from a
12-volt automobile auxiliary power outlet in a vehicle. Incorrect or
excessive voltage can result in overheating, which can damage the battery
and reduce the battery’s lifespan or cause a sudden and severe re
resulting in serious personal injury or property damage.
CAUTION: Do not remove the battery from the e-bike during the charging
process. If the battery has to be removed, rst end the charging process
before removing the battery from the e-bike, then once the battery is in a
proper state for charging, restart the charging process.
E-bike batteries have temperature sensors that prevent charging when outside
of the range specied by the manufacturer. The battery should be charged,
discharged, and operated in the following conditions:
• Charge (Temperature Range): 32 – 104º F (0 – 40º C)
• Discharge (Temperature Range): -4 - 113º F (-20 - 45º C)
• Operation (Relative Humidity): <80%

18
If the battery is being charged outside the recommended temperature range,
the battery will indicate a charging issue. If the battery is not charging, disconnect
the charger and adjust the conditions so the temperature is within the specied
range. Only reconnect the charger once the battery is within the specied
temperature range.
If the conditions for charging are all correct but the battery is not charging, or it’s
not fully charged hours after the manufacturer’s specied charge time, disconnect
the charger and have the battery and charger inspected by a qualied e-bike
mechanic.
WARNING: If the battery becomes too hot, starts to emit smoke or a
strong odor, shows any signs of deformation/bulging, or otherwise
presents unusual characteristics, discontinue use of the battery. If a battery
exhibits any of these symptoms and is failing catastrophically, evacuate the
area immediately and call re authorities. Only if possible to do so safely
and quickly should you attempt to move the battery outdoors and away
from people and ammable materials.
4. Storing your battery (long-term storage)
Even under the best of circumstances, the energy storage capacity of
Lithium-Ion batteries gradually degrades over time and with each charging
cycle. However, by following proper care and storage habits as specied by the
manufacturer, you can maximize the lifespan of the battery. Please read and
follow the storage recommendations below.
If the battery will be in storage for an extended period of time, it is
recommended the battery be stored with a partial charge, and the state of
charge should be checked periodically in accordance with the manufacturer’s
specications. If the state of charge has dropped below the manufacturer’s
recommended range, charge it back to within the range. Please refer to the
manufacturer specications for additional information.
CAUTION: A battery that is stored while functionally depleted, if left in that
state for an extended period of time, will naturally lose more power while
not being used, which can lead to a state of deep discharge. This state of
deep discharge can damage a battery resulting in signicantly reduced
energy capacity, which can make it difcult to properly recharge, or worse,
render it unserviceable, even with help from a qualied technician.
To optimize battery storage conditions, it’s especially important that they
be kept indoors in a temperature and climate-controlled environment whenever
possible. Ensure the following conditions are present:
• The battery is separated from the e-bike (if possible). If the battery is
integrated in the frame, the whole e-bike should be stored indoors.
• The storage area is protected from the elements, dry, well-ventilated, and
has a smoke detector. If you store your battery indoors, do not store it in a
bedroom or any place blocking egress from the area.
• The battery is on a clean, dry and at, non-ammable surface, preferably
metal, ceramic or glass.
• The battery and the charge port connectors (terminals or pins) are dry,
clean and free of debris.

19
• The battery and charger have no items covering or placed on top of them.
• The battery is not exposed to ammable materials or an open ame.
• The ambient temperature around the battery and charger is in the charging
temperature range specied by the manufacturer.
CAUTION: During storage, do not expose the battery to heat sources
that can result in exceeding the manufacturer’s recommended upper
temperature limit and result in damage to the battery. For example:
• Direct sunlight
• A hot car in the summer
• Proximity to space heaters or other heat sources
WARNING: Avoid exposing your e-bike to conditions that can result in
a short circuit:
• If possible, do not store your e-bike outdoors. Exposure to the
elements can quickly deteriorate the e-bike and its components.
• Do not store your e-bike under a cover as this can trap moisture.
Condensation can result in corrosion and damage to the battery
terminals or other components.
• Unplug the charger from the electrical outlet and the battery before
storing the battery. Do not leave a battery connected to the charger
after charging or while in storage.
• Do not store your e-bike or battery near any strong magnetic sources.
A short circuit may lead to a thermal runaway, sudden and severe re or
explosion, resulting in serious personal injury, death or property damage.
C. Transporting Your E-bike and Battery
Lithium-Ion batteries are classied and regulated by transportation
authorities as “Dangerous Goods” because of the inherent risk of a re if they are
damaged during transport. Check your local laws for details about shipping and
transporting an e-bike battery.
WARNING: Do not ship or transport a damaged battery or attempt to
circumvent laws regarding shipping of Lithium-Ion batteries. Failure
to heed this warning may lead to a re during the transportation process,
resulting in serious personal injury or death to transportation workers or
the public, and damage to vehicles or transportation facilities for which you
may be held civilly and criminally responsible.
Pay attention to the additional weight of an e-bike when carrying, transporting,
pushing, lifting, maneuvering or parking your e-bike.
WARNING: E-bikes can be heavy and awkward to move. Failure to use
proper lifting techniques may result in personal injury, or damage to
the e-bike if it is dropped.

20
1. Transporting on a car rack
Transporting an e-bike inside a vehicle (if there’s space in the vehicle to do
so safely) is preferable to transporting on an exterior bike rack.
Depending on the type, an e-bike can be signicantly heavier than a regular
bicycle. Make sure the vehicle-mounted rack is rated for transporting e-bikes and
can accommodate the tire width. Pay particular attention when lifting it onto a
vehicle-mounted bike rack. Use proper lifting techniques. Lifting the e-bike may
require assistance, especially if the rack is on the roof of a car.
If the e-bike is being transported on a roof rack, be aware that your vehicle’s
clearance is affected and the e-bike can come in contact with low-hanging
obstacles like garage doors or building entrances. Measure the height of the
e-bike on the roof and take note of the clearance measurement.
If the battery and display are easily removable, remove them and place them
securely inside the vehicle. This not only keeps your battery safer, it also reduces
the weight of the e-bike, which makes it easier to lift and reduces the load on the
bike rack.
Make sure the battery can’t roll around and is not exposed to direct sunlight
or excessive heat or cold for an extended period of time, and the connectors are
protected or covered.
Do not use a rack that places the e-bike upside down during transport.
Placing the e-bike upside down can result in damage to the handlebar controls.
Regularly check that the e-bike is securely held in place by the rack. An e-bike
that comes off the rack while driving can be a signicant danger to other drivers.
It is not recommended to transport your e-bike on a rack that will result in
signicant exposure to rain without the use of a rain cover. This can lead to water
ingress, which can cause damage to electrical components.
2. Transporting on public transit
Familiarize yourself with any relevant rules regarding transporting your e-bike
on public transit, such as weight, battery restrictions and tire widths. Some public
transit options require that a space is booked; others specify off-peak hours or
the need to cover the e-bike.
3. Transporting on an airplane
Lithium-Ion batteries are classied as “Dangerous Goods” for transportation
purposes and there are signicant restrictions and regulations related to
transporting a large Lithium-Ion battery by airplane. Check with your airline for
any information about transporting a battery on an airplane before traveling.
The battery may need to be shipped separately by a shipper who is trained and
authorized to ship Dangerous Goods.
4. Shipping a battery
Lithium-Ion batteries are classied and regulated by transportation
authorities as “Dangerous Goods” because of the inherent risk of a re if they are
damaged during transport. Check your local laws for details about shipping and
transporting an e-bike battery. Many bicycle retailers are trained in the proper
methods for shipping e-bikes and batteries. Please consult your local retailer if
you need to ship your e-bike.

21
WARNING: Do not ship or transport a damaged battery or attempt to
circumvent laws regarding shipping of Lithium-Ion batteries. Failure
to follow this warning may lead to a re during the transportation process,
resulting in serious personal injury or death to transportation workers or
the public, and damage to vehicles or transportation facilities for which you
may be held civilly and criminally responsible.
5. Disposing of your battery (end-of-life)
Lithium-Ion batteries are very efcient at conveniently storing large amounts
of energy. However, they do not last forever. Batteries are exhaustible items with
a lifespan which is subject to use and conditions. Over time and with each charge
and discharge cycle, their capacity to store energy gradually decreases.
Proper use and care can optimize the capacity and extend the life of the
battery. Improper care and maintenance can decrease its lifespan and void the
warranty. A battery that exhibits signs of signicant reduction in runtime has
reached the end of its life cycle and should be recycled/replaced. Please refer to
the manufacturer’s battery specications for information regarding the number of
charge/discharge cycles a battery is expected to provide.
Generally, when a battery’s capacity drops below the percentage of capacity
specied by your manufacturer, it has reached the end of its useful life cycle
and will need to be replaced, as capacity will drop more rapidly after that. If you
notice you’re no longer getting the range you expect, contact a qualied e-bike
mechanic to have the battery inspected and replaced if necessary.
If your battery’s lifespan is diminished to the point of needing replacement,
only replace the battery with an original equipment (OE) e-bike battery from your
e-bike manufacturer. Do not attempt to have your original battery “refurbished”, or
replaced with a reconditioned or an unauthorized/third-party battery.
WARNING: Do not dispose of an e-bike battery or any other
Lithium-Ion battery in your regular household trash or a public trash
receptacle. Batteries that enter the regular waste stream can be damaged,
leading to a re resulting in serious personal injury, death, property
damage and environmental contamination.
Dispose of all batteries and chargers that have reached their end of life in
an environmentally conscious manner, in accordance with regulations in effect in
your country, state or region.
Please contact your e-bike retailer or manufacturer for additional information
about battery and charger disposal and recycling, as well as any recycling
programs available to you. For example, in the United States Call2Recycle has
partnered with a network of manufacturers and retailers to offer a national battery
recycling program.
EUROPE: According to EU law, directives 2012/19/EU and 2006/66/EC, all
waste electrical and electronic equipment (WEEE) must be collected separately
from general waste. Please contact your local e-bike retailer for information on
properly disposing of e-bike batteries and chargers.

22
7. Safely Operating Your E-bike
WARNING: Failure to read, understand and follow all instructions and
warnings regarding the safe operation of an e-bike may lead to a
crash resulting in serious personal injury or death.
A. Safety First
1. Always wear an approved helmet when riding your e-bike, and follow the
helmet manufacturer’s instructions for t, use and care.
2. Do you have all the other required and recommended safety equipment?
Refer to Page 33, Section 7: “Safely Operating Your E-bike”, subsection
K: “Extreme, Stunt or Competition Riding”.
3. Do you know where you can legally operate your e-Bike? Refer to Page
10, Section 5: “E-bike Features and Functions”, subsection D: “Where
Can I Ride My E-bike?” It’s your responsibility to familiarize yourself with
the laws of the areas where you ride, and to comply with all applicable laws
regarding safe operation of an e-bike.
4. Do you know how to correctly secure your front and rear wheels? Refer
to Page 48, Section 11: “Tech”, subsection A: “Wheels” to make sure.
Riding with an improperly secured wheel can cause the wheel to wobble or
disengage from the e-bike, and cause serious injury or death.
5. If your e-bike has toeclips and straps or clipless (“step-in”) pedals, make
sure you know how they work. Refer to Page 61, Section 11: “Tech”,
subsection E: “Pedals”. These pedals require special techniques and skills.
Follow the pedal manufacturer’s instructions for use, adjustment and care.
6. Do you have “toe overlap”? On smaller-framed e-bikes your foot may be able
to contact the front wheel when a pedal is all the way forward and the wheel
is turned. Refer to Page 61, Section 11: “Tech”, subsection E: “Pedals”
to check whether you have toe overlap.
7. Does your e-bike have suspension? If so, refer to Page 62, Section 11:
“Tech”, subsection F: “Bicycle Suspension”. Suspension can change the
way an e-bike performs. Follow the suspension manufacturer’s instructions
for use, adjustment and care.
B. Mechanical Safety Check
Routinely check the condition of your e-bike before every ride.
• Nuts, bolts screws and other fasteners: Because manufacturers use a
wide variety of fastener sizes and shapes made in a variety of materials,
often differing by model and component, the correct tightening force or
torque cannot be generalized. To make sure that the many fasteners on your
e-bike are correctly tightened, refer to the Fastener Torque Specications in
the instructions provided by the manufacturer of the component in question.
Correctly tightening a fastener requires a calibrated torque wrench. A
professional e-bike mechanic with a torque wrench should torque the fasteners
on your e-bike. If you choose to work on your own e-bike, you must use a
torque wrench and the correct tightening torque specications from the e-bike
or component manufacturer. If you need to make an adjustment at home or in
the eld, we urge you to exercise care, and to have the fasteners you worked on
checked by a qualied bicycle mechanic as soon as possible.

23
NOTE: There are some components, for example the drive system, battery and
connecting wiring, that require special tools and knowledge, which you should
not attempt to work on yourself. Refer to Page 43, Section 10: “Fit” and Page
48, Section 11: “Tech” for the items that you may be able to adjust yourself. All
other adjustments and repairs should be done by a qualied e-bike mechanic.
WARNING: Correct tightening force on fasteners — nuts, bolts and
screws — on your e-bike is important. Too little force, and the fastener
may not hold securely. Too much force, and the fastener can strip threads,
stretch, deform or break. Either way, incorrect tightening force can result in
component failure, which can cause you to lose control and fall.
• Make sure nothing is loose. Lift the front wheel off the ground by two or
three inches, then let it bounce on the ground. Anything sound, feel or look
loose? Do a visual and tactile inspection of the whole e-bike. Any loose
parts or accessories? If so, secure them. If you’re not sure, ask someone
with experience to check.
• Tires and Wheels: Make sure tires are correctly inated. Check by
putting one hand on the saddle, one on the intersection of the handlebars
and stem, then bouncing your weight on the e-bike while looking at tire
deection. Compare what you see with how it looks when you know the
tires are correctly inated and adjust if necessary. Refer to Page 63,
Section 11: “Tech”, subsection G: “Tires and Tubes”.
• Tires in good shape? Spin each wheel slowly and look for cuts in the
tread and sidewall. Replace damaged tires before riding the e-bike.
• Wheels true? Spin each wheel and check for brake clearance and
side-to-side wobble. If a wheel wobbles side to side even slightly, or
rubs against or hits the brake pads, take the e-bike to a qualied bicycle
mechanic to have the wheel trued.
CAUTION: Wheels must be true for rim brakes to work effectively.
Wheel truing is a skill that requires special tools and experience. Do
not attempt to true a wheel unless you have the knowledge, experience and
tools needed to do the job correctly.
• Wheel rims clean and undamaged? Make sure the rims are clean and
undamaged at the tire bead and, if you have rim brakes, along the braking
surface. A worn braking surface can mean your wheel rim needs to be
replaced. Some wheel rims have a rim wear indicator that either becomes
visible or disappears as the rim’s braking surface wears. Riding a wheel
that is worn out and at the end of its usable life can result in wheel failure,
which can cause you to lose control and fall.
WARNING: Bicycle wheel rims are subject to wear. Riding a wheel that is
at the end of its usable life can result in wheel failure, which can cause
you to lose control and fall.
• Brakes: Check the brakes for proper operation. Squeeze the brake levers.
Are the brake quick-releases closed? Are all control cables seated and
securely engaged? If you have rim brakes, do the brake pads contact the
wheel rim squarely and make full contact with the rim? Do the brakes begin
24
to engage within an inch of brake lever movement? Can you apply full
braking force at the levers without having them touch the handlebar? If not,
your brakes need adjustment. Do not ride the e-bike until the brakes are
properly adjusted by a professional e-bike mechanic. R
efer to Page 57,
Section 11: “Tech”, subsection C: “Brakes”
.
• Wheel retention system: Make sure the front and rear wheels are correctly
secured. Refer to Page 48, Section 11: “Tech”, subsection A: “Wheels”.
• Seat post: If your seat post has an over-center cam-action fastener for
easy height adjustment, check that it is properly adjusted and in the locked
position. Refer to Page 56, Section 11: “Tech”, subsection B: “Seat
Post Cam-Action Clamp”.
• Handlebar and saddle alignment: Make sure the saddle and handlebar
stem are parallel to the e-bike’s center line and clamped tightly enough
so that you can’t twist them out of alignment.
R
efer to Section 10: “Fit”,
subsection B: “Saddle Position” on Page 44 and subsection C:
“Handlebar Height and Angle” on Page 46
.
• Handlebar grips: Make sure the handlebar grips are secure and in good
condition. If your grips are loose, or have cuts, tears or worn-out areas,
replace them.
• Handlebar ends:
Make sure the ends of the handlebar and any extensions
are plugged. If not, plug them before you ride. If the handlebars have bar
end extensions, make sure they are clamped according to the handlebar
and extension manufacturer’s instructions. Make sure your handlebar,
extensions, grips and brake and shifting controls are secure and allow the
safe operation of your e-bike, including the ability to steer, brake and shift
without any interference.
WARNING: Loose or damaged handlebar grips or unsecured handlebar
extensions can cause you to lose control, causing a crash resulting in
serious injury or death.
WARNING: The ends of handlebars and handlebar extensions must be
plugged at all times. Unplugged handlebars or extensions can cut or
impale you even in a minor crash, resulting in serious injury or death.
Some handlebars are equipped with grips that lock on with a mechanical
connection. They must have adequate space to properly align the grips with the
handlebar ends and be properly plugged so no portion of the handlebar end is
exposed. Locking grips must be properly tightened to avoid movement.
WARNING: Improperly secured locking grips could lead to a loss of
control or a crash, resulting in serious injury or death.
VERY IMPORTANT SAFETY NOTE:
Please also read and become thoroughly familiar with the important
information on the lifespan of your e-bike and its components in Appendix
B on Page 78.
25
C. Before Your First Ride
When riding an e-bike for the rst time, be sure to familiarize yourself with the
features and functions of your e-bike by reading all product documentation and
reviewing the features. It is recommended that you practice accelerating, riding
and braking in an area away from people and cars/trafc. Check the handling and
response of the e-bike; and check the comfort. If you have any questions, or if
you feel anything about the e-bike is not as it should be, consult a qualied e-bike
mechanic before you ride again.
The following questions will help you get to know the functionality and
intricacies of operating your e-bike:
• Brakes: Familiarize yourself with the types of brakes and braking action
of your e-bike. R
efer to Page 57, Section 11: “Tech”, subsection C:
“Brakes”
for more information on brakes and braking. Which lever operates
the front brake? In some countries, the left lever operates the front brake,
but in other countries it’s the opposite. Test the brakes at slow speeds
by shifting your weight slightly toward the back while gently applying the
brakes, rear brake rst. Sudden or excessive application of the front brake
could pitch you over the handlebars. Applying brakes too hard can lock
up a wheel, which could cause you to lose control and fall. Skidding is an
example of what can happen when a wheel locks up.
• Disc brakes: Disc brakes are very common on most e-bikes, and they
provide signicantly more stopping power than other types of brakes.
• Disc brake rotors: Braking performance relies upon a clean rotor. It is not
recommended to touch the disc brake rotors, as this can transfer oils from
the hands to the braking surface and the brake pads. Only touch the rotor
when it’s cool, not moving, and with gloves on.
WARNING
: Applying excessive force too hard or too suddenly to the
front brake to slow down or stop can result in loss of control,
including causing the rider to pitch over the handlebars, which can result in
serious personal injury or death.
WARNING
: Properly functioning brakes are essential to the safe
operation of your e-bike. If your brakes do not seem to work properly,
lose braking power, squeal excessively, or show any signs of damage to
the brake levers, cables, housing, calipers, pads or rotors, stop using your
e-bike and bring it to a qualied bicycle mechanic for inspection and any
required repairs. Riding an e-bike with improperly functioning brakes can
lead to a crash resulting in serious personal injury or death.
WARNING: Be sure to carefully familiarize yourself with the stopping
power of your brakes. If you are new to disc brakes, practice using the
front and rear brakes together in a safe place away from trafc until you can
safely stop your e-bike in a controlled way. Failure to use disc brakes
properly, locking up your wheels or excessive use of the front disc brake can
lead to a crash or pitchover, resulting in serious personal injury or death.
WARNING: Disc brakes are equipped with rotors that can generate a lot
of heat. Avoid touching any part of the brake system with exposed skin
(e.g., hands or legs). Skin contact against a hot brake rotor can result in burns.

26
WARNING: Disc brakes are equipped with rotors that can be very
sharp. Avoid touching the rotors, especially when the wheels are
rotating. Contact with a sharp rotor can cause serious injury.
• Gears: Which shifter button goes into a harder or easier gear? Practice
shifting the gears. Remember to never move the shifter while pedaling
backward, nor pedal backwards immediately after having moved the
shifter. This could jam the chain and cause serious damage to the e-bike.
R
efer to Page 59, section 11: “Tech”, subsection D: “Shifting Gears”.
• Pedals: If your e-bike has clipless pedals or toeclips, practice getting
in and out of the pedals. Refer to Page 61, Section 11: “Tech”,
subsection E: “Pedals”.
• Suspension: If your e-bike has suspension, familiarize yourself with how
the suspension responds to brake application and rider weight shifts. Refer
to Page 62, Section 11: “Tech”, subsection F: “Bicycle Suspension”.
• Display: What are the features and functions? Which buttons change the
power mode?
• Lights: Does the light turn on when the e-bike is powered on, or is it
turned on separately? Make sure the light is always on. The front light
beam must be angled properly so it doesn’t blind oncoming trafc.
• Power: Are you familiar with your e-bike’s power output? Start getting to
know your e-bike in the lower assistance settings, gradually work up to the
higher settings. Once comfortable, start riding under normal trafc conditions.
• Walk-assist: Are you familiar with the function of the power-assist mode?
Test the walk-assist function to familiarize yourself with walking next to an
e-bike that’s moving with low speed.
• Battery: Can the battery be easily removed from the e-bike? If so, be sure
to familiarize yourself with the process to properly and safely remove and
install the battery.
• Starting a ride: Do you know how to safely start a ride on an e-bike?
Develop a proper habit for starting your ride. Make sure the power is off
and you’re properly seated on the saddle, with hands on the handlebar and
one or more brakes engaged before putting a foot on a pedal.
WARNING: Do not put a foot on a pedal and swing a leg over the e-bike.
This is especially important if the power is on. While this technique may
work ne on a regular bicycle, this is potentially dangerous to do on an
e-bike, as it can cause the e-bike to unexpectedly launch once pressure is
applied to a pedal, leading to a crash resulting in serious personal injury.
D. Before Every Ride
Before every ride, you need to make sure your e-bike is in proper working
order. Here are some questions to ask yourself before every ride:
• Are all battery and terminal connections (control unit, command console,
drive unit) plugged properly?
• Is the battery fully charged? Charge it after each ride. Don’t wait until it’s
fully discharged. A battery in a state of deep discharge can negatively
affect the ability to charge it, and can also reduce its charge capacity.
• Is the display functioning properly? Any error messages? Don’t ride if it’s
showing errors or improper information.

27
• Is the battery tightly installed and securely locked (if it has a lock)?
• Is your light turned on, functioning and angled properly? If a bulb is dead,
only replace it with a compatible light bulb.
• Are the tires in good condition and properly inated? If you have questions
about the proper tire pressure for your e-bike, check the ination range
printed on the tire sidewall. Refer to Page 63, Section 11: “Tech”,
subsection G: “Tires and Tubes” for additional information about tire
ination.
• Are the brakes working properly? Squeeze both brake levers rmly to
make sure the brakes are working and able to slow and stop the e-bike.
NOTE: Some brake systems have a cutoff switch to stop the motor when the brakes
are applied. Check your model-specic e-bike manual to determine if your e-bike
has this feature. If so, check the function of the cutoff switch before each ride.
E. General E-bike Safety
WARNING: Failure to read, understand and follow all instructions and
warnings regarding the safe operation of an e-bike may lead to a
crash resulting in serious personal injury or death.
The addition of an integrated drive system means in some ways your e-bike
is like a regular bicycle, but in other ways it’s different and unique. The higher the
class and top speed, the more important these safety notices become. These
differences mean you must read and follow all instructions in this Manual and any
manufacturer product documentation. You should not treat your e-bike the same
as a regular bicycle. The content in this Manual related to rider safety applies to
all e-bikes, regardless of type or class.
Factors to pay attention to when riding an e-bike:
• Power: The added power and weight of the drive system means an
e-bike may be faster and heavier than a regular bicycle. This additional
acceleration, speed and weight can dramatically affect the handling,
cornering and braking of your e-bike. The faster you go and the more
weight you carry (including passengers or cargo), the more you have to
exercise caution when navigating around trafc and other people, slowing
down (preparing for greater stopping distances), and cornering (slowing
down well before entering the corner).
• Cargo weight: When transporting cargo or passengers, pay particular
attention to the handling and braking characteristics when riding the e-bike
with the additional load. Carrying additional weight can alter the center of
gravity of the e-bike, which can negatively affect the rate of acceleration,
braking distances and safe cornering. There is an increased risk of a
crash resulting in the rider or passenger going over the bars or falling off
the e-bike.
WARNING: Failure to take into account the additional weight and
speed of an e-bike and its cargo can lead to a crash resulting in
serious personal injury or death.
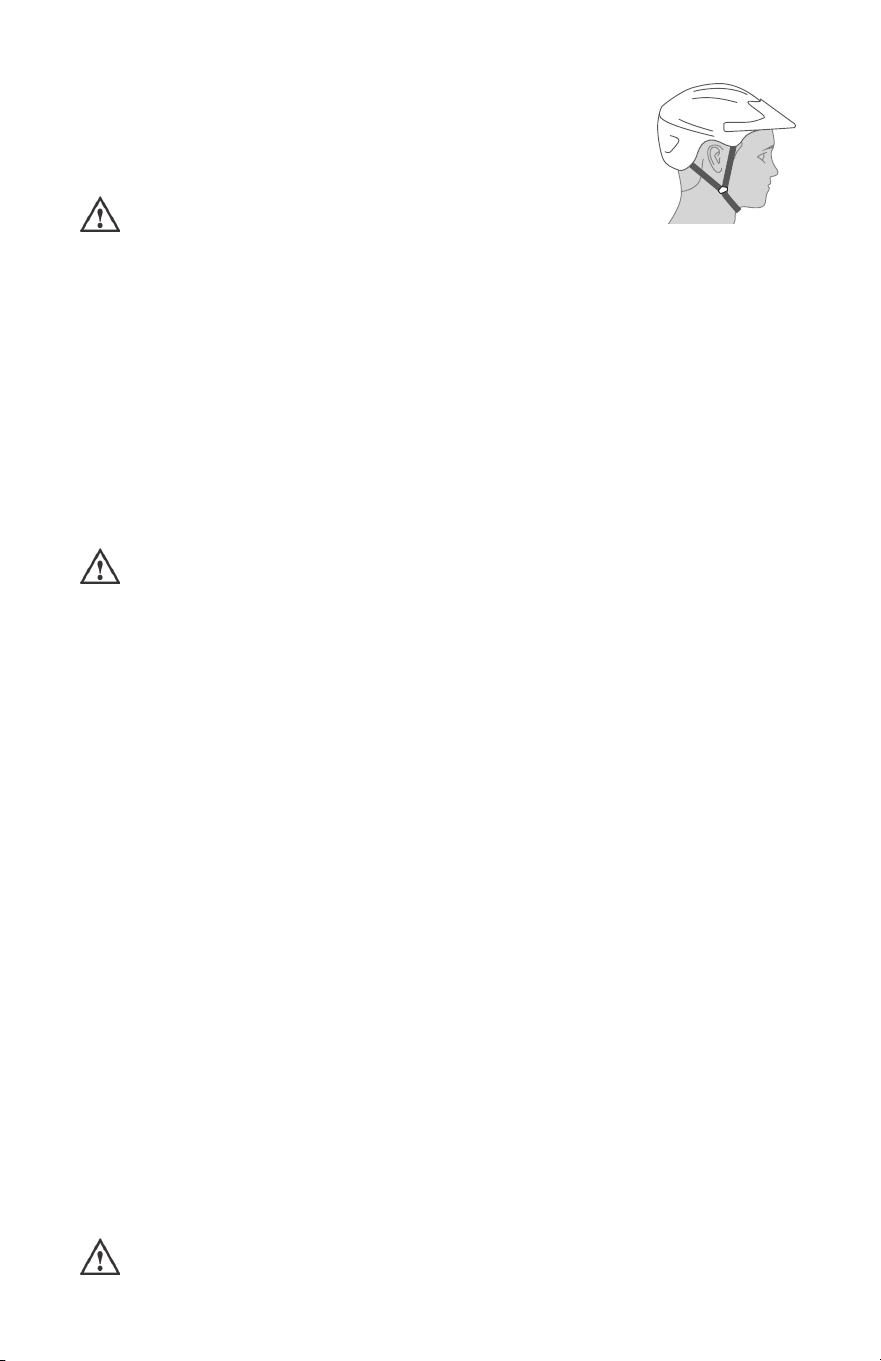
28
g. 5
• Helmet use (g. 5): Always wear a properly tted helmet
that is certied as meeting safety regulations when riding
your e-bike. Some manufacturers may offer helmets that
are specically designed for use with e-bikes.
WARNING: Wearing a helmet has been shown to reduce
the frequency and severity of injury should there be a
crash. Failure to wear a helmet may increase the risk of serious personal
injury or death.
• Display(s): If your e-bike has a display on the handlebar or frame, avoid
paying excessive attention to it. Spending extended periods of time looking at
your display can be distracting and can result in a crash. It’s intended only for
occasional glances. Be sure to keep your attention on the road ahead.
• Children and pets: When riding an e-bike in proximity of children or
animals, always be aware of their location and exercise caution to reduce
the risk of injury.
• Hot surfaces: Certain components on an e-bike can be hot to the touch
during or immediately after a ride.
WARNING: Components can reach very high temperatures during use,
especially when the e-bike is subjected to high loads at low speeds,
resulting in poor air movement around the e-bike. For example, riding up a
long, sustained hill, riding with a heavy load, or riding down a long hill with
prolonged brake application, can result in one or more systems generating
signicant heat. Avoid touching any part of the battery housing, drive
system or brake system with exposed skin (e.g., hands or legs). Contact
with hot components can result in burns if touched.
• Sun exposure: Do not park for extended periods in the blazing sun.
Prolonged exposure to excessive heat and UV rays from the sun can result
in damage to the battery and other components. It can also cause paint to
fade, and rubber or plastic parts to dry out, become brittle and crack.
• Component temperature: There are numerous circumstances that
can affect component temperatures. The more you pay attention to the
circumstances and try to mitigate the effects, the lower the temperatures
may be. The examples below describe circumstances that generally
require more effort from components like the motor, battery and brakes,
which can cause them to generate more heat.
- High ambient temperature
- Hilly terrain (elevation gain)
- Long distance of ride
- Low level of assistance
- High rider energy output
- High combined weight of e-bike, rider and cargo
- Inefcient gear selections
- Sustained application of brakes
WARNING: An e-bike may apply greater loads to your tires during use
than a regular bicycle. If you replace the tires on your e-bike, it is

29
strongly recommended to only use tires intended for e-bikes. Worn or
incorrect tires can result in loss of control when cornering or braking
which can cause a crash resulting in serious personal injury or death.
WARNING: Keep medical devices/implants (e.g., a pacemaker), or
sensitive electronic devices that retain electronic/digital data away from
any magnets or sensors located on your e-bike, which may interfere with the
function of these devices.
F. Lighting and Night Riding
Riding an e-bike at night is much more dangerous than riding during the
day. A bicyclist is very difcult for motorists and pedestrians to see. Therefore,
children should never ride at dawn, at dusk or at night. Adults who choose to
accept the greatly increased risk of riding at dawn, at dusk or at night need to
take extra care both riding and choosing specialized equipment that helps reduce
that risk.
Having a headlight on while riding increases your visibility, even in the
daytime. Many e-bikes are equipped with a headlight that is connected to and
powered by the drive system, when the battery is charged and the system is
turned on. If your e-bike is equipped with a headlight, it is recommended to
always have it on while riding. If your headlight does not turn on automatically
when the drive system is turned on, turn on the headlight.
NOTE: Light systems connected to the drive system won’t work if the battery is
removed or fully discharged. In some countries, if the e-bike is ridden without
lights, it won’t be in compliance with trafc laws.
WARNING: Using a headlight and taillight is highly recommended.
Riding an e-bike at night or in low light or visibility conditions without
a functioning headlight and taillight can create an increased risk of impact
with obstacles, unseen road conditions, pedestrians, animals or other road
users, including motor vehicles, leading to a crash resulting in serious
personal injury or death.
WARNING: Reectors are not a substitute for required lights. Riding at
dawn, at dusk, at night or at other times of poor visibility without an
adequate bicycle lighting system and without reectors is dangerous and
may result in serious injury or death.
Bicycle reectors are designed to pick up and reect car lights and street
lights in a way that may help you to be seen and recognized as a moving bicyclist.
CAUTION: Check reectors and their mounting brackets regularly to
make sure that they are clean, straight, unbroken and securely
mounted. Replace damaged reectors and straighten or tighten any that
are bent or loose.
The mounting brackets of front and rear reectors are often designed as
brake straddle cable safety catches which prevent the straddle cable from
catching on the tire tread if the cable jumps out of its yoke or breaks.

30
WARNING: Do not remove the front or rear reectors or reector
brackets from your e-bike. They are an integral part of the e-bike’s safety
system. Removing the reectors reduces your visibility to others using the
roadway. Being struck by other vehicles may result in serious injury or death.
WARNING: The reector brackets may protect you from a brake
straddle cable catching on the tire in the event of brake cable failure. If
a brake straddle cable catches on the tire, it can cause the wheel to stop
suddenly, causing you to lose control and fall.
If you choose to ride under conditions of poor visibility, check and be sure
you comply with all local laws about night riding, and take the following strongly
recommended additional precautions:
• Purchase and install battery- or generator-powered head and tail lights
which meet all regulatory requirements for where you live and provide
adequate visibility.
• Wear light-colored, reective clothing and accessories, such as a reective
vest, reective arm and leg bands, reective stripes on your helmet,
ashing lights attached to your body and/or your e-bike. Any reective
device or light source that moves will help you get the attention of
approaching motorists, pedestrians and other trafc.
• Make sure your clothing or anything you may be carrying on the e-bike
does not obstruct a reector or light.
• Make sure that your e-bike is equipped with correctly positioned and
securely mounted reectors.
While riding at dawn, at dusk or at night:
• Ride slowly.
• Avoid dark areas and areas of heavy or fast-moving trafc.
• Avoid road hazards.
• If possible, ride on familiar routes.
If riding in trafc:
• Be predictable. Ride so that drivers can see you and predict your movements.
• Be alert. Ride defensively and expect the unexpected.
G. General Bicycle Safety
1. All of the same safe riding practices that apply to unpowered bicycles also
apply to e-bikes, with the important difference being the addition of motor
power that can propel you and your e-bike at greater speeds and allow you
to accelerate more quickly. This makes your adherence to these general
rules of safety that much more important.
2. Always do the Mechanical Safety Check. Refer to Page 22, Section 7:
“Safely Operating Your E-bike”, subsection B: “Mechanical Safety Check”
before you get on an e-bike.
3. Be thoroughly familiar with the controls of your e-bike. Refer to Section
11: “Tech”, subsections C: “Brakes” on Page 57, D: “Shifting Gears” on
Page 59 and E: “Pedal” on Page 61.
4. Be careful to keep body parts and other objects away from the sharp teeth
of chainrings, the moving chain, the turning pedals and cranks, and the
spinning wheels of your e-bike.

31
5. Always wear:
• Shoes that will stay on your feet and will grip the pedals. Make sure that
shoelaces cannot get into moving parts, and never ride barefoot or in sandals.
• Bright, visible clothing that is not so loose that it can be tangled in the
e-bike or snagged by objects at the side of the road or trail.
• Protective eyewear, to protect against airborne dirt, dust and bugs — tinted
when the sun is bright, clear when it’s not.
6. Unless your e-bike was specically designed for jumping (See Appendix A,
Intended Use) don’t jump with your e-bike. Jumping an e-bike, particularly
a mountain e-bike, can be fun; but it can put huge and unpredictable stress
on the e-bike and its components. Riders who insist on jumping their
e-bikes risk serious damage, to their e-bikes as well as to themselves.
Before you attempt to jump, do stunt riding or race with your e-bike, read
and understand Page 33, Section 7: “Safely Operating Your E-bike”,
subsection K: “Extreme, Stunt or Competition Riding”.
7. Ride at a speed appropriate for conditions. Higher speed means higher risk.
H. Riding Safety
1. Obey all Rules of the Road and all local trafc laws.
2. You are sharing the road or the path with others — motorists, pedestrians
and other cyclists. Respect their rights.
3. Ride defensively. Always assume that others do not see you.
4. Look ahead, and be ready to avoid:
• Vehicles slowing or turning, entering the road or your lane ahead of you, or
coming up behind you.
• Parked car doors opening.
• Pedestrians stepping out.
• Children or pets playing near the road.
• Pot holes, sewer grating, railroad tracks, expansion joints, road or sidewalk
construction, debris and other obstructions that could cause you to swerve
into trafc, catch your wheel or cause you to crash.
• The many other hazards and distractions which can occur on an e-bike ride.
5. Ride in designated bike lanes, on designated bike paths or as close to the
edge of the road as practicable, in the direction of trafc ow or as directed
by local governing laws.
6. Stop at stop signs and trafc lights; slow down and look both ways at street
intersections. Remember that an e-bike always loses in a collision with a
motor vehicle, so be prepared to yield even if you have the right of way.
7. Use approved hand signals for turning and stopping.
8. Never ride with headphones or earbuds. They mask trafc sounds and
emergency vehicle sirens, distract you from concentrating on what’s going
on around you, and their wires can tangle in the moving parts of the e-bike,
causing you to lose control.
9. Never carry a passenger, unless the e-bike was designed to carry a
passenger. Before installing a child carrier or trailer, check with the e-bike
manufacturer to make sure the e-bike is designed for it. If the e-bike is
suitable for a child carrier or trailer, make sure that the carrier or trailer
is correctly mounted and the child is secured and wearing an approved
helmet. Refer to Page 37, Section 8: “Best Practices for Riding
and Carrying Passengers and Cargo” for more information on carrying

32
passengers, child carriers and trailers.
10. Never carry anything which obstructs your vision or your complete control of
the e-bike, or which could become entangled in the moving parts of the e-bike.
11. Never hitch a ride by holding on to another vehicle.
12. Don’t do stunts, wheelies or jumps. If you intend to do stunts, wheelies,
jumps or go racing with your e-bike despite advice to the contrary, refer
to Page 33, Section 7: “Safely Operating Your E-bike”, subsection K:
“Extreme, Stunt or Competition Riding”, now. Think carefully about your
skills before deciding to take the large risks that go with this kind of riding.
13. Don’t weave through trafc or make any moves that may surprise people
with whom you are sharing the road.
14. Observe and yield the right of way.
15. Never ride your e-bike while under the inuence of alcohol or drugs.
16. If possible, avoid riding in bad weather, when visibility is obscured, at dawn,
dusk or in the dark, or when extremely tired. Each of these conditions
increases the risk of a crash.
I. Off-Road Safety
We recommend that children not ride on rough terrain unless they are
accompanied by an adult. Some e-bikes may be designed for off-road use.
If your e-bike is designed for off-road use and you choose to ride your e-bike
off-road, follow these best practices:
1. The variable conditions and hazards of off-road riding require close attention
and specic skills. Start slowly on easier terrain and build up your skills. If
your e-bike has suspension, the increased speed you may develop also
increases your risk of losing control and falling. Get to know how to handle
your e-bike safely before trying increased speed or more difcult terrain.
2. Wear safety gear appropriate to the kind of riding you plan to do.
3. Don’t ride alone in remote areas. Even when riding with others, make sure
that someone knows where you’re going and when you expect to be back.
4. Always take along some kind of identication, so that people know who you
are in case of a crash; and take along some cash for food, a cool drink or
an emergency phone call.
5. Yield right of way to pedestrians and animals. Ride in a way that does
not frighten or endanger them, and give them enough room so that their
unexpected moves don’t endanger you.
6. Be prepared. If something goes wrong while you’re riding off-road, help may
not be close.
7. Before you attempt to jump, do stunt riding or race with your e-bike, read
and understand Page 33, Section 7: “Safely Operating Your E-bike”,
subsection K: “Extreme, Stunt or Competition Riding”.
J. Wet-Weather Riding
WARNING: Wet weather impairs traction, braking and visibility, both
for the bicyclist and for other vehicles sharing the road. The risk of a
crash is dramatically increased in wet conditions.
Under wet conditions, the stopping power of your brakes (as well as the
brakes of other vehicles sharing the road) is dramatically reduced and your tires

33
don’t grip nearly as well. This makes it harder to control speed and easier to lose
control. To make sure that you can slow down and stop safely in wet conditions,
ride more slowly and apply your brakes earlier and more gradually than you
would under normal, dry conditions. Refer to Page 32, Section 7: “Safely
Operating Your E-bike”, subsection J: “Wet-Weather Riding”.
K. Extreme, Stunt or Competition Riding
Whether you call it Aggro, Hucking, Freeride, North Shore, Downhill,
Jumping, Stunt Riding, Racing, Enduro or something else: if you engage in this
sort of extreme, aggressive riding, you voluntarily assume a greatly increased
risk of injury or death.
Not all e-bikes are designed for these types of riding, and those that are
may not be suitable for all types of aggressive riding. Check with the e-bike’s
manufacturer about the suitability of your e-bike before engaging in extreme
riding.
When riding fast down hill, you can reach speeds achieved by motorcycles,
and therefore face similar hazards and risks. Have your e-bike and equipment
carefully inspected by a qualied mechanic and be sure it is in perfect condition.
Consult with expert riders, area site personnel and race ofcials on conditions
and equipment advisable at the site where you plan to ride. Wear appropriate
safety gear, including an approved full-face helmet, full-nger gloves, and body
armor. Ultimately, it is your responsibility to have proper equipment and to be
familiar with course conditions.
WARNING: Although many catalogs, advertisements and articles
about bicycling depict riders engaged in extreme riding, this activity is
extremely dangerous, increases your risk of injury or death, and increases
the severity of any injury. Remember that the action depicted is being
performed by professionals with many years of training and experience.
Know your limits and always wear a helmet and other appropriate safety
gear. Even with state-of-the-art protective safety gear, you could be
seriously injured or killed when jumping, stunt riding, riding downhill at
speed or in competition.
WARNING: E-bikes and bicycle parts have limitations with regard to
strength and integrity, and this type of riding can exceed those
limitations or dramatically reduce the length of their safe use.
We recommend against this type of riding because of the increased risks; but
if you choose to take the risk, at least:
• Take lessons from a competent instructor rst.
• Start with easy learning exercises and slowly develop your skills before
trying more difcult or dangerous riding.
• Use only designated areas for stunts, jumping, racing or fast downhill riding
• Wear a full-face helmet, safety pads and other safety gear.
• Understand and recognize that the stresses imposed on your e-bike by
this kind of activity may break or damage parts of the e-bike and void the
warranty.
• Take your e-bike to a qualied bicycle mechanic if anything breaks or
bends. Do not ride your e-bike when any part is damaged.
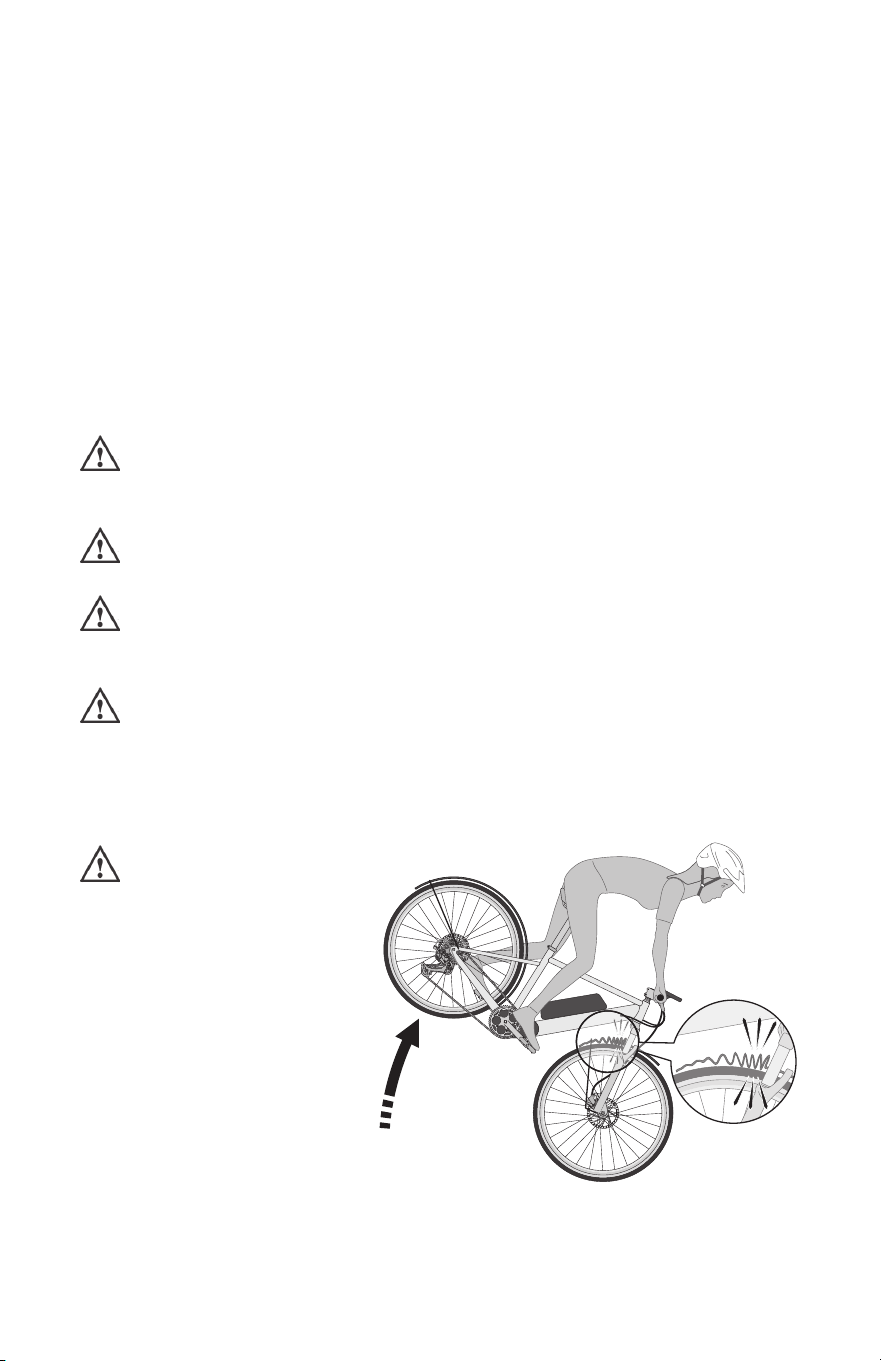
34
• If you ride downhill at speed, do stunt riding or ride in competition, know
the limits of your skill and experience. Ultimately, avoiding injury is your
responsibility.
L. Changing Components or Adding Accessories
There are many components and accessories available to enhance the
comfort, performance and appearance of your e-bike. However, if you change
components or add accessories, you do so at your own risk. The e-bike’s
manufacturer may not have tested that component or accessory for compatibility,
reliability or safety on your e-bike. Before installing any component or accessory,
including but not limited to a different size tire, a lighting system, a luggage rack,
a child seat or a trailer, make sure that it is compatible with your e-bike. Be sure
to read, understand and follow the instructions that accompany the products you
purchase for your e-bike. See also Appendix A, Page 73 and B, Page 78.
WARNING: Failure to conrm compatibility, properly install, operate
and maintain any component or accessory can result in serious injury
or death.
WARNING: Exposed springs on the saddle of any e-bike tted with a
child seat can cause serious injury to the child.
WARNING: Changing the components on your e-bike with other than
genuine replacement parts may compromise the safety of your e-bike
and may void the warranty.
WARNING: Any accessory or component attached to, on or near a
rotating wheel poses a risk of contacting or stopping the wheel,
leading to a crash resulting in serious injury or death. Before every ride
check to ensure that all such accessories and components, and the
fasteners used to attach them, are securely mounted to your e-bike.
g. 6
WARNING: Any object
that unexpectedly and
abruptly stops the rotation of
the front wheel can cause the
e-bike and rider to pitch
forward (g. 6), which can
result in serious injury or
death.

35
M. Walk-assist Mode
Some e-bikes are equipped with a walk-assist mode to help you move the
e-bike around without riding it. Proper use of walk-assist mode is important to
prevent loss of control and injury.
• Only use when dismounted.
• Keep both hands on the grips and ngers on one or both brake levers so
the motor power can be stopped immediately if necessary.
• Keep clear of the pedals while walking the e-bike.
WARNING! Make sure the e-bike system is turned off so that the
walk-assist mode cannot be accidentally activated when:
• Pushing the e-bike without the walk-assist mode turned on.
• Transporting the e-bike (lifting onto a car, bike rack or a train).
• Carrying the e-bike up and down stairs.
• Performing any maintenance or service (e.g., placing the chain on a
chainring) or other drivetrain parts, pedals or xing a at tire.
N. Getting the Most Out of Your E-bike
The variety of factors that affect your e-bike’s range makes it impossible
to accurately estimate the range before a ride. Pay attention to the variables
to maximize your range and adjust any factors during the ride as needed (e.g.,
lower assistance level, optimal gear shifting or lower speeds) to help you reach
your destination.
To maximize battery range, turn off the drive system when not in use. Most
drive systems have a sleep mode to conserve energy, which will turn off if the
e-bike has not been active for a predetermined amount of time.
Your e-bike’s range varies based on a number of factors:
• The level of motor assistance (power mode): More power assistance
from the motor will make riding easier but will use more battery power.
• How much power you apply to the pedals: The more power the rider
provides, the less the motor has to work.
• How fast you ride: The faster you ride, the more power the motor
generates, the more energy is required from the battery.
• Riding habits: The more efciently you ride, the greater the range will be.
For example, regular starts and stops will reduce your range.
• Gear choices: The higher the gear, the more power is required from the
motor. Choosing the best gear for the terrain can improve your range.
• Tire type and air pressure: Tires with aggressive tread or lower than
recommended pressure can increase your rolling resistance and reduce
your range.
• Number of battery charge/discharge cycles: Regular charging and
discharging reduces the battery’s capacity, which will reduce your range.
• Terrain features: Hilly terrain will reduce your range more than at terrain.
• Wind and temperature conditions: A strong headwind or colder
temperatures can reduce the efciency of your e-bike and reduce your range.
• Total combined weight (e-bike, rider and cargo): Carrying heavier cargo
makes the motor work harder, which can reduce your range.
• Condition of e-bike components: Certain components like wheel

36
bearings, if not functioning smoothly, can increase rolling resistance, which
can reduce your range.
To get the most range:
• Fully charge the battery before each ride.
• Use lower assistance modes.
• Ride more slowly and efciently.
• Choose the right gear for the terrain and accelerate gently.
• Check tire pressure regularly and set the pressure as recommended by the
manufacturer.
• Make sure your e-bike is in proper working order and serviced regularly,
the wheels spin freely and brake discs clear the brake pads.
• Carry the least amount of weight necessary.
Choose your gears according to the speed and incline you’re riding. Shift
gears regularly to keep a consistent, comfortable pedaling speed, or cadence.
Riding in a high gear with a low cadence increases the demand on the motor
and battery, which can reduce your range. Choosing a lower gear with a higher
cadence also puts less strain on the drivetrain, which can increase the longevity
of the drivetrain.
Maintain a steady pace and anticipate changes to your surroundings
whenever possible. Any unnecessary deceleration requires more energy to
accelerate back up to speed, which reduces your available range.
Before coming to a stop, shift gears into an easier gear. This will make
accelerating from a stop easier, and require less energy from the battery to get
back up to speed.
When riding uphill, keep to a reasonable pace and choose a lower gear with
a higher cadence. This puts less strain on the motor, which can help increase the
available range.
CAUTION (e-bikes equipped with throttle): Riding uphill at slow speed
using only the throttle can result in overheating of the drive system due to
excessive strain. This can result in component failure, as well as subject
the battery to excessive stress, which can reduce its capacity.
Center-mounted or “mid-drive” motors (motor that applies power to the
cranks) share many of the same drivetrain components as a regular bicycle.
However, the increase in force applied at the crank from the motor can result in
more strain to the drivetrain components (chain, derailleur, cassette, chainrings
and derailleur hanger). In order to minimize the strain and maximize the lifespan
of the drivetrain, apply best practices when shifting:
• Shift efciently by anticipating when the shift will be needed beforehand.
For example, shifting into an easier gear before starting to climb a hill
instead of during the climb.
• Ride with a cadence that matches the terrain and speed, so you’re not
pedaling too slowly and with too much force.
• When shifting, reduce your pedal force or throttle, shift the gears, then
gently re-engage your pedal force once the shift is complete.
WARNING: Shifting under a heavy load can cause damage to the
drivetrain components, including breaking the chain. This can cause a
crash, resulting in serious personal injury or death.

37
Keep your e-bike clean, well-maintained and functioning optimally. Check
tire pressure regularly. The better your e-bike is maintained, the more efciently
it will operate.
Familiarize yourself with your manufacturer’s specic startup
recommendations. Before doing more extensive, longer and more demanding
rides, become familiar with your e-bike’s functions, features and operation so
you can adapt your riding style to changing conditions.
WARNING: Conditions on the road, path or trail you are riding on can
present sudden hazards. Avoid or exercise caution by slowing your
speed on dangerous terrain, including:
• Potholes
• Train tracks
• Wet, oily or icy terrain
• Gravel or sand
• Curbs
• Wet leaves
• Speed bumps
• Drain grates
• Broken glass
• Thorns
• Steep hills
• Sharp or sudden turns
• Other hazards that can cause a puncture and/or loss of control
Failure to take these potentially dangerous conditions into account can
cause a crash, leading to serious personal injury or death.
8. Best Practices for Riding and Carrying
Passengers and Cargo
When riding your e-bike, you are usually sharing the roadway, path or trail
with other users. This presents certain risks to yourself and others.
WARNING: Riding your e-bike on public roads shared with motor
vehicles presents an obvious and assumed risk of collision. Most
serious injuries and fatalities related to e-bike use are the result of collisions
with larger, faster motor vehicles. When on an e-bike, remember that you do
not have the protection enjoyed by motorists, such as seat belts, airbags and
the surrounding structure of a motor vehicle. As a road user, it is your
responsibility to follow the rules of the road and operate your e-bike in such
a manner as to reduce your risk of a collision. Failure to follow this warning
may lead to a collision or crash, resulting in serious personal injury or death.
Please be considerate of others around you, whether they are motorists,
pedestrians or cyclists. Please pay attention to the following factors:
• Your speed: Always ride at a speed within your comfort zone and/or
according to the conditions you’re riding in (e.g., rain, darkness or loose

38
dirt). This especially applies when riding in wet weather, as you’ll need
even more time and greater distance to slow down and are more likely
to crash. Give lots of room to slow down and apply brakes gently. Riding
at speeds beyond your comfort or skill level can result in a serious crash.
Even if it’s legal, it’s not always safe to be riding at high speeds on paths or
trails when other users are present.
• Surrounding speeds: Consider the speeds of those around you and how
your speed is perceived. E-bike speeds are often underestimated since
they look like regular bicycles and decisions are made with the assumption
you’re riding slower than you are. Always be vigilant about what’s going on
around you at intersections or anyplace where cars might cross your path.
• Surrounding people: Exercise caution when passing pedestrians or other
cyclists. The greater the speed difference, the greater the likelihood of
a crash. Slow when people or pedestrians are present, as they may not
be aware of your presence and may step out in front of you. Riding with
greater speed and weight requires more care, especially around other
riders. Avoid distractions and stay focused on the road ahead. When
following other riders, maintain a sufcient enough gap to allow you to stop
safely. The higher your speed, the greater the gap should be.
CAUTION: When riding in a group, following other riders, or riding on
crowded roads, paths or trails, always maintain a gap sufcient to
allow you to stop safely.
• Applying brakes: Always be prepared to squeeze the brake levers. Your
brakes are designed to take into account the weight of the e-bike, rider and
cargo to stop your e-bike. If you apply them in a controlled manner, your
e-bike will slow down and come to a stop.
• Brake power: Don’t exclusively apply the front brake to slow down. This
can put undue stress on components and can put too much weight on the
front of the e-bike. Instead, to slow the e-bike down safely, gently engage
the rear brake, followed by the front brake. The amount of force applied
to each brake varies depending on the terrain, weather conditions, speed,
rider/cargo weight and trajectory.
WARNING: Applying excessive force to the front brake to slow down
can result in loss of control, including causing the rider to pitch over
the handlebars, which can result in serious personal injury or death.
A. Riding with Passengers
Check with your e-bike manufacturer for information about transporting
passengers with your e-bike. Many e-bikes are designed for use by one person
(the rider) unless explicitly stated by the manufacturer. Any transportation of a
passenger beyond the intended design of the e-bike is at your own risk. Certain
passenger and cargo e-bikes have requirements for how passengers are
placed on the e-bike. Follow any rules and restrictions specied by the e-bike
manufacturer.
Before transporting passengers, including children (see “Transporting Youth
and Children” below), inform yourself of all applicable laws, requirements and
restrictions (including age restrictions) for your particular country or region. Some
regions do not allow riding with passengers.

39
When carrying a passenger behind the rider, since they cannot see what’s
coming, ride with more caution, anticipate whenever possible what’s coming
sooner than usual, and always notify the passenger of an upcoming sudden
acceleration, deceleration, turn, bump or obstacle that could impact their safety
as a passenger, so they can brace for the event.
Remember: It is the rider’s responsibility to ensure the safe operation of the
e-bike and the safety of their passenger. Whenever possible, plan your route to
avoid riding signicant hills while carrying passengers.
WARNING: Riding with passengers on an e-bike signicantly affects
the balance, handling, acceleration and braking distance of an e-bike,
especially on a signicant downhill grade. Additional weight and speed
means additional forward momentum that will need to be counteracted by
your brakes in order to slow your e-bike or bring it to a stop. Because
braking demands increase with additional weight when going downhill,
there is a greater need to control your speed at the beginning and during
the descent. Riding at speeds that are too high to safely manage can lead
to a loss of control or crash, resulting in serious personal injury or death.
Weight Limits: E-bikes often have maximum stated structural weight limits for
rider, passenger and any cargo. Pay particular attention to the structural weight
limits specied by your e-bike manufacturer, and do not exceed them. If you are
unsure about the weight limit for your e-bike, ask the manufacturer. Even if the
rider, passenger and cargo weight are within the structural weight limits, the rider
must also determine if they’re comfortably and safely able to manage the weight
of a passenger.
WARNING: Do not exceed the maximum structural weight limit of your
e-bike. Exceeding the limit can affect the structural integrity of the
e-bike leading to a failure of the e-bike’s frame, fork or components, and
can also result in unsafe increases in braking distances. Any of these
conditions can lead to a crash resulting in serious personal injury or death.
To protect passengers, always make sure to prevent loose clothing or
personal belongings such as purses or backpacks from interfering with moving
parts while your e-bike is in motion.
WARNING: Any contact from body parts, clothing or cargo with the
e-bike while in motion can unexpectedly and abruptly stop the e-bike,
leading to a crash resulting in serious personal injury or death.
CAUTION: Make sure the e-bike is secured and stable when loading or
unloading passengers. The e-bike can tip over when passengers are
being loaded or unloaded, which can result in injury.
Your e-bike may be equipped with a kickstand. The kickstand is designed to
support only the e-bike without rider, cargo or passengers, while on a stable, at
surface. Do not rely on the kickstand to support the e-bike during the loading or
unloading process.
Passengers should not get on the e-bike unless the rider is holding the

40
e-bike. Never allow a child to climb onto the e-bike by themselves, unless an
adult is making sure the e-bike is steady.
Some e-bikes may have a seating area, handholds and/or foot supports for
the passenger. Passengers should be seated and handholds and foot supports
should be used at all times when the e-bike is in motion.
WARNING: Passengers must not stand on foot supports while the
e-bike is in motion. Standing on the foot supports negatively affects
the center of gravity of the e-bike and can cause instability leading to a
crash, which can result in serious personal injury or death.
Carrying Pets: Due to the unpredictable nature of pets, it is not recommended to
ride with a pet as a passenger or live cargo. Pets should always be transported
in a closed pet carrier or in a trailer designed for that purpose. Transporting a pet
that is not restrained or conned puts the rider and pet at signicant risk of injury,
and you do so at your own risk.
B. Transporting Youth or Children
WARNING: Riding with youth or children as passengers on an e-bike
carries signicant risks. Parents must exercise caution and good
judgment, and know they assume all risks when transporting a child.
WARNING: Children must always wear an approved helmet when
passengers on e-bikes.
Age restrictions vary depending on the country or region. Before riding with
a child as a passenger, familiarize yourself with and obey all applicable laws,
requirements and restrictions for your country or region.
Using a child carrier: Only use child carriers that are approved by the
manufacturer for use with your e-bike and that conform to local laws. Refer to the
e-bike manufacturer for any additional information about child carriers specic to
your e-bike.
WARNING: Always follow the installation, safety and compatibility
instructions provided by the manufacturer of the child carrier. Ensure
the child carrier is properly installed as instructed, with sufcient clearance
for the child’s heels and safety for ngers, and that the child is within the
weight range specied by the manufacturer. Always install foot restraints
or guards designed to prevent body parts becoming caught in a revolving
wheel. Failure to follow these warnings and all instructions provided by the
manufacturer can cause serious injury to the child or a crash, which can
result in serious personal injury or death.
WARNING: Do not leave a child unattended in a child carrier, and do
not rely on a kickstand to hold an e-bike up safely, except when
buckling the child in the child carrier. Always hold the e-bike safely and
securely when a child is in the child carrier, and remove the child before
leaving the e-bike. An unattended child can wriggle unexpectedly and cause
the e-bike to fall over, which can result in serious personal injury or death.
41
Check on your child regularly. If they fall asleep, it can put excessive strain
on their neck. A child should only be placed in a child seat if they’re able to hold
their head up independently, as well as withstand the movements and bouncing
that come with riding on an e-bike.
WARNING: Improper mounting of a child carrier, trailer or accessory
may result in failure of the frame, fork or components, causing serious
personal injury or death.
C. Transporting Cargo
WARNING: Cargo should only be carried on an e-bike that is designed
for that purpose. Carrying cargo on an e-bike that is not designed for
that purpose may lead to loss of control or crash, which can result in
serious personal injury or death.
Always load cargo as low as possible to help maintain a low center of gravity.
This helps improve the stability of the e-bike.
When riding with cargo, practice and familiarize yourself with the braking
distances and handling characteristics of the e-bike by starting with lighter loads
and gradually increasing the weight. Carrying increased weight will increase
your braking distance, which requires more careful use of your brakes. To help
maintain control, start by applying the rear brake rst, then gently apply the front
brake. Gradually increase the braking force as needed to safely slow the e-bike
in a controlled manner.
WARNING: Cargo must be properly secured to the e-bike with no loose
straps and checked periodically to ensure the cargo remains secure.
Loose cargo can shift or fall off the e-bike and can interfere with moving
parts. Loose straps can also interfere with moving parts. Either of these
situations can cause a crash, resulting in serious personal injury or death.
WARNING: Always make sure the e-bike is stable and secure before
loading or unloading any cargo, and the cargo is loaded to minimize any
interference with obstacles, other cyclists, pedestrians or motorists. Always
be aware of your surroundings. Cargo that interferes with your surroundings
can cause a crash, which can result in serious personal injury or death.
1. Cargo e-bikes
WARNING: All of the above instructions and warnings about carrying
passengers and cargo apply to cargo e-bikes. Failure to follow these
warnings could result in a crash leading to serious personal injury or death.
Cargo e-bikes are e-bikes designed specically to carry cargo and/or
passengers. The handling characteristics of cargo e-bikes can be very different
from a regular e-bike. As cargo e-bikes typically handle much slower, additional
practice is often required to get used to the handling. Ride more defensively, give
more room for turning, anticipate needing more distance to slow down, especially
when carrying cargo. Practice parking the cargo e-bike as well. Do not ride with
cargo that isn’t properly secured.

42
D. Using a Trailer
If use of a trailer, carrier or other passenger accessory is allowed with your
e-bike, make sure the trailer is compatible with your e-bike. Consult your e-bike
manufacturer for more information about trailer compatibility and installation. The
e-bike must be safe to ride with the trailer accessories installed, and the trailer
must be securely attached to the e-bike.
WARNING: E-bike manufacturers cannot test all available trailers for
compatibility and safety. Always follow the trailer manufacturer’s
installation, safety and usage instructions. An incompatible or incorrectly
installed trailer can cause a crash, which can result in serious personal
injury or death.
Towing a trailer with passengers or cargo increases the weight being towed
by the e-bike, which can negatively affect handling in multiple ways:
• Balance and handling: Passengers or cargo in the trailer can move
around and shift the balance and center of gravity of the e-bike, which can
affect the safe handling of the e-bike.
• Cornering: Entering corners must be done more slowly and carefully.
• Stopping: It takes more distance to slow and stop your e-bike.
• Maneuvering: Making quick direction changes is more difcult.
• Accelerating: More motor power is required to accelerate, which requires
more battery energy.
WARNING: Towing a trailer behind your e-bike can result in instability
of the e-bike and trailer. This can cause a crash, which can result in
serious personal injury or death.
9. Drive Systems
A. General Information About Your Drive System
Read, understand and follow all drive system manuals provided with your e-bike.
Refer to the e-bike manufacturer’s instructions for information on how to turn the
system on or off. Only turn the e-bike on or off as instructed by the manufacturer.
WARNING: NEVER open the battery pack or modify the wiring or any
electrical components of your e-bike. Opening the battery or
modifying the wiring can result in electric shock and can cause a re.
WARNING: Do not expose the drive system to excessive water. Never
fully submerge the drive system or use a pressure-washer to clean
your e-bike. Exposure of the battery or internal components of the drive
system to water can result in serious damage to the system components,
resulting in electric shock or re, leading to property damage, serious
personal injury or death.
WARNING: The drive system does not contain any user-serviceable
parts. Any service should be performed by a qualied technician. Do not
attempt to open, disassemble, modify, adjust or service any part of the drive

43
system or its components. Any tampering with the internals of the motor,
battery or other drive system components can result in damage to the system
or lead to a battery re, which can cause serious personal injury or death.
WARNING: E-bike drive system components are only intended for use on
e-bikes. Do not use these components for any other purpose or vehicle.
The mechanical parts of the drivetrain on most e-bikes are often very similar
to a drivetrain used on a regular bicycle, and often shift in the same way. Follow
the same recommendations and best practices as a regular bicycle to shift in a
way that is most benecial to the durability and efciency of your drivetrain.
For more information on servicing your e-bike, including the mechanical
components, please refer to Page 68, Section 12: “Maintaining and Servicing
Your E-bike”.
10. Fit
NOTE: Correct t is an essential element of bicycling safety, performance
and comfort. Making the adjustments to your e-bike that result in correct t
for your body and riding conditions requires experience, skill and special
tools. Always have a qualied bicycle mechanic make the adjustments on
your e-bike. Or, if you have the experience, skill and tools, have a qualied
bicycle mechanic check your work before riding.
WARNING: If your e-bike does not t properly, you may lose control
and fall. If your new e-bike doesn’t t, ask your authorized retailer to
exchange it before you ride it.
WARNING: A child should never ride an e-bike that is too big for them.
While some e-bikes have step-through frames (see g. 2) that may
allow a child to mount an e-bike, that does not mean the e-bike is the right
size for them to operate safely. An e-bike that is too big for a child may lead
to a loss of control and fall, resulting in serious personal injury or death.
1. Is your e-bike the right size? To check,
refer to Page 44, Section 10: “Fit”,
subsection A: “Standover Height”
. If your e-bike is too large or too small for
you, you may lose control and fall. If your new e-bike is not the right size, ask
your authorized retailer to exchange it before you ride it.
2. Is the saddle at the right height? To check, refer to Page 44, Section 10:
“Fit”, subsection B: “Saddle Position”. If you adjust your saddle height,
follow the Minimum Insertion instructions on Page 44, Section 10: “Fit”,
subsection B: “Saddle Position”.
3. Are saddle and seat post securely clamped? A correctly tightened saddle will
allow no saddle movement in any direction. Refer to Page 44, Section 10:
“Fit”, subsection B: “Saddle Position”.
4. Are the stem and handlebars at the right height for you? If not, refer to Page
46, Section
10
: “Fit”, subsection C: “Handlebar Height and Angle”.
5. Can you comfortably operate the brakes? If not, you may be able to adjust
their angle and reach. Refer to Section 10: “Fit”, subsections D: “Control
Position Adjustments” on Page 48 and E: “Brake Reach” on Page 48.
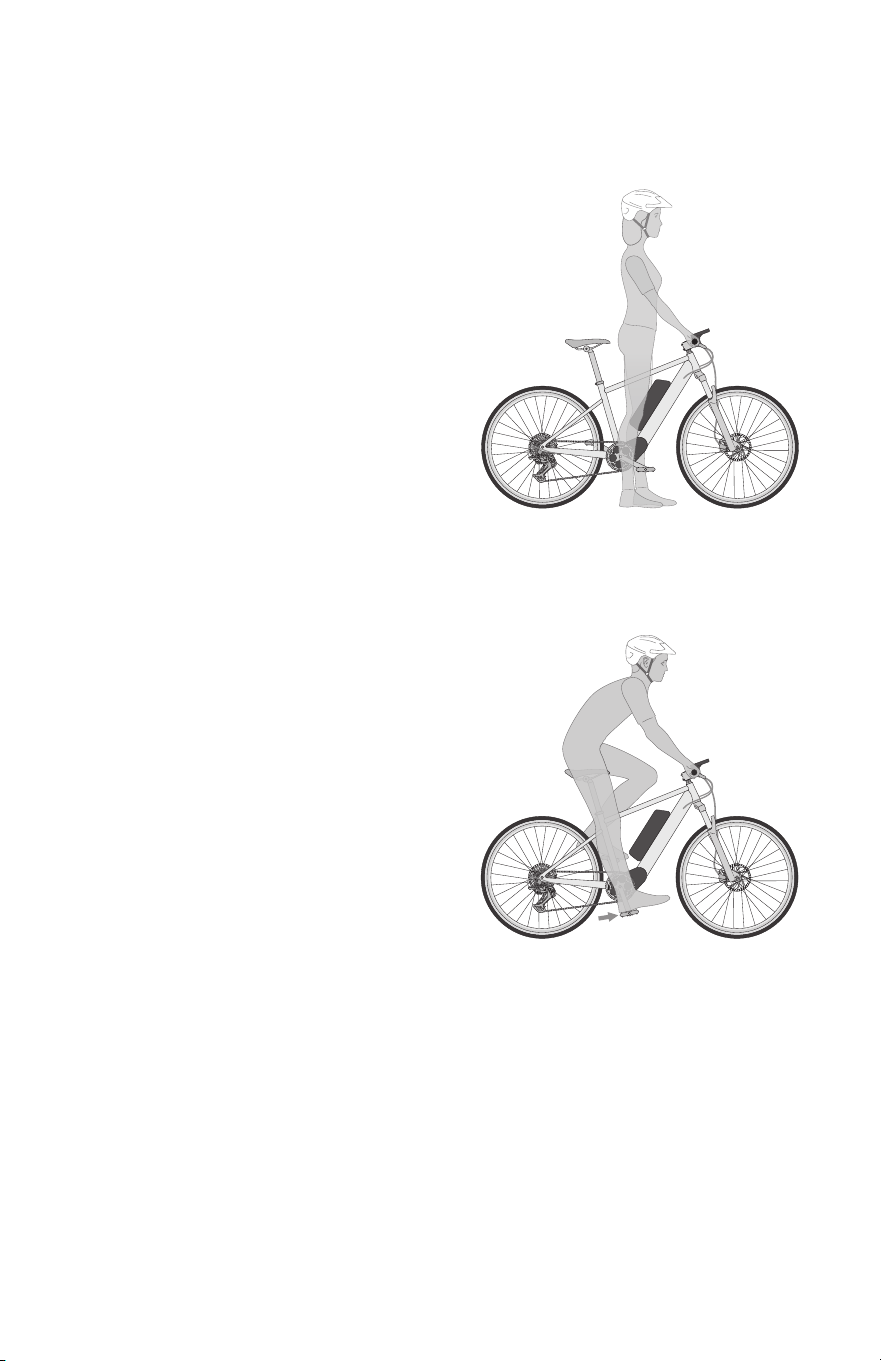
44
6. Do you fully understand how to operate your new e-bike? If not, before your
rst ride, review any functions or features that you do not understand.
A. Standover Height
g. 7
1. Diamond-frame e-bikes
Standover height is the basic element
of e-bike t (g. 7). It is the distance
from the ground to the top of the e-bike’s
frame at that point where your crotch is
when straddling the e-bike. To check for
correct standover height, straddle the e-bike
while wearing the kind of shoes in which
you’ll be riding, and bounce vigorously on
your heels. If your crotch touches the frame,
the e-bike is too big for you. Don’t even
ride the e-bike around the block. An e-bike
which you ride only on paved surfaces
and never take off-road should give you a
minimum standover height clearance of two inches (5 cm). An e-bike that you’ll
ride on unpaved surfaces should give you a minimum of three inches (7.5 cm) of
standover height clearance. And an e-bike that you’ll use off-road should give you
four inches (10 cm) or more of clearance.
g. 8
2. Step-through frame e-bikes
Standover height does not apply to
e-bikes with step-through frames. Instead,
the limiting dimension is determined by
saddle height range. You must be able to
adjust your saddle position as described
in 3.B without exceeding the limits set by
the height of the top of the seat tube and
the ”Minimum Insertion” or “Maximum
Extension” mark on the seat post.
B. Saddle Position
Correct saddle adjustment is an
important factor in getting the most performance and comfort from your e-bike.
Small changes in saddle position can have a substantial effect on performance and
comfort. To nd your best saddle position, make only one adjustment at a time.
The saddle can be adjusted in three directions:
1. Up and down adjustment. To check for correct saddle height (g. 8):
• sit on the saddle
• place one heel on a pedal
• rotate the crank until the pedal with your heel on it is in the down position
and the crank arm is parallel to the seat tube.
If your leg is not completely straight, your saddle height needs to be adjusted.
If your hips must rock for the heel to reach the pedal, the saddle is too high. If
your leg is bent at the knee with your heel on the pedal, the saddle is too low.
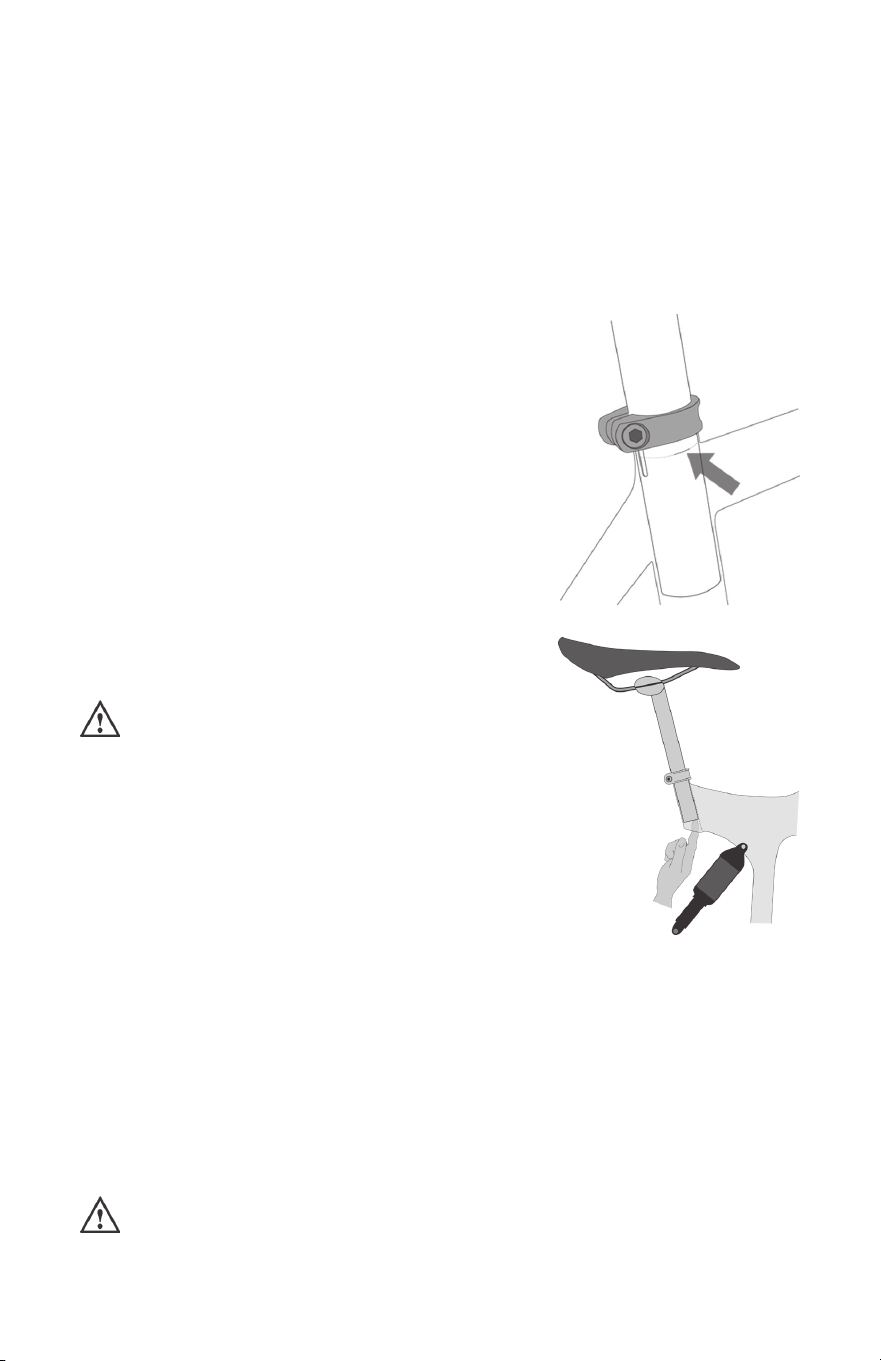
45
If you choose to make your own saddle height adjustment:
• loosen the seat post clamp
• raise or lower the seat post in the seat tube
• make sure the saddle is level fore and aft
• re-tighten the seat post clamp to the recommended torque
Once the saddle is at the correct height, make sure that the seat post
does not project from the frame beyond its “Minimum Insertion” or “Maximum
Extension” mark (g. 9).
g. 9
g. 10
NOTE: Some e-bikes have a sight hole in the seat
tube, the purpose of which is to make it easy to see
whether the seat post is inserted in the seat tube far
enough to be safe. If your e-bike has such a sight
hole, use it in addition to the “Minimum Insertion” or
“Maximum Extension” mark to make sure the seat
post is inserted in the seat tube far enough to be
visible through the sight hole.
If your e-bike has an interrupted seat tube, as is
the case on some suspension e-bikes, you must also
make sure that the seat post is far enough into the
frame so that you can touch it through the bottom of
the interrupted seat tube with the tip of your nger
without inserting your nger beyond its rst knuckle.
Also see NOTE above and g. 10.
WARNING: If your seat post is not inserted
in the seat tube as described in B.1 above,
the seat post, binder or even frame may break,
which could cause you to lose control and fall.
2. Front and back adjustment. The saddle can
be adjusted forward or back to help you get the
optimal position on the e-bike. If you choose
to make your own front and back adjustment,
make sure that the clamp mechanism is
clamping on the straight part of the saddle rails
and is not touching the curved part of the rails, and that you are using the
recommended torque on the clamping fastener(s).
3. Saddle angle adjustment. Most people prefer a horizontal saddle; but some
riders like the saddle nose angled up or down just a little. If you choose
to make your own saddle angle adjustment and you have a single bolt
saddle clamp on your seat post, it is critical that you loosen the clamp bolt
sufciently to allow any serrations on the mechanism to disengage before
changing the saddle’s angle, and then that the serrations fully re-engage
before you tighten the clamp bolt to the recommended torque.
WARNING: When making saddle angle adjustments with a single bolt
saddle clamp, always check to make sure that the serrations on the
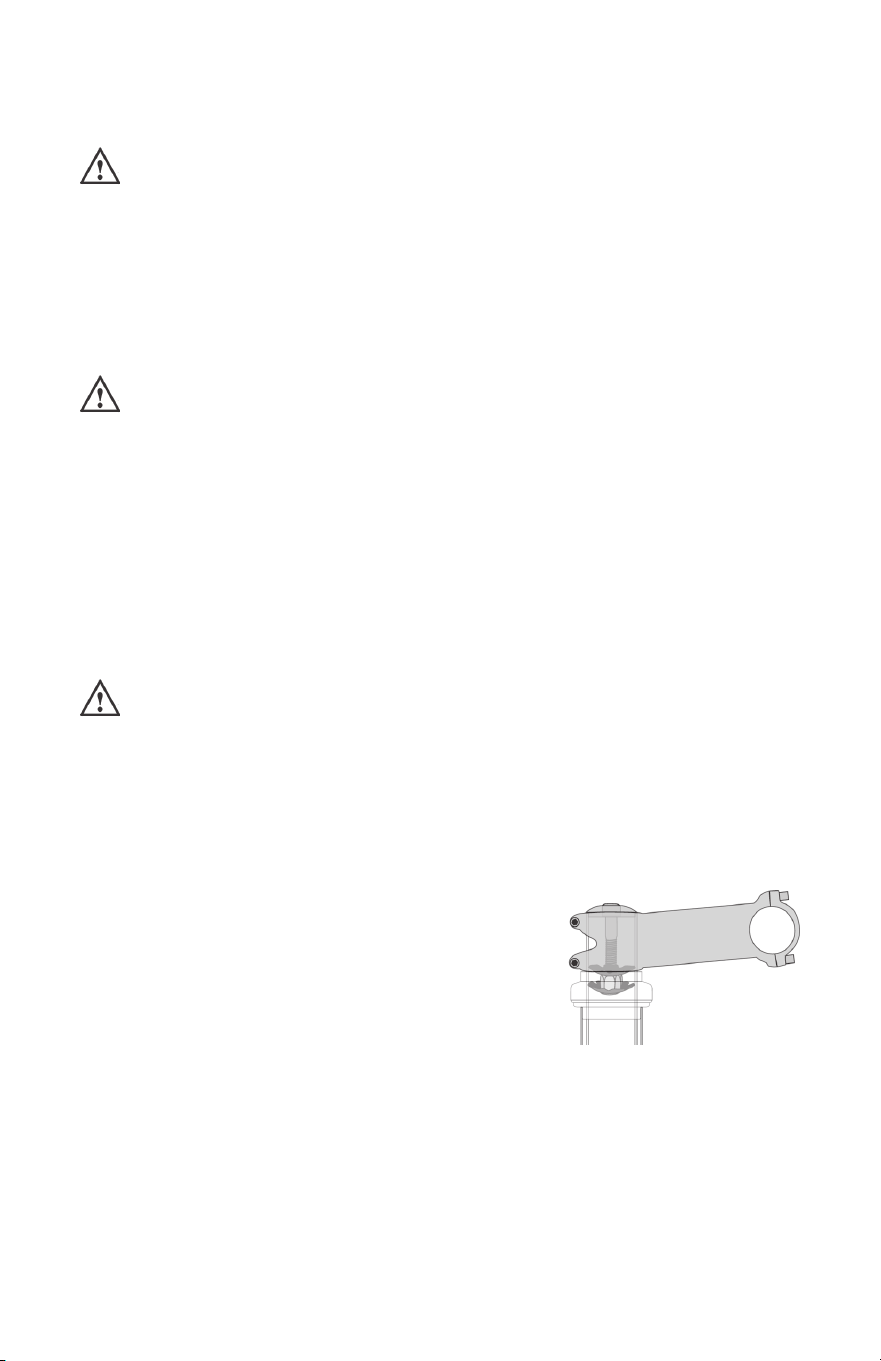
46
mating surfaces of the clamp are not worn. Worn serrations on the clamp
can allow the saddle to move, causing you to lose control and fall.
WARNING: Always tighten fasteners to the correct torque. Bolts that
are too tight can stretch and deform. Bolts that are too loose can
move and fatigue. Either mistake can lead to a sudden failure of the bolt,
causing you to lose control and fall.
NOTE: If your e-bike is equipped with a suspension seat post, the suspension
mechanism may require periodic service or maintenance. Consult the
manufacturer for recommended service intervals for your suspension seat post.
WARNING: After any saddle adjustment, be sure that the saddle
adjusting mechanism is properly seated and tightened before riding.
A loose saddle clamp or seat post clamp can cause damage to the seat
post, or can cause you to lose control and fall. A correctly tightened
saddle adjusting mechanism will allow no saddle movement in any
direction. Periodically check to make sure that the saddle adjusting
mechanism is properly tightened.
If, in spite of carefully adjusting the saddle height, tilt and fore-and-aft
position, your saddle is still uncomfortable, you may need a different saddle
design. Saddles, like people, come in many different shapes, sizes and
resilience.
WARNING: Some people have claimed that extended riding with a
saddle which is incorrectly adjusted or which does not support your
pelvic area correctly can cause short-term or long-term injury to nerves and
blood vessels, or even impotence. If your saddle causes you pain,
numbness or other discomfort, listen to your body and stop riding until the
saddle is adjusted or replaced.
C. Handlebar Height and Angle
g. 11
Your e-bike is equipped either with a “threadless”
stem, which clamps on to the outside of the steerer
tube, or with a “quill” stem, which clamps inside the
steerer tube by way of an expanding binder bolt.
If your e-bike has a “threadless” stem (g. 11)
a qualied bicycle mechanic may be able to change
handlebar height by moving height adjustment spacers from below the stem to
above the stem, or vice versa. Otherwise, you’ll have to get a stem of different
length or rise. Do not attempt to do this yourself, as it requires special knowledge.
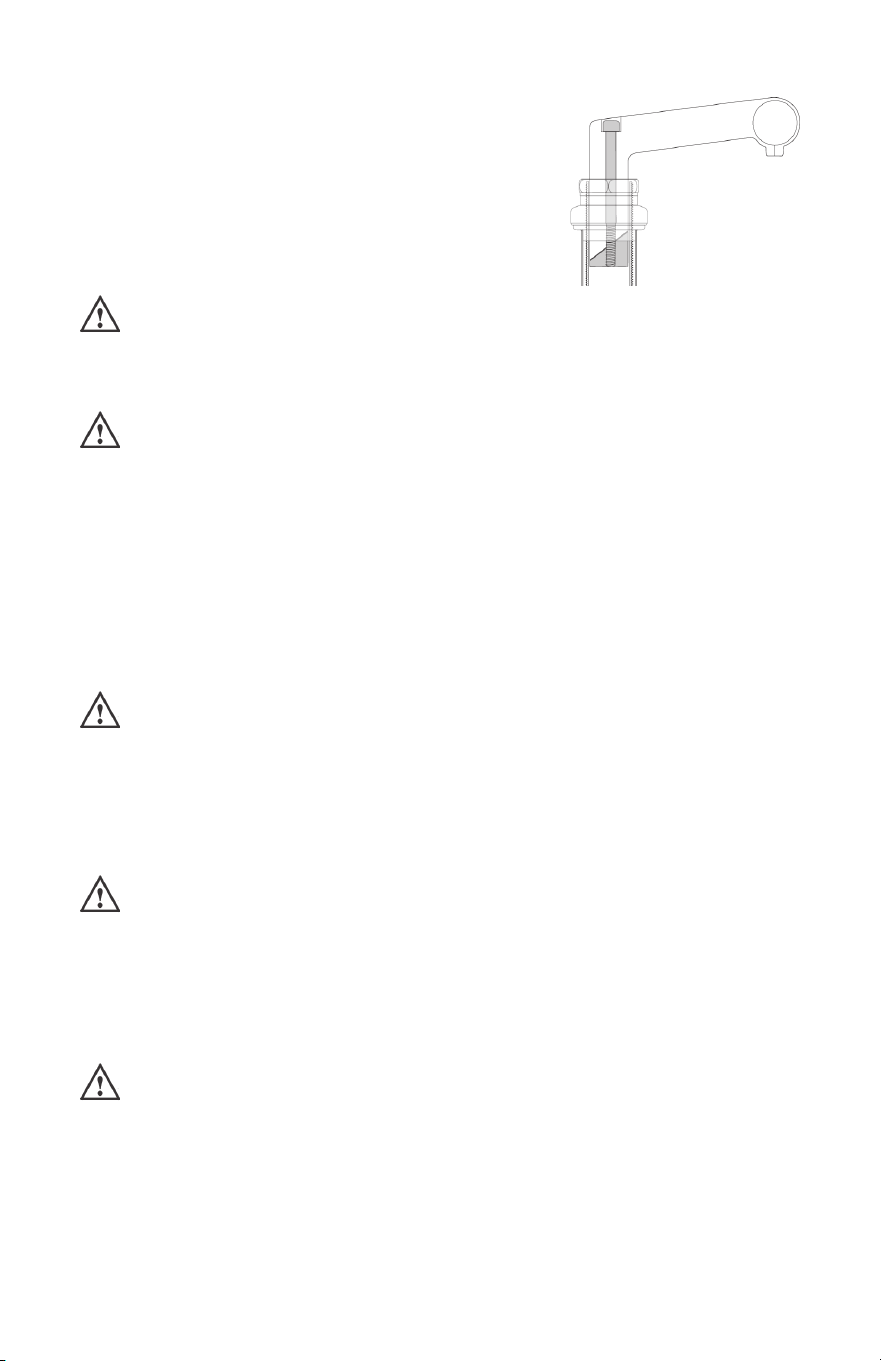
47
g. 12
If your e-bike has a “quill” stem (g. 12) you
can ask a qualied bicycle mechanic to adjust the
handlebar height a bit by adjusting stem height.
A quill stem has an etched or stamped mark
on its shaft that designates the stem’s “Minimum
Insertion” or “Maximum Extension”. This mark must
not be visible above the headset.
WARNING: A quill stem’s Minimum Insertion Mark must not be visible
above the top of the headset. If the stem is extended beyond the
Minimum Insertion Mark the stem may break or damage the fork’s steerer
tube, which could cause you to lose control and fall.
WARNING: On some e-bikes, changing the stem or stem height can
affect the tension of the front brake cable, locking the front brake or
creating excess cable slack which can make the front brake inoperable. If
the front brake pads move in toward the wheel rim or out away from the
wheel rim when the stem or stem height is changed, the brakes must be
correctly adjusted before you ride the e-bike.
Some e-bikes are equipped with an adjustable angle stem. If your e-bike
has an adjustable angle stem, ask a qualied bicycle mechanic to adjust it. Do
not attempt to make the adjustment yourself, as changing stem angle may also
require adjustments to the e-bike’s controls.
WARNING: Always tighten fasteners to the correct torque. Bolts that
are too tight can stretch and deform. Bolts that are too loose can
move and fatigue. Either mistake can lead to a sudden failure of the bolt,
causing you to lose control and fall.
A qualied bicycle mechanic can also change the angle of the handlebar or
bar end extensions.
WARNING: An insufciently tightened stem clamp bolt, handlebar
clamp bolt or bar end extension clamping bolt may compromise
steering action, which could cause you to lose control and fall. Place the
front wheel of the e-bike between your legs and attempt to twist the
handlebar/stem assembly. If you can twist the stem in relation to the front
wheel, turn the handlebars in relation to the stem, or turn the bar end
extensions in relation to the handlebar, the bolts are insufciently tightened.
WARNING: Be aware that adding aerodynamic extensions to handlebars
will change the steering and braking response of the e-bike.

48
D. Control Position Adjustments
The angle of the brake and shift control levers and their position on the
handlebars can be changed. Ask a qualied bicycle mechanic to make the
adjustments for you. If you choose to make your own control lever angle
adjustment, be sure to re-tighten the clamp fasteners to the recommended
torque.
E. Brake Reach
Many e-bikes have brake levers that can be adjusted for reach. If you have
small hands or nd it difcult to squeeze the brake levers, a qualied bicycle
mechanic can either adjust the reach or t shorter-reach brake levers.
WARNING: The shorter the brake lever reach, the more critical it is to
have correctly adjusted brakes, so that full braking power can be
applied within available brake lever travel. Brake lever travel insufcient to
apply full braking power can result in loss of control, which may result in
serious injury or death.
11. Tech
It’s important to your safety, performance and enjoyment to understand how
things work on your e-bike. We urge you to ask a qualied bicycle mechanic
how to do the things described in this section before you attempt them yourself,
and that you have a qualied bicycle mechanic check your work before you ride
the e-bike. If you have even the slightest doubt as to whether you understand
something in this section of the Manual, contact Pacic Cycle Consumer Care.
See also Appendix A, and B.
A. Wheels
E-bike wheels are designed to be removable for easier transportation and for
repair of a tire puncture. The wheel axles are inserted into slots, called “dropouts”
in the fork and frame, but some e-bikes use what is called a “thru-axle” wheel
mounting system.
If you have an e-bike with a thru-axle wheel mounting system, refer to Page
51, Section 11: “Tech”, subsection A.3: “Wheels - Thru-axle wheel mounting
system”.
If you do not have an e-bike with a thru-axle wheel mounting system, it will
have wheels secured in one of three ways:
1. A hollow axle with a shaft (“skewer”) running through it which has an
adjustable tension nut on one end and an over-center cam lever on the other
(cam-action system, g.13a & 13b).
2. A hollow axle with a shaft (“skewer”) running through it which has a nut on
one end and a tting for a hex key, lock lever or other tightening device on
the other (through-bolt, g. 14).
3. Hex nuts or hex key bolts which are threaded on to or into the hub axle
(bolt-on wheel, g. 15).
Your e-bike may be equipped with a different securing method for the front
wheel than for the rear wheel.
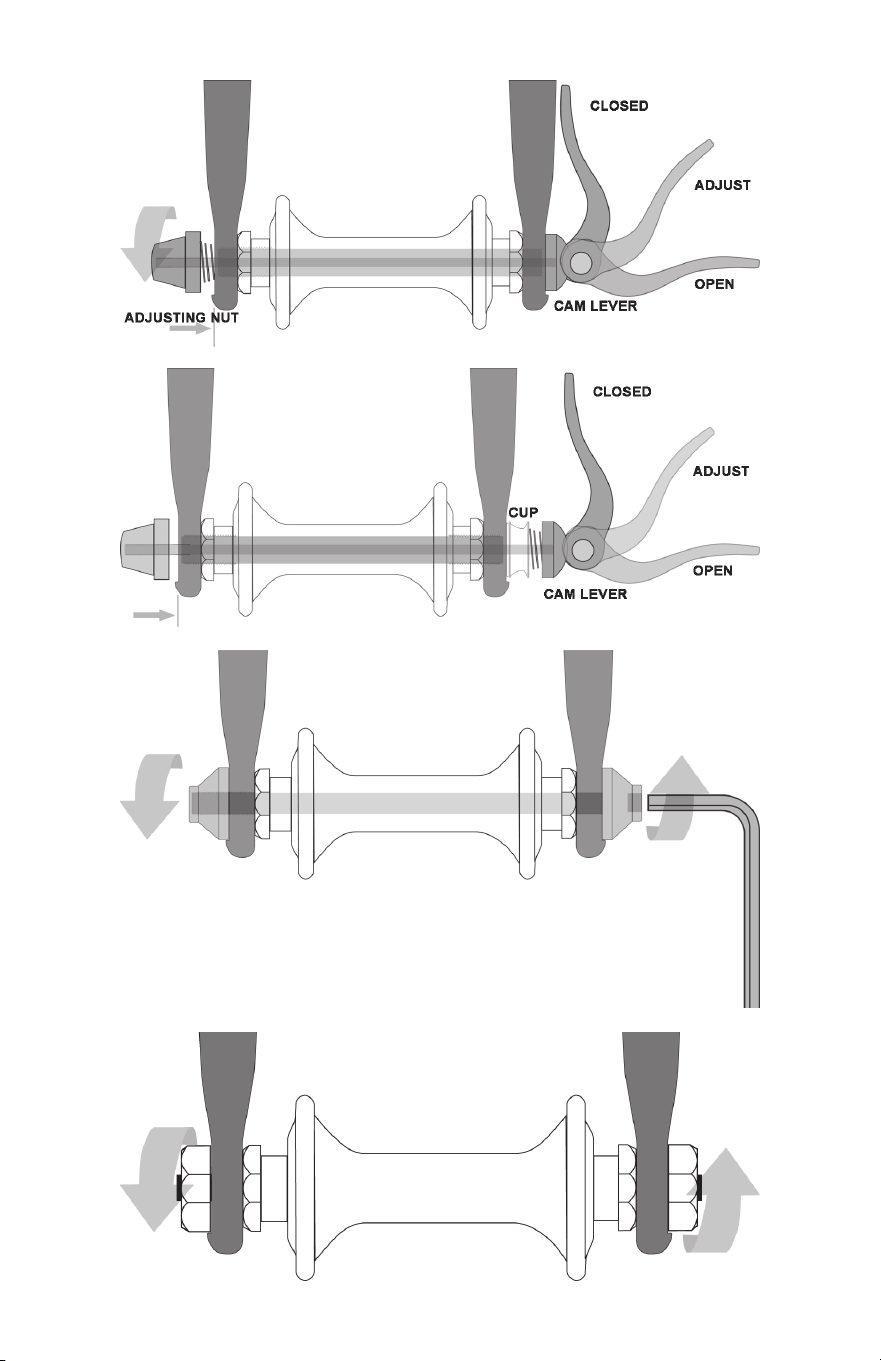
49
g. 13a
g. 13b
g. 14
g. 15

50
It is very important that you understand the type of wheel securing method
on your e-bike, that you know how to secure the wheels correctly, and that
you know how to apply the correct clamping force that safely secures the
wheel.
WARNING: Riding with an improperly secured wheel can allow the
wheel to wobble or fall off the e-bike, which can cause serious injury
or death. Therefore, it is essential that you:
1. Know how to install and remove your wheels safely.
2. Understand and apply the correct technique for clamping your wheel
in place.
3. Each time before you ride the e-bike, check that the wheel is securely
clamped.
The clamping action of a correctly secured wheel must emboss the
surfaces of the dropouts.
1. Front wheel secondary retention devices
Most e-bikes equipped with an over-center cam, through-bolt or bolt-on front
wheel retention have front forks with slotted dropouts that utilize a secondary wheel
retention device to reduce the risk of the wheel disengaging from the fork if the wheel
is incorrectly secured. Secondary retention devices are not a substitute for correctly
securing your front wheel.
Secondary retention devices fall into two basic categories:
a. The clip-on type is a part that the manufacturer adds to the front wheel hub
or front fork.
b. The integral type is molded, cast or machined into the outer faces of the
front fork dropouts.
WARNING: Do not remove or disable the secondary retention device.
As its name implies, it serves as a back-up for a critical adjustment. If
the wheel is not secured correctly, the secondary retention device can
reduce the risk of the wheel disengaging from the fork. Removing or
disabling the secondary retention device may also void the warranty.
Secondary retention devices are not a substitute for correctly securing
your wheel. Failure to properly secure the wheel can cause the wheel
to wobble or disengage, which could cause you to lose control and fall,
resulting in serious injury or death.
2. Wheels with cam-action systems
There are currently two types of over-center cam wheel retention
mechanisms: the traditional over-center cam (g. 13a) and the cam-and-cup
system (g. 13b). Both use an over-center cam-action to clamp the e-bike’s
wheel in place. Your e-bike may have a cam-and-cup front wheel retention
system and a traditional rear wheel cam-action system.
a. Adjusting the traditional cam-action mechanism (g. 13a)
The wheel hub is clamped in place by the force of the over-center cam

51
pushing against one dropout and pulling the tension adjusting nut, by way of the
skewer, against the other dropout. The amount of clamping force is controlled
by the tension adjusting nut. Turning the tension adjusting nut clockwise while
keeping the cam lever from rotating increases clamping force; turning it coun-
terclockwise while keeping the cam lever from rotating reduces clamping force.
Less than half a turn of the tension adjusting nut can make the difference
between safe clamping force and unsafe clamping force.
WARNING: The full force of the cam-action is needed to clamp the
wheel securely. Holding the nut with one hand and turning the lever
like a wing nut with the other hand until everything is as tight as you can
get it will not clamp a cam-action wheel safely in the dropouts. See also the
rst WARNING in this Section, Page 50.
b. Adjusting the cam-and-cup mechanism (g. 13b)
The cam-and-cup system on your front wheel will have been correctly
adjusted for your e-bike by your authorized retailer. Do not use a cam-and-cup
front wheel on any e-bike other than the one for which it has been adjusted.
3. Thru-axle wheel mounting system
If you have an e-bike equipped with thru-axle front or rear wheels, make
sure that you have read the manufacturer’s instructions, and follow those
when installing or removing a thru-axle wheel.
If your e-bike is equipped with a thru-axle, the thru-axle length, diameter,
and thread pitch must match the specications of your frame, fork and wheel
hubs. Always install or remove your wheel in accordance with the thru-axle
manufacturer’s instructions, and consult the manufacturer if you have questions.
If you intend to replace the thru-axle, make sure that the new thru-axle is
compatible with your e-bike. Do not remove the thru-axle from your e-bike and
use it on a different e-bike, as it may not be compatible and will not properly
secure your wheel.
WARNING: A wheel attachment device that is not properly secured can
allow the wheel to loosen or come off, suddenly stop the wheel,
decrease your control, and cause you to fall, resulting in serious injury or
death. Ensure the thru-axle is not interfering with any part of the e-bike and
is fully secured.
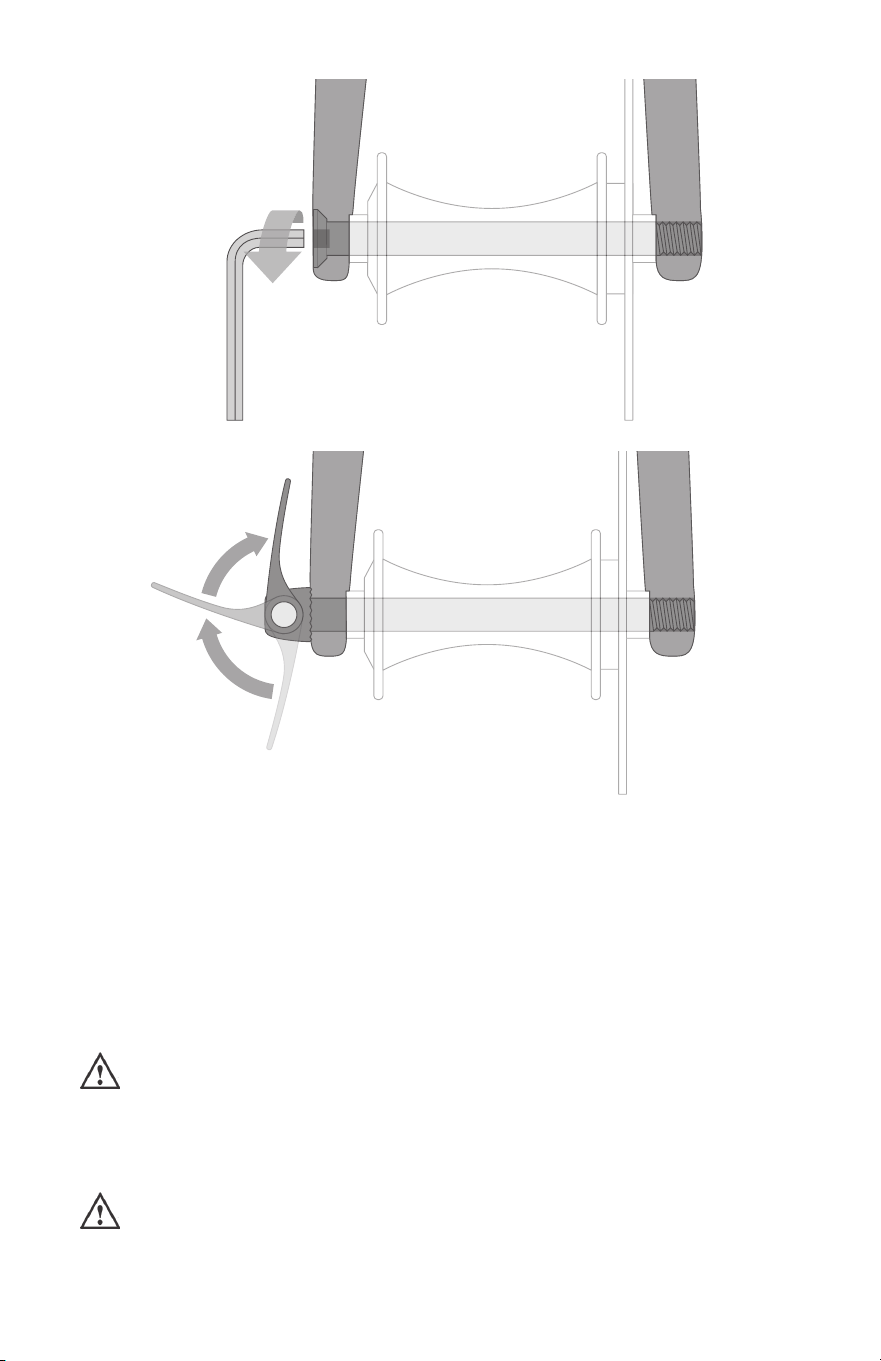
52
g. 16a
OPEN
ADJUST
CLOSED
g. 16b
a. Adjusting the thru-axle mechanism (g. 16a & 16b)
The thru-axle is inserted through the unthreaded hole in the frame or fork’s
dropout, through the wheel hub, and is threaded directly into the opposing
dropout by tightening the thru-axle. Common installation methods may use
an Allen hex key (g. 16a) or a cam lever (g. 16b). Please refer to the
manufacturer’s instructions for specic information about your thru-axle’s
operation, including correct torque specications or lever adjustment information.
4. Removing and installing wheels
WARNING: If your e-bike is equipped with an internal gear rear hub,
do not attempt to remove the wheel. The removal and re-installation of
most internal gear hubs requires special knowledge. Incorrect removal or
assembly can result in gear failure, which can cause you to lose control
and fall.
CAUTION: If your e-bike has a disc brake, exercise care in touching
the rotor or caliper. Disc rotors have sharp edges, and both rotor and
caliper can get very hot during use.

53
a. Removing a disc brake or rim brake Front Wheel
1. If your e-bike has rim brakes, disengage the brake’s quick-release mechanism
to increase the clearance between the tire and the brake pads. Refer to Page
57, Section 11: “Tech”, subsection C: “Brakes”, gs. 18 through 22.
2. If your e-bike has a cam-action front wheel retention, move the cam lever
from the locked or CLOSED position to the OPEN position (gs. 13a &
13b). If your e-bike has through-bolt or bolt-on front wheel retention, loosen
the fastener(s) a few turns counter-clockwise using an appropriate wrench,
lock key or the integral lever.
3. If your front fork has a clip-on type secondary retention device, disengage
it. If your front fork has an integral secondary retention device, and a
traditional cam-action system (g. 13a) loosen the tension adjusting nut
enough to allow removing the wheel from the dropouts. If your front wheel
uses a cam-and-cup system, (g. 13b) squeeze the cup and cam lever
together while removing the wheel. No rotation of any part is necessary with
the cam-and-cup system.
4. If your e-bike has a thru-axle front wheel mounting system (gs. 13a &
13b), loosen and remove the thru-axle according to the manufacturer’s
instructions, then remove the front wheel.
You may need to tap the top of the wheel with the palm of your hand to
release the wheel from the front fork.
b. Installing a disc brake or rim brake Front Wheel
CAUTION: If your e-bike is equipped with a front disc brake, be careful
not to damage the disc, caliper or brake pads when re-inserting the
disc into the caliper. Never activate a disc brake’s control lever unless the
disc is correctly inserted in the caliper. Refer to Page 57, Section 11:
“Tech”, subsection C: “Brakes”.
1. If your e-bike has a cam-action front wheel retention, move the cam lever
so that it curves away from the wheel (gs. 13a & 13b). This is the OPEN
position. If your e-bike has a thru-axle, through-bolt or bolt-on front wheel
retention, go to the next step.
2. With the steering fork facing forward, insert the wheel between the fork
blades so that the axle seats rmly at the top of the fork dropouts. The cam
lever, if there is one, should be on rider’s left side of the e-bike (g. 13a &
13b). If your e-bike has a clip-on type secondary retention device, engage it.
3. If your e-bike has a thru-axle front wheel mounting system, insert the
thru-axle through the unthreaded dropout side and through the hub body,
then thread the thru-axle into the threads of the opposing dropout.
4. If your e-bike has a traditional cam-action mechanism: holding the cam
lever in the ADJUST position with your right hand, tighten the tension
adjusting nut with your left hand until it is nger tight against the fork
dropout (g. 13a). If you have a cam-and-cup system: the nut and cup (g.
13b) will have snapped into the recessed area of the fork dropouts and no
adjustment should be required.
5. While pushing the wheel rmly to the top of the slots in the fork dropouts,
and at the same time centering the wheel rim in the fork:
(a) With a cam-action system, move the cam lever upwards and swing

54
it into the CLOSED position (g. 13a & 13b). The lever should now be
parallel to the fork blade and curved toward the wheel. To apply enough
clamping force, you should have to wrap your ngers around the fork
blade for leverage, and the lever should leave a clear imprint in the palm
of your hand.
(b) With a through-bolt or bolt-on system, tighten the fasteners to the
torque specications in the manufacturer’s instructions. (c) With a
thru-axle system, tighten the thru-axle (gs. 13a & 13b) according to the
manufacturer’s instructions.
NOTE: If, on a traditional cam-action system, the lever cannot be pushed all the
way to a position parallel to the fork blade, return the lever to the OPEN position.
Then turn the tension adjusting nut counterclockwise one-quarter turn and try
tightening the lever again.
WARNING: Securely clamping the wheel with a cam-action retention
device takes considerable force. If you can fully close the cam lever
without wrapping your ngers around the fork blade for leverage, the lever
does not leave a clear imprint in the palm of your hand, and the serrations
on the wheel fastener do not emboss the surfaces of the dropouts, the
tension is insufcient. Open the lever; turn the tension adjusting nut
clockwise a quarter turn; then try again. See also the rst WARNING in this
Section, Page 50.
6. If you disengaged the brake quick-release mechanism in 4. a. (1) above,
re-engage it to restore correct brake pad-to-rim clearance.
7. Spin the wheel to make sure that it is centered in the frame and clears the
brake pads; then squeeze the brake lever and make sure that the brakes
are operating correctly.
c. Removing a disc brake or rim brake Rear Wheel
1. If you have a multi-speed e-bike with a derailleur gear system, shift the rear
derailleur to high gear (the smallest, outermost rear sprocket). If you have
an internal gear rear hub, do not attempt to remove the rear wheel. Consult
the hub manufacturer’s instructions for additional information. If you have a
single-speed e-bike with rim or disc brake, go to step (4) below.
2. If your e-bike has rim brakes, disengage the brake’s quick-release mechanism
to increase the clearance between the wheel rim and the brake pads. Refer to
Page 57, Section 11: “Tech”, subsection C: “Brakes”, gs. 18 through 22.
3. On a derailleur gear system, pull the derailleur body back with your right hand.
4. If your e-bike has a cam-action front wheel retention, move the cam lever
from the locked or CLOSED position to the OPEN position (gs. 13a &
13b). If your e-bike has through-bolt or bolt-on front wheel retention, loosen
the fastener(s) a few turns counter-clockwise using an appropriate wrench,
lock key or the integral lever.
5. If your e-bike has a thru-axle rear wheel mounting system (gs. 13a & 13b),
loosen and remove the thru-axle according to the manufacturer’s instructions.
6. Push the rear wheel forward far enough to be able to remove the chain from
the rear sprocket, then lift the rear wheel off the ground a few inches and
remove it from the rear dropouts.

55
d. Installing a disc brake or rim brake Rear Wheel
CAUTION: If your e-bike is equipped with a rear disc brake, be careful
not to damage the disc, caliper or brake pads when re-inserting the
disc into the caliper. Never activate a disc brake’s control lever unless the
disc is correctly inserted in the caliper.
1. With a cam-action system, move the cam lever to the OPEN position (see
gs. 13a & 13b). The lever should be on the side of the wheel opposite the
derailleur and freewheel sprockets.
(a) On a derailleur e-bike, make sure that the rear derailleur is still in its
outermost, high gear, position; then pull the derailleur body back with your
right hand. Put the chain on top of the smallest freewheel sprocket.
(b) On a single-speed e-bike, remove the chain from the front sprocket, so
that you have plenty of slack in the chain. Put the chain on the rear wheel
sprocket.
2. Then, insert the wheel into the frame dropouts and pull it all the way into the
dropouts.
NOTE: On an e-bike with a single rear gear, replace the chain on the rear
sprocket and front chainring; then pull the wheel back in the dropouts so that it is
straight in the frame and the chain has about 1/4 inch of up-and-down play.
(a) With a cam-action system, move the cam lever upwards and swing
it into the CLOSED position (gs. 13a & 13b). The lever should now
be parallel to the seat stay or chain stay and curved toward the wheel.
To apply enough clamping force, you should have to wrap your ngers
around the fork blade for leverage, and the lever should leave a clear
imprint in the palm of your hand.
(b) With a through-bolt or bolt-on system, tighten the fasteners to the
torque specications in the manufacturer’s instructions. (c) With a
thru-axle system, tighten the thru-axle (gs. 13a & 13b) according to the
manufacturer’s instructions.
NOTE: If, on a traditional cam-action system, the lever cannot be pushed all the
way to a position parallel to the seat stay or chain stay, return the lever to the
OPEN position. Then turn the tension adjusting nut counterclockwise one-quarter
turn and try tightening the lever again.
WARNING: Securely clamping the wheel with a cam-action retention
device takes considerable force. If you can fully close the cam lever
without wrapping your ngers around the seat stay or chain stay for
leverage, the lever does not leave a clear imprint in the palm of your hand,
and the serrations on the wheel fastener do not emboss the surfaces of the
dropouts, the tension is insufcient. Open the lever; turn the tension
adjusting nut clockwise a quarter turn; then try again. See also the rst
WARNING in this Section, Page 50.
3. If you disengaged the brake quick-release mechanism in 4. c. (2) above,
re-engage it to restore correct brake pad-to-rim clearance.
4. Spin the wheel to make sure that it is centered in the frame and clears the
brake pads; then squeeze the brake lever and make sure that the brakes
are operating correctly.

56
B. Seat Post Cam-action Clamp
Some e-bikes are equipped with a cam-action seat post binder. The seat
post cam-action binder works exactly like the traditional wheel cam-action
fastener. Refer to Page 50, Section 11: “Tech”, subsection A.2: “Wheels with
cam-action systems”. While a cam-action binder looks like a long bolt with a lever
on one end and a nut on the other, the binder uses an over-center cam-action to
rmly clamp the seat post (see g. 12a).
WARNING: Riding with an improperly tightened seat post can allow the
saddle to turn or move and cause you to lose control and fall. Therefore:
1. Know how to correctly clamp your seat post.
2. Understand and apply the correct technique for clamping
your seat post.
3. Before you ride the e-bike, rst check that the seat post
is securely clamped.
Adjusting the seat post cam-action mechanism
The action of the cam squeezes the seat collar around the seat post to hold
the seat post securely in place. The amount of clamping force is controlled by the
tension adjusting nut. Turning the tension adjusting nut clockwise while keeping
the cam lever from rotating increases clamping force; turning it counterclockwise
while keeping the cam lever from rotating reduces clamping force. Less than half
a turn of the tension adjusting nut can make the difference between safe and
unsafe clamping force.
WARNING: The full force of the cam-action is needed to clamp the
seat post securely. Holding the nut with one hand and turning the
lever like a wing nut with the other hand until everything is as tight as you
can get it will not clamp the seat post safely.
WARNING: If you can fully close the cam lever without wrapping your
ngers around the seat post or a frame tube for leverage, and the
lever does not leave a clear imprint in the palm of your hand, the tension is
insufcient. Open the lever; turn the tension adjusting nut clockwise a
quarter turn; then try again.
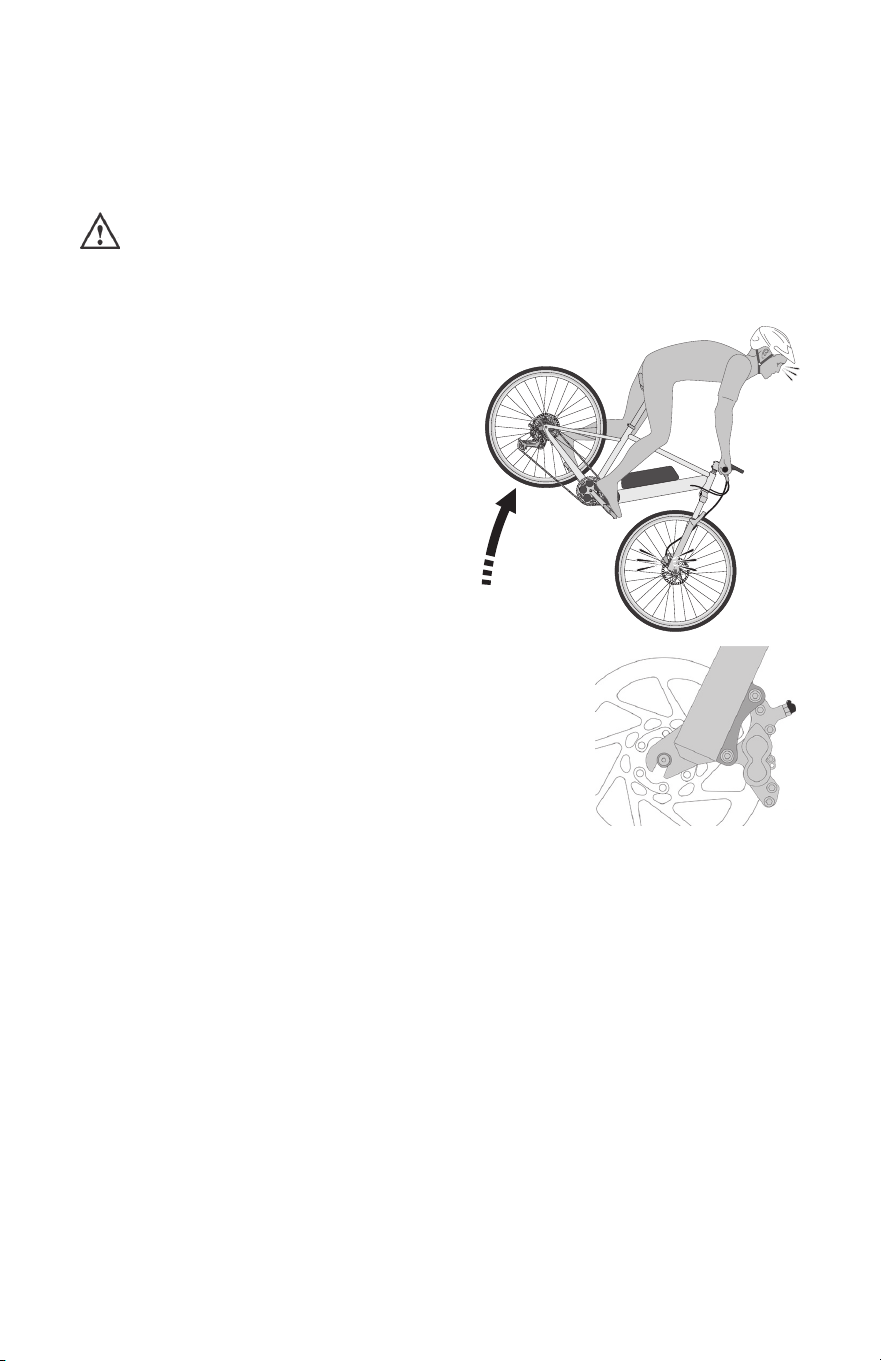
57
C. Brakes
There are three general types of bicycle brakes: rim brakes, which operate
by squeezing the wheel rim between two brake pads; disc brakes, which operate
by squeezing a hub-mounted disc between two brake pads; and internal hub
brakes. All three can be operated by way of a handlebar-mounted lever.
WARNING:
1. Riding with improperly adjusted brakes, worn brake pads, or wheels
on which the rim wear mark is visible is dangerous and can result in
serious injury or death.
g. 17
g. 18
2. Applying brakes too hard or too
suddenly can lock up a wheel,
which could cause you to lose
control and fall (see g. 17).
Sudden or excessive application of
the front brake may pitch the rider
over the handlebars, which may
result in serious injury or death.
3. Some bicycle brakes, such as
disc brakes (g. 18) and linear-pull
brakes (g. 19), are extremely
powerful. Take extra care in
becoming familiar with these
brakes and exercise particular care when using
them.
4. Some bicycle brakes are equipped with a
brake force modulator, a small, cylindrical
device through which the brake control cable
runs and which is designed to provide a more
progressive application of braking force.
A modulator makes the initial brake lever
force more gentle, progressively increasing
force until full force is achieved. If your e-bike is equipped with a
brake force modulator, take extra care in becoming familiar with
its performance characteristics. Some brake force modulators are
adjustable. If you don’t like the feel of your brakes, ask a qualied
bicycle mechanic about adjusting the brake force modulation.
5. Disc brakes can get extremely hot with extended use. Be careful not
to touch a disc brake until it has had plenty of time to cool.
6. See the brake manufacturer’s instructions for operation and care
of your brakes, and for when brake pads must be replaced. If you
do not have the manufacturer’s instructions, contact the brake
manufacturer.
7. If replacing worn or damaged parts, use only manufacturer-approved
genuine replacement parts.
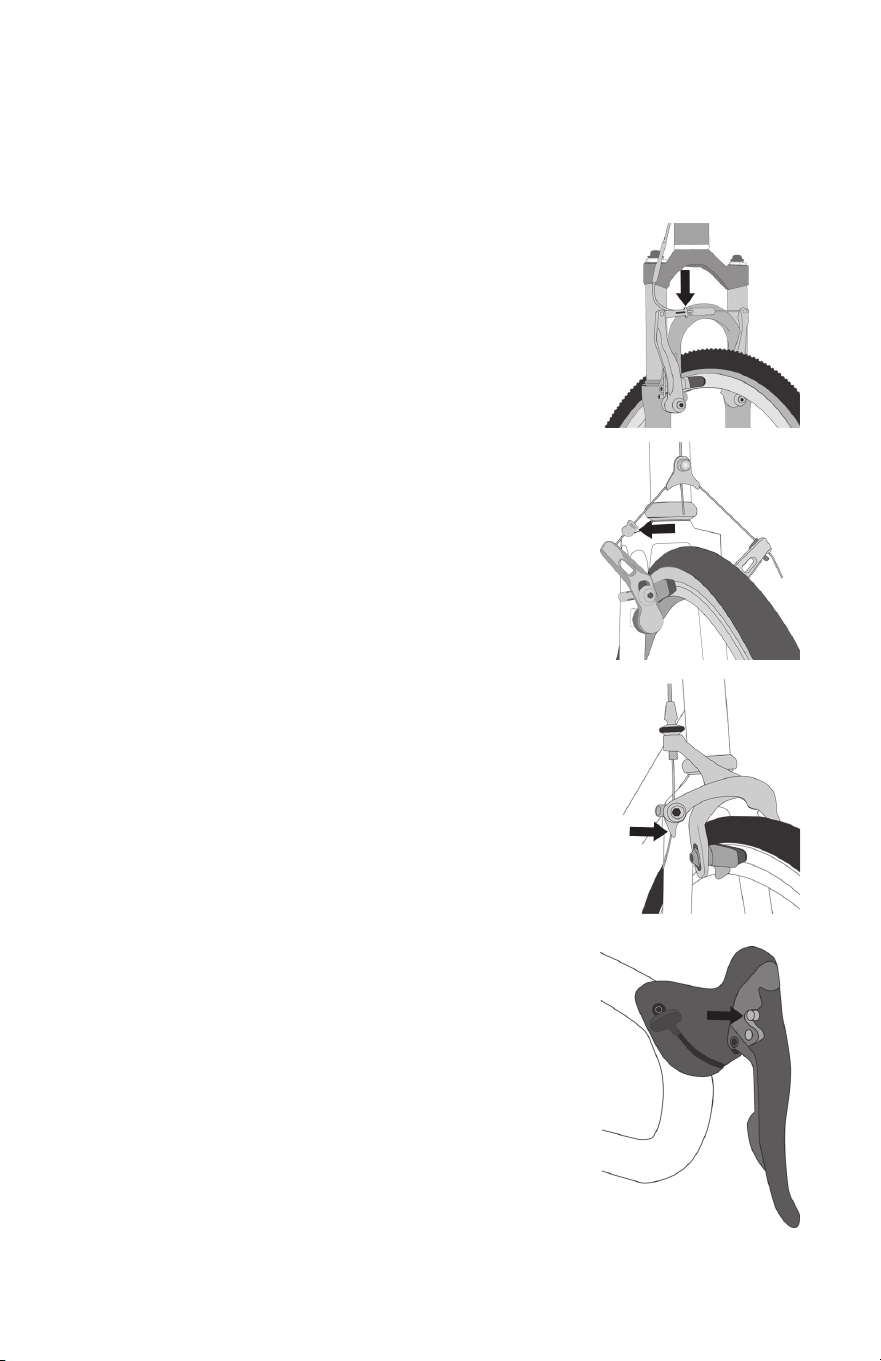
58
1. Brake controls and features
It’s very important to your safety that you learn and remember which brake lever
controls which brake on your e-bike. Traditionally, in the U.S. the right brake lever
controls the rear brake and the left brake lever controls the front brake; but, to check
how your e-bike’s brakes are set up, squeeze one brake lever and look to see which
brake, front or rear, engages. Now do the same with the other brake lever.
g. 19
g. 20
g. 21
g.
22
Make sure that your hands can reach and squeeze
the brake levers comfortably. If your hands are too small
to operate the levers comfortably, consult a qualied
bicycle mechanic before riding the e-bike. The lever
reach may be adjustable; or you may need a different
brake lever design.
Most rim brakes have some form of quick-release
mechanism to allow the brake pads to clear the tire
when a wheel is removed or reinstalled. When the brake
quick-release is in the open position, the brakes are
inoperative. Make sure that you understand the way the
brake quick-release works on your e-bike (see gs. 19,
20, 21 & 22) and check each time to make sure both
brakes work correctly before you get on the e-bike.
2. How brakes work
The braking action of an e-bike is a function of the
friction between the braking surfaces. To make sure that
you have maximum friction available, keep your wheel
rims and brake pads or the disc rotor and caliper clean
and free of dirt, lubricants, waxes or polishes.
Brakes are designed to control your speed, not
just to stop the e-bike. Maximum braking force for each
wheel occurs at the point just before the wheel “locks up”
(stops rotating) and starts to skid. Once the tire skids, you
actually lose most of your stopping force and all directional
control. You need to practice slowing and stopping
smoothly without locking up a wheel. The technique is
called progressive brake modulation. Instead of jerking the
brake lever to the position where you think you’ll generate
appropriate braking force, squeeze the lever, progressively
increasing the braking force. If you feel the wheel begin
to lock up, release pressure just a little to keep the wheel
rotating just short of lockup. It’s important to develop a feel
for the amount of brake lever pressure required for each
wheel at different speeds and on different surfaces. To
better understand this, experiment a little by walking your
e-bike and applying different amounts of pressure to each
brake lever, until the wheel locks.
When you apply one or both brakes, the e-bike
begins to slow, but your body wants to continue at the
speed at which it was going. This causes a transfer
of weight to the front wheel (or, under heavy braking,
around the front wheel hub, which could send you ying over the handlebars).

59
A wheel with more weight on it will accept greater brake pressure before
lockup; a wheel with less weight will lock up with less brake pressure.
So, as you apply brakes and your weight is transferred forward, you need
to shift your body toward the rear of the e-bike, to transfer weight back onto the
rear wheel; and at the same time, you need to both decrease rear braking and
increase front braking force. This is even more important on descents, because
descents shift weight forward.
Two keys to effective speed control and safe stopping are controlling wheel
lockup and weight transfer. This weight transfer is even more pronounced if your
e-bike has a front suspension fork. Front suspension “dips/compresses/dives”
under braking, increasing the weight transfer (see also Page 62, Section 11:
“Tech, subsection F: “Bicycle Suspension”. Practice braking and weight transfer
techniques where there is no trafc or other hazards and distractions.
Everything changes when you ride on loose surfaces or in wet weather. It will
take longer to stop on loose surfaces or in wet weather. Tire adhesion is reduced,
so the wheels have less cornering and braking traction and can lock up with less
brake force. Moisture or dirt on the brake pads reduces their ability to grip. The
way to maintain control on loose or wet surfaces is to go more slowly.
D. Shifting Gears
Your multi-speed e-bike may have a derailleur drivetrain (see 1. below),
an internal gear hub drivetrain (see 2. below) or, in some special cases, a
combination of the two.
1. How a derailleur drivetrain works
If your e-bike has a derailleur drivetrain, the gear-changing mechanism will have:
• a rear cassette or freewheel sprocket cluster
• a rear derailleur
• usually a front derailleur
• one or two shifters
• one, two or three front sprockets called chainrings
• a drive chain
a. Shifting gears
There are several different types and styles of shifting controls: levers, twist
grips, triggers, combination shift/brake controls and push-buttons. Ask your
authorized retailer to explain the type of shifting controls that are on your e-bike,
and to show you how they work.
The vocabulary of shifting can be pretty confusing. A downshift is a shift to a
“lower” or “slower” gear, one that is easier to pedal. An upshift is a shift to a “higher”
or “faster”, harder-to-pedal gear. What’s confusing is that what’s happening at the
front derailleur is the opposite of what’s happening at the rear derailleur (for details,
read the instructions on Shifting the Rear Derailleur and Shifting the Front Derailleur
below). For example, you can select a gear which will make pedaling easier on a
hill (make a downshift) in one of two ways: shift the chain down the gear “steps” to a
smaller gear at the front, or up the gear “steps” to a larger gear at the rear. So, at the
rear gear cluster, what is called a downshift looks like an upshift. The way to keep
things straight is to remember that shifting the chain in towards the centerline of the
e-bike is for accelerating and climbing and is called a downshift. Moving the chain
out or away from the centerline of the e-bike is for speed and is called an upshift.
Whether upshifting or downshifting, the e-bike derailleur system design
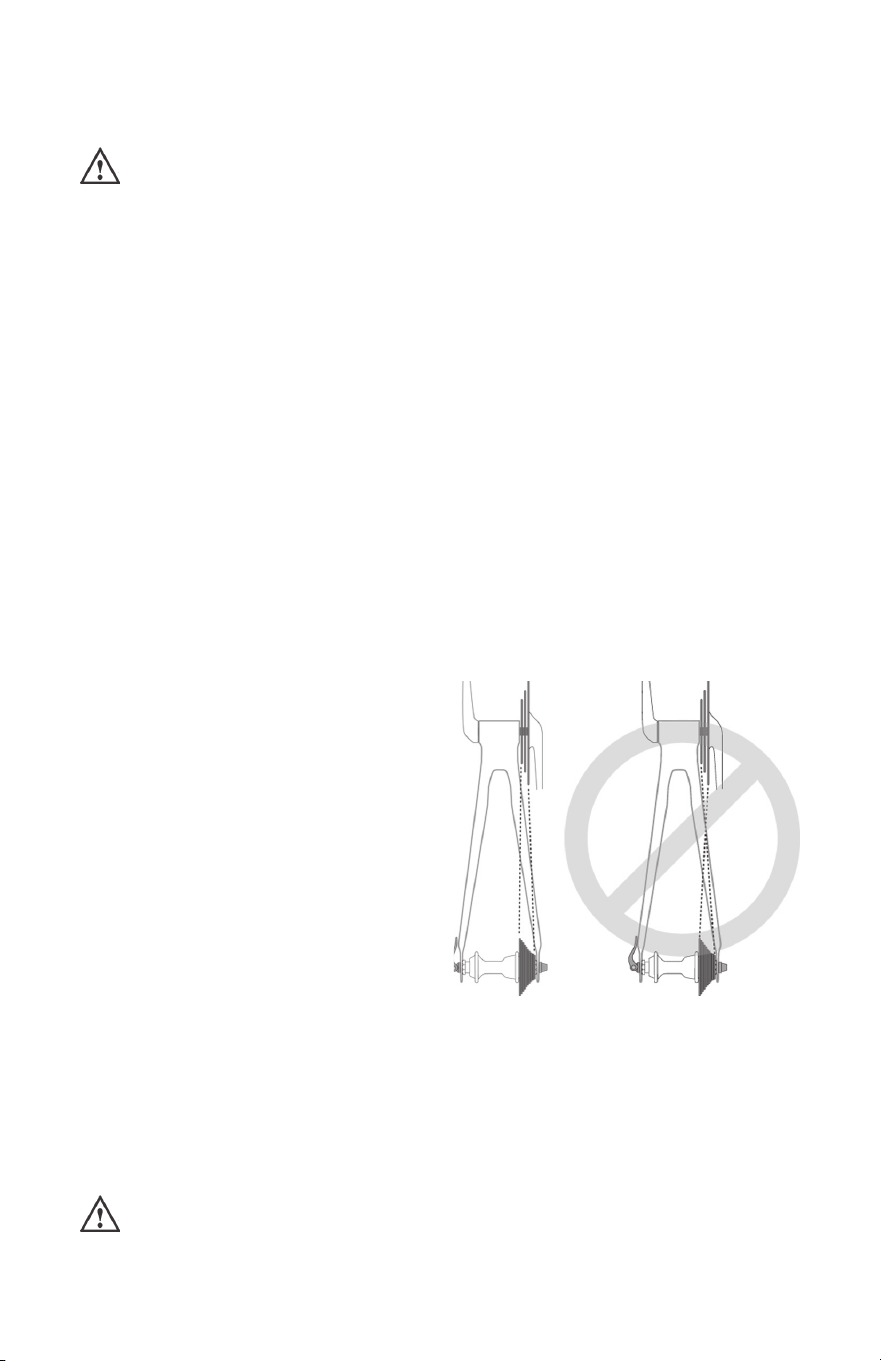
60
requires that the drive chain be moving forward and be under at least some
tension. A derailleur will shift only if you are pedaling forward.
CAUTION: Never move the shifter while pedaling backward, nor pedal
backwards immediately after having moved the shifter. This could jam
the chain and cause serious damage to the e-bike.
b. Shifting the Rear Derailleur
The rear derailleur is controlled by the right shifter. The function of the rear
derailleur is to move the drive chain from one gear sprocket to another. The
smaller sprockets on the gear cluster produce higher gear ratios. Pedaling in the
higher gears requires greater pedaling effort, but takes you a greater distance
with each revolution of the pedal cranks. The larger sprockets produce lower
gear ratios. Using them requires less pedaling effort, but takes you a shorter
distance with each pedal crank revolution. Moving the chain from a smaller
sprocket of the gear cluster to a larger sprocket results in a downshift. Moving the
chain from a larger sprocket to a smaller sprocket results in an upshift. In order
for the derailleur to move the chain from one sprocket to another, the rider must
be pedaling forward.
c. Shifting the Front Derailleur:
The front derailleur, which is controlled by the left shifter, shifts the chain
between the larger and smaller chainrings. Shifting the chain onto a smaller
chainring makes pedaling easier (a downshift). Shifting to a larger chainring
makes pedaling harder (an upshift).
g. 23
d. Which gear should I be in?
The combination of largest rear
and smallest front sprockets (g. 23) is
for the steepest hills. The smallest rear
and largest front combination is for the
greatest speed. It is not necessary to
shift gears in sequence. Instead, nd
the “starting gear” which is right for
your level of ability — a gear which is
hard enough for quick acceleration but
easy enough to let you start from a stop
without wobbling — and experiment with
upshifting and downshifting to get a feel for the different gear combinations. At
rst, practice shifting where there are no obstacles, hazards or other trafc, until
you’ve built up your condence. Learn not to use either the “smallest to smallest”
or “largest to largest” gear combinations because they may cause unacceptable
stress on the drive train. Learn to anticipate the need to shift, and shift to a
lower gear before the hill gets too steep. If you have difculties with shifting, the
problem could be mechanical adjustment.
WARNING: Never shift a derailleur onto the largest or the smallest
sprocket if the derailleur is not shifting smoothly. The derailleur may be
out of adjustment and the chain could jam, causing you to lose control and fall.

61
e. What if it won’t shift gears?
If moving the shift control one click repeatedly fails to result in a smooth shift
to the next gear, chances are that the mechanism is out of adjustment. Take the
e-bike to
a qualied bicycle mechanic
to have it adjusted.
2. How an internal gear hub drivetrain works
If your e-bike has an internal gear hub drivetrain, the gear changing
mechanism will consist of:
• a nite set of speeds (anywhere from three to 18 speeds or more), or
possibly an innitely variable internal gear hub
• one, or sometimes two shifters
• one or two control cables
• one front sprocket, also called a chainring
• one rear sprocket, also called a cog
• a drive chain
a. Shifting internal gear hub gears
Shifting with an internal gear hub drivetrain is simply a matter of moving the
shifter to the indicated position for the desired gear ratio. After you have moved
the shifter to the gear position of your choice, ease the pressure on the pedals for
an instant to allow the hub to complete the shift.
b. Which gear should I be in?
The numerically lowest gear (1) is for the steepest hills. The numerically
largest gear is for the greatest speed.
Shifting from an easier, “slower” gear (like 1) to a harder, “faster” gear (like 2
or 3) is called an upshift. Shifting from a harder, “faster” gear to an easier, “slower”
gear is called a downshift. It is not necessary to shift gears in sequence. Instead,
nd the “starting gear” for the conditions — a gear which is hard enough for quick
acceleration but easy enough to let you start from a stop without wobbling — and
experiment with upshifting and downshifting to get a feel for the different gears. At
rst, practice shifting where there are no obstacles, hazards or other trafc, until
you’ve built up your condence. Learn to anticipate the need to shift, and shift to
a lower gear before the hill gets too steep. If you have difculties with shifting, the
problem could be mechanical adjustment.
c. What if it won’t shift gears?
If moving the shift control one click repeatedly fails to result in a smooth shift
to the next gear, chances are that the mechanism is out of adjustment. Take the
e-bike to
a qualied bicycle mechanic
to have it adjusted.
E. Pedals
Toe overlap is when your toe can touch the front wheel when you turn the
handlebars to steer while a pedal is in the forward-most position. This is common
on small-framed e-bikes, and is avoided by keeping the inside pedal up and the
outside pedal down when making sharp turns. On any e-bike, this technique will
also prevent the inside pedal from striking the ground in a turn.
NOTE: Changing tire size or pedal crank arm length affects toe overlap.

62
WARNING: Toe overlap could cause you to lose control and fall.
Determine if the combination of frame size, crank arm length, pedal
design and shoes you will use results in toe overlap. Whether you have
overlap or not, you must keep the inside pedal up and the outside pedal
down when making sharp turns.
Some e-bikes come equipped with pedals that have sharp and potentially
dangerous surfaces. These surfaces are designed to increase grip between the
rider’s shoe and the pedal. If your e-bike has this type of high-performance pedal,
you must take extra care to avoid serious injury from the pedals’ sharp surfaces.
Based on your riding style or skill level, you may prefer a less aggressive pedal
design, or choose to ride with shin pads.
Clipless pedals (sometimes called “step-in pedals”) are another means
to keep feet securely in the correct position for maximum pedaling efciency.
They have a plate, called a “cleat,” on the sole of the shoe, which clicks into a
mating spring-loaded xture on the pedal. They only engage or disengage with
a very specic twisting motion that must be practiced until it becomes instinctive.
Clipless pedals require shoes and cleats which are compatible with the make and
model pedal being used.
Many clipless pedals are designed to allow the rider to adjust the amount of
force needed to engage or disengage the foot. Follow the pedal manufacturer’s
instructions to make this adjustment. Use the easiest setting until engaging
and disengaging becomes a reex action, but always make sure that there is
sufcient tension to prevent unintended release of your foot from the pedal.
WARNING: Clipless pedals are intended for use with shoes specically
made to t them and are designed to rmly keep the foot engaged with
the pedal. Do not use shoes which do not engage the pedals correctly.
Practice is required to learn to engage and disengage the foot safely. Until
engaging and disengaging the foot becomes a reex action, the technique
requires concentration which can distract your attention and cause you to
lose control and fall. Practice engaging and disengaging clipless pedals in a
place where there are no obstacles, hazards or trafc; and be sure to follow
the pedal manufacturer’s setup and service instructions. If you do not have the
manufacturer’s instructions, contact the manufacturer.
F. Bicycle Suspension
Many e-bikes are equipped with suspension systems. There are many
different types of suspension systems — too many to deal with individually in
this Manual. If your e-bike has a suspension system of any kind, be sure to read
and follow the suspension manufacturer’s setup and service instructions. If you
do not have the manufacturer’s instructions, contact the manufacturer.
WARNING: Failure to maintain, check and properly adjust the
suspension system may result in suspension malfunction, which may
cause you to lose control and fall.
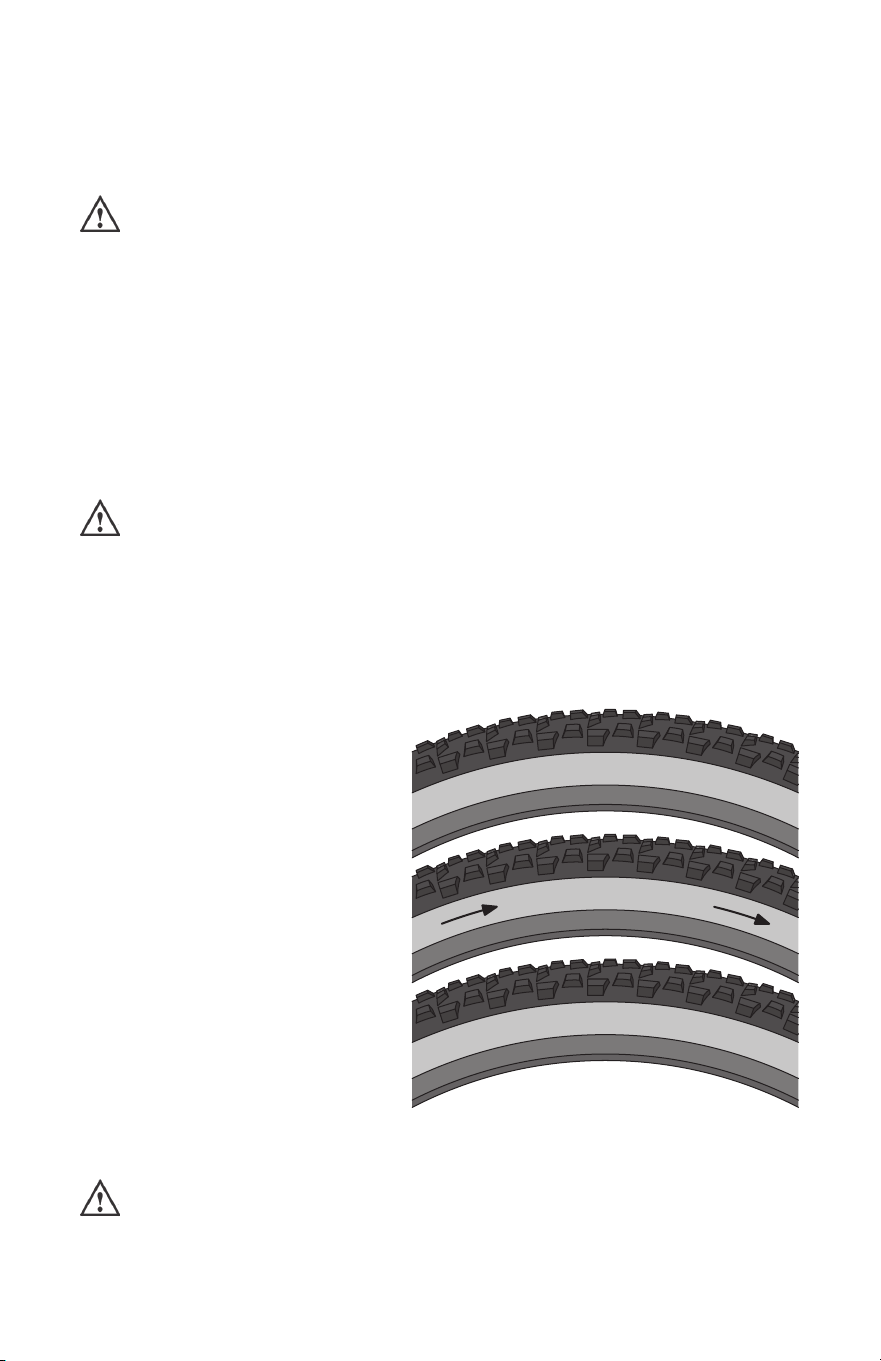
63
If your e-bike has suspension, the increased speed you may develop also
increases your risk of injury. For example, when braking, the front of a suspended
e-bike dips, compresses or dives. You could lose control and fall if you do not
have experience with this system. Learn to handle your suspension system safely.
WARNING: Changing suspension adjustment can change the handling
and braking characteristics of your e-bike. Never change suspension
adjustment unless you are thoroughly familiar with the suspension system
manufacturer’s instructions and recommendations, and always check for
changes in the handling and braking characteristics of the e-bike after a
suspension adjustment by taking a careful test ride in a hazard-free area.
Suspension can increase control and comfort by allowing the wheels to
better follow the terrain. This enhanced capability may allow you to ride faster;
but you must not confuse the enhanced capabilities of the e-bike with your own
capabilities as a rider. Increasing your skill will take time and practice. Proceed
carefully until you have learned to handle the full capabilities of your e-bike.
WARNING: Not all e-bikes can be safely retrotted with some types of
suspension systems. Before retrotting an e-bike with any
suspension, check with the e-bike’s manufacturer to make sure that what
you want to do is compatible with the e-bike’s design. Failing to do so can
result in catastrophic frame failure.
G. Tires and Tubes
3
0
-
8
0
P
S
I
(
2
.
5
-
5
.
5
B
A
R
)
R
O
T
A
T
I
N
G
D
I
R
E
C
T
I
O
N
6
0
-
6
2
2
(
2
9
X
2
.
3
)
g. 24
1. Tires
Bicycle tires are available in
many designs and specications,
ranging from general-purpose
designs to tires designed to perform
best under very specic weather or
terrain conditions.
The size, pressure rating,
and on some high-performance
tires the specic recommended
use, are marked on the sidewall
of the tire (g. 24). Some wheel
rim manufacturers also specify
maximum tire pressure with a label
on the rim.
The best and safest way to
inate a bicycle tire to the correct
pressure is with a bicycle pump that
has a built-in pressure gauge.
WARNING: There is a safety risk in using gas station air hoses or
other air compressors. They are not made for bicycle tires. They move
a large volume of air very rapidly, and will raise the pressure in your tire
very rapidly, which could cause the tube to explode.

64
CAUTION: Pencil-type automotive tire gauges can be inaccurate and
should not be relied upon for consistent, accurate pressure readings.
Instead, use a high-quality dial or digital gauge.
Tire pressure is given either as maximum pressure or as a pressure range.
How a tire performs under different terrain or weather conditions depends largely
on tire pressure. Inating the tire to near its maximum recommended pressure
gives the lowest rolling resistance; but also produces the harshest ride. High
pressures work best on smooth, dry pavement.
Very low pressures, at the bottom of the recommended pressure range, give
the best performance on smooth, slick terrain such as hard-packed clay, and on
deep, loose surfaces such as deep, dry sand.
Tire pressure that is too low for your weight and the riding conditions can cause
a puncture of the tube by allowing the tire to deform sufciently to pinch the inner
tube between the rim and the riding surface. This may also result in rim damage.
WARNING: Never inate a tire beyond the maximum pressure marked
on the tire’s sidewall or the wheel rim. If the maximum pressure rating
for the wheel rim is different from the maximum pressure shown on the tire,
always use the lower rating. Exceeding the recommended maximum
pressure may blow the tire off the rim or damage the wheel rim during
installation or while riding, resulting in a loss of control or crash causing
serious injury or death, as well as damage to the tire, tube, and/or wheel rim.
WARNING: Never ride a tire inated below the minimum pressure
marked on the tire’s sidewall. Tire pressure below the minimum may
cause a at tire and/or the tire to detach from the rim while riding, resulting
in a loss of control or crash causing serious injury or death, as well as
damage to the tire, tube, and/or wheel rim.
Check ination as described on Page 22, Section 7: “Safely Operating
Your E-bike“, subsection B: “Mechanical Safety Check”, so you’ll know how
correctly inated tires should look and feel when you don’t have access to a
gauge. Some tires may need to be brought up to pressure every week or two, so
it is important to check your tire pressures before every ride.
Some special high-performance tires have unidirectional treads: their tread
pattern is designed to work better in one direction than in the other. The sidewall
marking of a unidirectional tire will have an arrow showing the correct rotation
direction. If your e-bike has unidirectional tires, be sure that they are mounted to
rotate in the correct direction.
2. Tubeless rims and tires
Some e-bikes come equipped with rims (the circular, outermost portion of the
wheel to which the tire is mounted) and tires that can be set up without the use
of an inner tube. Tubeless rims and tires have special rim and tire bead proles
that form a seal and retain air when properly mounted. Tubeless rims come in
a variety of styles and may require additional components such as a rim tape,
valve cores, sealant and tubeless-compatible tires to complete the tubeless
setup. The rim manufacturer may identify the rims as “tubeless compatible” or
“tubeless ready” depending on which components are required. If you choose to
utilize the tubeless features of your rims, carefully review the rim manufacturer’s
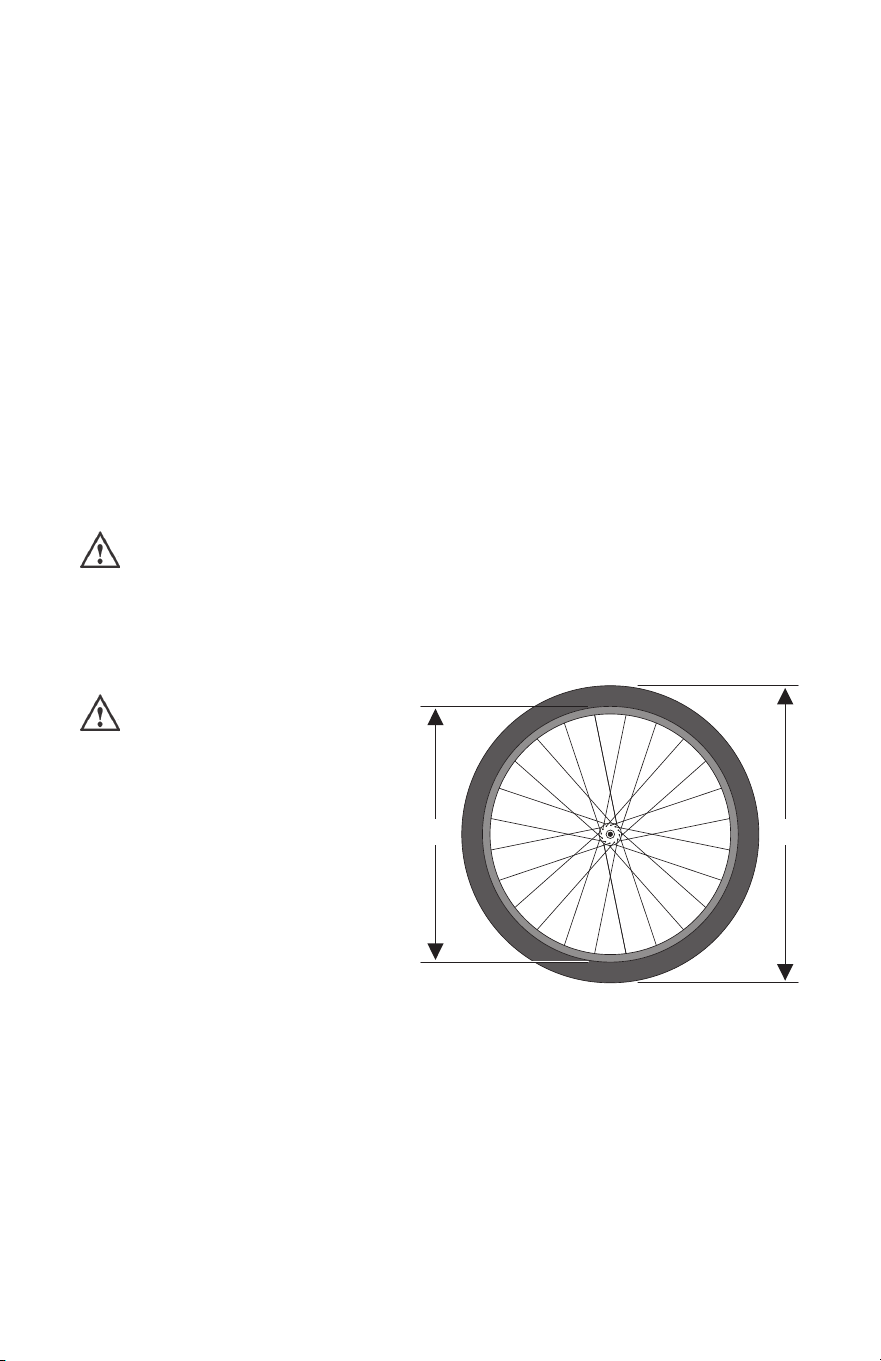
65
instructions regarding what additional components you need to convert to or
maintain a tubeless setup.
Tubeless rims have a wide range of proles that can affect the type of tubeless
tire that can be mounted to the rim. For example, your rim manufacturer may refer
to the rim prole as “hooked” or “hookless” depending on whether there is a hook
protruding on the inside of the rim. Likewise, the bead prole of tubeless tires
differs between tire manufacturers. Given the wide range of tubeless tires and rims
available, the compatibility of tubeless tires with different types of tubeless rims
varies signicantly. If you choose to run a tubeless setup, make sure the tires and
rims are compatible. Only use tubeless tires that have been approved by the rim
manufacturer or tire manufacturer for use on your rims.
Mounting tubeless tires on a tubeless rim requires specialized knowledge,
skills and equipment. A tubeless setup may require the installation of additional
components, including rim tape, valve cores and sealant. Carefully review
the instructions from both the rim and tire manufacturer regarding how to set
up tubeless tires before attempting to do so. If you have any concerns about
properly setting up your rims and tires to run as a tubeless setup, consult a
qualied bicycle mechanic.
WARNING: Riding on an improperly installed, incompatible or damaged
tubeless tire and rim combination can cause the tire to unexpectedly
lose pressure and detach from the rim, resulting in a crash causing serious
injury or death. Ensure the components are compatible according to the
component manufacturers before installation.
BA
g. 25
CAUTION: During installation,
an incompatible or damaged
tubeless tire and rim combination
can cause the tire to unexpectedly
lose pressure and tire sealant and
detach from the rim, resulting in
damage to the wheel or other
components, and may injure the
installer. Use of eye and ear
protection is recommended. Ensure
the components are compatible
according to the component
manufacturers before installation.
3. Tire and rim width/diameter
Wheel rims and tires come in a wide range of diameters (g. 25) and widths
(g. 26). The nominal diameter of the rim (A) must match the nominal diameter
of the tire (B), and the width of the rim (C) must be compatible with the width of
the tire (D).
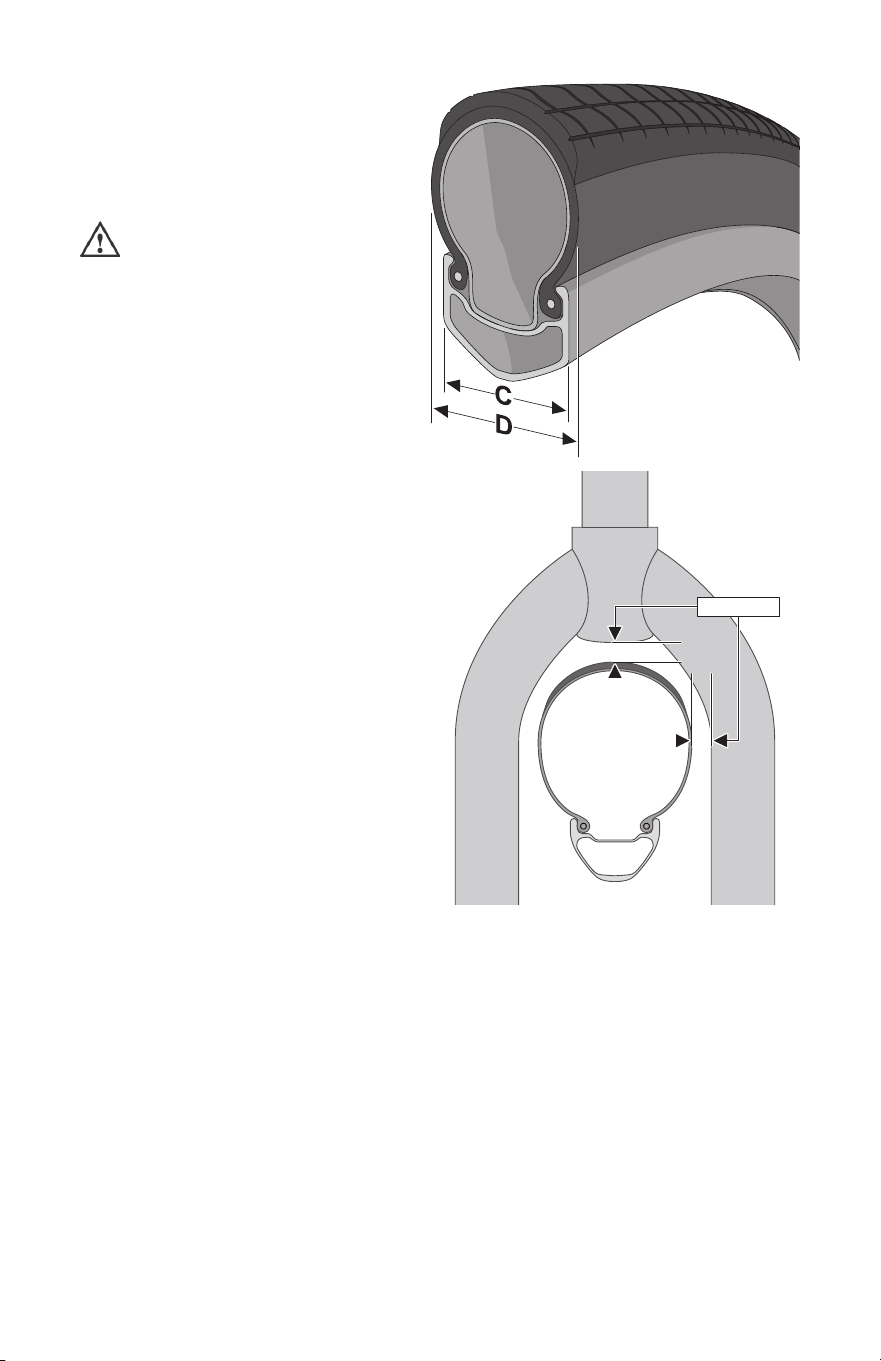
66
g. 26
Always follow the rim and tire
manufacturer’s recommendations
concerning tire models and sizes
that are compatible with your
specic rims.
WARNING: Failure to use a
compatible tire and rim
combination can cause the tire to
unexpectedly lose pressure and
detach from the rim, resulting in
a crash causing serious injury or
death. Ensure the components
are compatible according to the
component manufacturers before
installation.
≥ 6mm
g. 27a
4. Tire clearance
The diameter and width of the
original equipment wheels and tires
on your e-bike have been selected
to ensure they provide adequate
clearance between the rotating tire
and wheel, and the frame, fork or
other components. Any change to
your wheels or tires can affect this
clearance.
Tires that are marked as being
the same size may have different
widths when installed, properly
inated and mounted on your e-bike.
Always verify your tire clearance with
the tires mounted and fully inated
even if the replacement tires are
marked as being the same size as
the tires that are being replaced.
Minimum clearance between a properly inated tire and any part of the
e-bike typically should be at least 6mm (g. 27a & 27b). Some regulations allow
for clearance as low as 1.6mm. Please refer to your e-bike manufacturer for
additional information about tire clearance.
Always maintain enough clearance between the rotating tire and rim (g. 26a
& 26b), and the frame, fork or other components. Regularly inspect the frame
and fork for damage, as well as the area around the wheel for debris or objects
that could become stuck.
When riding your e-bike, the tires must not be able to contact the fork, frame
or any components when a suspension system is fully compressed or the wheels
are subjected to ex from side loads. For example, with a suspension fork, the
front tire must clear the fork crown when the fork is fully compressed.
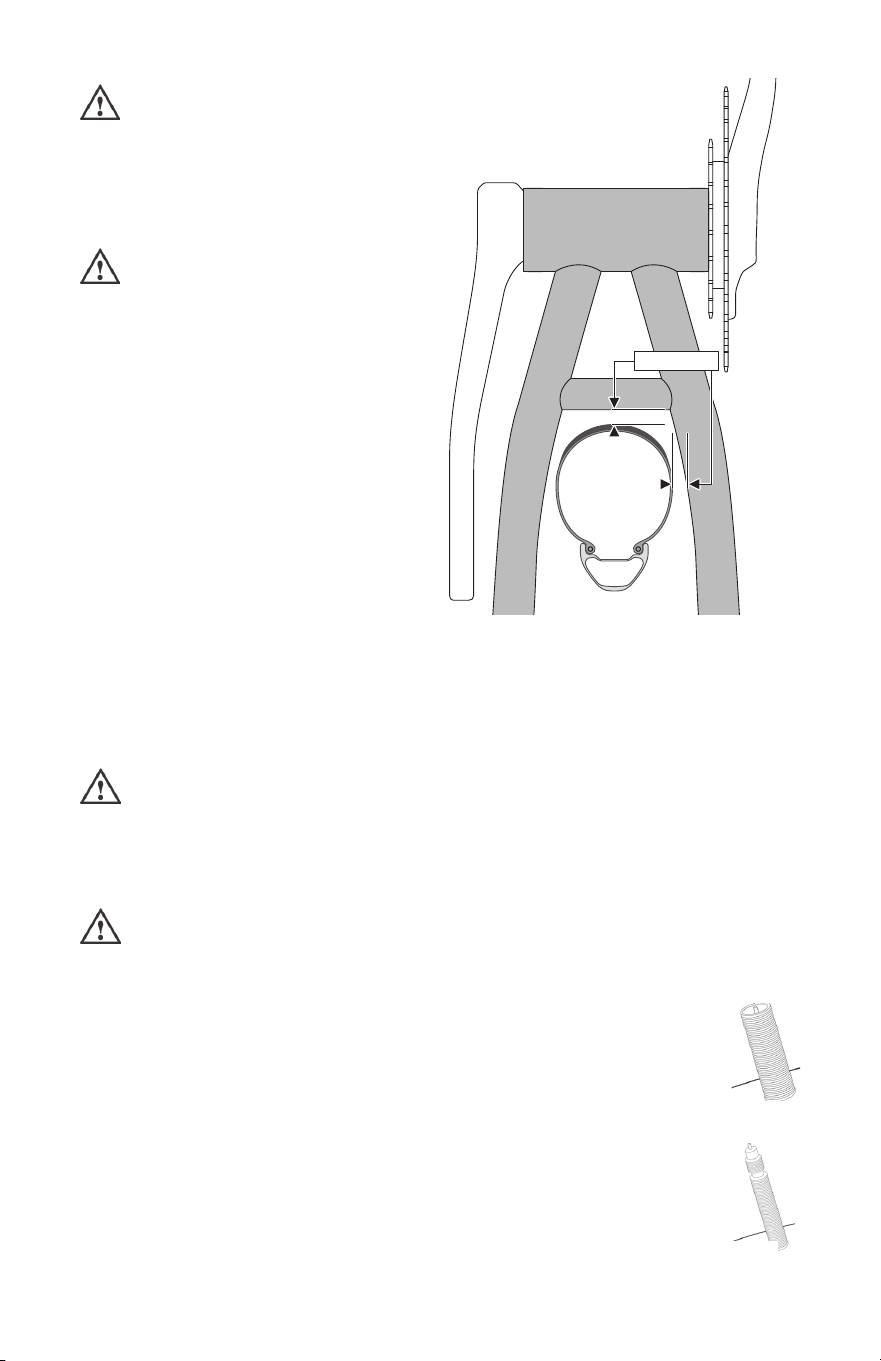
67
≥ 6mm
g. 27b
WARNING: Inadequate tire
clearance can allow debris or
objects to become trapped or cause
the wheels to stop unexpectedly,
which could cause a crash resulting
in serious injury or death.
WARNING: Inadequate tire
clearance that results in
contact between the tire and any
part of the e-bike can result in
damage which can lead to failure,
which could cause a crash resulting
in serious injury or death.
If you have mounted additional
accessories or components on your
e-bike, particularly fenders, these
products may require additional
clearance between the tire/wheel
and the accessory or component.
You should verify the required
clearance for any accessory or
component mounted on your e-bike with the manufacturer, and do not use
the product if the specied clearance cannot be maintained. For additional
information on changing components or adding accessories, see Page
34, Section 7: “Safely Operating Your E-bike”, subsection L: “Changing
Components or Adding Accessories”.
WARNING: Any accessory or component attached to, on or near a
rotating wheel poses a risk of contacting or stopping the wheel, leading
to a crash resulting in serious injury or death. Before every ride check to
ensure that all such accessories and components, and the fasteners used to
attach them, are securely mounted to your e-bike.
WARNING: Any object that unexpectedly and abruptly stops the
rotation of the front wheel can cause the e-bike and rider to pitch
forward (g. 5), which can result in serious injury or death.
g. 28a
g. 28b
5. Tire valves
There are primarily two kinds of bicycle tire valves: The Schrader
Valve and the Presta Valve. The bicycle pump you use must have the
tting appropriate to the valve stems on your e-bike.
The Schrader valve (g. 28a) is like the valve on a car tire. To
inate a Schrader valve tire, remove the valve cap and clamp the pump
tting onto the end of the valve stem. To let air out of a Schrader valve,
depress the pin in the end of the valve stem with the end of a key or
other appropriate object.
The Presta valve (g. 28b) has a narrower diameter and is only
found on bicycle tires. To inate a Presta valve tire using a Presta

68
headed bicycle pump, remove the valve cap; unscrew (counterclockwise) the valve
stem lock nut; and push down on the valve stem to free it up. Then push the pump
head on to the valve head, and inate. To inate a Presta valve with a Schrader
pump tting, you’ll need a Presta adapter which screws on to the valve stem once
you’ve freed up the valve. The adapter ts into the Schrader pump tting. Close the
valve after ination. To let air out of a Presta valve, open up the valve stem lock nut
and depress the valve stem.
WARNING: We highly recommend that you carry a spare inner tube
when you ride your e-bike. Patching a tube is an emergency repair. If
you do not apply the patch correctly or apply several patches, the tube can
fail, resulting in possible tube failure, which could cause you to lose
control and fall. Replace a patched tube as soon as possible.
12. Maintaining and Servicing Your E-bike
A. Servicing the Electrical Drive System
Your e-bike requires regular inspection, maintenance and service by a
qualied technician to ensure the proper and safe function, performance and
maximum life expectancy of your e-bike and its components. Exposure to road
salt, rain, dirt or snow, can result in corrosion/deterioration of certain e-bike
components. If any malfunctions or problems occur, or if you have any questions
related to component installation, adjustment or maintenance, please contact
Pacic Cycle Consumer Care for additional information.
Service to the drive system components (motor, battery, display(s), sensor(s),
wiring, software/rmware updates) should always be performed by a qualied
bicycle mechanic. While it is recommended to have all service done by a
qualied bicycle mechanic, depending on mechanical competence and ease of
required work, some service to non-drive-system-related components can be
performed by the owner, with proper tools and knowledge. For example, the most
basic services would include cleaning the e-bike or lubricating the chain. More
involved services would include adjusting brakes or gears or xing a at tire that
requires detaching electrical wiring or components.
WARNING: Modifying your e-bike or attempting to service it without
having the requisite tools, skills and knowledge can result in damage
to your e-bike or create a risk of re or electrical shock resulting in serious
injury or death.
WARNING: The drive system does not contain any user-serviceable
parts. Any service should be performed by a qualied technician. Do
not attempt to open, disassemble, modify, adjust or service any parts of the
drive system components. Any tampering with the internals of the motor,
battery or other drive system components can result in damage, which can
cause serious personal injury or death.

69
Follow all service recommendations made by the manufacturer. Please
contact Pacic Cycle Consumer Care for any questions about e-bike service
intervals.
• Maintain your battery as outlined on Page 3, Section 3: “General
Lithium-Ion Battery Safety” and Page 10, Section 6: “E-bike Battery Safety”.
• During periodic inspections, also inspect the battery terminals for any signs
of corrosion. Also inspect any visible wiring. Frayed or otherwise damaged
wires, loose or corroded plugs, or bad connections can result in damage to
the drive system and should be inspected and replaced as necessary.
• Do not apply any cleaning agents, paint or chemicals to any of the drive
system components on your e-bike, including the battery. Applying paint to
these components can result in failure.
• Dirt and salt from riding in winter or near the ocean, as well as sweat, can
be damaging to bicycle components. This includes e-bike drive system and
wiring parts. Regularly keep the e-bike clean.
• When performing service on an e-bike, if possible, remove the battery
before starting maintenance. If the battery is integrated into the frame and
not easily removed, make sure the system is turned off unless absolutely
necessary for a specic service, and make sure you’re not at risk of injury
should the system unexpectedly turn on and the drive system start rotating.
• Don’t turn the e-bike upside down onto the handlebars and seat. This can
result in damage to any handlebar-mounted display or controller components.
WARNING: Technological advances have made e-bikes and bicycle
components more complex, and the pace of innovation is increasing.
It is impossible for this manual to provide all the information required to
properly repair and/or maintain your e-bike. In order to help minimize the
chances of a crash and possible injury, it is critical that you have any repair
or maintenance that is not specically described in this manual performed
by a qualied bicycle mechanic. Equally important is that your individual
maintenance requirements will be determined by everything from your
riding style to geographic location.
WARNING: Many e-bike service and repair tasks require special
knowledge and tools. Do not begin any adjustments or service on your
e-bike until you have learned how to properly complete them. Improper
adjustment or service may result in damage to the e-bike or in a crash which
can cause serious injury or death.
B. Servicing the Mechanical Parts of Your E-bike
You may wish to service the mechanical (non-drive system and battery) parts
of your e-bike yourself. We recommend that you ask a qualied bicycle mechanic
to check the quality of your work the rst time you work on something and before
you ride the e-bike, just to make sure that you did everything correctly. Since
that will require the time of a mechanic, there may be a modest charge for this
service.

70
C. Service Intervals
Some service and maintenance of mechanical parts of an e-bike can and
should be performed by the owner, and require no special tools or knowledge
beyond what is presented in this manual.
The following are examples of the type of service you should perform
yourself. All other service, maintenance and repair should be performed in a
properly equipped facility by a qualied e-bike mechanic using the correct tools
and procedures specied by the manufacturer.
1. Break-in Period: Your e-bike will last longer and work better if you break it in
before riding it hard. Control cables and wheel spokes may stretch or “seat”
when a new e-bike is rst used and may require readjustment by a qualied
bicycle mechanic. Your Mechanical Safety Check will help you identify some
things that need readjustment. Refer to Page 22, Section 7: “Safely
Operating Your E-bike“, subsection B: “Mechanical Safety Check”. But
even if everything seems ne to you, it’s best to take your e-bike back to
a qualied bicycle mechanic for a checkup. Bicycle mechanics typically
suggest you bring the e-bike in for a 30-day checkup. Another way to judge
when it’s time for the rst checkup is to bring the e-bike in after three to
ve hours of hard off-road use, or about 10 to 15 hours of on-road or more
casual off-road use. But if you think something is wrong with the e-bike, take
it to a qualied bicycle mechanic before riding it again.
2. Before every ride: Mechanical Safety Check (Page 22, Section 7: “Safely
Operating Your E-bike“, subsection B: “Mechanical Safety Check”).
3. After every long or hard ride: if the e-bike has been exposed to water or grit;
or at least every 100 miles: Clean the e-bike and lightly lubricate the chain’s
rollers with a good-quality bicycle chain lubricant. Wipe off excess lubricant
with a lint-free cloth.
4. After every long or hard ride or after every 10 to 20 hours of riding:
• Squeeze the front brake and rock the e-bike forward and back. Everything
feel solid? If you feel a clunk with each forward or backward movement of
the e-bike, you probably have a loose headset. Have a qualied bicycle
mechanic check it.
• Lift the front wheel off the ground and swing it from side to side. Feel
smooth? If you feel any binding or roughness in the steering, you may
have a tight headset. Have a qualied bicycle mechanic check it.
• Grab one pedal and rock it toward and away from the centerline of the
e-bike; then do the same with the other pedal. Anything feel loose? If so,
have a qualied bicycle mechanic check it.
• Take a look at the brake pads. Are they worn or not hitting the wheel rim
squarely? Time to have a qualied bicycle mechanic adjust or replace
them.
• Carefully check the control cables and cable housings. Any rust? Kinks?
Fraying? If so, have a qualied bicycle mechanic replace them.
• Squeeze each adjoining pair of spokes on either side of each wheel
between your thumb and index nger. Do they all feel about the same?
If any feel loose, have a qualied bicycle mechanic check the wheel for
tension and trueness.
• Check the tires for excess wear, cuts or bruises. Have a qualied bicycle
mechanic replace them if necessary.

71
• Check the wheel rims for excess wear, dings, dents and scratches. Consult
a qualied bicycle mechanic if you see any rim damage.
• Check to make sure that all parts and accessories are still secure, and
tighten any that are not.
• Check the frame (particularly in the area around all tube joints), the
handlebars, the stem and the seatpost for any deep scratches, cracks or
discoloration. These are signs of stress-caused fatigue and indicate that
a part is at the end of its useful life and needs to be replaced. See also
Appendix B.
5. Disc brakes require a different set of inspection steps. Check for these
issues before every ride:
• Pads rubbing on rotors.
• Worn-out pads (which can lead to over-extended pistons).
• Pistons that are stuck and/or won’t retract fully.
• Disc rotors that are bent and need straightening.
• Hydraulic brakes that feel “sponge-y” and/or levers that can be depressed
all the way to the grips without generating adequate stopping power (due
to trapped air and/or leaks).
WARNING: Like any mechanical device, an e-bike and its components
are subject to wear and stress. Different materials and mechanisms
wear or fatigue from stress at different rates and have different life cycles.
If a component’s life cycle is exceeded, the component can suddenly and
catastrophically fail, causing serious injury or death to the rider.
Scratches, cracks, fraying and discoloration are signs of stress-caused
fatigue and indicate that a part is at the end of its useful life and needs
to be replaced. While the materials and workmanship of your e-bike or of
individual components may be covered by a warranty for a specied period
of time by the manufacturer, this is no guarantee that the product will last
the term of the warranty. Product life is often related to the kind of riding
you do and to the treatment to which you submit the e-bike. The e-bike’s
warranty is not meant to suggest that the e-bike cannot be broken or will
last forever. It only means that the e-bike is covered subject to the terms
of the warranty. Please be sure to read Appendix A, Intended Use of your
e-bike and Appendix B, The lifespan of your e-bike and its components,
starting on page Page 73.
6. As required: If either brake lever fails the Mechanical Safety Check (Page
22, Section 7: “Safely Operating Your E-bike“, subsection B: “Mechanical
Safety Check”), don’t ride the e-bike. Have a qualied bicycle mechanic
check the brakes. If the chain won’t shift smoothly and quietly from gear
to gear, the derailleur may be out of adjustment. See
a qualied bicycle
mechanic
.
D. If Your E-bike Sustains an Impact
First, check yourself for injuries, and take care of them as best you can. Seek
medical help if necessary.
Next, check your e-bike for damage.
After any crash, take your e-bike to
a qualied bicycle mechanic
for a thorough
check. Carbon composite components, including frames, wheels, handlebars,

72
stems, cranksets or brakes which have sustained an impact must not be ridden until
they have been disassembled and thoroughly inspected by a qualied mechanic.
See also Appendix B: “The Lifespan of your e-bike and its components”.
WARNING: A crash or other impact can put extraordinary stress on
bicycle components, causing them to fatigue prematurely.
Components suffering from stress fatigue can fail suddenly and cata-
strophically, causing loss of control, serious injury or death.
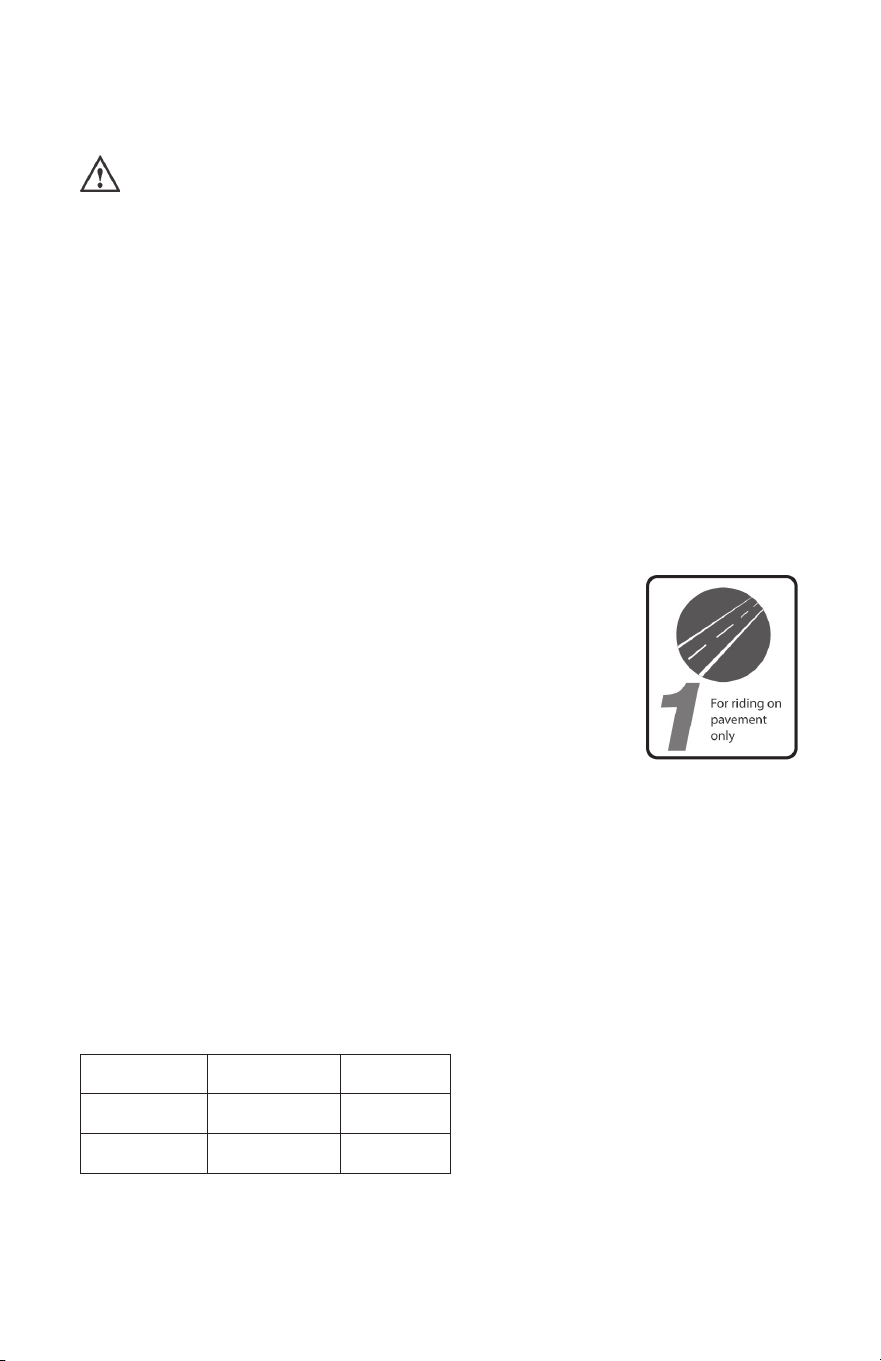
73
Appendix A: Intended Use of Your Bicycle
WARNING: Understand your bike and its intended use. Choosing the
wrong bicycle for your purpose can be hazardous. Using your bike the
wrong way is dangerous.
No one type of bicycle is suited for all purposes. Your authorized retailer can
help you pick the “right tool for the job” and help you understand its limitations.
There are many types of bicycles and many variations within each type. There
are many types of mountain, road, racing, hybrid, touring, cyclo-cross and gravel
bicycles.
Within each of type of bicycle, one can optimize for certain purposes. Visit
your bicycle shop and nd someone with expertise in the area that interests you.
Do your own homework. Seemingly small changes such as the choice of tires
can improve or diminish the performance of a bicycle for a certain purpose.
On the following pages, we generally outline the intended uses of various
types of bikes.
Industry usage conditions are generalized and evolving. Consult your
authorized retailer about how you intend to use your bike.
High-Performance Road
CONDITION 1
Bikes designed for riding on a paved surface where the
tires do not lose ground contact.
INTENDED To be ridden on paved roads only.
NOT INTENDED For off-road, cyclo-cross, or touring with
racks or panniers.
TRADE OFF Material use is optimized to deliver both light weight and
specic performance. You must understand that (1) these types of bikes are
intended to give an aggressive racer or competitive cyclist a performance
advantage over a relatively short product life, (2) a less aggressive rider will enjoy
longer frame life, (3) you are choosing light weight (shorter frame life) over more
frame weight and a longer frame life, (4) you are choosing light weight over more
dent-resistant or rugged frames that weigh more. All frames that are very light
need frequent inspection. These frames are likely to be damaged or broken in a
crash. They are not designed to take abuse or be a rugged workhorse. See also
Appendix B.
MAXIMUM WEIGHT LIMIT
RIDER LUGGAGE* TOTAL
lbs / kg lbs / kg lbs / kg
275 / 125 10 / 4.5 285 / 129
* Seat Bag/Handlebar Bag Only
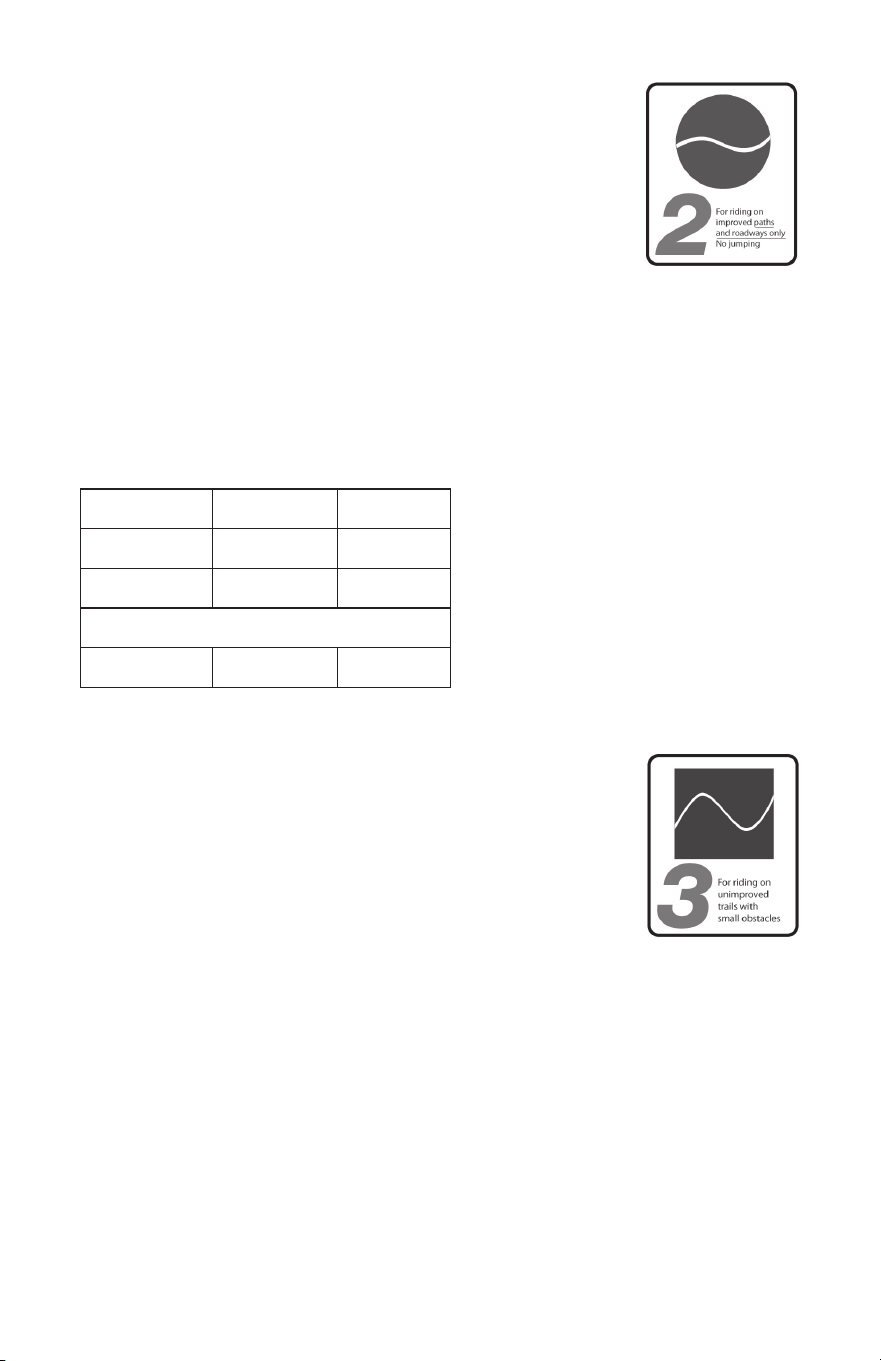
74
General Purpose Riding
CONDITION 2
Bikes designed for riding Condition 1, plus smooth gravel
roads and improved trails with moderate grades where the
tires do not lose ground contact.
INTENDED For paved roads, gravel or dirt roads that are
in good condition, and bike paths.
NOT INTENDED For off-road or mountain bike use, or for any kind of
jumping. Some of these bikes have suspension features, but these features are
designed to add comfort, not off-road capability. Some come with relatively wide
tires that are well-suited to gravel or dirt paths. Some come with relatively narrow
tires that are best suited to faster riding on pavement. If you ride on gravel or
dirt paths, carry heavier loads or want more tire durability, talk to your authorized
retailer about wider tires.
MAXIMUM WEIGHT LIMIT
RIDER LUGGAGE TOTAL
lbs / kg lbs / kg lbs / kg
300 / 136 30 / 14 330 / 150
for Touring or Trekking
300 / 136 55 / 25 355 / 161
Cross-Country, Marathon, Hardtails
CONDITION 3
Bikes designed for riding Conditions 1 and 2, plus rough
trails, small obstacles, and smooth technical areas, including
areas where momentary loss of tire contact with the ground
may occur. NOT jumping. All mountain bikes without rear
suspension are Condition 3, and so are some lightweight rear
suspension models.
INTENDED For cross-country riding and racing which ranges from mild to
aggressive over intermediate terrain (e.g., hilly with small obstacles like roots,
rocks, loose surfaces and hard pack and depressions). Cross-country and
marathon equipment (tires, shocks, frames, drive trains) are light weight, favoring
nimble speed over brute force. Suspension travel is relatively short since the bike
is intended to move quickly on the ground.
NOT INTENDED For Hardcore Freeriding, Extreme Downhill, Dirt Jumping,
Slopestyle, or very aggressive or extreme riding. No spending time in the air
landing hard and hammering through obstacles.
TRADE OFF Cross-Country bikes are lighter, faster to ride uphill, and more
nimble than All-Mountain bikes. Cross-Country and Marathon bikes trade off
some ruggedness for pedaling efciency and uphill speed.
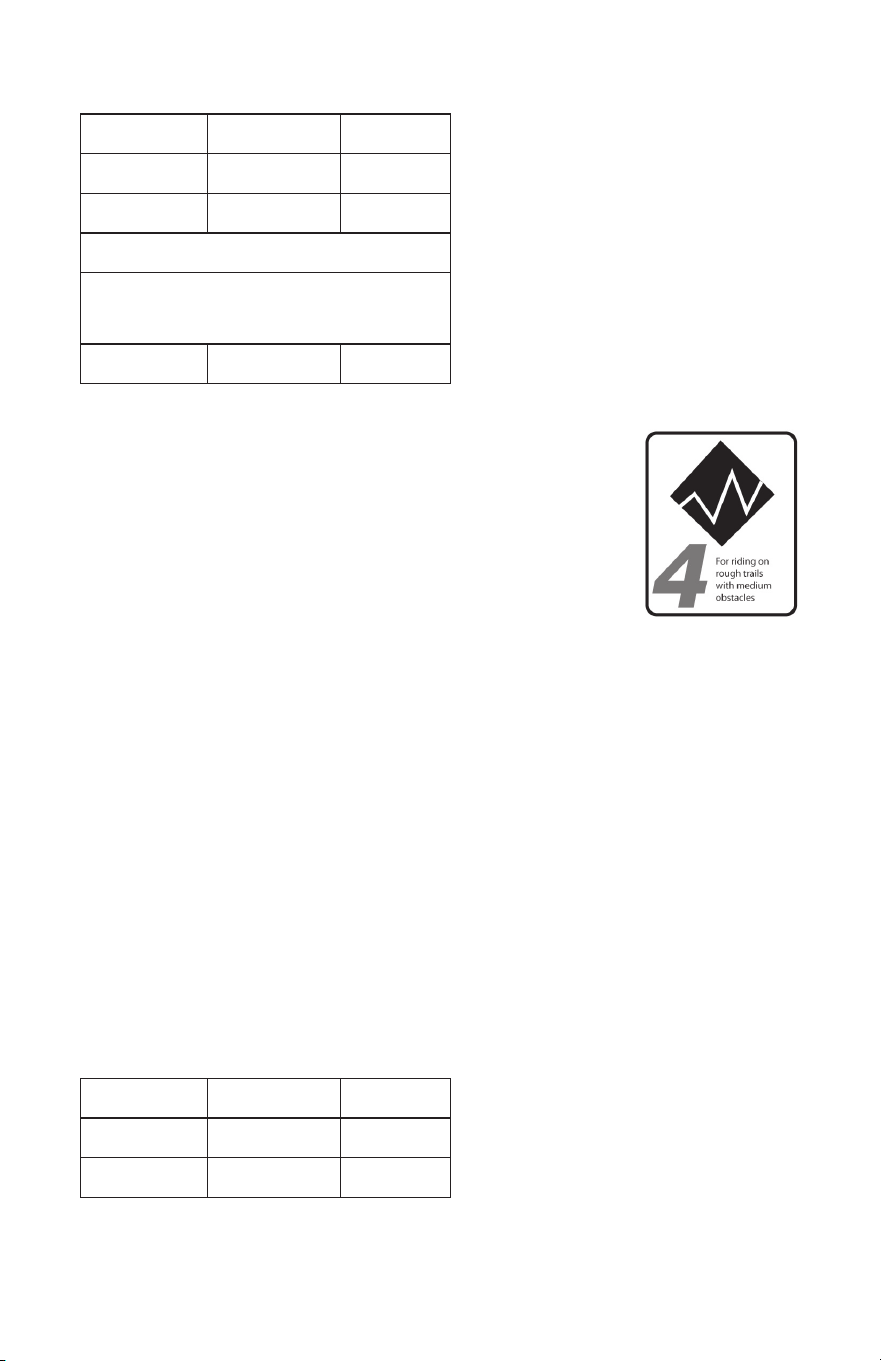
75
MAXIMUM WEIGHT LIMIT
RIDER LUGGAGE* TOTAL
lbs / kg lbs / kg lbs / kg
300 / 136 5 /2.3 305 / 138
* Seat Bag Only
Front suspension frames manufactured with
original equipment seat stay and dropout
rack mounts only
300 / 136 55 / 25 355 / 161
All Mountain
CONDITION 4
Bikes designed for riding Conditions 1, 2, and 3, plus
rough technical areas, moderately sized obstacles, and small
jumps.
INTENDED For trail and uphill riding. All-Mountain bicycles
are: (1) more heavy-duty than cross-country bikes, but less
heavy-duty than Freeride bikes, (2) lighter and more nimble than Freeride
bikes, (3) heavier and have more suspension travel than a cross-country bike,
allowing them to be ridden in more difcult terrain, over larger obstacles and
moderate jumps, (4) intermediate in suspension travel and use components that
t the intermediate intended use, (5) cover a fairly wide range of intended use,
and within this range are models that are more or less heavy-duty. Talk to your
authorized retailer about your needs and these models.
NOT INTENDED For use in extreme forms of jumping/riding such as
hardcore mountain, Freeriding, Downhill, North Shore, Dirt Jumping, Hucking etc.
No large drop-offs, jumps or launches (wooden structures, dirt embankments)
requiring long suspension travel or heavy-duty components; and no spending
time in the air landing hard and hammering through obstacles.
TRADE OFF All-Mountain bikes are more rugged than cross-country bikes,
for riding more difcult terrain. All-Mountain bikes are heavier and harder to ride
uphill than cross-country bikes. All-Mountain bikes are lighter, more nimble and
easier to ride uphill than Freeride bikes. All-Mountain bikes are not as rugged as
Freeride bikes and must not be used for more extreme riding and terrain.
MAXIMUM WEIGHT LIMIT
RIDER LUGGAGE* TOTAL
lbs / kg lbs / kg lbs / kg
300 / 136 5 / 2.3 305 / 138
* Seat Bag Only
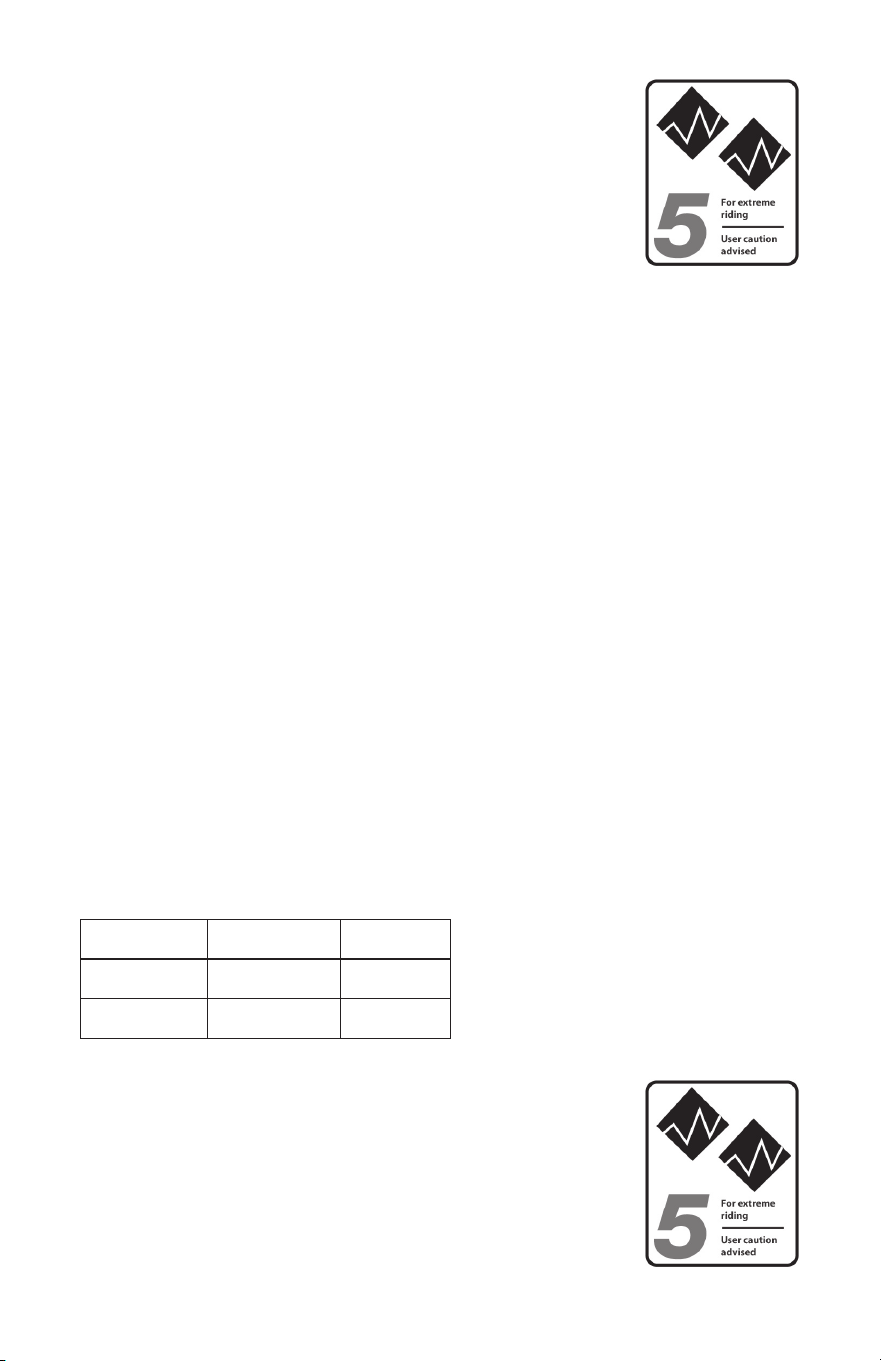
76
Gravity, Freeride, and Downhill
CONDITION 5
Bikes designed for jumping, hucking, high speeds, or
aggressive riding on rougher surfaces, or landing on at
surfaces. However, this type of riding is extremely hazardous
and puts unpredictable forces on a bicycle which may overload
the frame, fork or parts. If you choose to ride in Condition 5
terrain, you should take appropriate safety precautions such as more frequent bike
inspections and replacement of equipment. You should also wear comprehensive
safety equipment such as a full-face helmet, pads and body armor.
INTENDED For riding that includes the most difcult terrain that only very
skilled riders should attempt.
Gravity, Freeride, and Downhill are terms that describe hardcore mountain,
north shore or slopestyle. This is “extreme” riding and the terms describing it are
constantly evolving.
Gravity, Freeride, and Downhill bikes are: (1) heavier and have more
suspension travel than All-Mountain bikes, allowing them to be ridden in
more difcult terrain, over larger obstacles and larger jumps, (2) the longest
in suspension travel and use components that t heavy-duty intended use.
While all that is true, there is no guarantee that extreme riding will not break a
Freeride bike.
The terrain and type of riding that Freeride bikes are designed for is
inherently dangerous. Appropriate equipment, such as a Freeride bike, does not
change this reality. In this kind of riding, bad judgment, bad luck, or riding beyond
your capabilities can easily result in a crash, where you could be seriously
injured, paralyzed or killed.
NOT INTENDED To be an excuse to try anything. Read Page 33, Section
7: “Safely Operating Your E-bike”, subsection K: “Extreme, Stunt or Competition
Riding”.
TRADE OFF Freeride bikes are more rugged than All-Mountain bikes, for
riding more difcult terrain. Freeride bikes are heavier and harder to ride uphill
than All-Mountain bikes.
MAXIMUM WEIGHT LIMIT
RIDER LUGGAGE* TOTAL
lbs / kg lbs / kg lbs / kg
300 / 136 5 / 2.3 305 / 138
* Seat Bag Only
Dirt Jump
CONDITION 5
Bikes designed for jumping, hucking, high speeds, or
aggressive riding on rougher surfaces, or landing on at
surfaces. However, this type of riding is extremely hazardous
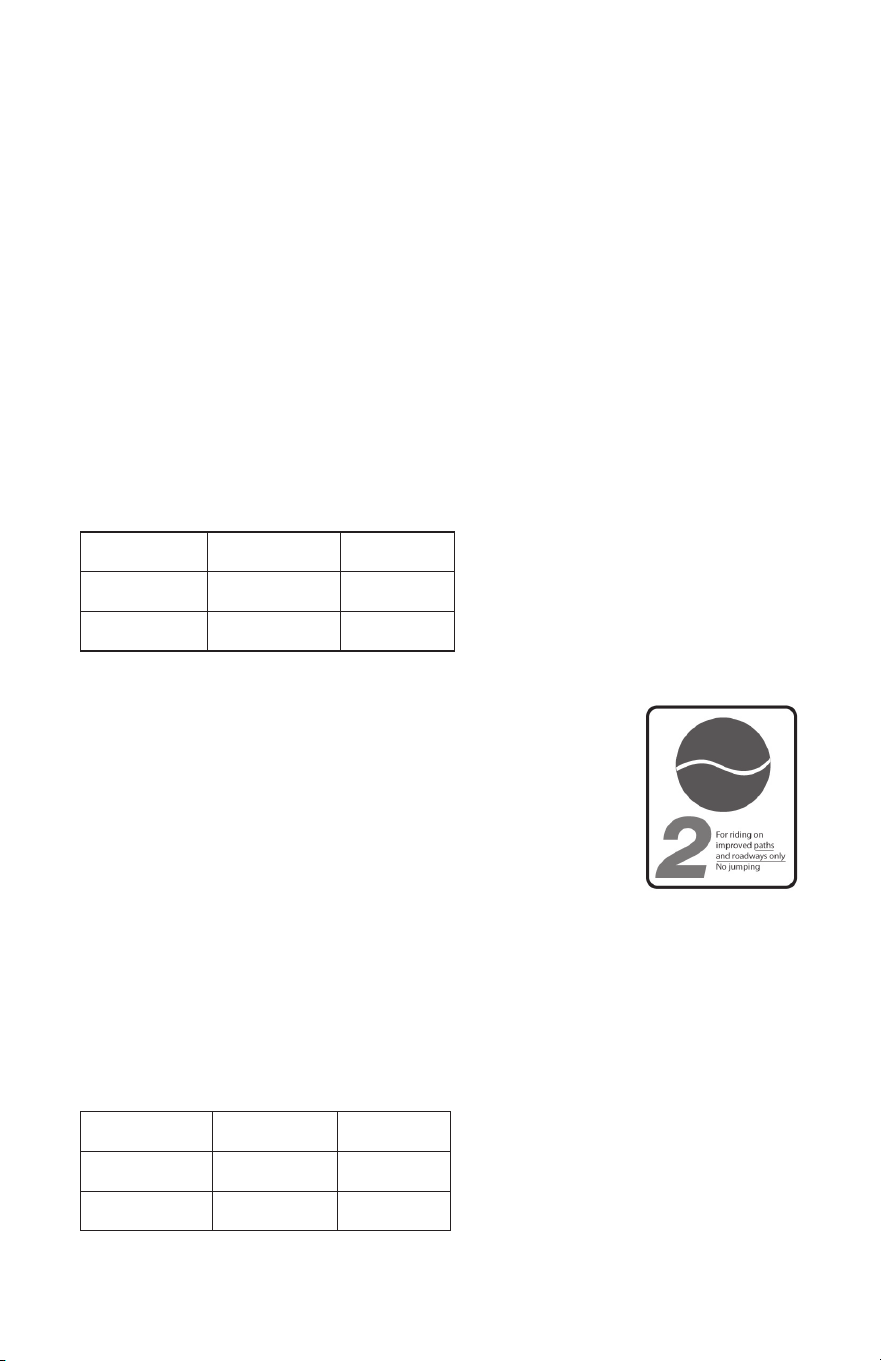
77
and puts unpredictable forces on a bicycle which may overload the frame, fork
or parts. If you choose to ride in Condition 5 terrain, you should take appropriate
safety precautions such as more frequent bike inspections and replacement of
equipment. You should also wear comprehensive safety equipment such as a
full-face helmet, pads and body armor.
INTENDED For man-made dirt jumps, ramps, skate parks other predictable
obstacles and terrain where riders need and use skill and bike control, rather
than suspension. Dirt Jumping bikes are used much like heavy-duty BMX bikes.
A Dirt Jumping bike does not give you skills to jump. Read Page 33,
Section 7: “Safely Operating Your E-bike”, subsection K: “Extreme, Stunt or
Competition Riding”.
NOT INTENDED For terrain, drop-offs or landings where large amounts
of suspension travel are needed to help absorb the shock of landing and help
maintain control.
TRADE OFF Dirt Jumping bikes are lighter and more nimble than Freeride
bikes, but they have no rear suspension and the suspension travel in the front is
much shorter.
MAXIMUM WEIGHT LIMIT
RIDER LUGGAGE TOTAL
lbs / kg lbs / kg lbs / kg
300 / 136 0 300 / 136
Gravel / Cyclo-cross
CONDITION 2
Bikes designed for riding Condition 1, plus gravel roads
and improved trails with moderate grades where the tires do
not lose ground contact.
INTENDED For gravel and cyclo-cross riding, training
and racing. Gravel and cyclo-cross riding involves a variety
of terrain and surfaces including dirt or mud. These bikes also work well for
all-weather rough road riding and commuting.
NOT INTENDED For off-road or mountain bike use or jumping. Gravel and
cyclo-cross bikes are not intended for mountain bike use. The larger road bike
size wheels are faster and lighter than mountain bike wheels, but not as strong.
Cyclo-cross riders and racers dismount before reaching an obstacle, carry their
bike over the obstacle and then remount.
MAXIMUM WEIGHT LIMIT
RIDER LUGGAGE TOTAL
lbs / kg lbs / kg lbs / kg
300 / 136 30 / 13.6 330 / 150

78
Appendix B: The Lifespan of Your Bike and
its Components
1. Nothing Lasts Forever, Including Your E-Bike.
When the useful life of your e-bike or its components is over, continued use
is hazardous.
Every e-bike and its component parts have a nite, limited useful life. The
length of that life will vary with the construction and materials used in the
frame and components; the maintenance and care the frame and components
receive over their life; and the type and amount of use to which the frame and
components are subjected. Use in competitive events, trick riding, ramp riding,
jumping, aggressive riding, riding on severe terrain, riding in severe climates,
riding with heavy loads, commercial activities and other types of non-standard
use can dramatically shorten the life of the frame and components. Any one or a
combination of these conditions may result in an unpredictable failure.
All aspects of use being identical, lighter e-bikes and their components
will usually have a shorter life than heavier e-bikes and their components. In
selecting a lightweight e-bike or components you are making a tradeoff, favoring
the higher performance that comes with lighter weight over longevity. So, If you
choose lightweight, high-performance equipment, be sure to have it inspected
frequently. You should have your e-bike and its components checked periodically
by a qualied bicycle mechanic for indicators of stress and/or potential failure,
including cracks, deformation, corrosion, paint peeling, dents, and any other
indicators of potential problems, inappropriate use or abuse. These are important
safety checks and very important to help prevent crashes, bodily injury to the
rider and shortened product life.
2. Perspective
Today’s high-performance e-bikes require frequent and careful inspection
and service. In this Appendix we try to explain some underlying material science
basics and how they relate to your e-bike. We discuss some of the trade-offs
made in designing your e-bike and what you can expect from your e-bike; and we
provide important, basic guidelines on how to maintain and inspect it. We cannot
teach you everything you need to know to properly inspect and service your
e-bike; and that is why we repeatedly urge you to take your e-bike to a qualied
bicycle mechanic for professional care and attention.
Frequent inspection of your e-bike is important to your safety. Follow
the Mechanical Safety Check on Page 22, Section 7: “Safely Operating
Your E-bike“, subsection B: “Mechanical Safety Check” of this Manual before
every ride.
Periodic, more detailed inspection of your e-bike is important. How often
this more detailed inspection is needed depends upon you.
You, the rider/owner, have control and knowledge of how often you
use your e-bike, how hard you use it and where you use it. Because your
mechanic cannot track your use, you must take responsibility for periodically
bringing your e-bike to a qualied bicycle mechanic for inspection and

79
service. A qualied bicycle mechanic will help you decide what frequency of
inspection and service is appropriate for how and where you use your e-bike.
For your safety and understanding, we urge you to read this Appendix in
its entirety. The materials used to make your e-bike determine how and how
frequently to inspect.
Ignoring this WARNING can lead to frame, fork or other component
failure, which can result in serious injury or death.
A. Understanding metals
Steel is the traditional material for building bicycle frames. It has good
characteristics, but in high-performance e-bikes, steel has been largely replaced
by aluminum and in some cases by carbon ber or titanium. The main factor
driving this change is interest in lighter e-bikes by cycling enthusiasts.
Properties of Metals
Please understand that there is no simple statement that can be made that
characterizes the use of different metals for e-bikes. What is true is how the metal
chosen is applied is much more important than the material alone. One must look
at the way the e-bike is designed, tested, manufactured and supported along with
the characteristics of the metal rather than seeking a simplistic answer.
Metals vary widely in their resistance to corrosion. Steel must be protected
or rust will attack it. Aluminum and Titanium quickly develop an oxide lm that
protects the metal from further corrosion. Both are therefore quite resistant to
corrosion. Aluminum is not perfectly corrosion resistant, and particular care must
be used where it contacts other metals and galvanic corrosion can occur.
Metals are comparatively ductile. Ductile means bending, buckling and
stretching before breaking. Generally speaking, of the common e-bike frame building
materials steel is the most ductile, titanium less ductile, followed by aluminum.
Metals vary in density. Density is weight per unit of material. Steel weighs 7.8
grams/cm
3
(grams per cubic centimeter), titanium 4.5 grams/cm
3
, aluminum 2.75
grams/cm
3
. Contrast these numbers with carbon ber composite at 1.45 grams/cm
3
.
Metals are subject to fatigue. With enough cycles of use, at high enough
loads, metals will eventually develop cracks that lead to failure. It is very
important that you read the basics of metal fatigue below.
Let’s say you hit a curb, ditch, rock, car, another cyclist or other object. At any
speed above a fast walk, your body will continue to move forward, momentum
carrying you over the front of the e-bike. You cannot and will not stay on the
e-bike, and what happens to the frame, fork and other components is irrelevant
to what happens to your body.
What should you expect from your metal frame? It depends on many
complex factors, which is why we tell you that crashworthiness cannot be a
design criteria. With that important note, we can tell you that if the impact is hard
enough the fork or frame may be bent or buckled. On a steel e-bike, the steel fork
may be severely bent and the frame undamaged. Aluminum is less ductile than
steel, but you can expect the fork and frame to be bent or buckled. Hit harder and
the top tube may be broken in tension and the down tube buckled. Hit harder and
the top tube may be broken, the down tube buckled and broken, leaving the head
tube and fork separated from the main triangle.
When a metal e-bike crashes, you will usually see some evidence of this

80
ductility in bent, buckled or folded metal.
It is now common for the main frame to be made of metal and the fork of
carbon ber. See Page 81, “Appendix B: The Lifespan of Your Bike and its
Components”, subsection B: “Understanding composites” below. The relative
ductility of metals and the lack of ductility of carbon ber means that in a crash
scenario you can expect some bending or bucking in the metal but none in the
carbon. Below some load the carbon fork may be intact even though the frame is
damaged. Above some load the carbon fork will be completely broken.
The Basics of Metal Fatigue
Common sense tells us that nothing that is used lasts forever. The more you
use something, and the harder you use it, and the worse the conditions you use it
in, the shorter its life.
Fatigue is the term used to describe accumulated damage to a part caused
by repeated loading. To cause fatigue damage, the load the part receives must
be great enough. A crude, often-used example is bending a paper clip back
and forth (repeated loading) until it breaks. This simple denition will help you
understand that fatigue has nothing to do with time or age. An e-bike in a garage
does not fatigue. Fatigue happens only through use.
So what kind of “damage” are we talking about? On a microscopic level, a crack
forms in a highly stressed area. As the load is repeatedly applied, the crack grows.
At some point the crack becomes visible to the naked eye. Eventually it becomes so
large that the part is too weak to carry the load that it could carry without the crack.
At that point there can be a complete and immediate failure of the part.
One can design a part that is so strong that fatigue life is nearly innite. This
requires a lot of material and a lot of weight. Any structure that must be light and
strong will have a nite fatigue life. Aircraft, race cars and motorcycles all have
parts with nite fatigue lives. If you wanted an e-bike with an innite fatigue life, it
would weigh far more than any e-bike sold today. So we all make a tradeoff: the
wonderful, lightweight performance we want requires that we inspect the structure.
What to Look For
• ONCE A CRACKS STARTS IT CAN GROW AND
GROW FAST. Think about the crack as forming a path-
way to failure. This means that any crack is potentially
dangerous and will only become more dangerous.
SIMPLE RULE 1 : If you nd a
crack, replace the part.
• CORROSION SPEEDS DAMAGE. Cracks grow more
quickly when they are in a corrosive environment. Think
about the corrosive solution as further weakening and
extending the crack.
SIMPLE RULE 2 : Clean your
e-bike, lubricate your e-bike,
protect your e-bike from salt,
remove any salt as soon as
you can.
• STAINS AND DISCOLORATION CAN OCCUR NEAR
A CRACK. Such staining may be a warning sign that a
crack exists.
SIMPLE RULE 3 : Inspect and
investigate any staining to see
if it is associated with a crack.
• SIGNIFICANT SCRATCHES, GOUGES, DENTS
OR SCORING CREATE STARTING POINTS FOR
CRACKS. Think about the cut surface as a focal point
for stress (in fact engineers call such areas “stress ris-
ers,” areas where the stress is increased). Perhaps you
have seen glass cut? Recall how the glass was scored
and then broke on the scored line.
SIMPLE RULE 4 : Do not
scratch, gouge or score any
surface. If you do, pay fre-
quent attention to this area or
replace the part.

81
• SOME CRACKS (particularly larger ones) MAY MAKE
A CREAKING NOISE AS YOU RIDE. Think about such
a noise as a serious warning signal. Note that a well-
maintained e-bike will be very quiet and free of creaks
and squeaks.
SIMPLE RULE 5 : Investi-
gate and nd the source of
any noise. It may not be a
crack, but whatever is caus-
ing the noise should be xed
promptly.
Fatigue Is Not A Perfectly Predictable Science
Fatigue is not a perfectly predictable science, but here are some general
factors to help you determine how often your e-bike should be inspected. The
more you t the “shorten product life” prole, the more frequent your need to
inspect. The more you t the “lengthen product life” prole, the less frequent your
need to inspect.
Factors that shorten product life:
• Hard, harsh riding style
• “Hits”, crashes, jumps, other “shots” to the e-bike
• High mileage
• Higher body weight
• Stronger, more t, more aggressive rider
• Corrosive environment (wet, salt air, winter road salt,
accumulated sweat)
• Presence of abrasive mud, dirt, sand, soil in riding environment
Factors that lengthen product life:
• Smooth, uid riding style
• No “hits”, crashes, jumps, other “shots” to the e-bike
• Low mileage
• Lower body weight
• Less aggressive rider
• Non-corrosive environment (dry, salt-free air)
• Clean riding environment
WARNING: Do not ride an e-bike or component with any crack, bulge
or dent, even a small one. Riding a cracked frame, fork or component
could lead to complete failure, with risk of serious injury or death.
B. Understanding composites
All riders must understand a fundamental reality of composites. Composite
materials constructed of carbon bers are strong and light, but when crashed or
overloaded, carbon bers do not bend, they break.
What Are Composites?
The term “composites” refers to the fact that a part or parts are made up of
different components or materials. You’ve heard the term “carbon ber e-bike.”
This really means “composite e-bike.”
Carbon ber composites are typically a strong, light ber in a matrix of
plastic, molded to form a shape. Carbon composites are light relative to metals.
Steel weighs 7.8 grams/cm
3
(grams per cubic centimeter), titanium 4.5 grams/

82
cm
3
, aluminum 2.75 grams/cm
3
. Contrast these numbers with carbon ber
composite at 1.45 grams/cm
3
.
The composites with the best strength-to-weight ratios are made of carbon
ber in a matrix of epoxy plastic. The epoxy matrix bonds the carbon bers
together, transfers load to other bers, and provides a smooth outer surface. The
carbon bers are the “skeleton” that carries the load.
Why Are Composites Used?
Unlike metals, which have uniform properties in all directions (engineers call
this isotropic), carbon bers can be placed in specic orientations to optimize
the structure for particular loads. The choice of where to place the carbon bers
gives engineers a powerful tool to create strong, light e-bikes. Engineers may
also orient bers to suit other goals such as comfort and vibration damping.
Carbon ber composites are very corrosion resistant, much more so than
most metals. Think about carbon ber or berglass boats.
Carbon ber materials have a very high strength-to-weight ratio.
What Are The Limits Of Composites?
Well designed “composite” or carbon ber e-bikes and components have
long fatigue lives, usually better than their metal equivalents.
While fatigue life is an advantage of carbon ber, you must still regularly
inspect your carbon ber frame, fork or components.
Carbon ber composites are not ductile. Once a carbon structure is
overloaded, it will not bend; it will break. At and near the break, there will be
rough, sharp edges and maybe delamination of carbon ber or carbon ber fabric
layers. There will be no bending, buckling or stretching.
If You Hit Something Or Have A Crash, What Can You Expect From Your
Carbon Fiber E-bike?
Let’s say you hit a curb, ditch, rock, car, other cyclist or other object. At
any speed above a fast walk, your body will continue to move forward, the
momentum carrying you over the front of the e-bike. You cannot and will not
stay on the e-bike and what happens to the frame, fork and other components is
irrelevant to what happens to your body.
What should you expect from your carbon frame? It depends on many
complex factors. But we can tell you that if the impact is hard enough, the fork
or frame may be completely broken. Note the signicant difference in behavior
between carbon and metal. See Page 79, “Appendix B: The Lifespan of
Your Bike and its Components”, subsection A: “Understanding metals”. Even
if the carbon frame was twice as strong as a metal frame, once the carbon frame
is overloaded it will not bend, it will break completely.
WARNING: Be aware that high temperature in a conned environment
can affect the integrity of composite materials, resulting in component
failure which could cause you to lose control and fall.
Inspection of Composite Frame, Fork and Components
Cracks:
Inspect for cracks, broken or splintered areas. Any crack is serious. Do not
ride any e-bike or component that has a crack of any size.

83
Delamination:
• Delamination is serious damage. Composites are made from layers of
fabric. Delamination means that the layers of fabric are no longer bonded
together. Do not ride any e-bike or component that has any delamination.
These are some delamination clues:
• A cloudy or white area. This kind of area looks different from the ordinary
undamaged areas. Undamaged areas will look glassy, shiny, or “deep,” as
if one was looking into a clear liquid. Delaminated areas will look opaque
and cloudy.
• Bulging or deformed shape. If delamination occurs, the surface shape
may change. The surface may have a bump, a bulge, soft spot, or not be
smooth and fair.
• A difference in sound when tapping the surface. If you gently tap the
surface of an undamaged composite you will hear a consistent sound,
usually a hard, sharp sound. If you then tap a delaminated area, you will
hear a different sound, usually duller, less sharp.
Unusual Noises:
Either a crack or delamination can cause creaking noises while riding. Think
about such a noise as a serious warning signal. A well maintained e-bike will be
very quiet and free of creaks and squeaks. Investigate and nd the source of any
noise. It may not be a crack or delamination, but whatever is causing the noise
must be xed or replaced before riding.
WARNING: Do not ride an e-bike or component with any delamination or
crack. Riding a delaminated or cracked frame, fork or other component
could lead to complete failure, with risk of serious injury or death.
C. Understanding components
It is often necessary to remove and disassemble components in order
to properly and carefully inspect them. This is a job for a professional e-bike
mechanic with the special tools, skills and experience to inspect and service
today’s high-tech high-performance e-bikes and their components.
Aftermarket “Super Light” Components
Think carefully about your rider prole as outlined above. The more you t
the “shorten product life” prole, the more you must question the use of super
light components. The more you t the “lengthen product life” prole, the more
likely it is that lighter components may be suitable for you.
Take these choices seriously and understand that you are responsible for the
changes.
Original Equipment Components
E-bike and component manufacturers test the fatigue life of the components
that are original equipment on your e-bike. This means that they have met
test criteria and have reasonable fatigue life. It does not mean that the original
components will last forever. They won’t.

84
Appendix C: Lithium-Ion Battery
Safety Manual
Lithium-Ion Battery Safety Manual
First Edition, 2024
Copyright, PeopleForBikes Coalition 2024
IMPORTANT: This manual contains important safety, performance and
service information regarding lithium-ion batteries used to power low-speed
electric bicycles (also called “e-bikes”). Read it and all manufacturer
information before you charge your battery or take the first ride on your new
electric bicycle. Keep this manual for future reference.
Additional safety, performance and service information for your e-bike and
battery may also be available. Make sure that your authorized retailer has
given you all the manufacturers’ literature that was included with your e-bike. In
case of a conflict between the instructions in this manual and information
provided by a manufacturer, always follow the manufacturer’s instructions.
If you have any questions or do not understand something, take responsibility for
your safety and consult with your authorized retailer or the e-bike’s manufacturer.
NOTE: This manual is not intended as a comprehensive use, service, repair or
maintenance manual. Please see your authorized retailer for all service, repairs,
maintenance or questions about your e-bike, its battery or drive system.
Know the Risks
Like any activity, owning and using an electric bicycle with a lithium-ion battery
involves risk of injury and damage. By choosing to own and ride an e-bike
equipped with a lithium-ion battery, you assume the responsibility for that risk.
You need to know and practice the rules of safe use of the battery.
This Manual contains many “Warnings” and “Cautions” concerning the
consequences of failure to properly charge, use, maintain or inspect your battery
and of failure to follow safe practices.
• The combination of the
safety alert symbol and the word WARNING
indicates a potentially hazardous situation which, if not avoided, could result in
serious injury or death.
• The combination of the
safety alert symbol and the word CAUTION
indicates a potentially hazardous situation which, if not avoided, may result in
minor or moderate injury, or is an alert against unsafe practices.
• The word CAUTION used without the safety alert symbol indicates a
situation which, if not avoided, could result in serious damage to the battery or
the voiding of your warranty.
85
What Is A Lithium-Ion Battery?
An e-bike battery consists of a series of Lithium-Ion cells designed to contain
electric energy. The charge and release of energy in the cells is managed and
controlled by internal circuitry. The cells and circuitry are contained in a housing
or shell, also known as a battery pack, which is designed to protect the cells and
internal circuitry and interface with a mounting mechanism on your e-bike.
Lithium-Ion batteries are powerful and store a tremendous amount of energy.
While they are generally designed with safety features to protect the battery and
the user, they must be handled with special care. When damaged, improperly
charged or misused, Lithium-Ion batteries are susceptible to an uncontrollable
energy release called thermal runaway, which can result in a sudden and severe
fire. Proper use, charging, discharging, care, maintenance, storage and
transportation are all critical to the long-term use of the battery and the safety of
the user and others.
WARNING: Batteries and chargers are designed to be safe and reliable
for their intended use. Failure to read and follow these instructions and use
your battery as intended by the manufacturer can result in thermal
runaway, resulting in a sudden and severe fire and serious personal injury
or death, as well as significant property damage.
Safety Must Always Be First
WARNING: Do not leave a battery unattended while charging,
especially overnight. If a battery fails while left to charge unattended, the
failure can get progressively worse, and can result in fire or explosion
resulting in serious personal injury, death, or property damage.
WARNING: Once the charge cycle is complete, immediately
disconnect the charger plug from the battery. Do not leave the battery
connected to the charger for an extended period of time after it is charged.
WARNING: NEVER open a Lithium-Ion battery pack or modify the
wiring or any electrical components of any product powered by a
Lithium-Ion battery. Opening the battery or modifying the wiring or
components can result in electric shock and can cause a fire leading to
serious personal injury, death, or property damage.
WARNING: NEVER loan your e-bike to another person or let
another person operate your e-bike or charge its battery unless they are
familiar with the instructions and warnings in this Manual and
competent to follow them. Allowing a person to charge a battery who
lacks the knowledge or ability to safely do so may result in electric
shock or fire, resulting in serious personal injury or death.

86
Lithium-Ion Battery Safety Summary
ALWAYS: Purchase batteries certified by an accredited testing laboratory.
ALWAYS: Follow manufacturer’s instructions for charging and storage.
ALWAYS: Use the correct battery, charger and cord.
ALWAYS: Plug directly into an electrical outlet for charging.
ALWAYS: Keep batteries and devices at room temperature.
ALWAYS: Store and charge batteries away from anything flammable.
ALWAYS: Keep batteries away from heat sources.
ALWAYS: Use proper methods for recycling old or damaged batteries.
NEVER: Use aftermarket or generic batteries or chargers.
NEVER: Plug into a power strip or overload an outlet.
NEVER: Overcharge or leave a battery charging overnight.
NEVER: Charge a battery or device on or close to any flammable material.
NEVER: Leave an e-bike or battery unattended while charging.
NEVER: Block your primary way in or out of a room or space.
NEVER: Place batteries in a trash or recycling bin.
Warning Signs For Lithium-Ion Batteries
The following is a list of signs of battery damage, which can result in
electric shock, short-circuit, fire and/or explosion:
• External battery casing damage (chips, cracks)
• Battery casing deformation (bulging)
• Battery casing or terminal discoloration
• Signs of corrosive (rust) damage from water entering the battery
• Plug connector damage or deformation
• Sounds, odors, smoke and/or flames emanating from the battery
• Battery fluid leak
WARNING: A battery should not exhibit any heat, flames, noises,
odors, smoke, swelling, leaks, discoloration, deformation or other
abnormalities. If a battery exhibits any of these symptoms and is failing
catastrophically:
1. Evacuate all people from the area immediately
2. Close the door and leave the building
3. Summon fire authorities (in the United States, call 911)
4. Do not try to extinguish the fire or move the battery or electric
bicycle outdoors unless it is safe to do so.
87
WARNING: If the battery is leaking, do not touch this liquid. Battery
liquid can cause irritation or burns. If there is contact with battery
liquid, rinse immediately with water. If the contact is with the eyes, seek
medical attention immediately after rinsing.
WARNING: If the battery is emitting any smoke or fumes, move to a
place with proper ventilation. Fumes can irritate the respiratory system.
If anyone is exposed to any smoke or fumes and experiencing negative
effects, seek medical attention.
WARNING: If your battery experiences a fault or error during use,
charge or discharge, immediately stop using or charging the battery,
check the manual provided by your manufacturer, and have the battery
inspected and if necessary, replaced by your authorized retailer.
Safe Battery Charging and Storage
WARNING: Carefully read, understand and follow all warnings and
manufacturer instructions for charging your battery. Failure to do so can
lead to an electrical shock or sudden and severe fire, resulting in serious
personal injury or death.
Before using your e-bike or charging your battery for the first time, read all the
instructions in this Manual and any product documentation included with your
e-bike. Turn the battery power on according to the manufacturer’s instructions.
This will help determine if the battery is charged, needs charging or is damaged.
Batteries are generally shipped from the manufacturer with a partial charge. It is
recommended to charge the battery to full capacity before your first use.
WARNING: Only use Original Equipment (OE) batteries and chargers
that are compatible with each other, and have been specified and
approved by the manufacturer for use with each other and with your
e-bike. Use of an unapproved or counterfeit battery or charger can result
in serious damage to the battery and/or components and can result in a
sudden and severe fire or explosion resulting in serious bodily injury or
death.
USING A GENERIC CHARGER
IS DANGEROUS

88
Make Sure Conditions Are Right For Charging:
• The battery and charger are compatible with each other and the e-bike.
• The battery is being charged during daylight hours and where it can be
observed in case of any indication of odor, smoke, fumes or fire.
• The charging area is protected from the elements, dry, well-ventilated, and
has a smoke detector. There must be clear egress from the area.
• A battery should not be charged in a bedroom or sleeping area.
• A charging battery cannot be left unattended and must be observed at all
times while charging.
• The battery is on a clean, dry and flat, non-flammable surface, preferably
metal, ceramic or glass.
• The battery and charger have no items covering or placed on top impeding
airflow around these components.
• The battery and charger are not exposed to flammable materials or an
open flame.
• The ambient temperature around the battery and charger is in the charging
temperature range specified by the manufacturer.
• The charger is plugged directly into an electrical outlet and the
rated voltage capacity from the outlet matches the charger.
ALWAYS PLUG THE CHARGER
INTO A WALL SOCKET
WARNING: Do not leave a battery unattended while charging,
especially overnight. Once the charge cycle is complete, immediately
disconnect the charger plug from the battery. Do not leave the battery
connected to the charger f or an extended period of time after it has
reached full charge. If a battery fails while left to charge unattended, the
failure can ge t progressively worse, and can result in fire or explosion
resulting in serious personal injury, death, or property damage.

89
WARNING: Keep the battery and charger away from children and
animals. Unless supervised or instructed on proper/responsible use,
children or people who lack the necessary experience or understanding
to operate the battery and charger safely should not be left unattended
with the battery and charger. There is a significant risk of personal
injury and/or damage.
How To Charge Your Battery:
Follow the general order of operations for connecting the charger and
charging the battery as shown below or as recommended by your e-bike
manufacturer.
• Remove the charge port cover (if present).
• Connect the charger to the battery and the power outlet, in the order
specified by the manufacturer.
• Once charging begins, periodically refer to the indicator lights on the
charger and e-bike’s charge level display for power level information.
• Once the indicator lights indicate a full charge, immediately disconnect the
charger from the power outlet and the battery, in the order specified by the
manufacturer.
• Replace the charge port cover (if present).
• If the battery will not be used right away, store the battery as outlined
below.
Safe Battery Storage:
If the battery will be in storage for an extended period of time, it is
recommended the battery be stored with a partial charge, and the state of
charge should be checked periodically in accordance with the manufacturer’s
specifications. If the state of charge has dropped below the manufacturer’s
recommended range, charge it back to within the range. Please refer to the
manufacturer specifications for additional information.
CAUTION: A battery that is stored while functionally depleted, if left in that
state for an extended period of time, will naturally lose more power while
not being used, which can lead to a state of deep discharge and damage to
the battery.
Lithium-ion batteries should be stored indoors in a temperature and
climate-controlled environment whenever possible. If possible, remove the
battery from the e-bike (if possible). If the battery is not removable, store the
e-bike indoors. The storage area must be protected from the elements, dry,

90
well-ventilated, and have a smoke detector. Do not store a battery or e–bike in a
bedroom or block egress. The battery should be stored on a clean, dry and flat,
non-flammable surface, preferably metal, ceramic or glass. Do not cover the
battery or store it near flammable materials.
WARNING: Avoid exposing your e-bike to conditions that can result in
excessive heat or a short circuit. A short circuit may lead to a thermal
runaway, sudden and severe fire or explosion, resulting in serious
personal injury, death or property damage. Avoid these conditions:
• If possible, do not store your e-bike outdoors. Exposure to the
elements can quickly deteriorate the e-bike and its components.
• Do not store a battery in direct sunlight or in a hot car.
• Do not store your e-bike under a cover as this can trap moisture.
• Do not store a battery near a space heater or other heat sources.
• Do not leave a battery connected to the charger after charging or
while in storage.
Transporting Your E-bike and Battery
Lithium-Ion batteries are regulated by transportation authorities as “Dangerous
Goods” because of the inherent risk of a fire if they are damaged during transport.
Check your local laws for details about shipping batteries.
WARNING: Do not ship or transport a damaged battery or attempt to
circumvent laws regarding shipping of Lithium-Ion batteries. Improperly
shipping a battery may lead to a fire during the transportation process,
resulting in serious personal injury or death to transportation workers or
the public, and property damage for which you may be held responsible.
1. Transporting on public transit:
Familiarize yourself with any relevant rules regarding transporting your e-bike
on public transit, such as weight, battery restrictions and tire widths. Some public
transit options require that a space is booked; others specify off-peak hours or
the need to cover the e-bike.
2. Transporting on an airplane:
Check with your airline for any information about transporting a battery on
an airplane before traveling. The battery may need to be shipped separately by
a shipper who is trained and authorized to ship Dangerous Goods.
3. Shipping a battery:
Check your local laws for details about shipping and transporting an e-bike
battery. Many bicycle retailers are trained in the proper methods for shipping
e-bikes and batteries. Please consult your local retailer if you need to ship your
e-bike.
91
WARNING: Do not ship or transport a damaged battery or attempt to
circumvent laws regarding shipping of Lithium-Ion batteries. Failure to
follow this warning may lead to a fire during the transportation process,
resulting in serious personal injury or death to transportation workers or
the public, and damage to vehicles or transportation facilities for which you
may be held civilly and criminally responsible.
Replacing and Disposing of Your Battery
Lithium-Ion batteries do not last forever. Batteries have a lifespan which is
subject to use and conditions. Over time and with each charge and discharge
cycle, their capacity to store energy gradually decreases. Please refer to the
manufacturer’s battery specifications for information regarding the number of
charge/discharge cycles a battery is expected to provide. When a battery is worn
out it needs to be replaced and responsibly recycled.
WARNING: Only replace the battery with an original equipment (OE)
e-bike battery from your e-bike manufacturer. Do not attempt to have your
original battery “refurbished” or replace it with a reconditioned or an
unauthorized/third-party battery. Refurbished batteries may lack important
electrical safety features and use of a refurbished battery may lead to a fire
resulting in serious personal injury, death, and property damage.
ALWAYS REPLACE A BATTERY
WITH A NEW CERTIFIED BATTERY
RECOMMENDED BY THE MANUFACTURER
WARNING: Do not dispose of an e-bike battery or any other
Lithium-Ion battery in your regular household trash or a public trash
receptacle. It may be illegal to do so. Batteries that enter the regular waste
stream can be damaged, leading to a fire resulting in serious personal
injury, death, property damage and environmental contamination.
Dispose of all batteries and chargers that have reached their end of life in an
environmentally conscious manner, in accordance with regulations in effect in
your country, state or region. Please contact your e-bike retailer or
manufacturer for additional information. In the United States Call2Recycle has
partnered with a network of manufacturers and retailers to offer a national
battery recycling program.

92
锂锂离离子子电电池池安安全全手手册册
第一版,2024 年
版权所有,PeopleForBikes Coalition 2024 年
重重要要说说明明::本手册就用于为低速电动自行车(也称“e-自行车”)供电的锂离子电
池提供了重要安全、性能和服务信息。请在给电池充电或新电动自行车首次上路
之前,先阅读本手册和所有制造商信息。请保管好本手册,供日后参考。
您也可以获取其他有关您的 e-自行车和电池的安全、性能和服务信息。请确保您
的授权零售商已向您提供 e-自行车附带的所有制造商资料。如果本手册中的说明
与制造商提供的信息之间存在不一致,请务必遵循制造商提供的说明。
如果您有任何疑问或不明白的地方,请对您自身的安全负责,咨询您的授权零售
商或 e-自行车制造商。
注注意意::本本手手册册无无意意用用作作全全面面的的使使用用、、服服务务、、维维修修或或维维护护手手册册。。有有关关 e-自自行行车车、、电电池池或或驱驱动动系系
统统的的所所有有服服务务、、维维修修、、维维护护或或问问题题,,请请联联系系您您的的授授权权零零售售商商。。
了了解解风风险险
和任何活动一样,购买和使用锂离子电池供电的电动自行车也存在受伤和损坏的
风险。选择购买和骑锂离子电池供电的电动自行车即代表您愿意承受这种风险。
您需要了解并践行电池的安全使用规则。
本手册就未能正确给电池充电、使用、维护或检查电池,以及未能采用安全实践
的后果说明了许多“警告”和“注意”事项。
• 安全警报符号 和“警
警告告”一词组合在一起表明存在潜在危险,如果不加以
避免,可能会造成严重伤害或死亡。
• 安全警报符号 和“注
注意意”一词组合在一起表明存在潜在危险,如果不加以
避免,可能会造成轻度或中度伤害,或构成不安全实践警报。
•“警
警告告”一词未结合安全警报符号使用表明如果不避免出现这种情况,可能会
导致电池严重损坏或保修失效。
锂锂离离子子电电池池是是什什么么??
e-自行车电池由一系列锂离子电池芯组成,专门用于储存电能。电池芯的充能和放
能均由内部电路管理和控制。电池芯和电路外面有一层外壳,也称为电池包,旨
在保护电池芯和内部电路,并与 e-自行车上的安装机件接合。
93
锂离子电池功能强大,可储存大量电能。虽然他们通常具备安全功能来保护电池和使用
者,但在处理时仍必须特别小心。如果出现损坏、充电不当或被误用,锂离子电池在放
能时容易失控(称为“热失控”),可能会突然引发重大火灾。正确使用、充电、放电、
保养、维护、存放和运输对电池拥有长使用寿命以及保障使用者和他人的安全都至关重
要。
警警告告::电电池池和和充充电电器器的的设设计计安安全全、、可可靠靠,,应应按按预预期期使使用用。。未未能能阅阅读读和和遵遵循循这这
些些说说明明,,以以及及未未能能按按照照制制造造商商的的预预期期使使用用电电池池,,都都可可能能会会导导致致热热失失控控,,从从而而突突然然
引引发发重重大大火火灾灾、、造造成成严严重重的的人人身身伤伤害害或或死死亡亡,,以以及及造造成成重重大大财财产产损损失失。。
安安全全始始终终放放在在第第一一位位
警警告告::充充电电时时,,尤尤其其是是整整晚晚充充电电,,不不要要让让电电池池无无人人看看管管。。如如果果电电池池在在充充电电时时
无无人人看看管管,,出出现现了了故故障障,,这这类类故故障障可可能能会会逐逐渐渐恶恶化化,,最最终终可可能能引引发发火火灾灾或或爆爆炸炸,,
从从而而造造成成严严重重的的人人身身伤伤害害、、死死亡亡或或财财产产损损失失。。
警警告告::充充电电循循环环完完成成后后,,请请立立即即从从电电池池上上拔拔下下充充电电器器插插头头。。充充电电完完成成后后,,不不
要要继继续续让让电电池池连连接接到到充充电电器器。。
警警告告::切切勿勿打打开开锂锂离离子子电电池池包包或或改改动动由由锂锂离离子子电电池池供供电电的的任任何何产产品品的的线线路路或或
任任何何电电气气元元件件。。打打开开电电池池或或改改动动线线路路或或电电气气元元件件可可能能会会导导致致触触电电,,也也可可能能引引发发火火
灾灾,,从从而而造造成成严严重重的的人人身身伤伤害害、、死死亡亡或或财财产产损损失失。。
警警告告::切切勿勿将将您您的的 e-自自行行车车借借给给他他人人,,或或让让他他人人操操作作您您的的 e-自自行行车车或或给给其其电电
池池充充电电,,但但他他们们熟熟悉悉本本手手册册中中的的说说明明和和警警告告事事项项并并有有能能力力遵遵循循的的除除外外。。允允许许不不知知
道道如如何何或或不不能能安安全全给给电电池池充充电电之之人人给给电电池池充充电电可可能能会会导导致致触触电电或或引引发发火火灾灾,,从从而而
造造成成严严重重的的人人身身伤伤害害或或死死亡亡。。
锂锂离离子子电电池池安安全全说说明明摘摘要要
务务必必::购买获得官方认可的测试实验室认证的电池。
务
务必必::遵循制造商的充电和存放说明。
务
务必必::使用正确的电池、充电器和电源线。
务
务必必::直接插入电源插座充电。
务
务必必::让电池和装置保持室温。
务
务必必::远离易燃物存放电池和给电池充电。

94
务务必必::让电池远离热源。
务务必必::使用正确方法回收旧电池或损坏的电池。
切
切忌忌::使用零配件市场上的或无厂家商标的电池或充电器。
切
切忌忌::插入电源插排或让电源插座过载。
切
切忌忌::让电池长时间充电或充电一整晚。
切切忌忌::将电池或装置放在任何易燃材料上或附近充电。
切切忌忌::充电时让 e-自行车或电池无人看管。
切切忌忌::堵住进出房间或空间的主要通道。
切切忌忌::将电池扔进垃圾桶或回收箱。
锂锂离离子子电电池池警警告告迹迹象象
下下方方列列出出了了可可能能导导致致触触电电、、短短路路、、引引发发火火灾灾和和/或或爆爆炸炸的的电电池池损损坏坏迹迹象象::
• 电池外壳损坏(出现缺损、裂缝)
• 电池外壳变形(鼓胀)
• 电池外壳或极端褪色
• 电池进水造成腐蚀性(生锈)损坏的迹象
• 插头连接器损坏或变形
• 电池发出声响、产生气味、冒烟和/或冒火
• 电池漏液
警
警告告::电电池池不不应应发发烫烫、、冒冒火火、、发发出出声声响响、、产产生生气气味味、、冒冒烟烟、、膨膨胀胀、、漏漏液液、、褪褪
色色、、变变形形或或出出现现其其他他异异常常。。如如果果电电池池出出现现上上述述任任何何迹迹象象,,因因此此出出现现灾灾难难性性故故障障::
1. 立立即即疏疏散散该该区区域域的的所所有有人人员员
2. 关关门门,,然然后后离离开开大大楼楼
3. 致致电电消消防防局局((在在美美国国拨拨打打 911))
4. 除除非非能能保保障障自自身身安安全全,,否否则则不不要要尝尝试试灭灭火火或或将将电电池池或或电电动动自自行行车车移移至至室室
外外。。
警警告告::如如果果电电池池漏漏液液,,请请勿勿接接触触泄泄露露的的液液体体。。电电池池液液可可能能会会引引起起刺刺激激或或灼灼
伤伤。。如如果果不不慎慎接接触触到到电电池池液液,,请请立立即即用用水水冲冲洗洗。。如如果果不不慎慎入入眼眼,,请请在在冲冲洗洗后后立立即即
就就医医。。
警警告告::如如果果电电池池冒冒烟烟,,请请移移至至通通风风良良好好的的地地方方。。烟烟雾雾会会刺刺激激呼呼吸吸系系统统。。如如果果
有有人人吸吸入入了了烟烟雾雾并并出出现现不不良良反反应应,,请请立立即即就就医医。。
95
警警告告::如如果果在在使使用用、、充充电电或或放放电电过过程程中中,,电电池池出出现现故故障障或或错错误误,,请请立立即即停停
止止使使用用或或充充电电、、翻翻阅阅制制造造商商提提供供的的手手册册,,并并检检查查电电池池,,必必要要时时找找您您的的授授权权零零售售商商
更更换换。。
电电池池安安全全充充电电和和存存放放
警警告告::请请仔仔细细阅阅读读、、理理解解并并遵遵循循所所有有警警告告事事项项和和制制造造商商说说明明来来给给电电池池充充电电。。
做做不不到到可可能能会会导导致致触触电电或或突突然然引引发发重重大大火火灾灾,,从从而而造造成成严严重重的的人人身身伤伤害害或或死死亡亡。。
请在首次使用 e-自行车或给电池充电之前,先阅读本手册中的所有说明以及 e-自
行车附带的任何产品文档。根据制造商的说明打开电池电源。这将有助于确定电池
是否有电、需要充电或已损坏。电池在制造商发运时通常有一点电量。建议在首次
使用前给电池充满电。
警
警告告::只只能能使使用用彼彼此此兼兼容容,,并并由由制制造造商商指指定定和和批批准准搭搭配配使使用用以以及及与与您您的的 e-自自
行行车车一一起起使使用用的的原原装装设设备备 (OE) 电电池池和和充充电电器器。。使使用用未未经经批批准准或或假假冒冒伪伪劣劣的的电电池池
或或充充电电器器可可能能会会给给电电池池和和/或或电电气气元元件件造造成成严严重重损损坏坏,,并并可可能能突突然然引引发发重重大大火火灾灾或或
爆爆炸炸,,从从而而造造成成严严重重的的人人身身伤伤害害或或死死亡亡。。
使
使
用
用
无
无
厂
厂
家
家
商
商
标
标
的
的
充
充
电
电
器
器
很
很
危
危
险
险
确确保保充充电电条条件件适适当当::
• 电池和充电器彼此兼容,也与 e-自行车兼容。
• 在白天,以及在方便观察产生气味、冒烟或冒火的迹象的地方给电池充电。
• 充电区域不受天气影响、保持干燥、通风良好,并装有烟雾报警器。该区域必须有
显眼的出口。
• 电池不应放在卧室或睡觉的地方充电。
• 电池充电时不能无人看管,必须始终有人在场。
• 电池放在干净、干燥、平坦、不易燃的表面上,最好是放在金属、陶瓷或玻璃上。
96
• 不在电池和充电器顶部加盖或放置任何物品,以免阻碍这些电气元件周围的气流。
• 电池和充电器不得靠近易燃材料或明火。
• 电池和充电器周围的环境温度保持在制造商规定的充电温度范围内。
• 充电器直接插入电源插座,且插座的额定电压容量与充电器适配。
务
务
必
必
将
将
充
充
电
电
器
器
插
插
入
入
墙
墙
壁
壁
插
插
座
座
警警告告::充充电电时时,,尤尤其其是是整整晚晚充充电电,,不不要要让让电电池池无无人人看看管管。。充充电电循循环环完完成成后后,,
请请立立即即从从电电池池上上拔拔下下充充电电器器插插头头。。充充满满电电后后,,不不要要继继续续让让电电池池连连接接到到充充电电器器。。如如
果果电电池池在在充充电电时时无无人人看看管管,,出出现现了了故故障障,,这这类类故故障障可可能能会会逐逐渐渐恶恶化化,,最最终终可可能能引引
发发火火灾灾或或爆爆炸炸,,从从而而造造成成严严重重的的人人身身伤伤害害、、死死亡亡或或财财产产损损失失。。
警警告告::远远离离儿儿童童和和动动物物存存放放电电池池和和充充电电器器。。除除非非在在监监督督或或指指导导下下正正确确/负负责责任任
地地使使用用,,否否则则儿儿童童或或缺缺乏乏必必要要的的经经验验或或不不明明白白如如何何安安全全操操作作电电池池和和充充电电器器之之人人不不
应应让让电电池池和和充充电电器器无无人人看看管管。。这这样样做做会会带带来来严严重重的的人人身身伤伤害害和和/或或损损坏坏风风险险。。
电电池池充充电电方方式式::
请按照下述或 e-自行车制造商建议的一般操作顺序连接充电器给电池充电。
• 拆下充电端口防护盖(如有)。
• 按照制造商规定的顺序将充电器连接到电池和电源插座。
• 充电开始后,定期查看充电器上的指示灯和 e-自行车的电量显示器,了解
电量。
• 指示灯指示电已充满后,立即按照制造商规定的顺序从电源插座和电池上
拔下充电器。
• 重新装上充电端口保护盖(如有)。

97
• 如果无需立即使用电池,则按照下述说明存放电池。
安安全全存存放放电电池池::
如果需要长时间存放电池,建议给电池充一定电量后存放,并应按照制造商的规
范定期检查荷电状态。如果荷电状态降至制造商建议的范围以下,给电池充电到
该范围。请参阅制造商规范,了解更多信息。
注注意意::如如果果长长时时间间存存放放电电量量用用尽尽的的电电池池,,不不用用时时会会自自然然损损失失更更多多电电量量,,可可能能会会导导
致致深深度度放放电电并并造造成成电电池池损损坏坏。。
锂离子电池应尽可能存放在温度和气候可控的室内环境中。如有可能,从 e-自行
车上拆下电池(如有可能)。如果无法拆下电池,将 e-自行车停放在室内。存放
区域必须不受天气影响、保持干燥、通风良好,并装有烟雾报警器。请勿在卧室
存放电池或 e-自行车或堵住出口。电池应存放在干净、干燥、平坦、不易燃的表
面上,最好是放在金属、陶瓷或玻璃上。不要盖住或在易燃材料附近存放电池。
警警告告::避避免免将将 e-自自行行车车存存放放在在可可能能导导致致过过热热或或短短路路的的环环境境中中。。短短路路可可能能导导致致
热热失失控控、、突突然然引引发发重重大大火火灾灾或或爆爆炸炸,,从从而而造造成成严严重重的的人人身身伤伤害害、、死死亡亡或或财财产产损损
失失。。避避免免存存放放在在以以下下环环境境中中::
• 如如有有可可能能,,不不要要将将 e-自自行行车车停停放放在在室室外外。。受受到到天天气气影影响响会会迅迅速速损损坏坏 e-
自
自行行车车及及其其组组件件。。
• 不不要要将将电电池池存存放放在在阳阳光光直直射射处处或或温温度度较较高高的的汽汽车车内内。。
• 不不要要遮遮盖盖 e-自自行行车车,,以以免免受受潮潮。。
• 不不要要将将电电池池存存放放在在小小型型取取暖暖器器或或其其他他热热源源附附近近。。
• 充充电电后后或或存存放放期期间间,,不不要要将将电电池池连连接接到到充充电电器器。。
运运输输 e-自自行行车车和和电电池池
锂离子电池存在固有风险,即在运输过程中出现损坏会引发火灾,因此属于“危险
品”,受运输局监管。请参阅您当地的法律了解有关运送电池的详细信息。

98
警警告告::不不要要装装运运或或运运输输损损坏坏的的电电池池,,也也不不要要试试图图规规避避有有关关锂锂离离子子电电池池运运送送
的的法法律律。。电电池池运运送送不不当当可可能能会会导导致致运运输输过过程程中中发发生生火火灾灾,,从从而而给给运运输输工工人人或或公公
众众造造成成严严重重的的人人身身伤伤害害或或死死亡亡,,以以及及财财产产损损失失,,您您可可能能需需要要对对此此承承担担责责任任。。
1. 使使用用公公共共交交通通工工具具运运输输::
您应熟悉有关使用公共交通工具运输 e-自行车的任何规则,如重量、电池限制
和轮胎宽度。一些公共交通工具选项要求预订位置;其他选项则规定在非高峰时段
运输或需要给 e-自行车购买保险。
2. 空
空运运::
在出行前咨询您的航空公司,了解有关空运电池的任何信息。电池可能需要
由接受过培训并获得授权运送危险品的托运人单独运送。
3. 运
运送送电电池池::
请参阅您当地的法律了解有关运送和运输 e-自行车电池的详细信息。许多自行
车零售商都接受过培训,知道如何正确运送 e-自行车和电池。如果您需要运送 e-
自行车,请咨询您当地的零售商。
警
警告告::不不要要装装运运或或运运输输损损坏坏的的电电池池,,也也不不要要试试图图规规避避有有关关锂锂离离子子电电池池运运送送的的
法法律律。。未未能能遵遵循循该该警警告告可可能能会会导导致致运运输输过过程程中中发发生生火火灾灾,,从从而而给给运运输输工工人人或或公公众众造造
成成严严重重的的人人身身伤伤害害或或死死亡亡,,以以及及给给车车辆辆或或运运输输设设施施造造成成损损坏坏,,您您可可能能需需要要对对此此承承担担
民民事事和和刑刑事事责责任任。。
更更换换和和处处置置电电池池
锂离子电池寿命有限。电池的寿命取决于使用情况和状态。时间越长以及充放电循
环次数越多,他们储存电能的能力逐渐减退。请参阅制造商提供的电池规范,了解
有关电池预期提供的充电/放电循环次数的信息。电池报废后,需要更换并以负责
任的方式回收。
警
警告告::只只能能找找 e-自自行行车车制制造造商商将将电电池池更更换换为为原原装装设设备备 (OE) e-自自行行车车电电池池。。不不
要要试试图图对对原原装装电电池池进进行行“翻翻新新”,,也也不不要要更更换换为为翻翻新新或或非非授授权权/第第三三方方电电池池。。翻翻新新电电
池池可可能能不不具具备备重重要要的的电电气气安安全全功功能能,,因因此此使使用用翻翻新新电电池池可可能能会会引引发发火火灾灾,,从从而而造造成成
严严重重的的人人身身伤伤害害、、死死亡亡和和财财产产损损失失。。

99
警警告告::不不要要将将 e-自自行行车车电电池池或或任任何何其其他他锂锂离离子子电电池池扔扔入入普普通通家家用用垃垃圾圾桶桶或或
公公共共垃垃圾圾桶桶。。这这样样做做可可能能违违法法。。电电池池进进入入常常规规废废物物流流后后可可能能出出现现损损坏坏,,引引发发火火
灾灾,,从从而而造造成成严严重重的的人人身身伤伤害害、、死死亡亡、、财财产产损损失失和和环环境境污污染染。。
根据您所在国家、州或地区的现行法规,以环保的方式处置所有使用寿命结束的
电池和充电器。请联系您的 e-自行车零售商或制造商了解更多信息。在美国,
Call2Recycle 与制造商和零售商网络合作推出了一个全国电池回收计划。
务
务
必
必
将
将
电
电
池
池
更
更
换
换
为
为
制
制
造
造
商
商
推
推
荐
荐
的
的
新
新
认
认
证
证
电
电
池
池

100
Manual de seguridad de la batería
de ion de litio
Primera edición, 2024
Derechos de autor, Coalición PeopleForBikes 2024
IMPORTANTE: Este manual contiene información importante de seguridad,
funcionamiento y servicio respecto a las baterías de ion de litio que se usan para
proporcionar energía a las bicicletas eléctricas de baja velocidad (también llamadas
“e-bike”). Lea este manual y toda la información del fabricante antes de cargar su batería
o dar el primer paseo en su nueva bicicleta eléctrica. Conserve este manual para futuras
consultas.
También puede haber información adicional disponible sobre la seguridad, el
funcionamiento y el servicio de su bicicleta eléctrica y su batería. Asegúrese de que su
minorista autorizado le haya dado toda la documentación de los fabricantes que estaba
incluida con su bicicleta eléctrica. En el caso de que haya un conflicto entre las
instrucciones de este manual y la información provista por un fabricante, siga siempre las
instrucciones del fabricante.
Si tiene alguna pregunta o hay algo que no entiende, asuma la responsabilidad de su
seguridad y consulte con un minorista autorizado o el fabricante de la bicicleta eléctrica.
NOTA: Este manual no tiene la finalidad de ser un manual de uso exhaustivo, servicios,
reparación o mantenimiento. Consulte a su minorista autorizado por todos los servicios, las
reparaciones, el mantenimiento o las preguntas sobre su bicicleta eléctrica, su batería o sistema
de manejo.
Conozca los riesgos
Como cualquier actividad, tener y usar una bicicleta eléctrica con una batería de ion de litio
implica un riesgo de lesiones y daños. Si elije tener y usar una bicicleta eléctrica con una
batería de ion de litio, asume la responsabilidad por ese riesgo. Debe saber y poner en
práctica las reglas de uso seguro de la batería.
Este manual contiene varias “Advertencias” y “Precauciones” con respecto a las
consecuencias de cargar, usar, mantener o inspeccionar su batería inadecuadamente y de
no seguir las prácticas seguras.
• La combinación del símbolo de alerta de seguridad y la palabra ADVERTENCIA
indica una situación potencialmente peligrosa que, si no se evita, podría resultar en
lesiones graves o la muerte.
• La combinación del símbolo de alerta de seguridad y la palabra PRECAUCIÓN
indica una situación potencialmente peligrosa que, si no se evita, puede ocasionar
lesiones leves o moderadas, o es un alerta sobre prácticas inseguras.
• La palabra PRECAUCIÓN utilizada sin el símbolo de alerta de seguridad indica una
situación que, si no se evita, podría ocasionar daños graves en la batería o la anulación de
su garantía.
¿Qué es una batería de ion de litio?
La batería de una bicicleta eléctrica consiste de una serie de celdas de ion de litio
diseñadas para contener la energía eléctrica. La carga y descarga de energía en las
101
celdas se administra y controla con un sistema de circuitos internos. Las celdas y el
sistema de circuitos están dentro de un armazón o una carcasa, también conocida como
paquete de baterías, que está diseñada para proteger las celdas y los circuitos internos y
conectar con un mecanismo de montaje en su bicicleta eléctrica.
Las baterías de ion de litio son potentes y almacenan una gran cantidad de energía. Aunque, por
lo general, se fabrican con medidas de seguridad para proteger a la batería y al usuario, se
deben tratar con especial cuidado. Cuando se dañan, se cargan inapropiadamente o se usan
incorrectamente, las baterías de ion de litio son susceptibles a una emisión de energía
incontenible llamada fuga térmica, que puede dar lugar a un incendio repentino y severo. El uso,
la carga, la descarga, el cuidado, el mantenimiento, el almacenamiento y el transporte
adecuados son fundamentales para el uso a largo plazo de la batería y para la seguridad del
usuario y de los demás.
ADVERTENCIA: las baterías y los cargadores están diseñados para que sean
seguros y confiables en su uso previsto. Si no lee ni sigue estas instrucciones y no
usa su batería según lo previsto por el fabricante, podría dar lugar a una fuga
térmica, que causaría un incendio repentino y severo y lesiones graves en las
personas o la muerte, así como daños considerables a la propiedad.
La seguridad siempre debe ser lo primero
ADVERTENCIA: No deje la batería sin supervisión mientras está cargando,
especialmente por la noche. Si la batería falla mientras se está cargando sin
supervisión, la falla podría empeorar progresivamente y dar lugar a un incendio o
explosión, que podría causar lesiones en las personas, la muerte o daños a la
propiedad.
ADVERTENCIA: Cuando el ciclo de carga esté completo, desconecte de
inmediato el enchufe del cargador de la batería. No deje la batería conectada al
cargador por un período prolongado cuando ya que esté cargada.
ADVERTENCIA: NUNCA abra el paquete de baterías de ion de litio ni modifique
el cableado o cualquier otro componente eléctrico de cualquier producto alimentado
por una batería de ion de litio. Abrir la batería o modificar el cableado o los
componentes puede dar lugar a descarga eléctrica y causar un incendio que
provoque lesiones graves a las personas, la muerte o daños a la propiedad.
ADVERTENCIA: NUNCA preste su bicicleta eléctrica a otra persona ni deje que
la maneje o cargue su batería a menos que conozca las instrucciones y las
advertencias de este manual y pueda seguirlas. Permitir que una persona cargue la
batería, si esta no tiene el conocimiento o la habilidad para hacerlo de forma segura,
puede dar lugar a una descarga eléctrica o un incendio, ocasionando lesiones
graves a la persona o la muerte.

102
Resumen de seguridad de la batería de ion de
litio
SIEMPRE: compre baterías certificadas por un laboratorio de pruebas acreditado.
SIEMPRE: siga las instrucciones del fabricante para la carga y el almacenamiento.
SIEMPRE: use la batería, el cargador y el cable correcto.
SIEMPRE: enchúfela directamente a un tomacorriente para cargarla.
SIEMPRE: mantenga las baterías y los dispositivos a temperatura ambiente.
SIEMPRE: almacene y cargue las baterías lejos de cualquier objeto inflamable.
SIEMPRE: mantenga las baterías lejos de fuentes de calor.
SIEMPRE: use los métodos apropiados para reciclar baterías viejas o dañadas.
NUNCA: use baterías o cargadores genéricos o del mercado de repuestos.
NUNCA: la enchufe a una regleta ni sobrecargue un tomacorriente.
NUNCA: sobrecargue o deje una batería cargando durante toda la noche.
NUNCA: cargue una batería o dispositivo sobre o cerca de cualquier material inflamable.
NUNCA: deje una bicicleta eléctrica o una batería sin supervisión mientras se carga.
NUNCA: nunca bloquee la entrada o salida principal de una habitación o un lugar.
NUNCA: coloque las baterías en un cubo de basura o de reciclaje.
Señales de advertencia en las baterías de ion de
litio
La siguiente es una lista de las señales de daños en la batería que pueden dar lugar
a descarga eléctrica, un cortocircuito, un incendio o una explosión:
• Daño de la carcasa externa de la batería (astillas, grietas)
• Deformación de la carcasa de la batería (hinchada)
• Decoloración de la carcasa o la terminal de la batería
• Señales de daños corrosivos (óxido) por haber entrado agua a la batería
• Deformación o daño en el conector del enchufe
• Sonidos, olores, humo o llamas que emanen de la batería
• Fuga de líquido de la batería
ADVERTENCIA: La batería no debería presentar calor, llamas, sonidos, olores,
humo, hinchazón, fugas, decoloración, deformación y otras anomalías. Si la batería
presenta cualquiera de estos síntomas y falla catastróficamente:
1. Evacue a todas las personas del área de inmediato
2. Cierre la puerta y salga del edificio
3. Llame a las autoridades de bomberos (en los Estados unidos, llame al 911)
4. No intente extinguir el fuego o mover la batería o la bicicleta eléctrica al
aire libre a menos que sea seguro hacerlo.
ADVERTENCIA: Si la batería está goteando, no toque el líquido. El líquido de la
batería puede causar irritación o quemaduras. Si entra en contacto con el líquido de
la batería, enjuague con agua de inmediato. Si entra en contacto con los ojos,
busque atención médica inmediatamente luego de enjuagarse.
ADVERTENCIA: Si la batería emite humo o gases, muévala a un lugar con
ventilación adecuada. Los gases pueden irritar el sistema respiratorio. Si una
persona estuvo expuesta al humo o los gases y experimenta efectos negativos, pida
atención médica.
103
ADVERTENCIA: Si su batería experimenta una falla o un error durante su uso,
carga o descarga deje de usar o cargar la batería de inmediato, revise el manual
proporcionado por su fabricante y haga revisar la batería y, de ser necesario, haga
que un minorista autorizado la reemplace.
Carga y almacenamiento seguro de la batería
ADVERTENCIA: Lea atentamente, entienda y siga todas las advertencias y las
instrucciones del fabricante para cargar su batería. Si no lo hace se puede provocar
una descarga eléctrica o un incendio repentino y severo, que puede ocasionar
lesiones graves a las personas o la muerte.
Antes de usar su bicicleta eléctrica o cargar su batería por primera vez, lea todas las
instrucciones de este manual y toda documentación del producto que vino incluida con su
bicicleta eléctrica. Encienda la batería según las instrucciones del fabricante. Esto ayudará
a determinar si la batería está cargada, necesita cargarse o está dañada. Las baterías
suelen enviarse con una carga parcial de fábrica. Se recomienda cargar la batería a su
capacidad total antes su primer uso.
ADVERTENCIA: Use solo baterías y cargadores del equipo original (Original
Equipment, OE) que sean compatibles entre sí y que hayan sido especificados y
aprobados por el fabricante para usar juntos y en su bicicleta eléctrica. El uso de
una batería o un cargador no aprobado o falso puede ocasionar graves daños a la
batería o a los componentes y puede resultar en un incendio o explosión repentina
y severa que ocasione lesiones corporales graves o la muerte.
ES PELIGROSO USAR UN CARGADOR
GENÉRICO
Asegúrese de que las condiciones sean adecuadas para la
carga:
• La batería y el cargador deben ser compatibles entre sí y con la bicicleta eléctrica.
• La batería se debe cargar durante las horas de luz y donde se pueda observar en
caso de cualquier indicación de olor, humo, gases o fuego.
• El área donde se carga debe estar protegida de los elementos, seca, bien ventilada y
debe tener un detector de humo. Debe tener una vía libre para salir del área.
• La batería nunca se debe cargar en un dormitorio o un lugar para dormir.
• No se debe dejar sin supervisión una batería que se está cargando y se debe
observar todo el tiempo mientras se carga.
• La batería debe estar en una superficie limpia, seca, plana y no inflamable,
preferentemente de metal, cerámica o vidrio.
104
• La batería y el cargador no deben tener elementos cubriéndolos o colocados encima
que impidan el flujo de aire alrededor de estos componentes.
• La batería y el cargador no deben estar expuestos a materiales inflamables o a una
llama abierta.
• La temperatura del ambiente donde está la batería y el cargador debe estar dentro del
rango de temperatura de carga especificado por el fabricante.
• Se debe conectar el cargador directamente a un tomacorriente y la capacidad de
tensión nominal del tomacorriente debe coincidir con la del cargador.
SIEMPRE ENCHUFE EL CARGADOR A
UNA TOMA DE CORRIENTE DE PARED
ADVERTENCIA: No deje la batería sin supervisión mientras está cargando,
especialmente por la noche. Cuando el ciclo de carga esté completo, desconecte de
inmediato el enchufe del cargador de la batería. No deje la batería conectada al
cargador por un período prolongado después de que alcance la carga completa. Si la
batería falla mientras se está cargando sin supervisión, la falla podría empeorar
progresivamente y dar lugar a un incendio o explosión, que podría causar lesiones
en las personas, la muerte o daños a la propiedad.
ADVERTENCIA: Mantenga la batería y el cargador lejos de niños y animales. A
menos que estén bajo supervisión o se les instruya sobre el uso apropiado/responsable,
los niños o las personas que no tienen la experiencia necesaria o el conocimiento para
operar la batería y el cargador de forma segura no deben estar cerca de ellos sin
supervisión. Existe un riesgo considerable de lesiones o daños.
Cómo cambiar su batería:
Siga el orden general de operaciones para conectar el cargador y cargar la batería como
se muestra a continuación o según lo recomiende el fabricante de su bicicleta eléctrica.
• Retire la cubierta del puerto de carga (si la hay).
• Conecte el cargador a la batería y a la toma de corriente, en el orden especificado
por el fabricante.
• Una vez que comience a cargar, consulte periódicamente las luces indicadoras
del cargador y la pantalla del nivel de carga de la bicicleta eléctrica para obtener
información sobre el nivel de energía.
• Una vez que las luces indicadoras marcan que la carga está completa,
desconecte de inmediato el cargador de la toma de corriente y de la batería, en el
orden especificado por el fabricante.
• Reemplace la cubierta del puerto de carga (si la hay).
• Si la batería no se utilizará enseguida, almacénela según se detalla a
continuación.

105
Almacenamiento seguro de la batería:
Si la batería estará almacenada por un período prolongado, se recomienda que se
almacene con una carga parcial y que se revise el estado de carga periódicamente de
acuerdo a las especificaciones del fabricante. Si el estado de carga ha disminuido por
debajo del rango recomendado por el fabricante, vuelva a cargarlo hasta que esté dentro
de ese rango. Consulte las especificaciones del fabricante para obtener más información.
PRECAUCIÓN: Si se almacena una batería que esté agotada y se deja en ese
estado por un período prolongado, naturalmente perderá más potencia mientras no
se use, lo que puede ocasionar un estado de descarga profunda y dañar la batería.
Las baterías de ion de litio deben almacenarse en el interior en un ambiente con
temperatura y clima controlados cuando sea posible. Si es posible, retire la batería de la
bicicleta eléctrica (si se puede). Si la batería no es extraíble, almacene la bicicleta
eléctrica en el interior. El área de almacenamiento debe estar protegida de los elementos,
seca, bien ventilada y debe tener un detector de humo. No almacene la batería o la
bicicleta eléctrica en un dormitorio o bloqueando una salida. La batería se debe
almacenar en una superficie limpia, seca, plana y no inflamable, preferentemente de
metal, cerámica o vidrio. No cubra la batería ni la guarde cerca de materiales inflamables.
ADVERTENCIA: Evite exponer su bicicleta eléctrica a condiciones que puedan
ocasionar calor excesivo o un cortocircuito. Un cortocircuito puede provocar una
fuga térmica, un incendio repentino y severo o una explosión, que puede ocasionar
lesiones físicas graves, la muerte o daños a la propiedad. Evite estas condiciones:
• Si es posible, no guarde su bicicleta eléctrica al aire libre. La exposición
a los elementos puede deteriorar rápidamente la bicicleta eléctrica y sus
componentes.
• No guarde la batería bajo el sol directo o en un automóvil a altas
temperaturas.
• No guarde su bicicleta eléctrica bajo una cubierta ya que esto puede
atrapar la humedad.
• No guarde la batería cerca de un calefactor u otras fuentes de calor.
• No deje la batería conectada al cargador luego de cargarla o mientras
está guardada.
Traslado de su bicicleta eléctrica y su batería
Las baterías de ion de litio están reglamentadas por las autoridades de transporte como
“mercancías peligrosas” debido al riesgo inherente de incendio si se dañan durante el
traslado. Consulte sus leyes locales para obtener más información sobre el envío de
baterías.
ADVERTENCIA: No envíe ni traslade una batería dañada, ni intente evadir las
leyes que regulan el envío de las baterías de ion de litio. El envío inapropiado de
una batería puede ocasionar un incendio durante el proceso de traslado, lo que
puede dar lugar lesiones graves o la muerte de los transportistas o el público y
daños a la propiedad por los que podrían considerarlo responsable.
106
1. Traslado en transporte público:
Familiarícese con toda norma pertinente sobre el traslado de su bicicleta eléctrica en el
transporte público, como el peso, las restricciones de la batería y el ancho de las ruedas.
Algunas opciones de transporte público requieren que se reserve un lugar; otras especifican
que sea durante las horas de menor actividad o la necesidad de cubrir la bicicleta eléctrica.
2. Traslado en avión:
Consulte a su aerolínea toda la información sobre el traslado de una batería en un
avión antes de viajar. Puede que la batería se deba enviar por separado con un
transportista que esté capacitado y autorizado para enviar mercancías peligrosas.
3. Envío de una batería:
Consulte sus leyes locales para obtener detalles sobre el envío y el traslado de la
batería de una bicicleta eléctrica. Muchos minoristas de bicicletas están capacitados con
los métodos apropiados para enviar bicicletas eléctricas y baterías. Consulte con su
minorista local si necesita enviar su bicicleta eléctrica.
ADVERTENCIA: No envíe ni traslade una batería dañada, ni intente evadir las
leyes que regulan el envío de las baterías de ion de litio. La incapacidad de seguir
esta advertencia puede provocar un incendio durante el proceso de traslado,
ocasionando lesiones graves o la muerte del personal del transporte o el público, así
como el daño de los vehículos o las instalaciones de transporte, por los cuales se le
puede adjudicar la responsabilidad civil y penal.
Reemplazar y desechar su batería
Las baterías de ion de litio no duran para siempre. Las baterías tienen una vida útil que
está sujeta al uso y las condiciones. Con el paso del tiempo y con cada ciclo de carga y
descarga, su capacidad de almacenar energía disminuye gradualmente. Consulte las
especificaciones del fabricante sobre la batería para obtener información sobre la cantidad
de ciclos de cargas/descargas que se espera que proporcione la batería. Cuando una
batería se gasta, se debe reemplazar y reciclar responsablemente.
ADVERTENCIA: Reemplace la batería únicamente con una batería de bicicleta
eléctrica del equipo original (OE) del fabricante de su bicicleta eléctrica. No intente
“renovar” su batería original o reemplazarla con una batería reacondicionada, sin
autorizar o fabricada por un tercero. Las baterías renovadas pueden carecer de
características de seguridad eléctrica importantes y el uso de dichas baterías puede
provocar un incendio que ocasione lesiones graves en las personas, la muerte o
daños a la propiedad.
SIEMPRE REEMPLACE SU BATERÍA CON
UNA BATERÍA NUEVA Y CERTIFICADA
RECOMENDADA POR EL FABRICANTE

107
ADVERTENCIA: No deseche la batería de una bicicleta eléctrica ni ninguna
otra batería de ion de litio en su basura doméstica habitual o en un contenedor de
basura público. Podría ser ilegal hacerlo. Las baterías que ingresan al flujo de
residuos habitual pueden dañarse, lo que puede ocasionar un incendio que
provoque lesiones graves en las personas, la muerte, daños a la propiedad y
contaminación medioambiental.
Deseche todas las baterías y los cargadores que hayan alcanzado el final de su vida útil
de manera consciente con el medioambiente, teniendo en cuenta las normas que están
en vigencia en su país, estado o región. Póngase en contacto con el minorista o
fabricante de su bicicleta eléctrica para obtener más información. En los Estados Unidos,
Call2Recycle se ha asociado con una red de fabricantes y minoristas para ofrecer un
programa nacional de reciclaje de baterías.

108
Руководство по технике безопасности
для литий-ионных аккумуляторов
Первое издание, 2024 год
Авторское право, Коалиция “PeopleForBikes”, 2024
ВАЖНО: Данное руководство содержит важную информацию о безопасности,
производительности и сервисном обслуживании литий-ионных аккумуляторов,
используемых для питания тихоходных электрических велосипедов (также
называемых “электровелосипедами”). Прочтите её и всю информацию
производителя, прежде чем заряжать аккумулятор или совершать первую поездку на
своем новом электрическом велосипеде. Сохраните это руководство для
дальнейшего использования.
Также может быть предоставлена дополнительная информация о безопасности,
производительности и сервисном обслуживании вашего электровелосипеда и
аккумулятора. Убедитесь, что ваш авторизованный продавец предоставил вам всю
литературу производителя, которая прилагалась к вашему электровелосипеду. В
случае расхождения между инструкциями, приведенными в данном руководстве, и
информацией, предоставленной производителем, всегда следуйте инструкциям
производителя.
Если у вас есть какие-либо вопросы или вы чего-то не понимаете, побеспокойтесь
о своей безопасности и проконсультируйтесь с вашим официальным продавцом или
производителем электровелосипеда.
ПРИМЕЧАНИЕ: Данное руководство не является исчерпывающим руководством
по эксплуатации, сервисному обслуживанию, ремонту или техобслуживанию.
Пожалуйста, обращайтесь к вашему авторизованному продавцу за всеми
вопросами по обслуживанию, ремонту и профилактике, а также по вопросам,
касающимся вашего электровелосипеда, его аккумулятора или системы привода.
Знайте риски
Как и любая деятельность, владение и использование электрического велосипеда с
литий-ионным аккумулятором сопряжено с риском получения травм и повреждений.
Приобретая электровелосипед, оснащенный литий-ионным аккумулятором, и катаясь
на нем, вы принимаете на себя ответственность за этот риск. Вам необходимо знать
и соблюдать правила безопасного использования аккумулятора.
Данное руководство содержит множество “Предупреждений” и “Предостережений”,
касающихся последствий неправильной зарядки, использования, технического
обслуживания или проверки аккумулятора, а также несоблюдения правил техники
безопасности.
• Сочетание символа предупреждения о безопасности и символа
предупреждения о безопасности со словом WARNING указывают на потенциально
опасную ситуацию, которая, если ее не избежать, может привести к серьезным
травмам или смерти.
• Сочетание символа предупреждения о безопасности со словом "WARNING"
указывают на потенциально опасную ситуацию, которая, если ее не избежать, может
привести к серьезным травмам или смерти.
• Слово CAUTION , используемое без символа предупреждения о безопасности,
указывает на ситуацию, которая, если ее не избежать, может привести к серьезному
повреждению аккумулятора или аннулированию гарантии.
109
Что такое литий-ионный аккумулятор?
Аккумулятор для электрического велосипеда состоит из серии литий-ионных
элементов, предназначенных для накопления электрической энергии. Заряд и
высвобождение энергии в элементах осуществляется с помощью внутренних схем.
Элементы и схемы находятся в корпусе, также известном как аккумуляторный блок,
который предназначен для защиты элементов и внутренних схем и сопряжения с
механизмом крепления на вашем электровелосипеде.
Литий-ионные аккумуляторы обладают высокой мощностью и накапливают огромное
количество энергии. Несмотря на то, что они, как правило, оснащены функциями
безопасности для защиты аккумулятора и пользователя, обращаться с ними
необходимо с особой осторожностью. При повреждении, неправильной зарядке или
неправильном использовании литий-ионные аккумуляторы подвержены
неконтролируемому выделению энергии, называемому тепловым выбросом, что
может привести к внезапному и серьезному возгоранию. Правильное использование,
зарядка, разрядка, уход, техническое обслуживание, хранение и транспортировка -
все это имеет решающее значение для длительного использования аккумулятора
и безопасности пользователя и других лиц.
ПРЕДУПРЕЖДЕНИЕ: Аккумуляторы и зарядные устройства
сконструированы таким образом, чтобы они были безопасными и надежными
для использования по назначению. Несоблюдение данных инструкций и
использование аккумулятора по назначению производителя может привести
к перегреву, что может привести к внезапному и сильному пожару, серьезным
травмам или смерти персонала, а также к значительному материальному
ущербу.
Безопасность всегда должна быть на первом
месте
ПРЕДУПРЕЖДЕНИЕ: Не оставляйте аккумулятор без присмотра во время
зарядки, особенно на ночь. Если аккумулятор выходит из строя, когда его
оставили заряжаться без присмотра, неисправность может усугубиться вплоть
до пожара или взрыва, что может привести к серьезным травмам, смерти или
материальному ущербу.
ПРЕДУПРЕЖДЕНИЕ: После завершения цикла зарядки немедленно
отсоедините вилку зарядного устройства от аккумулятора. Не оставляйте
аккумулятор подключенным к зарядному устройству на длительное время
после его зарядки.
ПРЕДУПРЕЖДЕНИЕ: НИКОГДА не вскрывайте литий-ионный аккумулятор
и не изменяйте проводку или какие-либо электрические компоненты любого
устройства, работающего от литий-ионного аккумулятора. Вскрытие
аккумулятора или изменение проводки или компонентов может привести к
поражению электрическим током и пожару, что может привести к серьезным
травмам, смерти или материальному ущербу.
ПРЕДУПРЕЖДЕНИЕ: НИКОГДА не отдавайте свой электровелосипед в
аренду другому лицу и не позволяйте другому лицу управлять вашим
электровелосипедом или заряжать его аккумулятор, если оно не ознакомлено с

110
инструкциями и предупреждениями, приведенными в данном руководстве, и не
способно им следовать. Если вы позволите зарядить аккумулятор человеку, у
которого нет знаний или умения делать это безопасно, это может привести к
поражению электрическим током или пожару, что может привести к серьезным
травмам или смерти.
Краткий обзор мер безопасности с литий-
ионными аккумуляторами
ВСЕГДА: Приобретайте аккумуляторы, сертифицированные аккредитованной
испытательной лабораторией.
ВСЕГДА: Cоблюдайте инструкции производителя по зарядке и хранению.
ВСЕГДА: Используйте правильный аккумулятор, зарядное устройство и шнур.
ВСЕГДА: Подключайте устройство непосредственно к электрической розетке для
зарядки.
ВСЕГДА: Храните батарейки и устройства при комнатной температуре.
ВСЕГДА: Храните и заряжайте аккумуляторы вдали от легковоспламеняющихся
предметов.
ВСЕГДА Храните аккумуляторы вдали от источников тепла.
ВСЕГДА: Используйте надлежащие методы утилизации старых или поврежденных
аккумуляторов.
НИКОГДА: Не используйте аккумуляторы или зарядные устройства вторичного рынка
или универсального использования.
НИКОГДА: Не подключайте к сетевому шнуру и не перегружайте розетку.
НИКОГДА: Не перегружайте аккумулятор и не оставляйте его заряжающимся на
ночь.
НИКОГДА: Не заряжайте аккумулятор или устройство на легковоспламеняющихся
материалах или вблизи них.
НИКОГДА: Не оставляйте электровелосипед или аккумулятор без присмотра во
время зарядки.
НИКОГДА: Не загораживайте свой основной вход в комнату или выход из нее.
НИКОГДА: Не выбрасывайте аккумуляторы в мусорное ведро или контейнер для
вторичной переработки.
Предупреждающие признаки для литий-ионных
аккумуляторов
Ниже приведен список признаков повреждений аккумулятора, которые могут
привести к поражению электрическим током, короткому замыканию, пожару
и/или взрыву:
• Внешние признаки повреждения аккумулятора (сколы, трещины)
• Деформация корпуса аккумуляторной батареи (раздутие)
• Изменение цвета корпуса аккумулятора или клеммной колодки
• Признаки коррозионного повреждения (ржавчины) в результате попадания
воды в аккумулятор
• Повреждение или деформация штекерного разъема
• Звуки, запахи, дым и/или пламя, исходящие от аккумулятора
• Утечка жидкости из аккумулятора

111
ПРЕДУПРЕЖДЕНИЕ: Аккумулятор не должен нагреваться, гореть в
пламени, издавать шумы, запахи, дым, разбухать, протекать, обесцвечиваться,
деформироваться или иметь другие отклонения от нормы. Если батарея
демонстрирует любой из этих симптомов и катастрофически выходит из строя:
1. Немедленно эвакуируйте всех людей из этого места
2. Закройте дверь и покиньте здание
3. Вызовите пожарные службы (в Соединенных Штатах звоните по
номеру 911)
4. Не пытайтесь потушить пожар и не перемещайте аккумулятор или
электровелосипед на улицу, если это не является безопасным.
ПРЕДУПРЕЖДЕНИЕ: Если аккумулятор протекает, не прикасайтесь к этой
жидкости. Жидкость для аккумулятора может вызвать раздражение или ожоги.
При контакте с жидкостью на аккумулятора немедленно промойте водой. При
контакте с глазами немедленно промойте и обратитесь к врачу.
ПРЕДУПРЕЖДЕНИЕ: Если аккумулятор выделяет дым или гарь, переместите
его в место с надлежащей вентиляцией. Пары могут раздражать дыхательную
систему. Если кто-либо подвергся воздействию дыма или испарений и
испытывает негативные последствия, обратитесь за медицинской помощью.
ПРЕДУПРЕЖДЕНИЕ: Если во время использования, зарядки или
разрядки вашего аккумулятора возникнут неисправности, немедленно
прекратите использование или зарядку аккумулятора, ознакомьтесь с
руководством, предоставленным производителем, и обратитесь за проверкой
и, при необходимости, заменой аккумулятора к авторизованному продавцу.
Безопасная зарядка и хранение аккумулятора
ПРЕДУПРЕЖДЕНИЕ: Внимательно прочитайте, поймите и следуйте всем
предупреждениям и инструкциям производителя по зарядке аккумулятора.
Несоблюдение этого требования может привести к поражению электрическим
током или внезапному сильному возгоранию, что может привести к
серьезным травмам или смерти человека.
Перед первым использованием электровелосипеда или зарядкой аккумулятора
прочтите все инструкции, приведенные в данном руководстве, а также любую
документацию по изделию, прилагаемую к вашему электровелосипеду. Включите
питание аккумулятора в соответствии с инструкциями производителя. Это поможет
определить, заряжен ли аккумулятор, нуждается ли он в зарядке или поврежден.
Аккумуляторы, как правило, поставляются производителем с частичным зарядом.
Перед первым использованием рекомендуется полностью зарядить аккумулятор.
ПРЕДУПРЕЖДЕНИЕ: Используйте только аккумуляторы и зарядные
устройства оригинального оборудования (OE), которые совместимы друг с
другом и были указаны и одобрены производителем для использования друг
с другом и с вашим электровелосипедом. Использование неутвержденной или
поддельной батареи или зарядного устройства может привести к серьезному
повреждению батареи и/или компонентов, а также к внезапному и сильному
пожару или взрыву, которые могут привести к серьезным телесным
повреждениям или смерти.

112
ИСПОЛЬЗОВАНИЕ УНИВЕРСАЛЬНОГО
ЗАРЯДНОГО УСТРОЙСТВА ОПАСНО
Убедитесь, что созданы подходящие условия для
зарядки
:
• Аккумулятор и зарядное устройство совместимы друг с другом и с
электровелосипедом.
• Аккумулятор заряжается в светлое время суток и там, где за ним можно
наблюдать в случае появления каких-либо признаков запаха, дыма, гари или
пожара.
• Зона зарядки защищена от непогоды, сухая, хорошо проветриваемая и
оснащена датчиком дыма. Должен быть свободный выход из помещения.
• Не следует заряжать аккумулятор в спальне или спальной зоне.
• Заряжающийся аккумулятор нельзя оставлять без присмотра, за ним
необходимо постоянно следить во время зарядки.
• Аккумулятор должен находиться на чистой, сухой и ровной негорючей
поверхности, предпочтительно металлической, керамической или стеклянной.
• Аккумулятор и зарядное устройство не должны накрываться и загромождаться
сверху какими-либо предметами, препятствующими циркуляции воздуха
вокруг этих компонентов.
• Аккумулятор и зарядное устройство не должны подвергаться воздействию
легковоспламеняющихся материалов или открытого огня.
• Температура окружающей среды вокруг аккумулятора и зарядного устройства
находится в диапазоне температур зарядки, указанном производителем.
• Зарядное устройство подключается непосредственно к электрической розетке,
и номинальное напряжение в розетке соответствует мощности зарядного
устройства.
ВСЕГДА ПОДКЛЮЧАЙТЕ ЗАРЯДНОЕ
УСТРОЙСТВО К НАСТЕННОЙ РОЗЕТКЕ
ПРЕДУПРЕЖДЕНИЕ: Не оставляйте аккумулятор без присмотра во время
зарядки, особенно на ночь. После завершения цикла зарядки немедленно
отсоедините вилку зарядного устройства от аккумулятора. Не оставляйте
аккумулятор подключенным к зарядному устройству на длительное время
после того, как он полностью зарядился. Если аккумулятор выходит из строя,
когда его оставили заряжаться без присмотра, неисправность может
усугубиться вплоть до пожара или взрыва, что может привести к серьезным
травмам, смерти или материальному ущербу.

113
ПРЕДУПРЕЖДЕНИЕ: Храните аккумулятор и зарядное устройство в
недоступном для детей и животных месте. Не следует оставлять
аккумулятор и зарядное устройство без присмотра или без инструктажа по
правильному/ответственному использованию, детей или людей, у
которых нет необходимого опыта или понимания безопасной
эксплуатации аккумулятора и зарядного устройства. Существует
значительный риск получения травм и/или повреждения оборудования.
Как зарядить ваш аккумулятор:
Следуйте общему порядку подключения зарядного устройства и зарядки
аккумулятора, как показано ниже, или в соответствии с рекомендациями
производителя вашего электровелосипеда.
• Снимите крышку зарядного устройства (если таковая имеется).
• Подключите зарядное устройство к аккумулятору и электрической розетке в
порядке, указанном производителем.
• После начала зарядки периодически обращайтесь к индикаторам на
зарядном устройстве и индикатору уровня заряда электровелосипеда для
получения информации об уровне мощности.
• Как только индикатор загорится, указывая на полную зарядку, немедленно
отсоедините зарядное устройство от электрической розетки и аккумулятор в
порядке, указанном производителем.
• Установите на место крышку зарядного устройства (если таковая имеется).
• Если аккумулятор не будет использован сразу, храните его, как описано
ниже.
Безопасное хранение аккумулятора:
Если аккумулятор будет храниться в течение длительного периода времени,
рекомендуется хранить его частично заряженным, а также периодически проверять
уровень заряда в соответствии со спецификациями производителя. Если уровень
заряда упал ниже рекомендованного производителем диапазона, зарядите его
снова в пределах этого диапазона. Пожалуйста, обратитесь к техническим
характеристикам производителя для получения дополнительной информации.
ВНИМАНИЕ: Аккумулятор, который хранится в разряженном состоянии, если
оставить его в таком состоянии на длительный период времени, естественно,
будет терять больше энергии, пока он не будет использоваться, что может
привести к глубокому разряду и повреждению аккумулятора.
По возможности литий-ионные аккумуляторы следует хранить в помещении с
регулируемой температурой и климатом. По возможности извлеките аккумулятор из
электровелосипеда (если это возможно). Если аккумулятор несъемный, храните
электровелосипед в закрытом помещении. Помещение для хранения должно быть
защищено от непогоды, сухим, хорошо проветриваемым и оснащенным датчиком
дыма. Не храните аккумулятор или электровелосипед в спальне и не загораживайте
выход. Аккумулятор следует хранить на чистой, сухой и ровной негорючей
поверхности, предпочтительно металлической, керамической или стеклянной. Не
закрывайте аккумулятор и не храните его вблизи легковоспламеняющихся
материалов.

114
ПРЕДУПРЕЖДЕНИЕ: Не подвергайте свой электровелосипед воздействию
условий, которые могут привести к чрезмерному нагреву или короткому
замыканию. Короткое замыкание может привести к перегреву, внезапному и
сильному пожару или взрыву, что может привести к серьезным травмам,
смерти или материальному ущербу. Избегайте этих условий:
• По возможности, не храните свой электровелосипед на открытом
воздухе. Воздействие внешних факторов может быстро привести к
повреждению электровелосипеда и его компонентов.
• Не храните аккумулятор под прямыми солнечными лучами или в
нагретом автомобиле.
• Не храните свой электровелосипед под чехлом, так как он может
задерживать влагу.
• Не храните аккумулятор вблизи обогревателя помещения или
других источников тепла.
• Не оставляйте аккумулятор подключенным к зарядному устройству
после зарядки или во время хранения.
Транспортировка вашего электрического
велосипеда и аккумулятора
Транспортные органы относят литий-ионные аккумуляторы к категории “Опасных
грузов” из-за присущего им риска возгорания в случае их повреждения во время
транспортировки. Ознакомьтесь с местным законодательством для получения
подробной информации о доставке аккумуляторов.
ПРЕДУПРЕЖДЕНИЕ: Не отправляйте и не транспортируйте
поврежденный аккумулятор и не пытайтесь обойти законы, касающиеся
транспортировки литий-ионных аккумуляторов. Неправильная
транспортировка аккумулятора может привести к возгоранию в процессе
транспортировки, что может привести к серьезным травмам или смерти
работников транспорта или населения, а также к материальному ущербу,
ответственность за который может быть возложена на вас.
1. Проезд в общественном транспорте:
Ознакомьтесь со всеми применимыми правилами, касающимися перевозки
вашего электровелосипеда в общественном транспорте, такими как вес, ограничения
по аккумулятору и ширина шин. В некоторых вариантах общественного транспорта
требуется зарезервировать место; в других указаны часы работы в нерабочее время
или необходимость использования электровелосипеда.
2. Транспортировка в самолете:
Перед поездкой уточните у своей авиакомпании любую информацию о
транспортировке аккумулятора в самолете. Возможно, аккумулятор должен будет
отправлен отдельно грузоотправителем, прошедшим обучение и имеющим
разрешение на отправку опасных грузов.
3. Доставка аккумулятора:
Ознакомьтесь с местным законодательством для получения подробной
информации о доставке и транспортировке аккумулятора для электронного
велосипеда. Многие продавцы велосипедов обучены правильным методам доставки
электронных велосипедов и аккумуляторов. Пожалуйста, проконсультируйтесь с
местным продавцом, если вам необходимо отправить свой электрический велосипед.
115
ПРЕДУПРЕЖДЕНИЕ: Не отправляйте и не транспортируйте поврежденный
аккумулятор и не пытайтесь обойти законы, касающиеся транспортировки
литий-ионных аккумуляторов. Несоблюдение этого предупреждения может
привести к пожару в процессе транспортировки, что может привести к
серьезным травмам или смерти работников транспорта или населения, а также
к повреждению транспортных средств или транспортных сооружений, за что вы
можете быть привлечены к гражданской и уголовной ответственности.
Замена и утилизация аккумулятора
Литий-ионные аккумуляторы не служат вечно. Срок службы аккумуляторов зависит от
условий эксплуатации. Со временем, с каждым циклом зарядки и разрядки, их
способность накапливать энергию постепенно уменьшается. Пожалуйста, обратитесь
к техническим характеристикам аккумулятора производителя для получения
информации о количестве циклов зарядки/разрядки, которые, как ожидается,
обеспечит аккумулятор. Когда аккумулятор изношен, ее необходимо заменить и
утилизировать со всей ответственностью.
ПРЕДУПРЕЖДЕНИЕ: Заменяйте батарею только на оригинальную батарею
для электровелосипеда, изготовленную производителем вашего
электровелосипеда. Не пытайтесь “восстанавливать” свой оригинальный
аккумулятор или заменить его на восстановленный или не авторизованный
аккумулятор стороннего производителя. В восстановленных аккумуляторах
могут отсутствовать важные элементы электробезопасности, а использование
восстановленных аккумуляторов может привести к возгоранию, что может
привести к серьезным травмам, смерти и материальному ущербу.
ПРЕДУПРЕЖДЕНИЕ: Не выбрасывайте аккумулятор для
электровелосипеда или любой другой литий-ионный аккумулятор в обычное
бытовое мусорное ведро или в общественный контейнер для мусора. Это
может быть незаконно. Аккумуляторы, попадающие в обычный поток
отходов, могут быть повреждены, что может привести к пожару, который
может привести к серьезным травмам, смерти, материальному ущербу и
загрязнению окружающей среды.
Утилизируйте все аккумуляторы и зарядные устройства, срок службы которых
подошел к концу, экологически безопасным способом в соответствии с правилами,
действующими в вашей стране, штате или регионе. Пожалуйста, свяжитесь с
продавцом или производителем вашего электрического велосипеда для получения
дополнительной информации. В Соединенных Штатах компания Call2Recycle
сотрудничает с сетью производителей и розничных продавцов, предлагая
национальную программу утилизации аккумуляторных батарей.
ВСЕГДА ЗАМЕНЯЙТЕ АККУМУЛЯТОР НА
НОВЫЙ СЕРТИФИЦИРОВАННЫЙ
АККУМУЛЯТОР, РЕКОМЕНДОВАННЫЙ
ПРОИЗВОДИТЕЛЕМ
116
Lithium-Ion Battery Safety Manual
INSTRUCTIONS PERTAINING TO
RISK OF FIRE OR ELECTRIC SHOCK
IMPORTANT SAFETY INSTRUCTIONS
WARNING: When using this product, basic precautions should always
be followed, including the following:
a. Read all the instructions before using the product.
b. To reduce the risk of injury, close supervision is
necessary when the product is used near children.
c. Do not put ngers or hands into the product.
d. Do not use this product if the exible power cord or output cable
is frayed, has broken insulation, or any other signs of damage.
e. This equipment is not intended to be used at ambient temperatures
less than -20°C (-4°F) or above ambient temperatures of 45°C (113°F).
f. The battery is intended to be charged when the ambient
temperature is between 0°C (32°F) and 40°C (104°F). Never charge
the battery when ambient temperatures are outside this range.
SAVE THESE INSTRUCTIONS
YI BN KO HT IT AR PL FR UR

Limitations apply. For complete details visit schwinnbikes.com
A01258-S 060525
WARNING: This product can expose you
to chemicals including lead and lead compounds,
which is known to the State of California to cause
cancer, birth defects and other reproductive harm.
For more information go to .P65Warnings.ca.gov
© 2025 PACIFIC CYCLE, INC. SCHWINN
®
is a registered trademark of Pacific Cycle, Inc.
schwinnbikes.com
1-800-626-2811
The Brand
You Tr ust
2 Year
Warranty
Pedal Assist
Components
LIMITED
Lifetime
Warranty
Bicycle Frame